Embed Size (px)
Citation preview
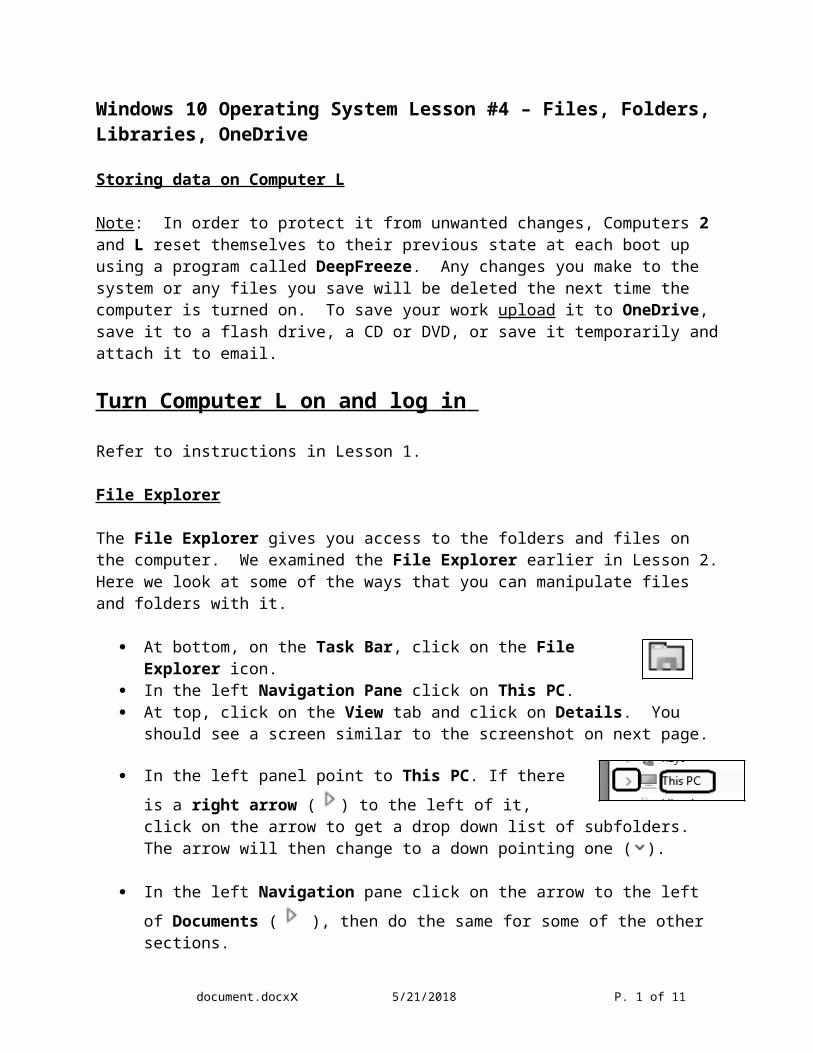
Windows 10 Operating System Lesson #4 – Files, Folders, Libraries, OneDrive
Storing data on Computer L
Note: In order to protect it from unwanted changes, Computers 2 and L reset themselves to their previous state at each boot up using a program called DeepFreeze. Any changes you make to the system or any files you save will be deleted the next time the computer is turned on. To save your work upload it to OneDrive, save it to a flash drive, a CD or DVD, or save it temporarily and attach it to email.
Turn Computer L on and log in
Refer to instructions in Lesson 1.
File Explorer
The File Explorer gives you access to the folders and files on the computer. We examined the File Explorer earlier in Lesson 2. Here we look at some of the ways that you can manipulate files and folders with it.
At bottom, on the Task Bar, click on the File Explorer icon.
In the left Navigation Pane click on This PC. At top, click on the View tab and click on Details. You should see a
screen similar to the screenshot on next page.
In the left panel point to This PC. If there is a right arrow ( ) to the left of it, click on the arrow to get a drop down list of subfolders. The arrow will then change to a down pointing one ( ).
In the left Navigation pane click on the arrow to the left of Documents ( ), then do the same for some of the other sections.
Click on the individual entries and examine the contents of the right panel.
The Address Bar at the top shows the name of the active Folder. Any subfolders and files in it are displayed in the main right panel. The entries on the Navigation pane are folders and system drives. Folders “contain” files, but only files hold actual data.
document.docxx 5/21/2018 P. 1 of 9
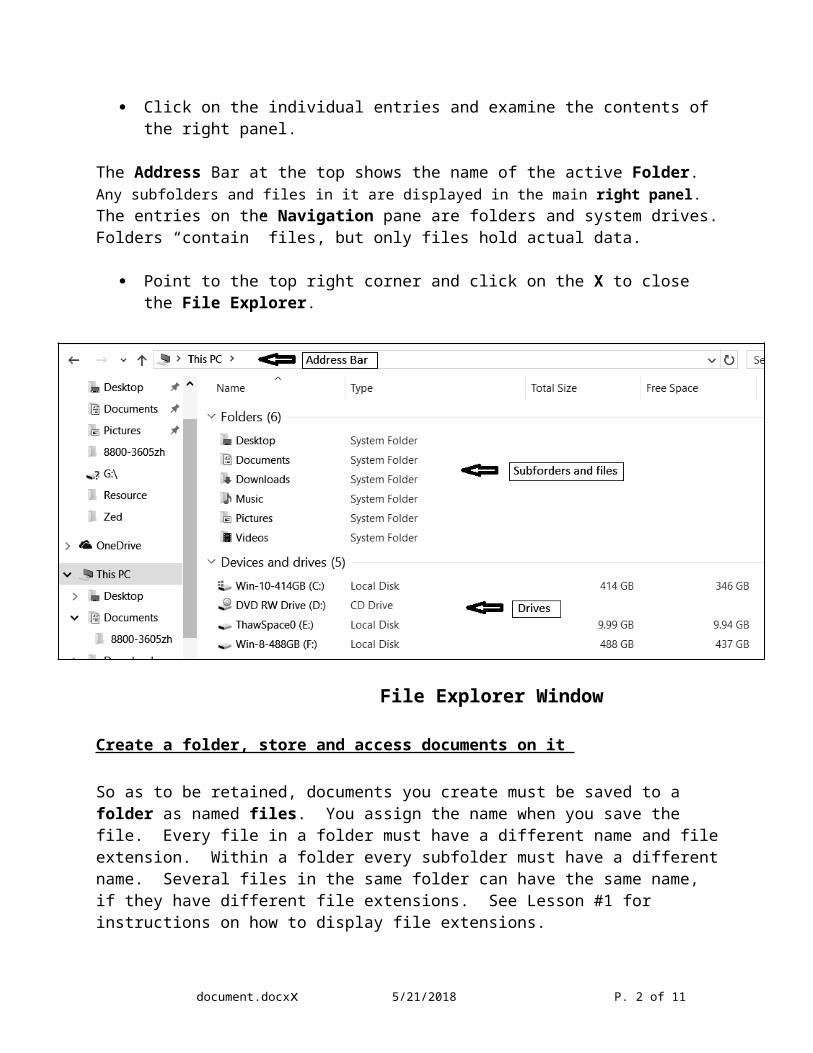
Point to the top right corner and click on the X to close the File Explorer.
File Explorer Window
Create a folder, store and access documents on it
So as to be retained, documents you create must be saved to a folder as named files. You assign the name when you save the file. Every file in a folder must have a different name and file extension. Within a folder every subfolder must have a different name. Several files in the same folder can have the same name, if they have different file extensions. See Lesson #1 for instructions on how to display file extensions.
Note: Because DeepFreeze is installed on Computer L, to save files permanently, save them to a flash drive, attach them to email, or follow steps in the exercise below to upload them to OneDrive.
(1) Make a folder
• At bottom, on the Task Bar, click on the File Explorer.• On the left Navigation Pane, under This PC, click on Documents.• Find an empty area in the Documents main right panel and RIGHT
click there. • Point to New. • Move across to the extended panel and click on Folder.
document.docxx 5/21/2018 P. 2 of 9
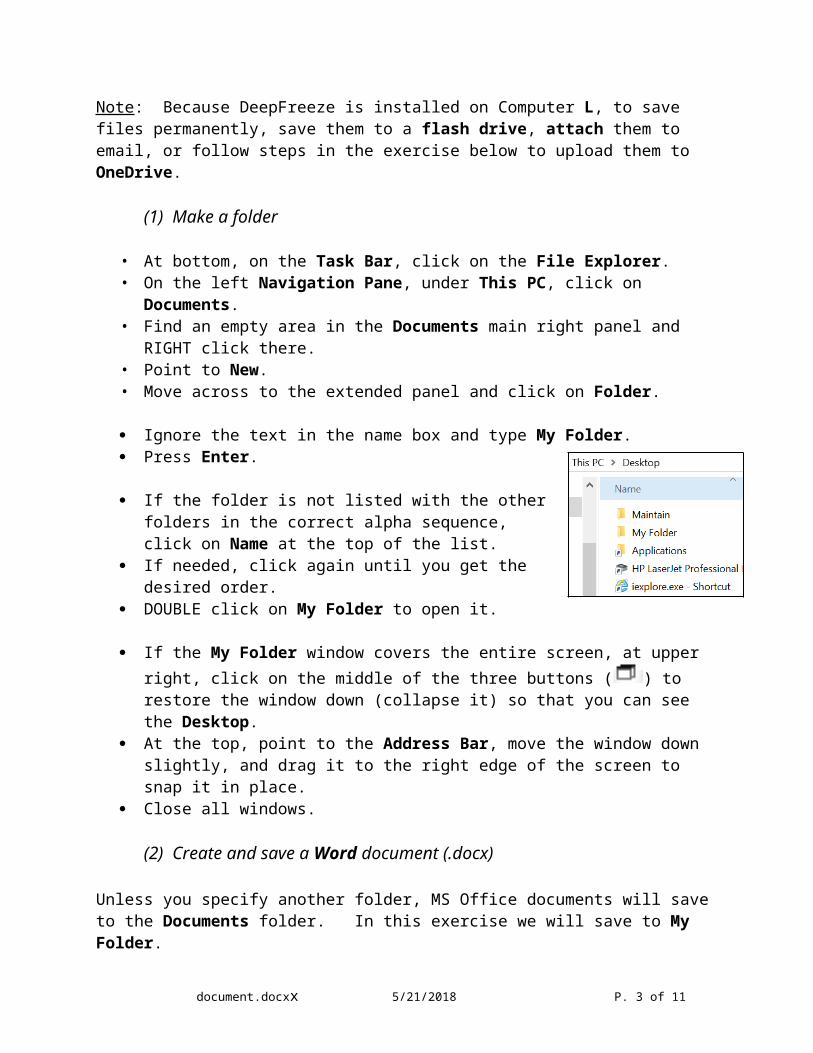
Ignore the text in the name box and type My Folder. Press Enter.
If the folder is not listed with the other folders in the correct alpha sequence, click on Name at the top of the list.
If needed, click again until you get the desired order.
DOUBLE click on My Folder to open it.
If the My Folder window covers the entire screen, at upper right, click on the middle of the three buttons ( ) to restore the window down (collapse it) so that you can see the Desktop.
At the top, point to the Address Bar, move the window down slightly, and drag it to the right edge of the screen to snap it in place.
Close all windows.
(2) Create and save a Word document (.docx)
Unless you specify another folder, MS Office documents will save to the Documents folder. In this exercise we will save to My Folder.
Open the Applications folder from the Desktop shortcut.
Open Microsoft Office Word 2007 or Winword.exe-e. Type the words Test file.
If the Word window covers the entire screen, at upper right, click on the middle of the three buttons ( ) to restore the window down (collapse it) so that you can see the Desktop.
At the top, point to the Address Bar, move the window down slightly, and drag it to the left edge of the screen to snap it in place.
Click on the Office Button, click on Save As. On the left Navigation Pane find This PC and click on the arrow to
the left of Documents icon ( ). In the drop down menu click on My Folder. The path in the Address Bar should show Documents, My Folder.
Click in the File name: box near the bottom. Delete any text there and type My File. Below it, in the Save as type: box, note the file extension .DOCX.
You will be saving the file in that format. Click on Save below at right.
document.docxx 5/21/2018 P. 3 of 9
Close all windows. Open the File Explorer, in the left Navigation Pane navigate to This
PC, Documents, My Folder and open the folder.
Check that My File.docx shows at right in the My Folder window. Do not close the My Folder yet, but close all other windows.
(3) Create and save a .BMP graphic file
With the My Folder window snapped at right, click on Start. Click in the Type here to search box and type MSPaint. Click on the Paint entry that appears at top.
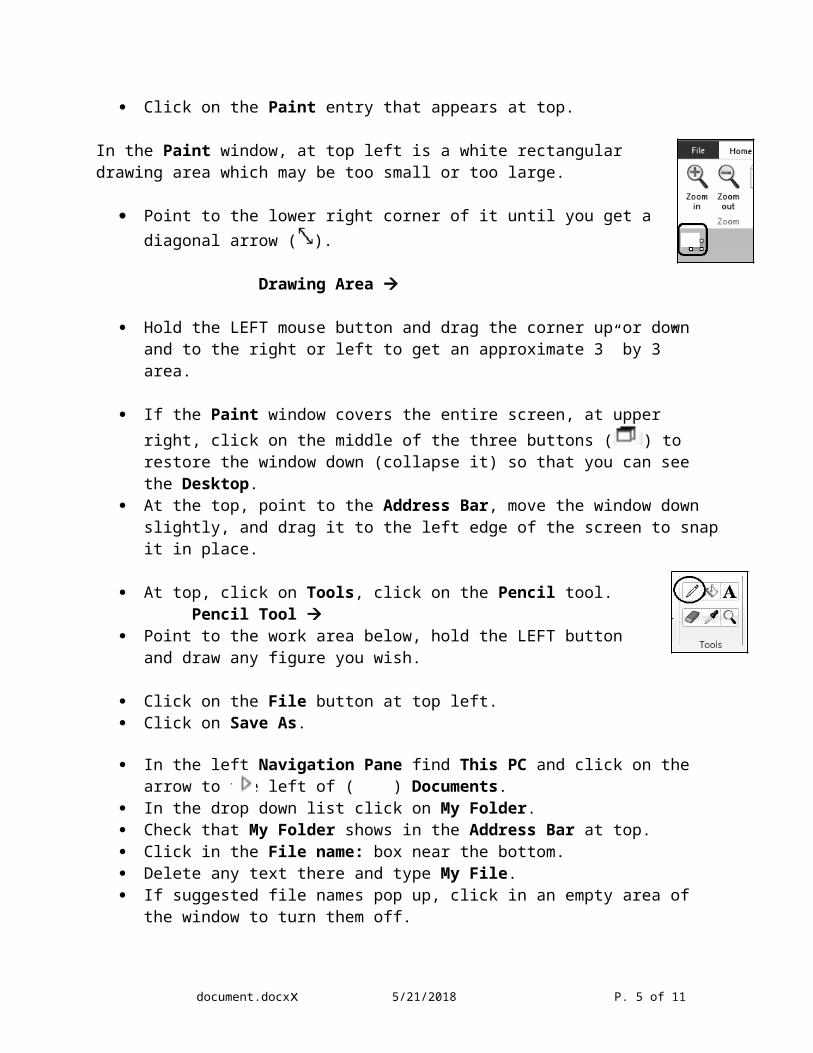
In the Paint window, at top left is a white rectangular drawing area which may be too small or too large.
Point to the lower right corner of it until you get a diagonal arrow ( ).
Drawing Area
Hold the LEFT mouse button and drag the corner up or down and to the right or left to get an approximate 3” by 3” area.
If the Paint window covers the entire screen, at upper right, click on the middle of the three buttons ( ) to restore the window down (collapse it) so that you can see the Desktop.
At the top, point to the Address Bar, move the window down slightly, and drag it to the left edge of the screen to snap it in place.
At top, click on Tools, click on the Pencil tool. Pencil Tool
Point to the work area below, hold the LEFT button and draw any figure you wish.
Click on the File button at top left. Click on Save As.
In the left Navigation Pane find This PC and click on the arrow to the left of ( ) Documents.
In the drop down list click on My Folder. Check that My Folder shows in the Address Bar at top. Click in the File name: box near the bottom. Delete any text there and type My File.
document.docxx 5/21/2018 P. 4 of 9
If suggested file names pop up, click in an empty area of the window to turn them off.
Below it, in the Save as type: box, note the file extension .PNG. You will be saving the file in that format.
Click on Save below. Close the Paint window and any other windows that may cover My
Folder. Check that My File.docx and My File.png show at right in the My
Folder window.
Note that there are two files called My File in the folder, but they can be distinguished because of their file extensions.
Close all windows.
Do not delete My Folder yet.
Libraries
Windows lets you use Folders and Libraries to keep track of your work and to organize it. Unless you direct it otherwise, Windows saves your work as files on the computer's hard drive. Your computer has many thousands of files on it. Documents and other files are the actual data. Libraries and folders are just catalogs of shortcuts to them.
You yourself can create folders and decide what to put in them. Libraries are mostly managed by the operating system and by apps and programs. The advantage of Libraries is that they save you the work of keeping track of different types of documents or files.
You cannot place files into the Library directly. To appear in the Library files must be placed in a folder that has been included in the Library. Windows will collect files into Library from all of the folders included in the Library. To begin with, the Library includes the folders Documents, Music, Photos, Pictures and Videos. Library folders may also appear in OneDrive (see below) and then files and folders from either location are included in the Library.
For example, Windows will place all of your pictures on the computer in the Pictures library, no matter where they are located or in what format they are. But this can be very confusing if you are trying to locate specific files. It can produce unfortunate results, as when unwanted background music files on a game DVD get placed in the Music library without you wanting them there, or when you deleted them from the Library but then you still find them on your hard drive. If libraries work for you and you know how to use them,
document.docxx 5/21/2018 P. 5 of 9
continue to do so at home. We will not use them in these lessons; we will work on the Desktop and use folders to keep track of our work.
Libraries on Computer L are especially confusing because DeepFreeze deletes newly created files on next boot up. On your home computer, folders included in the Library may be synchronized between your computer’s hard drive and your OneDrive account (see below). For example, some apps, such as Microsoft Office will save files to Documents on your local OneDrive automatically and the files then may show in the Documents library on your computer. To keep confusion at a minimum, in these lessons we will save and retrieve files using the actual folder paths.
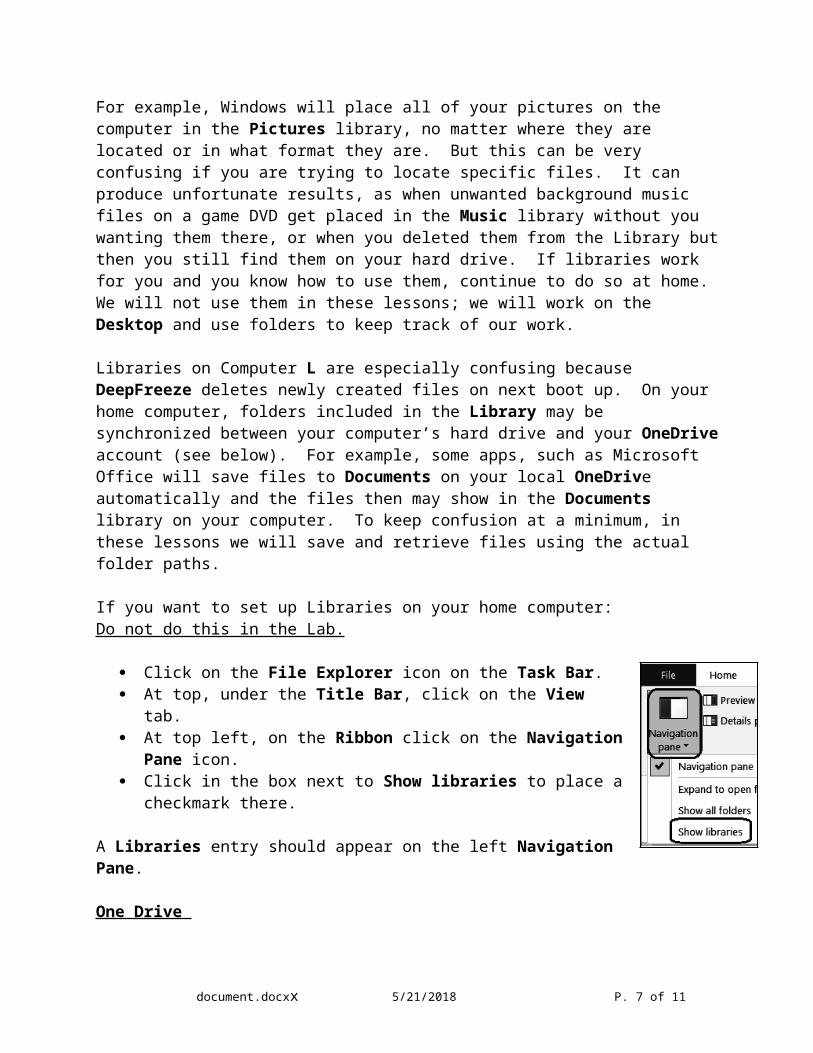
If you want to set up Libraries on your home computer:Do not do this in the Lab.
Click on the File Explorer icon on the Task Bar. At top, under the Title Bar, click on the View tab. At top left, on the Ribbon click on the Navigation Pane
icon. Click in the box next to Show libraries to place a
checkmark there.
A Libraries entry should appear on the left Navigation Pane.
One Drive
OneDrive, a feature introduced in Windows 8 as SkyDrive, makes available large amount of on line storage for your documents or other files. When you install or upgrade to Windows 10, you need to decide whether or not to set up an on-line Microsoft account. Your choice will very much affect how you will then use the computer, but you can change that option later. With a Microsoft account you can save each document or file that you create on your computer, on OneDrive, or on both.
Logging in on Computer L as gives you access to OneDrive. On these computers logging into the local User account gives you access to it. However, on any other computer connected to the Internet you can go to the www.outlook.com web page, log in as with an OneDrive or Outlook account ID and access the OneDrive files saved there.
There are different OneDrive locations. Computer L has a folder on the hard drive with path
This PC\[Any Name] (C:)\ Users\Lab User\OneDrive. Another OneDrive is on a Microsoft server in the Cloud. Files in these locations are "synchronized". When a file is changed in one location the change is carried over to the other location.
document.docxx 5/21/2018 P. 6 of 9
Because of DeepFreeze, to keep files you created on this computer, you must upload them to the OneDrive website. DeepFreeze will delete new files saved to the local OneDrive folder. However, OneDrive files are synchronized and uploaded files are retained and downloaded back into the local folder after you boot the computer.
There are various ways to access OneDrive.
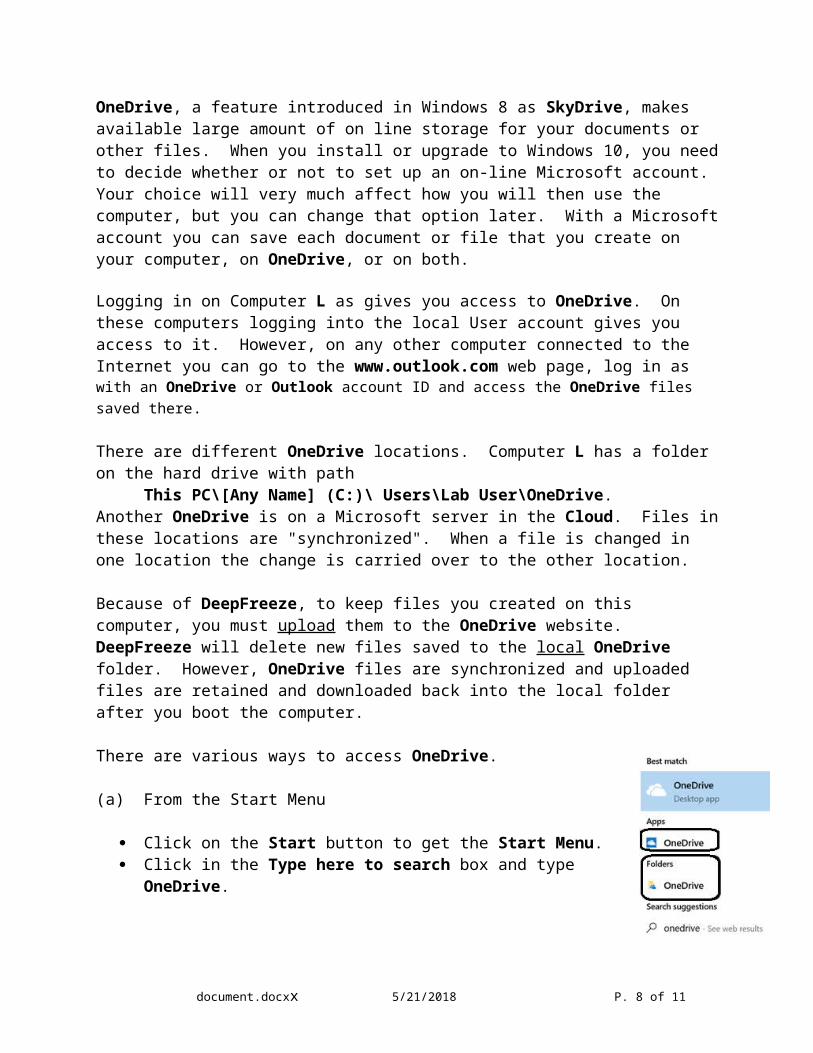
(a) From the Start Menu
Click on the Start button to get the Start Menu. Click in the Type here to search box and type OneDrive.
Click on the Folders - OneDrive entry to open the local OneDrive folder.
Note: To get OneDrive on your home computer, click in the Type here to search box and type OneDrive Store. This finds the OneDrive app that you can install. Once it is installed, log in with your Microsoft account.
Click in the Type here to search box and type OneDrive. Click on the entry with the Cloud icon. The cloud folder of the account will
open.
When you started, you logged onto Computer L with a Microsoft account. Had you logged in with a local account you would have to log into the OneDrive account now.
Close all windows.
(b) From Edge (or Internet Explorer, if activated)
Click on the Edge (or I/E) icon on the Task Bar. At top, in the address bar, type www.onedrive.com and press the
Enter key. If you are not already signed in, click on Sign in at top right and log in
with your Microsoft account (Outlook, Hotmail, Live mail, etc.). Ask you instructor about this lesson’s log in.
If you access the Outlook email account, rather than OneDrive, click on the Apps icon at upper right and click on OneDrive.
document.docxx 5/21/2018 P. 7 of 9
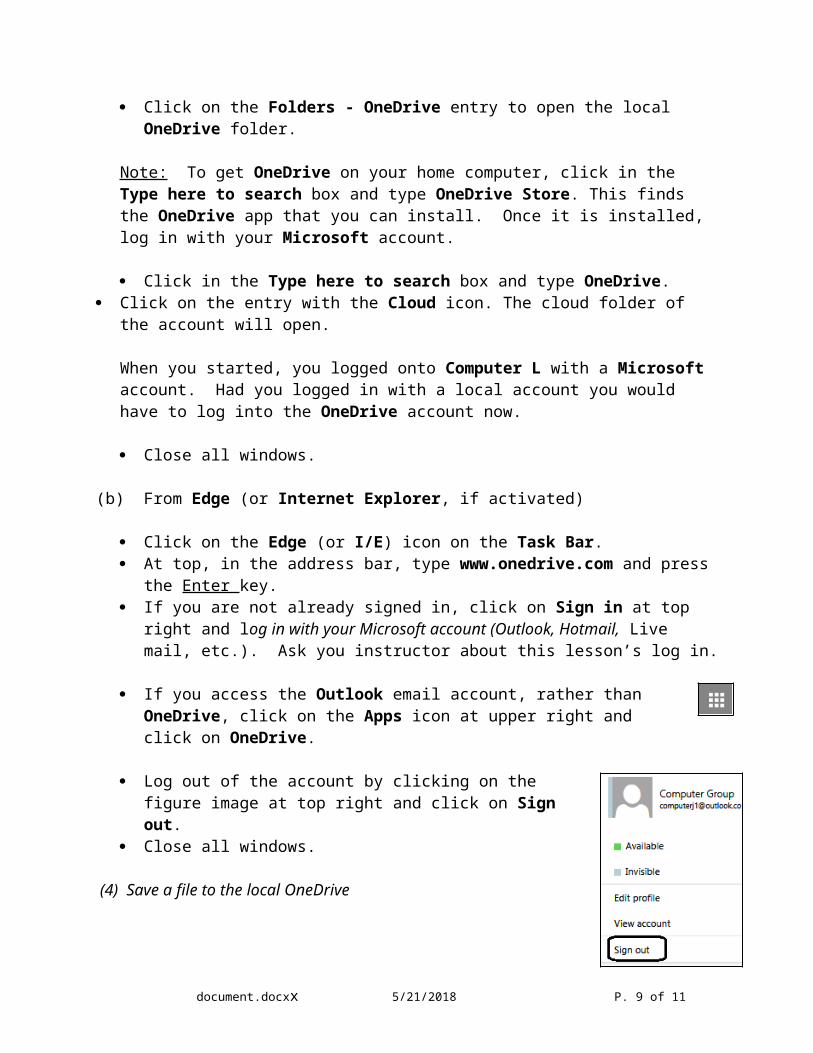
Log out of the account by clicking on the figure image at top right and click on Sign out.
Close all windows.
(4) Save a file to the local OneDrive
As an exercise, we will save and then upload to OneDrive the file My File.docx saved previously in the Computer Group's Documents folder, My Folder. If you restarted the computer since you created the file, go to the above instructions and create My Folder and My File.docx file again.
On the left Navigation Pane find This PC and click on the arrow to the left of Documents icon ( ).
In the drop down menu click on My Folder. The path in the Address Bar should show Documents, My Folder. DOUBLE click on My File.docx.
Click on the Office Button of My File.docx and click on Save as.
In the left Navigation Pane find OneDrive (you may have to scroll) and click on it.
Make sure the path at the top of the window shows OneDrive as the last entry.
Below, check that in the box next to File name it says My File.docx. Click on Save below at right. Close all windows.
On the Taskbar, click on File Explorer. Click on OneDrive. In the right panel of the window, find My File.docx. DOUBLE click on My File.docx to verify that it is the correct file. Close all windows.
(5) Upload a file to the cloud OneDrive
Log into the OneDrive account as above. If you see My File.docx listed, RIGHT click on it and click on Delete.
On the top bar, click on the up arrow ( ) with a pop up notice Upload from your computer....
Click on Files.
On the left Navigation Pane, under This PC, click on Documents.
document.docxx 5/21/2018 P. 8 of 9
If you restarted the computer before completing this exercise, use the directions above to create My Folder and My File.docx.
In the right panel DOUBLE click on My Folder. Click on My File.docx once to select it, and then click on Open below.
Wait for My File.docx to appear on the screen.
On the OneDrive screen, RIGHT click on My File.docx. Click on Delete.
At upper right, click on the empty person image.
Click on Sign out.
Close all windows.
Navigate to Documents and delete My Folder.
Close all windows.
Turn the computer off as previously instructed.
document.docxx 5/21/2018 P. 9 of 9