Embed Size (px)
Citation preview

File Upload In ADF
In this tutorial we are going to see file upload concept in ADF.
1.Start JDeveloper by selecting Start > Programs > Oracle Fusion Middleware 11.1.6.0.0 >JDeveloper Studio 11.1.1.6.0.

2.In the Select Role dialog, choose “Default Role” and click “OK”.

3.File > New then selecting the Applications menu item in the left side of the new dialog, select the Fusion Web Application (ADF) type and click “OK”.

4.Create the application click “Next”.

5.It will create model project click “Next”.

6.It will create the View Controller project.
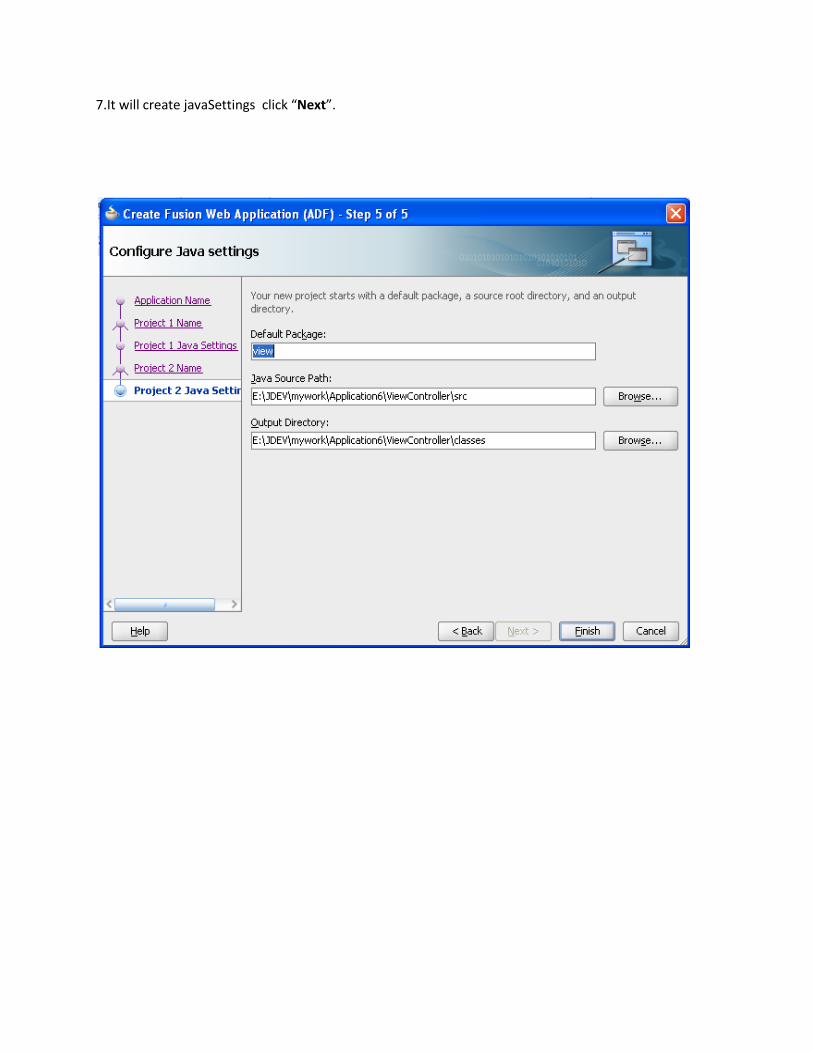
7.It will create javaSettings click “Next”.

8.Right click the package “ViewContoller” select->New
Select Java from the left side and Java Package on the right. Then click “OK”.
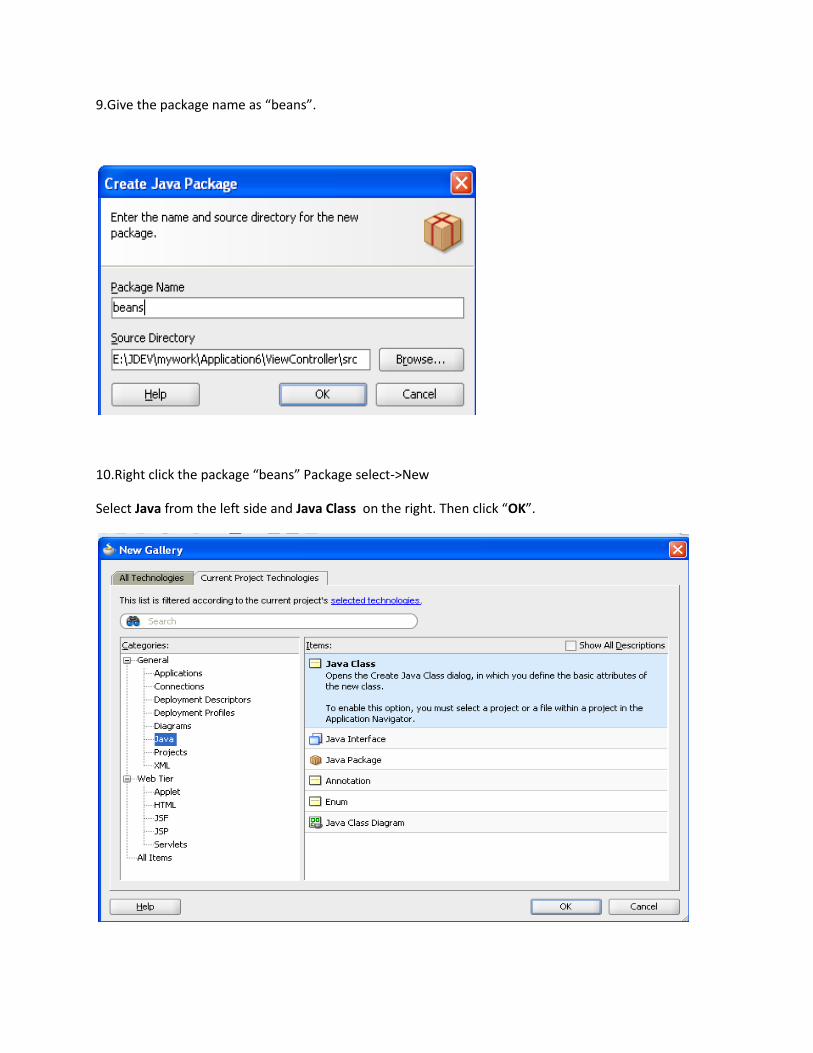
9.Give the package name as “beans”.
10.Right click the package “beans” Package select->New
Select Java from the left side and Java Class on the right. Then click “OK”.

11.Mention the class name as UploadBean.

12.To add following code in UploadBean.java
import java.io.BufferedReader;
import java.io.InputStream;
import java.io.InputStreamReader;
import java.util.ArrayList;
import java.util.List;
import org.apache.myfaces.trinidad.model.UploadedFile;
public class UploadBean {
public UploadBean() {
super();
}
private UploadedFile file;
public void setFile(UploadedFile file) {
this.file = file;
}
public UploadedFile getFile() {
return file;
}
public String upload(){
List<String> list=null;
try{
System.out.println("String");
list=new ArrayList<String>();
UploadedFile f1=getFile();

InputStream inputstream = f1.getInputStream();
BufferedReader br=new BufferedReader(new InputStreamReader(inputstream));
String str;
while((str=br.readLine())!=null){
System.out.println(str);
}
}
catch(Exception e) {
}
return null;
}
}

13. Right-click on the WebContent Folder and select new. Select JSF from the left side and JSF Page on
the right. Then click “OK”.

14.Mention the page name as upload

15.In upload.jspx page drag and drop Input file component and button.
16.Double click the button
Click new button .

17.In Bean Name give the alias name for your bean class and Class name select your class
Click Ok.

18.Now Managed Bean select your bean.
In method select the upload method which is in your bean class

19.Select the input file component ,then in property inspector value field bind the variable(file) which is
Available in your bean class.
20.Now save your work and run the upload.jspx page.
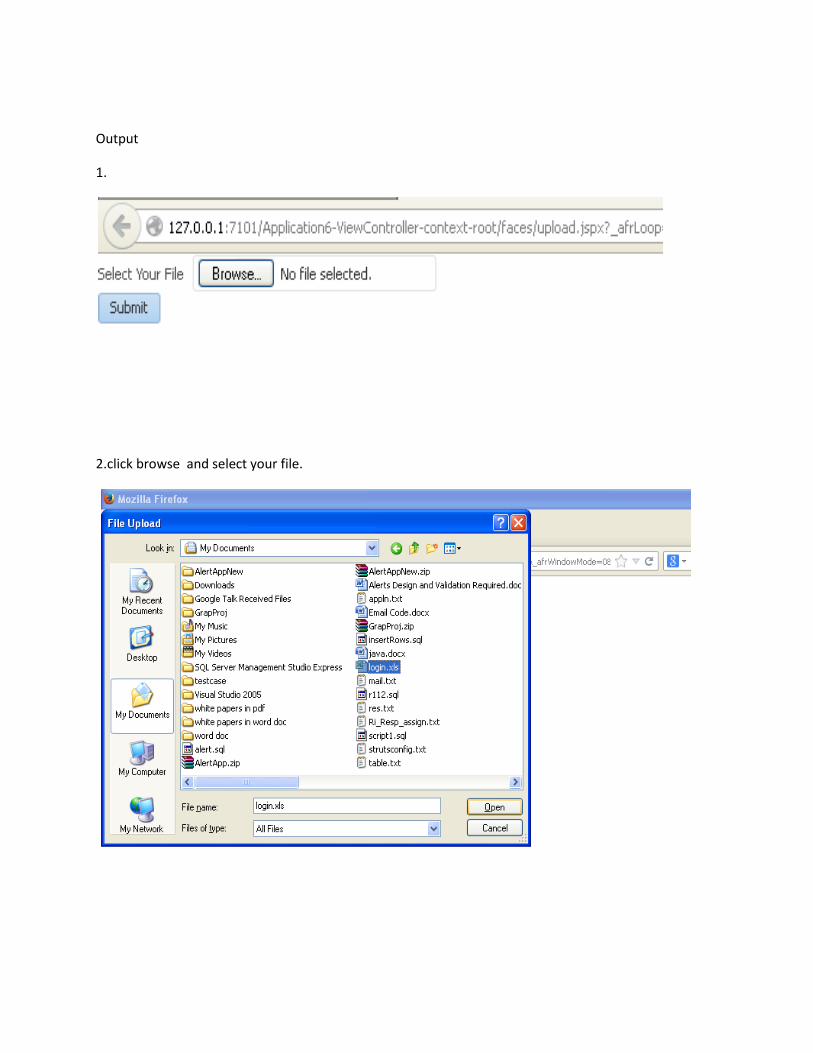
Output
1.
2.click browse and select your file.

3.
Click Submit button
4.file information will display in your log file. because in our backing bean code I just print the file lines
only.

Thank you,Keep Breathing &
Keep Learning


![[ A ] SPIRITS ADF [ADF] VODKA - BASIC](https://img.pdfslide.us/doc/110x75/6169d8c211a7b741a34c063e/-a-spirits-adf-adf-vodka-basic.jpg)