Embed Size (px)
Citation preview

SAP Business Warehouse/Business Intelligence Reporting
FI Exercise 1 Creating a Basic Ad Hoc QueryWashington State HRMS Business
Warehouse/Business Intelligence (BW/BI)
BW/BI Power User Workshop Materials
General Topics – BW/BI Power Users
BW/BI Power User Workshop - FI Exercise 1
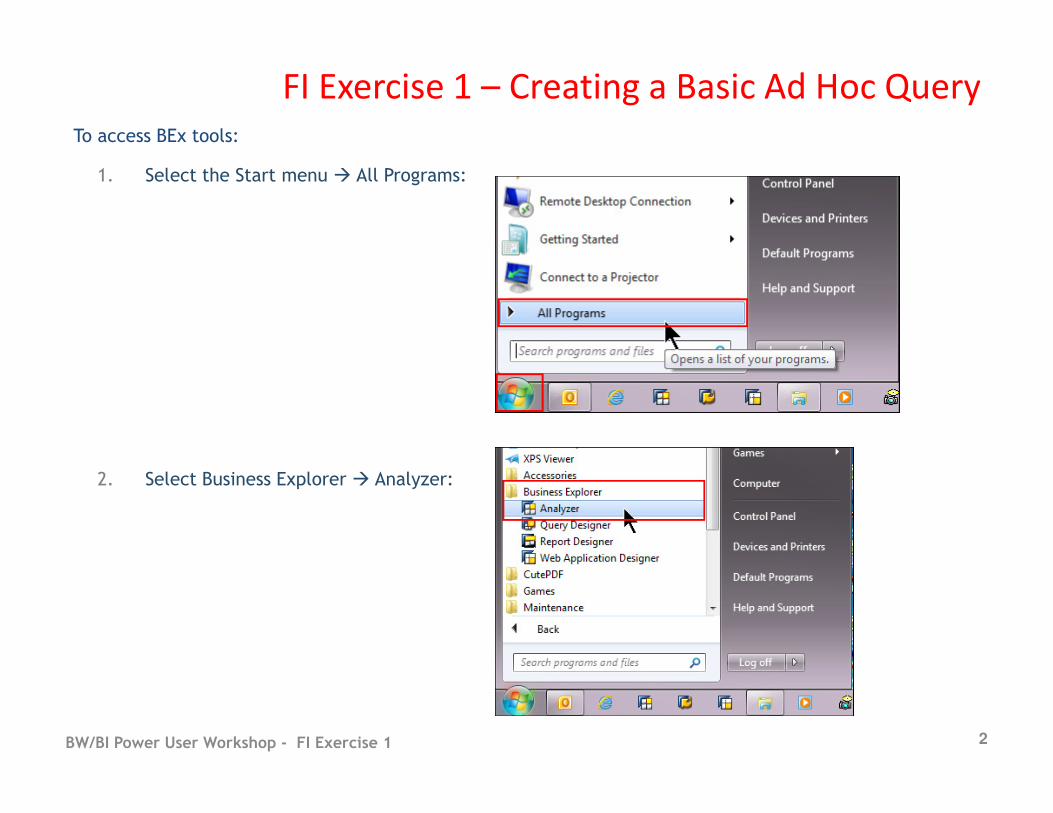
To access BEx tools:
2
FI Exercise 1 – Creating a Basic Ad Hoc Query
BW/BI Power User Workshop - FI Exercise 1
1. Select the Start menu � All Programs:
2. Select Business Explorer � Analyzer:
3
FI Exercise 1 – Creating a Basic Ad Hoc Query
BW/BI Power User Workshop - FI Exercise 1
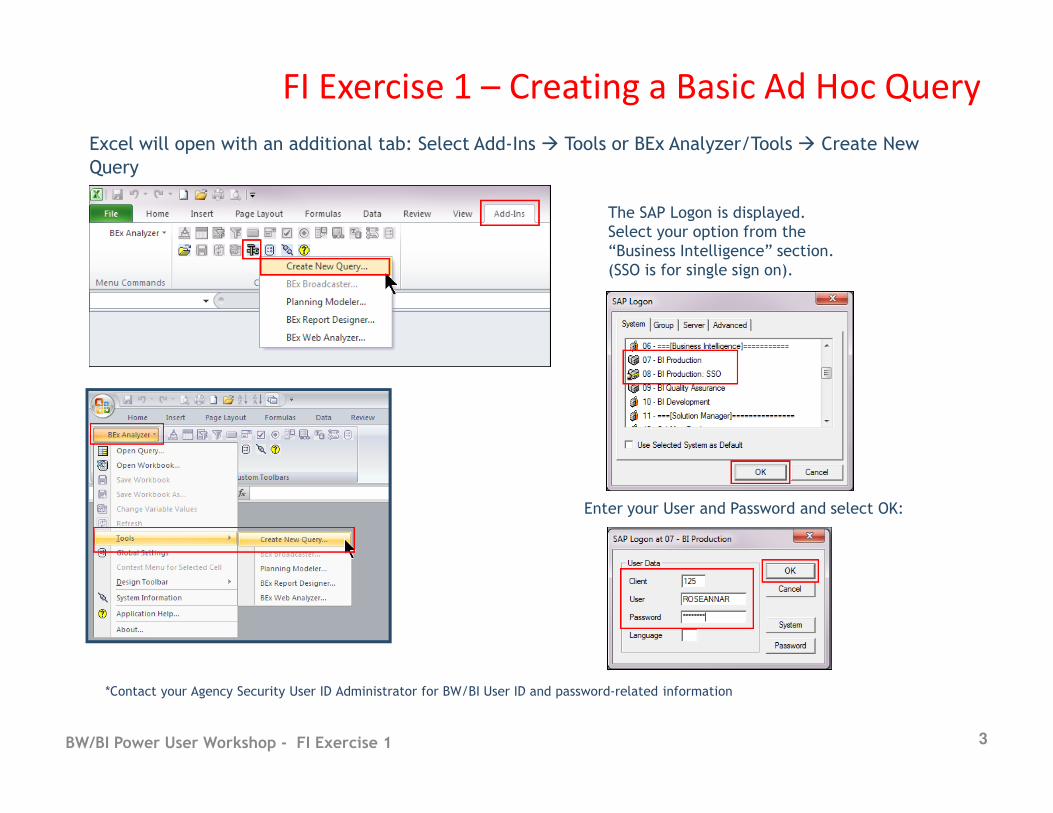
The SAP Logon is displayed.
Select your option from the
“Business Intelligence” section.
(SSO is for single sign on).
Excel will open with an additional tab: Select Add-Ins � Tools or BEx Analyzer/Tools � Create New
Query
*Contact your Agency Security User ID Administrator for BW/BI User ID and password-related information
Enter your User and Password and select OK:

4BW/BI Power User Workshop - FI Exercise 1
Result: BEx Query Designer will be opened in the Standard View.
FI Exercise 1 – Creating a Basic Ad Hoc Query
5BW/BI Power User Workshop - FI Exercise 1
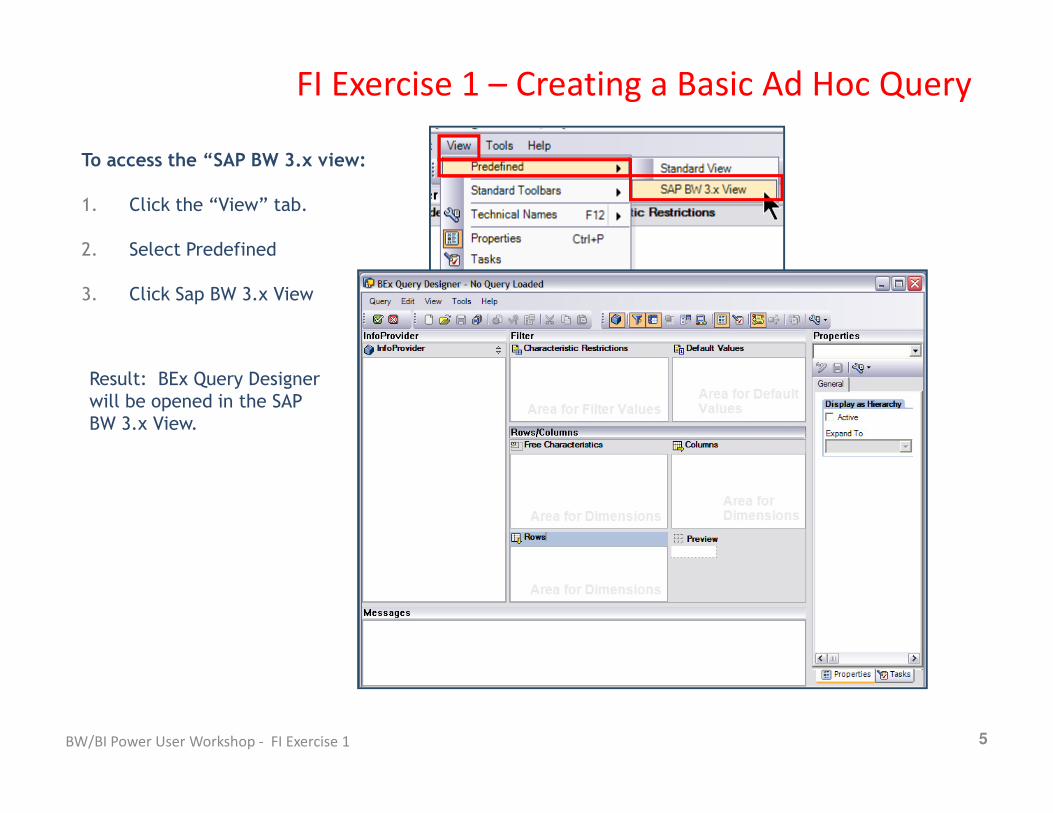
To access the “SAP BW 3.x view:
1. Click the “View” tab.
2. Select Predefined
3. Click Sap BW 3.x View
Result: BEx Query Designer
will be opened in the SAP
BW 3.x View.
FI Exercise 1 – Creating a Basic Ad Hoc Query

FI Exercise 1 – Creating a Basic Ad Hoc Query
BW/BI Power User Workshop - FI Exercise 1 6
1. Click the New Query icon from the BEx Query
Designer toolbar.
Creating a New Ad Hoc Query
Result: The New Query: Select InfoProvider screen is
displayed.
Click the Technical Names
icon to view InfoArea
Technical Names
2. Click on the InfoAreas tab, if
necessary.
3. Expand the AFRS Payroll InfoArea
from the “New Query – Select
InfoProvider” Screen.
4. Select AFRS Payroll (ZPY_C51)
InfoProvider.
5. Click Open.

FI Exercise 1 – Creating a Basic Ad Hoc Query
BW/BI Power User Workshop - FI Exercise 1 7
Click the Technical Names icon to toggle the
Technical Names of the Infobjects on.
Adding Key Figures
1. Expand the Key Figures section by
clicking on the Expand icon.
2. Drag&Drop AFRS Dollars from the
Key Figures section to the Columns
section of the query.
This will add the Payroll Costs to
the ad hoc query results.

FI Exercise 1: Creating a Basic Ad Hoc Query
BW/BI Power User Workshop - FI Exercise 1 8
Adding Characteristics
1. Expand the AFRS Time Dimensions.
2. Drag&Drop the Biennium Characteristic
to the Rows section of the query.
3. Expand the General Ledger Dimension.
4. Drag&Drop the Agency Characteristic
from the General Ledger Dimension
under the Biennium Characteristic in the
Rows section.
FI Exercise 1: Creating a Basic Ad Hoc Query
BW/BI Power User Workshop - FI Exercise 1 9
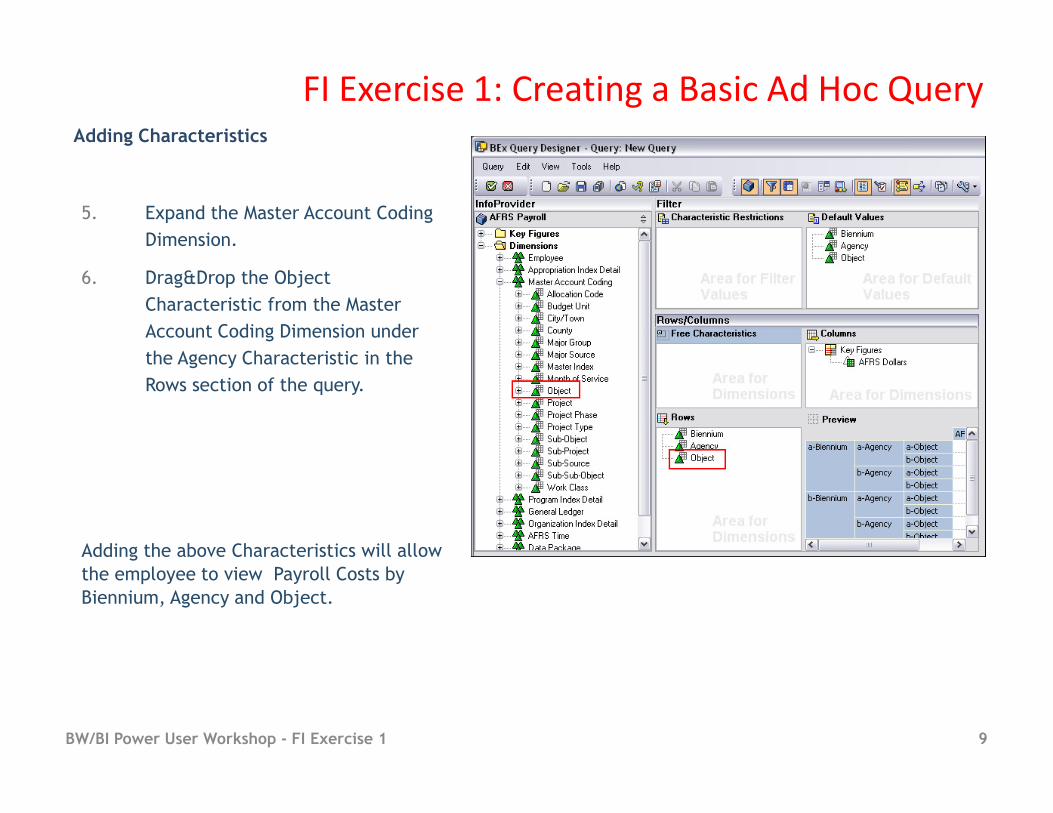
Adding Characteristics
5. Expand the Master Account Coding
Dimension.
6. Drag&Drop the Object
Characteristic from the Master
Account Coding Dimension under
the Agency Characteristic in the
Rows section of the query.
Adding the above Characteristics will allow
the employee to view Payroll Costs by
Biennium, Agency and Object.
FI Exercise 1: Creating a Basic Ad Hoc Query
BW/BI Power User Workshop - FI Exercise 1 10
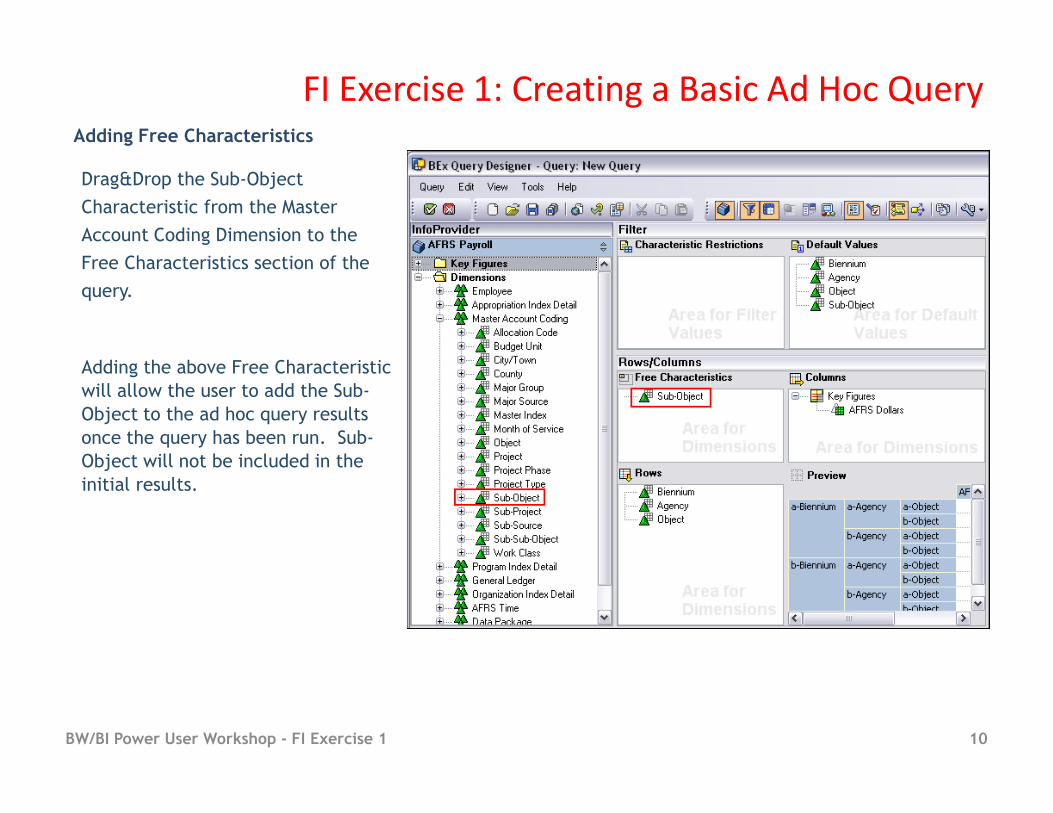
Adding Free Characteristics
Drag&Drop the Sub-Object
Characteristic from the Master
Account Coding Dimension to the
Free Characteristics section of the
query.
Adding the above Free Characteristic
will allow the user to add the Sub-
Object to the ad hoc query results
once the query has been run. Sub-
Object will not be included in the
initial results.

FI Exercise 1: Creating a Basic Ad Hoc Query
BW/BI Power User Workshop - FI Exercise 11
Saving the Ad Hoc Query
1. Click the Save Query icon from
the BEx Query Designer toolbar.
2. Enter the query Description in the
Description field of the Save Query
prompt (in this example, “Demo
Basic FI Query Part 1”).
3. Enter the query Technical Name
(example:
“X1790_DEMOBASICFIQUERYPART1”).
4. Click Save.