Embed Size (px)
Citation preview
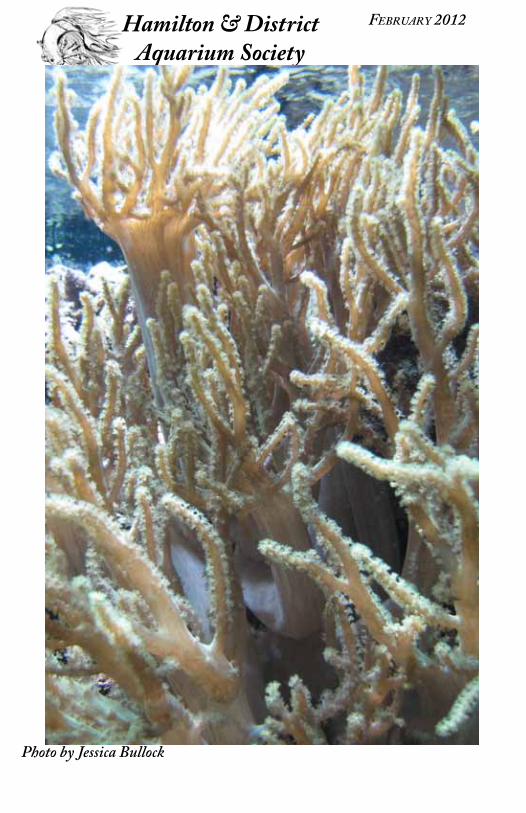
Photo by Jessica Bullock
Hamilton & DistrictAquarium Society
February 2012
February 2012
B oard of d irectors
editor & exchanges Jessica Bullock [email protected] (289) 639-3539breeders awards Charles Drew [email protected] (905) 332-4113
Programs Joe Bastianpillai [email protected] (905) 332-1886membershiPs Albert Van Mont-
fort298 Hawkridge Ave,Hamilton L9C 3L2
(905) 575-1509
reFreshments Sarah Langthorne (905) 575-1236auctioneer Frank Hyodo (905) 549-7428
Librarian Jessica Bullock [email protected] (289) 639-3539auction chairPerson Carla MacDonald [email protected] (905) 515-3771
caoac reP. Carla MacDonaldSarah Langthorne
[email protected] (905) 515-3771(905) 575-1236
webmaster Ryan Barrett [email protected]
Hamilton & DistrictAquarium Society
P resident
Carla MacDonald [email protected] (905) 515-3771
1st vice P resident
Karen Rogers [email protected]
2 nd vice P resident
Jessica Bullock [email protected]
t reasurer
Albert Van Montfort [email protected] (905) 575-1509
s ecretary
Margaret Dent [email protected] (905) 662-8218
The society meets the second Thursday of each month at 7:30 PM, except in July and August, at the Church of the Resurrection, 435 Mohawk Rd. West near the corner of Garth. Visitors are welcome.
www.hdas.caOur 61st Year of Publication
h&das buLLetin2
Carla's CommentsCarla MacDonald
Hi Everyone!
I'd like to thank the executive for standing up again for another year. It's great to see such great spirit within this group and we all hope that we are helping the HDAS be its best. If there is anything we can do to bring fish related info to you, please let us know.
I'd like to thank Margaret and Joe for their fantastic jobs showing us all how to make fish food. It was very informative - especially for those of us that don't go to such great lengths to make food. It sure is a cheaper way to spoil our fish. Thanks again Margaret and Joe. Our presentation this month is about "Plants". Jim Robinson will the presenter. His presentation will focus on the optimum conditions for plant growth. Our March program will be about
"Salt Water"
We still have room for you to sign up for the "Home Show". Does your tank have that winning something that everyone in the crowd will vote this years "Peoples Choice"? You won't know unless you enter the Show. Please make sure we have your information at the meeting.
See you there........
Carla
Table of ContentsCarla's Comments 2
Spawning Pelvicachromis taeniatus
(Moliwe) 3
Setting up a Reef Tank: Part 2 5
Cryogenic Reptiles 12
Gallery 15
Odds 'n' Ends 16
Submissions 16

3February 2012
Spawning Pelvicachromis taeniatus (Moliwe)Charles Drew
There are at least a dozen variants of the Pelvicachromis taeniatus. The last name such as Moliwe is the area in which that colour variant is collected. They all come from slow flowing rivers in Cameroon and Nigeria in West Africa. The fish are a close cousin of the well known Kribensis but most are differently spotted and have different colours. In the wild they feed on mainly insect larva and crustaceans. In the aquarium they eat most anything but have a preference for live or frozen foods. They like the temperature to be in the mid 70’s range. My room runs at about 78 degrees.
I had a pair over 50 years ago but do not remember having much or even any success in breeding them. I bought a pair several years ago at the OCA convention but they had been packed in a breathable bag in polluted water and did not make the trip home. This fall I sent out a feeler on the GTA aquarium forum to see if anyone in the area was breeding Taeniatus and got a reply from a hobbyist right here in Burlington. I found that he had a trio of young fish that he was willing to sell or trade me. They were F1’s from wild stock that he had bought from Oliver Lucanus in Montreal.
A few days later I had them swimming in a 15 gallon aquarium all set up for them to breed. The bottom substrate was coarse light brown sand with a few lava rocks and a piece of driftwood with some java fern and anubias tied on. I put in a round saucer type pleco cave and a three inch flower pot with a notch out of it as possible spawning sites.
Almost right away one female decided that the male was for her and started chasing the other relentlessly. The female was quickly removed for her own safety.
The next few weeks there was a lot of flaring going on and the belly of the female was soon large and purple. They still seemed a bit small to spawn but soon the female was digging and remodeling the entrance to the flower pot and adding an exit. Then one day the
h&das buLLetin4
male was alone swimming about the tank and the female could be seen sticking her nose out of the entrance to the pot. She stayed in the pot for a week while the male guarded the surrounding area. Then after seven days she came out with fourteen fry. The pair led them around the tank looking for food which I soon provided in the form of micro worms and live baby brine shrimp. It has been at least three weeks since they first left the cave and have grown to almost half an inch in length. It was not a large spawn as a mature pair usually has about sixty fry. Never the less it was a first spawn and I’m sure they will do better next time.
COUPON:
Please bring this bulletin to Pet Paradise for a 10% discount.2020 Appleby Line, Burlington - (905) 331-7381

5February 2012
Setting up a Reef Tank: Part 2Marty Ziegler
First published in Gravel Gossip, Diamond State Aquarium Society
One summer day I said to my wife, it's time to expand to a bigger tank- and she said, it's time for new carpeting, and behold, there was compromise. Since I wanted the new tank in the same location as the old tank, this would require a little more planning than I expected. The 55-gallon tank would have to be torn down one day, have the carpeting replaced the next day, and then set up the new tank the following day.
First off, I purchased a new 125-gallon tank and a deluxe wooden stand (my wife wanted to make sure the stand would match with the rest of the furniture). A stand to me is something to support the tank, not a piece of furniture, but again there is compromise. A friend of mine just so happened to be selling his 75-gallon set-up, so I purchased it for a very reasonable price and planned to combine the contents of that tank with the 55-gallon tank I already had set up. This would pretty much fill the new 125-gallon tank, so I would not need to buy anymore accessories at this time. His set-up included another Fluval 303 canister filter, a Sea Clear protein skimmer with Whisper 800 air pump, a larger wet-dry trickle filter system, an ultra-violet sterilizer, a two 175 watt metal halide lamp and two 40 watt actinic fluorescent bulb in a handmade wooden canopy, and a lot more live rock The only thing that I would need is additional coral, which I would spread out over the next two years.
Believe it or not, I accomplished the move with no casualties by the wee-hours of the morning of the fourth day. Setting up from existing systems does make for a faster transition to a mature tank.
I had decided against using any substrate in this tank after reading several articles in the aquarium magazines of this period, which I later regretted. Placing all this rock was quite overwhelming as I found myself constantly re-arranging the rock to get the desired effect. This was probably the most time-consuming part of the set-
h&das buLLetin6
up. I tried to create as many caves and ledges as I could with the rock that I had. Again, I regretted not epoxying some of the rockwork together, as later on I would have several accidental rockslides, which resulted in the loss of several corals.
I decided to hang the light canopy from the ceiling rather than set it on top of the tank. This is a good idea, as it greatly aids in air circulation, heat dissipation, and gas exchange, as well as make it easier to access the contents of the tank. The canopy was suspended approximately 6 inches from the top edge of the tank with two sections of decorative chain link, which can be purchased from any hardware store or home improvement center. Just be sure it is rated for the weight of the canopy you are using. The hanging hooks were firmly mounted to the ceiling joists. The metal halide bulbs are actually 9 inches from the surface of the water. This can be adjusted from time to time, raising the canopy higher when the bulbs are new, and then periodically lowering the canopy as the bulbs age. The 4-foot long canopy is centered over the 6-foot long tank. Because of the suspended canopy, light from the metal halides is still able to penetrate to both ends of the tank, although is reduced as it reaches the bottom ends of the tank Corals requiring high-intensity lighting would be kept in the middle 4 feet of the tank and on the upper level of the rock structure, while corals requiring lower-intensity lighting could be put in the lower levels or toward the ends of the tank.
The photo period was set for 6 hours with the metal halides on and 10 hours with the actinic blue fluorescents on, coming on two hours before the metal halides and going off two hours after the metal halides. This has seemed to work well for me, and although I have adjusted it from time to time, I have ended up going back to this lighting period and kept it there the past two years. As far as changing the bulbs, I generally replace one metal halide bulb after the first 12 months, and then replace the second bulb 3 months later. I raise the canopy after the first bulb replacement so the bulb is approximately 10-12 inches from the surface of the water, and then start lowering the canopy, one link at a time, about every three months after I replace the second bulb. This helps reduce the possibility of shocking the corals from the sudden change in light intensity. The actinic blue
11February 2012
fluorescent tubes are replaced every two years.
I used a glass cover for the top of the tank to keep stuff in the tank, to keep stuff out of the tank and to reduce evaporation. Later, I started removing the glass cover during the peak lighting periods (metal halides on) to allow higher light penetration in the tank. Even with the glass cover off for only 6 hours a day more than doubled the amount of water evaporation.
I went with the larger wet-dry trickle filter that came with the 75-gallon tank and used an Eheim 1250 water pump for the return to the tank from the sump. The overflow was placed in the center of the back of the tank A hang-on ultra-violet sterilizer was installed and an Eheim water pump was used to draw water from the sump. The Sea Clear protein skimmer with the Whisper 800 air pump driving two wooden airstones was placed next to the sump and water was drawn from the sump with a small powerhead, and then returned to the sump. I would later upgrade this to a Red Sea Berlin venturi skimmer driven by a Supreme Mag-Drive Model 5-water pump drawing water from outside the sump.
Two 200-watt submersible heaters are used to keep the tank at around 76 degrees F, at each end of the tank. I do not use a chiller, but the house has central air conditioning and is kept at 76 degrees during the summer months. Even so, during the summer months, the tank temperature can rise by a few degrees. So I later added a small fan that clamps onto the one end of the tank, which was purchased at a local discount store for $8, to blow air across the surface of the water under the light canopy. This fan is hooked to the light timer and helps reduce the temperature by a couple of degrees. At first, I ran the fan all the time, but it reduced the temperature too much during the night. The water evaporation does increase, but is manageable now that the fan is only on during the photoperiod
For next month's article, I shall write about the fish and corals which populated this tank and their care.
h&das buLLetin12
February 1992 –In his President’s message, Tom Tota noted the results of the recent club elections. Just as at our most recent meeting, the entire executive returned to their respective positions through acclamation, as no one ran against them. Tom mentioned that the scheduled speaker for the month, Terry Little, was not feeling well and as a result, Paul McFarlane would fill in with a presentation on Catfish. Articles this month included “The Night of the Long Knifefish” by Norm McEvoy, “Shuttle Shrimps” (reprint) and this interesting (and a little different) article that was also a reprint:
Cryogenic ReptilesVirginia Morell
Most reptiles survive cold northern winters by avoiding them altogether – they simply do not live where the earth freezes. Those which do overwinter usually hibernate in deep burrows, or, like the snapping turtle, disappear under the shelter of a frozen lake. But researchers have recently discovered a new trick in the reptile’s winter repertoire: hatchlings of the painted turtle, Chrysemys picta marginata, survive the chilly season by freezing nearly solid.
Although it is not the first higher animal known to tolerate freezing (four species of frog have a similar adaptation), it is, says Kenneth Storey, a cryobiologist at Ottawa’s Carleton University, “the highest vertebrate life form” with such a capability.
Storey, who is an expert on freezing-tolerant animals, discovered the painted turtle’s adaptation last spring. He and his colleagues removed 13 hatchlings from a nest near Algonquin Park, in Ontario, then transported them to his laboratory in a bed of ice and sphagnum moss. There, they placed the baby turtles in freezers, subjecting some to a temperature of -4°C and others to a low -11°C. All of the -4°C hatchlings survived, but only one of those frozen to the lower temperature came back to life.
13February 2012
“When the turtles freeze”, explains Storey, “about 55 percent of their body water turns to ice. Anything more than that is usually lethal.” In their frozen state, the turtles are about as “hard as Popsicles. They can’t move their limbs, their hearts are stopped, and their blood stops flowing.” In the wild, they may remain in this condition from the first winter freeze until the spring thaw – about five months.
To survive the icy interlude, the turtles rely on internal cryoprotectants. As the turtles freeze, their blood glucose and glycerol levels triple, minimizing the loss of water from cells and the cell shrinkage that accompanies freezing, and protecting cell membranes from structural damage.
Storey hopes that such cryoprotectants may one day help preserve human organs awaiting transplant. He and his colleagues are currently conducting experiments by using the cryoprotectants on the liver and heart cells of rats and rabbits. “It’s just a matter of filling the rabbits’ cells full of cryoprotectants, and they’ll hold up in the freezer too.”
h&das buLLetin14
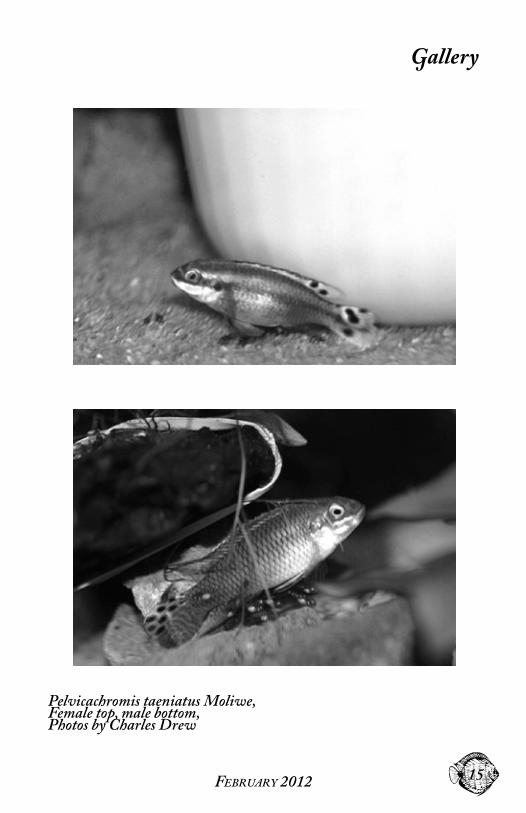
Gallery
15February 2012
Pelvicachromis taeniatus Moliwe,Female top, male bottom, Photos by Charles Drew
h&das buLLetin16
Odds 'n' Endsevents
February 19 Winter Auction, Tropical Fish Club of Erie County March 18 CAOAC Meeting, Waterdown March 25 Spring Auction & Show, Brant Aquarium SocietyMarch 31- April 1 Calgary Aquarium Society, Speaker Weekend
April 6-8 Aquaria Expo & CAOAC Convention, Winnipeg April 15 Regina Aquarium Society, Spring Auction April 16 Durham Regional Aquarium Society Aquariama April 21 Sarnia Aquarium Society Spring Auction
m eetings
February 9 February Meeting, Jim Robinson on Plants March 8 March Meeting, Saltwater talk April 14 H&DAS Spring Auction, Waterdown
Submissions
Articles are needed for every month's bulletin. Topics can include breeding, nutrition, water quality, do-it-yourself techniques, and amusing anecdotes. We have kicked off a new practice of using a hobbyist's photo for the cover of the e-bulletin. Hobbyist photos are needed for future months' bulletins. They do not need to be show quality fish or professional quality photos. Please send submissions to [email protected]


![[eBook] - Aquarium - The Reef Aquarium - Vol.1](https://img.pdfslide.us/doc/110x75/55cf988e550346d033984c0f/ebook-aquarium-the-reef-aquarium-vol1.jpg)