Embed Size (px)
Citation preview
February 2006 Colby College ITS
Introduction to Entourage 2008
February 2006 Colby College ITS
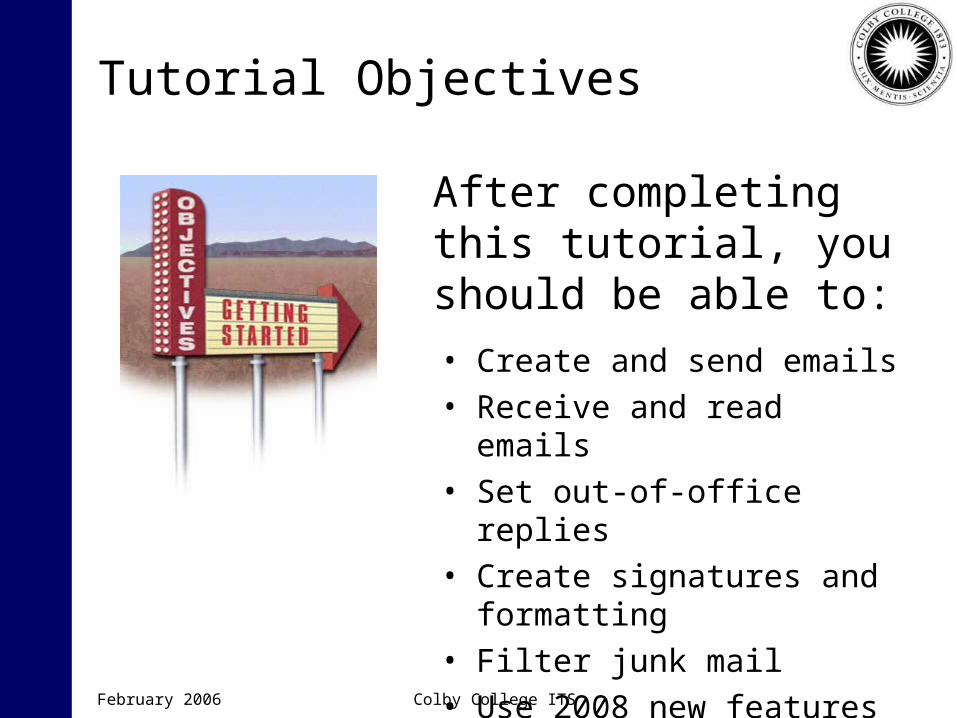
Tutorial Objectives
After completing this tutorial, you should be able to:
• Create and send emails• Receive and read emails• Set out-of-office replies• Create signatures and
formatting• Filter junk mail• Use 2008 new features

February 2006 Colby College ITS
The “Elements Gallery”
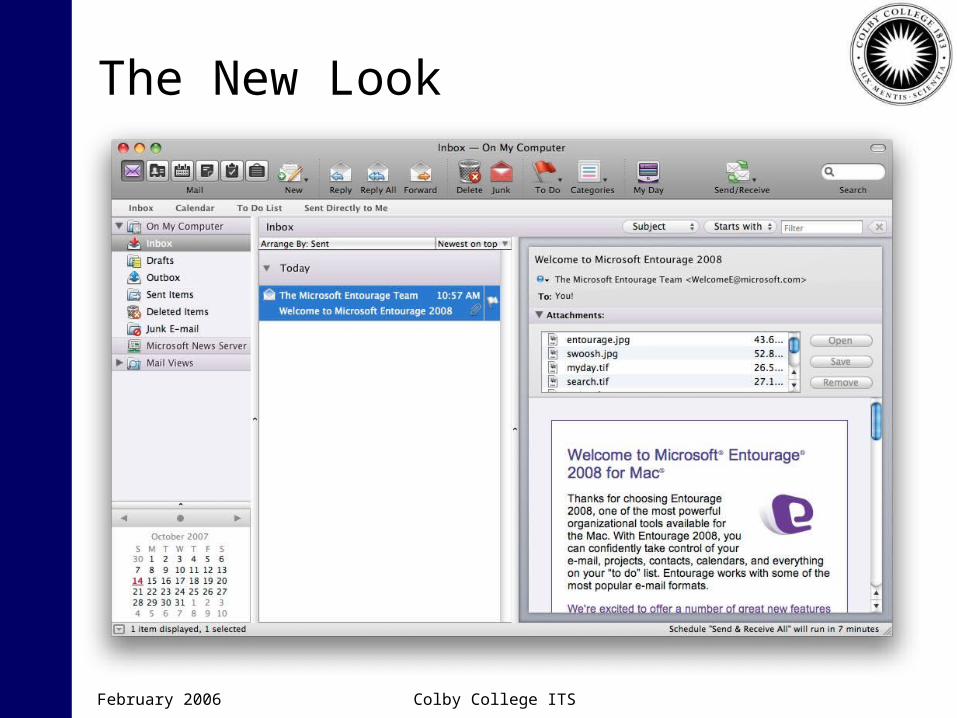
The New Look
February 2006 Colby College ITS
February 2006 Colby College ITS
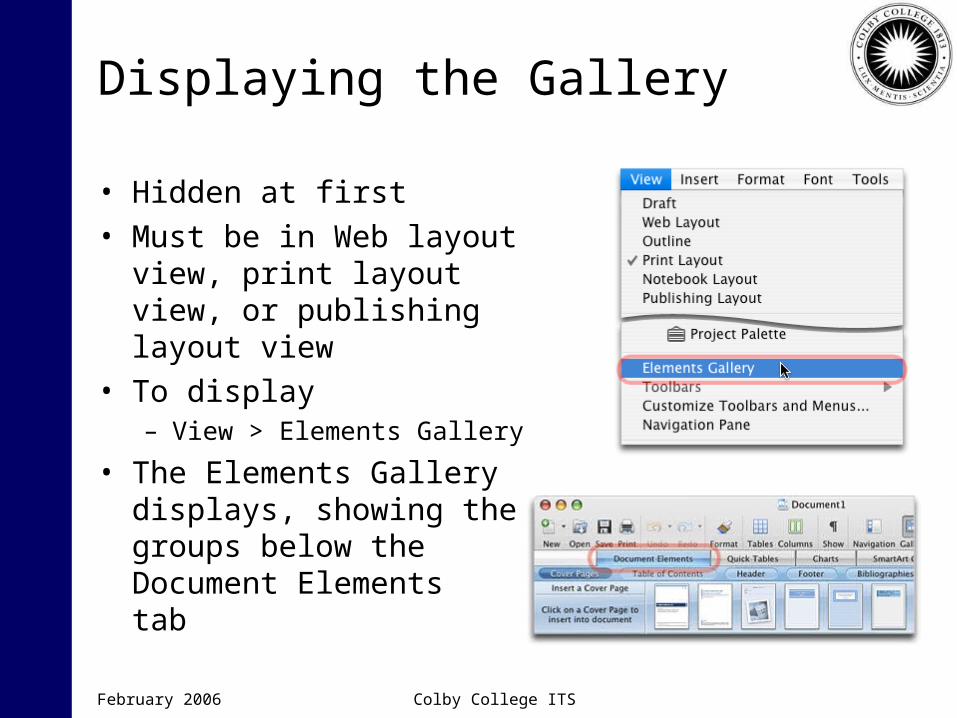
Displaying the Gallery
• Hidden at first• Must be in Web layout view,
print layout view, or publishing layout view
• To display– View > Elements Gallery
• The Elements Gallery displays, showing the groups below the Document Elements tab
February 2006 Colby College ITS
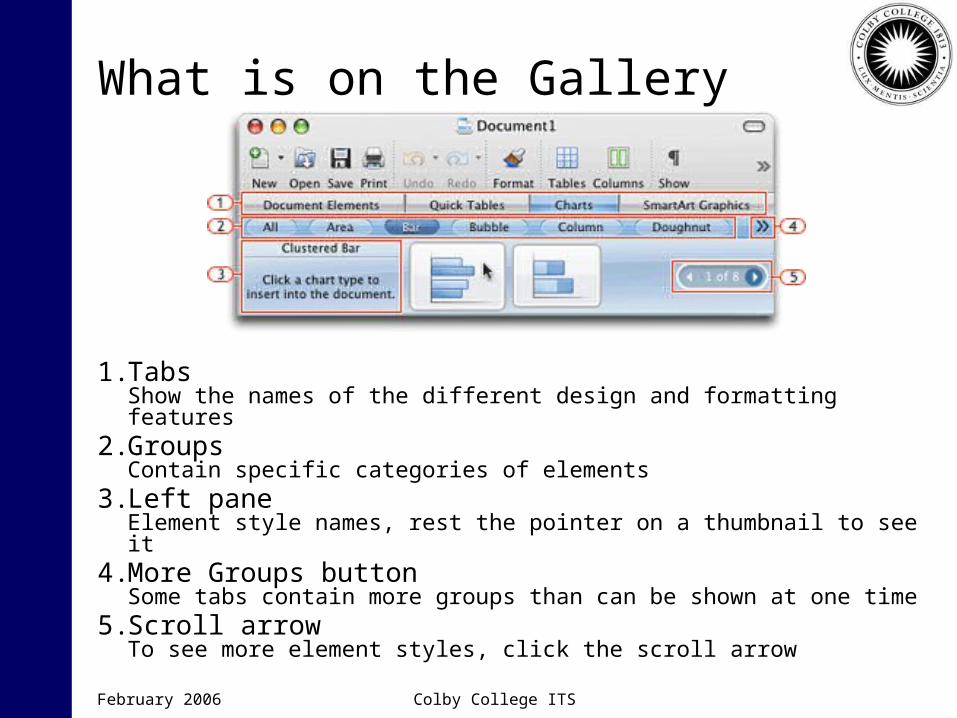
What is on the Gallery
1. TabsShow the names of the different design and formatting features
2. GroupsContain specific categories of elements
3. Left paneElement style names, rest the pointer on a thumbnail to see it
4. More Groups buttonSome tabs contain more groups than can be shown at one time
5. Scroll arrowTo see more element styles, click the scroll arrow

February 2006 Colby College ITS
Creating and Sending Email

February 2006 Colby College ITS
Sending an Email
• Mail > New
• Enter recipients' names in the To, Cc, and Bcc fields
• Enter text in the Subject box
• Compose your message
• Click Send
February 2006 Colby College ITS
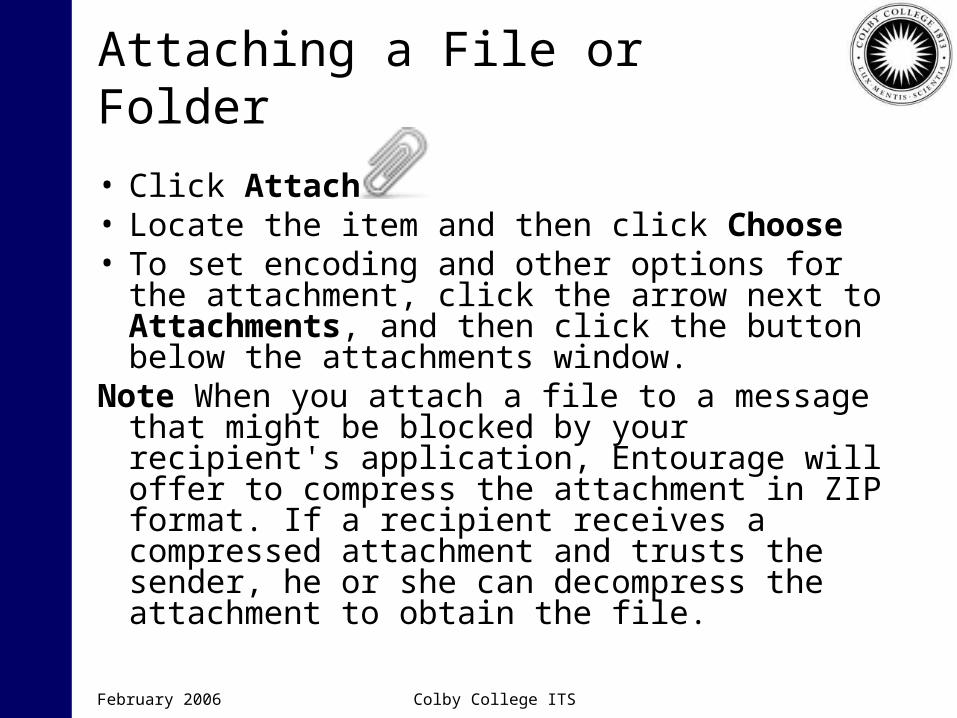
Attaching a File or Folder
• Click Attach • Locate the item and then click Choose• To set encoding and other options for the
attachment, click the arrow next to Attachments, and then click the button below the attachments window.
Note When you attach a file to a message that might be blocked by your recipient's application, Entourage will offer to compress the attachment in ZIP format. If a recipient receives a compressed attachment and trusts the sender, he or she can decompress the attachment to obtain the file.
February 2006 Colby College ITS
Inserting Multimedia
• This ONLY works if your recipient has HTML capable email. You can avoid this potential problems by ATTACHING your file rather than INSERTING it.
• Place the cursor where you want to add a picture, sound, or movie.
• Message > Insert >• Locate the media file, select it, and then
click Choose.• Typically supported file types:
– .jpeg, .gif, and .png for images; .mp3 for sound; and .mpeg for movies
February 2006 Colby College ITS
Searching for an Email Address
• Since e-mail addresses might be contained in messages, contacts, or other items, you can do a broad search across all the items that you have saved in Entourage
• Enter search word or words in the search box .
• After several seconds, results display under the Search bar
• In the Search Results bar, click Everything
February 2006 Colby College ITS
Pasting Information as a Picture
• In another Office application, copy the information that you want
• Open Entourage.
• Open the message or note that you want, and then place the cursor where you want to paste the information
• Edit > Paste Special > Paste As Picture
February 2006 Colby College ITS
Receiving and Reading Email
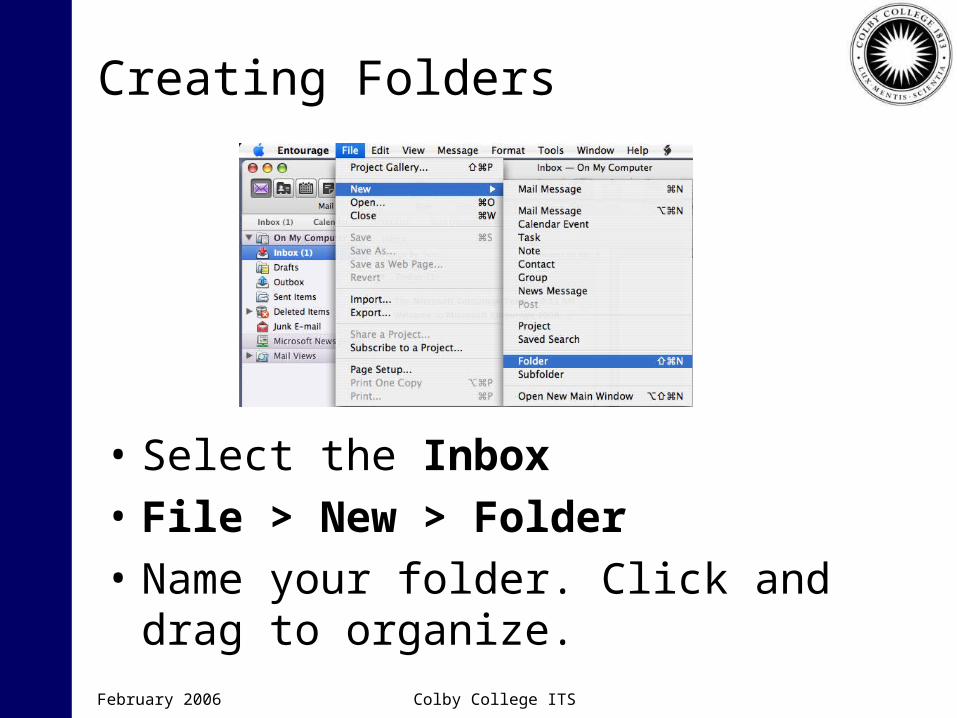
Creating Folders
• Select the Inbox
• File > New > Folder
• Name your folder. Click and drag to organize.
February 2006 Colby College ITS
February 2006 Colby College ITS
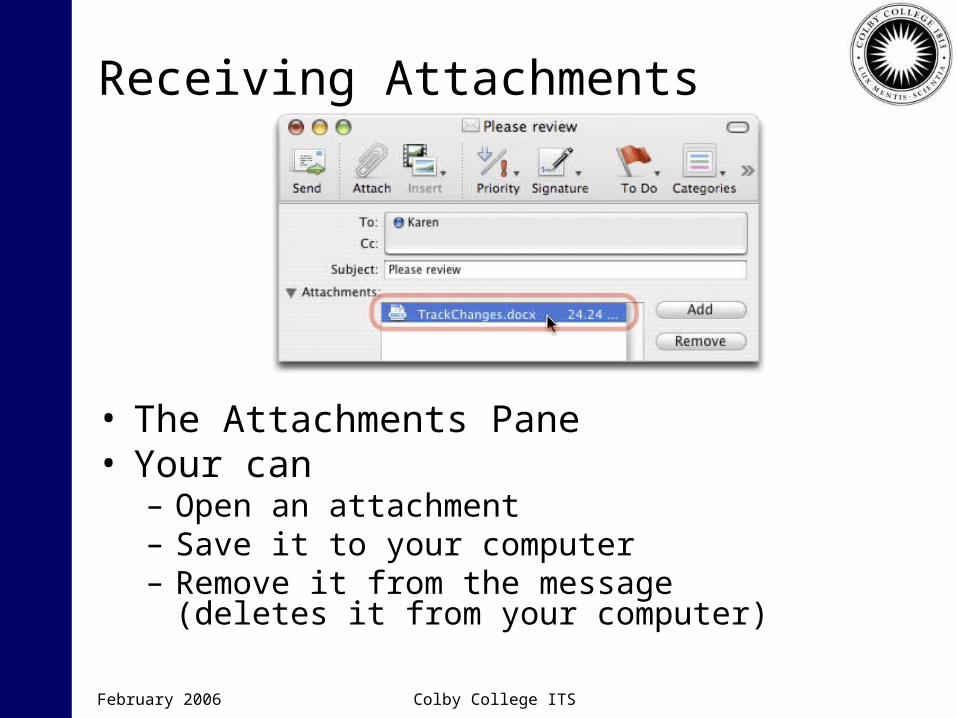
Receiving Attachments
• The Attachments Pane• Your can
– Open an attachment– Save it to your computer– Remove it from the message
(deletes it from your computer)
February 2006 Colby College ITS
Reply, Forward, Redirect• Reply
– Entourage removes any attachments from the message– You can edit the recipients, subject and message
• Forward– Entourage keeps the original message intact, including any
attachments – You can edit the recipients, subject and message– You cannot compose or forward complex HTML messages
or tables in an Entourage message body• Use Message > Forward as Attachment
• Redirect– Redirecting leaves the original sender, subject line, and
contents of the message intact– Replies will go to the original sender instead of you
February 2006 Colby College ITS
Blocking and Unblocking Senders
• To Block– Select a message from offending sender– Message > Block Sender
• Entourage moves message to Junk E-mail • Adds sender to Blocked Senders
• To Unblock– Tools > Junk E-mail Protection
• Select blocked sender• Press Delete
February 2006 Colby College ITS
Retrieving Mail from Junk
• Retrieving Mail from Junk– Open Junk E-mail folder– Click the message that you want to
retrieve– Click Not Junk– Click the option that you want– Click OK
February 2006 Colby College ITS
Blocked Attachments
• Entourage automatically blocks files it thinks may be dangerous
• If you TRUST the author of the message ask him/her to compress the file and resend it
• You can then uncompress the file on your computer

February 2006 Colby College ITS
Creating Out-of-Office Replies
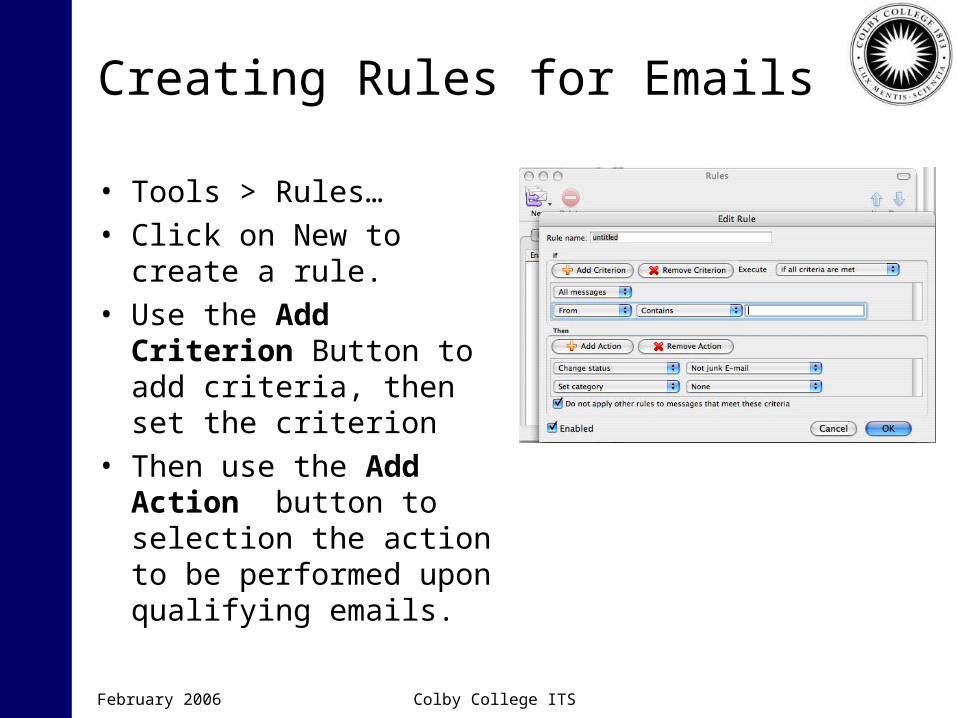
Creating Rules for Emails
• Tools > Rules…• Click on New to create a
rule.• Use the Add Criterion
Button to add criteria, then set the criterion
• Then use the Add Action button to selection the action to be performed upon qualifying emails.
February 2006 Colby College ITS
February 2006 Colby College ITS
Automatic Replies
Enabling• Tools > Rules > New > type
of message• Next to Rule name, type a
name for the rule • Under the Add Action
button, change Change status to Reply
• Click Reply Text– Type the automated reply– Click OK
• Make sure Enabled check box is selected
• Click OK
Disabling• Tools > Rules• Deselect Enabled check
box
NOTE:
• Since automated replies are run out of Entourage and NOT on the mail server, Entourage must be left running for the automatic reply to work.
February 2006 Colby College ITS
Creating Signatures and Formatting
February 2006 Colby College ITS
Creating a Signature
• Tools > Signatures
• Click New .
• In the Name box, type a title for the signature.
• In the lower portion of the signature window, type the text that you want to include in the signature.
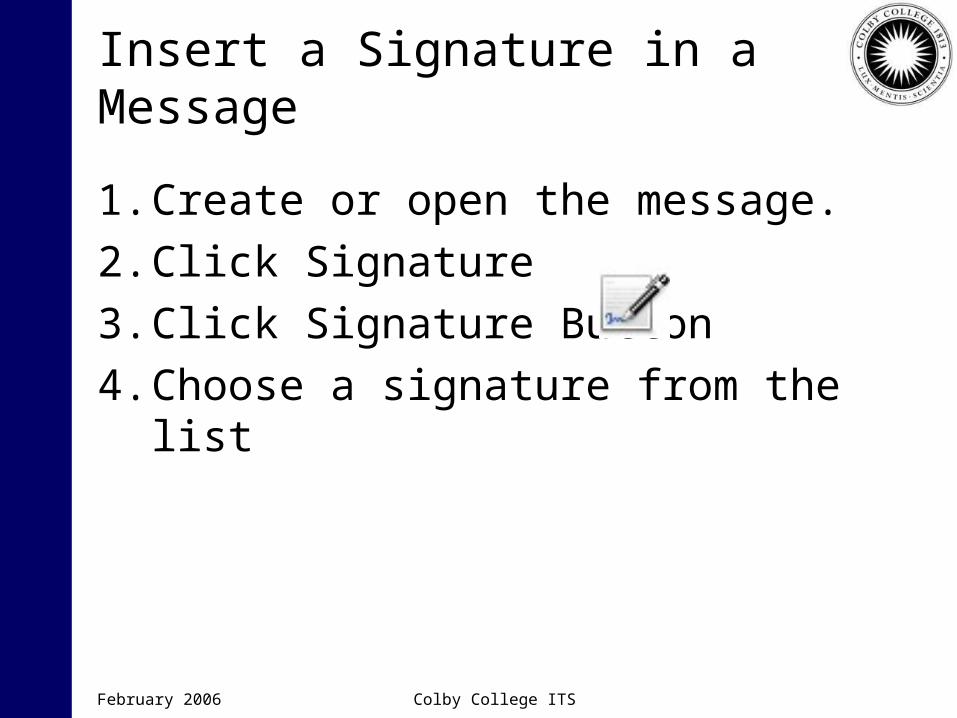
Insert a Signature in a Message
1. Create or open the message.
2. Click Signature
3. Click Signature Button
4. Choose a signature from the list
February 2006 Colby College ITS
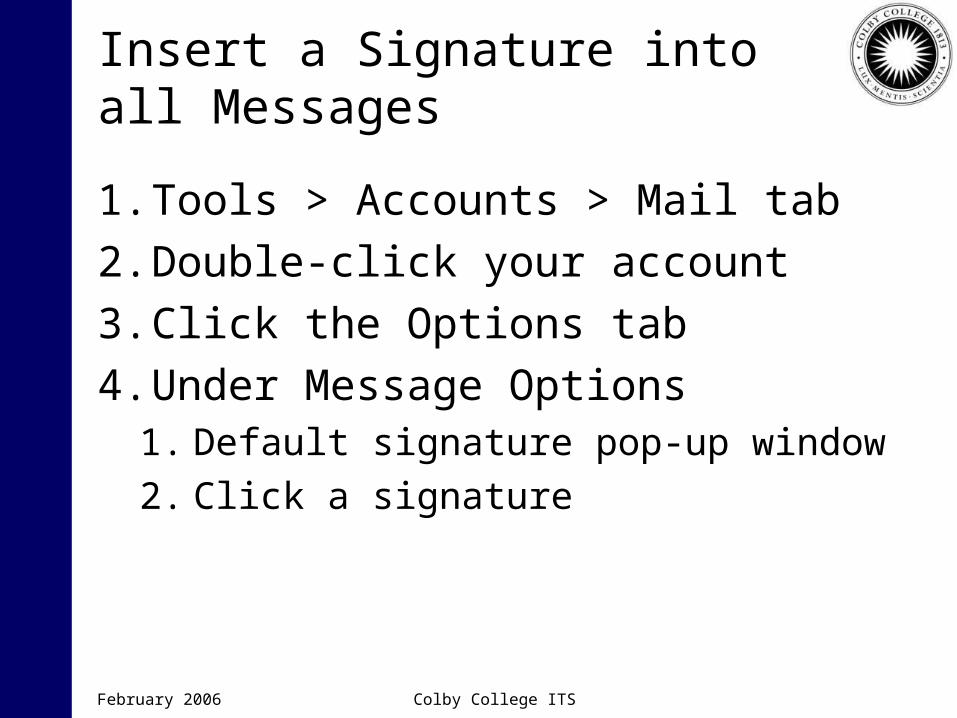
Insert a Signature into all Messages
1. Tools > Accounts > Mail tab
2. Double-click your account
3. Click the Options tab
4. Under Message Options1. Default signature pop-up window
2. Click a signature
February 2006 Colby College ITS

February 2006 Colby College ITS
Importing Contacts from Excel
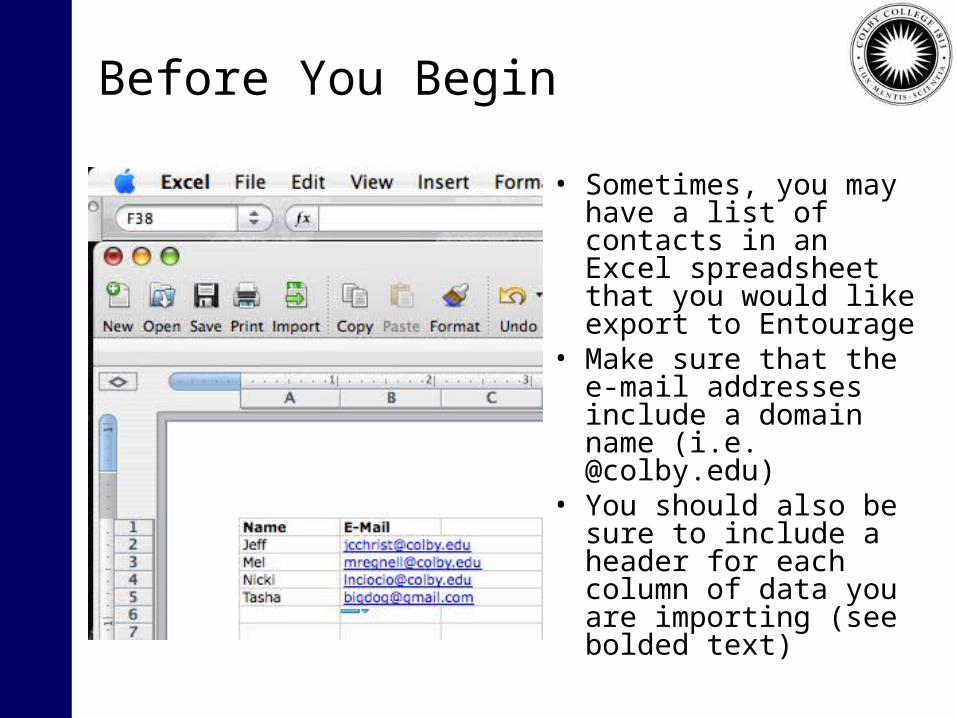
Before You Begin
• Sometimes, you may have a list of contacts in an Excel spreadsheet that you would like export to Entourage
• Make sure that the e-mail addresses include a domain name (i.e. @colby.edu)
• You should also be sure to include a header for each column of data you are importing (see bolded text)
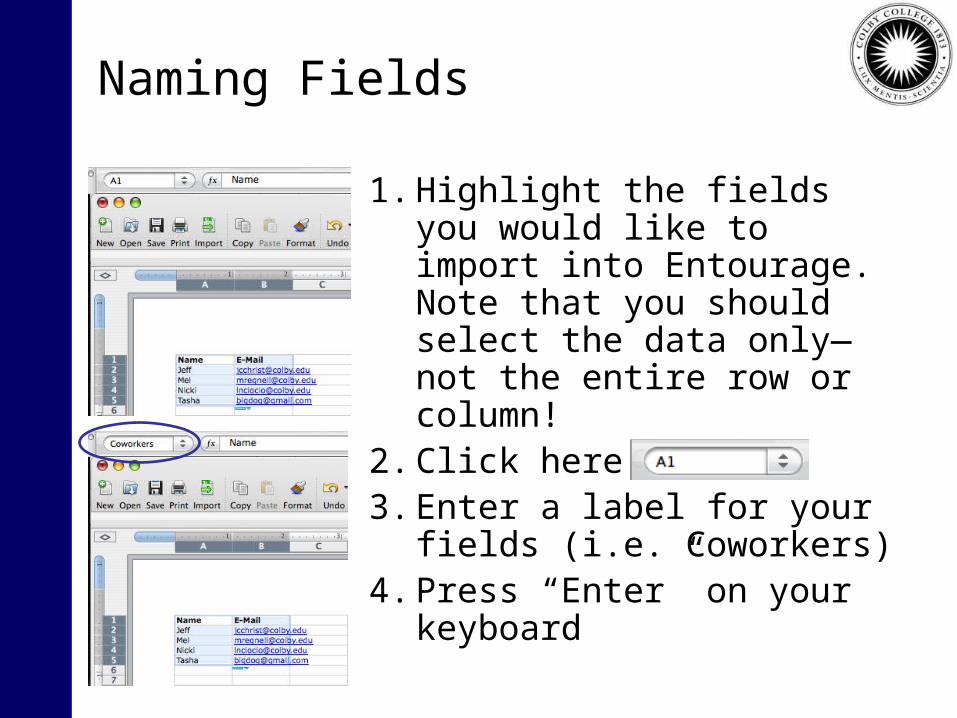
Naming Fields
1. Highlight the fields you would like to import into Entourage. Note that you should select the data only—not the entire row or column!
2. Click here:3. Enter a label for your fields
(i.e. Coworkers)4. Press “Enter” on your
keyboard
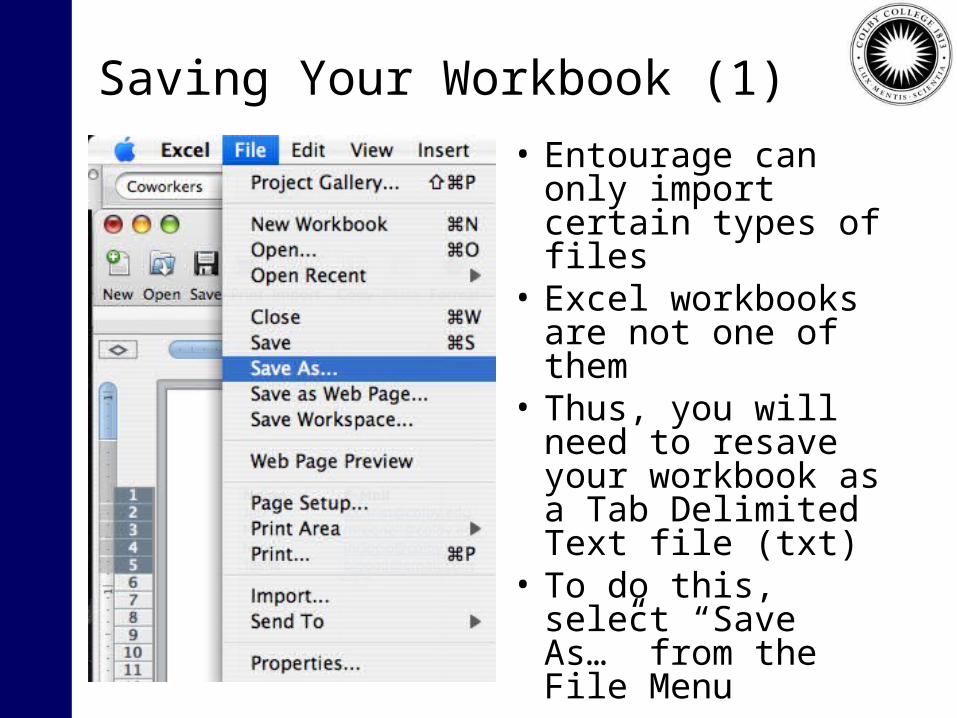
Saving Your Workbook (1)
• Entourage can only import certain types of files
• Excel workbooks are not one of them
• Thus, you will need to resave your workbook as a Tab Delimited Text file (txt)
• To do this, select “Save As…” from the File Menu
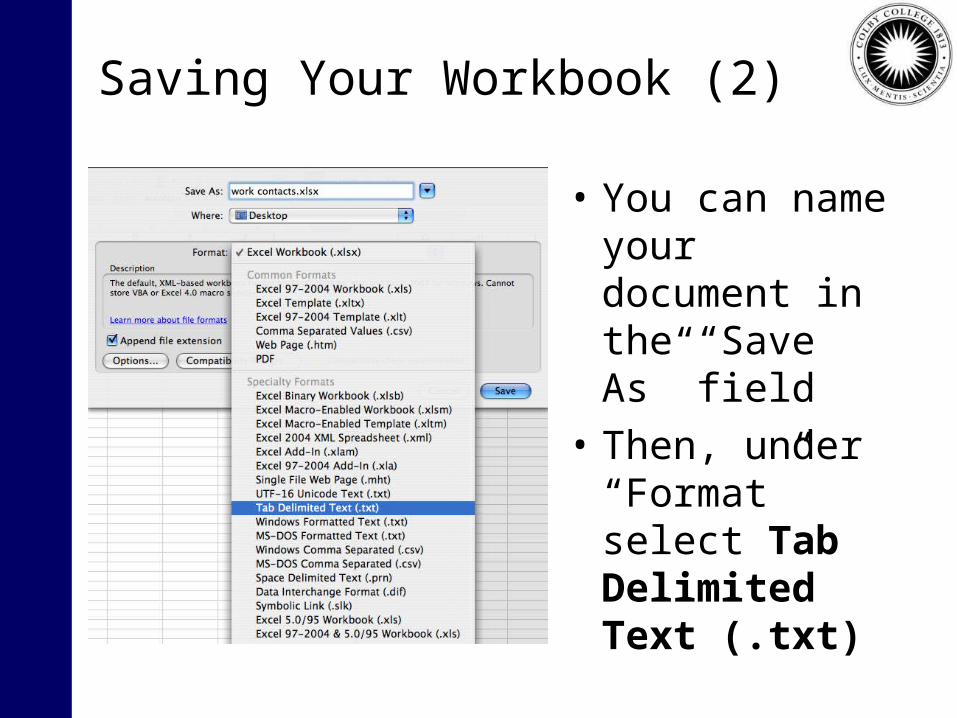
Saving Your Workbook (2)
• You can name your document in the “Save As” field
• Then, under “Format” select Tab Delimited Text (.txt)
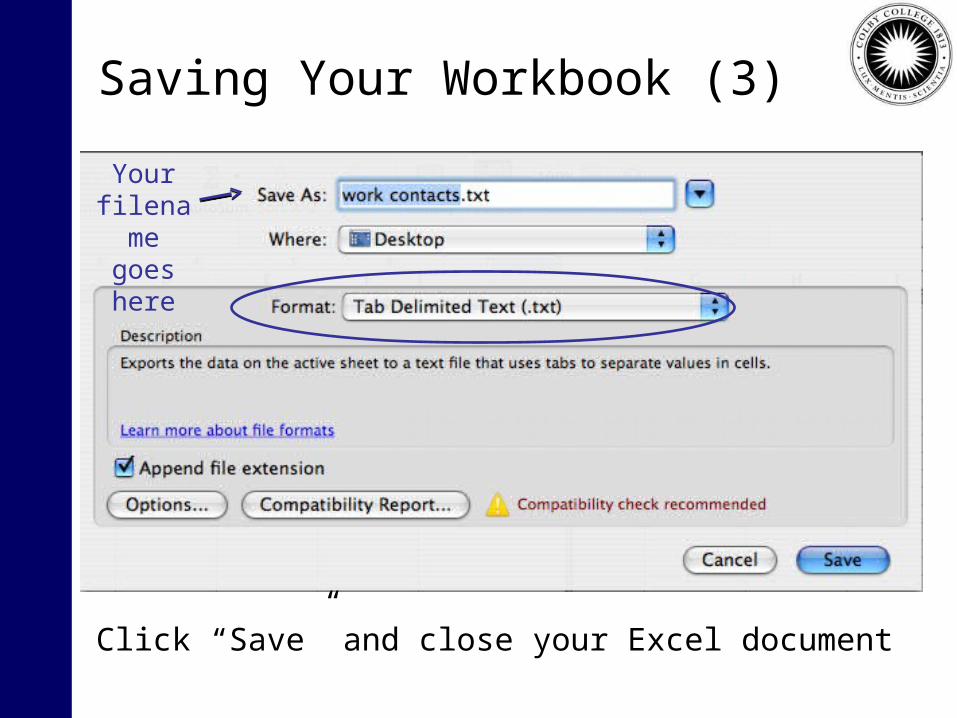
Saving Your Workbook (3)
Click “Save” and close your Excel document
Your filename
goes here
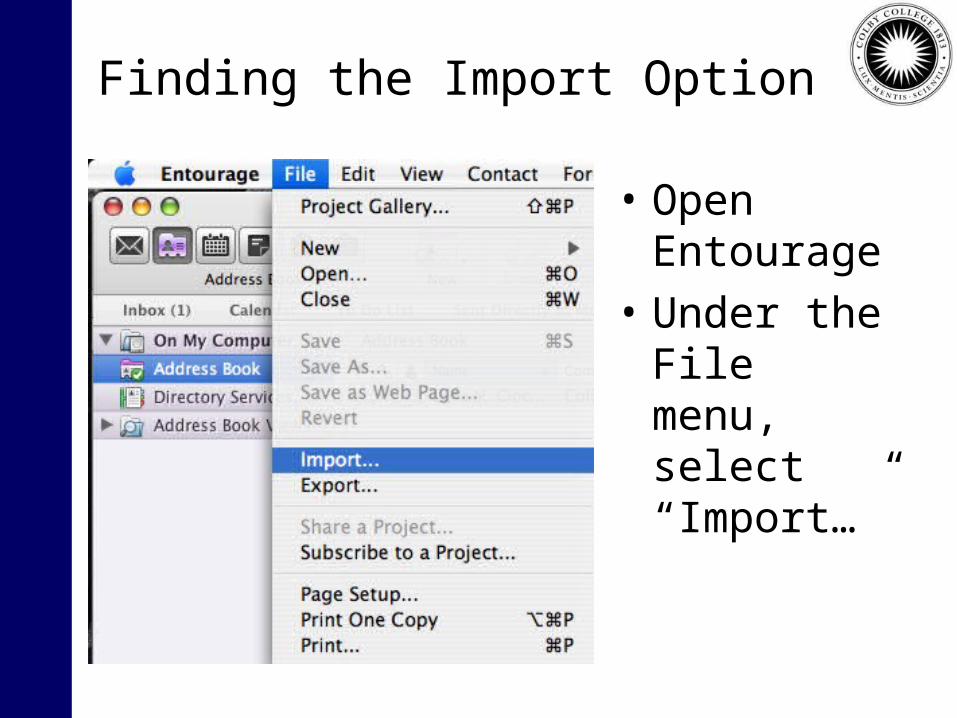
Finding the Import Option
• Open Entourage
• Under the File menu, select “Import…”
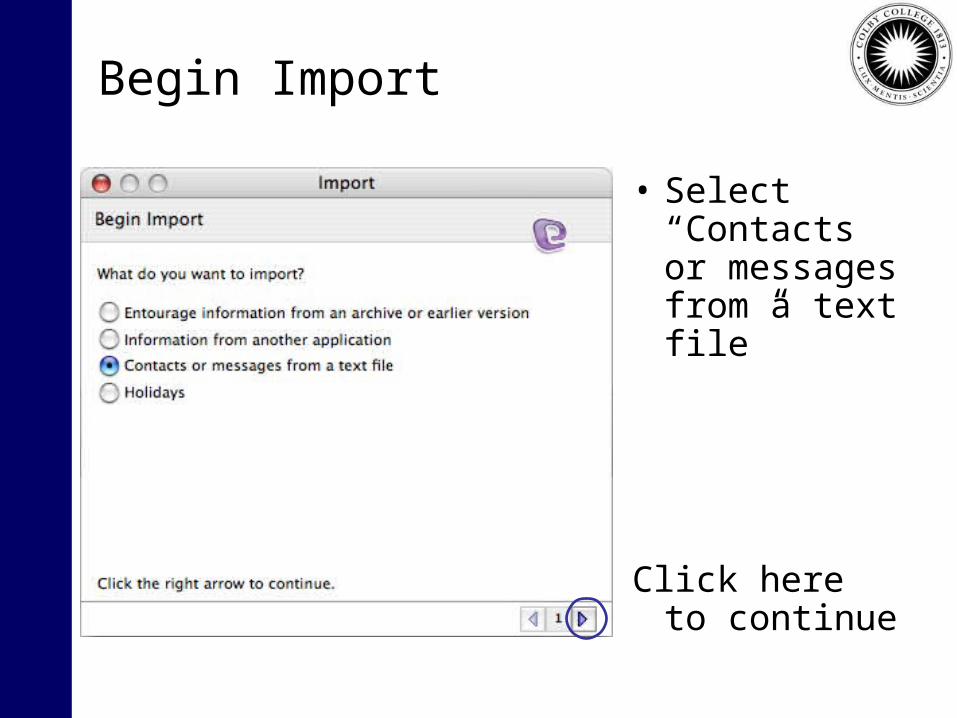
Begin Import
• Select “Contacts or messages from a text file”
Click here to continue
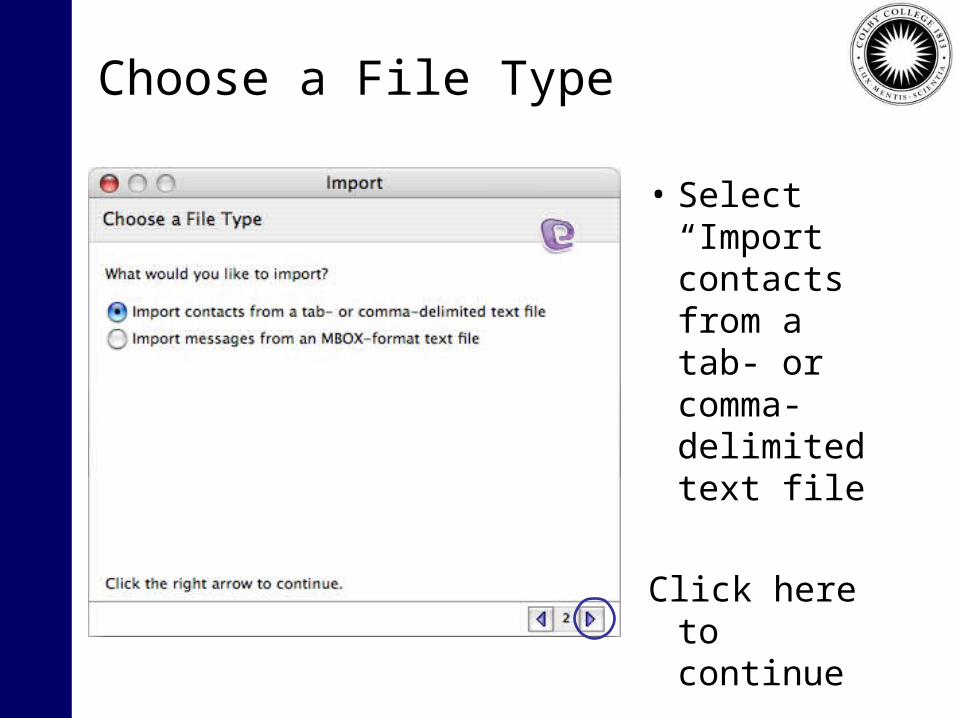
Choose a File Type
• Select “Import contacts from a tab- or comma-delimited text file
Click here to continue
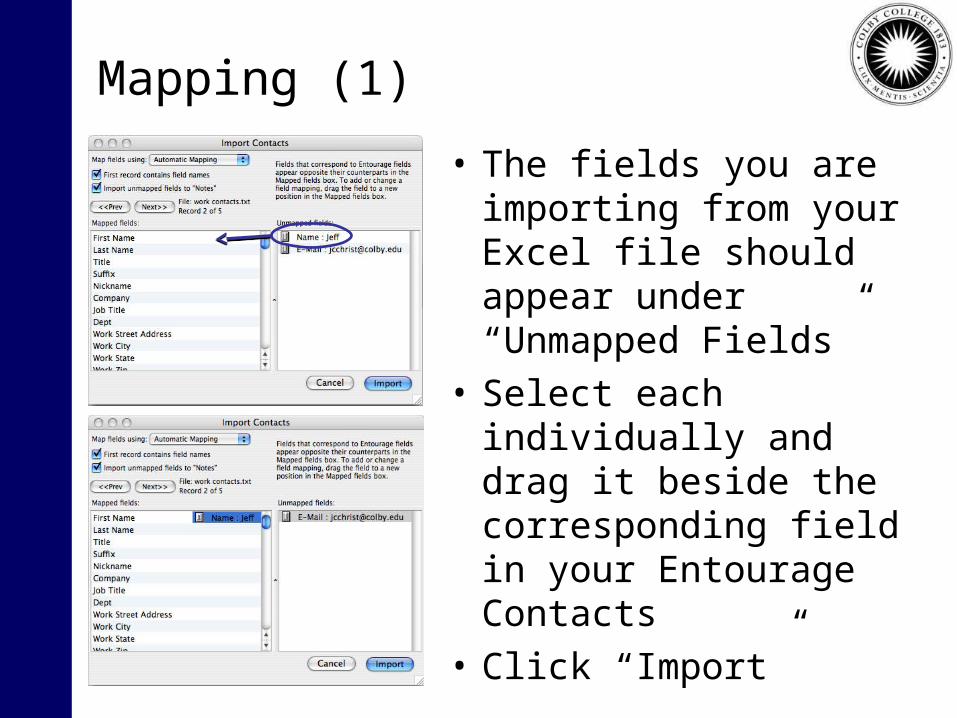
Mapping (1)
• The fields you are importing from your Excel file should appear under “Unmapped Fields”
• Select each individually and drag it beside the corresponding field in your Entourage Contacts
• Click “Import”

Mapping (2)
Unless you intend to repeatedly import Contacts from similarly formatted Excel
files, select “Don’t Save”
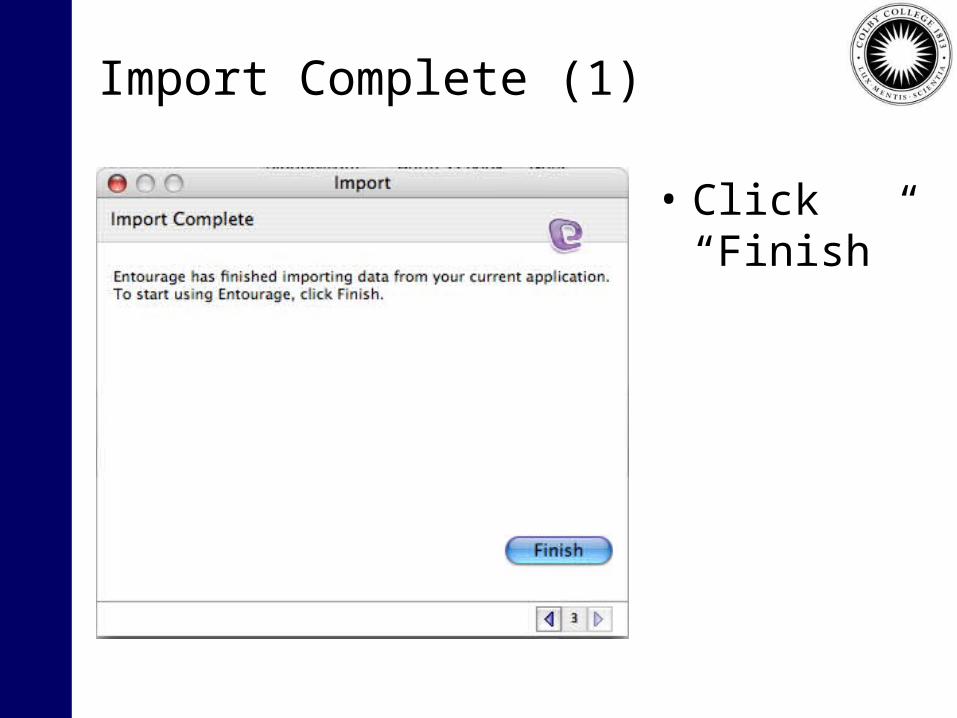
Import Complete (1)
• Click “Finish”
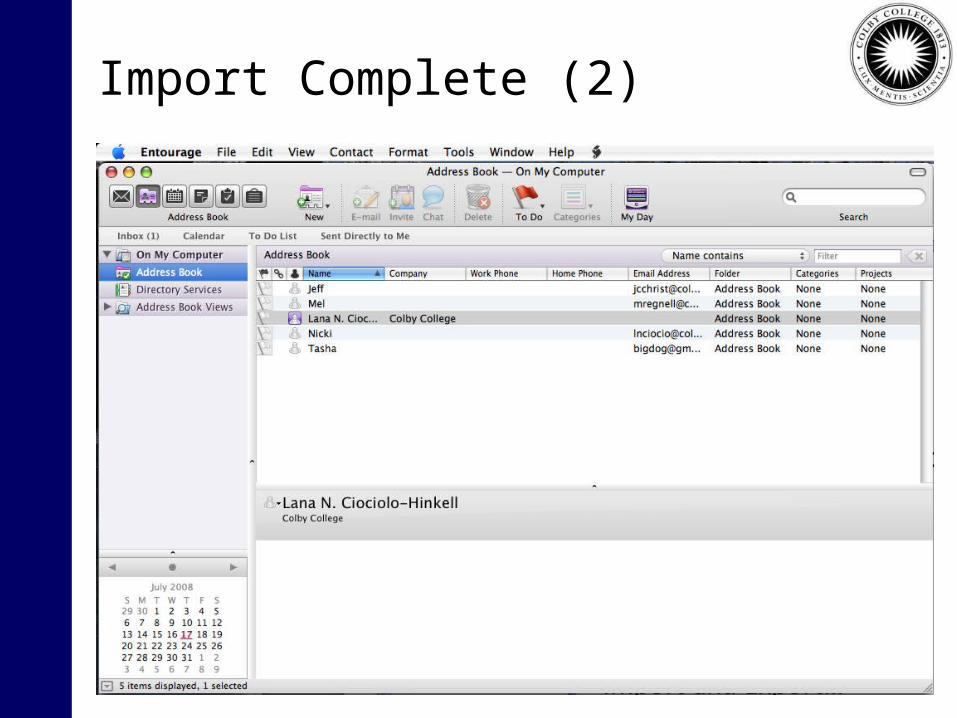
Import Complete (2)

February 2006 Colby College ITS
New Features in 2008

My Day (1)
• View calendar events and To Do List from your desktop without having to open Entourage
February 2006 Colby College ITS
My Day (2)
1. Click Mail button
2. Click My Day button
3. Do any of the following:– View location of a calendar event
• Rest the pointer on the event
– Open an event or To Do item in Entourage• Double-click the item's text
– Mark a To Do item as complete• Select the check box next to the To Do item
February 2006 Colby College ITS
My Day (3)
• (continued)– Add a task to your To Do List
• Click My Day New Task button• Type the task in the box, press ENTER
– View events and To Do List for the next day or the previous day
• Click My Day arrow buttons in the upper-right
– Show My Day in the Dock• Click My Day Preferences button,
Click the General tab, then click Show in Dock
February 2006 Colby College ITS
Spotlight Search
• By default searches all items• To limit search to a single folder;
– Click Mail button, then click the folder – Enter your search word or words in the search box
Entourage Search box– Results display under the Search bar
• To search attachments– Entourage Menu > Preferences– General Preferences > Spotlight– Select Include attachments
February 2006 Colby College ITS