Embed Size (px)
Citation preview

Page 1 of 46
Fallout Table Guide By ShoryukenToTheChin
1
2
3
4
6
5
7
8
9
10
12
11
Page 2 of 46
Key to Table Overhead Image –
1. Left Dodge Lane 2. Shop Sink Hole 3. Left Ramp 4. Faction Sink Hole 5. Critical Target 6. Left Orbit 7. Left Mini - Loop 8. Centre Lane 9. Right Ramp 10. Right Orbit 11. Right Dodge Lane 12. Right Mini - Loop
In this guide when I mention a Ramp, Lane, Hole etc. I will put a number in brackets which will correspond to the above Key, so that you know where on the Table that particular feature is located.

Page 3 of 46
TABLE SPECIFICS
Notice: This Guide is based off of the Zen Pinball 2 (PS4/PS3/Vita) version of the Table on default controls. Some of the controls will be different on the other versions (Pinball FX 2, etc...), but everything
else in the Guide remains the same.
INTRODUCTION Zen Studios has teamed up with Bethesda to give us a new 3 Table pack called “Bethesda Pinball”. This is 1 of the 3 Tables released within the pack. Fallout Pinball sees you play through various Modes in homage to the Video Game series. The Table incorporates the art style of the Video Game Series, and various audio works from the characters to add that extra bit of authenticity. I hope my Guide will help you understand the Table better.

Page 4 of 46
New Game Character Select -
At the start of each game, choose whether you would like a random character or decide the character’s gender & spend skill points on seven S.P.E.C.I.A.L. manually. Companion Select -
Selecting a companion at the beginning of a session grants different bonuses throughout the game. Press the “Launch” Button to stop the companion selector & thus take the highlighted companion with you. Each of these companions has a specific bonus perk. The selected companion picture will appear beside the plunger (shown in the image above). The following companions are available at the beginning of the game: Codsworth: Reduces damage from energy attacks. Dogmeat: Reduces shots required for a random loot. Strong: Increases melee damage. Nick Valentine: Grants a bottle cap after every ramp shot. John Hancock: Reduces radiation damage.

Page 5 of 46
Skill Shot - The Skill Shot can be attained by hitting the Critical Target (5) with the top Right Flipper. You will also be awarded with some bottle caps.
Instead of hitting the Critical Target (5) straight away, you can send the Ball around the Left Orbit (6) as this will spin the Spinner and the Skill Shot score will be raised.

Page 6 of 46
Kick Back & Ball Save Kickbacks – The Kickbacks on this Table are activated by spinning the Spinner via the Left Orbit (6) several times. Repeat this shot until both Kickbacks are enabled.
Kickbacks can also be purchased at the Shop using bottle caps.
*Note – Any Kickbacks activated will remain activate upon the Ball draining. * Ball Save - Ball Save can be activated on this Table once both Kickbacks are enabled previously. Simply repeat the process of acquiring those Kickbacks, and this time the Ball Save will activate instead.
*Note – This Ball Save will expire once its 30 Second timer expires or you drain the Ball, whichever comes first. *
Ball Save can also be purchased at the Shop using bottle caps. Ball Save is also temporary activated at the start of the many Game Modes.

Page 7 of 46
Extra Balls There are 5 Ways to achieve an Extra Ball; Collect the Extra Balls by hitting the Ball into the Critical Target (5) -
Method 1: Complete the Zeta Invaders Video Mode; look later in the guide under the section titled ‘Shop” for information on how to get this Extra Ball.
Method 2: Successfully use the Fatman (Mini-Nuke) once; look later in the Guide under “Fights”
section for information on how.
Method 3: Hit 20 Enemies during V.A.T.S.; look later in the Guide at the section titled “Fights” for information on how to get this Extra Ball.
Method 4: Complete 3 Vault Quests; look later in the guide under “Vault Quests” section.
Method 5: Hit the Eye-Bot 3 times; look later in the Guide at the section titled “Eye-Bot” for
information on how to get this Extra Ball.

Page 8 of 46
Raising the Multiplier To raise the Multiplier level you will need to produce combo shots.
Once done, the Multiplier level will increase to 2x times. Repeat the above process to raise the Multiplier up to 4x, & so forth.

Page 9 of 46
Character Related – Health, Armour, Levelling Up, Loot & Shop Health &Radiation Health
The health bar is represented at the bottom left of the table playfield, health is Green in colour. If all of the health is depleted, the fight is lost, & some bottle caps will be removed. Health can be refilled in several ways:
Hitting the Nuka Target (just below the Left Top Flipper).
Purchasing healing items in the Shop. Collecting loot.
Health

Page 10 of 46
Radiation
The health bar is represented at the bottom left of the table playfield, Radiation is Red in colour. This can drastically decrease the amount of health your character has, & decreases the amount of points gained from the various activities available on the table. Radiation can appear in many forms, such as radioactive ponds, radioactive storms, or even in hazardous loot materials. Getting radiated means less points to acquire during the play session and decreases maximum HP until cured. Watch out for the radiation meter, and cure yourself in the shop when radiated, or collect certain loot items to immediately cure radiation. Radiation sickness will slowly fade away, but visiting the Shop is highly advised to maintain the collection of the highest scores. Try to avoid the randomly appearing radiated ponds with your Ball, and shoot the Ball to the Shop Sink Hole (2) to avoid the radiation storm. Although collectible loot may be radiated, it may still worth collecting them because they can hold precious items. To determine if a loot is radiated or not, check if there is a green halo around them. You can raise the Endurance S.P.E.C.I.A.L. attribute to better withstand damage.
Radiation

Page 11 of 46
Armour
Upgrade your Armour by collecting Armour parts or buying them in the Shop. The Armour can be upgraded in three areas; each area has five levels: - Radiation resistance: Radiation levels will have smaller effect. - Damage resistance: Incoming bullets will have smaller effect. - Energy resistance: Incoming energy shots will have a smaller effect. Defeated by Enemies will degrade the Armour which leads to the negation of the Armour's positive effects. Repair the Armour to make it effective again.

Page 12 of 46
Levelling Up
Completing the various Quests (Faction, Vault & Side) available on the table will provide your character with experience, & allow you to level up. Once enough experience is collected, your character level will raise & a skill point will be awarded. You will need to enter the Shop to use any skill points acquired.
Select with skill you want to increase by spending the skill points you acquired previously. Skills available are as follows: Strength: Increase score for hitting Targets. Perception: Attack time increased. Endurance: Increase radiation, energy and damage resistance. Charisma: Reduces prices at the store. Intelligence: increase XP gain. Agility: Defense time increased. Luck: Increases chance of a better loot drop.

Page 13 of 46
Loot Collecting loot can be done in 1 of 2 ways:
Hitting all of the 4 “LOOT” Targets.
Defeating Enemies for a random loot pile to drop. Loot can appear on the table after defeating Enemies, finishing Side Quests and Faction Quests, or doing special tasks such as successfully using the mini-nuke. The only thing that is identifiable is the halo colour surrounding the loot: if it is Green, it is radiated, if it is Red, it is booby trapped. Radiated loot increases the player's radiation level, while booby trapped loot will slightly damage the player. Loot always gives a small amount of score to the player, and may contain bottle caps, Armour upgrades, weapon upgrades, radiation cure, kickbacks, a ballsaver or a bigger score. if no more upgrades are available because the player maxed out the item, than a bigger score will be awarded upon collection. You can raise the Luck S.P.E.C.I.A.L. attribute as it may provide much better loot.

Page 14 of 46
Shop Bottle caps are awarded after Faction Quests, Vault Quests, Side Quests, or can be found in random loots. The number of bottle caps can be seen on the dot-matrix and on the PIP-BOY next to the plunger. Use can then be used to purchase various items from the in-game Shop. To access the Shop you first need the Ball to roll down one of the Shop Inlanes.
Doing so will then activate the Shop at the Shop Sink Hole (2) for a short time.
Page 15 of 46
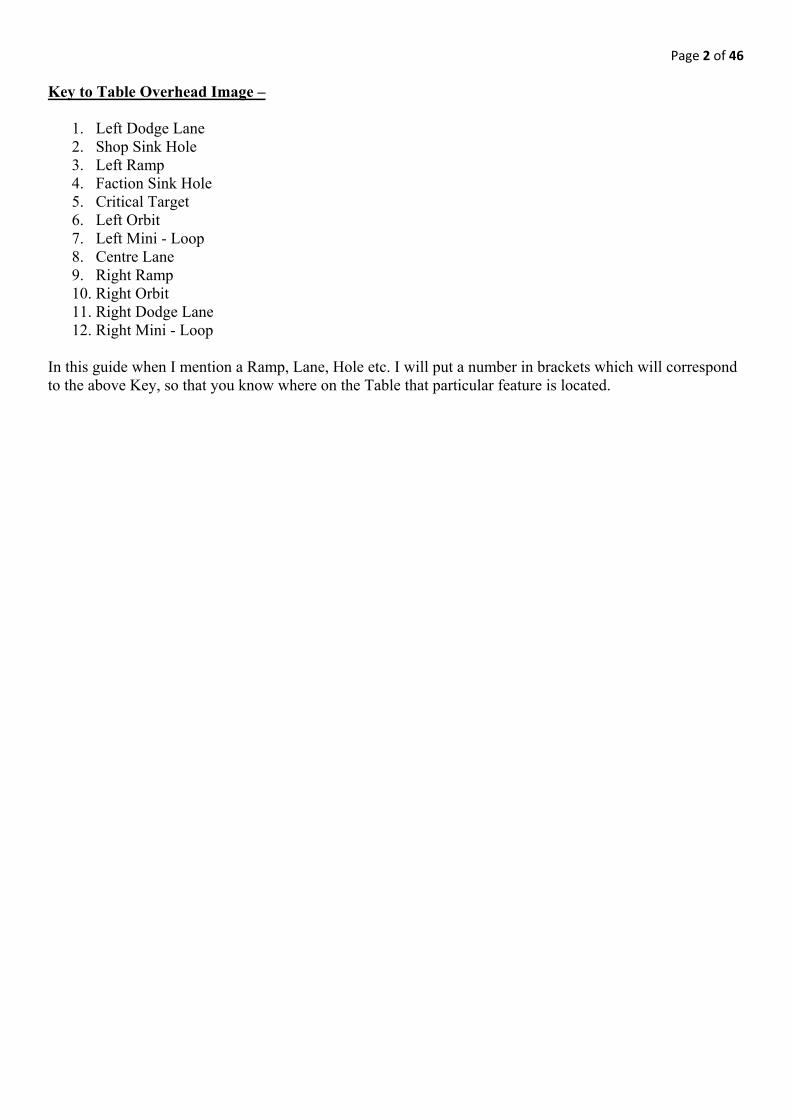
Managing to hit that Sink Hole in time will allow access to the Shop. Using the Flipper Buttons to cycle through the available items, and press the “Launch” Button to purchase them.
The Shop is only available when there are no modes running. To activate the Shop, get the Ball through the shop In-lanes and shoot the Shop Sink Hole (2) while active. Shop items:
Armour Repair. Radiation Removal. Nuka Cola (heal 20HP, +5 radiation). Stimpak (+ 50 HP): 50. Radiation Resistance. Damage Resistance. Energy Resistance. Weapon Damage Upgrade. Kickback. Ballsaver. Zeta Invaders game: PIP-Boy Arcade Game:Play the famous Zeta Invaders on your Pip-boy. Use
flippers to move left or right and use the launch button to shoot. Avoid enemy fire, and shoot down all the enemies to win the game. The game has 5 different stages with raising difficulty.
Mini-Nuke. Remember if you purchase the Zeta Invaders Video Mode item you will have the chance to play through a Video Mode to earn points. That’s not all; you can light Extra Ball if you manage to complete it. You can raise the Charisma S.P.E.C.I.A.L. attribute to decrease Shop prices.

Page 16 of 46
Fights – Explanations on How to Win Enemies can appear at any time on this table. You will encounter them for example when playing through the Vault Quests, which will require you to defeat them. So you should always be prepared for a fight. Remember to fill your V.A.T.S. bar & health before starting Quests. Weapon The player character uses the Combat Rifle as a weapon. This can be upgraded in the Shop or by finding an upgrade loot to deal more damage to Enemies and Bosses. The player can also throw Grenades or use melee attacks to deal damage, or use the Mini-Nuke to instantly win a Mode. Mini-Nuke: Buy a Mini-Nuke or find one in a loot pile (rare). Mini-Nukes can be used during fights. Using the Mini-Nuke properly might instantly win the current Mode by defeating all Enemies on the Playfield. To use the Mini-Nuke, acquire one first, and during any missions, hit the Left Mini-Loop (7). Time stops and the view will change to an FPS (First Person Shooter) mode, where player has to time his shot to hit the appearing circle on the Playfield.
If successful, the Mini-Nuke will detonate, and the Mode will be won. Failing to hit the circle, the player will lose his Mini-Nuke and the current Mode will continue. Activating the Mini-Nuke will also activate an Extra Ball for collection.

Page 17 of 46
V.A.T.S. To activate V.A.T.S., the Vault-Tec Targeting System you will need to do either of the below to fill out the V.A.T.S. bar –
Collect the V.A.T.S. Rollovers above the Bumpers.
Enemy hits will increase the V.A.T.S. bar over time. Once the bar is full you can use the system during the attacking sequence of a fight by holding down the “Lanch” Button for a while. Use the Flipper Buttons to switch between Targets, and then the “Launch” Button to highlight the selected Target. Now to hit the chosen Target, press both Flipper Buttons at the same time. Once the V.A.T.S. bar is depleted, fill it a little bit to use the system again. You can activate Extra Ball if you manage to hit 20 highlighted Targets.

Page 18 of 46
Fights Fights can be divided into two parts:
1. Regular fights (droptarget takedowns, regular cardboard targets): Enemies appear on the table, hit them with the Ball several times to deal with them.
2. Boss fights (big cardboard Target) : These can range from fighting a super mutant behemoth to any other bosses such as the Mirelurk Queen. They usually have a much bigger HP pool, deal more damage than regular Enemies, and might have special perks (radiation hits). The boss Enemies are always displayed on a bigger droptarget situated at the upper third of the Playfield. The Enemy's health status is displayed on the Dot-Matrix.
Enemy Types (regular droptargets): - Ghoul - Mirelurk - Raider - Super Mutant - Brotherhood of Steel soldier - Railroad soldier - Institute Synth (Boss Target) - Mirelurk Queen - Super Mutant Behemoth - Deathclaw - Sentry Bot
Page 19 of 46
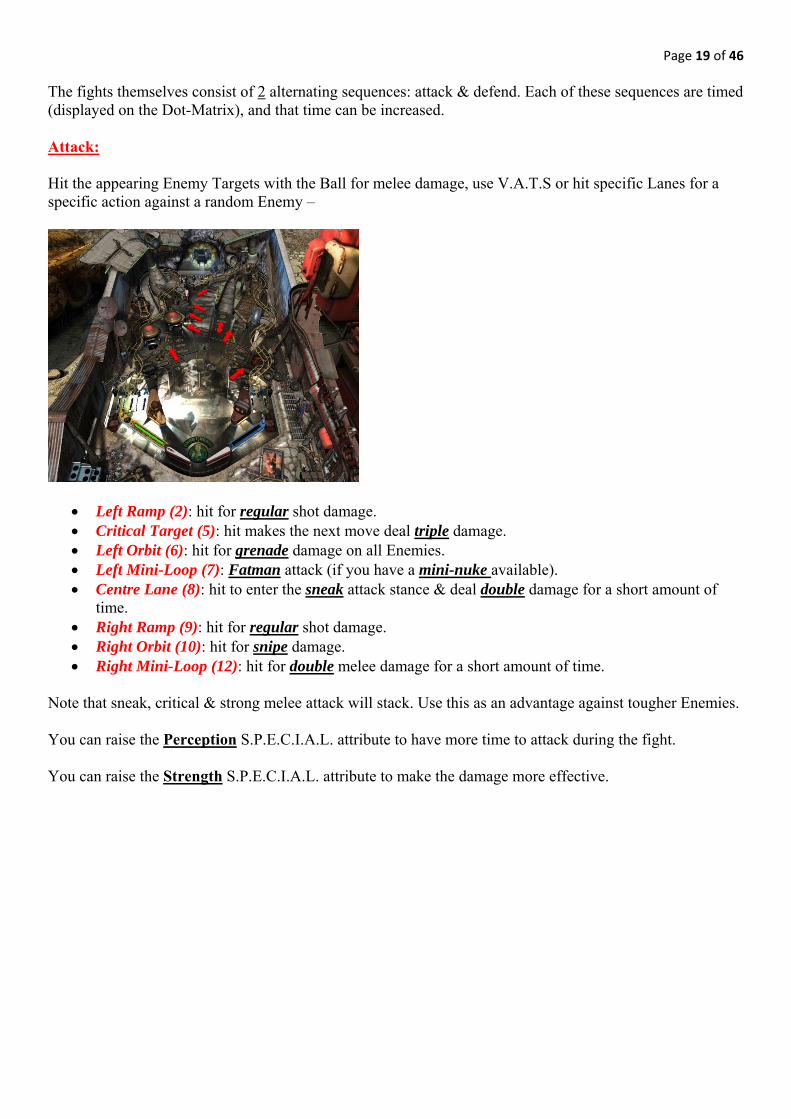
The fights themselves consist of 2 alternating sequences: attack & defend. Each of these sequences are timed (displayed on the Dot-Matrix), and that time can be increased. Attack: Hit the appearing Enemy Targets with the Ball for melee damage, use V.A.T.S or hit specific Lanes for a specific action against a random Enemy –
Left Ramp (2): hit for regular shot damage. Critical Target (5): hit makes the next move deal triple damage. Left Orbit (6): hit for grenade damage on all Enemies. Left Mini-Loop (7): Fatman attack (if you have a mini-nuke available). Centre Lane (8): hit to enter the sneak attack stance & deal double damage for a short amount of
time. Right Ramp (9): hit for regular shot damage. Right Orbit (10): hit for snipe damage. Right Mini-Loop (12): hit for double melee damage for a short amount of time.
Note that sneak, critical & strong melee attack will stack. Use this as an advantage against tougher Enemies. You can raise the Perception S.P.E.C.I.A.L. attribute to have more time to attack during the fight. You can raise the Strength S.P.E.C.I.A.L. attribute to make the damage more effective.

Page 20 of 46
Defend: Once the attack timer expires your Enemies will attack. To dodge their attacks you will have to hit either of the dodge Lanes – Left Dodge Lane (1) or Right Dodge Lane (11).
You can also use a Fatman attack (if you have a mini-nuke available).
If either of the above methods aren’t activated in time, then the Enemies attack will land and you will lose some health. The Enemies can attack you with either normal or energy based attacks. Once all of your health is depleted the fight is lost & a small amount of bottle caps will be removed from the inventory. You can raise the Agility S.P.E.C.I.A.L. attribute to have more time to dodge the Enemies attacks.
Page 21 of 46
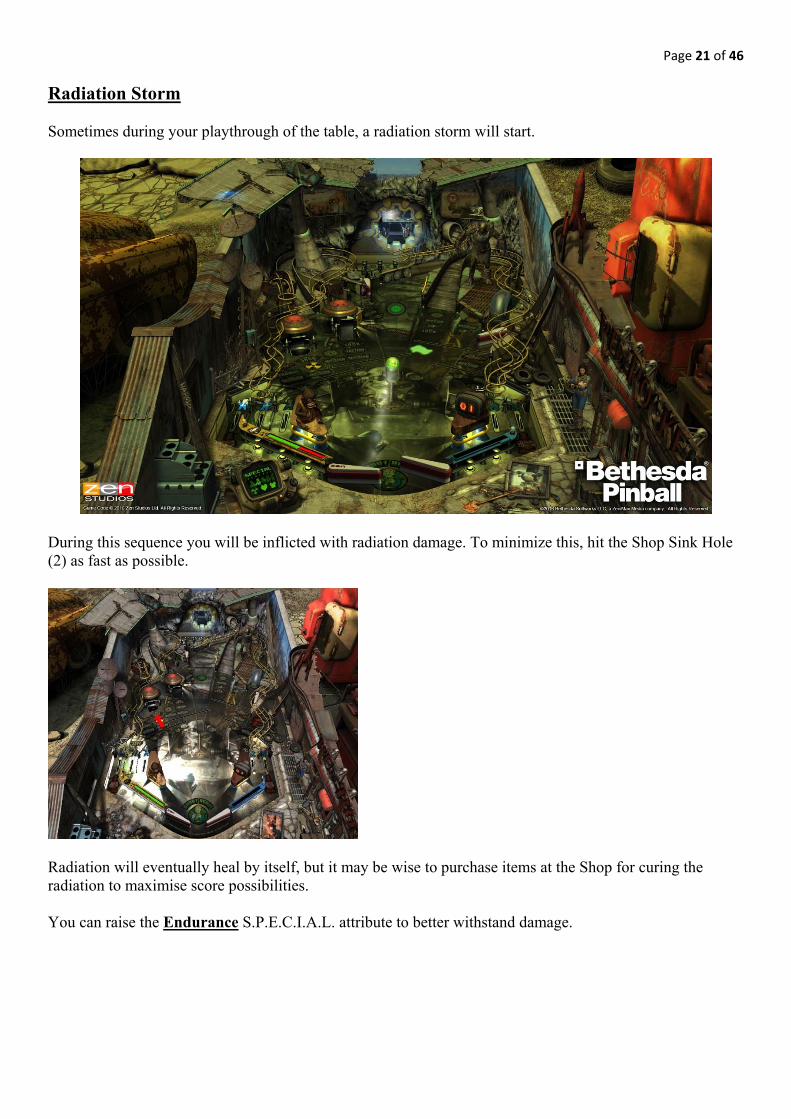
Radiation Storm Sometimes during your playthrough of the table, a radiation storm will start.
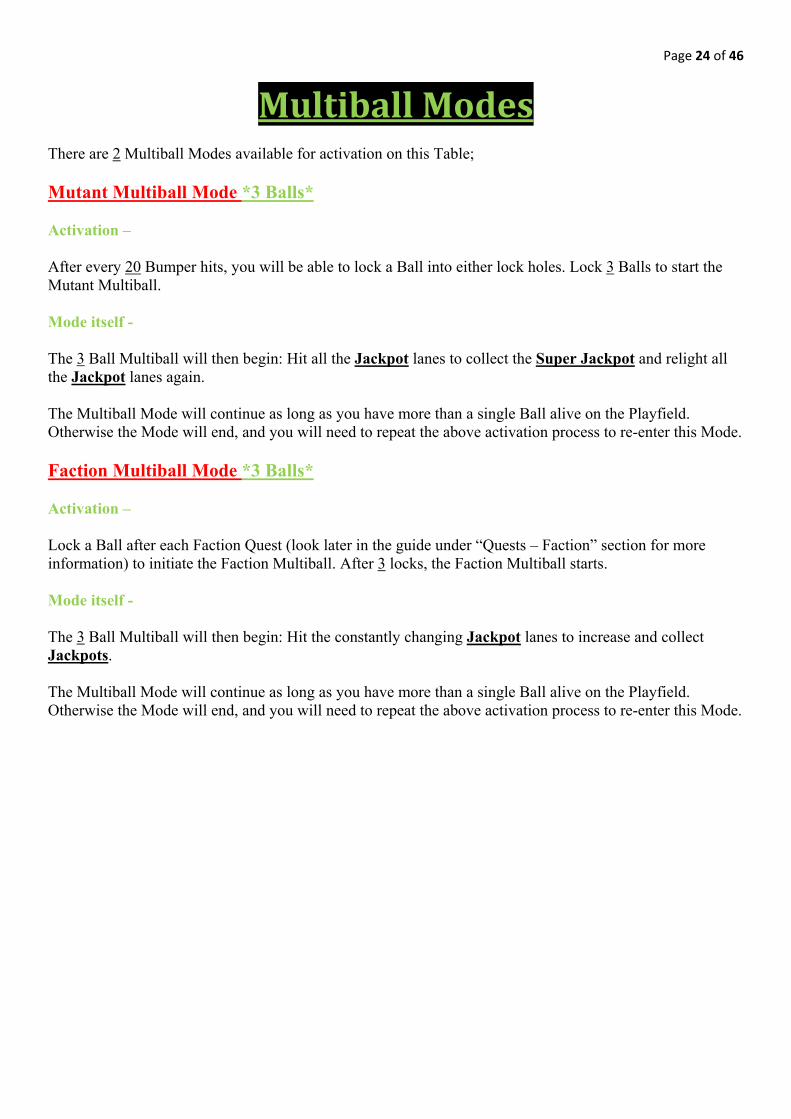
During this sequence you will be inflicted with radiation damage. To minimize this, hit the Shop Sink Hole (2) as fast as possible.
Radiation will eventually heal by itself, but it may be wise to purchase items at the Shop for curing the radiation to maximise score possibilities. You can raise the Endurance S.P.E.C.I.A.L. attribute to better withstand damage.

Page 22 of 46
Hurry Ups Enemy Mode: Activation: To start-up this Mode you will need to light all of the Vault Boy Icons Rollovers on the In’s & Outlanes.
Once the above is done. The Mode will begin. Completion: Completion requires you to defeat the appearing Enemy is fast as possible. The faster that is done, will grant you more points.
Deal with the appearing Enemy in time for a Jackpot score, bottle caps and XP.

Page 23 of 46
Eye-Bot: Activation: Sometimes the Eye-Bot enters the Playfield. Completion: Hit the Eye-Bot for a higher score bonus. The Eye-Bot will leave the table after a certain amount of time has passed.
Try to hit it to gain a massive Super Jackpot, XP and bottle caps. Hitting 3 Eye-Bot’s will activate an Extra Ball for collection.
Page 24 of 46
MultiballModes There are 2 Multiball Modes available for activation on this Table; Mutant Multiball Mode *3 Balls* Activation – After every 20 Bumper hits, you will be able to lock a Ball into either lock holes. Lock 3 Balls to start the Mutant Multiball. Mode itself - The 3 Ball Multiball will then begin: Hit all the Jackpot lanes to collect the Super Jackpot and relight all the Jackpot lanes again. The Multiball Mode will continue as long as you have more than a single Ball alive on the Playfield. Otherwise the Mode will end, and you will need to repeat the above activation process to re-enter this Mode. Faction Multiball Mode *3 Balls* Activation – Lock a Ball after each Faction Quest (look later in the guide under “Quests – Faction” section for more information) to initiate the Faction Multiball. After 3 locks, the Faction Multiball starts. Mode itself - The 3 Ball Multiball will then begin: Hit the constantly changing Jackpot lanes to increase and collect Jackpots. The Multiball Mode will continue as long as you have more than a single Ball alive on the Playfield. Otherwise the Mode will end, and you will need to repeat the above activation process to re-enter this Mode.

Page 25 of 46
Quests
Faction
Faction Quests will use randomized templates. These usually consist fighting with enemies, finding different items, traveling to locations and so on. There are 4 factions in Fallout Pinball, making Faction specific Quests can lead to other Factions not to cooperate with the player anymore. Joining any of the Factions will award faction specific bonuses throughout the game, but can also make different Missions harder due to being Enemies with other Factions. To raise awareness of the Factions, the player has to perform smaller tasks (described later at the specific factions). Once these specific tasks are completed, the Faction Sink Hole (4) will be available. Shoot the Ball in the hole and choose between the available Factions' quests.

Page 26 of 46
Each Faction has multiple Quests. Completing 5 Quests for a Faction will increase the bonus awarded, scores a huge amount of score, grants bottle caps, but makes other Factions hostile to the player. Once sided with a Faction, Faction Quests will still be available but only for the sided Faction, and worth bigger scores.
The Minutemen: To start up a Minutemen quest, the player has to find new locations by making bumper hits. Once the required locations are found, a Minutemen quest will be available at the Faction hole. Minutemen faction positive bonus: Adds a fourth ball at the wizard mode.
The Railroad: To start up a Railroad quest, hit either of the Left Ramp (3) &/or Right Ramp (9). Once the required ramp shots are completed, a Railroad quest will be available at the Faction hole. Railroad faction positive bonus: Longer Ball Save during Wizard Mode. When the Railroad is hostile to the player, doing ramp shots will start up the Railroad hurry up, where the player has to take down the appearing railroad target.
The Brotherhood of Steel: To start up a Brotherhood of Steel quest, the player has to hit the Right Mini – Loop (12) several times. Once it is done, a Brotherhood of Steel quest will be available at the Faction hole. Brotherhood of Steel faction positive bonus: Ads an extra jackpot lane during wizard mode. When the Brotherhood of Steel is hostile to the player, hitting right mini - orbits several times will start the Brotherhood of Steel Attackers Mode where the player has to take down the appearing BoS targets.
The Institute: To start up an Institute quest, the player has to hit either of the Orbits – Left Orbit (6) &/or Right Orbit (10). Once the requirement is complete, an Institute quest will be available at the Faction hole. Institute faction positive bonus: Awards a Ball Save and both Kickbacks at the beginning of a Mode, and 5 second longer Ball Save. When the Institute is hostile to the player, hitting either orbits a required amount of time will start the Institute attackers mode where the player has to take down the appearing Institute targets.
Siding with a specific Faction will lead to a bonus during the table’s Wizard Mode (explained in greater detail in that section later in the guide).

Page 27 of 46
Side
Side Quests will use randomized templates. These usually consist fighting with enemies, finding different items, traveling to locations and so on. Players will be awarded experience points and 10 bottle caps once a Side Quest is finished. Activation – Hitting the Side Targets will open up access to the Side Quests.
The Right Ramp (9) will open up to reveal a hidden Sink Hole. Sink the Ball into it to start a Side Quest.
Completion – Once the above is done. A random Side Quest will begin. Complete it to earn point based rewards etc.

Page 28 of 46
Vault(MainModes)
Starting-up/Completion of all 7 Vault Quests at least once will allow access to the Wizard Mode. To start a Vault Quest, you will need to hit the Ball at the Vault Gear Targets a total of 3 times.
Once done. A Ramp will rise, this is the Vault Ramp and you will need to send the Ball up it to get into the Vault to start a Quest.
The Vault Quests can be played in any order. Completing any Vault Quests will award the player bottle caps and XP. Collecting any S.P.E.C.I.A.L. Bobblehead will instantly add 1 point to the specific skill and grants a specific Bobblehead perk. You will need to collect all of these Bobblehead’s (7 altogether) to enable access to the table’s Wizard Mode. Bobblehead perks: Strength: - Increase score for melee hits. Perception: - Increase V.A.T.S. collect speed. Endurance: - Reduces radiation score impact. Charisma: - Increase bottle cap for quests. Intelligence: - Increase XP gain. Agility: Increase score using V.A.T.S. Luck: Collected loot always grants bottle caps.

Page 29 of 46
Completing 3 Vault Quests will activate Extra Ball for collection.
“Vault33”–StrengthBobblehead*Timed* This Quest will see you search for the Strength Bobblehead.
Hit the flashing Lanes. Be careful! As the super mutant will randomly fire onto the Playfield and this could lead to unwanted Ball drains. A few seconds will be brought back when you hit a flashing Lane. Continue to hit the flashing Lanes.
Page 30 of 46
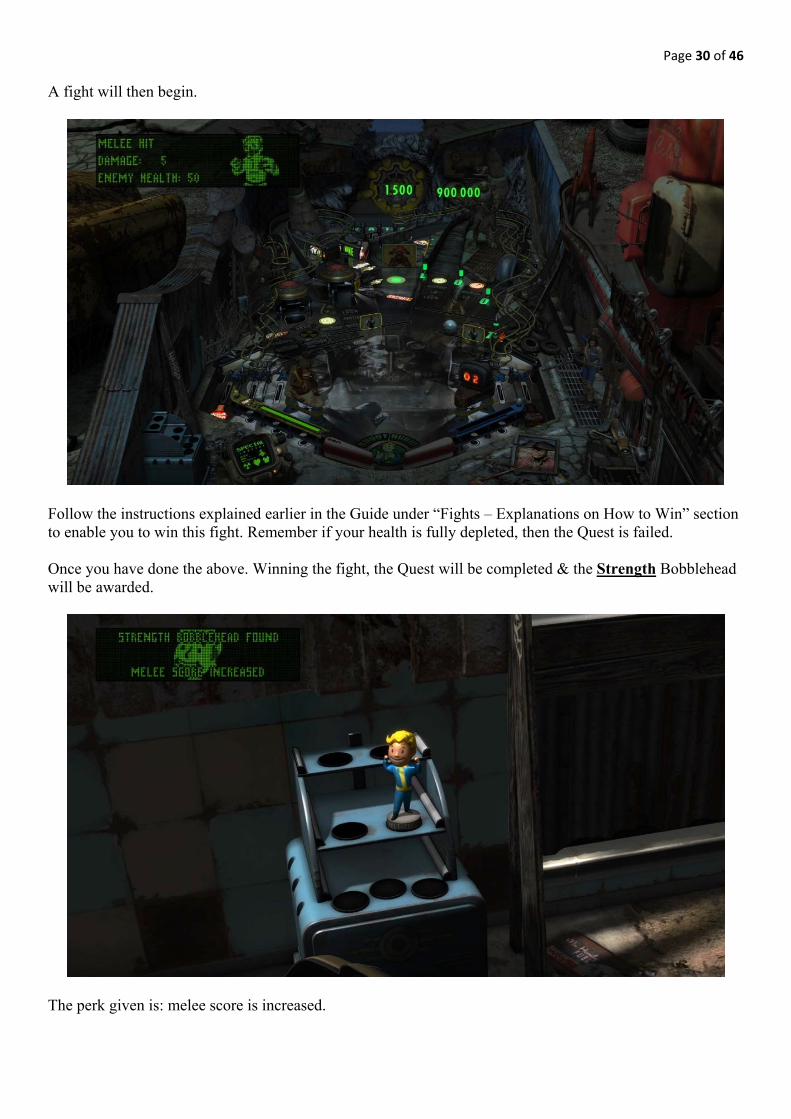
A fight will then begin.
Follow the instructions explained earlier in the Guide under “Fights – Explanations on How to Win” section to enable you to win this fight. Remember if your health is fully depleted, then the Quest is failed. Once you have done the above. Winning the fight, the Quest will be completed & the Strength Bobblehead will be awarded.
The perk given is: melee score is increased.

Page 31 of 46
“Vault41”–PerceptionBobblehead*Timed* This Quest will see you search for the Perception Bobblehead.
Hit the flashing Lanes. A few seconds will be brought back when you hit a flashing Lane.

Page 32 of 46
Follow the instructions explained earlier in the Guide under “Fights – Explanations on How to Win” section to enable you to win this fight. Remember if your health is fully depleted, then the Quest is failed.
Once you have done the above. Winning the fight, the Quest will be completed & the Perception Bobblehead will be awarded.
The perk given is: Increase V.A.T.S. collect speed.

Page 33 of 46
“Vault66”–EnduranceBobblehead*Timed* This Quest will see you search for the Endurance Bobblehead.
Hit the flashing Lanes. Be careful! As the super mutant will randomly stomp causing the Playfield to shake and this could lead to unwanted Ball drains. A few seconds will be brought back when you hit a flashing Lane. Continue to hit the flashing Lanes.

Page 34 of 46
Follow the instructions explained earlier in the Guide under “Fights – Explanations on How to Win” section to enable you to win this fight. Remember if your health is fully depleted, then the Quest is failed.
Once you have done the above. Winning the fight, the Quest will be completed & the Endurance Bobblehead will be awarded.
The perk given is: Reduces radiation score impact.

Page 35 of 46
“Vault99”–CharismaBobblehead*Timed* This Quest will see you search for the Charisma Bobblehead.
Hit the flashing Lanes. A few seconds will be brought back when you hit a flashing Lane.
Page 36 of 46
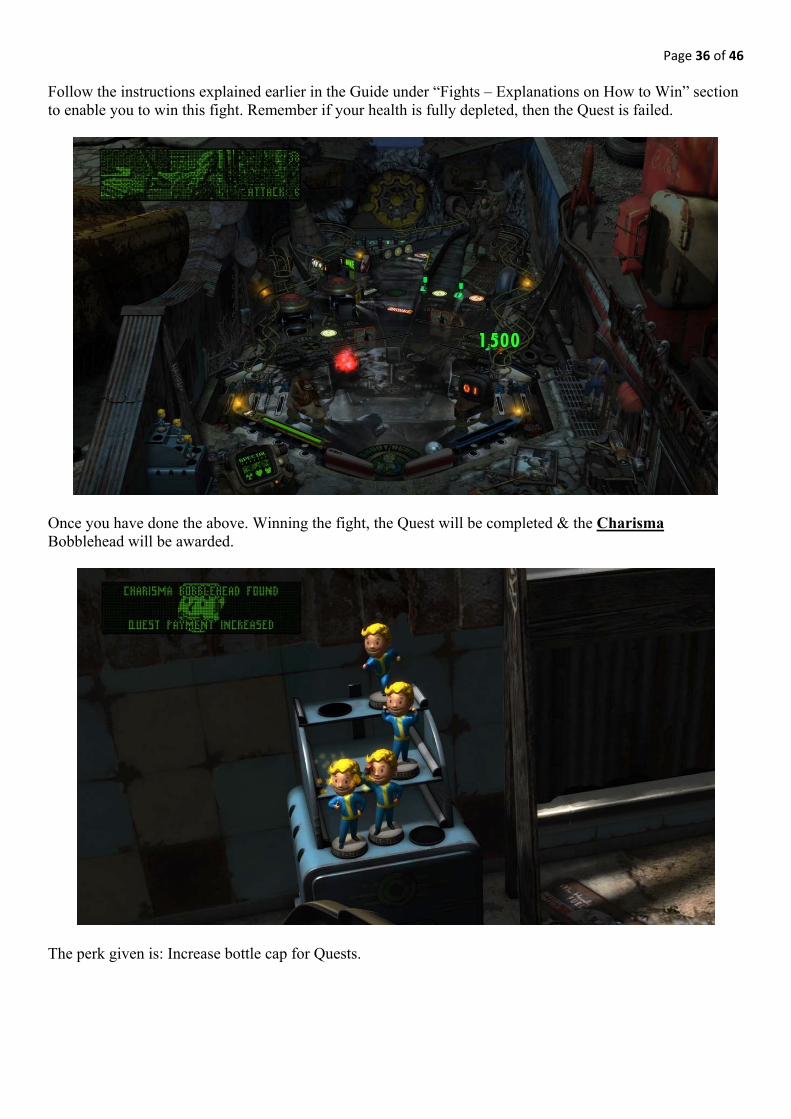
Follow the instructions explained earlier in the Guide under “Fights – Explanations on How to Win” section to enable you to win this fight. Remember if your health is fully depleted, then the Quest is failed.
Once you have done the above. Winning the fight, the Quest will be completed & the Charisma Bobblehead will be awarded.
The perk given is: Increase bottle cap for Quests.

Page 37 of 46
“Vault103”–IntelligenceBobblehead*Timed* This Quest will see you search for the Intelligence Bobblehead.
Hit the flashing Lanes. Be careful! As the super mutant will randomly stomp on the Playfield causing it to shake and this could lead to unwanted Ball drains. A few seconds will be brought back when you hit a flashing Lane. Continue to hit the flashing Lanes.
Page 38 of 46
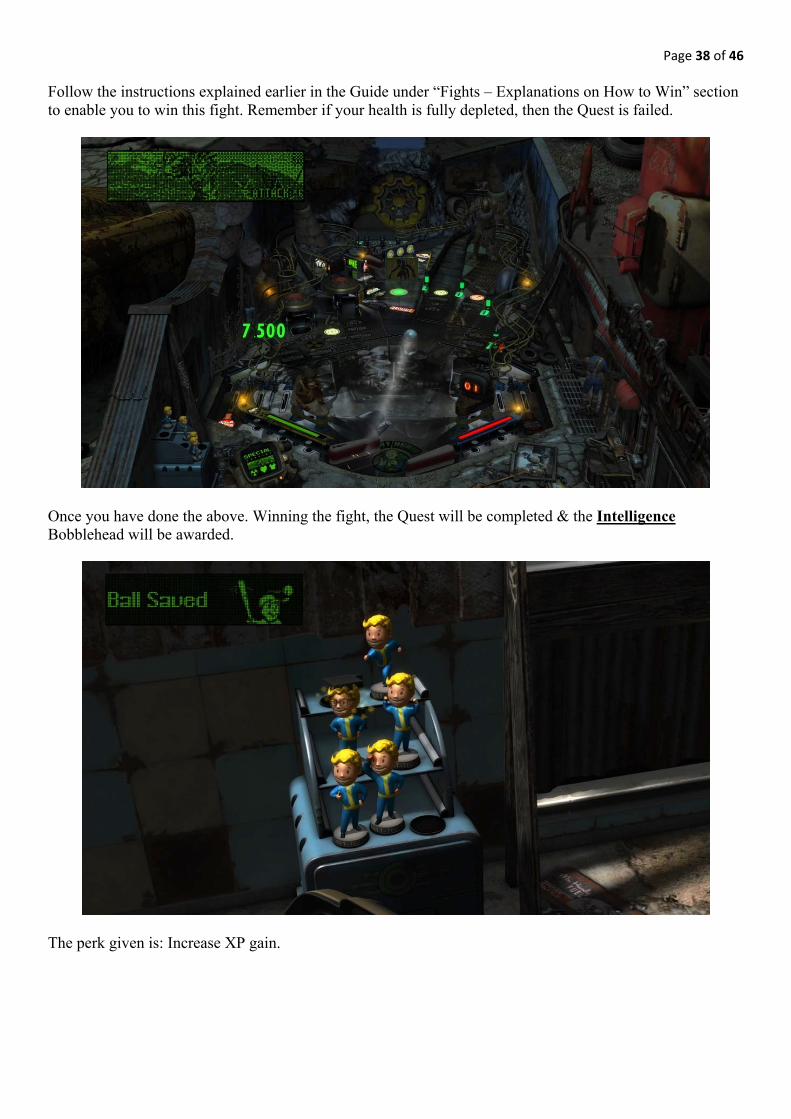
Follow the instructions explained earlier in the Guide under “Fights – Explanations on How to Win” section to enable you to win this fight. Remember if your health is fully depleted, then the Quest is failed.
Once you have done the above. Winning the fight, the Quest will be completed & the Intelligence Bobblehead will be awarded.
The perk given is: Increase XP gain.

Page 39 of 46
“Vault107”–AgilityBobblehead*Timed* This Quest will see you search for the Agility Bobblehead.
Hit the flashing Lanes. A few seconds will be brought back when you hit a flashing Lane. Continue to hit the flashing Lanes.

Page 40 of 46
Follow the instructions explained earlier in the Guide under “Fights – Explanations on How to Win” section to enable you to win this fight. Remember if your health is fully depleted, then the Quest is failed.
Once you have done the above. Winning the fight, the Quest will be completed & the Agility Bobblehead will be awarded.
The perk given is: Increase score using V.A.T.S.

Page 41 of 46
“Vault113”–LuckBobblehead*Timed* This Quest will see you search for the Luck Bobblehead.
Hit the flashing Lanes. Be careful! As the super mutant will randomly fire onto the Playfield and this could lead to unwanted Ball drains. A few seconds will be brought back when you hit a flashing Lane. Continue to hit the flashing Lanes.

Page 42 of 46
Follow the instructions explained earlier in the Guide under “Fights – Explanations on How to Win” section to enable you to win this fight. Remember if your health is fully depleted, then the Quest is failed.
Once you have done the above. Winning the fight, the Quest will be completed & the Luck Bobblehead will be awarded.
The perk given is: Collected loot always grants bottle caps.

Page 43 of 46
WizardMode–“Vault131”*3,upto4BallMultiball*
This Wizard Mode is available to start once you have at least started up all 7 of the Vault Quests. Otherwise all the Main Missions must be completed prior.
To start-up the Wizard Mode, just repeat the same process you had been doing to start the Vault Quests previously.

Page 44 of 46
Wizard Mode itself *Timed – 60 Seconds*: Collect Jackpots throughout 60 seconds with a 30 second Ball Saver in this 3-Ball Wizard Mode. Faction bonuses during Wizard Mode:
Minutemen: Adds a 4th Ball, increases Jackpot score to 150%. Railroad: Increases the duration of the Ball-Save during Wizard mode to 75 second, increases
Jackpot score to 150%. Brotherhood of Steel: Adds an extra Jackpot lane, increases Jackpot score to 150%. Institute: Makes eye-bots to enter the playfield during Wizard Mode, increases Jackpot to 150%.
Hitting the flashing Lanes will award Super Jackpots, whereas the Vault Gear Targets will give Jackpot awards.

Page 45 of 46
Repeat the above to gather as much Points as possible before the Wizard Mode ends. When the timer reaches 0, you will have the opportunity to hit the remaining Balls up the Vault Ramp into the Vault for a Vault Jackpot (roughly 10 Million Points).
The Wizard Mode will continue as long as you have more than a single Ball alive on the Playfield. Otherwise the Mode will end, and you will need to repeat the above activation process to re-enter this Mode. The Table will also reset.

Page 46 of 46
Special Thanks to all the Zen Studios Forum Community! Members such as shogun00, Cloda, Ty-43, Yoyo (without his help this guide wouldn’t have been possible!), deep, wims, skyway73, tenorhero, DiscoKing & surf1der. I couldn’t have completed the Guide without your help either directly or indirectly - you are all awesome!!!
In closing I hope you enjoyed this Table, I certainly have and I hope by using this Guide it increases that Fun factor for you and everyone else who plays with you.
Check out the other Tables available, they are all available to download on the Xbox Live Marketplace in Add-Ons section or download it straight from the PFX2 Platform itself. Zen Pinball 2 on PlayStation Network, Zen Pinball on the Apple AppStore, Zen Pinball 3D on Nintendo 3DS and Zen Pinball THD on Android Marketplace. Thanks for viewing my Guide; any feedback would be greatly appreciated -
“This is The Age of the Super Pinball Player!!!” Yours ShoryukenToTheChin