Embed Size (px)
Citation preview
Star Back
Bottom
Star Front
Bottom
Tab
Tab
Tab
TabTab
Tab
Tab
Tab
Tab Tab
Page 1 of 4
© Disney
© Disney
Family.com
Tinker Bell’s Wand
© Disney
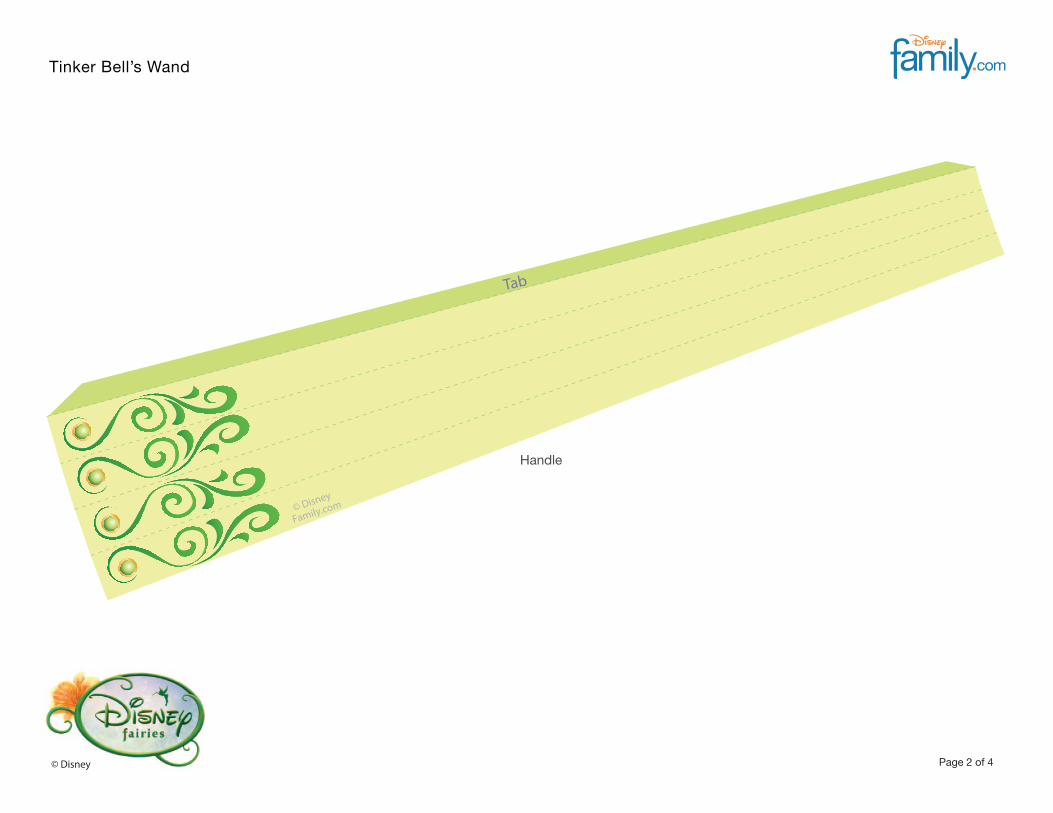
Tab
Handle
Page 2 of 4
© Disney
Family.com
Tinker Bell’s Wand
© Disney
- Instructions
underside of star
glue
glue
glue
bottoms line-up
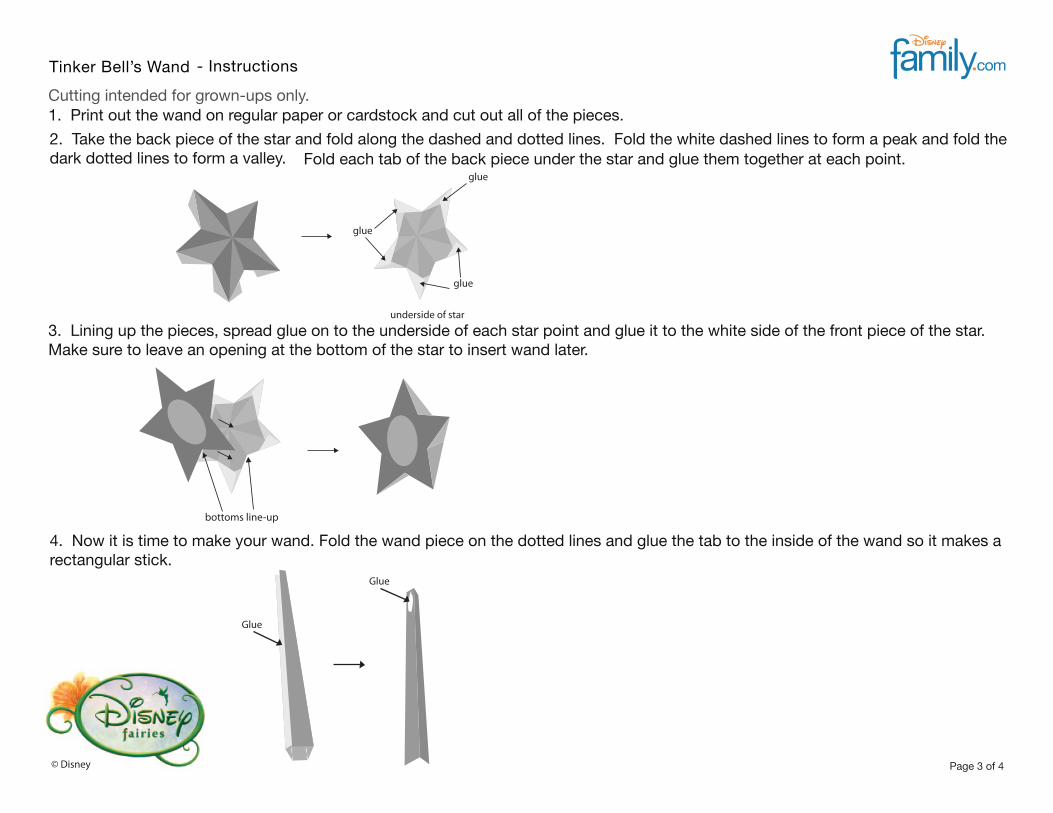
1. Print out the wand on regular paper or cardstock and cut out all of the pieces.
2. Take the back piece of the star and fold along the dashed and dotted lines. Fold the white dashed lines to form a peak and fold the dark dotted lines to form a valley. Fold each tab of the back piece under the star and glue them together at each point.
3. Lining up the pieces, spread glue on to the underside of each star point and glue it to the white side of the front piece of the star. Make sure to leave an opening at the bottom of the star to insert wand later.
Glue
Glue
4. Now it is time to make your wand. Fold the wand piece on the dotted lines and glue the tab to the inside of the wand so it makes a rectangular stick.
Page 3 of 4
Cutting intended for grown-ups only.
Tinker Bell’s Wand
© Disney
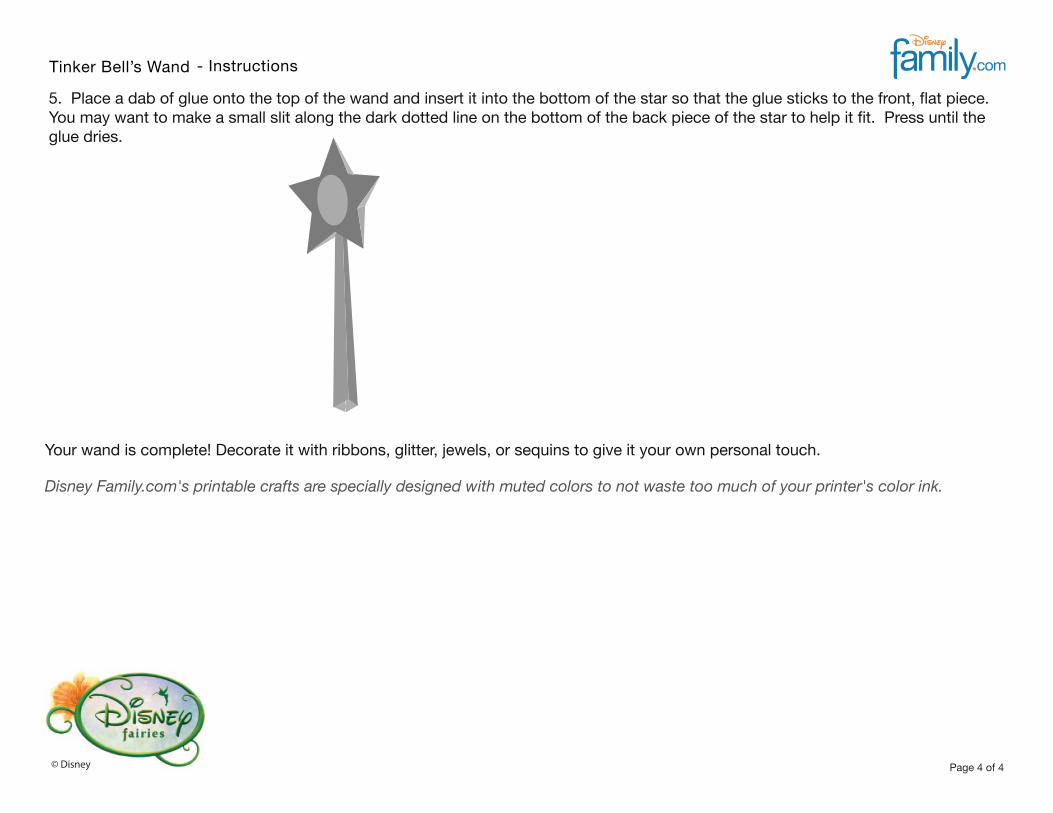
5. Place a dab of glue onto the top of the wand and insert it into the bottom of the star so that the glue sticks to the front, flat piece. You may want to make a small slit along the dark dotted line on the bottom of the back piece of the star to help it fit. Press until the glue dries.
Page 4 of 4
- Instructions
Your wand is complete! Decorate it with ribbons, glitter, jewels, or sequins to give it your own personal touch.
Disney Family.com's printable crafts are specially designed with muted colors to not waste too much of your printer's color ink.
Tinker Bell’s Wand
© Disney