Embed Size (px)
Citation preview
1/4 A079-GB
A079-GBNINZ S.p.A. - corso Trento, 2/AI-38061 ALA (TN) / ITALY www.ninz.itTel. + 39 0 464 678300Fax. +39 0 464 679025 [email protected]
A079-GB
5001176/2 - 10/14
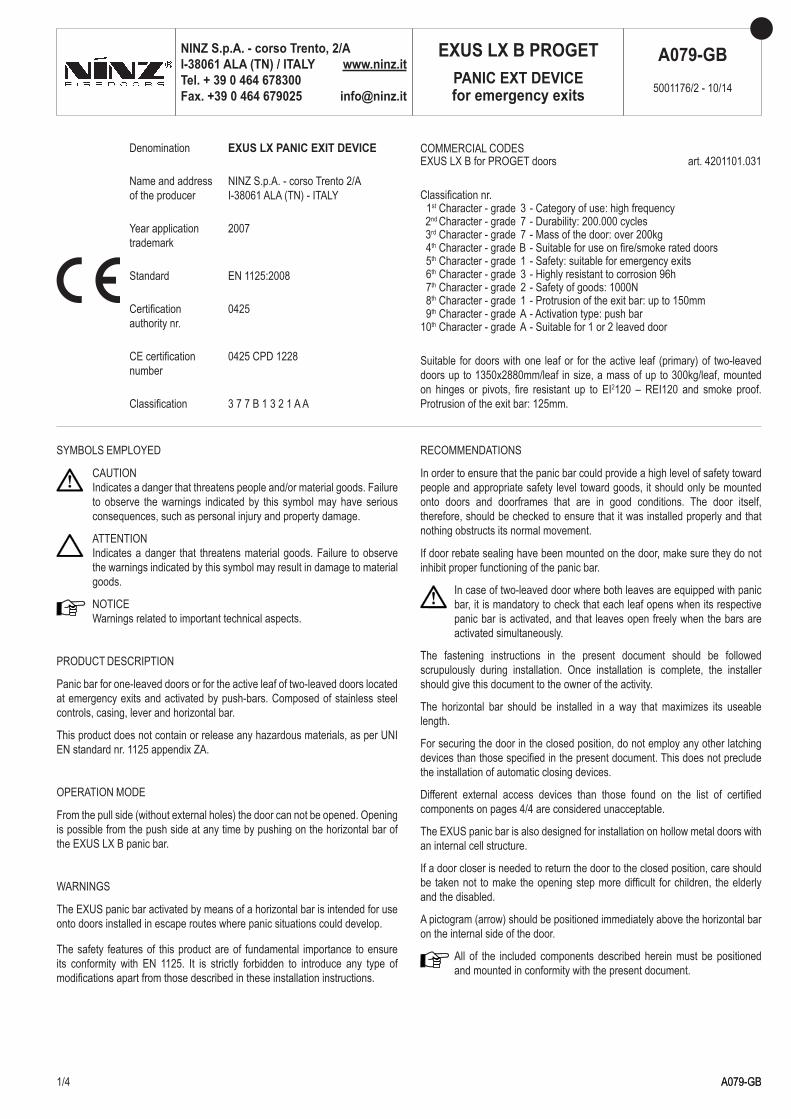
EXUS LX B PROGETPANIC EXT DEVICEfor emergency exits
COMMERCIAL CODES
Suitable for doors with one leaf or for the active leaf (primary) of two-leaved doors up to 1350x2880mm/leaf in size, a mass of up to 300kg/leaf, mounted on hinges or pivots, fire resistant up to EI2120 – REI120 and smoke proof. Protrusion of the exit bar: 125mm.
Classification nr. 1st Character - grade 3 - Category of use: high frequency 2nd Character - grade 7 - Durability: 200.000 cycles 3rd Character - grade 7 - Mass of the door: over 200kg 4th Character - grade B - Suitable for use on fire/smoke rated doors 5th Character - grade 1 - Safety: suitable for emergency exits 6th Character - grade 3 - Highly resistant to corrosion 96h 7th Character - grade 2 - Safety of goods: 1000N 8th Character - grade 1 - Protrusion of the exit bar: up to 150mm 9th Character - grade A - Activation type: push bar 10th Character - grade A - Suitable for 1 or 2 leaved door
EXUS LX B for PROGET doors art. 4201101.031NINZ S.p.A. - corso Trento 2/AI-38061 ALA (TN) - ITALY
Name and address of the producer
0425Certification authority nr.
2007Year application trademark
0425 CPD 1228CE certification number
3 7 7 B 1 3 2 1 A AClassification
Denomination EXUS LX PANIC EXIT DEVICE
Standard EN 1125:2008
SYMBOLS EMPLOYED
CAUTIONIndicates a danger that threatens people and/or material goods. Failure to observe the warnings indicated by this symbol may have serious consequences, such as personal injury and property damage.
ATTENTIONIndicates a danger that threatens material goods. Failure to observe the warnings indicated by this symbol may result in damage to material goods.
NOTICEWarnings related to important technical aspects.
PRODUCT DESCRIPTION
Panic bar for one-leaved doors or for the active leaf of two-leaved doors located at emergency exits and activated by push-bars. Composed of stainless steel controls, casing, lever and horizontal bar.
This product does not contain or release any hazardous materials, as per UNI EN standard nr. 1125 appendix ZA.
OPERATION MODE
From the pull side (without external holes) the door can not be opened. Opening is possible from the push side at any time by pushing on the horizontal bar of the EXUS LX B panic bar.
WARNINGS
The EXUS panic bar activated by means of a horizontal bar is intended for use onto doors installed in escape routes where panic situations could develop.
The safety features of this product are of fundamental importance to ensure its conformity with EN 1125. It is strictly forbidden to introduce any type of modifications apart from those described in these installation instructions.
RECOMMENDATIONS
In order to ensure that the panic bar could provide a high level of safety toward people and appropriate safety level toward goods, it should only be mounted onto doors and doorframes that are in good conditions. The door itself, therefore, should be checked to ensure that it was installed properly and that nothing obstructs its normal movement.
If door rebate sealing have been mounted on the door, make sure they do not inhibit proper functioning of the panic bar.
In case of two-leaved door where both leaves are equipped with panic bar, it is mandatory to check that each leaf opens when its respective panic bar is activated, and that leaves open freely when the bars are activated simultaneously.
The fastening instructions in the present document should be followed scrupulously during installation. Once installation is complete, the installer should give this document to the owner of the activity.
The horizontal bar should be installed in a way that maximizes its useable length.
For securing the door in the closed position, do not employ any other latching devices than those specified in the present document. This does not preclude the installation of automatic closing devices.
Different external access devices than those found on the list of certified components on pages 4/4 are considered unacceptable.
The EXUS panic bar is also designed for installation on hollow metal doors with an internal cell structure.
If a door closer is needed to return the door to the closed position, care should be taken not to make the opening step more difficult for children, the elderly and the disabled.
A pictogram (arrow) should be positioned immediately above the horizontal bar on the internal side of the door.
All of the included components described herein must be positioned and mounted in conformity with the present document.
2/4 A079-GB
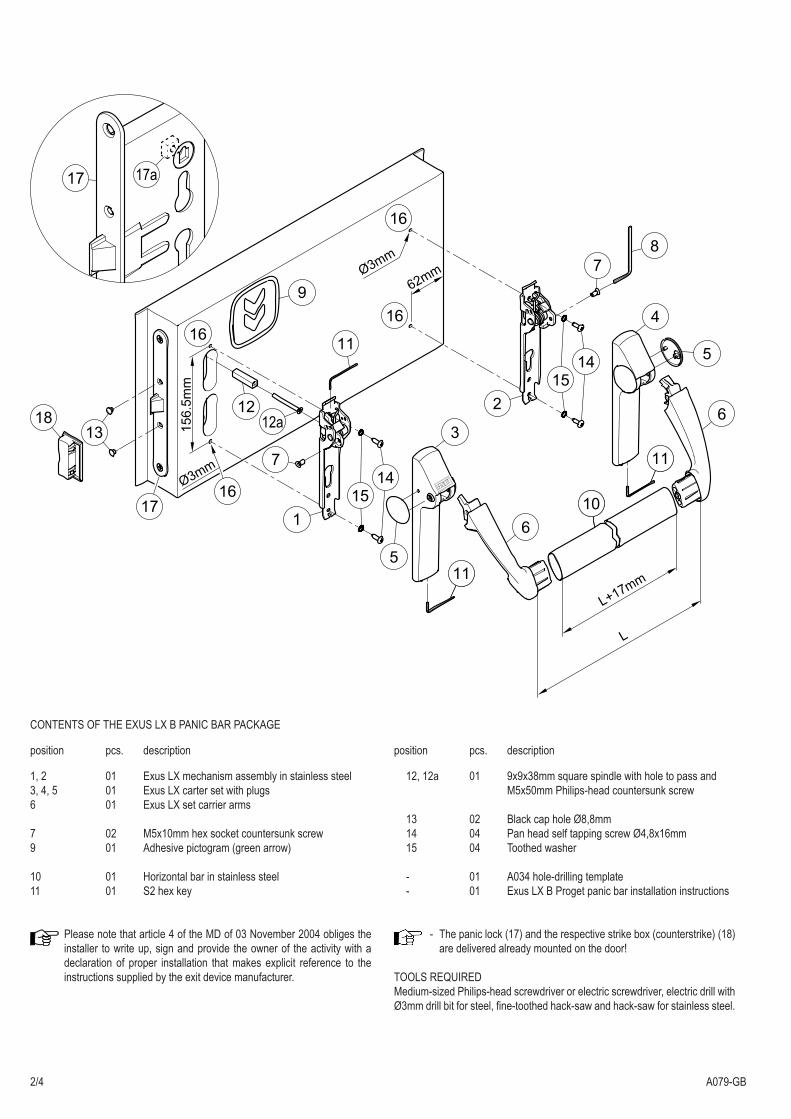
CONTENTS OF THE EXUS LX B PANIC BAR PACKAGE
position pcs. description
1, 2 01 Exus LX mechanism assembly in stainless steel3, 4, 5 01 Exus LX carter set with plugs6 01 Exus LX set carrier arms
7 02 M5x10mm hex socket countersunk screw9 01 Adhesive pictogram (green arrow)
10 01 Horizontal bar in stainless steel11 01 S2 hex key
Please note that article 4 of the MD of 03 November 2004 obliges the installer to write up, sign and provide the owner of the activity with a declaration of proper installation that makes explicit reference to the instructions supplied by the exit device manufacturer.
position pcs. description
12, 12a 01
13 02 Black cap hole Ø8,8mm 14 04 Pan head self tapping screw Ø4,8x16mm 15 04 Toothed washer
- 01 A034 hole-drilling template - 01 Exus LX B Proget panic bar installation instructions
- The panic lock (17) and the respective strike box (counterstrike) (18) are delivered already mounted on the door!
TOOLS REQUIREDMedium-sized Philips-head screwdriver or electric screwdriver, electric drill with Ø3mm drill bit for steel, fine-toothed hack-saw and hack-saw for stainless steel.
9x9x38mm square spindle with hole to pass and M5x50mm Philips-head countersunk screw

3/4 A079-GB
IMPORTANT- Installation should be carried out by qualified personnel only and in strict
conformity with the instructions supplied.- For a correct installation all supplied components must be used, including
toothed washers.- No variations are allowed, and only components indicated in the
package contents may be used.- Given its purpose, the Exus LX B panic bar should be mounted on the push-
side of the door.- Before proceeding with installation, check the package contents to ensure
that no pieces are missing.- Check if the door is equipped with the panic safe lock.- Any different installation configuration from that illustrated on pag. 2/4 is not
allowed.
INSTALLATION- Insert the M5x50mm screw (12a) into the countersunk hole of the
square spindle (12) and fasten it at the threaded insert (17a) of the panic safe lock (17) by tightening well the screw.
- Use the template to drill the holes (16) with the Ø3mm drill bit, checking the level. If holes are already present, drill them again for the internal reinforcement.
- Apply the operating mechanism (1) to the lock side (push-side of the door) and centre the square spindle (12) correctly. Fix the mechanism (1) at the leaf by fastening the Ø4,8x16mm self-tapping screws (14) and their toothed washers (15).
- Fix the square spindle (12) at the operating mechanism (1), using the S2 hex wrench (11).
- Fasten the mechanism (2) of the panic bar at hinged side, using the self-tapping screws Ø4,8x16mm (14) and their toothed washers (15).
- Remove the externally-facing plugs (5) from both carter (3 and 4). To do this, insert a finger inside the carter and push the plug out, being careful not to remove the plastic insert. Apply the carter with “EXIT” wording (3) on the operating mechanism (1) and the other one (4) on the mechanism from hinged side (2). Do not fasten the socked set screws, so as to let the two carter movable.
- Apply the carrier arms (6) and fasten them with the dedicated screws (7), tightening them securely with the included S3 wrench (8).
- Make a precise “L” measurement, cut the stainless steel bar (10) adding 17mm, and remove the burrs from the cut edge. Remove one carrier arm, attach the bar and re-fasten the entire assembly.
- Finish fastening of the two carter (3 and 4), screw on without overtighten the socked set screw, using the S2 hex key (11), then apply the plugs (5).
- Insert the two caps (13) in the open holes of the panic safe lock (17).- Push the Exus LX B panic bar at any point along the horizontal bar,
checking to ensure that the latch bolt opens easily und fully. Test the door in opened and closed position and if necessary file down the plastic strike box (18) of one-leaved doors or the panic safe lock for inactive leaf of two-leaved doors.
- Apply the pictogram (9) with the green arrow on the internal surface of the door, just above the horizontal bar.
- Lastly, use a dynamometer to measure the force required on the horizontal bar to release the lock. Record this force measurement in the present document.
USE- Ensure that the door always opens easily.- Avoid unnecessary strains on or handling of the exit bar.- Protect the panic bar from external atmospheric agents.- Avoid anything that could hamper the free movement of the bar.- Do not paint the lock.- Use the bar properly, do not pull it in the wrong direction.
- Make sure that any damaged or malfunctioning parts are replaced immediately.
MAINTENANCETo ensure that door usage conforms with regulations, the following maintenance checks should be carried out at least once a month:- Confirm that all of the installed components correspond with those listed in the
present instructions and that no other latching devices than those originally installed have been added to the door.
- Inspect and activate the panic bar to verify that all of its components are in satisfactory operational condition.
- Use a dynamometer to confirm that the release force shows no significant differences from the forces recorded at the time of installation.
- Check whether all screws are fully tightened, tightening any that may have loosened.
- Check whether exit bar can be moved with minimal effort, and that the latch bolt retreats from the strike box without offering resistance. If the door has become difficult to open due to friction, the resistance can be reduced by filing the strike box down to the appropriate height.
- Activate the Exus LX B panic bar at both ends of the horizontal bar, checking to ensure full retraction of the latch bolt in both cases.
- Ensure that the latch bolt exits completely when the horizontal bar is released.- Check the horizontal bar and replace it if any damage or deformities are
detected.- Check whether the inserts and strike boxes are blocked in any way
and eliminate any obstructions.- This product requires no special maintenance. Grease spray should be used
to lubricate the internal workings of the lock and panic bar on a regular basis - the latter has a hole on its carter for this purpose, located below the carrier arms.
- For normal cleaning, use a cleaning agent designed specifically for stainless steel.
- Any adjustments that become necessary must be carried out by qualified personnel using original NINZ replacement parts.
- The owner of the activity is responsible for keeping the declaration of correct installation on file, conducting proper exit bar maintenance in accordance with all of the manufacturer’s maintenance guidelines, keeping maintenance and check-up records and preserving the present document.
4/4 A079-GB
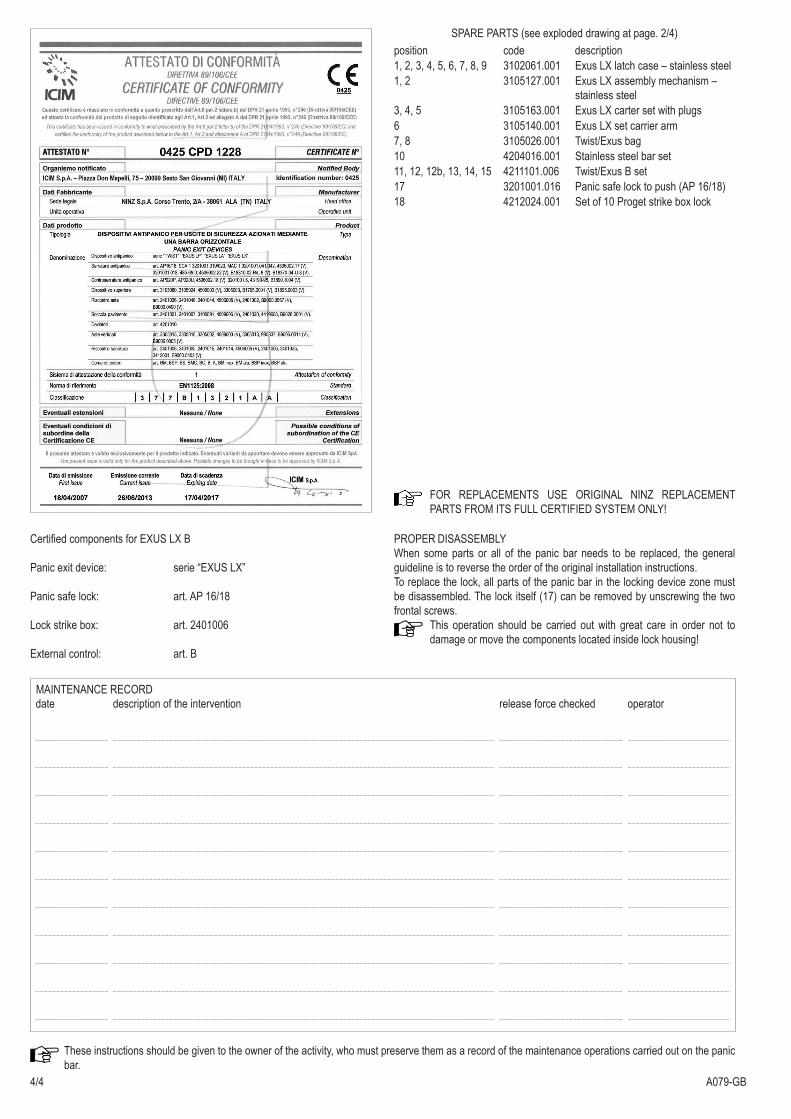
SPARE PARTS (see exploded drawing at page. 2/4)position code description1, 2, 3, 4, 5, 6, 7, 8, 9 3102061.001 Exus LX latch case – stainless steel1, 2 3105127.001 Exus LX assembly mechanism –
stainless steel3, 4, 5 3105163.001 Exus LX carter set with plugs6 3105140.001 Exus LX set carrier arm7, 8 3105026.001 Twist/Exus bag10 4204016.001 Stainless steel bar set11, 12, 12b, 13, 14, 15 4211101.006 Twist/Exus B set17 3201001.016 Panic safe lock to push (AP 16/18)18 4212024.001 Set of 10 Proget strike box lock
PROPER DISASSEMBLYWhen some parts or all of the panic bar needs to be replaced, the general guideline is to reverse the order of the original installation instructions.To replace the lock, all parts of the panic bar in the locking device zone must be disassembled. The lock itself (17) can be removed by unscrewing the two frontal screws.
This operation should be carried out with great care in order not to damage or move the components located inside lock housing!
Certified components for EXUS LX B
Panic exit device: serie “EXUS LX”
Panic safe lock: art. AP 16/18
Lock strike box: art. 2401006
External control: art. B
FOR REPLACEMENTS USE ORIGINAL NINZ REPLACEMENT PARTS FROM ITS FULL CERTIFIED SYSTEM ONLY!
MAINTENANCE RECORD
These instructions should be given to the owner of the activity, who must preserve them as a record of the maintenance operations carried out on the panic bar.
date description of the intervention release force checked operator