Embed Size (px)
Citation preview
Extract Audio File from a DVD Roxio Media Manager makes it easy to extract audio from a non-copy protected DVD, like a piano recital that you shot and recorded to DVD, or other performance. Then, you can create a CD or DVD music disc, export the audio to a portable device or save the audio file to your hard disk.
Getting Started:
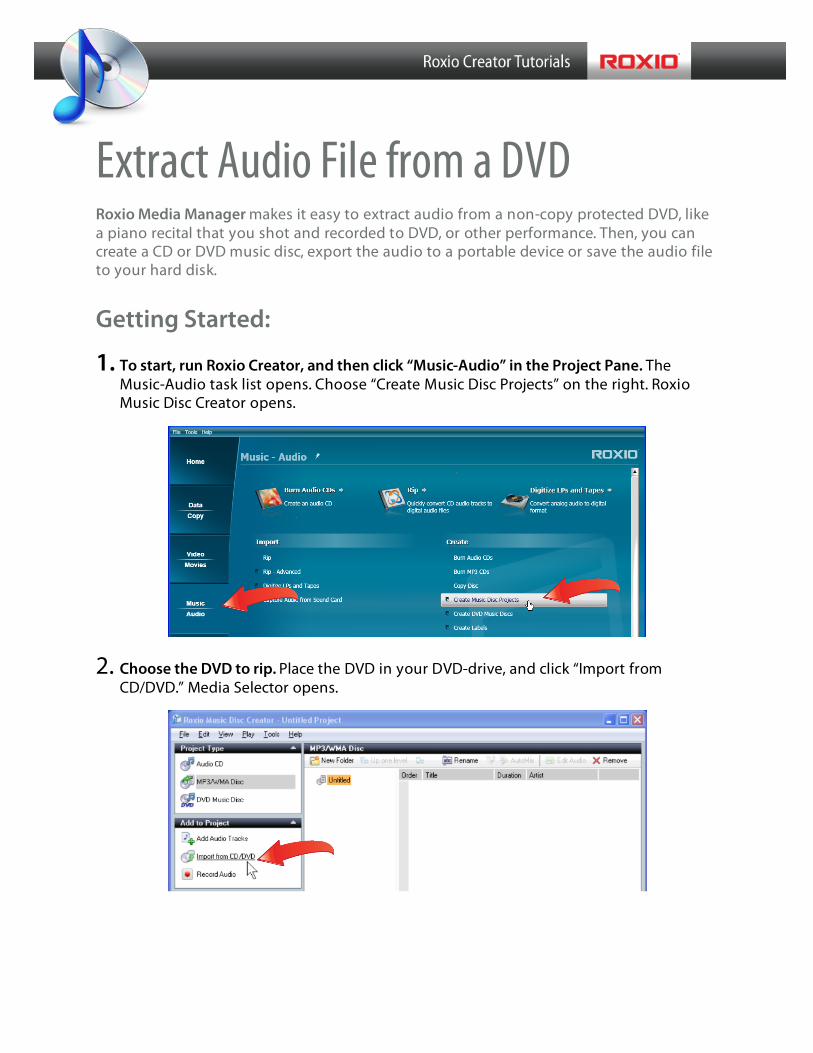
1. To start, run Roxio Creator, and then click “Music-Audio” in the Project Pane. The Music-Audio task list opens. Choose “Create Music Disc Projects” on the right. Roxio Music Disc Creator opens.
2. Choose the DVD to rip. Place the DVD in your DVD-drive, and click “Import from CD/DVD.” Media Selector opens.
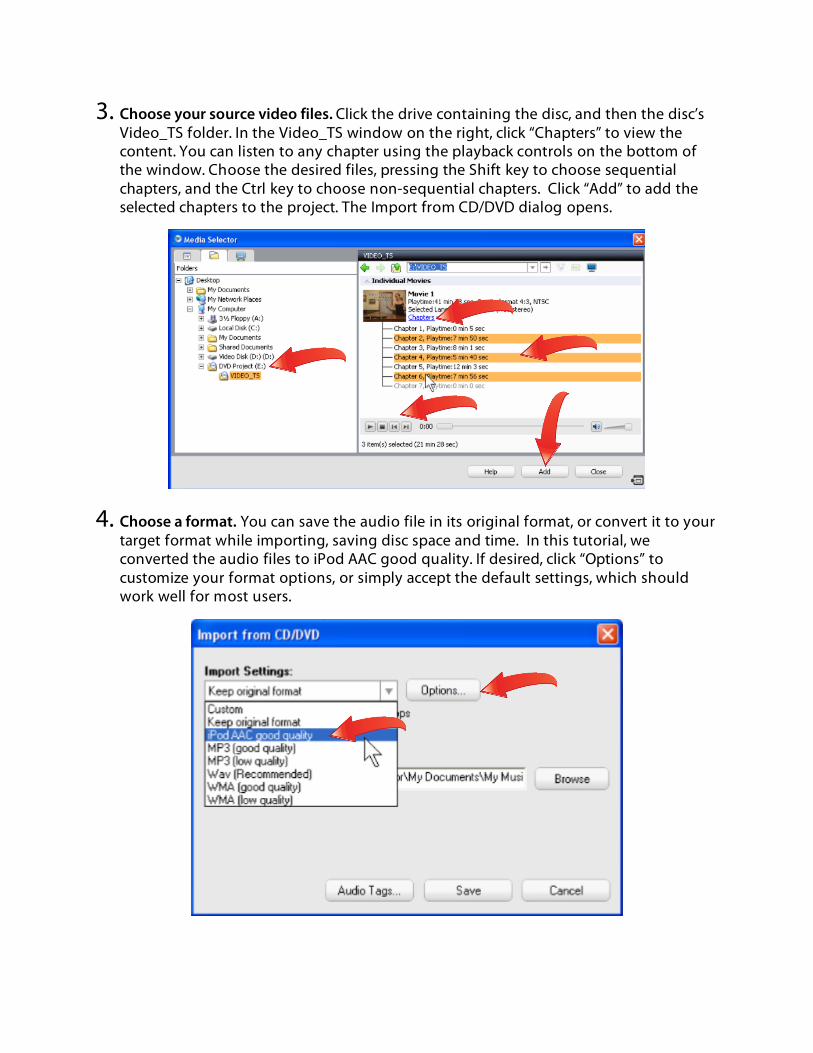
3. Choose your source video files. Click the drive containing the disc, and then the disc’s Video_TS folder. In the Video_TS window on the right, click “Chapters” to view the content. You can listen to any chapter using the playback controls on the bottom of the window. Choose the desired files, pressing the Shift key to choose sequential chapters, and the Ctrl key to choose non-sequential chapters. Click “Add” to add the selected chapters to the project. The Import from CD/DVD dialog opens.
4. Choose a format. You can save the audio file in its original format, or convert it to your target format while importing, saving disc space and time. In this tutorial, we converted the audio files to iPod AAC good quality. If desired, click “Options” to customize your format options, or simply accept the default settings, which should work well for most users.
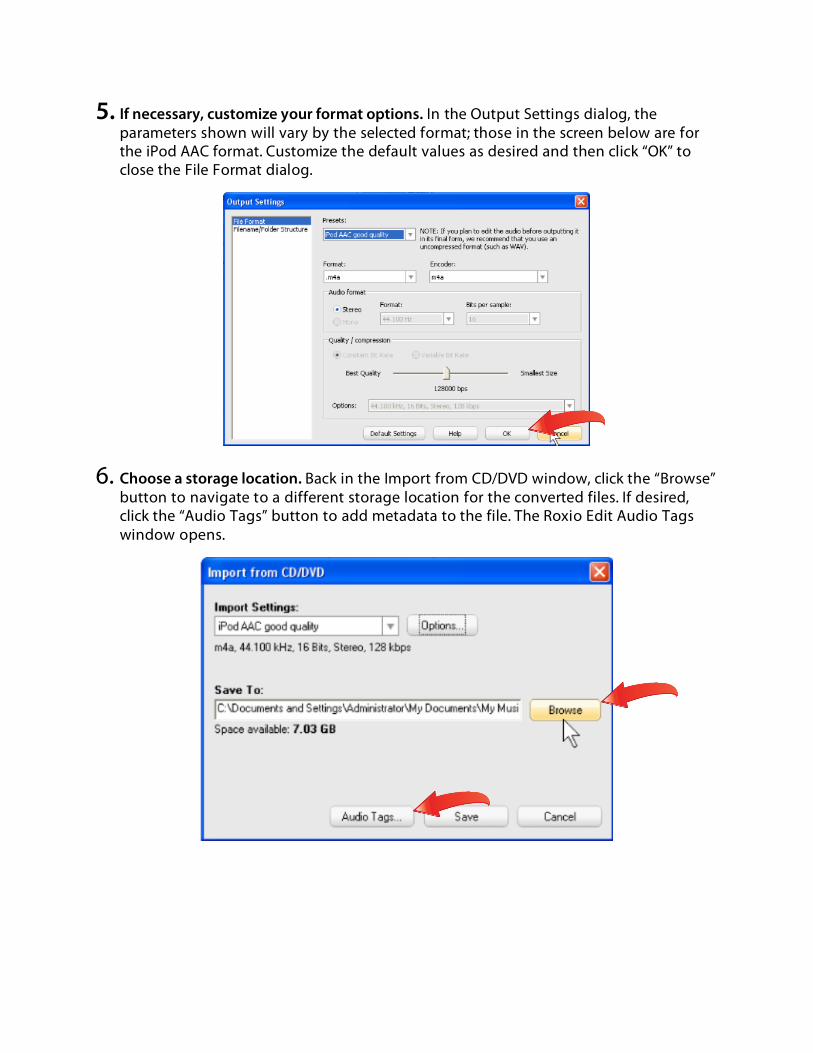
5. If necessary, customize your format options. In the Output Settings dialog, the parameters shown will vary by the selected format; those in the screen below are for the iPod AAC format. Customize the default values as desired and then click “OK” to close the File Format dialog.
6. Choose a storage location. Back in the Import from CD/DVD window, click the “Browse” button to navigate to a different storage location for the converted files. If desired, click the “Audio Tags” button to add metadata to the file. The Roxio Edit Audio Tags window opens.
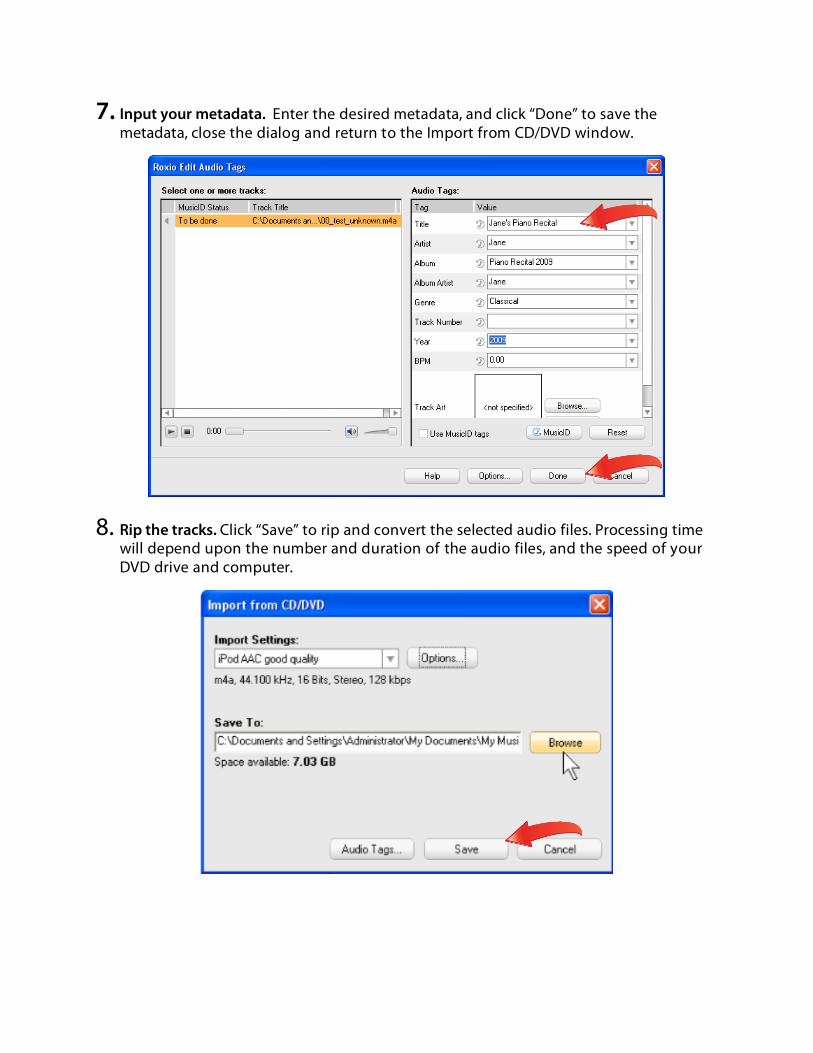
7. Input your metadata. Enter the desired metadata, and click “Done” to save the metadata, close the dialog and return to the Import from CD/DVD window.
8. Rip the tracks. Click “Save” to rip and convert the selected audio files. Processing time will depend upon the number and duration of the audio files, and the speed of your DVD drive and computer.
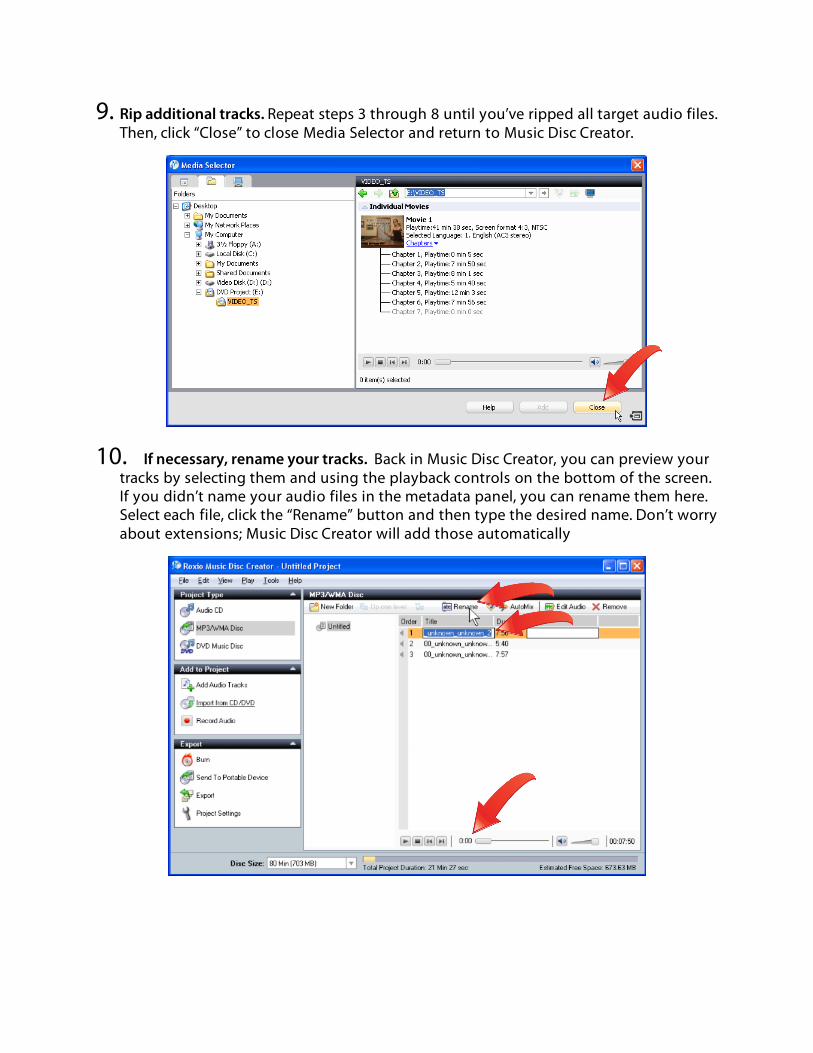
9. Rip additional tracks. Repeat steps 3 through 8 until you’ve ripped all target audio files. Then, click “Close” to close Media Selector and return to Music Disc Creator.
10. If necessary, rename your tracks. Back in Music Disc Creator, you can preview your tracks by selecting them and using the playback controls on the bottom of the screen. If you didn’t name your audio files in the metadata panel, you can rename them here. Select each file, click the “Rename” button and then type the desired name. Don’t worry about extensions; Music Disc Creator will add those automatically

11. Export your tracks. Once you’re ready, click to select the files to export. Then, click “Burn” to burn the audio files to a CD or DVD, “Send to Portable Device” to copy them to an iPod or other connected player, or “Export” to save the files to your hard disc.
12. Customize your output settings. If you choose this last option, Music Disc Creator opens the Export selected tracks dialog, where you can change your output settings, Save to location or edit your audio tags. When ready, click “Export” to start the process.