Embed Size (px)
Citation preview

Extended DISC® Australasia Ltd – EDOS Manual for Client Users Last Update: 20 January 2010
EXTENDED DISC® – INFORMATION YOU NEED Page 1 of 25
Extended DISC® Australasia Ltd
EDOS Manual for Client Users
Extended DISC® Australasia Ltd – EDOS Manual for Client Users Last Update: 20 January 2010
EXTENDED DISC® – INFORMATION YOU NEED Page 2 of 25
1. General Description……………………………………………………………………………………………………………………………………..3 1.1 Extended DISC® Online System……………………………..………………………………………………………………………………………….3 1.2 Products Available in EDOS……………………………………………………………………………………………………………………………..3 2. Technical Introduction……………………………………………………………………………………………………….…………………………4 2.1 EDOS Admin……………..…………………………………………………………..……………………………………………………………………4 2.2 EDOS Answering………..………………………………………………..……………………………………………………………………………….4 3. Points System……………………………………………………………………………………………………………………………………………5 4. Logging……………………………………………………………………………………………………………………………………………………6 4.1 Main Menu Screen………………………………………………………………………………………………………………………………………..6 5. My Settings………………………………………………………………………………………………………………………………………………..7 5.1 Change Password…………………………………………………………………………………………………………………………………………7 5.2 Personal Settings………………………………………………………………………………………………………………………………………….8 6. Personal Analysis Menu……………………………..……………..…………………………………………………………………………………..9 6.1 Define Default Settings for Personal Analysis Access Codes…………..……………………………………………………………………………9 6.2 Creating a Personal Analysis Access Code………………………………………………………………………………………………………..…10 6.3 Modifying a Personal Analysis Access Code………………………………………………………………………………………………………....11 6.4 Order Personal Analysis Results....…………………………………………………………………………………………………………………....12 6.5 Order more Passwords for an Access Code …………………………………………………………………………………………………………13 6.6 Create a Job Comparison………………………………………………………………………………………………………………………………13 6.7 Add a Job Comparison to an existing Personal Analysis Report…………………………………………………………………………………..14 6.8 Create an Access Code with a Job Comparison……………………………………………………………………………………………………..15 6.9 Create a Research Module……………………………………………………………………………………………………………………………..15 6.10 Create an Access Code with a Research Module……………………………………………………………………………………………………17 7. Team Analysis Menu………………………………………………………………………………………………………………………………..…18 7.1 Creating a Team Analysis………………………………………………………………………………………………………………………………18 7.2 Ordering Team Analysis Results……………………………………………………………………………………………………………………....18 7.3 Modify an Existing Team Analysis……………………………………………………………………………………………………………………..19 7.4 Define Default Settings for Team Analysis…………………………………………………………………………………………………………....20 8. Work Pair Analysis Menu…………………………………………………………………………………………………………………………..…21 7.1 Creating a Work Pair Analysis …………………………………………………………………………………………………………………………21 7.2 Define Default Settings for Work Pair Analysis……………………………………………………………………………………………………....22 9. Points…………………………………………………………………………………………………………………………………………………….23 9.1 Points Status…………………………………………………………………………………………………………………………………………..…24 9.2 Points Orders…………………………………………………………………………………………………………………………………………….24 9.3 Reports……………………………………………………………………………………………………………………………………………………25 9.4 Point Store………………………………………………………………………………………………………………………………………………..25
Extended DISC® Australasia Ltd – EDOS Manual for Client Users Last Update: 20 January 2010
EXTENDED DISC® – INFORMATION YOU NEED Page 3 of 25
1. General Description 1.1 Extended DISC Online System (EDOS)
• EDOS is a completely online solution eliminating the need to install software • Clients can manage the system independently • Clients can create and maintain their own access codes • Clients can access their database any time, any place online • Results can be ordered from any computer with internet access and Acrobat Reader • Clients can send results directly from EDOS with customised email content • All languages are available in the system and updated automatically • EDOS Points are saved in the system and new points can be ordered via email • Clients can Co-Brand reports with their company colours and tailor the Reading Guides • Clients can Co-Brand the answering pages to create a global image of the company • EDOS Research Module allows clients to combine a set of questions to the Personal Analysis Questionnaire that is sent as an
additional page to the Personal Analysis Report • EDOS results are stored in the online system database. In case of a system crash the data is stored on backup servers • The EDOS Server is protected against unauthorized access. It uses a SSL Certificate to ensure secured internet communication
(https protocol). All communications between the EDOS server and client browsers are encrypted. Login to the answering features of the server is protected by Access Codes and passwords can be added if necessary. Separate login procedures exist for the admin features. The server has regular updated firewall and virus protection
1.2 There are currently 5 Extended DISC products available in EDOS. These are:
• Extended DISC Personal Analysis • Extended DISC Work Pair Analysis • Extended DISC Team Analysis • Extended DISC Research Module • Extended DISC Job Comparison
Extended DISC® Australasia Ltd – EDOS Manual for Client Users Last Update: 20 January 2010
EXTENDED DISC® – INFORMATION YOU NEED Page 4 of 25
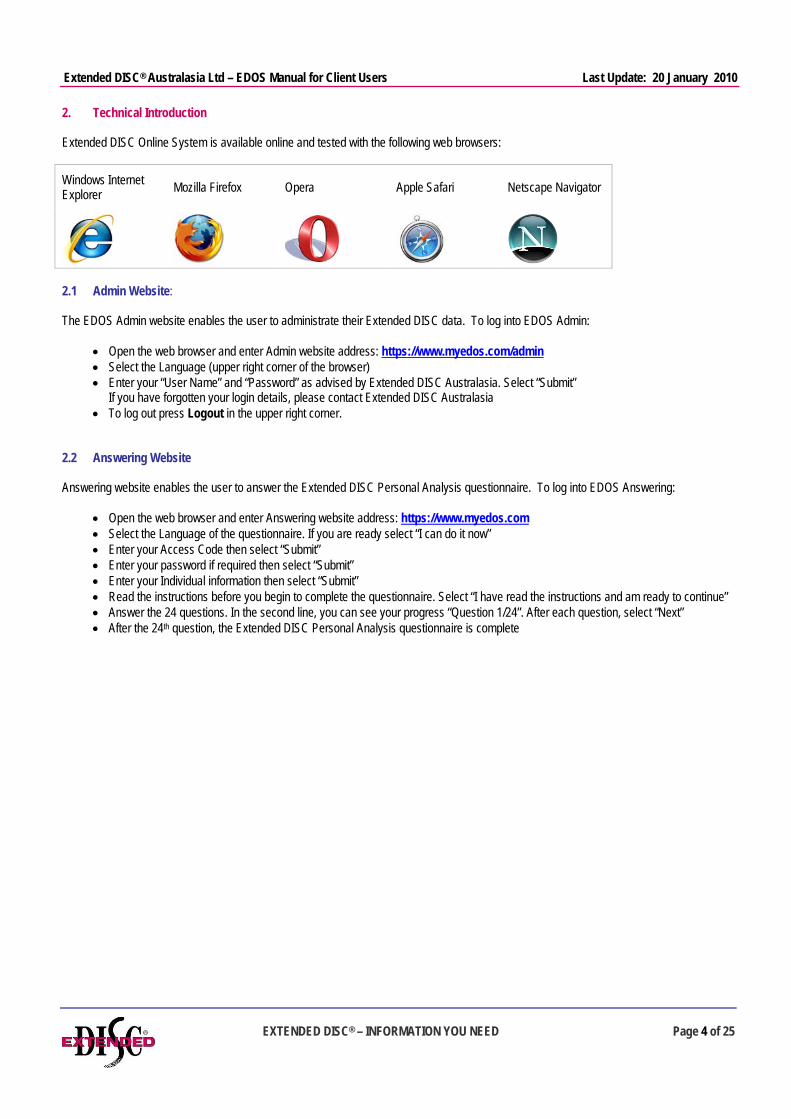
2. Technical Introduction Extended DISC Online System is available online and tested with the following web browsers:
Windows Internet Explorer Mozilla Firefox Opera Apple Safari Netscape Navigator
2.1 Admin Website: The EDOS Admin website enables the user to administrate their Extended DISC data. To log into EDOS Admin:
• Open the web browser and enter Admin website address: https://www.myedos.com/admin • Select the Language (upper right corner of the browser) • Enter your “User Name” and “Password” as advised by Extended DISC Australasia. Select “Submit”
If you have forgotten your login details, please contact Extended DISC Australasia • To log out press Logout in the upper right corner.
2.2 Answering Website Answering website enables the user to answer the Extended DISC Personal Analysis questionnaire. To log into EDOS Answering:
• Open the web browser and enter Answering website address: https://www.myedos.com • Select the Language of the questionnaire. If you are ready select “I can do it now” • Enter your Access Code then select “Submit” • Enter your password if required then select “Submit” • Enter your Individual information then select “Submit” • Read the instructions before you begin to complete the questionnaire. Select “I have read the instructions and am ready to continue” • Answer the 24 questions. In the second line, you can see your progress “Question 1/24”. After each question, select “Next” • After the 24th question, the Extended DISC Personal Analysis questionnaire is complete

Extended DISC® Australasia Ltd – EDOS Manual for Client Users Last Update: 20 January 2010
EXTENDED DISC® – INFORMATION YOU NEED Page 5 of 25
3. Points System Price of the Extended DISC® tools within EDO is indicated by the amount of points used. Each part a tool has its own price indicated by the amount of points needed. You can independently tailor each tool to your own needs by selecting appropriate parts of the chosen tools.
Assessment Tool / Part Points
Extended DISC Personal Analysis – Full Report = 50 points
Profile and Diamond Relationship Roles Reading Guide Questions
30
Cover Page Text Page Motivators Page Graphical Page Flexibility Zones Present Situation
20
Specific Behavioural Style Pages: Customer Service, Sales, Leadership, Management, Team, Office, Entrepreneurial, Project, IT and Training
7 each
Additional Language 7 each
Extended DISC Job Comparison Customer Service, Sales, Leadership, Management, Team, Office, Entrepreneurial, Project, IT and Training 7 each
Extended DISC Research Module Questionnaire Each Respondent
300 4 each
Extended DISC Team Analysis – Full Report = 60 points
Cover Page Shotgun Map Name Map Team Flexibility Zones
20 Maps
Arrow Map Team Profile & Percentages Scorecard
30
Team Roles 10 Additional Language 0 Add 1 person to team 5 Remove 1 person from team 5
Extended DISC Work Pair Analysis – Full Report = 10 points Cover Page Profile & Diamond Page Graphical Pages Text Page
10
Additional Language 10 Co-Branding
Report and Reading Guide 500 Answering Interface 1300

Extended DISC® Australasia Ltd – EDOS Manual for Client Users Last Update: 20 January 2010
EXTENDED DISC® – INFORMATION YOU NEED Page 6 of 25
4. Logging into EDOS To log into EDOS Admin please use the below link and enter your User Name and Password as advised by Extended DISC Australasia Ltd. EDOS Admin Website: https://www.myedos.com/admin
4.1 Main Menu Screen This Main Menu Screen shows what tools are available for Client Users in EDOS.

Extended DISC® Australasia Ltd – EDOS Manual for Client Users Last Update: 20 January 2010
EXTENDED DISC® – INFORMATION YOU NEED Page 7 of 25
5. My Settings When you first begin to use EDOS, we recommend you check your Personal Settings. Extended DISC Australasia will define these for you, however it is recommended that you check to ensure these have been set to your requirements.
5.1 Change Password To change your password, select “Change Password” from the “My settings Menu” then:
• Enter your old password • Enter your new password twice • Then “Save”
Extended DISC® Australasia Ltd – EDOS Manual for Client Users Last Update: 20 January 2010
EXTENDED DISC® – INFORMATION YOU NEED Page 8 of 25
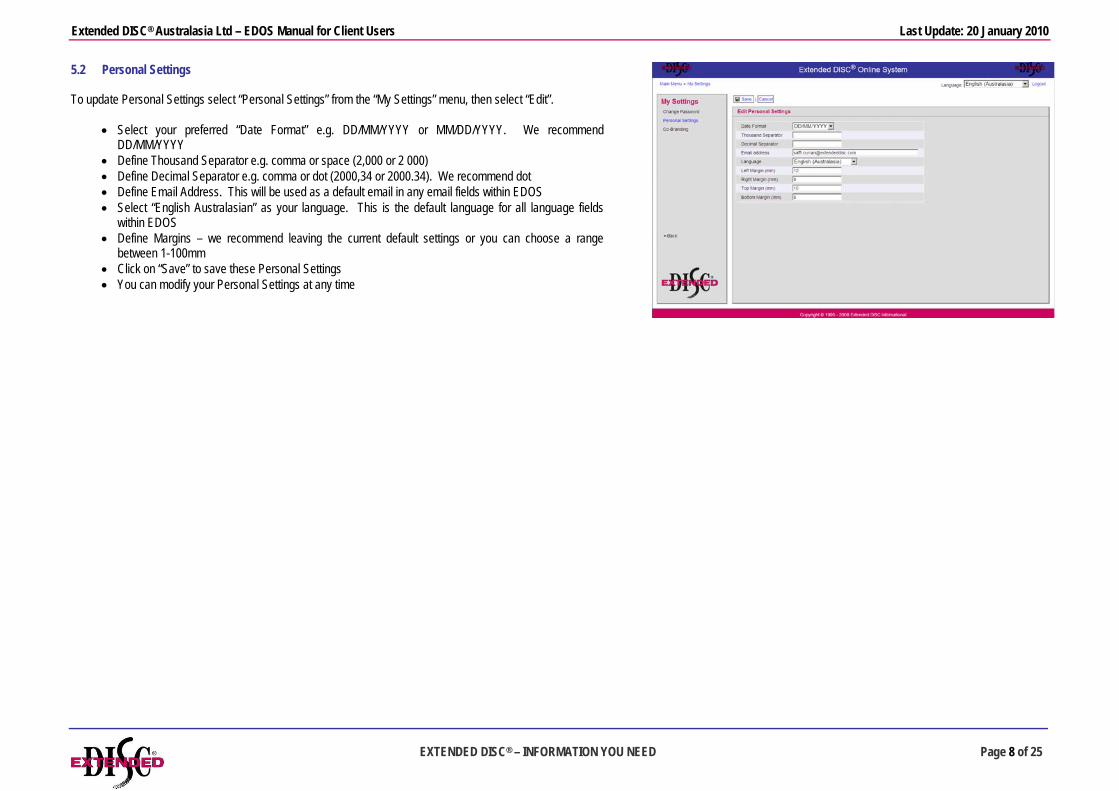
5.2 Personal Settings To update Personal Settings select “Personal Settings” from the “My Settings” menu, then select “Edit”.
• Select your preferred “Date Format” e.g. DD/MM/YYYY or MM/DD/YYYY. We recommend DD/MM/YYYY
• Define Thousand Separator e.g. comma or space (2,000 or 2 000) • Define Decimal Separator e.g. comma or dot (2000,34 or 2000.34). We recommend dot • Define Email Address. This will be used as a default email in any email fields within EDOS • Select “English Australasian” as your language. This is the default language for all language fields
within EDOS • Define Margins – we recommend leaving the current default settings or you can choose a range
between 1-100mm • Click on “Save” to save these Personal Settings • You can modify your Personal Settings at any time

Extended DISC® Australasia Ltd – EDOS Manual for Client Users Last Update: 20 January 2010
EXTENDED DISC® – INFORMATION YOU NEED Page 9 of 25
6. Personal Analysis 6.1 Define Default settings for Personal Analysis Access Codes To set up your default settings for all Access Codes go to “My Settings” from the main menu and choose “Report Settings” then select “Personal Analysis”:
• Select which country the results will be sent to e.g. Australia or New Zealand • Do not fill in “Organisation” as this should be completed for each Access Code created • Under “Access Code” enter AUS- or NZL- for the country you are in and leave the rest blank for
completing when you create Access Codes • Select which “Password” option is your preferred
o “No Password” means the respondent is not asked for a password only an Access Code o “One Entry” means the respondent is asked for an individual password with the Access
Code. This password can only be used once o “Multi Entry” means the respondent is asked for a multiple use password with the
Access Code. This password can be used over and over again o Select “PDF File” as your default “Send Method”. You can choose your preferred send
method each time you create a new Access Code. See “Creating a new Access Code for an explanation on the “Send Methods”
• Within “Send to Respondent” – always select “NO”. If you select “YES” a copy of the results will be sent to the email address given by the respondent when completing the questionnaire. We do not recommend respondents receive copies of their reports without it first being seen by the person who asked them to complete it
• Do not enter in a “To email” or “Bcc email” address at this time. Please complete this when you are creating an Access Code
• Within “Customer email message” you can tailor a message that is received only by the “To email” recipient. Please leave this area blank. If you want to create a message, please contact Extended DISC Australasia for further information
• Please select “Unlimited” under “Personal Allowance” • “Available free points” and “Points needed for this account” are completed automatically by the system
if required • Select “English Australasia” as your default “Language” • As you have chosen “PDF file” as your default setting for creating Access Codes” please select the
following pages for your default settings – Profile and Diamond, Relationship Roles. Reading Guide, Questions, Cover page, Text Page, Motivators Page, Graphical Page, Flexibility Zones, Present Situation
• If you prefer to receive your reports in a different order from the standard default setting from the Server, please use the “Up” or “Down” buttons to change the page order to your requirements

Extended DISC® Australasia Ltd – EDOS Manual for Client Users Last Update: 20 January 2010
EXTENDED DISC® – INFORMATION YOU NEED Page 10 of 25
• Select “A4” as your default setting for “Paper Size”. If you select another paper size, the report will not
print correctly • Select “DISC” as your default setting for “Profile Letters”. This must be standard for all Access Codes
you create • Select” “Yes” as your default setting for “Page Numbers”. This must be standard for all Access Codes
you create • Select “Both” as your default setting for “Graphical Pages”. This must be standard for all Access
Codes you create • Select “Yes” as your default setting for “Profile I on Graphs”. This must be standard for all Access
Codes you create • Within “Web Address” you can enter a website that respondents will be redirected to after the
completion of question 24 of the Personal Analysis questionnaire. The website needs to be in it’s full format e.g. http://www.extendeddisc.com
• All remaining fields should not be changed without contact Extended DISC Australasia
6.2 Creating a Personal Analysis Access Code To create a Personal Analysis Access Code go to “Assessment Tools” from the main menu and choose “Personal Analysis” then select “New Account”. As you have set up your default settings for Personal Analysis Access Codes, some of the fields will have been automatically populated.
• “Country” should have been automatically populated. • In “Organisation” enter in the name of the company you are creating the Access Code for • Within “Access Code” AUS- or NZL- should automatically appear depending on the country you are in.
When choosing the remaining characters of the Access Code you can have up to 11 letters or numbers after the initial AUS- or NZL- with no spaces e.g. NZL-EDTESTDTR. We recommend using a two letter abbreviation of your company name after AUS- or NZL- as this will enable Extended DISC Australasia to assist your respondents or clients if you are not available
• Change the “Password Type” if different from default setting • Select the number of passwords required if have chosen “One Entry” or “Multi Entries” • Select the “Send Method” if different from default setting. The different type of “Send Methods” are:
o “Do not sent results” – do not select this option o “dtr with points taken” – do not select this option o “dtr no points taken” – select this option if you use EDPS to view your reports o “pdf file” – select this option if you receive your reports back in PDF format
• Do not change “Send to Respondent” field
Extended DISC® Australasia Ltd – EDOS Manual for Client Users Last Update: 20 January 2010
EXTENDED DISC® – INFORMATION YOU NEED Page 11 of 25
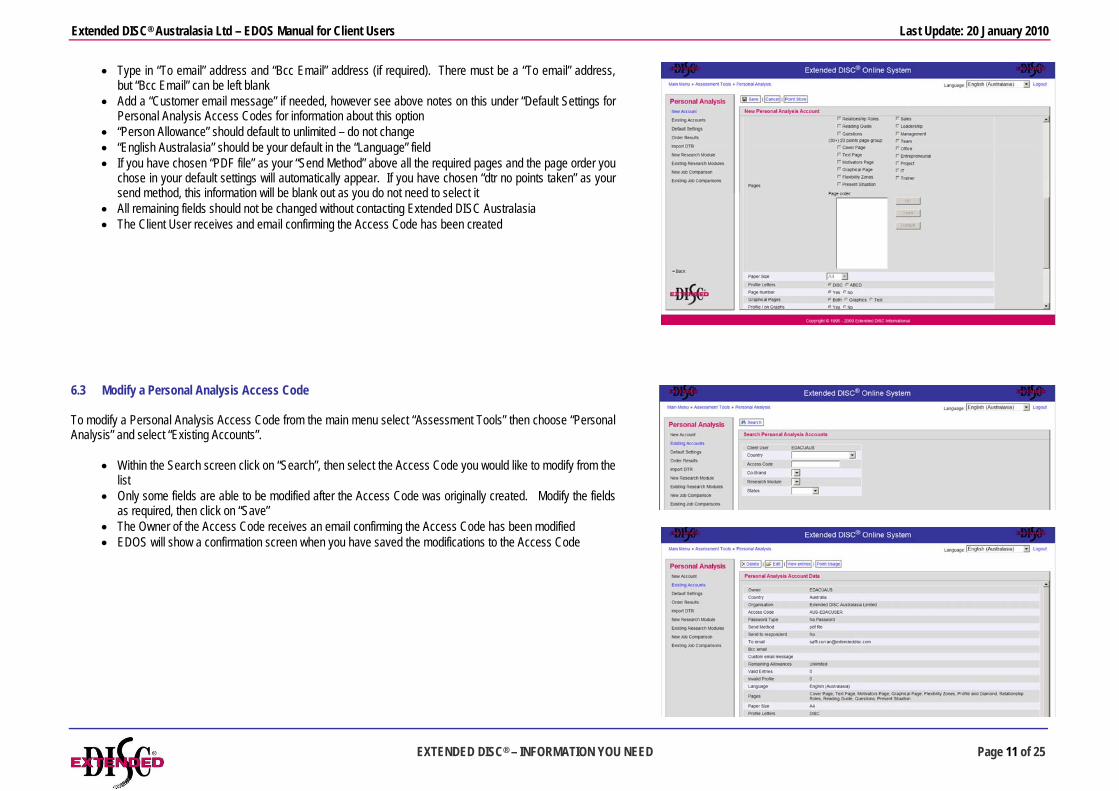
• Type in “To email” address and “Bcc Email” address (if required). There must be a “To email” address, but “Bcc Email” can be left blank
• Add a “Customer email message” if needed, however see above notes on this under “Default Settings for Personal Analysis Access Codes for information about this option
• “Person Allowance” should default to unlimited – do not change • “English Australasia” should be your default in the “Language” field • If you have chosen “PDF file” as your “Send Method” above all the required pages and the page order you
chose in your default settings will automatically appear. If you have chosen “dtr no points taken” as your send method, this information will be blank out as you do not need to select it
• All remaining fields should not be changed without contacting Extended DISC Australasia • The Client User receives and email confirming the Access Code has been created
6.3 Modify a Personal Analysis Access Code To modify a Personal Analysis Access Code from the main menu select “Assessment Tools” then choose “Personal Analysis” and select “Existing Accounts”.
• Within the Search screen click on “Search”, then select the Access Code you would like to modify from the list
• Only some fields are able to be modified after the Access Code was originally created. Modify the fields as required, then click on “Save”
• The Owner of the Access Code receives an email confirming the Access Code has been modified • EDOS will show a confirmation screen when you have saved the modifications to the Access Code

Extended DISC® Australasia Ltd – EDOS Manual for Client Users Last Update: 20 January 2010
EXTENDED DISC® – INFORMATION YOU NEED Page 12 of 25
6.4 Order Personal Analysis Results To order Personal Analysis Results from EDOS select “Assessment Tools” from the main menu, then select “Personal Analysis” and then select “Order Results”:
• Select the Search criteria. Then select “Search” • EDOS will display a list of reports generated with that Access Code • Select the results you want to order and click on “Order Results
• Define the “Send Method” by choosing either “pdf file” or “dtr no points taken” • If you are ordering one Personal Analysis Report “Separate PDF Files” should be “No”. If you are
ordering multiple Personal Analysis Reports “Separate PDF Files” should be “Yes”. This will ensure you receive each Personal Analysis Report in a separate document.
• Check the language is “English Australasian” • If you have selected “dtr no points taken” select “Order Results” • If you have selected “pdf file” as your “Send Method”, ensure the pages you need have been selected.
The standard Personal Analysis Report uses: o Profile and Diamond, Relationship Roles, Reading Guide, Questions, Cover Page, Text Page,
Motivators Page, Graphical Page, Flexibility Zones, Present Situation o If you want to change the page order for this particular report, select the page and use the up
and down arrows to move the page to where you want to be • All remaining fields should not be changed • Now select “Order Results”
• Order Summary shows how many points (if any) you will be charged for ordering these results. This screen also advising how many points are available within your EDOS account and confirms the report properties for this order.
• Select “Download Results” if you want to save the results directly to your computer • Select “Order by Email” if you want the results to be emailed
Results can also be ordered by clicking on “Databases” from the main menu, then select “Person Database” and define your search criteria then select “Order Results” and follow the above instructions to order the results.

Extended DISC® Australasia Ltd – EDOS Manual for Client Users Last Update: 20 January 2010
EXTENDED DISC® – INFORMATION YOU NEED Page 13 of 25
6.5 To Order More Passwords To order more passwords for an Access Code:
• Go to “Assessment Tools” from the main menu then select “Personal Analysis” then “Existing Accounts” then select “Search”
• Select the access code you need more passwords for then select “Edit” • Enter the number of new passwords required in the box next to “Number of New Passwords”, then select
“Save” • An email containing the new passwords will be emailed to the person who receive a copy of the Personal
Analysis Reports generated on that access code. • If you would like a copy of passwords already order for an access code go to “Assessment Tools” from the
main menu then select “Personal Analysis” then “Existing Accounts” then select “Search”. Select the access code, then select “Download Passwords”.
• A list of passwords issued to that access code can then be opened or saved. Remember “One Entry” passwords can only be used once so be careful when issuing passwords from this list as some passwords may have been used before.
6.6 To create a Job Comparison The Job Comparison is additional pages available within the Personal Analysis Report and shows a person’s natural inclination against a specific job requirement. It also provides the Specific Behavioural Style pages for that style. The Job Comparison is available in 10 different styles - Customer Service, Sales, Leadership, Management, Team, Office, Entrepreneurial, Project, IT and Training. Ask Extended DISC Australasia for copies of these: To create a Job Comparison:
• First complete a paper copy of a Job Comparison questionnaire • Go to “Assessment Tools” from the main menu then select “Personal Analysis” then “New Job
Comparison” • Ensure your “Client User” name is showing, then enter in a Job Name and select a Job Type from one of
the 10 options in the drop down box • Enter the scores from the paper copy of the Job Comparison, then select “Save”. This Job Comparison is
now saved and available to use with any Personal Analysis Report. • Job Comparisons can be edited or deleted by selecting “Existing Job Comparison” from the “Personal
Analysis” menu
Extended DISC® Australasia Ltd – EDOS Manual for Client Users Last Update: 20 January 2010
EXTENDED DISC® – INFORMATION YOU NEED Page 14 of 25
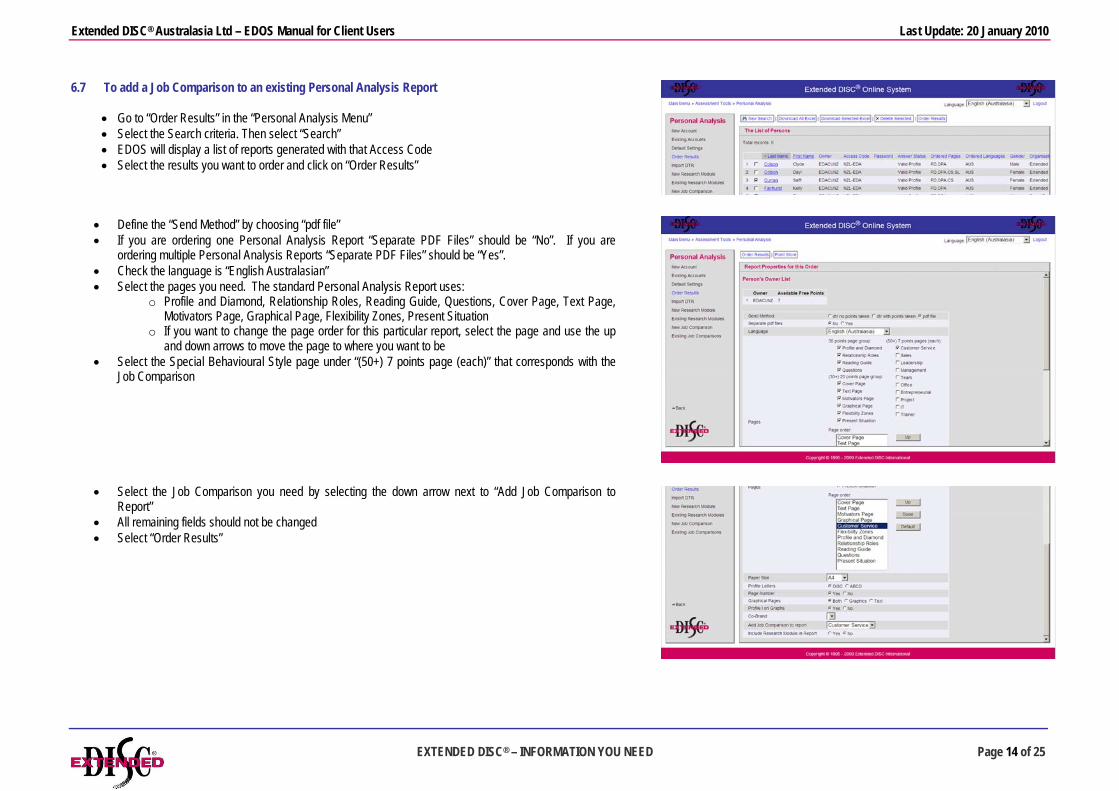
6.7 To add a Job Comparison to an existing Personal Analysis Report
• Go to “Order Results” in the “Personal Analysis Menu” • Select the Search criteria. Then select “Search” • EDOS will display a list of reports generated with that Access Code • Select the results you want to order and click on “Order Results”
• Define the “Send Method” by choosing “pdf file” • If you are ordering one Personal Analysis Report “Separate PDF Files” should be “No”. If you are
ordering multiple Personal Analysis Reports “Separate PDF Files” should be “Yes”. • Check the language is “English Australasian” • Select the pages you need. The standard Personal Analysis Report uses:
o Profile and Diamond, Relationship Roles, Reading Guide, Questions, Cover Page, Text Page, Motivators Page, Graphical Page, Flexibility Zones, Present Situation
o If you want to change the page order for this particular report, select the page and use the up and down arrows to move the page to where you want to be
• Select the Special Behavioural Style page under “(50+) 7 points page (each)” that corresponds with the Job Comparison
• Select the Job Comparison you need by selecting the down arrow next to “Add Job Comparison to Report”
• All remaining fields should not be changed • Select “Order Results”

Extended DISC® Australasia Ltd – EDOS Manual for Client Users Last Update: 20 January 2010
EXTENDED DISC® – INFORMATION YOU NEED Page 15 of 25
6.8 Create an Access Code with a Job Comparison To create an Access Code that will produce a Job Comparison with every Personal Analysis Report issued on that Access Code go to “Assessment Tools” from the main menu and select “Personal Analysis”, then select “New Account”:
• Create the Access Code following all the steps shown in 6.2 above. Please note you must select “PDF file” as the ‘Send Method”
• To select the Job Comparison you would like assigned to this Access Code click on the down arrow on box next to “Add Job Comparison to Report” and select the Job Comparison needed
• Select “Save” when you have completed all the required fields • Now when a Personal Analysis Report is generated using this Access Code, the Job Comparison and the
Special Behavioural Style will be included. This will use 57 points per Personal Analysis report (50 points for the Standard Personal Analysis plus 7 points for the Job Comparison)
6.9 To Create a Research Module Research Module is an add-on feature to the Personal Analysis Questionnaire. EDOS allows you to create additional questions for respondents to answer while they are completing the Personal Analysis Questionnaire. Research Module is useful to gain additional information from a respondent. For instance, a recruiter may use Research Module to ask some pre-interview questions or some industry specific questions. Research Module can be between 2 and hundreds of questions. Research Module uses 300 points to create and 4 points for each respondent. When creating a Research Module it is important to know how many questions you want to ask, whether they will be open ended or choice and have detailed instructions on how the questionnaire should be answered. You can determine the place for the Research Module at the time of creating the Access Code. The Research Module can go before the Personal Analysis Questionnaire or after it.

Extended DISC® Australasia Ltd – EDOS Manual for Client Users Last Update: 20 January 2010
EXTENDED DISC® – INFORMATION YOU NEED Page 16 of 25
To create a Research Module, go to “Assessment Tools” from the main menu, then “Personal Analysis” then select “New Research Module”:
• Under “Research Module Name” give the Research Module a name using your country code and name of the report i.e. NZL-Recruitment
• Under “Title” give the Research Module a title as you want it to appear in the answering page when a client completes the Personal Analysis Questionnaire i.e. Recruitment Personal Analysis
• Now select “Save”. Your EDOS account will now be charged 300 points for the creation of this Research Module.
If you are creating a Research Module for one of your “Client Users”, ensure you assign an Owner to the Research Module by selecting a “Client User” name from the drop down box.
• Select “Edit Questions” • Select “Add Instructions” – always start with instructions • Now select “Save”
• Select “Edit Questions” then select “Add Open-ended Questions” • Type your open ended question into the box • Select “Save” • You can add as many Open-ended Questions as you need by selecting “Edit Questions” then “Add Open-
ended Questions” and type in your question followed by “Save” until you have created all the required Open-ended Questions.
IMPORTANT: If you are copy/pasting questions into your Research Module make sure you don’t leave a blank line at the bottom of the questions. Always “backspace” the cursor until you are at the end of the question.
Extended DISC® Australasia Ltd – EDOS Manual for Client Users Last Update: 20 January 2010
EXTENDED DISC® – INFORMATION YOU NEED Page 17 of 25
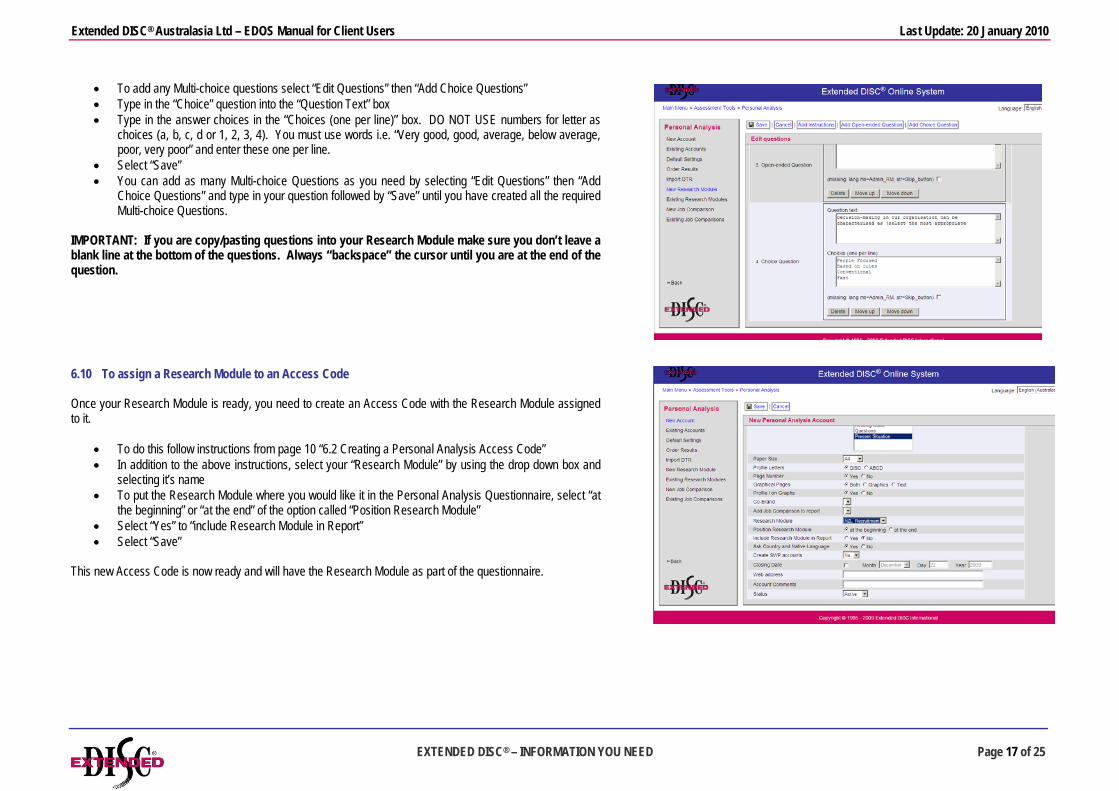
• To add any Multi-choice questions select “Edit Questions” then “Add Choice Questions” • Type in the “Choice” question into the “Question Text” box • Type in the answer choices in the “Choices (one per line)” box. DO NOT USE numbers for letter as
choices (a, b, c, d or 1, 2, 3, 4). You must use words i.e. “Very good, good, average, below average, poor, very poor” and enter these one per line.
• Select “Save” • You can add as many Multi-choice Questions as you need by selecting “Edit Questions” then “Add
Choice Questions” and type in your question followed by “Save” until you have created all the required Multi-choice Questions.
IMPORTANT: If you are copy/pasting questions into your Research Module make sure you don’t leave a blank line at the bottom of the questions. Always “backspace” the cursor until you are at the end of the question.
6.10 To assign a Research Module to an Access Code Once your Research Module is ready, you need to create an Access Code with the Research Module assigned to it.
• To do this follow instructions from page 10 “6.2 Creating a Personal Analysis Access Code” • In addition to the above instructions, select your “Research Module” by using the drop down box and
selecting it’s name • To put the Research Module where you would like it in the Personal Analysis Questionnaire, select “at
the beginning” or “at the end” of the option called “Position Research Module” • Select “Yes” to “include Research Module in Report” • Select “Save”
This new Access Code is now ready and will have the Research Module as part of the questionnaire.
Extended DISC® Australasia Ltd – EDOS Manual for Client Users Last Update: 20 January 2010
EXTENDED DISC® – INFORMATION YOU NEED Page 18 of 25
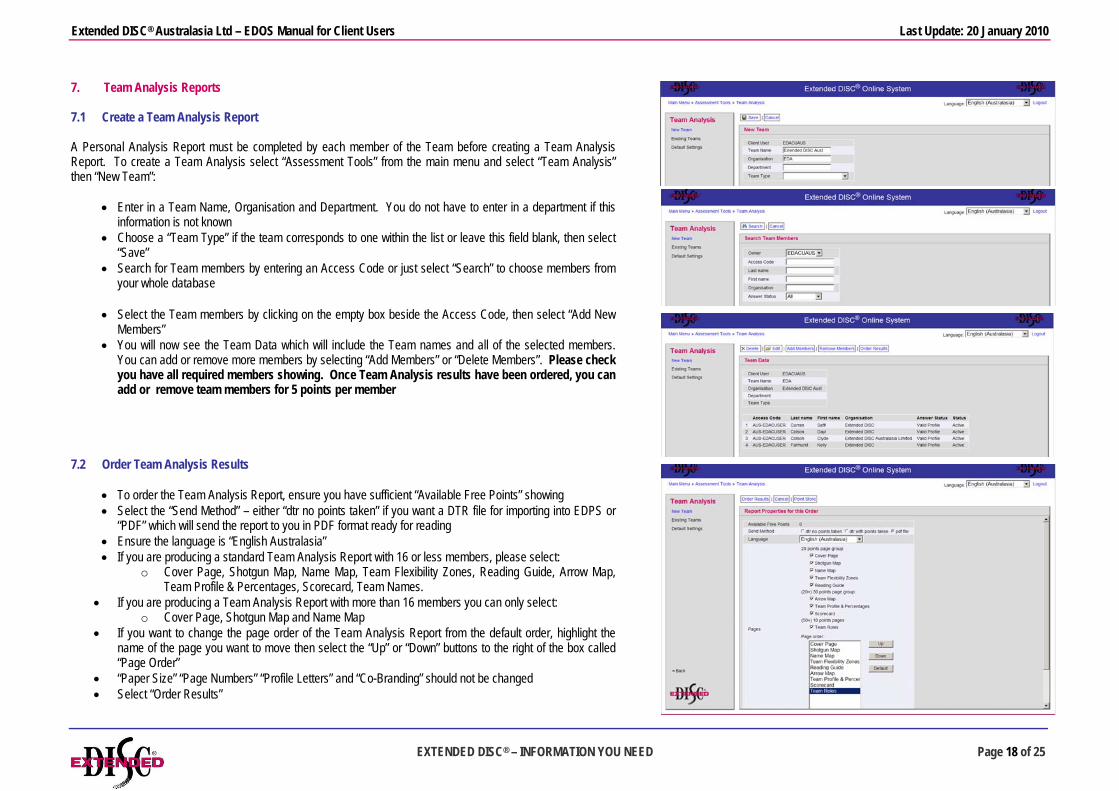
7. Team Analysis Reports 7.1 Create a Team Analysis Report A Personal Analysis Report must be completed by each member of the Team before creating a Team Analysis Report. To create a Team Analysis select “Assessment Tools” from the main menu and select “Team Analysis” then “New Team”:
• Enter in a Team Name, Organisation and Department. You do not have to enter in a department if this information is not known
• Choose a “Team Type” if the team corresponds to one within the list or leave this field blank, then select “Save”
• Search for Team members by entering an Access Code or just select “Search” to choose members from your whole database
• Select the Team members by clicking on the empty box beside the Access Code, then select “Add New Members”
• You will now see the Team Data which will include the Team names and all of the selected members. You can add or remove more members by selecting “Add Members” or “Delete Members”. Please check you have all required members showing. Once Team Analysis results have been ordered, you can add or remove team members for 5 points per member
7.2 Order Team Analysis Results
• To order the Team Analysis Report, ensure you have sufficient “Available Free Points” showing • Select the “Send Method” – either “dtr no points taken” if you want a DTR file for importing into EDPS or
“PDF” which will send the report to you in PDF format ready for reading • Ensure the language is “English Australasia” • If you are producing a standard Team Analysis Report with 16 or less members, please select:
o Cover Page, Shotgun Map, Name Map, Team Flexibility Zones, Reading Guide, Arrow Map, Team Profile & Percentages, Scorecard, Team Names.
• If you are producing a Team Analysis Report with more than 16 members you can only select: o Cover Page, Shotgun Map and Name Map
• If you want to change the page order of the Team Analysis Report from the default order, highlight the name of the page you want to move then select the “Up” or “Down” buttons to the right of the box called “Page Order”
• “Paper Size” “Page Numbers” “Profile Letters” and “Co-Branding” should not be changed • Select “Order Results”
Extended DISC® Australasia Ltd – EDOS Manual for Client Users Last Update: 20 January 2010
EXTENDED DISC® – INFORMATION YOU NEED Page 19 of 25
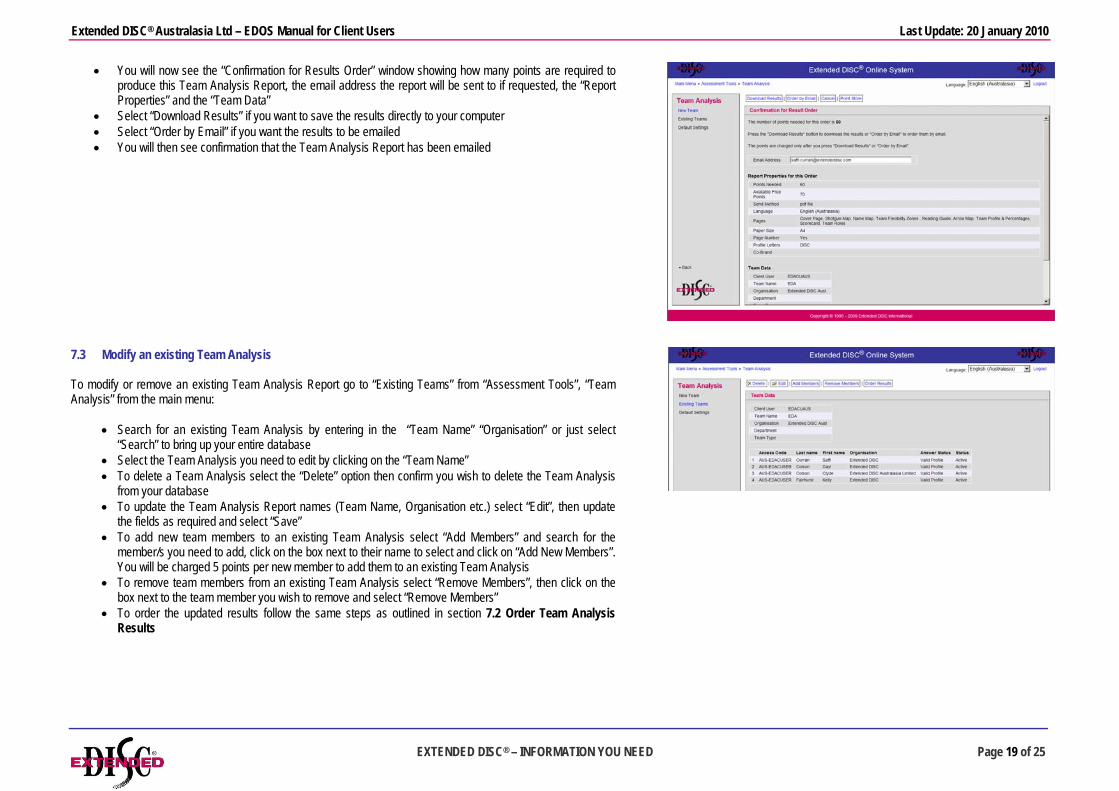
• You will now see the “Confirmation for Results Order” window showing how many points are required to produce this Team Analysis Report, the email address the report will be sent to if requested, the “Report Properties” and the “Team Data”
• Select “Download Results” if you want to save the results directly to your computer • Select “Order by Email” if you want the results to be emailed • You will then see confirmation that the Team Analysis Report has been emailed
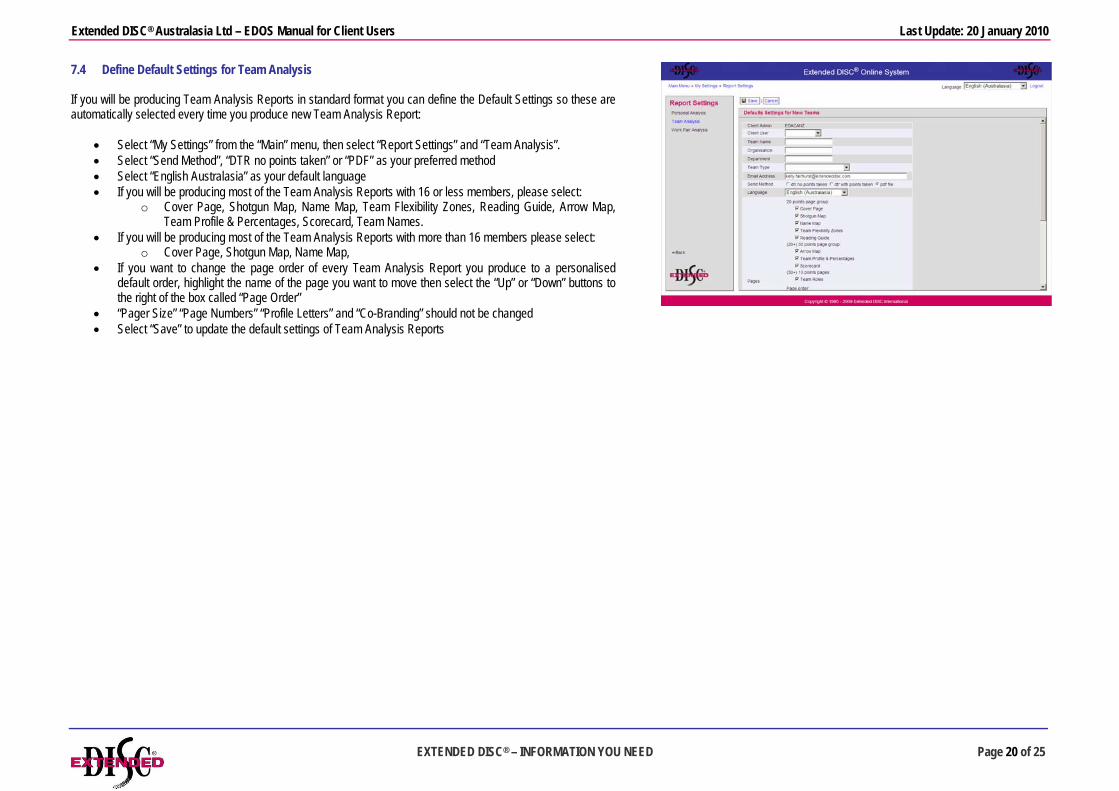
7.3 Modify an existing Team Analysis To modify or remove an existing Team Analysis Report go to “Existing Teams” from “Assessment Tools”, “Team Analysis” from the main menu:
• Search for an existing Team Analysis by entering in the “Team Name” “Organisation” or just select “Search” to bring up your entire database
• Select the Team Analysis you need to edit by clicking on the “Team Name” • To delete a Team Analysis select the “Delete” option then confirm you wish to delete the Team Analysis
from your database • To update the Team Analysis Report names (Team Name, Organisation etc.) select “Edit”, then update
the fields as required and select “Save” • To add new team members to an existing Team Analysis select “Add Members” and search for the
member/s you need to add, click on the box next to their name to select and click on “Add New Members”. You will be charged 5 points per new member to add them to an existing Team Analysis
• To remove team members from an existing Team Analysis select “Remove Members”, then click on the box next to the team member you wish to remove and select “Remove Members”
• To order the updated results follow the same steps as outlined in section 7.2 Order Team Analysis Results
Extended DISC® Australasia Ltd – EDOS Manual for Client Users Last Update: 20 January 2010
EXTENDED DISC® – INFORMATION YOU NEED Page 20 of 25
7.4 Define Default Settings for Team Analysis If you will be producing Team Analysis Reports in standard format you can define the Default Settings so these are automatically selected every time you produce new Team Analysis Report:
• Select “My Settings” from the “Main” menu, then select “Report Settings” and “Team Analysis”. • Select “Send Method”, “DTR no points taken” or “PDF” as your preferred method • Select “English Australasia” as your default language • If you will be producing most of the Team Analysis Reports with 16 or less members, please select:
o Cover Page, Shotgun Map, Name Map, Team Flexibility Zones, Reading Guide, Arrow Map, Team Profile & Percentages, Scorecard, Team Names.
• If you will be producing most of the Team Analysis Reports with more than 16 members please select: o Cover Page, Shotgun Map, Name Map,
• If you want to change the page order of every Team Analysis Report you produce to a personalised default order, highlight the name of the page you want to move then select the “Up” or “Down” buttons to the right of the box called “Page Order”
• “Pager Size” “Page Numbers” “Profile Letters” and “Co-Branding” should not be changed • Select “Save” to update the default settings of Team Analysis Reports
Extended DISC® Australasia Ltd – EDOS Manual for Client Users Last Update: 20 January 2010
EXTENDED DISC® – INFORMATION YOU NEED Page 21 of 25
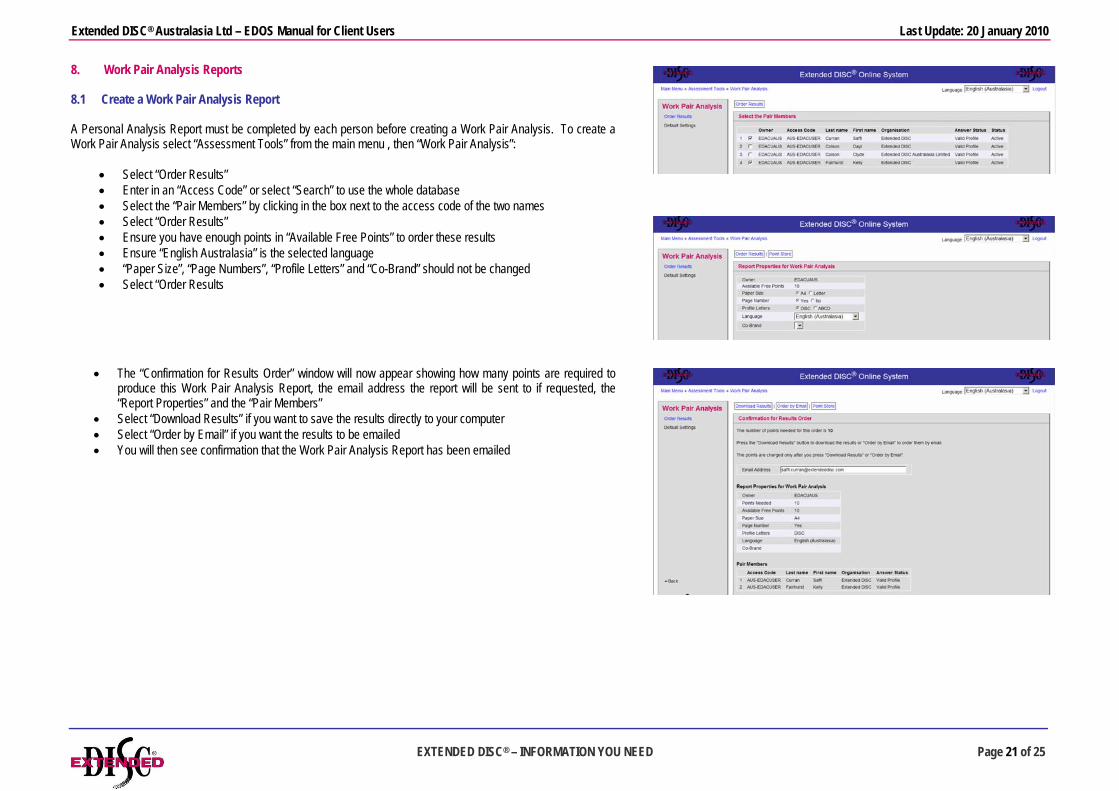
8. Work Pair Analysis Reports 8.1 Create a Work Pair Analysis Report A Personal Analysis Report must be completed by each person before creating a Work Pair Analysis. To create a Work Pair Analysis select “Assessment Tools” from the main menu , then “Work Pair Analysis”:
• Select “Order Results” • Enter in an “Access Code” or select “Search” to use the whole database • Select the “Pair Members” by clicking in the box next to the access code of the two names • Select “Order Results” • Ensure you have enough points in “Available Free Points” to order these results • Ensure “English Australasia” is the selected language • “Paper Size”, “Page Numbers”, “Profile Letters” and “Co-Brand” should not be changed • Select “Order Results
• The “Confirmation for Results Order” window will now appear showing how many points are required to
produce this Work Pair Analysis Report, the email address the report will be sent to if requested, the “Report Properties” and the “Pair Members”
• Select “Download Results” if you want to save the results directly to your computer • Select “Order by Email” if you want the results to be emailed • You will then see confirmation that the Work Pair Analysis Report has been emailed
Extended DISC® Australasia Ltd – EDOS Manual for Client Users Last Update: 20 January 2010
EXTENDED DISC® – INFORMATION YOU NEED Page 22 of 25
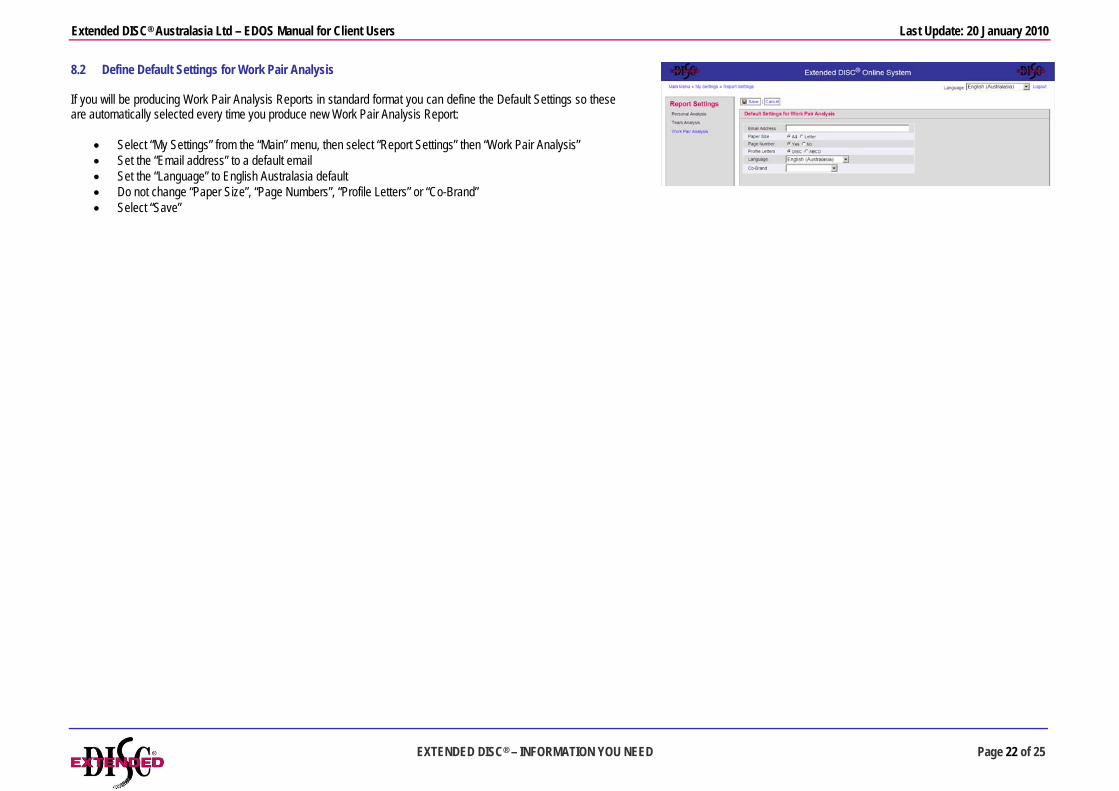
8.2 Define Default Settings for Work Pair Analysis If you will be producing Work Pair Analysis Reports in standard format you can define the Default Settings so these are automatically selected every time you produce new Work Pair Analysis Report:
• Select “My Settings” from the “Main” menu, then select “Report Settings” then “Work Pair Analysis” • Set the “Email address” to a default email • Set the “Language” to English Australasia default • Do not change “Paper Size”, “Page Numbers”, “Profile Letters” or “Co-Brand” • Select “Save”

Extended DISC® Australasia Ltd – EDOS Manual for Client Users Last Update: 20 January 2010
EXTENDED DISC® – INFORMATION YOU NEED Page 23 of 25
9. Points The price of Extended DISC tools within the system is indicated by the amount of points. Each tool has its own price indicated by the points required.
• Personal Analysis Report = 50 points • Additional Style pages = 7 points each (10 styles available) • Team Analysis Report (complete) = 60 points • Team Analysis Report (maps only) = 20 points • Work Pair Analysis Report = 10 points
• Only Counter 1 is currently used in EDOS
9.1 Points Status To view your current Points Status go to “Points” from the “Main Menu” and select “Points Status”
• “Free Points” advises the amount of points available for producing any report available within EDOS • “Reserved Points” advises the amount of points available for use on a Personal Analysis Access Code
only • “Total Balance” is both the above combined • “Maximum Balance” indicates the maximum points this account can have • Please do not use the “Remove Free Points” option without contacting Extended DISC Australasia

Extended DISC® Australasia Ltd – EDOS Manual for Client Users Last Update: 20 January 2010
EXTENDED DISC® – INFORMATION YOU NEED Page 24 of 25
If you want to view what activity has been done on your EDOS Account, select “Point Transaction” and
• Select “Counter 1”, define the date range for the search (if required), then select “Search Point Transaction
• This transaction report will advise the counter used, Action Taker, User, Date and time, Action Type, Point Balances before the transaction, the points used in that transaction and the Point Balances after the transaction
• If necessary this information can be downloaded to Excel, by selecting the “Download Excel” option
9.2 Points Orders To view any Points Orders you may have in the system go to:
• “Points Orders” from the “Points Menu” • Select “All” under “Points Status” and then select “Search” • The information will be displayed showing what counter, who the order was to, who placed the order, the
number of points order, the status of the order (pending, approved, denied) and the date of the order

Extended DISC® Australasia Ltd – EDOS Manual for Client Users Last Update: 20 January 2010
EXTENDED DISC® – INFORMATION YOU NEED Page 25 of 25
9.3 Reports There are 4 different Point reports available through the “Points” menu of EDOS.
• “Point Consumption” report shows all actions of the selected user that has consumed points • “Point Order” report shows all actions of the selected user that has added, consumed or deleted points • “Point Usage” report shows the history of all point actions of the selected user • “Point Store” report shows the history of points added by Extended DISC Australasia to the selected user
• To create one of the above reports, simply choose the report required • Select Counter 1 • Define a date range if required • Select “Search Point Transaction” • This report can then be downloaded to Excel if required by selecting “Download Excel”
9.4 Point Store To order points online, select “Point Store” from the “Points” menu.
• To order from your Affiliate select “Order from Client Admin” or to order from Extended DISC Australasia select “Order from Franchise Admin”
• Select “Counter 1” and the quantity of points required. Please note the minimum and maximum quantities available to purchase. If you want to purchase more than the maximum quantity allows, please contact your Affiliate or Extended DISC Australasia
• Select “Purchase” then on the next screen “Confirm” to place the order. You will then see an “Order Points Confirmation Screen” and receive and email confirming the points have been ordered
• An email will be sent to your Affiliate and Extended DISC Australasia for approval • When approval has been given, you will receive a confirmation email advising the points are available • Should your order be “Denied” please contact your Affiliate or Extended DISC Australasia