Embed Size (px)
Citation preview
1
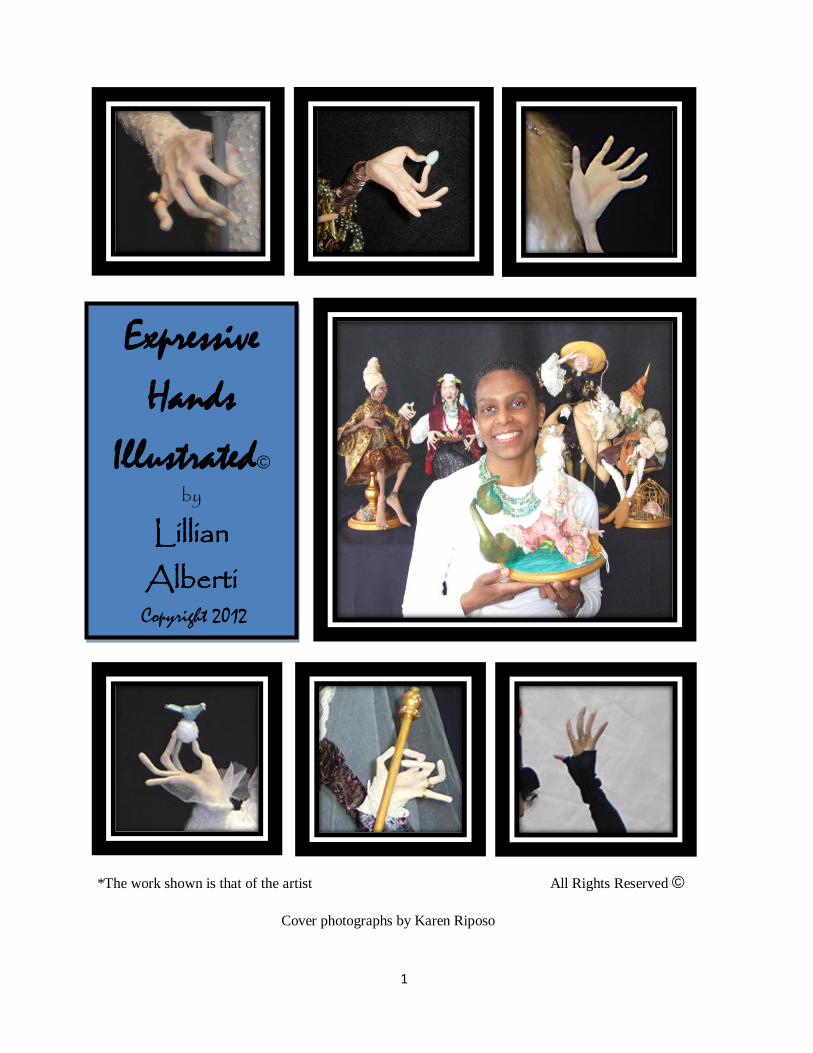
*The work shown is that of the artist All Rights Reserved ©
Cover photographs by Karen Riposo
Expressive
Hands Illustrated©
by
Lillian
Alberti Copyright 2012

2
Table of contents
1 Artist Statement .………………………. 3
2 A little background info .…………….. 4
3 A word about paper clays ….…………. 5
4 Sculpting tools and supplies ………… 7
5 Doll photographs ……………………… 8
6 Getting Started ...……………………… 9
7 A few things to consider ………………. 10
8 Creating the hand armature .…………. 11
9 Painting techniques ….………………… 18
10 Wrapping it up …………………………… 25
11 Doll photographs …………………………. 26
12 A final word ...…..………………………. 27
3
Artist Statement
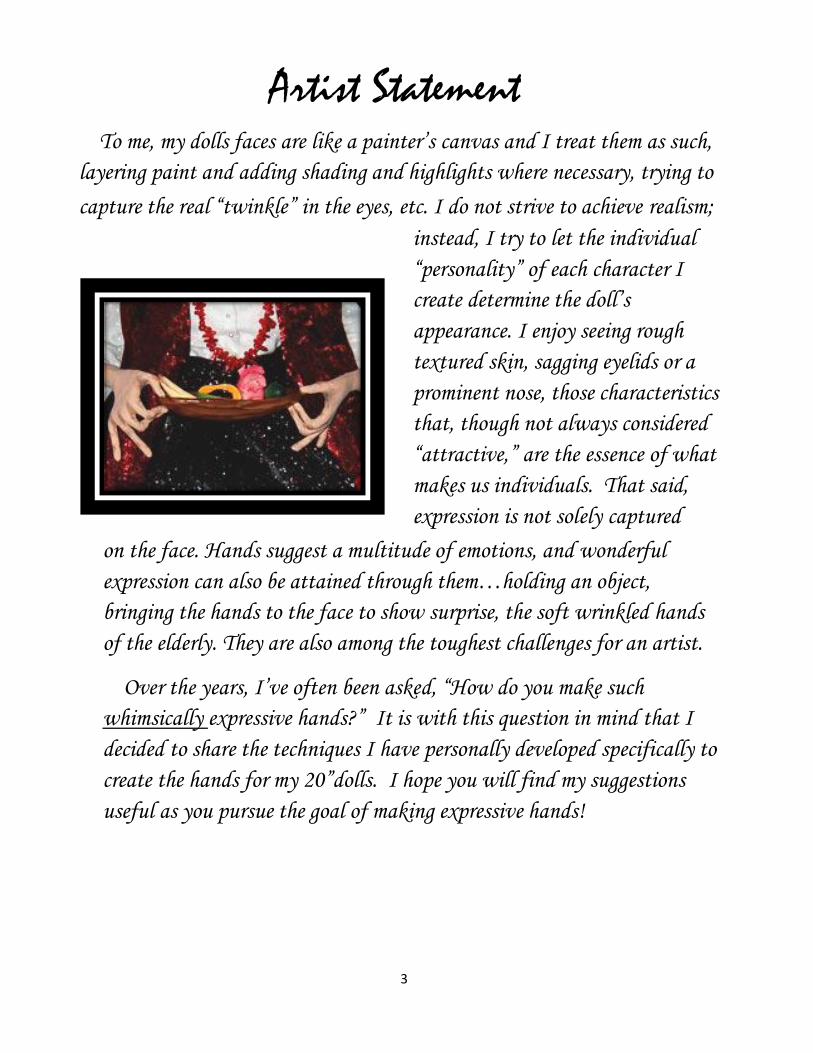
instead, I try to let the individual
“personality” of each character I
create determine the doll’s
appearance. I enjoy seeing rough
textured skin, sagging eyelids or a
prominent nose, those characteristics
that, though not always considered
“attractive,” are the essence of what
makes us individuals. That said,
expression is not solely captured
on the face. Hands suggest a multitude of emotions, and wonderful
expression can also be attained through them…holding an object,
bringing the hands to the face to show surprise, the soft wrinkled hands
of the elderly. They are also among the toughest challenges for an artist.
Over the years, I’ve often been asked, “How do you make such
whimsically expressive hands?” It is with this question in mind that I
decided to share the techniques I have personally developed specifically to
create the hands for my 20”dolls. I hope you will find my suggestions
useful as you pursue the goal of making expressive hands!
To me, my dolls faces are like a painter’s canvas and I treat them as such,
layering paint and adding shading and highlights where necessary, trying to
capture the real “twinkle” in the eyes, etc. I do not strive to achieve realism;
4
A little background info
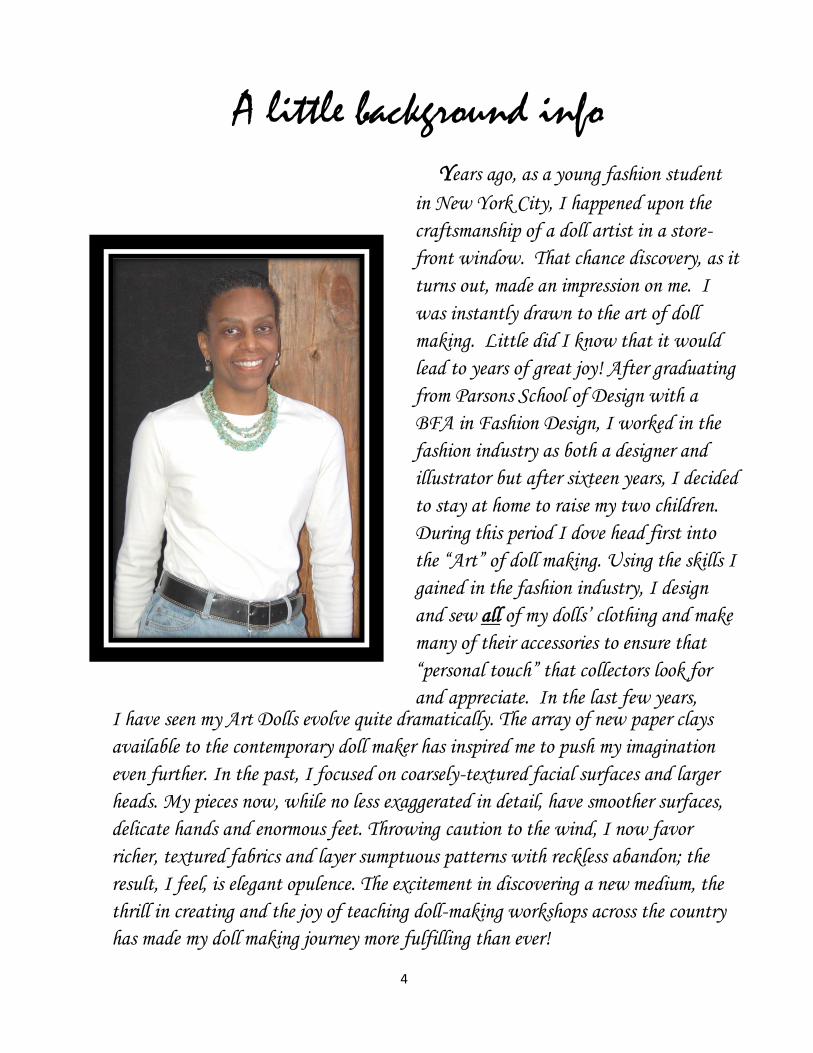
Years ago, as a young fashion student
in New York City, I happened upon the
craftsmanship of a doll artist in a store-
front window. That chance discovery, as it
turns out, made an impression on me. I
was instantly drawn to the art of doll
making. Little did I know that it would
lead to years of great joy! After graduating
from Parsons School of Design with a
BFA in Fashion Design, I worked in the
fashion industry as both a designer and
illustrator but after sixteen years, I decided
to stay at home to raise my two children.
During this period I dove head first into
the “Art” of doll making. Using the skills I
gained in the fashion industry, I design
and sew all of my dolls’ clothing and make
many of their accessories to ensure that
“personal touch” that collectors look for
and appreciate. In the last few years,
I have seen my Art Dolls evolve quite dramatically. The array of new paper clays
available to the contemporary doll maker has inspired me to push my imagination
even further. In the past, I focused on coarsely-textured facial surfaces and larger
heads. My pieces now, while no less exaggerated in detail, have smoother surfaces,
delicate hands and enormous feet. Throwing caution to the wind, I now favor
richer, textured fabrics and layer sumptuous patterns with reckless abandon; the
result, I feel, is elegant opulence. The excitement in discovering a new medium, the
thrill in creating and the joy of teaching doll-making workshops across the country
has made my doll making journey more fulfilling than ever!
5
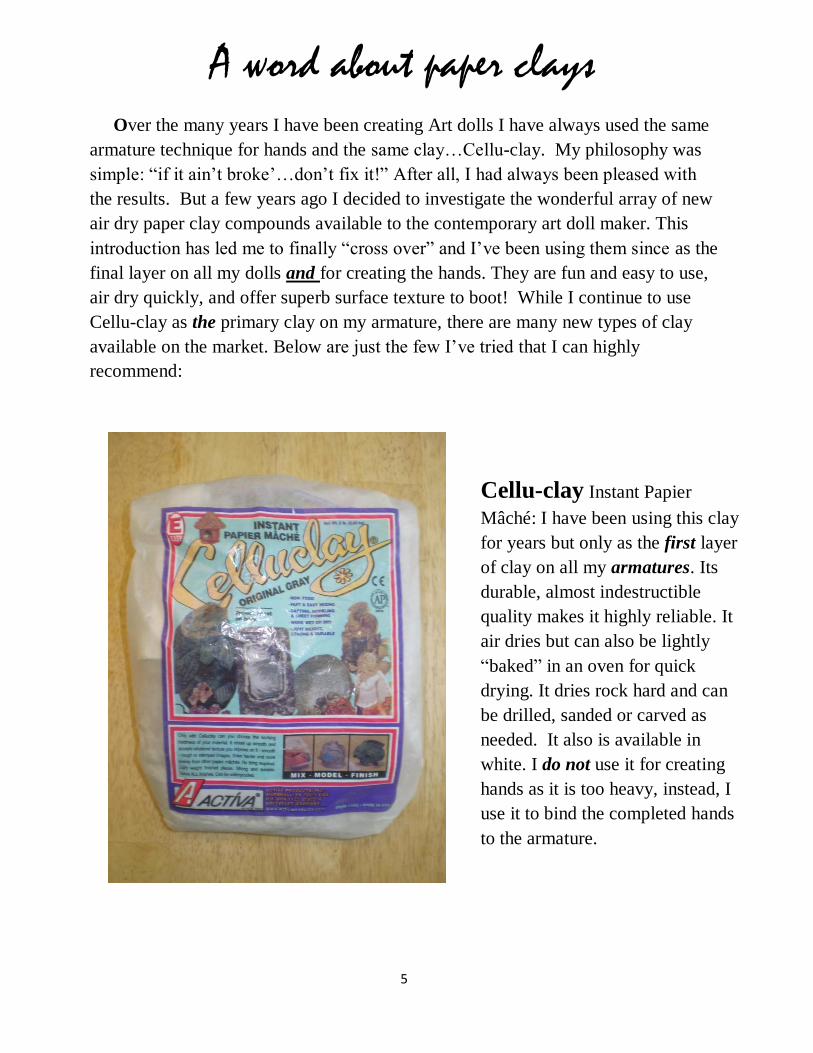
A word about paper clays
Over the many years I have been creating Art dolls I have always used the same
armature technique for hands and the same clay…Cellu-clay. My philosophy was
simple: “if it ain’t broke’…don’t fix it!” After all, I had always been pleased with
the results. But a few years ago I decided to investigate the wonderful array of new
air dry paper clay compounds available to the contemporary art doll maker. This
introduction has led me to finally “cross over” and I’ve been using them since as the
final layer on all my dolls and for creating the hands. They are fun and easy to use,
air dry quickly, and offer superb surface texture to boot! While I continue to use
Cellu-clay as the primary clay on my armature, there are many new types of clay
available on the market. Below are just the few I’ve tried that I can highly
recommend:
Cellu-clay Instant Papier
Mâché: I have been using this clay
for years but only as the first layer
of clay on all my armatures. Its
durable, almost indestructible
quality makes it highly reliable. It
air dries but can also be lightly
“baked” in an oven for quick
drying. It dries rock hard and can
be drilled, sanded or carved as
needed. It also is available in
white. I do not use it for creating
hands as it is too heavy, instead, I
use it to bind the completed hands
to the armature.
6
Things you should know:
Before making your purchase, do some on-line research on the ingredients in each
of the clays to be sure there aren’t any you might be sensitive or allergic to
Working with these clays will require using some small amounts of water, it is
important not to use too much as it will render the clays useless
When sanding or filing the dried clay, please make sure to do so in a well
ventilated area as to avoid breathing in the dust
For quick drying, set toaster oven at 175° for about 8-10 minute monitoring closely
to avoid scorching or use a heat gun for best results
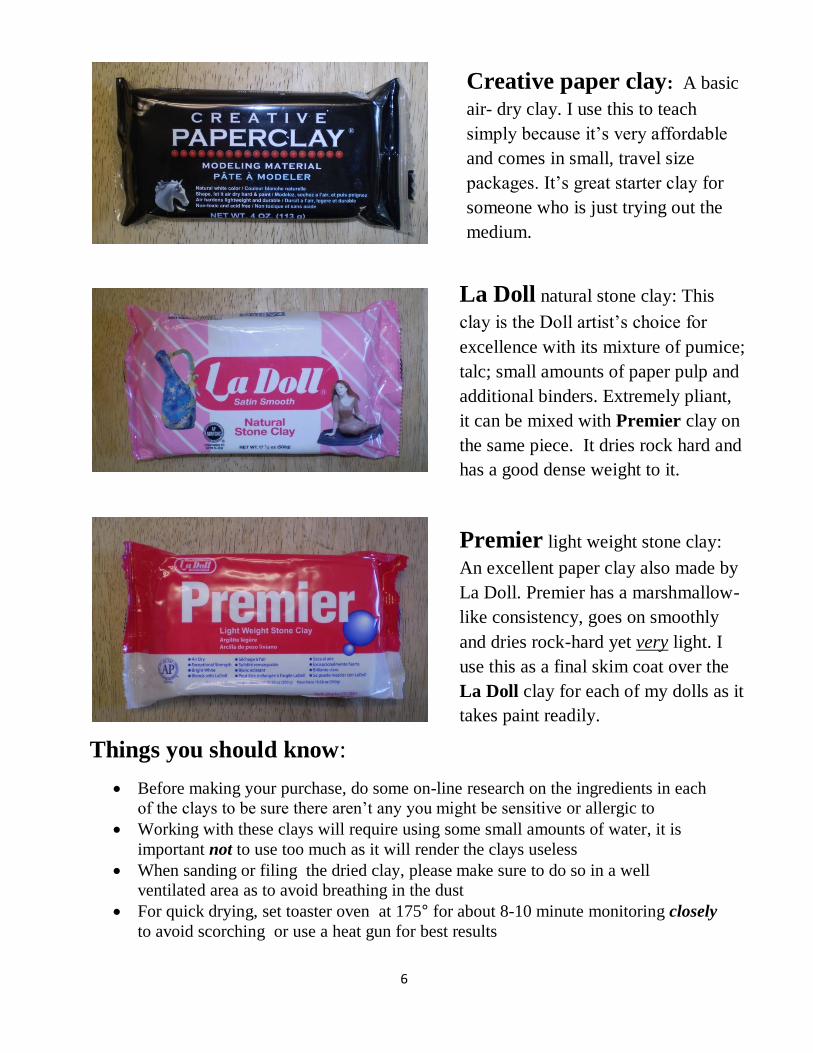
La Doll natural stone clay: This
clay is the Doll artist’s choice for
excellence with its mixture of pumice;
talc; small amounts of paper pulp and
additional binders. Extremely pliant,
it can be mixed with Premier clay on
the same piece. It dries rock hard and
has a good dense weight to it.
Premier light weight stone clay:
An excellent paper clay also made by
La Doll. Premier has a marshmallow-
like consistency, goes on smoothly
and dries rock-hard yet very light. I
use this as a final skim coat over the
La Doll clay for each of my dolls as it
takes paint readily.
Creative paper clay: A basic
air- dry clay. I use this to teach
simply because it’s very affordable
and comes in small, travel size
packages. It’s great starter clay for
someone who is just trying out the
medium.

7
Sculpting tools and supplies
* Tip: using small amounts of water with a paint brush is very
effective in getting the clay into hard to reach areas. That said,
it is also important to mention that too much water will
eventually render the clay ineffective …proceed with caution!
While there are a wide variety of sculpting
tools available on the market, I prefer using
Loew-Cornell’s wooden tools. I like the
smooth feel of them in my hands. There are
metal tools available that I believe are
considered top of the line, but, personally, I
find them to be somewhat clumsy to use.
Last on the list, but certainly not least, are
less expensive plastic ones. I recommend
trying out each variety by swapping with
other doll making friends and see what
works best for you.
22 gauge floral wire: used in
making all the hand armature
demonstrated in this booklet
Alene’s glue: but you may
used what works best for you
Masking tape: 1” wide
Paper towel: for drying
fingers
Small water dish: for
moistening fingers
# 2 paint brush: * very useful
when used with small amounts
of water for pushing clay into
tight spots
Ex-acto knife: great for
chiseling away dried clay
Needle nose pliers: for
manipulating wire
Wire cutter: for cutting wire
Hemostats (5” or 7”): also
used for manipulating wire as
well as sewing muslin in tight
spots
Emery board or other filing
tool for lightly sanding the
clay
While I may not use all of these tools on every project,
having them in my “tool box” has always proved to be
very helpful!
8
all compliment the
expressions on each of
the dolls face!
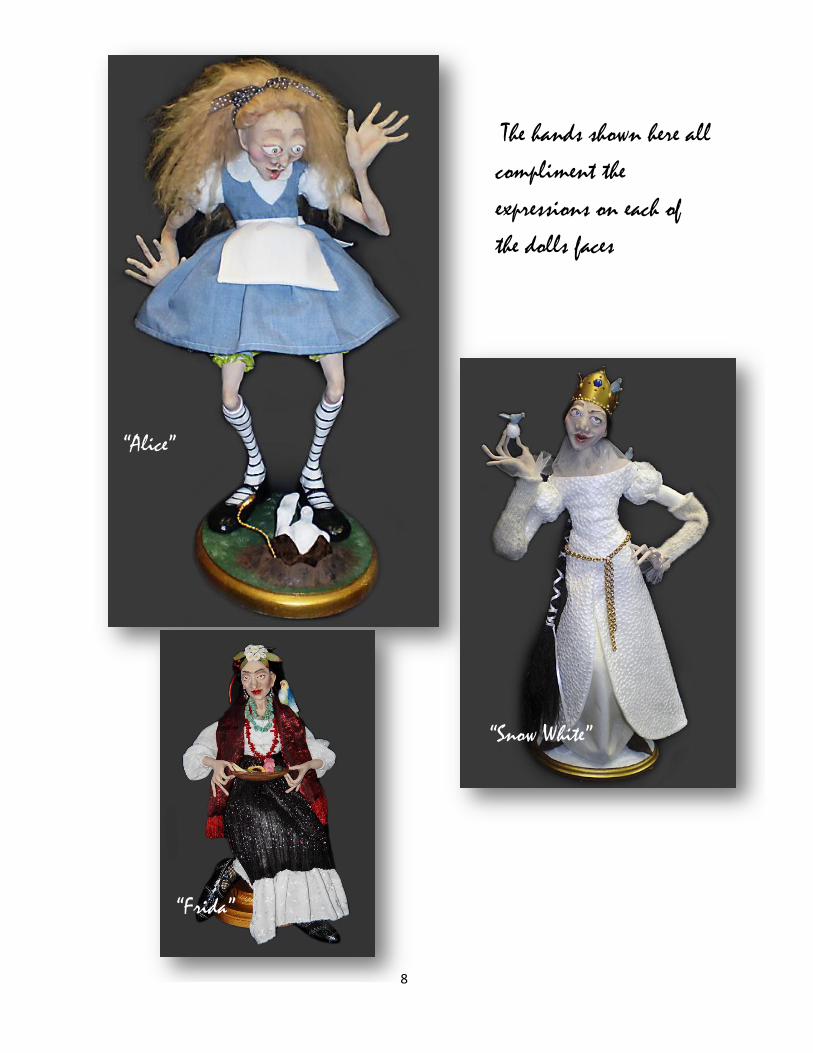
The hands shown here all
compliment the
expressions on each of
the dolls faces
“Snow White”
“Frida”
“Alice”
9
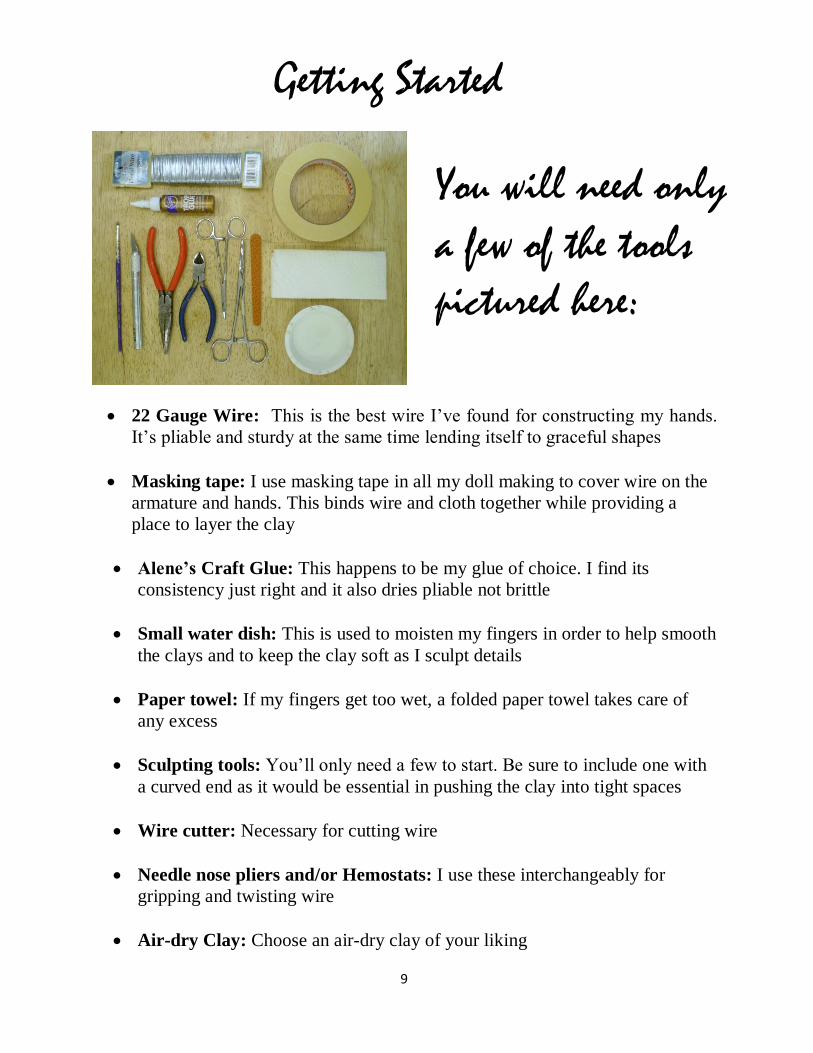
Getting Started
22 Gauge Wire: This is the best wire I’ve found for constructing my hands.
It’s pliable and sturdy at the same time lending itself to graceful shapes
Masking tape: I use masking tape in all my doll making to cover wire on the
armature and hands. This binds wire and cloth together while providing a
place to layer the clay
Alene’s Craft Glue: This happens to be my glue of choice. I find its
consistency just right and it also dries pliable not brittle
Small water dish: This is used to moisten my fingers in order to help smooth
the clays and to keep the clay soft as I sculpt details
Paper towel: If my fingers get too wet, a folded paper towel takes care of
any excess
Sculpting tools: You’ll only need a few to start. Be sure to include one with
a curved end as it would be essential in pushing the clay into tight spaces
Wire cutter: Necessary for cutting wire
Needle nose pliers and/or Hemostats: I use these interchangeably for
gripping and twisting wire
Air-dry Clay: Choose an air-dry clay of your liking
You will need only
a few of the tools
pictured here:
10
A few things to consider While starting each hand with a well proportioned, well-constructed
wire armature is essential, over the years I have found visual observation
to be equally as important in capturing expression. I watch carefully as
my children laugh or express surprise. I notice the movement of their
hands as they tell each other stories. While these gestures are nothing out
of the ordinary, each movement does, however, tell something. It is in
observing what is clearly visible that allows you to take license in
creating the “whimsy.” Now you are free to exaggerate what you
observe! Elongate the fingers, make the knuckles oversized, curve the
fingers… remember: we are not striving to capture realism!
Often when I sit down to make hands, the doll for which they are
intended is already completed. It is important that the expression of her
hands matches the expression I have sculpted on her face. To accomplish
this, I spend time in front of a mirror replicating the doll’s facial
expression while at the same time observing what my hands should be
doing to capture the same intention. I have been making Art dolls for
over 25 years and this observation technique now comes naturally. As I
work, I stop frequently to reposition my hands as I try to replicate them
in clay. This, as you can imagine, can be very time consuming; you may
find it helpful to have someone take a close-up picture of your “posed”
hands, thus eliminating the need for you to be your own “live” model.
You may also want to keep a catalog of your own photographed hands in
varied positions or to keep a file of magazine clippings with hands you
find interesting as these just may come in “handy” at some point…pun
definitely intended…lol!

11
Creating the hand armature
fig.1 fig.2
fig.3
fig.4
fig.5
fig.6
fig.7
fig.8 fig.9
12
Cut a length of wire approximately15” long. Measure about 5” and
bend the wire (fig.1)
Clamp it closed with hemostats/pliers and twist lightly measuring about 7/8 ” down (fig. 2)
Leaving a space of 3/16” and create another bend in the wire measuring 1” (fig. 3) and twist as before.
Continue in the same manner adjusting the height of each “finger”
in the normal configuration of a real hand (fig. 4)
After twisting the index finger, drop down 1 ¾” from the tip of the
index finger and bend the wire again creating an “L” shape (fig. 5)
Bend it back 1” and twist (fig. 6)
Drop down 1” and join the two wires at the “wrist,” use your
hemostats/pliers to twist as before to complete the hand (fig. 7)
Using the masking tape, wrap a single strip of tape over the front and back of hand. The two sides should meet and stick together to
create the “palm.” Then tear thin strips of tape approximately ¼”
wide and tape between the fingers. This secures the “fingers” to the “palm” (fig. 8)
After taping, hold the glue bottle horizontally and glide the fingers and the thumb back and forth into the tip of the glue bottle. This
simple action lightly coats the fingers with a thin layer of glue, no need to squeeze the bottle….and no mess! Also, make sure to run a
thin bead of glue in between the fingers as well. Allow the glue to
dry thoroughly (fig. 9)
13
\
fig.10
fig.11
1
fig.12
fig.13
fig.14
fig.15
fig.16
fig.17
fig.18
14
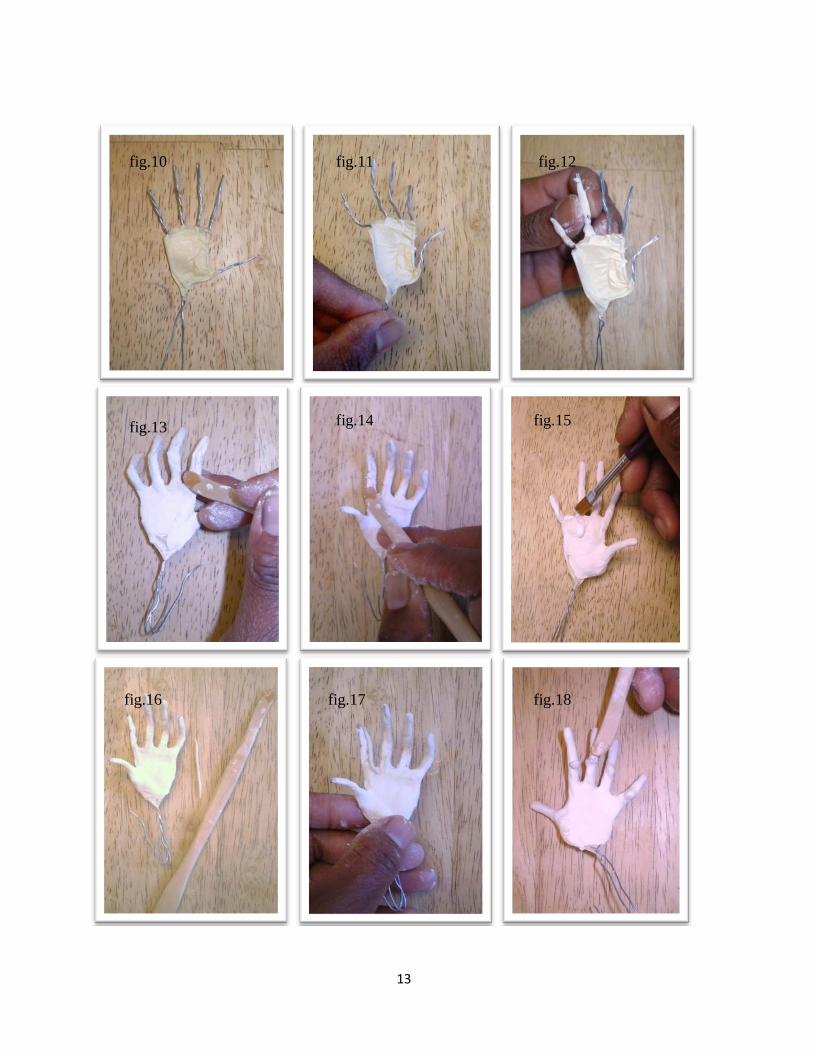
With your hand taped and the glue dry, you are now ready to begin
layering the clay (fig. 10)
Using your pliers/hemostats, place your hand in its desired (and hopefully dramatic) final position (fig. 11)
Moisten your fingers and run them along the length of each individual “finger” as you work on them. This will lightly re-
activate the glue and help the clay to adhere to its surface. Starting
with the pinky, start layering small amounts of clay pressing firmly to ensure contact. You can also add more clay to the finger tips to
exaggerate the length (fig. 12)
Move on to the taped “palm.” Add glue to help the clay adhere
better. I am not concerned with full coverage of clay at this time, just a simple first coat. Drying between layers may be necessary.
Be sure to cover the areas in-between the fingers securing them to
the palm then move along to the next finger (figs. 13 & 14)
When the first full layer is completely dry, use a paint brush to coat the hand with a thin layer of Alene’s glue. This will reinforce the
clay in the unlikely event of breakage and keep the “fingers” from
separating from the hand (fig. 15)
Lightly moistening the glue coated hand will help “fresh” clay adhere better before adding the second layer. Roll a thin “rope” of
clay and line it up against each finger as shown. Begin smoothing
the clay filling in all uneven areas and cracks. A moistened paint brush is great at achieving this (figs. 16 &17)
Roll bits of clay into tiny “balls” to create knuckles. You may choose to exaggerate the knuckles for a dramatic effect. Place a ball
of clay at the center back of each finger and smooth, repeating the
process with each consecutive finger (fig. 18) .
15
fig.19
fig.20
fig.21
fig.22
fig.23
fig.24
fig.25
fig.26
fig.27
16
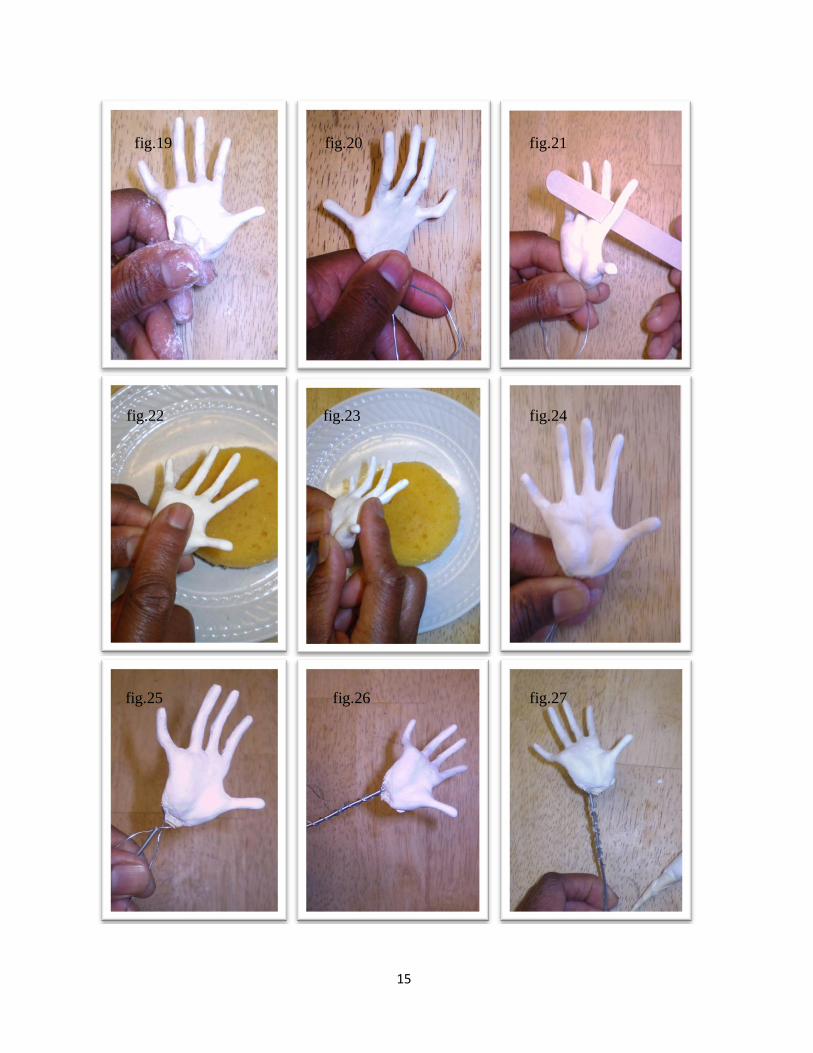
All areas of masking tape should be completely covered with clay
at this time. On the inside of the hand, begin adding clay to form
the fatty areas of the palm and thumb and smooth (fig. 19)
After all the clay has thoroughly dried, give your hand the “once
over.” Are the fingers all of equal widths? Are they the appropriate
lengths for the digits they represent? Is the whole hand in
proportion with the body of the doll for which it is intended? Are
you satisfied with the overall look? If not, now’s your chance to
make adjustments. Add a skim layer of clay if needed (fig. 20)
Taking an emery board or preferred filing tool, lightly sand all
rough edges while giving the fingers a rounded appearance. Do not
blow away the “clay dust” (fig. 21)
Follow-up by lightly rubbing the just sanded areas with moistened
fingers. Any remaining surface imperfections will “magically” be
filled in by the moistened “clay dust” (figs. 22 & 23)
Your hand is now finished and ready to be attached it to the doll
you created it for! (fig 24)
Carefully untwist the fine gauge wire at the “wrist” of the hand and
straddle it over the “wrist” stump of the doll’s arm (fig. 25)
Take one wire and twist it clockwise over the stump as snug as
possible (fig. 26)
Take the other wire and twist it counterclockwise, again, as snug as
possible (fig. 27)
17
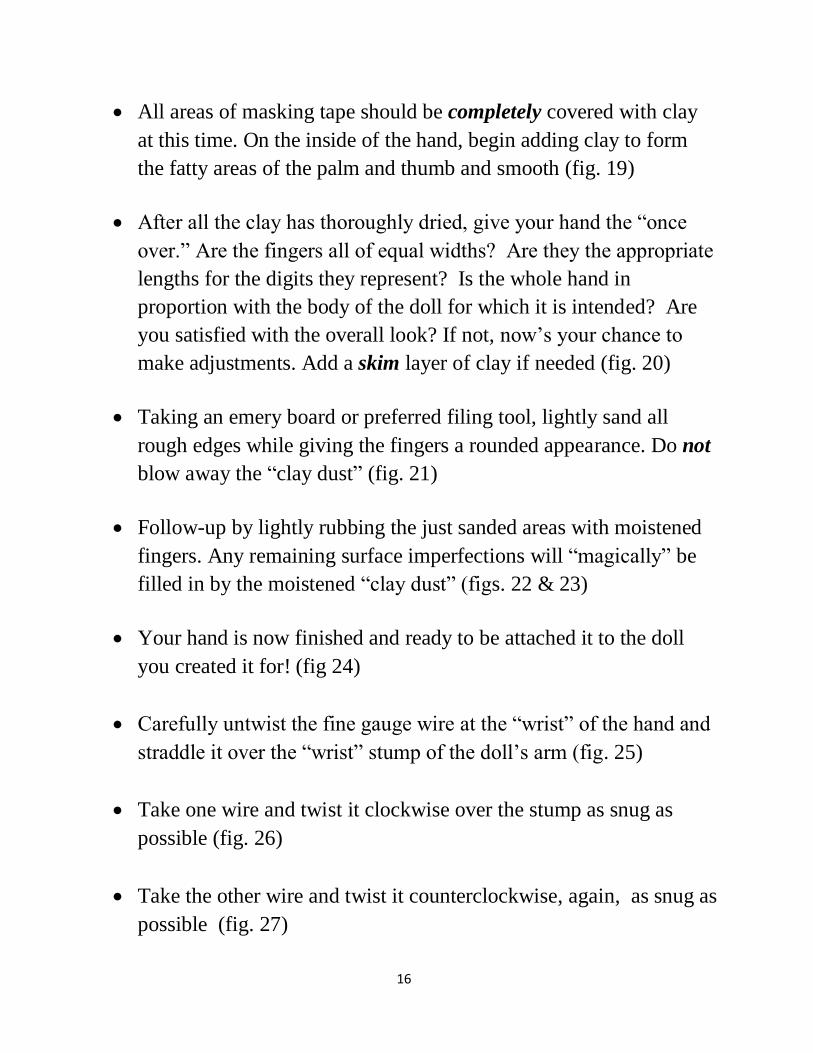
The following steps are the ones I take when attaching my hands to the
20” wire armature I’ve already prepared. You may use your own familiar
method for attaching your hand to your armature.
Wrap the twisted wire with masking tape. This provides a good base
to layer the clay (fig. 28)
I used my usual Cellu-clay as the first layer of clay as it is very
solid and reliable then followed with several layers of La Doll
natural stone clay to complete the entire arm. You, of course, can
use your preferred clays (fig. 29)
After all the clays have thoroughly dried and I’ve done some light
sanding, I paint the hands. For this particular doll, I finished her
hands as “evening gloves” and painted them as such (fig. 30)
fig.28
fig.29
fig.30
18
Painting techniques
There are two ways I like to paint the hands I create; Version One
accentuates and elongates the fingers…a cool, dramatic effect when creating hands for a “scary” or “aged” doll. Version Two
accentuates the knuckles and, I feel, gives a more natural, graceful
look to the hands… this is also the version I prefer using most. I will, however, begin with Version One. Also, even though I normally
don’t paint fingernails, I have included that painting technique for
those interested in exploring this option. Before starting, it is important to remember that the hands we are creating are meant to be
whimsical. I don’t really try to paint realistically but I do try to get the
“gist” of what is lifelike so that the overall look and effect of my dolls’ hands is believable to the observer.
Enjoy the process and don’t get frustrated. Each brush stoke will eventually lead you to perfection! I’ve been doing this for a long time
and I still tend to re-work something if I’m not happy with it. As you
study these pictures please keep this in mind: it takes time to develop the subtle shading techniques, but rest assured that with practice, you
will achieve your goal!
FYI: I use a huge array of different sized paint brushes. I recommend you
choose which ever size feels most comfortable for you as you work. You don’t need me to tell you that crafts stores are brimming with a huge assortment of paint in shades for you to explore, but just in case
you’re interested, these are my favorites:
“Toffee” is the color I use for “Caucasian” skin with “Sable
Brown” for contrast shading. Both by AMERICANA Paints
“Sable Brown” is also the color a like best for a medium shade
of “African American” skin with contrast shading in “Real
Brown” by Folkart Paints
19
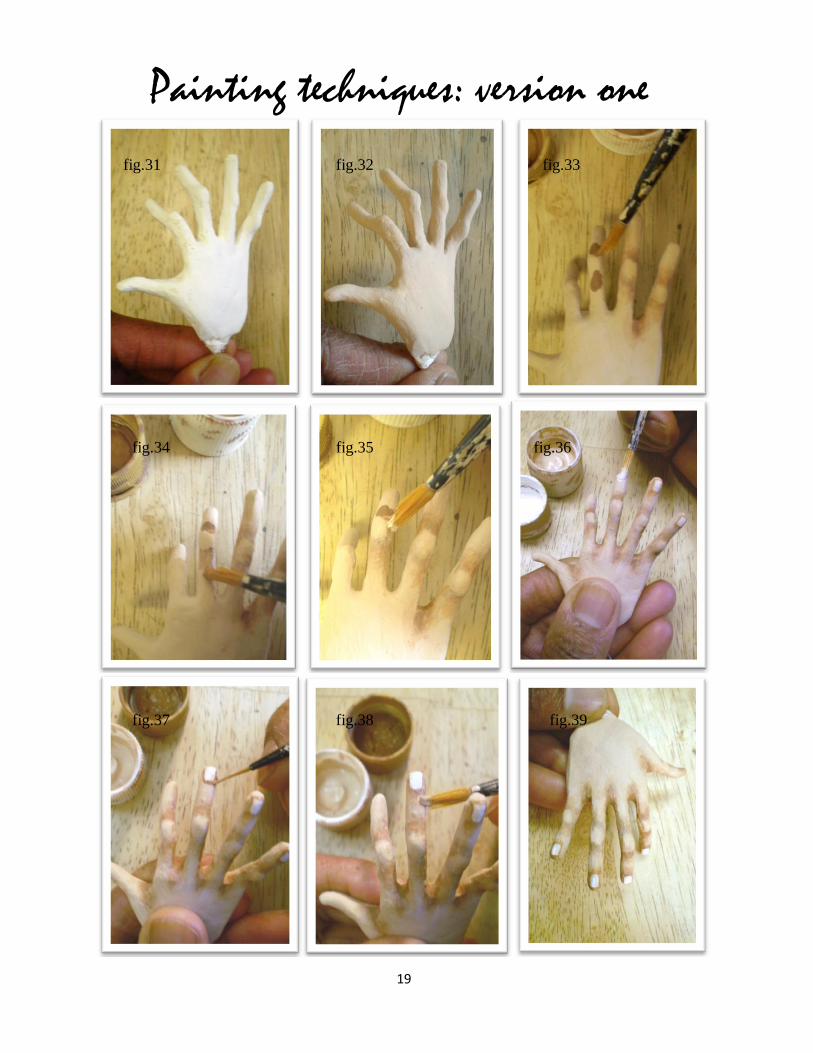
Painting techniques: version one
fig.31 fig.32 fig.33
fig.34
fig.35
fig.36
fig.37
fig.38
fig.39
20
I constructed the hand shown solely for this demonstration. Normally,
at the time of painting, your hand should be attached to the arm and
the doll completed (fig. 31)
Paint the entire hand with two coats of the skin shade of your choice letting dry between coats (fig. 32)
When dry, begin adding your contrast color on the hand, in between the fingers. Paint each crevice completely before moving on to the next, this
will avoid a “blotchy” effect. At the same time or when finished, begin
adding your contrast color to each finger above and below the knuckle. Paint and complete each finger before moving on to the next. The overall
look should be subtle shading. (fig. 33)
The trick to success is working quickly so the paint doesn’t dry before
you’re done. Rinse and dry your brush and, now, using your main color,
lightly blend the two colors fading out as you move away from the knuckle (fig. 34)
If the paint dries leaving prominent lines of demarcation around the knuckles, go back and address each just as you did in fig. 34. by lightly
blending the two colors and gently fading (fig. 35)
Mix your main skin tone with small amounts of white paint and paint your
“fingernail” bed (fig. 36)
Outline your finger nail with your contrasting shade…do not forget to
include the fingertip (fig. 37)
Work quickly to blend the dark color with the your maincolor and gently
fade just as you’ve been doing (fig. 38)
The completed hand! Even though the desired overall look is “dramatic”
the shading is soft and even…there are no jarring lines of demarcation (fig. 39)
21
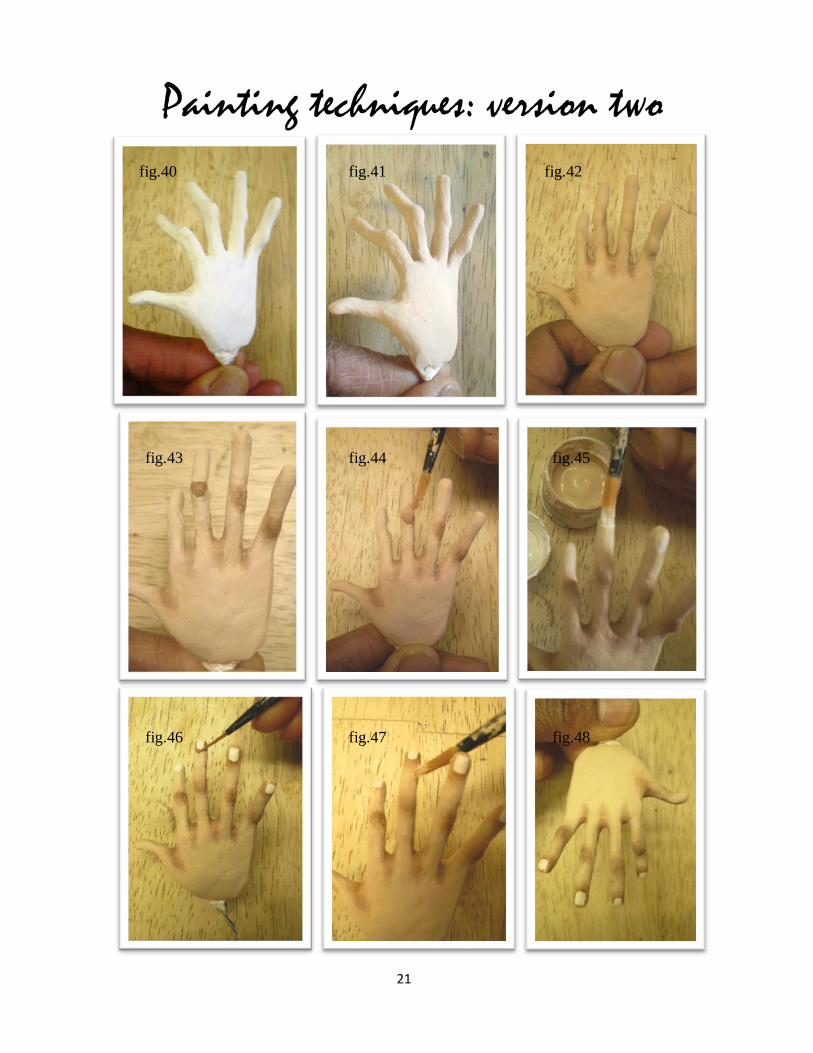
Painting techniques: version two
fig.40
fig.41
fig.42
fig.43
fig.44
fig.45
fig.46
fig.47
fig.48
22
Your completed hand in its “blank” stage (fig. 40)
Just as in version one, paint the entire hand with two coats of the skin
shade of your choice letting it dry between coats (fig. 41)
When dry, begin adding your contrast color on the hand, in between the
fingers. Paint each crevice completely before moving on to the next. The overall look should be subtle shading (fig. 42)
Next, add your contrast color directly on the knuckle (fig. 43)
Working quickly, use your main color and soften the contrasting color.
Paint around the knuckle, blending and fading out as you work. Paint and complete each finger before moving on to the next. (fig. 44)
The rest of the techniques is much like you’ve already done in version
one. Mix your main skin tone with small amounts of white paint and paint
your “fingernail” bed (fig. 45)
Working one finger at a time, outline the finger nails with your
contrasting shade…do not forget to include the fingertip (fig. 46)
Work quickly to blend the dark color with the your main
color and gently fade just as you’ve been doing (fig. 47)
The completed hand! Here you can see the overall look of the hand is soft
and gentle and that the shading is even…again, there are no jarring lines of demarcation (fig. 48)
23
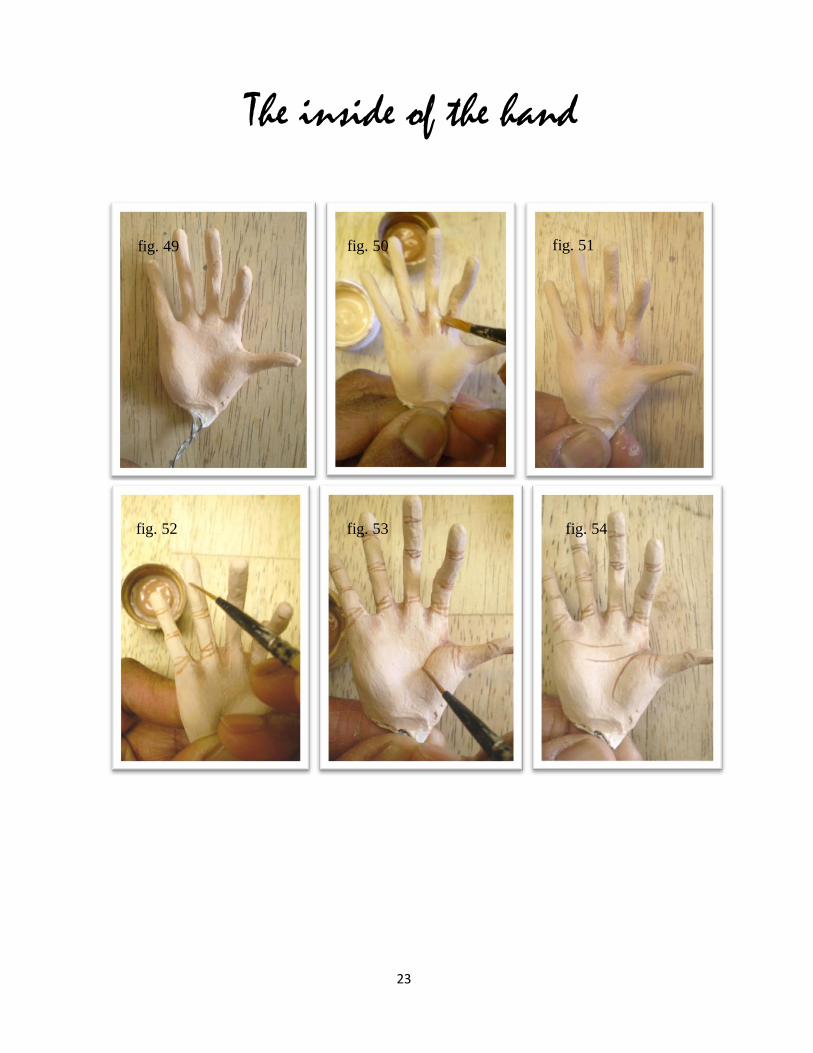
The inside of the hand
fig. 49 fig. 50 fig. 51
fig. 52
fig. 53
fig. 54
24
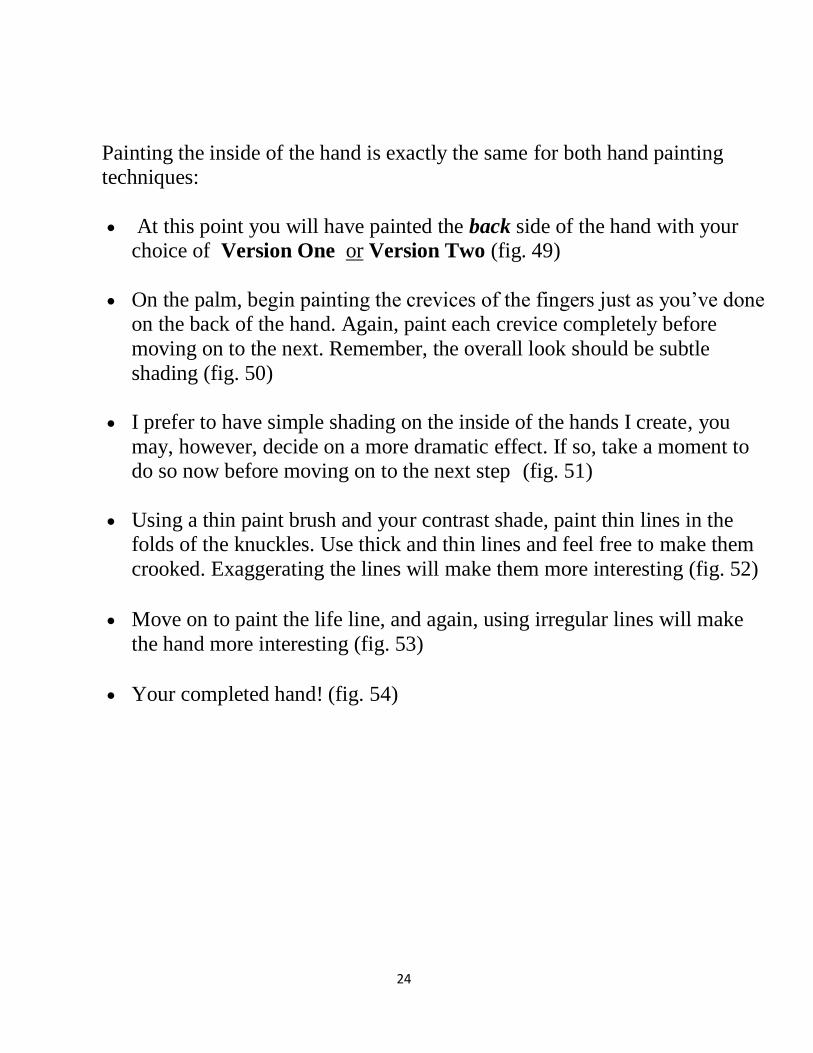
Painting the inside of the hand is exactly the same for both hand painting techniques:
At this point you will have painted the back side of the hand with your choice of Version One or Version Two (fig. 49)
On the palm, begin painting the crevices of the fingers just as you’ve done on the back of the hand. Again, paint each crevice completely before
moving on to the next. Remember, the overall look should be subtle
shading (fig. 50)
I prefer to have simple shading on the inside of the hands I create, you
may, however, decide on a more dramatic effect. If so, take a moment to do so now before moving on to the next step (fig. 51)
Using a thin paint brush and your contrast shade, paint thin lines in the folds of the knuckles. Use thick and thin lines and feel free to make them
crooked. Exaggerating the lines will make them more interesting (fig. 52)
Move on to paint the life line, and again, using irregular lines will make
the hand more interesting (fig. 53)
Your completed hand! (fig. 54)
25
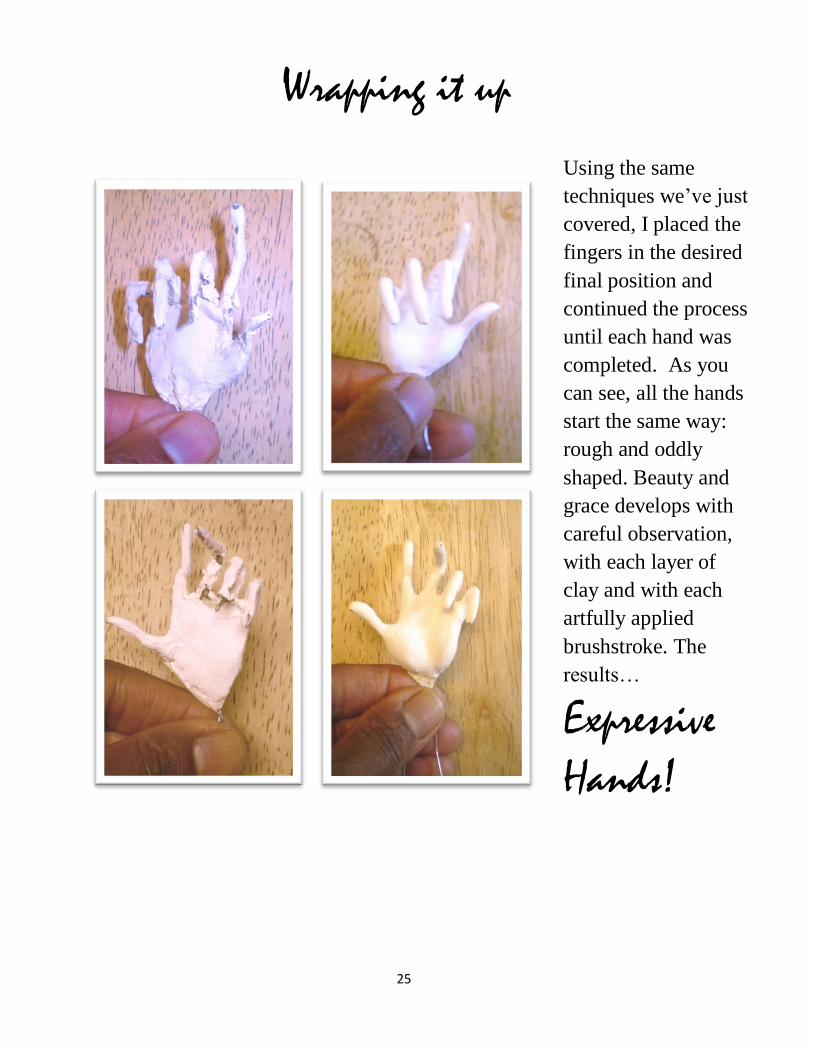
Wrapping it up
Using the same
techniques we’ve just
covered, I placed the
fingers in the desired
final position and
continued the process
until each hand was
completed. As you
can see, all the hands
start the same way:
rough and oddly
shaped. Beauty and
grace develops with
careful observation,
with each layer of
clay and with each
artfully applied
brushstroke. The
results…
Expressive
Hands!
26
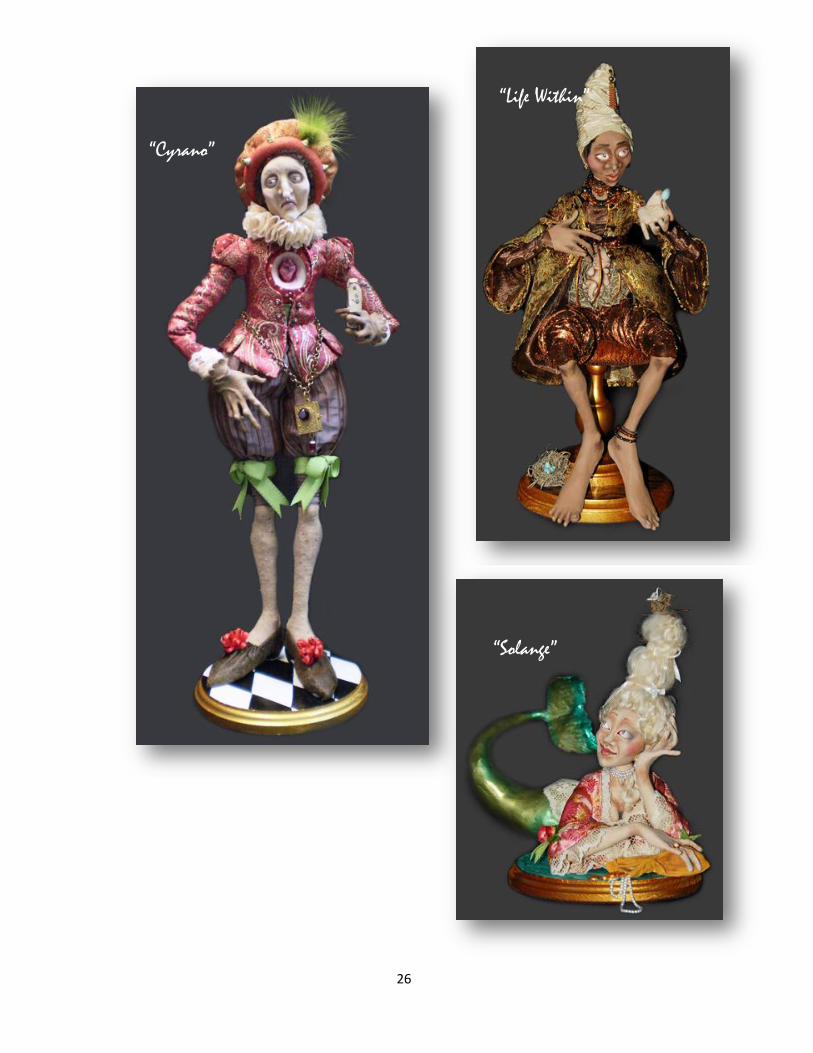
“Cyrano”
“Life Within”
“Solange”
“Cyrano”
27
A final word
Many artists follow some sort of mathematical formula to find the
right proportions for the hands they create. While this may work for
some, it does not, however, work for me and not just because I am lousy
at math…lol! I am a very “visual” individual and gauge whether the hand
is proportionate to the doll’s body simply by bringing the hand to the doll
after each step. I carefully compare the size of the hand to the doll’s face
and body. After years of this “training,” it has become second nature. I
have offered you my method…you will, of course, explore the options
and choose the one that works best for you!
As you progress in your hand-making skills, I’m sure you will see that
it is very important to inject your own personal style in your creations. It
is no secret that Van Craig and E.J. Taylor happen to be my favorite Art
doll artists. Mr. Craig’s style is, in my opinion, over the top, with hands
that are often gnarly and wildly exaggerated…fabulous! Mr. Taylor’s
hands, though no less fabulous, are more realistic and highly expressive.
There is no comparing the artistry of these two artists’ distinctive hand
making styles… each is a work of art! My dolls’ hands have elongated
fingers, one knuckle and no fingernails… I find this extends the illusion
of whimsy I strive to create. The stylizing of your hands must become
recognizable as your own!
Thank you for your purchase …I hope this workshop will
encourage and inspire you in your quest to create
expressive hands!
28
A Few Resources
Supplies, Craft & Fabric stores
Hobby Lobby: http://www.hobbylobby.com/
Michael’s: http://www.michaels.com/,
A. C. Moore” http://www.acmoore.com/
Doll Makers Journey: http://dollmakersjourney.com/
Joann’s Fabrics: http://www.joann.com/joann/home/home.jsp
Mary Jo’s Cloth Store, Inc.: http://maryjos.com/
Clotilde: http://www.clotilde.com/
Joggles: http://www.joggles.com/
Cloth Doll Supply: http://www.clothdollsupply.com/
Online doll clubs for networking and inspiration
Cloth doll connection: http://www.clothdollconnection.com/
Clay and Cloth Dolls: http://clothclaydolls.ning.com/
Creative Souls: http://creativesouls.ning.com/
Cloth Doll Artistry: http://clothdolls.ning.com/
Dolls as Art: DollsAsART.com
Recommended reading for inspiration
Art Doll Quarterly Magazine http://artdollquarterly.com/
Dolls Magazine www.dollsmagazine.com
Doll Reader Magazine www.dollreader.com
Contemporary Doll Collector Magazine www.contemporarydollcollector.com
500 Handmade Dolls by Lark publishing http://www.larkcrafts.com/500-series/
29
Events & Conventions: Quinlan Artist Doll & Teddy Bear Convention
CREATE
Art is…You
Doll Gatherers
Artistic figures in Cloth
Craft Schools
Chestnut Creek School of the Arts http://www.chestnutcreekarts.org/
John C Campbell Folk School https://www.folkschool.org/
The Fletcher Farm School of Arts & Crafts http://fletcherfarm.org/
Peters Valley Craft Center http://petersvalley.org/
Penland School of Crafts http://www.penland.org/
Touchstone Center for Crafts http://touchstonecrafts.org/
The Clearing Folk School http://theclearing.org/current/index.shtml
Haystack Mountain School of Crafts haystack http://www.haystack-mtn.org/
National Organizations The National Institute of American Doll Artists http://www.niada.org/
Original Doll Artist Council of America http://odaca.org/
Canadian Doll Artists Association http://canadiandollartistsassociation.ning.com/
United Federation of Doll Clubs http://ufdc.org/
International Doll Makers Association http://www.idmadolls.com/
The Doll Makers List http://www.dollmaking.org/