Embed Size (px)
Citation preview
Your guide to installing and using Coastal Explorer
COASTAL EXPLOREREXPLORING
EXPLORING
COASTAL EXPLORER Version 4
Your guide to installing and using Coastal Explorer
Copyright © 2017 Rose Point Navigation Systems. All rights reserved.
Rose Point Navigation Systems, Coastal Explorer, and Coastal Explorer Network are trademarks of Rose Point Navigation Systems.
The names of any other companies and/or products mentioned herein may be the trademarks of their respective owners.
WARNINGS: Use Coastal Explorer at your own risk. Be sure to carefully read and understand the user's manual and practice operation prior to actual use.
Coastal Explorer depends on information from the Global Position System (GPS) and digital charts, both of which may contain errors. Navigators should be aware that GPS-derived positions are often of higher accuracy than the positions of charted data. Rose Point Navigation Systems does not warrant the accuracy of any information presented by Coastal Explorer.
Coastal Explorer is intended to be used as a supplementary aid to navigation and must not be considered a replacement for official government charts, notices to mariners, tide and current tables, and/or other reference materials.
The captain of a vessel is ultimately responsible for its safe navigation and the prudent mariner does not rely on any single source of information.
The information in this manual is subject to change without notice.
Rose Point Navigation Systems 18005 NE 68th Street Suite A100 Redmond, WA 98052
Phone: 425-605-0985 Fax: 425-605-1285 e-mail: [email protected]
www.rosepoint.com
Welcome to Coastal ExplorerThank you for choosing Coastal Explorer!
If you are new to navigation software, but use a computer for anything else, you will find that Coastal Explorer works just like many other Windows applications: you create documents, edit them, save them, print them, etc. The big difference is that Coastal Explorer’s documents contain navigation objects such as routes and waypoints rather than paragraphs or spread-sheet cells.
If you already use another navigation program this might seem strange at first as most other systems keep all of your navigation objects in a single database rather than in document files. We expect that you will quickly come to appreciate the benefits of using documents as you can more easily organize, backup, and even e-mail your routes and other objects using familiar Windows commands.
Coastal Explorer includes many features that make it seem more like other Windows applications than most navigation systems. These features include the familiar clipboard operations Cut, Copy, and Paste, multi-level Undo and Redo commands, and a Find command.
While we have tried to make Coastal Explorer as easy to use as possible, we have not skimped on the features! Coastal Explorer is a very powerful planning and navigation tool. Here are just some of the powerful features you will soon be using:
• Quilted vector and raster charts, photo charts, and topographic maps
• Fast and easy panning and zooming
• Split-screen chart viewing
• Instant access to the information contained in your charts and guide books
• Unlimited routes and waypoints
• Route checking and obstacle alerts
• Virtual Instrument displays
• Autopilot control
• Custom screen configurations
• Chart portfolio management
• Tide and tidal current predictions
• Weather forecasts

How to Use This BookThis book was designed to get you started using Coastal Explorer and give you an overview of its capabilities. We’ve left out many details on how to use the program in order to make this a book you can just read cover to cover. Step-by-step instructions and many other details may be found in Coastal Explorer’s help system.
Here are some terms and conventions we used in making this book.
Click means to press and release a mouse button. If we don’t say otherwise, then we mean the left-most button. For touch screens, tapping the screen is the same as a click.
Right-Click means to press and release the right-most mouse button. This is a common operation to access popup menus. For touch screens, hold your finger on the screen until a box appears (about one second) to perform a “right-click”.
Drag means to press and hold the mouse button while moving the mouse and releasing the button when you are done. Dragging is usually done with the left-most button. Move your finger while touching the screen to drag on a touch screen.
We use a shortcut to point out where you can find commands. Rather than saying “Click on the Settings Button, then the Measurements command, and then the Distances box,” we will simply say “Select Settings > Measurements > Distances.”
Getting More InformationMost of the details about how to use Coastal Explorer are in its help system. This allows you to have access to the information you need when and where you need it most even if you leave this booklet behind. It also allows us to keep the documentation up to date as changes are made to the program.
To access the help system, use Main Menu > Help (the blue circle around a question mark is “Help”) or press the F1 key at any time. The F1 key will work anywhere in the program, even if you are in a dialog box. In fact, when you press the F1 key, Coastal Explorer will try to display the information most relevant to where you are in the program.
Like most programs, Coastal Explorer has a large number of commands that may be accessed with shortcut keys. A complete list of these keys is available in the help system and may be found by selecting Main Menu > Help > Keyboard Shortcuts. These keys are also listed at the back of this booklet.
Product SupportMore information, a user forum, and downloadable extras may be found on our website at rosepoint.com.

Finally, if you need to contact us for technical support, please send e-mail to [email protected] or call us at 425-605-0985 (Mon-Fri except holidays, 7am-5pm Pacific Time).
Providing FeedbackThe best way to provide feedback about Coastal Explorer is to use our forum at coastalexplorer.net.
Installing Coastal ExplorerSystem RequirementsThe minimum system requirements to use Coastal Explorer are:
• A PC running Microsoft Windows 7, Microsoft Windows 8, Microsoft Windows 10, or a newer compatible operating system.
• 4GB or more memory is recommended.
• 50MB Available Hard Drive Space; 500MB for a Full Installation and more for charts.
• Video display with at least 1024x768 pixel resolution or higher with 24-bit color (Millions of Colors) is recommended.
• Multi-touch screen, mouse, or other type of pointing device; when using a mouse, a scroll-wheel is recommended.
• Some features require:
• NMEA 0183 or NMEA 2000 compatible GPS with suitable PC interface
• NMEA 0183 or NMEA 2000 compatible autopilot with suitable PC interface
• Other NMEA 0183 or NMEA 2000 compatible equipment
• Internet access
Installing the SoftwareWhen you insert the Coastal Explorer DVD into your disc drive the setup program should run automatically. If the AutoRun feature is disabled on your drive you will need to open the disc and run the Setup program found there.
You can also download the Coastal Explorer setup program from our website at rosepoint.com in case your PC does not have an optical disc drive.
The setup program will guide you through the installation process.
After setup completes, be sure to activate Coastal Explorer on your computer. You will either need Internet access, or the ability to call someone with Internet access, to complete product activation.
Installing Optional Features
The setup program will install Coastal Explorer’s basic features. Even more features are available in the form of add-on modules and you can find these in Settings > Charts and Add-Ons > Chart and Add-On Store.
Additional Drivers
Be sure to install any drivers that might be necessary for your hardware configuration. In particular, USB Serial Adapters and USB GPS Receivers require that drivers be installed before those devices can be used. We recommend that you check the manufacturer’s website for updated drivers rather than simply using drivers that might come on a disc with a device. Most manufacturers have much newer and (usually) better drivers available on their websites.
Getting Program UpdatesCoastal Explorer has a built-in, semi-automatic update mechanism to help ensure you are always using the latest and greatest version.
When you use Coastal Explorer on a computer that is connected to the Internet, it will try to download the latest update. Coastal Explorer will display a message when an update has been downloaded and give you the option of installing it.
You can also get Coastal Explorer to check for updates at any time by using the Sync command.
If you need to update a computer that does not have access to the Internet, you can download an update file onto a USB flash drive or other portable storage device from our website at rosepoint.com in the support area.
Removing Coastal Explorer from Your ComputerUse the standard method of uninstalling a program for your version of Windows to uninstall Coastal Explorer. (Settings > System > Apps & features for Windows 10 or Control Panel > Add/Remove Programs for earlier versions.)
Uninstalling Coastal Explorer will remove the software, world base map, gazetteer, guide books, weather files, and other files that can be restored by running setup again. Your charts and navigation object documents are not removed by the uninstall program.
Starting Coastal ExplorerOnce you’ve installed Coastal Explorer, you can find it on the Windows Start menu in the All Programs list. The setup program will also offer to create an icon on your desktop for you.
You can also start Coastal Explorer by opening a navigation object document such as one in your Documents folder or one sent to you as an e-mail attachment. Just double-click on the document’s icon and Coastal Explorer will start up and load that document.
When Coastal Explorer starts up, it will open the last navigation object document that you were using (unless you started Coastal Explorer by opening a different document).
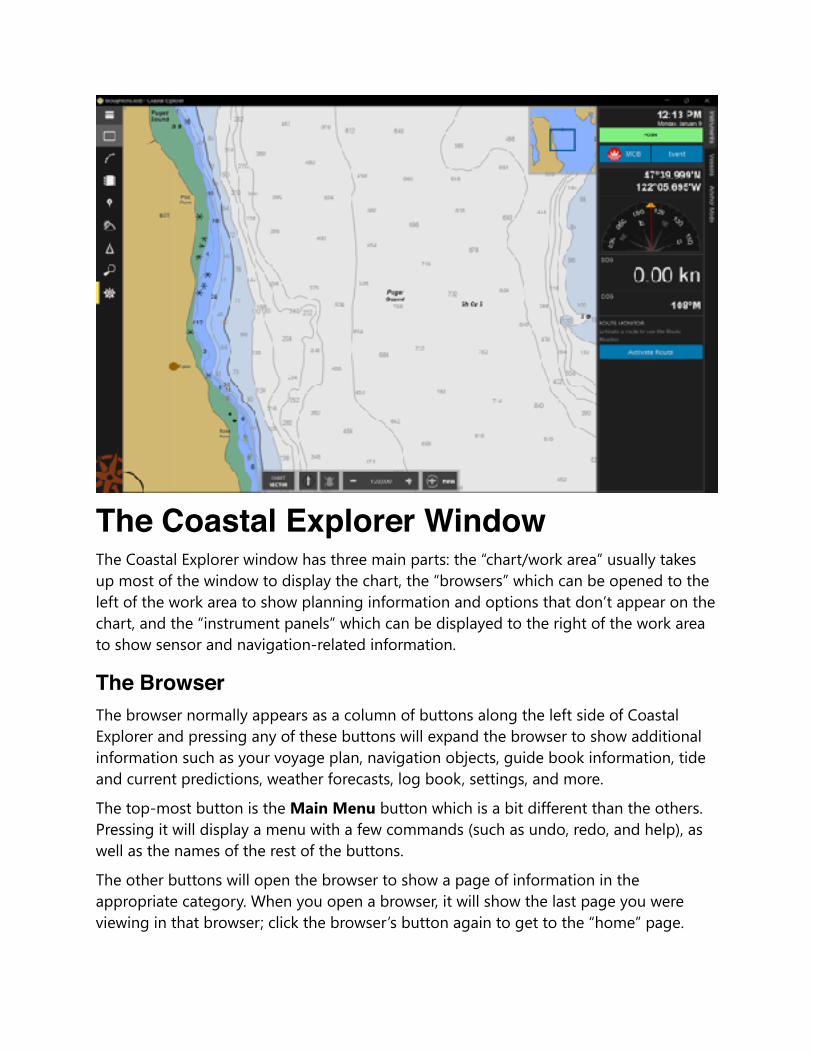
�The Coastal Explorer WindowThe Coastal Explorer window has three main parts: the “chart/work area” usually takes up most of the window to display the chart, the “browsers” which can be opened to the left of the work area to show planning information and options that don’t appear on the chart, and the “instrument panels” which can be displayed to the right of the work area to show sensor and navigation-related information.
The BrowserThe browser normally appears as a column of buttons along the left side of Coastal Explorer and pressing any of these buttons will expand the browser to show additional information such as your voyage plan, navigation objects, guide book information, tide and current predictions, weather forecasts, log book, settings, and more.
The top-most button is the Main Menu button which is a bit different than the others. Pressing it will display a menu with a few commands (such as undo, redo, and help), as well as the names of the rest of the buttons.
The other buttons will open the browser to show a page of information in the appropriate category. When you open a browser, it will show the last page you were viewing in that browser; click the browser’s button again to get to the “home” page.
Each browser has a title bar at the top to indicate what you’re looking at as well as a “back” button which will usually take you to the previous page and a “close” (X) which can be used to close that browser.
You can adjust the size of the browser by dragging the thin bar between it and the chart panels.
When a browser is open, an extra layer of symbols may appear on the chart. Clicking on any of these symbols will cause the browser to show information for that symbol. For example, when the Places browser is open, symbols indicating the positions of places from the guide books will appear on the chart and clicking on those symbols will show those entries in the browser.
The following sections describe the different browsers in more detail.
Screens
The Screens Browser lets you define and select from nine customizable screen layouts. These can provide you with quick access to different configurations for different types of activity. For example, you can create one configuration for cruising where you might want side-by-side charts at different scales and another for anchoring where a single zoomed-in chart might be more appropriate.
Voyage Plan
The Voyage Plan browser has several pages: the Files page is for managing your Voyage Plan Document files, the Routes page lists the routes in your current document, and the Marks page shows other type of objects.
Ship’s Log
This browser displays entries from your Ship’s Log, Tracks you’ve recorded while underway, and any Event marks you’ve created in your current Voyage Plan Document.
Places
The Places browser displays information from the US Coast Pilot™, the Coastal Explorer Network Community Guide Book, and any other guide books you might have installed from the Add-On Store (such as ActiveCaptain).
You can add information to the Coastal Explorer Network Community Guide Book and share it with others. To contribute to the community guide book, use Places > Add a new place.
Conditions
The Conditions browser shows you weather forecasts and observations, tide level and tidal current predictions, astronomical events, and more. Some of the information shown in this browser must be downloaded from the internet and some is received over AIS, so what you see here will depend on where you are and what type of access you have.
Vessels
If you have an AIS receiver connected to your PC, the Vessels browser will list all of the vessels currently being tracked by Coastal Explorer.
You can also setup a “buddy list” to keep track of your friends with AIS or various other tracking devices and to alert you when a buddy is nearby.
Search
The Search browser lets you find places and more. As you type into the search box, Coastal Explorer will search for places, navigation objects, vessels, nautical terms, abbreviations, and help topics that match what you’ve typed and display them all in a list.
You can also enter various types of measurements to have Coastal Explorer perform unit conversion for you, or enter coordinates (latitude and longitude) to have Coastal Explorer show you that place on the chart.
Settings
The Settings browser provides access to your chart collection, configuration and preference options, and more.
The Instrument PanelsInstrument panels appear on the right side of the Coastal Explorer window. You can customize the instrument panel to show the information most relevant to you and even create additional panels for different activities or circumstances.
Installing and Maintaining ChartsThe US Charts collection included with Coastal Explorer contains all of the official NOAA raster (RNC) and vector (ENC) charts and all of the official US Army Corps of Engineers Inland Navigation charts (IENC). Use Settings > Charts and Add-Ons to install these charts; an option to install them will appear at the top of the browser when a disc containing the charts is in your PC.
When you have internet access, you can also install charts using Settings > Charts and Add-Ons > Chart and Add-On Store. The store includes all of the US charts, raster and vector charts for British Columbia, C-MAP charts for the entire world, and more collections will be added as they become available.
When you install charts from the Chart and Add-On Store, Coastal Explorer will check for updates when it starts up or when you use the Sync command. The free US charts will always be updated and the Rose Point BC Charts and C-MAP charts are eligible for one year of updates.
Installing Other Types of ChartsCoastal Explorer can use various types of charts other than the charts that are included with the program. Depending on where and how those charts are installed on your computer, you may need to configure Coastal Explorer before they can be used.
Charts that are not installed from the Chart and Add-On Store are called “unmanaged charts” which means that Coastal Explorer cannot update them automatically.
Each time Coastal Explorer is started, it scans certain folders on your computer for charts that are installed by other programs. As chart files are added to or removed from these folders, Coastal Explorer updates your chart portfolio automatically.
When Coastal Explorer is installed the list of folders to scan will already contain a few common places for chart files to exist, so if you already have some compatible charts they may work right away. You can change the list of folders that are scanned with the Settings > Charts and Add-Ons > Install Other Charts and Add-Ons > Install charts already on this computer command.
If you have some charts that are not appearing, you can add the folders that contain them to the list and Coastal Explorer will be able to find them.
Most charts that you can purchase (BSB Version 4, for example) need to be “unlocked” before they can be used. These charts should be installed and unlocked using the setup program that came with them.
Installing ChartWorld, AVCS, or other “S-63” ChartsS-63 is a copy-protection scheme developed to protect the copyright of S-57 charts that are not made freely available (which includes most charts outside the US). S-63 protected charts work great with Coastal Explorer, but installing them requires a few extra steps.
When you purchase S-63 ENC charts you will be asked for your “S-63 User Permit". The User Permit is a special code that identifies your computer to the chart supplier and is needed for them to provide you with a license to use the charts you purchase. You can find your User Permit in Settings > Charts and Add-Ons > Install S-63 permits and charts.
After you have purchased some licenses, the chart supplier will provide you with two or more files. One file will contain the permits (licenses) to use the charts and the other files will contain the actual charts.
After purchasing S-63 chart permits, use the Settings > Charts and Add-Ons > Install S-63 permits and charts window to install the permits and the charts. Be sure to install the permits first as Coastal Explorer will only install S-63 charts that you have valid permits for.
Configuring Your ElectronicsCoastal Explorer can use and display information provided by a wide variety of sensors that are connected to your PC. These sensors include GPS receivers, depth sounders, speed logs, electronic compasses, AIS receivers, anemometers, and more.
Coastal Explorer can use information provided in several formats or “interfaces”. The most common of these is called NMEA 0183 which is a standard marine electronics connection interface that has been in use since around 1983. Coastal Explorer can also use information from sensors on an NMEA 2000 network which is the latest marine electronics standard.
Different sensors will have different requirements for connecting to your PC. We suggest you check with the sensor manufacturer for specific details, but you can also find some general information in the Coastal Explorer help system.
The Rose Point Nemo Gateway is the easiest way to connect your PC to your marine electronics. It provides four NMEA 0183 inputs, two NMEA 0283 outputs, as well as an NMEA 2000 network interface and makes that information available on a standard PC-compatible network eliminating the need for special “drivers”.
If you are using a USB GPS, follow the manufacturer’s instructions for getting the driver installed and if you are using Bluetooth, follow the manufacturer’s instructions for pairing the device with your PC. Then use the Settings > Electronics window to configure the COM port used by that GPS. If you are unsure of the correct COM port, you can use the Auto Detect option to have Coastal Explorer search all of the ports on your computer for a GPS. The Port Settings option gives you more control over how the port will be configured if you need it.
If you have an NMEA 2000 network on your vessel and would like Coastal Explorer to use those sensors, you will need a Rose Point Nemo Gateway or other compatible NMEA 2000 Gateway. Check Coastal Explorer Help or the support area of rosepoint.com for more information on NMEA 2000 Gateway compatibility.

Using the Chart PanelMost of the Coastal Explorer window is usually used to show a chart panel which consists of charts, chart overlays, a toolbar, and a Chart Overview.
Coastal Explorer can display several types of charts and many different overlays on top of those charts. Some overlays, such as your navigation objects, are always displayed. Some overlays, such as guide book places, are only displayed when a particular browser is open. And some overlays are controlled with options that are available on the toolbar or Settings > Chart Display.
The Chart Panel Toolbar
�The first button at the bottom of the chart panel provides access to many options that control the type of chart displayed, how the charts are displayed, and what overlays are included.
The next button controls the orientation of the chart. Clicking the button will cycle through North Up, Heading Up, and Course Up modes. You can also use the U key to cycle through these orientations.
The next button tells Coastal Explorer to automatically scroll the chart while your boat is moving. Two “Auto Scroll” modes are available: “Follow Boat” which keeps your boat near the center of the chart, and “Look Ahead” which keeps your boat near the edge of the chart to maximize the amount of chart you see ahead of you. Pressing the Home key is the same as clicking this button.
Next is the scale control which is actually thee buttons in one. The - and + buttons will decrease and increase the chart panel’s viewing scale. You can also use the – and + keys to do the same thing.
If you are using a mouse with a scroll wheel, you can rotate the wheel to adjust the viewing scale. If you have a multi-touch screen, you can zoom in and out by “pinching” or “stretching” the chart with two fingers.
The button in the middle indicates the current viewing scale and, when clicked, will show a panel that provides information about the current chart and some additional scale options.
The middle button is also used to indicate some status information about the chart being displayed, including:
MORE DETAIL: This indicates that a larger scale (more detailed) chart is available for the area being viewed. Zoom in to see the more detailed chart.
OVERSCALE: This indicates that the chart is being magnified beyond the scale of its data. Zoom out to see the chart at its intended scale.
WARNING: Zooming in on a chart past its scale is like using a magnifying glass on a paper chart; it might seem “bigger,” but you aren’t actually getting any more detail. With raster charts, the problem is fairly obvious as lines start to get thick and symbols get large, but vector charts don’t scale the same way and can cause a false sense of detail which can be dangerous! When the over-zoom indicator appears, make sure you are not relying on detail that is not really there!
Other indications may appear as well and the complete list can be found in Help.
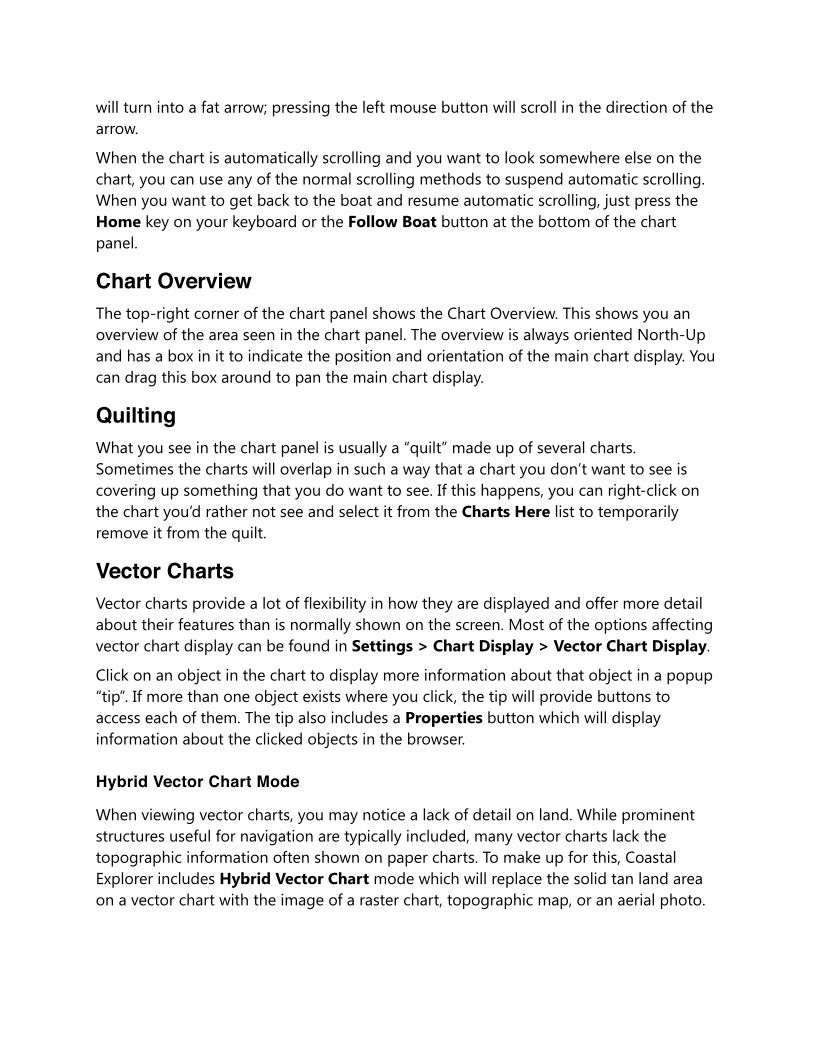
The final button is for creating new navigation objects on the chart and will be covered in more detail later in this booklet.
Moving the Chart AroundYou can move the chart around with the Arrow Keys; just press the arrow pointing in the direction you’d like to scroll; holding down the Shift key while pressing an arrow key will scroll faster.
The Page Up and Page Down keys will scroll the chart by almost a screen-full in the direction of your boat’s heading (Page Up) or in the opposite direction (Page Down). These keys (and the Home key) can be very handy while you are cruising and want to quickly check something ahead of you on the chart.
You can scroll with the mouse by dragging the chart around while holding the left mouse button. You can also scroll by moving the cursor to the edge of the chart where it
will turn into a fat arrow; pressing the left mouse button will scroll in the direction of the arrow.
When the chart is automatically scrolling and you want to look somewhere else on the chart, you can use any of the normal scrolling methods to suspend automatic scrolling. When you want to get back to the boat and resume automatic scrolling, just press the Home key on your keyboard or the Follow Boat button at the bottom of the chart panel.
Chart OverviewThe top-right corner of the chart panel shows the Chart Overview. This shows you an overview of the area seen in the chart panel. The overview is always oriented North-Up and has a box in it to indicate the position and orientation of the main chart display. You can drag this box around to pan the main chart display.
QuiltingWhat you see in the chart panel is usually a “quilt” made up of several charts. Sometimes the charts will overlap in such a way that a chart you don’t want to see is covering up something that you do want to see. If this happens, you can right-click on the chart you’d rather not see and select it from the Charts Here list to temporarily remove it from the quilt.
Vector ChartsVector charts provide a lot of flexibility in how they are displayed and offer more detail about their features than is normally shown on the screen. Most of the options affecting vector chart display can be found in Settings > Chart Display > Vector Chart Display.
Click on an object in the chart to display more information about that object in a popup “tip”. If more than one object exists where you click, the tip will provide buttons to access each of them. The tip also includes a Properties button which will display information about the clicked objects in the browser.
Hybrid Vector Chart Mode
When viewing vector charts, you may notice a lack of detail on land. While prominent structures useful for navigation are typically included, many vector charts lack the topographic information often shown on paper charts. To make up for this, Coastal Explorer includes Hybrid Vector Chart mode which will replace the solid tan land area on a vector chart with the image of a raster chart, topographic map, or an aerial photo.

Use the Chart Panel Options button to access the Hybrid Vector Chart option (or use the H key to turn it on or off). When Hybrid Vector Chart mode is enabled, selecting the Vector Chart type will disable the mode, but other chart types will change what is displayed in land areas. (C-MAP charts cannot be used with Hybrid Vector Chart mode.)

Using Navigation ObjectsCoastal Explorer lets you create several types of objects on the chart, including routes, marks, boundaries, and range/bearing lines. These are collectively called Navigation Objects and are described in detail in Help.
You can create a new navigation object by clicking on the + New button on the chart panel and selecting the type of object yow want from the menu.
After using a command that adds a new object, you should click on the chart where you want the object to appear. For routes and boundary areas, click at each waypoint or corner that you want a waypoint or marker, and when you are done, press the Esc key, or click twice in the same spot. For a range/bearing line you will click once at the start of the line and once at the end.
After inserting an object, you can move it around by dragging it with the mouse (routes can’t be dragged around, but their waypoints can).
Each type of object has various properties that can be seen and adjusted in the Properties browser. The Help system has all the details about each of these properties.
Clicking on an object will display a “tip” with information about that object as well as common operations for that type of object including an option to show the object’s Properties browser. Right-clicking on an object will display a menu of even more operations and options for that object.
While your Navigation Objects typically show up on the chart, Coastal Explorer also lets you see them in list form in various browsers. Routes and other Marks can be seen in the Voyage Plan browser while Tracks and Events are shown in the Ship’s Log browser.
Objects can be “hidden” which removes them from the chart, but not the lists so once you’ve hidden an object you can use the appropriate list to show it on the chart again.
Using Voyage Plan DocumentsCoastal Explorer stores your navigation objects in Voyage Plan Documents. You can keep all your objects in one document, or organize them into separate documents however you like.
Documents are used just like in most other applications; you create a new one with the New command, open one with the Open command, and save it with the Save or Save As command. These commands are all found on the Files page of the Voyage Plan browser and the standard keyboard shortcuts work as well (Ctrl+N for New, Ctrl+O for Open, and Ctrl+S for Save).
Document files are normally kept in the folder called “Documents” (or “My Documents” on Windows XP) but you can save them wherever you like.
Since Voyage Plan Documents are just normal files, you can send them as attachments to email messages using most email programs. If you receive a document as an e-mail attachment, you can open it from your e-mail message and Coastal Explorer will start automatically if it’s not already running.
If you need to move or copy objects from one document to another, you can use the normal clipboard commands (Cut, Copy, and Paste) or you can use the Voyage Plan > Export command to save part of a document to a file and then use the Voyage Plan > Import command to insert that file into another document.
Using the Voyage Plan > Import command, you can also import routes, waypoints, and other navigation objects from files created by other navigation programs as well as compatible chart plotters and GPS receivers. When you import objects, they are inserted into the currently open Voyage Plan Document.
Planning a RouteOne of the primary things Coastal Explorer is used for is planning a route and many tools are provided to help you do just that using several different techniques.
Creating a route always starts with the Add Route command which can be accessed either with + New > Route on the Chart Panel, or Voyage Plan > Routes > Add Route. When you create a new route, the Add Route page appears in the browser and you are given a few options for how to create your new route.
The most direct and familiar way to create a route is probably to just click on the chart where you want each waypoint to be, panning and scaling the chart as necessary, until you reach the destination and press the Esc key (or click again on the last waypoint) to finish building the route.
That technique works fine, but there are other ways too. The Add Route page lets you enter an origin and a destination and if you do that first, then Coastal Explorer can check to see if you already have a route that might work so you don’t need to make a new one.
For example, you might already have a route that starts at the destination and ends at the origin. In that case, there’s a good chance that just copying the route and reversing the copy will work just as well and be easier than creating a new route from scratch. You could certainly copy and reverse the route yourself, but you might not remember that you had one and it might be hidden on the chart.
Coastal Explorer can sometimes find routes that aren’t in your current document as well. For example, if you have the ActiveCaptain add-on, you can save routes to your ActiveCaptain account and access them from other devices. Coastal Explorer can search your ActiveCaptain routes and offer to import them into your current Voyage Plan document when you enter the origin and destination into the Add Route page.
Coastal Explorer will list any appropriate routes that it finds at the bottom of the Add Route page along with whatever action it can take to make that route available to you (for example to show hidden routes, copy and reverse a route in the other direction, import from ActiveCaptain, etc).
In addition to the found routes, Coastal Explorer will list an option to use the Route Builder which is a different way of creating a new route. Instead of placing waypoints one at a time along the route, this technique involves starting with a straight line from the origin to the destination and then adding and adjusting waypoints as necessary to refine the route until it is safe and appropriate to follow.
The route created when you choose the Route Builder option is no different than if you had created the route by clicking at the origin and the destination and then stopped
adding waypoints, and that means that the tools you use to refine a route can be used with any route in your Voyage Plan regardless of how it was created.
When you click on a route, an orange circle will appear where you clicked. If you drag this circle, a new waypoint will be inserted into that leg of the route and then follow your mouse (or finger if you’re using a touch screen) until you let up.
To finish a route that was started with the Route Builder, you can start by adding obvious waypoints to set the overall “shape” of the route while still viewing the chart at a small scale. Then zoom in and start moving and adding waypoints as necessary.
While the Route Details page is shown in the browser, you can see a lot of information about the route you are creating or refining, including a list of obstacles and warnings. Clicking on an obstacle or warning in the list will point to the location on the chart where it is a problem. This can be a helpful tool when trying to decide where new waypoints are needed or existing waypoints need to be moved even if you are not viewing the chart at a scale where you can see the problem yourself.
WARNING: Coastal Explorer cannot point out every obstacle or hazard that you might come across, so this feature must not be relied upon to guarantee a safe route, but it can make planning one a lot easier!
Instrument PanelsInstrument panels display information received by the sensors connected to your computer as well as some navigation-related information calculated by Coastal Explorer. Many different instruments are available and you can decide which of them to display.
Each instrument has a menu that may be accessed by clicking the right mouse button while pointing at the instrument. The menu allows you to change what is displayed in the instrument as well as remove the instrument or add another one. Some instruments also add commands to the menu that are specific to that type of instrument.
The Add Instrument window displays a large list of types of data that can be displayed. You can use the drop-down list of categories above the big list to display only one category of data at a time which can help you find a specific item.
After selecting a type of data, a preview of the instrument will appear on the right side of the window. Above the preview is a drop-down list of alternate displays for that data. Select the type of display you want and click OK to finish adding a new instrument to the Instrument Panel.
You can re-arrange the instruments on your Instrument Panel by holding down the Alt key and dragging an instrument up or down with the mouse.
You can choose an instrument panel to display by clicking its tab, or when an instrument panel is already displayed, clicking its tab will hide it. You can also use the Ctrl+F1 key to hide and show the instrument panel.
Creating Additional Instrument Panels
You can create additional Instrument Panel tabs by right-clicking in the tab area and selecting New Instrument Panel.
Your new Instrument Panels can be removed or renamed by right-clicking on their tab and selecting the Remove Instrument Panel or Rename Instrument Panel options.
Using Your Virtual BoatCoastal Explorer normally shows your position by placing a small green boat symbol there on the chart. You can change the color of your boat symbol and control various other aspects of the boat’s display using the Properties browser for the boat.
To access the Boat Properties browser, click on the Boat and then click on the tip’s Properties option or use Settings > Chart Display > Own-Ship Symbol.
Most of the properties on the General and Range pages affect the appearance of the boat symbol and the extra stuff that you can have around it.
The Settings > Vessel page has some options that you should setup in order for several other features of Coastal Explorer to work optimally.
The Length Overall and Beam options in the Vessel page allow Coastal Explorer to draw the boat symbol to the same scale as the chart when you are zoomed in far enough that the scaled length of your boat would be at least as large as the default symbol on the screen. You must also set the relative position of your GPS for this feature to work. That is done in the Position Sensor (GPS) page where you can set a position for each GPS you have configured.
The Draft and Bridge Clearance options are used by the obstacle detection features to make sure your routes don’t enter water that is too shallow or go under bridges or cables that are too low.
The Cruising Speed property is the default planned speed assigned to new route legs that you create. This speed can be changed later, but it helps to have your “normal” cruising speed here so you don’t have to change as much later if you want Coastal Explorer to calculate your ETA.
The Port and Starboard Turning Radius properties are used by the Wheel-Over Line and Predicted Log Race waypoint styles to predict the curve your boat might take as you turn towards a new waypoint.
Dead ReckoningNormally the boat symbol will appear where the GPS says it should be. However, you can activate Dead Reckoning mode to override the GPS position. Dead Reckoning mode is started whenever you move the boat to a new location by dragging it or by right-clicking on the chart and using the Move Boat Here option. Dead Reckoning mode is indicated with a yellow highlight in the POSN status indicator on the standard instrument panel.
You can get out of Dead Reckoning mode by selecting a position sensor from the POSN status indicator or from the menu displayed when right-clicking on the boat symbol.

While in dead reckoning mode, you can steer the boat and adjust its speed by using the Ctrl+Shift+Arrow Keys. The left and right arrows adjust the boat’s heading and the up and down keys adjust the speed.
Following a RouteOnce you’ve planned and checked a route and are ready to start cruising you can “Activate” the route you intend to follow. This tells Coastal Explorer to start monitoring your progress along this route and potentially send information to an autopilot so it can steer your vessel. You do this by clicking on the route and selecting the Activate command from the popup tip, or from within the Voyage Plan browser.
When a route is active it will change color (to green by default) and all other routes will turn gray. One of the waypoints of the route will also become active and you will see a dashed line between your boat and the active waypoint. If the waypoint is on-screen, it will have a pulsating circle around it.
When a route is first activated, Coastal Explorer will check to see if your boat has already passed some of the waypoints and will try to activate the next waypoint along the route.
When your boat arrives at (or passes) a waypoint, Coastal Explorer will automatically activate the next waypoint in the active route. Your boat is considered to have arrived at a waypoint if it gets within a certain distance of it; this distance is known as the “Arrival Circle Radius” and is one of the properties of a waypoint. Your boat is considered to have passed a waypoint if it crosses an imaginary line through the waypoint that bisects the angle between the leg leading up to the waypoint and the leg leading away from it. The arrival circle and the “pass” line are shown for each waypoint on the screen.
WARNING: If you have Coastal Explorer control an autopilot, we recommend you set the autopilot to a mode where it must be manually advanced to the next waypoint. This lets you make sure all course changes are really safe at the time they will be made.
You can activate a different waypoint manually at any time by clicking on the waypoint you want and selecting Activate from the popup tip. You can also skip to the next waypoint in a route with the W key or the previous waypoint with the Shift+W key.
When you start moving, the Instrument Panel will appear. This instrument panel is completely customizable, but the default settings will show information about your active route and your progress along it.
Your Cross Track Error (XTE) is an important thing to monitor as it indicates how far off course you are. Coastal Explorer has an alarm that you can use to indicate when your XTE exceeds a preset distance. Use the Settings > Alerts page to adjust the “XTE over” parameter to whatever makes you feel comfortable.
Sometimes you may find it necessary to go off course and you may decide to stay that way. For example, you might need to steer clear of another vessel and end up with a clear run to the next waypoint. If such a maneuver leaves you far enough off course that
the alarm is sounding, but you are certain you just want to go from where you are straight to the active waypoint, you can use the Reset XTE option (if you have it included on an instrument panel), or press the X key. This will adjust the current leg-line to be from your current position to the active waypoint effectively resetting your cross track error to zero.
Besides the cross track error alert, Coastal Explorer can warn you of various other conditions such as arriving at a waypoint, a depth below or above a value of your choosing, or a charted obstacle or warning area that you are getting close to. All of these alerts may be adjusted using the Settings > Alerts page.
As you are cruising Coastal Explorer can record a Track of where you actually go. You can start or stop tracking by clicking on your boat and selecting the Start Tracking or Stop Tracking commands. Tracks are just another type of Navigation Object, so you can select them by clicking on them, see and change their properties in the Properties browser, and right-click on them to perform various operations such as deleting them or converting them to routes.
SettingsThe Settings browser provides access to Coastal Explorer’s many options and configuration settings as well as a sort of “dashboard” for monitoring news and announcements from Rose Point and program, chart, and data updates.
When the Settings button on the browser is highlighted, it means that Coastal Explorer has something to tell you, usually that some updates are available or that a problem has been detected. When you open the Settings browser, it will either display a highlighted box with some additional information, or one of the menu items will be highlighted indicating that you should click there to find out more.
Near the top of the Settings home page, you will find controls for performing a Sync which is when Coastal Explorer checks the internet for updates and optionally downloads them. The Options button lets you control how much Coastal Explorer will do automatically.
The Settings home page also provides a way to select your daylight mode and adjust screen brightness. (The brightness option is not supported by all systems.) You can also change the daylight mode with the Ctrl+I key which will cycle through day, dusk, and night modes.
The Preferences area includes options that are typically selected based on personal preferences. These include window behaviors, user interface colors, measurement units, etc.
The Configuration area provides access to your chart and add-on collection and the tools to maintain them, and information about your vessel and the electronics interfaced to your PC.
More information is provided in Help, but here are a few options you should know about:
ThemeCoastal Explorer lets you select a “dark” theme or a “light” theme for most of the user interface. The dark theme uses a dark background with light text and symbols while the light theme uses a light background and dark text and symbols. This option can be found in Settings > General.
Full Screen ModeNormally the Coastal Explorer window works just like the window of any other application, however it also has the ability to go “full screen” and a few options relating to how and when this happens.
You can always switch between “normal” and “full-screen” with the F11 key. You can also set an option to go full-screen when you use the standard “maximize” button on the title bar. This option is available in Settings > General.
When Coastal Explorer is filling the screen, the title bar is hidden. To access the title bar, just move your mouse to the top of the screen (or touch near the top if you have a touch screen).
By default, “full-screen” really means “all of the screen except the Windows Start Bar which is normally at the bottom of the screen”. If you want Coastal Explorer to take over the whole screen, there is an option for that (also in Settings > General).
Screen ConfigurationsCoastal Explorer lets you save and restore custom screen configurations in the Screens browser.
Nine separate screen configuration "slots" are available. Each screen configuration can describe an arrangement of one to four panels including their relative sizes and their settings.
More specifically, each screen configuration consists of one to four panels, where each panel consists of a type and settings appropriate to that type of panel. Chart panels keep track of the latitude and longitude at the center of the panel, the chart viewing scale, what types of charts are shown (raster, vector, topographic map, etc.), the chart orientation, and the auto-scrolling mode. Video panels keep track of which video source is being used. Radar panels keep track of the off-center location and the status of tools such as VRM's and EBL's. In addition to these view settings, the screen configuration keeps track of the relative sizes of the panels.
You can use saved screen configurations to quickly reconfigure Coastal Explorer for specific tasks. For example, you might normally cruise with a large chart panel at a large scale in look-ahead mode alongside a smaller chart panel at a small scale in center-boat view. Then, when docking, you might prefer to have one large scale chart and a couple of video panels. If you have a compatible radar, you might want a small radar-only panel and a small overview chart as well as a large chart.
Each screen configuration also provides several options which you can use to prevent changes to panel settings from being saved automatically and to cause things to happen when a screen is selected. For example, you can create a planning mode screen that hides the instrument panels and an anchor mode screen that starts a new track and creates a boundary alarm around your boat.
Use the Edit buttons on each screen in the Screens Browser to make changes to a screen. In the screen editor, use the + Panel button to add another panel to the screen, use the close buttons on the panels to remove one, or drag them around to change the layout. Use the Options button to access the other options. And use the Done button to finish editing a screen.
Splitter positions and panel setting changes (such as chart viewing scale and location, auto-screen modes, orientation, and chart type) are normally saved to the current screen as you make those changes so that those settings are restored the next time you select that screen. This behavior may be disabled for an individual screen by enabling Prevent changes to panel options and splitter from being saved in the screen’s options.

Once you’ve saved a screen configuration, clicking the thumbnail in the Screens browser will select that screen for use. Pressing one of the digit keys (1-9) will also select the corresponding screen.
Video PanelsCoastal Explorer can display the image from video cameras connected to your PC. It is possible to use "webcam" style cameras that typically connect to a USB port, a network video camera, or a standard video camera connected to a video interface device (USB or internal) on your PC.
Coastal Explorer will let you select a source from all of the cameras currently connected to your PC and display the video in either a small Virtual Instrument Panel in the Task Pane or in a larger panel alongside your charts.
Video PanelsTo display video in the main work area, create a custom screen using the Screens browser and add a Video panel.
The Source button below the video panel lets you select the video source. Clicking this button displays a menu of the live video sources available on your computer as well as options to open a file or network stream.
Video InstrumentsTo display video on an instrument panel, right-click on the instrument panel and select the Add another instrument option, select Video from the list of data items, and press OK.
Right-click on the video instrument to access its options which will include the video source, any options provided by the video camera, and playback controls.

Keyboard ShortcutsCtrl+N Create a New Navigation Object Document
Ctrl+O Open an existing Navigation Object Document
Ctrl+S Save the currently open Navigation Object Document
Ctrl+P Print
Ctrl+A Select All
Ctrl+X Cut
Ctrl+C Copy
Ctrl+V Paste
Ctrl+Z Undo the last editing action
Ctrl+Y Redo the last editing action
Del Delete
Alt+Enter Show the Properties Panel for the selected object
Arrow Keys Pan the chart
Shift+Arrow Keys Pan the chart faster
Page Up Pan the chart towards the vessel's heading (or course in Course Up mode)
Page Down Pan the chart away from the vessel's heading (or course in Course Up mode)
Ctrl+Right Rotate the chart clockwise
Ctrl+Left Rotate the chart counter-clockwise
+ Zoom the chart In
- Zoom the chart Out
U Cycle the chart orientation between North, Course, and Heading
Home Center the chart on the boat
End Stop following the boat
Ctrl+B Cycle the "Bearing Display Mode" between True and Magnetic north
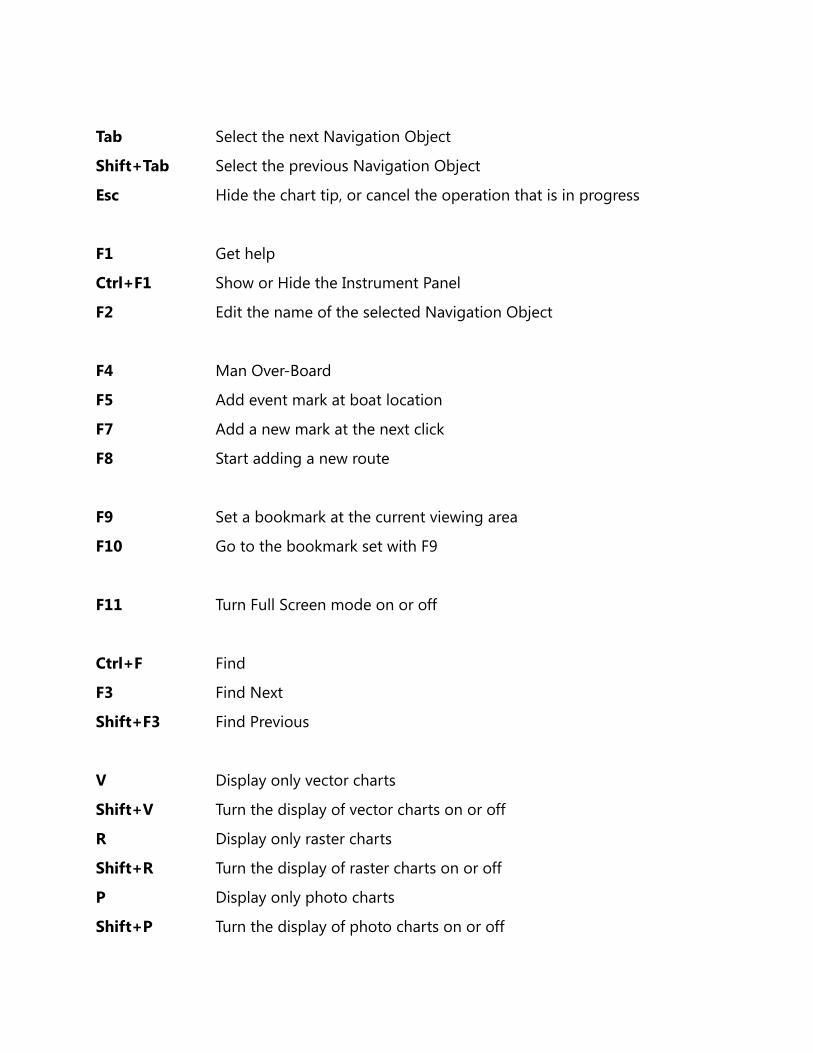
Tab Select the next Navigation Object
Shift+Tab Select the previous Navigation Object
Esc Hide the chart tip, or cancel the operation that is in progress
F1 Get help
Ctrl+F1 Show or Hide the Instrument Panel
F2 Edit the name of the selected Navigation Object
F4 Man Over-Board
F5 Add event mark at boat location
F7 Add a new mark at the next click
F8 Start adding a new route
F9 Set a bookmark at the current viewing area
F10 Go to the bookmark set with F9
F11 Turn Full Screen mode on or off
Ctrl+F Find
F3 Find Next
Shift+F3 Find Previous
V Display only vector charts
Shift+V Turn the display of vector charts on or off
R Display only raster charts
Shift+R Turn the display of raster charts on or off
P Display only photo charts
Shift+P Turn the display of photo charts on or off
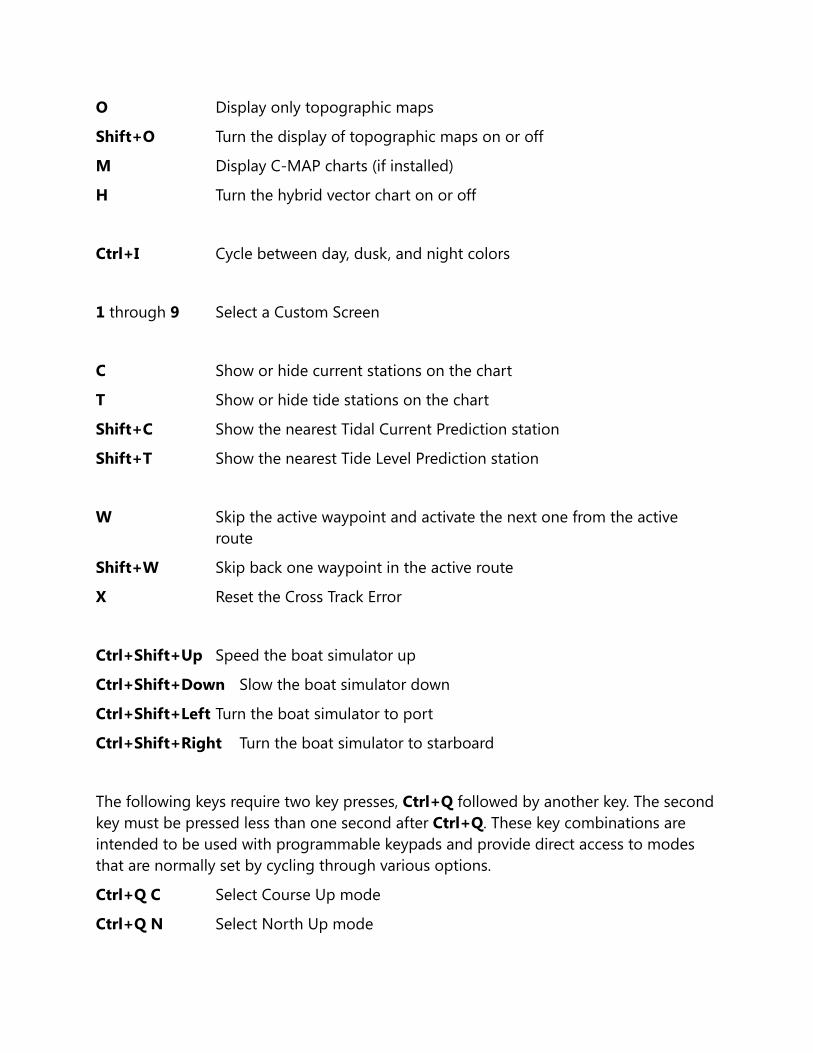
O Display only topographic maps
Shift+O Turn the display of topographic maps on or off
M Display C-MAP charts (if installed)
H Turn the hybrid vector chart on or off
Ctrl+I Cycle between day, dusk, and night colors
1 through 9 Select a Custom Screen
C Show or hide current stations on the chart
T Show or hide tide stations on the chart
Shift+C Show the nearest Tidal Current Prediction station
Shift+T Show the nearest Tide Level Prediction station
W Skip the active waypoint and activate the next one from the active route
Shift+W Skip back one waypoint in the active route
X Reset the Cross Track Error
Ctrl+Shift+Up Speed the boat simulator up
Ctrl+Shift+Down Slow the boat simulator down
Ctrl+Shift+Left Turn the boat simulator to port
Ctrl+Shift+Right Turn the boat simulator to starboard
The following keys require two key presses, Ctrl+Q followed by another key. The second key must be pressed less than one second after Ctrl+Q. These key combinations are intended to be used with programmable keypads and provide direct access to modes that are normally set by cycling through various options.
Ctrl+Q C Select Course Up mode
Ctrl+Q N Select North Up mode
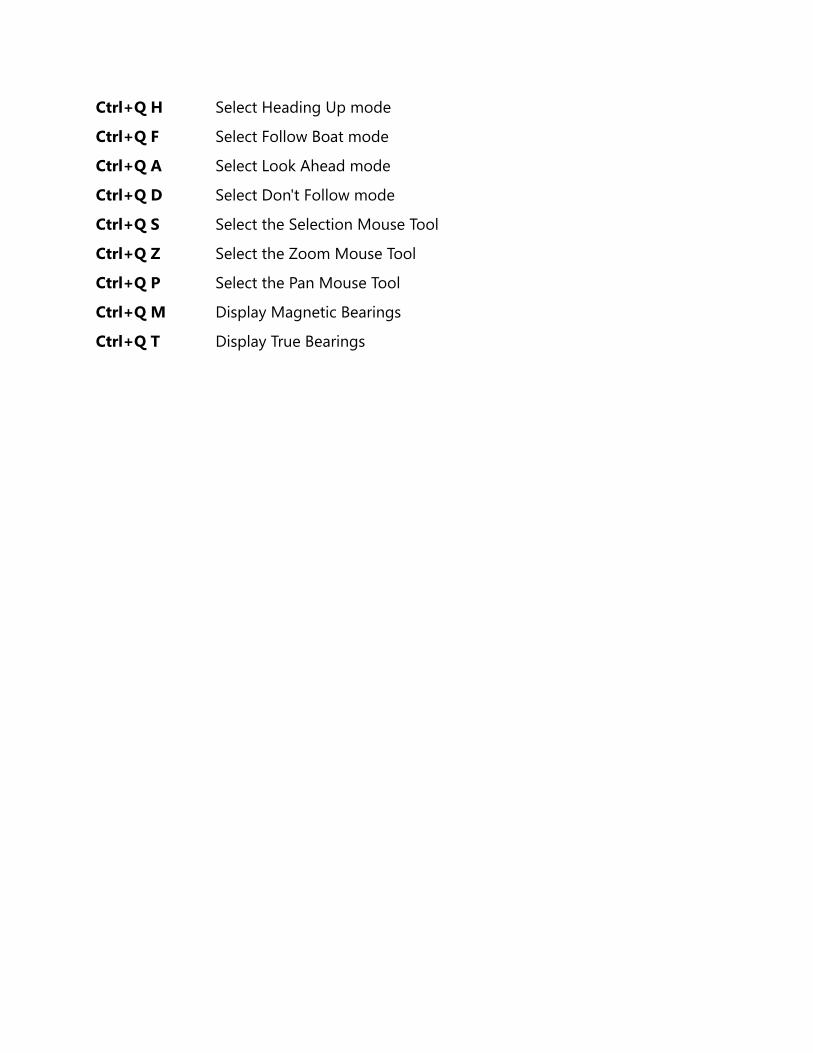
Ctrl+Q H Select Heading Up mode
Ctrl+Q F Select Follow Boat mode
Ctrl+Q A Select Look Ahead mode
Ctrl+Q D Select Don't Follow mode
Ctrl+Q S Select the Selection Mouse Tool
Ctrl+Q Z Select the Zoom Mouse Tool
Ctrl+Q P Select the Pan Mouse Tool
Ctrl+Q M Display Magnetic Bearings
Ctrl+Q T Display True Bearings