Embed Size (px)
Citation preview
Exercise #3: Set up simulator, Apache services and IDE environment
Introduction
In this exercise, we are going to set up all the services required to run the Big Data / IoT real time (truck) event processing exercises. We will install NiFi onto our Hortonworks Sandbox while activating Kafka and Storm for later use in the exercise series. We will also walkthrough how to set up an IDE on our local machine for Storm development testing and deploy our Storm project to the Sandbox for further testing.
Pre-requisites
• Read Table 1 to figure out some basic details about your sandbox
Parameter Value (VirtualBox)
Host Name 127.0.0.1
Port 2222
Terminal Username root
Terminal Password hadoop
Table 1: Virtual Machine Information
• Added sandbox.hortonworks.com to your /private/etc/hosts file (mac and linux users)
• Added sandbox.hortonworks.com to your /c/Windows/System32/Drivers/etc/hosts file
(windows 7 users)
The following terminal commands in the exercise instructions are performed in VirtualBox Sandbox and Mac machine. For windows users, to run the following terminal commands, download Git Bash.
If on mac or linux, to add sandbox.hortonworks.com to your list of hosts, open the terminal,
enter the following command, replace {Host-Name} with the appropriate host for your sandbox:
echo '{Host-Name} sandbox.hortonworks.com' | sudo tee -a /private/etc/hosts
If on windows 7, to add sandbox.hortonworks.com to your list of hosts, open git bash, enter
the following command, replace {Host-Name} with the appropriate host for your sandbox:
echo '{Host-Name} sandbox.hortonworks.com' | tee -a /c/Windows/System32/Drivers/etc/hosts
Section #1: Setup Nifi Environment
STEP 1: Install Nifi by Ambari Wizard
Use the following steps to perform the NiFi installation:
1. SSH into the Sandbox VM:
ssh [email protected] -p 2222
Note: You should receive a success message.
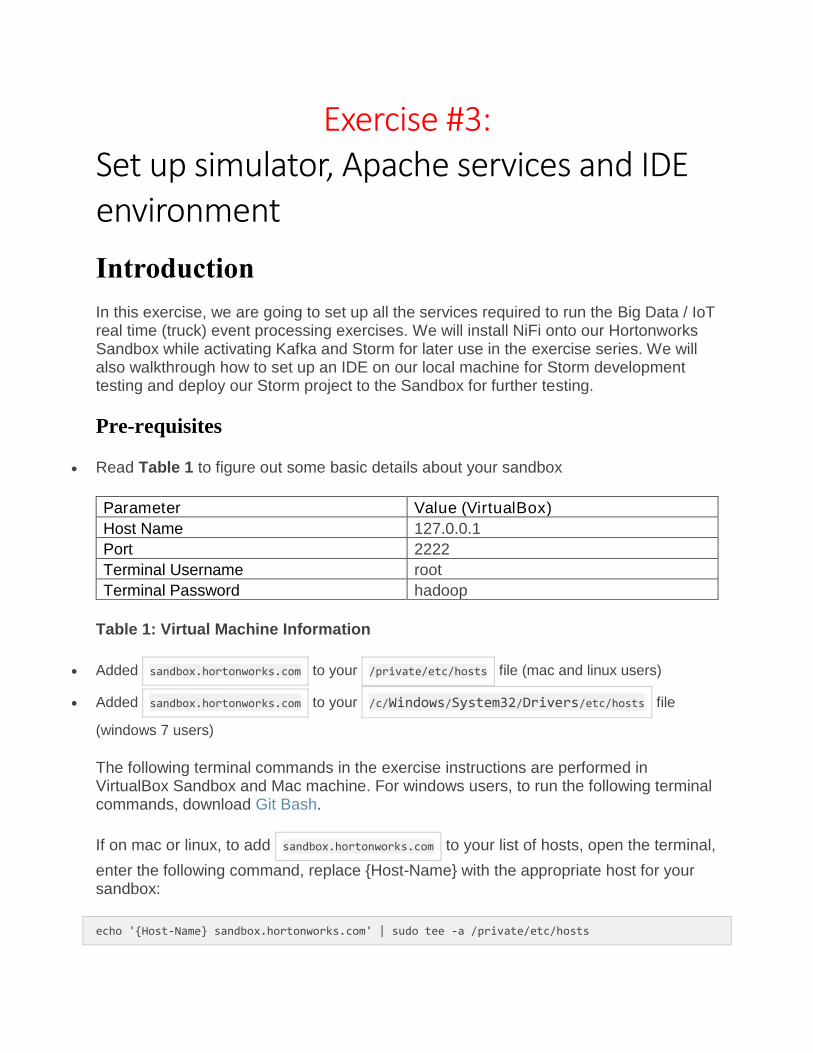
2. Login into Ambari as admin. In the left sidebar of services, click on the Actions button. A drop down menu appears, select the Add
Service button . The Add Service Wizard window will appear.
Choose the NiFi service:
3. Once NiFi box is checked, select the Next button. As the Ambari Wizard transitions to Assign Masters, you will see an Error window message ignore it. Click on the OK button. You will see an indicator that the Assign Masters page is loading, keep its default settings and click Next. As the wizard transitions to Assign Slaves
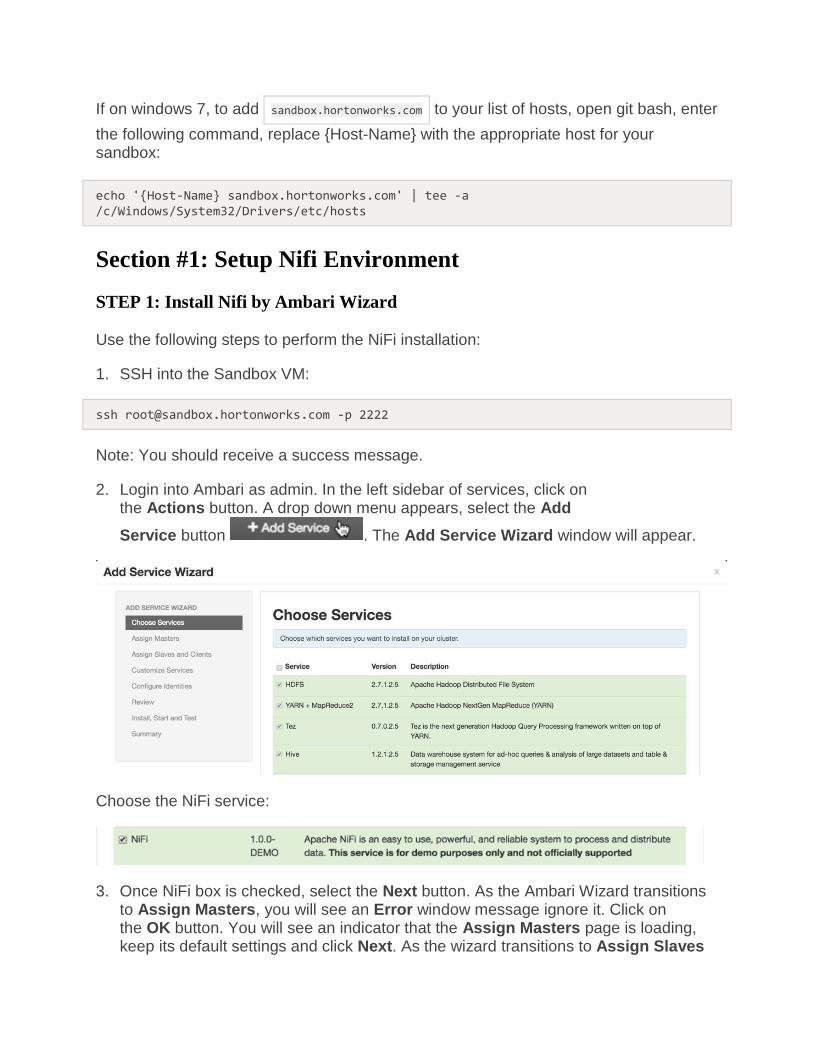
and Clients, a Validation Issues window will appear, select Continue Anyway. The wizard will continue onto the next setup settings called Customize Services. Keep its default settings, click Next. A Consistency Check Failed window will appear, click Proceed Anyway and you will proceed to the Review section.
4. For the Review section, you will see a list of repositories, select Deploy->.
Note: you should see a preparing to deploy message.
5. The wizard will transition to the Install, Start and Test section. Click Next.

6. At the Summary section, you see an Important alert, which states that we should restart services that contain restart indicators in the left sidebar of Ambari Services on the Ambari Dashboard. Click Continue->.
7. Upon a successful installation, you should see a new service listed with a green check symbol next to the service name. This check symbol also indicates that NiFi is running.
STEP 2: Start Nifi via Ambari Services
If NiFi is not already running, we will use Ambari Service Tool to launch NiFi.
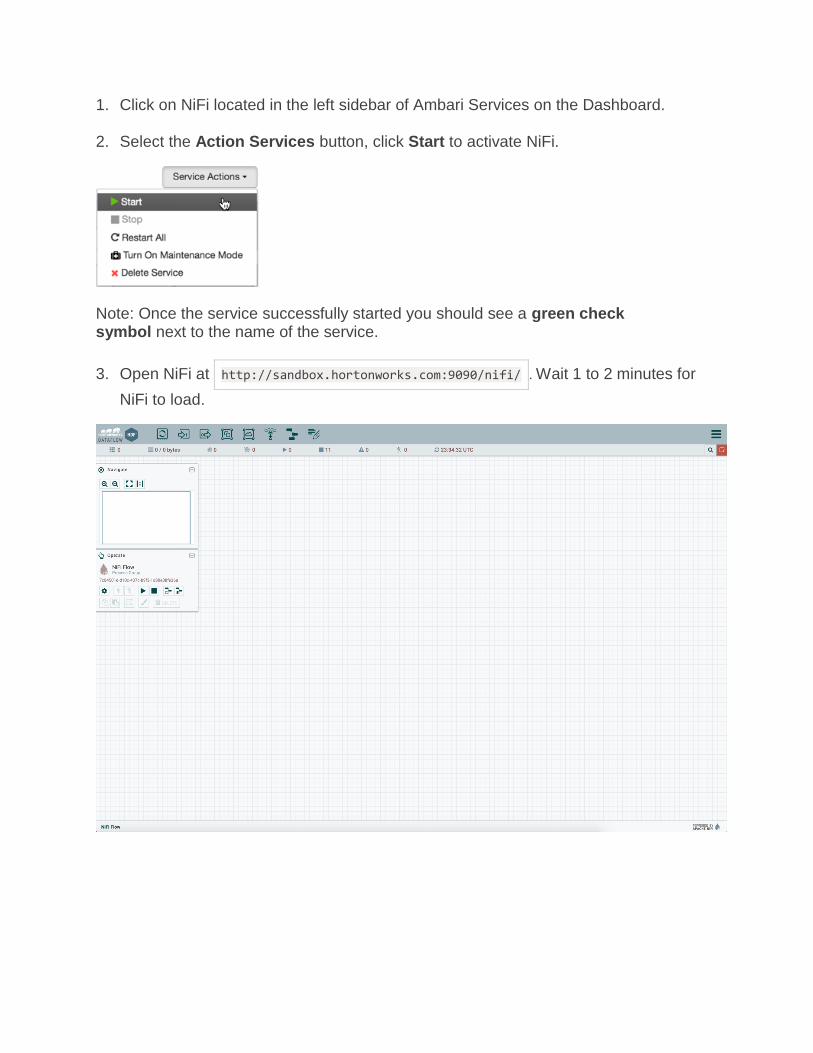
1. Click on NiFi located in the left sidebar of Ambari Services on the Dashboard.
2. Select the Action Services button, click Start to activate NiFi.
Note: Once the service successfully started you should see a green check symbol next to the name of the service.
3. Open NiFi at http://sandbox.hortonworks.com:9090/nifi/ . Wait 1 to 2 minutes for
NiFi to load.
Section #2: Setup Kafka Service
We need to setup Kafka because it will be used as secure cluster or the location where NiFi transports the data. Storm will pull that data from the cluster and push it into its topology(dataflow).
STEP 1: Start Kafka
1.1 ACCESS AMBARI
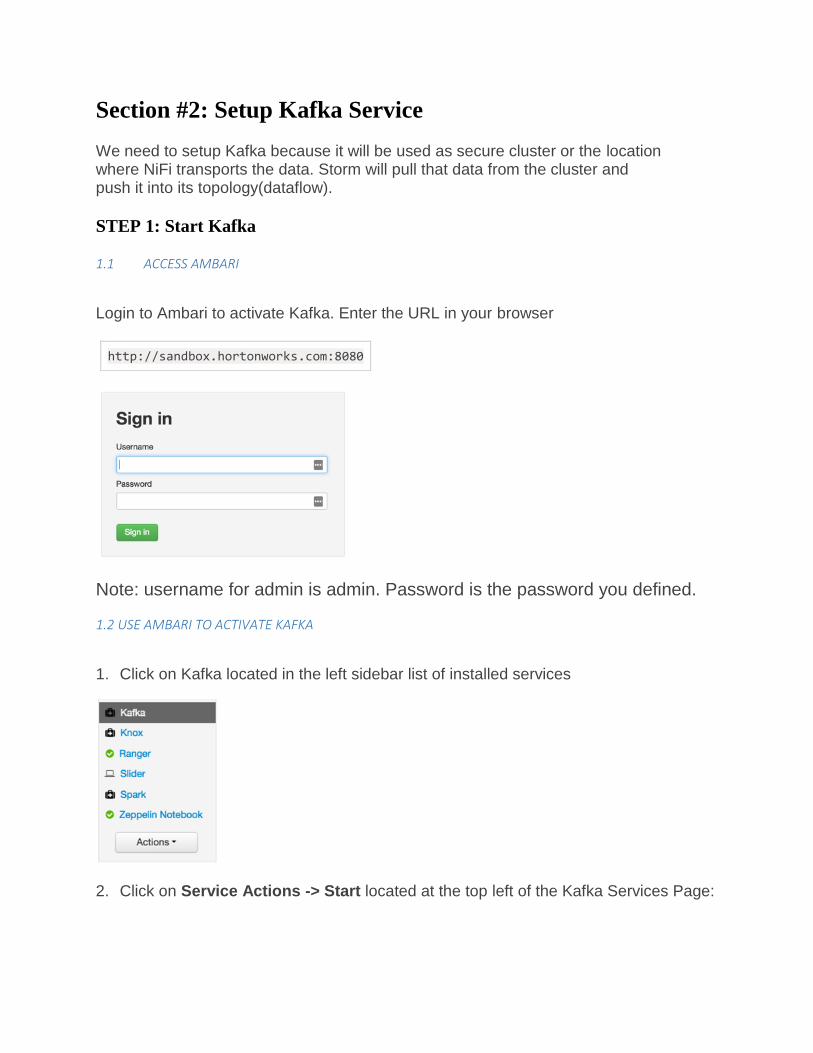
Login to Ambari to activate Kafka. Enter the URL in your browser
http://sandbox.hortonworks.com:8080
Note: username for admin is admin. Password is the password you defined.
1.2 USE AMBARI TO ACTIVATE KAFKA
1. Click on Kafka located in the left sidebar list of installed services
2. Click on Service Actions -> Start located at the top left of the Kafka Services Page:

3. Check the Turn off Maintenance Mode for Kafka box and click on Confirm Start:
Wait for Kafka to start.
STEP 2: Configure Kafka with ZooKeeper
ZooKeeper is the coordination interface between the Kafka broker and consumers:
The important Zookeeper properties can be checked in Ambari.
2.1 CONFIGURE ZOOKEEPER
Click on ZooKeeper in the list of services, then open the Configs tab. Verify ZooKeeper runs on port 2181:
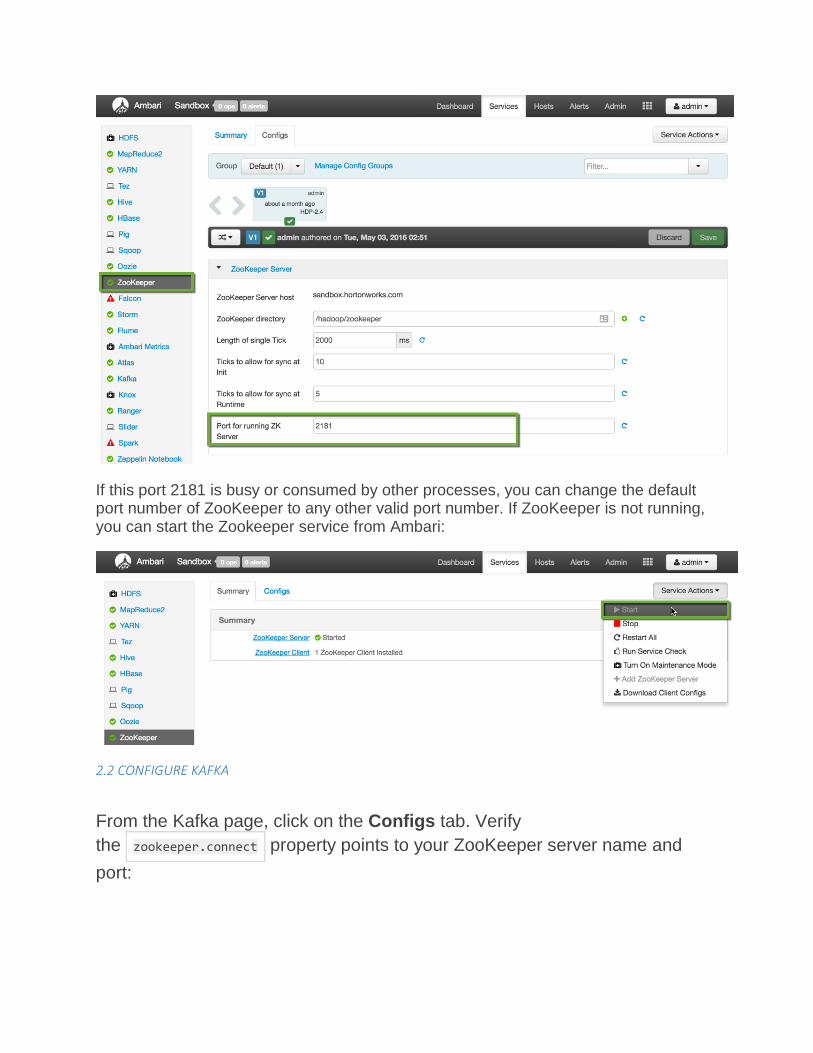
If this port 2181 is busy or consumed by other processes, you can change the default port number of ZooKeeper to any other valid port number. If ZooKeeper is not running, you can start the Zookeeper service from Ambari:
2.2 CONFIGURE KAFKA
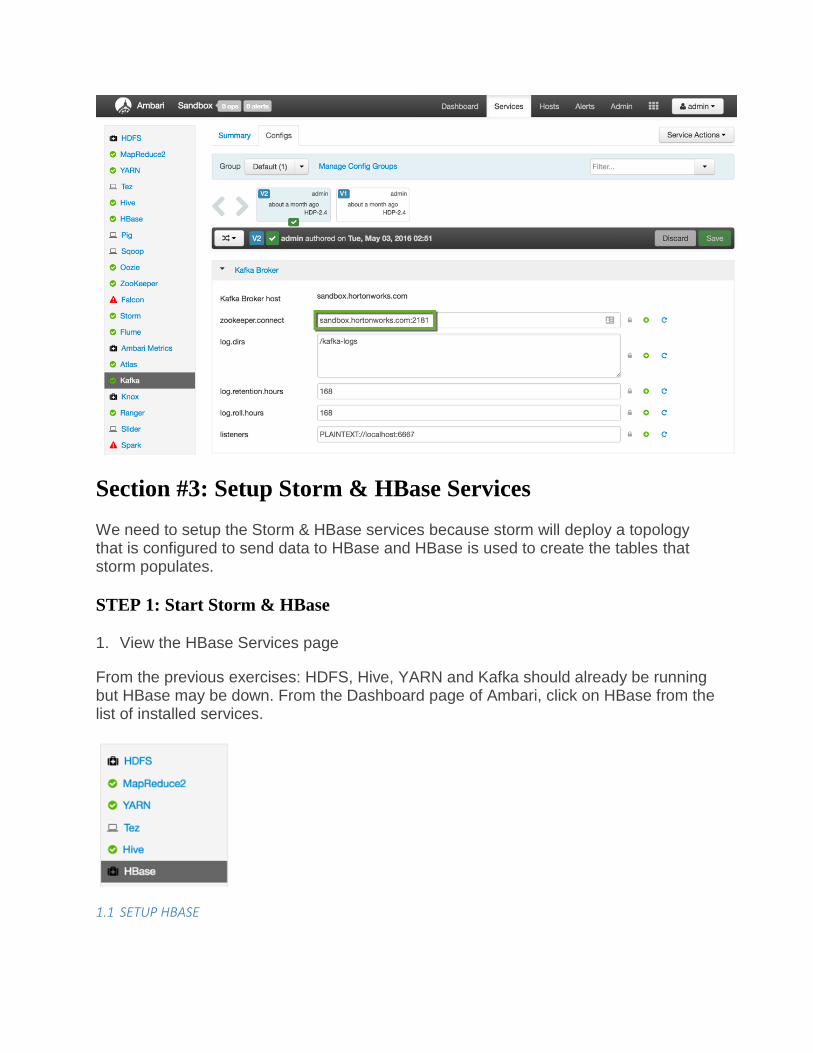
From the Kafka page, click on the Configs tab. Verify
the zookeeper.connect property points to your ZooKeeper server name and
port:
Section #3: Setup Storm & HBase Services
We need to setup the Storm & HBase services because storm will deploy a topology that is configured to send data to HBase and HBase is used to create the tables that storm populates.
STEP 1: Start Storm & HBase
1. View the HBase Services page
From the previous exercises: HDFS, Hive, YARN and Kafka should already be running but HBase may be down. From the Dashboard page of Ambari, click on HBase from the list of installed services.
1.1 SETUP HBASE
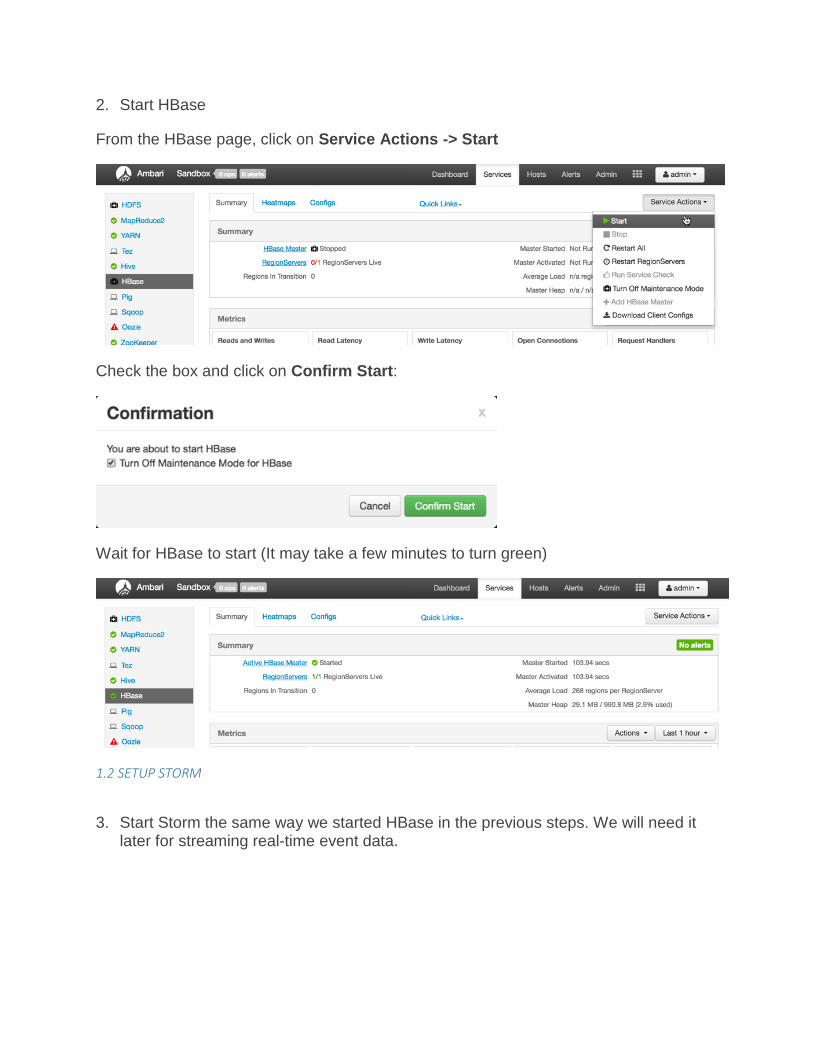
2. Start HBase
From the HBase page, click on Service Actions -> Start
Check the box and click on Confirm Start:
Wait for HBase to start (It may take a few minutes to turn green)
1.2 SETUP STORM
3. Start Storm the same way we started HBase in the previous steps. We will need it later for streaming real-time event data.
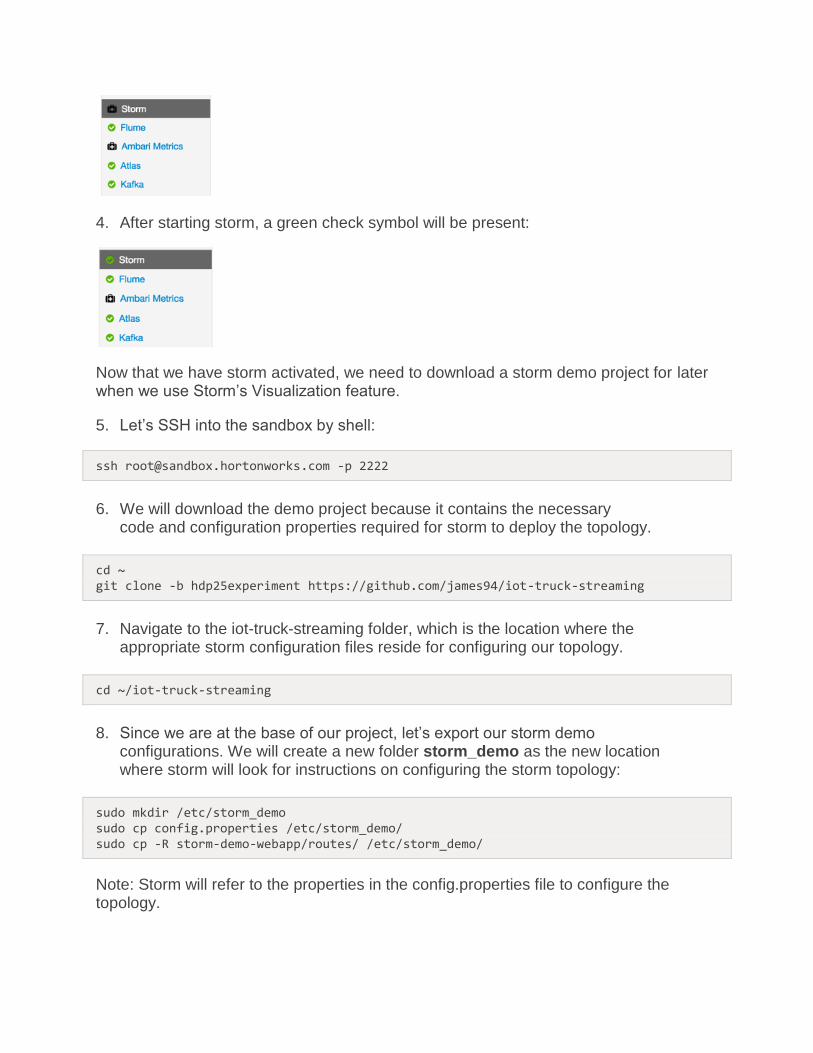
4. After starting storm, a green check symbol will be present:
Now that we have storm activated, we need to download a storm demo project for later when we use Storm’s Visualization feature.
5. Let’s SSH into the sandbox by shell:
ssh [email protected] -p 2222
6. We will download the demo project because it contains the necessary
code and configuration properties required for storm to deploy the topology.
cd ~ git clone -b hdp25experiment https://github.com/james94/iot-truck-streaming
7. Navigate to the iot-truck-streaming folder, which is the location where the
appropriate storm configuration files reside for configuring our topology.
cd ~/iot-truck-streaming
8. Since we are at the base of our project, let’s export our storm demo
configurations. We will create a new folder storm_demo as the new location where storm will look for instructions on configuring the storm topology:
sudo mkdir /etc/storm_demo sudo cp config.properties /etc/storm_demo/ sudo cp -R storm-demo-webapp/routes/ /etc/storm_demo/
Note: Storm will refer to the properties in the config.properties file to configure the topology.
You can use the Ambari dashboard to check status of other components too. If HDFS, Hive, YARN are down, you can start them in the same way: by selecting the service and then using the Service Actions to start it. The remaining components do not have to be up. (Oozie can be stopped to save memory, as it is not needed for this exercise)
Section #4: Run the simulator by terminal
The simulator must be setup in order for NiFi to pull data from it and push that data into the dataflow.
Stream Simulator
The stream simulator is a lightweight framework that generates truck event data. The simulator uses New York City Truck Routes (kml) which defines driver road paths with Latitude and Longitude information. The simulator uses Akka to simplify concurrency, messaging and inheritance. It has two Plain Old Java Objects (POJOS), one for Trucks and another for Drivers that generate the events. Consequently, the AbstractEventEmitter class becomes extended while the onReceive method generates events, creates new Actors, sends messages to Actors and delivers those events to an EventCollector class. This class’s purpose is to collect events generated from the domain objects and print them to standard output. Let’s run the simulator through the terminal and see the events that are generated.
STEP 1: Run the simulator by shell
Before we run the simulator, let’s install and download the simulator.
1.1 SETUP THE SIMULATOR
1. If you have not already, ssh into sandbox shell, type the command to access the sandbox by shell:
ssh [email protected] -p 2222
2. Install Apache Maven. We will use it to compile the simulator code,
so we can activate the simulator by shell or NiFi later. Execute the command:
cd ~/iot-truck-streaming ./setup/bin/install_maven.sh
Note: You will be prompted to allow maven to install, type ‘y’ for yes
After your maven package installs, you should obtain the message: Complete!
3. For maven to run, it needs to detect the pom.xml file. Rename pom25.xml to pom.xml, copy/paste the commands:
mv -f storm-streaming/pom25.xml storm-streaming/pom.xml /usr/maven/bin/mvn clean package -DskipTests
Note: You should receive that all sub projects compiled successfully.
1.2 RUN THE SIMULATOR
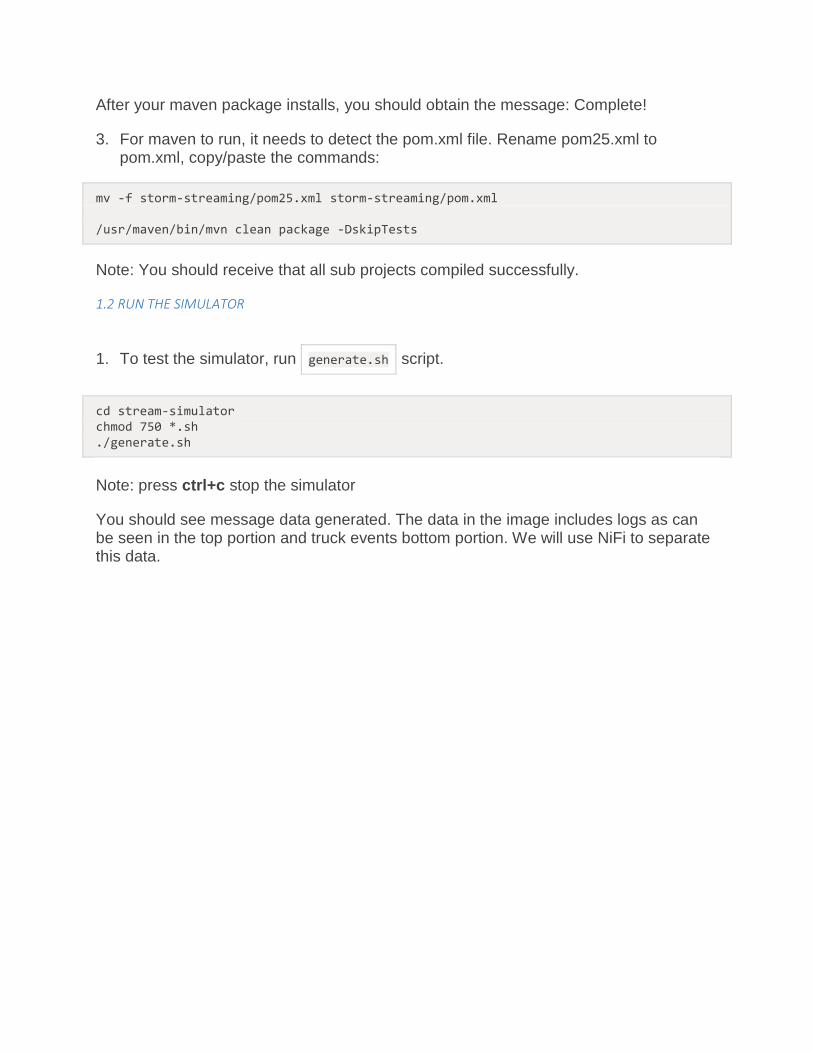
1. To test the simulator, run generate.sh script.
cd stream-simulator chmod 750 *.sh ./generate.sh
Note: press ctrl+c stop the simulator
You should see message data generated. The data in the image includes logs as can be seen in the top portion and truck events bottom portion. We will use NiFi to separate this data.
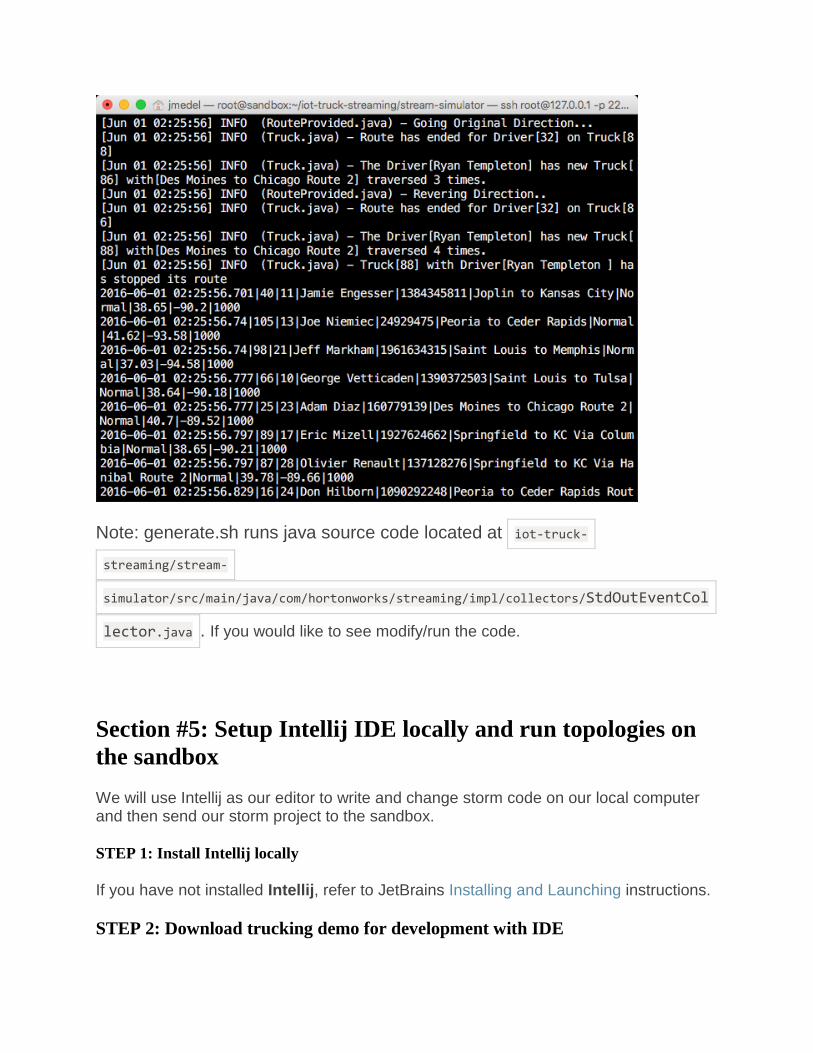
Note: generate.sh runs java source code located at iot-truck-
streaming/stream-
simulator/src/main/java/com/hortonworks/streaming/impl/collectors/StdOutEventCol
lector.java . If you would like to see modify/run the code.
Section #5: Setup Intellij IDE locally and run topologies on
the sandbox
We will use Intellij as our editor to write and change storm code on our local computer and then send our storm project to the sandbox.
STEP 1: Install Intellij locally
If you have not installed Intellij, refer to JetBrains Installing and Launching instructions.
STEP 2: Download trucking demo for development with IDE
Earlier we cloned the iot-truck-streaming project from github onto our sandbox. Now we will clone it onto our local machine.
1. Perform the git clone command on the local machine. Feel free to clone it in any directory, just remember the location. In the exercise, let’s clone it in our Documents folder.
cd ~/Documents git clone -b hdp25experiment https://github.com/james94/iot-truck-streaming.git
Note: You may receive an error if you don’t have git installed on your local machine.
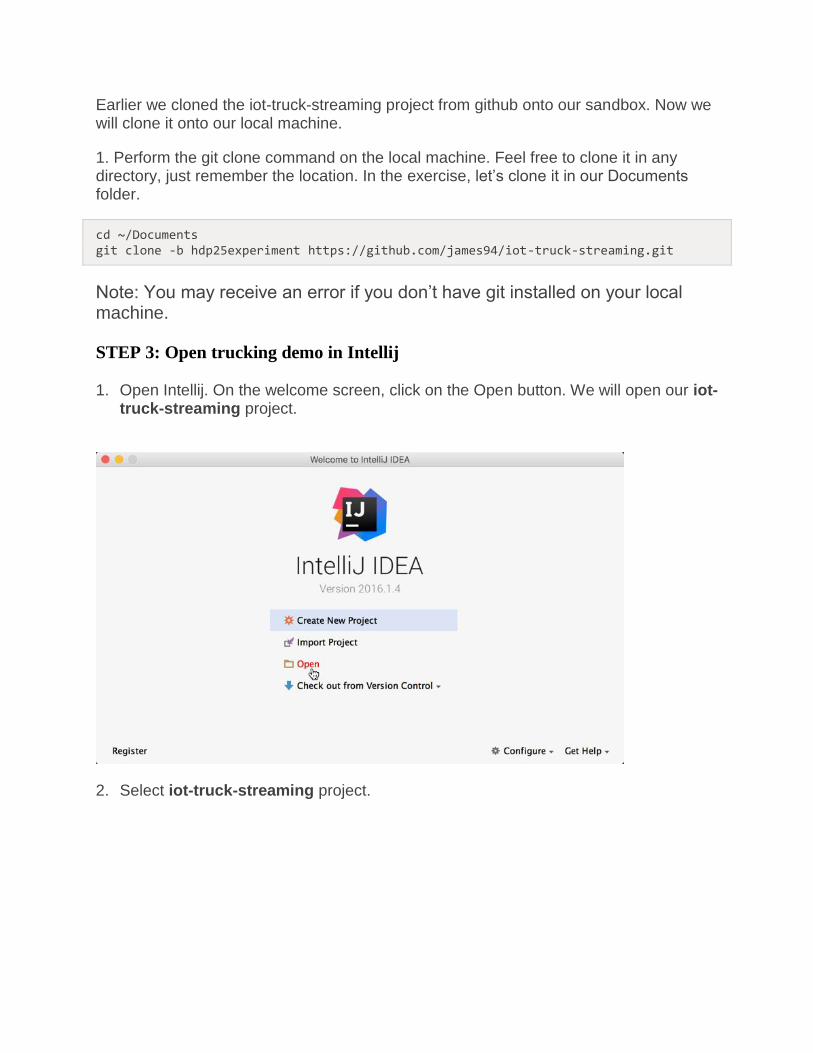
STEP 3: Open trucking demo in Intellij
1. Open Intellij. On the welcome screen, click on the Open button. We will open our iot-truck-streaming project.
2. Select iot-truck-streaming project.
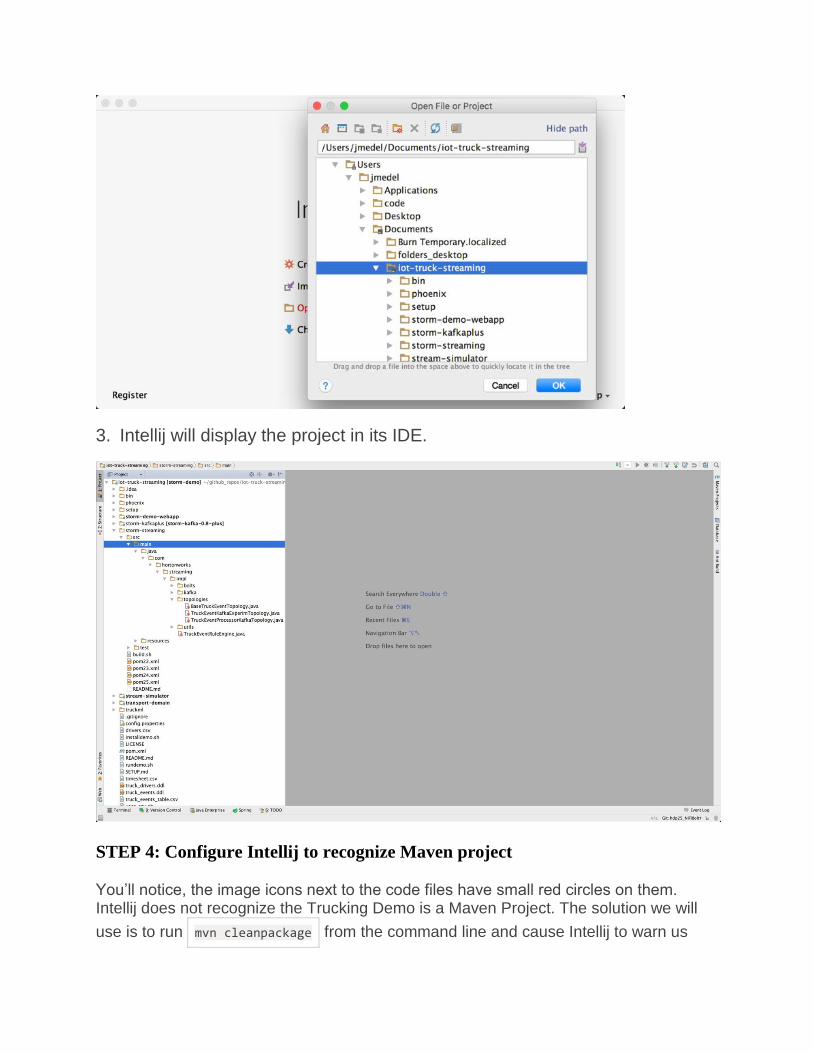
3. Intellij will display the project in its IDE.
STEP 4: Configure Intellij to recognize Maven project
You’ll notice, the image icons next to the code files have small red circles on them. Intellij does not recognize the Trucking Demo is a Maven Project. The solution we will
use is to run mvn cleanpackage from the command line and cause Intellij to warn us
that Maven Projects need to be imported to be recognized by the IDE. When the Enable Auto-Import box appears in Intellij, we will activate for Maven projects. 1. Let’s begin the process to run maven against our Trucking Demo Project.
4.1 SPECIFY POM.XML FOR MAVEN
• For maven to work, we have to tell it which pom file to use from the storm-streaming
directory. Let’s rename pom25 to pom using shell.
mv iot-truck-streaming/storm-streaming/pom25.xml iot-truck-streaming/storm-streaming/pom.xml
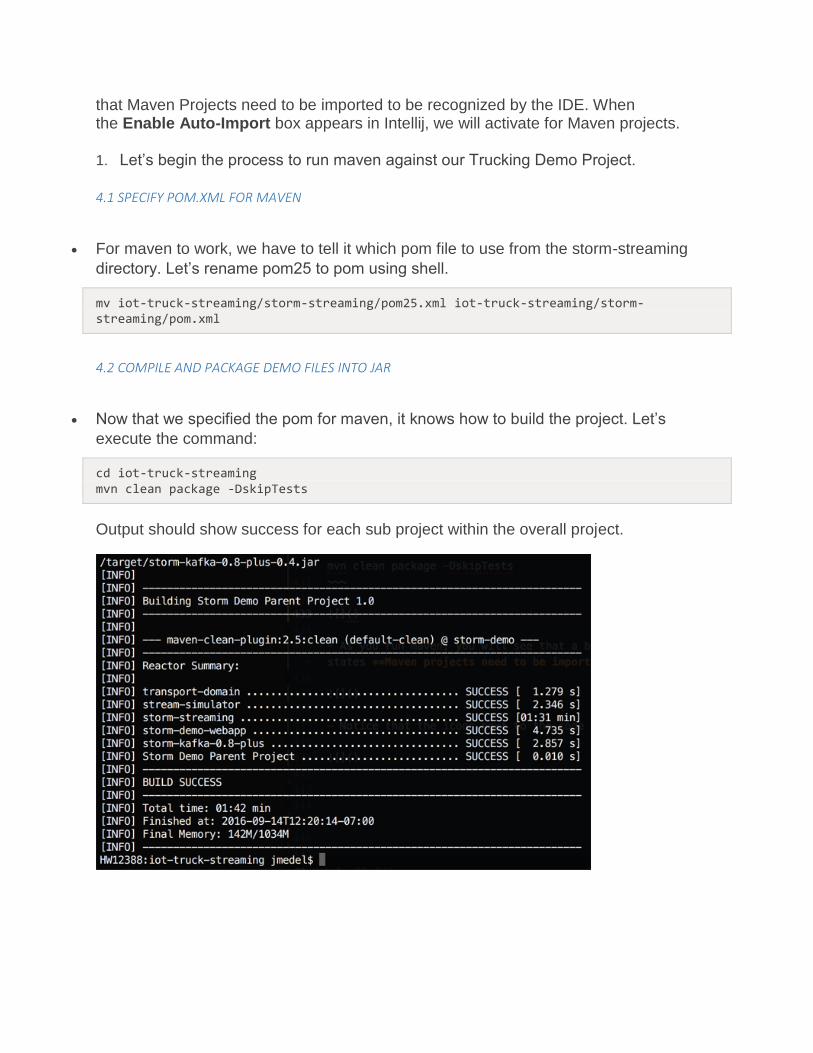
4.2 COMPILE AND PACKAGE DEMO FILES INTO JAR
• Now that we specified the pom for maven, it knows how to build the project. Let’s
execute the command:
cd iot-truck-streaming mvn clean package -DskipTests
Output should show success for each sub project within the overall project.
APACHE MAVEN COMMAND:
mvn clean deletes everything in the target folder. For example, if this was the second time you ran the mvn command from iot-truck-streaming folder, the storm-streaming folder as well as other folders that contain pom.xml files will have their target folders impacted. Clean part of the command removes the old target folder, while the package part of the command compiles the code and packages it into jar files per the pom file.
Note: packaging may take around 9 minutes. Add -DskipTests to the end of mvn command to speed up process.
Why is Maven important for development testing? It enables developers to test their large software projects that contain many java files at fast speeds.
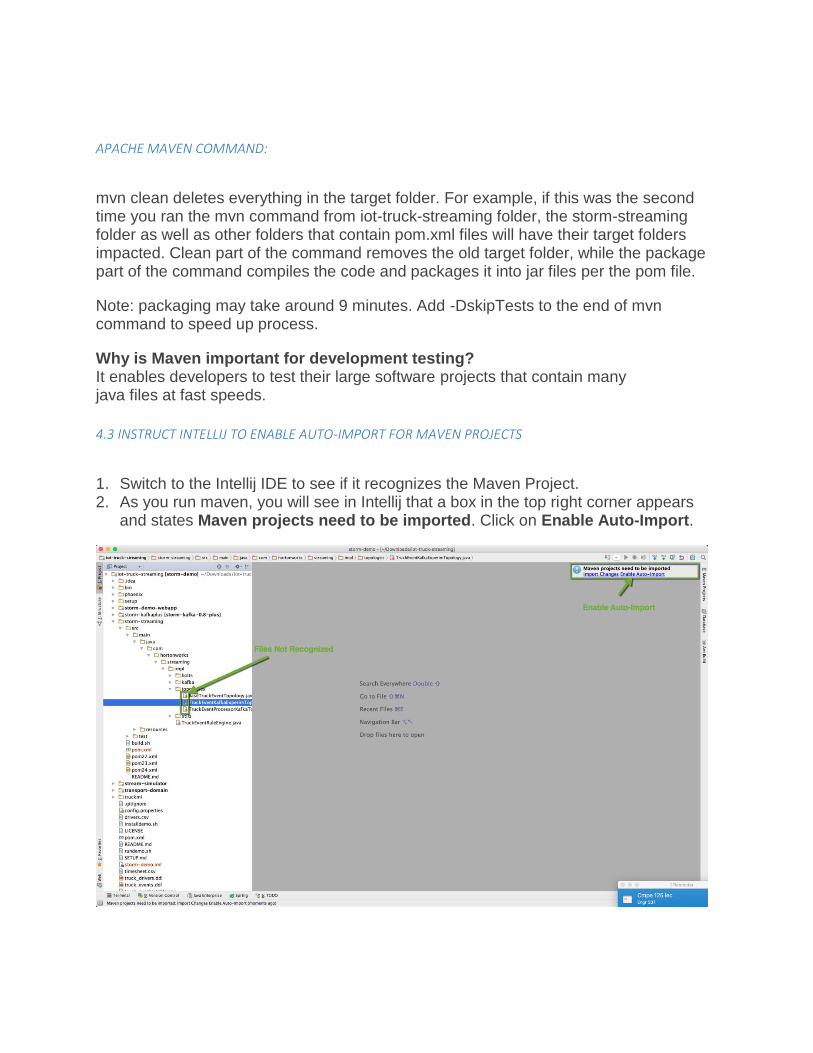
4.3 INSTRUCT INTELLIJ TO ENABLE AUTO-IMPORT FOR MAVEN PROJECTS
1. Switch to the Intellij IDE to see if it recognizes the Maven Project. 2. As you run maven, you will see in Intellij that a box in the top right corner appears
and states Maven projects need to be imported. Click on Enable Auto-Import.
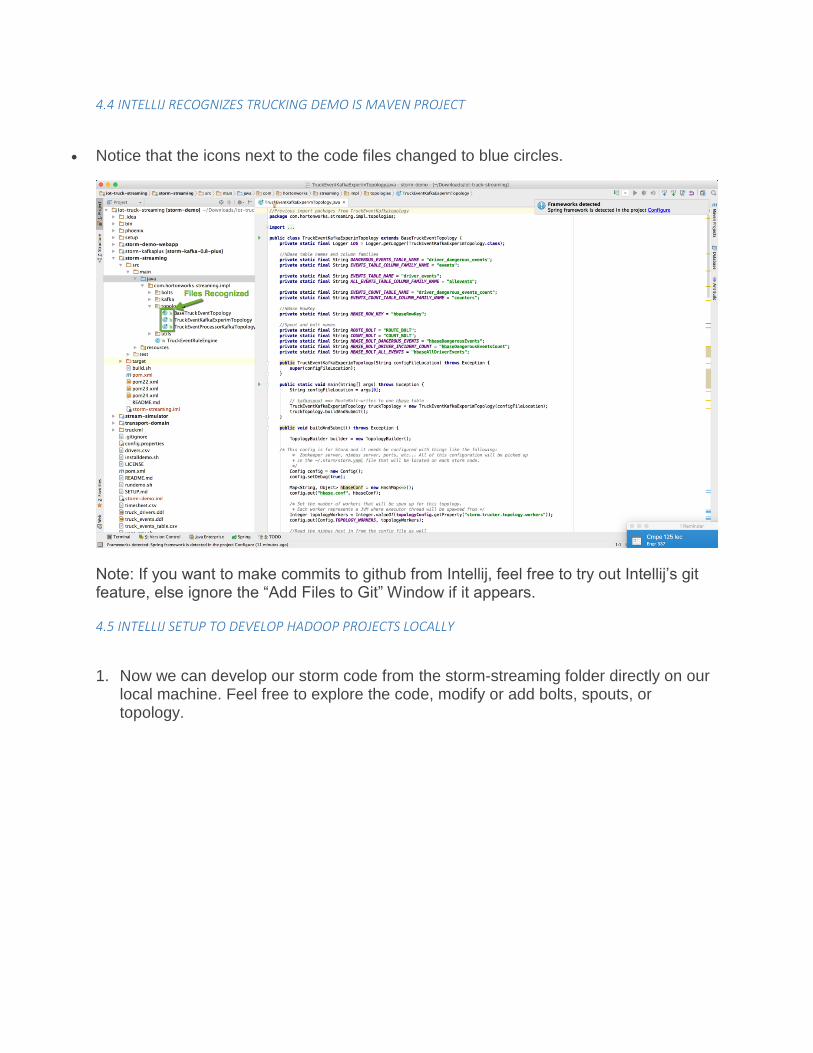
4.4 INTELLIJ RECOGNIZES TRUCKING DEMO IS MAVEN PROJECT
• Notice that the icons next to the code files changed to blue circles.
Note: If you want to make commits to github from Intellij, feel free to try out Intellij’s git feature, else ignore the “Add Files to Git” Window if it appears.
4.5 INTELLIJ SETUP TO DEVELOP HADOOP PROJECTS LOCALLY
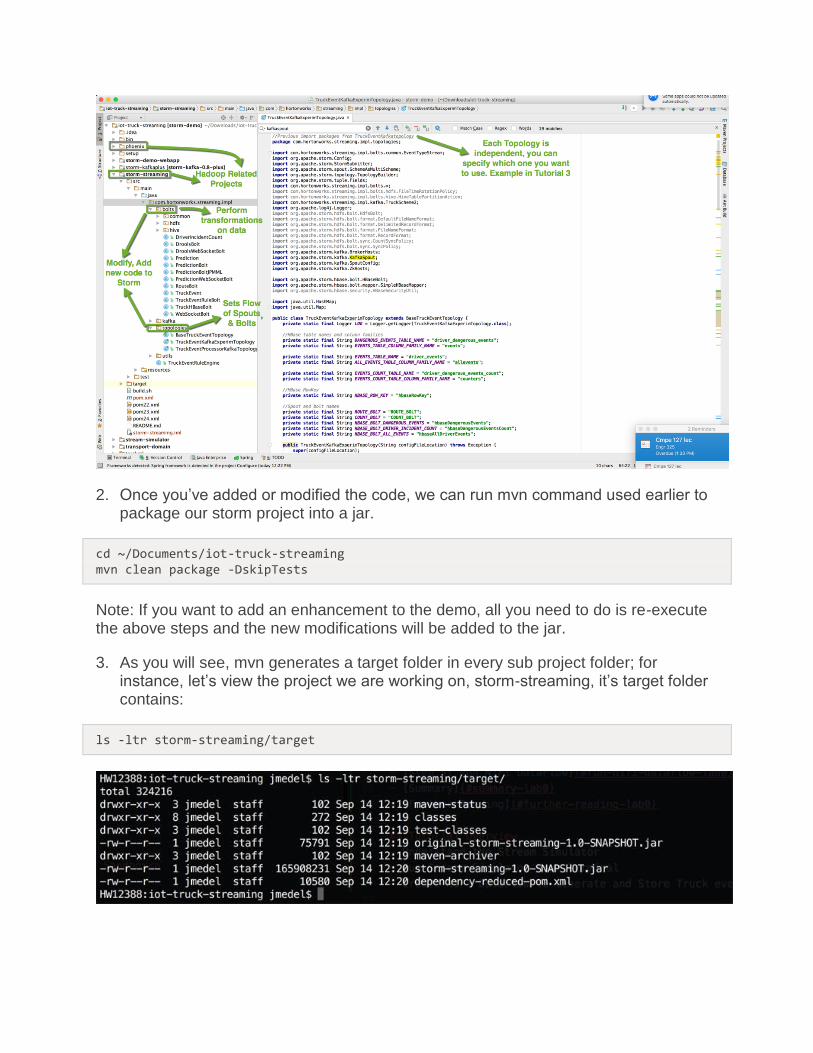
1. Now we can develop our storm code from the storm-streaming folder directly on our local machine. Feel free to explore the code, modify or add bolts, spouts, or topology.
2. Once you’ve added or modified the code, we can run mvn command used earlier to package our storm project into a jar.
cd ~/Documents/iot-truck-streaming mvn clean package -DskipTests
Note: If you want to add an enhancement to the demo, all you need to do is re-execute the above steps and the new modifications will be added to the jar.
3. As you will see, mvn generates a target folder in every sub project folder; for instance, let’s view the project we are working on, storm-streaming, it’s target folder contains:
ls -ltr storm-streaming/target
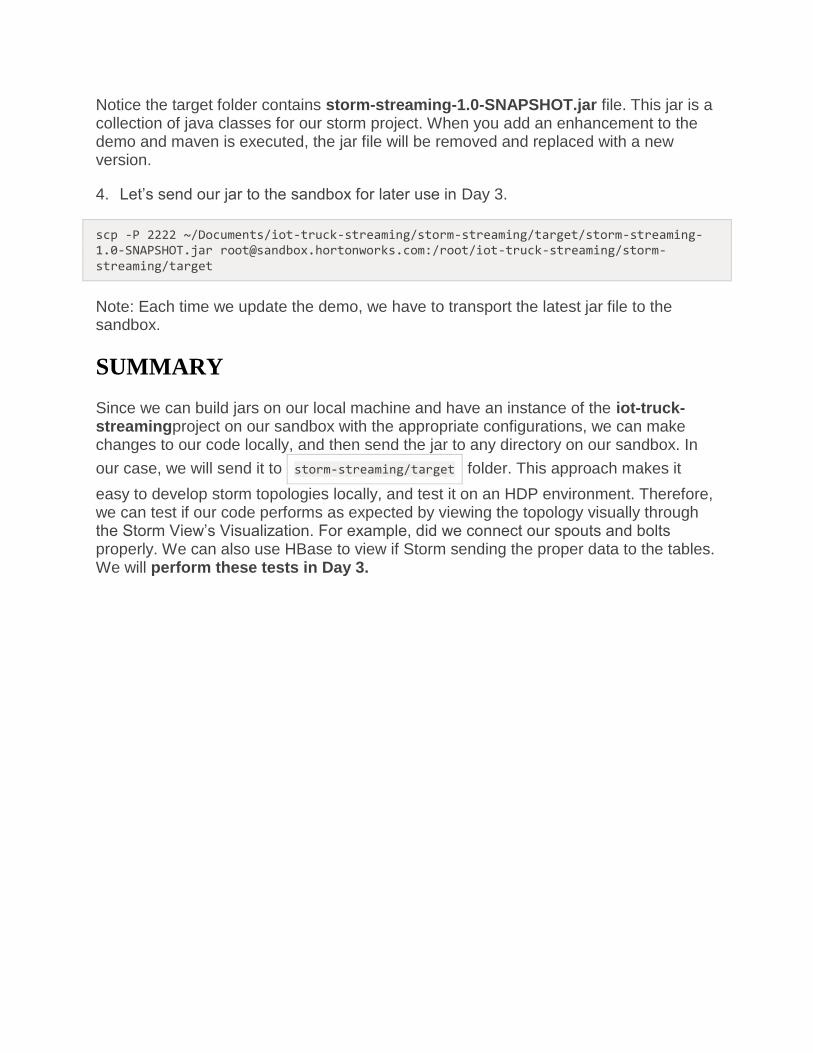
Notice the target folder contains storm-streaming-1.0-SNAPSHOT.jar file. This jar is a collection of java classes for our storm project. When you add an enhancement to the demo and maven is executed, the jar file will be removed and replaced with a new version.
4. Let’s send our jar to the sandbox for later use in Day 3.
scp -P 2222 ~/Documents/iot-truck-streaming/storm-streaming/target/storm-streaming-1.0-SNAPSHOT.jar [email protected]:/root/iot-truck-streaming/storm-streaming/target
Note: Each time we update the demo, we have to transport the latest jar file to the sandbox.
SUMMARY
Since we can build jars on our local machine and have an instance of the iot-truck-streamingproject on our sandbox with the appropriate configurations, we can make changes to our code locally, and then send the jar to any directory on our sandbox. In
our case, we will send it to storm-streaming/target folder. This approach makes it
easy to develop storm topologies locally, and test it on an HDP environment. Therefore, we can test if our code performs as expected by viewing the topology visually through the Storm View’s Visualization. For example, did we connect our spouts and bolts properly. We can also use HBase to view if Storm sending the proper data to the tables. We will perform these tests in Day 3.