Embed Size (px)
Citation preview

www.nebaribonsai.com
Evolution of a
Japanese Maple
Acer Palmatum, “Shishio Improved”
Developing nursery stock
Brian Van Fleet
www.nebaribonsai.com
2004
2004
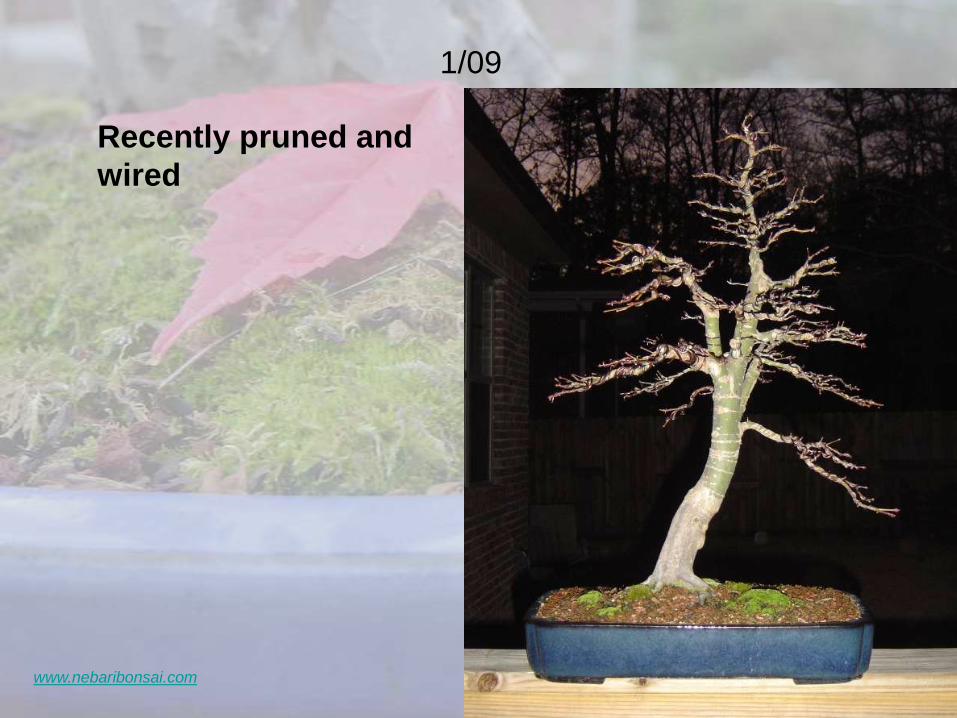
This tree
arrived in a 5-
gallon
container in
8/02. I
planted it in
the ground,
and layered
off the center
leader.
www.nebaribonsai.com
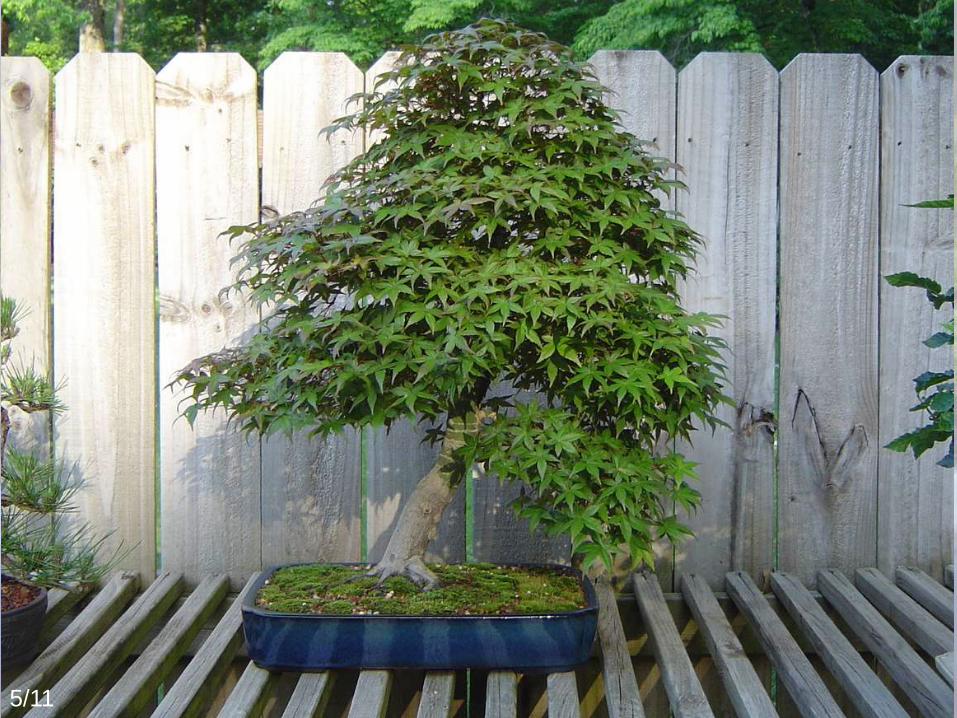
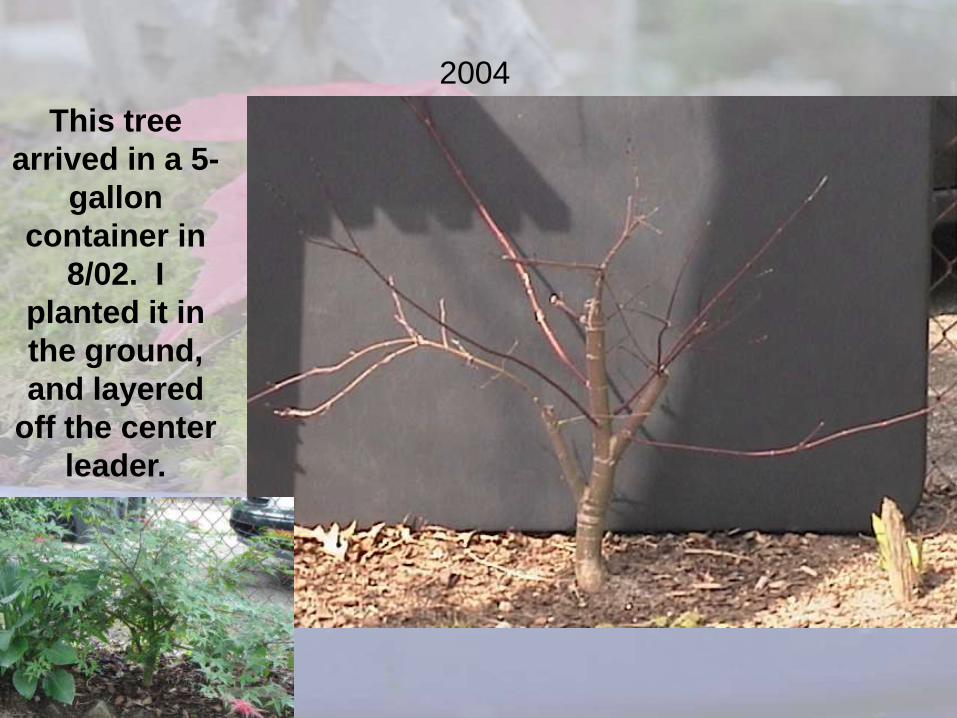
2005
Planted in it’s
first bonsai pot in
3/05. The tree
was allowed to
grow unchecked
for the season.
www.nebaribonsai.com
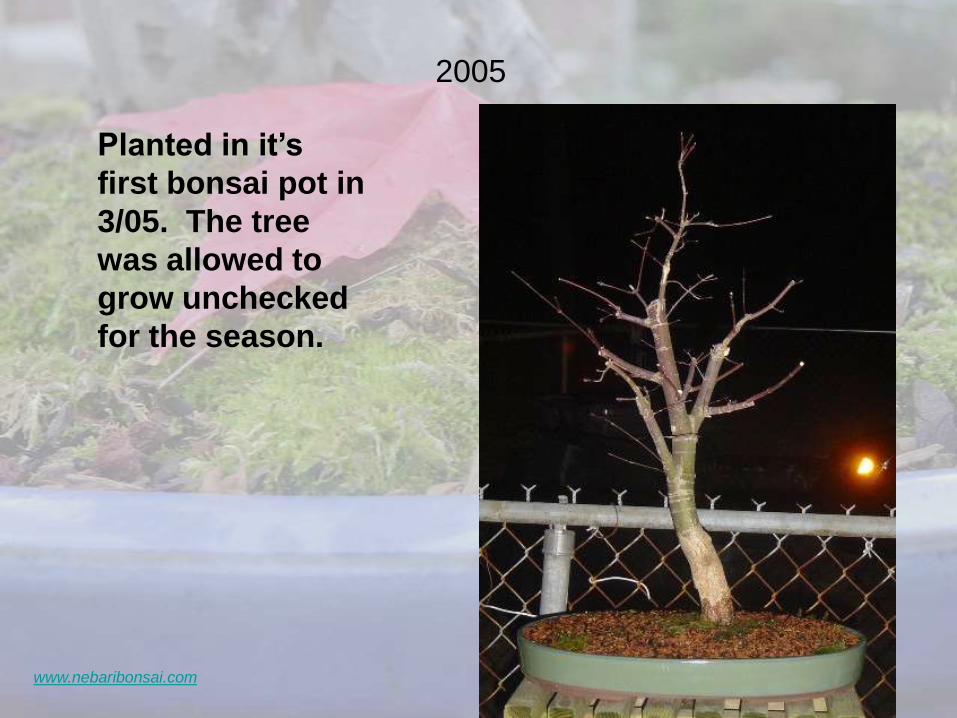
2005
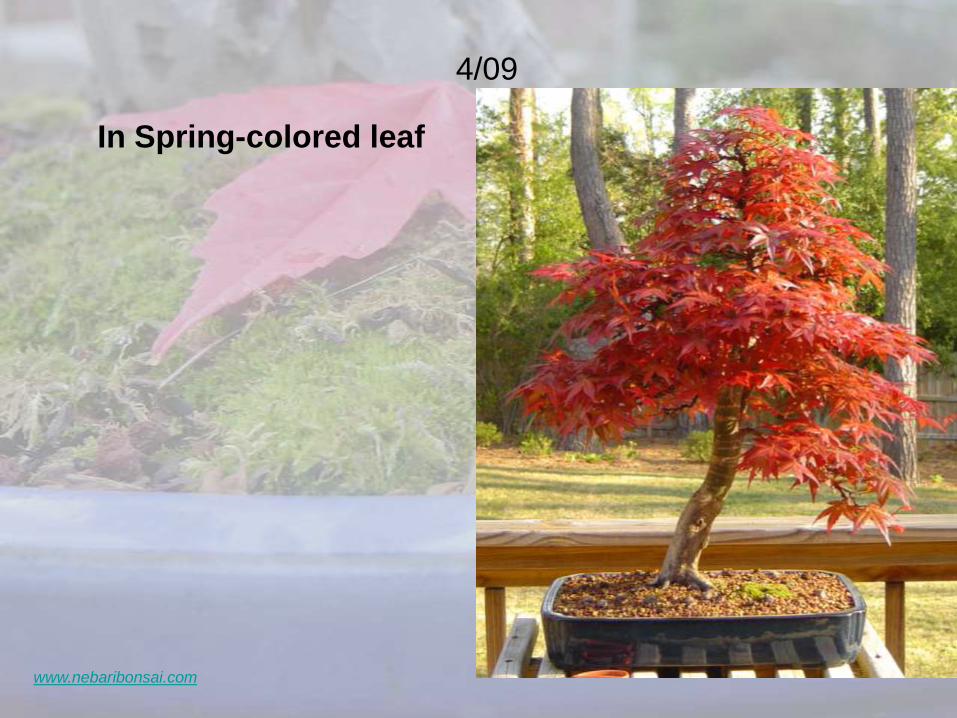
Mid-April 2005.
The Shishio
Improved has fire-
engine red foliage
which turns a
fresh green in
early summer.
www.nebaribonsai.com
2006
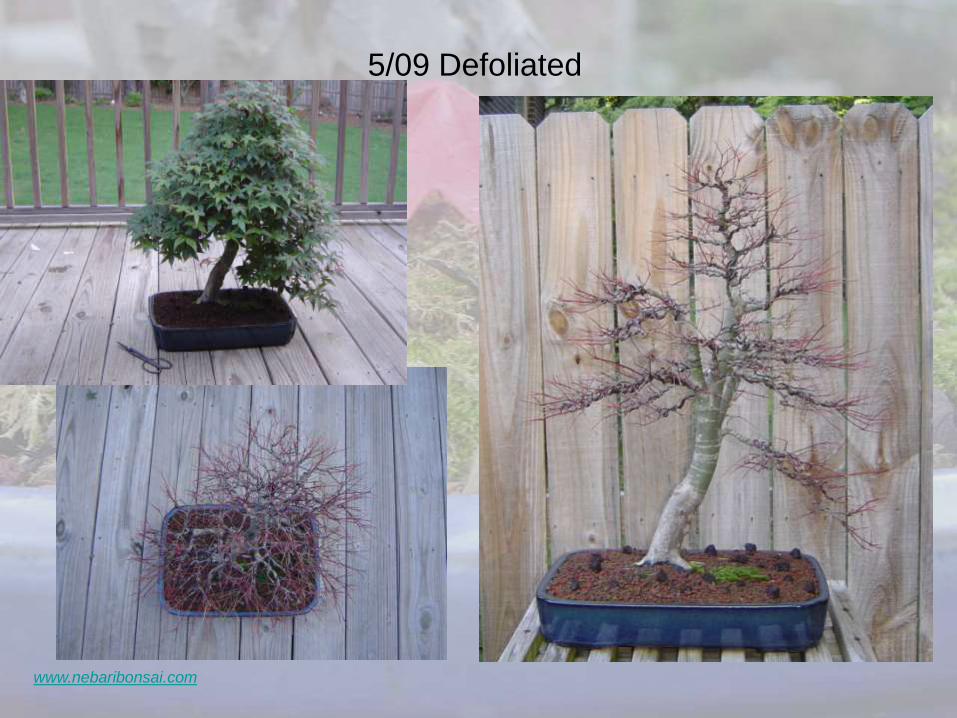
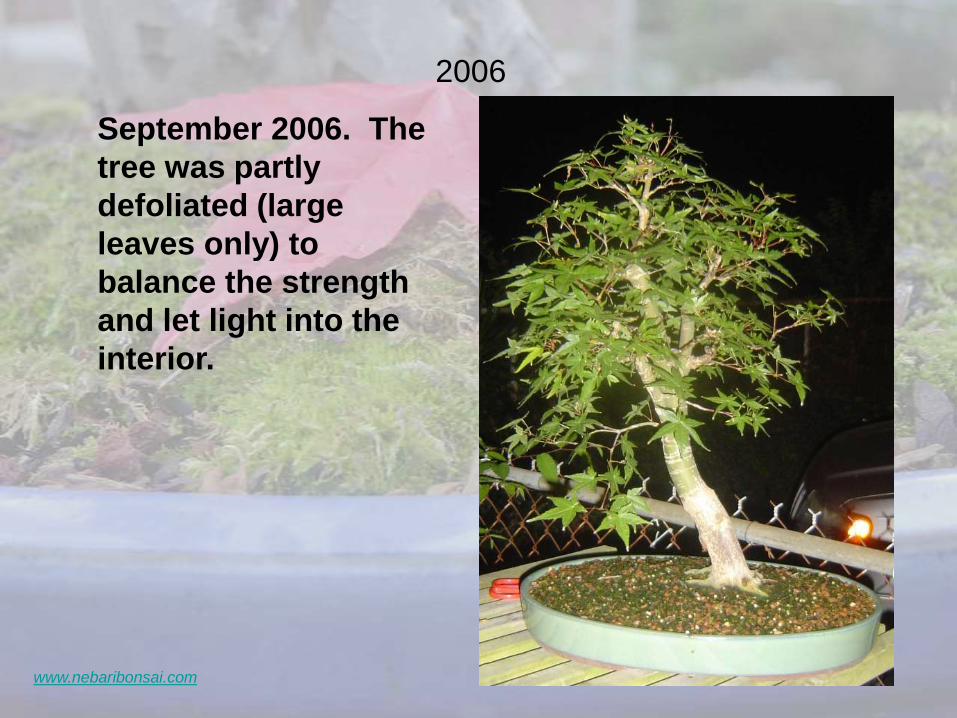
September 2006. The
tree was partly
defoliated (large
leaves only) to
balance the strength
and let light into the
interior.

www.nebaribonsai.com
2006
Christmas 2006. The
maple was wired, and
a new front was
selected based on
the movement of the
trunk and appearance
of the nebari.
www.nebaribonsai.com
2007
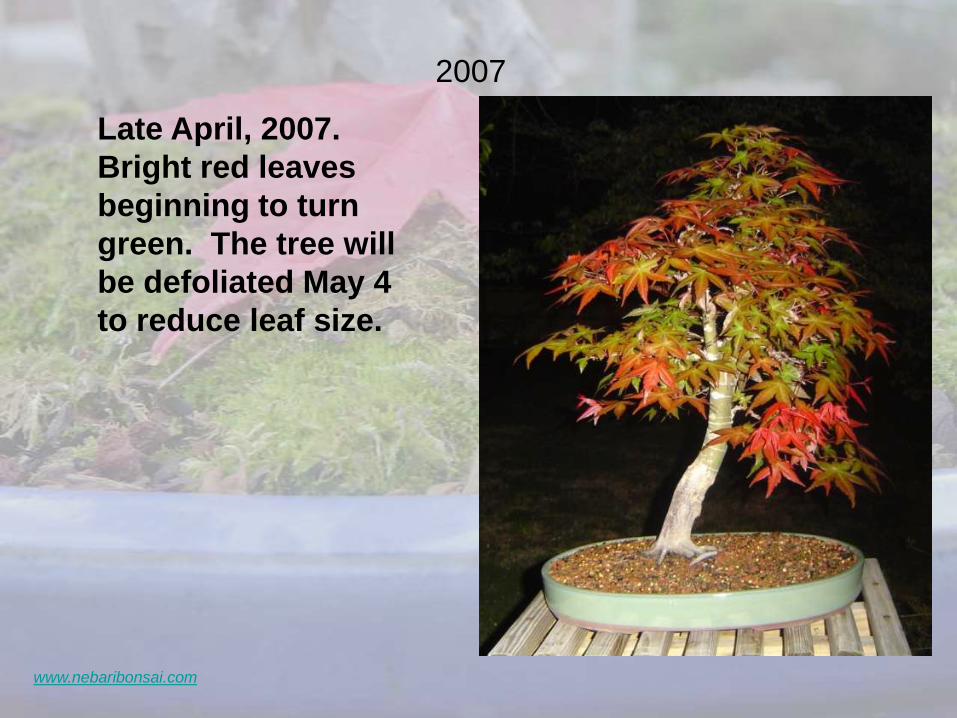
Late April, 2007.
Bright red leaves
beginning to turn
green. The tree will
be defoliated May 4
to reduce leaf size.
www.nebaribonsai.com
2007
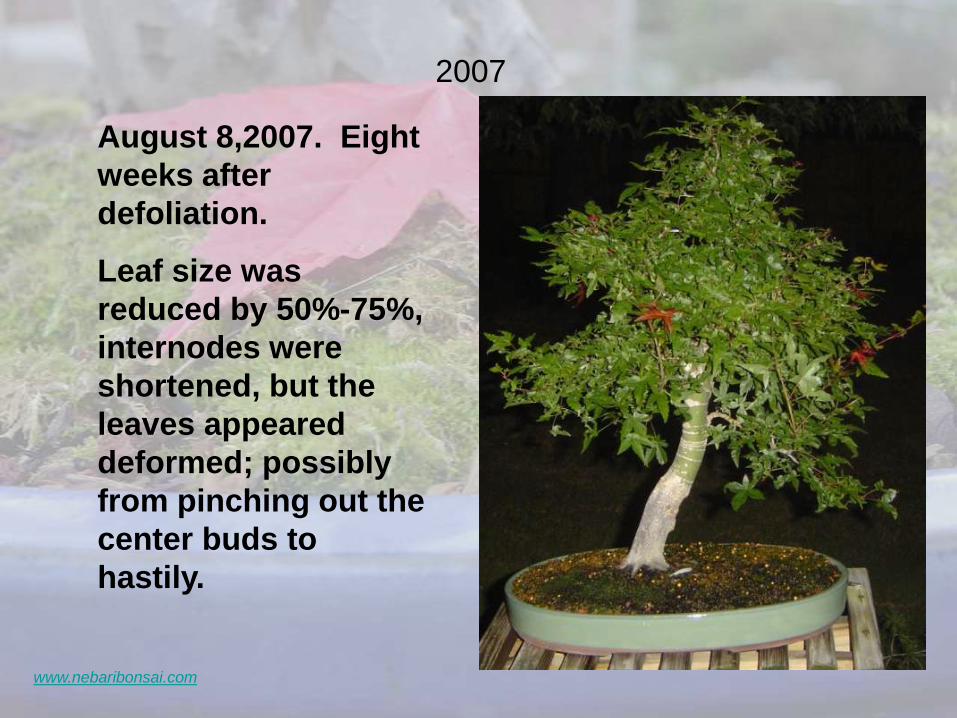
August 8,2007. Eight
weeks after
defoliation.
Leaf size was
reduced by 50%-75%,
internodes were
shortened, but the
leaves appeared
deformed; possibly
from pinching out the
center buds to
hastily.
www.nebaribonsai.com
2007
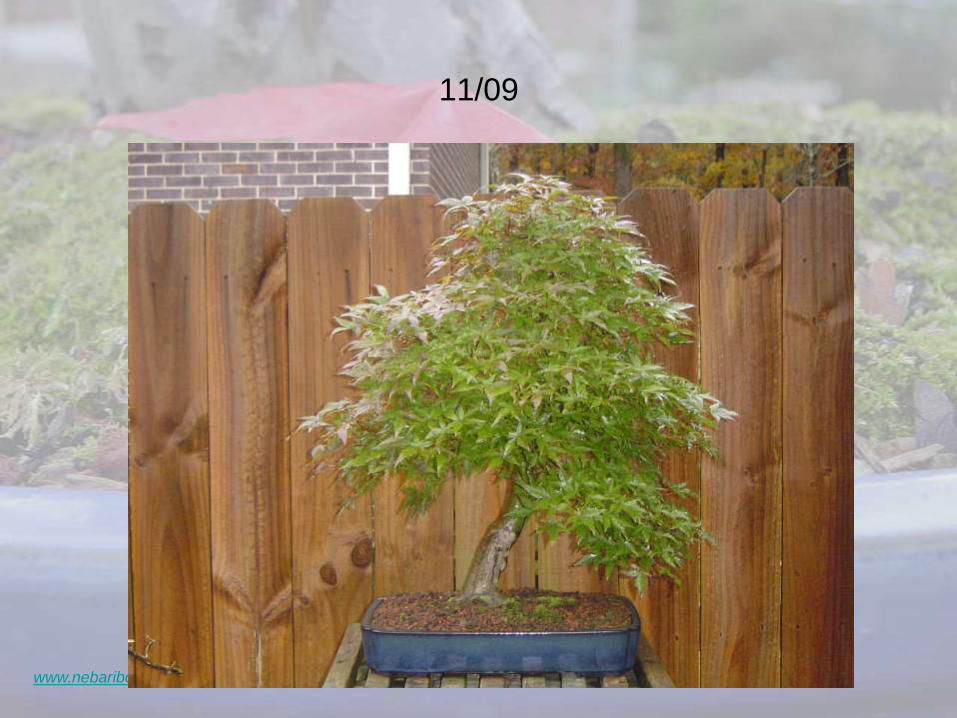
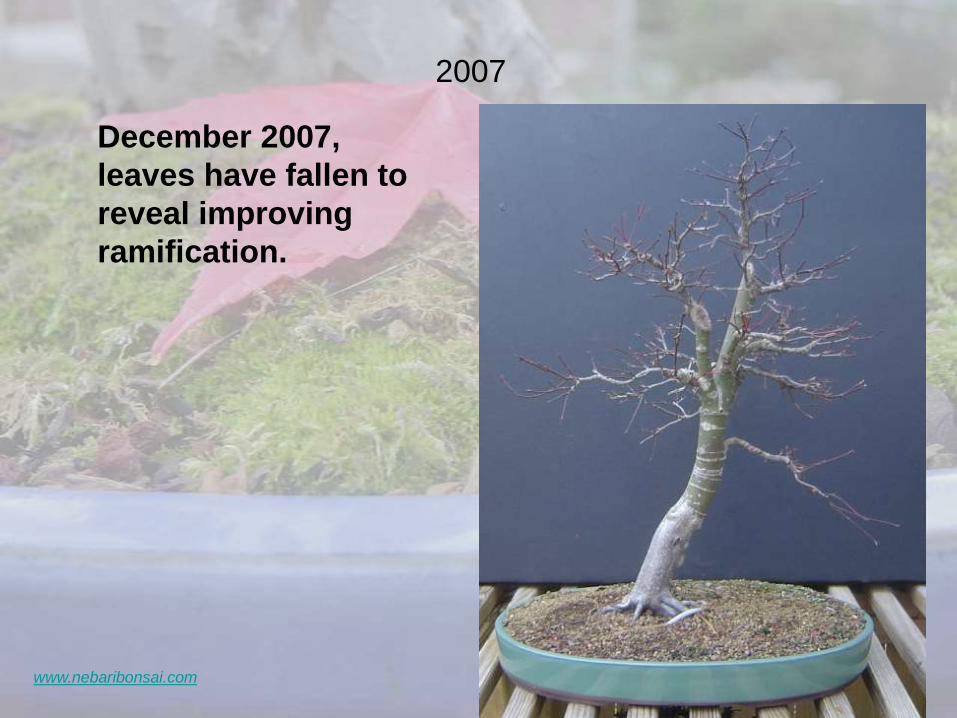
December 2007,
leaves have fallen to
reveal improving
ramification.
www.nebaribonsai.com
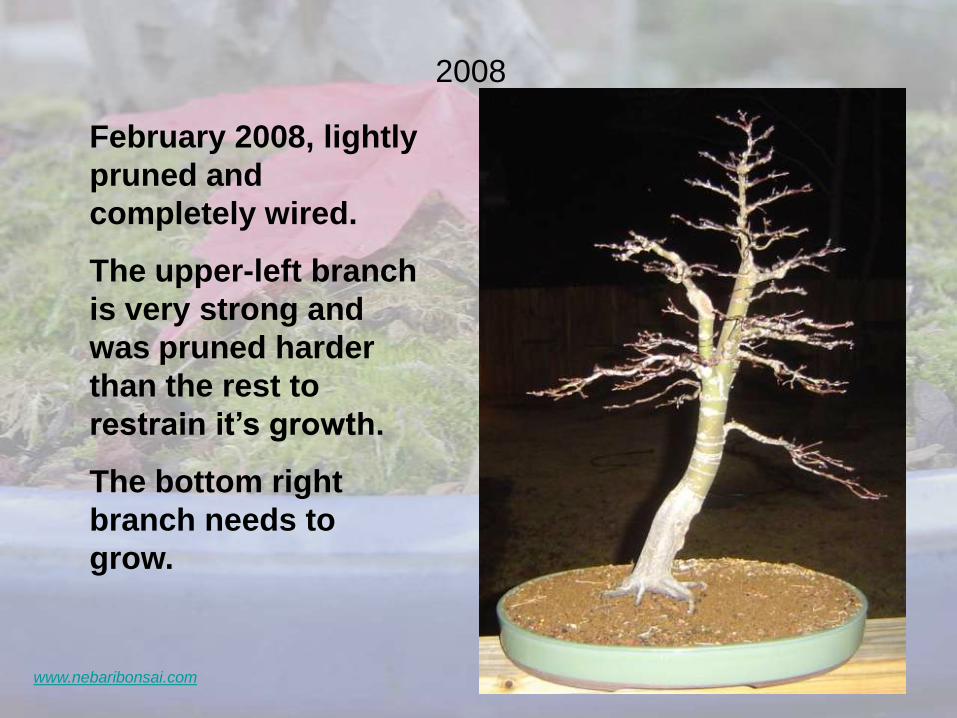
2008
February 2008, lightly
pruned and
completely wired.
The upper-left branch
is very strong and
was pruned harder
than the rest to
restrain it’s growth.
The bottom right
branch needs to
grow.
www.nebaribonsai.com
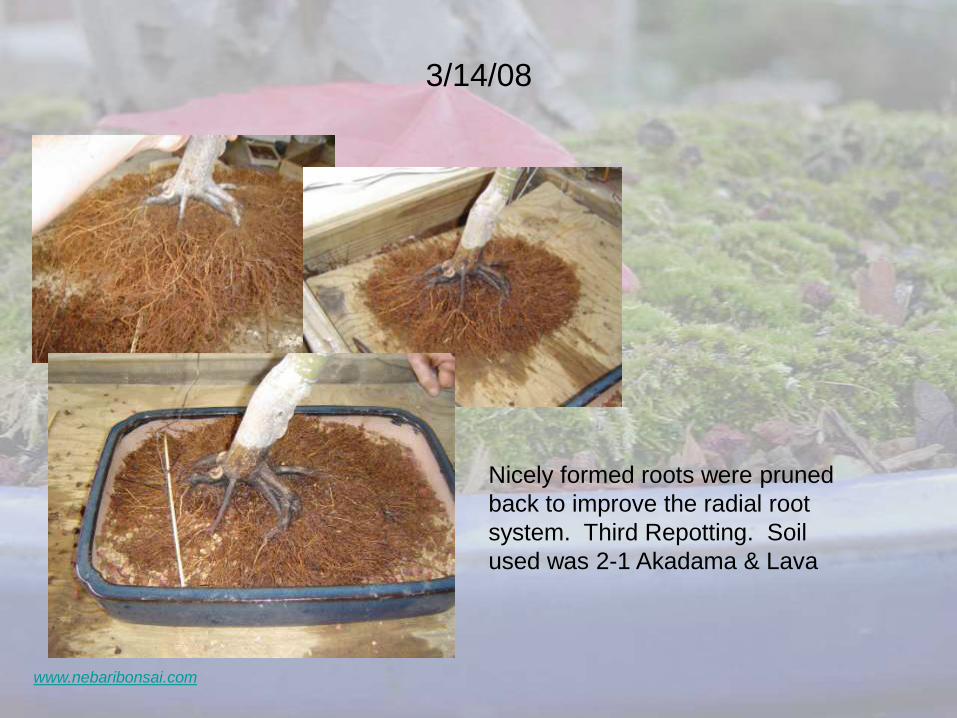
3/14/08
Nicely formed roots were pruned
back to improve the radial root
system. Third Repotting. Soil
used was 2-1 Akadama & Lava
www.nebaribonsai.com
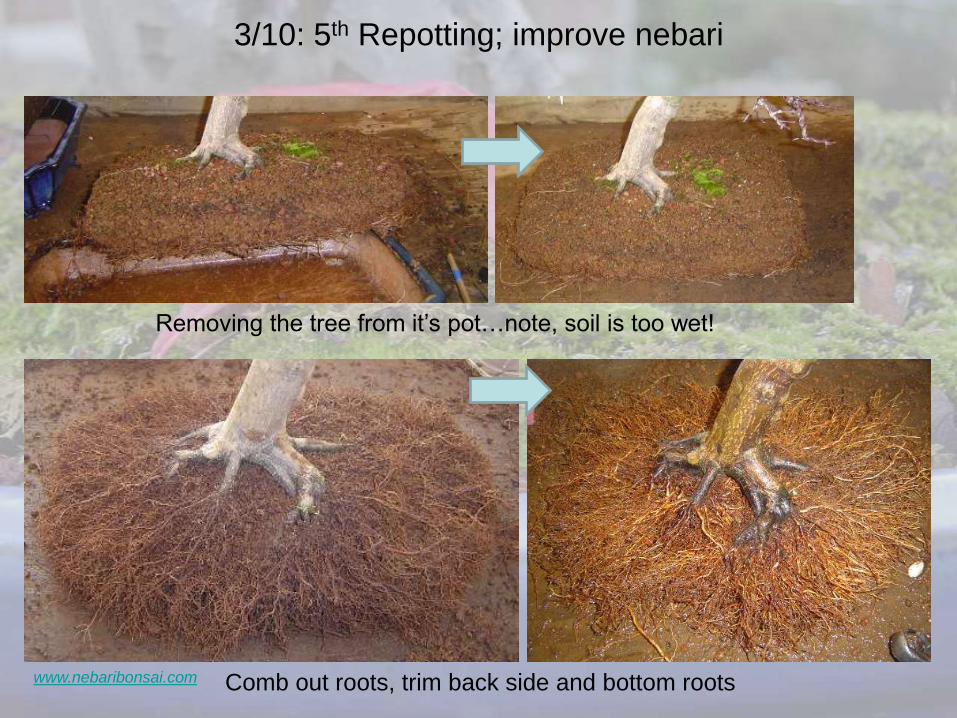
3/10: 5th Repotting; improve nebari
Removing the tree from it‟s pot…note, soil is too wet!
Comb out roots, trim back side and bottom roots
www.nebaribonsai.com
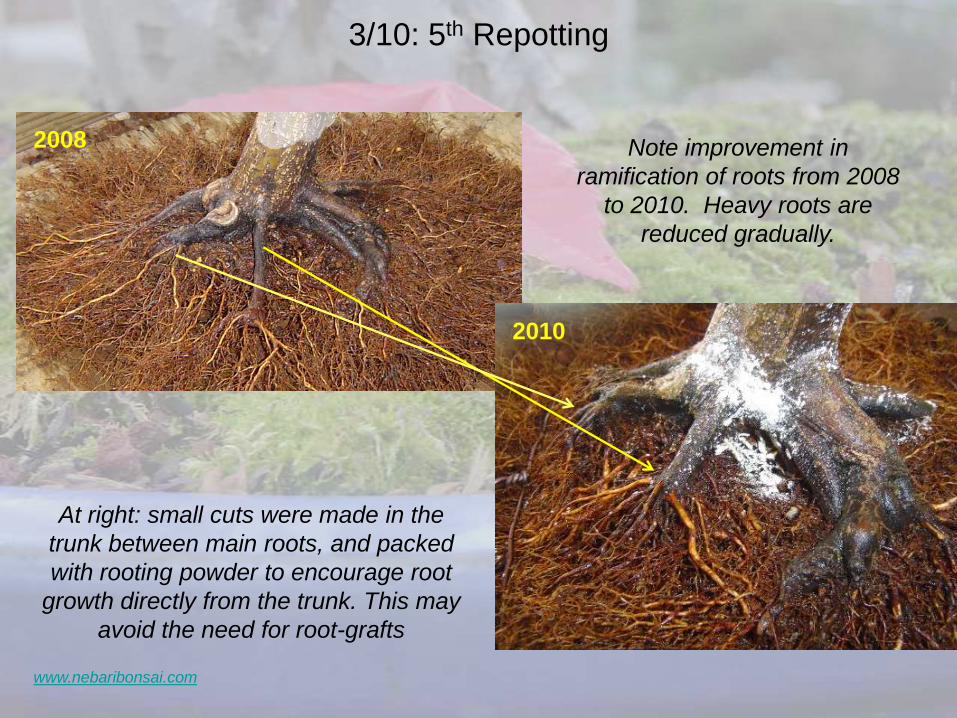
3/10: 5th Repotting
Note improvement in
ramification of roots from 2008
to 2010. Heavy roots are
reduced gradually.
At right: small cuts were made in the
trunk between main roots, and packed
with rooting powder to encourage root
growth directly from the trunk. This may
avoid the need for root-grafts
2008
2010

www.nebaribonsai.com
3/10: 5th Repotting
Roots were combed out, shortened, and then attention was turned to improving
the nebari. Heavy roots were reduced, and replaced with finer roots. Finer roots
are combed outward and untangled to form the basis for future nebari.

www.nebaribonsai.com
3/10: 5th Repotting
Another heavy root reduced
gradually. All areas are packed
with rooting powder and
sphagnum moss to encourage
rooting
www.nebaribonsai.com
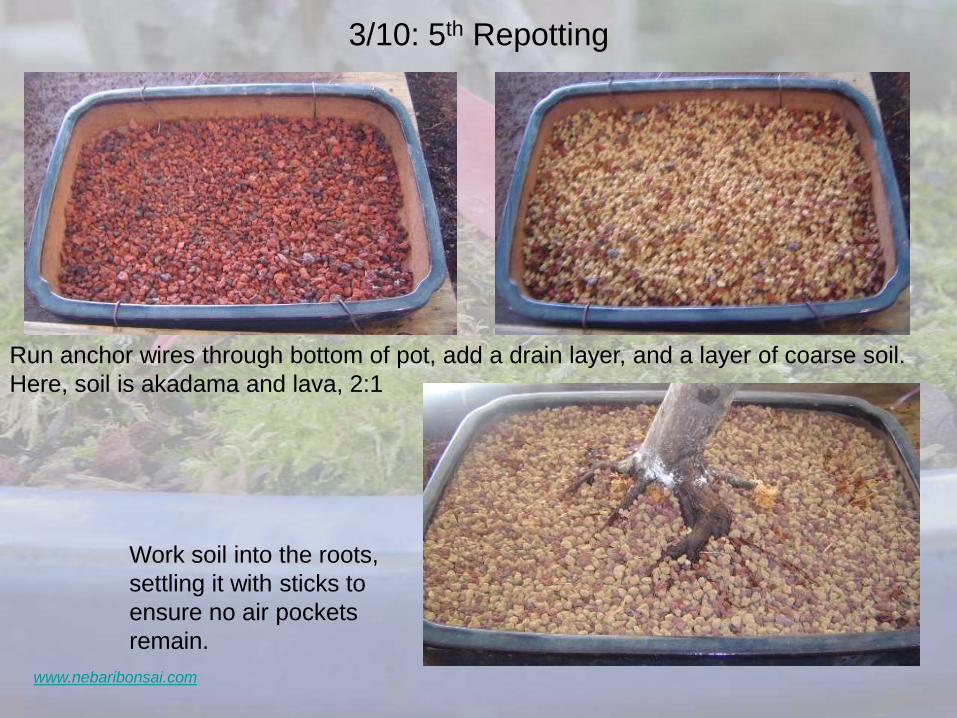
3/10: 5th Repotting
Run anchor wires through bottom of pot, add a drain layer, and a layer of coarse soil.
Here, soil is akadama and lava, 2:1
Work soil into the roots,
settling it with sticks to
ensure no air pockets
remain.
www.nebaribonsai.com
4/10
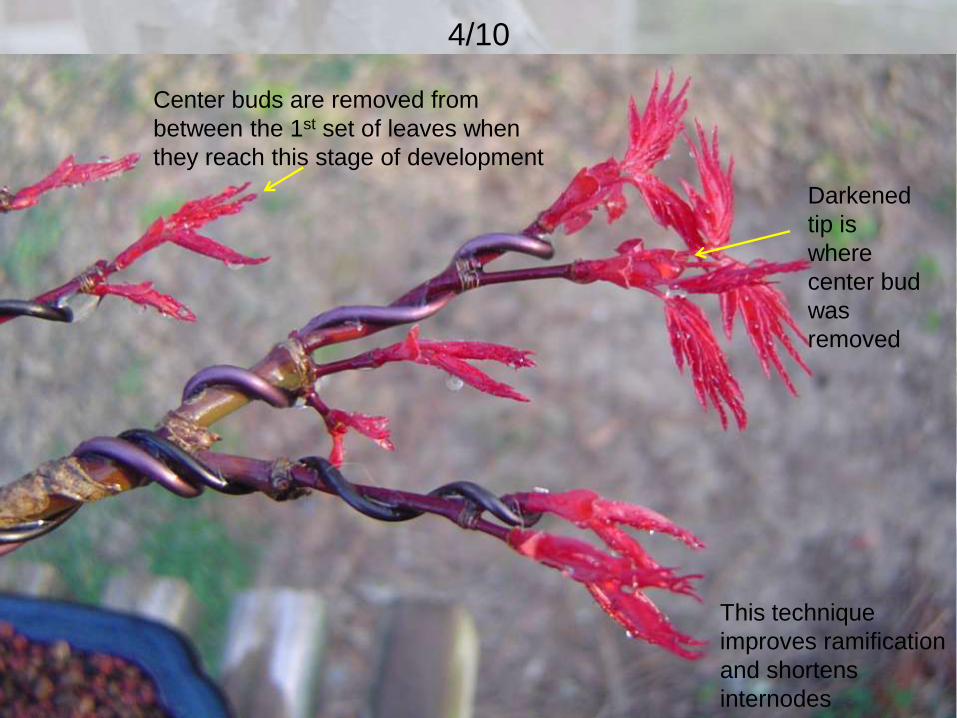
This technique
improves ramification
and shortens
internodes
Center buds are removed from
between the 1st set of leaves when
they reach this stage of development
Darkened
tip is
where
center bud
was
removed
www.nebaribonsai.com
6/4/10
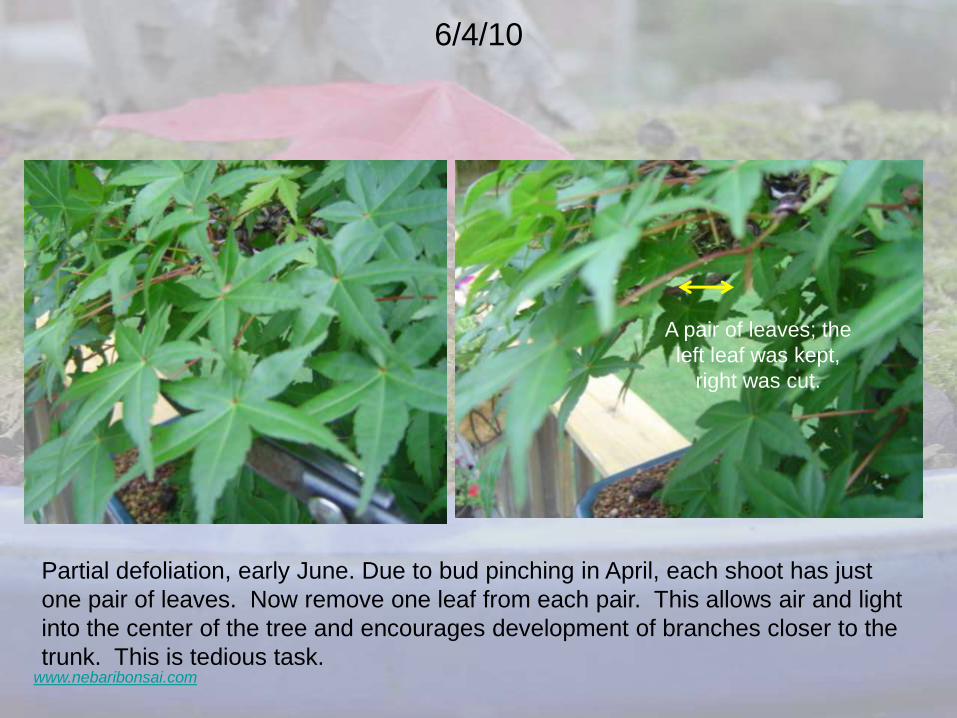
Partial defoliation, early June. Due to bud pinching in April, each shoot has just
one pair of leaves. Now remove one leaf from each pair. This allows air and light
into the center of the tree and encourages development of branches closer to the
trunk. This is tedious task.
A pair of leaves; the
left leaf was kept,
right was cut.
www.nebaribonsai.com
6/4/10
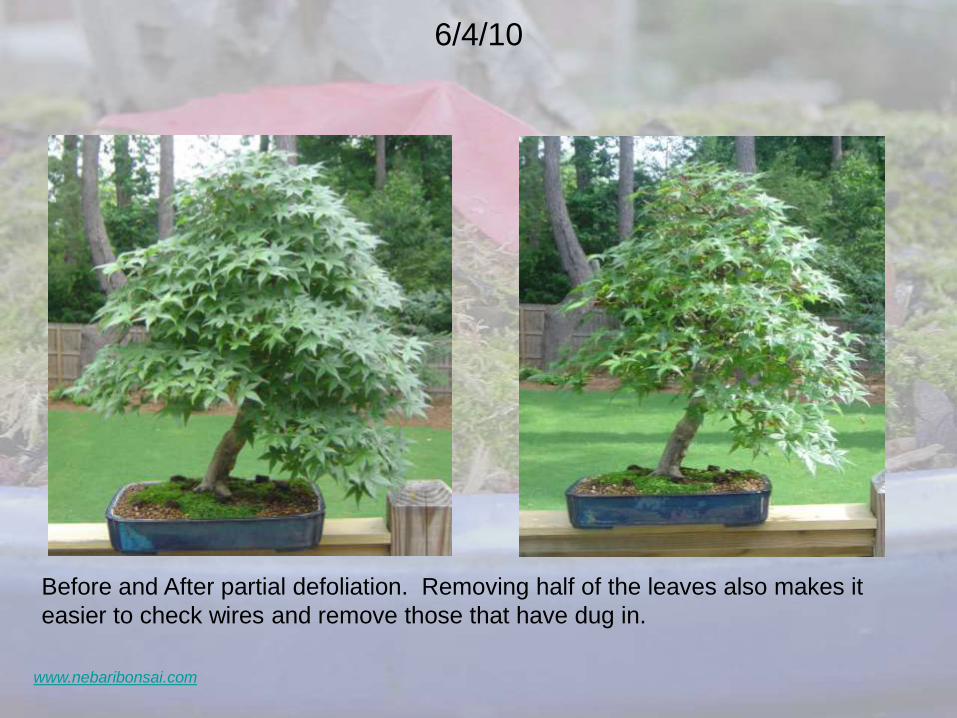
Before and After partial defoliation. Removing half of the leaves also makes it
easier to check wires and remove those that have dug in.
www.nebaribonsai.com
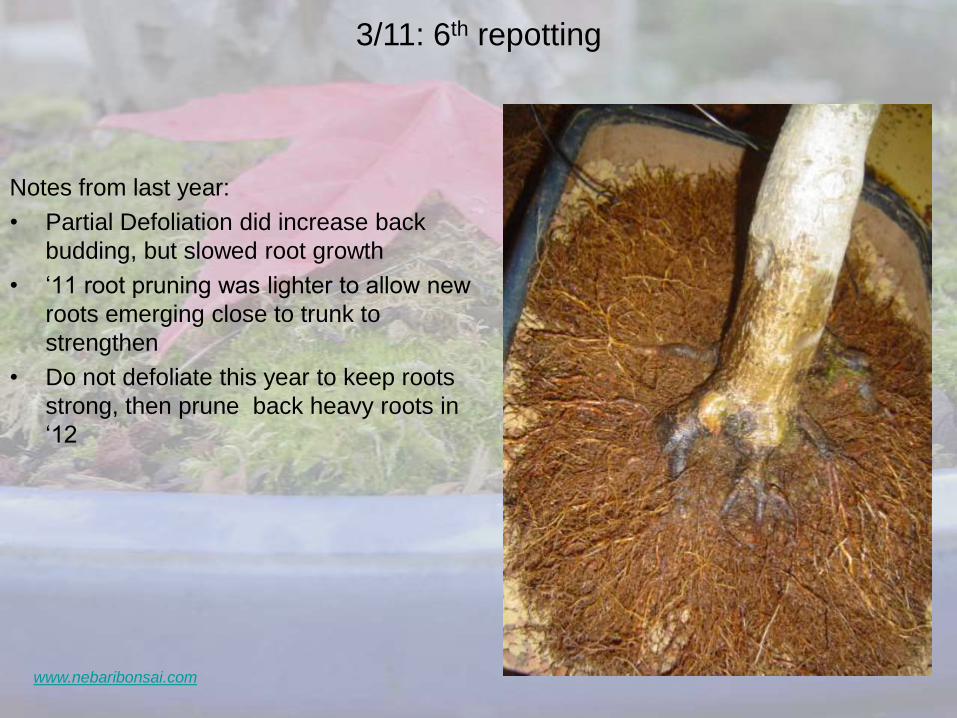
Notes from last year:
• Partial Defoliation did increase back
budding, but slowed root growth
• „11 root pruning was lighter to allow new
roots emerging close to trunk to
strengthen
• Do not defoliate this year to keep roots
strong, then prune back heavy roots in
„12
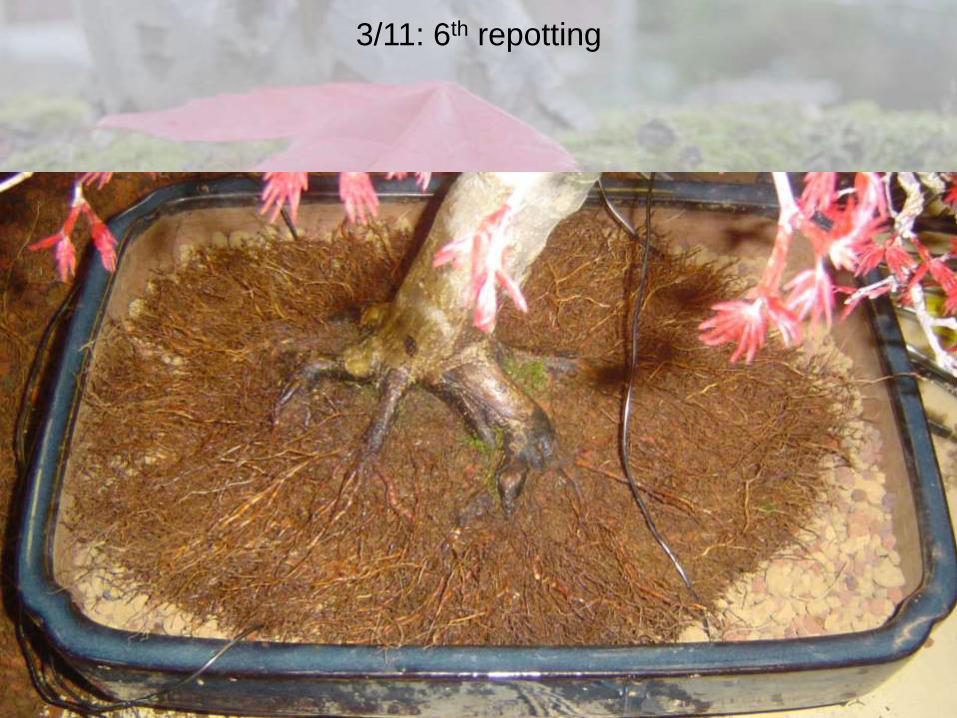
3/11: 6th repotting
www.nebaribonsai.com
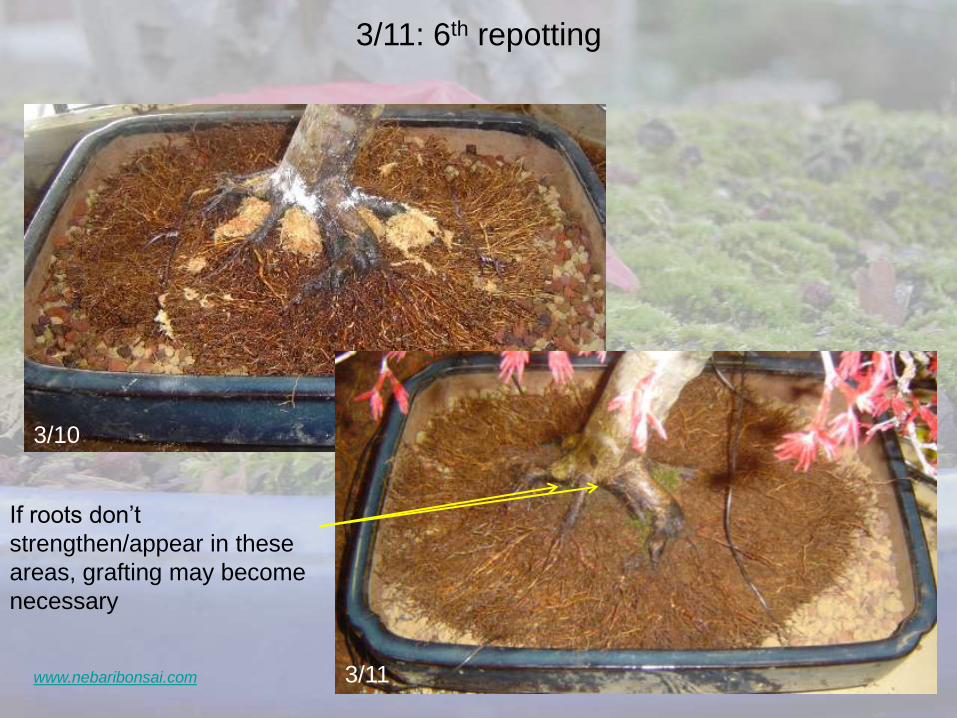
3/11: 6th repotting
3/10
3/11
If roots don‟t
strengthen/appear in these
areas, grafting may become
necessary
www.nebaribonsai.com
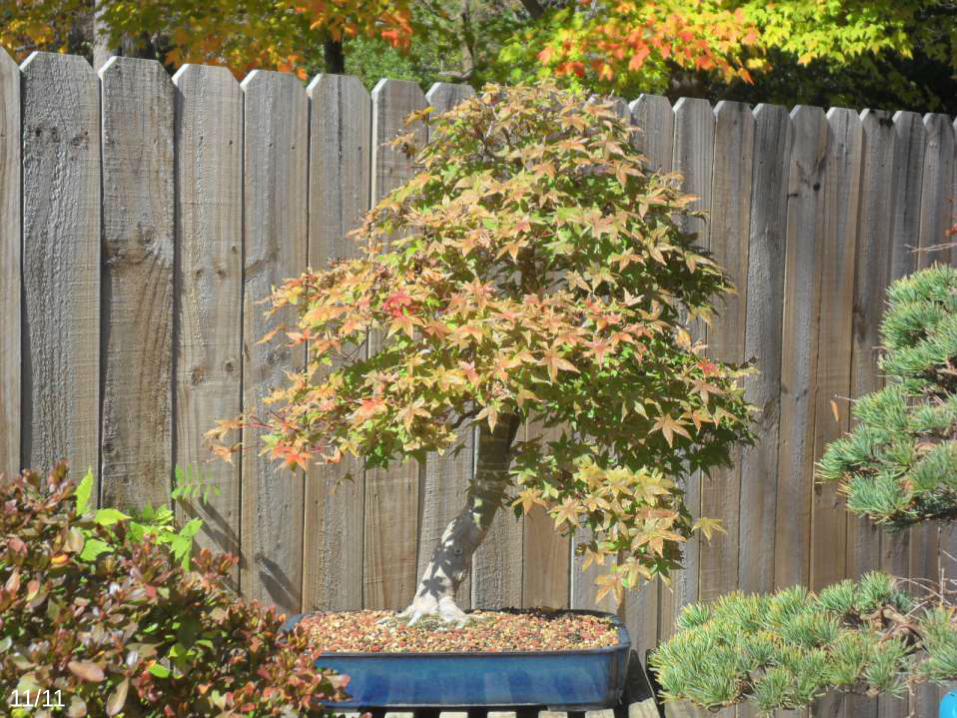
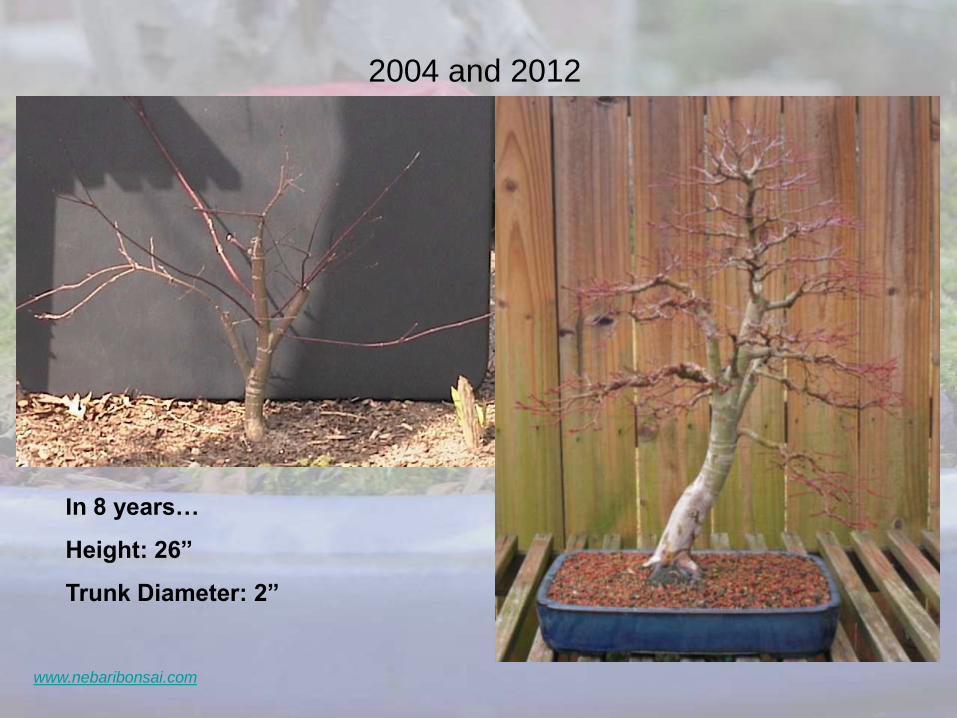
2004 and 2012
In 8 years…
Height: 26”
Trunk Diameter: 2”