Embed Size (px)
Citation preview

European Computer Driving Licence
Module 4 – Spreadsheets
Chapter 4.4 - Functions
FunctionsZ A function is a formula used
in a calculationZ Excel has over 200 functions
to help with many applications
Z For ECDL4 you will learn about:, =SUM, =AVERAGE, =MIN, =MAX, =COUNT
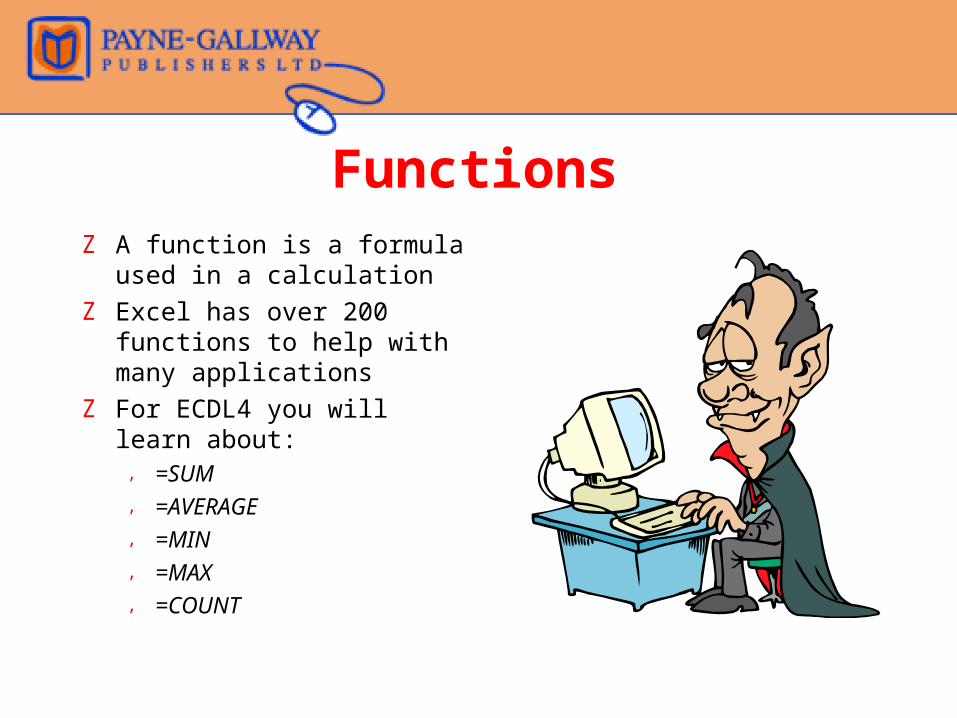
The SUM function
Z Although you can use the AutoSum button to add up a column or row of numbers, you can also type the function, Click where you want the
total to appear, Type =SUM(, Click and drag the cells you
want to add up, Press the Enter key
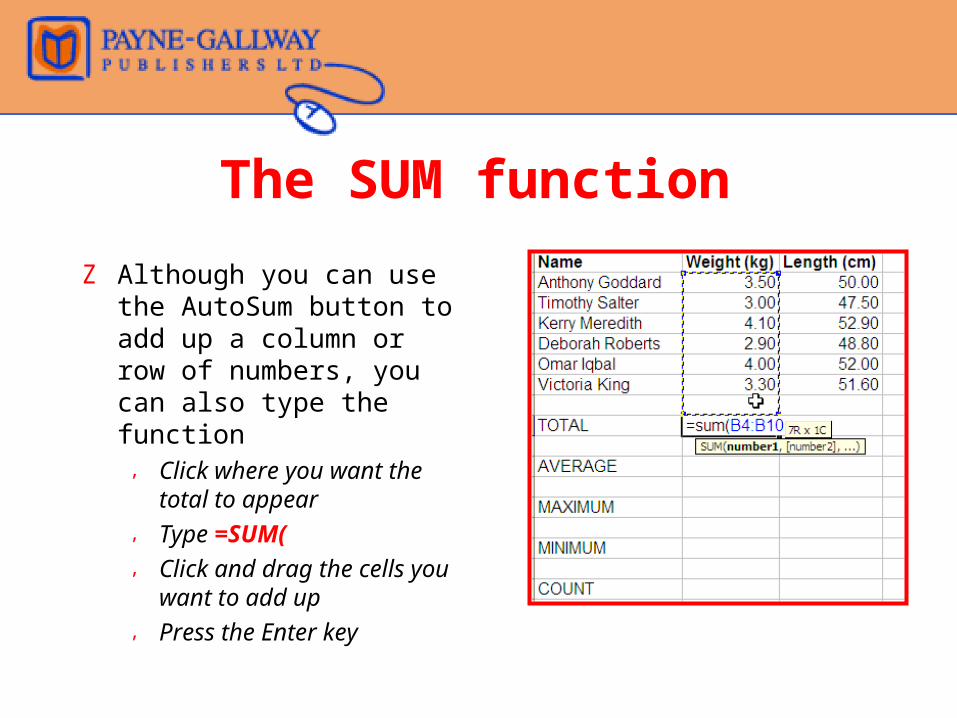
The AVERAGE Function
Z Use this to work out the average of a range of cells, Click where you want the
result of the function to appear (eg cell B13)
, Type =AVERAGE(, Select the cells you want to
find the average of, Press the Enter key
Watch out: any blank cell formatted as Number will upset your average!
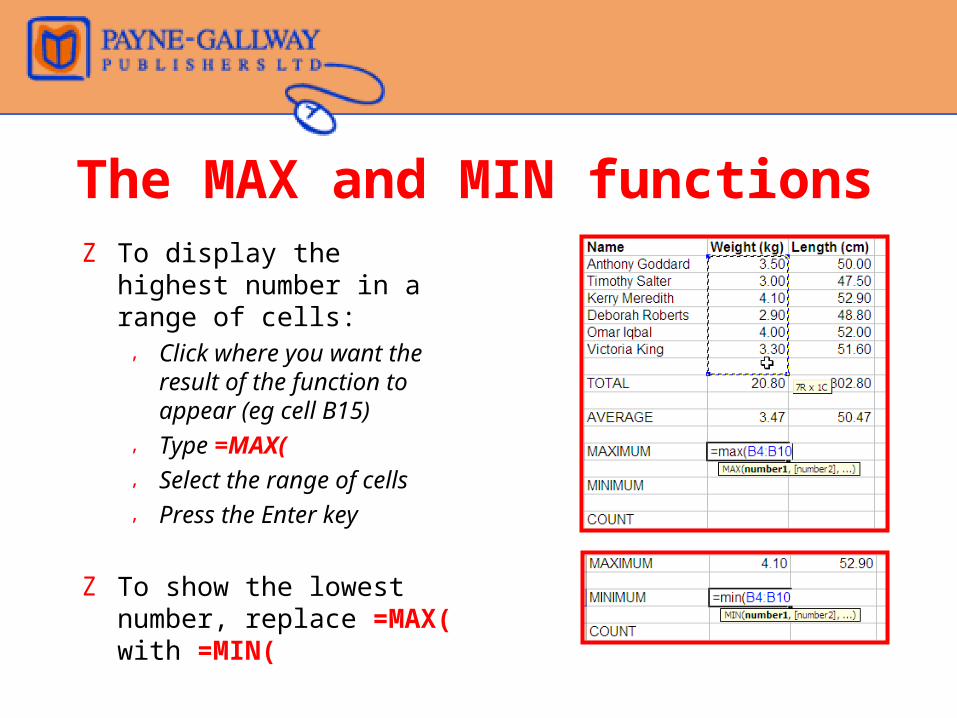
The MAX and MIN functionsZ To display the highest
number in a range of cells:, Click where you want the
result of the function to appear (eg cell B15)
, Type =MAX(, Select the range of cells, Press the Enter key
Z To show the lowest number, replace =MAX( with =MIN(
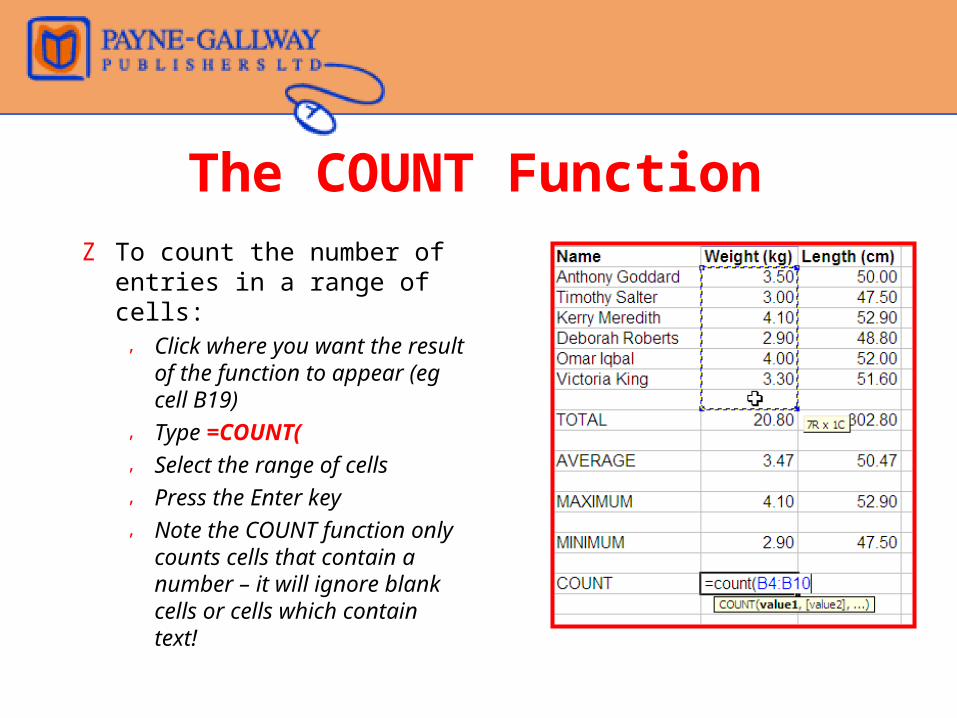
The COUNT FunctionZ To count the number of
entries in a range of cells:, Click where you want the
result of the function to appear (eg cell B19)
, Type =COUNT(, Select the range of cells, Press the Enter key, Note the COUNT function
only counts cells that contain a number – it will ignore blank cells or cells which contain text!
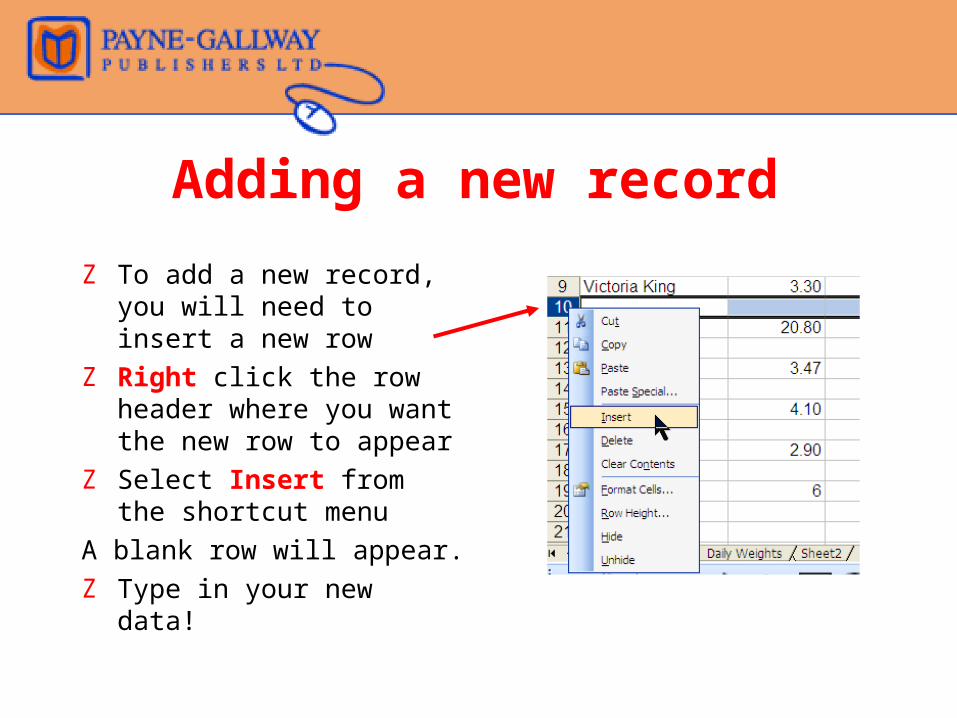
Adding a new record
Z To add a new record, you will need to insert a new row
Z Right click the row header where you want the new row to appear
Z Select Insert from the shortcut menu
A blank row will appear.Z Type in your new data!
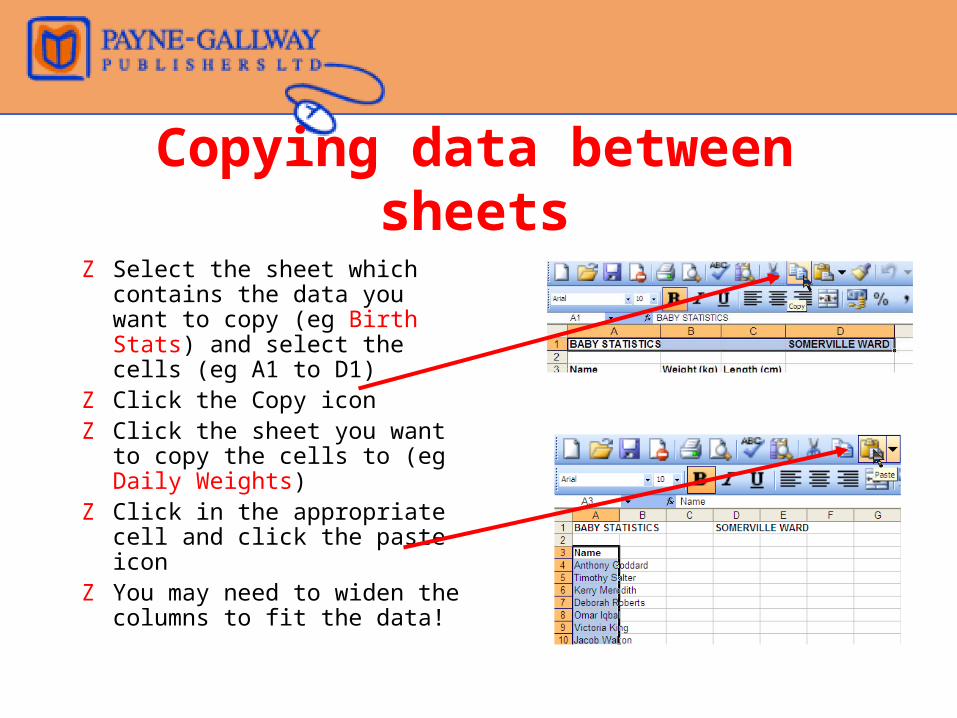
Copying data between sheets
Z Select the sheet which contains the data you want to copy (eg Birth Stats) and select the cells (eg A1 to D1)
Z Click the Copy iconZ Click the sheet you want to
copy the cells to (eg Daily Weights)
Z Click in the appropriate cell and click the paste icon
Z You may need to widen the columns to fit the data!
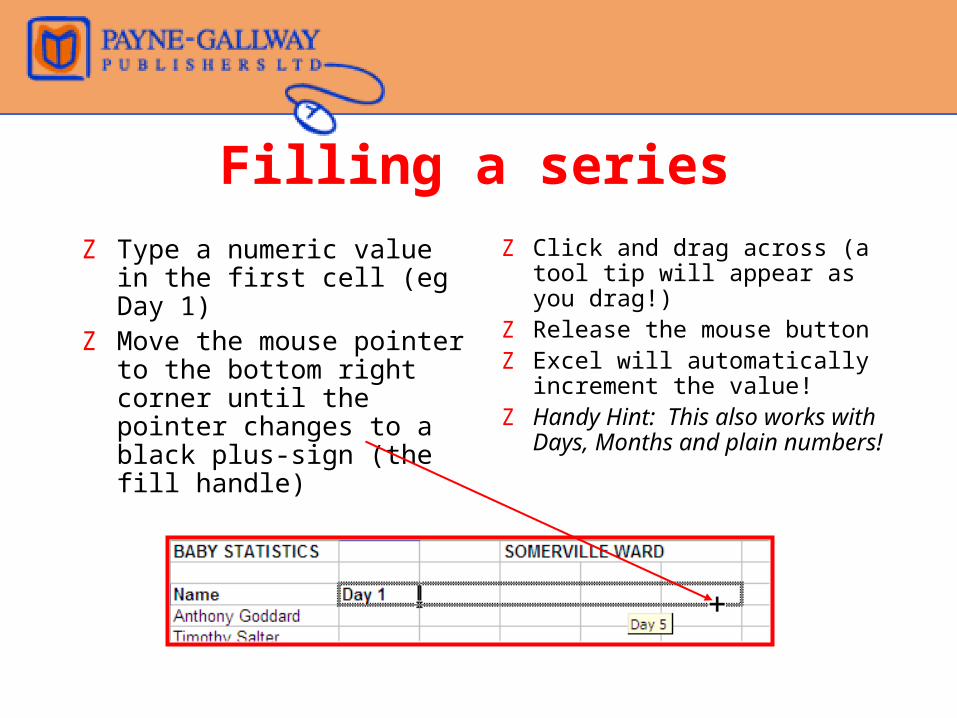
Filling a seriesZ Type a numeric value in the
first cell (eg Day 1)Z Move the mouse pointer to
the bottom right corner until the pointer changes to a black plus-sign (the fill handle)
Z Click and drag across (a tool tip will appear as you drag!)
Z Release the mouse buttonZ Excel will automatically
increment the value!Z Handy Hint: This also works
with Days, Months and plain numbers!
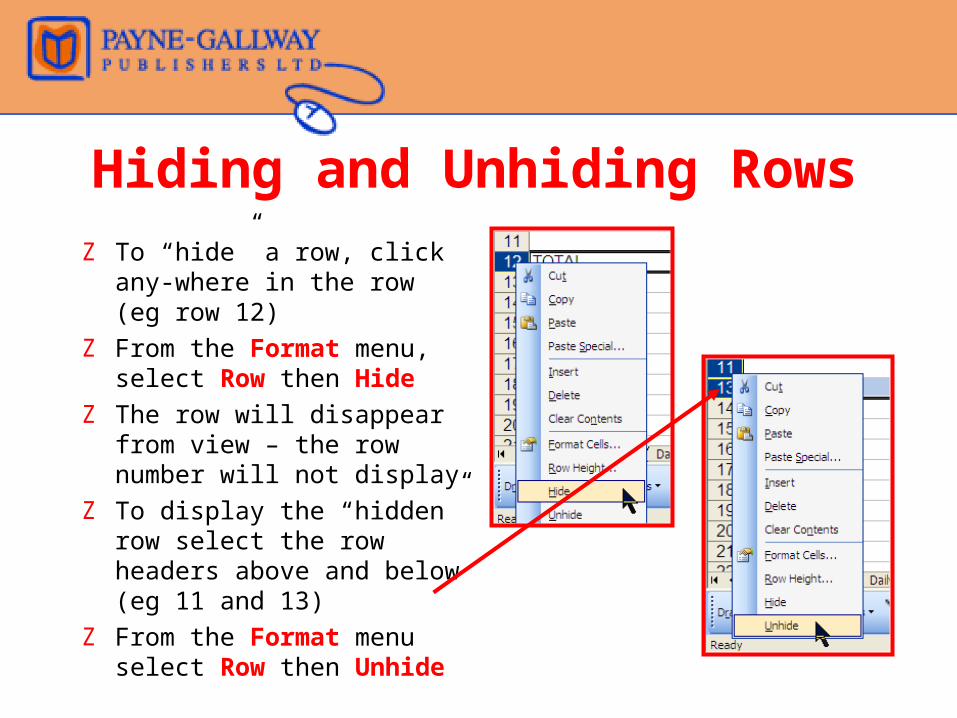
Hiding and Unhiding RowsZ To “hide” a row, click any-
where in the row (eg row 12)Z From the Format menu,
select Row then HideZ The row will disappear from
view – the row number will not display
Z To display the “hidden” row select the row headers above and below (eg 11 and 13)
Z From the Format menu select Row then Unhide
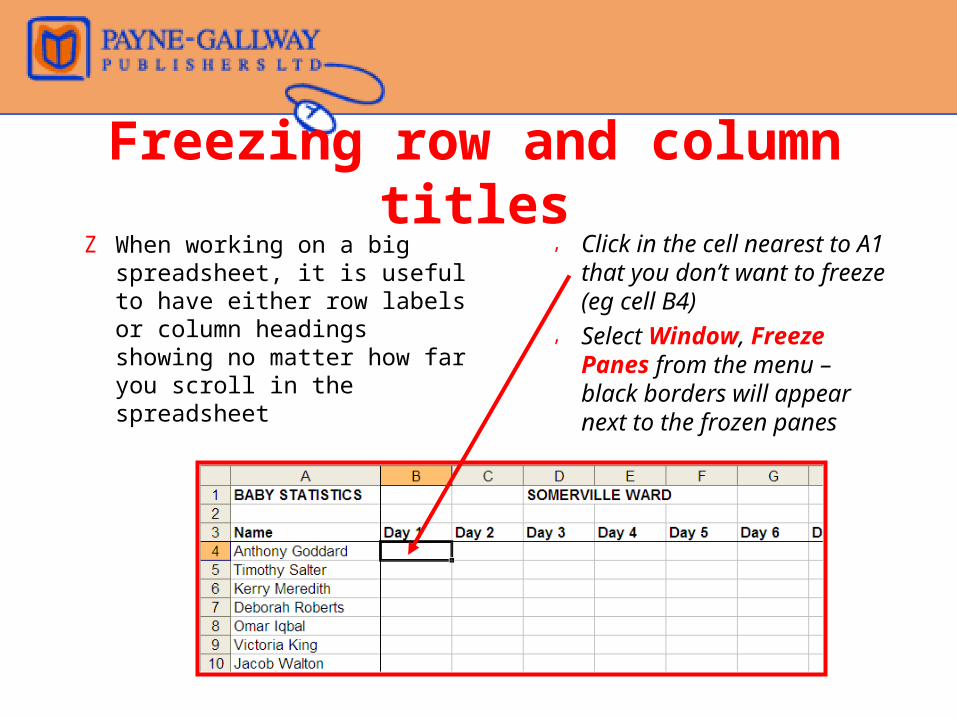
Freezing row and column titlesZ When working on a big
spreadsheet, it is useful to have either row labels or column headings showing no matter how far you scroll in the spreadsheet
, Click in the cell nearest to A1 that you don’t want to freeze (eg cell B4)
, Select Window, Freeze Panes from the menu – black borders will appear next to the frozen panes
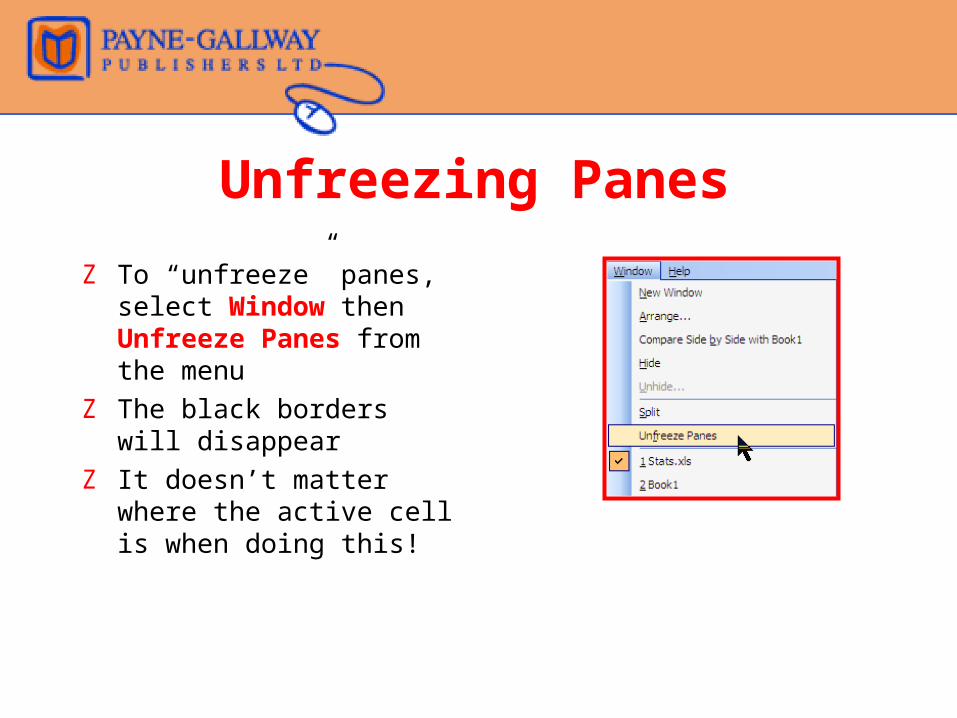
Unfreezing Panes
Z To “unfreeze” panes, select Window then Unfreeze Panes from the menu
Z The black borders will disappear
Z It doesn’t matter where the active cell is when doing this!
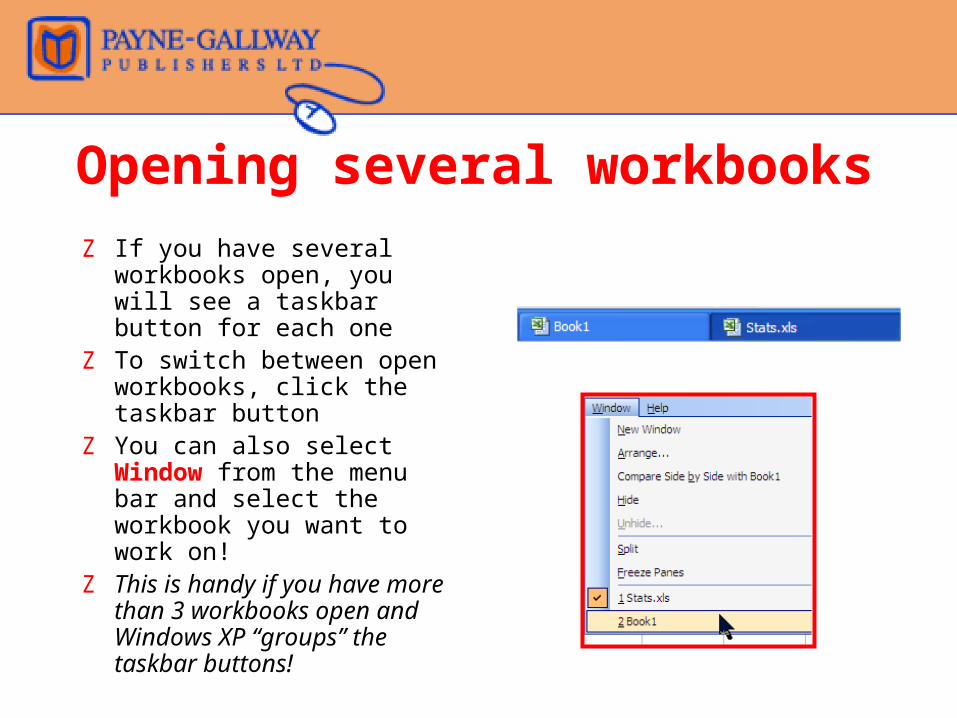
Opening several workbooksZ If you have several
workbooks open, you will see a taskbar button for each one
Z To switch between open workbooks, click the taskbar button
Z You can also select Window from the menu bar and select the workbook you want to work on!
Z This is handy if you have more than 3 workbooks open and Windows XP “groups” the taskbar buttons!
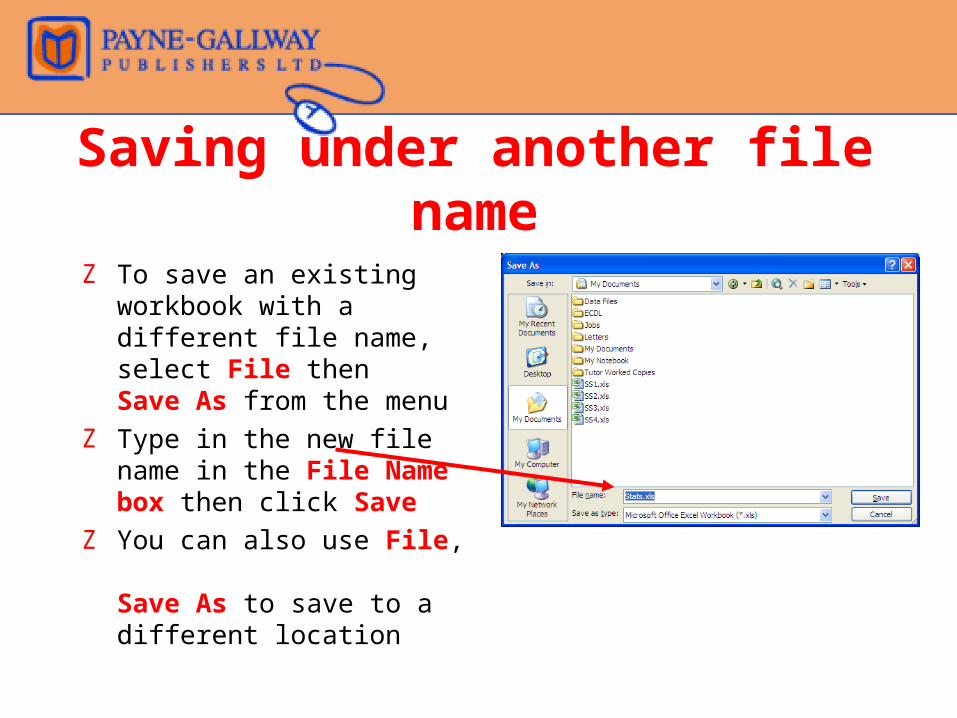
Saving under another file name
Z To save an existing workbook with a different file name, select File then Save As from the menu
Z Type in the new file name in the File Name box then click Save
Z You can also use File, Save As to save to a different location
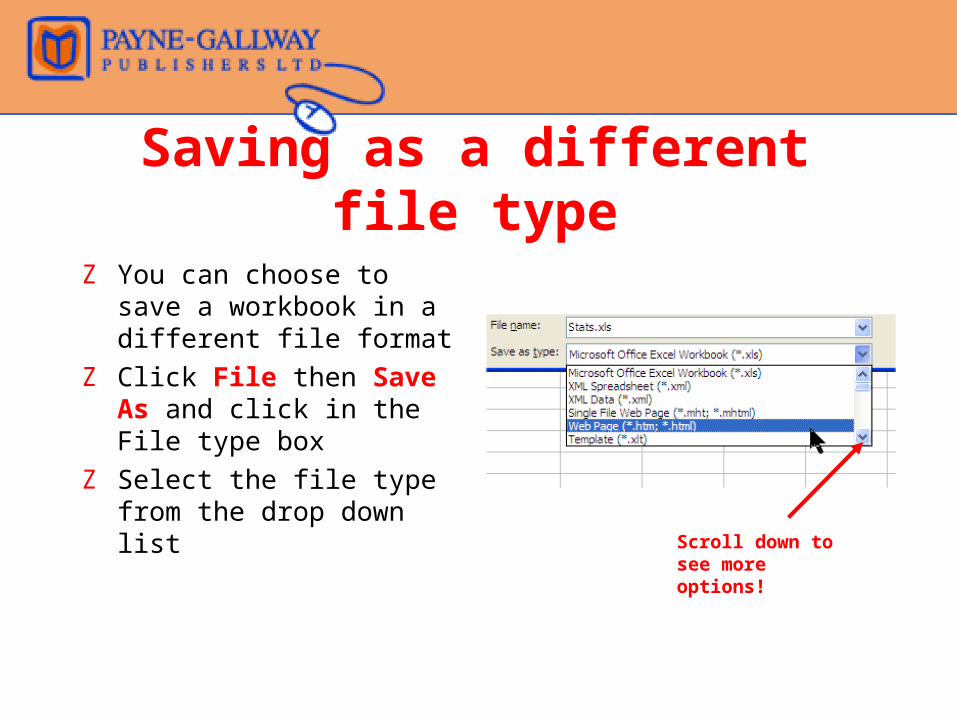
Saving as a different file type
Z You can choose to save a workbook in a different file format
Z Click File then Save As and click in the File type box
Z Select the file type from the drop down list
Scroll down to see more options!
Different file formatsZ To post a spreadsheet file on the
web, save as a Single File Web Page (.htm or .html)
Z To save as a text file that can be read by other operating systems, choose Text File
Z To save as a template, select Template
Z To save in a format suitable for older spreadsheet or database programs, select csv format
Z You can also save as a Lotus 1-2-3 spreadsheet (.wk4) or dBase (.dbf)
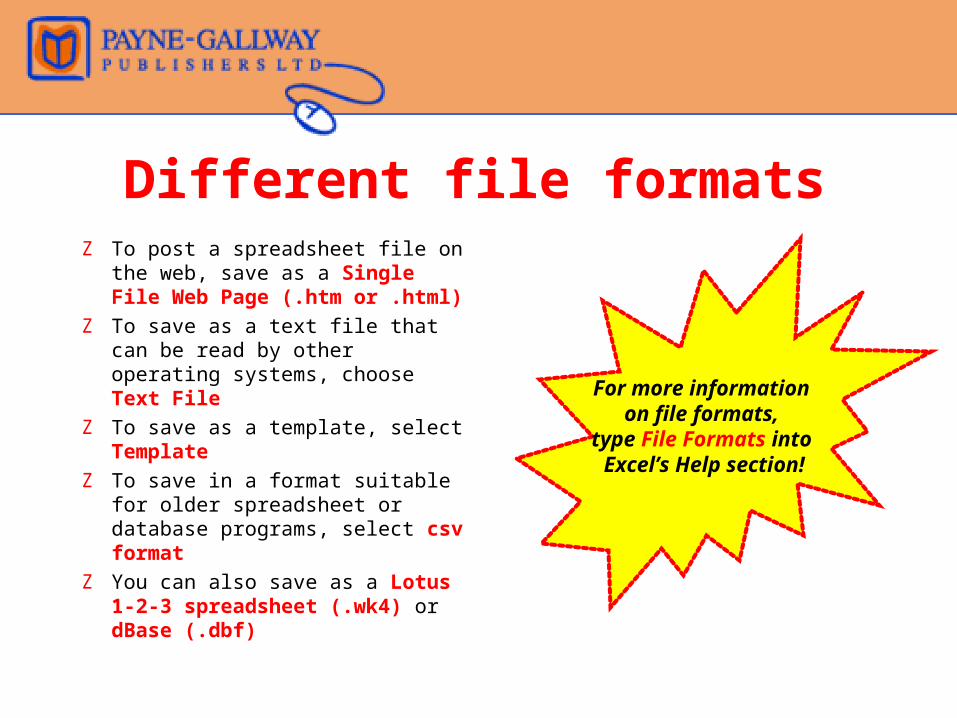
For more information on file formats,
type File Formats into Excel’s Help section!