Embed Size (px)
Citation preview
Essential Newborn Nursing , AIIMS , New Delhi 2008
www.newbornwhocc.org
1
Essential Newborn Care
For Nurses
Facilitator’s Guide
WHO Collaborating Centre for Training and Research in Newborn Care
Department of Pediatrics, All India Institute of Medical Sciences
New Delhi, India
www.newbornwhocc.org
Essential Newborn Nursing , AIIMS , New Delhi 2008
www.newbornwhocc.org
2
Contents
Page no
General Instructions 3 - 10 Module 1: 11- 17
Module 2:
18 - 24
Module 3:
25 - 33
Module 4:
34 - 39
Instructions for clinical demonstration
40 - 50
Module 5:
51 - 55
Module 6:
56 - 61
Module 7:
62 - 66
Module 8:
67 - 72
KAP (Pre-test and Post-test)
72 - 80
Essential Newborn Nursing , AIIMS , New Delhi 2008
www.newbornwhocc.org
3
Guidelines to use facilitator guide
How does this course differ from other training courses?
• The material in the course is not presented by lecture. Instead, each participant is
given a set of instructional modules, which have the basic information to be
learned. Information is also provided through demonstrations, role-play and
videotapes.
• The modules are designed to help each participant develop specific
skills necessary for management of normal and sick newborn. Participants
develop these skills as they read the modules, observe live and videotaped
demonstrations, and practice skills in written exercises, group discussions, or role-
plays.
• After reading skills in the modules, participants practice the skills in a real clinical
setting, with supervision to ensure correct practices.
• Each participant works at his own speed.
• Each participant discusses any problems or questions with a facilitator, and
receives prompt feedback from the facilitator on completed exercises.
(Feedback includes telling the participant how well he has done the exercise and
what improvements could be made).
Who is a FACILITATOR?
A facilitator is a person who helps the participants learn the skills presented in the
course. The facilitator spends much of his time in discussions with participants, either
individually or in small groups. For facilitators to give enough attention to each
participant, a ratio of one facilitator to 5 to 6 participants is desired. In your assignment
to teach this course, YOU are a facilitator.
As a facilitator, you need to be very familiar with the material being taught. It is your job
to give explanations, do demonstrations, answer questions, talk with participants about
their answers to exercises, conduct role-plays, lead group discussions, organize and
supervise clinical practice in hospital, and generally give participants any help they
need to successfully complete the course. You are not expected to teach the content of
the course through formal lectures. (Nor is this a good idea, even if this is the teaching
method to which you are most accustomed.)
What, then, DOES a FACILITATOR
do?
As a facilitator, you do 3 basic things:
1. You INSTRUCT
• Make sure that each participant understands how to work through the
materials and what he is expected to do in each module and each exercise.
• Answer the participant’s question as they occur.
• Explain any information that the participant finds confusing, and help him
Essential Newborn Nursing , AIIMS , New Delhi 2008
www.newbornwhocc.org
4
understand the main purpose of each exercise.
• Lead group activities, such as group discussions, video exercises, and role-
plays, to ensure that learning objectives are met.
• Promptly assess each participant’s work and give correct answers.
• Discuss with the participant how he obtained his answers in order to
identify any weaknesses in the participant’s skills or understanding.
• Provide additional explanations or practice to improve skills and
understanding.
• Help the participant to understand how to use skills taught in the course in his
own clinic.
• Explain what to do in each clinical practice session.
• Model good clinical skills, including communication skills, during clinical
practice sessions.
• Give guidance and feedback as needed during clinical practice sessions.
2. You MOTIVATE
• Compliment the participant on his correct answers, improvements or
progress.
• Make sure that there are no major obstacles to learning (such as too
much noise or not enough light).
3. You MANAGE
• Plan ahead and obtain all supplies needed each day, so that they are in
the classroom or taken to the postnatal ward when needed.
• Make sure that movements from classroom to hospital and back are
efficient.
• Monitor progress of each participant.
How do you do these things?
• Show enthusiasm for the topics covered in the course and for the work that
the participants are doing.
• Be attentive to each participant’s questions and need. Encourage the
participants to come to you at any time with questions or comments. Be
available during scheduled times.
• Watch the participants as they work, and offer individual help if you
see a participant looking troubled, staring into space, not writing answers, or
not turning pages. These are clues that the participant may need help.
• Promote a friendly, cooperative relationship. Respond positively to
question (by saying, for example, “Yes, I see what you mean,” or “That
is a good question.”). Listen to the questions and try to address the
participant’s concerns, rather than rapidly giving the “correct” answer.
• Always take enough time with each participant to answer his questions
completely (that is, so that both you and the participant are satisfied).
What NOT to do…
Essential Newborn Nursing , AIIMS , New Delhi 2008
www.newbornwhocc.org
5
• During times scheduled for course activities, do not work on other projects
or discuss matters not related to the course.
• In discussions with participants, avoid using facial expressions or making
comments that could cause participants to feel embarrassed.
• Do not call on participants one by one as in a traditional classroom,
with an awkward silence when a participant does not know the answer.
Instead, ask questions during individual feedback.
• Do not lecture about the information that participants are about to read. Give
only the introductory explanations that are suggested in the Facilitator Guide. If
you give too much information too early, it may confuse participants. Let them
read it for themselves in the modules.
• Do not review text paragraph by paragraph. (This is boring and suggests that
participants cannot read for themselves.) As necessary, review the highlights of
the text during individual feedback or group discussions.
• Avoid being too much of a showman. Enthusiasm (and keeping the
participants awake) is great, but learning is most important. Keep watching to
ensure that participants understand the materials. Difficult points may require
you to slow down and work carefully with individuals.
• Do not treat participants as if they are children. They are adults.
• Do not talk too much. Encourage the participants to talk.
• Do not be shy, nervous, or worried about what to say. This Facilitator Guide will
help you remember what to say. Just use it!
How can this FACILITATOR GUIDE help you?
This Facilitator Guide will help you teach the course modules, including the video
segments. For each module, this Facilitator Guide includes the following:
• A list of the procedures to complete the module, highlighting the type of
feedback to be given after each exercise.
• Guidelines for the procedures. These guidelines describe: - How to do
demonstrations, role-plays, and group discussions, - Supplies needed for these
activities. – How to conduct the video exercises, – Points to make in group
discussions or individual feedback.
• Answer sheets (or possible answer) for most exercises
• A place to write down points to make in addition to those listed in the guidelines
On pages 7 to 9 of this Facilitator Guide is a section titled “Guidelines for All Modules”
(session I). This section describes training techniques to use when working with
participants during the course. It also includes important techniques to use when:
• Participants are working individually.
• You are providing individual feedback,
• You are leading a group discussion,
• You are coordinating a role-play
To prepare yourself for each module, you should:
• Read the module and work the exercises
• Read in this Facilitator Guide all information provided about the module
• Plan exactly how work on the module will be done and what major points to
Essential Newborn Nursing , AIIMS , New Delhi 2008
www.newbornwhocc.org
6
make
• Collect any necessary supplies for exercises in the module, and prepare for any
demonstrations or role-plays
• Think about sections that participants might find difficult and questions they may
ask
• Plan ways to help with difficult sections and answer possible questions
• Think about the skills taught in the module and how they can be applied in
participants’ own practice.
Ask participants questions that will encourage them to think about using the skills in their
practice. Questions are suggested in appropriate places in the Facilitator Guide.
Essential Newborn Nursing , AIIMS , New Delhi 2008
www.newbornwhocc.org
7
Guidelines for All Modules
When Participants are working
• Look available, interested and ready to help.
• Watch the participants as they work, and offer individual help if you see a
participant looking troubled, staring into space, not writing answer or not
turning pages. These are clues that the participant may need help.
• Encourage participants to ask questions whenever they would like some help.
• If important issues or questions arise when you are talking with an individual, make
note of them to discuss later with the entire group.
When Providing Individual Feedback
• Before giving individual feedback, refer to the appropriate notes in this
guide to remind yourself of the major points to make.
• Compare the participant’s answers sheet provided. If the answer is
labelled “Possible Answer” the participant’s answer does not need to match
exactly, but should be reasonable. If exact answers are provided, be sure the
participant’s answer matches exactly.
• If the participant’s answer to any exercise is incorrect or is unreasonable, ask the
participant questions to determine why the error was made. There may be
many reasons for an incorrect answer. For example, a participant may not
understand the question, may not understand certain terms used in the
exercise, may use different procedures at his clinic, may have overlooked
some information about a case, or may not understand a basic process
being taught.
• Once you have identified the reason(s) for the incorrect answer to the
exercise, help the participant correct the problem. For example, you may only
need to clarify the instructions. On the other hand, if the participant has
difficulty understanding the process itself, you might try using a specific case
example. After the participant understands the process that was difficult, ask
him to work the exercise or part of the exercise again.
• Summarize, or ask the participant to summarize, what was done in the exercise
and why. Emphasize that it is most important to learn and remember the process
demonstrated by the exercise. Give the participant a copy of the answer
sheet, if one is provided.
• Always reinforce the participant for good work by (for example):
- Commenting on his understanding.
- Showing enthusiasm for ideas for application of the skills in his
work. - Telling the participant that you enjoy discussing
exercises with him. - Letting the participant know that his hard
work is appreciated.
Essential Newborn Nursing , AIIMS , New Delhi 2008
www.newbornwhocc.org
8
When Leading a Group Discussion:
• Plan to conduct the group discussion at a time when you are sure all
participants completed the preceding work. Wait to announce this time until
most participants are ready, so that others will not hurry.
• Before beginning the discussion, refer appropriate notes in this guide to
remind yourself of the purpose of discussion and the major points to make.
• Always begin the group discussion by telling the participants the purpose of
the discussion.
• Often there is no single correct answer that needs to be agreed on in a
discussion. Just be sure the conclusions of the group are reasonable and that
all participants understand how the conclusions were reached.
• Try to get most of the group members involved in the discussion. Record key
ideas on a flipchart as they emerge. Keep your participation to a minimum
but ask questions to keep the discussion active and on track.
• Always summarize, or ask a participant to do so, what has been discussed in
the exercise.
• Give participants a copy of the answer sheet, if one is provided.
• Reinforce the participants for their good work by (for example):
- Praising them for the list they compiled,
- Commenting on their understanding of the exercise,
- Commenting on their creative or useful suggestions for using the skills
on the job, - Praising them for their ability to work together as a group.
When Coordinating a Role-play
• Before the role-play, refer to the appropriate notes in this guide to remind
yourself of the purpose of the role-play, roles to be assigned, background
information, and major points to make in the group discussion afterwards.
• As participants come to you for instructions before the role-play,
- Assign roles. At first, select individuals who are outgoing rather than shy,
perhaps by asking for volunteers. If necessary, a facilitator may be a
model for the group by acting in an early role-play.
- Give role-play participants any props needed, for example, a baby
doll, and drugs. - Give role-play participants any background
information needed.
• (There is usually some information for the “mother” which can be
photocopied or clipped from this guide.)
- Suggest that role-play participants speak loudly.
- Allow preparation time for role-play for the participants.
• When everyone is ready, arrange seating/placement of individuals involved.
Have the “mother” and “nurse” stands or sit apart from the rest of the group,
where everyone can see them.
• Begin by introducing the players in their roles and stating the purpose or
situation. Interrupt if the players are having tremendous difficulty or have
strayed from the purpose of the role-play.
Essential Newborn Nursing , AIIMS , New Delhi 2008
www.newbornwhocc.org
9
• When the role-play is finished, thank the players and praise them for their
participation. Ensure that feedback offered by the rest of the group is
supportive. First discuss things done well. Then discuss things that could be
improved.
• Try to get all group members involved in discussion after the role-play. In many
cases, there are questions given in the module to help structure the
discussion.
Ask participants to summarize what they learned from the role-play.
Checklist of supplies needed for work on Modules
Supplies needed for each person include:
• Name tag and hold
• Paper
• Ball point pen
• Eraser
• Felt tip pen
• Highlighter
• One pencil
Supplies needed for each group include:
• Paper clips
• Pencil sharpeners
• Stapler and staples
• Extra pencils and erasers
• Flipchart pad and marker or blackboard and chalk
• Two rolls transparent tape
• Rubber bands
• One roll masking tape
• Scissors
Access is needed to a CD /video player. In addition, certain exercises require
special supplies such as drugs, demonstration aids or a baby doll (or rolled towel to
hold like a baby). These supplies are listed in the guidelines for each activity. Be sure
to review the guidelines and collect the supplies needed before these activities.
[FACILITATOR’S GUIDE]
11
Module 1: KANGAROO MOTHER CARE
Introduction to the Module on KMC
Facilitator will get up and greet the participants. Introduce yourself and the
participants to each other. Keep on writing the surname/nickname on the board. After
the round of introduction, facilitator should announce, “You will learn in this module
initiation, procedures and benefits of Kangaroo Mother Care. This module is for
you to keep”. Facilitator should distribute the module to each participant.
Now ask them to read page 2 to 3 and read the poster on page 4 (given as a separate
sheet).There will be a demonstration on the poster.
Demonstration on the KMC Poster
Make sure that all participants have read all the pages. Gather all the participants near
the demonstration aid fixed on the flip board. As a facilitator, read one of the
components of poster aloud. Make sure that all the participants are looking at the
poster. Then ask participants one after other to read the remaining components on the
poster. Build a discussion on the various aspects of the KMC.
.
Now all of you will read page 5 to 9 and do self evaluation on page 10. Tell participants that they would be given individual feedback after they have done the self evaluation
[FACILITATOR’S GUIDE]
12
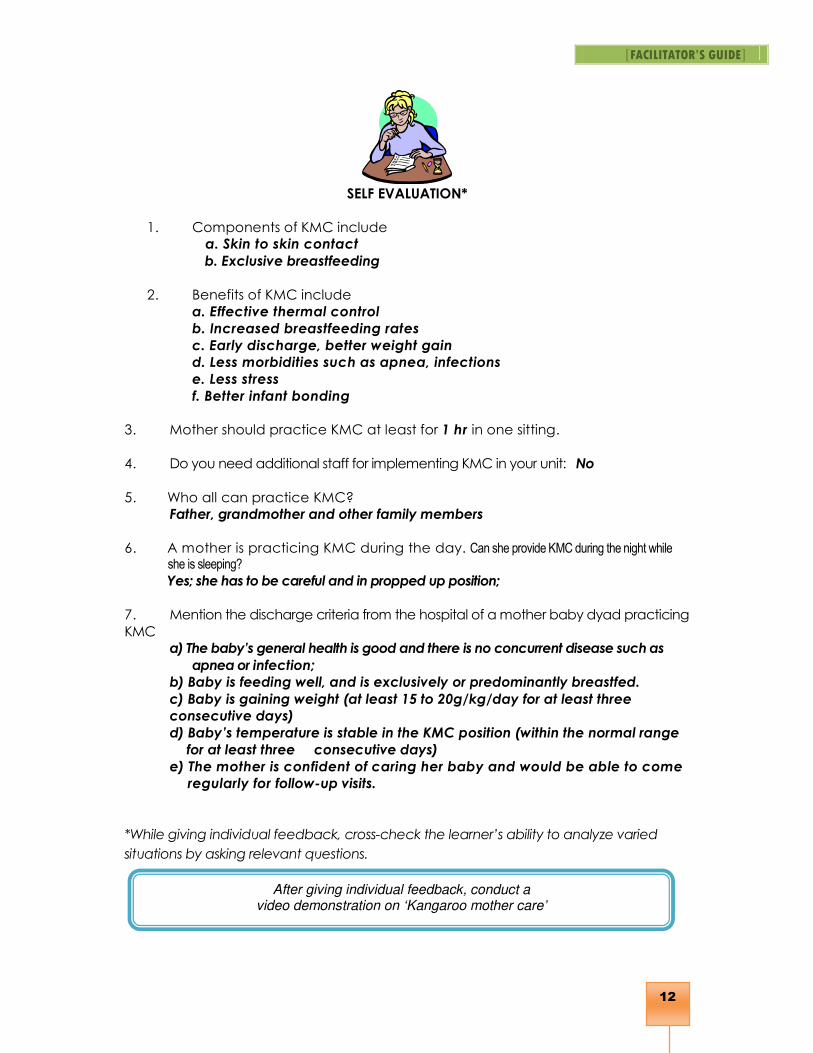
SELF EVALUATION*
1. Components of KMC include
a. Skin to skin contact
b. Exclusive breastfeeding
2. Benefits of KMC include
a. Effective thermal control
b. Increased breastfeeding rates
c. Early discharge, better weight gain
d. Less morbidities such as apnea, infections
e. Less stress
f. Better infant bonding
3. Mother should practice KMC at least for 1 hr in one sitting.
4. Do you need additional staff for implementing KMC in your unit: No
5. Who all can practice KMC?
Father, grandmother and other family members
6. A mother is practicing KMC during the day. Can she provide KMC during the night while she is sleeping?
Yes; she has to be careful and in propped up position;
7. Mention the discharge criteria from the hospital of a mother baby dyad practicing
KMC
a) The baby’s general health is good and there is no concurrent disease such as
apnea or infection;
b) Baby is feeding well, and is exclusively or predominantly breastfed.
c) Baby is gaining weight (at least 15 to 20g/kg/day for at least three
consecutive days)
d) Baby’s temperature is stable in the KMC position (within the normal range
for at least three consecutive days)
e) The mother is confident of caring her baby and would be able to come
regularly for follow-up visits.
*While giving individual feedback, cross-check the learner’s ability to analyze varied
situations by asking relevant questions.
After giving individual feedback, conduct a video demonstration on ‘Kangaroo mother care’
[FACILITATOR’S GUIDE]
13
VIDEO
Organize a video show for all participants. One of facilitator should announce
“There will be a video demonstration on initiation, procedure of KMC, perceptions of
family, health professionals about KMC. After the video there will be a discussion”.
After the show, the facilitator should initiate a discussion with the group. Encourage the
participants to share their own experience; perception about KMC. You should take
their opinion on various aspects of the video demonstration.
After video demonstration, conduct a role-play on ‘Counseling and preparing a mother for KMC’.
[FACILITATOR’S GUIDE]
14
ROLE PLAY
Two facilitators should demonstrate role-play on KMC. One of facilitators should
moderate the discussion and take feedback from every participant on their
comments.
Introduce the two facilitators doing role-play to the group:
----------------------is mother; -----------------------------is nurse. She has a premature baby 1.2 kg
admitted in Nursery. Nurse will motivate and counsel the mother for KMC. All the
participants will record the feedback in ALPAC format in the learner module page 12.
AL : Ask and listen (and accept mother’s concern).
P: Praise the mother for her right practices, concern or enthusiasm for the baby.
A: Give a few practical advices that she can understand and follow easily.
C: Confirm whether she has understood
Introduction of KMC to mother
Nurse: Hello Anita, how are you?
Mother: I am fine, thank you.
Nurse: Have you seen your baby today, how does he look?
Mother: Yes Sister, he looks much better now. His breathing problem has now settled and
he is breathing on his own. He is 5 days old but still losing weight. His weight
was 1200 grams at birth and today his weight is 1080 grams.
Nurse: Don’t worry Anita. Most babies do lose weight in the first week of life. You can
help in care of the baby. Since when are you coming to see your baby?
Mother: I have been coming to see the baby since last 24 hour. Initially I was
scared to touch the baby. The nurses have helped me to overcome that
fear and now I am able to touch and caress my baby. Today I also changed
his nappy.
Nurse: That‘s very good Anita. Do you feel your baby require different kind of
care than that of other babies?
Mother: Yes, he is too small. The sister asked to me to wash and warm before each
handling. They are keeping my baby in this machine to keep him warm and
also feeding him every 2 hourly.
Nurse: Did you hold your baby?
Mother: No I am scared.
Nurse: Do you want to take the baby in your lap?
Mother: Yes, but I am scared to do it
Nurse: There are things you can do for the baby which will help him gain
weight and remain well. There is a method of care called Kangaroo Mother
Care. It is based on the method by which kangaroos care for their babies.
Have you heard about the animal kangaroo?

[FACILITATOR’S GUIDE]
15
Mother: Yes. It is an animal found in Australia. But how does this method of care
help me and my baby?
Nurse: The mother kangaroo carries the baby in her pouch, where the baby
stays warm and gets breast-feeding and grows bigger till the time he
starts coming out. We have tried to adopt a similar method of care for
our human babies. I can explain that method of care to you.
Mother: Is that method safe?
Nurse: That is a very important question. We have found this method to be safe. Initially
you must do this under our supervision and then as you develop confidence
you can do it on your own.
Mother: How does it help my baby?
Nurse: As I have already told you, this method ensures that your baby remains warm.
As the baby is so close to you, this stimulation leads to improvement in
breast milk output. Hence KMC helps in both warmth and breast-feeding. Both
these things are most important at this stage for the baby. Do you want me to
explain this method of care to you?
Mother: Yes
Nurse: You must wear a gown, which can be opened from the front. The baby
should be prepared for this. He should be wearing a nappy to prevent
soiling you and socks and cap to keep him warm. All other clothes should be
removed
Mother: Would the baby not get cold if all his clothes are removed?
Nurse: I understand your concern. However your skin temperature is 37oC which
is just accurate for the baby. By remaining in touch with you, the baby gets
warmth from you and he does not get cold. In addition, your clothes cover him.
The baby should be put upright on the chest between the breasts. Care should
be taken to ensure that the head is slightly extended and turned to one
side. This ensures that the baby continues to breathe. You can also observe
his breathing in this position. Now wrap your gown over the baby. How are you
feeling now?
Mother: I am comfortable but still I am not confident? What if he stops breathing?
Nurse: While the baby is in this position, you can keep a watch on the babies
breathing. While you are in the unit the doctors and nurses will also help you in
the monitoring of the baby. As the baby grows older and puts on weight, you
would become more confident. In fact you can then sense his breathing
movements without observing them. In addition, your own breathing
movements will stimulate the baby to breathe.
Mother: Does this method help my baby to put on weight?
Nurse: You are right. This helps your baby to put on weight. During KMC, the
baby may start breast-feeding. In addition, you can express breast milk into a
container and the baby can be fed the same milk by a tube. You would have
more milk and we can then give more breast milk to your baby. This would help
the baby to put on more weight
Mother: Does this mean that I can get discharged sooner if my baby starts gaining
weight?
Nurse: Definitely. If your baby starts sucking and you are confident then we can also
discharge you sooner.
Mother: I am feeling better now nurse. How often should I do this KMC?
[FACILITATOR’S GUIDE]
16
Nurse: Try to do this procedure for three to four times a day and each time do it
for 1-2 hour. In fact your husband can also help you. If you get tired or you are
busy with something else, your husband or other family members can do it for
you.
Mother: Thank you sister. Your explanation has really satisfied me and I am very relieved.
I would like to definitely help in the care of my baby. I now feel that I can
contribute to the care of my baby. This makes me feel better.
Nurse: You can also speak to a few mothers who are practicing KMC. It will give you
more confidence. Please do not hesitate to talk to me or to any one of us if you
have any doubts regarding this or anything else. I hope that you have a good
experience and that your baby gets well soon. Thank you.
Ask to stop role-play
Lead a discussion how the role-play was conducted. Ask the participants to comment on
how the role-play was performed. Ask them to elaborate on what has been done well
and what needs to be improved upon. Build up the discussion by involving each
participant. Write comments of participant on the flip chart under two headings (Good
things and things need to be improved).
After the discussion, ask the participants to evaluate the role-play with principles of
counseling (ALPAC) by writing on the Learners Guide.
Encourage participant to share their own experience and summarize the key
points to the group.
Role-play by participants
• Ask the participants to volunteer for next role-play. Give a situation;
assign one to be the nurse and the other to be a mother.
• Assignment of roles should be done much in advance (during
tea/lunch breaks). Following instructions should be provided in writing
to the participants of role play.
Instruction for Mother
You have delivered a baby 5 days ago weighing 1800 g, who is feeding well and active.
You have observed a mother in the postnatal ward keeping her baby on her
chest. Ask the Nurse what Seema is doing and can you also do this.
Instruction for Nurse
As a nurse you have to counsel the mother to initiate and practice KMC, her baby is 1800g,
5 day old, active & feeding well.
[FACILITATOR’S GUIDE]
17
Lead a discussion how the role-play was conducted. Ask the participants to comment on
how the role-play was performed. Ask them to evaluate the role-play with principals of
counselling(ALPAC).By writing on the learner’s guide.
Discuss with the participants how to ensure privacy in hospital setting for the mother and
use of different apparel for providing KMC.
---------------------------------------------------------------------------------------------------------------------------
SUMMARIZING THE MODULE
Once all the participants complete the module, one of the facilitator should get up and
summarize the module. “So we have learnt in this module about benefits and
procedure of KMC. Tomorrow we will see actual demonstration in hospital setting.
[FACILITATOR’S GUIDE]
18
Module II: Thermal Protection
Introduction
In this module you would learn about thermal protection. We know
maintenance of normal temperature is essential for newborn babies. Hypothermia as
well as hyperthermia is bad for babies. As a staff nurse we can prevent these by
simple measures. Use the highlighter pen to highlight important points in the
module for yourself.
DEMONSTRATION
Place a naked wet doll on the table. Discuss the four ways a baby can lose heat and
demonstrate how to prevent these.
Ask four participants the following question adding a different way of losing heat each
time, giving examples.
Ask: What are the four ways a baby can lose heat?
Evaporation
- Not drying the baby after delivery when it is wet.
(Dry the doll with a towel)
Radiation
- Not covering the baby’s head so that its body heat is able to pass into the
surrounding air.
(Put a hat onto the baby’s head)
Convection
- Leaving the baby in a draught.
(Take the baby away from an open door or window)
Conduction
- Leaving the baby on a cold surface, particularly metal.
(Take the baby off the table top, wrap it up and indicate you have put it in
a cot temporarily)
Ask the participants to start reading pages 2 to 4. Once everybody has finished reading, demonstrate the
‘Mechanisms of heat loss and the ways to prevent them’
Ask the participants to read pages 6 to 7. Then conduct a demonstration on ‘Measurement of axillary temperature using a thermometer’
[FACILITATOR’S GUIDE]
19
DEMONSTRATION
Ask co-facilitator to record the axillary temperature. Lead a discussion about
what steps were done correctly and what were wrong. Facilitator should lead a
discussion & emphasize correct steps of recording temperature.
� Use a mannequin or doll and a thermometer.
� Follow the points given in the box ‘Recording the axillary temperature’.
� A participant to read out each point as it is demonstrated.
DEMONSTRATION
Make sure that all participants have read page 9 and seen the contents of poster.
Gather all the participants near the demonstration aid fixed on the flip board. As a
facilitator, read one of the components of poster aloud. Make sure that all the
participants are looking at the poster. Then ask participants one after other to read the
remaining components on the poster. Build a discussion on the various aspects of warm
chain.
Ask them to read page 9; after they have finished reading, conduct a demonstration on ‘Temperature regulation and warm chain’ using the poster
After the demonstration, conduct an oral drill on ‘Hypothermia and its management’.
[FACILITATOR’S GUIDE]
20
ORAL DRILL
One of facilitators should conduct the oral drill. Ask all participants to open the
module on page 11. Facilitator can also have a look on the table on page 11. Tell
them that you will ask them a question and they need to answer from the table.
Before you start asking questions, summarize the table by saying aloud: ‘this table
has 5 columns namely, category, temperature range, feel by touch, clinical
features, and action. It describes how to categorize the infants based on
temperature, how to assess the temperature by touching the abdomen and
extremities, what would be the clinical features in each category, and what action
a nurse should take in these cases’.
Give an example referring to the table (e.g. in moderate hypothermia,
temperature range is 32-36oC). Make sure all participants locate this in the table.
Now, you start asking questions; You can ask
Q1. If baby has warm trunk and cold extremities on touch, he has
Cold stress
Q2. What action you will undertake for a baby with cold stress?
Cover adequately, Warm room or bed, Skin-to-skin contact,
Provide warmth
Q3. A baby has been brought to emergency room with axillary temperature of 31.8 oC.
Classify the hypothermia category
Severe hypothermia
Q4. What are the clinical symptoms and signs in a baby who has axillary temperature of
34 oC
Poor feeding, weak cry, lethargy and fast breathing.
Q5. How would a baby with normal temperature be felt on
touch?
Warm trunk and warm extremities
After the oral drill, ask the participants to do self evaluation on page 12. Tell participants that they would be given individual feedback
after they have done the self evaluation
[FACILITATOR’S GUIDE]
21
SELF EVALUATION
1. Newborn baby is prone to develop hypothermia due to
a) Larger surface area
b) Decreased thermal insulation due to lack of subcutaneous fat
(LBW infants)
c) Reduced amount of brown fat (LBW infants)
2. Enumerate four mechanisms of heat loss in neonates:
Radiation
Convection
Evaporation
Conduction
3. Steps of “warm chain” in hospital include the following:
Steps to prevent heat loss in labor room i. Warm delivery room (25°C)
ii. Newborn care corner temperature at 30°C
iii. Drying immediately. Remove the wet towel and cover with another pre-
warmed towel
iv. Skin-to-skin contact between mother and baby
Steps to prevent heat loss in postnatal ward i. Breast feeding.
ii. Appropriate clothing; cover head and extremities.
iii. Keep mother and baby together.
iv. Postpone bathing and weighing.
4. Routine temperature should be recorded by axillary route.
5. Normal axillary temperature range is 36.5 to 37.5°C.
6. How can you assess baby’s temperature by touch?
By touching the abdomen and extremities of the baby.
7. A baby with cold stress will have warm abdomen and cold soles/palms.
After giving individual feedback, conduct a group discussion /case study (given in page 13).
[FACILITATOR’S GUIDE]
22
GROUP DISCUSSION – CASE STUDY
Ask one participant to read the case-scenario: ‘You are posted in postnatal ward. A
recently born baby is irritable. On examination you found a 6 hr old, lying in a separate
cot. Baby has no clothes and yet only wrapped in a hospital cotton sheet. HR is
140/minute, RR 56/minute. Extremities are blue and cold while abdomen is still warm to
touch. Axillary temperature is 36.1oC. The room is cold’.
Lead a discussion by asking the following questions. Ask individual participant first
and then ask the group; reach a final consensus answer and make everyone write
the same on their modules.
Q1. What is problem with the baby?
Baby is in cold stress
Q2. What are the adverse effects of this condition?
• Can progress to severe degree of hypothermia
• Baby can develop low blood sugar
• Fast breathing/ apnea
• Bleeding tendency
Q3. What led to this situation in the baby?
• Room is cold
• Rooming in is not being practiced
• No clothing offered to the baby
• Breastfeeding not yet initiated
Q4. What will you do to rectify these conditions?
• Provide a heater in room to raise room temperature
• Prevent air currents in the room. Switch off the fan, close the windows
etc.
• Provide adequate and warm clothing to baby (cover head and
extremities)
• Skin-to-skin contact with mother
• Frequently put the baby on breast
• Frequent monitoring of baby for temperature maintenance
You can ask more questions regarding the case and lead the discussion.
After the group discussion, conduct a role-play on ‘How to keep a baby warm in postnatal ward’.
[FACILITATOR’S GUIDE]
23
ROLE PLAY
Objectives: To demonstrate how to keep baby warm in postnatal
ward.
Time allotted: 10 minutes
One of the facilitators would act as a nurse while the other would act as the mother.
Nurse: Good morning Geeta. How are you?
Geeta: I delivered in the morning. I breastfed her and she passed black stool after
that.
Nurse: That’s good Geeta. Your baby looks so cute but why did not you dress her
fully yet.
Geeta: My mother-in-law has just brought clothes for her but I do not know how to
dress her.
Nurse: Do not worry Geeta. Your mother in law is so caring for you and your
baby. I will help you how to do that.
(Demonstrate adequate clothing of the baby – woolens, cap, socks
etc.)
Geeta: Thank you sister. But how would I know that the baby is not heated up in this hot
season.
Nurse: Babies usually need little more cloths than adults even in summer month.
You can assess temperature of baby by touching his abdomen and
hands and face. If she appears too warm than you can decrease the
clothing a little bit. If he is appropriately clothed he will not get cold and will
be comfortable.
Geeta: How will I know that my baby is cold?
Nurse: I will demonstrate this to you. See, touch with your dorsum of hand on
abdomen and extremities of baby. If abdomen is warm but the extremities
are cold then your baby is in cold stress. Give extra clothes or keep
baby next to you in skin-to-skin contact.
Geeta: When should I give bath
Nurse: Tomorrow and make sure that baby has warm soles and abdomen.
After the role-play, ask the participants to evaluate it by using the principles of counseling (ALPAC) and write on the Learners Guide.
Ask them to read page no. 15 & 16.
[FACILITATOR’S GUIDE]
24
SUMMARIZING THE MODULE
Once all the participants have completed the module, one of the facilitator should
get up and summarize asking participants the key messages. Facilitator should keep
writing on board. Then again ask one participant to open the learning objectives
and read. In end tell, we will see clinical demonstration of what you have learnt in
hospital tomorrow. This module is for you to keep, we have finished two of three
modules. Now we will start next module.
[FACILITATOR’S GUIDE]
25
Module III: Feeding of normal and LBW babies
Introduction to the module:
Introduce by saying aloud: ‘In this module. you will learn feeding of normal birth
weight babies and low birth weight babies. We are aware that most of the knowledge
and skills you already possess, but still this module is very important to learn’.
DEMONSTRATION
Make sure that all participants have read pages 2 to 4. Ask them to open page 3
(figure on Anatomy of Breast) of the module. Gather all the participants near the
demonstration aid fixed on the flip board. As a facilitator, read one of the
components of figure aloud pointing where that structure is. Make sure that all the
participants are looking at the demonstration aid. Then ask participants one after
other to indicate the remaining structures on the figure.
Similarly using demonstration aids on prolactin and oxytocin reflex build a discussion
among the participants.
After you have finished the discussion, ask the participants to read page 6 and do the exercise on page 7;
tell them that they will be given individual feedback
Ask the participants to start reading pages 2 to 4. Once everybody has finished reading, conduct a demonstration on
‘Anatomy of breast and physiology of lactation’.
[FACILITATOR’S GUIDE]
26
SELF-EVALUATION
1. Benefits of beast feeding for baby and mother are:
Complete food, easily digested, protects against infection, promotes emotional
bonding, Delays pregnancy, lowers risk of breast and ovarian cancer,
decreases mother’s work load, better involution of uterus
2. How long should exclusive breast-feeding be continued for babies?
For at least 6 months.
3. Milk secretion is caused by Prolactin hormone, while milk ejection (letdown)
by Oxytocin hormone.
4. Enumerate factors, which enhance “milk secretion reflex” by increasing prolactin
production
Suckling, expression of milk, emptying of breast, night feeds.
5. Oxytocin reflex is stimulated by:
Mother thinks lovingly of baby.
Sound of the baby.
Mother is relaxed/comfortable.
Confidence.
6. Look at the picture. Is Malti doing correct? Yes/No
No.
How many times she should breast feed in a day? (ANSWER NOT GIVEN IN
MODULE; Announce the correct answer at the end) As frequently as baby demands day and night (at least 8 times in a day)
After individual feedback, ask the participants to read pages 8 to 11; once they finished reading, conduct a video demonstration on
’Initiation of breast feeding and good positioning and attachment’
[FACILITATOR’S GUIDE]
27
VIDEO
Introduce by saying aloud: ‘The first video will demonstrate you how to counsel and
support a mother for initiation of breast feeding; the second video will demonstrate the
correct position of mother and baby and signs of good attachment and effective
sucking’.
After the show the facilitator should initiate a discussion with the participants. Encourage
the participants to share their own experiences, perceptions about breastfeeding
and lead a discussion. You should take their opinion on various aspect of the video.
SELF-EVALUATION
1. Can a mother feed her baby in lying down position? Yes
2. Enumerate the four key points of positioning of baby for breastfeeding
i. Supporting whole of the baby’s body
ii. Head, neck and back are in the same
plane
iii. Entire baby’s body should face
mother
iv Baby’s abdomen touches mother abdomen
3. Signs of good attachment are
i. Baby’s mouth wide open
ii. Lower lip turned outward
iii. Baby’s chin touches mother’s breast
iv.Majority of areola inside baby’s mouth
After the video demonstration, ask the participants to read pages 13 to 15 and do the exercise on page 16-17. Give individual feedback.
[FACILITATOR’S GUIDE]
28
4. What differences do you see?
1. Baby sucking on nipple & areola (good attachment)
2. Baby sucking on nipple only (poor attachment)
5. Enumerate problems associated with poor attachment.
Sore nipple, breast engorgement, poor milk supply, refusal to suck.
6. How will you assess the adequacy of breastfeeding?
If the baby
i. Passes urine 6-8 times in 24 hours.
ii. Goes to sleep for 2-3 hrs after the feeds.
iii. Gains weight @20-40 gm/day.
iv. Crosses birth weight by 2 weeks.
7. How many times should a baby be breastfed?
At least 8 times in 24 hours
8. Can mother skip one or two night feeds? No
9. What advice will you give to a mother who develops heaviness and pain in
breast on third day after delivery?
Frequent breastfeeding, Correct attachment, Hot fomentation, Expression of
milk and Paracetamol for pain
11. How you will manage a mother with sore nipple?
Correct positioning and attachment.
Apply hind milk to the nipple.
Expose the nipple to air between feeds.
After giving individual feedback, conduct a role-play on ‘Not enough milk’.
[FACILITATOR’S GUIDE]
29
ROLE PLAY
Give a brief introduction: ‘A common complaint of mothers in the postnatal ward is “Not
enough milk”. We shall perform a role-play to address this problem’.
Introduce the Facilitator I as Nurse and Facilitator II as Mother. Ask the participants to
observe: .
Nurse: Hello Meena! How are you today?
Mother: I am fine sister, but I am slightly worried about my baby
Nurse: Meena, why are you worried?
Meena: My baby has been crying all night. I have been feeding the baby but I think
my milk is not enough for the baby.
Nurse: Don’t worry Meena. I am here to help you. Let us see what is the problem.
Now tell
me, has the baby passed urine during the day and night
Meena: Yes sister, the baby has passed urine. In fact he has passed urine 2 times last
night.
Nurse: How many times did the baby pass urine in the last 24 hours?
Mother: The baby has passed urine 5-6 times in the last 24 hours.
Nurse: Excellent. Meena, if the baby is passing urine 5-6 times in 24 hours, then the
baby is receiving sufficient milk. Even if the baby passes urine 4 times in
24 hours, the baby is getting adequate milk. So Meena, your baby is
getting enough milk.
Mother: But sister, my baby has been crying all night.
Nurse: Meena, I can understand your worry. But the baby could be crying because
of other reasons. The baby could be crying because of a wet nappy, or
because he is feeling cold. Was the baby crying because of a wet nappy
last night?
Mother: Yes sister, 1-2 times the baby was crying because of a wet nappy. But he was
still crying at other times.
Nurse: OK Meena, show me how you were feeding the baby?
(Mother demonstrates the positioning, attachment of the baby)
Nurse: Very good, Meena. You are doing very well. Your baby is sucking very
well.
He is going off to sleep.
Mother: This is what usually happens. He sucks for some time and then goes off
to sleep. Then he wakes up after 30 minutes and starts crying again.
Nurse: Meena, your observation is very correct. A baby must suck for at least 7-10
minutes on each breast to get a full feed. Most babies sleep off during
the feed and they must be continuously stimulated to enable a baby to
take a complete feed. If a baby takes a complete feed, he will be satisfied
and will usually sleep for 2-3 hours.
[FACILITATOR’S GUIDE]
30
Mother: I get tired also. Why can’t 1 give top feed during the night?
Nurse: Meena that may be very harmful. Most babies are more active at night
and would take a feed more often during the night. This sucking helps in milk
production. Also, hormones for milk production are also released more
during the night. Hence it is very important that the baby should suck
more often and especially during the night to help in milk production.
The best solution for not enough milk is to let the baby suck more often at
the breast.
Meena: So, sister, if I feed the baby more often and during the night, then my milk will
be enough for the baby. Will you be available during the night to help me?
Nurse: Yes, Meena I will be available or some other nurse will be available to take
care of you throughout the night. OK, Meena, I want to ask you something
now? How often would you feed the baby?
Meena: I will feed the baby every 2-3 hours and I will continue the feed during
the night also because that will help my milk production.
Nurse: Yes, Meena, I can see that you have understood what I had to say. Excellent,
Meena I am very sure that you will do a very good job of feeding your baby.
If there are any problems, you can contact my staff or me at any time. OK
bye.
After the role-play, ask the participants to evaluate it by using the principles of counseling (ALPAC) and write on the Learners Guide.
Ask them to read page no. 19 & 20. Conduct a video demonstration after they have finished reading. .
[FACILITATOR’S GUIDE]
31
VIDEO DEMONSTRATION
This video will demonstrate to you ‘paladai feeding’. After the show the facilitator should
initiate a discussion with the participants. Encourage the participants to share their
own experiences, perceptions about this method of feeding and lead a discussion.
You should take their opinion on various aspects of the video.
DEMONSTRATION
Conduct a clinical demonstration on ‘Paladai feeding ’at the bedside (when you take
the participants to the postnatal ward).
.’
Ask the participants to read page 22. Conduct a video demonstration after they have finished reading.
After video demonstration, inform the participants that there will be a clinical demonstration on ‘Paladai feeding’ at the bedside on Day 2.
[FACILITATOR’S GUIDE]
32
VIDEO DEMONSTRATION
This video will demonstrate to you ‘Intra-gastric tube feeding’. After the show the facilitator
should initiate a discussion with the participants. Encourage the participants to share
their own experiences, perceptions about this method of feeding and lead a
discussion.
DEMONSTRATION
Conduct a clinical demonstration on ‘Intra-gastric tube feeding’ at the bedside (when
you take the participants to the postnatal ward).
After video demonstration, inform the participants that there will be a clinical demonstration on ‘Intra-gastric tube feeding’ at the bedside on Day 2.
Ask them to do the exercise on page 24 and give individual feedback.
[FACILITATOR’S GUIDE]
33
SELF-EVALUATION
1. Describe the best method of feeding in following babies.
1080 gm: Inform doctor, start IV fluids; initiate gavage feeding gradually
1460 gm: Paladai feeds; initiate breastfeeding gradually
1996 gm: Breastfeeding.
2. When should we start feeds in a baby who is born with birth weight of 1180 gm?
Once they are stable (no respiratory distress)
3. The best milk to be given by oro-gastric tube feeding is
Expressed breast milk
4. Advantages of spoon feeding include
Faster than spoon or cup; Less spillage
SUMMARIZING THE MODULE
Tell the participants that in this module we learnt about
Benefits of breast milk
Milk production and let down reflex mediated by Prolactin and Oxytocin
Positioning of baby and mother
Attachment of baby for successful breast feeding
Common problems associated with breastfeeding and
Feeding of LBW
Ask for any clarifications. If there are none, tell them that they have completed
today's task successfully.
[FACILITATOR’S GUIDE]
34
Module IV: Neonatal Resuscitation
Preparation
Before starting the session, make sure that:
1. You have understood the objectives of the session
2. You have all the items needed for running the module:
i. Mannequin (keep dressed)
ii. Cotton sheet – 2
iii. Shoulder towel (3/4”)
iv. Different sizes and shapes of face mask
v. Resuscitation bag, reservoir, oxygen tubing
vi. Suction devices: catheter (12, 14F) mucous trap.
3. Each facilitator should have extra resource material for an advanced learner.
You can ask them to be read this in case some one happens to finish before
time.
i. WHO manual on ‘Basic Newborn Resuscitation’
ii. Teaching aids
Introduce the module
Introduce by saying: ‘In this module, you will learn steps of resuscitation of an
asphyxiated newborn (Routine care for a normal baby has been covered in a
separate module). As a nurse/midwife, you must master the skills for providing safe
and effectve resuscitation of newborn babies. These can be practised on the
mannequin using appropriate equipments as discussed in the module’.
Ask the participants to start reading pages 2-3. Once they have finished reading, conduct a group discussion regarding ‘Preparation prior to delivery’.
[FACILITATOR’S GUIDE]
35
GROUP DISCUSSION
Assemble all the necessary equipments in the table. Ask all the participants to get
up and gather around you with their modules opened on page 2-3.Make sure that
all the participants are looking at the demonstration aid. Then ask participants one
after other the equipments needed for resuscitation.
Show each item of resuscitation equipment as it is discussed: Bag, mask, suction
device, clock, warm and folded cloths etc. indicate the remaining structures on the
figure.
Raise a discussion about what the participants practice at the time of birth.
Ask the participants to read pages 5 to 10; then conduct a demonstration on ‘The steps of resuscitation’.
[FACILITATOR’S GUIDE]
36
DEMONSTRATION
Scenario:
Mother delivers a normal baby.
Two trainers/facilitators: one plays the mother and the other the health worker.
1. Demonstrate initial steps and assessment at birth: Show them how to deliver
the baby on to the mother’s abdomen.
2. Note the time of birth; demonstrate the correct procedure of drying the baby
(Holding the baby in a pre warmed linen, drying and removing the wet linen.
Heat should be provided by keeping the baby warm using a warmer/bulb).
3. Assess the baby’s breathing: demonstrate how to assess breathing during
drying itself.
Enact all the four scenarios:
• Demonstrate baby crying and/ or breathing at 40 breaths per minute
(Take a breath – count one/two – breathe again. Continue for 40
breaths)
• Demonstrate gasp
• Demonstrate baby not breathing at all.
4. Demonstrate resuscitation on the mannequin
5. Inform the mother that the baby needs some help. Bring the baby under a
warmer (tell partcipants that if there is no warmer, they have to arrange some
source for providing warmth near the baby’s corner)
6. Demonstrate positioning. Position the baby in such a way that airways are
patent. Show that the neck is not flexed or hyper extended.
7. Show them how to do suctioning of the mouth and nose using the suitable
device.
8. Demonstrate them how to evaluate the baby’s breathing again. Tell them
that the baby is not breathing.
Ask the class: what should we do now? (Ventilate)
9. Now demonstrate the parts of resuscitation bag, safety features, function and
mechanism of increasing oxygen concentration using reservoir & types of
masks.
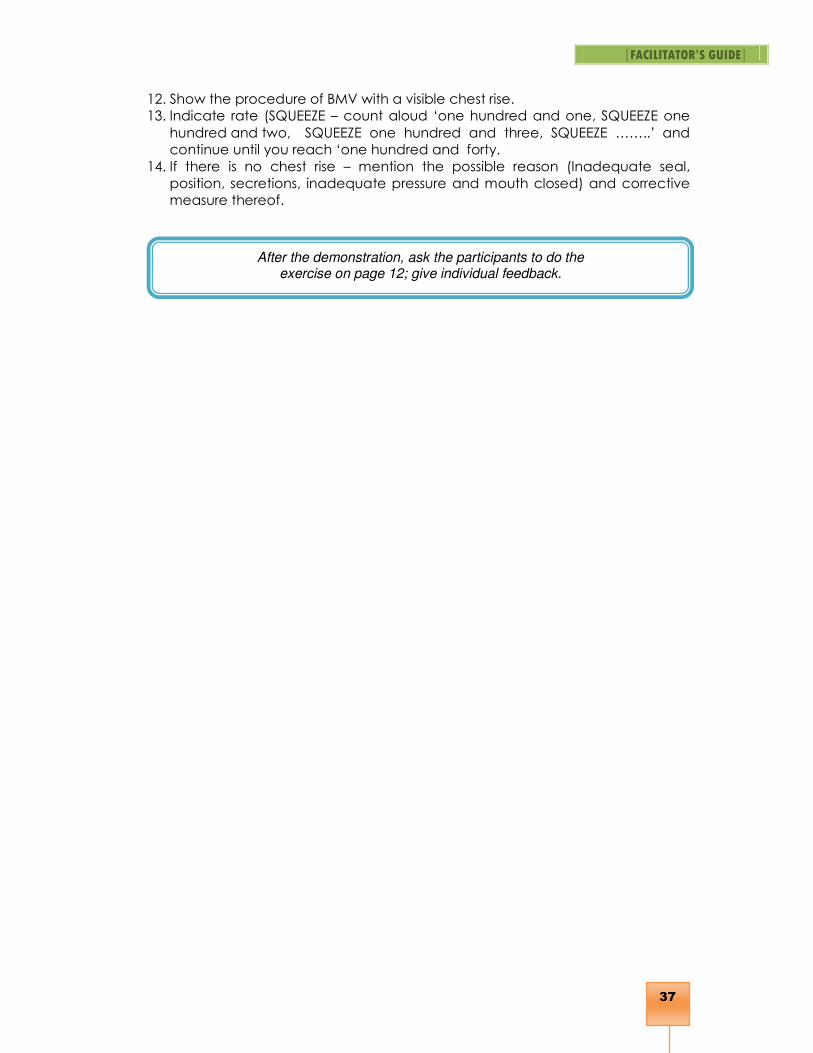
10. Show the assembly and testing of Bag and Mask equipment using palm.
Testing bag & mask equipment
11. Show the procedure of Bag and Mask ventilation on the mannequin. Select
appropriate sized bag and face mask, connect oxygen tubing and reservoir.
Show quickly that the equipment is in working order. Stand on head side or by
the side of baby so that you have clear vision of chest of the baby.
[FACILITATOR’S GUIDE]
37
12. Show the procedure of BMV with a visible chest rise.
13. Indicate rate (SQUEEZE – count aloud ‘one hundred and one, SQUEEZE one
hundred and two, SQUEEZE one hundred and three, SQUEEZE ……..’ and
continue until you reach ‘one hundred and forty.
14. If there is no chest rise – mention the possible reason (Inadequate seal,
position, secretions, inadequate pressure and mouth closed) and corrective
measure thereof.
After the demonstration, ask the participants to do the exercise on page 12; give individual feedback.
[FACILITATOR’S GUIDE]
38
SELF EVALUATION
1. Enumerate three situations where there is an increased chance for breathing
problems to occur:
Preterm
Born after long traumatic labor
Born to mothers who received sedation during the late stages of labor
2. In suctioning a baby’s nose and mouth, the rule is to first suction the Mouth and
then the Nose.
3. Choose the correct answer: The following babies will need resuscitation
• baby crying at birth: No
• baby breathing at a rate of 40 per minute: No
• baby is gasping at birth: Yes
• baby not breathing at birth: Yes
4. Enumerate the three signs that need to be monitored during resuscitation of a
newborn baby:
Heart rate
Breathing and
Color
5. Compress the bag enough to cause a visible chest expansion at the rate of 40
breaths per min.
6. You are using a self inflating bag to ventilate a baby. The bag fills after every
squeeze. But the baby's chest is not rising. List 3 possible reasons and the actions
that had to be taken:
Blocked airway Re-position the baby’s head
Do suction (if secretions are present)
Leakage of air around the mask Check the seal around the mask; if it is
not good, re-position the mask.
Inadequate pressure Squeeze the bag harder (using more
pressure)
After providing individual feedback, ask participants to read pages 13 to 14. Once they have finished reading, conduct a demonstration on ‘The steps of resuscitation’.
[FACILITATOR’S GUIDE]
39
DEMONSTRATION
The trainer to demonstrate in real time the sequence of events as taught above on
the mannequin, from delivery to placing the baby skin-to-skin with its mother.
� One person to time resuscitation and tidying up and recording events.
S. No Steps
1. Deliver the baby on to mother’s abdomen
2. Note the time of birth and dry the baby
3. Assess the baby’s breathing: o Baby breathing or crying – no further action o Baby gasping or not breathing – Continue resuscitation
4. Cut cord quickly; transfer baby to a firm warm surface and START resuscitation. CALL FOR HELP.
Open the airway: o Position baby’s head so it is slightly extended o Suction first mouth and then the nose.
5. If still not breathing, VENTILATE o Use correct sized mask o Ensure proper seal o Squeeze 2-3 times and observe the chest rise o If chest rise is adequate, ventilate for one minute and reassess o If chest rise is NOT adequate, take corrective steps.
6. Assess heart rate after 30 seconds of ventilation: If > 100/min: assess breathing; if breathing or crying, STOP VENTILATION If 60-100/min: continue ventilation If < 60/min, continue ventilation and begin chest compressions
7. If breathing less than 30 breaths per minute or has severe chest in-drawing, CONTINUE VENTILATION.
Explain the events to the mother/family. Arrange referral. Record the event.
SUMMARIZING THE MODULE
Summarize the module by repeating what has been taught in the module. Ask for
any clarifications. If there are none, tell them that they have succesfully completed
this module.
[FACILITATOR’S GUIDE]
40
Clinical Demonstration: General Principles
Ideally a separate facilitator should be assigned for this activity. Identify a room or
space to conduct the activity. On day one of the course she/he should work in
consultation with the local coordinator and select cases to show the signs as
detailed in the checklist. Assign task to participants or do the return demonstration of
skills with all the participants. The preparations can be made in the postnatal ward
itself. The other Facilitator will bring their group to Clinical Facilitator who will be
responsible for skill demonstration. After demonstration to all, ask each one to
demonstrate and take feedback from the others.
Preparations for Clinical demonstration
Do complete clinical demonstration as per your schedule. Even if there are one or
two participants whom you think would know this, don’t curtail it since it is quite
possible most others are unaware. The Co -Facilitator have the responsibility of
keeping these participants away from the first row of the Group because they are
trouble makers. Having completed everything will give you more satisfaction rather
than jump starting and finishing quickly.
1. Clinical Instructor will identify suitable cases (willing mothers) for
Demonstration. Use different mother-baby pair for clinical skill
demonstration. Demonstration on a single case is often tiring and on
occasions parents may resent examination.
2. Often helpful to identify mothers with breast feeding problems like
cracked nipple, breast engorgement. Look around for preterm, LBW baby
who is well covered.
3. Baby on Paladai feeding. Ask mother to demonstrate use of paladai in
front of the group.This means you will have to identify which baby is due
for feeding at what time , so that you can bring the group participants at
correct time for demonstration to that case.
4. Collect all supplies for demonstration of temperature recording. Collect
rectal & clinical thermometer for demonstration.
5. Identify a room having room thermometer.
6. Identify two mothers one for demonstration of KMC procedure and ask
one of the participant to counsel a mother for initiation of KMC.
[FACILITATOR’S GUIDE]
41
Day 2 Activities: Clinical Demonstration
Today we will see what we have learnt yesterday about KMC/Thermal
Protection/Feeding of Healthy and LBW babies.
We will divide your group in two A1-A2/B1-B2 (so that each group has 6-7
participants)
For A1 – Facilitator will be ………………………………. and …………………………..
For A2 – Facilitator will be ………………………………. and …………………………..
Ask participants to follow facilitators. They should not get lost on the way otherwise
whole group will be delayed. Tell them to bring their modules along because they
will have to refer them . Tell them, You have a checklist (show and give to each
participant) to enter what you have seen.
At the end of the demonstration bring them with you to the Conference Hall. If you
finish early, keep your group busy in the Conference Hall by revising a few things
you feel your Group is having difficulty in understanding. Keep them busy, so that
they feel you are really interested in making their learning simple. They will respect
you, if they find that you are concerned and dedicated for their training.
Each group will be divided into two for the ward demonstrations. The two facilitators
should accompany the group to the ward. One facilitator should lead the group and
the other facilitator should follow at the end to make sure that all the participants
reach the ward.
Ward demonstrations will be done in two groups, one hour each by Clinical Instructor
First demonstration will be on Thermal protection and KMC and would be
conducted in the room where LBW babies are kept with their mothers.
Gather your group and take them to that room. Ask each participant to observe
and record how the babies are kept warm. Raise a discussion on the ways to
prevent heat loss in preterm infants.
Demonstrate the following:
• Keeping the baby warm
• Recording axillary temperature
• Assessment of temperature by touch
• Functioning of warmer
• Initiation of kangaroo mother care
Second demonstration will be on breast feeding and feeding by paladai and intra-
gastric tube. It will be conducted in the postnatal ward (exept for gastric tube
feeding which is ideally demonstrated in a stable preterm baby outside the nursery).
Ensure that the following points are covered:
• Positioning the mother
[FACILITATOR’S GUIDE]
42
• Positioning the baby
• Attachment
• Reflexes – rooting, sucking etc.
• Management of breast engorgement
• Management of inverted and sore nipple
• Back massages for insufficient milk
• Paladai feeding
• Orogastric feeding
• Expression of breast milk
[FACILITATOR’S GUIDE]
43
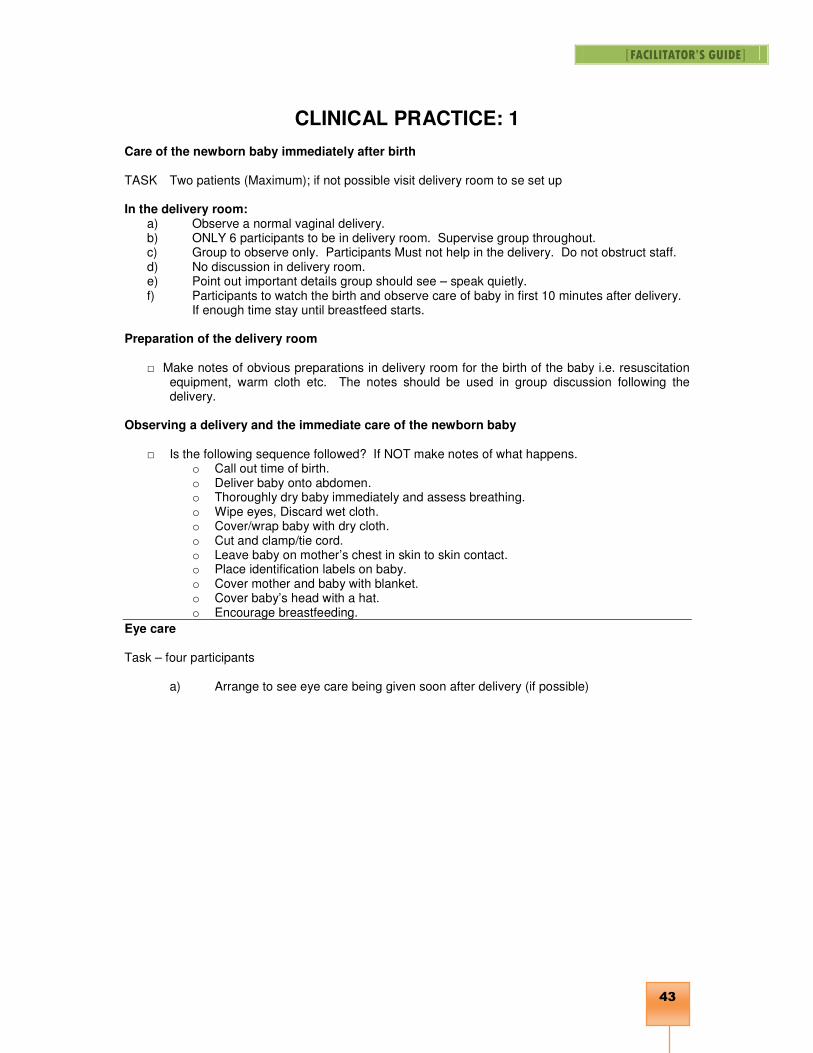
CLINICAL PRACTICE: 1 Care of the newborn baby immediately after birth TASK Two patients (Maximum); if not possible visit delivery room to se set up In the delivery room:
a) Observe a normal vaginal delivery. b) ONLY 6 participants to be in delivery room. Supervise group throughout. c) Group to observe only. Participants Must not help in the delivery. Do not obstruct staff. d) No discussion in delivery room. e) Point out important details group should see – speak quietly. f) Participants to watch the birth and observe care of baby in first 10 minutes after delivery.
If enough time stay until breastfeed starts. Preparation of the delivery room
□ Make notes of obvious preparations in delivery room for the birth of the baby i.e. resuscitation equipment, warm cloth etc. The notes should be used in group discussion following the delivery.
Observing a delivery and the immediate care of the newborn baby
□ Is the following sequence followed? If NOT make notes of what happens. o Call out time of birth. o Deliver baby onto abdomen. o Thoroughly dry baby immediately and assess breathing. o Wipe eyes, Discard wet cloth. o Cover/wrap baby with dry cloth. o Cut and clamp/tie cord. o Leave baby on mother’s chest in skin to skin contact. o Place identification labels on baby. o Cover mother and baby with blanket. o Cover baby’s head with a hat. o Encourage breastfeeding.
Eye care Task – four participants
a) Arrange to see eye care being given soon after delivery (if possible)
[FACILITATOR’S GUIDE]
44
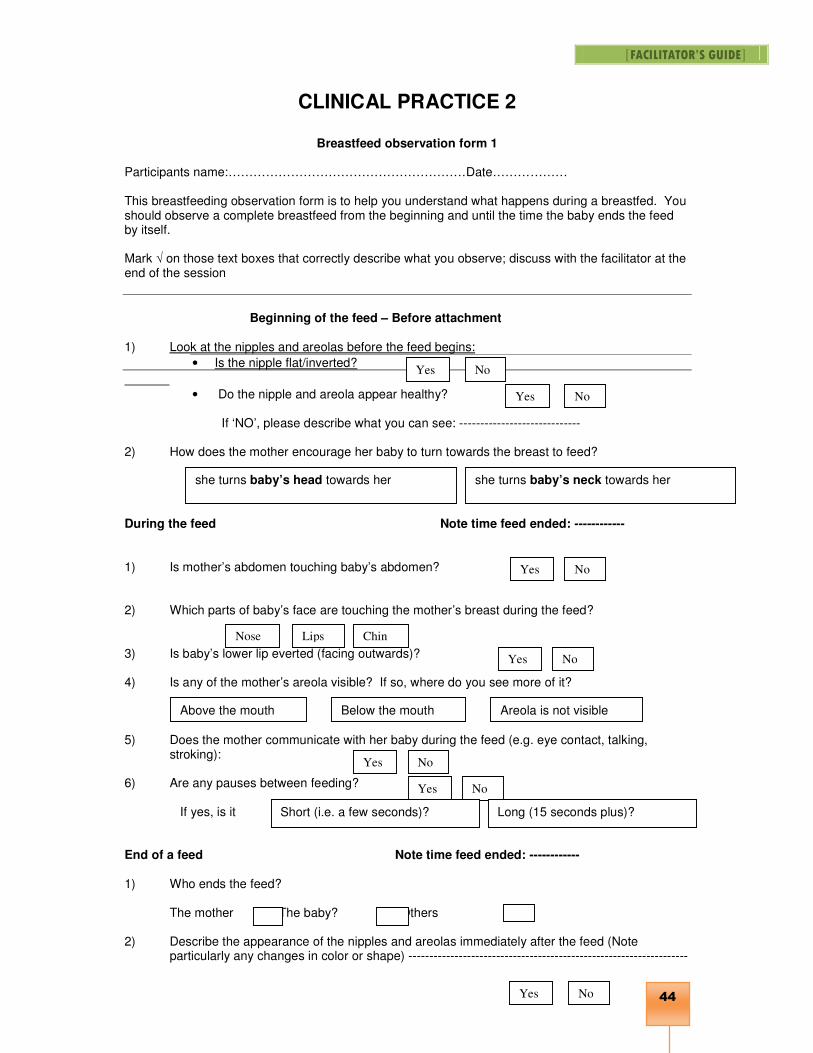
CLINICAL PRACTICE 2
Breastfeed observation form 1 Participants name:…………………………………………………Date……………… This breastfeeding observation form is to help you understand what happens during a breastfed. You should observe a complete breastfeed from the beginning and until the time the baby ends the feed by itself. Mark √ on those text boxes that correctly describe what you observe; discuss with the facilitator at the end of the session
Beginning of the feed – Before attachment 1) Look at the nipples and areolas before the feed begins:
• Is the nipple flat/inverted?
• Do the nipple and areola appear healthy?
If ‘NO’, please describe what you can see: ----------------------------- 2) How does the mother encourage her baby to turn towards the breast to feed? During the feed Note time feed ended: ------------ 1) Is mother’s abdomen touching baby’s abdomen? 2) Which parts of baby’s face are touching the mother’s breast during the feed? 3) Is baby’s lower lip everted (facing outwards)? 4) Is any of the mother’s areola visible? If so, where do you see more of it? None is 5) Does the mother communicate with her baby during the feed (e.g. eye contact, talking,
stroking): 6) Are any pauses between feeding? If yes, is it End of a feed Note time feed ended: ------------ 1) Who ends the feed? The mother The baby? Others 2) Describe the appearance of the nipples and areolas immediately after the feed (Note
particularly any changes in color or shape) -------------------------------------------------------------------
Yes No
Yes No
she turns baby’s head towards her she turns baby’s neck towards her
Yes No
Nose Chin Lips
Yes No
Yes No
Above the mouth Below the mouth Areola is not visible
Yes No
Yes No
Short (i.e. a few seconds)? Long (15 seconds plus)?
[FACILITATOR’S GUIDE]
45
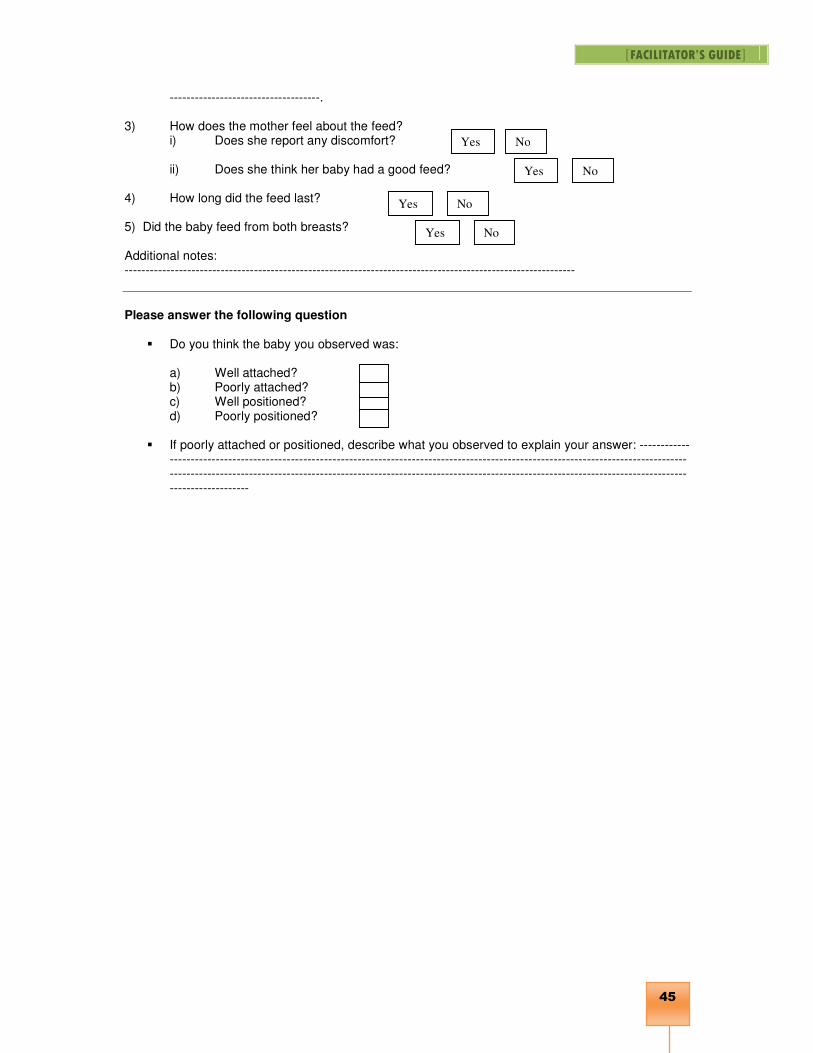
------------------------------------. 3) How does the mother feel about the feed?
i) Does she report any discomfort?
ii) Does she think her baby had a good feed? 4) How long did the feed last? 5) Did the baby feed from both breasts? Additional notes: ------------------------------------------------------------------------------------------------------------
Please answer the following question
� Do you think the baby you observed was:
a) Well attached? b) Poorly attached? c) Well positioned? d) Poorly positioned?
� If poorly attached or positioned, describe what you observed to explain your answer: ------------
---------------------------------------------------------------------------------------------------------------------------------------------------------------------------------------------------------------------------------------------------------------------------
Yes No
Yes No
Yes No
Yes No
[FACILITATOR’S GUIDE]
46
CLINICAL PRACTICE 3
KEEPING THE BABY WARM
Two pairs
a) Supervise participants making general observations in the POSTNATAL WARD and the LABOUR AND DELIVERY AREA, note the following:
b) Ask participants what they have seen so far. Point out your own observations. o How babies are kept warm…………………………………… ……………………………………. ……………………………………………………………………… ,,,,,,,,,,,,,,,,,,,,,,,,,,,,,,,,,,,,,,,,,,,,,,,,,,,,,,,,,,,,,,,,,,,,,,,,,,,,,,,,,,,,,,,,,,,,,,,,,, o Factors which may contribute to babies getting cold………………. …………………………………………………………………………………..,,,,,,,,,,,,,,,,,,,,,,,,,,,,,,,,,,,,,,,,,,,,,,,,,,,,,,,,,,,,,,,,,,,,,,,,,,,,,,,,,,,,,,,,,,,,,,,,,,,,,,,,,,,,,,, ,,,,,,,,,,,,,,,,,,,,,,,,,,,,,,,,,,,,,,,,,,,,,,,,,,,,,,,,,,,,,,,,,,,,,,,,,,,,,,,,,,,,,,,,,,,,,,,,,,,,,,,,,,,,,,,,
Trainer/clinical facilitator: Demonstrate steps of taking a baby’s temperature: Participants notes ……………………………………………………………………… ,,,,,,,,,,,,,,,,,,,,,,,,,,,,,,,,,,,,,,,,,,,,,,,,,,,,,,,,,,,,,,,,,,,,,,,,,,,,,,,,,,,,,,,,,,,,,,,,,,,,,,,,,,,,,,,,,,,,,,,,,,,, ,,,,,,,,,,,,,,,,,,,,,,,,,,,,,,,,,,,,,,,,,,,,,,,,,,,,,,,,,,,,,,,,,,,,,,,,,,,,,,,,,,,,,,,,,,,,,,,,,,,,,,,,,,,,,,,,,,,,,,,,,,,,, ,,,,,,,,,,,,,,,,,,,,,,,,,,,,,,,,,,,,,,,,,,,,,,,,,,,,,,,,,,,,,,,,,,,,,,,,,,,,,,,,,,,,,,,,,,,,,,,,,,,,,,,,,,,,,,,,,,,,,,,,,,,,,,, ,,,,,,,,,,,,,,,,,,,,,,,,,,,,,,,,,,,,,,,,,,,,,,,,,,,,,,,,,,,,,,,,,,,,,,,,,,,,,,,,,,,,,,,,,,,,,,,,,,,,,,,,,,,,,,,,,,,,,,,,,,,,,,,,
[FACILITATOR’S GUIDE]
47
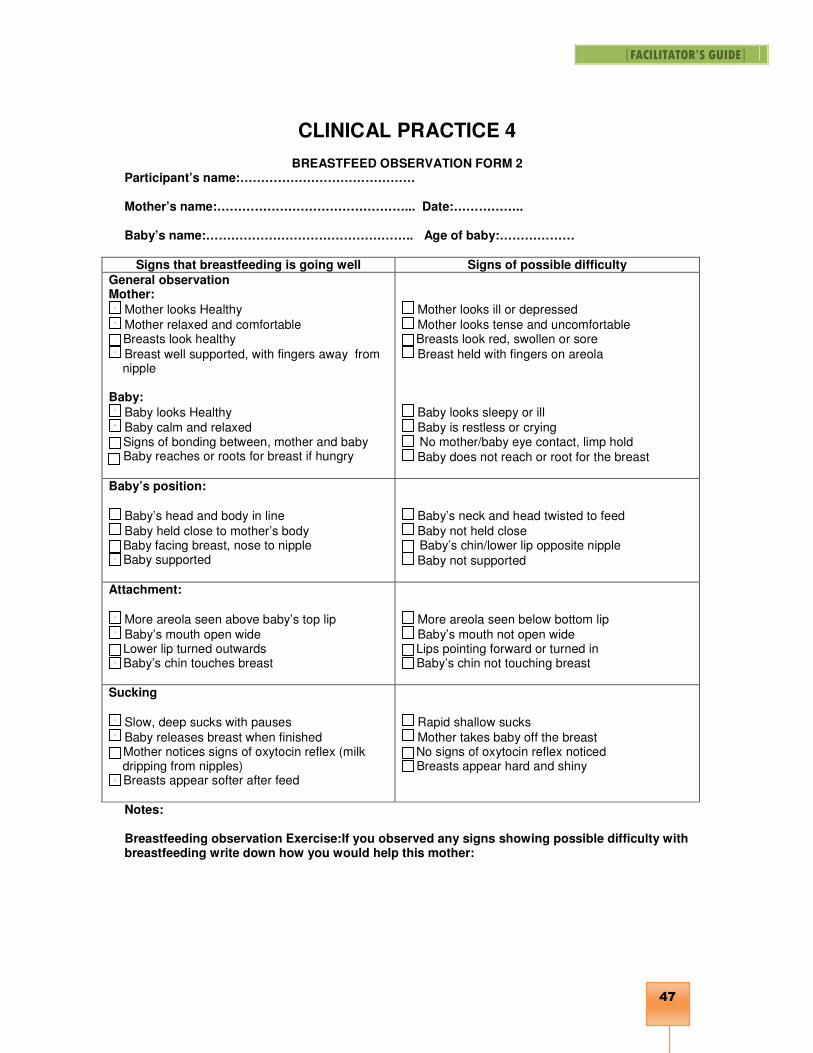
CLINICAL PRACTICE 4
BREASTFEED OBSERVATION FORM 2 Participant’s name:…………………………………… Mother’s name:………………………………………... Date:…………….. Baby’s name:………………………………………….. Age of baby:………………
Signs that breastfeeding is going well Signs of possible difficulty
General observation Mother:
Mother looks Healthy
Mother relaxed and comfortable Breasts look healthy
Breast well supported, with fingers away from nipple Baby:
Baby looks Healthy
Baby calm and relaxed Signs of bonding between, mother and baby
Baby reaches or roots for breast if hungry
Mother looks ill or depressed
Mother looks tense and uncomfortable Breasts look red, swollen or sore
Breast held with fingers on areola
Baby looks sleepy or ill
Baby is restless or crying No mother/baby eye contact, limp hold
Baby does not reach or root for the breast
Baby’s position:
Baby’s head and body in line
Baby held close to mother’s body Baby facing breast, nose to nipple
Baby supported
Baby’s neck and head twisted to feed
Baby not held close Baby’s chin/lower lip opposite nipple
Baby not supported
Attachment:
More areola seen above baby’s top lip
Baby’s mouth open wide Lower lip turned outwards
Baby’s chin touches breast
More areola seen below bottom lip
Baby’s mouth not open wide Lips pointing forward or turned in
Baby’s chin not touching breast
Sucking
Slow, deep sucks with pauses
Baby releases breast when finished Mother notices signs of oxytocin reflex (milk dripping from nipples)
Breasts appear softer after feed
Rapid shallow sucks
Mother takes baby off the breast No signs of oxytocin reflex noticed
Breasts appear hard and shiny
Notes: Breastfeeding observation Exercise:If you observed any signs showing possible difficulty with breastfeeding write down how you would help this mother:
[FACILITATOR’S GUIDE]
48
CLINICAL PRACTICE 5
Kangaroo Mother Care
Facilitator 1.Demonstrate to the group 2. Allocate two participants in pairs to a mother with stable LBW baby
……………………………………………………………………………………………
1.Choose appropriate mother baby pair – stable , LBW , healthy willing mother 2. Use appropriate attire for demonstration 3,Maintain privacy 4.Explain the procedure to mother 5,Demonstrate the procedure to mother while participants observe 6,Explain monitoring to mother 7.Demonstrate different positions 8.Tell the participants they have learnt these in the modules and the video demonstration
[FACILITATOR’S GUIDE]
49
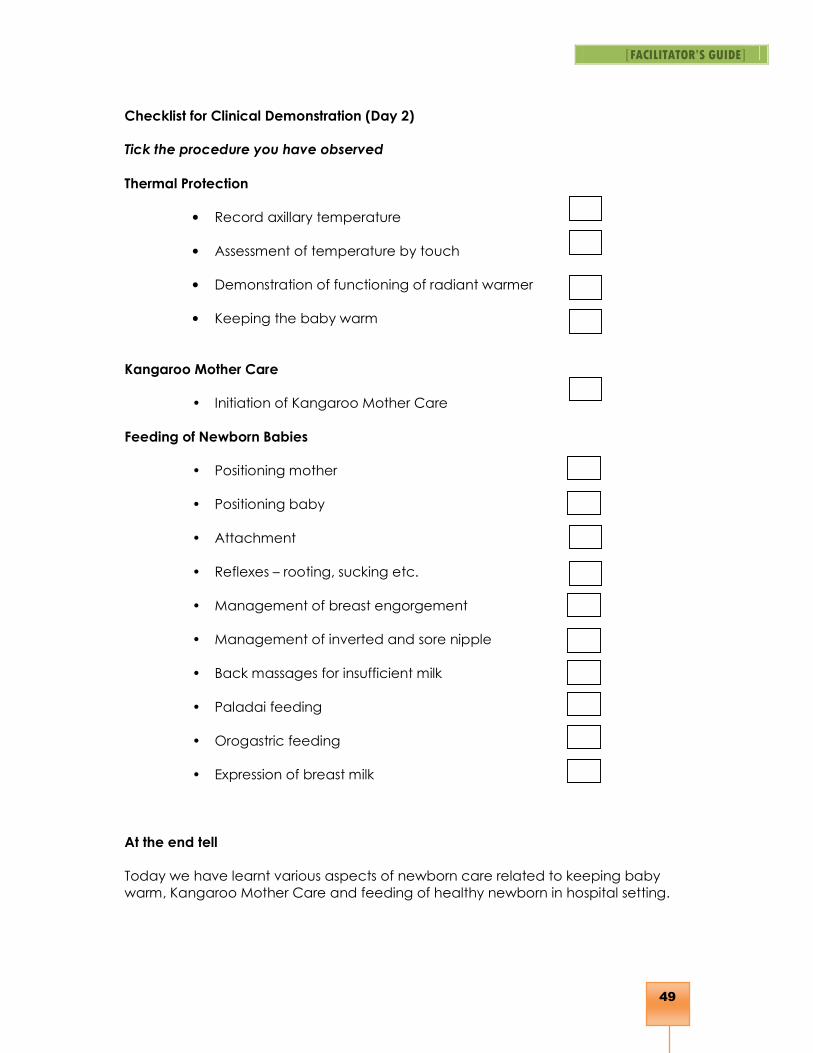
Checklist for Clinical Demonstration (Day 2)
Tick the procedure you have observed
Thermal Protection
• Record axillary temperature
• Assessment of temperature by touch
• Demonstration of functioning of radiant warmer
• Keeping the baby warm
Kangaroo Mother Care
• Initiation of Kangaroo Mother Care
Feeding of Newborn Babies
• Positioning mother
• Positioning baby
• Attachment
• Reflexes – rooting, sucking etc.
• Management of breast engorgement
• Management of inverted and sore nipple
• Back massages for insufficient milk
• Paladai feeding
• Orogastric feeding
• Expression of breast milk
At the end tell
Today we have learnt various aspects of newborn care related to keeping baby
warm, Kangaroo Mother Care and feeding of healthy newborn in hospital setting.
[FACILITATOR’S GUIDE]
50
Day –3 Programme
Each group will be divided into two for the ward demonstrations. The two facilitators
should accompany the group to the ward. One facilitator should lead the group and
the other facilitator should follow at the end to make sure that all the participants
reach the ward.
Ward demonstrations will be done in two groups, one hour each by Clinical
Instructor.
First demonstration (Asepsis routines)
Hand washing
Waste disposal
Disinfection procedure
Skin preparation for IV cannula insertion/pricks
Assessment of CRT
Second demonstration (Counselling and equipment)
Counselling of mother for breastfeeding
Counselling of mother at discharge (Normal newborn)
Weight record
Phototherapy
Radiant warmer
Facilitators should escort their group back to the conference hall. After returning to
the conference hall, the
checklist for clinical demonstration should be handed over to the participant.
[FACILITATOR’S GUIDE]
51
Checklist for Clinical Demonstration (Day 3)
Tick the procedure you have observed
• Weighing of baby
• Assessment for capillary refill time (CRT)
• Hand washing
• Skin preparation for IV cannula insertion
• Counselling of mother for breast feeding
• Counselling at discharge (Normal newborn)
• Waste disposal
• Disinfection procedures
• Phototherapy
• Radiant warmer
[FACILITATOR’S GUIDE]
52
Counselling of mother at discharge (Normal newborn)
One of the facilitator will demonstrate counselling of mother of normal newborn at
discharge. This will be done in the postnatal ward.
Counselling should be done with the principles of ‘ALPAC’.
.
1. Maintain baby’s temperature – Protect the baby from cold/heat by
wrapping/clothing according to climate. If baby is cold to touch, re-warm by
skin to skin contact and appropriate clothing including cap and woolen
socks.
2. Exclusive breast feeding till 6 months of age frequently day and night. Do not
give the baby any other food including water even in summer months.
3. Prevention of infection – Keep the umbilical stump clean and dry. Do not
apply anything on the cord stump. Do not apply anything in the eyes.
4. Immunization – Tell her, the schedule for immunization and time of her next
visit.
5. Danger signs – Mother as well as family must be informed of the danger signs
for identifying her sick baby. Ask them to seek medical help if any of these
danger signs are present.
The danger signs in a newborn include: lethargy, hypothermia (both abdomen and
feet are cold to touch), rapid or difficult breathing, convulsion abdominal distension,
bleeding from any site, yellow palms/soles.
Then ask one of the participants to do discharge counselling of mother of another
newborn in the ward.
[FACILITATOR’S GUIDE]
53
WEIGHING A BABY
Purpose
To monitor the adequacy of nutrition as well as fluid balance. (Term babies lose
about 10% of birth weight and regain birth weight at 7 – 10 days of age while
preterms can lose up to 15% of birth weight and regain birthweight by 14 days of
age).
Indications
• All babies at birth.
• All LBW babies at 2 weeks (to check regaining of the birth weight), 4 weeks
(to ascertain a weight gain of 80-100 g/kg per week) and then every month.
• Sick newborn and VLBW (<1500 g) babies daily to monitor fluid therapy for at
least one week.
Point of emphasis
If baby loses or gains 3 % or more of body weight in a day it should be brought to the
notice of a physician.
Equipment
1. Weighing scale
2. Clean and preferably sterile towel (autoclaved newspaper can be used)
Procedure
1. Put the weighing scale on a flat, stable surface.
2. Put a clean towel on the scale pan. Zero the scale if the machine has the
facility or record the weight of the towel.
3. Record weight prior to feeding.
4. Detach as many tubes / equipment as possible.
5. Keep the naked baby on the towel and record the weight (subtract the
weight of the towel if the scale has not been zeroed with the towel on the
scale).
6. Keep baby in middle of scale pan; hold the remaining tubes and lines in
hand.
7. Use separate sterile towel for each baby.
8. If using pre-weighed splint, reduce the weight from baby’s weight.
9. For quality assurance check accuracy of weighing scale with standard
known weights every 2 weeks.
[FACILITATOR’S GUIDE]
54
Radiant Warmer
Radiant warmer is one of the most important equipment used in neonatal care. It
provides radiant heat to the baby. These can be manual or servo controlled. If a
manual warmer is being used a baby under it has to be constantly monitored till he
attains a normal temperature and then it has to be switched off. As far as possible
use of manual radiant warmers should be avoided. Servo controlled warmers have a
skin probe which senses the skin temperature and displays it one the display panel.
This information is processed by the microprocessor and used to provide heater
output. The desired skin temperature is set on the display panel which is matched
with the actual sensed skin temperature by the microprocessor and if the measured
temperature is low, the heater is switched on whereas if it is high or normal heater
remains off. If the heater has been switched on, based on the low sensed
temperature, as the heating progress and baby’s temperature reaches normal the
heater output reduced and is finally switched off when the desired and actual
temperatures are the same. The use of this warmer will be demonstrated to you and
possible trouble shooting will also be discussed.
Objective:
Upon completion of this section the participant should
• know the parts of a warmer
• be able to demonstrate the working of the warmer
• know the dangers associated with its usage and should be able to rectify
minor equipment failures.
Parts:
• Bassinet
• Quartz rod
• Skin probe - Air probe
• Control panel - Heater output
Working:
i) Connect to mains
ii) For pre warming keep heater output to maximum iii) Place baby
iii) Connect probe
iv) Read temperature on display
v) Adjust heater output
• If below 36°C – High
• If between 36-36.5°C – Medium
• If between 36.5 – 37.5°C Low
• If >37.5°C – Remove baby /Switch off warmer
vi) Measure temperature ½ hourly x 2 hours & then 2 hourly
Cleaning & Disinfection
- Glutaraldehyde 2%
- Soap/Detergent - once daily
[FACILITATOR’S GUIDE]
55
Dos & Donts:
i) Check temperature ½ hourly /2 hourly
ii) Ensure warm feet
iii) Do not leave baby unattended
iv) Ensure side walls of bassinet are fastened up
v) Ensure adequate clothing in case of electricity failure
In case of equipment failure
i) Check fuse
ii) Check plug
iii) Check cord
Side effects & Dangers
- Increased insensible water loss
- Fluid intake must be tailored to meet demands - Hyperthermia
- Hypothermia
[FACILITATOR’S GUIDE]
56
Phototherapy Unit
Phototherapy units are equipments used for treatment of hyperbilirubinemia.
Unconjugated bilirubin absorbs blue light and in the process becomes decolourised.
Light is effective in the treatment of hyperbilirubinemia mainly because of its blue
content. Phototherapy reduces the serum concentration of bilirubin and the risk of
bilirubin toxicity by producing configurational and structural photoisomers of bilirubin.
These photoisomers are non-toxic and water soluble and are easily excreted by the
body. Phototherapy is easy to use and doesn’t produce any major side effects.
A phototherapy unit consists of a light source of 6 white tube lights of 20 watt each
which gives an irradiance of 4-8 microwatt/cm2/nm in 400-500 nm range
(wavelength) at the baby’s level. The baby is kept under the phototherapy unit at a
distance of 45 cms.
A baby requiring phototherapy (based on clinical and laboratory assessment) is
placed under the phototherapy units naked except for an eye shield and a napkin.
The baby’s position is changed after every feed to allow exposure of the body
surface to this light. When a baby receives phototherapy they should be provided
extra fluids in the form of frequent breast feeding or IV fluids to take care of the
increased insensible water loss. The baby’s temperature should be maintained
frequently to prevent hypo or hyperthermia.
The phototherapy unit should be checked use to ensure effective phototherapy. A
unit in use should have all the tubelights in good working condition. If a tubelight is
flickering or is fused or has black rings at the ends it should be replaced immediately.
A baby under phototherapy should be regularly monitored for effectiveness of
therapy and for possible side effects. The baby should be removed from
phototherapy as soon as the bilirubin level declines to safe levels.
Objective: Upon completion of this section the participant should
1. know the parts of a phototherapy unit
2. be able to understand the functioning and demonstrate the working of
a phototherapy unit
3. be able to place a baby under phototherapy unit
Parts: Tubes - Number- 6–8
Colour - White Watt - 20 Wavelength - 420-460nm Distance - 45 cms
Working:
i) Connect to mains
ii) Switch on the unit & check that all tubelights are working
iii) Place baby naked only with the napkin on
iv) Cover the eyes
v) Change position with each breastfeed
[FACILITATOR’S GUIDE]
57
vi) Increase fluid intake
- Breast feed frequently
Spoon/Gavage/IV increase by 20 ml/kg/day
vii) Provide continuous phototherapy
Dos & Donts:
i) Cover eyes
ii) Check temperature – prevent hypo/hyperthermia
iii) Check weight daily
iv) Frequent breast feeding/increase allowance for fluid
v) Reassess frequently
In case of equipment failure:
i) Check fuse
ii) Check plug
iii) Check cord
iv) Change tube if flickering or if ends are blackend
Ineffective Phototherapy:
i) Baby covered
ii) All tubes not working
iii) Flickering light
iv) Tube ends have black circles
Side effects and Dangers:
i) Hyperthermia/Hypothermia
ii) Increased insensible water loss - Tailor fluid intake to meet demands
[FACILITATOR’S GUIDE]
58
V. Care of a baby at birth
Preparation
Before starting the session, make sure that:
1. You have understood the objectives of the session
2. You have all the items needed for running the module:
i. Doll (mannequin)
ii. Fresh or preserved umbilical cord
iii. Sterile tie
iv. Sterile blade
v. Pieces of cloth etc.
Introduce the module
Introduce by saying: ‘In this module, you will learn about care of a normal baby at
the time of and upto one hour after birth. Care of a baby who is asphyxiated and
who needs resuscitation are covered separately in another module ’.
Ask the participants to start reading page 2-3. Tell them once they have finished reading, there will be a demonstartion on the cord , eye and skin care.
[FACILITATOR’S GUIDE]
59
DEMONSTRATION
Demonstrate all the ten steps of care of a normal baby at the time of birth. One
facilitator (or participant) to lie down on the cot in supine position (as in the labor
room). Use a doll and demonstrate all the steps including care of the cord and
eyes.
Ensure that you dicuss following points
1. Eye care : Donot apply anything but in areas where the STD rates are high
eye prophylaxis using Teteracycline ointmnet or 1 % silver nitrate drops
2. Cord care : Leave it to dry; do not apply anything to cord. Watch for
bleeding or pus discahrge
3. Tempertaure: Cover the baby’s head with a cap. Cover the mother and
baby with a warm cloth.
4. Breastfeeding: Emphasize the importance of counseling for breastfeeding at
this time as mothers will be more receptive now.
Ask the participants to read pages 5 to 7 and then do the exercise on page 8 to 9. Once they have finished the self evaluation, give individual feedback.
[FACILITATOR’S GUIDE]
60
SELF-EVALUATION
1. The four basic needs of a baby at the time of birth are:
i. Warmth
ii. Normal breathing
iii. Mother’s milk
iv. Protection from infection
2. Where should be a baby kept immediately after a normal delivery?
Baby has to be kept on the mother’s chest (if this is not possible, the baby
should be kept in a clean, warm, safe place close to the mother).
3. How would you clamp and cut the umbilical cord after birth?
Cord should be clamped using a sterile, disposable clamp or a sterile tie and
cut using a sterile blade about 2 cm (1-inch) away from the skin.
4. Enumerate the steps of ‘Warm chain’.
At delivery
1. Warm delivery room (25° C) with no
draughts.
2. Dry the baby immediately; remove
the wet cloth.
3. Wrap the baby with clean dry cloth.
4. Keep the baby close to the mother
(ideally skin-to-skin) to stimulate
early breastfeeding.
5. Postpone bathing/sponging for 24
hours.
After delivery
1. Keep the baby clothed and
wrapped with the head covered.
2. Minimize bathing especially in cool
weather or for small babies.
3. Keep the baby close to the mother.
4. Use kangaroo care for stable LBW
babies and for re-warming stable
bigger babies.
5. Show the mother how to avoid
hypothermia, how to recognize it,
and how to re-warm a cold baby.
5. Mention the benefits of initiating skin-to-skin care immediately after birth:
Maintains temperature and helps in early initiation of breastfeeding.
6. Enumerate the ‘Six cleans’ one has to follow at the time of delivery:
i) Clean attendant's hands (washed with soap).
ii) Clean delivery surface.
iii) Clean cord- cutting instrument (i.e. razor, blade).
iv) Clean string to tie cord.
v) Clean cloth to wrap the baby.
vi) Clean cloth to wrap the mother.

[FACILITATOR’S GUIDE]
61
SELF EVALUATION
1. During the first hour after birth babies need to be monitored every 15 minutes.
2. Name the three most important parameters that need to be monitored in the
first hour after birth:
Breathing and
Temperature or warmth
Color
3. Routine care of eyes at birth includes
Cleaning eyes immediately after birth with swab soaked in sterile water
using separate swab for each eye (clean from medial to lateral side)
Give prophylactic eye drops within 1 hour of birth as per hospital policy (in
areas with high incidence of sexually transmitted diseases).
4. Babies born by caesarean section should not be routinely separated from
mothers for initial hours after birth.
SUMMARIZE THE MODULE
Summarize the module by repeating what has been taught in the module. Ask for
any clarifications. If there are none, tell them that they have succesfully completed
this module.
After self-evaluation, ask the participants to read pages 10 to 12. Do the exercise on page 13. Once they have finished the
Self-evaluation, give individual feedback.

[FACILITATOR’S GUIDE]
62
Module VI: Common Procedures
Introduction to the module
In this module you will learn about the different procedures carried out in baby care
area. Though we have been doing these procedures quite commonly, but we will
recapitulate and try to focus on finer aspects of the procedures.
DEMONSTRATION
Ask one of the participants to come in front and demonstrate the procedure of IM
injection. Ask her/him to give 1 mg of vit K to the manikin. Provide her/him necessary
articles needed. Discuss briefly about the procedure highlighting the key points and
take the view of the participants on how the procedure was done. Build a
discussion.
After the demonstration, ask them to read pages 4 to 7. Tell them that they will read about commonly used drugs for the babies. After all the participants have read,
conduct a demonstration on preparation of medications
Ask the participants to read pages 2 to 3. After they have read, demonstrate the procedure of intramuscular injection.
[FACILITATOR’S GUIDE]
63
DEMONSTRATION
Ask one of the participant to demonstrate how to prepare 75 mg injection Ampicillin
for IV injection for a baby. Ask the other participants to observe the steps carefully
and give feedback at the end. Emphasise to them to follow strict aseptic
precaution, while preparing injection.
Establishment of IV access is very important in treating newborn babies and we
know that it needs to be done properly and in aseptic measure as it is very common
route of infection to the babies.
DEMONSTRATION
Using a model, one of the facilitators should demonstrate the technique of ideal IV
line fixation. Tell other participants to observe the steps and lead a discussion.
Oxygen administration:
Sick newborn babies commonly require O2 administration. We can give oxygen by
many ways and in the next part of the module we will read how oxygen can be
given by a hood. After they finished reading introduce the next procedure.
Ask the participants to read pages 8 to 9. After they have read, demonstrate how to fix the intravenous line.
After the demonstration, briefly introduce about oxygen administration (see below); Then ask them to read pages 10 to 11.
After they have read, briefly introduce about the next procedure; Then ask them to read pages 12 to 14.
[FACILITATOR’S GUIDE]
64
Insertion of feeding tube:
It is a routinely required procedure in management of sick and small babies. This part
of the module deals with technique of insertion of feeding tube.
DEMONSTRATION
Conduct a demonstration on insertion of feeding tube. After the demonstration, ask
one of the participants to demonstrate the procedure while other participants would
observe.
Demonstrate how to insert the feeding tube (using a mannequin).
After the demonstration, introduce the next procedure: ‘Expression of breast milk’
and ask them to read pages 15 to 18.
[FACILITATOR’S GUIDE]
65
Expression of breast milk is required in number of breast conditions as well as when
breastmilk is required for the feeding of sick or small babies. In the next few pages,
we will learn about expression of breast milk.
DEMONSTRATION
Demonstrate the right technique of providing hot fomentation, breast massage and
squeezing / pressing the breast. Tell the participants that they will see the procedure
while visiting the hospital.
VIDEO
After the show the facilitator should initiate a discussion with the participants.
Encourage the participants to share their own experiences, perceptions about
expression of breast milk and lead a discussion.
Once they have read, demonstrate the procedure of expression of breast milk (using a breast model)
After the demonstration, conduct a video demonstration on ‘Expression of breast milk’
After the video demonstration, introduce the next procedure ‘Temperature recording’ and ask them to read pages 20 to 21. and ask them to read pages 15 to 18.
[FACILITATOR’S GUIDE]
66
Temperature recording:
As a staff nurse, we record temperature of normal and sick babies. We will learn the
correct technique of recording temperature. You will be demonstrated the
procedure in the hospital in the clinical demonstration session.
Weight recording is an essential component of newborn care. For all babies weight is
recorded at birth or at admission to hospital. Now you will learn the proper
procedure of weight recording.
Once they have finished reading, introduce the next procedure ‘Weight recording’ (see below) and ask them to read pages 22 to 23.
and ask them to read pages 15 to 18.
Once they have read, demonstrate the procedure of weight recording (using a mannequin)
[FACILITATOR’S GUIDE]
67
DEMONSTRATION
Demonstrate weight recording using a mannequin and an electronic weighing
scale. After demonstration, ask one of the participants to demonstrate the
procedure while other participants would observe.
VIDEO
After the show the facilitator should initiate a discussion with the participants.
Encourage the participants to share their own experiences, perceptions about
expression of breast milk and lead a discussion.
Transport of neonates
Sick newborn babies often have to be transported from one hospital to other or
sometimes within the hospital. One should ensure that the baby is stable before
transporting. You will now learn the precautions you should follow while transporting
a newborn on pages 26 to 27.
SUMMARIZE THE MODULE
Summarize the module by repeating what has been taught in the module. Ask for
any clarifications. If there are none, tell them that they have succesfully completed
this module.
After the demonstration, conduct a video demonstration on ‘Weight recording’.
After the video demonstration, introduce the next procedures ‘Oropharyngeal suction’ and ‘Transport of neonates’ (see below)
and ask them to read pages 24 to 27.
[FACILITATOR’S GUIDE]
68
Module VII: Management of the ‘Normal’, ‘At Risk’ and
‘Sick’ Neonate
In this module, you will learn how to identify a neonate who is either at-risk or actually
sick .You will also learn how to manage them in your hospital setting.
ROLE-PLAY
This can be done at the time of clinical demonstration (see page no. 38 in this
guide). After this, ask one of the partcipants to do the same (for another mother)
while others would observe. Raise a discussion at the end of the role play.
Ask them to read pages 2 to 6. Tell them that they will read about every day care of neonates, the danger signs, and the criteria for discharge from the health facility.
After they have read, conduct a role-play regarding the ‘Counseling before discharge’ (if not conducted during clinical visit) .
After role-play, ask them to do the self evaluation on page 8. Tell participants that they would be given individual feedback after they have done the self evaluation
[FACILITATOR’S GUIDE]
69
SELF EVALUATION
1. The key areas of everyday care include:
Breastfeeding, Warmth, Cord care, Hygiene
2. Enumerate the steps to keep normal baby warm:
• Dress the baby or wrap in soft dry clean cloth.
• Cover the head with a cap for the first few days, especially if baby is small.
• Keep the baby with in easy reach of the mother. Do not separate them.
• If mother and baby need to be separated, ensure the baby is dressed or
wrapped and covered with a blanket.
• Assess warmth every 4 hours by touching baby’s feet; if feet are cold, use
skin-to-skin contact, add extra blanket and reassess.
• Keep the room for the mother and baby warm.
3. Mention at least ten danger signs in a neonate
• Not feeding well
• Less active than before
• Fast breathing (more than 60 breaths per minute)
• Slow breathing (less than 30 breaths per minute)
• Moderate or severe chest in-drawing
• Grunting / moaning
• Convulsions
• Floppy or stiff
• Fever (temperature >37.50 C)
• Temperature <35.50 C or not rising after re-warming
• Umbilicus draining pus or umbilical redness extending to skin.
• More than 10 skin pustules or bullae, or swelling, redness, hardness of skin.
• Bleeding from stump or cut.
• Pallor.
4. Discharge criteria for a normal baby include:
• Feeding well-suckling effectively 8 times in 24 hours, day and night
• No danger signs
• No need for any medication except vitamins
• For small baby: feeding well and gaining weight adequately
After the individual feedback, conduct an oral drill
[FACILITATOR’S GUIDE]
70
ORAL DRILL
Ask all participants to open the module on page 9. Facilitator can also have a look
on the table on page 9. Tell them that you will ask them a question and they need
to answer from the table.
Give an example referring to table (e.g. if a neonate’s weight is > 2500g, she is
classified as normal). Make sure all participants locate this in the table when you
ask questions.
Ask them to read pages 10 to 14. Tell them that they will read how to identify at-risk
neonates, how to care for them in a health care facility, and how to follow-up after
discharge.
Ask them to read pages 10 to 14. Tell them that they will read how to identify at-risk neonates and how to care for them in a health care facility. Ask them to do the self evaluation on page 15. Give individual feedback
after they have done the self evaluation
[FACILITATOR’S GUIDE]
71
SELF EVALUATION
1. An ‘at-risk’ neonate will have:
a. Birth weight: 1500 - 2499 g
b. Sensorium: Depressed, but is arousable
c. Respiratory rate: over 60 per minute, but no chest retractions.
d. Yellowness of skin, but no staining of palms/soles
2. The staff nurse should monitor the following signs every 2 hourly in ‘at-risk’
neonates:
Temperature Convulsion
Sucking Bleeding
Sensorium Diarrhea
Respiration Vomiting
Apnea Abdominal distension
Cyanosis
3. Follow-up care of ‘at-risk’ neonate includes:
Condition Time of follow-up visit
If sent home Health worker: to visit next day
Mother (with the baby): to be called after two and
seven days.
If referred Health worker: to visit one day after discharge from
hospital
Mother (with the baby): to be called after two and
seven days after discharge from hospital.
4. Signs of well-being in an ‘at-risk’ neonate are:
The baby accepts feeds well and has warm trunk, warm and pink soles (and
palms).
Ask them to read pages 16 to 17. Tell them that they will read how to identify sick neonates and how to care for them in a health care facility. Ask them to do the self evaluation on page 18. Give individual feedback
after they have done the self evaluation
[FACILITATOR’S GUIDE]
72
SELF EVALUATION
1. Where is the ‘at risk’ neonate managed?
The care of ‘at risk’ neonate is immediately initiated at health facility itself under
direct supervision. After initial improvement, further care can be provided at
home.
2. What are the signs you will monitor in a sick neonate?
Temperature, sucking, sensorium, respiration, apnea, cyanosis, convulsions,
bleeding, diarrhea, vomiting, abdominal distension, capillary refill time.
3. What advice you give for home care of ‘at risk’ baby?
• Keep the baby warm
• Continue the prescribed treatment
• Provide exclusive breast milk feeding
• Monitor for danger signs
4. What is the immediate care given for a sick baby?
Maintain temperature, oxygen if there is respiratory distress/ cyanosis, stabilize
(Inj. 10% Dextrose I/V, Inj Normal saline I/V), Inj. Vit K, feeding if possible, first
dose of antibiotic, monitoring, communication with parents & organizing transport
to appropriate health facility.
SUMMARIZE THE MODULE
Summarize the module by repeating what has been taught in the module. Ask for
any clarifications. If there are none, tell them that they have succesfully completed
this module.
[FACILITATOR’S GUIDE]
73
Module VIII: Prevention of infection and waste disposal
Introducing the module:
‘In this module you will learn how to prevent infection occurring in newborn babies.
Infection being the most common cause of death, we must take effective steps to
prevent them’.
‘You will learn
• Steps of effective hand washing
• Learn routines of housekeeping and disinfection in baby care area
• Learn disposal of hospital waste’ in this module.
DEMONSTRATION
Conduct a demonstration on ‘Steps of hand washing’ (using the poster) followed by
another demonstration on ‘how to wear gloves’.
Ask the participants to read page 2 to 4. After they have finished reading, conduct a demonstration on ‘Steps of hand washing’ using a poster.
After the demonstration, ask them to do the self evaluation on page 6. Tell participants that they would be given individual feedback
after they have done the self evaluation
[FACILITATOR’S GUIDE]
74
SELF EVALUATION
1. Basic requirements for asepsis in nursery include:
• Running water supply
• Soap
• Elbow or foot operated taps
• Strict hand washing
• Avoiding overcrowding
• Plenty of disposable items
• Rational antibiotic policy
• Strict housekeeping & asepsis routines
2. Single Most Important, Very Simple and Cheap method for prevention of
infection in nursery is hand washing.
3. The key features of good hand-washing technique include:
Six steps
Two minutes hand washing before entering the newborn care area
Twenty seconds hand washing in between and after touching the baby
4. Sterile gloves should be worn for the following procedures (Enumerate any three):
Blood sampling
IV access &
IV injection
5. What are the steps of skin preparation of iv cannula insertion or needle prick?
Clean with spirit, let it dry;
Clean with iodine, let it dry and
Clean with spirit
After the individual feedback, conduct an oral drill
[FACILITATOR’S GUIDE]
75
ORAL DRILL
One of the facilitator will get up and conduct oral drill on disinfection routines.
Emphasize that you will ask quick question related to routines as given on page 6.
Make sure that all participants have opened page 6 of module. Following are the
few examples of question you would rapidly ask the participants. Make sure that the
participants are able to refer to the table while answering the questions. Make sure
that you ask sufficient questions to cover the contents of the table and involve all
the participants.
1. How do you disinfect cotton gauze?
2. Cheattle forceps is cleaned by -
3. How do you sterilize sets for procedures
4. How do you clean swab containers
5. How do you clean measuring tape
6. How do you disinfect resuscitation bags
7. How is Radiant warmer cleaned when not in use.
8. How do you clean phototherapy unit.
After the oral drill, ask them to read page 8. After they have finished reading, conduct a demonstration on waste disposal.
[FACILITATOR’S GUIDE]
76
DEMONSTRATION
Organise a demonstration on safe disposal of hospital waste using the
demonstration aid. Inform the participants that different hospitals may have different
policies and they need to learn about their own policies and dispose off the hospital
waste accordingly.
After the demonstration, ask them to do the self evaluation on page 10. Tell participants that they would be given individual feedback
after they have done the self evaluation
[FACILITATOR’S GUIDE]
77
SELF EVALUATION
1. Indicate the bucket you will use for following wastes:
Paper towel after use black
Soiled nappy of the baby yellow
Used disposable syringe blue
2. How do you sterilize/disinfect the following?
Thermometer-Spirit
Ambu bag-Autoclave, boil, cidex
Cheattle forceps – Autoclave
Probe of pulse oximeter-Spirit
Oxygen tubing-Cidex
Stethoscope -Spirit
3. B/O Rajkumari is a 32 week preterm baby with birth weight of 1.3 kg. The baby is 2
days old now. Mother is now recovered from her birth related problems and
wants to help you in baby’s work, what are the areas you will like to involve the
mother?
1. Give EBM
2. Assist feeding
3. KMC
4. Change nappy
After the individual feedback, conduct a video demonstration on ‘asepsis routines’.
[FACILITATOR’S GUIDE]
78
VIDEO DEMONSTRATION
There will be a short video film on the asepsis routines to be followed in the nursery.
Lead a discussion on the video. Ask participants what they have learnt new and
what they have been practicing in their hospitals. Discuss that ideally one should use
distilled water after sterilization but for practical purposes running water is good
enough. If they do not have Cidex washing AMBU bag with soap/surf water and
then with fresh water can achieve nearly same goal of maintaining asepsis.
SUMMARIZE THE MODULE
Summarize the module by repeating what has been taught in the module. Ask for
any clarifications. If there are none, tell them that they have succesfully completed
this module.
[FACILITATOR’S GUIDE]
79
KAP Questionnaire
(for attitude and practices only) PRE Workshop
This questionnaire has been designed for the ‘Evaluation of impact of Nursing Training on
the knowledge, practices and neonatal outcome’. You have been chosen as one of the respondents to this questionnaire which will serve as baseline information and as future reference to newborn care in your country. We hope that you will answer the questions as best as you
can. We assure you that information will be kept confidential and will in no way jeopardize your career.
1. Do you teach mothers to assess baby’s temperature by touching feet and
abdomen?
[ ] Yes [ ] No
2. Do you practice skin-to-skin contact for stable LBW(<2500gms) babies admitted in the nursery?[ [ ] Yes
[ ] No
If yes, how does this practice help LBW baby?
3. Do you see babies who are otherwise stable in nursery, developing hypothermia (skin temp < 36oC)?
[ ] Yes
[ ] No
If yes, do you try to find out why this has happened in that particular baby? [ ] Yes
[ ] No
If yes, enumerate the possible reasons:
4. How much duration do you hand wash before entering baby care area?
[ ] 15 seconds [ ] 2 minutes
[ ] 5 minutes
5. Does your unit have a continuous supply of tap water 24 hours a day?
[ ] Yes [ ] No
If no, how do you perform handwashing before entering the nursery?
[ ] Do not handwash [ ] Use tumbler and bucket
[ ] Other utensils
[ ] Perform hadwash once inside the unit
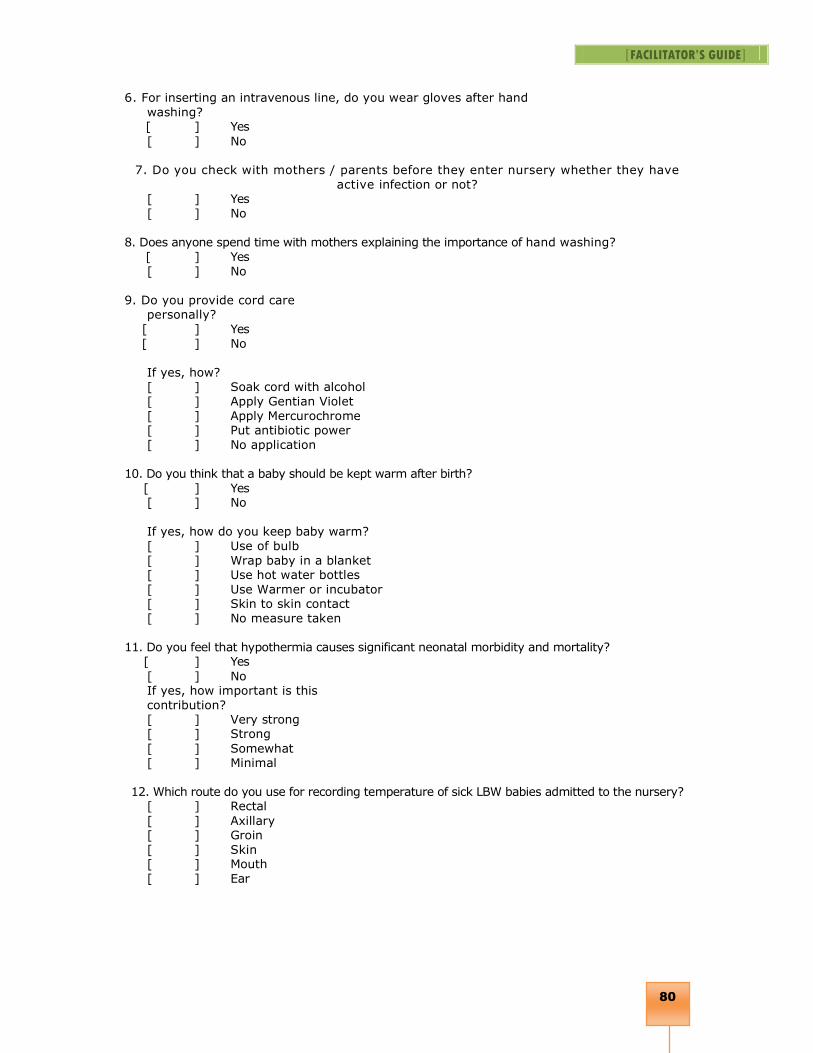
[FACILITATOR’S GUIDE]
80
6. For inserting an intravenous line, do you wear gloves after hand
washing? [ ] Yes
[ ] No 7. Do you check with mothers / parents before they enter nursery whether they have
active infection or not? [ ] Yes
[ ] No
8. Does anyone spend time with mothers explaining the importance of hand washing?
[ ] Yes
[ ] No
9. Do you provide cord care personally?
[ ] Yes
[ ] No
If yes, how? [ ] Soak cord with alcohol
[ ] Apply Gentian Violet
[ ] Apply Mercurochrome [ ] Put antibiotic power
[ ] No application
10. Do you think that a baby should be kept warm after birth?
[ ] Yes [ ] No
If yes, how do you keep baby warm?
[ ] Use of bulb
[ ] Wrap baby in a blanket [ ] Use hot water bottles
[ ] Use Warmer or incubator [ ] Skin to skin contact
[ ] No measure taken
11. Do you feel that hypothermia causes significant neonatal morbidity and mortality? [ ] Yes
[ ] No If yes, how important is this
contribution? [ ] Very strong [ ] Strong
[ ] Somewhat [ ] Minimal
12. Which route do you use for recording temperature of sick LBW babies admitted to the nursery?
[ ] Rectal
[ ] Axillary [ ] Groin
[ ] Skin [ ] Mouth
[ ] Ear
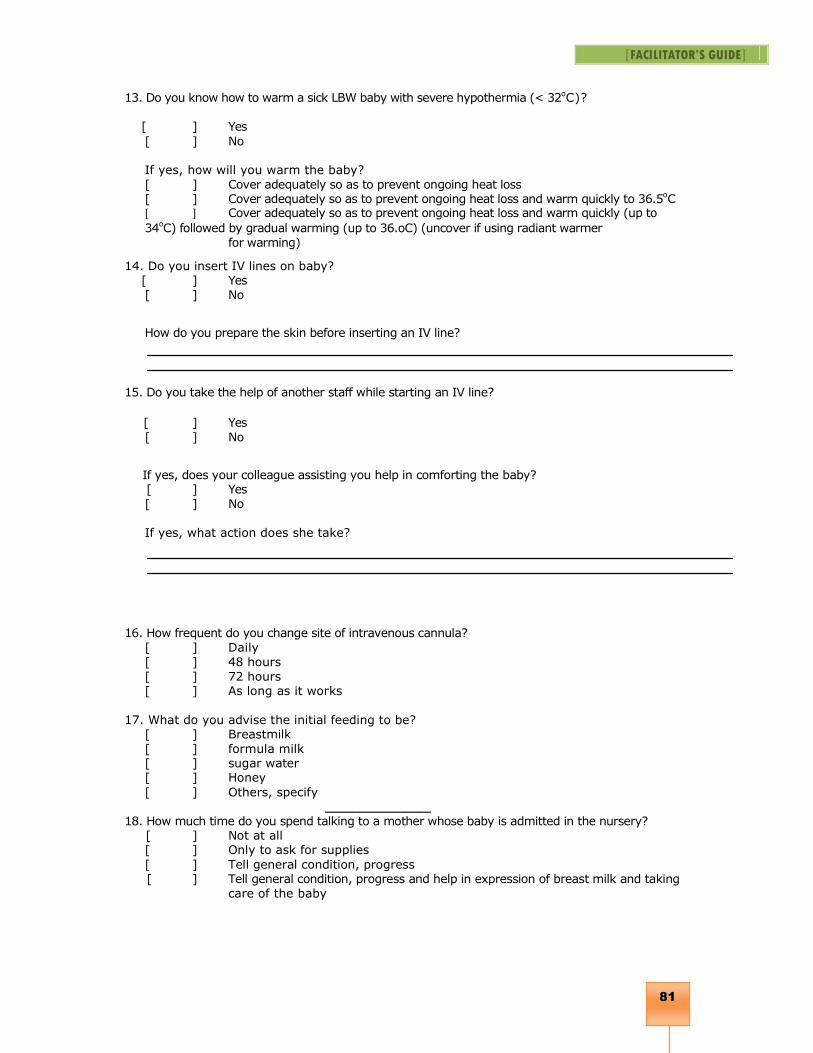
[FACILITATOR’S GUIDE]
81
13. Do you know how to warm a sick LBW baby with severe hypothermia (< 32oC)?
[ ] Yes
[ ] No
If yes, how will you warm the baby?
[ ] Cover adequately so as to prevent ongoing heat loss [ ] Cover adequately so as to prevent ongoing heat loss and warm quickly to 36.5oC [ ] Cover adequately so as to prevent ongoing heat loss and warm quickly (up to
34oC) followed by gradual warming (up to 36.oC) (uncover if using radiant warmer
for warming)
14. Do you insert IV lines on baby? [ ] Yes
[ ] No
How do you prepare the skin before inserting an IV line?
15. Do you take the help of another staff while starting an IV line?
[ ] Yes
[ ] No
If yes, does your colleague assisting you help in comforting the baby? [ ] Yes
[ ] No
If yes, what action does she take?
16. How frequent do you change site of intravenous cannula?
[ ] Daily
[ ] 48 hours
[ ] 72 hours [ ] As long as it works
17. What do you advise the initial feeding to be? [ ] Breastmilk
[ ] formula milk [ ] sugar water [ ] Honey
[ ] Others, specify ______________
18. How much time do you spend talking to a mother whose baby is admitted in the nursery? [ ] Not at all
[ ] Only to ask for supplies
[ ] Tell general condition, progress [ ] Tell general condition, progress and help in expression of breast milk and taking
care of the baby

[FACILITATOR’S GUIDE]
82
19. Are you happy with your present skills and knowledge on providing care to sick newborn?
[ ] Yes [ ] No
If no, are you willing to undergo further training to augment your present skills and knowledge?
[ ] Yes [ ] No
Following are attitude & practice questions. There are no Yes, No Choices
Please circle the appropriate answer for each statement
Strongly Agree
Somewhat Agree
Neither Agree nor Disagree
Somewhat Strongly Disagree Disagree
1. I feel comfortable initiating IV line alone 1 2 3 4 5
2. Handwashing should be done before entering nursery 1 2 3 4 5
3. Skin-to-skin contact with mothers is a good practice for LBW babies
1 2 3 4 5
4. I would prefer babies under my care receiving expressed breastmilk rather than formula milk
1 2 3 4 5
5. I feel comfortable using warmer and incubator for premature babies
1 2 3 4 5
6. I feel that I can help a mother initiate breastfeeding who complains of insufficient milk supply
1 2 3 4 5
7. I believe Nursing practices play an important role of prevention of infection in admitted newborn
1 2 3 4 5
8. I feel that a written policy and procedure manual will help my day-to-day practice in the nursery
1 2 3 4 5
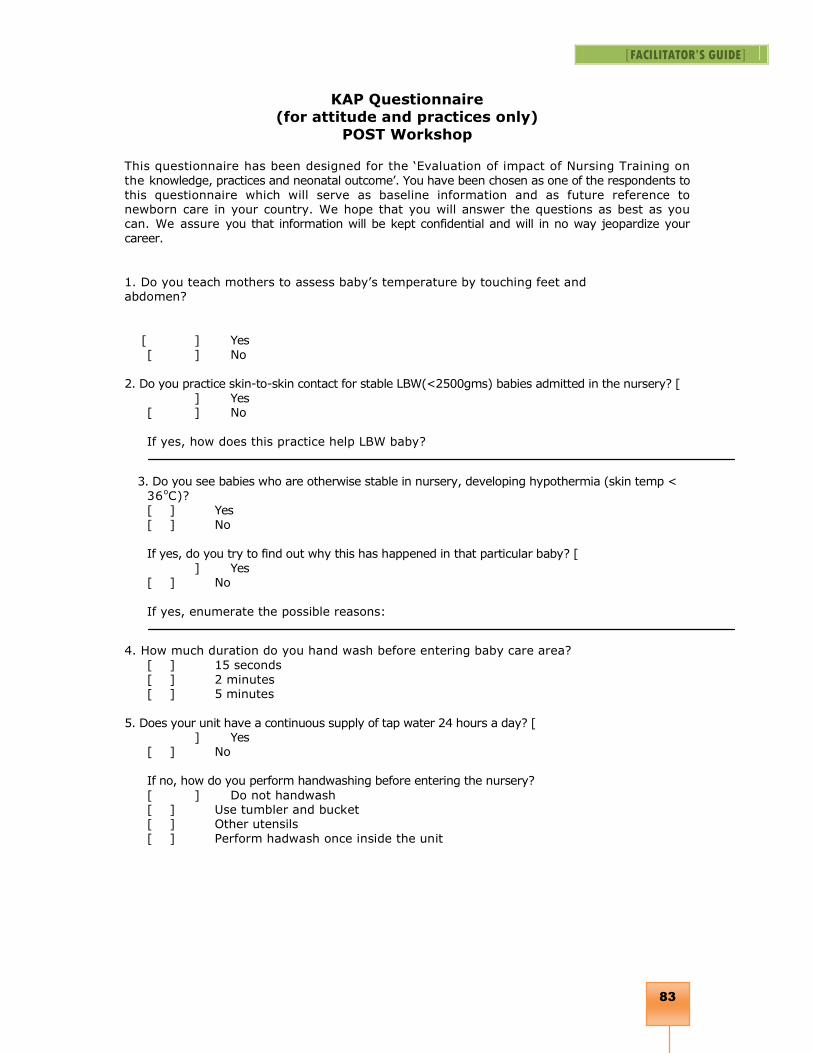
[FACILITATOR’S GUIDE]
83
KAP Questionnaire
(for attitude and practices only)
POST Workshop
This questionnaire has been designed for the ‘Evaluation of impact of Nursing Training on
the knowledge, practices and neonatal outcome’. You have been chosen as one of the respondents to
this questionnaire which will serve as baseline information and as future reference to newborn care in your country. We hope that you will answer the questions as best as you can. We assure you that information will be kept confidential and will in no way jeopardize your
career.
1. Do you teach mothers to assess baby’s temperature by touching feet and abdomen?
[ ] Yes
[ ] No
2. Do you practice skin-to-skin contact for stable LBW(<2500gms) babies admitted in the nursery? [
] Yes [ ] No
If yes, how does this practice help LBW baby?
3. Do you see babies who are otherwise stable in nursery, developing hypothermia (skin temp <
36oC)? [ ] Yes
[ ] No
If yes, do you try to find out why this has happened in that particular baby? [
] Yes [ ] No
If yes, enumerate the possible reasons:
4. How much duration do you hand wash before entering baby care area?
[ ] 15 seconds
[ ] 2 minutes [ ] 5 minutes
5. Does your unit have a continuous supply of tap water 24 hours a day? [ ] Yes [ ] No
If no, how do you perform handwashing before entering the nursery?
[ ] Do not handwash [ ] Use tumbler and bucket [ ] Other utensils
[ ] Perform hadwash once inside the unit
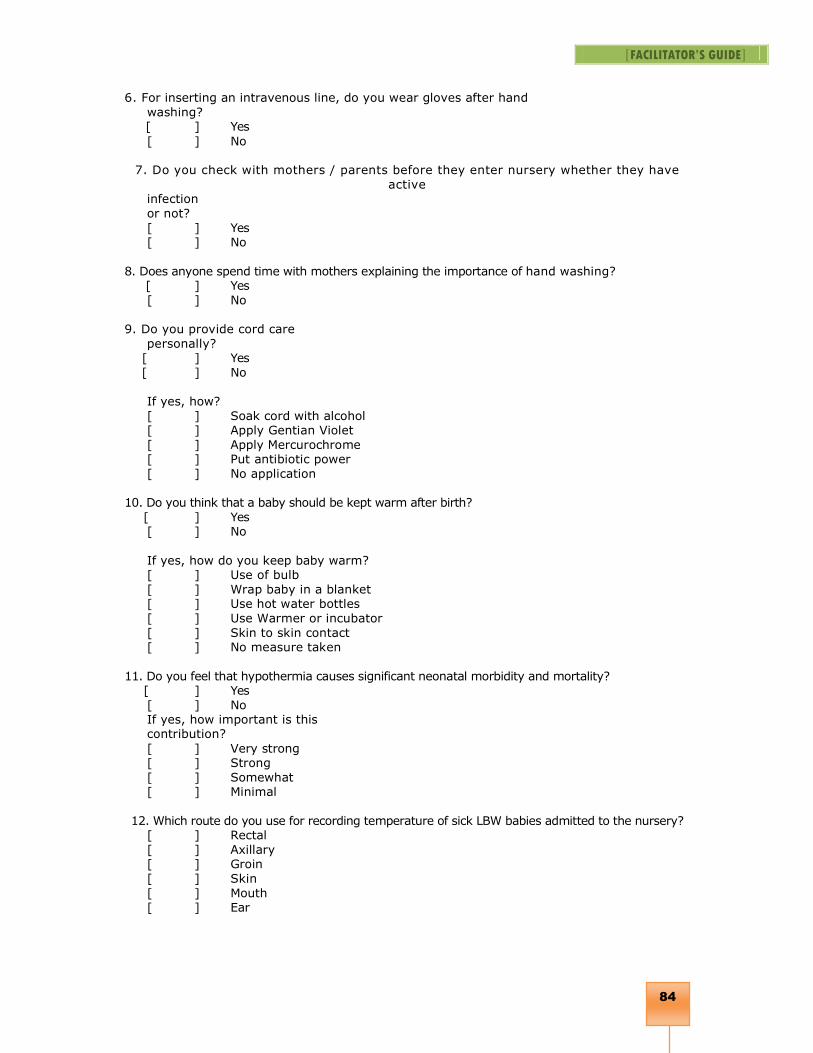
[FACILITATOR’S GUIDE]
84
6. For inserting an intravenous line, do you wear gloves after hand
washing? [ ] Yes
[ ] No 7. Do you check with mothers / parents before they enter nursery whether they have
active infection
or not?
[ ] Yes [ ] No
8. Does anyone spend time with mothers explaining the importance of hand washing? [ ] Yes
[ ] No
9. Do you provide cord care
personally? [ ] Yes
[ ] No
If yes, how?
[ ] Soak cord with alcohol [ ] Apply Gentian Violet
[ ] Apply Mercurochrome [ ] Put antibiotic power
[ ] No application
10. Do you think that a baby should be kept warm after birth?
[ ] Yes [ ] No
If yes, how do you keep baby warm? [ ] Use of bulb
[ ] Wrap baby in a blanket [ ] Use hot water bottles
[ ] Use Warmer or incubator
[ ] Skin to skin contact [ ] No measure taken
11. Do you feel that hypothermia causes significant neonatal morbidity and mortality? [ ] Yes
[ ] No If yes, how important is this contribution?
[ ] Very strong [ ] Strong
[ ] Somewhat [ ] Minimal
12. Which route do you use for recording temperature of sick LBW babies admitted to the nursery? [ ] Rectal
[ ] Axillary [ ] Groin
[ ] Skin
[ ] Mouth [ ] Ear
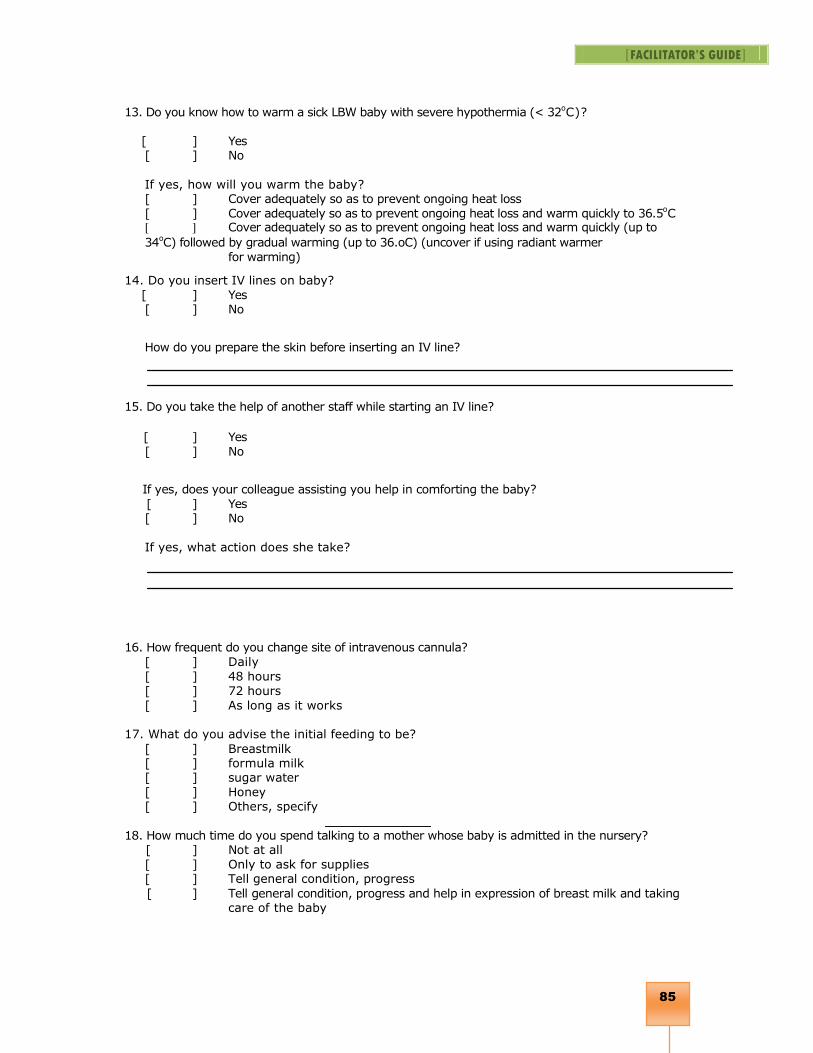
[FACILITATOR’S GUIDE]
85
13. Do you know how to warm a sick LBW baby with severe hypothermia (< 32oC)?
[ ] Yes [ ] No
If yes, how will you warm the baby? [ ] Cover adequately so as to prevent ongoing heat loss
[ ] Cover adequately so as to prevent ongoing heat loss and warm quickly to 36.5oC [ ] Cover adequately so as to prevent ongoing heat loss and warm quickly (up to
34oC) followed by gradual warming (up to 36.oC) (uncover if using radiant warmer
for warming)
14. Do you insert IV lines on baby?
[ ] Yes [ ] No
How do you prepare the skin before inserting an IV line?
15. Do you take the help of another staff while starting an IV line?
[ ] Yes
[ ] No
If yes, does your colleague assisting you help in comforting the baby?
[ ] Yes [ ] No
If yes, what action does she take?
16. How frequent do you change site of intravenous cannula?
[ ] Daily
[ ] 48 hours
[ ] 72 hours
[ ] As long as it works 17. What do you advise the initial feeding to be?
[ ] Breastmilk [ ] formula milk [ ] sugar water
[ ] Honey [ ] Others, specify
______________ 18. How much time do you spend talking to a mother whose baby is admitted in the nursery? [ ] Not at all
[ ] Only to ask for supplies [ ] Tell general condition, progress
[ ] Tell general condition, progress and help in expression of breast milk and taking care of the baby
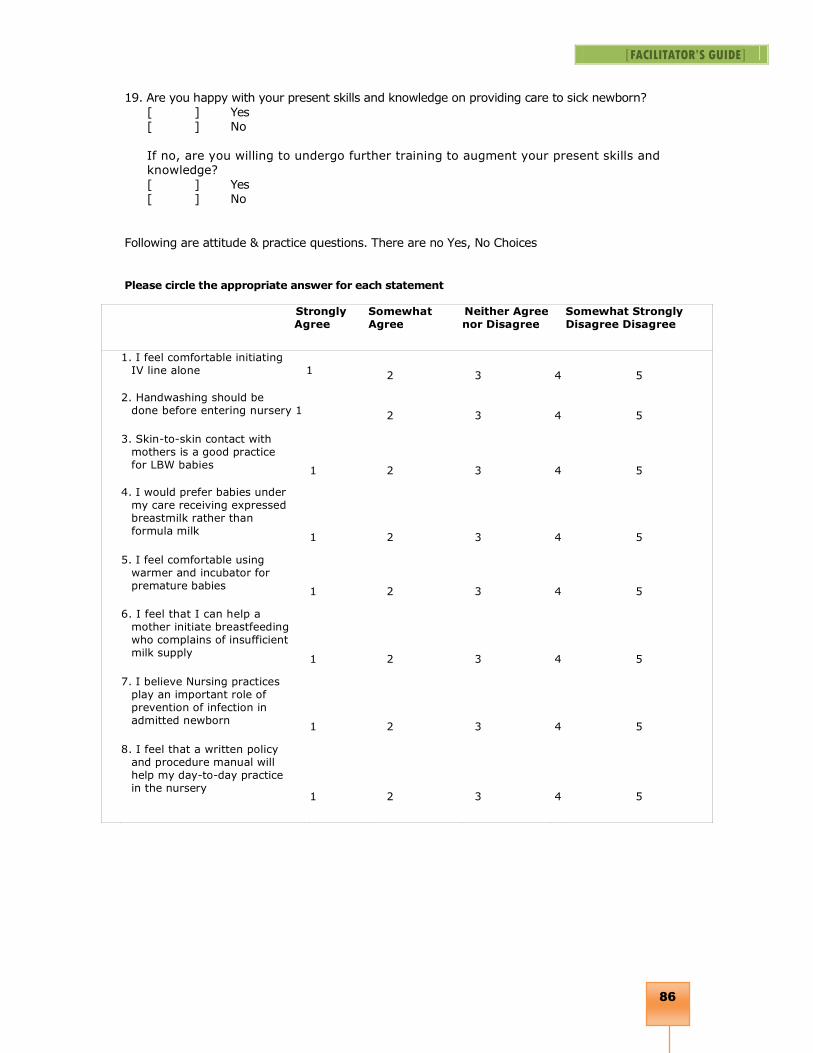
[FACILITATOR’S GUIDE]
86
19. Are you happy with your present skills and knowledge on providing care to sick newborn?
[ ] Yes [ ] No
If no, are you willing to undergo further training to augment your present skills and knowledge?
[ ] Yes [ ] No
Following are attitude & practice questions. There are no Yes, No Choices
Please circle the appropriate answer for each statement
Strongly Agree
Somewhat Agree
Neither Agree nor Disagree
Somewhat Strongly Disagree Disagree
1. I feel comfortable initiating IV line alone 1 2 3 4 5
2. Handwashing should be done before entering nursery 1 2 3 4 5
3. Skin-to-skin contact with mothers is a good practice for LBW babies
1 2 3 4 5
4. I would prefer babies under my care receiving expressed breastmilk rather than formula milk
1 2 3 4 5
5. I feel comfortable using warmer and incubator for premature babies
1 2 3 4 5
6. I feel that I can help a mother initiate breastfeeding who complains of insufficient milk supply
1 2 3 4 5
7. I believe Nursing practices play an important role of prevention of infection in admitted newborn
1 2 3 4 5
8. I feel that a written policy and procedure manual will help my day-to-day practice in the nursery
1 2 3 4 5