Embed Size (px)
Citation preview
Ziza Interior Lighting Kit Installation Tutorial
This tutorial is provided as a courtesy by ECS Tuning.
Proper service and repair procedures are vital to the safe, reliable operation of all motor vehicles as well as the personal safety of those performing the repairs. Standard safety procedures and precautions (including use of safe-ty goggles and proper tools and equipment) should be followed at all times to eliminate the possibility of personal injury or improper service which could damage the vehicle or compromise its safety.
Although this material has been prepared with the intent to provide reliable information, no warranty (express or implied) is made as to its accuracy or completeness. Neither is any liability assumed for loss or damage resulting from reliance on this material. SPECIFICALLY, NO WARRANTY OF MERCHANTABILITY, FITNESS FOR A PARTICULAR PUR-POSE OR ANY OTHER WARRANTY IS MADE OR TO BE IMPLIED WITH RESPECT TO THIS MATERIAL. In no event will ECS Tuning, Incorporated or its affiliates be liable for any damages, direct or indirect, consequential or compensatory, arising out of the use of this material.
ES#2207836 BMW E60 5-Series
R
best viewed in Acrobat® Reader®
R
Address: 1000 Seville Road, Wadsworth, OH 44281 Phone: 1.800.924.5172 Web: www.ecstuning.com
Ziza E60 Interior Lighting Kit
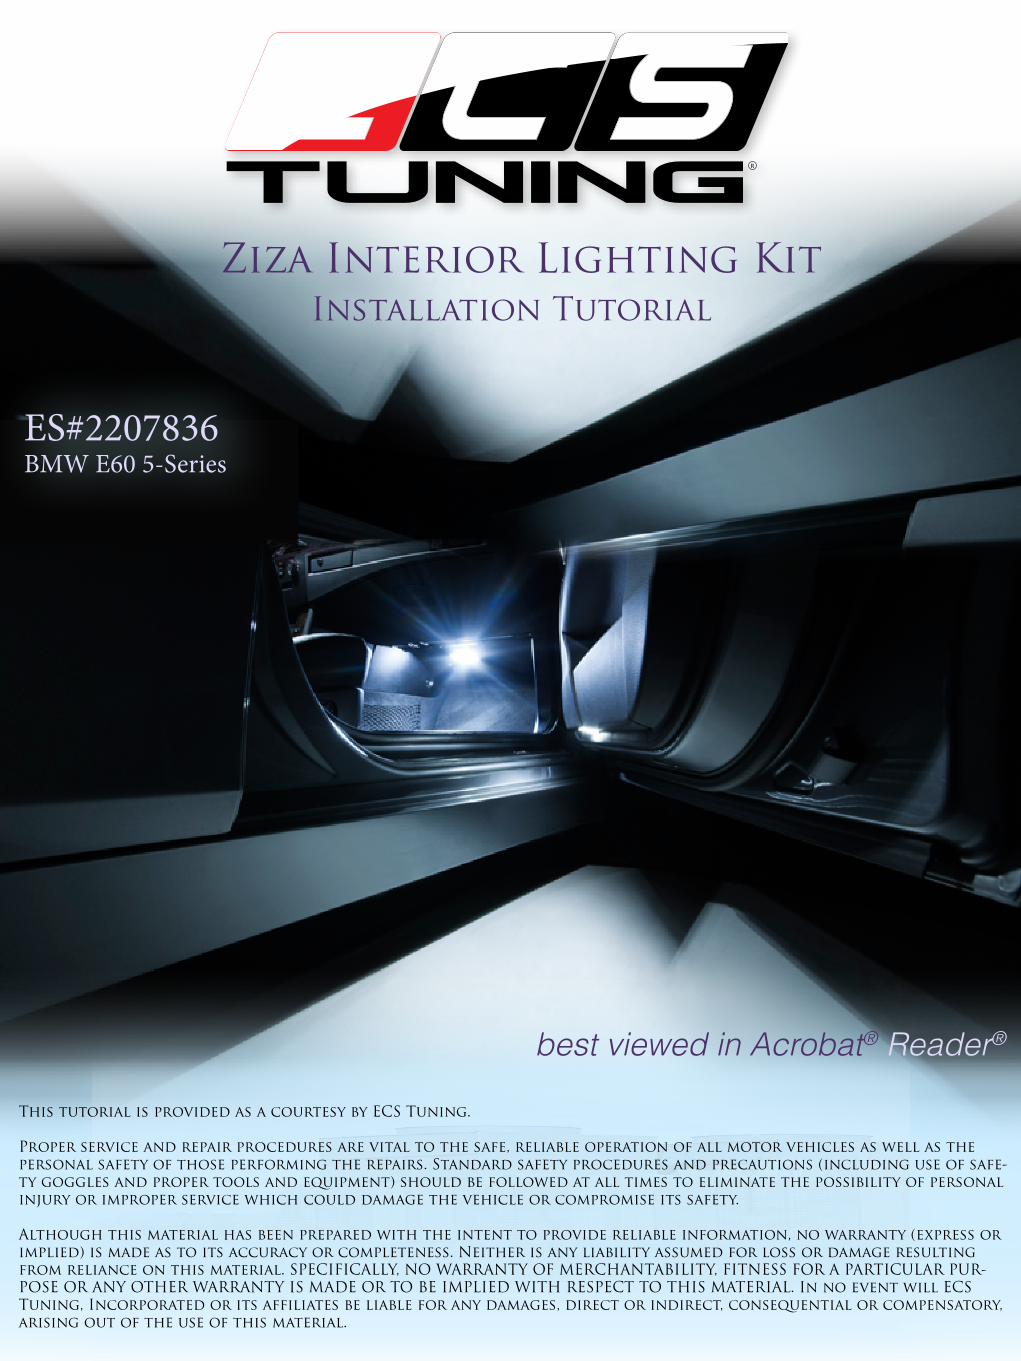
Whenever replacing or removing interior trim, door panels, fascia and trim strips, dashboards, or window mouldings, the primary risk is in scuffing or damaging a highly visible area of your car.
Made of impact resistant plastic, Schwaben trim and moulding removal tools do not scratch or mar your interior like metal screwdrivers and pry bars will.
The complete Schwaben set is available at ECStuning.com; please click the link below for more information.
Schwaben Master Trim and Moulding Tool Kit
What are LEDs?LEDs are Light Emitting Diodes, solid state devices that emit light when connected to electrical current. They have no moving parts or wire filaments to burn out. They emit a whiter light, run cooler, and last longer that the incandescent (filament style bulbs) we are replacing in this tutorial.
Unlike filament bulbs, LEDs are polarity sensitive. They have plus and minus (positive and negative) electrical terminals that must match the polarity of the applied voltage. Installing the bulbs “backwards” in the light bulb sockets (with reversed polarity) will not harm them, but they will not light. Flipping the bulb 180 degrees in the electrical connector cures this problem.
R
Address: 1000 Seville Road, Wadsworth, OH 44281 Phone: 1.800.924.5172 Web: www.ecstuning.com
Ziza E60 Interior Lighting Kit
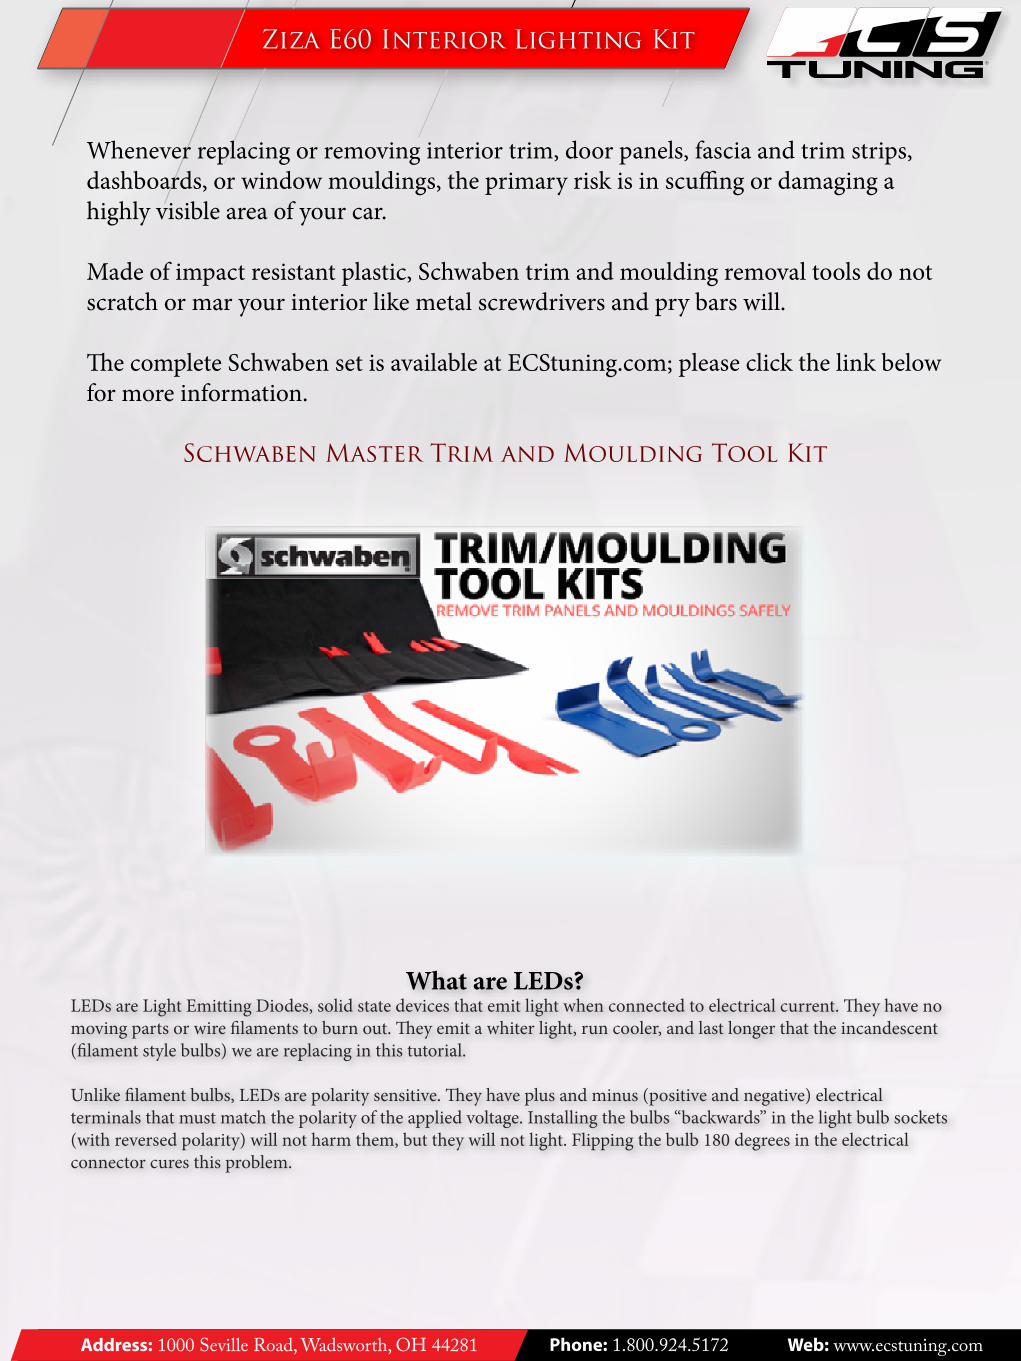
The primary challenge when replacing the incandescent inteior lighting bulbs with LED lighting is in removing panels covered in cloth and plastics without leaving permanent scuffs or tears on the part or car.
The replacement of the bulb itself is exceedingly simple; the Ziza product has been designed as a direct-fit replacement - there will be no modification required to any other parts for perfect fitment.
Figure 1 above details the location, type, and size of Wthe LED you are installing.
Figure 1
Caution: Lights that are left on for more than 3-5 minutes will be dangerously hot - use care when handling.
R
Address: 1000 Seville Road, Wadsworth, OH 44281 Phone: 1.800.924.5172 Web: www.ecstuning.com
Ziza E60 Interior Lighting Kit
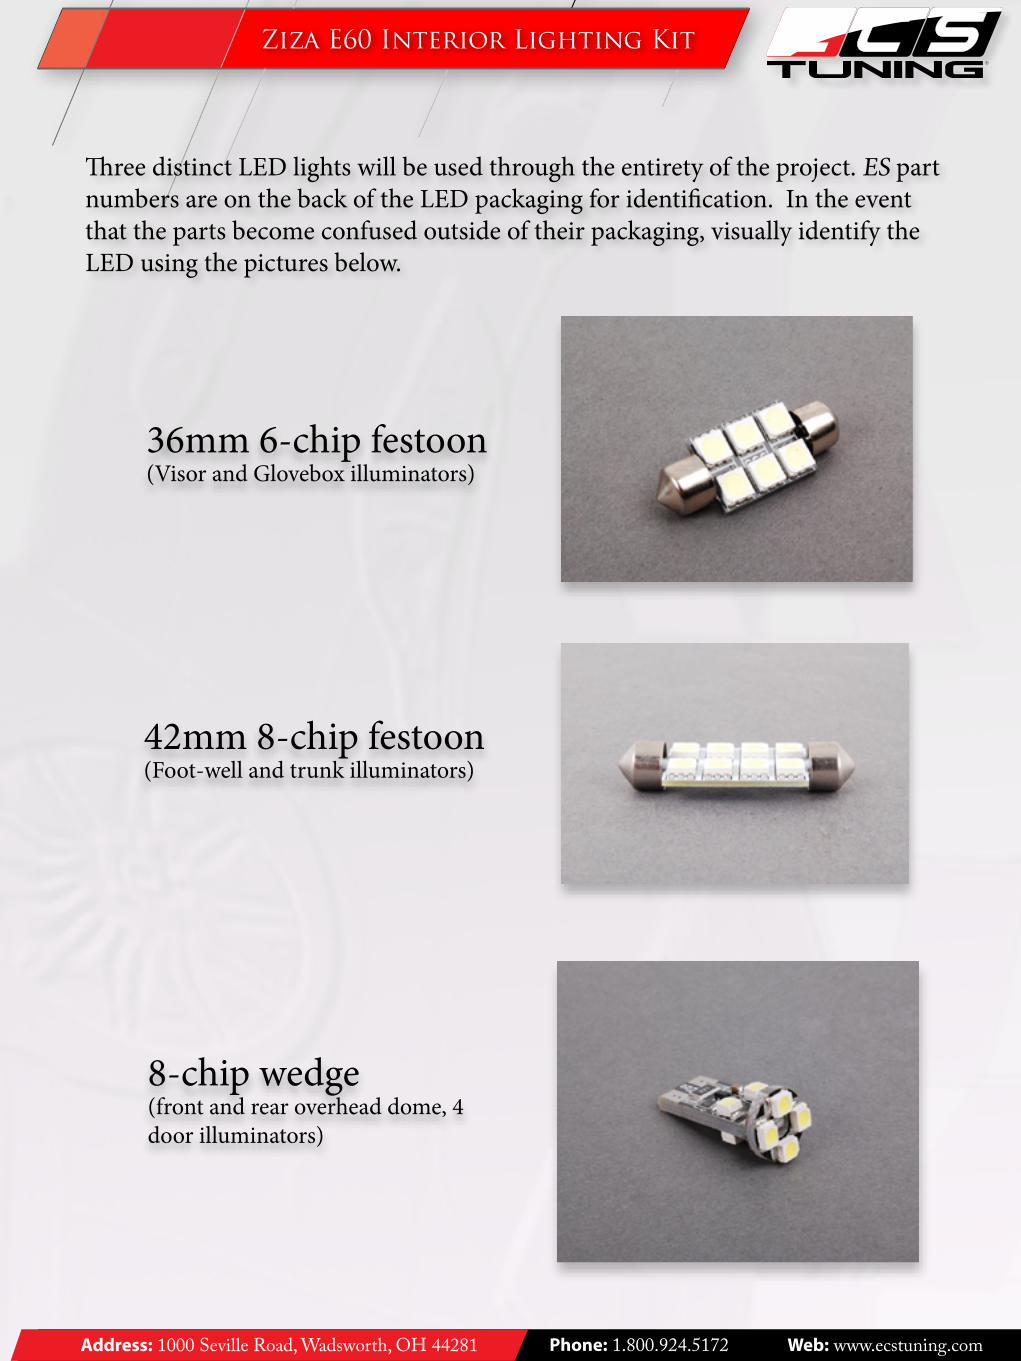
36mm 6-chip festoon(Visor and Glovebox illuminators)
42mm 8-chip festoon(Foot-well and trunk illuminators)
8-chip wedge(front and rear overhead dome, 4 door illuminators)
Three distinct LED lights will be used through the entirety of the project. ES part numbers are on the back of the LED packaging for identification. In the event that the parts become confused outside of their packaging, visually identify the LED using the pictures below.
R
Address: 1000 Seville Road, Wadsworth, OH 44281 Phone: 1.800.924.5172 Web: www.ecstuning.com
Ziza E60 Interior Lighting Kit
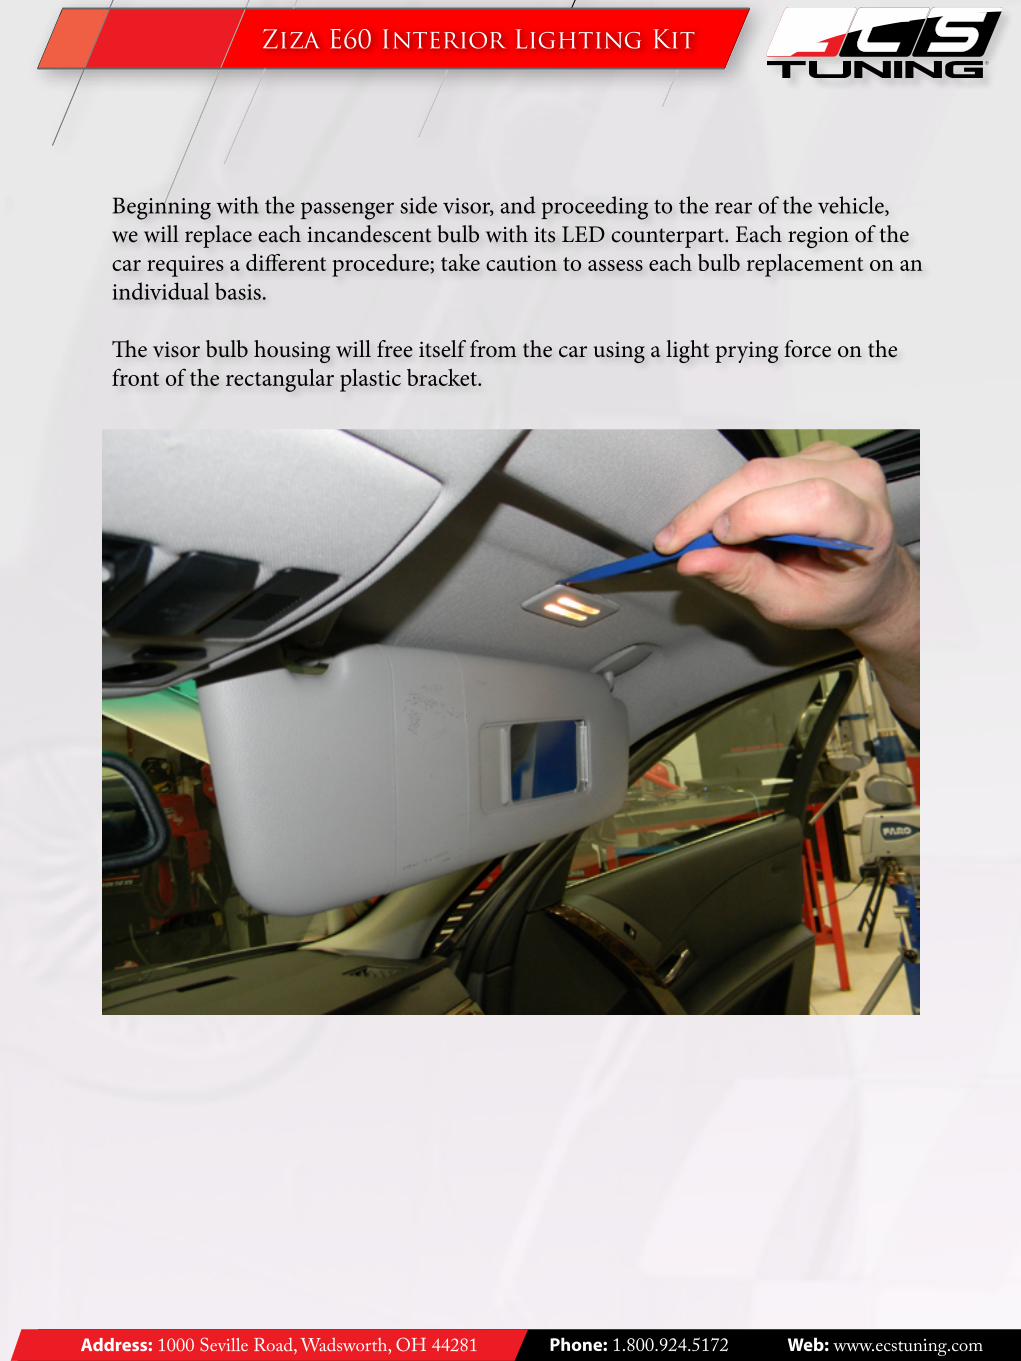
Beginning with the passenger side visor, and proceeding to the rear of the vehicle, we will replace each incandescent bulb with its LED counterpart. Each region of the car requires a different procedure; take caution to assess each bulb replacement on an individual basis.
The visor bulb housing will free itself from the car using a light prying force on the front of the rectangular plastic bracket.
R
Address: 1000 Seville Road, Wadsworth, OH 44281 Phone: 1.800.924.5172 Web: www.ecstuning.com
Ziza E60 Interior Lighting Kit
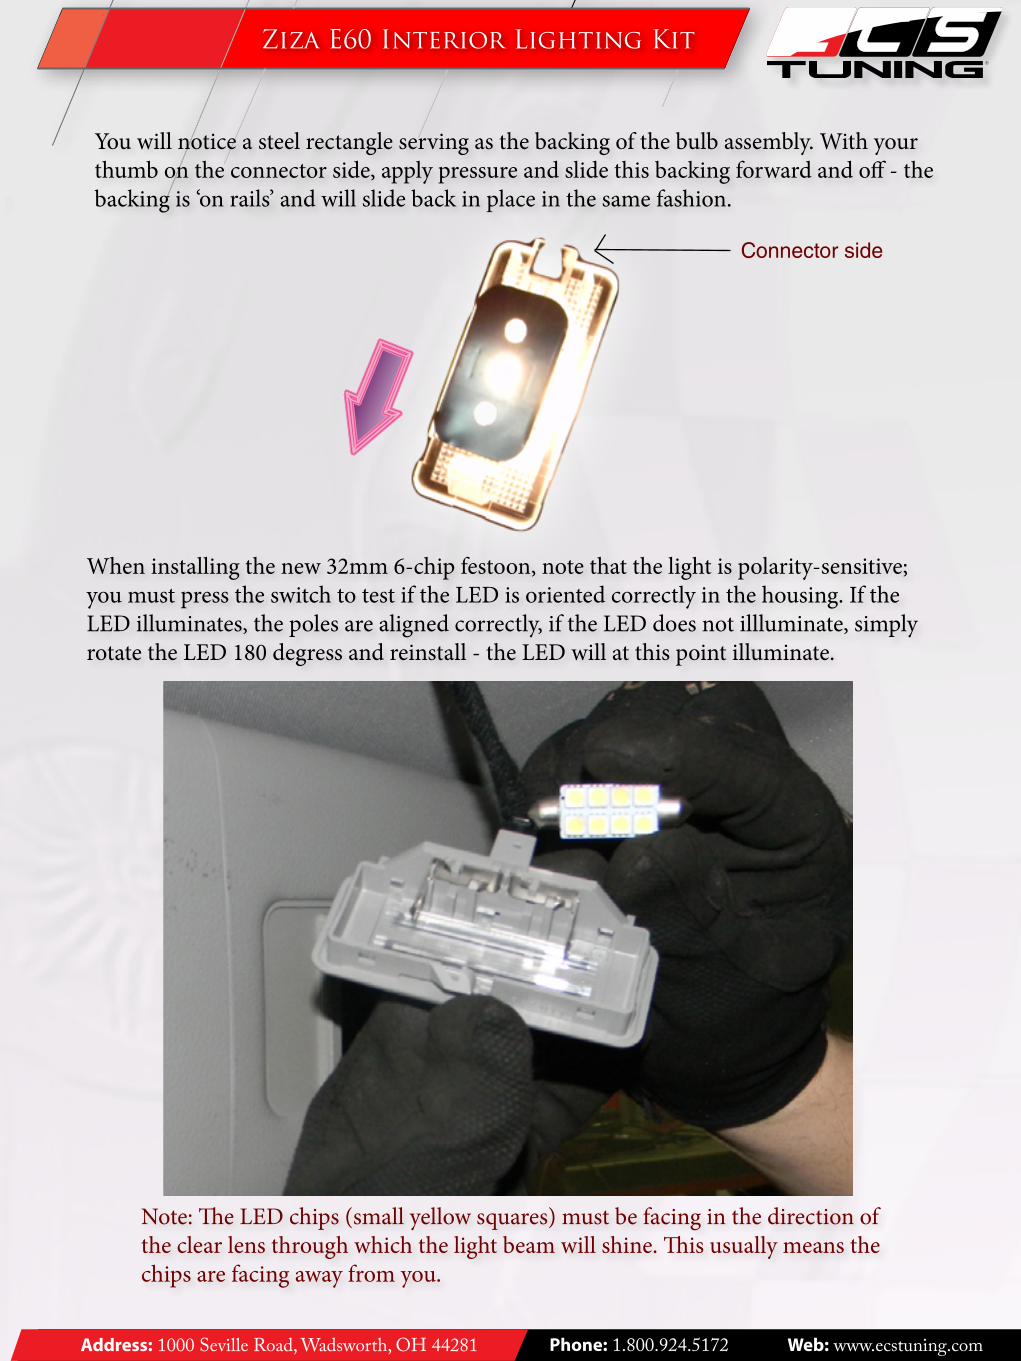
When installing the new 32mm 6-chip festoon, note that the light is polarity-sensitive; you must press the switch to test if the LED is oriented correctly in the housing. If the LED illuminates, the poles are aligned correctly, if the LED does not illluminate, simply rotate the LED 180 degress and reinstall - the LED will at this point illuminate.
You will notice a steel rectangle serving as the backing of the bulb assembly. With your thumb on the connector side, apply pressure and slide this backing forward and off - the backing is ‘on rails’ and will slide back in place in the same fashion.
Note: The LED chips (small yellow squares) must be facing in the direction of the clear lens through which the light beam will shine. This usually means the chips are facing away from you.
Connector side
R
Address: 1000 Seville Road, Wadsworth, OH 44281 Phone: 1.800.924.5172 Web: www.ecstuning.com
Ziza E60 Interior Lighting Kit
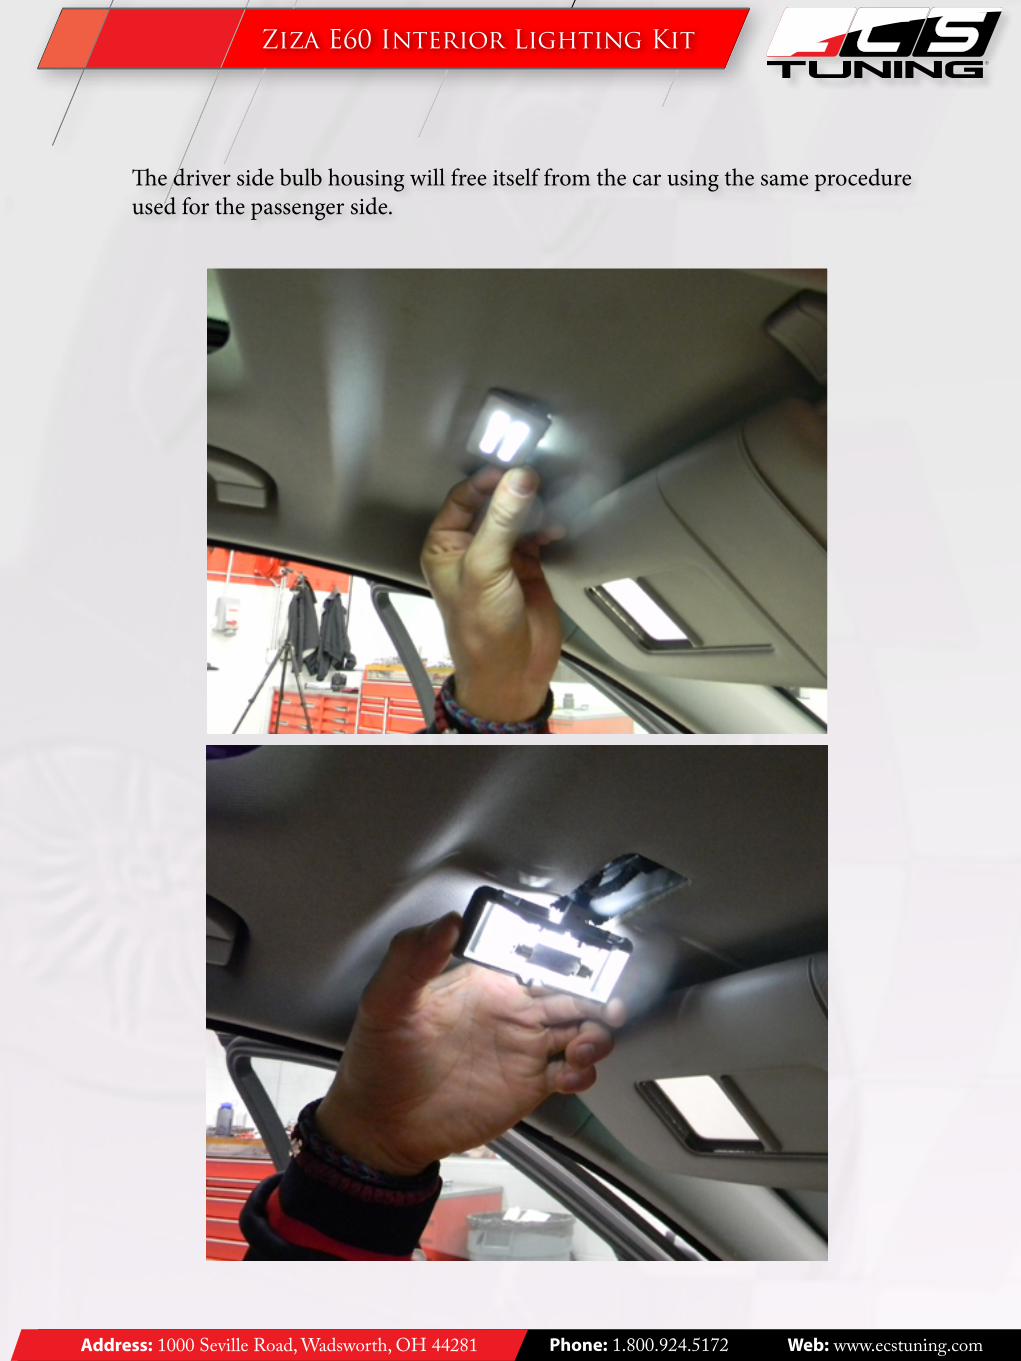
The driver side bulb housing will free itself from the car using the same procedure used for the passenger side.
R
Address: 1000 Seville Road, Wadsworth, OH 44281 Phone: 1.800.924.5172 Web: www.ecstuning.com
Ziza E60 Interior Lighting Kit
Moving on to the front overhead dome, the procedure here requires the removal of a front and rear part - the housing for the sunroof and phone buttons, and the light housing itself. Pry up the front piece first from the left side - the rear part will begin to dislodge with it. The two pieces should pop out soon after, although some finesse is required to completely dislodge the whole unit.
Once the bulb assembly itself is dangling in front of you, take note of the three black knobs that house the bulbs. Twist the knob to the left 1/4 turn and the bulb will back out easily. Holding the black tab in one hand, pull outwards while slightly wiggling the bulb. Removing this bulb will take moderate effort. The bulb is strong and will not break when pulling hard on it. Once the bulb is removed, slide the 8-chip wedge LED into thebracket where the incandecent bulb sat. This will take moderate effort.
R
Address: 1000 Seville Road, Wadsworth, OH 44281 Phone: 1.800.924.5172 Web: www.ecstuning.com
Ziza E60 Interior Lighting Kit
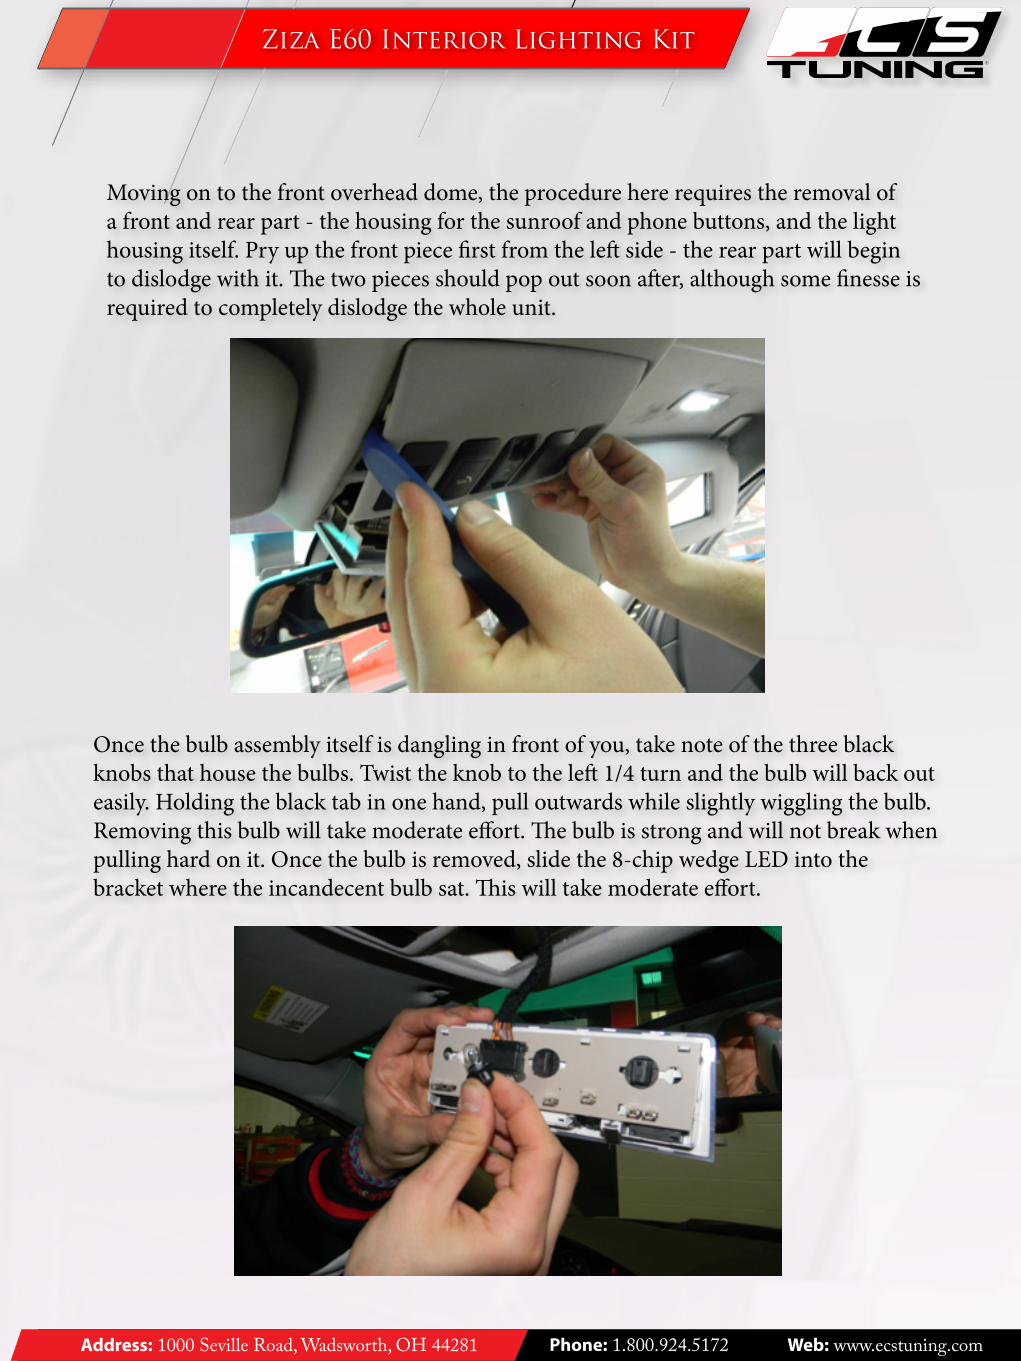
These bulbs are polar sensitive. It is not necessary to read the bulb or bulb housing to determine polarity. Install the LED and check for it to illuminate, making sure the light it switched to ‘on’. If it does not illuminate, remove the light and rotate it 180 degrees, and reinstall. The bulb will now illuminate.
Press back into place the front switch housing. Then press the new, LED lit bulb housing back into its original place.
R
Address: 1000 Seville Road, Wadsworth, OH 44281 Phone: 1.800.924.5172 Web: www.ecstuning.com
Ziza E60 Interior Lighting Kit
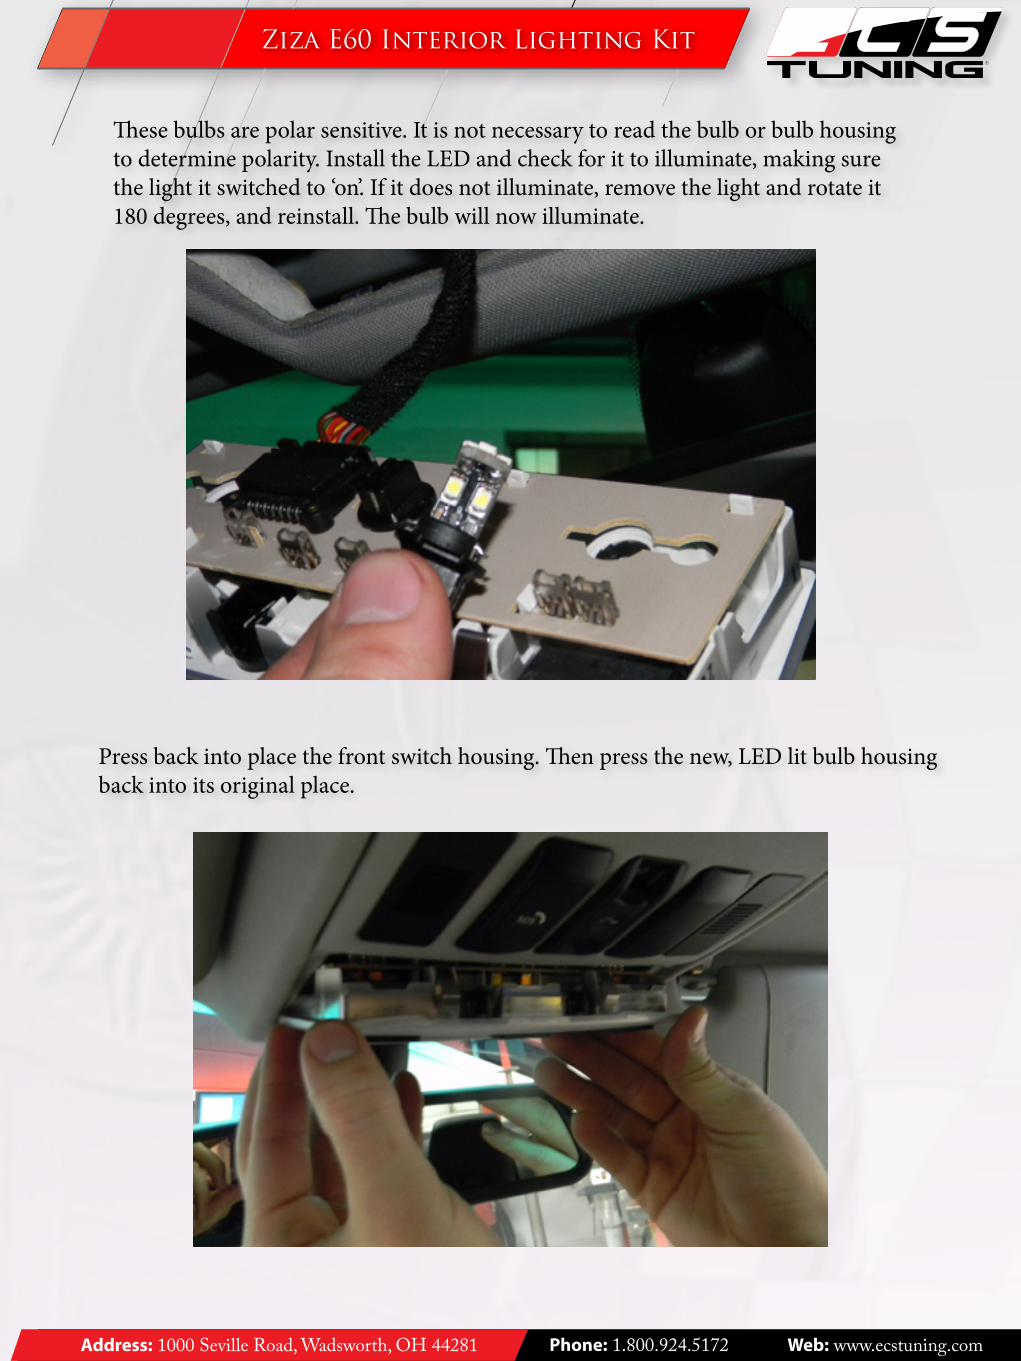
This image shows the glovebox bulb housing already removed. Before proceeding to remove this part, please note the location of the securing clip on the end of the clear lens. This is the side of the lens that you must pry up using the non-marring tool. It can be visually distinguished when installed by a small rectangular cutout, well-suited to your tool. Prying from the wrong side may damage the insertion point or the plastic clip.
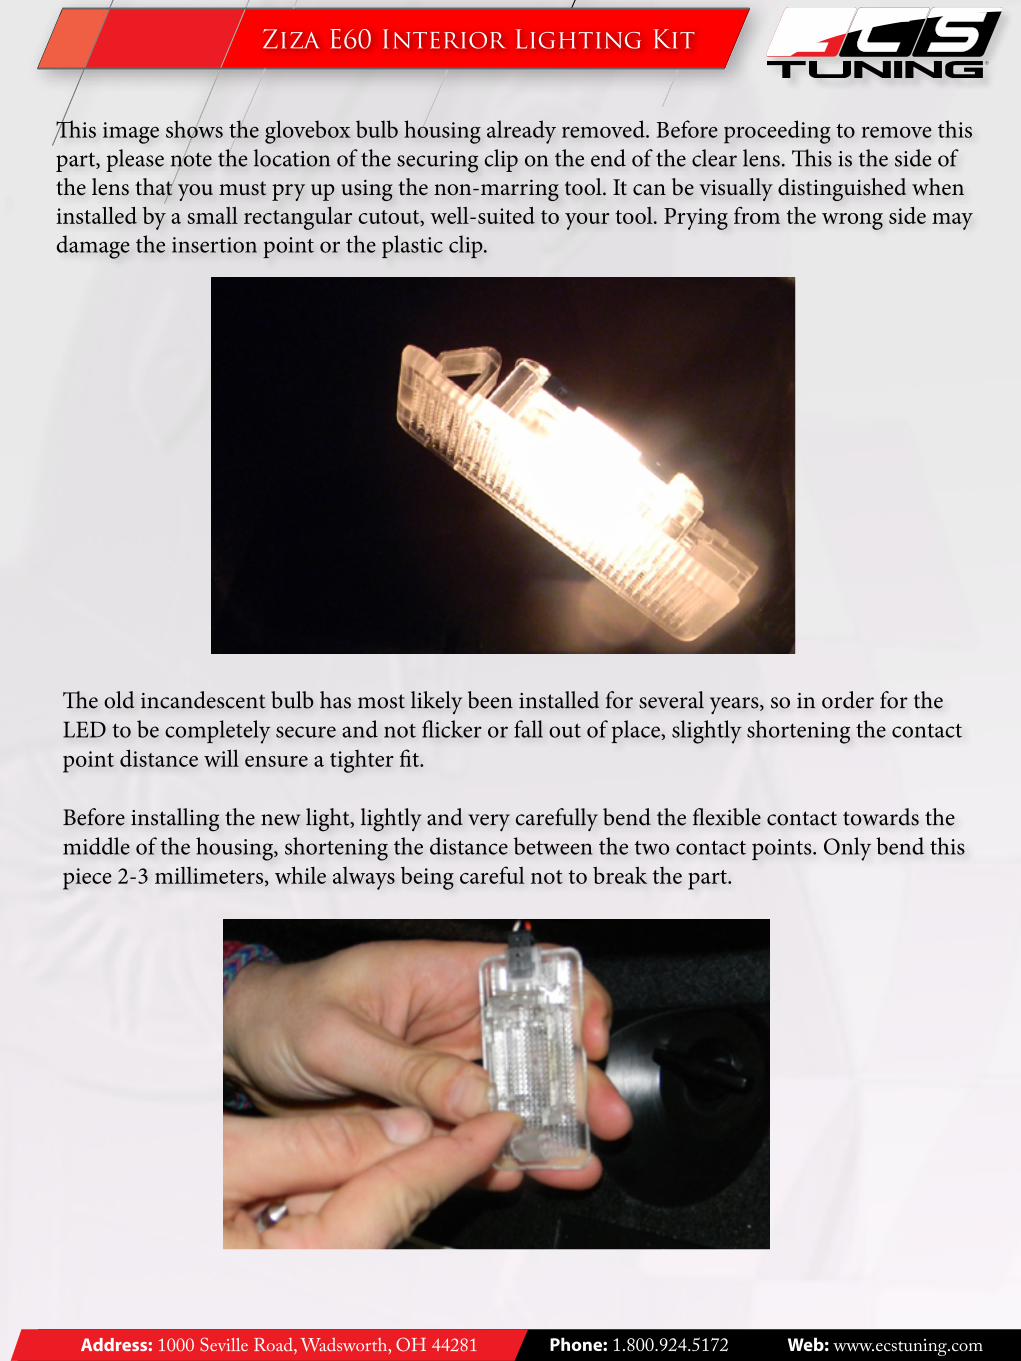
The old incandescent bulb has most likely been installed for several years, so in order for the LED to be completely secure and not flicker or fall out of place, slightly shortening the contact point distance will ensure a tighter fit.
Before installing the new light, lightly and very carefully bend the flexible contact towards the middle of the housing, shortening the distance between the two contact points. Only bend this piece 2-3 millimeters, while always being careful not to break the part.
R
Address: 1000 Seville Road, Wadsworth, OH 44281 Phone: 1.800.924.5172 Web: www.ecstuning.com
Ziza E60 Interior Lighting Kit
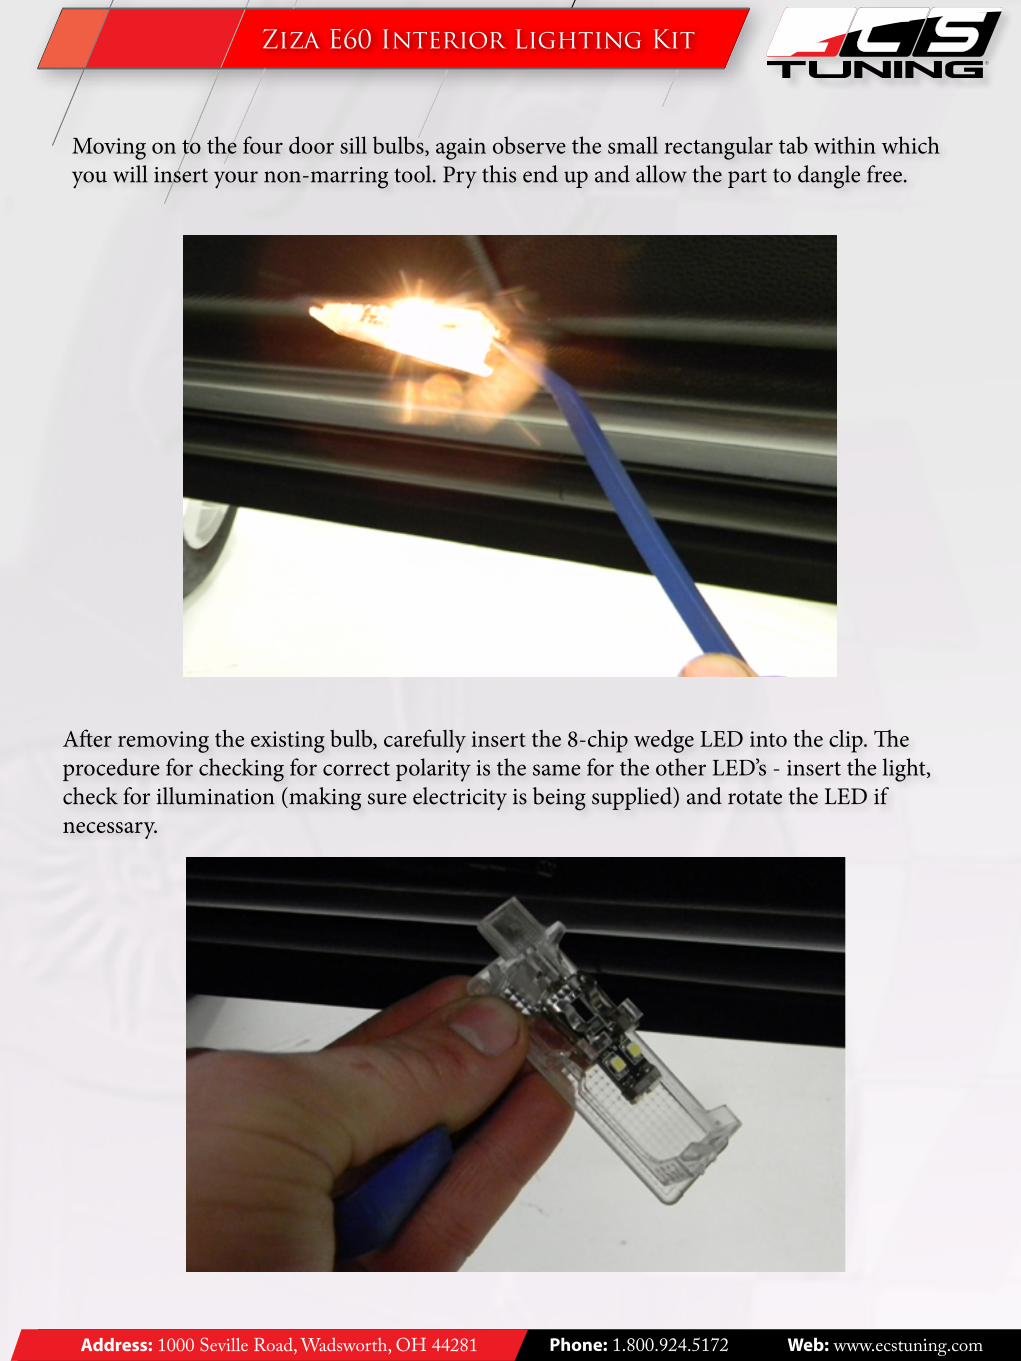
Moving on to the four door sill bulbs, again observe the small rectangular tab within which you will insert your non-marring tool. Pry this end up and allow the part to dangle free.
After removing the existing bulb, carefully insert the 8-chip wedge LED into the clip. The procedure for checking for correct polarity is the same for the other LED’s - insert the light, check for illumination (making sure electricity is being supplied) and rotate the LED if necessary.
R
Address: 1000 Seville Road, Wadsworth, OH 44281 Phone: 1.800.924.5172 Web: www.ecstuning.com
Ziza E60 Interior Lighting Kit
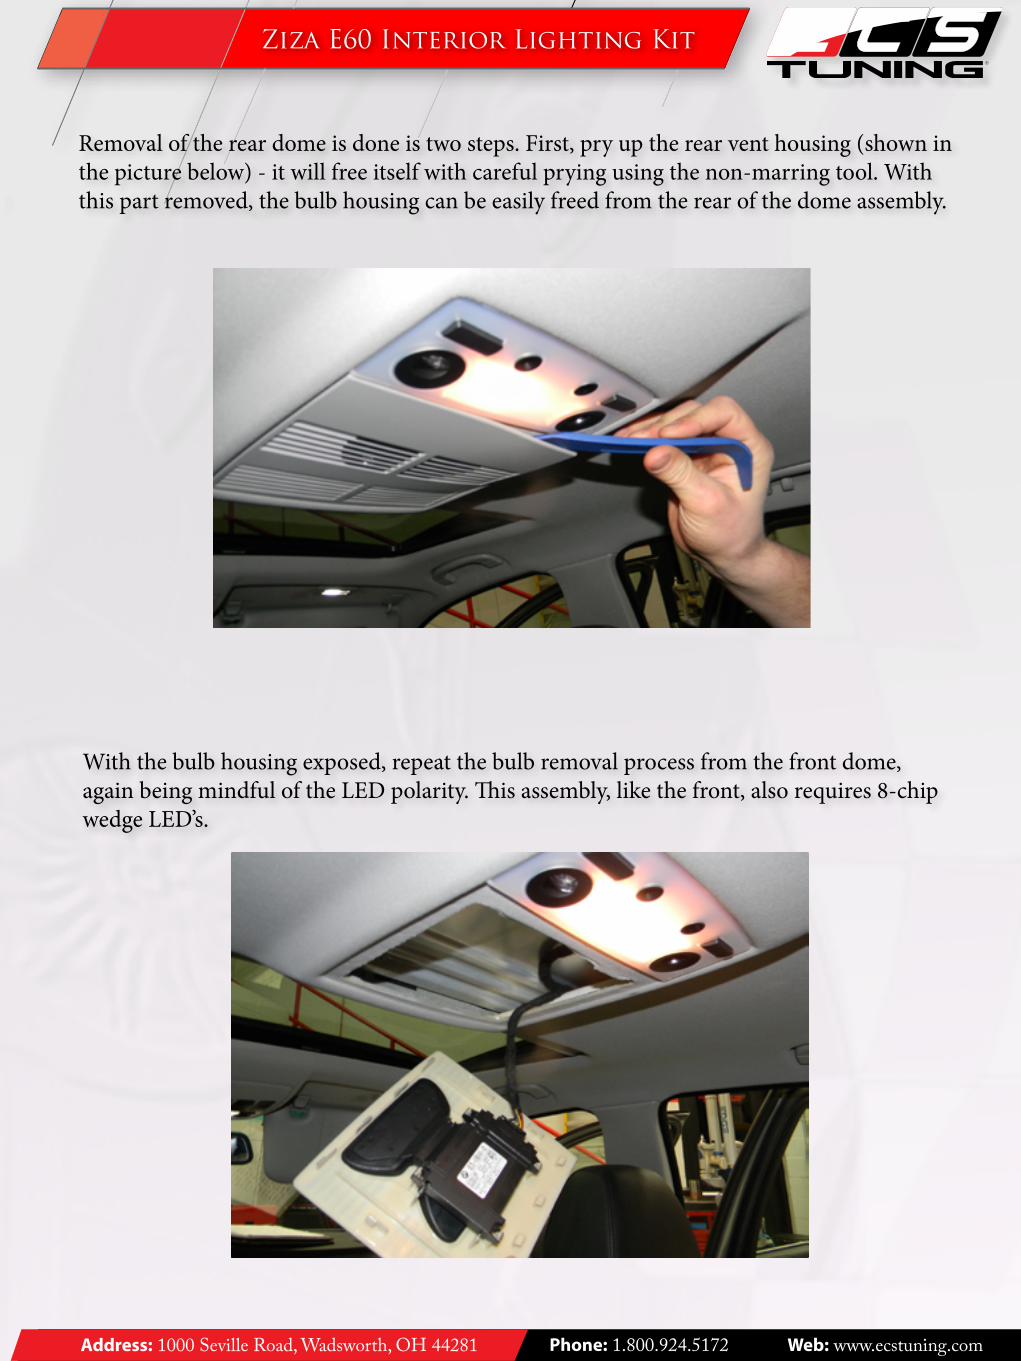
Removal of the rear dome is done is two steps. First, pry up the rear vent housing (shown in the picture below) - it will free itself with careful prying using the non-marring tool. With this part removed, the bulb housing can be easily freed from the rear of the dome assembly.
With the bulb housing exposed, repeat the bulb removal process from the front dome, again being mindful of the LED polarity. This assembly, like the front, also requires 8-chip wedge LED’s.
R
Address: 1000 Seville Road, Wadsworth, OH 44281 Phone: 1.800.924.5172 Web: www.ecstuning.com
Ziza E60 Interior Lighting Kit
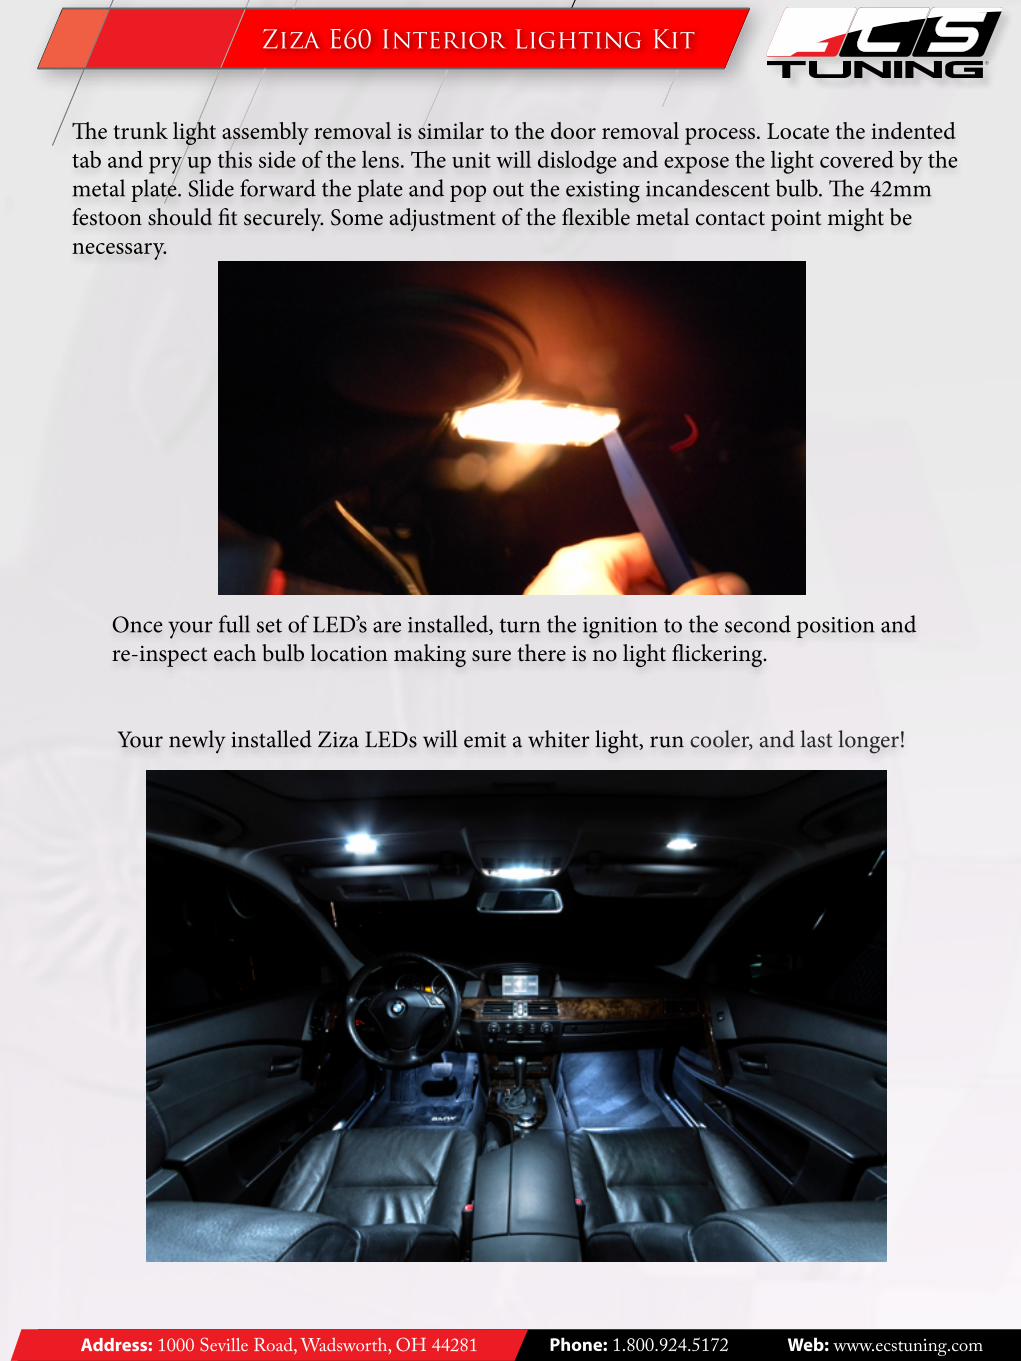
The trunk light assembly removal is similar to the door removal process. Locate the indented tab and pry up this side of the lens. The unit will dislodge and expose the light covered by the metal plate. Slide forward the plate and pop out the existing incandescent bulb. The 42mm festoon should fit securely. Some adjustment of the flexible metal contact point might be necessary.
Once your full set of LED’s are installed, turn the ignition to the second position andre-inspect each bulb location making sure there is no light flickering.
Your newly installed Ziza LEDs will emit a whiter light, run cooler, and last longer!