Embed Size (px)
Citation preview
1
Ergonomics Training for Nursing Home Workers
Training Techniques
For
Health and Safety
Training Workers
Participation
Discussion
Involvement

2
Ergonomics Training for Nursing Home Workers
Train-the-Trainer Program
Agenda
Day 1
9:00 AM - 3:30 PM
9- 9:45 Registration
Introductions
Icebreaker Activity
Course Overview
10-11:00 Observe Ergonomics Training session (conducted by UML personnel)
11-12:00 How Adults Learn
Discussion: What did they observe about the training content and method
Activity: Best and Worst Training Experiences
Adult Learning Styles
Activity: Learning Style Inventory
Need for multiple training approaches in class
Popular Education
12– 12:30 Lunch
12:30- 1:30 Training Techniques
Discussion:
Facilitating a discussion
Using a trigger (picture, quote, role play)
Demonstrate a role play as a trigger
Using open-ended questions
Responding to questions
Small Group Activities
Reasons for small groups
They help each other
They draw on joint experience
3 Heads are Better than 1
3
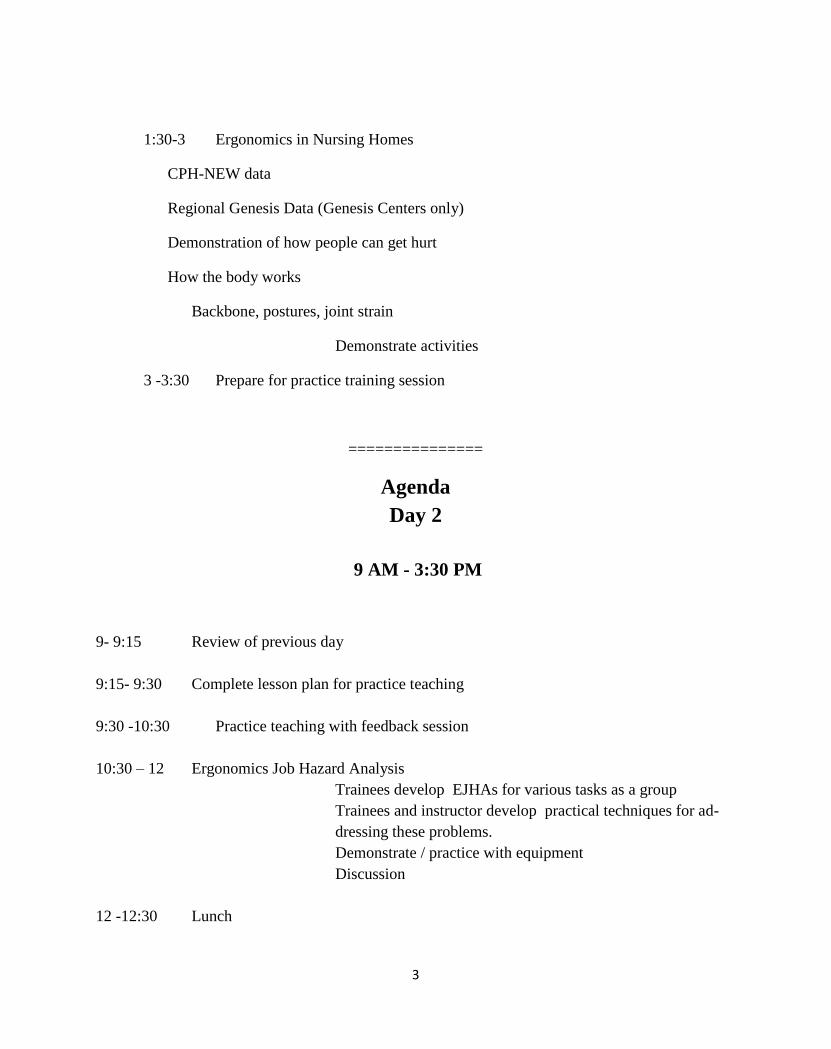
1:30-3 Ergonomics in Nursing Homes
CPH-NEW data
Regional Genesis Data (Genesis Centers only)
Demonstration of how people can get hurt
How the body works
Backbone, postures, joint strain
Demonstrate activities
3 -3:30 Prepare for practice training session
===============
Agenda
Day 2
9 AM - 3:30 PM
9- 9:15 Review of previous day
9:15- 9:30 Complete lesson plan for practice teaching
9:30 -10:30 Practice teaching with feedback session
10:30 – 12 Ergonomics Job Hazard Analysis
Trainees develop EJHAs for various tasks as a group
Trainees and instructor develop practical techniques for ad-
dressing these problems.
Demonstrate / practice with equipment
Discussion
12 -12:30 Lunch

4
12:30 – 2 Practice Teaching 2
Prepare lesson plans
Present Training
Feedback
2-3 Planning for Training
How and when will they schedule training?
How will they handle problems that are uncovered during train-
ing?
Setting a plan of action
Record-keeping responsibilities
3-3:15 Questions/ Discussions
3:15- 3:30 Evaluation
This material was partially produced under grant number SH-22314-11-60-F-25 from the
Occupational Safety and Health Administration, U.S. Department of Labor. It does not necessarily
reflect the views or policies of the U.S. Department of Labor, nor does mention of trade names,
commercial products, or organizations imply endorsement by the U.S. Government.
5
Table of Contents
Section 1: Adult Learners
Section 2: Training Techniques
Questions
Flip Charts
Discussion
Role Play
Small Group Activities
Section 3: Training Essentials
Setting the Physical Climate
Lesson Plans
Feedback
Section 4: Evaluation

6
SECTION 1 – ADULT LEARNERS

7
Voluntary adult learners ... 1. Consent. They consent to voluntarily spend- time and dollars to learn what you
hope to teach. Thus, they initially approach your class with anticipation and a
positive attitude.
2. Set aside time out of a busy schedule - often on a work-day evening-- to come
and learn what you have to teach. Because they m ay drive up to 30 miles one
way, they usually want a two- or three-hour class period.
3. Expect the instructor to be well-prepared for the class. This includes having a
clear set of objectives and defined content for the course and each class session; being organized, enthusiastic about teaching; and being clearly knowledgeable
or expert in the subject matter.
4. Expect the instructor to provide definite guidance to students for moving from
point of entry to point of stated objectives.
5. Resent being talked down to. They expect to be treated as peers who want to be
taught and learn about something you know and want to share.
6. Possess a wider frame of reference acquired through life experience. This often
permits an easier accommodation of knowledge. They are also eager to share their life experiences and "accumulated wisdom" in class.
7. Seek pragmatic solutions to their educational needs. They want, need and must
acquire enough theory to be able to analyze their problems and alternative solutions. Thus, practical application, discussion and hands-on, problem-solving exercises score high.
8. Possess high motivation. They really want to learn - in most cases. 9. Frequently lack self-confidence after having been out of formal school for some
years.
10. Appreciate a well-organized, competent, enthusiastic instructor who cares
about the students.
School of Continuing Studies, Indiana University
PROFILE OF THE VOLUNTARY ADULT LEARNER

8
1. Motivation. A necessary condition for effective learning is motivation, the “why” of be-
havior. There is a wide variety of different motives, depending on the individual and the
situation. These motives may conflict with one another, or they may reinforce each other.
Learning is enhanced if the experience is satisfying for all involved. This satisfaction can
be increased by:
Encouraging and rewarding active participation
Giving immediate recognition for achievement
Providing the learner with knowledge of his/her progress
Putting the classroom learning experience in a real world frame of reference
2. Attention. An individual can concentrate on only one stimulus at a time. Therefore, any-
thing that may distract attention should be avoided. Physical surroundings can be distract-
ing, as can an attempt to teach more than one thing at a time.
3. Individual differences. There are individual differences in the ways and rates of learning.
Some do well in reading; others can barely read. Yet the person who can barely read may
be extremely quick to grasp the importance of a new idea and be able to put it to use. Some
can learn effectively by acting out a case; others are so scared that they cannot remember
what took place. The job of the instructor is to recognize these differences among learners
and to help each individual learn as much as possible in the ways best suited to that person
4. Using what is learned. Unless materials or skills that are learned are put to use immediate-
ly, they are likely to be quickly forgotten. Therefore, the instructor must see that new
learning is applied frequently, or it will not be retained.
5. Emotions and learning. Our emotions definitely affect learning. If we are tense or fright-
ened or angry we do not learn as well as if we are comfortable and relaxed. The instructor
must create the atmosphere in the class that encourages maximum learning.
6. Age and learning. Most of the subjects of workers’ education can be learned as well or bet-
ter by older persons as by young persons. Experience and maturity of judgement are im-
portant elements of adult education, and it takes time to acquire these qualities.
7. Pattern of learning. People learn better as a rule when they know the total framework of
the course or program they are talking part in. The instructor should describe the purpose
of the whole course initially and then relate each of the pieces to the whole as the course
progresses. Summaries at the end of each session and reviews at the beginning of the next
session are also helpful in achieving this goal.
PRINCIPLES OF LEARNING

9
8. Self-examination and learning are more effective when they are not threatening to the indi-
vidual. Participants in the class should be encouraged to raise questions without fear that
they will be thought stupid. They should be encouraged to express doubts and objections
honestly. When on individual badgers and dominates a class, monopolizing the discussion
and so on, learning is stalled for everyone. Others may feel intimidated from participating,
and it’s for sure that the individual who is dominating isn’t learning anything. That person
is there to show that they already know everything.

10
When we are teaching or training adults, we need to put aside the ideas we have from our experience as children in “school". For adults to learn, we must use approaches and techniques quite different from those most of us experienced in our school days.
Adults are accustomed to learning in their own way informally. They learn all the time
• By doing
• By observing
• By reading and watching television
• By asking questions
• By talking with other
We call this "learning by experience". It is very powerful. It isn't always enough, however -- people learn better and faster if they have an opportunity to analyze their experience with others, get feedback and .new ideas, and expand their understanding beyond their own backyards. This is what happens in a good education program.
The teacher's role is
to . . .
• Organize the material.
• Help people think about it in a complete and disciplined way.
• Provide an opportunity to hear other ideas and information.
• Give opportunity to "test" learning or practice it.
The techniques used in education for adults must be chosen to keep students involved as much as possible. The subject matter, the teacher's style and the physical situation (is there video equipment? for example) influence the techniques you use.
For example:
• Technical science information may be covered by a mini-lecture
and discussion, or a film and discussion.
• A session on recruiting new participants might draw on in-
volvement methods, using discussion and role playing.
HELPING ADULTS LEARN
11
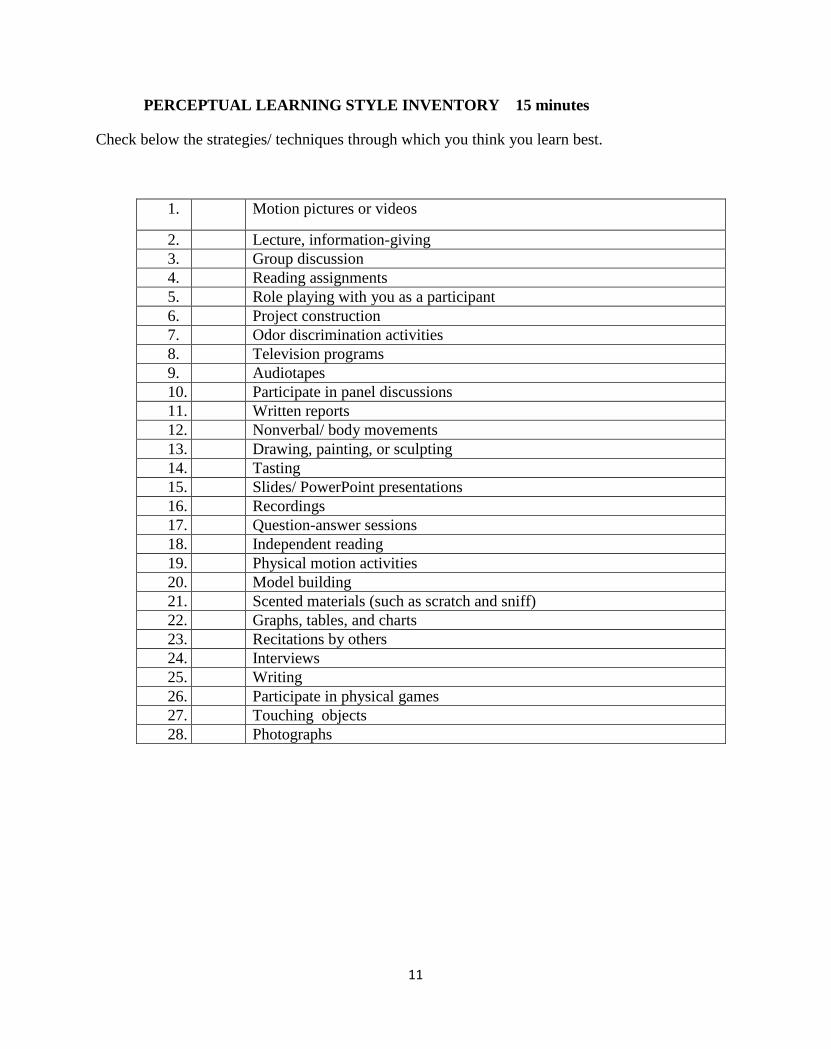
PERCEPTUAL LEARNING STYLE INVENTORY 15 minutes
Check below the strategies/ techniques through which you think you learn best.
1. Motion pictures or videos
2. Lecture, information-giving
3. Group discussion
4. Reading assignments
5. Role playing with you as a participant
6. Project construction
7. Odor discrimination activities
8. Television programs
9. Audiotapes
10. Participate in panel discussions
11. Written reports
12. Nonverbal/ body movements
13. Drawing, painting, or sculpting
14. Tasting
15. Slides/ PowerPoint presentations
16. Recordings
17. Question-answer sessions
18. Independent reading
19. Physical motion activities
20. Model building
21. Scented materials (such as scratch and sniff)
22. Graphs, tables, and charts
23. Recitations by others
24. Interviews
25. Writing
26. Participate in physical games
27. Touching objects
28. Photographs
12
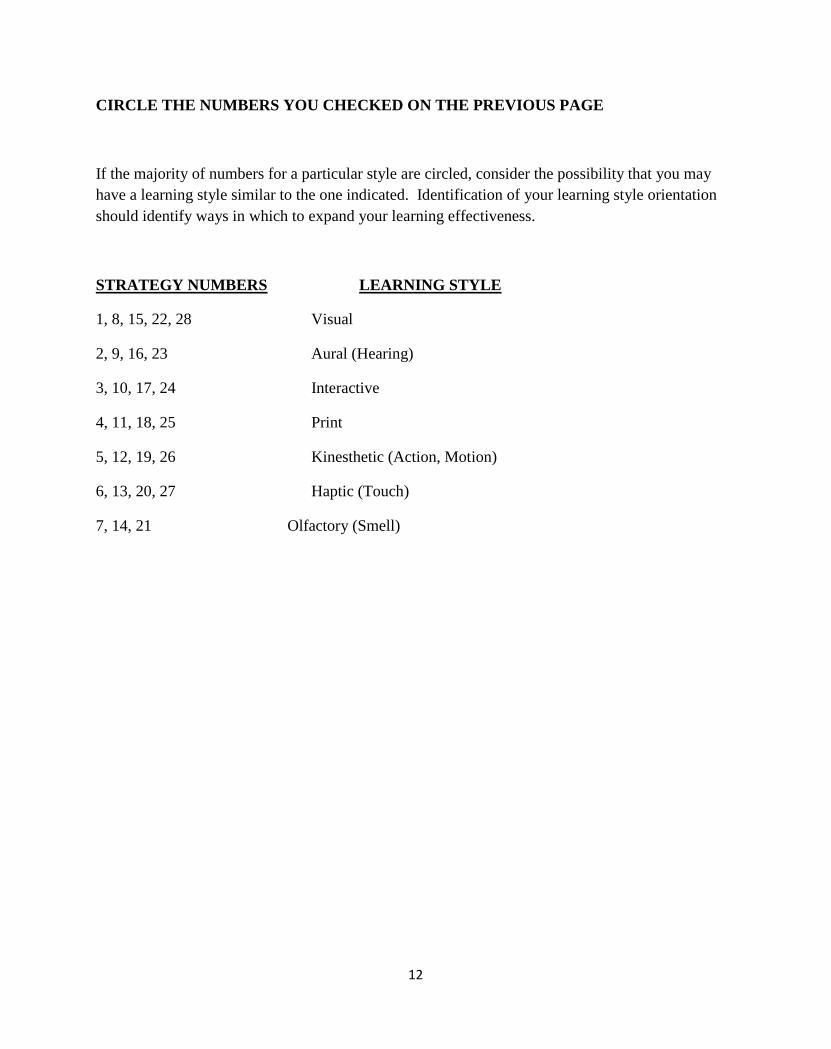
CIRCLE THE NUMBERS YOU CHECKED ON THE PREVIOUS PAGE
If the majority of numbers for a particular style are circled, consider the possibility that you may
have a learning style similar to the one indicated. Identification of your learning style orientation
should identify ways in which to expand your learning effectiveness.
STRATEGY NUMBERS LEARNING STYLE
1, 8, 15, 22, 28 Visual
2, 9, 16, 23 Aural (Hearing)
3, 10, 17, 24 Interactive
4, 11, 18, 25 Print
5, 12, 19, 26 Kinesthetic (Action, Motion)
6, 13, 20, 27 Haptic (Touch)
7, 14, 21 Olfactory (Smell)
13
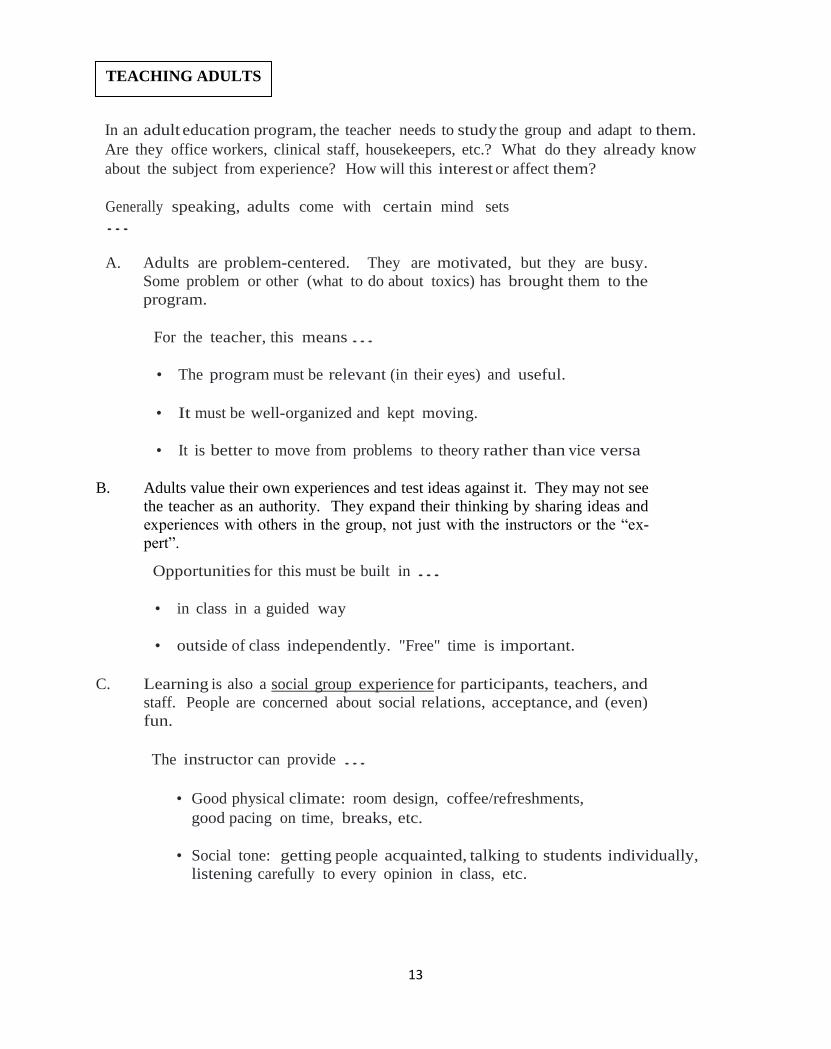
In an adult education program, the teacher needs to study the group and adapt to them.
Are they office workers, clinical staff, housekeepers, etc.? What do they already know
about the subject from experience? How will this interest or affect them?
Generally speaking, adults come with certain mind sets
...
A. Adults are problem-centered. They are motivated, but they are busy.
Some problem or other (what to do about toxics) has brought them to the
program.
For the teacher, this means ...
• The program must be relevant (in their eyes) and useful.
• It must be well-organized and kept moving.
• It is better to move from problems to theory rather than vice versa
B. Adults value their own experiences and test ideas against it. They may not see
the teacher as an authority. They expand their thinking by sharing ideas and
experiences with others in the group, not just with the instructors or the “ex-
pert”.
Opportunities for this must be built in ...
• in class in a guided way
• outside of class independently. "Free" time is important.
C. Learning is also a social group experience for participants, teachers, and
staff. People are concerned about social relations, acceptance, and (even)
fun.
The instructor can provide ...
• Good physical climate: room design, coffee/refreshments,
good pacing on time, breaks, etc.
• Social tone: getting people acquainted, talking to students individually,
listening carefully to every opinion in class, etc.
TEACHING ADULTS

14
D. Most adults see themselves as self-directed and responsible. They need
theory and generalization, but they must think them through to see how
they fit their situation.
Necessary are ...
• Small groups, role plays, case studies, problems, simulations,
Independent thinking assignments.
• Mini-lectures are good for new information or for articulating a subject,
but usually need follow-up.
E. Most adults are action-oriented. They learn better when teaching
techniques have involvement built in.
• They like to try new things out in a "safe'' atmosphere and get feedback.
• They like some challenge but they need a sense of accomplishment.
• Variety in teaching methods keeps them moving.
15
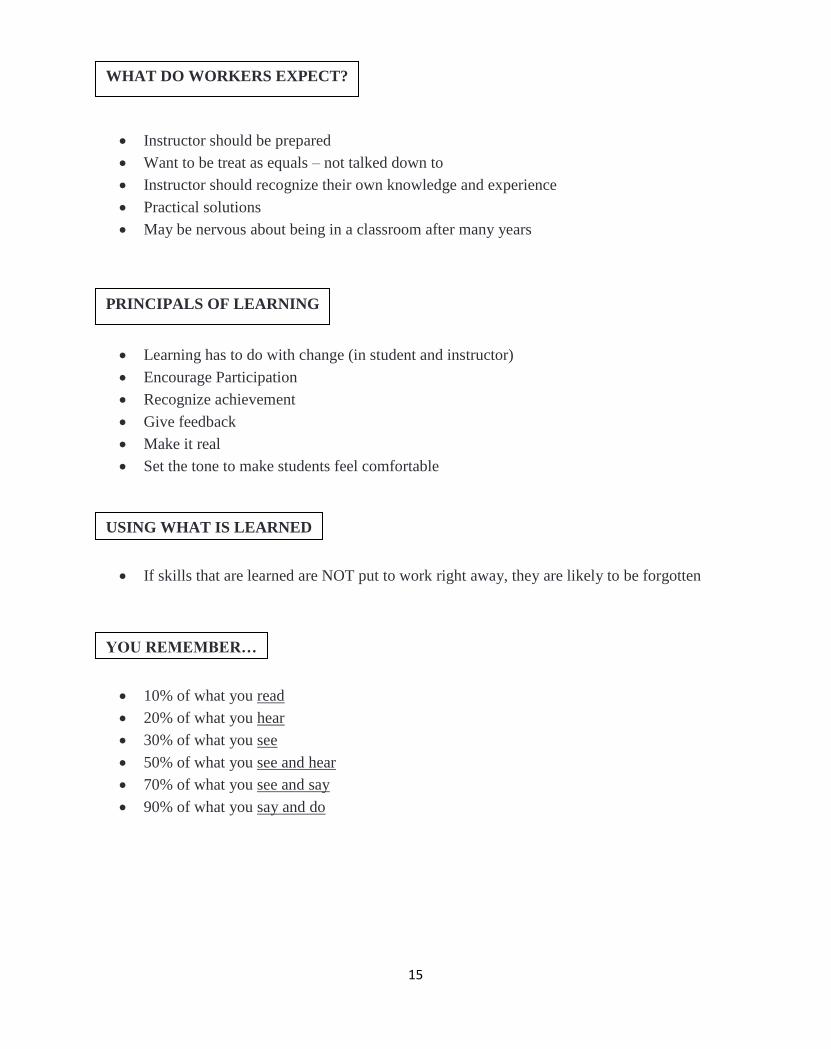
Instructor should be prepared
Want to be treat as equals – not talked down to
Instructor should recognize their own knowledge and experience
Practical solutions
May be nervous about being in a classroom after many years
Learning has to do with change (in student and instructor)
Encourage Participation
Recognize achievement
Give feedback
Make it real
Set the tone to make students feel comfortable
If skills that are learned are NOT put to work right away, they are likely to be forgotten
10% of what you read
20% of what you hear
30% of what you see
50% of what you see and hear
70% of what you see and say
90% of what you say and do
WHAT DO WORKERS EXPECT?
PRINCIPALS OF LEARNING
USING WHAT IS LEARNED
YOU REMEMBER…

16
Lead/ encourage discussions
Good listener
Encourage participation
Help summarize discussions
Show that you care
“Read” your audience
Class discussions
Small group activities
Hands-on practice
Encourage questions and comments
Creating a learning environment that meets the needs of adult learners is a key element of success-
ful adult education programs. The instructor should work to establish an atmosphere in which eve-
ryone feels free to participate, comment, question, react, and to learn and apply their-learning. The
initial task of the trainer is to “set the climate” so that it is conductive to participation and learning.
The challenge is to create a non-threatening atmosphere in which adults have permission and are
expected to share in the responsibility for their learning. The following are some strategies for ac-
complishing this:
Establish Adult-to-Adult Rapport. Use positive nonverbal communication, deal with the whole
person, address learners as equals, share authority, and employ informal room arrangements such as
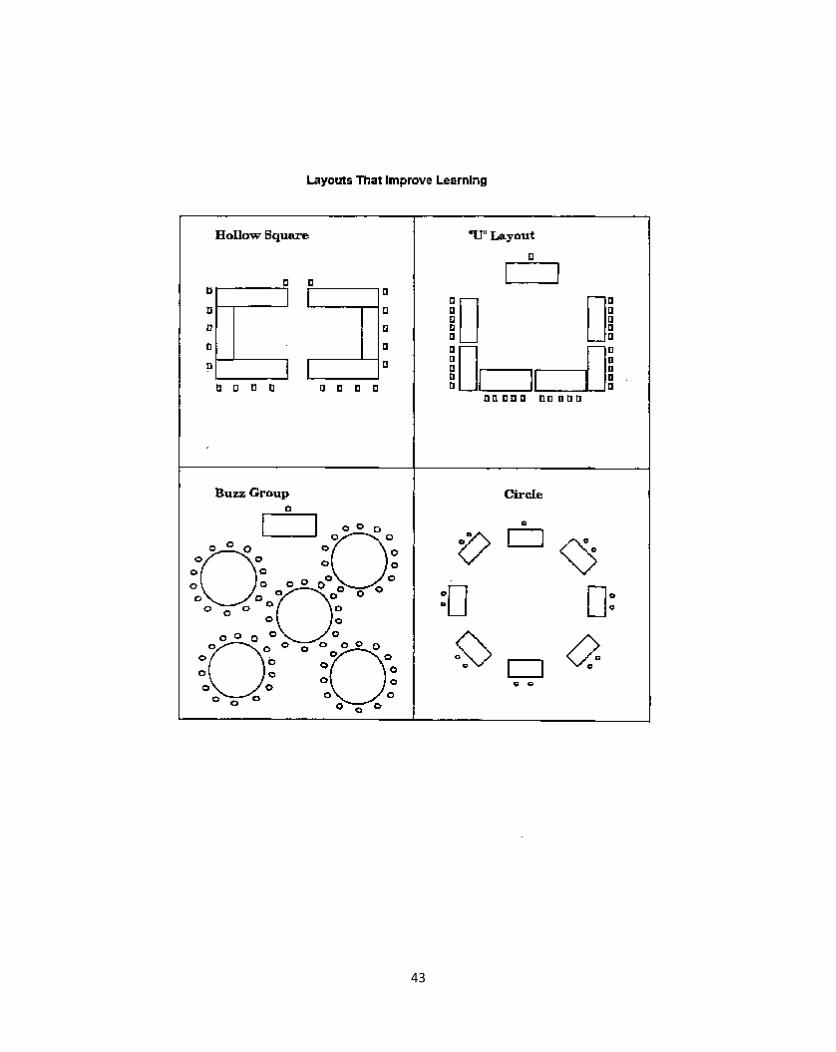
placing all the chairs in a circle, in a “U” or around a table. Adult students also appreciate instruc-
tors who share appropriate information about themselves and who are approachable and accessible.
Create a Participatory Environment. Involve the learners in deciding on course content and es-
tablishing class management guidelines, having learners serve a s instructional resources, and moni-
toring learners satisfaction throughout the activity. Providing multiple learning options, which ena-
bles learners to choose those methods and materials best suited to their needs, will also encourage
participation.
Facilitate Adult Independence. Encourage them to learn on their own, serving as a role model of
an independent adult learner, and teaching decision-making and problem-solving techniques.
FACILITATOR
HOW DO STUDENTS PARTICIPATE?
CREATE A CLIMATE FOR LEARNING
17
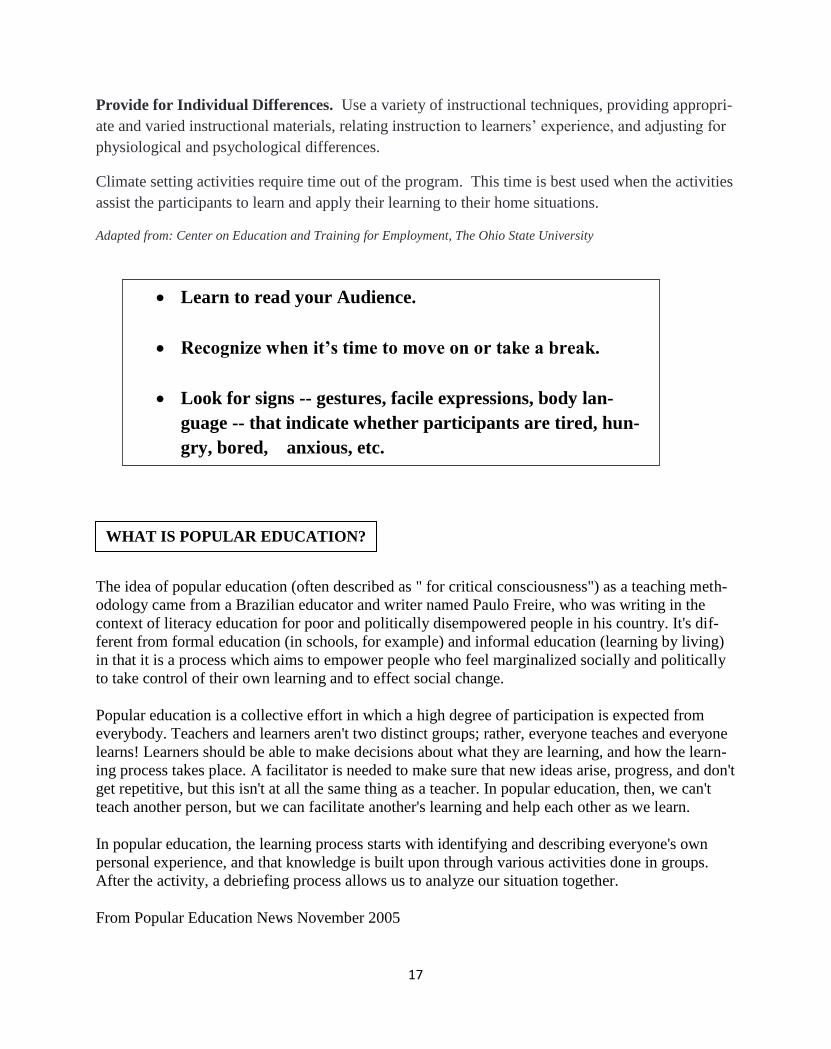
Provide for Individual Differences. Use a variety of instructional techniques, providing appropri-
ate and varied instructional materials, relating instruction to learners’ experience, and adjusting for
physiological and psychological differences.
Climate setting activities require time out of the program. This time is best used when the activities
assist the participants to learn and apply their learning to their home situations.
Adapted from: Center on Education and Training for Employment, The Ohio State University
The idea of popular education (often described as " for critical consciousness") as a teaching meth-
odology came from a Brazilian educator and writer named Paulo Freire, who was writing in the
context of literacy education for poor and politically disempowered people in his country. It's dif-
ferent from formal education (in schools, for example) and informal education (learning by living)
in that it is a process which aims to empower people who feel marginalized socially and politically
to take control of their own learning and to effect social change.
Popular education is a collective effort in which a high degree of participation is expected from
everybody. Teachers and learners aren't two distinct groups; rather, everyone teaches and everyone
learns! Learners should be able to make decisions about what they are learning, and how the learn-
ing process takes place. A facilitator is needed to make sure that new ideas arise, progress, and don't
get repetitive, but this isn't at all the same thing as a teacher. In popular education, then, we can't
teach another person, but we can facilitate another's learning and help each other as we learn.
In popular education, the learning process starts with identifying and describing everyone's own
personal experience, and that knowledge is built upon through various activities done in groups.
After the activity, a debriefing process allows us to analyze our situation together.
From Popular Education News November 2005
Learn to read your Audience.
Recognize when it’s time to move on or take a break.
Look for signs -- gestures, facile expressions, body lan-
guage -- that indicate whether participants are tired, hun-
gry, bored, anxious, etc.
WHAT IS POPULAR EDUCATION?
18
SECTION 2 – TEACHING TECHNIQUES
19
Description
Icebreakers – or warm-ups are a way of getting people to know each other, relax and feel a part of
the group, and prepare them for learning. They can also perform a valuable function in getting an
afternoon or evening program off to a good start.
When is it a useful teaching technique?
Use icebreakers to;
Acquaint participants with each other using non-threatening warm-up activities
Put participants at ease
Make a smooth start by introducing and focusing the program
Set the stage for the program
Introduce specific topics that may be developed in more detail later
Let participants know that they are responsible for their learning and that the trainers job is
to facilitate the learning
Revitalize a program that may have gone flat
How to conduct an Icebreaker
There are many different kinds of icebreakers. Most of them involve assigning the group a task
which will require the participants of the group to interact with each other and get to know each
other.
Some basic rules for Icebreakers
1. They should not be longer than 20 minutes or shorter than 5 minutes
2. They should involve active participation of all of the groups in giving information, per-
forming a task, solving a program or discussing an issue – perhaps brainstorming on an
issue.
3. A good icebreaker is participant-centered, not instructor-centered.
4. The icebreaker should be designed to involve everyone in an activity that helps them
feel at ease through interacting, moving, talking and relating to each other.
ICEBREAKERS
20
Introduction
This means asking each person to get up and introduce herself or himself. Tell them
to give their name, job title, state they are from, where they work, or whatever is rel-
evant to the class.
Pairs
Pair people up with someone they don’t know and give them 7 to 10 minutes to get
acquainted. Then ask each person to introduce his or her partner to the entire group
– name, department, job title, plus one interesting fact you have specified 9how long
has the person worked here?, or what is their reason for attending the class/, etc.)
Walk-around
Give everyone a 5x7 card and ask them to write one fact in each of the four corners.
Example; job title, hobby, favorite sport, where would you most like to be right now/
have them pin the cards on their shoulder or lapel, then ask them to get up and circu-
late around the room, saying hello to each other and talking about the items on their
cards. This takes about 10 minutes.
Buzz Groups/small Group Activities
Break up the class into buzz groups of 3 or 4 people they don’t know. The groups
can then have a discussion “task” set by the instructor. For example;
“Introduce yourselves and tell each other ….
How you happened to become (job title), or
What’s the main safety problem on your particular job, or
What do you want to learn in this class, etc.”
Reporting back – have each group appoint a chairperson or recorder who gives a three minute re-
port to the entire group on what the buzz group discussed. If you have the buzz group summarize
their discussion results on a piece of flip chart paper, they can post this up front and it will speed up
the reports.
Sample “Get Acquainted” Icebreaking Techniques
21
MAKING LECTURES EFFECTIVE
Description
A lecture is a presentation technique whereby the instructor presents facts and
ideas to a group and they listen (hopefully). It is a presentation technique.
The effective instructor works to …
• keep lectures short (10-15 minutes);
• make lectures easy to understand. WHEN is it a useful teaching technique? Use lectures to …
• give people information they don't have.
• provide an overview of a topic.
• save time. Lectures can cover a topic rapidly but people often
tune out and you can't be sure they understand you.
To be effective as an education technique, a good lecture needs to be followed up
with a participatory activity such as having participants fill out a questionnaire, par-
ticipate in a buzz group, discuss open-ended questions, observe and analyze a role
play, etc. HOW to prepare for a lecture
1. Make a detailed outline of your subject: two or three major points are
enough for 15 minutes.
2. As you write, ask yourself "Is this clear? "Is it easy to understand?"
• Use an example, a story, a comparison or an experience illus-
trate a point.
• Use the flip chart or overhead to reinforce major points.
• Use a handout (cartoon, map, diagram) to attract and focus partici
pants' attention.
3. Ask yourself "How can I get the participants into the act?"
• Ask them to raise hands to answer a question that may have
PRESENTATION TECHNIQUE
22
been posed earlier.
• Set up a buzz group to discuss a major point.
• Ask an open-ended question, then facilitate a mini-discussion.
4. Organize your material. The introduction outlines areas you intend to cover;
the body discusses these key areas; and the closing summarizes the main
points.
Presentation skills to enhance your lecture
1. Make eye contact with the participants. Staring over the heads of the partici
pants or down at your notes distracts your audience. 2. Stop to look at your notes as necessary. Pauses are OK. Be careful not to
read your notes. This is a definite turn-off to the participants. 3. Move around the room if possible varying your gestures and voice.
4. Use visual aids (flip charts, P o w e r P o i n t slides or handouts to pro-
vide variety in your lecture.
5. Try to avoid:
• Language that might offend someone
• Complicated terminology, acronyms
• Inappropriate jokes
• Use of tag questions at the end of sentences
such as - "okay"?, "all right?"
• Modifiers - "sort of', "kind of', etc.

23
Description
Group discussion is an exchange of ideas among participants of a group facilitated y the discussion
leader. The whole group participates in examining a problem or a concept and discovers the answer
together as a group.
WHEN is it a useful teaching technique?
Use discussion to …
• build understanding. By using discussion you can tell if the
group really understands, absorbs information.
• exchange information and experiences. Adults bring a lot of
knowledge to the class (as well as some misinformation). Discussion allows participants to share what they know/don't know about the subject.
• study and solve problems. The group can look at the cause of a
problem, examine facts, and arrive at solutions. For example, the rising cost of healthcare, w o r k e r i n j u r i e s , etc., lend themselves to discussion.
• change attitudes. If the purpose of the session is to broaden or
change attitudes, discussion can be particularly valuable. Subjects such as using personal protection equipment, organizing work to reduce stress, etc. can be effectively handled through discussion.
• determine the participants' needs. At the beginning of a session
the instructor may use discussion to hear why students are at-tending a session or what they hope to get out of a particular class.
DISCUSSION TECHNIQUES
24
HOW to prepare for a discussion
1. Make a teaching outline of the main points you want to cover.
Define the subject.
Briefly introduce the subject with some background information and indicate
why the subject is important to the group.
2. Decide how you are going to start the discussion. You could use a film or
videotape, a questionnaire, a mini-lecture, role play or just a provocative
question. These are called triggers.
3. Write out your discussion questions (and back-up questions) -- phrase them
carefully. HOW to lead a discussion
A good discussion is also dependent on the ability of the discussion leader to assist
the group in doing its job. The discussion facilitator should ...
• Make it clear that this session is going to be a group discussion
in which everyone's views are welcome. It is not a lecture.
• Start the discussion and see that the group follows the "ground
rules" indicated in the box.
• Lead the discussion by keeping things on track and by presenting
new questions to move the group on.
• Encourage wide participation from the group. Make sure that
one person does not dominate.
• Clarify and summarize points made by participants of the group that may not be entirely clear to others. The discussion leader can help clarify the issue by restating a point or by adding an il-lustration that will help point up what the person is saying.
25
GROUND RULES FOR DISCUSSION
• Discussion is a team effort. To be effective, there are certain
rules that need to be adhered to by everyone if the discussion
is to productive
• One person talks at a time.
• Everybody LISTENS.
• Look at the person who is talking and try to understand their point
- don't argue
mentally.
• Contribute your ideas - don't hang back.
Deal with one subject at a time -- stick to the point
The question is not only a useful tool, it is highly versatile. A good instructor tries to
talk as little as possible and makes the students do the talking. This is achieved by
asking the right kinds of questions. Questions can help you:
• Begin a discussion. The fastest way of getting a discussion under way
is to ask a thought-provoking question.
• . Arouse interest in the subject matter under discussion. A question
containing an element of controversy is most likely to achieve this.
• Direct the thinking of the group. Suppose your lesson deals with how to
get more people to vote in an election. You could ask “How much is this problem related to the fact that none of the candidates seem to be interested in everyday people?”
• Determine the students' understanding or knowledge. You have taught the concept of inflation and now you wish to know whether they now what inflation is. Simply asking them, "What do we mean by infla-tion?" will let you know whether they have the idea or not. If you wish to test their understanding, all you need do is ask this question:
HOW TO USE QUESTIONS
26
"How can one tell whether there is inflation?"
• Get participation from a particular student. You can call a student's name
and ask he/she the question directly. A word of caution, if you use this
approach make sure that you have established a climate in which the
participants do not feel put on the spot or embarrassed.
• Obtain information or opinions. For example: “Why do some peo-
ple refuse to get flu shots?” TECHNIQUES FOR ASKING QUESTIONS For maximum effect, the manner, as well as the right question, is important. Here are suggestions which you might consider:
Vary your questions. You’ll get more participation if you ask “open-ended questions for which there is no single “right” or “wrong” answer, but several possible responses.
Speak distinctly so everyone can hear the question.
Listen carefully to the reply to your question.
Reword a question if it’s not clear and you are getting a poor response. Give example to clarify the meaning.
Don’t put a student down if you don’t like the answer they’ve given. A stu-dent who feels put down or criticized will stop talking and the rest of the class will be hesitant to offer any input.
Encourage students to ask questions and repeat them to make sure that eve-ryone was able to hear.
To help you begin a discussion, or to find out how much your participants know or whether they have mastered a certain topic, it may be wise to photocopy a series of questions into a “questionnaire” format. Such a questionnaire makes for direct partic-ipation by the participants and shifts attention from the instructor to the questions. It is particularly useful if you are inclined to be nervous.
________________________ Adapted from: Teaching Methods and Techniques in Labor Education”, S.Fanny Simon.

27
HANDLING DISCUSSION
Some Dos and Don'ts:
Do try to include everyone.
Don't depend only on those who are the most outspoken and eager.
Be democratic. Call on everyone. Draw out the shy people by asking them questions you
know they can handle.
In short, include people, but take care not to embarrass people or put them on the spot.
Don't put people down. EVER. Even if some people's comments seem totally
inappropriate, try to find ways to redirect the comment. Look for the grain of
truth in their comment and ask someone else to expand on it. Or repeat the
question in another way. You may not have been clear about what you were
asking.
Do stop people from going off on tangents, or speaking at great length. It's
O.K. to interrupt people politely, for example: "We're going to have to stick
more closely to the question,-", "We won't have time to take up every important
issue in this class" (and suggest another way for them to pursue the issue),
"Excuse me, but in order for everyone to speak, we have to limit our time;" or
"Could you try to sum-up what you are saying?, I'm, sorry, but because of time,
we're going to have to move on."
Occasionally, a class goes off on a tangent that is of such pressing interest to
everyone that you need to try to take the time to address it. You have to use
your own judgment about what is most important and useful for the whole
group. If you are clear on the goals of the activity--you will probably be able to
tell a "productive" diversion from a "destructive" diversion.
Don't expect to have all the answers. Questions will always come up that the
instructors can't answer. This is not a weakness, it's natural. Don't fake it. Say
you don't know and offer to try to find out; suggest how they might find out; ask
if others in the room may know, etc. (If it’s a technical question about ergonomics, you can
call Scott.)

28
• Do expect people to have fun. The class is a rare opportunity for people to
share and learn together. There's bound to be some good humor. Learning
should be fun, and if there's some merriment it doesn't necessarily mean
people aren't taking you or the class seriously.
• Don't expect perfection. In most classes, there are some rough spots, little
things that don't go exactly as you expected. Be flexible and try to hold on to
your sense of humor. The important thing is that you are helping to give people
a chance to work together on issues that concern them.

29
Description
Brainstorming is a situation where all participants of a group spontaneously offer
ideas on a problem or question. The aim is to be creative and produce a lot of ide-
as. WHEN is it a useful teaching technique?
Use brainstorming when you want to ...
• involve the entire group in the generation of ideas to solve a problem
or address a particular situation
• stimulate the creative thinking capabilities of the group
• change pace – energize the
group
HOW to CONDUCT BRAINSTORMING
1. The instructor needs to explain the rules of brainstorming to the group --
. respond in a
few words any
idea is okay
no evaluation is allowed-- no one can say "that's a lousy
idea"
2. Explain the question or problem for the brainstorm. For example, you can
have people brainstorm about how to do a particular job more safely. 3. The group should respond quickly, one at a time, while the instructor records
the ideas on a flip chart or blackboard. (The instructor usually does not
contribute ideas in this process, but acts as the recorder and to summa-rize.) To keep up momentum, the instructor must be enthusiastic, "great
idea", "let's go", "ready for the next one", etc.
BRAINSTORMING
30
4. Ask the group to put judgment and evaluation temporarily aside:.
Acquire a "try anything" attitude.
No fault finding is allowed. It stifles ideas, halts associ-
ation. Today's criticism may kill future ideas.
All ideas are at least thought starters.
5. Tell the group to turn their imagination loose.
The wilder the ideas the better.
Free wheeling is encouraged, ideas can be brought down to
earth later.
A wild idea may be the only way to bring out another really
good one.
6. Encourage participants to think of as many ideas as they
can: Quantity breeds quality.
The more ideas to choose from, the more chance of a good
one.
There is always more than one good solution to any problem.
7. Ideas can be combined and improved.
The ideas don't all have to be original.
Improve on the ideas of others.
Combine previously mentioned
ideas.
Brainstorming is a group activity. Take advantage of group
association.
8. Once all ideas have been exhausted, the instructor may wish to go back over
the list to provide an opportunity for any last minute thoughts. 9. Evaluate the list (either at the current session or plan for a future session).
The group can then:
prioritize the ideas-- which are most important?
combine ideas
use the ideas as a basis for solving the original problem
31
CASE METHOD
The case method presents a record of realistic situation, complete with the problems that exist in it, but offers no conclusions. The case method requires the class to consider a problem, much as they would have to do in real life, and to use both facts and judgment in solving the problem. WHEN is it a useful teaching technique? Use the case method to …
Improve critical-thinking, problem-solving, and decision-making skills Solve an actual policy, administrative, or implementation problem
Get the group to think concretely about a problem
Preparing a Case
1. Identify the session objectives. What learning needs must the case address? 2. Indentify the central case situation. Based on the learning needs of the participants, what
should be the central case issue?
3. Chose the case situation. There are all kinds of cases, ranging from brief and simple problems to long and complicated situations. Usually in the briefer problem, the answer is more clear-cut than in the longer case since there are characteristics of a good case:
It is specific as to detail, yet can be handled in several different ways. It is interesting and realistic. It forces the class to take facts into account and exercise judgment in handling the problem.
4. Plan your case research. Where will you find the information you
need to develop a "true-to-life" situation.
5. Conduct your case research. Gather data through interviews,
observation, documentation.
6. Write the case. Describe the events, circumstances, and characters of the case situation. Write in the active voice, i.e. "Bob Smith was on
a break when ..." Present the organizational background infor-mation that's relevant to the situation. Include dialogue between
characters if you have actual quotes or information from which you can create quotes. Change the names of the people who went through
the situation, and change them to names that could be either male or female (e.g. Lee, Pat, Terry). Cover the situation completely, but do
not include unnecessary details.
DISCUSSION TECHNIQUES
32
HOW to conduct a session using a Case
1. Review the objectives of the case method session: to improve
communication and interaction skills, etc.
2. Briefly describe the case method process:
Participants independently read the case, analyze the data,
and develop possible solutions to the case issues.
Participants consider and debate possible solutions in a group
discussion. Instructor summarizes the discussion, asks partici-
pants to draw case conclusions, and highlights lessons learned.
3. Explain the ground rules of the session:
All participants will take an active part in the discussion,
presenting their opinions and defending them with evidence and
reason.
participants will consider fully the contributions of others in the
group; participants will challenge but not criticize others'
viewpoints and suggestions.
Unless the objective of the session is to solve a problem the
group currently is facing, participants will keep in mind that a
main purpose of the discussion is not to develop a group con-
sensus, but rather to help participants see alternative solu-
tions and refine their thinking.
Let the trainees come to their own conclusions about the case. The instructor will contribute to the discussion only as needed, providing feedback but not "answers".
4. Distribute copies of the case. Read it aloud to the class, then suggest
that the participants read the case again carefully, underlining
key facts. Instruct participants to develop possible solutions to the
case issues as they are reading, solutions supported by evidence
in the case. Allow ample time for careful reading.
5. Allow ample time for a comprehensive discussion, one that will in-
clude presentation and debate on many viewpoints.
6. Summarize the discussion by restating the various viewpoints with
their key supporting evidence.
33
Small Group Activities
Many teachers have found that small group activities are a useful way to teach. Here's
why:
1. Small group activities encourage active participation on the part of the
students. Education need not be a boring, negative experience where the
students are expected to sit back and passively absorb what is being
said by the teacher or videotape.
2. Exercises help break the mold that the teacher is the all knowing
authority figure. Everyone has had experiences at work and in life that
can be very instructive for co-workers to hear about. Exercises give
people a chance to share experiences, which is the method by
which they have gained the most knowledge.
3. Exercises allow students to solve problems among themselves, especially when there is no
clear answer. They will learn from each other in the process.
4. The purpose of health and safety education is to identify, evaluate and
control hazards on the job. Small group exercises help students develop
skills such as problem solving, that they will need when they go back to
their workplaces.
5. Small group activities help create a warm relaxed atmosphere in the
class, so that people will feel comfortable in being there.
6. Small group activities help give the instructor an indication of how well
the students are absorbing the content of what's being discussed.
How to Work with Small Group Activities
1. Most of the activities for the ergonomics training have been designed for groups
of 4 to 6 people. If you have a very small class, you may not be able to divide the class into
groups. They can discuss things among themselves in a single small group.
Discussion Techniques
34
2. Whole group discussions are also useful, especially for general brainstorming sessions or to in-
troduce a new topic. They do not replace small group activities.
3. Group Selection: There is no one way to set up small groups. Sometimes it makes the most
sense for people who work together to be in the same group because they share common issues
and concerns. Other times it might be better to mix up groups so they get a broader sense that
not just their floor or unit share the same concerns.
4. Setting up the activity: Be very clear about what you expect them to do. Are they supposed to
think about an issue and then write down there thoughts on a sheet of flip chart paper? Are they
supposed to come up with 3 things they think are most important? Be sure they know what to
do. It is also important to tell them how much time they have.
5. Monitor Progress: During the activity, walk around the room periodically to see how the dis-
cussions are going. Are they actively engaged? Do they seem to be hung up on something? If
so, clarify what they are to be doing. Act as a facilitator and resource, but DO NOT comment on
whether you think they are “right” or “wrong”. Let them know 3-5 minutes before their time is
up, so they can finish. If one group has finished and another is still working, encourage that
group to finish up. Sometimes groups get so involved, that they take more time than was allo-
cated. If this happens. Use your judgment. If you can spare a few extra minutes, let them know
that they will have a bit more time.
6. Each group should select a person who will report back to the main
body during the "report back". This function should rotate with each
exercise, so that more than one person gets experience doing this.
Before the groups get started, remind them to select the reporter. If you
see a group hesitating too long on this, you may try to appoint someone yourself. Usually that
stimulates the group to act quickly.
7. List Making During Report Back
Report backs can become very time-consuming. Here are some ways
to limit discussion, while still having each group participate in the
session:
Ask each group to tell only one or two of the most important
things that came up in their discussion. This is especially
important if you have 3 or more groups.
After the first couple of groups report, ask the remaining groups
to list only things that haven't been brought up yet.
35
DO NOT FEEL COMPELLED TO - MAKE THE LIST COMPLETE. The idea of
the exercise is to give people a sense of what the list can cover. You can
mention a few additional items and then direct people to their handouts for
more information.
Parking Lot
Sometimes an important question will come up that you are planning to cover later in the course.
Or it may be an issue that you need to do some follow-up with someone else in the center. You can
set up a ”Parking Lot” Label a flip chart sheet as a parking lot and write down any answers that
need to be dealt with later. It will help you remember to cover that particular point. It also shows
that you are taking the students’ concerns seriously.
36
USING FLIP CHARTS EFFECTIVELY
Writing key phrases on the flip chart reinforces learning. Students can see, as well as
hear, what is being talked about. They remember more when they use both eyes and
ears.
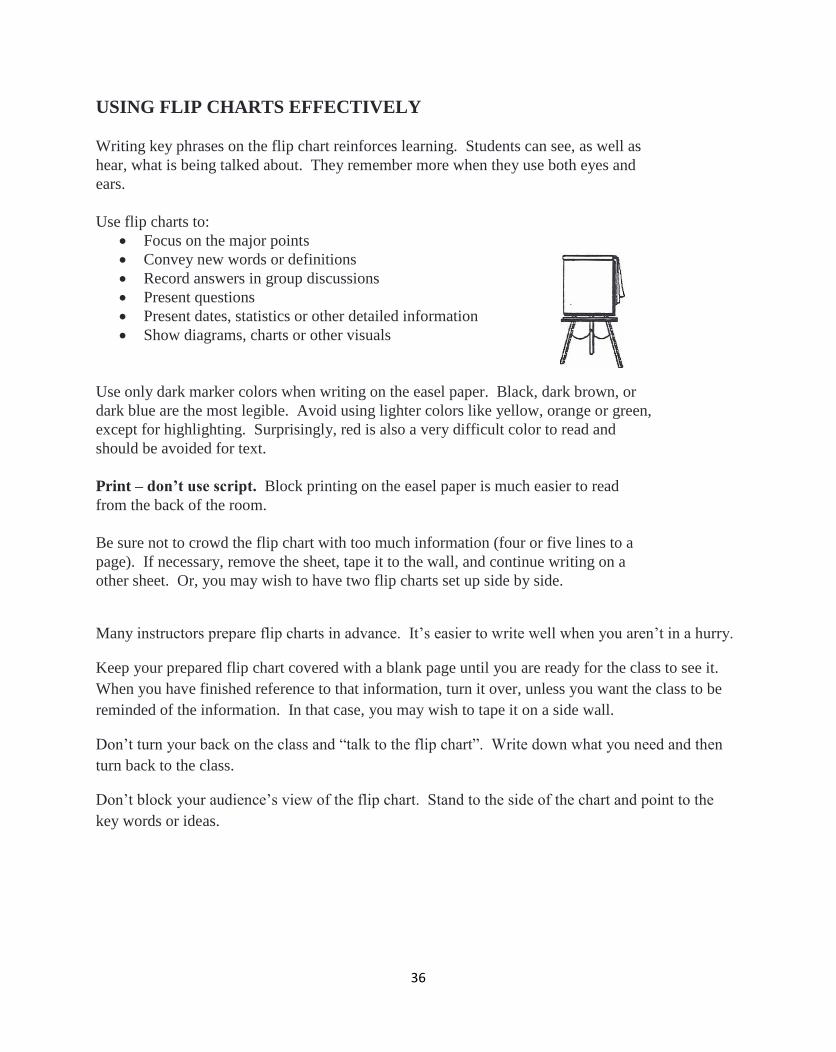
Use flip charts to:
Focus on the major points
Convey new words or definitions
Record answers in group discussions
Present questions
Present dates, statistics or other detailed information
Show diagrams, charts or other visuals
Use only dark marker colors when writing on the easel paper. Black, dark brown, or
dark blue are the most legible. Avoid using lighter colors like yellow, orange or green,
except for highlighting. Surprisingly, red is also a very difficult color to read and
should be avoided for text.
Print – don’t use script. Block printing on the easel paper is much easier to read
from the back of the room.
Be sure not to crowd the flip chart with too much information (four or five lines to a
page). If necessary, remove the sheet, tape it to the wall, and continue writing on a
other sheet. Or, you may wish to have two flip charts set up side by side.
Many instructors prepare flip charts in advance. It’s easier to write well when you aren’t in a hurry.
Keep your prepared flip chart covered with a blank page until you are ready for the class to see it.
When you have finished reference to that information, turn it over, unless you want the class to be
reminded of the information. In that case, you may wish to tape it on a side wall.
Don’t turn your back on the class and “talk to the flip chart”. Write down what you need and then
turn back to the class.
Don’t block your audience’s view of the flip chart. Stand to the side of the chart and point to the
key words or ideas.
37
38

39
REMEMBER….
What Can Instructors Do?
Use as little lecture as possible
Act as a facilitator not an all-knowing teacher
Have participants solve problems themselves or use references
Participants shouldn’t be expected to be able to remember huge amounts of information from memory.
Good instructors don’t supply answers that can be found in technical reference materi-
als. Use your imagination to find ways of working participants through the materials to
learn all areas of the books.
Case studies also help technical training work and easily lead into simple role plays. An instructor can set up a situation in which a worker asks a safe-ty and health director what to do with a certain chemical. Instead of the instructor providing the response, it would be opened up to the whole class for input into handling the situation --just like in real life.
Memorization is NOT Education
Participants learn best through:
Discussion
Problem-solving
Doing
40
SECTION 3 -- TEACHING ESSENTIALS
41
It is difficult to tell someone how to teach. Two good instructors do not use the same
approach. Personalities, amount of information and viewpoints are never identical.
But there are some ideas about teaching that should be considered by any teacher.
Some would say that all you need to remember is to prepare adequately and then
don’t talk too much. In most cases, however, a little more is necessary, thus the fo l-
lowing suggestions.
If you are to teach effectively, you should know as much as possible about the people
you will teach. Certain thoughts and questions are in their minds; some of which will
help them learn, some will interfere with their learning.
Instructors are usually quite concerned with gathering materials, presenting them in a
proper manner, leaving time for questions, starting and stopping on time, etc. With
all these things on their minds, they sometimes forget the problems of the learners.
We will look at the class for a while from the viewpoint of the learners.
1. Why are they here?
Were they sent by someone else because the other people thought the program
was important?
Did they come because they strongly desire to learn what you are teaching?
Are they here out of curiosity?
2. Do they know what the class will consist of? If not, they will be happy to have
an overview of the course.
3. What would be a good introduction to the course?
4. Do the participants think of it as their class or yours? If they think of it as
yours, they are likely to let you do all the talking while they take a passive role.
How can you help them think of the class as theirs?
CHECKLIST ON EFFECTIVE TEACHING SKILLS
THE PARTICIPANTS’ VIEW OF THE CLASS
42
5. If they have been away from school a long time, they will not be at ease in a
classroom, especially during the first class. What are some ways of putting
them at ease?
Students must do something in class occasionally-- otherwise it will remain your class rather
than theirs.
There is much less chance that they will be bored if they occasionally have to write the answer to a question, copy something from the blackboard, solve a problem, make suggestions, or answer a question verbally.
The physical setting in which education takes place can stimulate learning or block it. The im-
portance of the physical environment is often overlooked by instructors because they feel that they
have little or no control over it, or they don’t realize its impact on teaching/learning. Here are sever-
al suggestions that will make your group comfortable and will create a physical climate conducive to
learning.
1. A room with movable chairs and tables is important so they can be grouped or placed around
in a circle or “U” shape. Fixed auditorium seats are not the ideal for educational programs
but worker educators often have no choice. IF this is the situation, be creative and have par-
ticipants turn around to face in each for short group activities or use pairs and triads.
2. Plenty of light and ventilation in the room is important.
3. For each session, you should have a blackboard, chalk and eraser; a flip chart and markers;
or an overhead projector and screen. Whatever “too;” you decide to use, make sure that is
can be seen by all and read easily.
4. Avoid being glued to the “head table” or podium because it can create unnecessary barriers.
Move out into the group whenever possible to encourage active participation.
5. Check the location of clocks, windows, columns and any other room fixtures that may be dis-
tracting.
6. Speak loud enough and clearly so that everyone can hear you without straining. If a micro-
phone is necessary to accomplish this, use it.
7. Time use is important. Allow enough time for breaks, meals, socializing when participants
can move.
SETTING THE PHYSICAL CLIMATE FOR LEARNING
43
44
A brief review of the previous session is valuable in orienting the students.
e.g., “Last week we discussed some of the major problems involved in protect-
ing workers. Some of these were …”
Briefly state what we are going to do today. e.g., ''Today we are going to
concentrate on how to prevent trips and falls."
During the last few minutes of class you may wish to briefly summarize
the main points of today's class.
Whenever possible, the students should be given something to prepare for
the next class. The assignment need not be a long or complicated one. Its
main purpose is to get the students to think about the issues being covered
in class. I t helps to head off the problem of students coming into class
"cold." Examples of materials students can work on between classes: five
true or false statements to analyze; a specific problem to solve; a brief
reading assignment; a case study that has no definite best answer.
Sometimes you will sense that a class is falling flat. It will be difficult to reverse the trend. There are, however, some ways to change the class pattern.
• A short break will give you a chance to make fresh start.
• Give the class five minutes to solve a problem you have previ-
ously prepared.
• Raise a controversial point or present a paradox.
• Give a very short quiz consisting of five or ten statements on
which they must agree or disagree. (This has to be prepared before
class.)
• Hand out a very short article for them to read, analyze and comment
on.
You must really be prepared for class. Experienced teachers say that when you teach a class without thorough preparation you are simply hoping for the best. Classes
will often be dull and students will not return. An added dividend to be gained from thorough preparation is the feeling of confidence you take to the classroom.
SETTING THE STAGE FOR EACH CLASS
45
• How do you know they are receiving you if you do not sound them out
frequently?
• Attention span is very short -- thus variety in methods becomes
important.
• We tend to try to cover too much! You can cover ten hours of material
in five by talking fast -- but nothing would be learned.
• Sometimes lecture overpowers or simply entertains. Remember learn-
ing is a two-way process.
• Occasionally tell a story to illustrate a
point.
• Never reject outright what students can offer. Ask them to put it in
other words. Ask a leading question to get them back to the point.
• Occasionally use a personal experience to illustrate a
point.
• Buzzing in the background must be stopped. The class falls apart if
students are permitted to talk freely while the class is in progress.
"Can't hear what Tom has to say," is better than "Be quiet."
• Give students a chance to come up with answers -- don't give them all
yourself. Throw questions back at the group sometimes.
• Over a period of time you should direct questions toward each student
remembering that the more difficult questions may embarrass the stu-dent who knows little about the subject.
HINTS ON TEACHING

46
1. In general, how did you feel the class went?
2. How did you feel (about yourself) while teaching today's class?
3. How did you feel about the students in today's class?
4. Is there anything that worked well for you in class today-- that you particularly
liked? Does that usually go well?
5. Is there anything that did not work well-- that you disliked about the Class? Is that
typically a problem area for you?
6. What were your teaching strengths? Did you notice anything you im-
proved on or any personal goals you met?
7. What were your teaching problems -- areas that still need improvement?
8. What teaching problem will you focus on for the next class? Do you
have any suggestions or strategies for change?
AFTER CLASS, ASK YOURSELF ...
47
A Teaching Outline Must:
Fit the subject
Fit the group
Fit the time available
First – Do Some Thinking
Analyze the group
Who are they?
What do they already know (or not know) about this subject?
How can you arouse their interest?
Why is this important to them?
Set specific objectives.
What do you want the group to “learn”?
Jot down three or four specific points.
Second – Draft an Outline
What are the major points to be covered?
What will you put first, second, etc.
What techniques will you use?
How will you get participation and involvement? (usually through discussion, buzz
groups, role play and discussion, practice, reports from individuals or groups)
How will you provide a sense of structure, order and progress? (usually through lecture,
mini-summaries, use of flip charts, “let’s move on”, use of written materials)
How long will each point (or section) take? Time it.
Third – Polish the Outline
Write out the plan – with your comments, questions, techniques.
Prepare the introduction – to explain what the class will cover and to hook their interest.
Prepare your summary – and decide where you will give mini-summaries.
PREPARING A TEACHING OUTLINE

48
STEPS IN MAKING A TEACHING OUTLINE
1. Analyze Group
2. Set Objectives
3. Outline Major Points
4. Select Techniques
5. Figure Time
6. Polish Outline
7. Write Intro and Summary
49
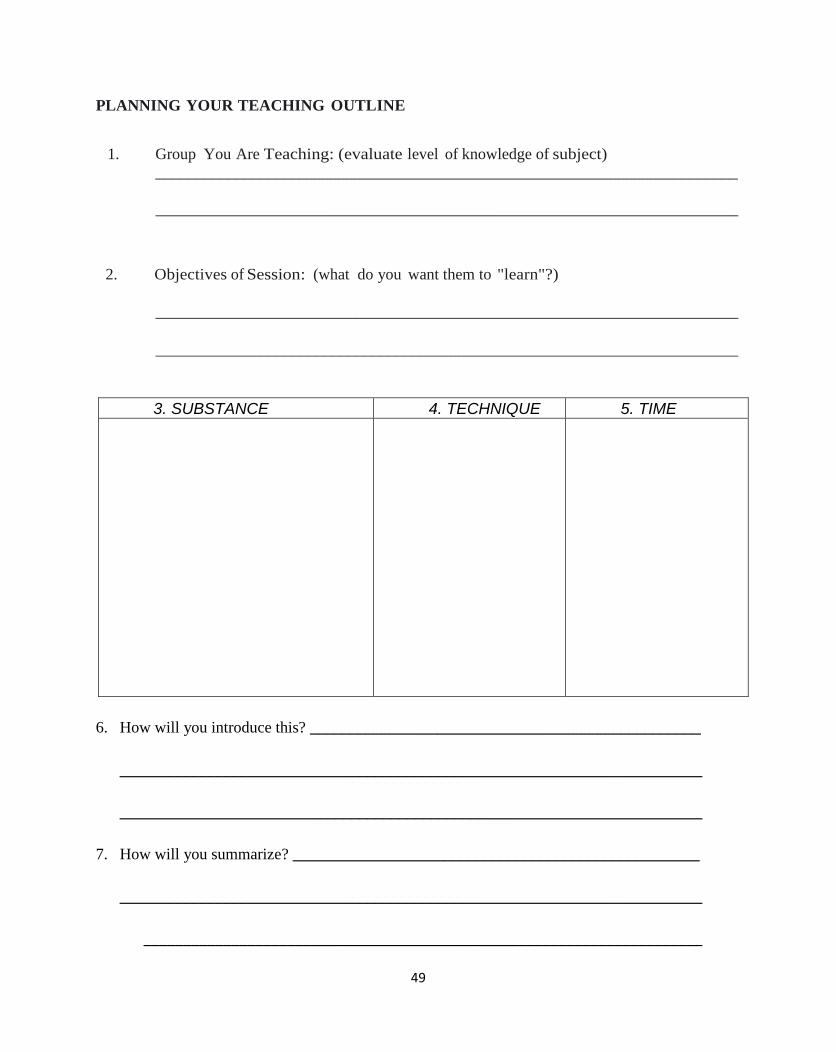
PLANNING YOUR TEACHING OUTLINE
1. Group You Are Teaching: (evaluate level of knowledge of subject)
_________________________________________________________________________
_________________________________________________________________________
2. Objectives of Session: (what do you want them to "learn"?)
_________________________________________________________________________
_________________________________________________________________________
3. SUBSTANCE 4. TECHNIQUE 5. TIME
6. How will you introduce this? _________________________________________________
_________________________________________________________________________
_________________________________________________________________________
7. How will you summarize? ___________________________________________________
_________________________________________________________________________
______________________________________________________________________
50
When you are learning to do something new, whether it’s riding a bike or making a speech, you
need FEEDBACK. You need to know what you did well and how you can improve.
GIVING FEEDBACK
Feedback can come from a friend or a teacher. When you are the person giving feedback, your goal
is to help the other person learn and develop. Good feedback required a helpful spirit, not lengthy
critical analysis.
Start by asking the person how they felt. Often they are more critical of themselves that you are.
Sometimes they have questions. “Did I talk loud enough?” or “What should I do when …?"
Follow these guidelines….
1. Be positive. Tell the person exactly what you thought they did well.
“I liked your introduction. It made me see why this topic is important”
2. Be specific.
“It’s great” is ok, but not of much help. Better is, “I thought you used the flipchart well to
list the main points.”
3. Phrase critical comments carefully.
A. Suggest another way of doing it.
“Your talk would be more interesting if you gave examples.”
“When the discussion gets off track, perhaps you could have asked another question to
bring it back”
“It would have made it clearer for me if you had written those names on the flip
chart.”
B. Avoid saying “You should….” or “You shouldn’t…” Give personal reaction
How you felt
“When Joe made the point that …, I felt you ignored it (changed the subject, etc.)”
GIVING AND RECEIVNG FEEDBACK
51
4. Make the feedback suit the person’s knowledge or skill. Is he or she a beginner or a pro?
For example
A person learning to swim can work on their arm stroke or their leg kick not both at
the same time.
Similarly, a person learning to teach cannot guide discussion as well as an experienced instruct
tor. Feedback will help most if only two or three suggestions are given at any one time
RECEIVING FEEDBACK
Receiving feedback takes trust. Try to listen to what is said and see what the per-
son is getting at.
1. Hear feedback as someone being helpful and helping you learn. Try not to
be defensive.
2. If you want feedback on a particular point, ask for it.
3. Show that you appreciate the comments being offered. "Thank you" or
"What would have been more effective?" are responses you might make. 4. Listen carefully and check to make sure that what you heard is what the oth-
er person was saying.
5. If you have had enough. say so. "I want to think about that later" or "That's all
for now."
52
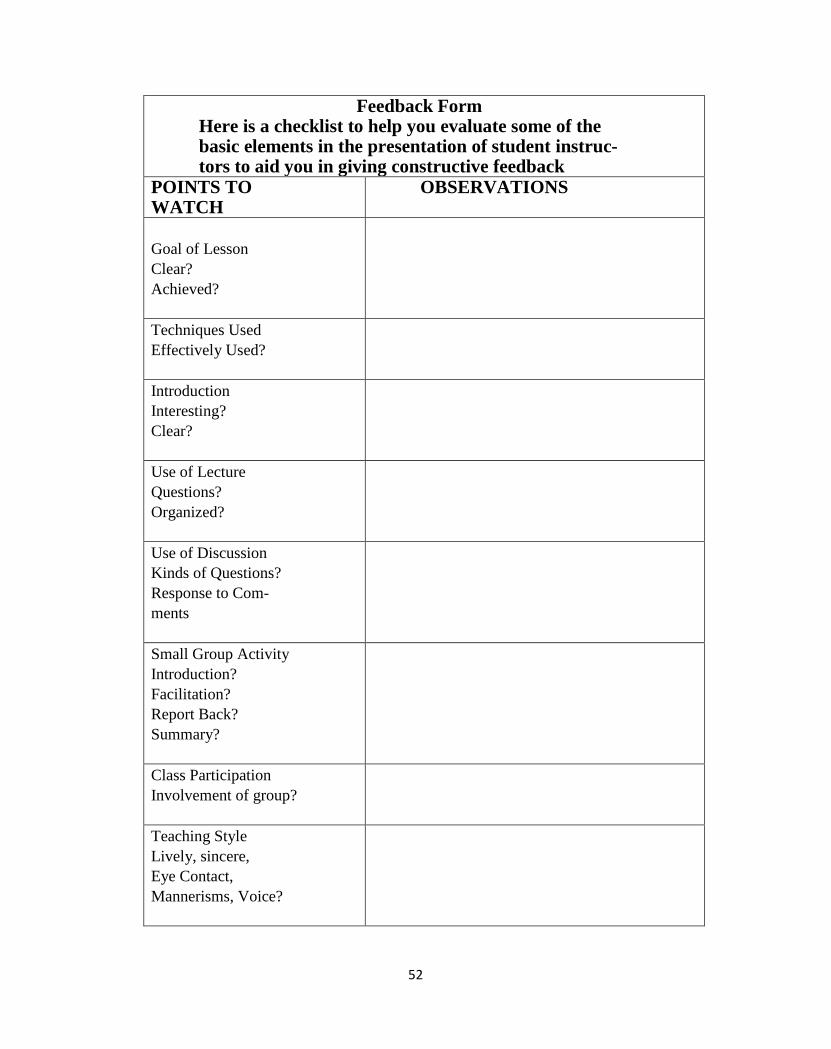
Feedback Form Here is a checklist to help you evaluate some of the basic elements in the presentation of student instruc-tors to aid you in giving constructive feedback
POINTS TO WATCH
OBSERVATIONS
Goal of Lesson
Clear?
Achieved?
Techniques Used
Effectively Used?
Introduction
Interesting?
Clear?
Use of Lecture
Questions?
Organized?
Use of Discussion
Kinds of Questions?
Response to Com-
ments
Small Group Activity
Introduction?
Facilitation?
Report Back?
Summary?
Class Participation
Involvement of group?
Teaching Style
Lively, sincere,
Eye Contact,
Mannerisms, Voice?

53
Section 4 -- EVALUATION
54
You’ve just finished a training session, you feel it went well, the participants seemed satisfied, but
you’re just not sure if it was really successful. You wish there was a way to know if anything need-
ed to be changed, if you were able to meet the students learning needs, if the program was effective,
etc.
A program evaluation can give insight into these areas. By evaluation, we mean the various tech-
niques and activities which:
help the instructor, as well as the participants, measure the amount and kind of learning
which has occurred;
help the instructor receive input on the effectiveness of the content, environment and facili-
ties, techniques, aids, etc.;
help the instructor receive constructive feedback on his/her own performance
WHY Evaluate?
Worker education begins with the identification of learning needs. Based on these needs, learning
objectives are formulation. The rest of the program planning and course preparation is directed to
the eventual delivery of a learning program designed to meet these objectives.
It is, therefore, of critical importance that instructors be able to answer certain questions about a
program, such as: Have the learning objectives been met? Has the desired change in skill,
knowledge or attitude actually occurred? None of these questions can be answered unless we eval-
uate.
There are other reasons why evaluation is important. Unless the opportunity for self-evaluation is
systematically build into learning programs, it is very difficult for the participants to assess their
own progress. Since each participant must ultimately be relied upon to apply new knowledge, this
personal assessment (usually call “self-evaluation) must occur.
PROGRAM EVALUATION
55
The various things that should be measured through evaluation include:
1. The learner’s own sense of progress towards the objectives of the program.
2. The degree of change in knowledge, awareness, attitude or skill, based on the stated objec-
tives of the program.
3. The appropriateness and usefulness of various environmental considerations such as loca-
tion, physical setting, schedule, meals, etc.
4. The effectiveness of the various techniques used—group discussion, lecture, role playing,
etc.
5. The usefulness of the various aids used—handouts, films/videotapes, overhead transparen-
cies, etc.
6. The appropriateness and the level of the course content.
7. The performance, in terms of effectiveness, of the instructor.
There is not a single best way to evaluate. In fact, regardless of the kind of educational program
involved, it is advisable to use a variety of approaches. The specific approaches used will depend
on such considerations as the style of the instructor, the level of the participants, the amount of time
available, and most importantly, the nature of the learning objectives.
Basic evaluation approaches include; observation, practice, questionnaires, and follow-up surveys.
1. Observation
Observation is the instructor just being alerted to what is happening in the classroom. While
observation does not fall into the category of hard data gathering and should never be exclu-
sively relied upon, it is an important source of information that should be considered part of
our overall evaluation package. This is especially true because it is one of the few avenues
for on-going or continuous evaluation.
If participants are arriving late for sessions, obviously not paying attention, rarely asking
questions, etc., something is wrong. If the room is too small or poorly ventilated – that will
become obvious long before participants get around to filling out a formal/written evalua-
tion. These and other matters can often be dealt with ‘on the spot’.
What to Evaluate
How to Evaluate

56
2. Practice
Using protective equipment; practicing safe work practices. These are learning applications
that can be built into the program format and evaluated by both the instructor and the partic-
ipants as to skills acquired.
3. Questionnaires
Questionnaires are probably the most common form of evaluation in worker education pro-
grams. They are usually distributed at the end of the session or program. Questionnaires
are useful for a number of reasons, but two notable benefits are: the questionnaire can pro-
vide a source of measuring any differences from on program to another (this allows the in-
structor to better gauge the impact of any changes made in the program); and the question-
naire can provide a format for participants who prefer to write their comments anonymous-
ly.
4. Follow-up Surveys
Follow-up surveys are those sent out to participants some time after completion of the pro-
gram. They are especially useful for obtaining input regarding the effect the learning pro-
gram has had on their day-to-day performance. It can also give people the chance to express
ideas that occur to them after they have had an opportunity to reflect on their experiences.
In summary, evaluations need to be conducted primarily to determine whether the program
accomplished what is started out to do. Did it meet its objectives? If this thought is con-
stantly at the front of the instructor’s mind, the class will not only stay on target, but even
more importantly will contribute to better and more effective training programs in the fu-
ture.
57
1. Always give participants enough time to complete evaluation forms in class. “Take-home”
forms usually stay there. If you only save the last few minutes for the session for evalua-
tion, the forms will show tell-tale signs of the time crunch; hurried and incomplete respons-
es. Before the wrap-up segment of the program, put aside some time to review the program
and answer questions about the evaluation forms.
2. To get a comprehensive picture of your program, try to ask the same number of questions
about both strengths and weaknesses. A “mixed review” can be more accurate and helpful
than overly positive or negative responses.
3. Evaluation more than one time during the training if possible. An eight-hour workshop can
be evaluated at mid-point and improved for the remaining half. If you only evaluate at the
end, you won’t be able to share comments, use suggestions, or follow-up for additional in-
formation.
4. When it isn’t feasible to stop and evaluation the program at different points, use a method of
ongoing evaluation, such as observation. Instead of evaluating only at the end of the pro-
gram (during long programs it can be difficult to remember important details), hand out
evaluation forms at the beginning and instruct learners when and how to fill them out. Give
them a few minutes after each session to evaluate the material, presentation, and presenter.
5. Share responses with the group. Express your interest in their opinions and ideas by prepar-
ing a summary of the written evaluations and sending them out to participants. This will
give individuals a sense of how others responded and how their own reactions compare with
the overall group response.
6. Hold on to your evaluations. Use the ideas and suggestions to improve your performance
and programs and to measure your development of skills.
Adapted from; ‘Essentials for Evaluation”, issue 601, INFO-UNE, American Society for
Training and development, January 1986.
Tips for Written Evaluations