Embed Size (px)
Citation preview
1
©2016 EnviroMap [email protected]
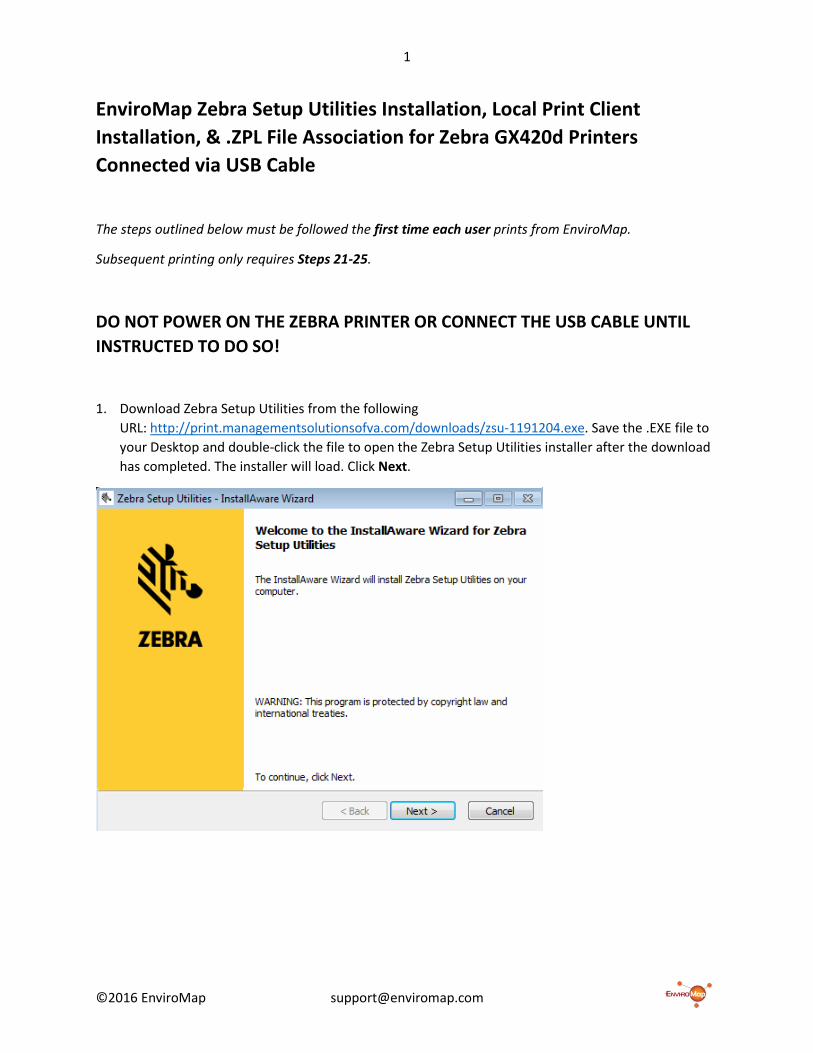
EnviroMap Zebra Setup Utilities Installation, Local Print Client Installation, & .ZPL File Association for Zebra GX420d Printers Connected via USB Cable
The steps outlined below must be followed the first time each user prints from EnviroMap.
Subsequent printing only requires Steps 21-25.
DO NOT POWER ON THE ZEBRA PRINTER OR CONNECT THE USB CABLE UNTIL INSTRUCTED TO DO SO!
1. Download Zebra Setup Utilities from the followingURL: http://print.managementsolutionsofva.com/downloads/zsu-1191204.exe. Save the .EXE file toyour Desktop and double-click the file to open the Zebra Setup Utilities installer after the downloadhas completed. The installer will load. Click Next.

2
©2016 EnviroMap [email protected]
2. Place a check in the I accept the terms of the license agreement checkbox and click Next.
3. Verify your preferred installation directory and click Next.
3
©2016 EnviroMap [email protected]
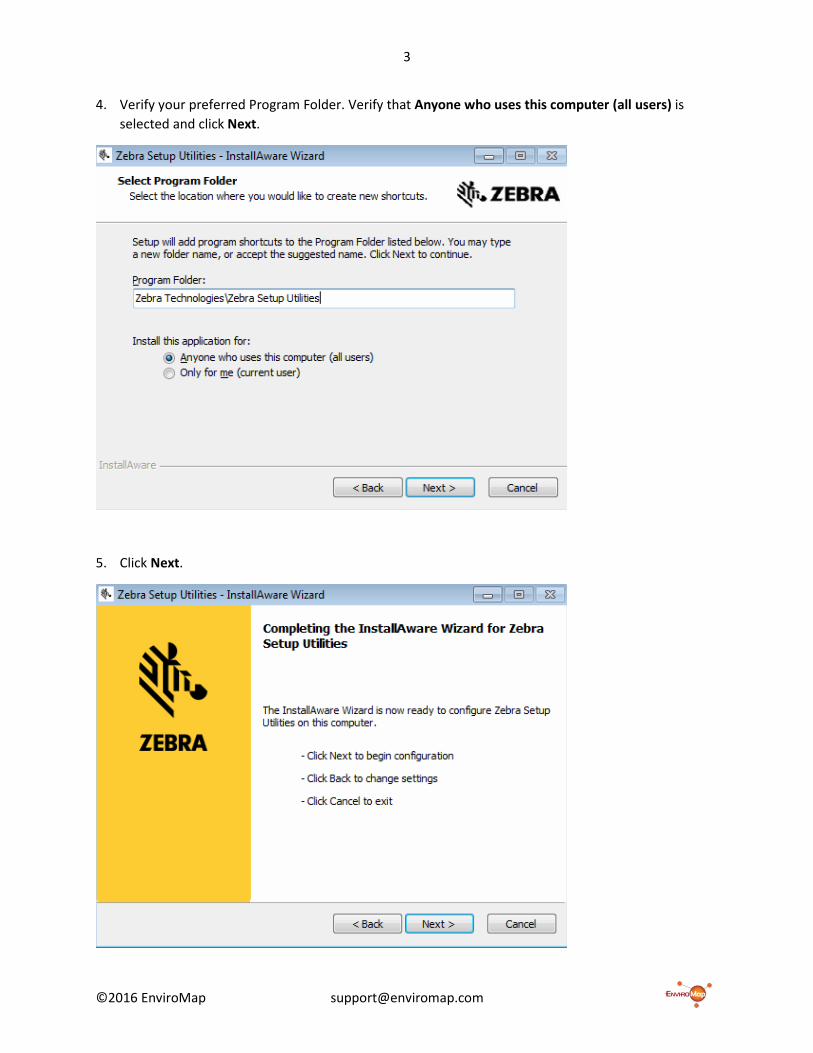
4. Verify your preferred Program Folder. Verify that Anyone who uses this computer (all users) is selected and click Next.
5. Click Next.
4
©2016 EnviroMap [email protected]
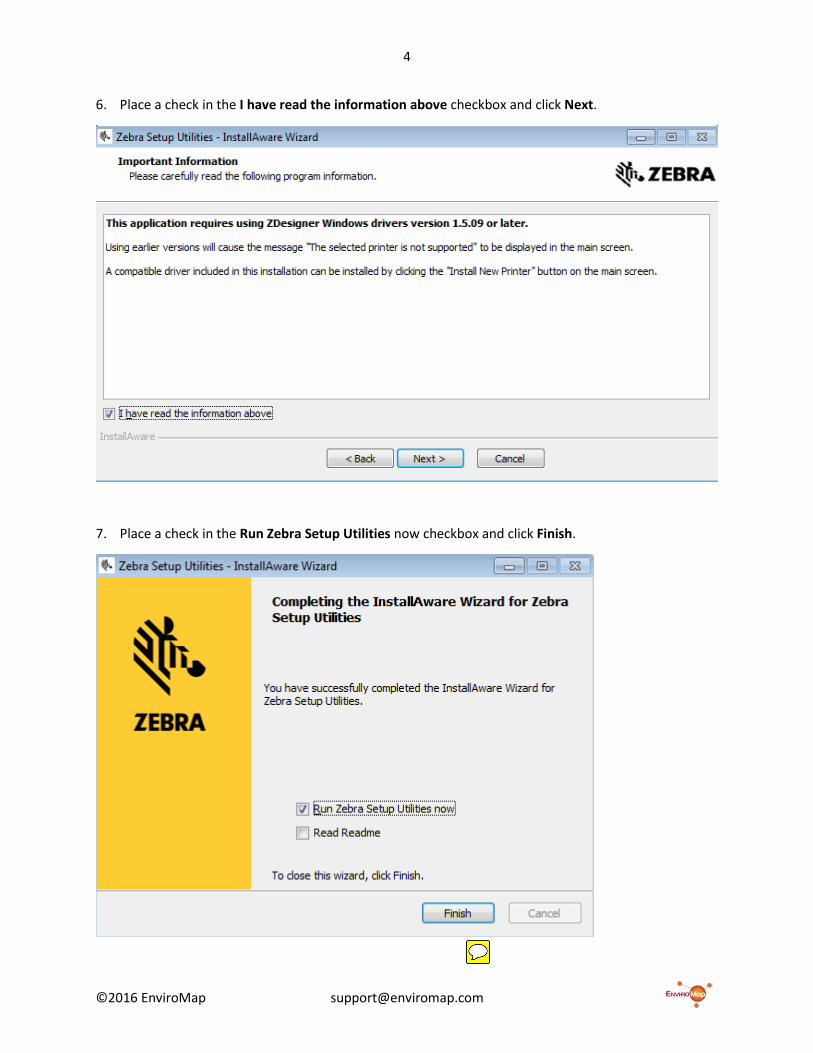
6. Place a check in the I have read the information above checkbox and click Next.
7. Place a check in the Run Zebra Setup Utilities now checkbox and click Finish.

5
©2016 EnviroMap [email protected]
8. Click Next to preload the Zebra printer drivers.
9. Allow the drivers to install.

6
©2016 EnviroMap [email protected]
10. Verify that USB (Universal Serial Bus) is selected and click Next.
11. Insert a new roll of labels into your Zebra printer. Connect one end of the supplied USB cable to the Zebra printer and the other end to your local computer. Power the Zebra printer on and click Finish. Windows will now install the printer, which can be located and verified by clicking the Start button and selecting Devices and Printers.

7
©2016 EnviroMap [email protected]
12. The Zebra Setup Utilities application should automatically start. If it does not, navigate to your computer’s Desktop and double-click the newly created Zebra Setup Utilities icon.
13. Click on your Zebra ZDesigner GX420d printer, so that it is highlighted, and click Configure Printer Settings.

8
©2016 EnviroMap [email protected]
14. Verify that Units are inch. Enter 1.00 for Width. Enter 3.00 for Height. Verify that Orientation is Normal. Click Next until the button is grayed out, and unable to be clicked, and click Finish.
TO
9
©2016 EnviroMap [email protected]
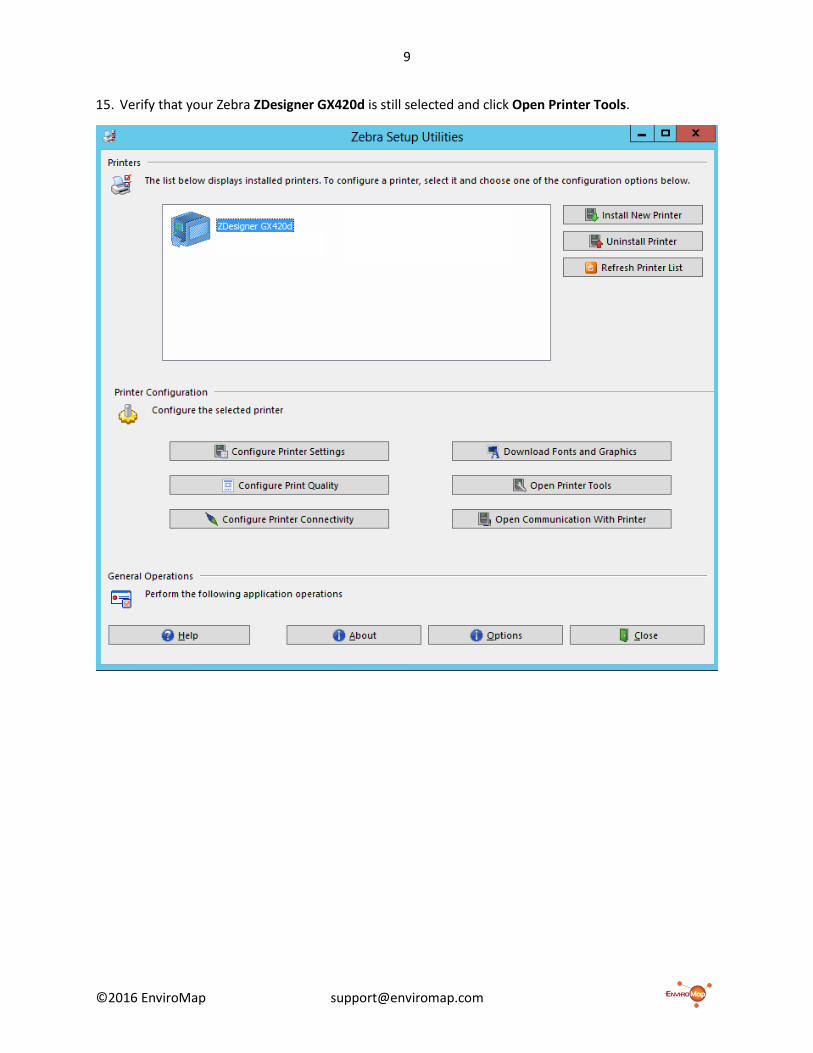
15. Verify that your Zebra ZDesigner GX420d is still selected and click Open Printer Tools.
10
©2016 EnviroMap [email protected]
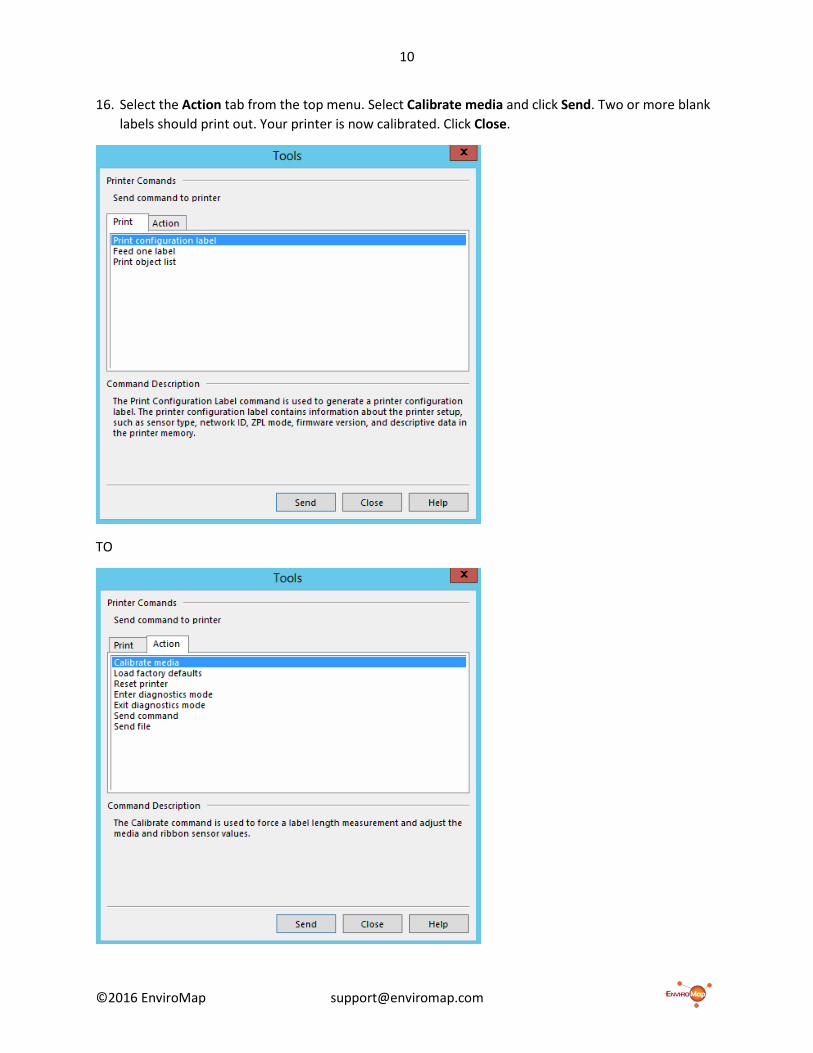
16. Select the Action tab from the top menu. Select Calibrate media and click Send. Two or more blank labels should print out. Your printer is now calibrated. Click Close.
TO
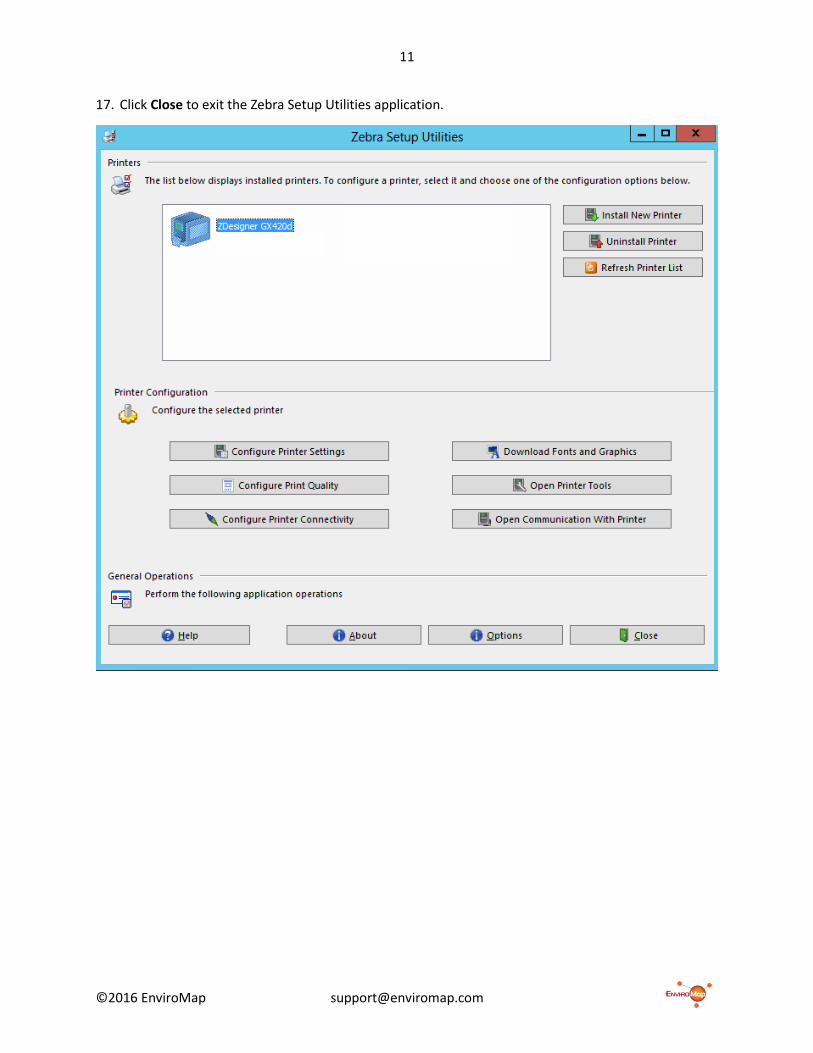
12
©2016 EnviroMap [email protected]
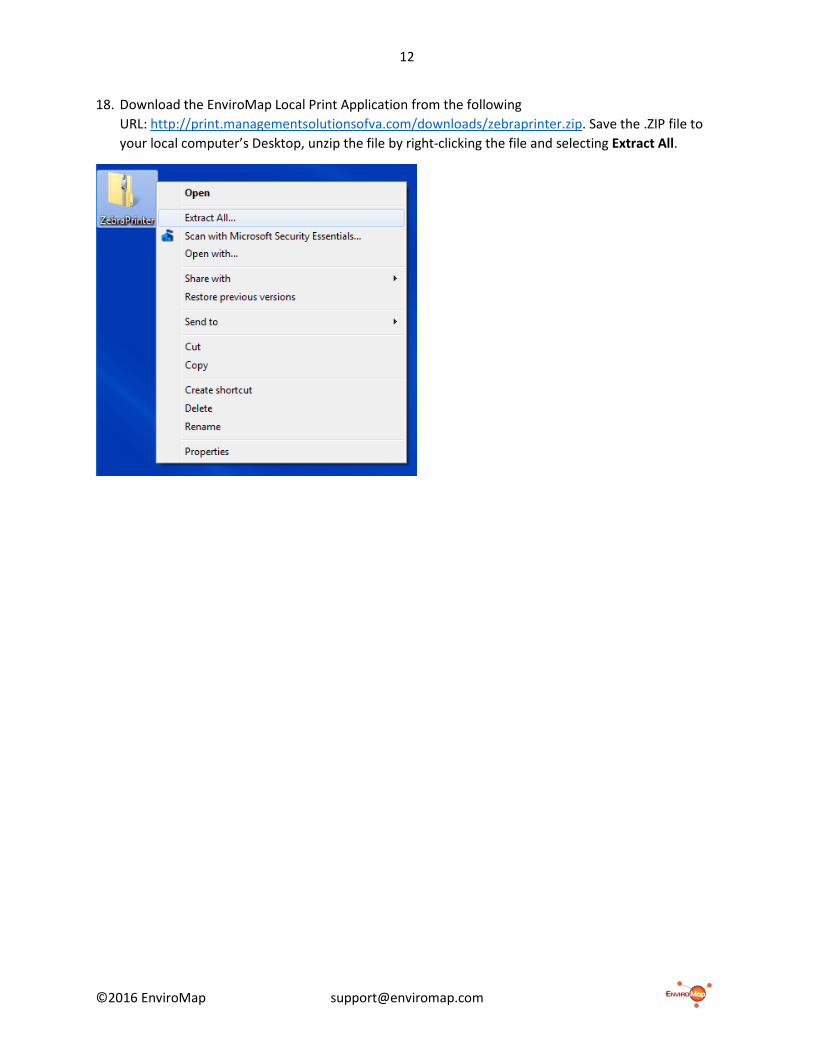
18. Download the EnviroMap Local Print Application from the following URL: http://print.managementsolutionsofva.com/downloads/zebraprinter.zip. Save the .ZIP file to your local computer’s Desktop, unzip the file by right-clicking the file and selecting Extract All.
13
©2016 EnviroMap [email protected]
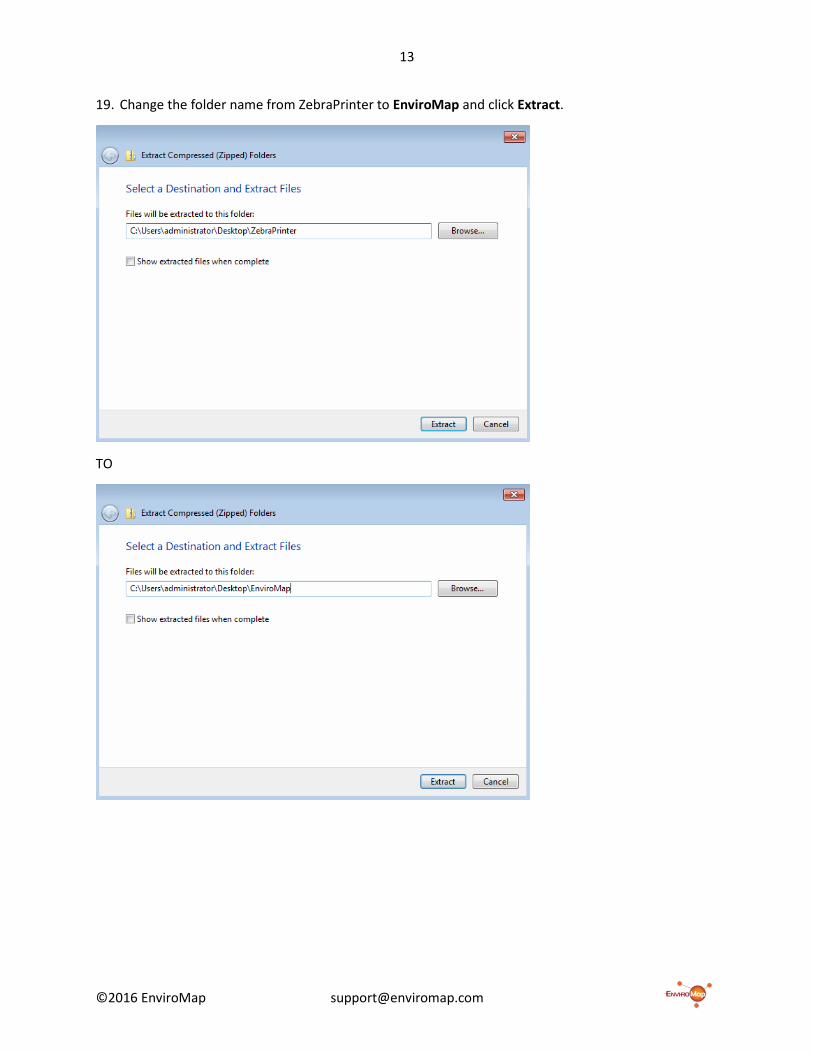
19. Change the folder name from ZebraPrinter to EnviroMap and click Extract.
TO
14
©2016 EnviroMap [email protected]
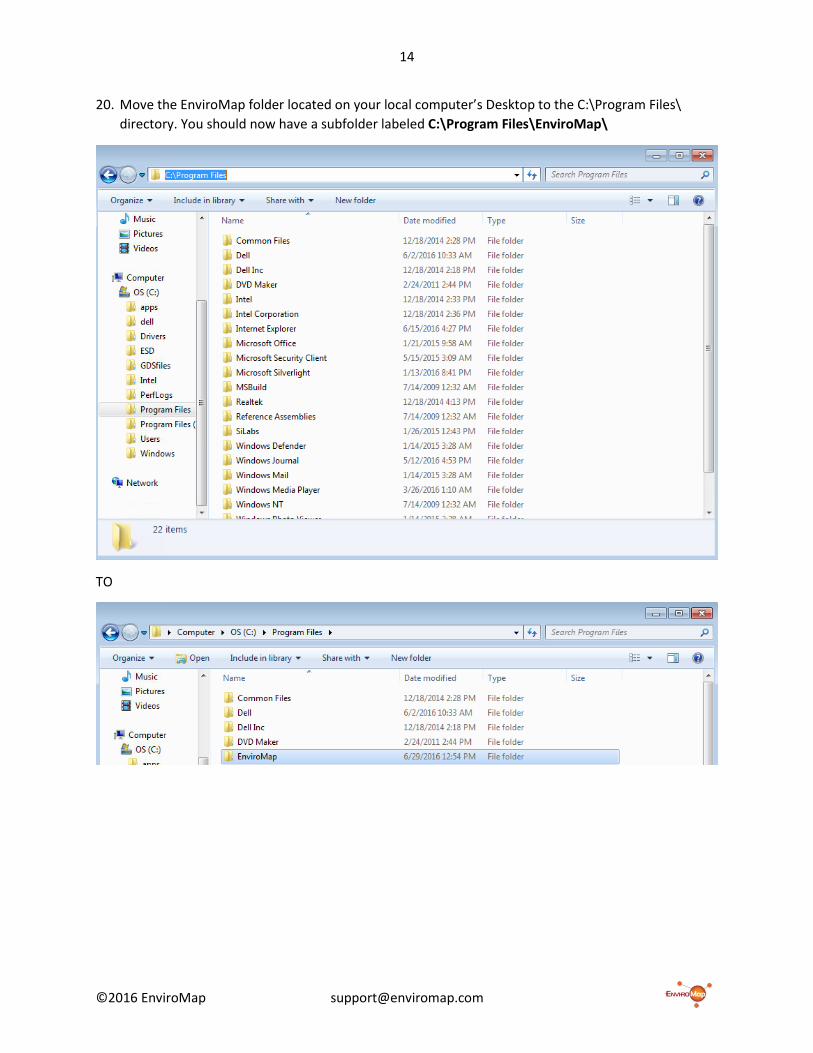
20. Move the EnviroMap folder located on your local computer’s Desktop to the C:\Program Files\ directory. You should now have a subfolder labeled C:\Program Files\EnviroMap\
TO
15
©2016 EnviroMap [email protected]
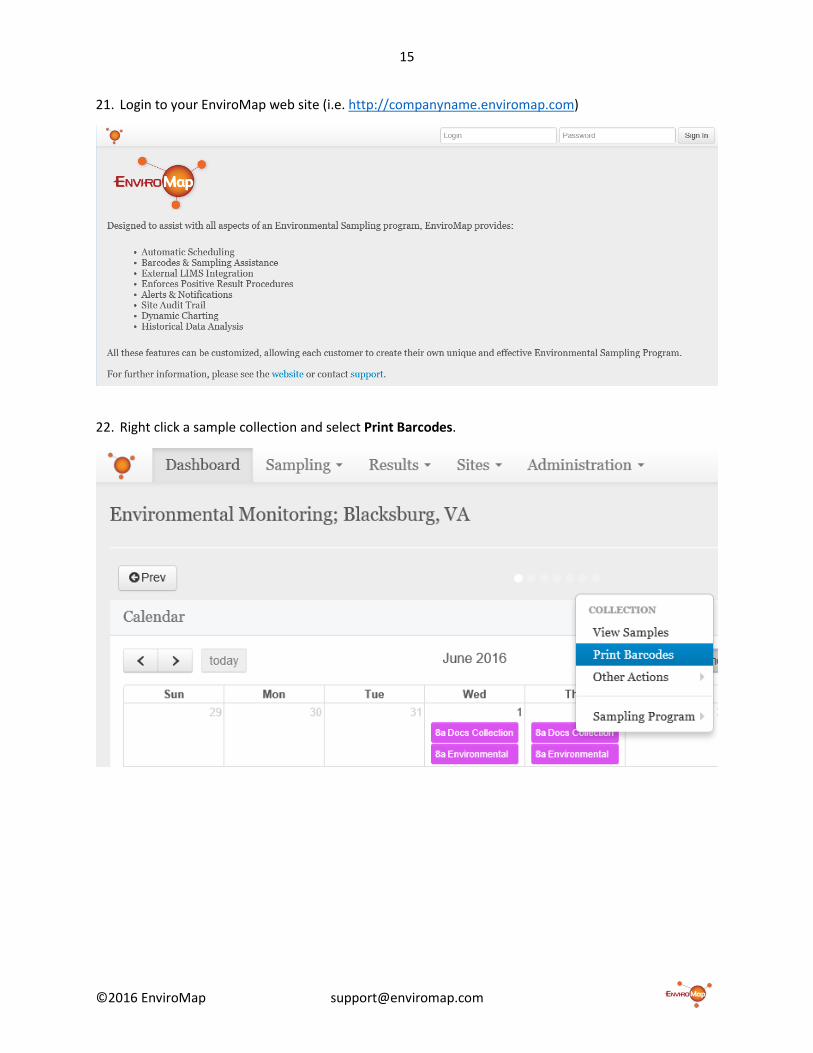
21. Login to your EnviroMap web site (i.e. http://companyname.enviromap.com)
22. Right click a sample collection and select Print Barcodes.

16
©2016 EnviroMap [email protected]
23. If the Select Samples screen loads, select the sample and click Save Changes. If it does not appear, continue to step 24.
24. The Print Sample Barcodes / Labels screen will load. Select the samples you would like to print.Select Print Per option. Verify that the Printer selection displays Save to file, and click Save.
17
©2016 EnviroMap [email protected]
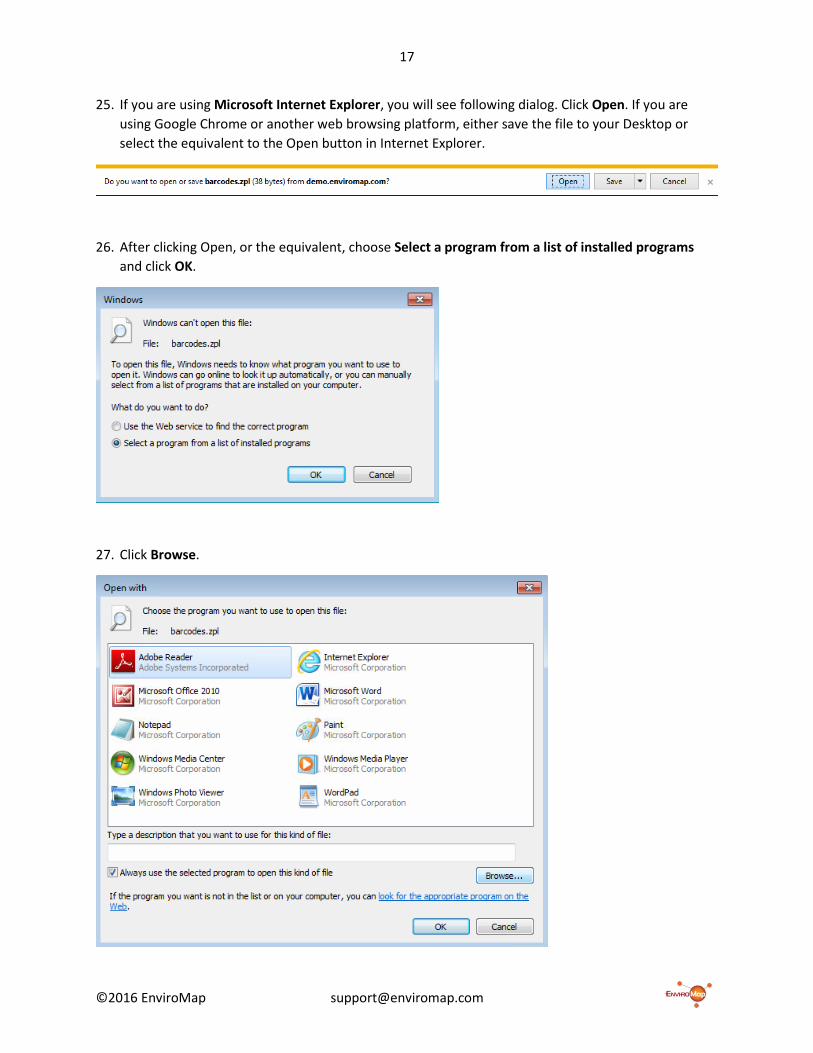
25. If you are using Microsoft Internet Explorer, you will see following dialog. Click Open. If you are using Google Chrome or another web browsing platform, either save the file to your Desktop or select the equivalent to the Open button in Internet Explorer.
26. After clicking Open, or the equivalent, choose Select a program from a list of installed programs and click OK.
27. Click Browse.
18
©2016 EnviroMap [email protected]
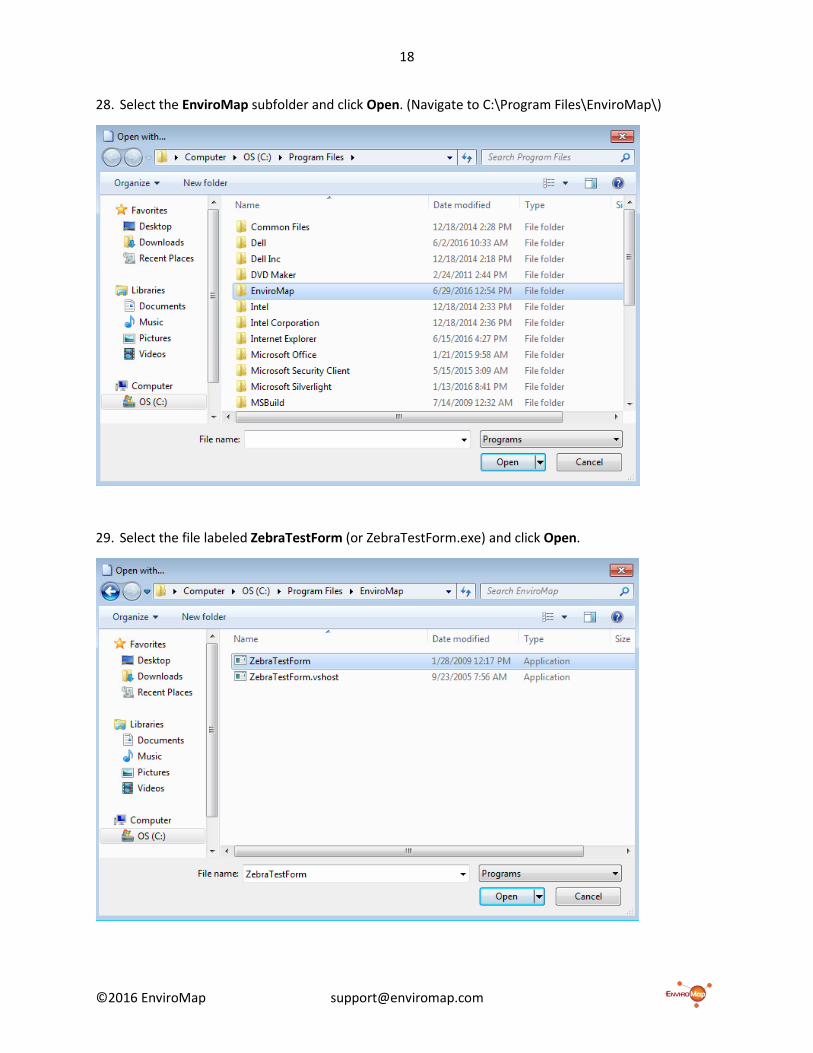
28. Select the EnviroMap subfolder and click Open. (Navigate to C:\Program Files\EnviroMap\)
29. Select the file labeled ZebraTestForm (or ZebraTestForm.exe) and click Open.
19
©2016 EnviroMap [email protected]
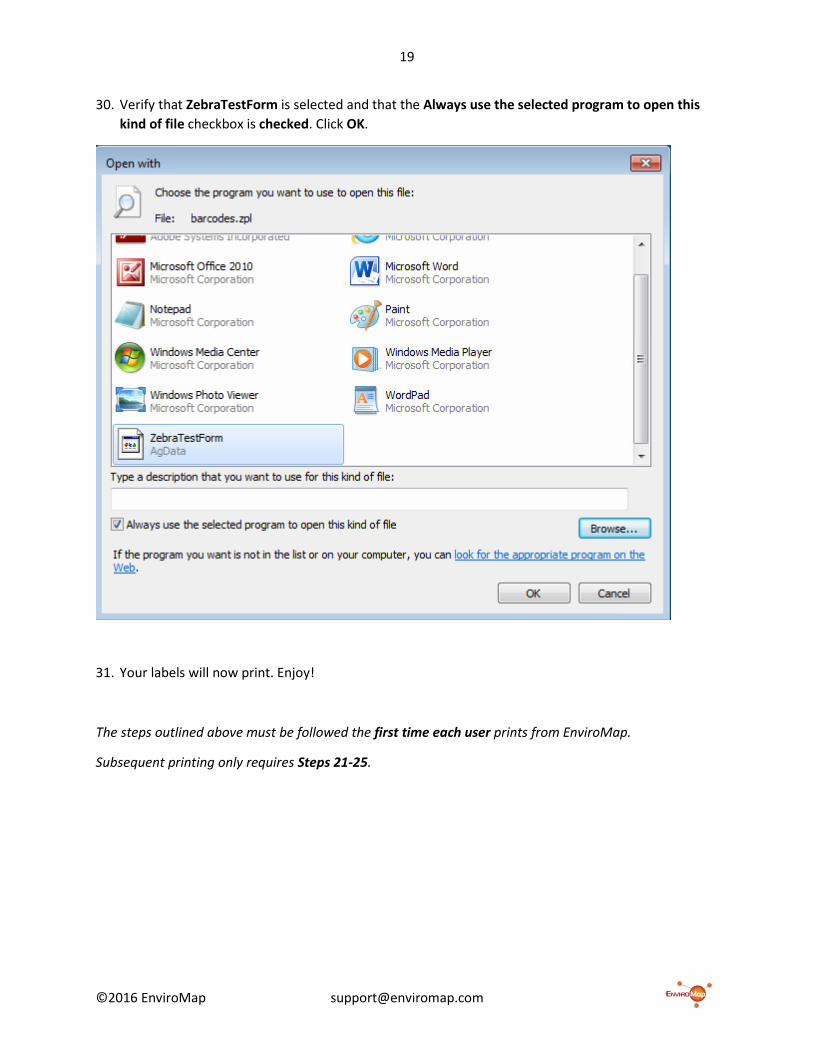
30. Verify that ZebraTestForm is selected and that the Always use the selected program to open this kind of file checkbox is checked. Click OK.
31. Your labels will now print. Enjoy!
The steps outlined above must be followed the first time each user prints from EnviroMap.
Subsequent printing only requires Steps 21-25.