Embed Size (px)
Citation preview
Entities October 25, 2010
The Creators & Functions menu provides a place to identify record creators, the functions that produce records, and contact information for the people in record-creating offices. To access this menu, click Creators and Functions from the main menu.

An entity is any person, family, or corporate body responsible for the creation of a record or the context surrounding that record’s existence. When records are produced by governmental entities, often they are called agencies. In Utah, this is the primary type of record creator we work with. An “agency” is a unit of government that operates relatively independently. It may be part of a larger department or have smaller divisions under it. Program units are not considered separate agencies, but they can be recorded in the database when they exist. Programs are usually small workgroups, but are unique in that they may span several agencies, such as federal grant programs. The way the line is drawn between something being an agency versus a program is its size and purpose, the level of independence, an official name, the existence of a director, and a separate budget from other agency units. If it has all those things, it’s an agency. Other related entities may also be added to the system even if those corporate bodies, persons, or families did not directly create the records, but provide context to them. In government, persons could be elected officials or even department or division directors where they are named within the context or description of the records. Families could include the governor and his/her spouse, since the Archives does collect and preserve First Lady records.
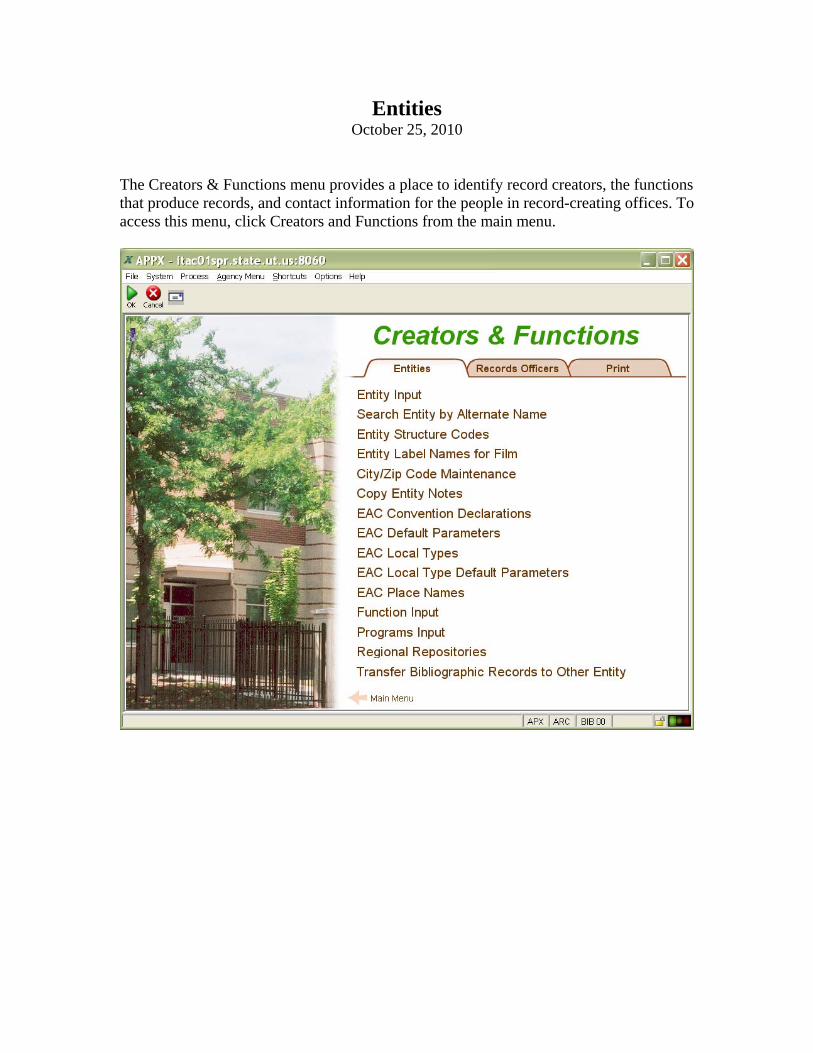
Entity Structure Codes Before a new entity can be added, its relationship to other entities must first be determined. Organizational charts can be helpful in this pursuit. For Executive Branch agencies, the highest level that the system tracks are cabinet-level departments. These agencies can then be broken down into four other sub-levels. For other government types, the top-level agency might be a county, city, court, or school district name. Click Entity Structure Codes:
Type PS and press Enter or click OK:
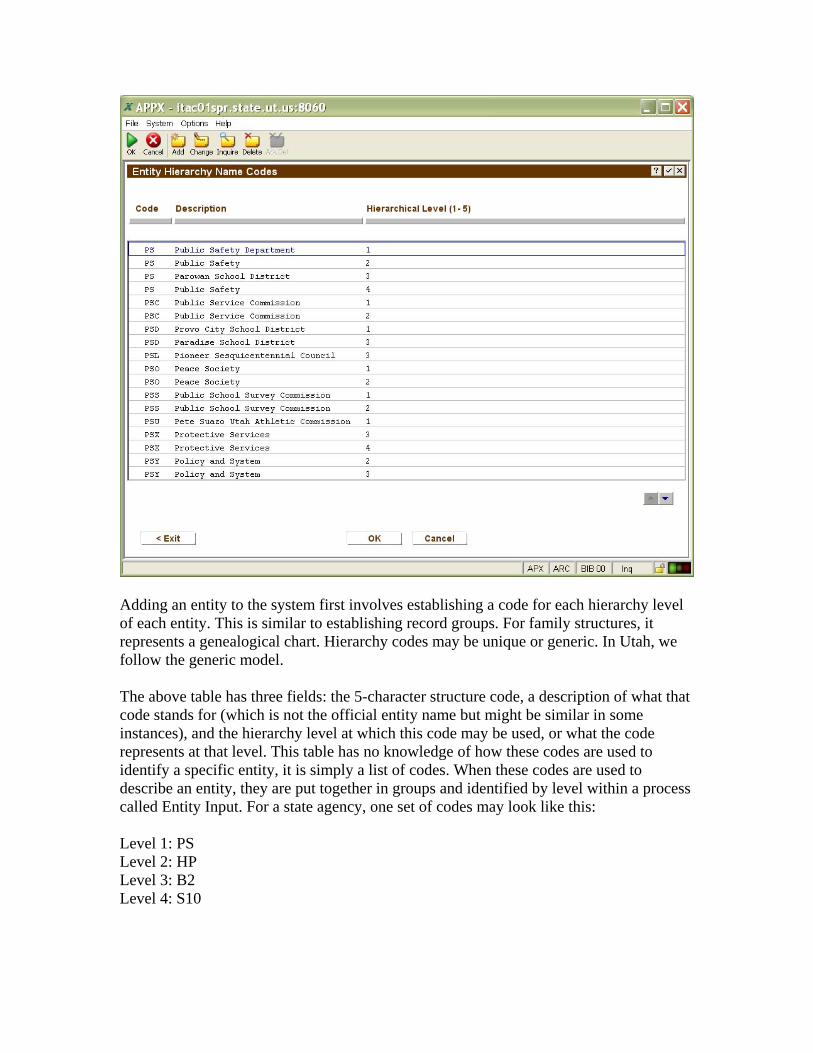
Adding an entity to the system first involves establishing a code for each hierarchy level of each entity. This is similar to establishing record groups. For family structures, it represents a genealogical chart. Hierarchy codes may be unique or generic. In Utah, we follow the generic model. The above table has three fields: the 5-character structure code, a description of what that code stands for (which is not the official entity name but might be similar in some instances), and the hierarchy level at which this code may be used, or what the code represents at that level. This table has no knowledge of how these codes are used to identify a specific entity, it is simply a list of codes. When these codes are used to describe an entity, they are put together in groups and identified by level within a process called Entity Input. For a state agency, one set of codes may look like this: Level 1: PS Level 2: HP Level 3: B2 Level 4: S10

This group of codes is used to indicate the Utah Highway Patrol Section 10. The first code, PS, represents the Department of Public Safety. The second code, HP, is for the Highway Patrol. The third level, B2, represents Bureau II, and S10 represents Section 10. Before these codes can be used to represent the entity, they need to be added to the Entity Structure Codes table, and each piece (code, description, and hierarchy level it appears at) must be entered. In the above example, all other divisions within Public Safety will always have PS as their top level hierarchy code. The code PS could mean different things if found at other hierarchy levels, however. A city might have a Public Safety department, in which case PS would be used at the second level. At the third level, PS could mean something entirely different, such as the Parowan School District. What is important here isn’t any one hierarchy code or its naming convention. All that these codes need to do is together provide a unique key to the entity file, in a way that represents hierarchical relationships to other entities. If we run reports and tell the system that we want everything tied to a hierarchy level 1 equal to PS, we know that it will print everything for every division and subdivision of the Department of Public Safety. If we tell the query to limit the report to PS as the first level, and HP as the second, then it will just print everything tied to the Highway Patrol. For another example, the level 1 hierarchy code for Iron County is IC. Each county has a County Clerk, which is the second level of the hierarchy. Instead of trying to come up with a unique hierarchy code every time there is another county or town clerk, we just have one code, in this case LR, which stands for Clerk. Together, the Iron County (Utah) County Clerk has the following hierarchy codes: Level 1: IC Level 2: LR Davis County (Utah) County Clerk looks very similar: Level 1: DAS Level 2: LR
Adding New Codes Before adding new codes, do a search for the code you want to use and see if it is already in use at the hierarchy level that you want to use it. To do a search, click Inquire Mode or press F11. This will bring up a blank screen, called Key Entry Mode. Type the code you want to search and click OK or press Enter. If the code you entered is already in use, do another search until you find a code that is not in use. Remember that the code only needs to not be in use for the hierarchy level that you want to record.

Click Add Mode, or press F9. Type the code, the descriptive name (keep the descriptive name generic if possible), and the hierarchy level the code pertains to. Add the code multiple times if you want to use that code with that name at multiple levels. Press Enter or click OK to save the new record. Click Exit or F8 to go back to the Creators & Functions menu.
Entity Input Click on Entity Input:
To bring up the first entity, click OK or press Enter:
Identity

The Identity tab in Entity Input displays the name and entity structure information needed to first create the record. This becomes the name authority file for entities.
On the top line is the entity number and official name. The entity number is the primary key to the entity file, and is just a 5-digit sequence number. The Label Name, or “agency short name,” is a 30-character version of the entity name that is useful when displaying data where real estate is limited, such as on search results screens and columnar reports. It also fits well on labels. The Entity Type field is a 3-character field that summarizes what kind of entity is being added. In the Encoded Archival Context (EAC) standard, there are only three types of entities: corporate bodies, persons, and families. In Axaem, the corporate body designation is broken down into smaller groups for use in the records management process, as well as MARC coding (in the case of meeting names), but is recorded as “corporateBody” within EAC output, and will display as such onscreen after entering the entity type. Most record creators in Utah fall under one of these categories: SG, for State Government MUN, for Municipal Government CNT, for County Government

SD, for School Districts SPD, for Special Districts If you place your cursor on the Entity Type field when in Change Mode (F12), then press F2 to scan, the system will bring up the following choices:
Click Cancel to exit out of the pop-up window. The Created dates for the agency provide a place to record when the entity began and when dissolved (if applicable). The OK for Inventory checkbox is not editable by the end-user, but does indicate whether this entity has record series eligible to be stored at the Archives or Records Center. Eligibility is based upon the wording of the retention schedule. It is displayed here to help users understand why the box inventory application will or will not allow an entity to be added to its system. Changes made in Axaem to entity names are automatically sent to the box inventory system so that both it and Axaem are in sync. The Higher Entity field indicates the entity number assigned to the entity that is one level higher than the one you are looking at. The buttons to the right allow you to navigate to
higher or lower entities. Below the higher entity is the list of five hierarchy codes. This is where the hierarchy codes entered into the Entity Structure Codes table are linked to the agency. These codes as a unit provide a unique key to the entity file and are required. The Hierarchy Began date establishes when this agency first existed within the given hierarchy. The buttons below the main information record specific details about the entity, especially details that are repeatable and can have more than one entry. If data is contained in these fields, the button will be shaded.
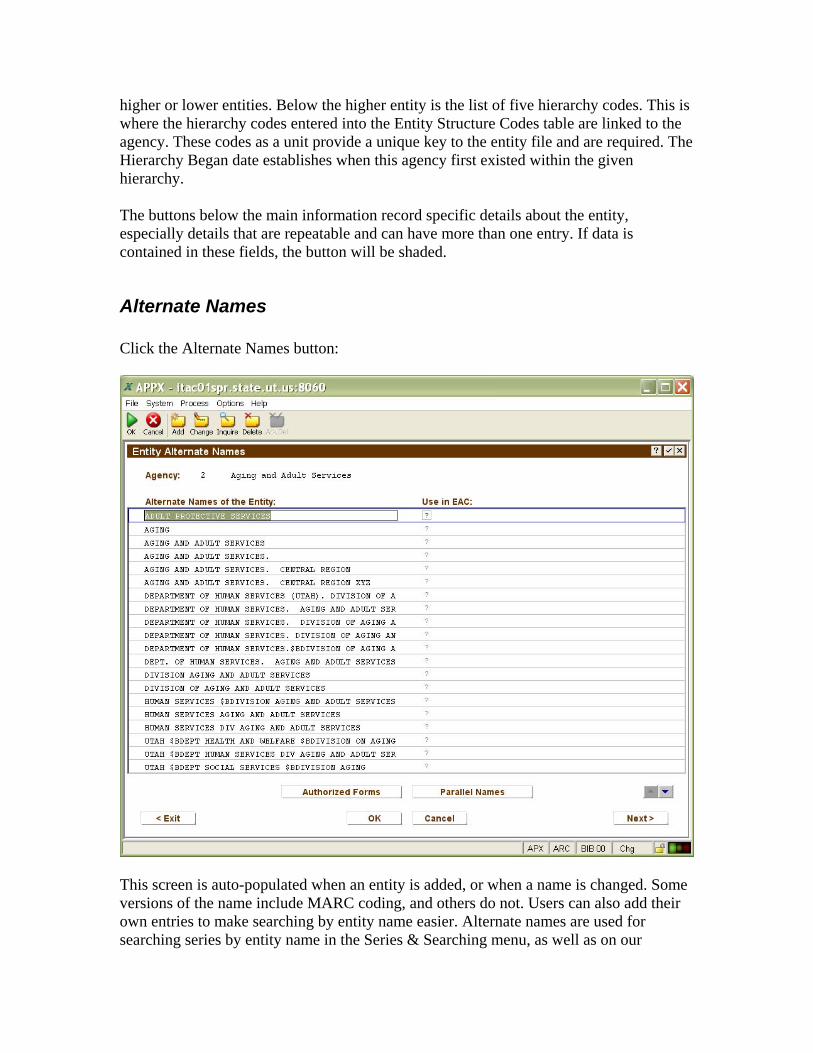
Alternate Names Click the Alternate Names button:
This screen is auto-populated when an entity is added, or when a name is changed. Some versions of the name include MARC coding, and others do not. Users can also add their own entries to make searching by entity name easier. Alternate names are used for searching series by entity name in the Series & Searching menu, as well as on our

website to search for retention schedules and finding aids by entity name. If the name is to be used in EAC output, place a checkmark in the field indicated. The button for Authorized Forms is for indicating whether the name in question is an authorized or alternate form under certain rules, such as AACR2. Parallel Names are entered when a name has a secondary expression, such as in another language. Click Exit or press F8.
Multiple Identities Click the Multiple Identities button. This screen provides a way to link many entities together, either because the entity is known by two separate names/roles, or because many entities are working together as a unit under a single name. The Type of Multiple field is to identify if the relationship is “one in many” or “many in one,” as defined by the EAC standard. Once entered here, a corresponding entry will also be made in the record of the other entity (this feature is still under development).
Click Exit or press F8 to return to Entity Input.

Official Name Click the Official Name button. This screen is where the entity’s current official name is recorded. It is encoded by following MARC rules. A separate version of the official name, with the MARC code stripped out, is also recorded. Changes to the official name are automatically recorded in the long name. The entity long name is used in reports, whereas the official name is used in the MARC catalog. Instead of having to type the name of our state for each official name, the checkboxes will allow the system to do that for you. The difference between “Utah” and “Utah.$b” may be found in AACR2 or other cataloging rulebooks. The entity hierarchy is displayed at the top of the screen as a reminder of where this entity fits inside its family or corporate structure. Record when the official name began, and whether or not it has been registered with the Library of Congress as part of their name authority file.

Authorized Forms Identify the convention declaration or vocabulary under which this form of the name is authorized or alternative:
Click Exit or press F8 to return to Entity Input.
Parallel Names Click the Parallel Names button. This screen records the official name of the entity as expressed in different languages. To lookup available values in the language, script, or convention fields, click the Scan button to the right of the field or press F2.

Click Exit or press F8 to return to Entity Input.
Prior Names Click the Prior Names button. This screen is used to record when an entity’s name was active, for those names that are no longer in use. The decision to record a prior name rather than to create a separate entity for the new name and close the dates of the old one is based upon the functions of the entity and how it was created. In government, often new agencies are created by statute and have specific functions, which may be a blending of functions formerly belonging to other agencies, or brand new functions never needed before. If either of those conditions is the case, then create a new entity. If an entity retains the same functions but just updates its name, this is when the prior names field is used. Indicate the date span of the prior name, the official MARC-encoded version of the name, and the un-coded version of the name. Date spans for the prior name are used when displaying series information, in that if a series was created during the period of the prior name, the beginning and ending dates of the series will be compared to the beginning and

ending dates of the entity, and the entity’s prior name will be used to identify the office that created the records. Some entities go through many name changes over the years. You may click Next to scroll through them. This information is used in MARC code 710.
Click Exit or press F8 to return to Entity Input.
Prior Structure Click the Prior Structure button. This screen records changes to agency hierarchy over time. Indicate the date span when the hierarchy was active, and the agency codes that reflect how it was situated. The official name at the time of the hierarchy is also recorded. This information is used in MARC code 797.

Click Exit or press F8 to return to Entity Input. Click the Context Tab at the top of the screen:
Context

Click Access Points:

The name authority file in MARC output may have associated details in the 6XX fields. This is where they are entered. Click Exit or press F8 to return to Entity Input.
Biography/History Notes Click Biography/History Notes. This is where you enter all official entity history information, as well as other note types.
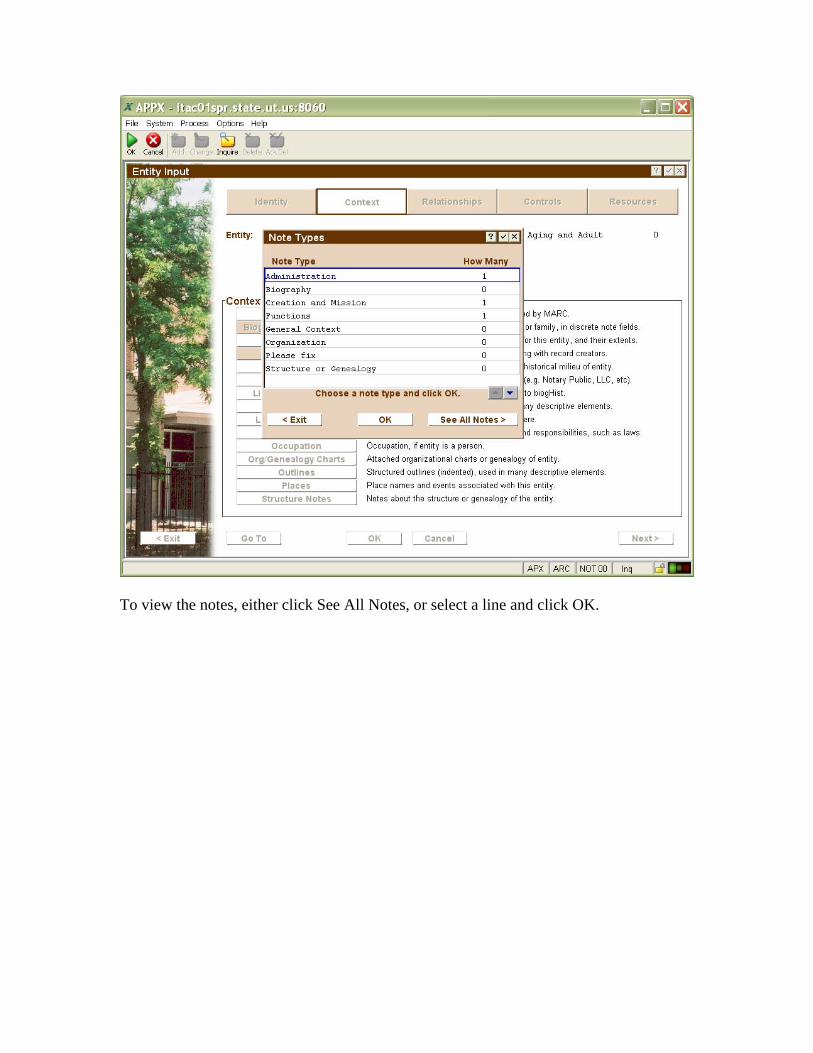
To view the notes, either click See All Notes, or select a line and click OK.

This window is where individual notes receive header information, such as a note name and the MARC code associated with the note. It also has a checkbox to indicate whether or not this note should print out on reports or be included in the catalog. This is a scrolling list, and you may scroll through as many notes as there are for the given category. The text is displayed here but is not entered here. Click OK to go into the screen where the note is entered.
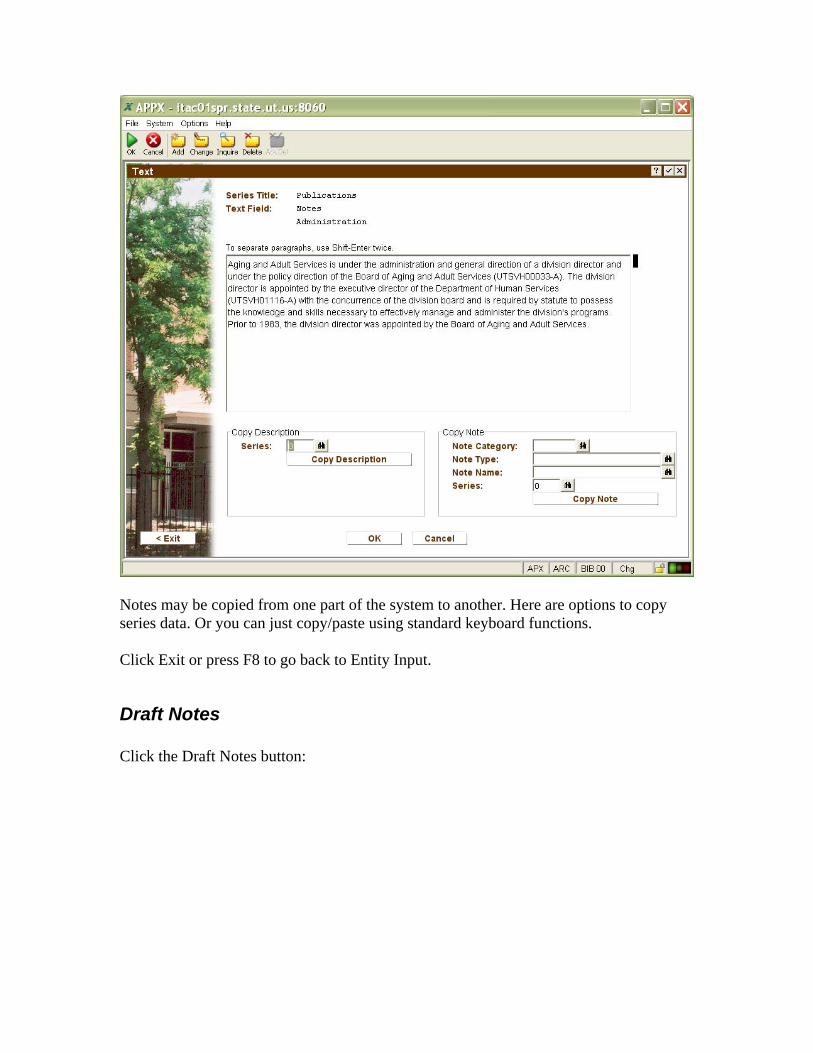
Notes may be copied from one part of the system to another. Here are options to copy series data. Or you can just copy/paste using standard keyboard functions. Click Exit or press F8 to go back to Entity Input.
Draft Notes Click the Draft Notes button:

Draft notes are used to record agency history information as it is gathered in the field. Often an official agency history will not be written immediately, but details are good to have here when we find them. Each draft note is tied to a 3-digit key field, so you can record up to 999 notes. Click Exit or F8 to go back to Entity Input.
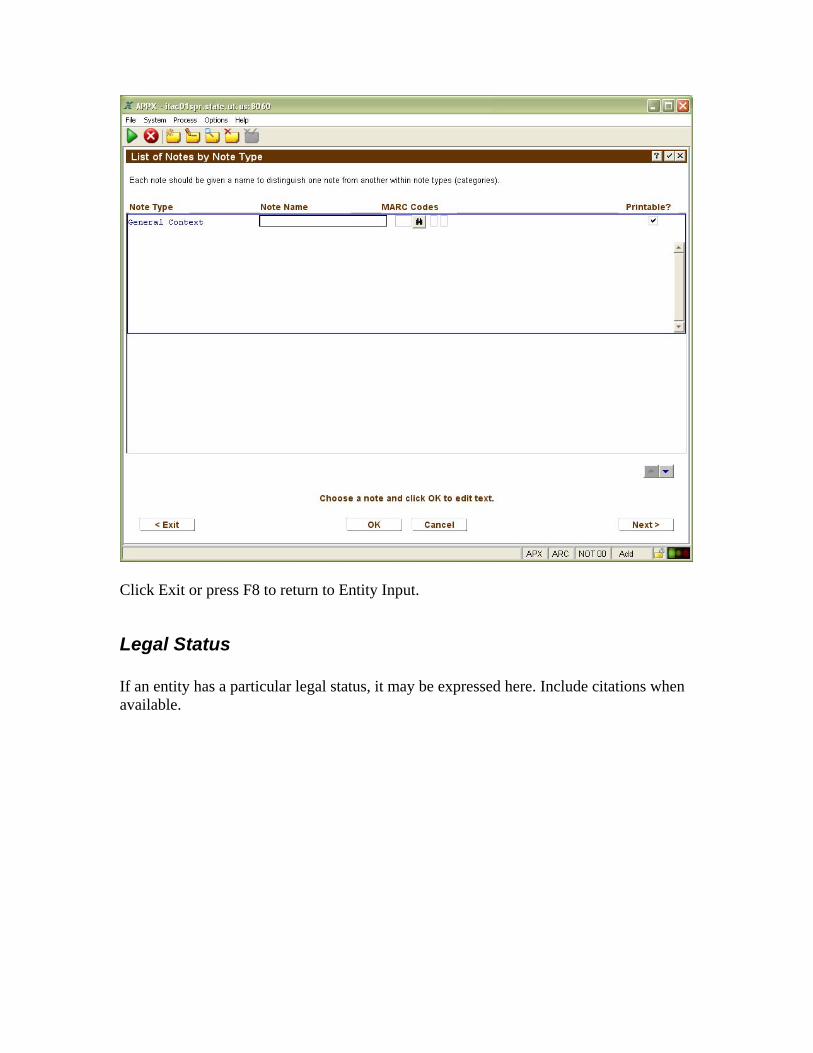
General Context The General Context note field has its own button on the Context tab of Entity Input so that this feature will not be overlooked. The tags used in EAC output for this information are separate and distinct from other contextual data, and provide a place to add discursive text that may be difficult to express in another form.
Click Exit or press F8 to return to Entity Input.
Legal Status If an entity has a particular legal status, it may be expressed here. Include citations when available.

Click Exit or press F8 to return to Entity Input.
Chronological Lists A chronological list, when it exists, will be appended to the end of the Biography/Administrative History element within EAC. Add each event in the order that it happened, and include dates and places as appropriate.

Click Exit or press F8 to return to Entity Input.
Lists Other types of lists may be added to the field you specify. First add the list group, and then add items to the list.


Click Exit or press F8 to return to Entity Input.
Local Descriptions Local descriptions, as defined by EAC, describe entities using locally-defined terms, and may contain lists or outlines.

List each item in the Local Description:

Click Exit or press F8 to return to Entity Input.
Mandates If an entity has a particular mandate, include it in the fields below:

Click Exit or press F8 to return to Entity Input.
Occupations If the entity is a person, include their occupations:

Click Exit or press F8 to return to Entity Input.
Organizational & Genealogical Charts You may attach organizational or genealogical charts to the entity. The URL may be an online resource or something held in a local directory:

Click Exit or press F8 to return to Entity Input.
Outlines Date in outline form may be added to many elements in EAC. Indicate which one in the initial outline grouping, then add individual items to the outline.

The level of indent should be zero for the first element, and then sequential numbers below to indicate how many “tabs” to add to each outline item, so that it indents properly.

Click Exit or press F8 to return to Entity Input.
Places Identify places associated with this entity. Each place name is controlled in another screen available from the Creators and Functions menu, and is available for lookup here:

Click Exit or press F8 to return to Entity Input.
Structure or Genealogy The Structure or Genealogy note provides you with the ability to write discursive text to explain an entity’s structure or genealogy in the event that more specific fields do not allow needed flexibility.

Click Exit or press F8 to return to Entity Input.
Relationships Click on the Relationships tab. This section offers you the ability to identify relationships between entities, bibliographic records, and functions that are not already expressed via entity hierarchy or creators tied to records.

Related Entities If an agency has a relationship with another agency, and that relationship should be recorded in the name authority file and the agency catalog record, it is added here. Related agencies may or may not share a hierarchical relationship:

Click Exit or press F8 to return to Entity Input.
Related Functions A function is an independent element in EAC, and can exist without being tied to an entity. However, when an entity has one or more functions, they should be identified here. You may scan the Function key to tie the entity to an existing function (found on the Creators and Functions menu), as well as indicate the relationship type. Since functions as an independent element have not yet been fully developed in Axaem, the output in EAC still uses the <function> element rather than <functionRelation>.
Click Exit or press F8 to return to Entity Input.
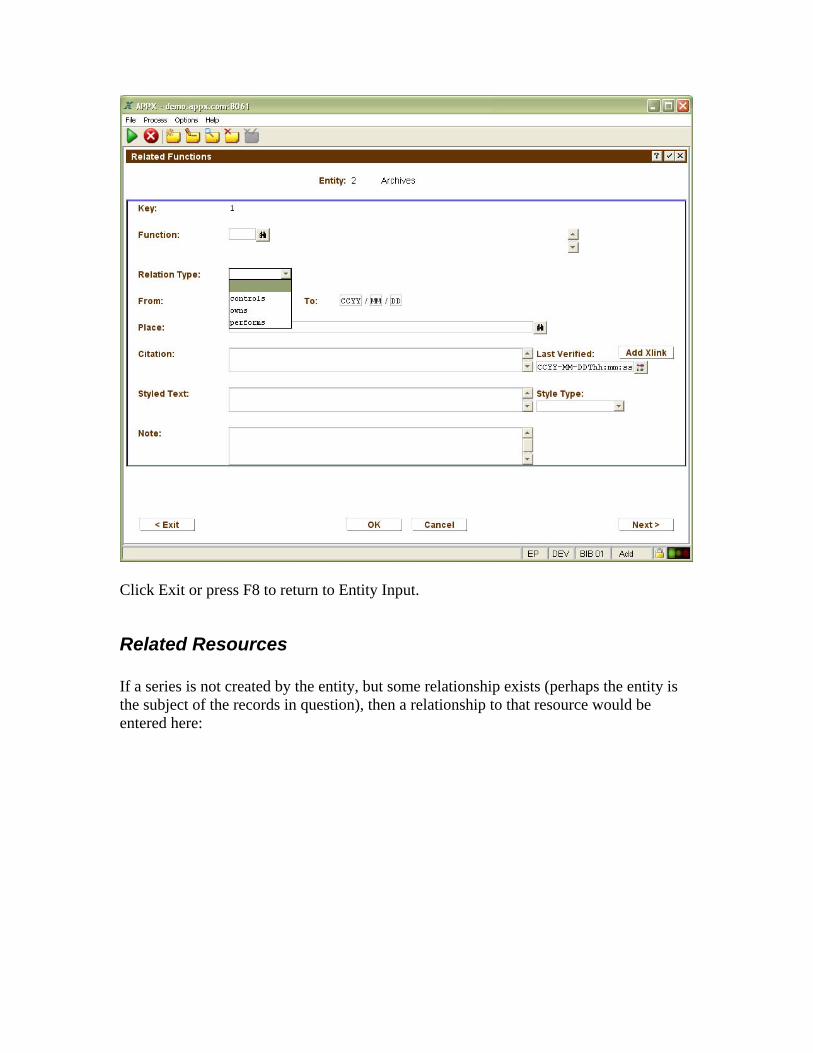
Related Resources If a series is not created by the entity, but some relationship exists (perhaps the entity is the subject of the records in question), then a relationship to that resource would be entered here:

Click Exit or press F8 to return to Entity Input.
Programs Click on Programs. A program is a subunit of an agency that does not rise to the level of an agency, such as a work group. A program may also be a function shared across more than one agency, such as participation in federal program. Programs are identified in order to print retention schedules by these work groups, and they are first added in the Agency Programs Input process on the Agency Information menu. If an agency is tied to any programs, they will display in a list here:
Click Exit or press F8 to return to Entity Input.
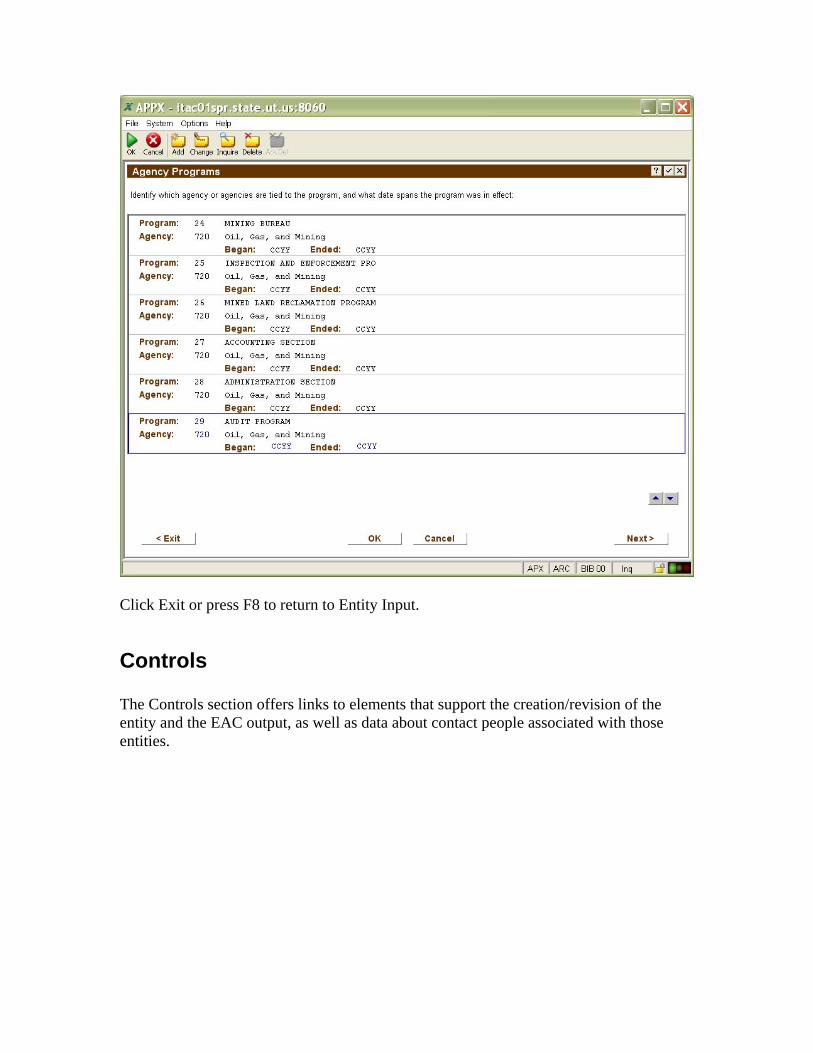
Controls The Controls section offers links to elements that support the creation/revision of the entity and the EAC output, as well as data about contact people associated with those entities.

Entity Address The Address button is for just what you would think:

There is a checkbox for indicating whether this address is available for state building mail delivery. The county code is included so that reports can be run by geographic area. Click Exit or press F8 to go back to the prior screen.
Alternative Sets If another authority control record exists in another system, identify it in Alternative Sets:
Click Exit or press F8 to return to Entity Input.
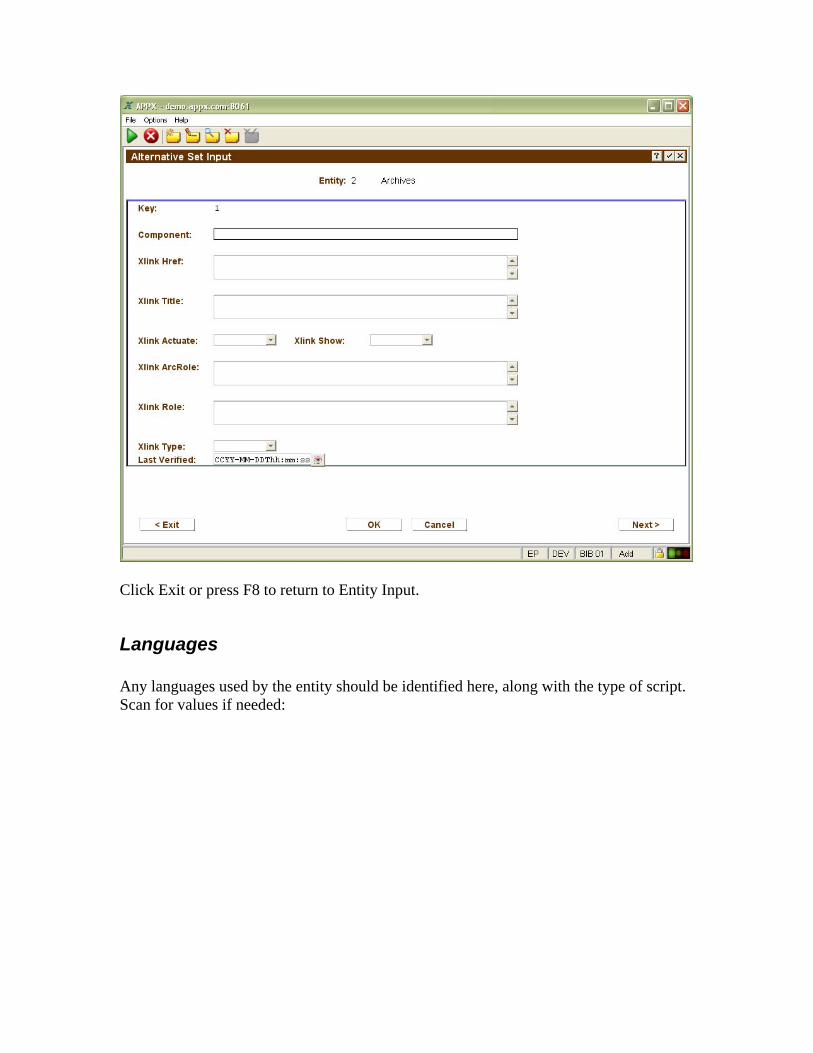
Languages Any languages used by the entity should be identified here, along with the type of script. Scan for values if needed:

Click Exit or press F8 to return to Entity Input.
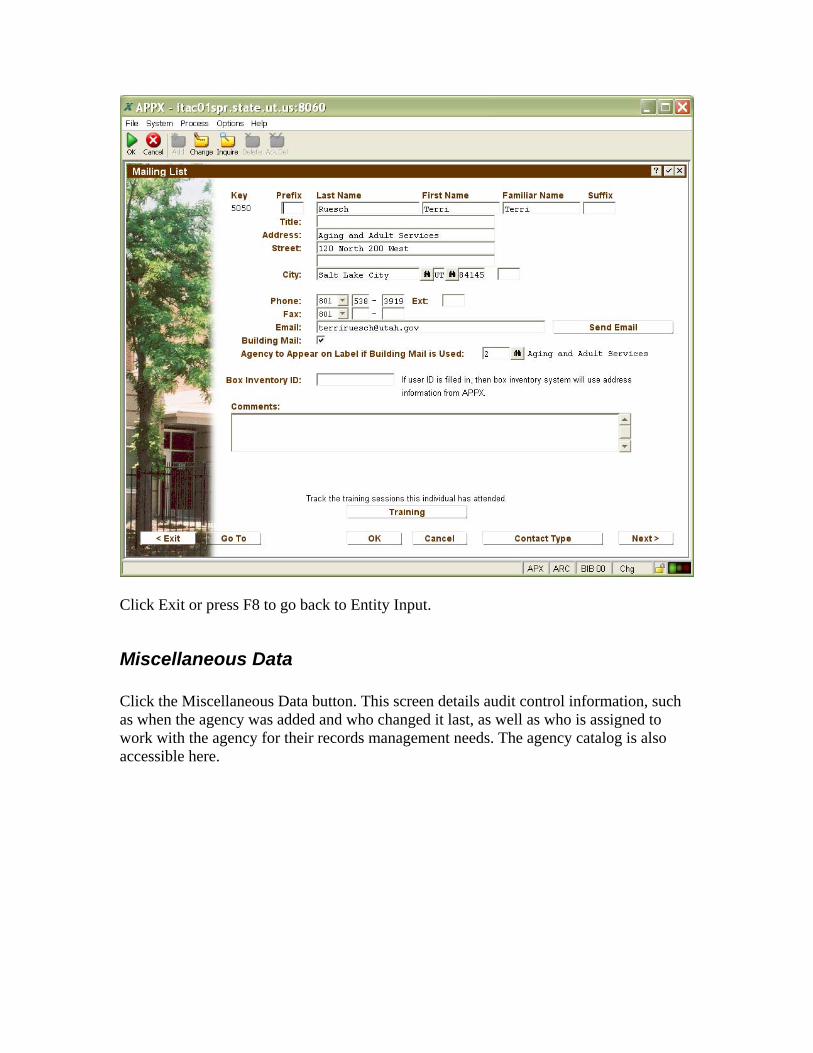
Mailing List Contacts Click Mailing List Contacts. This screen summarizes all of the contact people who are tied to this entity.

From this screen you can drill down into the mailing list itself, where contact information is recorded. Choose a name and click Go To Mailing List. This view into agency contact information via the Entity Input screen is for convenience, not for adding. To add new contact people, you would go into the mailing list directly through another menu option.
Click Exit or press F8 to go back to Entity Input.
Miscellaneous Data Click the Miscellaneous Data button. This screen details audit control information, such as when the agency was added and who changed it last, as well as who is assigned to work with the agency for their records management needs. The agency catalog is also accessible here.

Click Exit or press F8 to go back to the Entity Input screen.
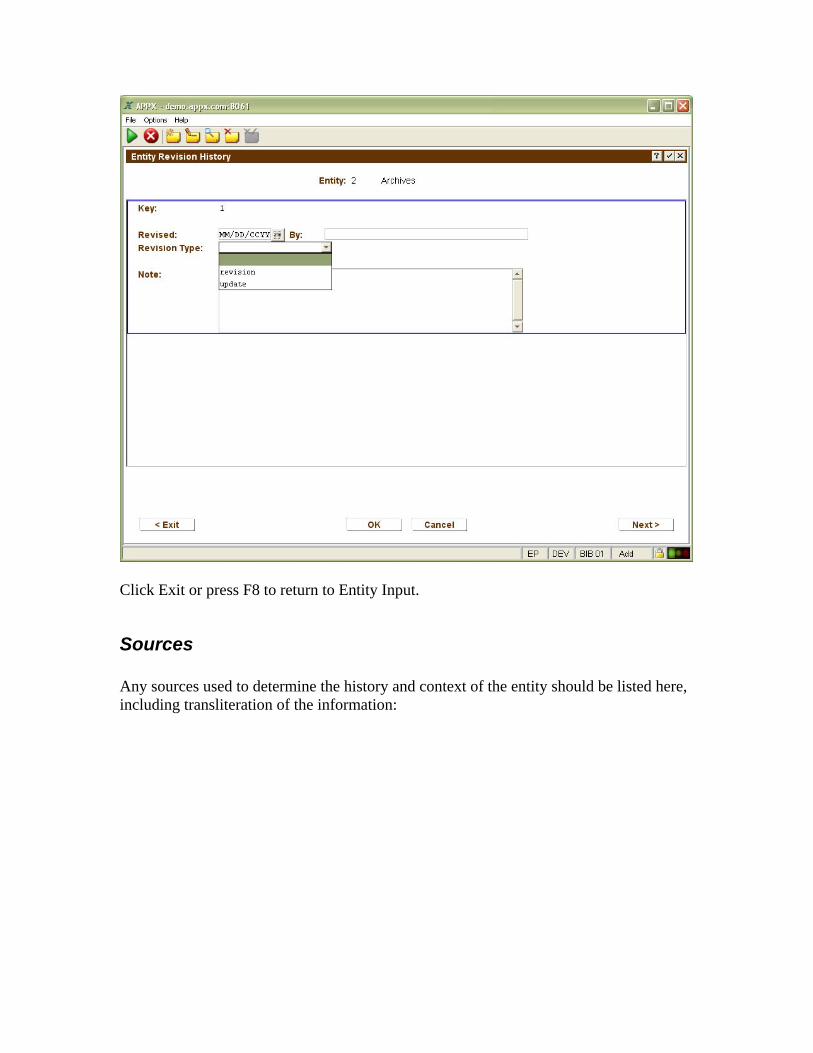
Revision History Axaem automatically knows when the record for the entity was added, but subsequent additions or changes need to be recorded in Revision History:
Click Exit or press F8 to return to Entity Input.
Sources Any sources used to determine the history and context of the entity should be listed here, including transliteration of the information:

Click Exit or press F8 to return to Entity Input.
View EAC To view the EAC record and export the XML data to a file that can be saved, click View EAC.
Resources The Resources section provides links to specific resources tied to this entity, including summaries of holdings.
Boxes

An Update process found on the Boxes menu will populate data in the fields below. It takes information from the box inventory system and counts the boxes in relation to entity hierarchy. This information is useful for statistical reports.
Click Exit or press F8 to return to Entity Input.
Microfilm The Microfilm button provides a quick glance at the amount of film we have for a given agency. When film exists, the data appears like this:

Note how film totals are rolled up by agency hierarchy. In the above example, film only exists at the Alcoholic Beverage Control (ABC) level, so the number 13 reflects everything at ABC as well as under the Commission. In the example below, each level has its own film, and together they show how much any hierarchy level has. That means that the Finance Division has 609 microfilm reels, 230 of which come from the Accounting Operations section. To produce these film totals, an update function on the Microfilm menu called Film in Storage Reset is run. The numbers do not automatically change as film is added or deaccessioned. The process is used to facilitate year-end status reports.

Click Exit or press F8 to go back to Entity Input.

Series Tied to Entity The Series Tied to Entity button will only be visible if there are series records tied to the agency. If there are, clicking on the button allows you to drill down to the series record:

Click Exit or press F8 to return to Entity Input.
Adding a New Entity To add a new agency, first make sure that all of the agency name codes you will need for this agency have been added prior. Then in Entity Input, click Add Mode or press F9. A blank agency screen will appear:

Skip the first field (it will auto-populate later) and place your cursor on the Label Name field. Type a label name. Then indicate the agency type that this organization should be linked to. Add a creation date. Type the first hierarchy level code and as many thereunder as you will need to describe this entity. Add the Hierarchy Began date.

Instead of clicking OK at this point to save the record, go directly into the Official Name screen. The first time you click this button, the data lookup information first appears:

The second time you click Official Name, it will take you into the official name screen and also save the new agency record with its new agency number.

Add the official name (with MARC codes), the agency long name (without MARC codes), and indicate whether or not the name has been registered with the Library of Congress. Click OK and the system will return you to the Entity Input screen, and display the official name at the top of the record.
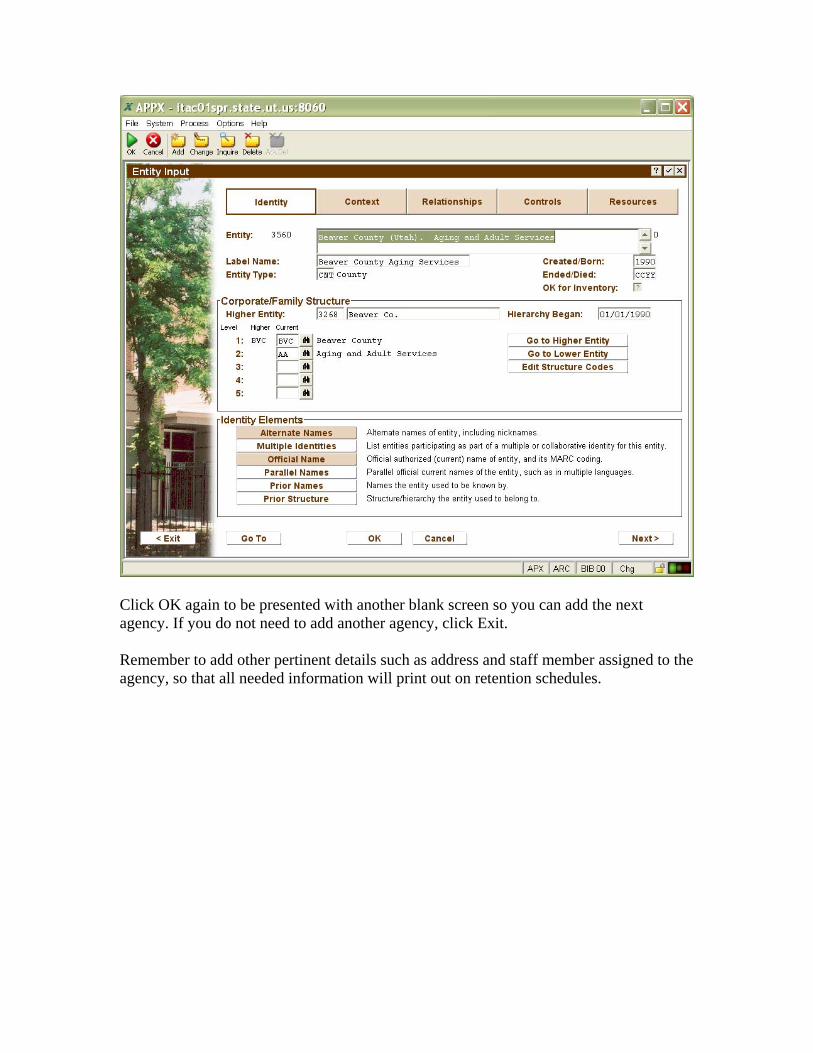
Click OK again to be presented with another blank screen so you can add the next agency. If you do not need to add another agency, click Exit. Remember to add other pertinent details such as address and staff member assigned to the agency, so that all needed information will print out on retention schedules.