Embed Size (px)
Citation preview

Enterprise nVision for FSCM 9.0 Created on 2/4/2010 10:12:00 AM

COPYRIGHT & TRADEMARKS
Copyright © 1998, 2009, Oracle and/or its affiliates. All rights reserved.
Oracle is a registered trademark of Oracle Corporation and/or its affiliates. Other names
may be trademarks of their respective owners.
This software and related documentation are provided under a license agreement
containing restrictions on use and disclosure and are protected by intellectual property
laws. Except as expressly permitted in your license agreement or allowed by law, you
may not use, copy, reproduce, translate, broadcast, modify, license, transmit, distribute,
exhibit, perform, publish or display any part, in any form, or by any means. Reverse
engineering, disassembly, or decompilation of this software, unless required by law for
interoperability, is prohibited.
The information contained herein is subject to change without notice and is not warranted
to be error-free. If you find any errors, please report them to us in writing.
If this software or related documentation is delivered to the U.S. Government or anyone
licensing it on behalf of the U.S. Government, the following notice is applicable:
U.S. GOVERNMENT RIGHTS
Programs, software, databases, and related documentation and technical data delivered to
U.S. Government customers are “commercial computer software” or “commercial
technical data” pursuant to the applicable Federal Acquisition Regulation and agency-
specific supplemental regulations. As such, the use, duplication, disclosure, modification,
and adaptation shall be subject to the restrictions and license terms set forth in the
applicable Government contract, and, to the extent applicable by the terms of the
Government contract, the additional rights set forth in FAR 52.227-19, Commercial
Computer Software License (December 2007). Oracle USA, Inc., 500 Oracle Parkway,
Redwood City, CA 94065.
This software is developed for general use in a variety of information management
applications. It is not developed or intended for use in any inherently dangerous
applications, including applications which may create a risk of personal injury. If you use
this software in dangerous applications, then you shall be responsible to take all
appropriate fail-safe, backup, redundancy and other measures to ensure the safe use of
this software. Oracle Corporation and its affiliates disclaim any liability for any damages
caused by use of this software in dangerous applications.
This software and documentation may provide access to or information on content,
products and services from third parties. Oracle Corporation and its affiliates are not
responsible for and expressly disclaim all warranties of any kind with respect to third
party content, products and services. Oracle Corporation and its affiliates will not be
responsible for any loss, costs, or damages incurred due to your access to or use of third
party content, products or services.
Training Guide Enterprise nVision for FSCM 9.0
Page iii
Table of Contents Enterprise nVision for FSCM 9.0 .................................................................................1
PS/nVision Basics .................................................................................................................. 1 Understanding Report Instances and Layouts .................................................................................... 1 Running Existing nVision Reports .................................................................................................... 8 Using DrillDown in the PS/nVision HomePage ............................................................................... 12
PS/nVision Reporting on the Web ...................................................................................... 20 Performing Report Requests ........................................................................................................... 21 Copying a Request to Another Business Unit / Clone ...................................................................... 35 Creating and Running Scope Definitions ......................................................................................... 43 Using DrillDown on the Web .......................................................................................................... 62 Running Report Books.................................................................................................................... 70

Training Guide Enterprise nVision for FSCM 9.0
Page 1
Enterprise nVision for FSCM 9.0 PS/nVision is a PeopleSoft reporting tool that retrieves information from a PeopleSoft database
and places it onto a Microsoft Excel spreadsheet. This transfer of information from the database to a spreadsheet enables you to use familiar Excel commands for formatting and analyzing data.
Information is transferred in a form that helps you see the big picture, explore details, and make decisions. With PS/nVision, you spend your time analyzing results rather than summarizing and
entering data onto the spreadsheet. PS/nVision selects data from PeopleSoft database using
ledgers, trees, and queries. Queries are useful for extracting data from sources other than ledgers.
Upon completion of this module, you will be able to:
• Identify the basic features of PS/nVision.
• Use PS/nVision on the Web for reporting.
PS/nVision Basics
PS/nVision works within spreadsheets. In Windows, when PS/nVision starts, it automatically
opens Microsoft Excel. You access PS/nVision features from a special PS/nVision menu within Microsoft Excel to create templates (layouts) for data retrieval. The PS/nVision program itself
appears minimized on the Windows taskbar. You can click the PS/nVision icon to open the
PS/nVision window, but unless a specific PS/nVision dialog box is currently active in Excel, the PS/nVision window is blank.
Each Excel spreadsheet created with PS/nVision is a report instance or a report layout. After you create a report layout (XNV file), you can use it to format data automatically. You can also create
a custom front-end macro sheet for point-and-click access to reports and reporting functions.
Upon completion of this lesson, you will be able to: • Describe report instances and layouts.
• Run existing PS/nVision reports.
• Use Drill-down in the PS/nVision HomePage.
Understanding Report Instances and Layouts Each Excel spreadsheet created with PS/nVision is either a report instance or a report layout.
In this topic, you will learn about the PS/nVision report instances and layouts.
Procedure

Training Guide
Enterprise nVision for FSCM 9.0
Page 2
Step Action
1. A report instance contains data that PS/nVision retrieves from your PeopleSoft
database. A report layout is the format in which the report instance is displayed.
Multiple report instances can be generated from a single report layout.

Training Guide Enterprise nVision for FSCM 9.0
Page 3
Step Action
2. A report layout is an Excel spreadsheet that you can use as a template to define the format in which the report is displayed and the type of information that goes into the
report.
The report layout displayed below consists of various columns and specifies the type
of data that can be retrieved within these columns. The report layout also consists of
formulae to calculate the retrieved data.
Training Guide
Enterprise nVision for FSCM 9.0
Page 4
Step Action
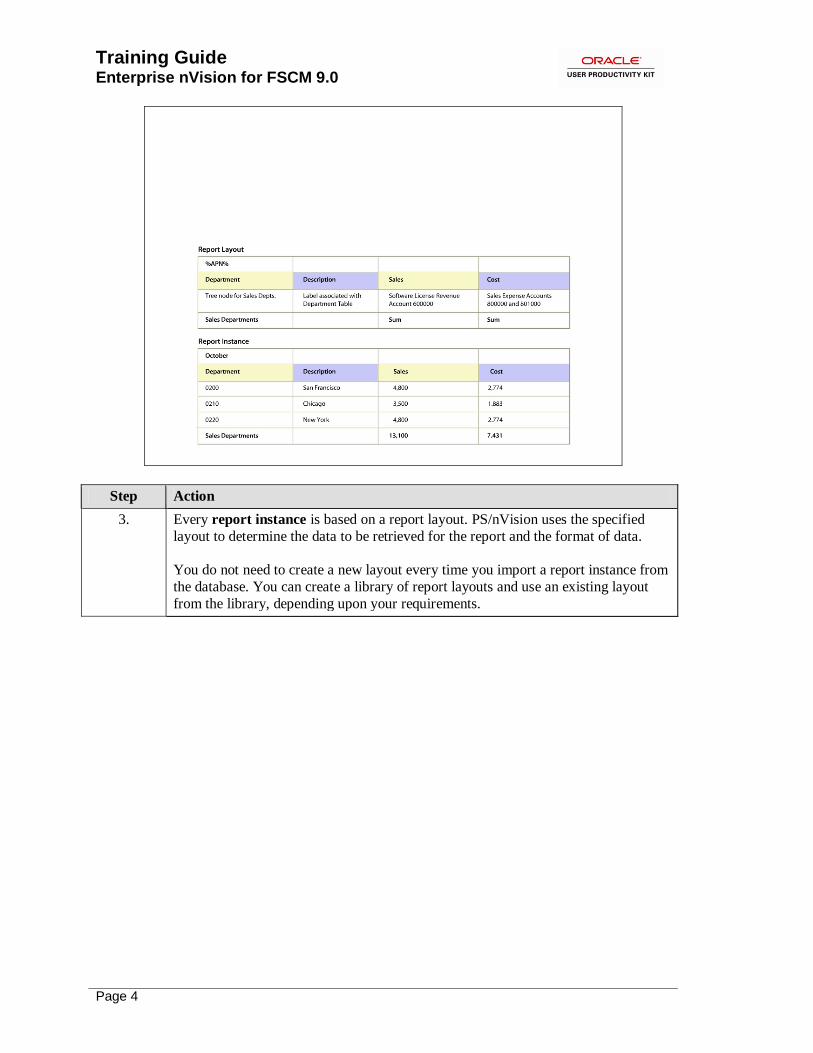
3. Every report instance is based on a report layout. PS/nVision uses the specified
layout to determine the data to be retrieved for the report and the format of data.
You do not need to create a new layout every time you import a report instance from
the database. You can create a library of report layouts and use an existing layout
from the library, depending upon your requirements.

Training Guide Enterprise nVision for FSCM 9.0
Page 5
Step Action
4. A feature of PS/nVision is that it keeps track of the layout used in any given report. Therefore, the next time you run that report or another report of the same type,
PS/nVision automatically loads the correct layout for you.

Training Guide
Enterprise nVision for FSCM 9.0
Page 6
Step Action
5. PS/nVision provides two kinds of report layouts:
• Tabular layouts
• Matrix layouts
The main difference between both of these layouts is the way in which they specify
the data to be retrieved from the database. Tabular layouts are used for detailed transaction reporting, while matrix layouts are more appropriate for summarized
reporting and analysis.
Training Guide Enterprise nVision for FSCM 9.0
Page 7
Step Action
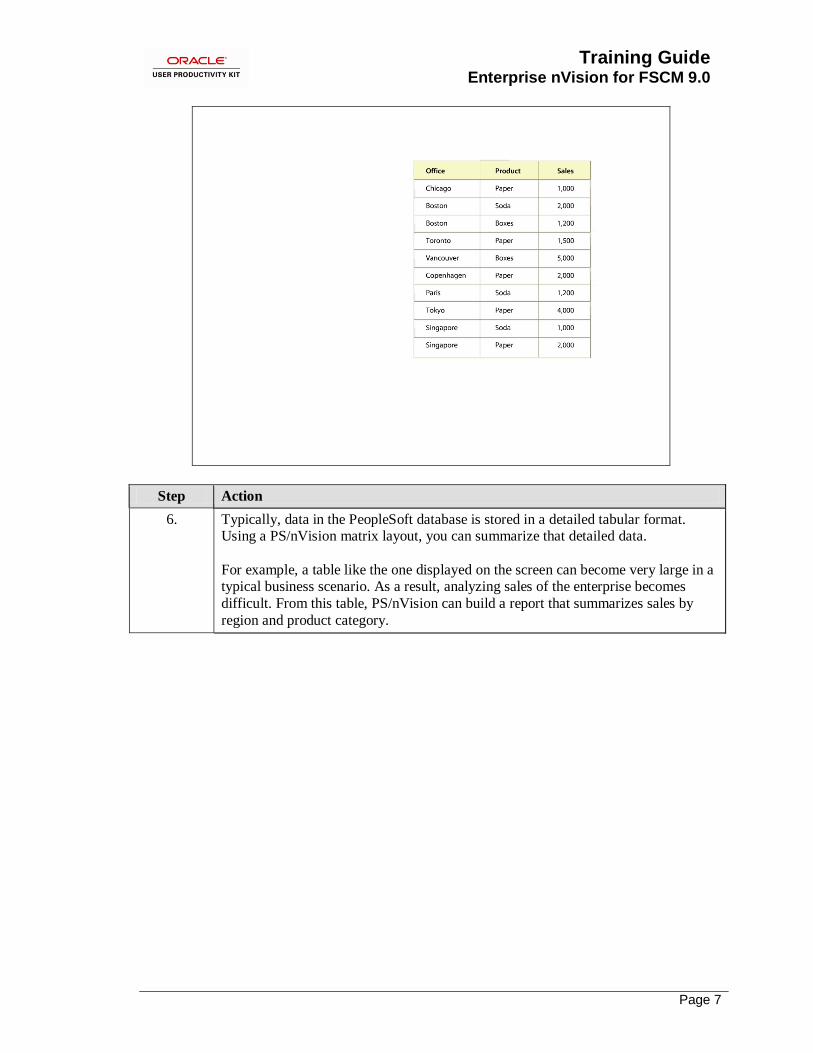
6. Typically, data in the PeopleSoft database is stored in a detailed tabular format. Using a PS/nVision matrix layout, you can summarize that detailed data.
For example, a table like the one displayed on the screen can become very large in a typical business scenario. As a result, analyzing sales of the enterprise becomes
difficult. From this table, PS/nVision can build a report that summarizes sales by
region and product category.
Training Guide
Enterprise nVision for FSCM 9.0
Page 8
Step Action
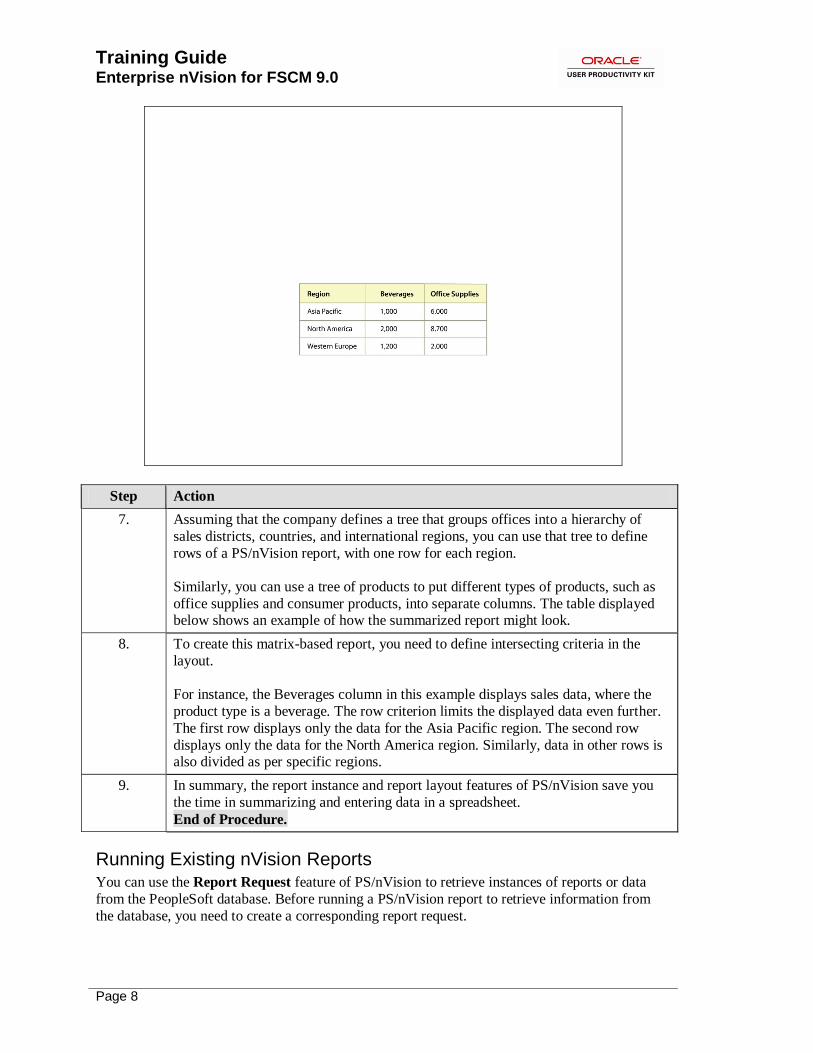
7. Assuming that the company defines a tree that groups offices into a hierarchy of
sales districts, countries, and international regions, you can use that tree to define
rows of a PS/nVision report, with one row for each region.
Similarly, you can use a tree of products to put different types of products, such as
office supplies and consumer products, into separate columns. The table displayed below shows an example of how the summarized report might look.
8. To create this matrix-based report, you need to define intersecting criteria in the
layout.
For instance, the Beverages column in this example displays sales data, where the
product type is a beverage. The row criterion limits the displayed data even further.
The first row displays only the data for the Asia Pacific region. The second row
displays only the data for the North America region. Similarly, data in other rows is also divided as per specific regions.
9. In summary, the report instance and report layout features of PS/nVision save you
the time in summarizing and entering data in a spreadsheet.
End of Procedure.
Running Existing nVision Reports You can use the Report Request feature of PS/nVision to retrieve instances of reports or data
from the PeopleSoft database. Before running a PS/nVision report to retrieve information from
the database, you need to create a corresponding report request.

Training Guide Enterprise nVision for FSCM 9.0
Page 9
Each report request is a collection of report-specific information, such as request name, report title, associated layout, and scope. You can save and reuse a report request. Report requests
created in PS/nVision for Windows are public. If you want to create secured report requests, you
must use PS/nVision on the Web, where requests are secured by default.
In this topic, your manager has asked you to create an income comparison report for the Florida
Operations business unit. The report should compare the revenue and expenses for the year 2001
over the previous year. You need to run the Comparative Income Statement report.
Procedure
Step Action
1. The PS/nVision HomePage is displayed. You need to create a report request using
the features on this page.
Click the nVision menu.
Training Guide
Enterprise nVision for FSCM 9.0
Page 10
Step Action
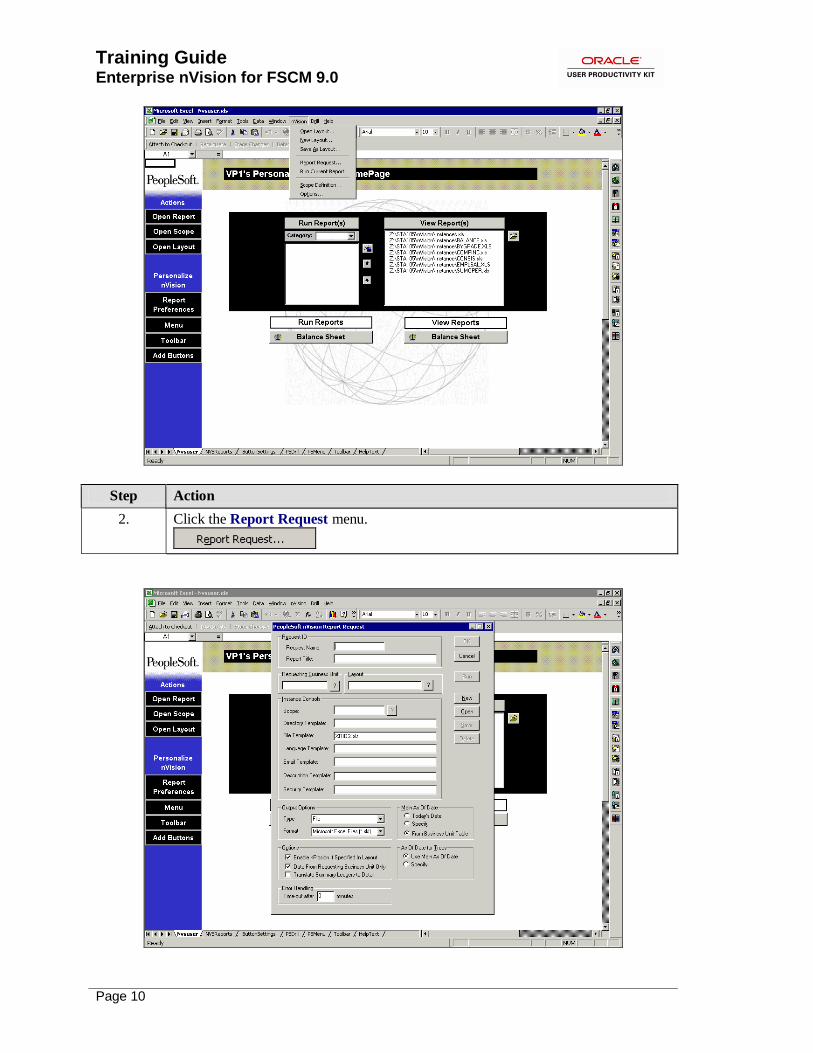
2. Click the Report Request menu.

Training Guide Enterprise nVision for FSCM 9.0
Page 11
Step Action
3. Use the PeopleSoft nVision Report Request dialog box to enter information about
the report you are running, such as what layout to use, what time period to report on,
and where to store the reports. You can save and reuse this information.
Click the New button.
4. Enter a name to identify your report request. By naming and saving report requests,
you can retrieve all the information of a report request the next time you run the
report.
Click in the Request Name field.
5. Enter the desired information into the Request Name field. Enter "COMPINC".
6. Click in the Report Title field.
7. Enter a description to describe your report request.
Enter the desired information into the Report Title field. Enter "Comparative
Income Statement".
8. Click in the Requesting Business Unit field.
9. Enter the business unit that the report belongs to. You can retrieve data for this
business unit alone or for several business units.
Enter the desired information into the Requesting Business Unit field. Enter
"US005".
10. Click in the Layout field.
11. Select the report layout to use for this report. You are using the COMPINC.xnv
layout to run your report.
Enter the desired information into the Layout field. Enter "COMPINC".
12. If you are using this report layout to create multiple instances of the report, then you
specify appropriate values in the Instance Controls section. In this exercise, you are
creating only one instance of the report.
13. Set the reporting period for this report. Many report layouts report on data over a given accounting period, such as the current quarter or year-to-date. PS/nVision uses
the main as of date to determine the meaning of any TimeSpans used in the layout.
Click the Specify: option.
Training Guide
Enterprise nVision for FSCM 9.0
Page 12
Step Action
14. Click in the Specify field.
15. Enter the desired information into the Specify field. Enter "12/31/2001".
16. Now, run the report.
Click the Run button.
Step Action
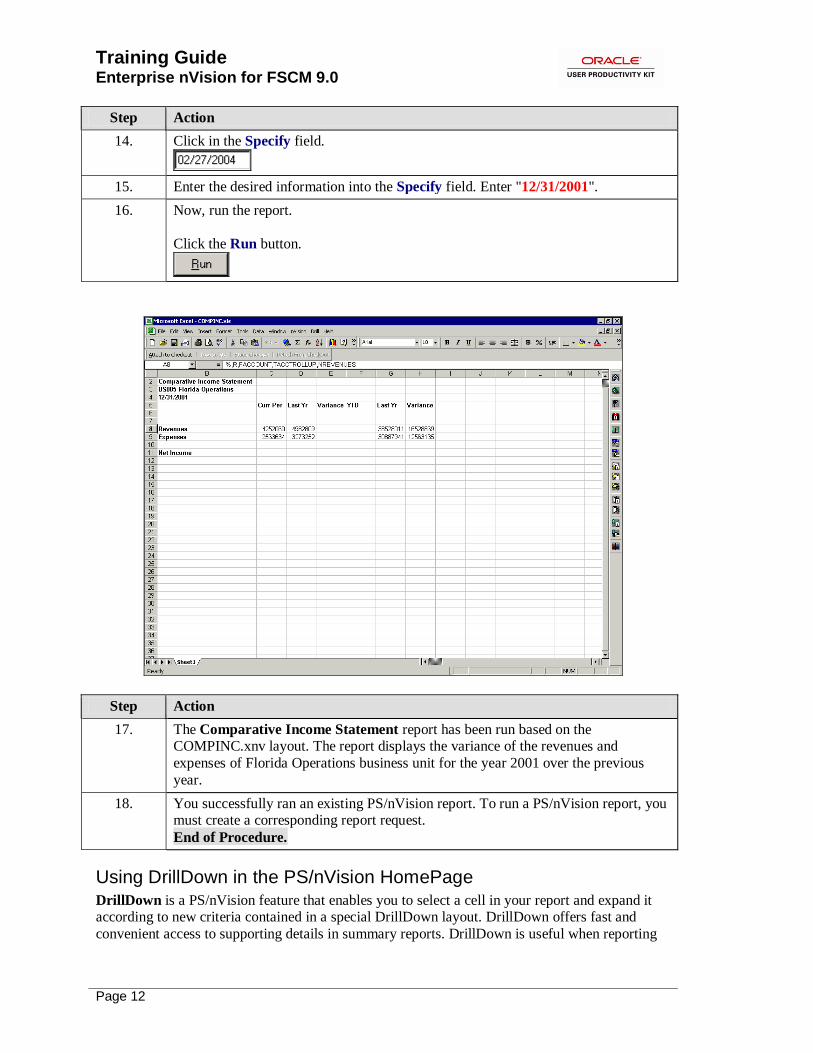
17. The Comparative Income Statement report has been run based on the COMPINC.xnv layout. The report displays the variance of the revenues and
expenses of Florida Operations business unit for the year 2001 over the previous
year.
18. You successfully ran an existing PS/nVision report. To run a PS/nVision report, you must create a corresponding report request.
End of Procedure.
Using DrillDown in the PS/nVision HomePage DrillDown is a PS/nVision feature that enables you to select a cell in your report and expand it according to new criteria contained in a special DrillDown layout. DrillDown offers fast and
convenient access to supporting details in summary reports. DrillDown is useful when reporting

Training Guide Enterprise nVision for FSCM 9.0
Page 13
is based on summary ledgers, because it provides underlying details whenever and wherever you need them.
The DrillDown feature is available from matrix layouts only. However, the layout that displays the results of the DrillDown can be either matrix or tabular. Note that you can drill-down further
only from a matrix layout. After you display the result of a DrillDown in a tabular form, you
cannot drill further.
The DrillDown component is available in the Windows version and the Web version of
PS/nVision. DrillDown works in a similar way in both the versions of PS/nVision. You can
perform drill-down in Windows version by selecting a cell on a report instance and selecting an appropriate DrillDown layout from the Drill menu. The key to DrillDown is passing the selection
criteria from a parent cell to its child cell by using the DrillDown layout.
In this topic, you have generated a Comparative Income Statement report. Based on that report, the Controller department requests a report that provides underlying details of the net revenues
for 2001 by department and period.
Procedure
Training Guide
Enterprise nVision for FSCM 9.0
Page 14
Step Action
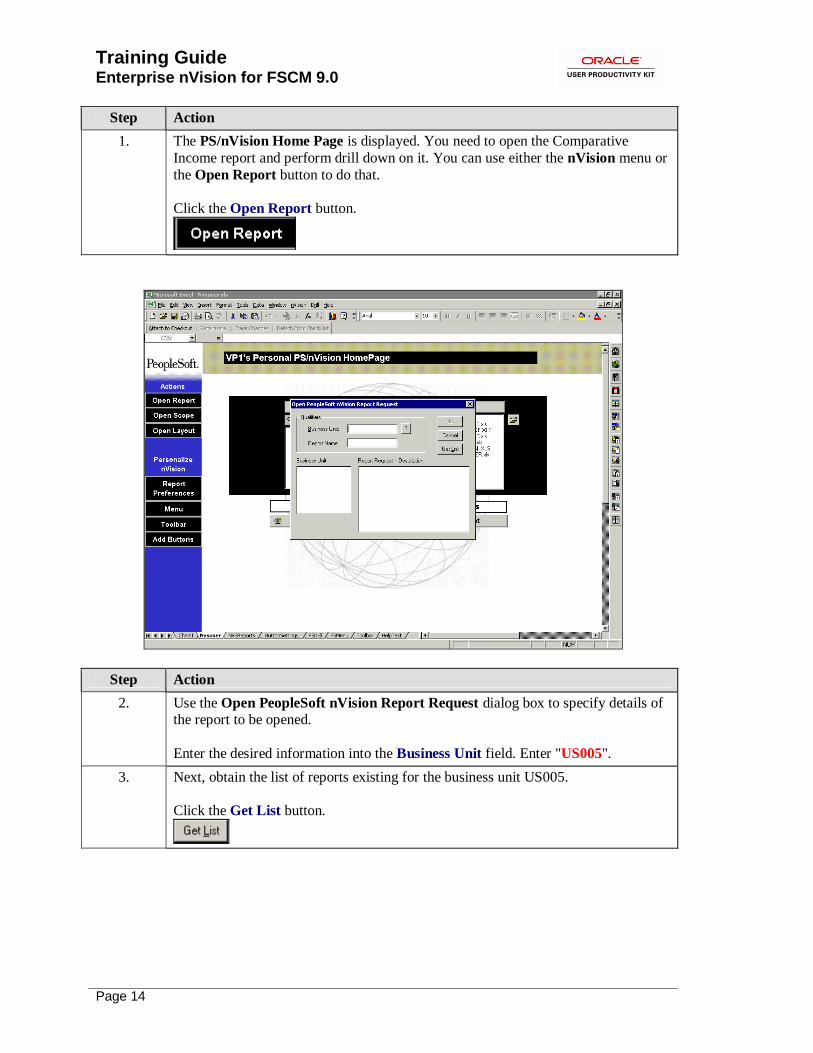
1. The PS/nVision Home Page is displayed. You need to open the Comparative
Income report and perform drill down on it. You can use either the nVision menu or
the Open Report button to do that.
Click the Open Report button.
Step Action
2. Use the Open PeopleSoft nVision Report Request dialog box to specify details of the report to be opened.
Enter the desired information into the Business Unit field. Enter "US005".
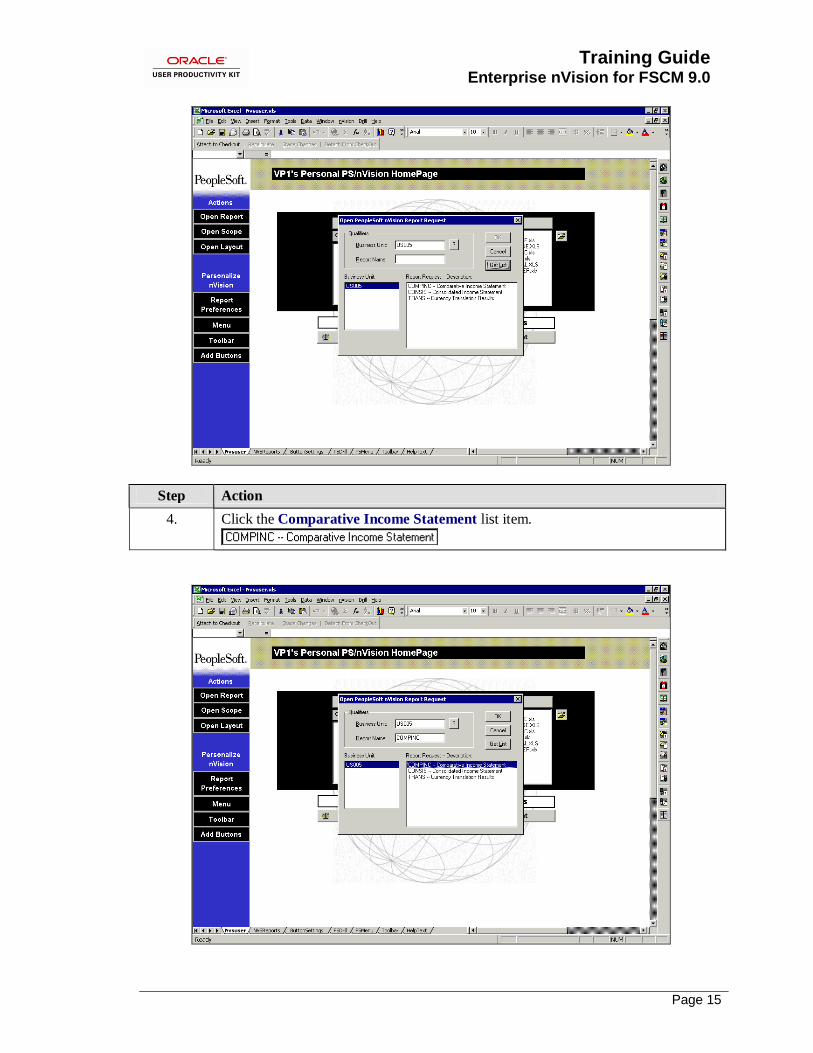
3. Next, obtain the list of reports existing for the business unit US005.
Click the Get List button.
Training Guide Enterprise nVision for FSCM 9.0
Page 15
Step Action
4. Click the Comparative Income Statement list item.

Training Guide
Enterprise nVision for FSCM 9.0
Page 16
Step Action
5. Click the OK button.
Step Action
6. The PeopleSoft nVision Report Request dialog box displays the report request parameters. Use this dialog box to run the report.
Click the Run button.
Training Guide Enterprise nVision for FSCM 9.0
Page 17
Step Action
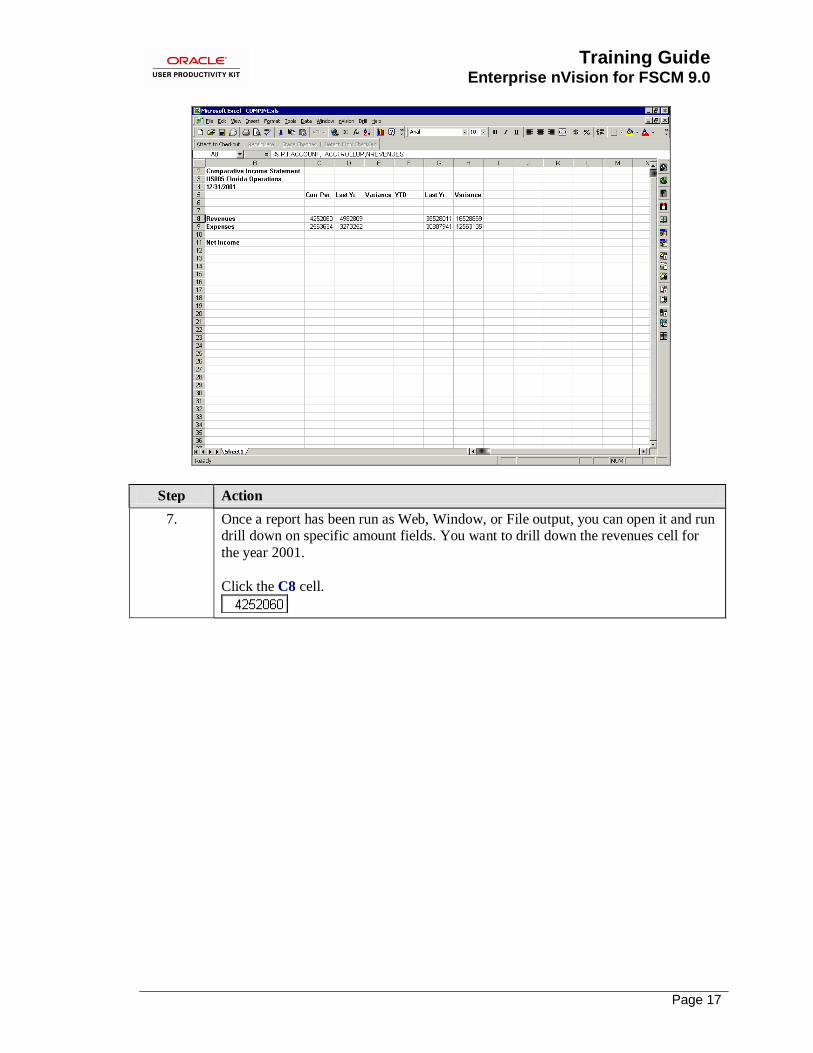
7. Once a report has been run as Web, Window, or File output, you can open it and run drill down on specific amount fields. You want to drill down the revenues cell for
the year 2001.
Click the C8 cell.
Training Guide
Enterprise nVision for FSCM 9.0
Page 18
Step Action
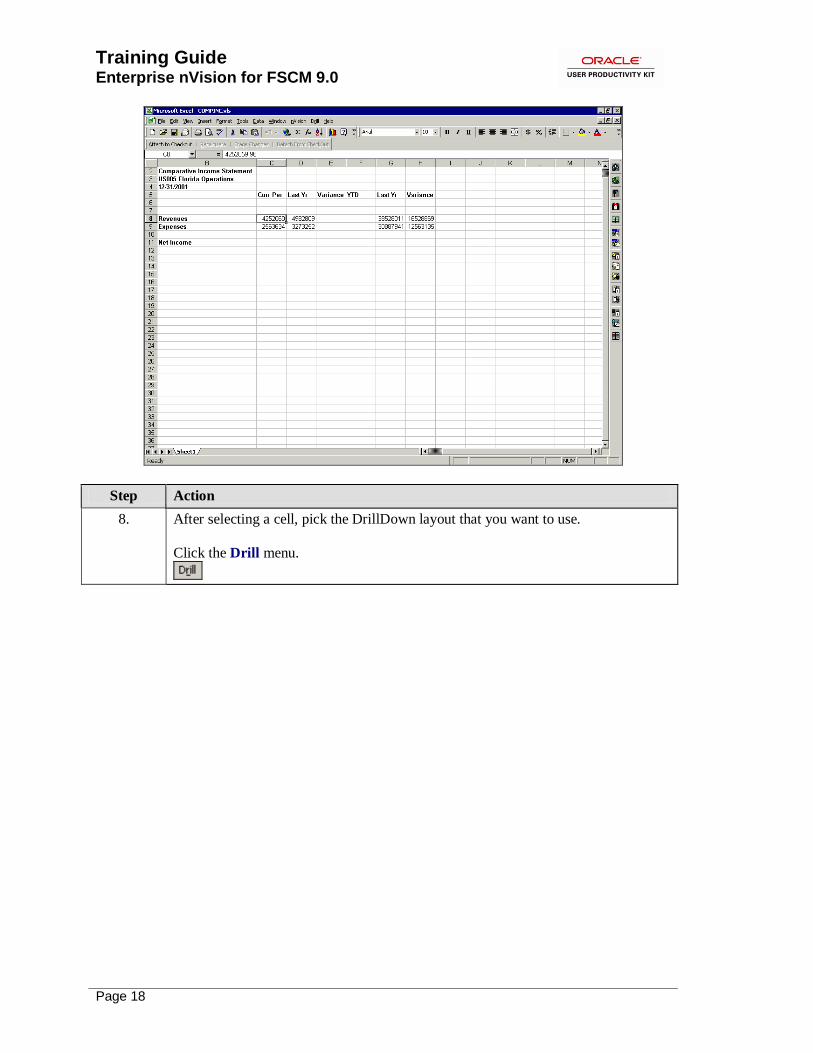
8. After selecting a cell, pick the DrillDown layout that you want to use.
Click the Drill menu.

Training Guide Enterprise nVision for FSCM 9.0
Page 19
Step Action
9. A number of generic reports are provided with the application and can be tailored or cloned as needed. For this example, use the existing Account by Period layout.
Click the Account by Period menu.
Training Guide
Enterprise nVision for FSCM 9.0
Page 20
Step Action
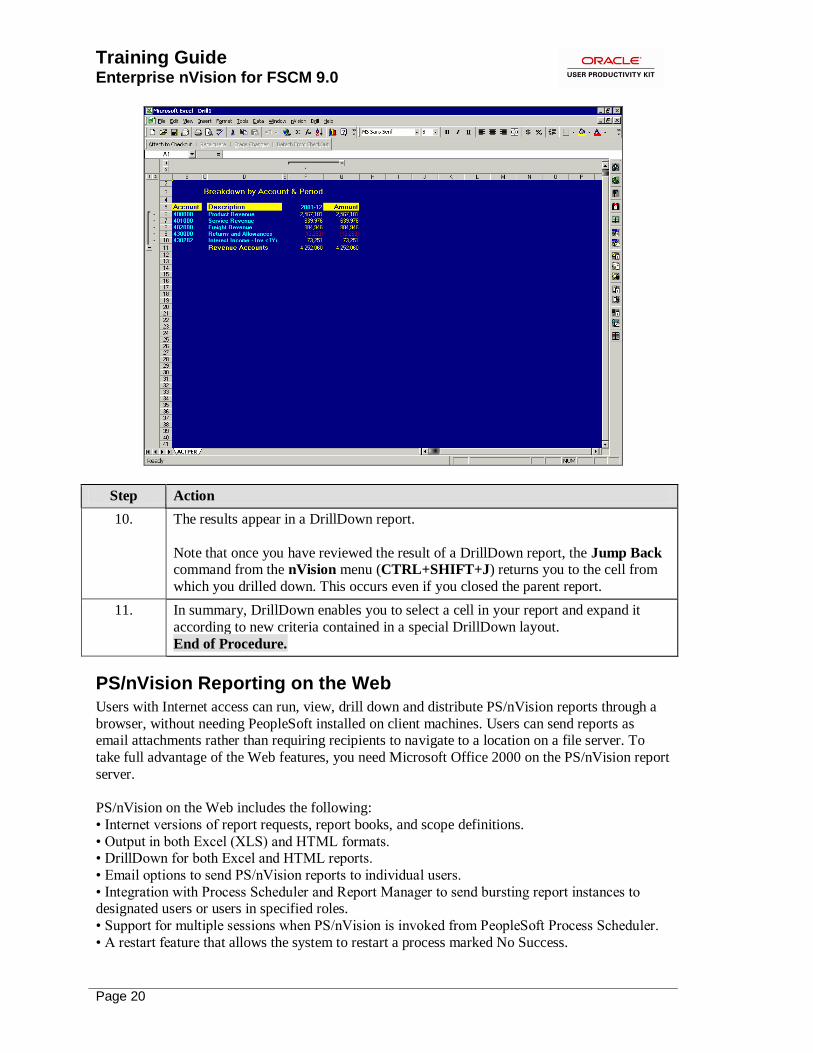
10. The results appear in a DrillDown report.
Note that once you have reviewed the result of a DrillDown report, the Jump Back command from the nVision menu (CTRL+SHIFT+J) returns you to the cell from
which you drilled down. This occurs even if you closed the parent report.
11. In summary, DrillDown enables you to select a cell in your report and expand it
according to new criteria contained in a special DrillDown layout.
End of Procedure.
PS/nVision Reporting on the Web
Users with Internet access can run, view, drill down and distribute PS/nVision reports through a
browser, without needing PeopleSoft installed on client machines. Users can send reports as email attachments rather than requiring recipients to navigate to a location on a file server. To
take full advantage of the Web features, you need Microsoft Office 2000 on the PS/nVision report
server.
PS/nVision on the Web includes the following:
• Internet versions of report requests, report books, and scope definitions.
• Output in both Excel (XLS) and HTML formats. • DrillDown for both Excel and HTML reports.
• Email options to send PS/nVision reports to individual users.
• Integration with Process Scheduler and Report Manager to send bursting report instances to designated users or users in specified roles.
• Support for multiple sessions when PS/nVision is invoked from PeopleSoft Process Scheduler.
• A restart feature that allows the system to restart a process marked No Success.

Training Guide Enterprise nVision for FSCM 9.0
Page 21
Upon completion of this lesson, you will be able to:
• Perform report requests.
• Copy a request to another business unit/clone. • Create and run scope definitions.
• Use DrillDown on the Web.
• Run report books.
Performing Report Requests Before running a PS/nVision report to retrieve information from the database, you need to create
a corresponding report request. Each report request is a collection of report-specific information,
such as request name, report title, associated layout, and scope.
The report requests created on the Web are secured by default. This means that they are available
only to you and to any users or groups you assign. You can make a report request public to allow access to any user.
In this topic, you have been asked to run the Consolidated Income report for a business unit. The
report should be in the Web format and should display revenue and expenses details.
Procedure

Training Guide
Enterprise nVision for FSCM 9.0
Page 22
Step Action
1. Begin by navigating to the nVision Report Request page.
Click the vertical scrollbar.
Step Action
2. Click the Reporting Tools link.
Training Guide Enterprise nVision for FSCM 9.0
Page 23
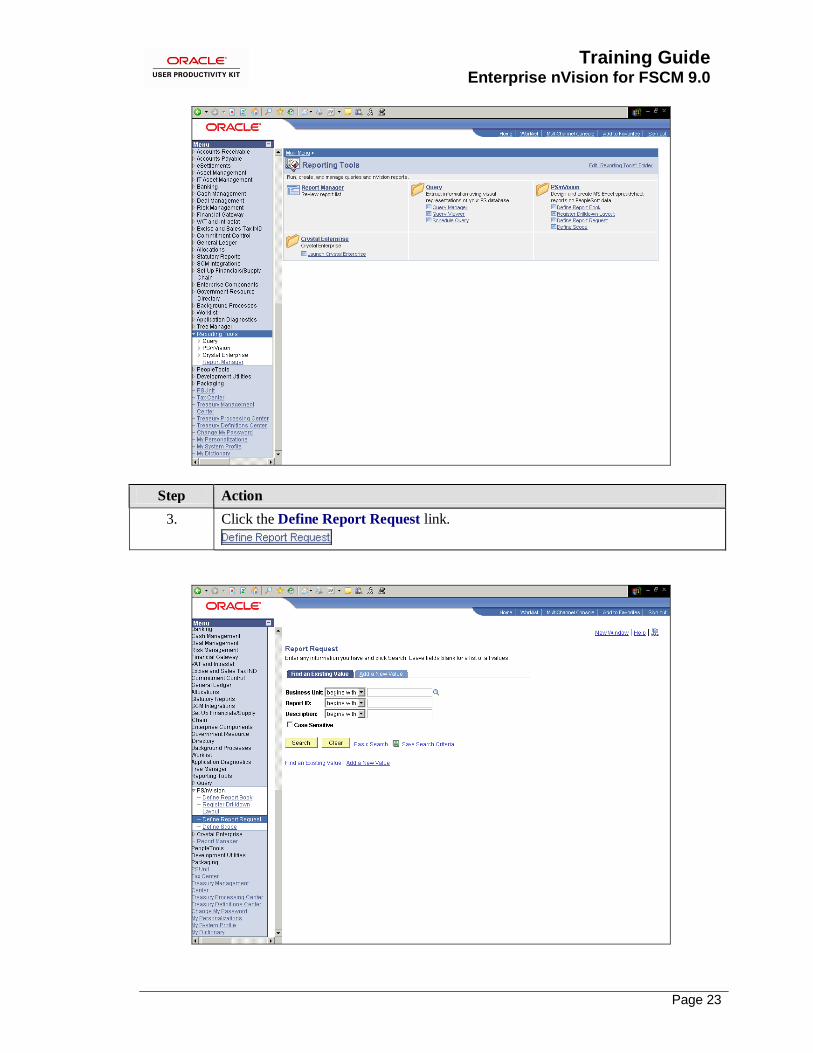
Step Action
3. Click the Define Report Request link.

Training Guide
Enterprise nVision for FSCM 9.0
Page 24
Step Action
4. Click the Add a New Value tab.
Step Action
5. Specify the business unit for which you want to run the report.
Enter the desired information into the Business Unit field. Enter "US001".
6. Enter a name to identify your report request. You can use this name to retrieve all the information of a report request the next time you run the report.
Click in the Report ID field.
7. Enter the desired information into the Report ID field. Enter "CONSIS2".
8. Click the Add button.
9. Use the nVision Report Request page to define report request parameters.

Training Guide Enterprise nVision for FSCM 9.0
Page 25
Step Action
10. Enter a description to describe your report request.
Enter the desired information into the Report Title field. Enter "Consolidated
Income Statement".
11. Select the report layout to use for this report. The layout is saved in a directory in the
Process Scheduler Configuration file.
Click in the *Layout field.
12. Enter the desired information into the *Layout field. Enter "CONSIS".
13. Set the reporting period for this report.
Click the *As Of Reporting Date list.
14. Click an entry in the list.
15. Click in the *As Of Reporting Date field.
16. Enter the desired information into the *As Of Reporting Date field. Enter
"12/31/2001".

Training Guide
Enterprise nVision for FSCM 9.0
Page 26
Step Action
17. Use the Tree As Of Date field to specify trees that are in effect as of the reporting
date. You can specify a different date and use a set of trees in effect on that date. For
example, you may have a reporting structure set to go into effect in three months.
For this example, use the Use As Of Reporting Date option.
18. Use the Type field to specify how will the results of the process request be treated.
The default Web type sends each report instance to Report Manager. Retain the default type for this example.
19. PS/nVision reports have two different formats for creating report instances, HTML
and Excel. Both formats are valid with all output types. To use HTML, Excel 2000
or later must be installed on your PS/nVision report server.
For this example, use the default HTML Documents format.
Step Action
20. Click the Advanced Options tab.
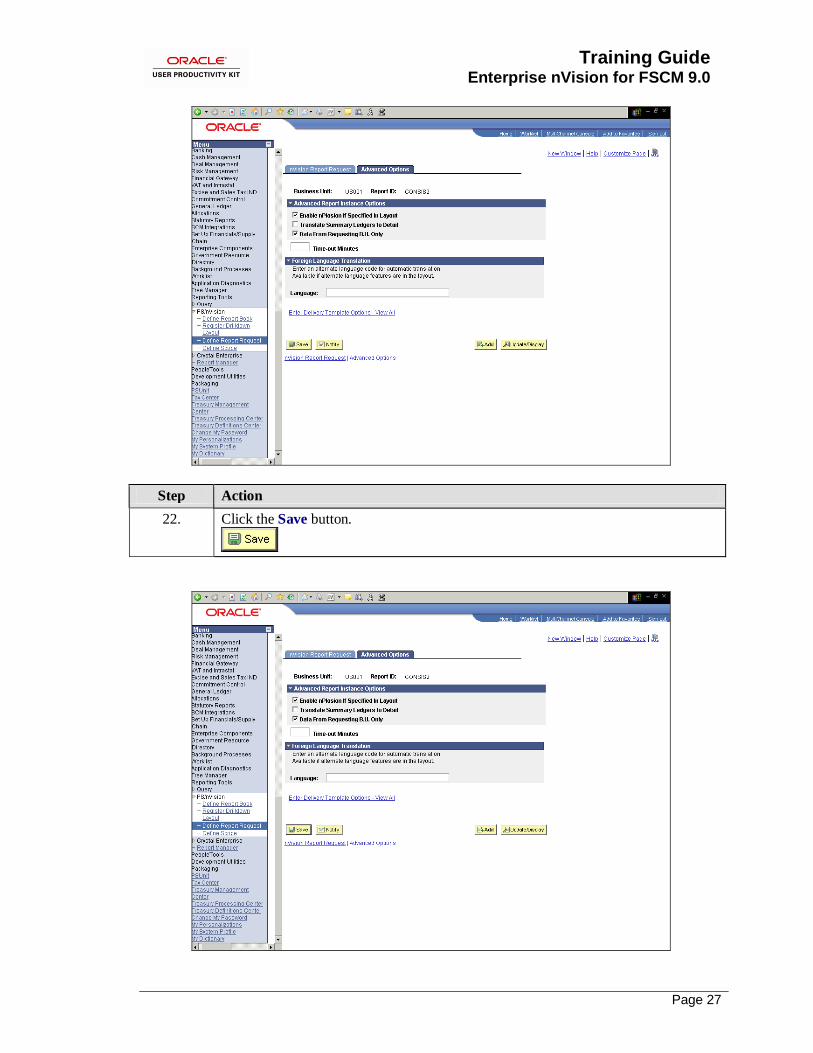
21. The Advanced Options page allows you to change high level specifications for your report request. For this example, retain the default specifications.
Training Guide Enterprise nVision for FSCM 9.0
Page 27
Step Action
22. Click the Save button.
Training Guide
Enterprise nVision for FSCM 9.0
Page 28
Step Action
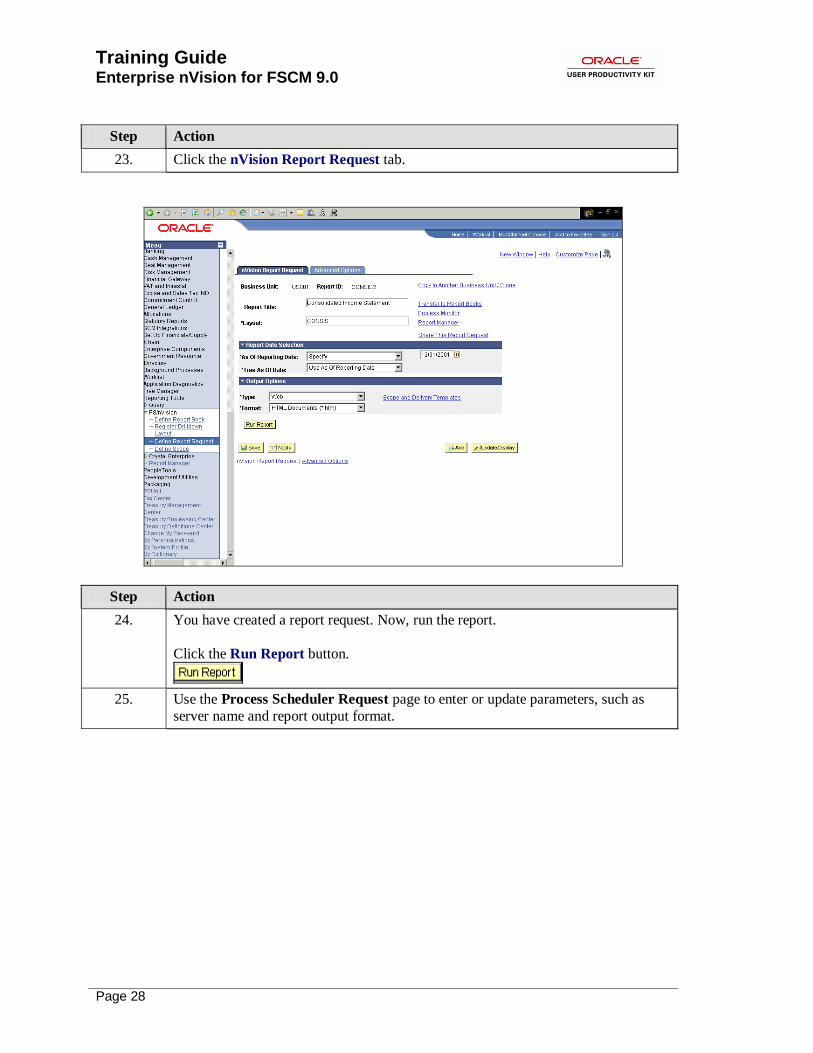
23. Click the nVision Report Request tab.
Step Action
24. You have created a report request. Now, run the report.
Click the Run Report button.
25. Use the Process Scheduler Request page to enter or update parameters, such as
server name and report output format.

Training Guide Enterprise nVision for FSCM 9.0
Page 29
Step Action
26. You must select a Server Name to identify the server on which the report will run. If you use the same Run Control ID for subsequent processes, the server name that
you last used will default in this field.
Click the Server Name list.
27. Click an entry in the list.
28. Click the OK button.
Training Guide
Enterprise nVision for FSCM 9.0
Page 30
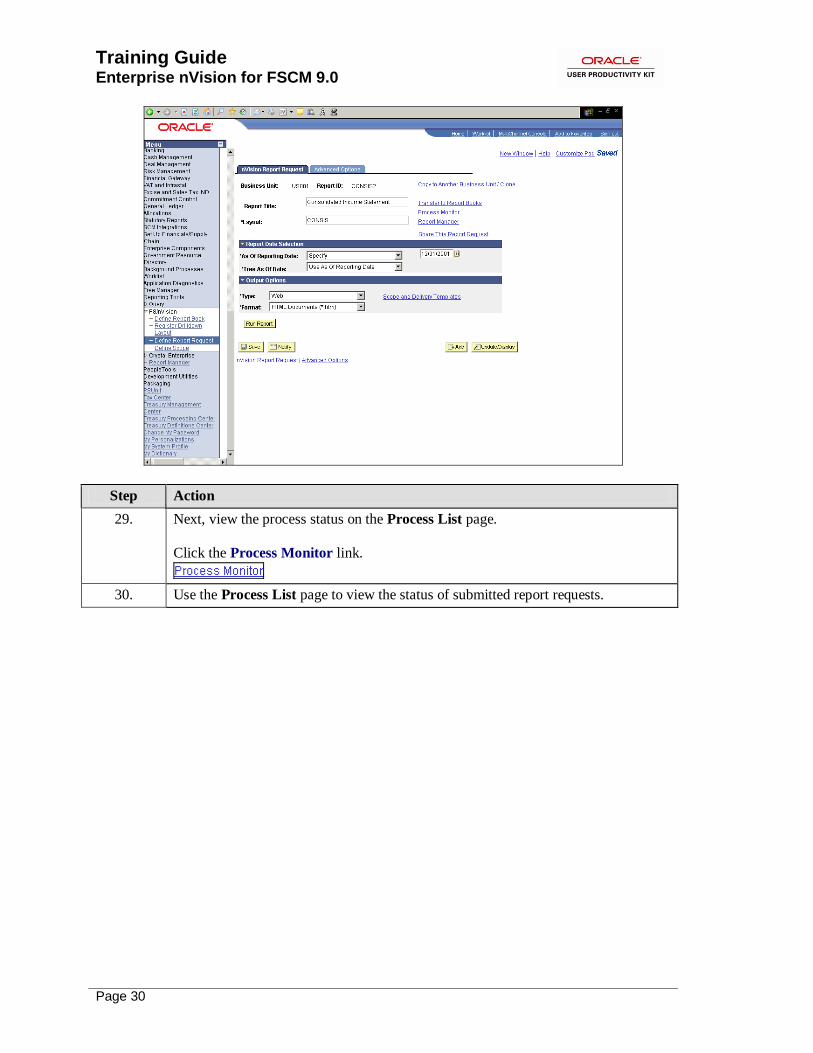
Step Action
29. Next, view the process status on the Process List page.
Click the Process Monitor link.
30. Use the Process List page to view the status of submitted report requests.

Training Guide Enterprise nVision for FSCM 9.0
Page 31
Step Action
31. The current status of the report is Initiated. The report is finished when the status is Success. Continue to click the Refresh button until the status is Success.
Click the Refresh button.
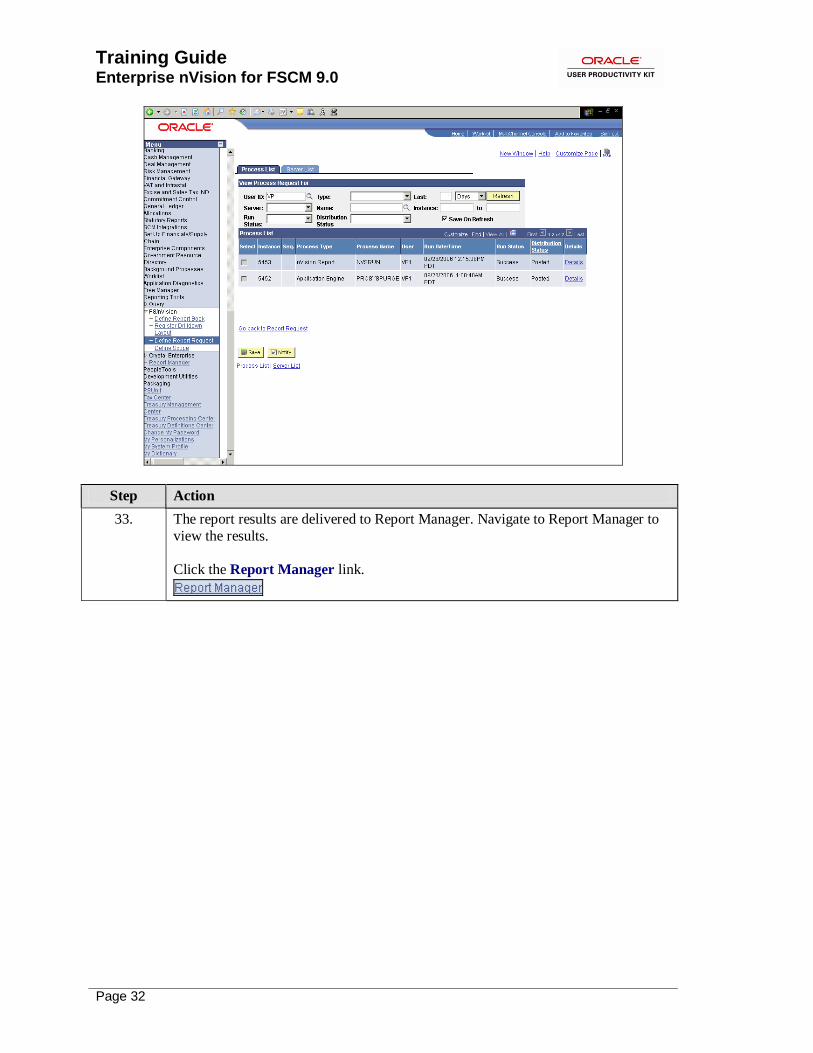
32. The run status has changed to Success.
Notice that the process instance number is 5453. You will need this number for later
reference.
Training Guide
Enterprise nVision for FSCM 9.0
Page 32
Step Action
33. The report results are delivered to Report Manager. Navigate to Report Manager to
view the results.
Click the Report Manager link.
Training Guide Enterprise nVision for FSCM 9.0
Page 33
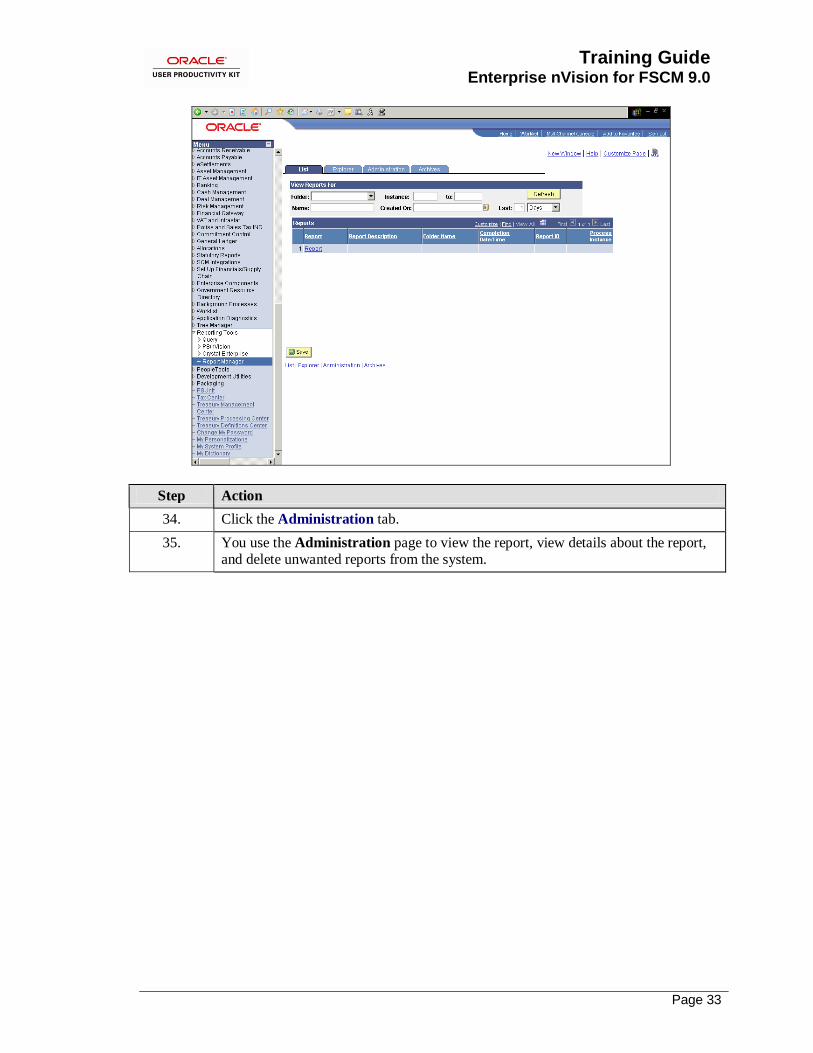
Step Action
34. Click the Administration tab.
35. You use the Administration page to view the report, view details about the report, and delete unwanted reports from the system.

Training Guide
Enterprise nVision for FSCM 9.0
Page 34
Step Action
36. Notice that the process instance 5453 is posted. Click the Description link to open
the report.
Click the Description link.

Training Guide Enterprise nVision for FSCM 9.0
Page 35
Step Action
37. Review the Consolidated Income Statement report and close the window.
Click the Close button.
38. You successfully ran a report request on the Web version of PS/nVision.
End of Procedure.
Copying a Request to Another Business Unit / Clone You can copy a PS/nVision report request to another business unit to save time. If you want to
clone a report request for the same business unit, you change the Report ID to a unique value.
When you copy a secure report request, all the groups and users associated with that request are
copied from the original request to the new copy. If you want to copy a report request to another
existing report request, the existing request must either be public or you must have access to it. If you do not have access, an error message will display.
In this topic, you have been asked to define the Quarterly Earnings Summary report for the
Florida Operations business unit. You discover that a similar report request has been run by your coworker for another business unit. Therefore, you decide to copy that report request to the
Florida Operations business unit.
Procedure

Training Guide
Enterprise nVision for FSCM 9.0
Page 36
Step Action
1. Begin by navigating to the nVision Report Request page.
Click the vertical scrollbar.
Training Guide Enterprise nVision for FSCM 9.0
Page 37
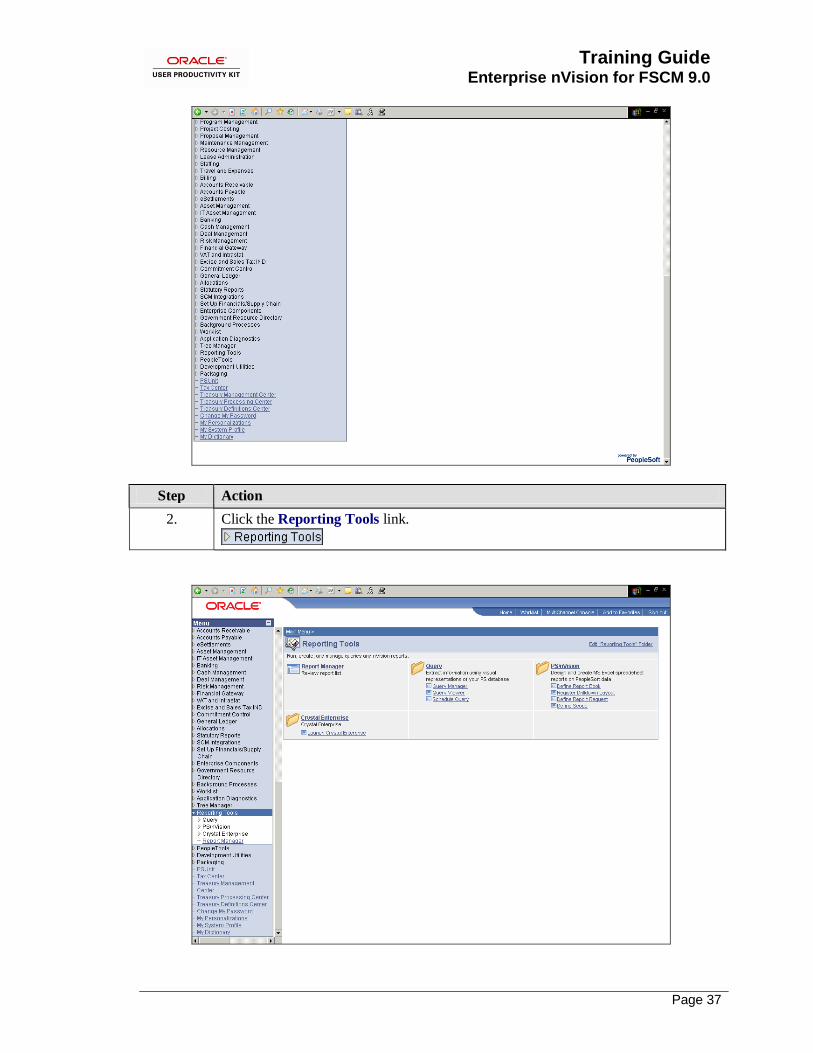
Step Action
2. Click the Reporting Tools link.

Training Guide
Enterprise nVision for FSCM 9.0
Page 38
Step Action
3. Click the Define Report Request link.
Step Action
4. Find the existing Quarterly Earnings Summary report request for the business unit US001, which will be copied to US005.
Enter the desired information into the Business Unit field. Enter "US001".
5. Click in the Report ID field.
6. Enter the desired information into the Report ID field. Enter "EARNSUMM".
7. Click the Search button.
8. The nVision Report Request page displays the report request unit. You can use this page to set options for running the report.

Training Guide Enterprise nVision for FSCM 9.0
Page 39
Step Action
9. In this example, you need to copy this report request to the US005 business unit.
Click the Copy to Another Business Unit / Clone link.
10. The Copy Report Request page enables you to copy a report request to another business unit or to clone the request for a same business unit.
In this example, you are copying the report request to another business unit.

Training Guide
Enterprise nVision for FSCM 9.0
Page 40
Step Action
11. Enter the desired information into the Business Unit field. Enter "US005".
12. PeopleSoft populates the Report ID field based on the report ID entered on the
Report Request search page. When copying a report request to a different business
unit, you can change the report ID or retain the same ID.
For this example, change the report ID to EARN_SUM.
Click in the Report ID field.
13. Enter the desired information into the Report ID field. Enter "EARN_SUM".
14. Click the OK button.

Training Guide Enterprise nVision for FSCM 9.0
Page 41
Step Action
15. Now, view the clone.
Click the Return to Search button.

Training Guide
Enterprise nVision for FSCM 9.0
Page 42
Step Action
16. Enter the desired information into the Business Unit field. Enter "US005".
17. Click in the Report ID field.
18. Enter the desired information into the Report ID field. Enter "EARN_SUM".
19. Click the Search button.
Training Guide Enterprise nVision for FSCM 9.0
Page 43
Step Action
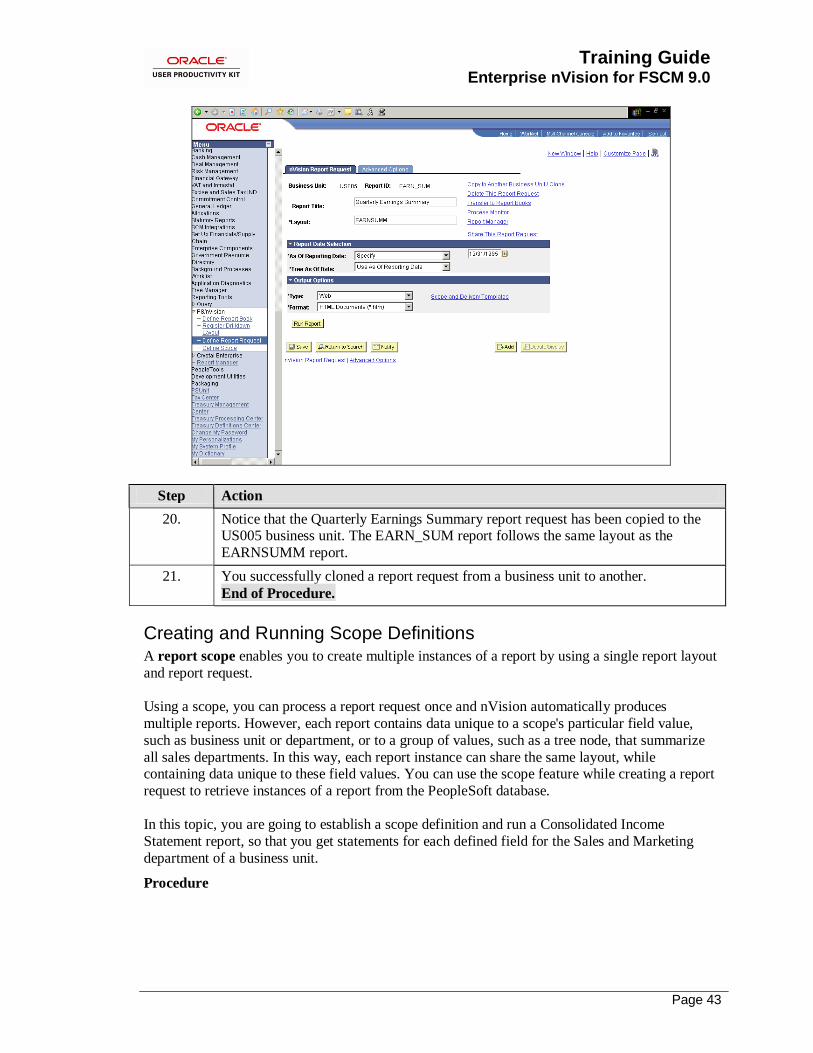
20. Notice that the Quarterly Earnings Summary report request has been copied to the US005 business unit. The EARN_SUM report follows the same layout as the
EARNSUMM report.
21. You successfully cloned a report request from a business unit to another.
End of Procedure.
Creating and Running Scope Definitions A report scope enables you to create multiple instances of a report by using a single report layout
and report request.
Using a scope, you can process a report request once and nVision automatically produces
multiple reports. However, each report contains data unique to a scope's particular field value,
such as business unit or department, or to a group of values, such as a tree node, that summarize
all sales departments. In this way, each report instance can share the same layout, while containing data unique to these field values. You can use the scope feature while creating a report
request to retrieve instances of a report from the PeopleSoft database.
In this topic, you are going to establish a scope definition and run a Consolidated Income
Statement report, so that you get statements for each defined field for the Sales and Marketing
department of a business unit.
Procedure

Training Guide
Enterprise nVision for FSCM 9.0
Page 44
Step Action
1. Begin by navigating to the Scope Definition page.
Click the vertical scrollbar.

Training Guide Enterprise nVision for FSCM 9.0
Page 45
Step Action
2. Click the Reporting Tools link.
Training Guide
Enterprise nVision for FSCM 9.0
Page 46
Step Action
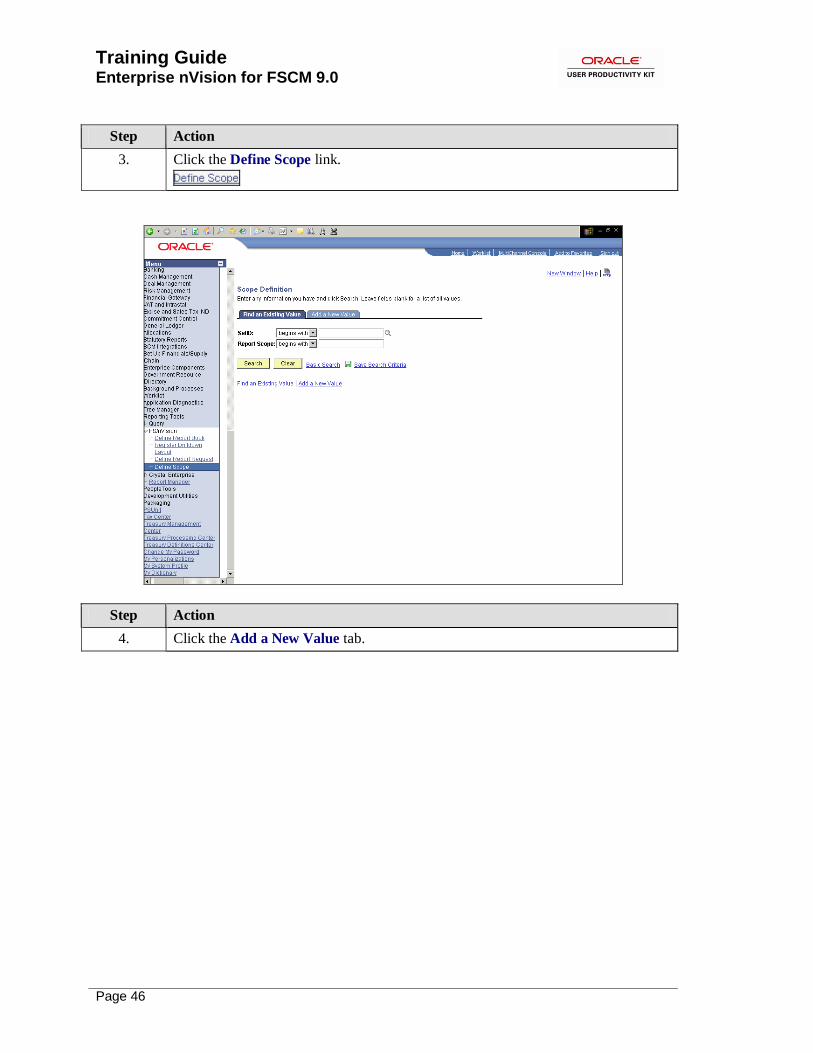
3. Click the Define Scope link.
Step Action
4. Click the Add a New Value tab.
Training Guide Enterprise nVision for FSCM 9.0
Page 47
Step Action
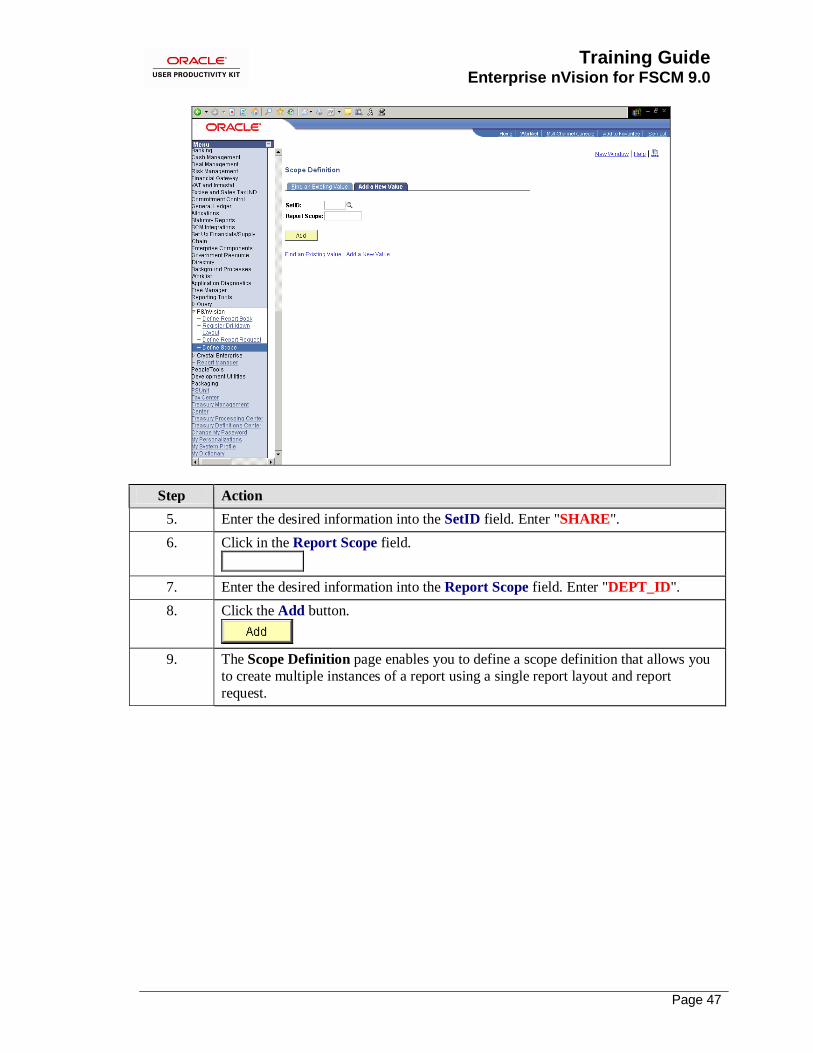
5. Enter the desired information into the SetID field. Enter "SHARE".
6. Click in the Report Scope field.
7. Enter the desired information into the Report Scope field. Enter "DEPT_ID".
8. Click the Add button.
9. The Scope Definition page enables you to define a scope definition that allows you
to create multiple instances of a report using a single report layout and report
request.

Training Guide
Enterprise nVision for FSCM 9.0
Page 48
Step Action
10. Enter the description that describes the general function of the scope.
Enter the desired information into the Description field. Enter "Selected
Departments".
11. Enter the name of the field that controls the scope.
Click in the *Field Name field.
12. Enter the desired information into the *Field Name field. Enter "DEPTID".
13. Select one option from the How Specified drop down list box to define how the
scope field is used in the report.
Click the *How Specified list.
14. In this example, you want to create an instance for each detail value associated with
the specified tree nodes. Therefore, you will select Detail - Selected Parents option.
Click an entry in the list.

Training Guide Enterprise nVision for FSCM 9.0
Page 49
Step Action
15. Specify the tree on which the scope is based. The list is filtered based on the SetID or Business Unit, and field entered.
Click in the Tree Name field.
16. Enter the desired information into the Tree Name field. Enter "DEPARTMENTS".
17. Click in the Select Value field.
18. Enter the desired information into the Select Value field. Enter "SALES-
MKTG_DIV".
19. Click the Save button.
Step Action
20. Next, run a report request based on the scope definition you created.
Click the Define Report Request link.
Training Guide
Enterprise nVision for FSCM 9.0
Page 50
Step Action
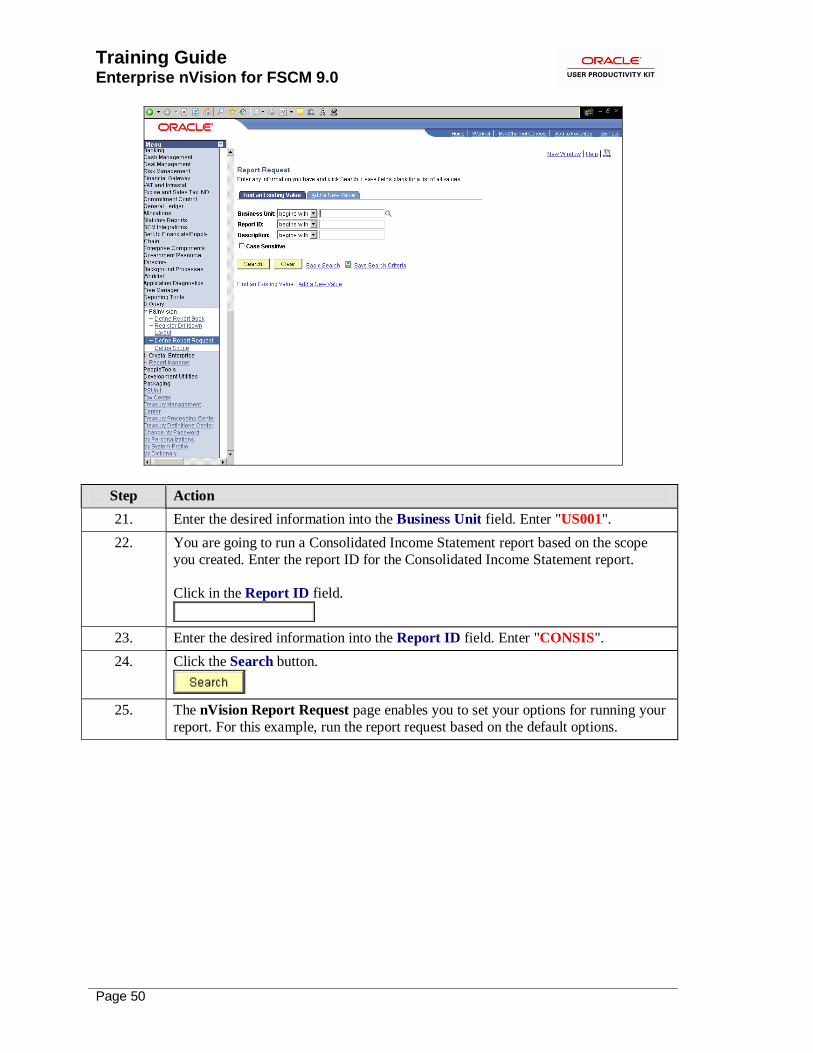
21. Enter the desired information into the Business Unit field. Enter "US001".
22. You are going to run a Consolidated Income Statement report based on the scope
you created. Enter the report ID for the Consolidated Income Statement report.
Click in the Report ID field.
23. Enter the desired information into the Report ID field. Enter "CONSIS".
24. Click the Search button.
25. The nVision Report Request page enables you to set your options for running your
report. For this example, run the report request based on the default options.
Training Guide Enterprise nVision for FSCM 9.0
Page 51
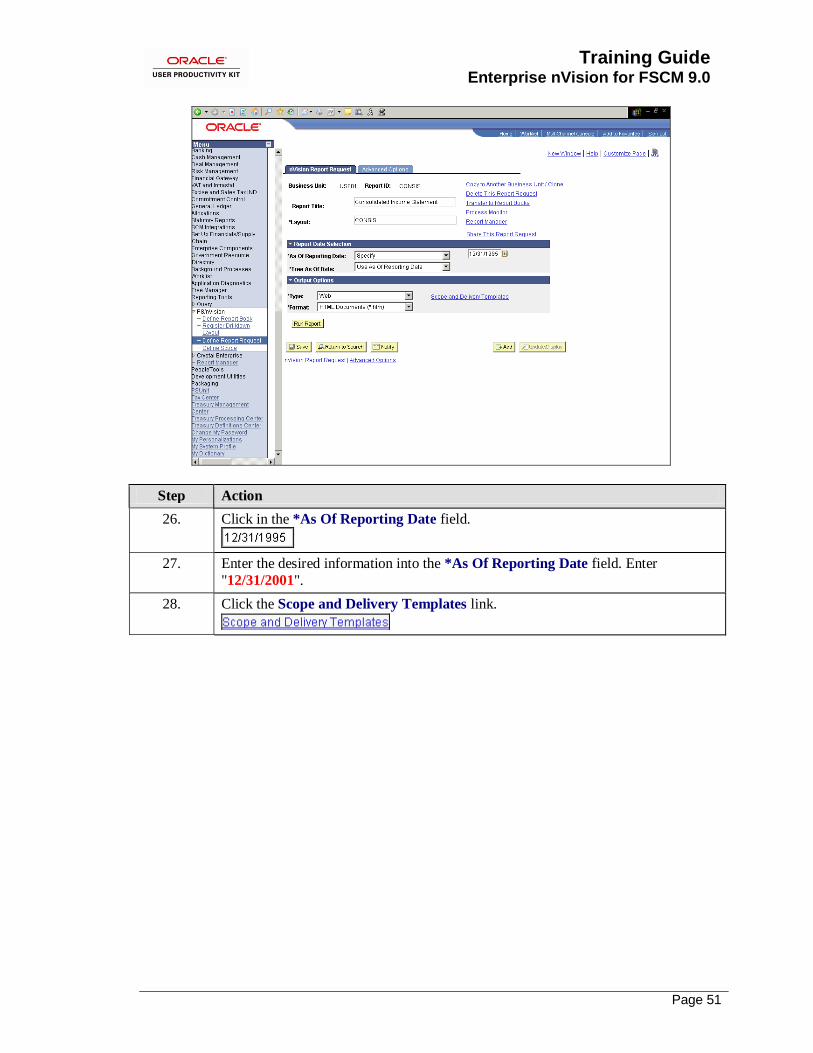
Step Action
26. Click in the *As Of Reporting Date field.
27. Enter the desired information into the *As Of Reporting Date field. Enter
"12/31/2001".
28. Click the Scope and Delivery Templates link.

Training Guide
Enterprise nVision for FSCM 9.0
Page 52
Step Action
29. Select a scope definition to specify the data each report instance includes and how
many instances PS/nVision creates. For example, you can select a scope to create
multiple instances of a report based on specific values for a field, such as instances for business unit, department, or product. Use the %SCN% variable on your layout
to show the scope name on the report instance.
In this example, enter the scope definition you created.
Enter the desired information into the Report Scope field. Enter "DEPT_ID".
30. Click the OK button.
Training Guide Enterprise nVision for FSCM 9.0
Page 53
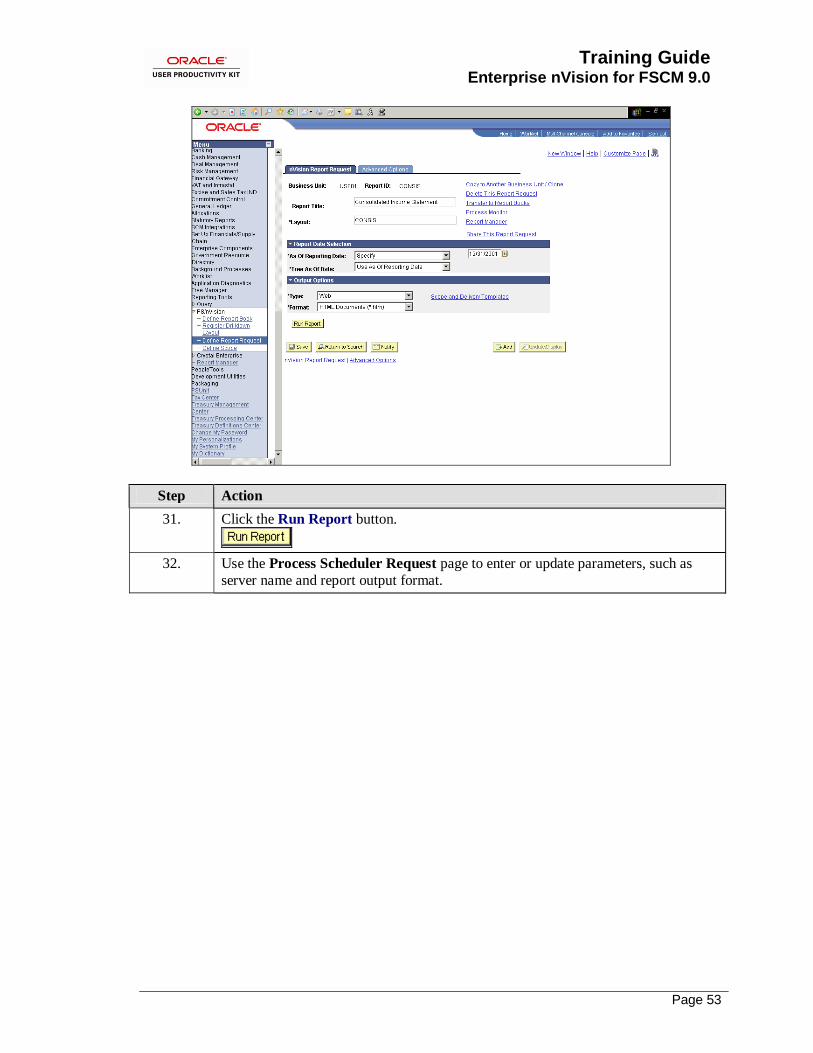
Step Action
31. Click the Run Report button.
32. Use the Process Scheduler Request page to enter or update parameters, such as
server name and report output format.
Training Guide
Enterprise nVision for FSCM 9.0
Page 54
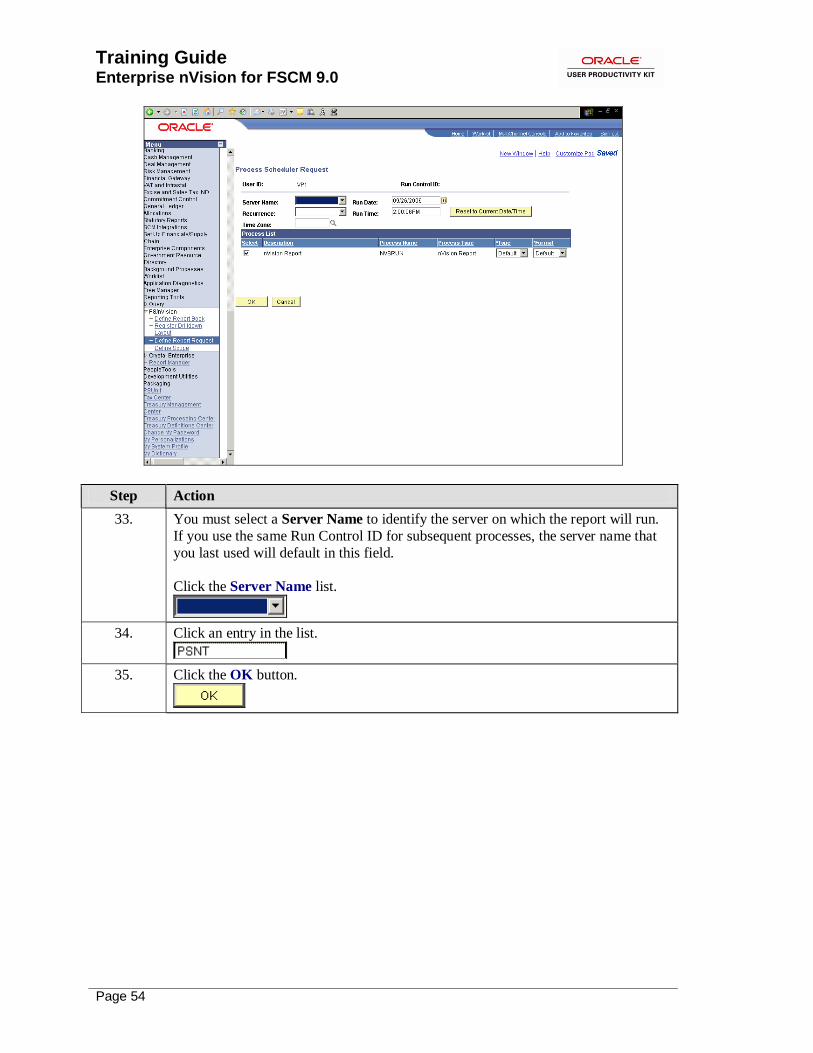
Step Action
33. You must select a Server Name to identify the server on which the report will run.
If you use the same Run Control ID for subsequent processes, the server name that
you last used will default in this field.
Click the Server Name list.
34. Click an entry in the list.
35. Click the OK button.

Training Guide Enterprise nVision for FSCM 9.0
Page 55
Step Action
36. Next, view the process status on the Process List page.
Click the Process Monitor link.
37. Use the Process List page to view the status of submitted report requests.
Training Guide
Enterprise nVision for FSCM 9.0
Page 56
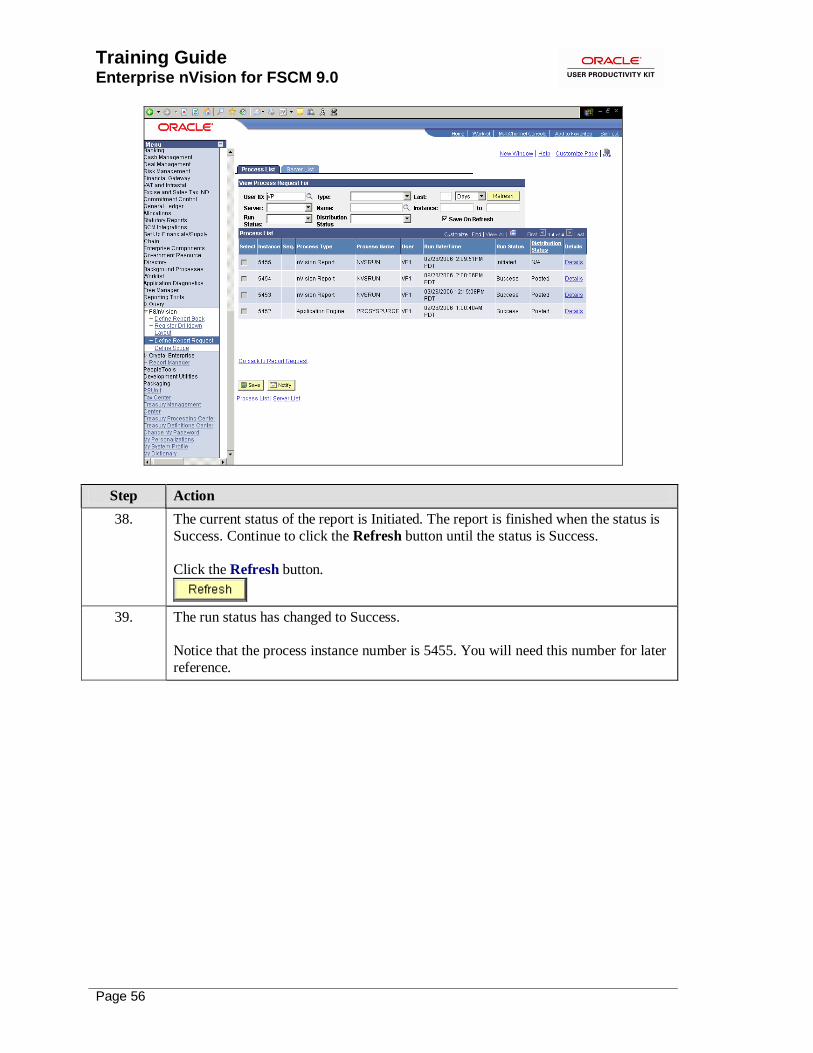
Step Action
38. The current status of the report is Initiated. The report is finished when the status is
Success. Continue to click the Refresh button until the status is Success.
Click the Refresh button.
39. The run status has changed to Success.
Notice that the process instance number is 5455. You will need this number for later
reference.

Training Guide Enterprise nVision for FSCM 9.0
Page 57
Step Action
40. The report results are delivered to Report Manager. Navigate to Report Manager to view the results.
Click the Report Manager link.
Training Guide
Enterprise nVision for FSCM 9.0
Page 58
Step Action
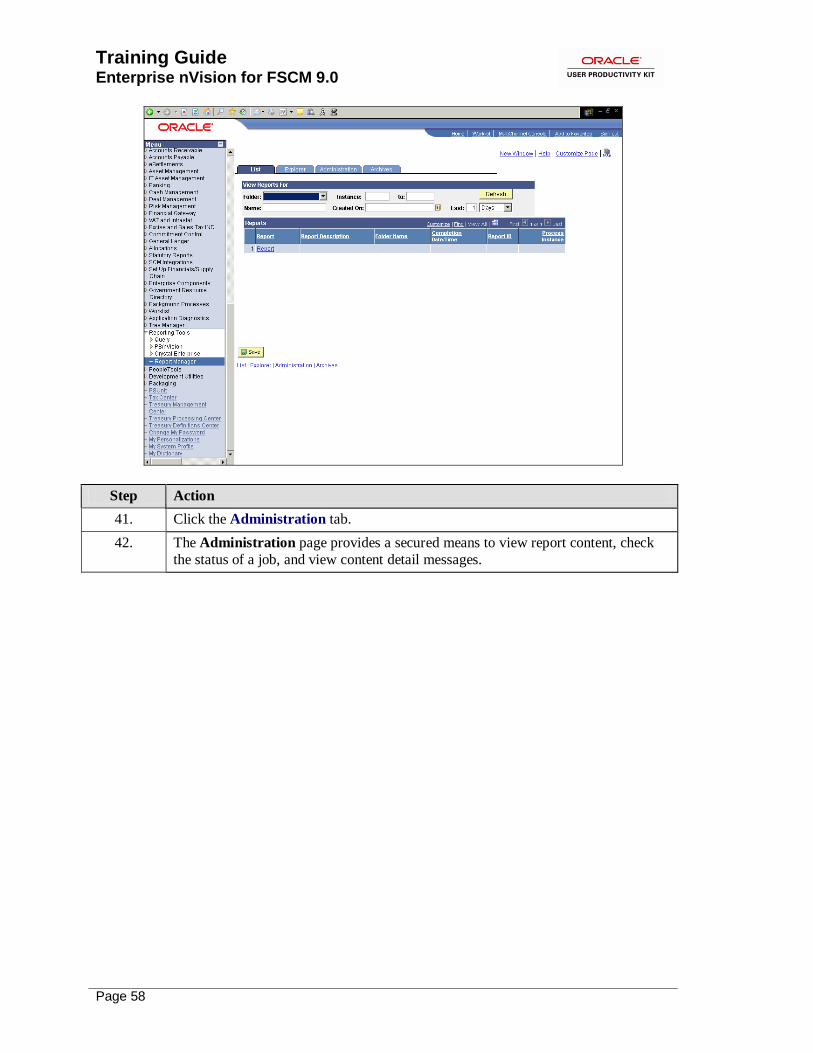
41. Click the Administration tab.
42. The Administration page provides a secured means to view report content, check
the status of a job, and view content detail messages.
Training Guide Enterprise nVision for FSCM 9.0
Page 59
Step Action
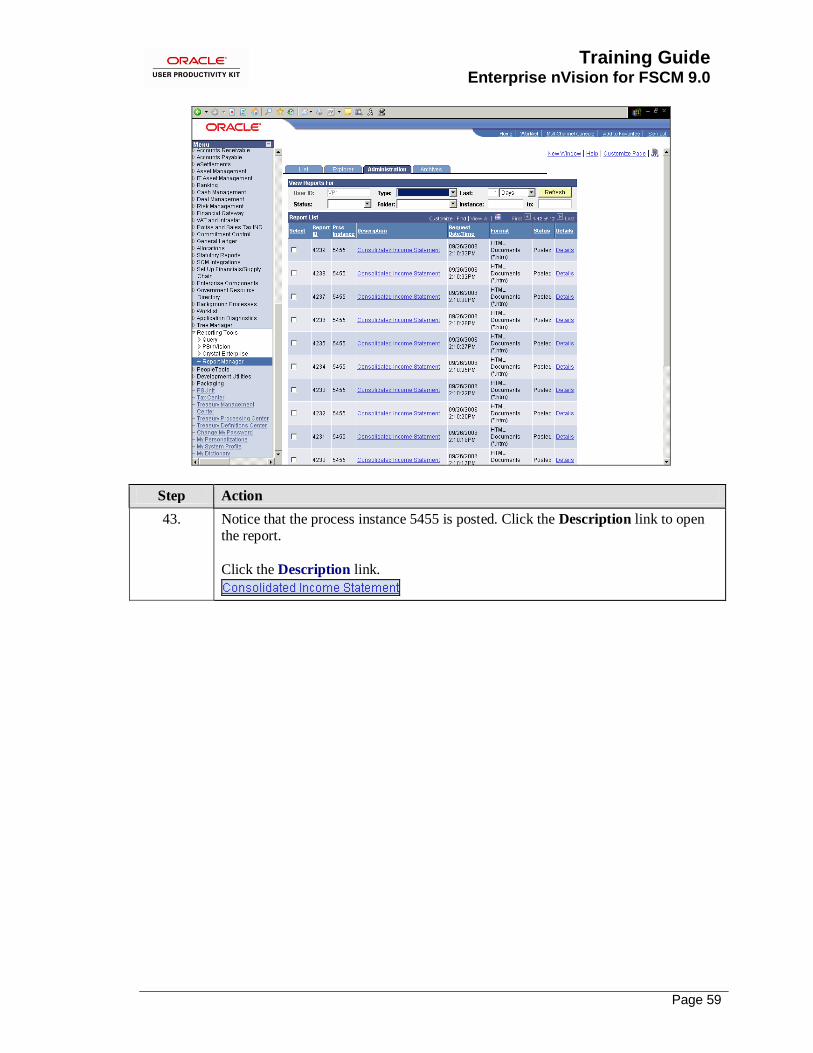
43. Notice that the process instance 5455 is posted. Click the Description link to open the report.
Click the Description link.
Training Guide
Enterprise nVision for FSCM 9.0
Page 60
Step Action
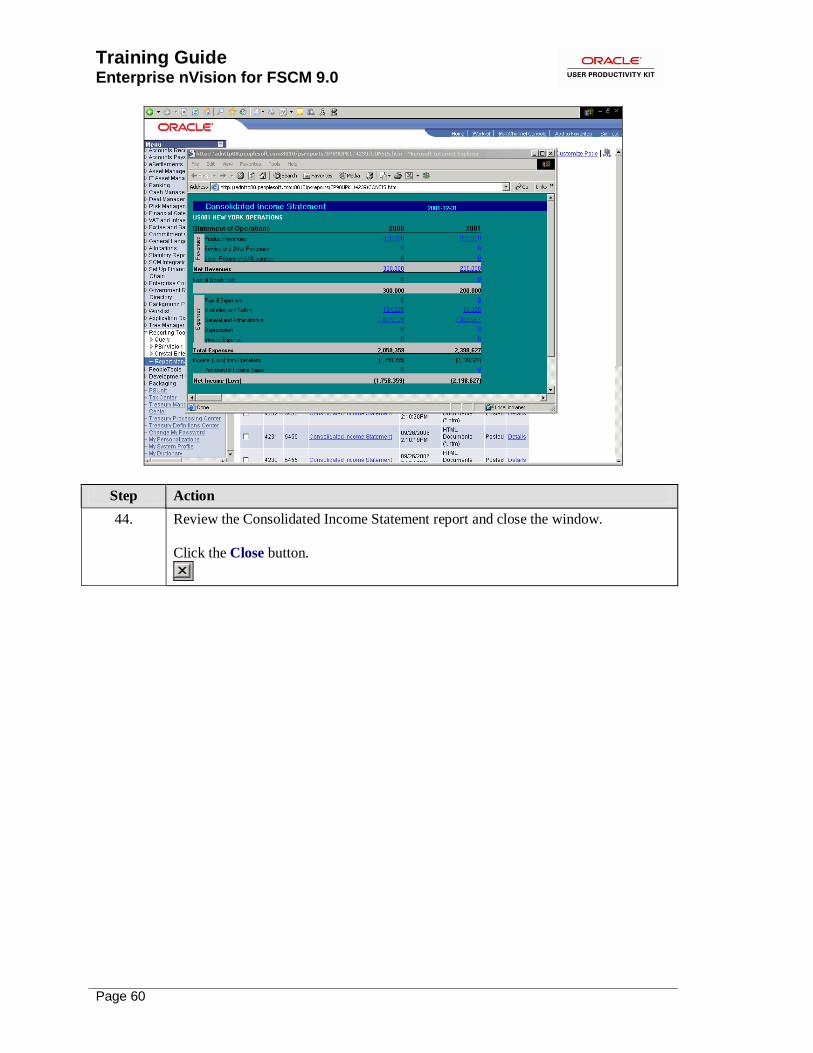
44. Review the Consolidated Income Statement report and close the window.
Click the Close button.
Training Guide Enterprise nVision for FSCM 9.0
Page 61
Step Action
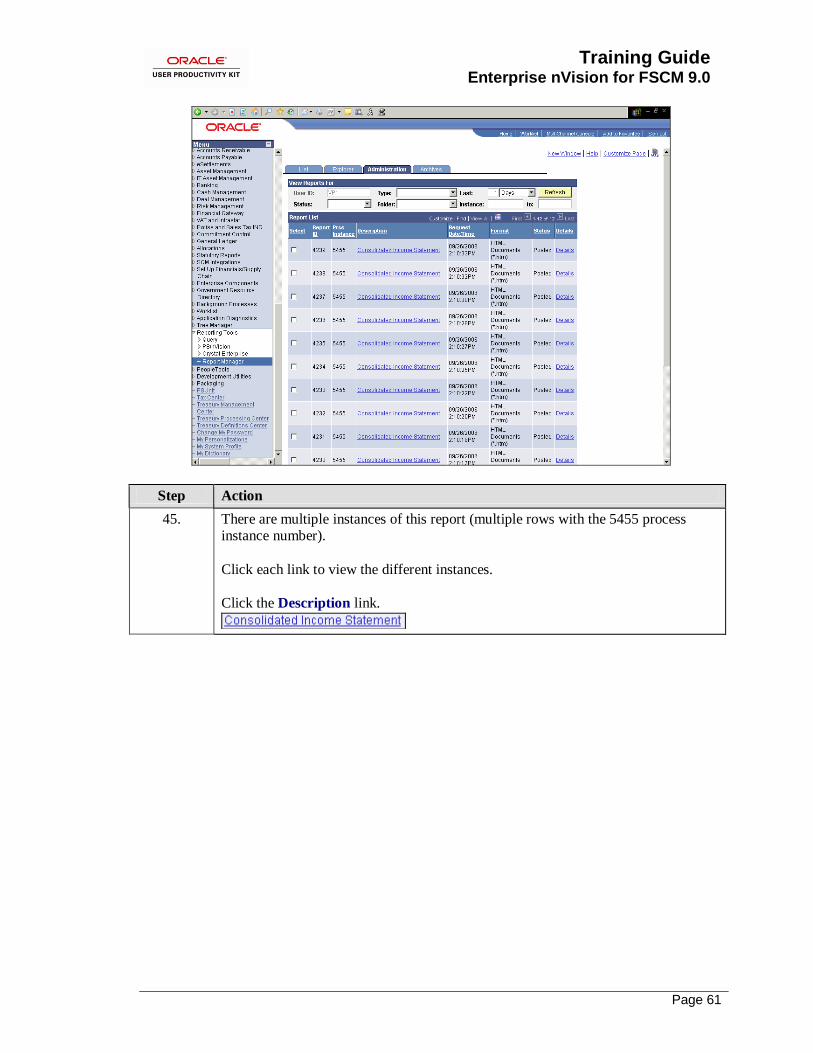
45. There are multiple instances of this report (multiple rows with the 5455 process instance number).
Click each link to view the different instances.
Click the Description link.
Training Guide
Enterprise nVision for FSCM 9.0
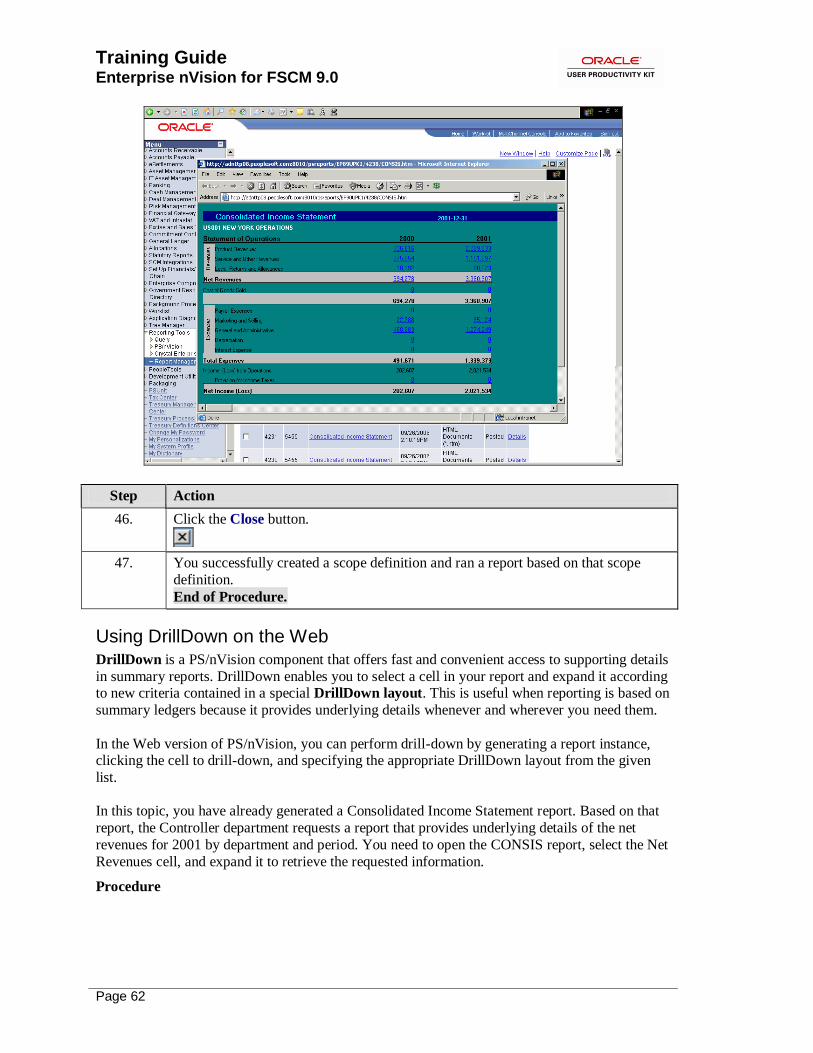
Page 62
Step Action
46. Click the Close button.
47. You successfully created a scope definition and ran a report based on that scope
definition.
End of Procedure.
Using DrillDown on the Web DrillDown is a PS/nVision component that offers fast and convenient access to supporting details
in summary reports. DrillDown enables you to select a cell in your report and expand it according to new criteria contained in a special DrillDown layout. This is useful when reporting is based on
summary ledgers because it provides underlying details whenever and wherever you need them.
In the Web version of PS/nVision, you can perform drill-down by generating a report instance, clicking the cell to drill-down, and specifying the appropriate DrillDown layout from the given
list.
In this topic, you have already generated a Consolidated Income Statement report. Based on that
report, the Controller department requests a report that provides underlying details of the net
revenues for 2001 by department and period. You need to open the CONSIS report, select the Net
Revenues cell, and expand it to retrieve the requested information.
Procedure

Training Guide Enterprise nVision for FSCM 9.0
Page 63
Step Action
1. Begin by navigating to the Administration page.
Click the vertical scrollbar.

Training Guide
Enterprise nVision for FSCM 9.0
Page 64
Step Action
2. Click the Reporting Tools link.

Training Guide Enterprise nVision for FSCM 9.0
Page 65
Step Action
3. Click the Report Manager link.
Step Action
4. Click the Administration tab.
5. The Administration page provides a secured means to view report content, check the status of a job, and view content detail messages.

Training Guide
Enterprise nVision for FSCM 9.0
Page 66
Step Action
6. Click the hyperlink for the report name for which you want to drill down.
Click the Description link.

Training Guide Enterprise nVision for FSCM 9.0
Page 67
Step Action
7. The Consolidated Income report appears.
Click the hyperlink for the field for which you want to drill down. In this example,
you want to drill down on the Net Revenues for 2001.
Click the Net Revenues link.
8. Click the Maximize/Restore button.
9. The Run Drilldown page enables you to select the DrillDown layout that you want
to run on a particular report.
10. Select the output type Window or Web from the Type drop-down list:
• Web: The Report Manager Report List page appears again.
• Window: Result of the DrillDown will be automatically delivered to a new browser window, and a copy sent to Report Manager.
11. The value PSNT in the Server Name fields for all the layouts indicates that the
report will be run on the PSNT server.
Training Guide
Enterprise nVision for FSCM 9.0
Page 68
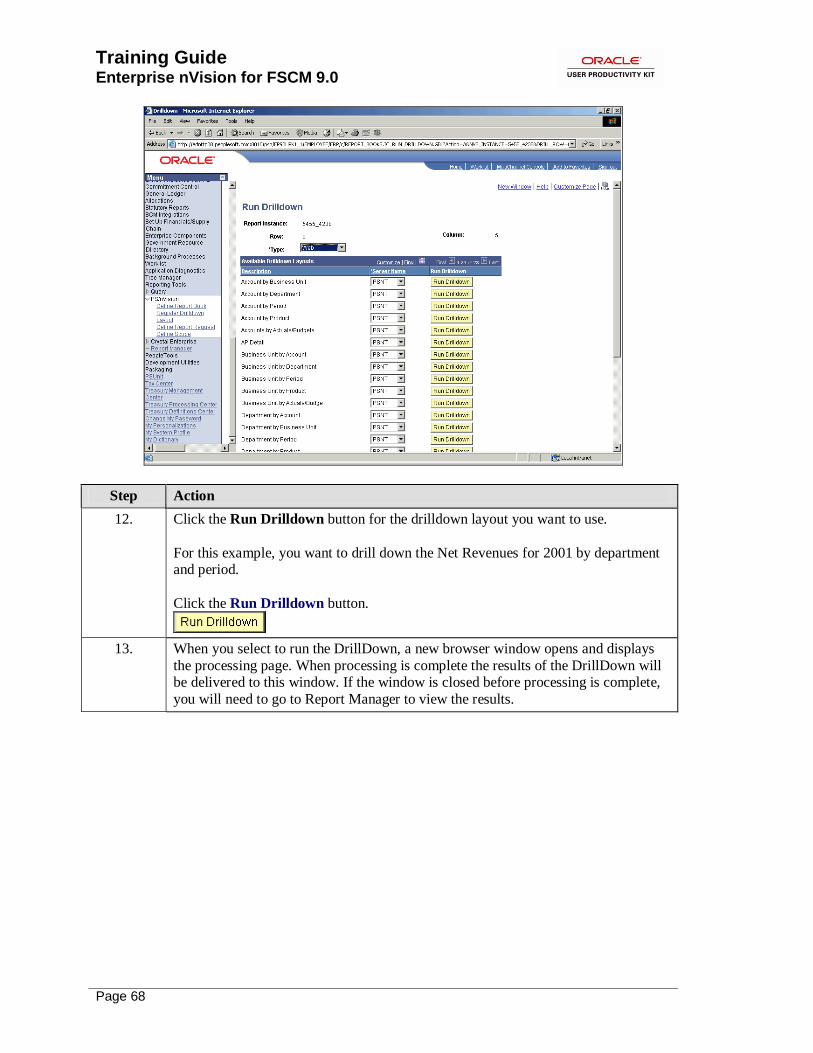
Step Action
12. Click the Run Drilldown button for the drilldown layout you want to use.
For this example, you want to drill down the Net Revenues for 2001 by department and period.
Click the Run Drilldown button.
13. When you select to run the DrillDown, a new browser window opens and displays
the processing page. When processing is complete the results of the DrillDown will be delivered to this window. If the window is closed before processing is complete,
you will need to go to Report Manager to view the results.

Training Guide Enterprise nVision for FSCM 9.0
Page 69
Step Action
14. The requested report does not appear on the Administration page now. Click the Refresh button until the report is generated and posted.
Click the Refresh button.
15. After your DrillDown runs, it appears as a report in the report list. DrillDown report
descriptions always include DR, the parent process instance number, and the
original report description.
Notice that the report DR_5455_5461_CONSIS.htm appears as Posted.
Click the Description link.
Training Guide
Enterprise nVision for FSCM 9.0
Page 70
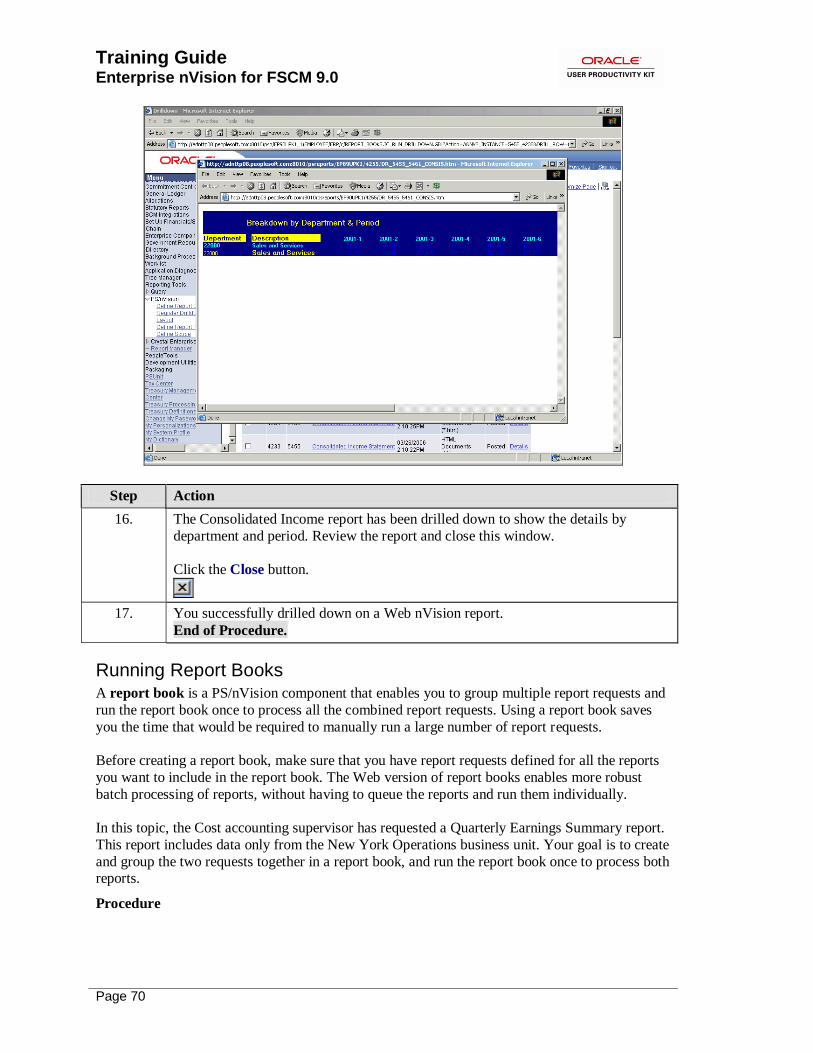
Step Action
16. The Consolidated Income report has been drilled down to show the details by
department and period. Review the report and close this window.
Click the Close button.
17. You successfully drilled down on a Web nVision report.
End of Procedure.
Running Report Books A report book is a PS/nVision component that enables you to group multiple report requests and
run the report book once to process all the combined report requests. Using a report book saves
you the time that would be required to manually run a large number of report requests.
Before creating a report book, make sure that you have report requests defined for all the reports
you want to include in the report book. The Web version of report books enables more robust
batch processing of reports, without having to queue the reports and run them individually.
In this topic, the Cost accounting supervisor has requested a Quarterly Earnings Summary report.
This report includes data only from the New York Operations business unit. Your goal is to create
and group the two requests together in a report book, and run the report book once to process both reports.
Procedure

Training Guide Enterprise nVision for FSCM 9.0
Page 71
Step Action
1. Begin by navigating to the Report Book page.
Click the vertical scrollbar.

Training Guide
Enterprise nVision for FSCM 9.0
Page 72
Step Action
2. Click the Reporting Tools link.
Training Guide Enterprise nVision for FSCM 9.0
Page 73
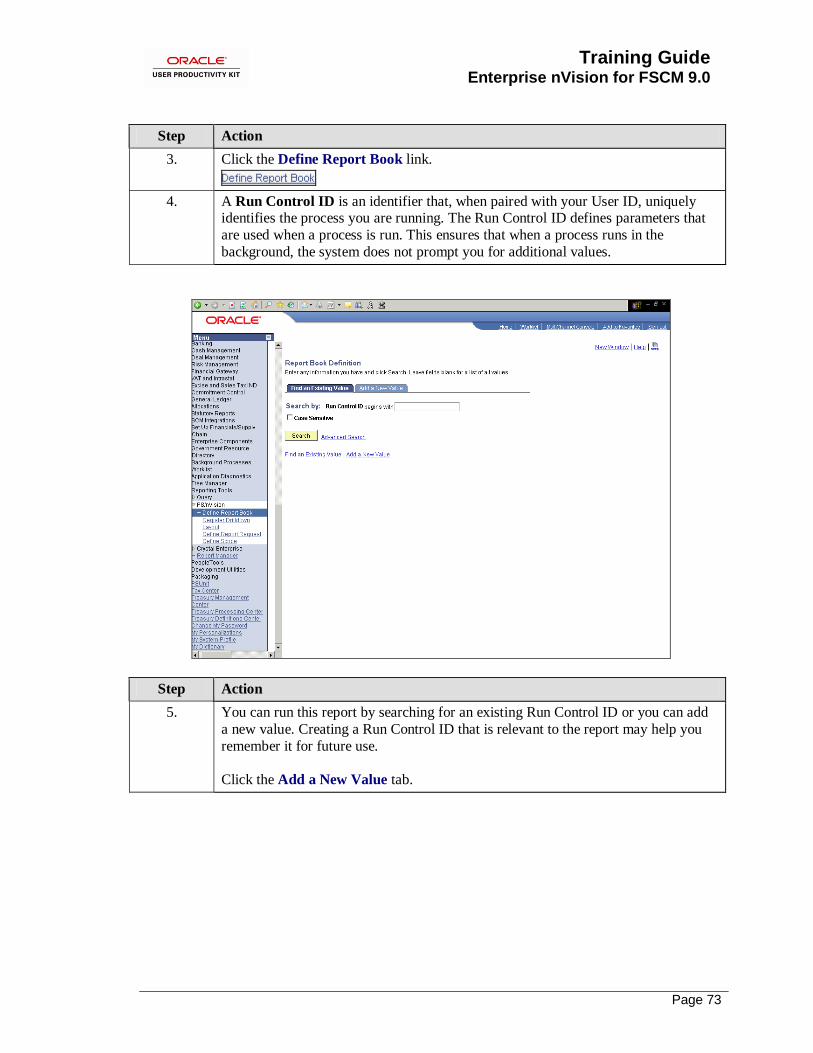
Step Action
3. Click the Define Report Book link.
4. A Run Control ID is an identifier that, when paired with your User ID, uniquely identifies the process you are running. The Run Control ID defines parameters that
are used when a process is run. This ensures that when a process runs in the
background, the system does not prompt you for additional values.
Step Action
5. You can run this report by searching for an existing Run Control ID or you can add
a new value. Creating a Run Control ID that is relevant to the report may help you
remember it for future use.
Click the Add a New Value tab.
Training Guide
Enterprise nVision for FSCM 9.0
Page 74
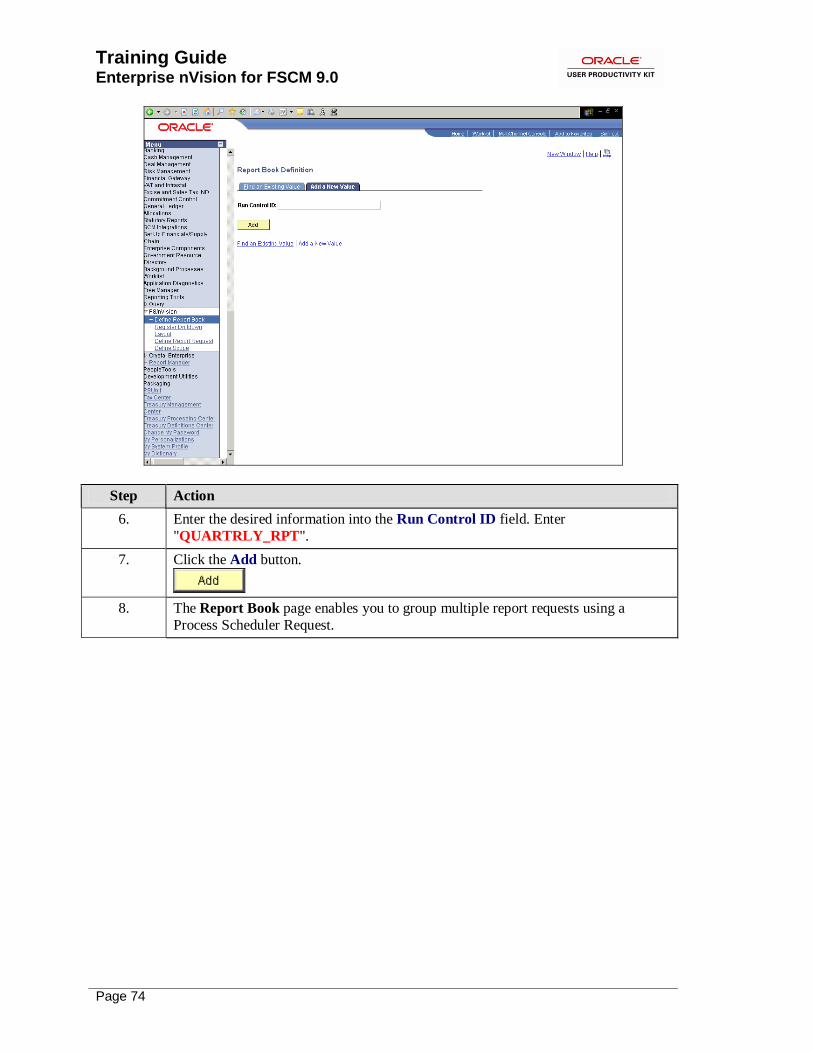
Step Action
6. Enter the desired information into the Run Control ID field. Enter
"QUARTRLY_RPT".
7. Click the Add button.
8. The Report Book page enables you to group multiple report requests using a
Process Scheduler Request.
Training Guide Enterprise nVision for FSCM 9.0
Page 75
Step Action
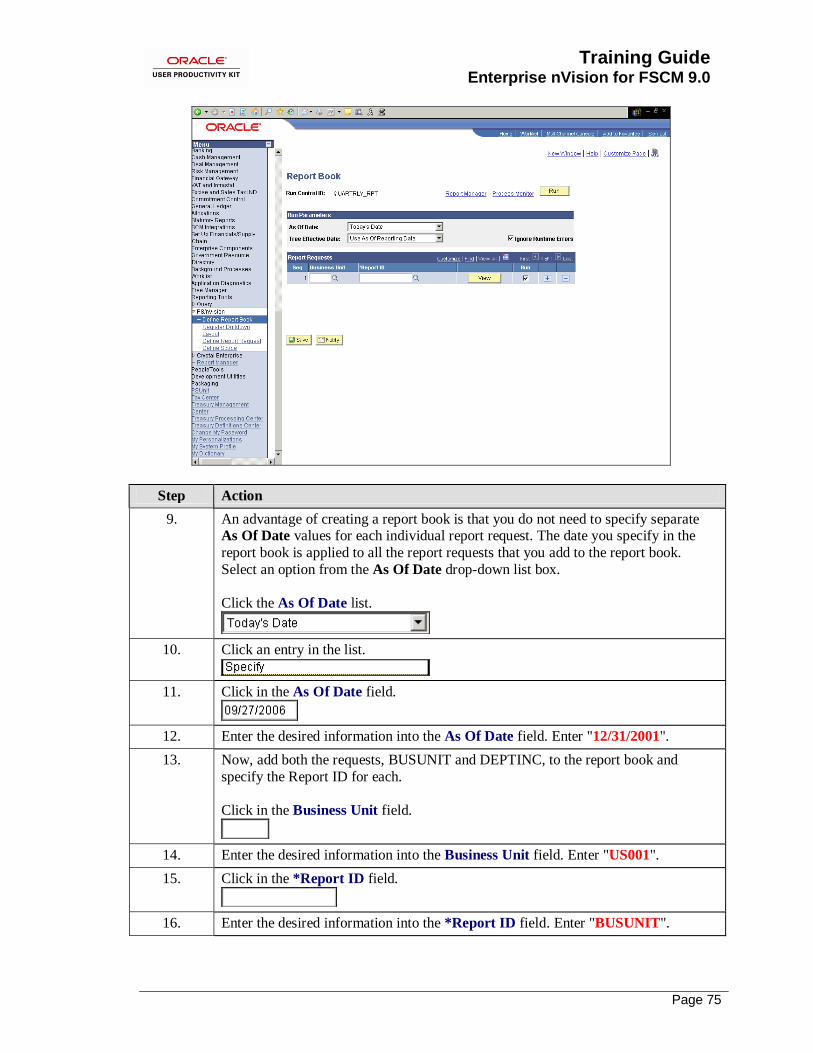
9. An advantage of creating a report book is that you do not need to specify separate As Of Date values for each individual report request. The date you specify in the
report book is applied to all the report requests that you add to the report book.
Select an option from the As Of Date drop-down list box.
Click the As Of Date list.
10. Click an entry in the list.
11. Click in the As Of Date field.
12. Enter the desired information into the As Of Date field. Enter "12/31/2001".
13. Now, add both the requests, BUSUNIT and DEPTINC, to the report book and
specify the Report ID for each.
Click in the Business Unit field.
14. Enter the desired information into the Business Unit field. Enter "US001".
15. Click in the *Report ID field.
16. Enter the desired information into the *Report ID field. Enter "BUSUNIT".

Training Guide
Enterprise nVision for FSCM 9.0
Page 76
Step Action
17. Click the Add Row button.
18. Enter the desired information into the Business Unit field. Enter "US001".
19. Click in the *Report ID field.
20. Enter the desired information into the *Report ID field. Enter "DEPTINC".
21. Next, click the Run button for all reports you want to run when this book is requested.
Click the Run button.
22. Use the Process Scheduler Request page to enter or update parameters, such as
server name and report output format.
Step Action
23. You must select a Server Name to identify the server on which the report will run. If you use the same Run Control ID for subsequent processes, the server name that
you last used will default in this field.
Click the Server Name list.

Training Guide Enterprise nVision for FSCM 9.0
Page 77
Step Action
24. Click an entry in the list.
25. Use the Type field to select the type of output you want to generate for this job.
Your four choices are File, Printer, Email, or Web.
Click the *Type list.
26. Click an entry in the list.
27. Use the Format field to define the output format for the report. The values are dependent upon the Process Type you have selected. In this example, the default
value is XLS and you want to select HTM.
Click the *Format list.
28. Click an entry in the list.
29. You use the Distribution link to access the Distribution Detail page on which you can set report distribution options, such as the recipients of your process output. This
link is available only when the output type is Web, Window, or Email. For this
exercise, you do not need to specify these options.
30. Click the OK button.

Training Guide
Enterprise nVision for FSCM 9.0
Page 78
Step Action
31. Notice the Process Instance number appears. This number helps you identify the
process you have run when you check the status.
Click the Process Monitor link.
32. Use the Process List page to view the status of submitted report requests.
Training Guide Enterprise nVision for FSCM 9.0
Page 79
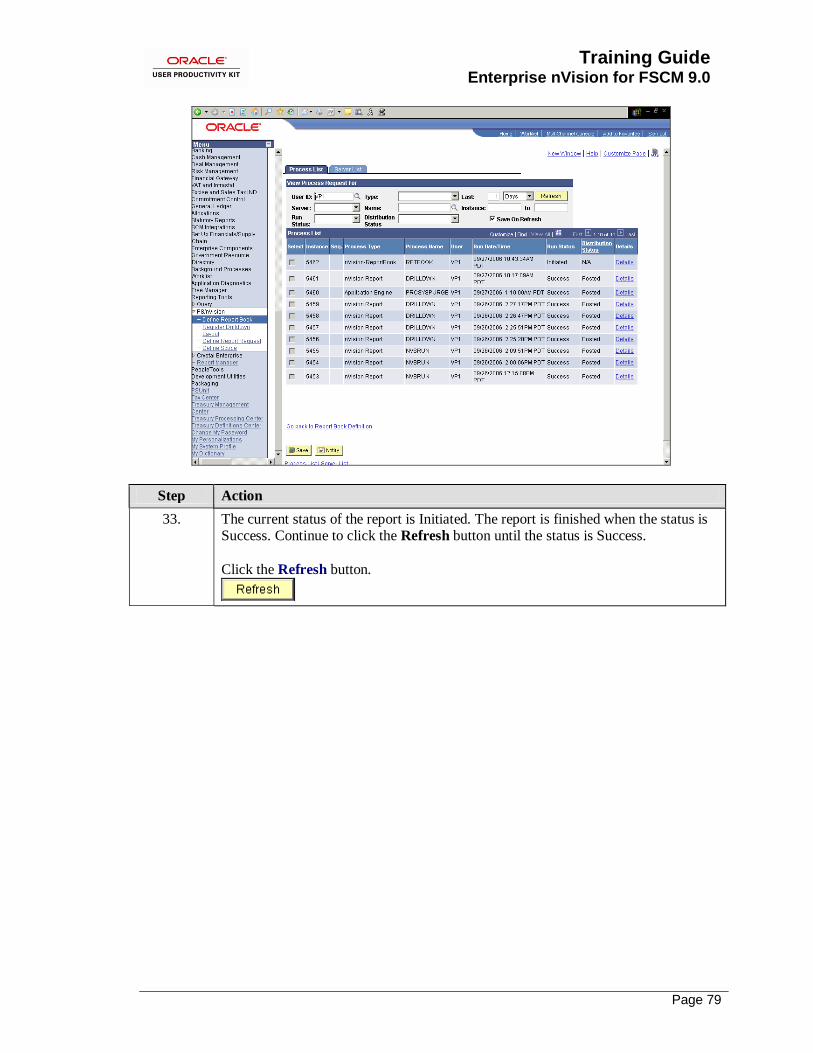
Step Action
33. The current status of the report is Initiated. The report is finished when the status is Success. Continue to click the Refresh button until the status is Success.
Click the Refresh button.
Training Guide
Enterprise nVision for FSCM 9.0
Page 80
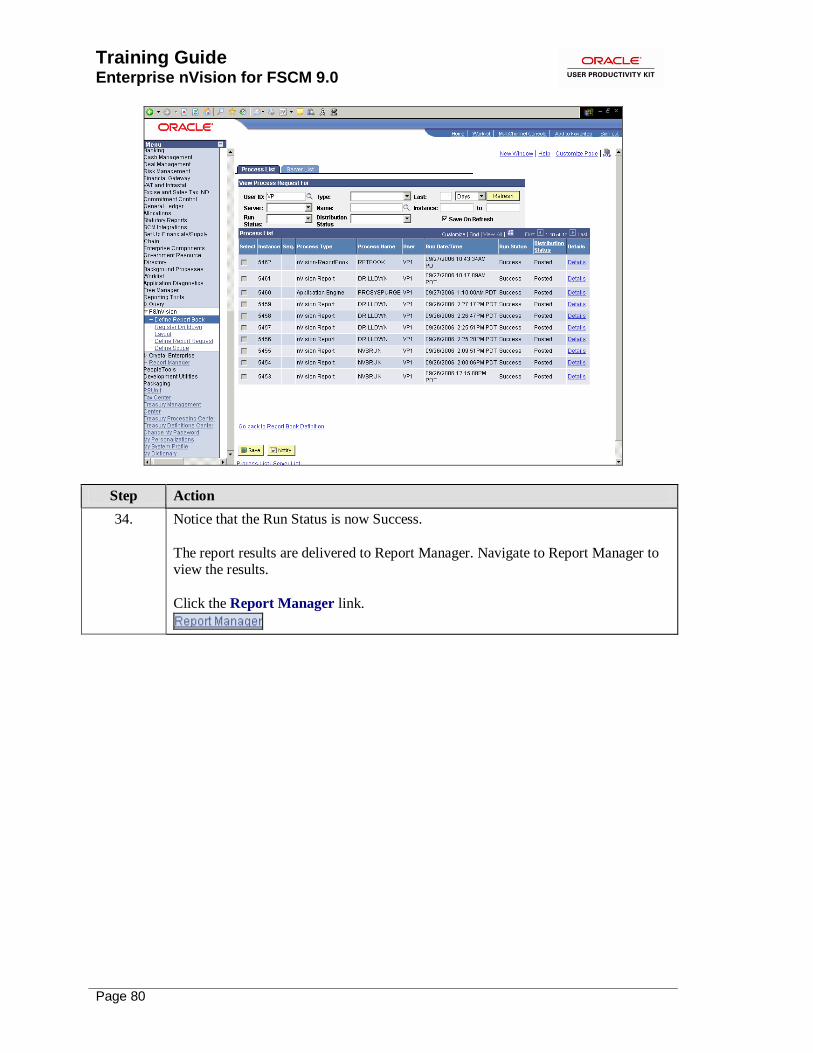
Step Action
34. Notice that the Run Status is now Success.
The report results are delivered to Report Manager. Navigate to Report Manager to view the results.
Click the Report Manager link.

Training Guide Enterprise nVision for FSCM 9.0
Page 81
Step Action
35. Click the Administration tab.
36. The Administration page provides a secured means to view report content, check the status of a job, and view content detail messages.

Training Guide
Enterprise nVision for FSCM 9.0
Page 82
Step Action
37. Notice that the process instance 5462 is posted. Click the Description link to open
the report.
Click the Description link.

Training Guide Enterprise nVision for FSCM 9.0
Page 83
Step Action
38. The DEPTINC Quarterly Earning Summary report appears. Similarly, you can view the BUSUNIT Quarterly Earning Summary report by returning to the
Administration page and clicking the link for that report.
Click the Close button.
39. You successfully created and ran a report book. The report book component of
PS/nVision saves you the time to manually create and run multiple report requests.
End of Procedure.