Embed Size (px)
Citation preview
120 East Pritchard Street • Asheboro, NC 27203 • Phone: (336) 629-3000 • FAX (336) 629-3100
www.phasechange.com Rev.62016-09-07
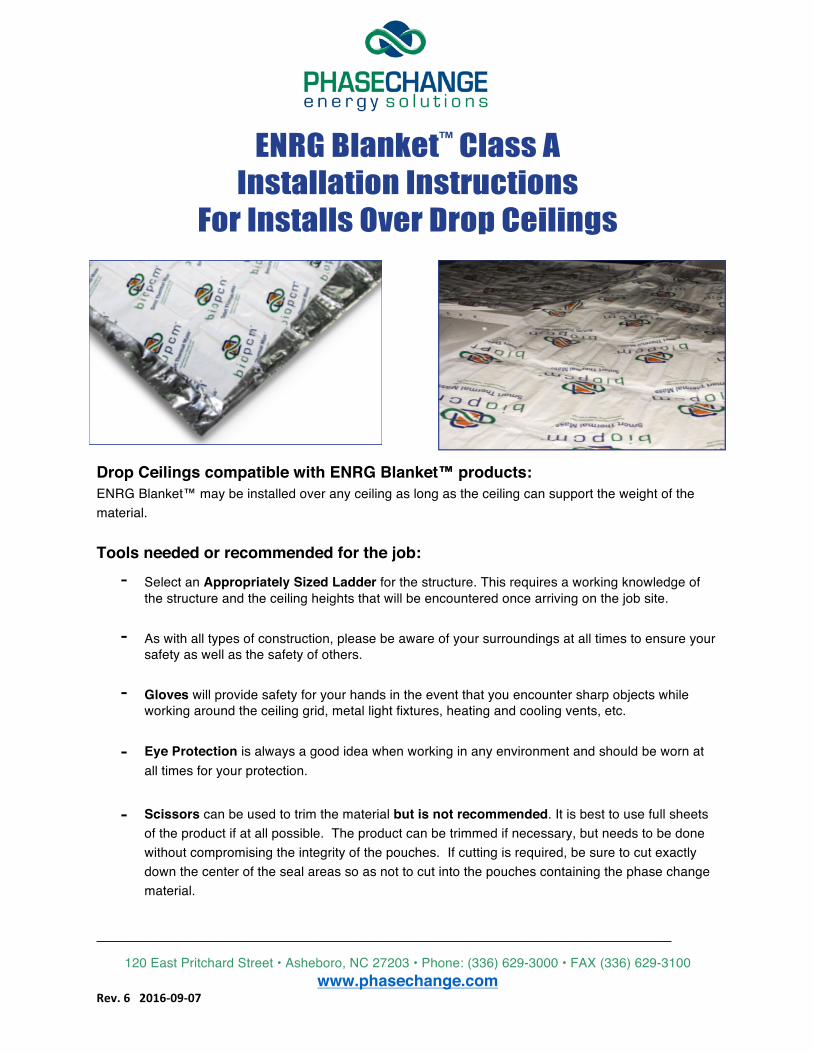
ENRG Blanket™ Class A Installation Instructions
For Installs Over Drop Ceilings
Drop Ceilings compatible with ENRG Blanket™ products: ENRG Blanket™ may be installed over any ceiling as long as the ceiling can support the weight of the material. Tools needed or recommended for the job:
- Select an Appropriately Sized Ladder for the structure. This requires a working knowledge of the structure and the ceiling heights that will be encountered once arriving on the job site.
- As with all types of construction, please be aware of your surroundings at all times to ensure your safety as well as the safety of others.
- Gloves will provide safety for your hands in the event that you encounter sharp objects while working around the ceiling grid, metal light fixtures, heating and cooling vents, etc.
- Eye Protection is always a good idea when working in any environment and should be worn at all times for your protection.
- Scissors can be used to trim the material but is not recommended. It is best to use full sheets of the product if at all possible. The product can be trimmed if necessary, but needs to be done without compromising the integrity of the pouches. If cutting is required, be sure to cut exactly down the center of the seal areas so as not to cut into the pouches containing the phase change material.

120 East Pritchard Street • Asheboro, NC 27203 • Phone: (336) 629-3000 • FAX (336) 629-3100
www.phasechange.com Rev.62016-09-07
Tools needed or recommended for the job: (continued)
- Skid Resistant Shoes are recommended when climbing a ladder and can reduce the risk of potentially dangerous while climbing ladders in a work environment.
- Small rolling cart for transporting ENRG Blanket™ from truck to building and staging the material around the install space.
- Plastic tarp for covering desks and equipment. Tarp may or may not be needed depending on the amount of debris sitting on top of the drop ceiling panels.
- Vacuum cleaner of reasonable size to clean debris that may fall from ceiling tiles.
- Feather duster or similar tool to sweep fallen debris from desks, chairs, all other surfaces.
- Broomstick or similar extended-reach tool to position energy blanket above ceiling tiles without dragging the ENRG Blanket™ across T-bar grid. Tool should be approximately 4’ in length with a rubber or grippy end that will help move the mats without puncturing them.
- Safety glasses to protect from falling debris as ceiling tiles are removed.
- Diagram of building and room layout to be used to record where ENRG Blanket™ was installed.
- Headlamps. Its dark above the T-bar grid.
- Clean rubber/latex gloves. Bright white ceiling tiles can be easily stained with dirty hands.
- Paper towels, Windex. The ENRG Blanket™ mats can be damaged during transportation. Damaged mats will show a film of oil-like BioPCM® on the surface of the mat. Bring plenty of clean paper towels and Windex in case clean-up of mats is necessary. DO NOT INSTALL DAMAGED MATS. BioPCM® is not toxic. However, we recommend washing hands if installers come into contact with the material.
Material Protection and Storage All materials shall be kept clean and dry prior to their installation. When stored outside or on a job site, materials shall be kept off the ground and adequately covered with tarpaulins. When unpacking the product, use caution to be sure that the product is not cut or punctured in any manner.
120 East Pritchard Street • Asheboro, NC 27203 • Phone: (336) 629-3000 • FAX (336) 629-3100
www.phasechange.com Rev.62016-09-07
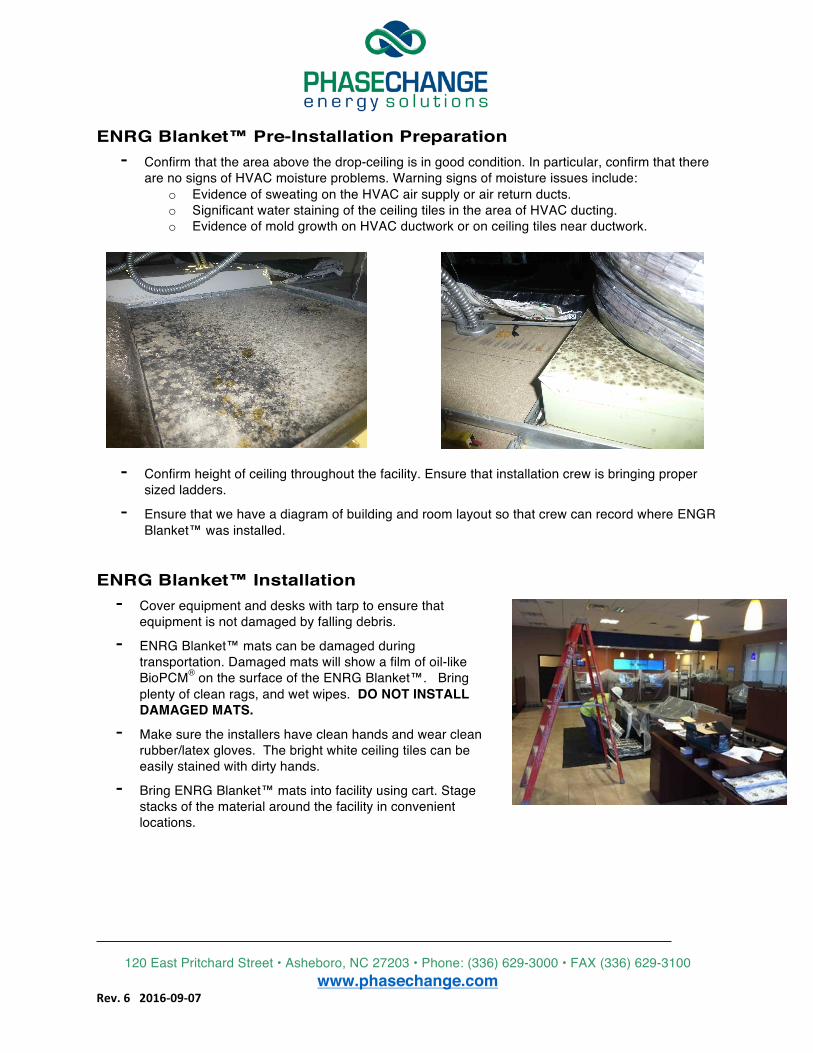
ENRG Blanket™ Pre-Installation Preparation - Confirm that the area above the drop-ceiling is in good condition. In particular, confirm that there
are no signs of HVAC moisture problems. Warning signs of moisture issues include: o Evidence of sweating on the HVAC air supply or air return ducts. o Significant water staining of the ceiling tiles in the area of HVAC ducting. o Evidence of mold growth on HVAC ductwork or on ceiling tiles near ductwork.
- Confirm height of ceiling throughout the facility. Ensure that installation crew is bringing proper sized ladders.
- Ensure that we have a diagram of building and room layout so that crew can record where ENGR Blanket™ was installed.
ENRG Blanket™ Installation
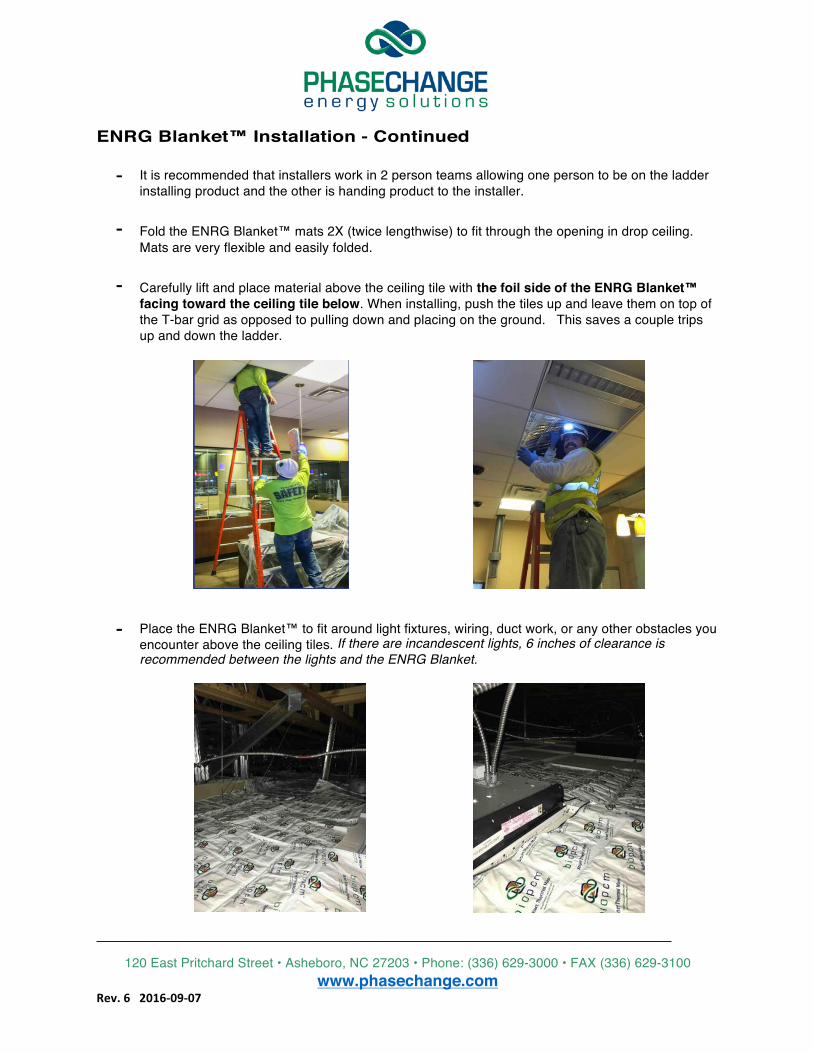
- Cover equipment and desks with tarp to ensure that equipment is not damaged by falling debris.
- ENRG Blanket™ mats can be damaged during transportation. Damaged mats will show a film of oil-like BioPCM® on the surface of the ENRG Blanket™. Bring plenty of clean rags, and wet wipes. DO NOT INSTALL DAMAGED MATS.
- Make sure the installers have clean hands and wear clean rubber/latex gloves. The bright white ceiling tiles can be easily stained with dirty hands.
- Bring ENRG Blanket™ mats into facility using cart. Stage stacks of the material around the facility in convenient locations.
120 East Pritchard Street • Asheboro, NC 27203 • Phone: (336) 629-3000 • FAX (336) 629-3100
www.phasechange.com Rev.62016-09-07
ENRG Blanket™ Installation - Continued
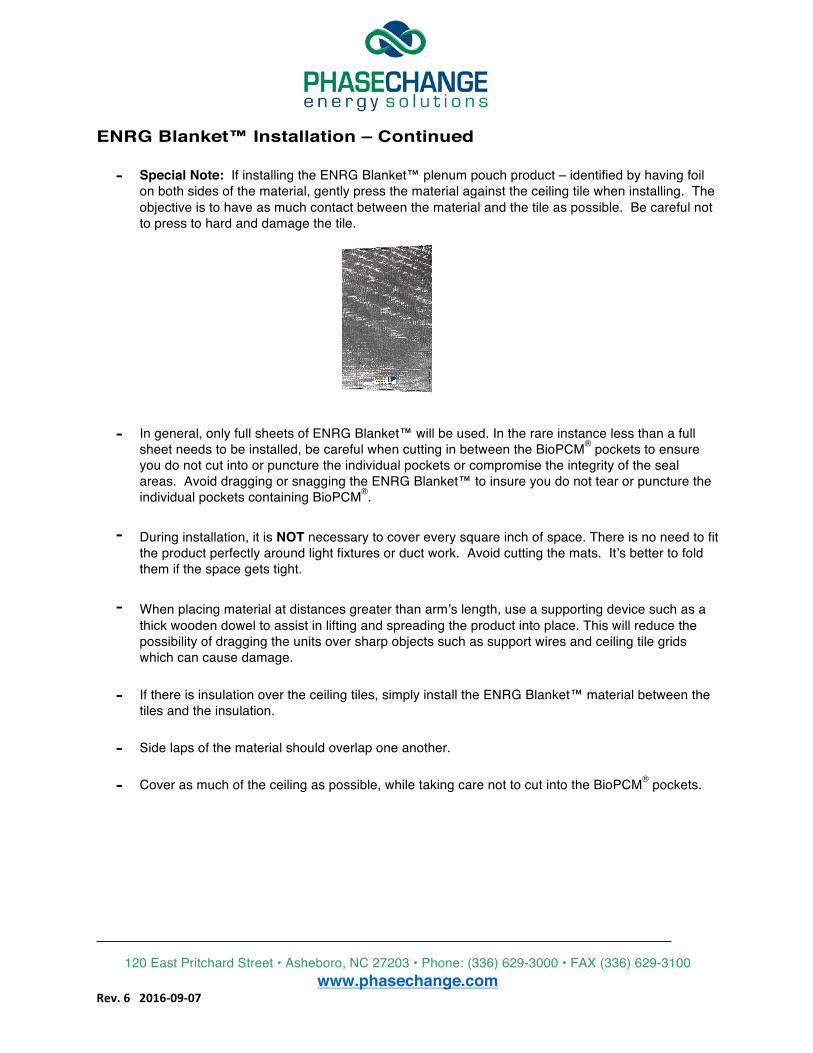
- It is recommended that installers work in 2 person teams allowing one person to be on the ladder installing product and the other is handing product to the installer.
- Fold the ENRG Blanket™ mats 2X (twice lengthwise) to fit through the opening in drop ceiling. Mats are very flexible and easily folded.
- Carefully lift and place material above the ceiling tile with the foil side of the ENRG Blanket™ facing toward the ceiling tile below. When installing, push the tiles up and leave them on top of the T-bar grid as opposed to pulling down and placing on the ground. This saves a couple trips up and down the ladder.
- Place the ENRG Blanket™ to fit around light fixtures, wiring, duct work, or any other obstacles you encounter above the ceiling tiles. If there are incandescent lights, 6 inches of clearance is recommended between the lights and the ENRG Blanket.
120 East Pritchard Street • Asheboro, NC 27203 • Phone: (336) 629-3000 • FAX (336) 629-3100
www.phasechange.com Rev.62016-09-07
ENRG Blanket™ Installation – Continued
- Special Note: If installing the ENRG Blanket™ plenum pouch product – identified by having foil on both sides of the material, gently press the material against the ceiling tile when installing. The objective is to have as much contact between the material and the tile as possible. Be careful not to press to hard and damage the tile.
- In general, only full sheets of ENRG Blanket™ will be used. In the rare instance less than a full sheet needs to be installed, be careful when cutting in between the BioPCM® pockets to ensure you do not cut into or puncture the individual pockets or compromise the integrity of the seal areas. Avoid dragging or snagging the ENRG Blanket™ to insure you do not tear or puncture the individual pockets containing BioPCM®.
- During installation, it is NOT necessary to cover every square inch of space. There is no need to fit the product perfectly around light fixtures or duct work. Avoid cutting the mats. It’s better to fold them if the space gets tight.
- When placing material at distances greater than arm’s length, use a supporting device such as a thick wooden dowel to assist in lifting and spreading the product into place. This will reduce the possibility of dragging the units over sharp objects such as support wires and ceiling tile grids which can cause damage.
- If there is insulation over the ceiling tiles, simply install the ENRG Blanket™ material between the tiles and the insulation.
- Side laps of the material should overlap one another.
- Cover as much of the ceiling as possible, while taking care not to cut into the BioPCM® pockets.

120 East Pritchard Street • Asheboro, NC 27203 • Phone: (336) 629-3000 • FAX (336) 629-3100
www.phasechange.com Rev.62016-09-07
ENRG Blanket™ Installation – Continued
- When a section is complete, replace the drop ceiling tile with ENRG Blanket™ above.
- Follow all warnings and precautions listed on tools and equipment during the installation process.
- Use CAUTION while climbing ladders and working around electrical wiring.
- The biggest safety concern is proper ladder use. In addition to using the correct height ladder… After popping up a ceiling tile, the installer will lay mats in all directions. At some point, the installer will need to install facing away from the ladder and lose 3 points of contact. Installer must reposition the ladder. Care should be taken when moving and positioning ladders around desks and furniture.