Embed Size (px)
Citation preview

Written By: Mike Nolterieke Revision Level: 07 Last Revised: 2/17/2004 6:30 PM
Enabling and Configuring SOL (Serial Over LAN) on
an 8832 Blade Server
Whitepaper

Page 2 of 23
Enabling and Configuring SOL (Serial Over LAN) on an 8832 Blade
Server Whitepaper Written By: Mike Nolterieke
I. Introduction
This white paper explains how to update and configure the various BladeCenter modules and 8832 Blade Server components used to enable Serial Over LAN, herein referred to as SOL. There are several BladeCenter modules and 8832 Blade Server components that must be updated and configured correctly in order for SOL to function properly. This white paper details which modules and components are necessary and the steps to update and configure them properly. It is very important that all of the steps outlined in this document are carefully followed to enable SOL functionality.
This white paper was written for use with the IBM BladeCenter 1.0 chassis, IBM 4-Port Gigabit ESM (Ethernet Switch Module), 8839 Blade Server(s), Red Hat Enterprise Linux ES 2.1, and SUSE SLES 8.0. Notes: The 8832 Blade Server(s) must be ship level. The easiest way to check this is to look at the “Hardware Revision” of the 8832 Blade Server(s) under the “Hardware VPD” link in the Web Interface. The Hardware Revision must be 36 or higher. You can also determine this by physically looking at the 8832 Blade Server planar. The planar revision is stamped on the board directly above the top memory slot. This MUST say “Pass 4” or higher. If it is not Pass 4 or higher, SOL will not function. This whitepaper provides instructions for updating the IBM 4-Port Gigabit ESM (Ethernet Switch Module). The IBM 4-Port Gigabit ESM is the only ESM that currently supports SOL. The terms “IBM ESM” and “ESM” will be used for the rest of this document to refer to the IBM 4-Port Gigabit ESM unless otherwise specifically stated. In order for SOL to function properly, a supported ESM must be installed in the I/O Module Bay 1 of the BladeCenter chassis. Technical Limitations: SOL uses the first (Planar Ethernet 1) network interface of the 8832 Blade Server to communicate. When this network interface attempts to PXE/DHCP boot, the network interface is reset. This causes any current SOL session to be dropped and become “Not Ready”. Due to this, it is recommended that if you require PXE/DHCP booting, you should use the second (Planar Ethernet 2) network interface and set the BIOS option “Run PXE only on selected Planar NIC” to “Enabled”. When the BIOS option “Run PXE only on selected Planar NIC” is set to “Disabled”, the BIOS will automatically attempt to PXE/DHCP boot from Planar Ethernet 1 if PXE/DHCP booting fails for any reason on Planar Ethernet 2. Setting the BIOS option “Run PXE only on selected Planar NIC” to “Enabled” will prevent the BIOS from attempting to PXE/DHCP boot from Planar Ethernet 1 if PXE/DHCP booting fails for whatever reason on Planar Ethernet 2. In certain rare circumstances, the serial data of the 8832 Blade Server may stop flowing. This results in a blank SOL session with only a blinking cursor. When this occurs, simply press the control and q keys (Ctrl+q) at the same time. This key sequence will allow the flow of serial data to resume.

Page 3 of 23
Enabling and Configuring SOL (Serial Over LAN) on an 8832 Blade
Server Whitepaper Written By: Mike Nolterieke
II. SOL Overview
SOL is accomplished in the following way: Serial data that flows to and from the 8832 Blade Server(s) COM port is routed through the network infrastructure of the BladeCenter chassis. This network infrastructure includes the BladeCenter Management Module, the ESM (Ethernet Switch Module), and the onboard NIC (Network Interface Controller) of the 8832 Blade Server(s). In addition the 8832 Blade Server(s) ISMP (Integrated System Management Processor) also assists in handling the serial data to and from the COM port. The BladeCenter Management Module acts as a proxy in the network infrastructure to couple a client running a telnet session to the BladeCenter Management Module with an SOL session to the 8832 Blade Server(s). This then allows the telnet client to interact with the serial port of the 8832 Blade Server over the network. Since all of the SOL traffic is controlled by and routed through the BladeCenter Management Module, it is possible for administrators to segregate the management traffic of the BladeCenter from the data traffic of the Blade Server(s). In order to initiate an SOL connection to an 8832 Blade Server, you must first establish a telnet CLI (Command Line Interface) session to the BladeCenter Management Module. Once the telnet CLI session to the BladeCenter Management Module has been established, you can then initiate a remote console SOL session to any individual 8832 Blade Server. You can establish as many as 20 separate telnet sessions to one BladeCenter Management Module. This gives you the ability to have a maximum of one SOL session active on all 14 8832 Blade Server(s) at the same time and also have 6 additional CLI sessions for BladeCenter chassis management. If security is a concern, SSH (Secure Shell) sessions are also available so users can establish secured telnet CLI sessions to the BladeCenter Management Module prior to starting an SOL console redirect session to the 8832 Blade Server(s). Note: Due to the encryption of data on an SSH session there will be some performance impact
as seen by the remote SSH client.
Page 4 of 23
Enabling and Configuring SOL (Serial Over LAN) on an 8832 Blade
Server Whitepaper Written By: Mike Nolterieke
III. SOL BladeCenter Modules and 8832 Blade Server Components Below is a table of BladeCenter modules and 8832 Blade Server components required to enable SOL. The latest updates for these modules and components should be obtained from the IBM web site prior to following the instructions outlined in this document.
BladeCenter Management Module 8832 Blade Server BIOS 8832 Blade Server Diagnostics 8832 Blade Server ISMP 8832 Blade Server Broadcom Ethernet Controller Firmware 8832 Blade Server Broadcom Ethernet Controller Linux Device Driver IBM 4-Port Gigabit ESM (Ethernet Switch Module)
Page 5 of 23
Enabling and Configuring SOL (Serial Over LAN) on an 8832 Blade
Server Whitepaper Written By: Mike Nolterieke
IV. BladeCenter Management Module
The following assumptions have been made for these directions 1. The BladeCenter Management Module External Network Interface (eth0) already has
a valid configuration for your production network 2. You are able to and have already connected to the BladeCenter Management
Module Web interface The following considerations must to be taken into account prior to configuring the network settings to enable SOL. The BladeCenter Management Module External Network Interface (eth0) configuration must have a valid configuration for your production network. This configuration may be obtained from a DHCP server or set statically. The BladeCenter Management Module Internal Network Interface (eth1) and the ESM configuration can be different than that of the BladeCenter Management Module External Network Interface (eth0). However, the BladeCenter Management Module Internal Network Interface (eth1) and the ESM configuration must reside the within the same subnet. Keep in mind that the BladeCenter Management Module Internal Interface (eth1) is exposed to the external network via the BladeCenter Management Module so the configuration used must not conflict with other addresses on your production network. Also, if you use a configuration for the ESM that is not valid for your production network, you will not be able to update the firmware or manage your ESM via the telnet or Web interfaces. The SOL BSMP (Blade System Management Processors) address range can be anything you wish as long as it does not conflict with any of the actual IP addresses of the 8832 Blade Servers. These addresses are used for internal communications only and are not exposed to the external network. Below is the configuration that was used during the development of this document and will be used as reference and examples. BladeCenter Management Module External Network Inte rface (eth0) IP address: 9.xxx.xxx.173 Subnet mask: 255.255.255.128 Gateway address: 9.xxx.xxx.129 Note: The configuration above was obtained from a DHCP server on the production network BladeCenter Management Module Internal Network Inte rface (eth1) IP address: 9.xxx.xxx.151 Subnet mask: 255.255.255.128 Gateway address: 9.xxx.xxx.129 ESM IP address: 9.xxx.xxx.147 Subnet mask: 255.255.255.128 Gateway address: 9.xxx.xxx.129 SOL BSMP BSMP IP address range: 10.1.1.100

Page 6 of 23
Enabling and Configuring SOL (Serial Over LAN) on an 8832 Blade
Server Whitepaper Written By: Mike Nolterieke
Follow the directions outlined below to update the firmware and configure the BladeCenter Management Module to enable SOL.
1. Update the BladeCenter Management Module firmware a. Obtain the latest BladeCenter Management Module zip file b. Unzip the file obtained above into a temporary directory c. Update the BladeCenter Management Module firmware
Note: There are three packet files (cnet??us.pkt) r equired to update the firmware of the BladeCenter Management Module. You must repeat the steps below for each of the packet files
i. Click on the “Firmware Update” link in the “MM Control” section ii. Click the “Browse…” button in the “Update MM Firmware” section iii. Select one of the firmware files that has a “.pkt” extension from the
temporary directory where you unzipped the latest build in step b above and click the “Open” button
iv. Click the “Update” button in the “Update MM Firmware” section and wait for the status window to close
v. Click the “Continue” button in the “Confirm Firmware Update” section and wait for the update to complete
Repeat these steps for the remaining firmware packe t files d. Restart the BladeCenter Management Module
Do not restart the BladeCenter Management Module un til you have completed the steps above for ALL of the firmware p acket files i. Click on the “Restart MM” link in the “MM Control” section ii. Click the “Restart” button in the “Restart MM” section iii. Click the “OK” button in the confirmation window iv. Click “Yes” to close the current Web interface v. Wait about 30 seconds or so, start a new Web browser, and
reconnect to the BladeCenter Management Module Web interface 2. Configure the BladeCenter Management Module to enable SOL
a. Configure the “Internal Network Interface (eth1)” settings i. Click on the “Network Interfaces” link in the “MM Control” section ii. Ensure that the “Enabled” option is selected for the “Interface” field in
the “Internal Ethernet Interface (eth1)” section iii. Set and save the “Static IP Configuration” fields in the “Internal
Network Interface (eth1)“ section 1. Set the “IP address” (9.xxx.xxx.151) 2. Set the “Subnet mask” (255.255.255.128) 3. Set the “Gateway address” (9.xxx.xxx.129)
Be sure to remember or write down the values of the “IP address” and “Subnet mask” fields as they will be needed in step 2, subsection d, of Section VII
4. Click the “Save” button and click “OK” or “Yes” to any windows that may pop up
Do not restart the BladeCenter Management Module

Page 7 of 23
Enabling and Configuring SOL (Serial Over LAN) on an 8832 Blade
Server Whitepaper Written By: Mike Nolterieke
b. Configure the ESM network settings
i. Click on the “Management” link in the “I/O Module Tasks” section ii. Configure and save the “New Static IP Configuration” fields in the
“Bay 1 (Ethernet SM)” section if they are not already correct as listed in the “Current IP Configuration” section
1. Set the “IP address” (9.xxx.xxx.147) 2. Set the “Subnet mask” (255.255.255.128) 3. Set the “Gateway address (9.xxx.xxx.129) 4. Click the “Save” button
c. Configure the Serial Over LAN settings i. Click on the “Serial Over LAN” link in the “Blade Tasks” section ii. Configure and save the following fields in the “Serial Over LAN
Configuration” section 1. Select the “Enabled” option of the “Serial Over LAN” field 2. Enter the “BSMP IP address range” (10.1.1.100) 3. Set the “Accumulate timeout” field (default is 5) if it is not set 4. Set the “Send threshold” field (default is 250) if it is not set 5. Set the “Retry count” field (default is 3) if it is not set 6. Set the “Retry interval” field (default is 250) if it is not set 7. Click the “Save” button Do not attempt to enable or disable SOL on any of t he 8832 Blade Server’s in the “Serial Over LAN Status” secti on
3. Restart the BladeCenter Management Module a. Click on the “Restart MM” link in the “MM Control” section b. Click the “Restart” button in the “Restart MM” section c. Click the “OK” button in the confirmation window d. Click the “Yes” button to close the current Web interface e. Wait about 30 seconds or so, start a new Web browser, and reconnect to the
BladeCenter Management Module Web interface The BladeCenter Management Module is now enabled for SOL.

Page 8 of 23
Enabling and Configuring SOL (Serial Over LAN) on an 8832 Blade
Server Whitepaper Written By: Mike Nolterieke
V. 8832 Blade Server BIOS Follow the directions outlined below to update and configure the 8832 Blade Server BIOS to enable SOL.
1. Flash the 8832 Blade Server BIOS a. Obtain the latest 8832 Blade Server BIOS diskette image b. Create a diskette from the image obtained above c. Boot the diskette created above and follow the prompts to flash the BIOS d. Reboot the system
2. Configure the 8832 Blade Server BIOS settings a. Press F1 as the 8832 Blade Server is booting to enter the setup utility b. Enter the “Devices and I/O Ports” selection
i. Set “Serial Port A” to “Auto-configure” ii. Set “Serial Port B” to “Auto-configure” iii. Enter the “Remote Console Redirection” selection
1. Set “Remote Console Active” to “Enabled” 2. Set “Remote Console COM Port” to “COM 2” 3. Set “Remote Console Baud Rate” to “19200” 4. Set “Remote Console Data Bits” to “8” 5. Set “Remote Console Parity” to “None” 6. Set “Remote Console Stop Bits” to “1” 7. Set “Remote Console Text Emulation” to “ANSI” 8. Set “Remote Console Keyboard Emulation” to “ANSI” 9. Set “Remote Console Active After Boot” to “Enabled” 10. Set “Remote Console Flow Control” to “Hardware” 11. Press escape (Esc) 12. Press escape (Esc)
Due to technical limitations, you should not attemp t to use “Planar Ethernet 1” for PXE/DHCP booting or installation. If you require PXE/DHCP booting, you must follow the instructions outlined in step c below. Refer to Section I for additional information. c. Enter the “Start Options” selection
i. Set the “Planar Ethernet PXE/DHCP” field to “Planar Ethernet 2” ii. Set the “Run PXE only on selected Planar NIC” field to “Enabled” iii. Press escape (Esc)
d. Highlight the “Save Settings” selection and press enter e. Press enter to confirm saving the settings f. Highlight the “Exit Setup” selection and press enter g. Ensure that the “Yes, exit the Setup Utility” is highlighted and press enter
The 8832 Blade Server BIOS is now enabled for SOL.

Page 9 of 23
Enabling and Configuring SOL (Serial Over LAN) on an 8832 Blade
Server Whitepaper Written By: Mike Nolterieke
VI. 8832 Blade Server ISMP Follow the directions outlined below to update the 8832 Blade Server ISMP (Integrated Systems Management Processor). There is no configuration required for the 8832 Blade Server ISMP to enable SOL. Important Note: Do not change the BladeCenter Media Tray owner either by pressing the button on the
front of the 8832 Blade Server or via the BladeCenter Management Module Web interface during the flashing operation. This will cause the flashing procedure to be interrupted and can possibly render the 8832 Blade Server ISMP inoperable.
1. Flash the 8832 Blade Server ISMP
a. Obtain the latest 8832 Blade Server ISMP diskette image b. Create a diskette from the image obtained above c. Flash the 8832 Blade Server ISMP in one of the two following ways
i. Physically at the BladeCenter chassis 1. Boot the diskette created above and follow the prompts to
flash the 8832 Blade Server ISMP ii. Remotely via the BladeCenter Management Module Web interface
These instructions assume you are already connected to the BladeCenter Management Module Web interface
1. Click on the “Firmware Update” link under the “Blade Tasks” section
2. Select the correct 8832 Blade Server from the “Target” option in the “Update Blade Firmware” section
3. Click the “Browse…” button in the “Update Blade Firmware” section
4. Select the file named “BR8TXXA.PKT”, where XX is the current build number, from the diskette that you created in step c above and press the “Open” button
5. Click the “Update” button in the “Update Blade Firmware” section and wait for the progress window to close
6. Click the “Continue” button in the “Confirm Firmware Update” section and wait for the update to complete
The 8832 Blade Server ISMP is now enabled for SOL.

Page 10 of 23
Enabling and Configuring SOL (Serial Over LAN) on an 8832 Blade
Server Whitepaper Written By: Mike Nolterieke
VII. 8832 Blade Server Broadcom Ethernet Controllers Below are the requirements for SOL to function with the 8832 Blade Server Broadcom Ethernet Controllers.
The ESM must be installed in Slot 1 Jumper J28 must be placed on pins 2 and 3. This is the default configuration from the factory. You should only need to verify or con figure this if you are having problems establishing an SOL connection
The requirement above refers to the placement of Jumper J28. Jumper J28 is located near the end of the 8832 Blade Server system board across from where the hard drives mount. Pin 1 is the pin that is closest to the bottom (the right side) of the 8832 Blade Server as you are looking at it from the front. Pin 2 is the pin that is in the middle. And, Pin 3 is the pin that is closest to the top (the left side) of the 8832 Blade Server as you are looking at it from the front. There are two methods that can be used to update the firmware of the 8832 Broadcom Ethernet Controllers. Follow the directions outlined below for the process you wish to use to update the 8832 Blade Server Broadcom Ethernet Controllers. There is no configuration required for the 8832 Blade Server Broadcom Ethernet Controllers to enable SOL.
1. Flash the 8832 Blade Server Broadcom Ethernet Controllers via the automated DOS
bootable diskette Note: Any current SOL sessions will be terminated when using this process to
update the 8832 Blade Server Broadcom firmware a. Obtain the latest Broadcom Ethernet Controller firmware diskette image b. Create a diskette from the image obtained above c. Boot the diskette created above
Note: A menu will be presented when the diskette boots. The default selection is to flash the Broadcom Ethernet Controllers and configure SOL on NIC 1 (Device 0). There is no user intervention required as the menu will automatically time out and perform the default operation. You should only select the second option if you were instructed to do so. Selecting the second option can cause SOL not to function.
Page 11 of 23
Enabling and Configuring SOL (Serial Over LAN) on an 8832 Blade
Server Whitepaper Written By: Mike Nolterieke
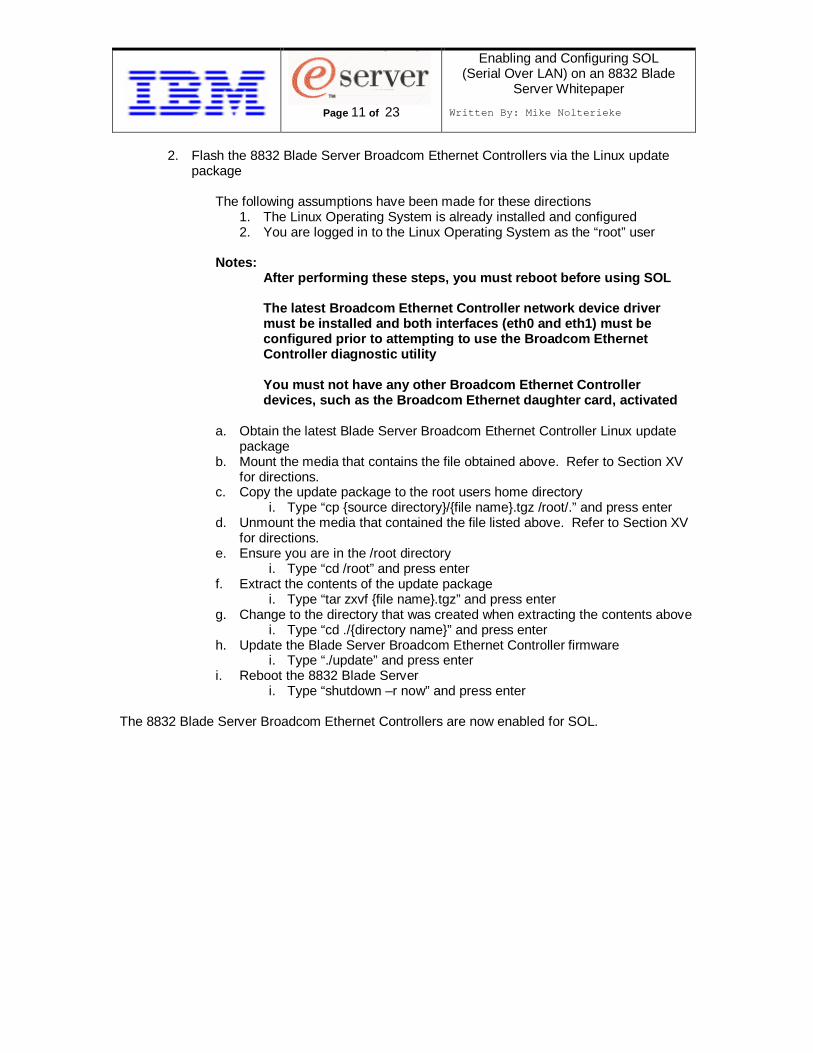
2. Flash the 8832 Blade Server Broadcom Ethernet Controllers via the Linux update
package
The following assumptions have been made for these directions 1. The Linux Operating System is already installed and configured 2. You are logged in to the Linux Operating System as the “root” user
Notes:
After performing these steps, you must reboot befor e using SOL The latest Broadcom Ethernet Controller network dev ice driver must be installed and both interfaces (eth0 and eth 1) must be configured prior to attempting to use the Broadcom Ethernet Controller diagnostic utility
You must not have any other Broadcom Ethernet Contr oller devices, such as the Broadcom Ethernet daughter car d, activated
a. Obtain the latest Blade Server Broadcom Ethernet Controller Linux update package
b. Mount the media that contains the file obtained above. Refer to Section XV for directions.
c. Copy the update package to the root users home directory i. Type “cp {source directory}/{file name}.tgz /root/.” and press enter
d. Unmount the media that contained the file listed above. Refer to Section XV for directions.
e. Ensure you are in the /root directory i. Type “cd /root” and press enter
f. Extract the contents of the update package i. Type “tar zxvf {file name}.tgz” and press enter
g. Change to the directory that was created when extracting the contents above i. Type “cd ./{directory name}” and press enter
h. Update the Blade Server Broadcom Ethernet Controller firmware i. Type “./update” and press enter
i. Reboot the 8832 Blade Server i. Type “shutdown –r now” and press enter
The 8832 Blade Server Broadcom Ethernet Controllers are now enabled for SOL.

Page 12 of 23
Enabling and Configuring SOL (Serial Over LAN) on an 8832 Blade
Server Whitepaper Written By: Mike Nolterieke
VIII. IBM 4-Port Gigabit ESM (Ethernet Switch Module) The following assumptions have been made for these directions
1. You are already connected to the BladeCenter Management Module Web Interface Note: You will not be able to perform the direction s outlined below if you used values for
the network configuration of the IBM ESM that are n ot within the same subnet as the BladeCenter Management Module network interfaces (e th0 and eth1). Refer to Section IV for additional information.
Follow the directions outlined below to update the firmware of the IBM ESM. There is no configuration required for the IBM ESM to enable SOL.
1. Connect to the IBM ESM Web interface a. Click on the “Management” link under the “I/O Module Tasks” section Ensure that the “Current IP Configuration” section co ntains values that are within the same subnet as the BladeCenter Managemen t Module network interfaces (eth0 and eth1) as this will be required in order to access the Web interface of the IBM ESM. If they are not, you MUST modify them before proceeding. Refer to Section IV for additio nal information. b. Click on the “Advanced Management” link under the “Bay 1 (Ethernet SM)*” c. Scroll down to the bottom of the page and click the “Start Web Session”
button in the “Start Telnet/Web Session” section This will launch a new Web browser and connect to the IBM ESM Web interface
d. Log in to the IBM ESM (the default User name is “USERID” and the default Password is “PASSW0RD”)
2. Update the IBM ESM firmware a. Obtain the latest IBM ESM firmware file b. Click on the “Maintenance” link c. Click on the “Using Browser” link d. Click on the “Upgrade Firmware/Configuration” link e. Click the “Browse” button and select the file obtained in step “1a” above f. Click the “Start” button, answer “Yes” to any questions and wait for the
firmware to be updated g. Close the Web browser
3. Restart the IBM ESM a. From the Management Module Web Interface, click on the “Power/Restart”
link under the “I/O Module Tasks” section b. Check the box next to your IBM ESM and click on the “Restart Module(s) and
Run Standard Diagnostics” link c. Click the “OK” button on the confirmation screen
The IBM 4-Port Gigabit ESM (Ethernet Switch Module) is now enabled for SOL.

Page 13 of 23
Enabling and Configuring SOL (Serial Over LAN) on an 8832 Blade
Server Whitepaper Written By: Mike Nolterieke
IX. Completing the Configuration The following assumptions have been made for these directions
1. You are already connected to the BladeCenter Management Module Web Interface Now that all of the required items have been updated and configured, follow the directions outlined below to complete the configuration.
1. Enable SOL on the 8832 Blade Server(s) a. Click on the “Serial Over LAN” link in the “Blade Tasks” section b. Check the boxes next to the 8832 Blade Server(s) that you wish to enable
SOL on in the “Serial Over LAN Status” section c. Click on the “Enable Serial Over LAN” link at the bottom d. After the page reloads, the “SOL” section on the table should say “Enabled”
for the 8832 Blade Server(s) you selected e. The “SOL Session” section of the table should say “Not Ready” for the 8832
Blade Server(s) you selected 2. Power Up or Restart the 8832 Blade Server(s)
a. Click on the “Power/Restart” link in the “Blade Tasks” section b. Check the 8832 Blade Server(s) that you have enabled SOL on and click on
either the “Power On Blade” or “Restart Blade” depending on the current status of your 8832 Blade Server(s)
c. Click the “OK” button on the confirmation window d. Click the “OK” button on the information window and wait for the Web page
to refresh 3. Check the status of the 8832 Blade Server(s)
a. Click on the “Serial Over LAN” link in the “Blade Tasks” section b. Scroll down and ensure that the “SOL Session” section of the table in the
“Serial Over LAN Status” for the selected 8832 Blade Server(s) now says “Ready”
Note: If the “SOL Session” field for the 8832 Blade Server(s) is not in the “Ready” state,
you should check for the existence and correct placement of the J28 jumper on the system board of the 8832 Blade Server(s). Refer to Section VII for additional information.
The SOL configuration is now complete.
Page 14 of 23
Enabling and Configuring SOL (Serial Over LAN) on an 8832 Blade
Server Whitepaper Written By: Mike Nolterieke
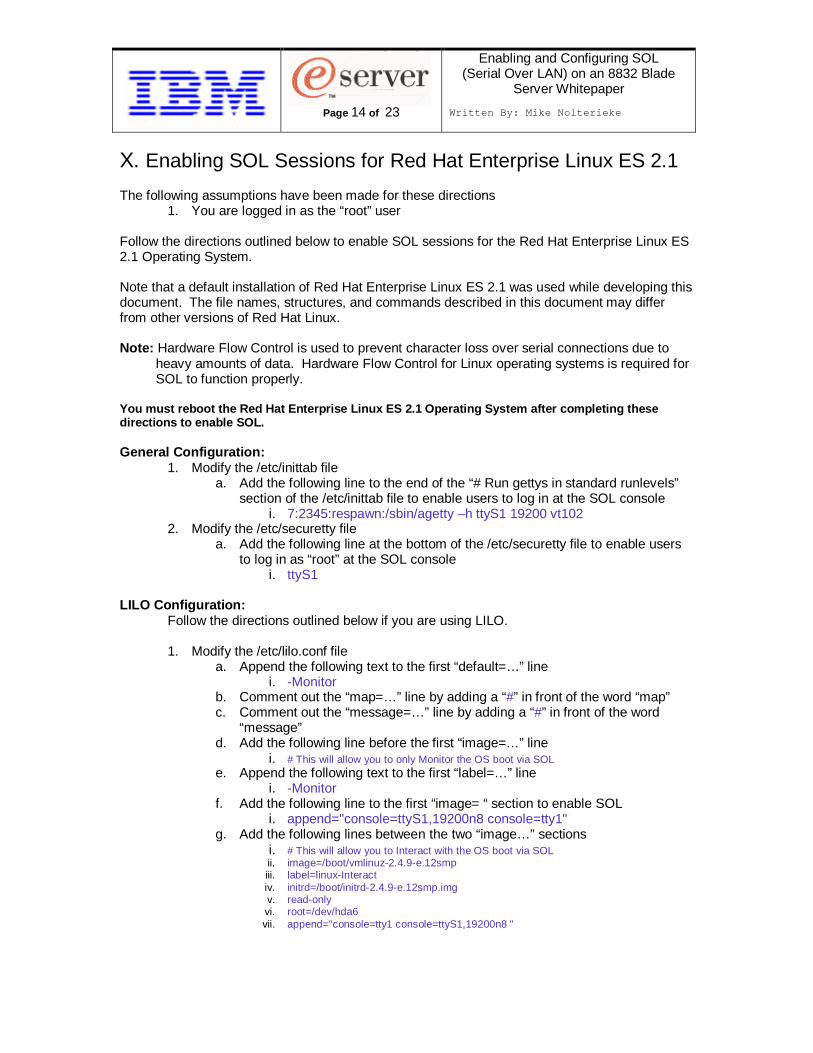
X. Enabling SOL Sessions for Red Hat Enterprise Linux ES 2.1 The following assumptions have been made for these directions
1. You are logged in as the “root” user Follow the directions outlined below to enable SOL sessions for the Red Hat Enterprise Linux ES 2.1 Operating System. Note that a default installation of Red Hat Enterprise Linux ES 2.1 was used while developing this document. The file names, structures, and commands described in this document may differ from other versions of Red Hat Linux. Note: Hardware Flow Control is used to prevent character loss over serial connections due to
heavy amounts of data. Hardware Flow Control for Linux operating systems is required for SOL to function properly.
You must reboot the Red Hat Enterprise Linux ES 2.1 Operating System after completing these directions to enable SOL. General Configuration:
1. Modify the /etc/inittab file a. Add the following line to the end of the “# Run gettys in standard runlevels”
section of the /etc/inittab file to enable users to log in at the SOL console i. 7:2345:respawn:/sbin/agetty –h ttyS1 19200 vt102
2. Modify the /etc/securetty file a. Add the following line at the bottom of the /etc/securetty file to enable users
to log in as “root” at the SOL console i. ttyS1
LILO Configuration: Follow the directions outlined below if you are using LILO.
1. Modify the /etc/lilo.conf file a. Append the following text to the first “default=…” line
i. -Monitor b. Comment out the “map=…” line by adding a “#” in front of the word “map” c. Comment out the “message=…” line by adding a “#” in front of the word
“message” d. Add the following line before the first “image=…” line
i. # This will allow you to only Monitor the OS boot via SOL e. Append the following text to the first “label=…” line
i. -Monitor f. Add the following line to the first “image= “ section to enable SOL
i. append="console=ttyS1,19200n8 console=tty1" g. Add the following lines between the two “image…” sections
i. # This will allow you to Interact with the OS boot via SOL ii. image=/boot/vmlinuz-2.4.9-e.12smp iii. label=linux-Interact iv. initrd=/boot/initrd-2.4.9-e.12smp.img v. read-only vi. root=/dev/hda6 vii. append="console=tty1 console=ttyS1,19200n8 "
Page 15 of 23
Enabling and Configuring SOL (Serial Over LAN) on an 8832 Blade
Server Whitepaper Written By: Mike Nolterieke
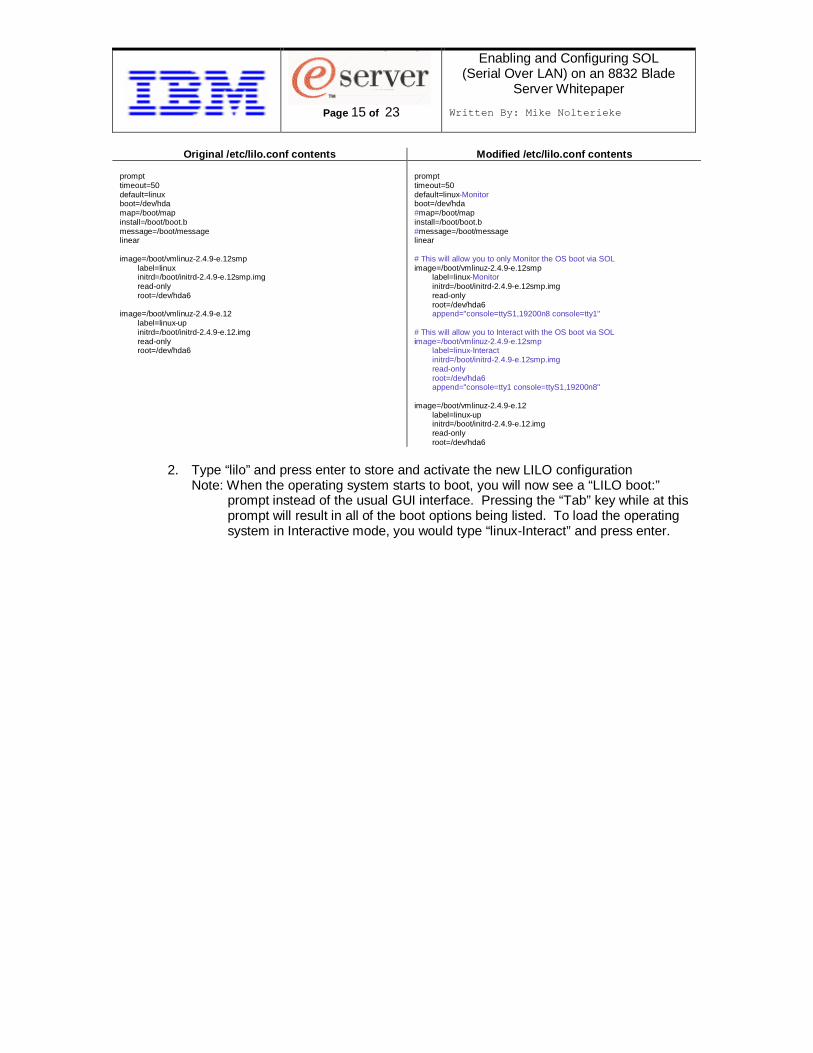
Original /etc/lilo.conf contents Modified /etc/lilo .conf contents
prompt timeout=50 default=linux boot=/dev/hda map=/boot/map install=/boot/boot.b message=/boot/message linear
image=/boot/vmlinuz-2.4.9-e.12smp label=linux initrd=/boot/initrd-2.4.9-e.12smp.img read-only root=/dev/hda6 image=/boot/vmlinuz-2.4.9-e.12 label=linux-up initrd=/boot/initrd-2.4.9-e.12.img read-only root=/dev/hda6
prompt timeout=50 default=linux-Monitor boot=/dev/hda #map=/boot/map install=/boot/boot.b #message=/boot/message linear
# This will allow you to only Monitor the OS boot via SOL image=/boot/vmlinuz-2.4.9-e.12smp label=linux-Monitor initrd=/boot/initrd-2.4.9-e.12smp.img read-only root=/dev/hda6 append="console=ttyS1,19200n8 console=tty1" # This will allow you to Interact with the OS boot via SOL image=/boot/vmlinuz-2.4.9-e.12smp label=linux-Interact initrd=/boot/initrd-2.4.9-e.12smp.img read-only root=/dev/hda6 append="console=tty1 console=ttyS1,19200n8"
image=/boot/vmlinuz-2.4.9-e.12 label=linux-up initrd=/boot/initrd-2.4.9-e.12.img read-only root=/dev/hda6
2. Type “lilo” and press enter to store and activate the new LILO configuration
Note: When the operating system starts to boot, you will now see a “LILO boot:” prompt instead of the usual GUI interface. Pressing the “Tab” key while at this prompt will result in all of the boot options being listed. To load the operating system in Interactive mode, you would type “linux-Interact” and press enter.

Page 16 of 23
Enabling and Configuring SOL (Serial Over LAN) on an 8832 Blade
Server Whitepaper Written By: Mike Nolterieke
GRUB Configuration: Follow the directions outlined below if you are using GRUB.
1. Modify the /boot/grub/grub.conf file a. Comment out the “splashimage=…” line by adding a “#” in front of the word
“splashimage” b. Add the following line before the first “title=…” line
i. # This will allow you to only Monitor the OS boot via SOL c. Append the following text to the first “title=…” line
i. SOL Monitor d. Append the following text to the “kernel/…” line of the first “title…” section
i. console=ttyS1,19200 console=tty1 e. Add the following lines between the two “title…” sections
i. # This will allow you to Interact with the OS boot via SOL ii. title Red Hat Linux (2.4.9-e.12smp) SOL Interactive iii. root (hd0,0) iv. kernel /vmlinuz-2.4.9-e.12smp ro root=/dev/hda6 console=tty1 console=ttyS1,19200 v. initrd /initrd-2.4.9-e.12smp.img
Original /boot/grub/grub.conf contents Modified /bo ot/grub/grub.conf contents
#grub.conf generated by anaconda # # Note that you do not have to rerun grub after making changes to this file # NOTICE: You have a /boot partition. This means that # all kernel and initrd paths are relative to /boot/, eg. # root (hd0,0) # kernel /vmlinuz-version ro root=/dev/hda6 # initrd /initrd-version.img #boot=/dev/hda default=0 timeout=10 splashimage=(hd0,0)/grub/splash.xpm.gz title Red Hat Enterprise Linux ES (2.4.9-e.12smp)
root (hd0,0) kernel /vmlinuz-2.4.9-e.12smp ro root=/dev/hda6 initrd /initrd-2.4.9-e.12smp.img
title Red Hat Enterprise Linux ES-up (2.4.9-e.12) root (hd0,0) kernel /vmlinuz-2.4.9-e.12 ro root=/dev/hda6 initrd /initrd-2.4.9-e.12.img
#grub.conf generated by anaconda # # Note that you do not have to rerun grub after making changes to this file # NOTICE: You have a /boot partition. This means that # all kernel and initrd paths are relative to /boot/, eg. # root (hd0,0) # kernel /vmlinuz-version ro root=/dev/hda6 # initrd /initrd-version.img #boot=/dev/hda default=0 timeout=10 #splashimage=(hd0,0)/grub/splash.xpm.gz # This will allow you to only Monitor the OS boot via SOL title Red Hat Enterprise Linux ES (2.4.9-e.12smp) SOL Monitor root (hd0,0) #Note: The following “kernel…” line is all one line, not two separate lines # The text has wrapped in this example kernel /vmlinuz-2.4.9-e.12smp ro root=/dev/hda6 console=ttyS1,19200 console=tty1 initrd /initrd-2.4.9-e.12smp.img # This will allow you to Interact with the OS boot via SOL title Red Hat Linux (2.4.9-e.12smp) SOL Interactive root (hd0,0) #Note: The following “kernel…” line is all one line, not two separate lines # The text has wrapped in this example kernel /vmlinuz-2.4.9-e.12smp ro root=/dev/hda6 console=tty1 console=ttyS1,19200 initrd /initrd-2.4.9-e.12smp.img title Red Hat Enterprise Linux ES-up (2.4.9-e.12) root (hd0,0) kernel /vmlinuz-2.4.9-e.12 ro root=/dev/hda6 initrd /initrd-2.4.9-e.12.img
Red Hat Enterprise Linux ES 2.1 configuration is now complete. Do not forget to reboot the operating system for the changes to take effect.

Page 17 of 23
Enabling and Configuring SOL (Serial Over LAN) on an 8832 Blade
Server Whitepaper Written By: Mike Nolterieke
XI. Enabling SOL Sessions for SUSE SLES 8.0 The following assumptions have been made for these directions
1. You are logged in as the “root” user Note that a default installation of SUSE SLES 8.0 was used while developing this document. The file names, structures, and commands described in this document may differ from other versions of SUSE Linux. Note: Hardware Flow Control is used to prevent character loss over serial connections due to
heavy amounts of data. Hardware Flow Control for Linux operating systems is required for SOL to function properly.
You must reboot the SUSE SLES 8.0 Operating System after completing these directions to enable SOL. Follow the directions outlined below to enable SOL sessions for the SUSE SLES 8.0 Operating System.
1. Modify the /etc/inittab file a. Add the following line to the end of the “# getty-programs for the normal
runlevels” section of the /etc/inittab file to enable users to log in at the SOL console
i. 7:2345:respawn:/sbin/agetty –h ttyS1 19200 vt102 2. Modify the /etc/securetty file
a. Add the following line after the “tty6” line in the /etc/securetty file to enable users to log in as “root” at the SOL console
i. ttyS1 3. Modify the /boot/grub/menu.lst file
a. Comment out the “gfxmenu…” line by adding a “#” in front of the word “gfxmenu”
b. Add the following line before the first “title…” line i. # This will allow you to only Monitor the OS boot via SOL
c. Append the following text to the first “title…” line i. SOL Monitor
d. Append the following text to the “kernel…” line of the first “title…” section i. console=ttyS1,19200 console=tty1
e. Add the following lines between the first two “title…” sections i. # This will allow you to Interact with the OS boot via SOL ii. title linux SOL Interactive iii. kernel (hd0,1)/boot/vmlinuz root=/dev/hda2 acpi=oldboot vga=791 console=tty1
console=ttyS1,19200 iv. initrd (hd0,1)/boot/initrd
Note: See next page for an example of a modified /boot/grub/menu.lst file.

Page 18 of 23
Enabling and Configuring SOL (Serial Over LAN) on an 8832 Blade
Server Whitepaper Written By: Mike Nolterieke
Original /boot/grub/menu.lst contents Modified /boo t/grub/menu.lst contents
gfxmenu (hd0,1)/boot/message color white/blue black/light-gray default 0 timeout 8 title linux kernel (hd0,1)/boot/vmlinuz root=/dev/hda2 acpi=oldboot vga=791 initrd (hd0,1)/boot/initrd title floppy root chainloader +1 title failsafe kernel (hd0,1)/boot/vmlinuz.shipped root=/dev/hda2 ide=nodma apm=off vga=normal nosmp disableapic maxcpus=0 3 initrd (hd0,1)/boot/initrd.shipped
#gfxmenu (hd0,1)/boot/message color white/blue black/light-gray default 0 timeout 8 # This will allow you to only Monitor the OS boot via SOL title linux SOL Monitor #Note: The following “kernel…” line is all one line, not two separate lines # The text has wrapped in this example kernel (hd0,1)/boot/vmlinuz root=/dev/hda2 acpi=oldboot vga=791 console=ttyS1,19200 console=tty1 initrd (hd0,1)/boot/initrd # This will allow you to Interact with the OS boot via SOL title linux SOL Interactive #Note: The following “kernel…” line is all one line, not two separate lines # The text has wrapped in this example kernel (hd0,1)/boot/vmlinuz root=/dev/hda2 acpi=oldboot vga=791 console=tty1 console=ttyS1,19200 initrd (hd0,1)/boot/initrd title floppy root chainloader +1 title failsafe kernel (hd0,1)/boot/vmlinuz.shipped root=/dev/hda2 ide=nodma apm=off vga=normal nosmp disableapic maxcpus=0 3 initrd (hd0,1)/boot/initrd.shipped
SUSE SLES 8.0 configuration is now complete. Do not forget to reboot the operating system for the changes to take effect.

Page 19 of 23
Enabling and Configuring SOL (Serial Over LAN) on an 8832 Blade
Server Whitepaper Written By: Mike Nolterieke
XII. Installing the 8832 Blade Server Broadcom Ethernet Controller Device Driver for Linux Operating Systems
The following assumptions have been made for these directions
1. You are logged in as the “root” user 2. The development tools packages have already been installed 3. The kernel source package has already been installed
The latest device driver version should always be o btained from the IBM web site. The version listed in these instructions is for example purposes only. Follow the directions outlined below to install the 8832 Blade Server Broadcom Ethernet Controller device driver. Note that default installations of Red Hat Enterprise Linux ES 2.1 and SUSE SLES 8.0 were used while developing this document. The file names, structures, and commands described in this document may differ from other versions of Linux operating systems.
1. Obtain the latest version of 8832 Blade Server Broadcom Ethernet Controller device driver source package
2. Mount the media containing the 8832 Blade Server Broadcom Ethernet Controller device driver source obtained above. Refer to Section XV for directions.
3. Install the 8832 Blade Server Broadcom Ethernet Controller device driver source package
a. Change directory to where the source package is located i. For example, type “cd /mnt/cdrom” and press enter
b. Type “rpm –ivh bcm5700-7.1.22-1.src.rpm” 4. Unmount the media containing the 8832 Blade Server Broadcom Ethernet Controller
device driver source. Refer to Section XV for directions. 5. Change to the directory where the source package was installed
a. Red Hat Enterprise Linux ES 2.1 i. Type “cd /usr/src/redhat”
b. SUSE SLES 8.0 i. Type “cd /usr/src/packages”
6. Build the 8832 Blade Server Broadcom Ethernet Controller device driver a. Type “rpm –bb SPECS/bcm5700.spec” and press enter
7. Install the 8832 Blade Server Broadcom Ethernet Controller device driver package built in the step above
a. Type “rpm –ivh RPMS/i386/bcm5700-7.1.22-1.i386.rpm --force” and press enter
8. Install the 8832 Blade Server Broadcom Ethernet Controller device driver module a. Type “insmod bcm5700”
9. Configure the network interfaces for the Red Hat Enterprise Linux ES 2.1 or SUSE SLES 8.0 operating system
Configuring the network interfaces of the Red Hat Enterprise Linux ES 2.1 and SUSE SLES 8.0 operating systems is beyond the scope of this document. Please refer to the documentation provided with your operating system for these instructions.
The installation of the 8832 Blade Server Broadcom Ethernet Controller device driver is complete.

Page 20 of 23
Enabling and Configuring SOL (Serial Over LAN) on an 8832 Blade
Server Whitepaper Written By: Mike Nolterieke
XIII. Enabling SOL Sessions for Windows 2003 Standard Edition The following assumptions have been made for these directions
1. You are logged in as a user that has administrative access Note that a default installation of Windows 2003 Standard Edition was used while developing this document. You must reboot the Windows 2003 Standard Edition O perating System after completing these directions to enable SOL. Follow the directions outlined below to enable SOL sessions for the Windows 2003 Standard Edition Operating System.
1. Determine which boot entry ID to modify a. From a Windows command prompt, type “bootcfg” and press enter
This will display the current boot options b. Locate the line in the “Boot Entries” section that says “OS Friendly Name:
Windows Server 2003, Standard” c. Directly above that line will be the boot entry ID
For example: “Boot entry ID: 1” d. Note this boot entry ID as it will be used in the next step
2. Enable EMS a. From a Windows command prompt, type “bootcfg /EMS ON /PORT COM2
/BAUD 19200 /ID {x}”, where {x} is the boot entry ID as determined in step 1 above, and press enter
3. Verify that EMS is enabled a. From a Windows command prompt, type “bootcfg” and press enter
This will display the current boot options b. Verify that the following modifications exist
i. The following should be in the “Boot Loader Settings” section 1. “redirect: COM2” 2. “redirectbaudrate: 19200”
ii. The “OS Load Options:” line in the “Boot Entries” section should have “/redirect” appended
Original bootcfg program output Modified bootcfg pr ogram output
Boot Loader Settings ---------------------------- timeout: 30 default: multi(0)disk(0)rdisk(0)partition(1)\WINDOWS Boot Entries ---------------- Boot entry ID: 1 OS Friendly Name: Windows Server 2003, Standard Path: multi(0)disk(0)rdisk(0)partition(1)\WINDOWS OS Load Options: /fastdetect
Boot Loader Settings ---------------------------- timeout: 30 default: multi(0)disk(0)rdisk(0)partition(1)\WINDOWS redirect: COM2 redirectbaudrate: 19200 Boot Entries ---------------- Boot entry ID: 1 OS Friendly Name: Windows Server 2003, Standard Path: multi(0)disk(0)rdisk(0)partition(1)\WINDOWS OS Load Options: /fastdetect /redirect
The Windows 2003 Standard Edition Operating System configuration is now complete. Do not forget to reboot the operating system for the changes to take effect.
Page 21 of 23
Enabling and Configuring SOL (Serial Over LAN) on an 8832 Blade
Server Whitepaper Written By: Mike Nolterieke
XIV. Using SOL This section describes how to start and stop BladeCenter Management Module telnet CLI and SOL sessions as well as other special key sequences you can use while in an SOL session.
Starting BladeCenter Management Module Telnet CLI S essions:
1. From any command prompt, type “telnet {location}”, where location is the hostname or IP address of the BladeCenter Management Module
2. Log in to the BladeCenter Management Module (the default user name is USERID and the default password is PASSW0RD)
Starting SOL Sessions:
1. Type “console –T system:blade[x]” from a BladeCenter Management Module telnet CLI prompt, where blade[x] (note that the brackets “[ ]” are required) is the number of the 8832 Blade Server (1 -14 in the chassis) that you wish to start the SOL session with.
Note: The BladeCenter Management Module automatically stores the previous 8 KB
(Kilobytes) of serial data that was transmitted by each 8832 Blade Server even when SOL sessions are not active. When an SOL session is established, all of the previous serial data, up to 8 KB, is automatically displayed. If there is no previous data available when the SOL session is started, the cursor will remain on the command line until new serial data is transmitted.
Rebooting 8832 Blade Server(s) via SOL sessions:
You no longer have to exit the current SOL and use the telnet CLI of the BladeCenter Management Module to reboot the 8832 Blade Server. Instead, you can type the following sequence of commands from within the SOL session. 1. Key sequence (“Esc” → “R” → “Esc” → “r” → “Esc” → “R”)
a. Press the escape (“Esc”) key b. Type a capital “R” by pressing the “Shift” and “r” keys at the same time c. Press the escape (“Esc”) key again d. Type a lowercase “r” e. Press the escape (“Esc”) key again f. Type a capital “R” by pressing the “Shift” and “r” keys at the same time
Exiting SOL Sessions:
1. Key sequence (“Esc” → “(“) a. Press the escape (“Esc”) key b. Type a “(“ by pressing the “Shift” and the “9” key at the same time
Note: Exiting an SOL session does not stop the flow of serial data Exiting BladeCenter Management Module Telnet CLI Se ssions:
1. Type “exit” at the BladeCenter Management Module telnet CLI prompt after exiting an SOL session

Page 22 of 23
Enabling and Configuring SOL (Serial Over LAN) on an 8832 Blade
Server Whitepaper Written By: Mike Nolterieke
XV. Mounting and Unmounting Media for Linux Operating Systems Follow the directions outlined below to mount and unmount media for Linux Operating Systems on the 8832 Blade Server.
1. Mounting media for Linux Operating Systems on the 8832 Blade Server a. If the media is a CD
i. Ensure the /mnt/cdrom directory exists, type “mkdir /mnt/cdrom” and press enter if it does not
ii. Type “mount /dev/scd0 –t iso9660 –o ro /mnt/cdrom” and press enter b. If the media is a diskette
i. Ensure the /mnt/sda directory exists, type “mkdir /mnt/sda” and press enter if it does not
ii. Type “mount /dev/sda –o auto /mnt/sda” and press enter
2. Unmounting media for Linux Operating Systems on the 8832 Blade Server c. Type “cd” and press enter d. If the media is a CD
i. Type “umount /mnt/cdrom” and press enter e. If the media is a diskette
i. Type “umount /mnt/sda” and press enter

Page 23 of 23
Enabling and Configuring SOL (Serial Over LAN) on an 8832 Blade
Server Whitepaper Written By: Mike Nolterieke
XVI. Installing and Configuring SSH (Secure Shell Server) for SOL The following assumptions have been made for these directions
1. You are already connected to the BladeCenter Management Module Web Interface 2. You can connect to the external IBM web site
Follow the directions outlined below to install and configure SSH for SOL. You can omit step 1 if you have previously installed the SSL/SSH security key file.
1. Obtain and install the SSL and SSH security file from IBM a. Click on the “Security” link under the “MM Control” section b. Obtain the latest SSL/SSH security key file from IBM by clicking on the
“BladeCenter firmware update” link in the “Install SSL/SSH” section and following the directions
c. Click the “Browse…” button and select the file you downloaded in the previous instruction
d. Click the “Install SSL/SSH” button e. Click on the “configure and enable” link in the “Install SSL/SSH” section
2. Generate the SSH Server Private Key a. Click the “Generate SSH Server Private Key” button in the “SSH Server Key
Management” section b. Click the “OK” button in the confirmation window and wait for the process to
complete 3. Enable SHH
a. Set the “SSH Server” option in the “Secure Shell (SSH) Server” section to “Enabled” and press the “Save” button
b. Click the “OK” button in the confirmation window 4. Restart the Management Module
a. Click on the “Restart MM” link in the “MM Control” section b. Click the “Restart” button in the “Restart MM” section c. Click the “OK” button in the confirmation window
The installation and configuration of SSH is complete, you can now use your favorite SSH client to start secured telnet and SOL sessions to the Management Module and 8832 Blade Server(s).