Embed Size (px)
Citation preview
ELIXIR Data Transfer DocumentationRelease 0
ELIXIR Data Transfer Group
May 02, 2019


Introduction
1 Introduction and Overview 3
2 Use case-based documentation 7
i

ii

ELIXIR Data Transfer Documentation, Release 0
ELIXIR is a distributed infrastructure for life-science information. As part of the H2020 project ELIXIR-Excelerateto accelerate the implementation of ELIXIR, the ELIXIR Compute Platform task 4.3.3 Data Storage and Transfershas investigated, tested and piloted different methods to move data between sites, compute facilities and users’ localenvironments. These pages contain findings, recommendations and instructions for different scenarios related to datatransfers.
Introduction 1

ELIXIR Data Transfer Documentation, Release 0
2 Introduction

CHAPTER 1
Introduction and Overview
ELIXIR, the European collaboration for life science information, is not only funded by the member countries, in theform of membership fees and in-kind contributions, but also with a H2020 grant from the European Commission. Thegrant, called ELIXIR-Excelerate, was awarded in 2012 and is a 4-year project to build up ELIXIR as an infrastructure.
1.1 Background
ELIXIR is a distributed organization with a hub in Hinxton, England. A large part of the ELIXIR activities areshaped around 5 different platforms (Compute, Interoperability, Tools, Data and Training). Each platform developsand provides services for the life science community. In order to provide useful services, ELIXIR also has usercommunities, which are focused on scientific areas. In the Excelerate grant, there are four user communities (or usecases, as they are called in the grant application): marine metagenomics, plant genotypes, human data and rare disease.
The Compute Platform is divided into working groups responsible for different subtasks. In this document, we try togive an overview on how we have been working on the data transfer task in the ELIXIR Compute Platform.
1.1.1 Collecting requirements and making plans
At the start of the Excelerate project, we started planning the compute platform by communicating with the use casesabout their requirements for technical services. This information was then compiled and reorganized into a document,the ELIXIR Technical Architecture, which is revised annually. In this document, we have collated and translatedcommon elements for IT services into so-called technical use cases (TUCs).
Upon reviewing the requirements, and taking the level of funding into consideration, it became apparent that we couldnot spend any resources developing new tools or technologies. Instead, our strategy in the compute platform is toidentify, integrate and deploy best-of-breed technologies that can fulfill the requirements from the communities. Thisis not a bad thing, as this forces us to utilize the efforts from e-infrastructures, from other scientific disciplines, andfrom the commercial sector.
3
ELIXIR Data Transfer Documentation, Release 0
1.2 Sub task: Data Storage and Transfers
In the sub task “Data Storage and Transfers” we have been asked to develop services for four TUCs: data transfers,network storage, data distribution, and a data/PID registry. Here, we focus on data transfers, which in spite of beingan old problem, often is a stumble block for large scale data analysis.
1.2.1 Bulk transfers
When it comes to data transfers, we really mean bulk transfers of large data volumes. Smaller transfers are really not aproblem, as it can be achieved with common software and protocols thanks to mature tools, and the fantastic academicnetworks, coordinated by GÉANT, that we have access to. However, for transfers on the terra- and peta-byte scale,performance make a substantial difference in transfer time, and we need to use the best tools available.
Second, due to the heterogeneous and complex landscape of data producers, providers, centers, processing facilitiesand scientists, we need to be technology and protocol agnostic, and also – in order to have any chance of uptake –propose non-invasive solutions that are reasonably easy to deploy and maintain. We also aim to provide a service thatis as simple as possible (but not simpler); i.e. we aim to provide a service that can move bits from one place to anotherreliably, and with high performance - preferrably using free software.
When it comes to large scale transfers over long distances, http/(s)ftp are not viable options. While there are multiplecommercial providers and proprietary tools (e.g. Aspera, Globus Transfer, . . . ) the de facto standard for bulk transfersin academia is gridftp, which is being used extensibly at CERN, PRACE, XSEDE, NERSC, etc. The protocol is anextension of ftp that have some useful features:
• parallel transfers
• third-party transfers
• checksums
• resumable transfers
• encryption
• sync
In 2017, Globus announced that they will no longer maintain the open source Globus Toolkit, which include server andclient software for gridftp-based transfers. Fortunately, there is now a community effort in place, the Grid communityForum, that will keep the software maintained for the time being.
Getting high performance using free software used to be something of a black art, but with the advent of self-tuningtcp parameters in the Linux network stack, good results can be obtained without virtually any manual work. In fact,with a high-bandwidth connection, disk I/O often end up as the bottleneck in the transfer (which of course can beoptimized further by using solid state disks and/or striping on the end points, but that is a whole other story).
1.2.2 Managed transfers
When working with large scale transfers, it is advantageous to have a service that can carry out the transfer, confirmintegrity using checksums, and keep logs of the activities. This is useful not only because you can have a central placeto monitor the transfer jobs, but also because it is then possible to submit a transfer job from your laptop, shut it downand return later. Furthermore, a dedicated transfer service can at least partly move the task of optimizing performancefrom end users to IT staff with expert knowledge.
To this end, we have deployed a pilot instance of File Transfer Service 3 (fts3), which is developed at CERN, where itis being used to distribute large volumes of experimental data world-wide.
fts3 is REST service with support for multiple protocols (e.g. https, gridftp, S3), and no extra configuration is neededat the storage endpoints. Third-party transfers are used when possible, otherwise they are relayed by the fts3 server.
4 Chapter 1. Introduction and Overview

ELIXIR Data Transfer Documentation, Release 0
The fts3 software is well designed, and the code is clean and readable. The architecture also allows for horizontalscaling, so that more instances can be deployed if needed.
On top of fts3, we have deployed a pilot web service that provides an easy-to-use interface for submitting and moni-toring the transfers.
1.2.3 AAI integration
Services that read from and write to storage systems most often need to have a system of authentication and autho-rization. In ELIXIR we have a well-functioning AAI system where users can obtain an ELIXIR identity that canbe connected to identity providers such as eduGAIN or google id. Service providers can then use several differentmethods to authenticate users, e.g. SAML and OAuth2.
When it comes to the transfer services that we are testing, the AAI layer is based on Public Key Infrastructure (PKI).This is a mature and battle tested technology. However, obtaining and handling certificates has also proven to be alarge hurdle for users – in particular the life science community, which is less accustomed to the sometimes archaiccommand line utilities involved.
Our approach is to rely on the PKI technology, but to avoid exposing users to certificates. For this to work, we relyon a credential translation service (CTS) called rcauth, which is part of the AARC project. The CTS allows users toobtain so-called proxy certificates by authenticating to a web portal. These proxy certificates, which can be thought ofas short-lived tickets, can then be used when communicating with transfer and storage service.
1.3 Current status and the road ahead
We now have all the building blocks needed for carrying out large scale data transfers. Future work in this areawill to some extent also take place in the European Open Science Cloud, where there is a life science project calledEOSC-Life.
1.3. Current status and the road ahead 5

ELIXIR Data Transfer Documentation, Release 0
6 Chapter 1. Introduction and Overview

CHAPTER 2
Use case-based documentation
I want to. . .
• deploy a storage endpoint
– GridFTP installation instructions for ELIXIR use
– GridFTP Servers and Clients with Ansible
• move data
– . . . to a cloud instance (user to cloud)
* Docker image for cloud data ingestion
– . . . between workstations (user to user)
* FilePizza (WebRTC in browser)
* ShareDrop (WebRTC in browser)
* Magic wormhole (command line application)
* FileSender (web service)
– . . . from a central repository to a local resource, and keep the mirror up to date
* Reference Data Set Distribution Service
* Dat - a protocol for sharing data between computers
2.1 GridFTP installation instructions for ELIXIR use
ELIXIR Excelerate WP4
Harri Salminen/CSC, 2016
7
ELIXIR Data Transfer Documentation, Release 0
This document covers an example installation of a standard globus GridFTP server with ELIXIR Demo CA on aScientific Linux 7 server. For official and more comprehensive generic installation instructions please see the gtadminmanual
2.1.1 Software installation
First you need to have or install the Scientific Linux 7 server or similar (Centos/RHEL). This example uses SL7.2set up as an infrastructure server. If you have a debian based distribution like Ubuntu the principles are same butcommands differ (yum -> apt-get, firewall-cmd -> ufw or whatever fw you use etc.). It’s assumed thatyou have a running server with standard unix development and management tools with which you are familiar with.
To start the server installation please go to http://toolkit.globus.org/toolkit/ and check for the latest stable release. Inthis case it was GT6.0 and its download page listed repositories for various operating systems (Centos/RHEL/SL,Ubuntu, SuSE,Mac OS X,Windows etc.).
Install the chosen repo with:
wget http://toolkit.globus.org/ftppub/gt6/installers/repo/globus-toolkit-repo-latest.→˓noarch.rpmrpm -i globus-toolkit-repo-latest.noarch.rpm
Then install Globus packages e.g.:
yum install globus-gridftp globus-gsi globus-data-management-server
You may also want a client tools for in the server or your client host to test the server with:
yum install globus-data-management-client
2.1.2 Firewall configuration
Open ports for GridFTP control and data connections:
firewall-cmd --add-port=50000-51000/tcpfirewall-cmd --add-port=2811/tcp
Check results:
firewall-cmd --zone=public --list-allpublic (default, active)interfaces: eth0sources:services: dhcpv6-client sshports: 2811/tcp 50000-51000/tcpmasquerade: noforward-ports:icmp-blocks:rich rules:
If your public interface is eth1 instead of eth0 change it with:
firewall-cmd --zone=public --change-interface=eth1
You’ll also need to configure the port range to the environment of the GridFTP server in its startup script. (e.g./etc/init.d/globus-gridftp-server):
8 Chapter 2. Use case-based documentation

ELIXIR Data Transfer Documentation, Release 0
export GLOBUS_TCP_PORT_RANGE=50000,51000
or if you use xinetd in /etc/xinet.d/gridftp:
env += GLOBUS_TCP_PORT_RANGE=50000,51000
If you also need to restrict source ports there’s variable called GLOBUS_TCP_SOURCE_RANGE for that purpose.
2.1.3 Access Control
For secure transfers GridFTP uses the Grid Security Infrastructure. It requires that the client has a valid X.509 certifi-cate which is signed by a Certificate Authority (CA). Both sides must be able to validate the certificate via a chain oftrust. Who you trust, determines with whom you can communicate. In this example we trust both the InteroperableGlobal Trust Federation (IGTF) used for building distributed research infrastructures and an ELIXIR demo CA usedfor demonstrating the possibilities of the ELIXIR AAI pilot.
The server does also support password and ssh authentication which are beyond the scope of this document but ofcourse documented in the manuals if you need them. It even has anonymous mode which is not recommended. If youneed to allow anonymous public access, I’d recommend you to look at pureftpd and rsync instead.
After verifying the client certificate the server uses the DN in the certificate to map the user to a local user using a gridmap file. What that entitles the user to do, is up to the configuration of each particular installation.
Host certificate
Every server needs its own server certificate and key which should be signed by a Certificate Authority accepted bythe clients. How you get certificates depends on your organization. Many european sites can get the certificate servicevia their National Research Network. Like FUNET, most of them, but not all, are partners in the Terena CertificateService.
If your organization is not a member in that, check you can get IGTF recognized certificates via some other trustedsource. If not, you may have to acquire it from some other CA or act as your own CA. The standard installation doescreate by default a globus-simple-ca and associated certificates which are mainly intended for testing and development.In that case you’ll have to convince all your clients to install and trust your CA certificates as well which may work ina limited internal setup you can control but not very well globally between organizations.
In all cases the procedure is similar. First you create a certificate request for your server with openssl preferably on thesame server. The -subj parameter is filled according to your local instructions and identifies your server globally.
openssl req -newkey rsa:4096 -sha256 -nodes -subj"/C=FI/ST=Uusimaa/L=Espoo/O=CSC/CN=gridftp.bio.nic.funet.fi" -outgridftp.bio.nic.funet.fi.req -keyout gridftp.bio.nic.funet.fi.key
Then you send the resulting .req file to your local certificate provider. E.g. an authorized person in your organizationthat can verify you and issue the certificate while you wait.
After you get your public host certificate, you should place it in a file called /etc/grid-security/hostcert.pem.
The private .key file should be named as /etc/grid-security/hostkey.pem which should be protectedfrom access by others than root. (0600)
You should of course have the domain name in the request configured in the DNS. Bear in mind that reverse DNSrecord (PTR) is checked by some applications (e.g. uberftp) but not all (e.g. globus-url-copy) so try to keep it syncedwith the certificate or some applications may not work. If you plan to use a CNAME for the server you could includethe name mentioned in the reverse record as an alternative name.
2.1. GridFTP installation instructions for ELIXIR use 9

ELIXIR Data Transfer Documentation, Release 0
Subject: DC=org, DC=terena, DC=tcs, C=FI, ST=Uusimaa, L=Espoo, O=CSC -Tieteen tietotekniikan keskus Oy, CN=gridftp.bio.nic.funet.fi...X509v3 Subject Alternative Name:DNS:gridftp.bio.nic.funet.fi,DNS:valine.nic.funet.fi
This approach works only if you have authority to request certificates for all the domains in question from the CA.Usually server certificates are issued for a period of 1-3 years and you should be the owner of the domains for thatperiod. For servers with a short lifetime you may need to figure out a solution by getting your own subdomain (withreverse DNS) and apply for a wildcard certficate e.g. *.vm.yourproject.somewhere.net.
IGTF CA certificate list installation
If you use common eScience certificates from terena or other IGTF compatible certificates Grid Community usuallyuses you should add trust anchors which means CA certificate and signing policy files usually kept in the directory/etc/grid-security/certificates. The easiest way is to install them from the IGTF repository so theywill be automatically kept up to date. You should also install the Certificate Revocation List update scripts in cronto be able to revoke certificates that may have been compromised or for some other reason. Please note that there’smultiple different IGTF repo versions. Please pick the comprehensive one detailed under heading Installation whichshould also contain the CA for eScience Personal Certificates you probably may wish to use. For more informationplease go to https://wiki.egi.eu/wiki/EGI_IGTF_Release.
ELIXIR CILogon integration
The ELIXIR AAI integration is still in R&D phase and is the process of being included in the official IGTF repository.To enable it at the moment you should do the following:
cd /etc/grid-security/certificates
wget --no-check-certificate -O /etc/grid-security/certificates/rcauth.eu.pem http://→˓rcauth.eu/pilot/g1/ca/cacert.pem
wget --no-check-certificate -O /etc/grid-security/certificates/rcauth.eu.signing_→˓policy https://rcauth.eu/pilot/rcauth-pilot-ica-g1.signing_policy
export HASH=`openssl x509 -in/etc/grid-security/certificates/rcauth.eu.pem -noout -hash`
ln -s rcauth.eu.pem $HASH.0
ln -s rcauth.eu.signing_policy $HASH.signing_policy
wget --no-check-certificate -O/etc/grid-security/certificates/dcaroot.pemhttps://ca.dutchgrid.nl/dcaroot/g1/ca/cacert.pem
wget --no-check-certificate -O/etc/grid-security/certificates/dcaroot.signing_policyhttps://ca.dutchgrid.nl/dcaroot/g1/dca-root-g1.signing_policy
export HASH=\`openssl x509 -in/etc/grid-security/certificates/dcaroot.pem -noout -hash`
ln -s dcaroot.pem $HASH.0
(continues on next page)
10 Chapter 2. Use case-based documentation

ELIXIR Data Transfer Documentation, Release 0
(continued from previous page)
ln -s dcaroot.signing_policy $HASH.signing_policy
Obtaining ELIXIR CILogon VO proxy
To test and demonstrate the ELIXIR AAI infrastructure there’s a portal via one can get a temporary proxy certificatethat validates against the rcauth.eu CA. First you need to register yourself with your name to the elixir intranet to getan ELIXIR id. There’s also a growing number of alternative authenticators available on the vo proxy login page.
After that you can go to the demo portal, press the vo-proxy button and you should end up in a page that has thetemporary proxy certificate and key behind a show/hide link.
Please cut/paste a copy of the encoded certificates and private key to your client machine in a file /tmp/x509up_uUID with permissions 0600. UID would be the user under which you are going to run the GridFTPclients.
For real use this step is planned to be automated under the hood in one way or other during the course of the ELIXIREXCELERATE WP4. This is just a proof of concept.
Adding users to Gridmap file
Also take note of the identity line in your certificate which you’ll need to put in the gridmap file at the server to mapthe identity to a local user (here a fictitious Joe User):
grid-mapfile-add-entry -dn ‘/DC=eu/DC=rcauth/DC=rcauth-clients/O=elixir-europe.org/→˓CN=Joe Use ABCDEFG1234567’ -ln test
For eScience certificates there’s usually at least C, O and CN attributes and rest vary locally.
After the gridmap procedure the holders of the certificate mentioned in the file have the same file access rights as thelocal user it’s mapped to including usually the root directory.
Limiting access
If you want to further limit access to certain directories you’ll need additional gridftp configuration options which canbe placed in /etc/gridftp.conf. If you wish, more complex configurations may be split to files without type (adot in a filename) to the /etc/gridftp.d/ directory which you must create first yourself.
E.g. to restrict access to only certain directory trees use a setting like restrict_paths /pub,/home.
If you wish to limit users to their home directories set use_home_dirs 1.
Chrooting the gridftp server
If you wish you can optionally chroot the whole gridftp server to particular directory tree as follows:
mkdir /mnt/gridftpcd /mnt/gridftp/globus-gridftp-server-setup-chroot -r /mnt/gridftp/
and add in the gridftp config chroot_path /mnt/gridftp
After that you should have /mnt/gridftp/etc/grid-security/certificates and other necessary filesand directories copied under /mnt/gridftp. You can the mount whatever data directories you need. And you can
2.1. GridFTP installation instructions for ELIXIR use 11
ELIXIR Data Transfer Documentation, Release 0
use restrict paths to hide the /etc, /dev and /tmp directories if you wish. Note that /etc/passwd contains pathsfor users home directories that are now relative to the chroot root directory.
NOTE: the server still runs under user root by default even though it changes to the user mentioned in the gridmap file.If you want to avoid that and prefer a non-root public server, you can set up a split configuration where the frontend isrunning under some other userid and the data transfer backend nodes as root. See the admin manual for advice on howto set up split and striped configurations. You’ll need to create a new user id with suitable environment, write customstartup scripts, copy keys, assign backend ports etc. so the default configuration for a single server setup describedhere is not enough.
2.1.4 Testing the server
After you have set up the server it’s time to test it.
First try to start it either as a standalone daemon:
service globus-gridftp-server start
If it fails, start debugging and reading the manual until it succeeds. You may want to set a config parameter debug 1after which the server doesn’t disconnect but stays at foreground in debug mode until one request has been served.
The default installation includes a xinetd configuration file in /etc/xinet.d/gridftp which you can enable bychanging the disable parameter in it to no and reloading xinetd config. However in that mode you can’t debug it inforeground mode.
Third option which is also suited for debugging is to run the server directly from command line. For command lineoptions try
globus-gridftp-server -h
If you have the certificates for the CA set up in your local workstation and grid proxy initialized either by grid-proxy-init (the normal way) or by copying the above mentioned proxy to /tmp directory (the demo way) you should beready to start.
For testing the simple globus-url-copy tool is used here:
Syntax: globus-url-copy [-help] [-vb] [-dbg] [-r] [-rst] [-s <subject>][-p <parallelism>] [-tcp-bs <size>] [-bs <size>]-f <filename> | <sourceURL> <destURL>If something fails, add -dbg flag to see where it fails.
List directories
globus-url-copy -list gsiftp://gridftp.bio.nic.funet.fi/gsiftp://gridftp.bio.nic.funet.fi/
home/pub/
globus-url-copy -listgsiftp://gridftp.bio.nic.funet.fi/pub/mirrors/ftp.ebi.ac.uk/pub/databases/ensembl/→˓mysql/83/xiphophorus_maculatus_rnaseq_83_1/
gsiftp://gridftp.bio.nic.funet.fi/pub/mirrors/ftp.ebi.ac.uk/pub/databases/ensembl/→˓mysql/83/xiphophorus_maculatus_rnaseq_83_1/
(continues on next page)
12 Chapter 2. Use case-based documentation
ELIXIR Data Transfer Documentation, Release 0
(continued from previous page)
alt_allele.MYDalt_allele.MYI...
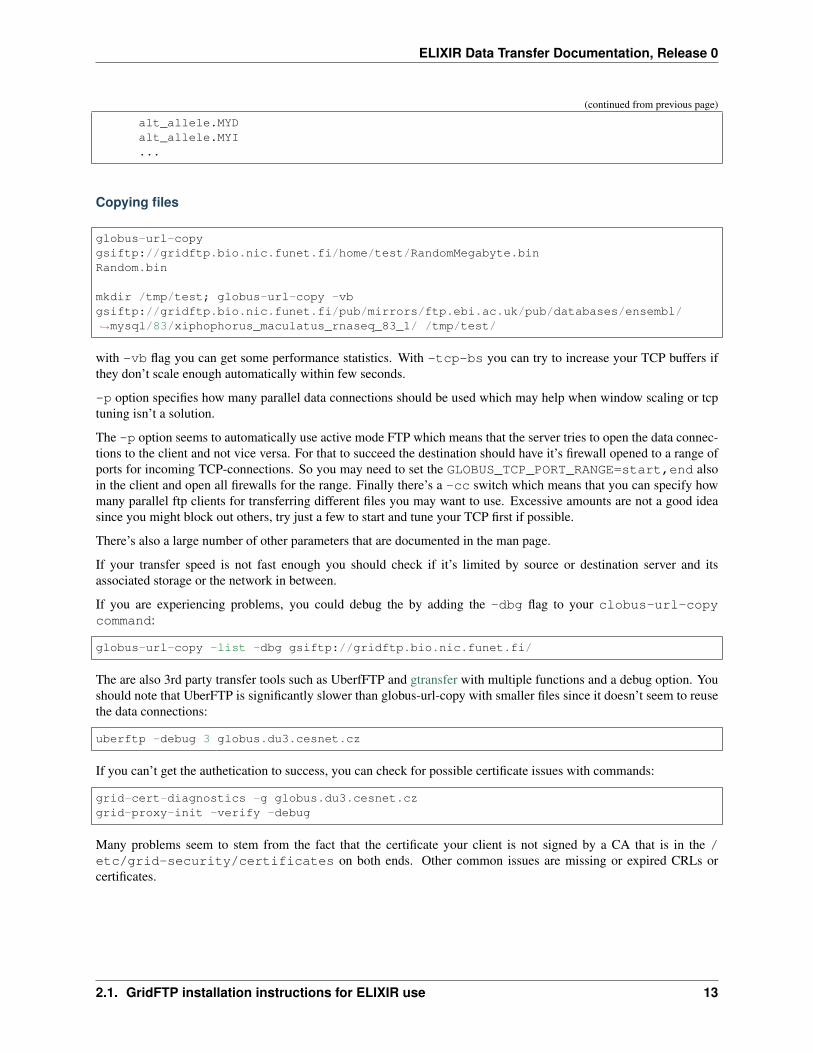
Copying files
globus-url-copygsiftp://gridftp.bio.nic.funet.fi/home/test/RandomMegabyte.binRandom.bin
mkdir /tmp/test; globus-url-copy -vbgsiftp://gridftp.bio.nic.funet.fi/pub/mirrors/ftp.ebi.ac.uk/pub/databases/ensembl/→˓mysql/83/xiphophorus_maculatus_rnaseq_83_1/ /tmp/test/
with -vb flag you can get some performance statistics. With -tcp-bs you can try to increase your TCP buffers ifthey don’t scale enough automatically within few seconds.
-p option specifies how many parallel data connections should be used which may help when window scaling or tcptuning isn’t a solution.
The -p option seems to automatically use active mode FTP which means that the server tries to open the data connec-tions to the client and not vice versa. For that to succeed the destination should have it’s firewall opened to a range ofports for incoming TCP-connections. So you may need to set the GLOBUS_TCP_PORT_RANGE=start,end alsoin the client and open all firewalls for the range. Finally there’s a -cc switch which means that you can specify howmany parallel ftp clients for transferring different files you may want to use. Excessive amounts are not a good ideasince you might block out others, try just a few to start and tune your TCP first if possible.
There’s also a large number of other parameters that are documented in the man page.
If your transfer speed is not fast enough you should check if it’s limited by source or destination server and itsassociated storage or the network in between.
If you are experiencing problems, you could debug the by adding the -dbg flag to your clobus-url-copycommand:
globus-url-copy -list -dbg gsiftp://gridftp.bio.nic.funet.fi/
The are also 3rd party transfer tools such as UberfFTP and gtransfer with multiple functions and a debug option. Youshould note that UberFTP is significantly slower than globus-url-copy with smaller files since it doesn’t seem to reusethe data connections:
uberftp -debug 3 globus.du3.cesnet.cz
If you can’t get the authetication to success, you can check for possible certificate issues with commands:
grid-cert-diagnostics -g globus.du3.cesnet.czgrid-proxy-init -verify -debug
Many problems seem to stem from the fact that the certificate your client is not signed by a CA that is in the /etc/grid-security/certificates on both ends. Other common issues are missing or expired CRLs orcertificates.
2.1. GridFTP installation instructions for ELIXIR use 13
ELIXIR Data Transfer Documentation, Release 0
Network performance analysis
For checking the network connection I recommend in addition to the basic ping and traceroute tools the iperf perfor-mance testing tool against some suitable iperf servers. The command line iperf too can act either as server or clientso it would relatively easy to set up servers at each site so that one could measure, analyze and tune network issuesindependent of storage and gridftp server issues. You can get it along with documentation from https://iperf.fr/ Version3 is recommended, it’s easier to use and has more features. Use version 2 only if there’s no version 3 available. Theyare not compatible and use different default ports.
A basic iperf v3 server is started simply with command iperf3 -s. You only need to open port 5201 for TCP andUDP both in IPv4 and IPv6 (if you use it). Funet has a dedicated iperf server with a 10Gbit/s link called iperf.funet.fi. Also iperf-delay50 and iperf-delay150.funet.fi are available with simulated extra 50ms(trans european) or 150ms (transatlantic) delay.
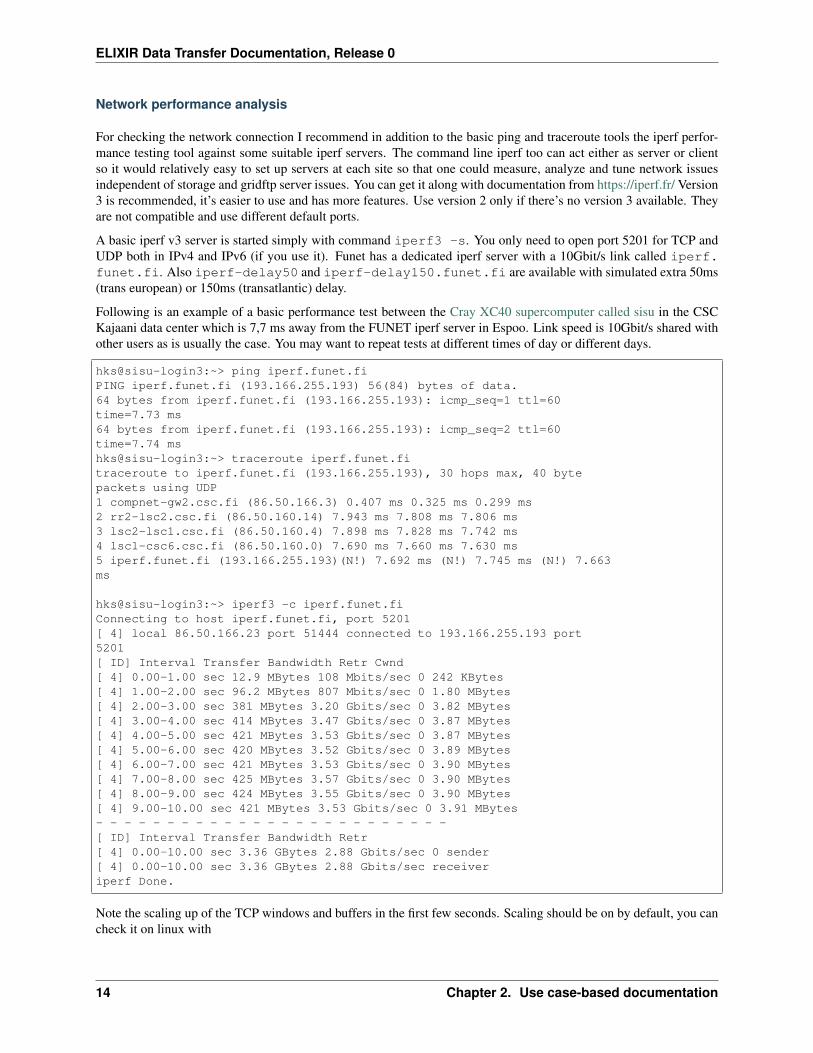
Following is an example of a basic performance test between the Cray XC40 supercomputer called sisu in the CSCKajaani data center which is 7,7 ms away from the FUNET iperf server in Espoo. Link speed is 10Gbit/s shared withother users as is usually the case. You may want to repeat tests at different times of day or different days.
hks@sisu-login3:~> ping iperf.funet.fiPING iperf.funet.fi (193.166.255.193) 56(84) bytes of data.64 bytes from iperf.funet.fi (193.166.255.193): icmp_seq=1 ttl=60time=7.73 ms64 bytes from iperf.funet.fi (193.166.255.193): icmp_seq=2 ttl=60time=7.74 mshks@sisu-login3:~> traceroute iperf.funet.fitraceroute to iperf.funet.fi (193.166.255.193), 30 hops max, 40 bytepackets using UDP1 compnet-gw2.csc.fi (86.50.166.3) 0.407 ms 0.325 ms 0.299 ms2 rr2-lsc2.csc.fi (86.50.160.14) 7.943 ms 7.808 ms 7.806 ms3 lsc2-lsc1.csc.fi (86.50.160.4) 7.898 ms 7.828 ms 7.742 ms4 lsc1-csc6.csc.fi (86.50.160.0) 7.690 ms 7.660 ms 7.630 ms5 iperf.funet.fi (193.166.255.193)(N!) 7.692 ms (N!) 7.745 ms (N!) 7.663ms
hks@sisu-login3:~> iperf3 -c iperf.funet.fiConnecting to host iperf.funet.fi, port 5201[ 4] local 86.50.166.23 port 51444 connected to 193.166.255.193 port5201[ ID] Interval Transfer Bandwidth Retr Cwnd[ 4] 0.00-1.00 sec 12.9 MBytes 108 Mbits/sec 0 242 KBytes[ 4] 1.00-2.00 sec 96.2 MBytes 807 Mbits/sec 0 1.80 MBytes[ 4] 2.00-3.00 sec 381 MBytes 3.20 Gbits/sec 0 3.82 MBytes[ 4] 3.00-4.00 sec 414 MBytes 3.47 Gbits/sec 0 3.87 MBytes[ 4] 4.00-5.00 sec 421 MBytes 3.53 Gbits/sec 0 3.87 MBytes[ 4] 5.00-6.00 sec 420 MBytes 3.52 Gbits/sec 0 3.89 MBytes[ 4] 6.00-7.00 sec 421 MBytes 3.53 Gbits/sec 0 3.90 MBytes[ 4] 7.00-8.00 sec 425 MBytes 3.57 Gbits/sec 0 3.90 MBytes[ 4] 8.00-9.00 sec 424 MBytes 3.55 Gbits/sec 0 3.90 MBytes[ 4] 9.00-10.00 sec 421 MBytes 3.53 Gbits/sec 0 3.91 MBytes- - - - - - - - - - - - - - - - - - - - - - - - -[ ID] Interval Transfer Bandwidth Retr[ 4] 0.00-10.00 sec 3.36 GBytes 2.88 Gbits/sec 0 sender[ 4] 0.00-10.00 sec 3.36 GBytes 2.88 Gbits/sec receiveriperf Done.
Note the scaling up of the TCP windows and buffers in the first few seconds. Scaling should be on by default, you cancheck it on linux with
14 Chapter 2. Use case-based documentation
ELIXIR Data Transfer Documentation, Release 0
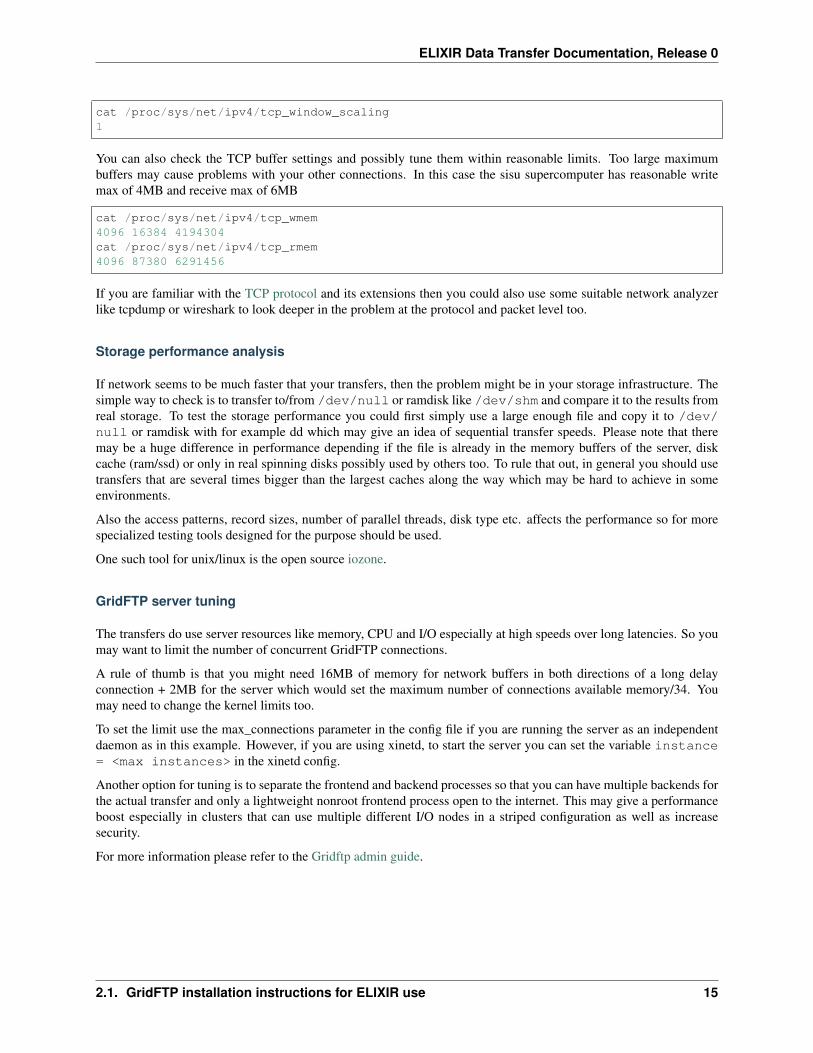
cat /proc/sys/net/ipv4/tcp_window_scaling1
You can also check the TCP buffer settings and possibly tune them within reasonable limits. Too large maximumbuffers may cause problems with your other connections. In this case the sisu supercomputer has reasonable writemax of 4MB and receive max of 6MB
cat /proc/sys/net/ipv4/tcp_wmem4096 16384 4194304cat /proc/sys/net/ipv4/tcp_rmem4096 87380 6291456
If you are familiar with the TCP protocol and its extensions then you could also use some suitable network analyzerlike tcpdump or wireshark to look deeper in the problem at the protocol and packet level too.
Storage performance analysis
If network seems to be much faster that your transfers, then the problem might be in your storage infrastructure. Thesimple way to check is to transfer to/from /dev/null or ramdisk like /dev/shm and compare it to the results fromreal storage. To test the storage performance you could first simply use a large enough file and copy it to /dev/null or ramdisk with for example dd which may give an idea of sequential transfer speeds. Please note that theremay be a huge difference in performance depending if the file is already in the memory buffers of the server, diskcache (ram/ssd) or only in real spinning disks possibly used by others too. To rule that out, in general you should usetransfers that are several times bigger than the largest caches along the way which may be hard to achieve in someenvironments.
Also the access patterns, record sizes, number of parallel threads, disk type etc. affects the performance so for morespecialized testing tools designed for the purpose should be used.
One such tool for unix/linux is the open source iozone.
GridFTP server tuning
The transfers do use server resources like memory, CPU and I/O especially at high speeds over long latencies. So youmay want to limit the number of concurrent GridFTP connections.
A rule of thumb is that you might need 16MB of memory for network buffers in both directions of a long delayconnection + 2MB for the server which would set the maximum number of connections available memory/34. Youmay need to change the kernel limits too.
To set the limit use the max_connections parameter in the config file if you are running the server as an independentdaemon as in this example. However, if you are using xinetd, to start the server you can set the variable instance= <max instances> in the xinetd config.
Another option for tuning is to separate the frontend and backend processes so that you can have multiple backends forthe actual transfer and only a lightweight nonroot frontend process open to the internet. This may give a performanceboost especially in clusters that can use multiple different I/O nodes in a striped configuration as well as increasesecurity.
For more information please refer to the Gridftp admin guide.
2.1. GridFTP installation instructions for ELIXIR use 15

ELIXIR Data Transfer Documentation, Release 0
2.2 GridFTP Servers and Clients with Ansible
We have created two Ansible roles and an example playbook for the deployment of GridFTP servers and/or clients.The role will:
• Install globus software and dependencies as needed
• Configure gridftp servers
– Main config in /etc/gridftp.conf
– Directory access restrictions in /etc/gridftp.d
– Host cert/key in /etc/grid-security
– CA certificates in /etc/grid-security/certificates
– Complete management of mappings in /etc/grid-security/grid-mapfile
• Start the service and enable it at boot
• Open firewall ports if firewalld is detected
• Install fetch-crl and cron jobs on servers to maintain revocation lists
• Install UberFTP of clients
This playbook will also transfer SimpleCA certificates from the server to all the clients, a step that is only needed ifyou don’t have access to a real CA certificate and/or a real host certificate/key, ie when using Vagrant.
Additionally, a Vagrantfile is provided to launch VirtualBox machines on a local setup for testing purposes.
Most of the work is based on notes and conversations with Mikael Borg and Harri Salminen:
• Brief notes on gridftp transfers using proxy certificates from the ELIXIR CILogon service
• GridFTP installation instructions for ELIXIR use
2.2.1 Github repositories
• https://github.com/EMBL-EBI-TSI/ansible-playbook-gridftp (version 1.2.0)
• https://github.com/EMBL-EBI-TSI/ansible-gridftp (version 1.2.0)
• https://github.com/EMBL-EBI-TSI/ansible-simpleca (version 1.0.0)
2.2.2 Running the playbook
General instructions can be found in the playbook repository and further documentation of the roles can be found intheir respective repositories. In this document we will complete that setup specifically for ELIXIR with CILogon.We’ll go through three examples:
• Full setup in Vagrant/VirtualBox
• Setting up a GridFTP server
• Adding GridFTP clients
In the following sections we assume you have a working Ansible environment (see below), cloned the ansible-playbook-gridftp repository and installed the role dependencies:
16 Chapter 2. Use case-based documentation

ELIXIR Data Transfer Documentation, Release 0
git clone https://github.com/EMBL-EBI-TSI/ansible-playbook-gridftp.gitcd ansible-playbook-gridftpansible-galaxy install -r requirements.yml
Adding ELIXIR specifics to the playbook
Before launching servers, to make GridFTP works with ELIXIR’s CA we first need to add the CA certificate and usermappings to the playbook.
Elixir AAI integration with CILogon
While the integration is still work in progress at Elixir AAI, the interim solution is to:
• Install rcauth-pilot-ica-g1 and DDCA-Root-G1-CA certificates in servers and clients.These are already included in the playbook (group_vars/all/main.yml and group_vars/gridftp-servers/main.yml).
• Users should get their certificate manually by:
a. Sign up for an ELIXIR account if you haven’t already at https://www.elixir-europe.org/intranet.
b. Obtain proxy certificate from https://elixir-cilogon-mp.grid.cesnet.cz/vo-portal/ by pressing Get Proxybutton.
c. Copy the certificate to /tmp/x509up_u1000 with permissions 0600 on the gridftp client host, where1000 is your user id (id -u).
d. Check the proxy certificate with grid-proxy-info.
Issues with CESNET’s certificate at globus.du3.cesnet.cz
We have noticed some authentication problems when connecting to globus.du3.cesnet.cz. The follow-ing workaround is necessary only on gridftp clients and is already included in the playbook (group_vars/gridftp-clients/main.yml):
• Add “TERENA SSL CA 3” certificate with the modified signing policy. Download the certificate and save it infiles/TERENA-SSL-CA-3.pem.
• Add “TERENA SSL CA 3” DN to the signing policy of the root DigiCert certificate.
Mappings
We need to let the GridFTP server know how to map DNs to local users. This is done by listing your mappings ingroup_vars/gridftp-servers/main.yml. For example:
gridftp_mappings:- ln: nobodydn: /DC=eu/DC=rcauth/DC=rcauth-clients/O=elixir-europe.org/CN=your identity
You can find your DN using grid-proxy-info on a GridFTP client. You can add as many as needed, but rememberto run ansible-playbook on every change.
2.2. GridFTP Servers and Clients with Ansible 17
ELIXIR Data Transfer Documentation, Release 0
Full setup in Vagrant/VirtualBox
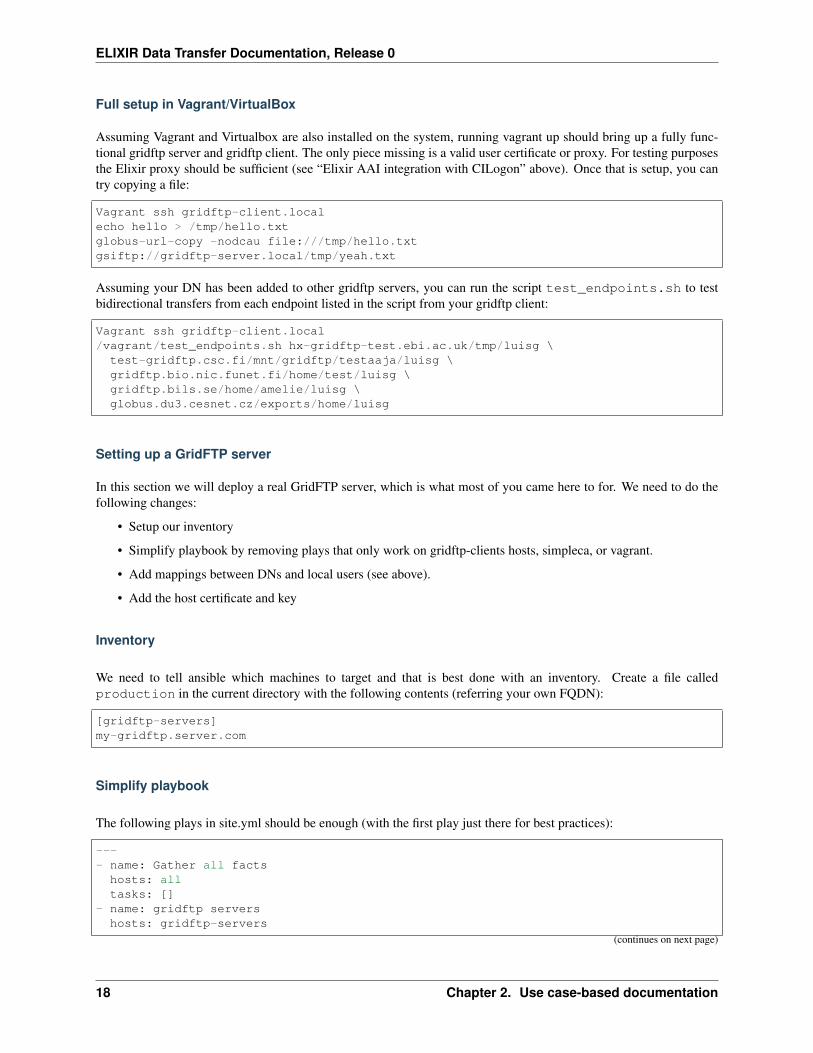
Assuming Vagrant and Virtualbox are also installed on the system, running vagrant up should bring up a fully func-tional gridftp server and gridftp client. The only piece missing is a valid user certificate or proxy. For testing purposesthe Elixir proxy should be sufficient (see “Elixir AAI integration with CILogon” above). Once that is setup, you cantry copying a file:
Vagrant ssh gridftp-client.localecho hello > /tmp/hello.txtglobus-url-copy -nodcau file:///tmp/hello.txtgsiftp://gridftp-server.local/tmp/yeah.txt
Assuming your DN has been added to other gridftp servers, you can run the script test_endpoints.sh to testbidirectional transfers from each endpoint listed in the script from your gridftp client:
Vagrant ssh gridftp-client.local/vagrant/test_endpoints.sh hx-gridftp-test.ebi.ac.uk/tmp/luisg \
test-gridftp.csc.fi/mnt/gridftp/testaaja/luisg \gridftp.bio.nic.funet.fi/home/test/luisg \gridftp.bils.se/home/amelie/luisg \globus.du3.cesnet.cz/exports/home/luisg
Setting up a GridFTP server
In this section we will deploy a real GridFTP server, which is what most of you came here to for. We need to do thefollowing changes:
• Setup our inventory
• Simplify playbook by removing plays that only work on gridftp-clients hosts, simpleca, or vagrant.
• Add mappings between DNs and local users (see above).
• Add the host certificate and key
Inventory
We need to tell ansible which machines to target and that is best done with an inventory. Create a file calledproduction in the current directory with the following contents (referring your own FQDN):
[gridftp-servers]my-gridftp.server.com
Simplify playbook
The following plays in site.yml should be enough (with the first play just there for best practices):
---- name: Gather all facts
hosts: alltasks: []
- name: gridftp servershosts: gridftp-servers
(continues on next page)
18 Chapter 2. Use case-based documentation
ELIXIR Data Transfer Documentation, Release 0
(continued from previous page)
roles:- {role: gridftp, gridftp\_mode: server}
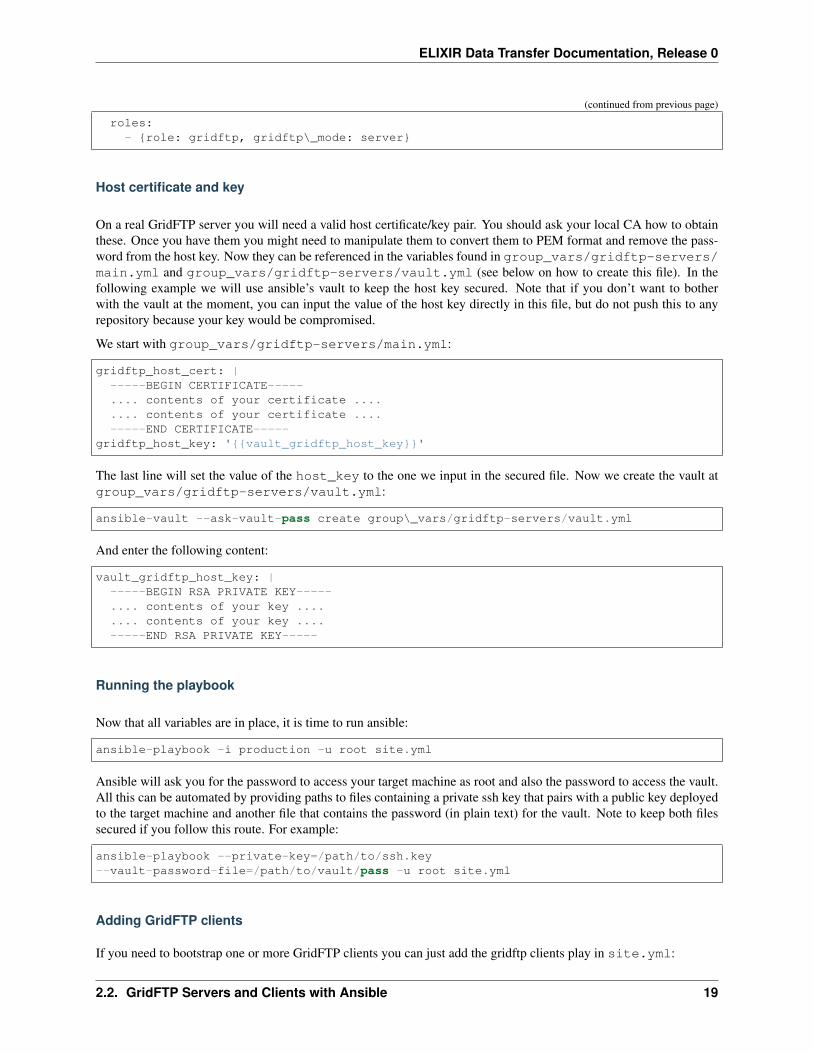
Host certificate and key
On a real GridFTP server you will need a valid host certificate/key pair. You should ask your local CA how to obtainthese. Once you have them you might need to manipulate them to convert them to PEM format and remove the pass-word from the host key. Now they can be referenced in the variables found in group_vars/gridftp-servers/main.yml and group_vars/gridftp-servers/vault.yml (see below on how to create this file). In thefollowing example we will use ansible’s vault to keep the host key secured. Note that if you don’t want to botherwith the vault at the moment, you can input the value of the host key directly in this file, but do not push this to anyrepository because your key would be compromised.
We start with group_vars/gridftp-servers/main.yml:
gridftp_host_cert: |-----BEGIN CERTIFICATE-----.... contents of your certificate ........ contents of your certificate ....-----END CERTIFICATE-----
gridftp_host_key: '{{vault_gridftp_host_key}}'
The last line will set the value of the host_key to the one we input in the secured file. Now we create the vault atgroup_vars/gridftp-servers/vault.yml:
ansible-vault --ask-vault-pass create group\_vars/gridftp-servers/vault.yml
And enter the following content:
vault_gridftp_host_key: |-----BEGIN RSA PRIVATE KEY-----.... contents of your key ........ contents of your key ....-----END RSA PRIVATE KEY-----
Running the playbook
Now that all variables are in place, it is time to run ansible:
ansible-playbook -i production -u root site.yml
Ansible will ask you for the password to access your target machine as root and also the password to access the vault.All this can be automated by providing paths to files containing a private ssh key that pairs with a public key deployedto the target machine and another file that contains the password (in plain text) for the vault. Note to keep both filessecured if you follow this route. For example:
ansible-playbook --private-key=/path/to/ssh.key--vault-password-file=/path/to/vault/pass -u root site.yml
Adding GridFTP clients
If you need to bootstrap one or more GridFTP clients you can just add the gridftp clients play in site.yml:
2.2. GridFTP Servers and Clients with Ansible 19
ELIXIR Data Transfer Documentation, Release 0
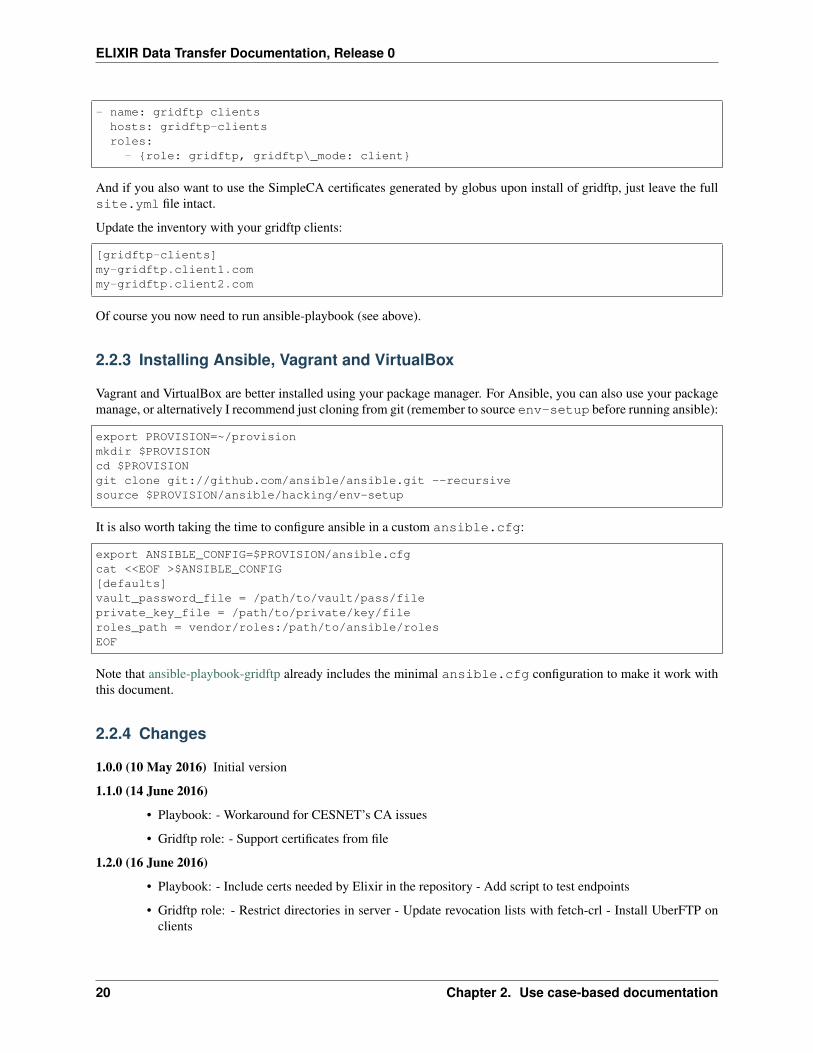
- name: gridftp clientshosts: gridftp-clientsroles:- {role: gridftp, gridftp\_mode: client}
And if you also want to use the SimpleCA certificates generated by globus upon install of gridftp, just leave the fullsite.yml file intact.
Update the inventory with your gridftp clients:
[gridftp-clients]my-gridftp.client1.commy-gridftp.client2.com
Of course you now need to run ansible-playbook (see above).
2.2.3 Installing Ansible, Vagrant and VirtualBox
Vagrant and VirtualBox are better installed using your package manager. For Ansible, you can also use your packagemanage, or alternatively I recommend just cloning from git (remember to source env-setup before running ansible):
export PROVISION=~/provisionmkdir $PROVISIONcd $PROVISIONgit clone git://github.com/ansible/ansible.git --recursivesource $PROVISION/ansible/hacking/env-setup
It is also worth taking the time to configure ansible in a custom ansible.cfg:
export ANSIBLE_CONFIG=$PROVISION/ansible.cfgcat <<EOF >$ANSIBLE_CONFIG[defaults]vault_password_file = /path/to/vault/pass/fileprivate_key_file = /path/to/private/key/fileroles_path = vendor/roles:/path/to/ansible/rolesEOF
Note that ansible-playbook-gridftp already includes the minimal ansible.cfg configuration to make it work withthis document.
2.2.4 Changes
1.0.0 (10 May 2016) Initial version
1.1.0 (14 June 2016)
• Playbook: - Workaround for CESNET’s CA issues
• Gridftp role: - Support certificates from file
1.2.0 (16 June 2016)
• Playbook: - Include certs needed by Elixir in the repository - Add script to test endpoints
• Gridftp role: - Restrict directories in server - Update revocation lists with fetch-crl - Install UberFTP onclients
20 Chapter 2. Use case-based documentation

ELIXIR Data Transfer Documentation, Release 0
2.3 Brief notes on gridftp transfers using proxy certificates from theELIXIR CILogon service.
Mikael Borg
Feb 2016
2.3.1 Background
I have set up a gridftp endpoint for testing purposes. So far, test transfers have been authenticated using a Terenae-science certificate obtained from my university. Here is a brief description of data transfers authenticated with aproxy certificate obtained from the CIlogon demo portal.
2.3.2 Client-server transfer
In this test, a file is transferred to and from my workstation and a gridftp endpoint. The user is authenticated with anELIXIR proxy certificate.
On gridftp server
Obtain CA certificate:
$ wget --no-check-certificate -O \/etc/grid-security/certificates/ELIXIR-demo.pem \https://snf-676811.vm.okeanos.grnet.gr/ca/demoroot.html
Specify certificate signing policy file /etc/grid-security/certificates/ELIXIR-demo.signing_policy with the content (this was just an educated guess):
#access_id_CA X509 '/O=Grid/OU=GlobusTest/CN=Globus Simple CA for Demo Portal'pos_rights globus CA:signcond_subjects globus '"/O=Grid/OU=GlobusTest/*"'
Create symbolic links based on certificate hash:
$ export HASH=`openssl x509 -in /etc/grid-security/certificates/ELIXIR-demo.pem -→˓noout -hash`$ cd /etc/grid-security/certificates$ ln -s ELIXIR-demo.pem $HASH.0$ ln -s ELIXIR-demo.signing_policy $HASH.signing_policy
Add proxy certificate subject and username to /etc/grid-security/grid-mapfile.
Restart gridftp server.
On workstation:
Obtain proxy certificate from https://elixir-cilogon-mp.grid.cesnet.cz/vo-portal/ by pressing “Get Proxy” button. Youneed to have an ELIXIR account which you can create by registrating to Intranet (https://www.elixir-europe.org/intranet).
Copy certificate file to /tmp/x509up_u1000 and change permissions to 600 (1000 is my numerical uid).
2.3. Brief notes on gridftp transfers using proxy certificates from the ELIXIR CILogon service. 21

ELIXIR Data Transfer Documentation, Release 0
Check certificate:
$ grid-proxy-infosubject : /O=Grid/OU=GlobusTest/CN=932d5e00216556be236eff3fb858b9b9297b9a02@elixir-→˓europe.org/CN=1272315132/CN=1222112553issuer : /O=Grid/OU=GlobusTest/CN=932d5e00216556be236eff3fb858b9b9297b9a02@elixir-→˓europe.org/CN=1272315132identity : /O=Grid/OU=GlobusTest/CN=932d5e00216556be236eff3fb858b9b9297b9a02@elixir-→˓europe.orgtype : RFC 3820 compliant impersonation proxystrength : 2048 bitspath : /tmp/x509up_u1000timeleft : 8:30:09
Copy file from workstation to gridftp server:
$ globus-url-copy -v -vb -nodcau tmp.txt gsiftp://gridftp.bils.se/home/borg/tmp/tmp.→˓txtSource: file:///home/borg/tmp/Dest: gsiftp://gridftp.bils.se/home/borg/tmp/
tmp.txt
Copy file from gridftp server back to workstation:
$ globus-url-copy -v -vb -nodcau gsiftp://gridftp.bils.se/home/borg/tmp/tmp.txt tmp2.→˓txt
Check that the files are identical:
$ diff tmp.txt tmp2.txt
2.3.3 Third-party transfer
Here, a data transfer between two gridftp endpoints is initiated from my workstation. It is demonstrated that thetransfer is not possible without first * installing the trust anchor of the CILogon certificate authority * adding the usersidentity (i.e. certificate subject) to the grid-mapfile that maps certificates to use accounts.
Set up additional gridftp endpoint. Obtain ELIXIR proxy certificate.
1. Test without installing CA on new endpoint (should not work):
$ globus-url-copy -v -vb -nodcau gsiftp://gridftp.bils.se/home/borg/tmp/nt.00.tar.gzgsiftp://gridftp.borg.hk/home/borg/tmp/nt.00.tar.gz Source: gsiftp://gridftp.bils.se/home/borg/tmp/Dest: gsiftp://gridftp.borg.hk/home/borg/tmp/nt.00.tar.gz
error: globus_ftp_client: the server responded with an error 530 530-globus_xio: Au-thentication Error 530-OpenSSL Error: s3_srvr.c:3297: in library: SSL routines, functionSSL3_GET_CLIENT_CERTIFICATE: no certificate returned 530-globus_gsi_callback_module: Couldnot verify credential 530-globus_gsi_callback_module: Can’t get the local trusted CA certificate: Cannotfind trusted CA certificate with hash 93df451c in /etc/grid-security/certificates 530 End.
2. Install CA certificate and try again (should still not work):
$ globus-url-copy -v -vb -nodcau gsiftp://gridftp.bils.se/home/borg/tmp/nt.00.tar.gzgsiftp://gridftp.borg.hk/home/borg/tmp/nt.00.tar.gz Source: gsiftp://gridftp.bils.se/home/borg/tmp/Dest: gsiftp://gridftp.borg.hk/home/borg/tmp/nt.00.tar.gz
error: globus_ftp_client: the server responded with an error 530 530-Login in-correct. : globus_gss_assist: Gridmap lookup failure: Could not map
22 Chapter 2. Use case-based documentation
ELIXIR Data Transfer Documentation, Release 0
/O=Grid/OU=GlobusTest/CN=932d5e00216556be236eff3fb858b9b9297b9a02@elixir-europe.org530- 530 End.
3. Add entry to gridmap-file and retry (should work!):
$ globus-url-copy -v -vb -nodcau gsiftp://gridftp.bils.se/home/borg/tmp/nt.00.tar.gzgsiftp://gridftp.borg.hk/home/borg/tmp/nt.00.tar.gz Source: gsiftp://gridftp.bils.se/home/borg/tmp/Dest: gsiftp://gridftp.borg.hk/home/borg/tmp/nt.00.tar.gz
836184904 bytes 78.18 MB/sec avg 80.99 MB/sec inst
error: globus_ftp_client: the server responded with an error 500 500-Command failed. : an end-of-filewas reached 500-globus_xio: The GSI XIO driver failed to establish a secure connection. The failureoccured during a handshake read. 500-globus_xio: An end of file occurred 500 End.
2.4 Test of FTS3 for transfers
Mikael Borg
August 2016
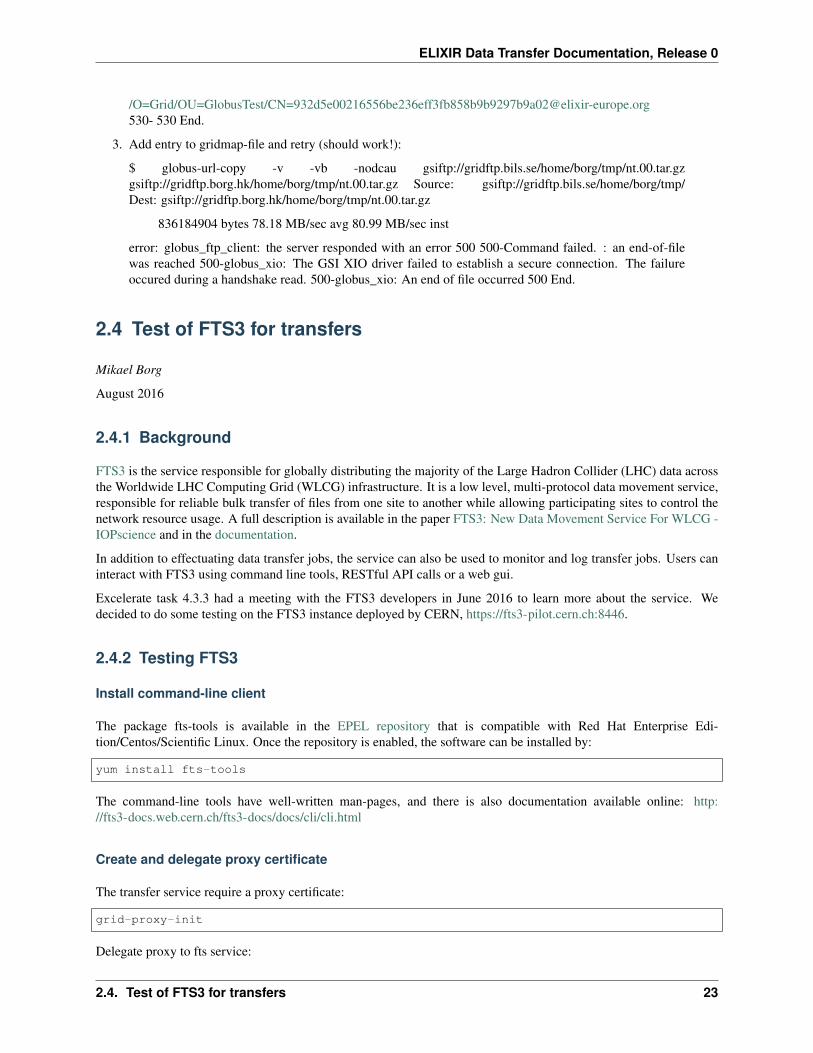
2.4.1 Background
FTS3 is the service responsible for globally distributing the majority of the Large Hadron Collider (LHC) data acrossthe Worldwide LHC Computing Grid (WLCG) infrastructure. It is a low level, multi-protocol data movement service,responsible for reliable bulk transfer of files from one site to another while allowing participating sites to control thenetwork resource usage. A full description is available in the paper FTS3: New Data Movement Service For WLCG -IOPscience and in the documentation.
In addition to effectuating data transfer jobs, the service can also be used to monitor and log transfer jobs. Users caninteract with FTS3 using command line tools, RESTful API calls or a web gui.
Excelerate task 4.3.3 had a meeting with the FTS3 developers in June 2016 to learn more about the service. Wedecided to do some testing on the FTS3 instance deployed by CERN, https://fts3-pilot.cern.ch:8446.
2.4.2 Testing FTS3
Install command-line client
The package fts-tools is available in the EPEL repository that is compatible with Red Hat Enterprise Edi-tion/Centos/Scientific Linux. Once the repository is enabled, the software can be installed by:
yum install fts-tools
The command-line tools have well-written man-pages, and there is also documentation available online: http://fts3-docs.web.cern.ch/fts3-docs/docs/cli/cli.html
Create and delegate proxy certificate
The transfer service require a proxy certificate:
grid-proxy-init
Delegate proxy to fts service:
2.4. Test of FTS3 for transfers 23
ELIXIR Data Transfer Documentation, Release 0
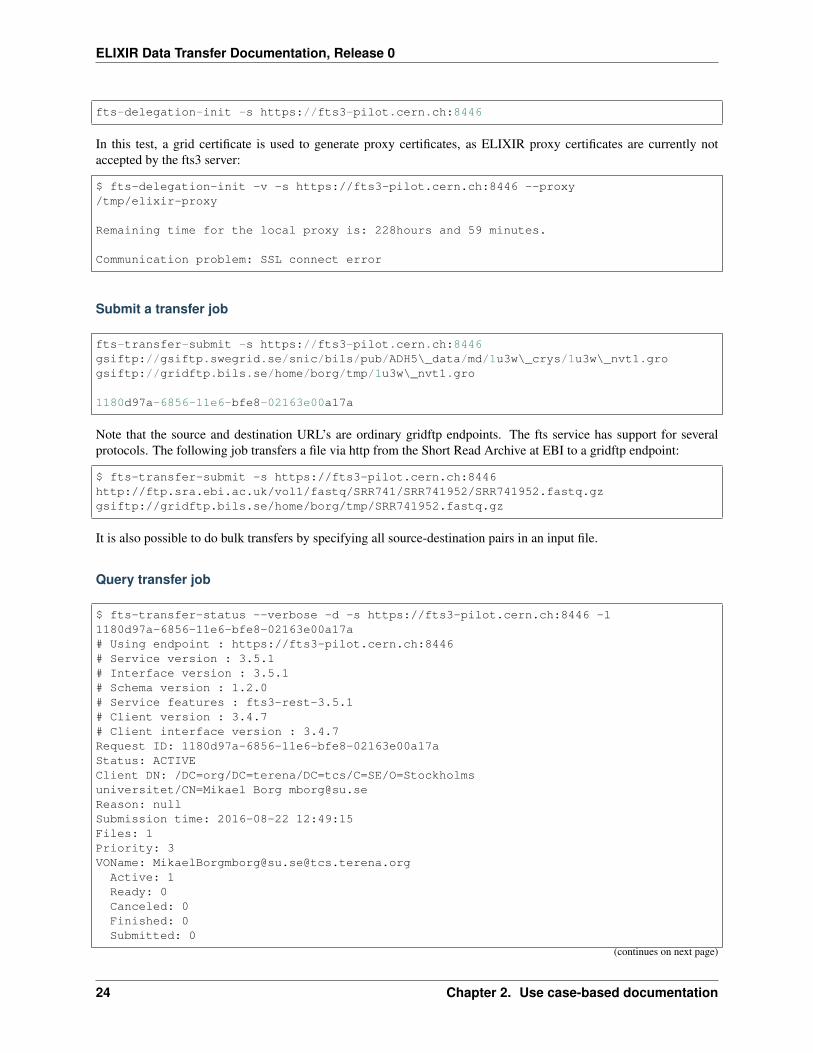
fts-delegation-init -s https://fts3-pilot.cern.ch:8446
In this test, a grid certificate is used to generate proxy certificates, as ELIXIR proxy certificates are currently notaccepted by the fts3 server:
$ fts-delegation-init -v -s https://fts3-pilot.cern.ch:8446 --proxy/tmp/elixir-proxy
Remaining time for the local proxy is: 228hours and 59 minutes.
Communication problem: SSL connect error
Submit a transfer job
fts-transfer-submit -s https://fts3-pilot.cern.ch:8446gsiftp://gsiftp.swegrid.se/snic/bils/pub/ADH5\_data/md/1u3w\_crys/1u3w\_nvt1.grogsiftp://gridftp.bils.se/home/borg/tmp/1u3w\_nvt1.gro
1180d97a-6856-11e6-bfe8-02163e00a17a
Note that the source and destination URL’s are ordinary gridftp endpoints. The fts service has support for severalprotocols. The following job transfers a file via http from the Short Read Archive at EBI to a gridftp endpoint:
$ fts-transfer-submit -s https://fts3-pilot.cern.ch:8446http://ftp.sra.ebi.ac.uk/vol1/fastq/SRR741/SRR741952/SRR741952.fastq.gzgsiftp://gridftp.bils.se/home/borg/tmp/SRR741952.fastq.gz
It is also possible to do bulk transfers by specifying all source-destination pairs in an input file.
Query transfer job
$ fts-transfer-status --verbose -d -s https://fts3-pilot.cern.ch:8446 -l1180d97a-6856-11e6-bfe8-02163e00a17a# Using endpoint : https://fts3-pilot.cern.ch:8446# Service version : 3.5.1# Interface version : 3.5.1# Schema version : 1.2.0# Service features : fts3-rest-3.5.1# Client version : 3.4.7# Client interface version : 3.4.7Request ID: 1180d97a-6856-11e6-bfe8-02163e00a17aStatus: ACTIVEClient DN: /DC=org/DC=terena/DC=tcs/C=SE/O=Stockholmsuniversitet/CN=Mikael Borg [email protected]: nullSubmission time: 2016-08-22 12:49:15Files: 1Priority: 3VOName: [email protected]@tcs.terena.org
Active: 1Ready: 0Canceled: 0Finished: 0Submitted: 0
(continues on next page)
24 Chapter 2. Use case-based documentation
ELIXIR Data Transfer Documentation, Release 0
(continued from previous page)
Failed: 0Staging: 0Started: 0Delete: 0
Source:gsiftp://gsiftp.swegrid.se/snic/bils/pub/ADH5\_data/md/1u3w\_crys/1u3w\_nvt1.groDestination: gsiftp://gridftp.bils.se/home/borg/tmp/1u3w\_nvt1.groState: ACTIVEReason:Duration: -3680938157Staging: 0Retries: 0
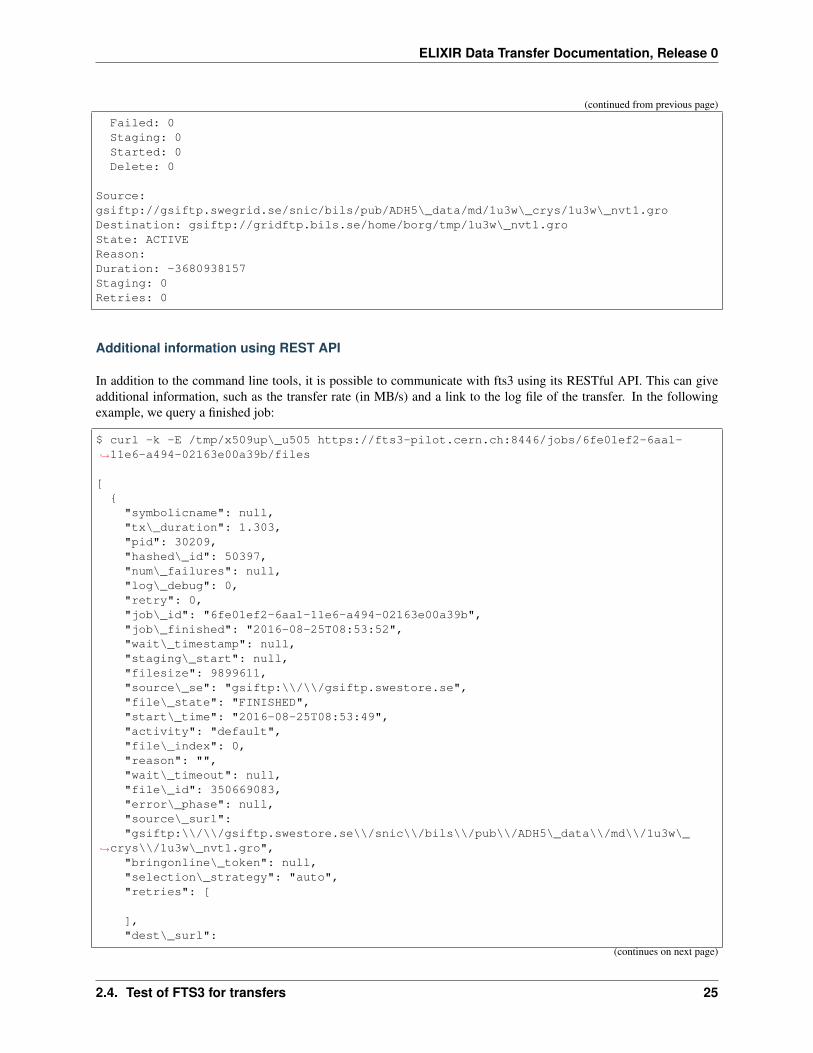
Additional information using REST API
In addition to the command line tools, it is possible to communicate with fts3 using its RESTful API. This can giveadditional information, such as the transfer rate (in MB/s) and a link to the log file of the transfer. In the followingexample, we query a finished job:
$ curl -k -E /tmp/x509up\_u505 https://fts3-pilot.cern.ch:8446/jobs/6fe01ef2-6aa1-→˓11e6-a494-02163e00a39b/files
[{"symbolicname": null,"tx\_duration": 1.303,"pid": 30209,"hashed\_id": 50397,"num\_failures": null,"log\_debug": 0,"retry": 0,"job\_id": "6fe01ef2-6aa1-11e6-a494-02163e00a39b","job\_finished": "2016-08-25T08:53:52","wait\_timestamp": null,"staging\_start": null,"filesize": 9899611,"source\_se": "gsiftp:\\/\\/gsiftp.swestore.se","file\_state": "FINISHED","start\_time": "2016-08-25T08:53:49","activity": "default","file\_index": 0,"reason": "","wait\_timeout": null,"file\_id": 350669083,"error\_phase": null,"source\_surl":"gsiftp:\\/\\/gsiftp.swestore.se\\/snic\\/bils\\/pub\\/ADH5\_data\\/md\\/1u3w\_
→˓crys\\/1u3w\_nvt1.gro","bringonline\_token": null,"selection\_strategy": "auto","retries": [
],"dest\_surl":
(continues on next page)
2.4. Test of FTS3 for transfers 25

ELIXIR Data Transfer Documentation, Release 0
(continued from previous page)
"gsiftp:\\/\\/gridftp.bils.se\\/home\\/borg\\/tmp\\/1u3w\_nvt1.gro3","internal\_file\_params": "nostreams:1,timeout:4000,buffersize:0","finish\_time": "2016-08-25T08:53:52","dest\_se": "gsiftp:\\/\\/gridftp.bils.se","staging\_finished": null,"user\_filesize": 0,"file\_metadata": null,"error\_scope": null,"transferhost": "fts703.cern.ch","throughput": 7.24559,"checksum": null,"log\_file":"\\/var\\/log\\/fts3\\/transfers\\/2016-08-25\\/gsiftp.swestore.se\_\_gridftp.
→˓bils.se\\/2016-08-25-0853\_\_gsiftp.swestore.se\_\_gridftp.bils.se\_\_350669083\_\_→˓6fe01ef2-6aa1-11e6-a494-02163e00a39b",
"agent\_dn": null,"reason\_class": null,"vo\_name": "[email protected]@tcs.terena.org","recoverable": false
}]
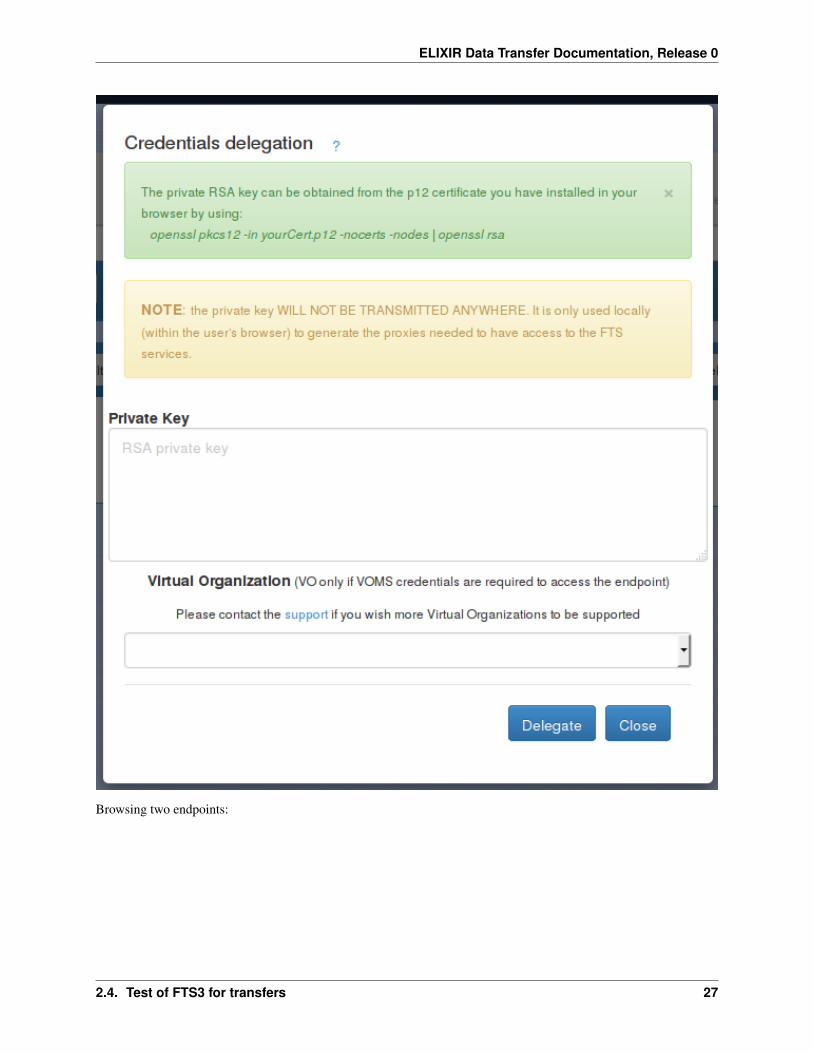
Web interfaces
webfts
FTS3 provides several web interfaces for interacting with fts3. The webfts interface can be used to submit transferjobs, but requires the user to paste his/her private key so that it is saved locally in the browser, and then used to generateproxy certificates. It is then possible to browse endpoints and initiate data transfers.
Link: https://webfts.cern.ch/
26 Chapter 2. Use case-based documentation
ELIXIR Data Transfer Documentation, Release 0
Browsing two endpoints:
2.4. Test of FTS3 for transfers 27

ELIXIR Data Transfer Documentation, Release 0
Viewing past transfer jobs:
There is ongoing development to have the web interface authenticate via SAML, and then obtain proxy certificatesby making API calls to a credential translation service. Currently, there is only support for the CERN Security TokenService (STS). The code is in the ‘kipper’ branch of webfts: https://gitlab.cern.ch/fts/webfts/tree/kipper, which in turnrequires the software ‘kipper’: https://gitlab.cern.ch/sts/kipper/tree/master.
Ftsmon
Ftsmon is a separate web application where monitoring of jobs can be achieved with the certificate installed in thebrowser, but without entering the private key.
Link: https://fts3-pilot.cern.ch:8449/fts3/ftsmon
28 Chapter 2. Use case-based documentation

ELIXIR Data Transfer Documentation, Release 0
Dashboard
The FTS Dashboard gives an overview of transfers across different VO’s and technologies.
Link: http://dashb-fts-transfers.cern.ch/ui
2.4.3 Notes
• The FTS3 service seems to fulfill most of the requirements that we have for an ELIXIR data transfer service:multi-protocol, monitoring and logging, checksums, API, web gui, . . .
• The software is free software (Apache License, Version 2.0) and seems straight-forward to deploy. All compo-nents are available in the RHEL/CENTOS EPEL repository. Installation and configuration guide.
• The fts3 development team is very approachable.
• Some development is needed if we want to make the webfts interface connect to the ELIXIR credential transla-tion service for proxy certificates.
• It seems like logs of transfers jobs are per default public. This might be a problem in some cases (e.g. pharmacompanies that want to hide what they are working on).
2.5 AAI Integration: mapping users
Mikael Borg
Dec 2017
2.5.1 Background
Users of ELIXIR gridftp endpoints are authenticated using X509 certificates. The certificate user identities (subjects)must be mapped to local accounts. This is done in the configuration file /etc/grid-security/grid-mapfile.
2.5. AAI Integration: mapping users 29

ELIXIR Data Transfer Documentation, Release 0
However, the ELIXIR AAI certificate subjects sometimes change, which means that the mapping must be kept up todate. This document describes how to set up automatic user mapping.
In the following it is assumed that a gridftp endpoint already is deployed.
2.5.2 Set up sync with PERUN
Install package edg-mkgridmap (present in e.g. EPEL repository):
$ yum install -y edg-mkgridmap
Configure edg-mkgridmap with /etc/edg-mkgridmap.conf:
group "vomss://voms1.grid.cesnet.cz:8443/voms/vo.elixir-europe.org/"AUTOgmf_local /etc/localgridmap.conf
The first line tells the script to obtain a list of certificate subjects from ELIXIR PERUN. The second line configureswhere to store local user mappings that should be present in the grid-mapfile (e.g. if you have some other user mappingbased on e.g. grid certificates).
2.5.3 Configure user mapping
The AUTO keyword tells edg-mkgridmap to execute the local script /usr/libexec/edg-mkgridmap/local-subject2user when mapping certificates to local user accounts. The script is called with each usercertificate subject as argument and is expected to write the local username associated with the user certificate subjectto STDOUT.
Here is a sample script that will map a couple of ELIXIR identities to local user account ‘heartbeat’, and one ELIXIRidentity to local user ‘borg’:
#!/bin/bash# map the following to the heartbeat account:
heartbeaters="Delisa Simonovic\|Amelie Cornelis\|Jinny Chien"if [[ $1 =~ $heartbeaters ]]
thenecho "heartbeat"
fi# local userif [[ $1 =~ 'Mikael Borg' ]]then
echo "borg"fi
Note that the script need to be executable.
2.5.4 Testing
It is possible to test the set-up by running edg-mkgridmap without arguments. The resulting grid-mapfile will then bewritten to STDOUT.
Note that access to PERUN requires that the server making the connection has a proper host certificate - letsencryptcertificates are not accepted. For testing purposes, it is possible to use an ELIXIR proxy certificate though:
30 Chapter 2. Use case-based documentation

ELIXIR Data Transfer Documentation, Release 0
• Obtain ELIXIR proxy certificate from CILogon and save to a file, e.g. cert.txt
• Run edg-mkgridmap in user mode with environment variable X509_USER_PROXY pointing to your proxycertificate, e.g.:
X509\_USER\_PROXY=$HOME/cert.txt edg-mkgridmap --usermode
2.5.5 Keep mapping updated via cronjob
Finally, in order to keep the user mapping up to date, run edg-mkgridmap as a cronjob, e.g. add file /etc/cron.d/edg-mkgridmap.cron with content (as one line):
17 \*/2 \* \* \* /usr/sbin/edg-mkgridmap --conf=/etc/edg-mkgridmap.conf--output=/etc/grid-security/grid-mapfile --safe --cache --quiet
2.5.6 Acknowledgements
Thanks to Michal Procházka for providing necessary information.
2.6 Prerequisities to generate RCAuth.eu certificates
If you need to create RCAuth.eu proxy certificates, you have to be a member of a particular virtual organisation to beable to do so.
Use your ELIXIR credentials to log in the following application and submit it: https://perun.elixir-czech.cz/registrar/?vo=elixir&group=EGI:vo.elixir-europe.org
Expect a mail confirmation that your application has been submitted and later another confirmation that it was accepted.Shortly after this, you’ll be able to generate proxy certificates in ELIXIR.
Note that membership in this virtual organisation is managed manually. Primary manager is Steven Newhouse. It canbe also approved by Michal Prochazka.
2.7 How to Prepare Documentation
David Antos
May 2018
2.7.1 Where
ELIXIR Data Transfer documentation is published on http://elixir-data-transfer-docs.readthedocs.io/. Its source codesare kept on https://github.com/david-antos/elixir-data-transfer-docs. When changes are pushed to GitHub, Read theDocs published version gets regenerated automatically.
2.6. Prerequisities to generate RCAuth.eu certificates 31
ELIXIR Data Transfer Documentation, Release 0
2.7.2 How
reStructuredText
The documentation is preferrably written in reStructuredText format. Using Markdown is also possible, but it ismuch less standardised. For good reasons to prefer reStructuredText, see http://ericholscher.com/blog/2016/mar/15/dont-use-markdown-for-technical-docs/.
If you’re new to reStructuredText, there are some docs for you:
• reStructuredText Primer is a good start
• Quick reStructuredText for quick reference
• Full Specification is good when strange things happen
• reStructuredText and Sphinx Cheat Sheet is a good and concise reference
Please note that reStructuredText is extremely picky to text indentation. If you run into trouble, check your indentationfirst.
Necessary local software
You’ll need
• git
• any text editor
• (optional but recommended) Sphinx will allow you to generate the documentation locally
Writing new documentation/article
Kindly add a folder to the repository for a new article to keep it neat. Write the documentation (using .rst file suffixis recommended). Make a link to the documentation from index.rst.
If you have Sphinx installed, you can prepare local preview of your docs. Just run
make html
(or a windows bat equivalent) in the main folder and point your browser to _build/html/index.html. Or anyother format you like.
Please note: to keep things simple, we use built-in Sphinx style for local html output. It differs from the style on theRead the Docs site. The reason is not to complicate things beyond necessary, you’d have to install the Read the Docsstyle locally.
2.7.3 Tips and tricks
If you’re unlucky enough to have your documentation in Google Docs or any other format (even lacking proper logicalmarkup), you may try Pandoc to convert it.
Initial conversion of this group’s documentation in Google Docs has been produced by exporting to docx, convertingaccording to Mpei’s Blog and heavily edited by hand.
32 Chapter 2. Use case-based documentation

ELIXIR Data Transfer Documentation, Release 0
2.7.4 Working with Git repository
For the time being, there is no urge for a strict “editorial process” to be put in place. The core team members of datatransfer may have write access to the GitHub repository. Please keep in mind that committing to the repository directlyrebuilds the documentation on the public website. The branch-to-be-published is “master”. You are therefore advisedto push material suitable for public viewing (it doesn’t have to necessarily be finished, of course) and compilable.Check your work locally or at least check the public website after pushing changes. Use a branch for development.
Ask David or any other collaborator to grant you access to the repository (including your GitHub identity to thisrequest speeds things up).
If you are an outside contributor or if you feel you’d prefer your documentation to be extensively reviewed beforepublishing, use the “fork and pull” model. Fork the repository, create a branch, do your stuff, and create a pull request.Refer to https://help.github.com/categories/collaborating-with-issues-and-pull-requests/ if you need to get familiarwith the process.
2.7.5 Contacts
For write access to the GitHub repo, requirements to add plugins (keep it reasonable, please), change the config ofRead the Docs, please contact David Antos (david (dot) antos (atsymbol) cesnet.cz).
2.7. How to Prepare Documentation 33