Embed Size (px)
Citation preview
OSC Elements of Suturing
Part 1 Presented by:
Patton D. Graham, NP-C
About the presenter:
Patton D. Graham is a family and emergency department nurse practitioner. He is a member of the
American Association of Emergency Nurse Practitioners and the American Academy of Nurse
Practitioners.
His publications include a brief article in the Journal of Christian Nursing entitled, Nursing School: A
Balancing Act (April 2012), and the book The Medical Prepper Guidebook: Equipping You to Provide
Medical Care When Help is Not on the Way (April 2016). Patton has taught on the collegiate level, and
has also taught suturing, wound care, and procedural processes for the past two years while also
working as an emergency department nurse practitioner.
DISCLAIMER and TERMS OF USE
The instruction contained within this course is based on experience and what has worked for me.
Although facts, figures, and statements including dosages and techniques are researched and vetted to
the author’s fullest capability, no claim or promise is made of total accuracy and the chance exists for
inaccurate, outdated, or otherwise unreliable information to be contained herein. The consumer of this
material, whether by reading, listening, or watching, is charged with the responsibility of verifying its
contents prior to using or implementing any of it.
Copyright 2018-2019
Introduction Get ready to take notes and learn as much as you can about laceration repair! This course is designed
with nurse practitioners and physician assistants in mind, as well as physicians that want to brush up on
their repair skills. Support staff including RNs, LPNs, technicians, and office staff will also learn much
from this course. At the end of this course, you will better understand and have enhanced training in:
• Choosing among the different materials used to repair lacerations
• The different approaches to laceration repair
• Suturing multiple types of lacerations using a variety of techniques
• Cleansing lacerations to aid in infection prevention
• Treating animal bites
• Tetanus and rabies prevention
• The use of laceration anesthesia
• Examination and assessment of lacerations
• Implementing antibiotics when needed for lacerations
• Looking for foreign bodies and removing them when possible
• Seeking surgical consultation for lacerations
• Avoiding common cosmetic errors resulting from laceration repairs
• Implementing effective follow-up plans for your patients
When and When NOT to Close Most lacerations are sutured.
Some lacerations / wounds might not be closed:
• Puncture wounds.
• Animal and human bites.
• Old wounds.
Always cleanse the wound.
In most cases of laceration, you are going to close the wound and achieve healing though primary
intention.
There are some cases, however, when you might delay closure:
Puncture wounds are never closed.
• Animal and human bites should not be closed unless the goal is to avoid an undesirable
cosmetic defect.
• Wounds having occurred greater than 24 hours prior to presentation.
These should be allowed to heal through secondary intention or referred to plastics to avoid an
undesirable cosmetic defect.
In all cases, whether you close or not, the wound should be thoroughly irrigated and cleansed.
Closure medium How do you decide what to close a wound with?
Consider these three factors:
• Laceration location
• Age of the patient, their affect and emotional lability
• Ability of the patient to return for suture or staple removal
Selection of the medium for closure should be based on the following criteria:
• Laceration location
• Staples work better on linear cuts, and are almost always appropriate on scalp lacerations.
• Absorbable sutures are great for ear lacerations, both anteriorly and posteriorly.
• Age of the patient, their affect and emotional lability
Placing a central steri-strip, with glue at the outer edges, works great for those border-line pediatric
lacerations where a single suture might be necessary but you just know the patient is not going to
tolerate the process.
Skin tears in the geriatric population are sometimes rather deep, but their skin can be so thin. What
can work really well are steri-strips with benzoin tincture placed around the wound edges (not in the
wound) to help secure them. This will help prevent the sutures from tearing through.
Ability of the patient to return for suture or staple removal
In cases where you believe the patient may not be able to return for closure medium removal in a timely
manner, use absorbable sutures (which can be placed internally or externally) and don’t require
removal. Just advise the patient that itching at the site of repair is common while the sutures are
being absorbed.
Needles and Suture Line The numbers that matter:
The size of the line
The size of the needle
Once you have attained some comfort with lacerations, you will also have developed a better gut
impression about how to repair them.
The numbers that matter:
• The size of the line:
o 3-0 – muscle layers, areas of high tension where scarring won’t matter
o 4-0 – all other sites unless otherwise indicated
o 5-0 – face or ears, lips, eyelids, penis
o 6-0 – face or ears, lips, eyelids
• The size of the needle:
o PC-3 and FJ-Cruiser don’t matter much.
o What matters most is the length of the needle which, thankfully in most facilities, limits
your choices to three:
▪ 11mm – nailbeds, eyelids, and tight spaces
▪ 13mm – standard suturing, the “work-horse”
▪ 19mm – bridging mildly gaping lacerations, deep layered sutures
Once you have attained some comfort and, dare I say it, even joy, when lacerations walk through the
door, you will also have developed a better gut impression about what suture line size and needle
length you will need to make the repair happen based on what the wound looks like.
A.C.E. F.A.S.T. CLOSURE • Analgesia (and hemostasis)
• Cleansing
• Examination
• Foreign Body (consider)
• Antibiotics (consider)
• Surgical Consult (consider)
• Tetanus
• Closure
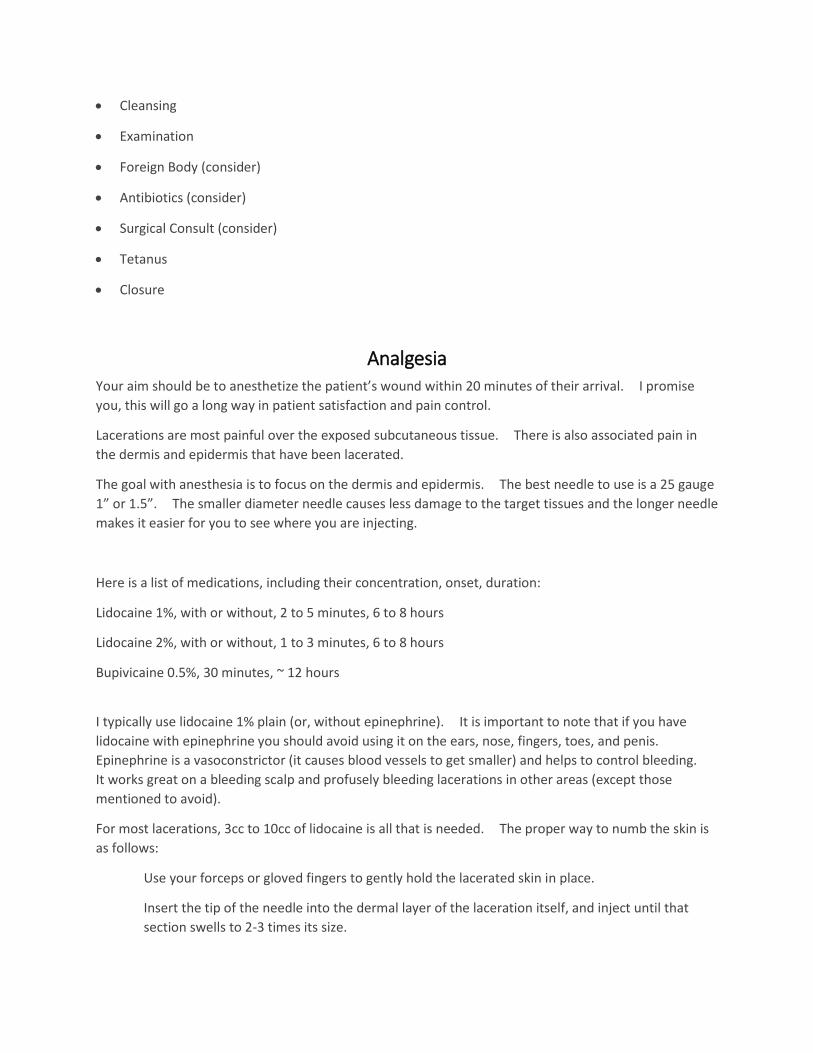
Analgesia Your aim should be to anesthetize the patient’s wound within 20 minutes of their arrival. I promise
you, this will go a long way in patient satisfaction and pain control.
Lacerations are most painful over the exposed subcutaneous tissue. There is also associated pain in
the dermis and epidermis that have been lacerated.
The goal with anesthesia is to focus on the dermis and epidermis. The best needle to use is a 25 gauge
1” or 1.5”. The smaller diameter needle causes less damage to the target tissues and the longer needle
makes it easier for you to see where you are injecting.
Here is a list of medications, including their concentration, onset, duration:
Lidocaine 1%, with or without, 2 to 5 minutes, 6 to 8 hours
Lidocaine 2%, with or without, 1 to 3 minutes, 6 to 8 hours
Bupivicaine 0.5%, 30 minutes, ~ 12 hours
I typically use lidocaine 1% plain (or, without epinephrine). It is important to note that if you have
lidocaine with epinephrine you should avoid using it on the ears, nose, fingers, toes, and penis.
Epinephrine is a vasoconstrictor (it causes blood vessels to get smaller) and helps to control bleeding.
It works great on a bleeding scalp and profusely bleeding lacerations in other areas (except those
mentioned to avoid).
For most lacerations, 3cc to 10cc of lidocaine is all that is needed. The proper way to numb the skin is
as follows:
Use your forceps or gloved fingers to gently hold the lacerated skin in place.
Insert the tip of the needle into the dermal layer of the laceration itself, and inject until that
section swells to 2-3 times its size.
Do this every 1-2cm and then wait 5 minutes.
Test to make sure the area is numb. Ask the patient to close their eyes and, using the very tip of your
needle, prod the skin and ask them to tell you when they feel anything.
Deep sensation is normal and won’t go away with this type of anesthesia. The objective is to eliminate
sharp sensation. The advantage of using bupivicaine over lidocaine is that it lasts so much longer and
is used for digital blocks.
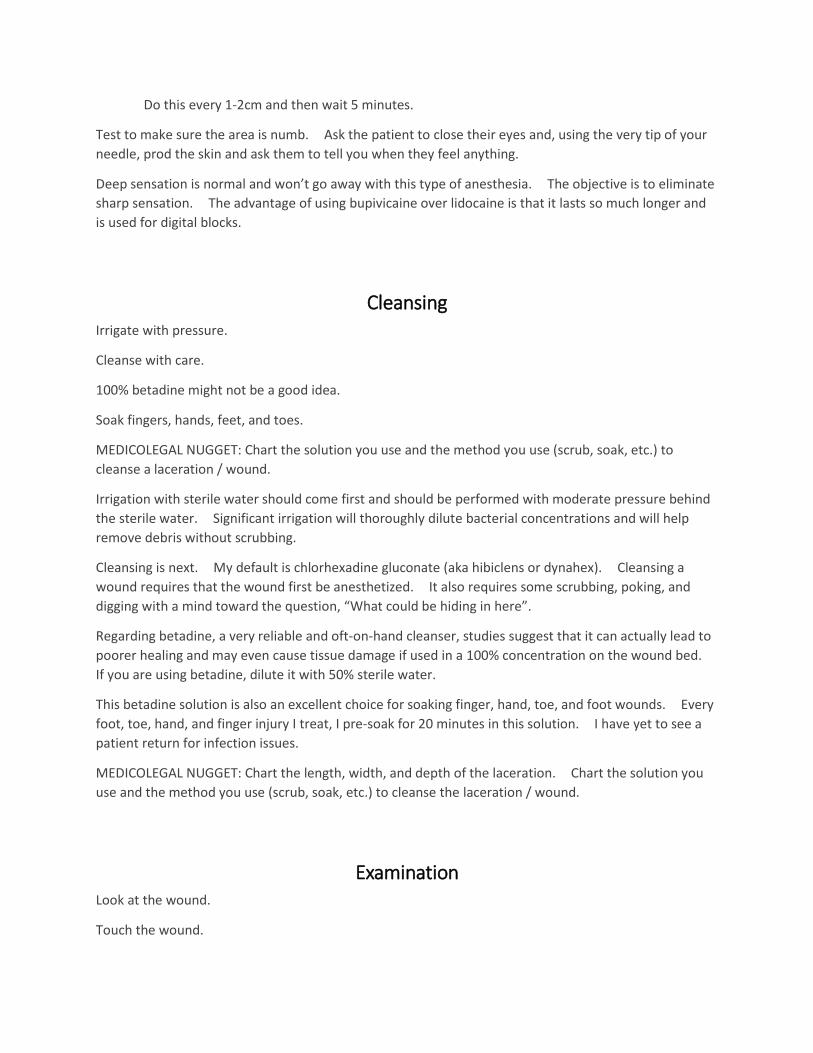
Cleansing Irrigate with pressure.
Cleanse with care.
100% betadine might not be a good idea.
Soak fingers, hands, feet, and toes.
MEDICOLEGAL NUGGET: Chart the solution you use and the method you use (scrub, soak, etc.) to
cleanse a laceration / wound.
Irrigation with sterile water should come first and should be performed with moderate pressure behind
the sterile water. Significant irrigation will thoroughly dilute bacterial concentrations and will help
remove debris without scrubbing.
Cleansing is next. My default is chlorhexadine gluconate (aka hibiclens or dynahex). Cleansing a
wound requires that the wound first be anesthetized. It also requires some scrubbing, poking, and
digging with a mind toward the question, “What could be hiding in here”.
Regarding betadine, a very reliable and oft-on-hand cleanser, studies suggest that it can actually lead to
poorer healing and may even cause tissue damage if used in a 100% concentration on the wound bed.
If you are using betadine, dilute it with 50% sterile water.
This betadine solution is also an excellent choice for soaking finger, hand, toe, and foot wounds. Every
foot, toe, hand, and finger injury I treat, I pre-soak for 20 minutes in this solution. I have yet to see a
patient return for infection issues.
MEDICOLEGAL NUGGET: Chart the length, width, and depth of the laceration. Chart the solution you
use and the method you use (scrub, soak, etc.) to cleanse the laceration / wound.
Examination Look at the wound.
Touch the wound.
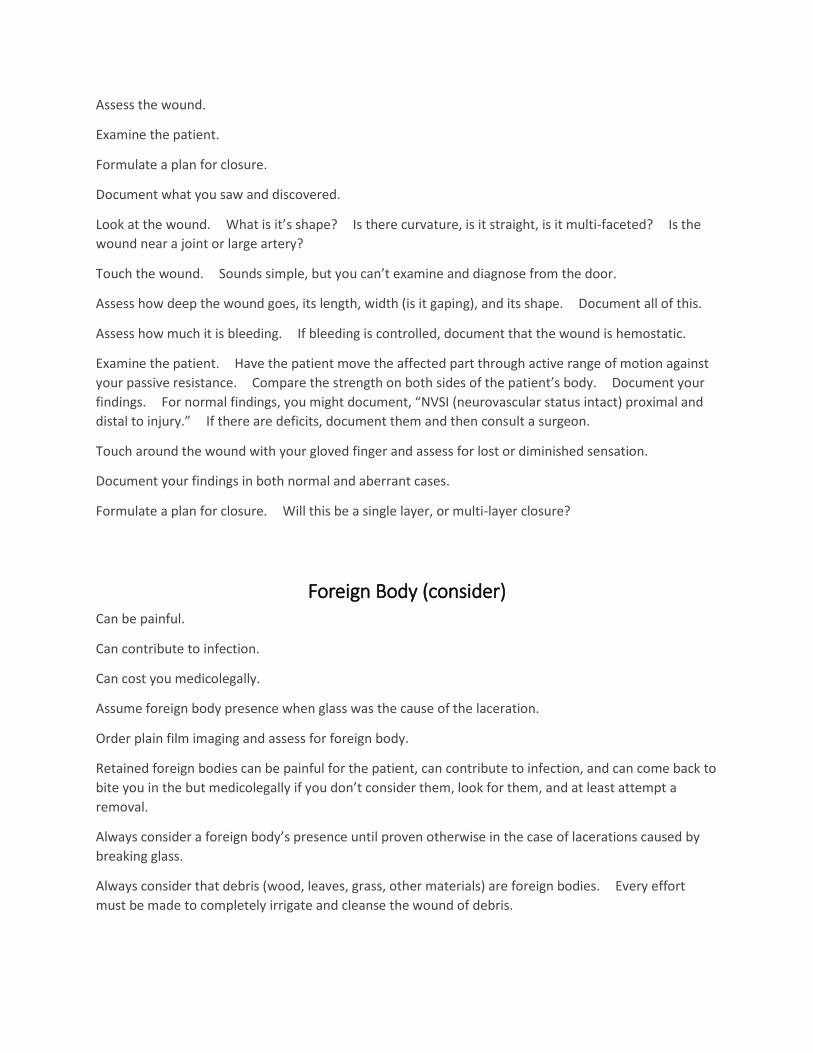
Assess the wound.
Examine the patient.
Formulate a plan for closure.
Document what you saw and discovered.
Look at the wound. What is it’s shape? Is there curvature, is it straight, is it multi-faceted? Is the
wound near a joint or large artery?
Touch the wound. Sounds simple, but you can’t examine and diagnose from the door.
Assess how deep the wound goes, its length, width (is it gaping), and its shape. Document all of this.
Assess how much it is bleeding. If bleeding is controlled, document that the wound is hemostatic.
Examine the patient. Have the patient move the affected part through active range of motion against
your passive resistance. Compare the strength on both sides of the patient’s body. Document your
findings. For normal findings, you might document, “NVSI (neurovascular status intact) proximal and
distal to injury.” If there are deficits, document them and then consult a surgeon.
Touch around the wound with your gloved finger and assess for lost or diminished sensation.
Document your findings in both normal and aberrant cases.
Formulate a plan for closure. Will this be a single layer, or multi-layer closure?
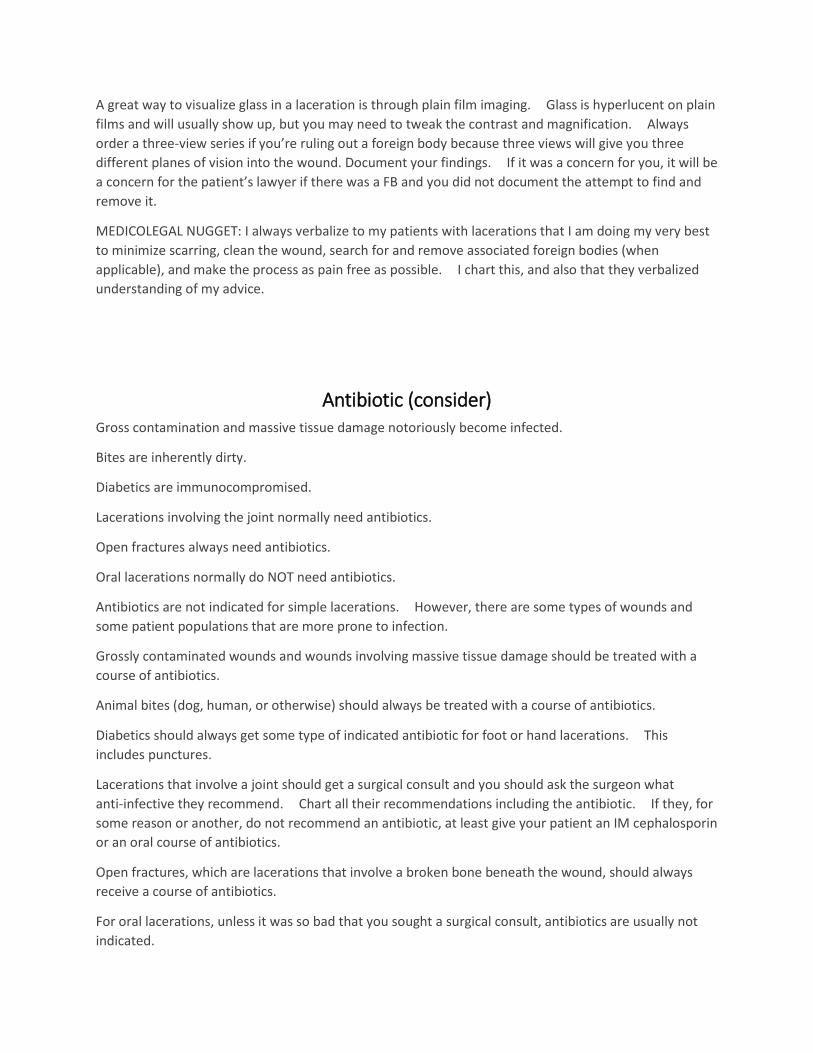
Foreign Body (consider) Can be painful.
Can contribute to infection.
Can cost you medicolegally.
Assume foreign body presence when glass was the cause of the laceration.
Order plain film imaging and assess for foreign body.
Retained foreign bodies can be painful for the patient, can contribute to infection, and can come back to
bite you in the but medicolegally if you don’t consider them, look for them, and at least attempt a
removal.
Always consider a foreign body’s presence until proven otherwise in the case of lacerations caused by
breaking glass.
Always consider that debris (wood, leaves, grass, other materials) are foreign bodies. Every effort
must be made to completely irrigate and cleanse the wound of debris.
A great way to visualize glass in a laceration is through plain film imaging. Glass is hyperlucent on plain
films and will usually show up, but you may need to tweak the contrast and magnification. Always
order a three-view series if you’re ruling out a foreign body because three views will give you three
different planes of vision into the wound. Document your findings. If it was a concern for you, it will be
a concern for the patient’s lawyer if there was a FB and you did not document the attempt to find and
remove it.
MEDICOLEGAL NUGGET: I always verbalize to my patients with lacerations that I am doing my very best
to minimize scarring, clean the wound, search for and remove associated foreign bodies (when
applicable), and make the process as pain free as possible. I chart this, and also that they verbalized
understanding of my advice.
Antibiotic (consider) Gross contamination and massive tissue damage notoriously become infected.
Bites are inherently dirty.
Diabetics are immunocompromised.
Lacerations involving the joint normally need antibiotics.
Open fractures always need antibiotics.
Oral lacerations normally do NOT need antibiotics.
Antibiotics are not indicated for simple lacerations. However, there are some types of wounds and
some patient populations that are more prone to infection.
Grossly contaminated wounds and wounds involving massive tissue damage should be treated with a
course of antibiotics.
Animal bites (dog, human, or otherwise) should always be treated with a course of antibiotics.
Diabetics should always get some type of indicated antibiotic for foot or hand lacerations. This
includes punctures.
Lacerations that involve a joint should get a surgical consult and you should ask the surgeon what
anti-infective they recommend. Chart all their recommendations including the antibiotic. If they, for
some reason or another, do not recommend an antibiotic, at least give your patient an IM cephalosporin
or an oral course of antibiotics.
Open fractures, which are lacerations that involve a broken bone beneath the wound, should always
receive a course of antibiotics.
For oral lacerations, unless it was so bad that you sought a surgical consult, antibiotics are usually not
indicated.
Surgical Consult (consider) Does the wound involve a tendon that is obviously damaged?
Assess and compare BOTH sides of the body.
Always consult if there are neurovascular changes.
MOI = Direct blow? Get imaging.
Compartment syndrome?
MEDICOLEGAL NUGGET: Always document your performance of two-point sensory examination and
comparison of strength bilaterally, including your findings. If you get a consult, document date and
time, who, what you discussed with them, and what their recommendations were.
Always consult if you can see a moving ligament with obvious signs of damage OR if the affected part is
weaker than its contralateral counterpart.
To determine this, have the patient move the affected part through active range of motion against your
passive resistance. Compare the strength on both sides of the patient’s body. If there is a deficit,
consult a surgeon.
Most of the time, orthopedic surgeons are NOT going to repair a tendon injury unless it has sustained a
laceration through greater than 50% of its diameter.
Always consult if there are neurovascular changes. Neurologic changes include changes in sensation.
Vascular changes include changes in skin temperature and color, and arterial involvement. If the
patient, bystanders, nursing staff, or you have witnessed spurting blood, the injury involves an artery
until proven otherwise by a vascular surgeon.
If the mechanism of injury was a crush or direct blow, get plain film images to rule out a fracture or
dislocation. If you find either, consult an orthopedic surgeon and treat as an open fracture.
Compartment syndrome.
MEDICOLEGAL NUGGET: Always document your performance of two-point sensory examination and
comparison of strength bilaterally, including your findings. If you get a consult, document date and
time, who, what you discussed with them, and what their recommendations were. Always document
the absence or presence of compartment syndrome.
Tetanus Always ask your patients what their tetanus status is.
Immigrants may not have received any, or only some, of the vaccination schedule.
Bottom line rule: if the last vaccination dose was greater than 5 years ago, they get a booster.
MEDICOLEGAL NUGGET: Always chart their tetanus immunization status and any intervention you
implemented.
Tetanus is a big deal because it can kill.
Tetanus prone wounds include all wounds other than clean, minor wounds.
Patients who have received the full tetanus immunization schedule and who present with clean, minor
wounds do not need a tetanus booster.
Patients who have not received the full tetanus immunization schedule, or in cases where this is
uncertain, who received their last dose greater than 5 years ago, and who present with clean, minor
wounds only need a tetanus booster.
Patients who have not received the full tetanus immunization schedule, or in cases where this is
uncertain, who received their last dose greater than 5 years ago, and who present with anything except
a clean, minor wound need both a tetanus booster and a dose of tetanus immunoglobulin (TIG).
Adults and children age 7 and above should receive 250 units TIG IM ONCE. Children through age 6
should receive 4 units / kg TIG IM ONCE up to 250 units.
Closure
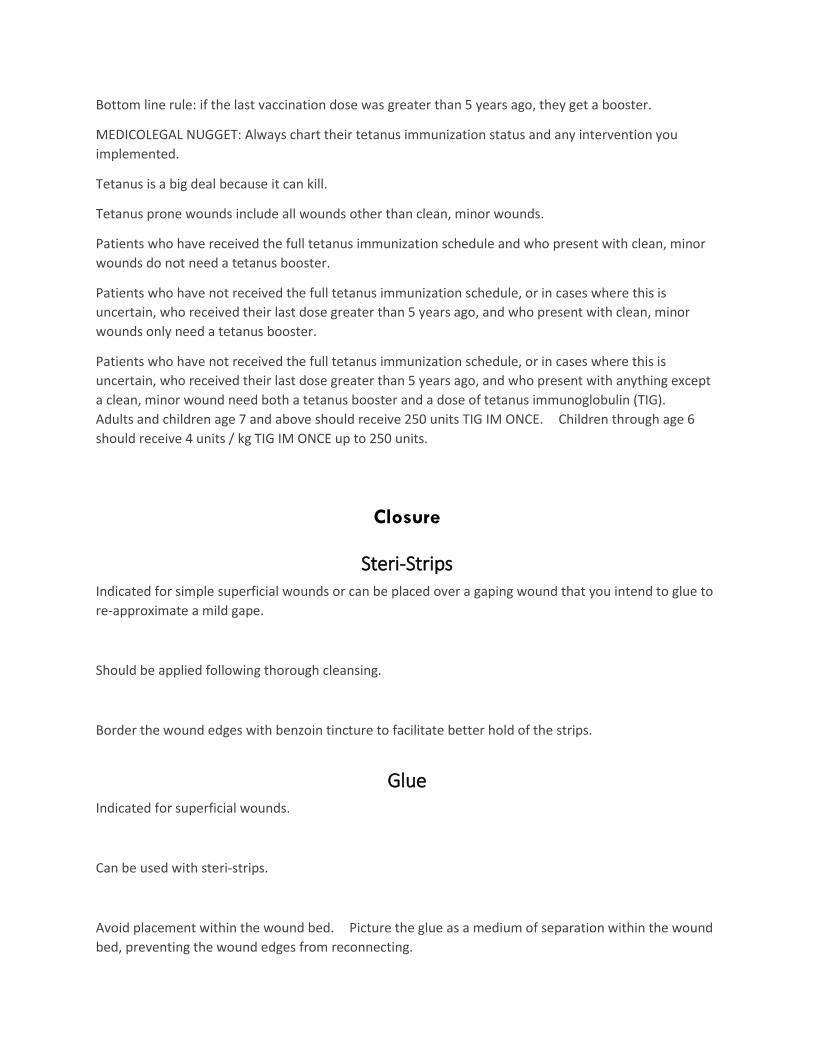
Steri-Strips Indicated for simple superficial wounds or can be placed over a gaping wound that you intend to glue to
re-approximate a mild gape.
Should be applied following thorough cleansing.
Border the wound edges with benzoin tincture to facilitate better hold of the strips.
Glue Indicated for superficial wounds.
Can be used with steri-strips.
Avoid placement within the wound bed. Picture the glue as a medium of separation within the wound
bed, preventing the wound edges from reconnecting.
Apply pressure to the wound prior to gluing to achieve hemostasis.
Staples Indicated for scalp and other linear wounds where a cosmetic outcome is not of great concern.
If a wound extends through multiple layers, closure of deep layers with absorbable suture line can be
performed first, and then then outer skin layer can be closed with staples.
Don’t press too firmly or too lightly with the staple gun. Too much pressure can cause the skin to
prematurely evert and then your staple is placed too tightly. Too little pressure can cause staple
placement to be too shallow and poorly approximate the wound.
Throws and Knots A throw is a loop within a knot. Knots are tied by looping one end of the suture line around the
forceps held by your dominant hand and then using the forceps to grasp the other end of the suture line
and pulling it through the loop. Best practice for throws and knots is the 5/2/4 rule. Use five throws
(loops) around your first knot, and then two throws after that for a total of four knots.
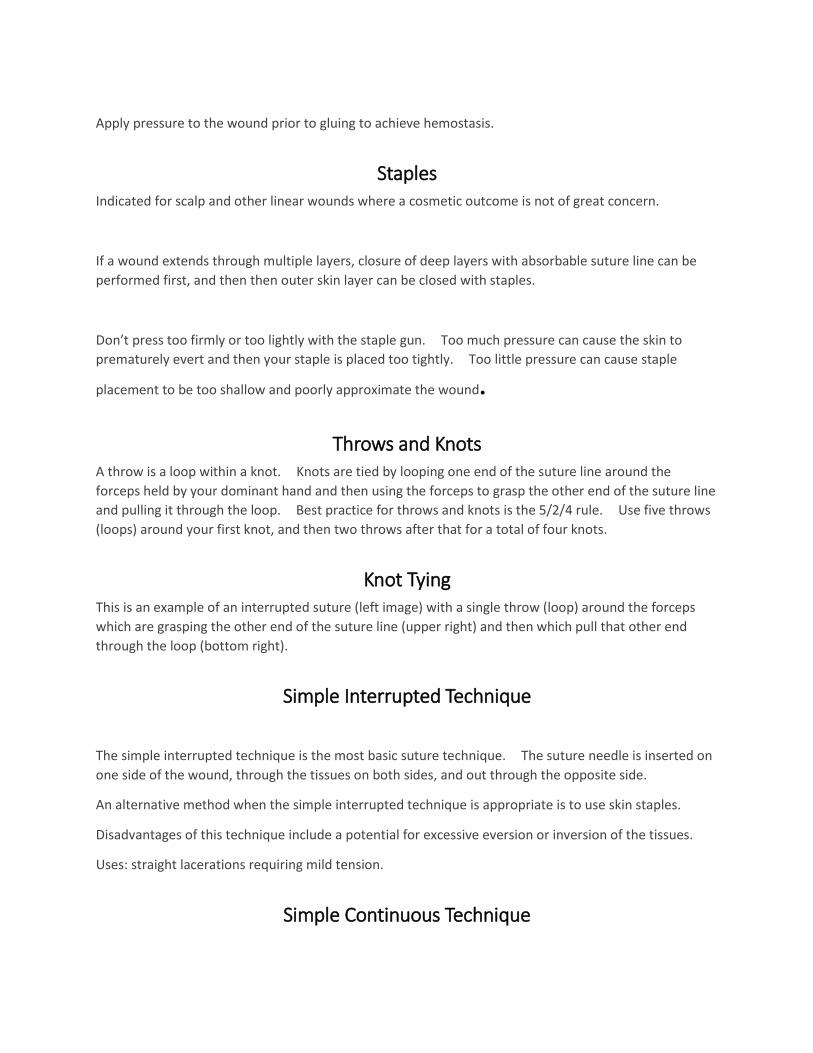
Knot Tying This is an example of an interrupted suture (left image) with a single throw (loop) around the forceps
which are grasping the other end of the suture line (upper right) and then which pull that other end
through the loop (bottom right).
Simple Interrupted Technique
The simple interrupted technique is the most basic suture technique. The suture needle is inserted on
one side of the wound, through the tissues on both sides, and out through the opposite side.
An alternative method when the simple interrupted technique is appropriate is to use skin staples.
Disadvantages of this technique include a potential for excessive eversion or inversion of the tissues.
Uses: straight lacerations requiring mild tension.
Simple Continuous Technique
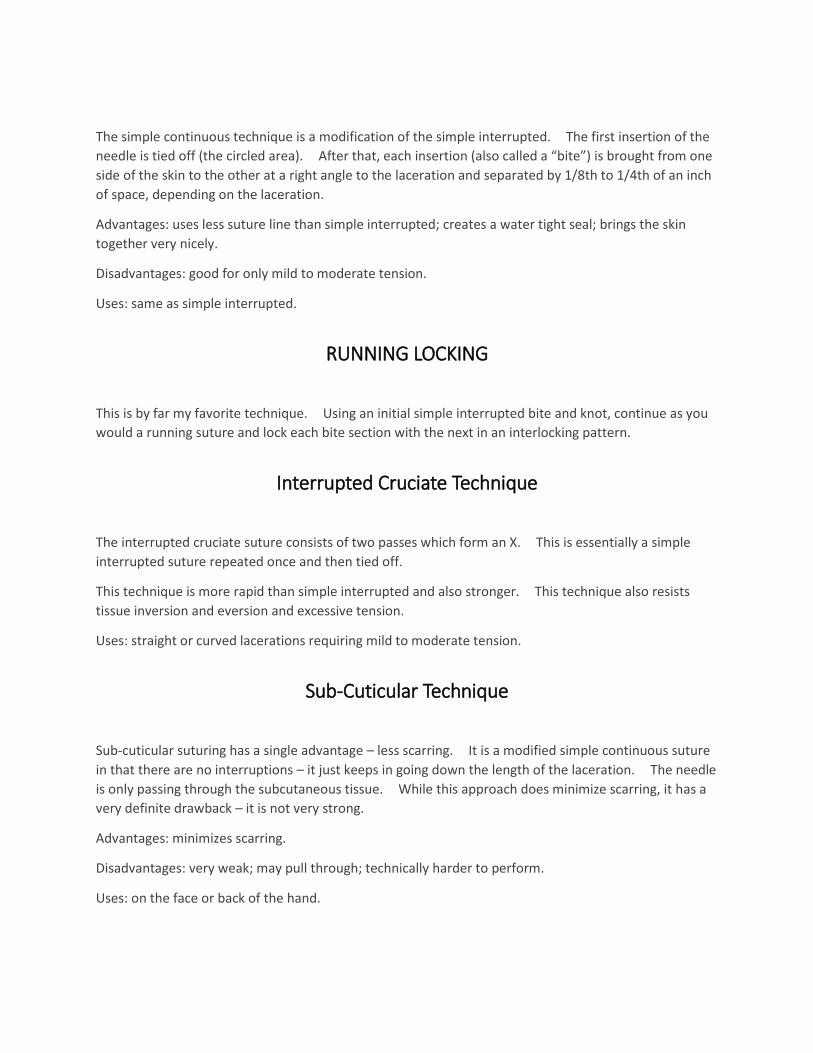
The simple continuous technique is a modification of the simple interrupted. The first insertion of the
needle is tied off (the circled area). After that, each insertion (also called a “bite”) is brought from one
side of the skin to the other at a right angle to the laceration and separated by 1/8th to 1/4th of an inch
of space, depending on the laceration.
Advantages: uses less suture line than simple interrupted; creates a water tight seal; brings the skin
together very nicely.
Disadvantages: good for only mild to moderate tension.
Uses: same as simple interrupted.
RUNNING LOCKING
This is by far my favorite technique. Using an initial simple interrupted bite and knot, continue as you
would a running suture and lock each bite section with the next in an interlocking pattern.
Interrupted Cruciate Technique
The interrupted cruciate suture consists of two passes which form an X. This is essentially a simple
interrupted suture repeated once and then tied off.
This technique is more rapid than simple interrupted and also stronger. This technique also resists
tissue inversion and eversion and excessive tension.
Uses: straight or curved lacerations requiring mild to moderate tension.
Sub-Cuticular Technique
Sub-cuticular suturing has a single advantage – less scarring. It is a modified simple continuous suture
in that there are no interruptions – it just keeps in going down the length of the laceration. The needle
is only passing through the subcutaneous tissue. While this approach does minimize scarring, it has a
very definite drawback – it is not very strong.
Advantages: minimizes scarring.
Disadvantages: very weak; may pull through; technically harder to perform.
Uses: on the face or back of the hand.
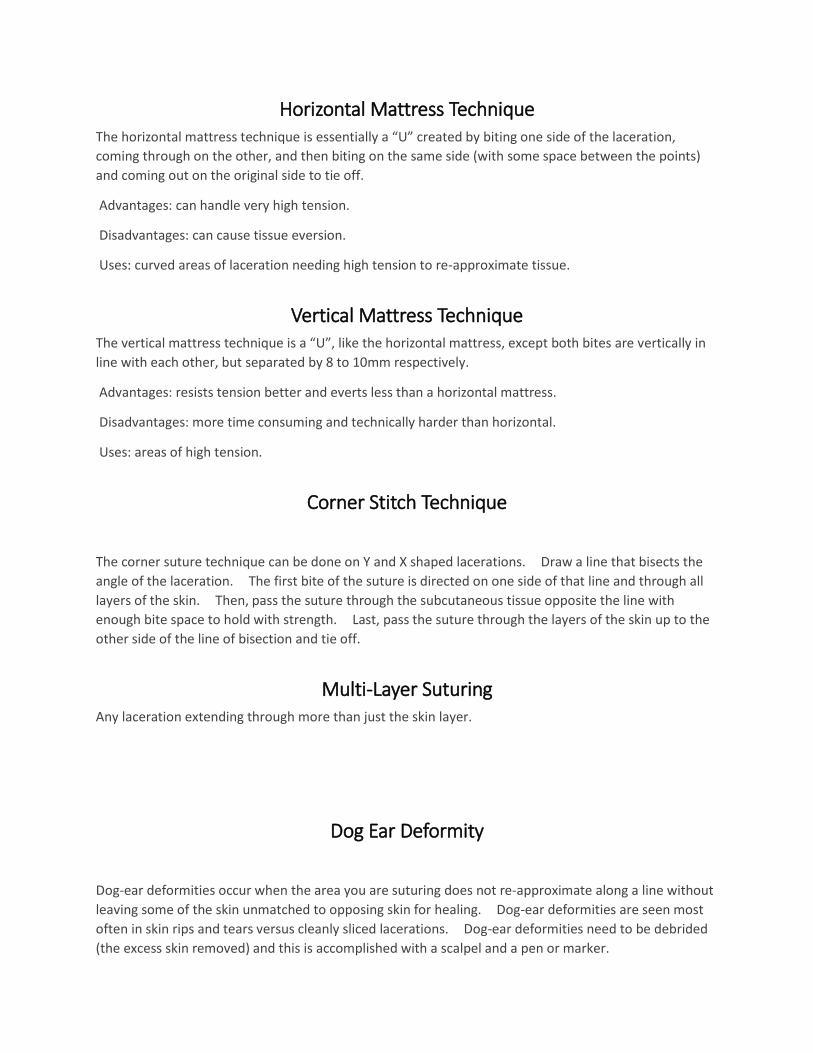
Horizontal Mattress Technique The horizontal mattress technique is essentially a “U” created by biting one side of the laceration,
coming through on the other, and then biting on the same side (with some space between the points)
and coming out on the original side to tie off.
Advantages: can handle very high tension.
Disadvantages: can cause tissue eversion.
Uses: curved areas of laceration needing high tension to re-approximate tissue.
Vertical Mattress Technique The vertical mattress technique is a “U”, like the horizontal mattress, except both bites are vertically in
line with each other, but separated by 8 to 10mm respectively.
Advantages: resists tension better and everts less than a horizontal mattress.
Disadvantages: more time consuming and technically harder than horizontal.
Uses: areas of high tension.
Corner Stitch Technique
The corner suture technique can be done on Y and X shaped lacerations. Draw a line that bisects the
angle of the laceration. The first bite of the suture is directed on one side of that line and through all
layers of the skin. Then, pass the suture through the subcutaneous tissue opposite the line with
enough bite space to hold with strength. Last, pass the suture through the layers of the skin up to the
other side of the line of bisection and tie off.
Multi-Layer Suturing Any laceration extending through more than just the skin layer.
Dog Ear Deformity
Dog-ear deformities occur when the area you are suturing does not re-approximate along a line without
leaving some of the skin unmatched to opposing skin for healing. Dog-ear deformities are seen most
often in skin rips and tears versus cleanly sliced lacerations. Dog-ear deformities need to be debrided
(the excess skin removed) and this is accomplished with a scalpel and a pen or marker.
Debridement should be performed in dog-ear deformities and when tissue has become devitalized in
connection with the laceration. A great example of this a chainsaw injury. The chain lacerates the
skin of the leg (or somewhere else), but the chain is also hot and cauterizes the periphery of the
remaining tissue. This tissue will have a duskier, grayer appearance and should be removed prior to
closure.
Undermining Undermining is a technique that relieves skin tension and improves cosmetic outcomes.
The technique is fairly simple, and the result is the separation of the dermal layer from the underlying
connective tissue.
Undermining is performed using sterile scissors. The wound margins are separated, and the scissors
are inserted just beneath the dermal layer and opened. This bluntly dissects and separates the dermal
layer from the underlying subcutaneous tissue.
Undermining relieves the static tension placed on the outer dermal layer by the inner layer of the
connective tissue. Alleviation of this tension promotes an excellent cosmetic outcome and significantly
reduces dehiscence.
Undermining is performed in areas of high tension where an enhanced cosmetic outcome is important.
MEDICOLEGAL NUGGET: Always document whether you performed undermining, as well as the
statement “Every effort was made to limit scarring including, but not limited to, undermining.”
Part 5
Approach Considerations and Special Topics
SCALP lacerations Most scalp lacerations can be closed with staples.
If using sutures, use a blue polypropelene line.
The scalp is highly vascular and can bleed a lot. Consider using an anesthetic with epinephrine to
promote vasoconstriction.
There is no need to cut hair.
Do not glue a scalp.
Scalp lacerations tend to be the most straightforward repairs. However, always assess your patient for
signs of concussion and c-spine injury using NEXUS or another criteria, as there is almost always a
traumatic cause for scalp lacerations.
NEXUS, my preferred c-spine screening criteria, can be used on patients age 1 to 101, and consists of
five questions, each counting for one point.
Are there any focal neurological deficits?
Is there any midline spine tenderness?
Is the patient presenting with an altered level of consciousness?
Is the patient intoxicated?
Is there any distracting injury present?
Patient’s with scalp lacerations definitely have injury, however lacerations alone do not meet the criteria
for “distracting injury”. This term refers to “a condition thought by the clinician to be producing pain
sufficient to distract from a second [that is] (neck) injury. Examples may include but are not limited to
the following:
A long bone fracture
A visceral injury requiring surgical consultation
A large laceration, degloving injury, or crush injury
Large burns
Or any other injury producing acute functional impairment
[Providers] may also classify any injury as distracting if it is thought to have the potential to impair the
patient’s ability to appreciate other injuries” (Hoffman HR, et al. NEJM 2000; 343: 94-9).
If your patient ranks 1+ on NEXUS criteria, apply an occlusive dressing to the neck laceration, place your
patient in a c-collar, and get a c-spine radiograph series before proceeding with wound closure to
rule-out c-spine injury. Otherwise, proceed with or without c-spine imaging based on this information
and clinical gestalt for each particular patient.
Regarding head CTs, and given the traumatic nature of some head injuries, screen your patient for
concussion and follow an algorithm for deciding whether or not to scan your patient. Your facility will
likely have a protocol in place with algorithms for pediatric and adult patient populations. PECARN
criteria is currently the most reliable pediatric guideline for traumatic head CT. For adults, there are
many guidelines and you should use the one adopted by your facility to guide your treatment of the
patient.
So, you’ve made imaging decisions based on algorithms and guidelines, and ruled out traumatic head
and c-spine injury. The patient is ready to be sewn. Closure of most scalp lacerations can usually be
done with staples after thorough irrigation and cleansing. There is debate about whether to
anesthetize scalp wounds that will be stapled. I always anesthetize the wound when I’m going to
staple it. Anesthesia of scalp wounds not only makes application of the staples go more smoothly, it
also decreases post-procedure pain.
The anesthetic of choice is lidocaine 1% or 2% with epinephrine. Scalps can bleed a lot due to their
increased vascular nature. Epinephrine is an appropriate way to help minimize bleeding.
Epinephrine has also been shown to work synergistically with lidocaine, decreasing time of onset and
increasing duration.
Prior to closure, probe and search for retained foreign bodies, especially when the mechanism of injury
was related glass, motor vehicle or ATV accident, or any other indicator for foreign bodies.
Here’s a pearl for closure - whether you staple or suture, there is never any real need to cut or trim hair.
I have closed thousands of wounds, including scalp wounds. I have yet to run across a wound so
severely compromised by hair that I felt cutting or trimming was indicated. But, I haven’t seen every
situation. If you run across a scalp laceration that you feel you just can’t close without cutting or
trimming hair, keep your salon work to a minimum. Lacerations heal much more quickly than hair
regrows.
Here’s another pearl – don’t glue a scalp laceration unless your treating a patient who already has very
short hair and the laceration is superficial. This can work for kids with small scalp wounds to avoid the
trauma of needles. But, make sure your actually treating the laceration, and not just the child’s
emotions.
Closure of non-superficial scalp lacerations can be accomplished using a wide stapler and applying
staples about every centimeter, centered over the wound approximation line. Don’t press to firmly or
too lightly with the stapler. If you put one in that doesn’t approximate the tissue or that is poorly
holding the tissue together, remove it and try again.
If you decide to suture a scalp, use a blue polypropelene suture to better distinguish suture line from
hair.
Sutures or staples should remain in place for 5 to 7 days. Antibiotics are not indicated unless the
wound was grossly contaminated (including animal attack), or in cases of immunocompromised
patients.
MEDICOLEGAL NUGGET: In head injuries, always document a Glasgow coma score, even if it’s 15.
Always document whether the patient was cleared from c-spine imaging using NEXUS criteria or met
NEXUS criteria and was scanned.
Eyelid lacerations Most lid closures should be performed by an ophthalmologic surgeon.
Perform a thorough physical exam and rule out underlying injury to the globe, canaliculi, and presence
of foreign body.
Seek ophthalmology consultation whenever the clinical impression indicates.
Eyelid lacerations should be managed, from the start, with the end cosmetic and functional outcomes in
mind.
Eyelid closures can be fraught with complications if done poorly. If there is any concern about closure,
do not proceed and refer to plastics with ophthalmology consultation.
As with any laceration, always perform a detailed physical exam of the underlying and surrounding
anatomy. Rule out underlying injury to the globe, canaliculi, and presence of foreign body. If the globe
appears intact, evert the lids and search for foreign objects, including contact lenses. Note any
hyphema or subconjuntical hemorrhage.
Seek immediate ophthalmology consultation when:
Globe injury is apparent or suspected
Extraocular movement deficits are present
Medial or lateral canthus appear rounded instead of triangular (suspect injury to the canthal ligament)
Lacerations are presents near the canaliculi
Orbital fat is visible
Supraorbital anesthesia is present (suspect injury to the supraorbital nerve)
Foreign body is apparent or suspected; neuroimaging may be the next step
Closure of lid lacerations should be performed when there is a total absence of any indication to consult
ophthalmology and with extreme care. Superficial lacerations that involve only the skin and orbicularis
muscle are the extent of what you should close. Closure can be performed with glue or with 6-0
sutures after careful inspection and cleansing.
Glue – Cut a diagonal opening slightly larger than the size of the laceration into a clear adhesive dressing
and apply it to the patient’s closed eye with the cut-out centered over the wound. Provided the
wound is well approximated, apply a single layer of skin adhesive and allow to fully dry. Carefully
remove the dressing.
6-0 suture – Using the same technique with the clear adhesive dressing, perform wound closure with 6-0
nylon or polypropelene suture on a small (11mm to 13mm) needle. Using simple interrupted or
running technique, mildly evert the wound edges to approximation being very careful to only take bites
into the skin layer and not enter the muscular layer.
Sutures should remain in place for 5 to 7 days. Eyelids are not prone to infection and PO antibiotics are
not normally indicated. However, the underlying conjunctiva may develop a secondary conjunctivitis.
I recommend prescribing an anti-inflammatory eye drop to be used as needed and also an antibiotic
drop.
MEDICOLEGAL NUGGET: Always advise the patient and their family that you are doing your best to
minimize pain, scarring, and poor cosmetic and functional outcomes, as well as the risk for possible
vision loss, lid malposition, cutaneous scarring, and the possible need for follow-up surgical revision.
Document that you have discussed this with the patient / family.
Ear lacerations Begin with the end in mind – the cosmetic outcome.
Completely reapproximate skin over cartilage.
Achieve analgesia through either field block
or local infiltration.
Be concerned about auricular hematoma.
Ear lacerations can appear daunting at first. But, if you like puzzles, this challenge can offer the reward
of significant fulfillment. Be warned, ear laceration repair takes time.
Most ear lacerations occur through the ear body, which is comprised of the helix, the antitragus, and the
lobule. Consider that the entire ear is a skin covered extension of cartilage. Cartilage is avascular and
derives its blood supply from the overlying skin. If skin does not cover cartilage, the cartilage will die,
so you must completely approximate overlying skin.
Sometimes, the wound edges of ear lacerations are macerated and approximating these edges to
achieve a good cosmetic outcome is not possible. In this case, consider cutting a triangular wedge out
of the affected area to create a linear surgical edge that can be more precisely approximated.
Analgesia should be performed using either a field block or through local infiltration of a 1-2% plain
lidocaine (no epinephrine).
Once analgesia is achieved, careful cleaning should be performed and resection, if necessary, should
occur to allow for precise re-approximation.
Ears essentially have two layers that are conducive to closure. Full thickness lacerations through the
cartilage can first be closed with a deep dermal absorbable suture through the cartilage layer only.
This will re-approximate the contour of the ear. The risk in doing the deep dermal suture is that the
absorbable suture might not be fully absorbed and present as a foreign body down the road. I
recommend closing ear lacerations through the skin layer only. This minimized foreign body risk.
The skin should be closed with 5-0 or 6-0 nylon suture on a small (11mm to 13mm) needle. Start on
the posterior side with a single suture in the middle of the posterior laceration and re-approximate.
Next, move to the outermost edge of the laceration and place a single suture. Next, place a single
suture at the middle of the anterior laceration. Evaluate for precise approximation, and then fill in the
gaps. Ear sutures should have about a half centimeter between them. Take your bites with precision
and constantly re-evaluate your line of approximation. Tie your knots slowly, and don’t overtighten
them as excessive eversion can cause delayed healing. You’re also using a very thin suture line. If
you pull too hard, the line will snap leaving you with a short and tattered end to try to continue tying
knots with.
Once the laceration has been fully re-approximated and all cartilage is covered with skin, we need to be
concerned about auricular hematoma. The ear is well vascularized and will continue bleeding into the
space between skin and cartilage. This can create a moderate hematoma that could contribute to
tissue necrosis at worst, and delayed healing at best. Care should be taken to prevent this. Apply a
single line of antibiotic ointment around the ear laceration. Then, gauze padding should be placed
behind the ear taking care not to push the ear out but also placing enough padding that the ear remains
stable. Additional gauze padding should be placed over the anterior ear and a roll-gauze wrap should
be applied around the head with mild compression.
Sutures should remain in place for 7 to 10 days. Antibiotics are not routinely indicated, unless there is
significant wound contamination or the presence of comorbidities that alter immune response.
MEDICOLEGAL NUGGET: As always, advise the patient that you’re doing your best to minimize pain,
scarring, and infection risk through thorough cleansing. Advise them that they should seek medical
attention if there is excessive bleeding, moderate swelling, intractable pain, signs of infection including
but not limited to purulent discharge, or for any concerning sign or symptom. Advise them to wear the
headwrap and gauze padding for until the sutures are removed, with daily dressing changes. Ear
lacerations, like most, heal best if they are kept clean and dry. This means limiting topical cleansing to
only normal hygiene except for a once daily application of white petrolatum. Advise your patient of
this.
Lip lacerations Begin with the end in mind – the cosmetic outcome.
Consider infraorbital or mental nerve blocks to avoid secondary edema associated with local infiltration
of anesthetic.
Look for chipped tooth fragments within the laceration.
Lip lacerations can present as true puzzles – your job being to put the pieces back together as precisely
as possible. You must, therefore, begin with end cosmetic result in mind.
Prior to closure, however, consideration should be given to analgesia delivery approaches. Any time
we locally infiltrate anesthetic, we create edema. In the lip, this edema can increase the complexity of
closure. That is, our delivery of anesthetic potentially creates swelling and this swelling creates an
even more drastic mismatch between the wound margins. Consider, instead, an infraorbital or mental
nerve block. If you are not trained to perform these blocks, local infiltration is your only option for
analgesia delivery. Remember the epinephrine adage, “ears, nose, fingers, toes, penis” and avoid
using lidocaine with epinephrine as this can cause severe vasoconstriction. Granted, this
vasoconstriction occurs very infrequently, but it is still a good approach to avoid the epi.
Once analgesia is achieved, and you’re working through your ACE FAST approach, carefully and
thoroughly cleanse the lacerated tissue. An approach pearl for cleansing, contrary to what you may
have been taught, is not to cleanse with too much pressure as blunt dissection of the tissue layers can
occur further complicating the laceration and its repair.
Be sure to check the patient’s teeth for fractures and frank chips. If there are chipped teeth, probe
and search for fragments in the lacerated tissue and remove them. If you are unsure about retained
fragments, obtain a soft tissue x-ray – tooth fragments are generally radiopaque.
Closure of lip lacerations usually involves a single layer of 6-0 non-absorbable suture. Nylon is black
and will blend with mustache hair, so in your hairy patients, after clearing some of their man pelt with
scissors, consider using blue polypropelene to make the sutures more identifiable and that much easier
to remove.
Deciding how many layers your closure will consist of is determined by the depth of the wound. If the
laceration is completely through the lip, such as those caused by tooth puncture, consider a 6-0
absorbable layer on the inside of the lip, then a buried deep dermal suture to close the empty space if
the wound is gaping, and then 6-0 on the outside of the lip.
The vermillion border is the most important guide for suture placement. If the laceration extends
through the vermillion border, the suture that re-approximates and realigns the vermillion border
should be the first one that you place on the outside of the lip. Use a fine-tip marker to draw a line on
either side of the laceration marking the trajectory of the vermillion border (how many times can I say
vermillion border?). Place a suture so that these lines are brought together, and the contour of the
vermillion border is precisely realigned. Add more sutures as needed to fully re-approximate the
laceration.
Application of an antibacterial ointment is not necessary for lip lacerations and oral antibiotics are not
normally indicated except in the case of wound severe wound contamination or animal attack. Sutures
should be removed in 3 to 5 days.
MEDICOLEGAL NUGGET: Always document your examination of the patient’s teeth, tongue, and buccal
surfaces noting the absence of secondary trauma (unless present, then you’re also documenting and
addressing this trauma). Always document whether the laceration extends through the vermillion
border and, if it does, that every effort was made to realign this border.
Buccal lacerations Common with direct blow injuries.
Will normally heal well without repair unless …
Put your patient on a soft diet for one week following injury.
Address pain with an OTC or RX NSAID.
Lacerations of the buccal space are common in direct blow injuries to the face.
Buccal mucosa lacerations will normally heal fine without repair, unless they are larger than 2cm or
gaping. Lacerations extending through the buccal mucosa to the outer epidermis should be thoroughly
cleansed and irrigated and closed from the inside out, repeating irrigation and cleansing at each level.
For full thickness lacerations, the parotid gland and Stensen’s duct should be assessed for patency by
drying the mucosa with sterile gauze and then firmly palpating the gland. If the gland and duct are
patent, saliva will pass through Stensen’s duct. If no saliva is expressed, consult an orofacial surgeon.
Simple closure of the tissue is appropriate for an intact gland / duct with absorbable suture on the
buccal surface, and non-absorbable suture on the outer skin.
Follow-up plan should include a soft diet for one week, NSAIDs, and daily mouth rinses with an oral
antiseptic.
Tongue lacerations Common with falls.
Should be closed if the tongue is bisected.
Put your patient on a soft diet for one week following injury.
Address pain with an OTC or RX NSAID.
Lacerations of the tongue are common in falls.
Bleeding can be profuse. To facilitate assessment, and as a necessity during closure, ask an assistant to
suction the mouth as needed while you work.
Regarding closure, the current literature definitely recommends closure when the tongue is bisected,
and variably recommends closure for non-bisecting lacerations greater than 2cm. If you decide that a
tongue laceration should be closed, analgesia can be delivered topically with 4% lidocaine, or by
infiltration into the lacerated tissue with small amounts of 2% lidocaine with epinephrine to avoid
deforming the tissue by volume expansion. Inferior alveolar or lingual nerve blocks can be performed
by experienced providers to achieve anesthesia of the tongue.
During closure, position the patient in a reclined supine position. Use rolled 2x2 gauze to facilitate a
dry work environment, and have someone at the ready to suction when needed. Make sure you have
a directional light that can be positioned to provide plenty of working light.
Absorbable 4-0 or 5-0 sutures should be placed at a minimum of halfway through the thickness of the
tongue, tied loosely to allow for tongue swelling which can be extensive, and tied with 4-5 throws per
knot to avoid knot unraveling. If the laceration is full thickness, suture both the inferior and superior
aspects of the laceration.
Follow-up plan should include a soft diet for one week, frequent ice chips and popsicles, an NSAID, and
daily mouth rinses with an oral antiseptic.
MEDICOLEGAL NUGGET: Always document your exam of the patient’s teeth, especially any damage. If
there are chips, ensure fragments aren’t embedded in the tongue or buccal space.
NECK lacerations Unless completely superficial, very concerning for injury to vital structures
Airway, Breathing, and Circulation are priorities of stabilization
After ABCs, assess for any sign of vital structure injury, as well as signs of decompensation
Unless completely superficial, the emergency department is the appropriate management setting
Unless completely superficial, neck lacerations are very concerning for injury to vital structures.
Airway, Breathing, and Circulation are the priorities of initial stabilization.
After ABCs, assess for any sign of vital structure injury, as well as signs of decompensation.
Signs of vital structure injury include:
Any concerning change in vital signs
Any concern for airway, breathing, or circulation
Voice change of any kind
Blood anywhere in the mouth or throat
Changes in or pain with active and passive range of motion of the neck
Hematoma
Thrill or bruit of the carotid arteries
Neck lacerations can be superficial, or they can go very deep. If there is any suspicion that a neck
laceration is more than superficial, your patient needs to be treated emergently. Aspects of
emergency neck laceration management include stabilization and support of airway, breathing, and
circulation; advanced imaging; and surgical ligation, hemostasis, and repair of the injured vital
structures.
MEDICOLEGAL NUGGET: When documenting on neck lacerations, paint a very clear picture in narrative
form of what your patient and their wound looks like. Here’s an example: “44 year male patient
presents with single 4cm linear laceration to anterior LEFT neck with mild bleeding and mild gaping.
Upon cleansing of the wound with chlorhexidine gluconate, and following local infiltration of 6mL 1%
lidocaine into wound which provided adequate local anesthesia, probing and exploration reveals no
foreign bodies and no obvious extension of wound beyond skin layer. The patient’s vital signs are
stable upon initial assessment, and have remained so throughout time in facility. The patient is
speaking clearly without dysphonia or dyspnea. There is normal sensation and vascularization
surrounding, proximal from, and distal to the wound. Mouth and throat exam are normal. The
patient denies complaint or concern anywhere else. Patient is negative NEXUS criteria. Mechanism of
injury was sheet metal grazing skin; speed and momentum of injury was low; wound and patient
presentation not consistent with damage to vital structures of the neck and simple closure is indicated.
TORSO
APPROACH CONSIDERATIONS
Torso pearls Always assess laceration depth
A deep laceration may penetrate into the lungs or other vital organs
Initial assessment includes a set of reliable vital signs, and vigilant re-assessment for signs of
decompensation
Always assess laceration depth by probing and exploring the depth of the wound bed.
Pay close attention to your patient’s vital signs. Deep lacerations, especially on thin patients, may
penetrate into the lungs or other vital organs.
Initial assessment includes a set of reliable vital signs, and vigilant re-assessment for signs of
decompensation
If a torso laceration is found to be superficial, close in the normal fashion.
EXTREMITIES
APPROACH CONSIDERATIONS
Nailbed INJURIES AND lacerations Subungual hematomas do not require removal of the nail
All nail injuries should be imaged.
50% of nail bed lacerations have an associated fracture
Nail injuries will generally fall into one of three categories:
Intact nail with subungual hematoma
Partially avulsed nail
Completely avulsed nail
Category 1, intact nail with subungual hematoma, is the most common nailbed injury. Subungual
hematoma is a collection of blood beneath the intact nail from damaged capillaries.
The only way to drain that collected blood is to put a hole into the nail itself. This is called trephination.
There are some reasons and conditions for which you won’t want to trephinate a nail:
1. If you’re going to remove the nail anyway, DON’T.
2. If it isn’t painful, DON’T.
3. If it is already draining, DON’T.
The reason’s to perform trephination are essentially the opposites of the reasons NOT to do it. If it
hurts, isn’t draining, and you’re not going to lose or remove the nail then trephination is a good solution
to help with the pain. It is also very quick at relieving the pressure and mounting pain that a subungual
hematoma can cause.
There are many different ways to drain a nail, and you trephinate finger or toe nails the same way and
for the same reasons. All you’re doing is making a hole in a painful nail. What you don’t want to do is
make a hole in the nailbed, the tissue below the nail itself. That could lead to greater pain, more
bleeding, infection, and delayed healing.
Clean the nail with povidine-iodine or chlorhexidine gluconate before the procedure and keep it
clean. You will need an 18 gauge sterile needle (my preferred tool), gloves, and gauze pads. With your
non-dominant gloved hand, stabilize the patient’s affected finger on a flat surface like a table. With
your dominant gloved hand, apply medium pressure with the needle to the center of the nail
hematoma. Twist left and right repeatedly until you pierce through the nail. Remember to pay close
attention and give special effort toward not piercing the patient’s nailbed. Use the gauze to wipe
expressed blood from the finger and then re-cleanse.
Follow-up for nail trephination includes instructions to keep the nail clean and dry, and avoid soaking in
any solution or liquid for two days. Showering is appropriate. Antibiotics are not indicated.
Some treatment pearls for nail trephination:
1. The nail may fall off during the week following hematoma drainage but should regrow as long as
the germinal matrix is intact.
2. Multiple holes may be necessary to facilitate adequate drainage.
3. Drainage of the subungual hematoma does not accelerate healing or prevent infection.
Category 2, partially avulsed nail, and category 3, completely avulsed nail, can occur with or without a
nailbed laceration and can result in complete avulsion of the nailbed. In category 2, the partially
avulsed nail presents a snag danger. If the entire nail is “hanging by a thread”, removal of the nail is
recommended. If the partial avulsion results from a nail tear and some of the nail remains, trim the
loose edges of the remaining nail to limit snag danger and address the visible nailbed.
For category 2 and 3 nail injuries, the affected finger or toe should be soaked in a cleansing solution for
20 minutes following a digital block. Do not let your nurses (although well-intentioned as they are)
start soaking the affected digit until after you have attempted analgesia. The patient will likely remove
their digit every two minutes (or more often) due to pain, and the benefit of the soak will be lost.
After soaking, inspect the nailbed for lacerations. If present, close with a 6-0 absorbable suture. The
nailbed needs to be covered following repair, as it will be very tender. For patients with an intact but
avulsed nail that you have removed to facilitate nailbed repair, drill a hole on both sides of the nail with
an 18 gauge needle and run a nylon suture in simple interrupted fashion through the nail hole and into
the medial and lateral aspects of the paronychium (one suture on each side of the nail and anchored
through the adjoining skin).
A non-stick sterile dressing and soft finger splint should be applied. The dressing should be changed in
5 to 7 days. The nylon nail sutures should be removed in 2 to 3 weeks.
MEDICOLEGAL NUGGET: All nail injuries should be imaged. This is for the obvious reason that you
don’t want to miss a fracture, but especially because you don’t want to demonstrate to a judge that you
cared so little about the patient that you chose not to fully investigate their injury. That’s a slam dunk
loss on your end. Always document that the digit was soaked, for how long, and in what solution.
Joint-capsule lacerations Lacerations near or at joints should always make you question whether the joint capsule is involved.
Possible involvement of the joint capsule is an indication for emergent orthopedic consultation.
Step 1: Physical exam
Step 2: Imaging
Step 3: Intra-articular injection of methylene blue
Lacerations near or at joints should always make you question whether the joint capsule is involved.
Possible involvement of the joint capsule is an indication for emergent orthopedic consultation and
probable evaluation and washout of the affected joint.
Your threshold of suspicion should be very high if any of the following criteria are met:
1. Close proximity of laceration to joint
2. Visibility of the joint capsule
3. Any periarticular fracture
4. Intra-articular air or foreign bodies on plain films
5. A clinical gestalt suggestive of joint capsule involvement
Step one in managing a laceration near a joint is physical exam.
Physical examination of lacerations near a joint are frequently unremarkable, so a thorough examination
of the affected joint is the starting point once analgesia has been achieved. A clear understanding of
the underlying anatomy is required for you to make a determination about consultation.
Step two is imaging the affected joint and ruling out the presence of air, foreign bodies, or periarticular
fracture. These are indications for emergent orthopedic consultation.
Step three is intra-articular injection of methylene blue. This step is only indicated when imaging has
ruled out air, foreign bodies, and periarticular fracture as these signal joint capsule involvement by
themselves. Intra-articular injection of methylene blue is a safe way to assess for joint capsule
involvement when your index of suspicion is elevated. This approach will be limited by whether or not
your facility stocks methylene blue as an injection medium. This approach should be avoided if your
patient takes any serotonergic psychiatric medication. Methylene blue is thought to potentially
increase serotonin levels.
To perform intra-articular injection of methylene blue, prepare in the normal fashion for a joint
injection. This injection is painful, so prepare your patient both with oral or IV pain medication and
with subcutaneous injection of lidocaine 1% over the insertion site.
To prepare the injection solution, add 2mL of methylene blue to 500mL sterile normal saline. Fill one
to two 20mL syringes with the solution. Next, scrub the injection area with a surgical cleansing
preparation. Repeat this process 2-3 more times. This is a sterile procedure, so cover the extremity
with a sterile drape and follow sterile procedure.
The needle insertion site should be distant from the site of laceration, and should follow normal joint
injection site selection criteria. After injection of a local anesthetic into the subcutaneous tissue, use
an 18g needle on a 5mL syringe to enter the joint space. Aspirate 1-2mL to ensure you are correctly
positioned, and don’t be overly concerned if the aspirate is bloody. Grasping the needle hub and
securing the needle with one hand, remove the 5mL syringe and screw on the syringe pre-filled with
methylene blue. Inject the solution into the joint, fully distending the capsule. Watch for leaking of
the methylene blue at the site of laceration. If leaking is noted, this is indication for emergent
orthopedic consultation and intervention, as well as IV antibiotics. At the end of the procedure, and
whether or not leaking was noted, attempt to aspirate as much of the methylene blue from the joint
capsule as possible. Cleanse the injection site again with a surgical preparation, and cover with a
sterile dressing.
If you do not note any leaking of the methylene blue solution into the laceration, you are ready to close
the laceration in the normal fasion.
NOTE: During physical examination of a joint, you might see the aponeurosis – a white fibrous band of
tendon material. If lacerated, closure should begin at this level with absorbable suture. If the
laceration goes through the aponeurosis and into tendons or the synovial capsule, seek consultation.
SPECIAL TOPICS
APPROACH CONSIDERATIONS
Pediatric lacerations Consider the probable emotional volatility of your patient
Topical first with tegaderm or gauze
Moderate sedation may be appropriate
Consider the probable emotional volatility of your patient. Kids are scared easily and they can respond
wildly and dramatically. If you were injured and had a giant coming at you with shiny metal tools, you
would be scared, too. It’s a good idea to enter the exam room with only your stethoscope on and
maybe a pen light. Calmly introduce yourself (even if the patient is waling) to the parents, and calmly
ask what has happened. Listen and don’t interrupt. Smile and nod. Ask permission from the
parents to examine the patient, and then ask the patient for permission. Build a relationship of trust
with your pediatric patient by asking their permission and waiting for them to permit. Sometimes,
they don’t. It’s appropriate in those moments to refer back to the parents and remind your patient
that they have given their permission and that if you can’t look at their “hurt spot” then you can’t help
them (remember, with a smile and not arm-twisting). Once your patient permits the exam, proceed
slowly, gradually, and gently. Often, you can size up the width, depth, and length of the laceration
with minimal effort. At this point, knowing the patient has a wound that needs closure, it’s a good idea
to plainly state that their cut or hurt spot needs to be fixed. Ask the parents if their OK with this. Ask
the patient if they have ever had stitches before (if you’re using staples on a scalp, most kids don’t react
well if you say staple so stick with stitches). Explain to them that it fixes their cut, but that you would
never lie to them and you want them to know that it will hurt just a little. Tell them you’re going to
help make it not hurt by putting some special goo on it that will make the feeling go away some (start
with topical TAL or EMLA or some derivative if these over the wound PRIOR to cleaning it covered with a
tegaderm, and WAIT the 20 minutes that it takes to actually work).
Once the 20 minutes have passed, gently and slowly remove the tegaderm. Drape the wound in the
normal sterile fashion using a hole-punched drape (the kind with the hole in the middle). Bring a nurse
with you to hold the second drape in your kit up like the divider used in a C-section. Let the patient
know you’re going to gently clean the wound and also take away the rest of the feeling. This is where
you can make or break the experience for your patient. For kids, always use buffered lidocaine with a
target concentration of 1:9 sodium bicarbonate and lidocaine 1% or 2%. Lidocaine, an amide
anesthetic, is also a low pH liquid and therefore burns when injected. Sodium bicarbonate increases
the pH making it more neutral, while actually synergistically increasing its action. Another make or
break point – use a very small needle (the needle suppled in the laceration tray is fine). Gently touch
the area around the laceration with your non-dominant hand (the one not holding the syringe) and let
the patient know your working. Slowly spread the wound margins and very slowly insert the needle
into the outer third of one side of the wound edge. Here’s a key – make your injection as slow as you
reasonably can. Studies have shown that the slower you inject the buffered solution, the less the
patient senses your doing anything and the greater success you have with anesthetizing the wound.
Complete this process around the wound edges and close in the preferred fashion.
For those darn kids that just put up a good fight, and cosmetic outcomes aren’t going to be good, and
you’re going to permanently traumatize them by continuing with the procedure, consider moderate
sedation via ketamine. Ketamine is a dissociative anesthetic with amnestic characteristics.
Translation – your patient is completely out of it, won’t remember anything, won’t fight or struggle with
procedure, and will maintain their own airway. ACEP recommends ketamine as safe in children and
the target doses are as follows:
An alternative to ketamine is midazolam. Midazolam is a sedative with anteretrograde amnesia
characteristics. Translation – about the same effect as ketamine without a needle. This can be
administered through a mucosal administration device (MAD) intranasally. IV midazolam at 5mg/mL
concentration can be used, with a target dose of 0.4-0.5mg/kg, with a maximum 10mg dose.
Distribute the dose evenly between the nares by rapidly infusing through the MAD on each side.
When performing moderate sedation, be extremely clear about your facility’s policy regarding this. In
most facilities, moderate sedation must be initiated, conducted, or both, by a physician. You’ll still do
the closure, but have your reasoning ready to explain to your supervising physician if you believe this
option is both indicated and most beneficial for the patient. Also, be sure you’re proficient with your
PALS. MEDICOLEGAL NUGGET – fully explain to the patient’s parents why you believe moderate
sedation is warranted; fully explain to them the risks and benefits of the procedure while also not
making it sound scary; have them sign a moderate sedation consent form; and also explain to them that
they will be waiting 1-2 hours for their little one to fully return to normal.
Open Fractures A nail-bed laceration overlying a tuft fracture does not present the same level of complexity as an open
tib-fib fracture.
Always consult an orthopod for fractures unless you’re absolutely sure of the level of care you should
provide in a given case.
Always document your consultations.
Never forget the antibiotics.
Treat your patient’s pain.
Open fractures can range from simple to complex in nature. An example of a simple open fracture is
the lacerated nailbed with a distal tuft or tip fracture. This is considered an open fracture, however
your management of it differs greatly from an open tib-fib or other long-bone fracture.
Simple open fractures like nailbed fractures should be well irrigated and cleansed, and fully closed.
Prior to closure, displaced fractures of the distal phalanx should be reduced with, and repeat
confirmatory imaging performed. A first-generation cephalosporin should be given IV or IM and the
patient should be discharged home with a 5 day course of a prophylactic first-generation cephalosporin.
If there is potential contamination from feces, add a penicillin to this regimen. As always, assess for
tetanus status.
For complex open fractures like an open tib-fib fracture, early surgical and orthopedic consultation is
indicated. A first generation cephalosporin should be given IV, and the wound should be loosely
closed. Loose closure is exactly what it sounds like. Don’t tie that knot tight and leave some space
(about half a centimeter) between the wound margins. These are general guidelines – you should do
whatever the surgeon outlines if that is different from these guidelines.
For any fracture, both patient satisfaction and patient outcomes increase markedly when pain is
addressed early. For fractures, especially open fractures, use appropriate local and systemic analgesia.
For fractures, it doesn’t matter if your patient takes oxycodone 10 twenty-five times daily. They’re
used to that opiate load and are still in real pain. So, treat their pain. Consider a low-dose anxiolytic
such as lorazepam or diazepam IV as an adjuvant to pain control.
MEDICOLEGAL NUGGET: Always document the time you initially saw the patient, and the time you
initially consulted a surgeon. Document their name and their instructions, and that you executed
those instructions.
FLAP lacerations No epi
Anchor suture
Steri strips for thin-skinned geriatric patients.
Flap lacerations can be a fun weaving project for those inclined. Flaps are, well, flaps of skin that have
initially been lacerated and then pulled away from the subcutaneous tissue.
Initial assessment of the flap includes ensuring it remains vitalized. Dusky or grey appearing flaps are
devitalized and should be revised, or cut back to the point of vitalization. If devitalization is too great,
the wound should be cleansed and explored for foreign bodies, and loosely sutured together. The
patient should be referred to plastics for repair.
In normal healthy skin flaps, without regard for size, the anesthetic of choice is lidocaine without
epinephrine. Epinephrine has the potential to constrict the blood vessels in the skin flap to the degree
that we end up causing devitalization.
Once analgesia has been delivered, and the wound cleansed and explored in the normal fashion and
cleared from retained foreign body, closure can be straightforward or initially challenging. Flaps have a
remarkable tendency to capitalize on the elastic nature of skin and will often not seem to fully lay back
down in full extension. They sort of shrivel up and won’t line up with the wound margins just by laying
them flat. When this happens, a horizontal mattress suture can be placed at the apex of the flap as an
anchor to stretch the skin and hold it in place. Don’t overtighten this anchor and create excessive
eversion at the apex of the flap. That could lead to poor healing. After the anchor suture has been
placed, if it was necessary, close the wound in the fashion indicated by its presentation (running,
running locking, or simple interrupted technique for example). Depending on the shape of the flap,
more than one anchor suture might be necessary.
Flaps in thin-skinned patients, namely the geriatric population, are best closed with steri-strips after
bordering the wound edges with benzoin tincture.
Following closure, instruct your patient to keep the wound clean, dry, and open to air as often as
possible. Sutures remain in place as indicated by the location of the wound.
CHAINSAW AND OTHER “HOT” INJURIES Chainsaws get hot. Skin lacerated by hot objects should be assessed for tissue vitalization.
Devitalized tissue should be revised.
If the extent of devitalization is too great, loosely close the wound after cleansing and refer to plastics.
Chainsaws get hot. Skin lacerated by hot objects should be assessed for tissue vitalization.
Devitalized tissue should be revised. With chainsaws, normally there can be a thin margin of
cauterized and devitalized tissue spanning the wound margins. This tissue should be cut out with a #15
scalpel, with great effort toward keeping all vitalized tissue and removing only that which is cauterized.
If the extent of devitalization is too great, loosely close the wound after cleansing and refer to plastics.
Animal Bites Animal bites should only be closed to avoid cosmetic defects.
Punctures, unless gaping, should not be closed.
Always initiate antibiotics
Don’t forget to update tetanus if needed.
Most of the time these aren’t sutured unless the healing wound will result in a cosmetic defect.
Suturing is ONLY done to appropriately address cosmetic outcomes and is completely appropriate in this
case.
Puncture wounds that are gaping can be managed with a single loose interrupted suture.
Always update tetanus if the patient has received three doses on the regular vaccination schedule but it
has been more than 5 years since their last dose or the date of their last dose is unknown.
Always initiate antibiotics. Normally, cephalexin 500mg PO TID x 10 days or clindamycin 300mg PO TID
x 10 days is sufficient for adults, and either of these medications adjusted for weight for the pediatric
patient.
Rabies prophylaxis should be initiated for any animal species endemic to rabies or exhibiting aberrant
behavior. Rabies prophylaxis includes BOTH of the following:
A one time dose of the rabies immunoglobulin at 20 units / kilogram with as much as possible infiltrated
into the wound site (yes, the wound site) and the balance injected IM.
Four (4) doses of the rabies vaccine injected IM on days 0, 3, 7, and 14. It is best practice for the
patient to receive the immunoglobulin and the vaccine as soon as the injury has occurred (this means
refer to ED if you do not have these medications on hand in your facility), and then write them a
prescription for the remaining rabies vaccine doses. It will go far for patient satisfaction if you furnish
them with a schedule for their follow-up vaccinations as well as telling them where to go to get this
done.
MEDICOLEGAL NUGGET: Always document whether animal control was notified. If rabies prophylaxis
was initiated, document that it was and why (animal not behaving normally, animal unable to be
observed for 10 days by animal control, rabies endemic species, etc.).
Anticoagulated patient Check INR
Warn about hematoma
Whenever possible, apply pressure dressing over wound once closed
When treating lacerations in patients who are also anticoagulated, initial wound hemostasis may
present a challenge.
In these cases, applying manual pressure, or pressure with a blood pressure cuff, should help the wound
stop bleeding. For wounds where arteries have been severed, inflating a blood pressure cuff to the
point where perfusion is limited can be a useful intervention prior to and even during closure.
Using an anesthetic with epinephrine can also be helpful for profusely bleeding capillaries.
If your practice setting has the capability of checking a point of care or immediate result INR, check this
important lab value in your anticoagulated patients and document the result. If the result is
supratherapeutic (or even subtherapeutic) notify their PCP or coumadin clinic and treat their
supratherapeutic anticoagulation as indicated in the normal fashion (e.g., vitamin K or skipping future
doses).
Closure can be completed as indicated by the wound. Warn your patients that a mild hematoma can
develop and they should return to your facility for moderate sized or larger hematomas. Large
hematomas can exert too much pressure on the wound bed and surrounding tissues and may need to
be evacuated.
Following closure in the anticoagulated patient, apply a pressure dressing to the wound and instruct the
patient to keep it on for 6 to 8 hours, readjusting the pressure as needed for comfort and circulation.
The poorly healing laceration If a patient returns at the designated time for suture or staple removal and the wound has not healed,
remove the sutures and refer to plastics.
There are various reasons wounds do not heal and I have seen this happen in medically complex and
medically healthy patients.
Your job in this scenario is not to determine why the hasn’t healed correctly, but to connect the patient
with a plastic surgeon who can fully address the problem.
If a patient returns at the designated time for suture or staple removal and the wound has not healed,
remove the sutures and refer to plastics.
There are various reasons wounds do not heal and I have seen this happen in medically complex and
medically healthy patients.
Your job in this scenario is not to determine why the hasn’t healed correctly, but to connect the patient
with a plastic surgeon who can fully address the problem.
Follow-up Palms of the hand, soles of the feet – 14 to 21 days
Trunk, anywhere on the legs, dorsal hands, dorsal feet – 10 to 14 days

Scalp, anywhere on the arms – 8 to 12 days
Anywhere on the face – 5 to 7 days
Different areas of the body require different healing times.
The longer sutures or staples remain in, the greater the likelihood of scarring resulting from their
presence.
We must strike a balance between healing time and scar prevention.
The following is a general guideline for the timing of suture or staple removal:
Palms of the hand, soles of the feet – 14 to 21 days
Trunk, anywhere on the legs, dorsal hands, dorsal feet – 10 to 14 days
Scalp, anywhere on the arms – 8 to 12 days
Anywhere on the face – 5 to 7 days
MEDICOLEGAL NUGGET: It is good practice to instruct your patient to apply antibiotic ointment or white
petrolatum (both are equally effective) ONCE DAILY to the wound closed with sutures or staples, and to
keep the wound clean and dry (free from immersion, showers are OK) until closure materials have been
removed.


![UNUSUAL FOX BEHAVIOUR: RABIES EXCLUSION INVESTIGATION · Shoa]haven Hospital for treatment. The lacerations were dressed (no suturing was required) and Adult Diphtheria and Tetanus](https://img.pdfslide.us/doc/110x75/5f0602457e708231d415d608/unusual-fox-behaviour-rabies-exclusion-investigation-shoahaven-hospital-for-treatment.jpg)