Embed Size (px)
Citation preview

Element Management System (EMS) Server Installation, Operation & Maintenance Manual
Version 5.2 Document #: LTRT-94115
Notice This IO&M Manual describes the installation, operation and maintenance of AudioCodes’ EMS server. Information contained in this document is believed to be accurate and reliable at the time of printing. However, due to ongoing product improvements and revisions, AudioCodes cannot guarantee accuracy of printed material after the Date Published nor can it accept responsibility for errors or omissions. Updates to this document and other documents can be viewed by registered Technical Support customers at www.audiocodes.com under Support / Product Documentation.
© Copyright 2007 AudioCodes Ltd. All rights reserved. This document is subject to change without notice.
Refer to the current release notes that may be included with your documentation or hardware delivery. Date Published: May-01-2007 Date Printed: Jul-09-2007

EMS Server General
Version 5.2 3 July 2007
Table of Contents
1 Overview ..............................................................................................................9
2 EMS Server and Client Requirements .............................................................11
3 EMS Software Delivery Options.......................................................................13 3.1 EMS Standard .....................................................................................................................13
3.1.1 DVD .........................................................................................................................13 3.1.2 CDs..........................................................................................................................13
4 EMS Server Pre-Installation Requirements.....................................................15 4.1 Hardware Requirements ....................................................................................................15
5 Installing the EMS Server .................................................................................17 5.1 Installing Solaris 10 from AudioCodes’ CD/DVD ............................................................17 5.2 Running the Installation Script .........................................................................................18 5.3 Activating the NTP Server / NTP Server and Client ........................................................22
6 Upgrading the EMS Server ...............................................................................23 6.1 Major Version Upgrade ......................................................................................................23 6.2 Minor Version Upgrade......................................................................................................25
7 EMS Server Security .........................................................................................29 7.1 Configuring the Firewall ....................................................................................................29 7.2 EMS Server Hardening.......................................................................................................32 7.3 Rolling Back from Hardened Server.................................................................................34
8 Running the EMS Server ..................................................................................37
9 Maintaining the EMS Server .............................................................................39 9.1 Backing up the Database ........................................................................................39 9.2 Recovery after Database Failure.............................................................................39
9.3 Running Database Maintenance Tasks............................................................................40 9.3.1 Total Machine Failure ..............................................................................................40 9.3.2 Database is Started but the EMS Schema is Damaged .........................................41 9.4 Check Free Disk Space...........................................................................................41
10 Reinstalling EMS Server Software...................................................................43 10.1 Removing the Previous Software Version...............................................................43 10.2 Installing the New Software Version........................................................................43
11 Installing the EMS Client ..................................................................................45 11.1 Installing the EMS Client on a Client PC..........................................................................45
11.1.1 Running the EMS on a Client PC ............................................................................45 11.1.2 First-Time Login.......................................................................................................45
11.2 Installing the EMS Client on a Client PC using Java Web Start (JAWS): .....................45
12 Appendix A - Frequently Asked Questions (FAQs)........................................47 12.1 Installation...........................................................................................................................47
AudioCodes EMS
EMS Server IO&M Manual 4 Document #: LTRT-94115
12.2 Post-installation..................................................................................................................47 12.3 After Rebooting the Machine ............................................................................................47 12.4 Determining which Version is Running on the EMS Server ..........................................47 12.5 Changes Not Updated in the Client ..................................................................................48 12.6 Updating the Timezone of the EMS Server Machine ......................................................49 12.7 Changing the EMS Server IP Address..............................................................................49 12.8 Removing the EMS Server Installation.............................................................................51
13 Appendix B - Configuring the EMS Server to Function in a NAT Environment.............................................................................................................53
13.1 Configuring the EMS Server..............................................................................................53 13.2 Configuring the Media Gateway........................................................................................53
14 Appendix C - EMS Server Advanced Hardening.............................................55 14.1 Rolling Back from Advanced Hardening..........................................................................56
15 Appendix D - EMS Server Oracle Database Hardening..................................57 15.1 Oracle Database Hardening ..............................................................................................57 15.2 Changing the DB Password ..............................................................................................59
16 Appendix E - Daylight Saving Time (DST).......................................................61 16.1 EMS Client ...........................................................................................................................61
16.1.1 Windows ..................................................................................................................61 16.1.2 Java .........................................................................................................................62
16.2 Example of Installing Windows Patches on the EMS Client..........................................62 16.3 Example of Installing the Java Patch for the EMS Client ...............................................63
EMS Server General
Version 5.2 5 July 2007
List of Tables Table 2-1: EMS Standard - Minimal Platform Requirements .................................................................11 Table 2-2: EMS Standard - Software Requirements..............................................................................11 Table 7-1: OAM&P Flows: NOC ↔MG EMS .........................................................................................31 Table 7-2: OAM&P Flows: MG EMS→NOC...........................................................................................31
AudioCodes EMS
EMS Server IO&M Manual 6 Document #: LTRT-94115
List of Figures Figure 5-1: Installing Solaris 10 from AudioCodes’ CD - 1 ....................................................................18 Figure 5-2: Installing Solaris 10 from AudioCodes’ CD - 2 ....................................................................18 Figure 5-3: Run the root.sh Configuration Script....................................................................................20 Figure 5-4: Screen to Enter Passwords for Database Users.................................................................21 Figure 6-1: Replace the CD driver with a DVD driver in SUN Blade 150 – Unscrew the Rear Panel ..23 Figure 6-2: Replace the CD driver with a DVD driver in SUN Blade 150 – Unscrew the CD ROM .....24 Figure 6-3: Replace the CD driver with a DVD driver in SUN Blade 150 – Disconnect Power / SCSI
Cables from CD ROM .....................................................................................................................24 Figure 6-4: Replace the CD driver with a DVD driver in SUN Blade 150 – Pull Out CD ROM, Insert
DVD Instead ....................................................................................................................................25 Figure 6-5: Removing Irrelevant Information from File ‘nodes_upgrade.csv’ ........................................28 Figure 7-1: Firewall Configuration Schema............................................................................................30 Figure 7-2: Start Hardening - Close all services ....................................................................................32 Figure 7-3: Prompts Referring to EMS Web Services ...........................................................................32 Figure 7-4: Prompts Referring to Using JAWS Technology for the EMS ..............................................32 Figure 7-5: Activating the EMS Hardening Feature- 2 ...........................................................................33 Figure 7-6: Rolling Back from Hardened Server - 1...............................................................................34 Figure 7-7: Rolling Back from Hardened Server - 2...............................................................................34 Figure 7-8: Rolling Back from Hardened Server - 3...............................................................................34 Figure 7-9: Rolling Back from Hardened Server - 4...............................................................................35 Figure 8-1: Running the EMS Server .....................................................................................................37 Figure 8-2: Stopping the EMS Server from Running..............................................................................37 Figure 14-1: Activating the Advanced Hardening Feature .....................................................................55 Figure 14-2: Rolling Back from Advanced Hardening............................................................................56 Figure 15-1: Activating the Oracle Hardening Feature ..........................................................................58 Figure 15-2: Activating the Oracle Hardening Feature ..........................................................................58 Figure 15-3: Activating the Oracle Hardening Feature ..........................................................................58 Figure 15-4: Activating the Oracle Hardening Feature ..........................................................................59 Figure 15-5: Changing the DB Password...............................................................................................59 Figure 15-6: Changing the DB Password...............................................................................................60 Figure 16-1: Installing Windows OS Patches – PC Information.............................................................62 Figure 16-2: Installing Windows OS Patches – Selecting the Operating System..................................63 Figure 16-3: Installing Windows OS Patches – Download and Install ...................................................63 Figure 16-4: Java Installation’s Home Directory ....................................................................................63 Figure 16-5: Changing the Directory to ‘bin’...........................................................................................64 Figure 16-6: Installing the Patch.............................................................................................................64
EMS Server Contents
Version 5.2 7 July 2007
Note: When viewing this manual on CD, Web site or on any other electronic copy, all cross-references are hyperlinked. Click on the page or section numbers (shown in blue) to reach the individual cross-referenced item directly. To return to the point from where you accessed the cross-reference, press Alt + ←.
Note: The EMS supports the following AudioCodes products:
→ Mediant 1000 / 2000 / 3000 / 5000 / 8000 Media Gateways
→ IPmedia 2000 and IPmedia 3000 Media Servers
→ MediaPack Media Gateways MP-102 (FXS), MP-104 (FXS and FXO), MP-108 (FXS and FXO), MP-112 (FXS), MP-114 (FXS), MP-118 (FXS) and MP-124 (FXS), collectively referred to in this manual as MediaPacks.
→ TP-260 and IPM-260 boards
Trademarks
AC logo, Ardito, AudioCoded, AudioCodes, AudioCodes logo, IPmedia, Mediant, MediaPack, MP-MLQ, NetCoder, Stretto, TrunkPack, VoicePacketizer and VoIPerfect, are trademarks or registered trademarks of AudioCodes Limited.
All other products or trademarks are property of their respective owners. WEEE EU Directive
Pursuant to the WEEE EU Directive, electronic and electrical waste must not be disposed of with unsorted waste. Please contact your local recycling authority for disposal of this product.”
Customer Support
Customer technical support and service are provided by AudioCodes’ Distributors, Partners, and Resellers from whom the product was purchased. For Customer support for products purchased directly from AudioCodes, contact [email protected]
Document Conventions
Courier - UNIX Commands
[ ] - User-inserted input
Times New Roman, bold, size 11 - User name, path or file name
When x.y.z appears in this document as part of a software file name, ‘x.y’ indicates the major version and ‘z’ indicates the build number. For example, 5.2.38: ‘5.2’ indicates the major version and ‘38’ indicates the build number.
AudioCodes EMS
EMS Server IO&M Manual 8 Document #: LTRT-94115
Related Documentation
Manual Name
Mediant 5000 / 8000 Media Gateway Installation, Operation & Maintenance Manual
Mediant 5000 / 8000 Media Gateway Release Notes
Mediant 3000 User’s Manual
IPmedia 3000 Media Server User’s Manual
Mediant 2000 User’s Manual
IPmedia 2000 Media Server User’s Manual
MediaPack MGCP-MEGACO User’s Manual
MediaPack User’s Manual
Element Management System (EMS) Server Installation & Maintenance Manual
Element Management System (EMS) Product Description
Element Management System (EMS) Release Notes
Element Management System (EMS) Online Help
Mediant 5000 / 8000 Media Gateway Programmer's User Manual
EMS Parameter Guide for the Mediant 5000 and Mediant 8000 Gateways
EMS Parameter Guide for Mediant 1000, Mediant 2000, Mediant 3000, IPmedia 3000 and IPmedia 2000
EMS Parameter Guide for MediaPack
EMS Server 1. Overview
Version 5.2 9 July 2007
1 Overview The EMS provides customers with the capability to easily and rapidly provision, deploy and manage:
1. MediaPack Media Gateways (up to 3000)
2. TP-260/Mediant 1000 / 2000 / 3000 Media Gateways and IPmedia 2000/3000 Media Servers (up to 100)
3. Mediant 5000 / 8000 Media Gateways, IPmedia 5000 / 8000 Media Servers (up to 20)
Provisioning, deploying and managing these Media Gateways with the EMS is performed from a centralized management station (PC) in a user-friendly Graphic User Interface (GUI).
The EMS comprises two infrastructure elements:
1. EMS Server (running on Sun™ Microsystems’ Solaris™)
2. EMS Client (running on Microsoft™ Windows™ operating system), displaying the EMS GUI screens that provide the Customer access to system entities.
This EMS Installation & Maintenance Manual is intended for anyone responsible for installing and maintaining AudioCodes’ EMS server and the server database – Oracle 9i, running on a UNIX™.
Customers should also refer to the Oracle9i Installation Guide, Release 2 (9.2.0.7.0) for UNIX Systems: AIX-Based Systems, Compaq Tru64 UNIX, HP; 9000 Series HP-UX, Linux Intel, and Sun Solaris as of May 2002. Part No. A96167-01.
AudioCodes EMS
EMS Server IO&M Manual 10 Document #: LTRT-94115
Reader’s Notes
EMS Server 2. EMS Server and Client Requirements
Version 5.2 11 July 2007
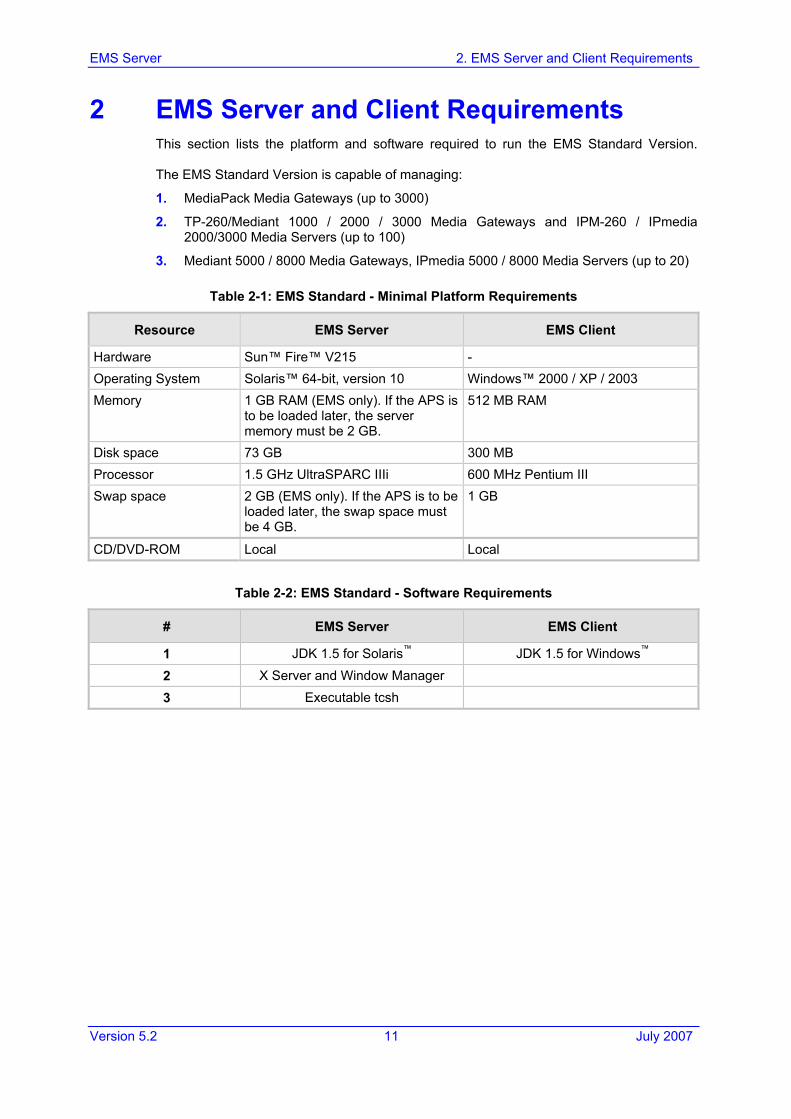
2 EMS Server and Client Requirements This section lists the platform and software required to run the EMS Standard Version. The EMS Standard Version is capable of managing:
1. MediaPack Media Gateways (up to 3000)
2. TP-260/Mediant 1000 / 2000 / 3000 Media Gateways and IPM-260 / IPmedia 2000/3000 Media Servers (up to 100)
3. Mediant 5000 / 8000 Media Gateways, IPmedia 5000 / 8000 Media Servers (up to 20)
Table 2-1: EMS Standard - Minimal Platform Requirements
Resource EMS Server EMS Client
Hardware Sun™ Fire™ V215 - Operating System Solaris™ 64-bit, version 10 Windows™ 2000 / XP / 2003 Memory 1 GB RAM (EMS only). If the APS is
to be loaded later, the server memory must be 2 GB.
512 MB RAM
Disk space 73 GB 300 MB Processor 1.5 GHz UltraSPARC IIIi 600 MHz Pentium III Swap space 2 GB (EMS only). If the APS is to be
loaded later, the swap space must be 4 GB.
1 GB
CD/DVD-ROM Local Local
Table 2-2: EMS Standard - Software Requirements
# EMS Server EMS Client
1 JDK 1.5 for Solaris™ JDK 1.5 for Windows™
2 X Server and Window Manager
3 Executable tcsh

AudioCodes EMS
EMS Server IO&M Manual 12 Document #: LTRT-94115
Reader’s Notes
EMS Server 3. EMS Software Delivery Options
Version 5.2 13 July 2007
3 EMS Software Delivery Options The EMS software can be delivered optionally as DVDs or CDs.
3.1 EMS Standard
3.1.1 DVD Two DVDs are provided:
1. Solaris 10 Installation for EMS Server, Solaris 10 01/06 REV3
2. SW Installation & Documentation
The DVD ‘SW Installation & Documentation’ comprises:
1. Documentation – All documentation related to the present EMS version.
2. EmsClientInstall – EMS client software, to be installed on the operator’s Windows™ based workstation.
3. EmsServerInstall – EMS server software, to be installed on the dedicated Solaris 10 based EMS server machine.
4. Oracle Database software folders and one Patch 07 file in zip format (p4163445.zip), to be installed on the dedicated Solaris 10 based EMS server machine.
Oracle1
Oracle2
Oracle3
p4163445.zip
5. MG_sw - Media gateway software folder containing .ems files for high-density media gateways.
3.1.2 CDs Nine CDs are provided
1. Four Solaris 10 CDs – Unique CDs for the EMS installation
• Solaris 10 Installation for EMS Server CD 1 of 4, Solaris 10 01/06 REV3
• Solaris 10 Installation for EMS Server CD 2 of 4, Solaris 10 01/06 REV3
• Solaris 10 Installation for EMS Server CD 3 of 4, Solaris 10 01/06 REV3
• Solaris 10 Installation for EMS Server CD 4 of 4, Solaris 10 01/06 REV3
2. SW Installation & Documentation, Version 5.2.x (where ‘x’ is a build number)
3. Four Oracle CDs:
• Database Installation CD 1 of 3
• Database Installation CD 2 of 3
• Database Installation CD 3 of 3
• Database Patch 07 Installation
AudioCodes EMS
EMS Server IO&M Manual 14 Document #: LTRT-94115
The CD ‘EMS Software’ contains:
Documentation – All documents related to the present EMS version.
EmsClientInstall – EMS client software, to be installed on the operator’s Windows™ based workstation.
EmsServerInstall – EMS server software, to be installed on the dedicated Solaris 10 based EMS server machine.
MG_sw - Media gateway software folder including .ems files for high-density media gateways.
EMS Server 4. EMS Server Pre-Installation Requirements
Version 5.2 15 July 2007
4 EMS Server Pre-Installation Requirements Before beginning the EMS server installation procedure, verify that your system meets the hardware, disk space, operating system and other requirements.
This is necessary for the installation to succeed.
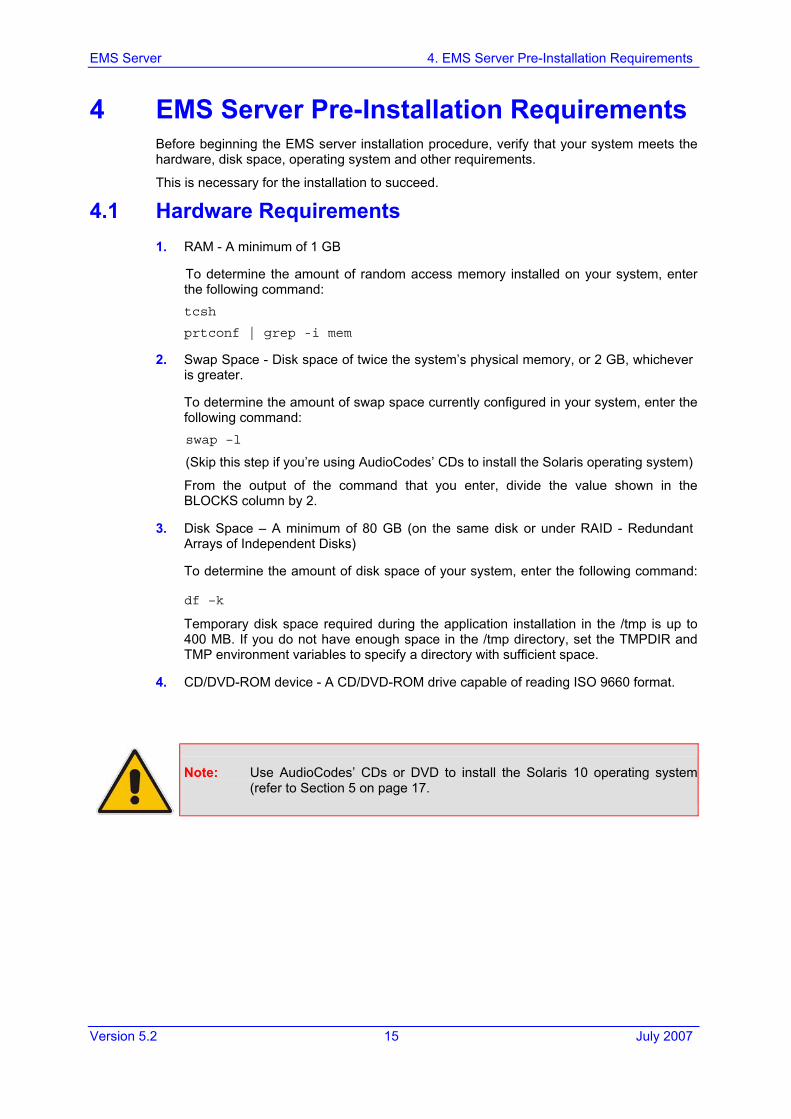
4.1 Hardware Requirements 1. RAM - A minimum of 1 GB
To determine the amount of random access memory installed on your system, enter the following command: tcsh
prtconf | grep -i mem
2. Swap Space - Disk space of twice the system’s physical memory, or 2 GB, whichever is greater.
To determine the amount of swap space currently configured in your system, enter the following command: swap –l
(Skip this step if you’re using AudioCodes’ CDs to install the Solaris operating system)
From the output of the command that you enter, divide the value shown in the BLOCKS column by 2.
3. Disk Space – A minimum of 80 GB (on the same disk or under RAID - Redundant Arrays of Independent Disks)
To determine the amount of disk space of your system, enter the following command: df –k
Temporary disk space required during the application installation in the /tmp is up to 400 MB. If you do not have enough space in the /tmp directory, set the TMPDIR and TMP environment variables to specify a directory with sufficient space.
4. CD/DVD-ROM device - A CD/DVD-ROM drive capable of reading ISO 9660 format.
Note: Use AudioCodes’ CDs or DVD to install the Solaris 10 operating system (refer to Section 5 on page 17.

AudioCodes EMS
EMS Server IO&M Manual 16 Document #: LTRT-94115
Reader’s Notes
EMS Server 5. Installing the EMS Server
Version 5.2 17 July 2007
5 Installing the EMS Server 5.1 Installing Solaris 10 from AudioCodes’ CD/DVD
To install Solaris 10 from AudioCodes’ DVD:
1. Insert the DVD labeled ‘Solaris 10 for EMS’ into the DVD ROM 2. Connect the server via the serial port with a terminal application 3. Send a break in order to change into ok mode (Usually Alt+b) 4. Type: ‘boot cdrom’ and press <Enter> 5. Wait for the Solaris Installation Program to appear and press F2 6. Identify This System – Press F2 to continue 7. Network Connectivity – Choose ‘Yes’ and press F2 to continue 8. Choose the Network Interface and press F2 9. Use DHCP – Choose ‘No’ and press F2 10. Enter the Host Name and press F2 11. Enter the IP Address for the server and press F2 12. System part of subnet – Choose ‘Yes’ and press F2 13. Enter the Subnet mask and press F2 14. IPv6 – Choose ‘No’ and press F2 15. Default Route – Choose ‘Specify one’ and press F2 16. Enter the Route IP Address and press F2 17. Confirm Information: Verify that the configuration is as expected and press F2 18. Name Service - Choose ‘None’ and press F2 19. Press F2 to continue 20. Update the date and the time and press F2 21. Wait for installation completion 22. Reboot the server
To install Solaris 10 from AudioCodes’ CD:
1. Insert the first CD labeled ‘Solaris 10 for EMS’ into the CD ROM 2. Connect the server via the serial port with a terminal application 3. Send a break in order to change into ok mode (Usually Alt+b) 4. Type: ‘boot cdrom’ and press <Enter> 5. Wait for the Solaris Installation Program to appear and press F2 6. Identify This System – Press F2 to continue 7. Network Connectivity – Choose ‘Yes’ and press F2 to continue 8. Choose the Network Interface and press F2 9. Use DHCP – Choose ‘No’ and press F2 10. Enter the Host Name and press F2 11. Enter the IP Address for the server and press F2 12. System part of subnet – Choose ‘Yes’ and press F2 13. Enter the Subnet mask and press F2
AudioCodes EMS
EMS Server IO&M Manual 18 Document #: LTRT-94115
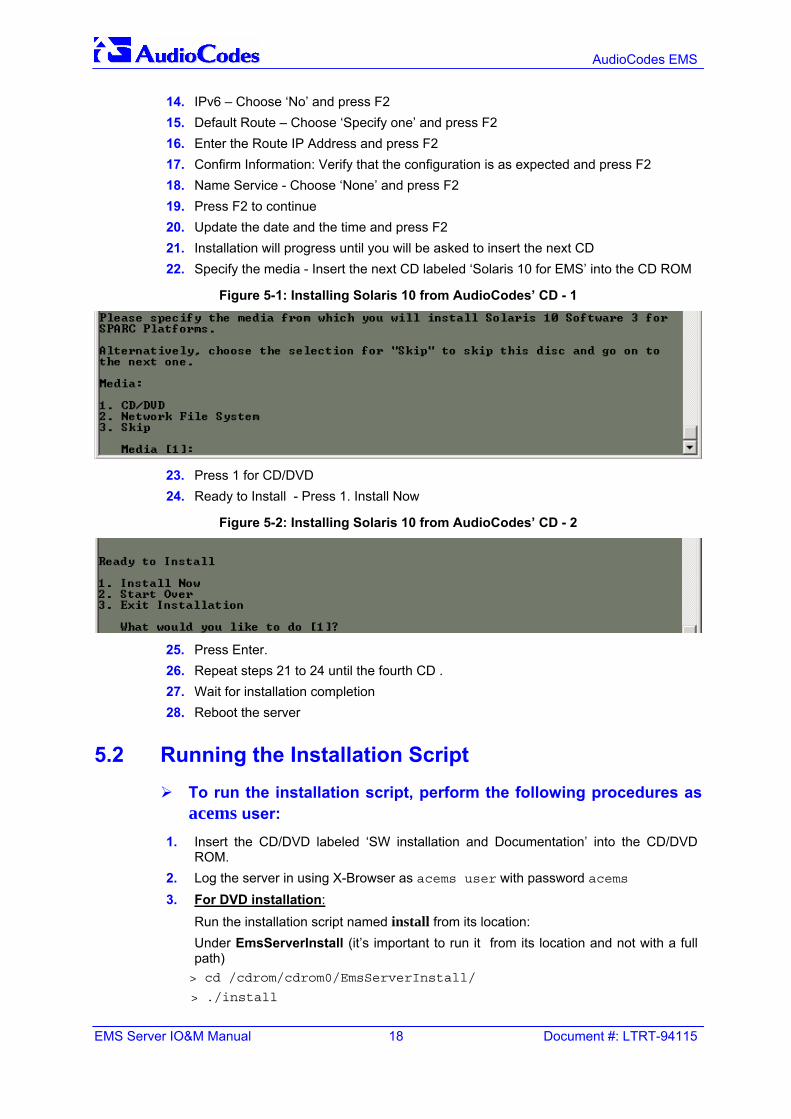
14. IPv6 – Choose ‘No’ and press F2 15. Default Route – Choose ‘Specify one’ and press F2 16. Enter the Route IP Address and press F2 17. Confirm Information: Verify that the configuration is as expected and press F2 18. Name Service - Choose ‘None’ and press F2 19. Press F2 to continue 20. Update the date and the time and press F2 21. Installation will progress until you will be asked to insert the next CD 22. Specify the media - Insert the next CD labeled ‘Solaris 10 for EMS’ into the CD ROM
Figure 5-1: Installing Solaris 10 from AudioCodes’ CD - 1
23. Press 1 for CD/DVD 24. Ready to Install - Press 1. Install Now
Figure 5-2: Installing Solaris 10 from AudioCodes’ CD - 2
25. Press Enter. 26. Repeat steps 21 to 24 until the fourth CD . 27. Wait for installation completion 28. Reboot the server
5.2 Running the Installation Script To run the installation script, perform the following procedures as
acems user: 1. Insert the CD/DVD labeled ‘SW installation and Documentation’ into the CD/DVD
ROM. 2. Log the server in using X-Browser as acems user with password acems 3. For DVD installation:
Run the installation script named install from its location: Under EmsServerInstall (it’s important to run it from its location and not with a full
path) > cd /cdrom/cdrom0/EmsServerInstall/
> ./install
EMS Server 5. Installing the EMS Server
Version 5.2 19 July 2007
4. For CD installation:
Copy the file emsServerDeploy_x.y.z.tar into the directory /ACEMS. Unpack the archive file by running the command
tar -xvf emsServerDeploy_x.y.z.tar
Run the installation script named install from its location under EmsServerInstall (it’s important to run it from its location and not with a full path)
> cd EmsServerInstall > ./install
5. For CD and DVD The License Agreement must be accepted to continue with the installation. After reading it, accept it by pressing ‘y’ or ‘yes’; pre-installation requirement checks are now carried out. The installation checks that the system holds up for the requirements. If any check fails, a detailed message is displayed with instructions on how to fix the problem. The installation cannot proceed without passing the requirements. If a problem is encountered, fix it as instructed and repeat the installation. Following pre-installation requirement checks, system checks are carried out: Operating System requirements, memory and disk size, Java™ version, etc.
6. Press ENTER to continue. 7. When you’re prompted for the ORACLE_HOME directory, the default value defined
in the prompt is /ACEMS/orahome. Press ENTER to use this value (recommended) or choose another location; Oracle variables verifications are performed.
8. Press ENTER to continue; when you’re prompted for the database location, the default defined in the prompt is /ACEMS/oradata. Press ENTER to use this value (recommended) or choose another location; Oracle variables verifications are continued.
9. Press ENTER to continue; UNIX kernel parameters verifications are performed. 10. Press ENTER to continue. 11. X-window check: Press ENTER to continue. 12. When you’re prompted for the EMS software location, the default value defined in the
prompt is /ACEMS (recommended). If you choose another location, the location must be an existing directory under ACEMS home directory with writing permissions for acems. This directory will be referred to as the EMS software directory.
13. Provide root password when required. 14. In the Oracle Software Installation section press Enter to continue 15. Provide root password when required. 16. Only for CD installation (not DVD) – When required, type ‘eject’ on a new console
screen and insert database installation CD#2. Edit the edit box from /cdrom/orcl9201_1/ to: /cdrom/orcl9201_2/ and click OK
17. Only for CD installation (not DVD) – When required, type ‘eject’ on the console screen and insert database installation CD#3. Edit the edit box from /cdrom/orcl9201_1/ to: /cdrom/orcl9201_3/ and click OK
18. An Oracle Universal Installer progress bar appears. 19. A new screen is displayed with an instruction to run root.sh
AudioCodes EMS
EMS Server IO&M Manual 20 Document #: LTRT-94115
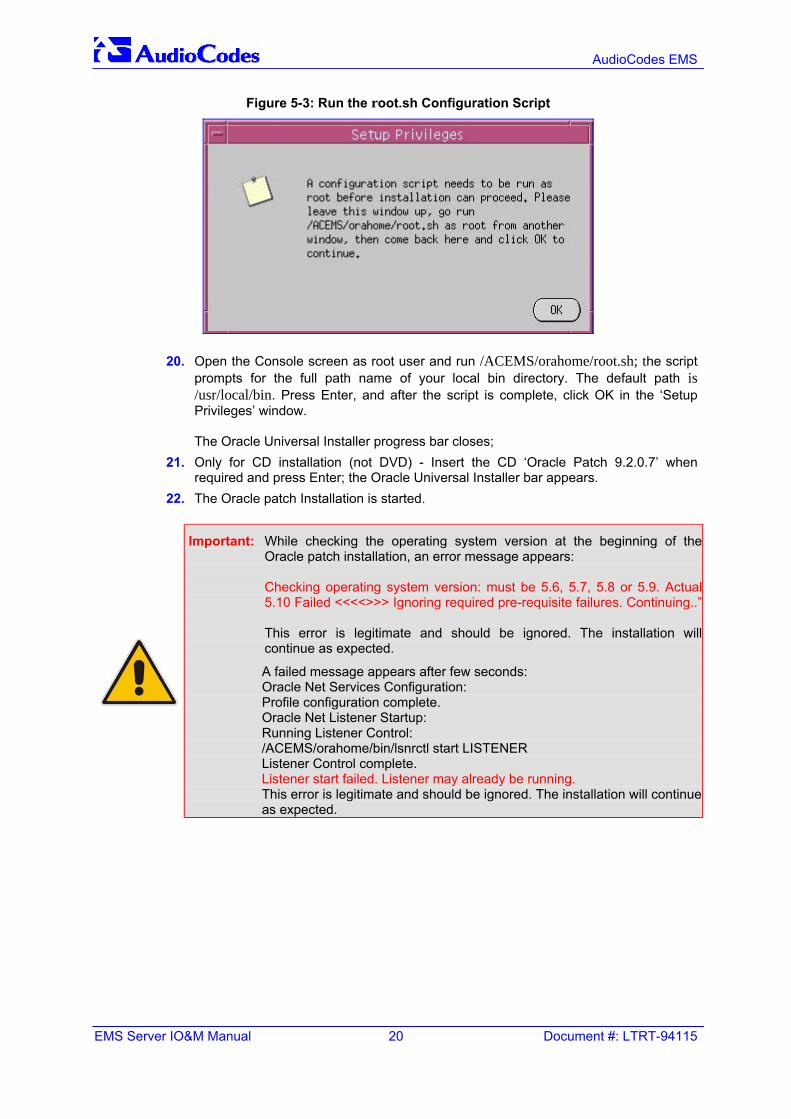
Figure 5-3: Run the root.sh Configuration Script
20. Open the Console screen as root user and run /ACEMS/orahome/root.sh; the script prompts for the full path name of your local bin directory. The default path is /usr/local/bin. Press Enter, and after the script is complete, click OK in the ‘Setup Privileges’ window. The Oracle Universal Installer progress bar closes;
21. Only for CD installation (not DVD) - Insert the CD ‘Oracle Patch 9.2.0.7’ when required and press Enter; the Oracle Universal Installer bar appears.
22. The Oracle patch Installation is started.
Important: While checking the operating system version at the beginning of the Oracle patch installation, an error message appears: Checking operating system version: must be 5.6, 5.7, 5.8 or 5.9. Actual 5.10 Failed <<<<>>> Ignoring required pre-requisite failures. Continuing..” This error is legitimate and should be ignored. The installation will continue as expected.
A failed message appears after few seconds: Oracle Net Services Configuration: Profile configuration complete. Oracle Net Listener Startup: Running Listener Control: /ACEMS/orahome/bin/lsnrctl start LISTENER Listener Control complete. Listener start failed. Listener may already be running. This error is legitimate and should be ignored. The installation will continue as expected.
EMS Server 5. Installing the EMS Server
Version 5.2 21 July 2007
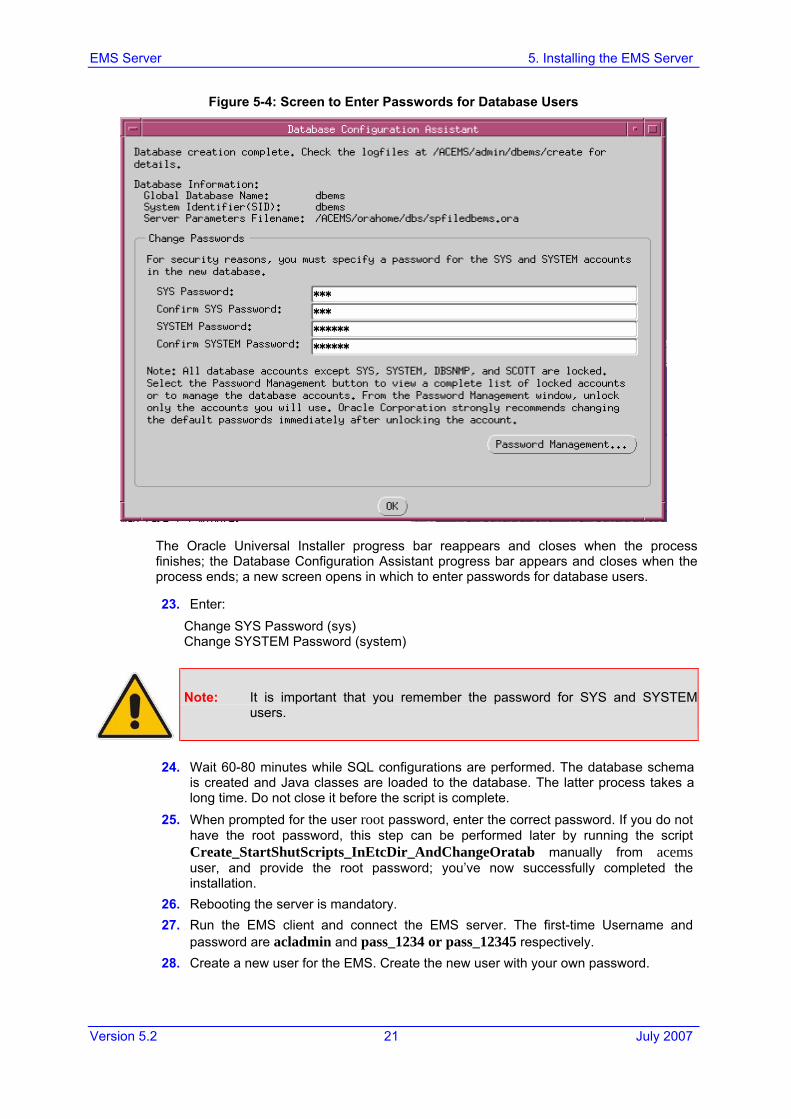
Figure 5-4: Screen to Enter Passwords for Database Users
The Oracle Universal Installer progress bar reappears and closes when the process finishes; the Database Configuration Assistant progress bar appears and closes when the process ends; a new screen opens in which to enter passwords for database users.
23. Enter: Change SYS Password (sys) Change SYSTEM Password (system)
Note: It is important that you remember the password for SYS and SYSTEM users.
24. Wait 60-80 minutes while SQL configurations are performed. The database schema
is created and Java classes are loaded to the database. The latter process takes a long time. Do not close it before the script is complete.
25. When prompted for the user root password, enter the correct password. If you do not have the root password, this step can be performed later by running the script Create_StartShutScripts_InEtcDir_AndChangeOratab manually from acems user, and provide the root password; you’ve now successfully completed the installation.
26. Rebooting the server is mandatory. 27. Run the EMS client and connect the EMS server. The first-time Username and
password are acladmin and pass_1234 or pass_12345 respectively. 28. Create a new user for the EMS. Create the new user with your own password.
AudioCodes EMS
EMS Server IO&M Manual 22 Document #: LTRT-94115
5.3 Activating the NTP Server / NTP Server and Client The NTP script triggers the EMS server to synchronize its clock according to the clocks of other devices, and vice versa. (The other devices can be any device containing an NTP server or client, such as Mediant 5000/8000).
The NTP server allows other devices to synchronize their clocks according to the EMS server clock.
The NTP client activates synchronization of the EMS server clock according to another (more accurate) NTP server clock.
To run the NTP script, take these steps:
1. Log in to the EMS server as root
2. Change directory to the directory in which the script is located. For example: # cd /ACEMS/server_x.y.z/
3. Run the script command: # perl runNtp.pl
4. Choose 1 to start NTP services
5. For the EMS server to act as NTP server and NTP client, choose ‘y’
6. If you choose ‘y’, enter the IP address of the NTP server according to whose clock the NTP client clock will synchronize.
7. If you choose ‘n’, only the NTP server is launched.
To stop the NTP script, take these steps:
1. Log in to the EMS server as root
2. Change directory to the directory in which the script is located. For example: # cd /ACEMS/server_x.y.z/
3. Run the script command: # perl runNtpServer.pl
4. Choose 2 to stop NTP services
Note: After installation, NAT (Network Address Translation) is disabled. To enable it, refer to Appendix B - Configuring the EMS Server to Function in a NAT Environment on page 53.
EMS Server 6. Upgrading the EMS Server
Version 5.2 23 July 2007
6 Upgrading the EMS Server 6.1 Major Version Upgrade
A major version upgrade of the EMS (from version 2.2, 3.0 and 3.2) is not supported. Users must perform a full installation of version 5.2. This is because the EMS server’s operating system has been upgraded from Solaris 5.9 to Solaris 10.
If your EMS server machine does not have a DVD driver and you want to install from DVD, it is possible to order one from SUN.
DVD for SUN Blade 150: P/N 370-4439 DVD for SUN Fire: P/N X7410A-4.
To replace the CD driver with a DVD driver in SUN Blade 150, take these steps:
1. Shut down the SUN Blade.
2. Disconnect the power cable, Ethernet cable and any other cable connected to the server.
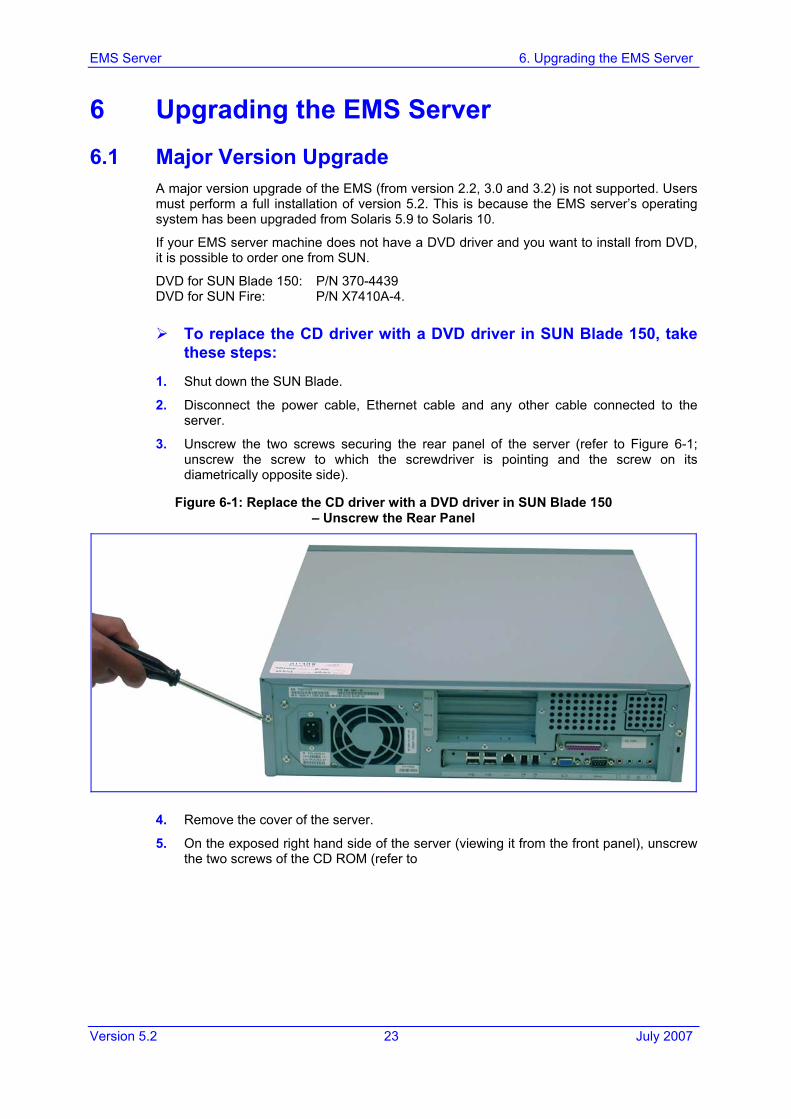
3. Unscrew the two screws securing the rear panel of the server (refer to Figure 6-1; unscrew the screw to which the screwdriver is pointing and the screw on its diametrically opposite side).
Figure 6-1: Replace the CD driver with a DVD driver in SUN Blade 150 – Unscrew the Rear Panel
4. Remove the cover of the server.
5. On the exposed right hand side of the server (viewing it from the front panel), unscrew the two screws of the CD ROM (refer to

AudioCodes EMS
EMS Server IO&M Manual 24 Document #: LTRT-94115
Figure 6-2: Replace the CD driver with a DVD driver in SUN Blade 150 – Unscrew the CD ROM
6. Disconnect the power and the SCSI cables from the CD ROM (refer to Figure 6-3)
Figure 6-3: Replace the CD driver with a DVD driver in SUN Blade 150 – Disconnect Power / SCSI Cables from CD ROM
7. Pull out the CD ROM and insert the new DVD into the same space instead (refer to Figure 6-4).
Unscrew the two screws securing the CD ROM in position
Disconnect the power and SCSI cables from the CD ROM

EMS Server 6. Upgrading the EMS Server
Version 5.2 25 July 2007
Figure 6-4: Replace the CD driver with a DVD driver in SUN Blade 150 – Pull Out CD ROM, Insert DVD Instead
8. Connect the power and the SCSI cables to the new DVD
9. Screw in the two screws of the DVD
10. Place the cover in its place
11. Screw in the two screws on the rear panel of the server
12. Plug in the power cable and Ethernet cable
13. Switch on the server
6.2 Minor Version Upgrade The server installation verifies whether it can perform an upgrade procedure from your previous version. If the EMS does not support upgrading from your previous version, refer to Section 10, Reinstalling EMS Server Software, on page 43.
To upgrade the EMS server, take these steps: 1. Login as root and stop the EMS Server application:
#cd /ACEMS/server_x.y.z #./ServerShutdown
2. Login the EMS Server as acems 3. Back up the current database and save the dmp file on another location (refer to
Section 9, Maintaining the EMS Server, on page 39)
AudioCodes EMS
EMS Server IO&M Manual 26 Document #: LTRT-94115
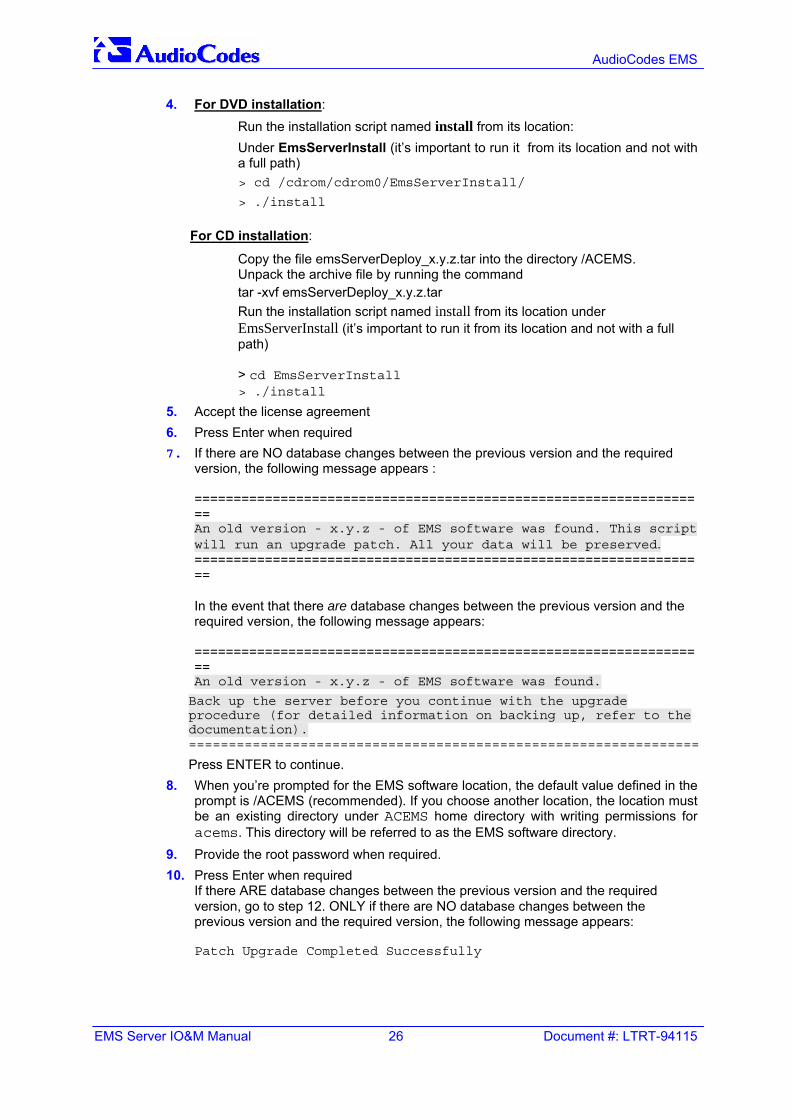
4. For DVD installation:
Run the installation script named install from its location: Under EmsServerInstall (it’s important to run it from its location and not with a full path) > cd /cdrom/cdrom0/EmsServerInstall/
> ./install
For CD installation:
Copy the file emsServerDeploy_x.y.z.tar into the directory /ACEMS. Unpack the archive file by running the command tar -xvf emsServerDeploy_x.y.z.tar Run the installation script named install from its location under EmsServerInstall (it’s important to run it from its location and not with a full path)
> cd EmsServerInstall
> ./install 5. Accept the license agreement 6. Press Enter when required 7. If there are NO database changes between the previous version and the required
version, the following message appears : ================================================================== An old version - x.y.z - of EMS software was found. This script will run an upgrade patch. All your data will be preserved. ================================================================== In the event that there are database changes between the previous version and the required version, the following message appears: ================================================================== An old version - x.y.z - of EMS software was found.
Back up the server before you continue with the upgrade procedure (for detailed information on backing up, refer to the documentation). ================================================================
Press ENTER to continue. 8. When you’re prompted for the EMS software location, the default value defined in the
prompt is /ACEMS (recommended). If you choose another location, the location must be an existing directory under ACEMS home directory with writing permissions for acems. This directory will be referred to as the EMS software directory.
9. Provide the root password when required. 10. Press Enter when required
If there ARE database changes between the previous version and the required version, go to step 12. ONLY if there are NO database changes between the previous version and the required version, the following message appears: Patch Upgrade Completed Successfully

EMS Server 6. Upgrading the EMS Server
Version 5.2 27 July 2007
Important: Do not continue to the next step (reboot) unless you receive the message above! If you don’t receive the message above, continue from step 12.
After receiving the above message, log in to the EMS server as root and reboot the server.
11. The EMS server upgrade is now completed. Install the appropriate version of the EMS client and log in to the EMS server.
===== IF THERE WERE DATABASE CHANGES, CONTINUE HERE =====
12. After step 10 in the event that there WERE database changes, wait for the upgrade to complete.
13. If you are now prompted, enter the Oracle Patch installation location. 14. If prompted with ‘Replace README.html? [y]es, [n]o, [A]ll, [N]on’,
then answer y; now, the Oracle Universal Installer progress bar appears; when it closes, the process continues for approximately 60 minutes.
15. When prompted, copy the directory /tmp/ems_upgrade to another directory that is permanent. These files include your old data of nodes, profiles and operators list.
Important: Do not open the file ‘nodes.upgrade.csv’ with Excel. Open it only with WordPad.
16. Press ENTER to continue 17. Log in to the EMS server as root and Reboot the server. 18. Install the appropriate version of the EMS client. 19. Run the EMS client and connect the EMS server with the default login user name and
password (acladmin and pass_1234 or pass_12345 respectively) 20. Add the relevant versions for the media gateways using the Software Manager
21. Take the files from the folder ems_upgrade in the EMS server and locate them on the EMS client PC using FTP.
22. Add the Nodes tree to the new server: Before adding the file ‘nodes_upgrade.csv’ to the Nodes tree, perform the following:
1. Open the file using WordPad.
2. Remove all irrelevant information: Delete the first three lines and the last line (only nodes information should be in the file). Refer to the example in Figure 6-5 on page 28:

AudioCodes EMS
EMS Server IO&M Manual 28 Document #: LTRT-94115
Figure 6-5: Removing Irrelevant Information from File ‘nodes_upgrade.csv’
• In WordPad, open the ‘File’ menu and ‘Save As …’
• In the ‘Save As Type’ drop-down list, select ‘Unicode Text Document’ and in the ‘File Name’, change it back to .csv format.
• Click the ‘Save’ button to save it.
• In the EMS Client, right-click on the Globe.
• Select ‘Add MGs from file’
• Browse to the file nodes_upgrade.csv
• Click OK
23. Add operators using the file operators.csv. Note that this file can be used as a list of operators and their details only; the operators must manually be added to the EMS.
24. Attach the profiles to the appropriate MGs using the file profile_attachments.csv Note that this file can be used as a list of profiles and MGs only; the profiles must manually be applied to the MGs in the EMS:
• Right-click on the MG and choose ‘Apply Master Profile’.
• Select the appropriate profile from the list according to profile_attachments.csv
• Click OK
EMS Server 7. EMS Server Security
Version 5.2 29 July 2007
7 EMS Server Security 7.1 Configuring the Firewall
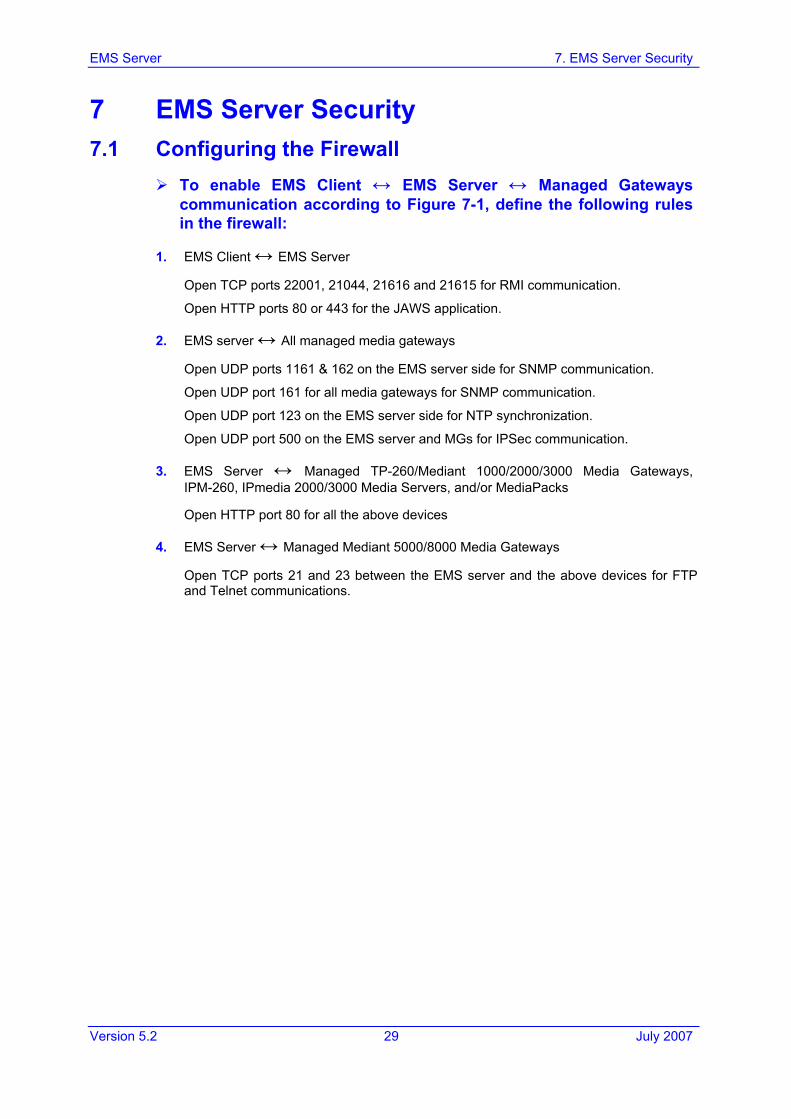
To enable EMS Client ↔ EMS Server ↔ Managed Gateways communication according to Figure 7-1, define the following rules in the firewall:
1. EMS Client ↔ EMS Server
Open TCP ports 22001, 21044, 21616 and 21615 for RMI communication.
Open HTTP ports 80 or 443 for the JAWS application.
2. EMS server ↔ All managed media gateways
Open UDP ports 1161 & 162 on the EMS server side for SNMP communication.
Open UDP port 161 for all media gateways for SNMP communication.
Open UDP port 123 on the EMS server side for NTP synchronization.
Open UDP port 500 on the EMS server and MGs for IPSec communication.
3. EMS Server ↔ Managed TP-260/Mediant 1000/2000/3000 Media Gateways, IPM-260, IPmedia 2000/3000 Media Servers, and/or MediaPacks
Open HTTP port 80 for all the above devices
4. EMS Server ↔ Managed Mediant 5000/8000 Media Gateways
Open TCP ports 21 and 23 between the EMS server and the above devices for FTP and Telnet communications.

AudioCodes EMS
EMS Server IO&M Manual 30 Document #: LTRT-94115
Figure 7-1: Firewall Configuration Schema
EMS Server 7. EMS Server Security
Version 5.2 31 July 2007
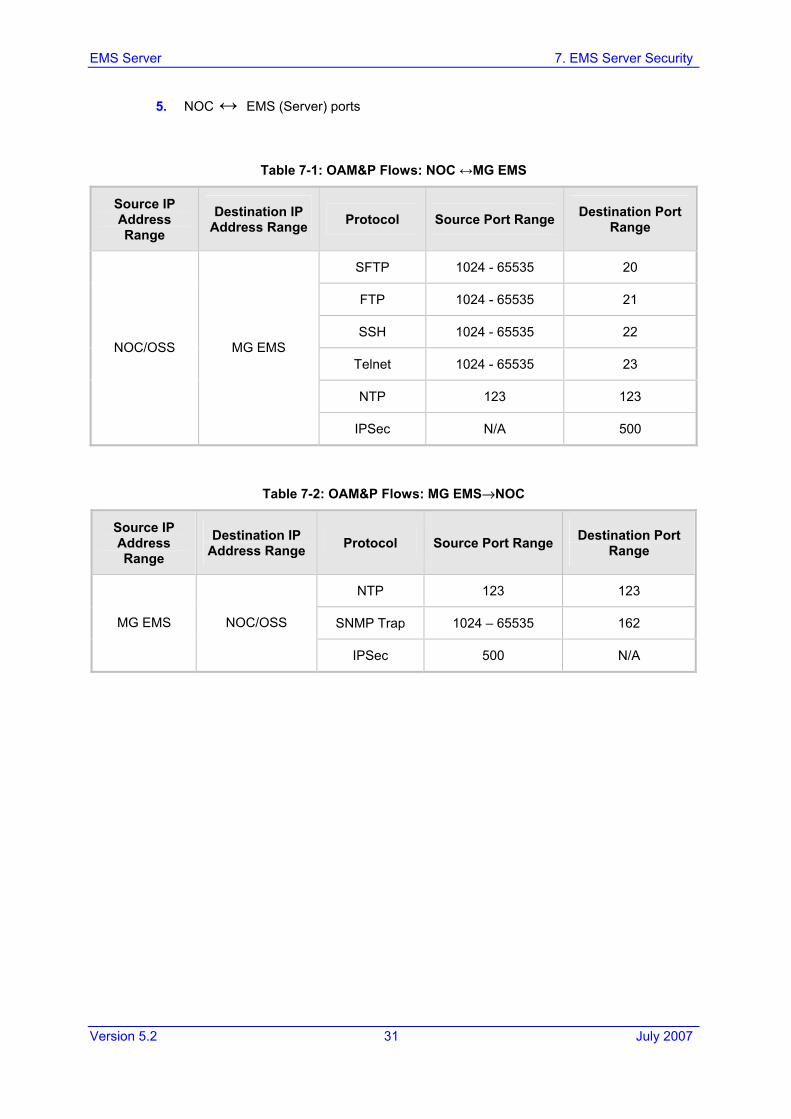
5. NOC ↔ EMS (Server) ports
Table 7-1: OAM&P Flows: NOC ↔MG EMS
Source IP Address Range
Destination IP Address Range Protocol Source Port Range Destination Port
Range
SFTP 1024 - 65535 20
FTP 1024 - 65535 21
SSH 1024 - 65535 22
Telnet 1024 - 65535 23
NTP 123 123
NOC/OSS MG EMS
IPSec N/A 500
Table 7-2: OAM&P Flows: MG EMS→NOC
Source IP Address Range
Destination IP Address Range Protocol Source Port Range Destination Port
Range
NTP 123 123
SNMP Trap 1024 – 65535 162 MG EMS NOC/OSS
IPSec 500 N/A
AudioCodes EMS
EMS Server IO&M Manual 32 Document #: LTRT-94115
7.2 EMS Server Hardening The purpose of the hardening procedure is to protect the EMS server from unauthorized access and hostile attack. It makes it hard to break in by closing all superfluous EMS server ports.
To activate the hardening feature, take these steps:
1. Connect the server as acems, using secured shell (ssh).
2. Change user to root (su root) and supply the root password.
3. Go to /ACEMS/server_5.2.X
4. Run the script: # perl emsHarden.pl
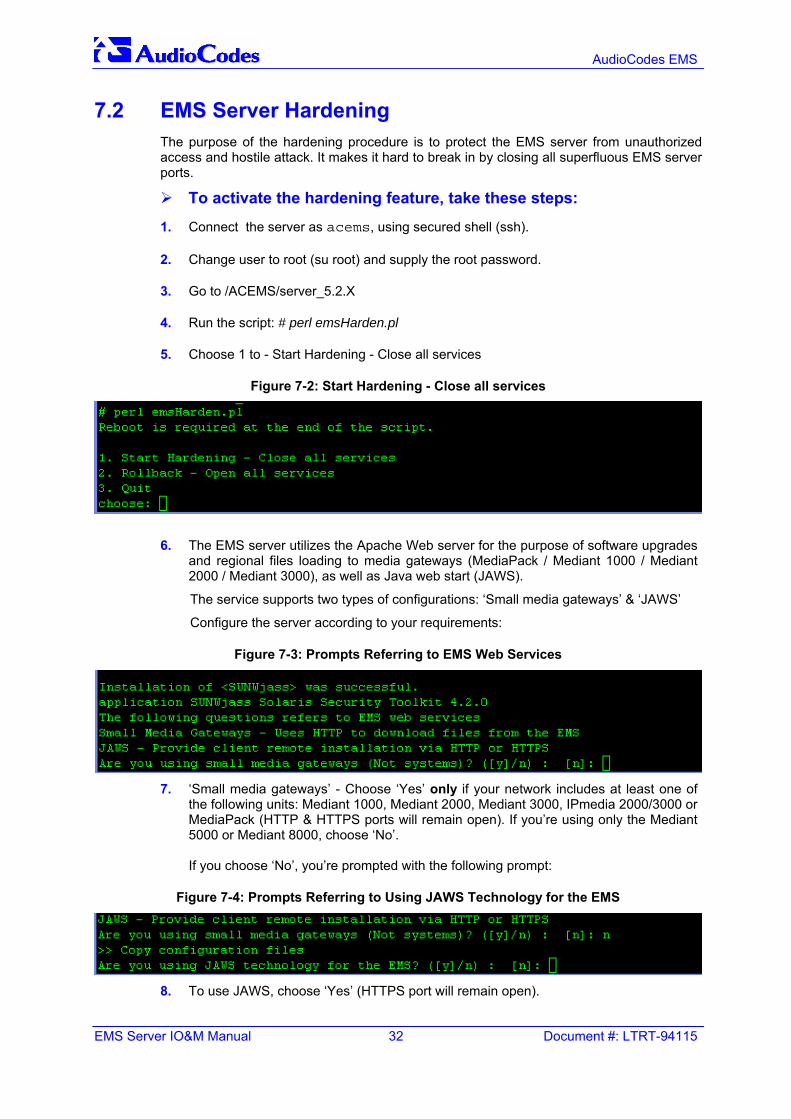
5. Choose 1 to - Start Hardening - Close all services
Figure 7-2: Start Hardening - Close all services
6. The EMS server utilizes the Apache Web server for the purpose of software upgrades and regional files loading to media gateways (MediaPack / Mediant 1000 / Mediant 2000 / Mediant 3000), as well as Java web start (JAWS).
The service supports two types of configurations: ‘Small media gateways’ & ‘JAWS’
Configure the server according to your requirements:
Figure 7-3: Prompts Referring to EMS Web Services
7. ‘Small media gateways’ - Choose ‘Yes’ only if your network includes at least one of
the following units: Mediant 1000, Mediant 2000, Mediant 3000, IPmedia 2000/3000 or MediaPack (HTTP & HTTPS ports will remain open). If you’re using only the Mediant 5000 or Mediant 8000, choose ‘No’. If you choose ‘No’, you’re prompted with the following prompt:
Figure 7-4: Prompts Referring to Using JAWS Technology for the EMS
8. To use JAWS, choose ‘Yes’ (HTTPS port will remain open).
EMS Server 7. EMS Server Security
Version 5.2 33 July 2007
9. Are you sure that you want to continue? To run the JASS package, type "yes".
10. Wait a few minutes.
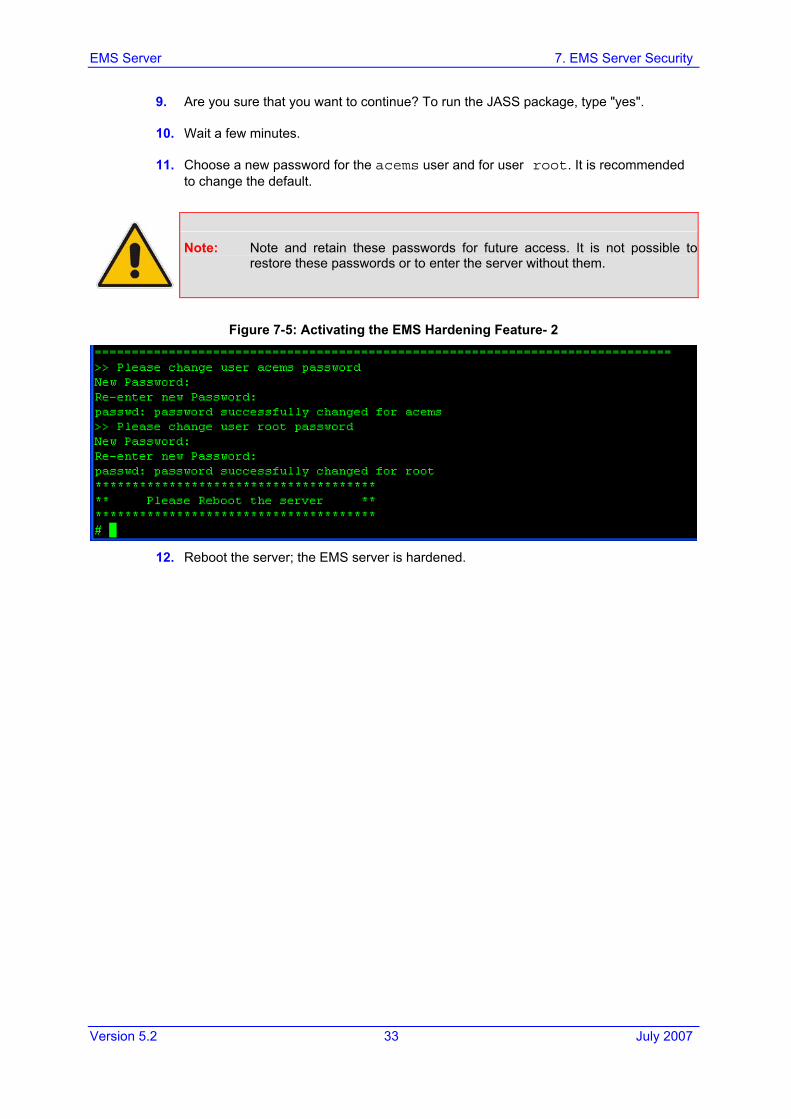
11. Choose a new password for the acems user and for user root. It is recommended to change the default.
Note: Note and retain these passwords for future access. It is not possible to restore these passwords or to enter the server without them.
Figure 7-5: Activating the EMS Hardening Feature- 2
12. Reboot the server; the EMS server is hardened.
AudioCodes EMS
EMS Server IO&M Manual 34 Document #: LTRT-94115
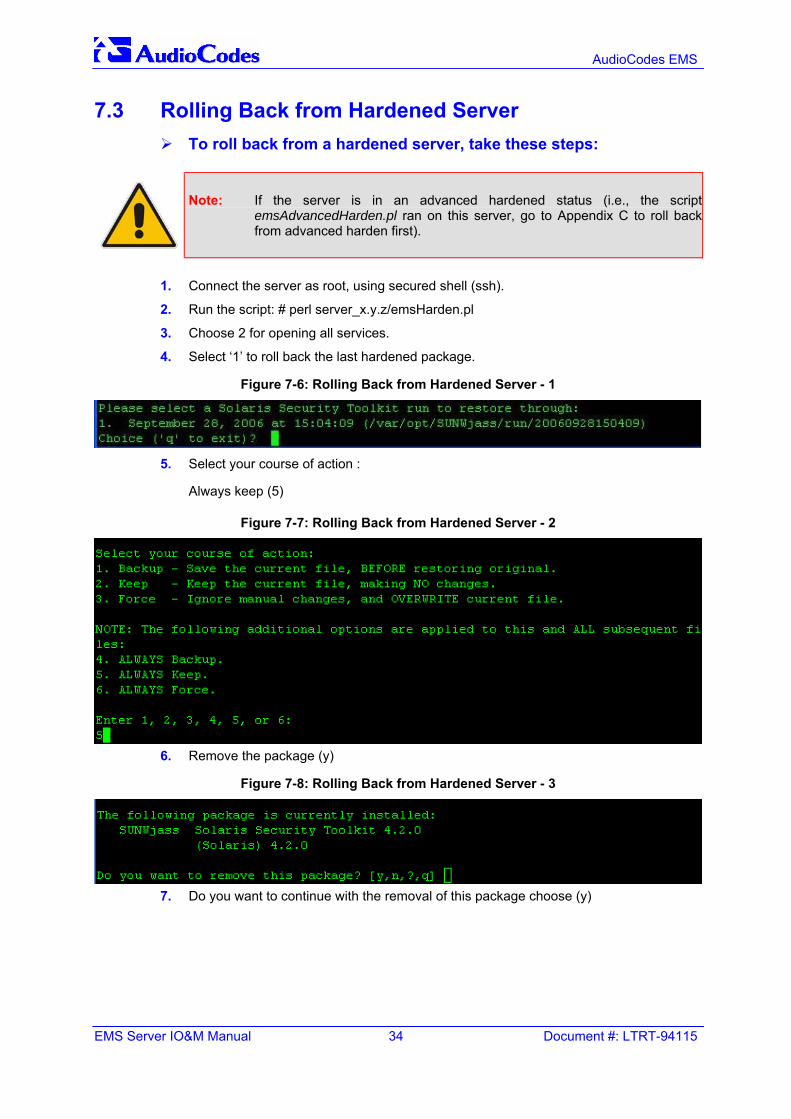
7.3 Rolling Back from Hardened Server To roll back from a hardened server, take these steps:
Note: If the server is in an advanced hardened status (i.e., the script emsAdvancedHarden.pl ran on this server, go to Appendix C to roll back from advanced harden first).
1. Connect the server as root, using secured shell (ssh).
2. Run the script: # perl server_x.y.z/emsHarden.pl
3. Choose 2 for opening all services.
4. Select ‘1’ to roll back the last hardened package.
Figure 7-6: Rolling Back from Hardened Server - 1
5. Select your course of action :
Always keep (5)
Figure 7-7: Rolling Back from Hardened Server - 2
6. Remove the package (y)
Figure 7-8: Rolling Back from Hardened Server - 3
7. Do you want to continue with the removal of this package choose (y)
EMS Server 7. EMS Server Security
Version 5.2 35 July 2007
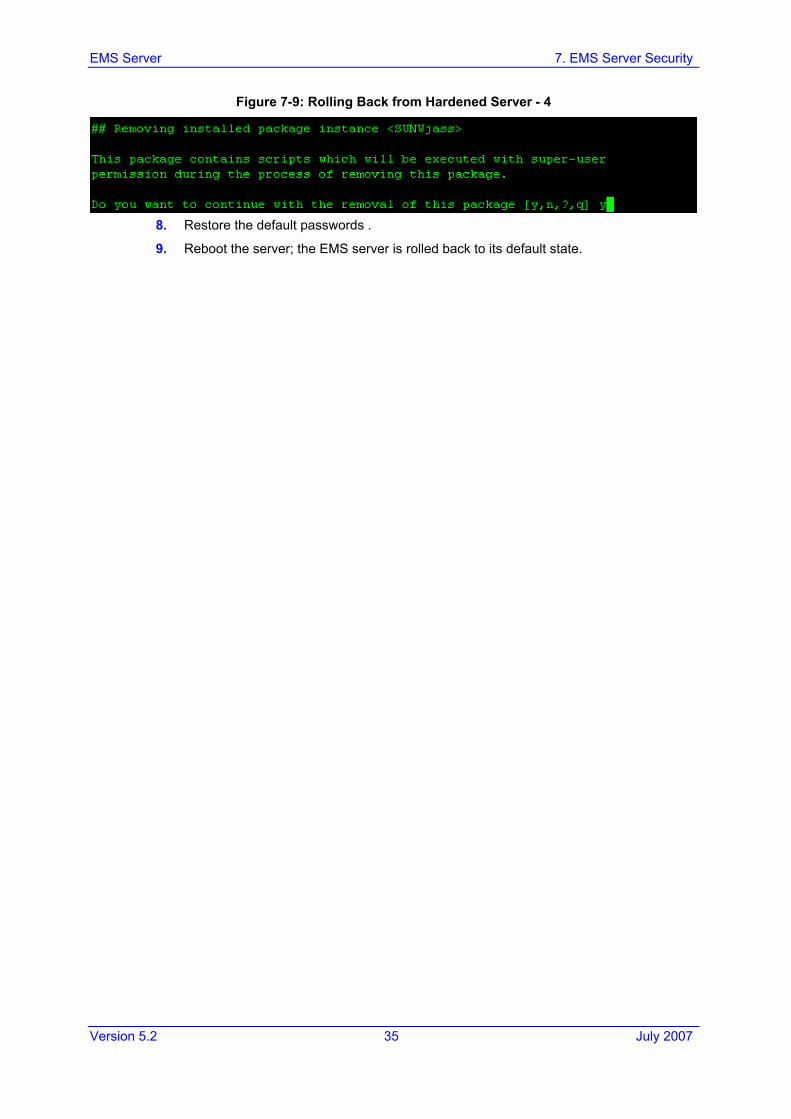
Figure 7-9: Rolling Back from Hardened Server - 4
8. Restore the default passwords .
9. Reboot the server; the EMS server is rolled back to its default state.

AudioCodes EMS
EMS Server IO&M Manual 36 Document #: LTRT-94115
Reader’s Notes

EMS Server 8. Running the EMS Server
Version 5.2 37 July 2007
8 Running the EMS Server To run the EMS server:
Run script ./watchDog_unix & under directory server_x.y.z
Figure 8-1: Running the EMS Server
To stop the EMS server from running:
Run script ./ServerShutdown under directory server_x.y.z
Figure 8-2: Stopping the EMS Server from Running

AudioCodes EMS
EMS Server IO&M Manual 38 Document #: LTRT-94115
Reader’s Notes
EMS Server 9. Maintaining the EMS Server
Version 5.2 39 July 2007
9 Maintaining the EMS Server 9.1 Backing up the Database
AudioCodes provides a simple mechanism for data backup in the form of a script that uses Oracle import and export tools. The script can be scheduled to run periodically and can also be run manually.
It is highly recommended to back up the EMS data manually, especially after an extensive configuration process, to ensure safeguarding in the event of a malfunction.
To back up the database manually:
Run the following script with user acems to manually export the data:
backup_scripts /manual_backup
Two files are created. The first is EMSexport.dmp. It contains server database information. The second is emsServerBackup.tar. It contains all version directories. All the server files and the database are backed up with these files.
These two files are created under the abovementioned location at the scheduled time or after manual export. You MUST back up these files in another location each time.
9.2 Recovery after Database Failure Three kinds of failures are possible:
1. Total machine failure.
2. Database could not be started.
3. Database is started but the EMS schema is damaged.
The actions to be performed in each case are different. First establish what the case is, in order to follow the right procedure.
In all cases, when running the recovery script, check that the EMS server is down.

AudioCodes EMS
EMS Server IO&M Manual 40 Document #: LTRT-94115
9.3 Running Database Maintenance Tasks To maintain the database in an optimum configuration, periodically perform the following:
To perform scheduling for the backup procedure, run:
backup_scripts/schedule_backup
9.3.1 Total Machine Failure Reinstall the EMS and database software (refer to Section 3 on page 13). This brings the EMS to a state where the database is started and running. Thereafter, perform the procedure described in Section 9.3.2; the database is started but the EMS schema is damaged.

EMS Server 9. Maintaining the EMS Server
Version 5.2 41 July 2007
9.3.2 Database is Started but the EMS Schema is Damaged 1. Check that the database is up and that the EMS server is down.
2. Move the current server directory (mv server_x server_x_old) with user acems
3. Copy the backup files (emsServerBackup.tar, EMSexport.dmp) under the recovery directory
4. Run the following recovery script with user acems:
recovery_scripts/schema_recovery
9.4 Check Free Disk Space
The scheduled task for disk space performs basic maintenance. In addition, manually check the disk space from time to time to see if the disk is full and if other applications (like mail, loggers, etc.) are occupying some disk space that can be freed by deleting external files.
Run the command:
df –k
If disk usage is over 80%, some space must be freed. This task is very important because shortage of disk space can cause an application failure.

AudioCodes EMS
EMS Server IO&M Manual 42 Document #: LTRT-94115
Reader’s Notes
EMS Server 10. Reinstalling EMS Server Software
Version 5.2 43 July 2007
10 Reinstalling EMS Server Software
Note: This procedure does NOT preserve data previously saved in the EMS server. Before taking this step, it is advised to back up the EMS server and make sure that the installation procedure is well understood and that all pre-requirements are met.
To upgrade the EMS from version 1.6 Beta 2, 2.2, 3.0 ,3.2 and 5.0, reinstall the EMS server operating system and database. To install the new software version, first remove the previous software version.
10.1 Removing the Previous Software Version Refer to Section 12.8, Removing the EMS Server Installation, on page 51.
10.2 Installing the New Software Version
1. Refer to Section 5, Installing the EMS Server, on page 17 to install the server.
2. It is recommended to reboot the system after the installation is finished and verify automatic startup.

AudioCodes EMS
EMS Server IO&M Manual 44 Document #: LTRT-94115
Reader’s Notes

EMS Server 11. Installing the EMS Client
Version 5.2 45 July 2007
11 Installing the EMS Client 11.1 Installing the EMS Client on a Client PC
1. Insert AudioCodes’ EMS installation disk.
2. Double-click the EMS Client Installation file (PC)/ac_ems_setup_win32.exe and follow the installation instructions.
3. As a result of the installation process, the EMS Client icon is added to the desktop.
11.1.1 Running the EMS on a Client PC To run the EMS on a client PC:
Double-click the EMS Client icon on your desktop or run Start>Programs>EMS Client.
11.1.2 First-Time Login 1. Log in as user ‘acladmin’ with password ‘pass_1234’ or ‘pass_12345’.
Note that these first-time access defaults are case sensitive. The Administrator can modify these first-time access defaults later, after defining system Users. If you incorrectly define these or the field Server IP Address, a prompt is displayed indicating that the fields should be redefined correctly.
2. In the main screen, open the ‘Users List’ and add new users according to your requirements.
11.2 Installing the EMS Client on a Client PC using Java Web Start (JAWS): Java Web Start (JAWS) enables you to install the EMS client (compatible with your EMS server version) without using any CDs.
To install the EMS client on a client PC using JAWS:
1. Open Internet Explorer and type the EMS Server IP in the Address field and add /jaws as suffix, for example: http://10.7.6.5/jaws/
2. Follow the online instructions.

AudioCodes EMS
EMS Server IO&M Manual 46 Document #: LTRT-94115
Reader’s Notes
EMS Server Appendix A - Frequently Asked Questions (FAQs)
Version 5.2 47 July 2007
12 Appendix A - Frequently Asked Questions (FAQs)
12.1 Installation Q: ‘Out of Memory’ error encountered while creating database A: The system parameters were not defined. Verify that all the required parameters
are defined and that the syntax is correct.
Q: ‘Cannot write file…’ error encountered during software installation A: If you didn’t define the location of ORACLE_HOME under the acems user home
directory, then you might have forgotten to give the acems user writing permissions to this location.
12.2 Post-installation Q: When trying to run watchDog_unix or runServer_unix from the directory where it
is located, there is an error ‘command not found’. A: The current directory(.) is not part of the search path. To check the path, run the
command: echo $PATH
If the current directory is not in the path, run the scripts as follows:
./watchDog_unix ./runServer_unix
Note: If you performed the procedure to start the EMS server automatically, check that the server is up after the reboot and do not run it again.
12.3 After Rebooting the Machine Q: The database doesn't start automatically after the machine is rebooted. A: Check:
1. The syntax in var/opt/oracle/oratab: the file should end with an empty line. 2. That the symbolic link ‘S90dbstart’ under /etc/rc2.d is not broken 3. That all scripts have execute permissions for acems user 4. That the default shell for acems user is tcsh.
12.4 Determining which Version is Running on the EMS Server Q: I have a few EMS versions installed on my EMS server and I receive an error
during login stating that there is a mismatch between client and server versions. How can I determine which EMS version is currently running on my EMS server?

AudioCodes EMS
EMS Server IO&M Manual 48 Document #: LTRT-94115
A: Check the file /etc/rc2.d/S99Emsserver to determine what version is loaded on the EMS server (in the example below, the version of server currently running is 5.2.38).
EMS-Server20:/ [root] => more /etc/rc2.d/S99EmsServer #!/sbin/sh USER=root;export USER /ACEMS/server_5.2.38/watchDog_unix & EMS-Server20:/ [root] =>
12.5 Changes Not Updated in the Client
Q: After a successful installation, the multiple add operation - as well as changes made by other clients - are not updated in the client.
A: Check the configuration of the date on the server machine. This problem occurs when the daylight-saving configuration is defined incorrectly.
To redefine the clock in the EMS application: 1. Change clock in the EMS server (using the command date).
2. Reboot the EMS server machine (verify that the EMS server application is up and running).
3. Change the clock in the EMS client machine.
4. Reboot the EMS client machine.
5. Open the EMS client application and connect to the EMS server.
6. Verify correct clock settings by opening the ‘User Journal’ and checking your last login time.
EMS Server Appendix A - Frequently Asked Questions (FAQs)
Version 5.2 49 July 2007
12.6 Updating the Timezone of the EMS Server Machine Q: I received an EMS server machine configured with a timezone different to that
which I require. How I can change this? A: To determine your current time zone, open the file /etc/default/init (refer to the
example below showing the timezone of Israel). To update the timezone, edit this file using the content of /usr/share/lib/zoneinfo
(refer to the Timezone Example, below) as a reference. Save the file and reboot the EMS server machine.
# more /etc/default/init #ident "@(#)init.dfl 1.6 00/05/27 SMI" # # This file is /etc/default/init. /etc/TIMEZONE is a symlink to this file. # This file looks like a shell script, but it is not. To maintain # compatibility with old versions of /etc/TIMEZONE, some shell constructs # (i.e., export commands) are allowed in this file, but are ignored. # # Lines of this file should be of the form VAR=value, where VAR is one of # TZ, LANG, CMASK, or any of the LC_* environment variables. # TZ=Israel CMASK=022
Timezone Example:
# cd /usr/share/lib/zoneinfo # ls Africa EST5EDT GMT+2 GMT-4 Japan Portugal America Egypt GMT+3 GMT-5 Kwajalein ROK Antarctica Eire GMT+4 GMT-6 Libya Singapore Arctic Etc GMT+5 GMT-7 MET Turkey Asia Europe GMT+6 GMT-8 MST UCT Atlantic Factory GMT+7 GMT-9 MST7MDT US Australia GB GMT+8 GMT0 Mexico UTC Brazil GB-Eire GMT+9 Greenwich Mideast Universal CET GMT GMT-0 HST NZ W-SU CST6CDT GMT+0 GMT-1 Hongkong NZ-CHAT WET Canada GMT+1 GMT-10 Iceland Navajo Zulu Chile GMT+10 GMT-11 Indian PRC posixrules Cuba GMT+11 GMT-12 Iran PST8PDT src EET GMT+12 GMT-2 Israel Pacific tab EST GMT+13 GMT-3 Jamaica Poland
12.7 Changing the EMS Server IP Address Q: How do I change the EMS server IP address? A: Update the following files as user root and reboot:
/etc/hosts
In the example below, the current IP address is 10.7.6.2 (boldened). Edit the file with the new IP address and save it.
# cd etc # more hosts

AudioCodes EMS
EMS Server IO&M Manual 50 Document #: LTRT-94115
# # Internet host table # 127.0.0.1 localhost 10.7.6.2 EMS-Server2 loghost #
/etc/netmasks: In the example below, the current netmask is 10.7.0.0 255.255.0.0 (boldened). Edit the file with the required netmask and save it.
# more netmasks # # The netmasks file associates Internet Protocol (IP) address # masks with IP network numbers. # # network-number netmask # # The term network-number refers to a number obtained from the Internet Network # Information Center. # # Both the network-number and the netmasks are specified in # "decimal dot" notation, e.g: # # 128.32.0.0 255.255.255.0 # 10.7.0.0 255.255.0.0 #
/etc/defaultrouter In the example below, the current default router is 10.7.0.1 (boldened). Edit the file with the required default router and save it.
# more defaultrouter 10.7.0.1
/etc/inet/ipnodes In the example below, the current IP address is 10.7.6.13 (boldened). Edit the file with the new IP address and save it.
# # Internet host table # ::1 localhost 127.0.0.1 localhost 10.7.6.13 EMS-Server13 loghost
Under /usr/local/apache2/conf/, change the IP address of these files:
httpd.conf
ssl.conf
Edit each file with the new IP address and save it. Under /ACEMS/server_5.2.X/jaws/, change the IP address of these files:
index.html
jhall.jnlp
ems.jnlp

EMS Server Appendix A - Frequently Asked Questions (FAQs)
Version 5.2 51 July 2007
download.html
Edit each file with the new IP address and save it.
Note: For these changes to take effect, reboot the server.
12.8 Removing the EMS Server Installation Q: How do I remove the EMS Server installation? A: Follow the following procedure:
1. Login as root
2. Run the command pkill java
3. Stop the process apche2 by running: /usr/local/apache2/bin/apachectl stop
4. Restore the previous Apache2 configuration by running commands
rm /usr/local/apache2/conf/httpd.conf
and
rm /usr/local/apache2/conf/ssl.conf
5. Remove the content of ACEMS by running rm –r /ACEMS/*
6. Remove the oracle folder by running rm –r /var/opt/oracle
7. Remove the autostart script by running rm /etc/rc2.d/S99EmsServer
8. Reboot the EMS server

AudioCodes EMS
EMS Server IO&M Manual 52 Document #: LTRT-94115
Reader’s Notes
EMS Server Appendix B – Configuring Server for NAT
Version 5.2 53 July 2007
13 Appendix B - Configuring the EMS Server to Function in a NAT Environment
13.1 Configuring the EMS Server To configure the EMS server:
1. Open the configuration file of the EMS Server in a text editor from path: /ACEMS/server_3.2.x/externals/configurationProperties/generalConfig.properties
Note: If you inadvertently make an error when configuring the file config.properties, the result can be that the server won’t function. Consequently, back up the file before making any configuration change.
2. Define parameter EnableAutoDetecte=true
13.2 Configuring the Media Gateway To configure the gateway:
1. Enable the keep alive trap (refer to the gateway’s User’s Manual)
2. Set the keep alive interval to a normal rate, depending on the router (usually 30-90 seconds)
3. Set the keep alive port to 162.

AudioCodes EMS
EMS Server IO&M Manual 54 Document #: LTRT-94115
Reader’s Notes
EMS Server Appendix C – EMS Server Advanced Hardening
Version 5.2 55 July 2007
14 Appendix C - EMS Server Advanced Hardening The purpose of the script emsAdvancedHarden.pl is to harden Solaris 10 for enhanced security performance.
The security script is supplemented to comply with special US DoD requirements.
Note: Run emsHarden.pl and reboot before running this script. With all security scripts, do not press Ctrl+C.
To activate the advanced hardening feature, take these steps: 1. Connect the server as acems, using secured shell (ssh).
2. Change the user to root (su root) and supply the root password.
3. Go to /ACEMS/server_5.2.X
4. Run the script # perl emsAdvancedHarden.pl
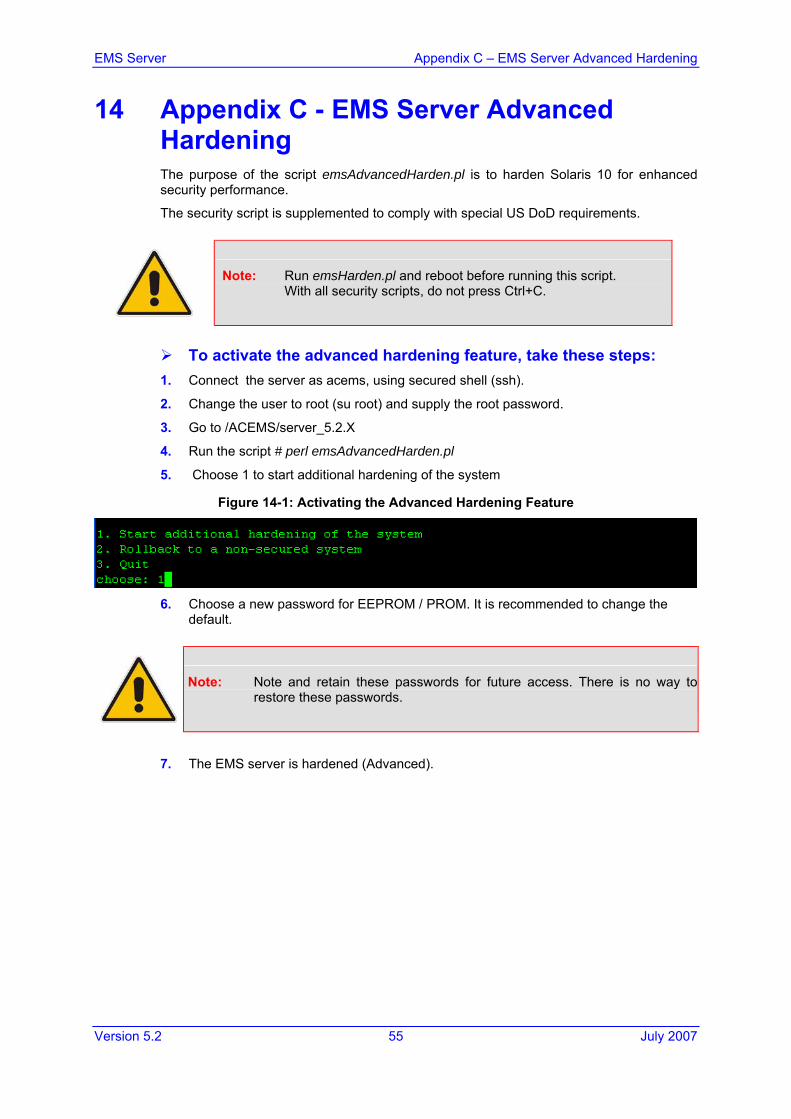
5. Choose 1 to start additional hardening of the system
Figure 14-1: Activating the Advanced Hardening Feature
6. Choose a new password for EEPROM / PROM. It is recommended to change the
default.
Note: Note and retain these passwords for future access. There is no way to restore these passwords.
7. The EMS server is hardened (Advanced).
AudioCodes EMS
EMS Server IO&M Manual 56 Document #: LTRT-94115
14.1 Rolling Back from Advanced Hardening To roll back from the advanced hardened server, take these steps:
1. Connect the server as acems, using secured shell (ssh).
2. Change user to root (su root) and supply the root password.
3. Go to /ACEMS/server_5.2.X
4. Run the script: # perl emsAdvancedHarden.pl
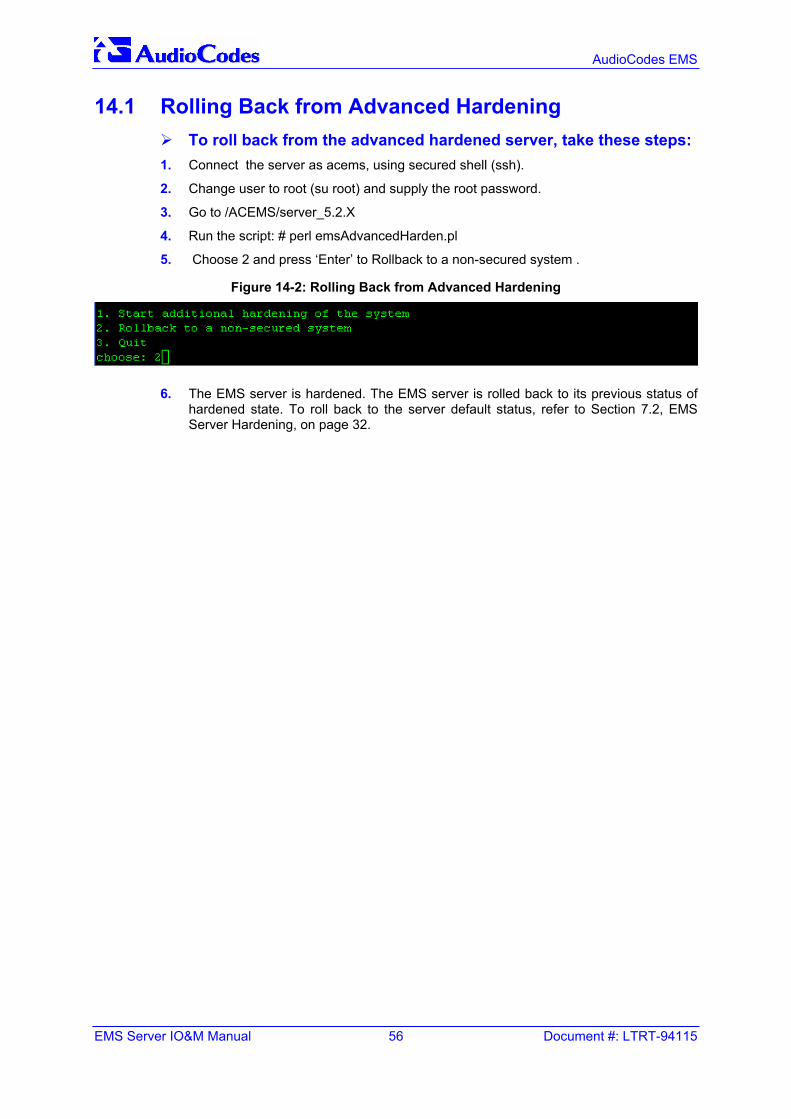
5. Choose 2 and press ‘Enter’ to Rollback to a non-secured system .
Figure 14-2: Rolling Back from Advanced Hardening
6. The EMS server is hardened. The EMS server is rolled back to its previous status of hardened state. To roll back to the server default status, refer to Section 7.2, EMS Server Hardening, on page 32.
EMS Server Appendix D – EMS Server Oracle DB Hardening
Version 5.2 57 July 2007
15 Appendix D - EMS Server Oracle Database Hardening
15.1 Oracle Database Hardening The purpose of the script OracleSecurity.sh is to harden the EMS Oracle Database for enhanced security performance.
The security script is supplemented to comply with special US DoD requirements.
Note: With all security scripts, do not press Ctrl+C.
To activate the Oracle hardening feature, take these steps: The server should be down when the Oracle hardening scripts run. It is recommended that the advanced hardening feature in Appendix C should be run prior to the Oracle hardening feature.
1. Connect the server as acems, using secured shell (ssh).
2. Change the user to root (su root) and supply the root password.
3. Go to /ACEMS/server_5.2.X
4. Stop the EMS server by running the shutdown script ./ServerShutdown .
5. Change user to acems (su acems) and supply the acems password.
6. Go to /ACEMS/oracle_hardening folder
7. Run the script: ./OracleSecurity.sh
8. Wait a few minutes until you’re prompted to press ‘Enter’
AudioCodes EMS
EMS Server IO&M Manual 58 Document #: LTRT-94114
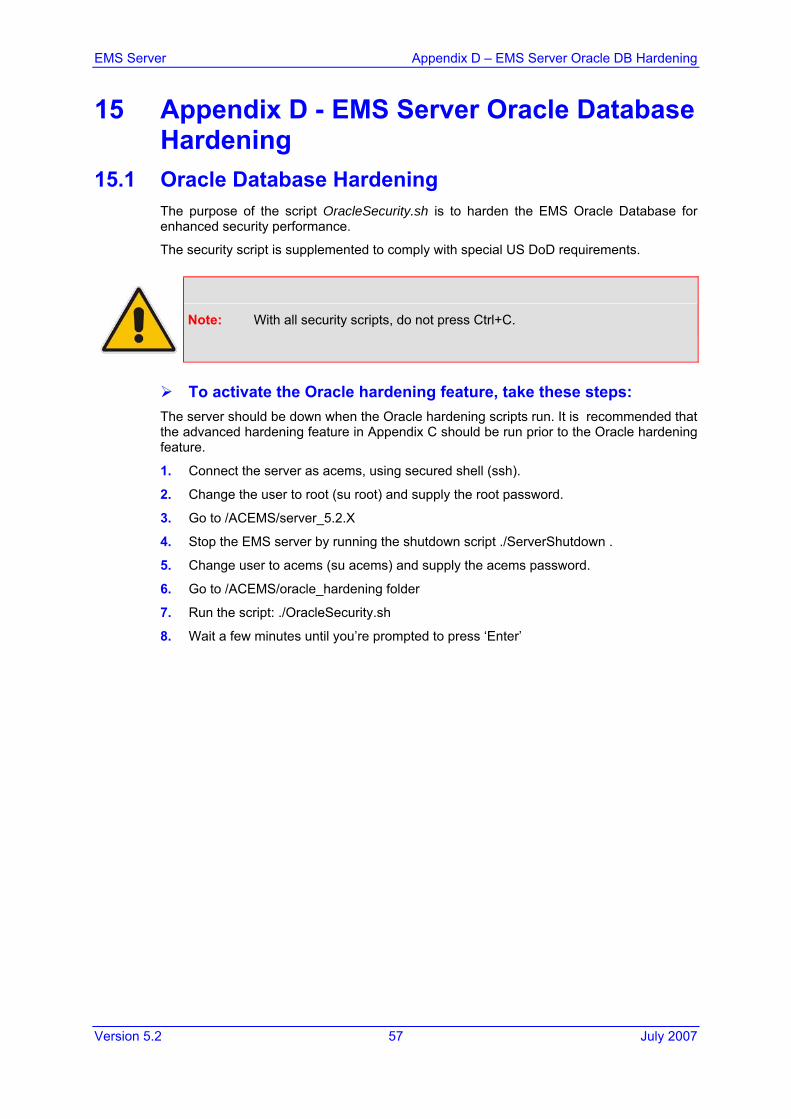
Figure 15-1: Activating the Oracle Hardening Feature
9. You’re asked to insert a default user password (the password should contain at least
one digit, one character and one underline “_”).
You can define the same password for all users.
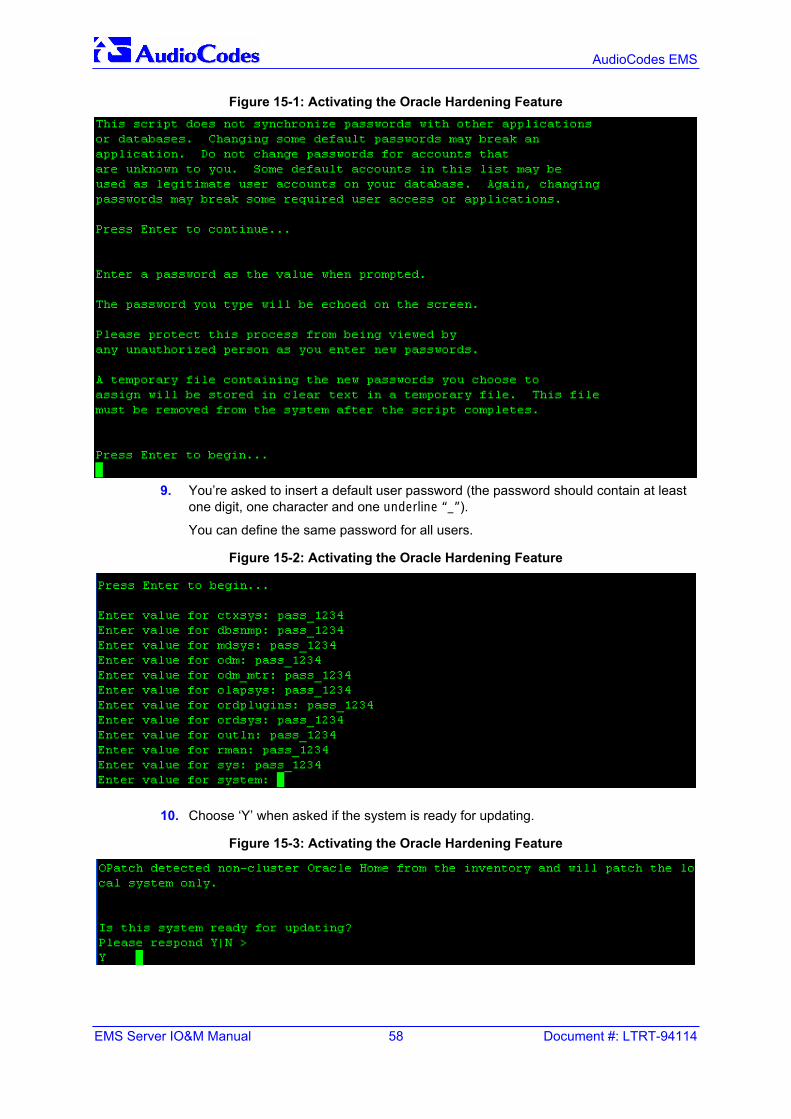
Figure 15-2: Activating the Oracle Hardening Feature
10. Choose ‘Y’ when asked if the system is ready for updating.
Figure 15-3: Activating the Oracle Hardening Feature
EMS Server Appendix D – EMS Server Oracle DB Hardening
Version 5.2 59 July 2007
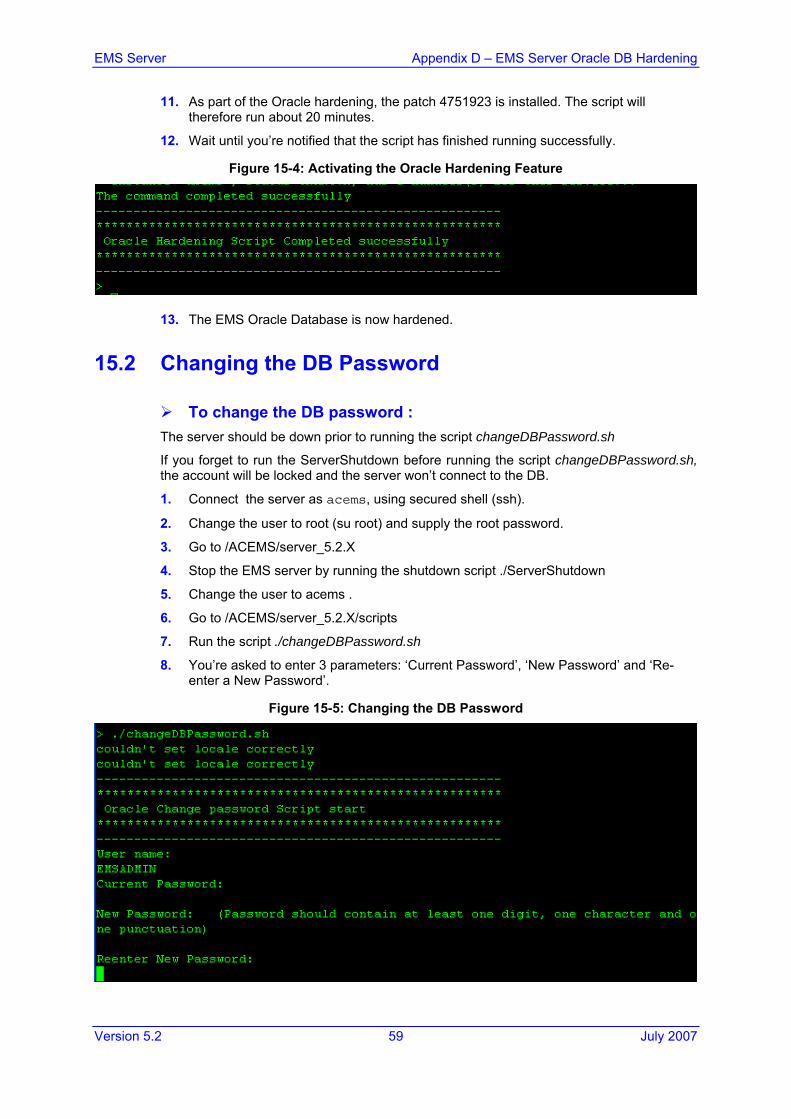
11. As part of the Oracle hardening, the patch 4751923 is installed. The script will therefore run about 20 minutes.
12. Wait until you’re notified that the script has finished running successfully.
Figure 15-4: Activating the Oracle Hardening Feature
13. The EMS Oracle Database is now hardened.
15.2 Changing the DB Password
To change the DB password : The server should be down prior to running the script changeDBPassword.sh
If you forget to run the ServerShutdown before running the script changeDBPassword.sh, the account will be locked and the server won’t connect to the DB.
1. Connect the server as acems, using secured shell (ssh).
2. Change the user to root (su root) and supply the root password.
3. Go to /ACEMS/server_5.2.X
4. Stop the EMS server by running the shutdown script ./ServerShutdown
5. Change the user to acems .
6. Go to /ACEMS/server_5.2.X/scripts
7. Run the script ./changeDBPassword.sh
8. You’re asked to enter 3 parameters: ‘Current Password’, ‘New Password’ and ‘Re-enter a New Password’.
Figure 15-5: Changing the DB Password
AudioCodes EMS
EMS Server IO&M Manual 60 Document #: LTRT-94114
Note: Note and retain these passwords for future access. It is not possible to restore these passwords or to enter the DB without them.
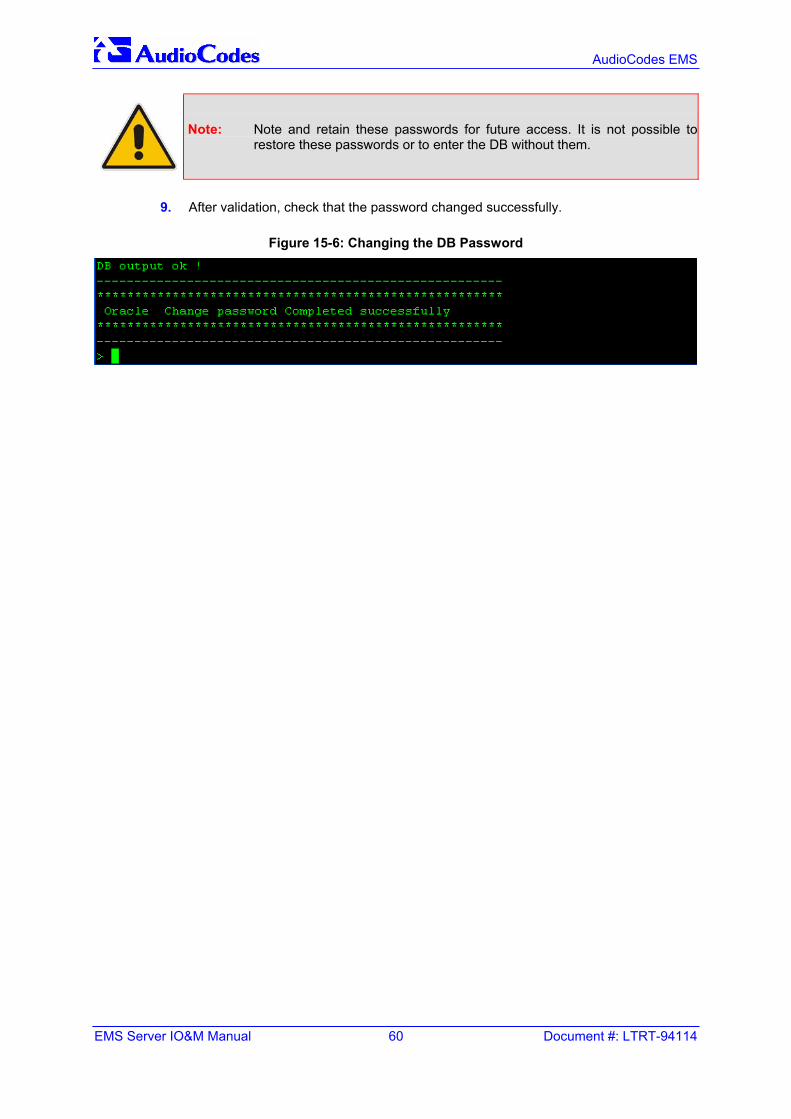
9. After validation, check that the password changed successfully.
Figure 15-6: Changing the DB Password
EMS Server Appendix E – DST
Version 5.2 61 June 2007
16 Appendix E - Daylight Saving Time (DST) This section explains how to apply Daylight Saving Time (DST) changes for Australia (2006), USA (2007), Canada (2007) and other countries, after the EMS application is installed.
Many countries around the world over the past two years have implemented legislation to change their Daylight Savings Time (DST) dates and time zone definitions.
The following major changes are implemented:
tz2005o - Australia, USA
tz2006a - Canada (Quebec, Ontario, Nova Scotia, Nunavut, Saskatchewan, Manitoba, New Brunswick and Prince Edward Island)
tz2006n - Canada (the other provinces)
tz2006p - Western Australia
tz2007a - Bahamas
Customers who maintain local time on their AudioCodes products and reside in Australia or North America must update AudioCodes’ software to support the new DST settings.
EMS Server
The local time of the EMS server is used to calculate the time of the Performance Measurements (PMs) and EMS Journal events, displayed in the EMS GUI. Users who configured a local time zone on an EMS server which is subject to new DST settings are affected.
v5.2 fully supports new DST settings.
Patches are applied automatically for the EMS Standard server, as it is installed.
EMS Client
The local time of the EMS client is used to calculate the time of the SNMP alarms displayed in the EMS GUI. Users who configured a local time zone on an EMS client that is subject to new DST settings are affected.
AudioCodes does not provide an operating system that is used on the computers that run EMS client software. Customers should therefore consult the vendor of the specific operating system that is used. For Windows XP, refer to the page in URL: http://support.microsoft.com/DST2007.
After applying the OS-specific patches, patch the Java installation on the EMS client as well. Detailed instructions are provided in this section.
16.1 EMS Client To apply new DST settings to EMS client, update both the Windows operating system and the Java version (refer to Section 16.1.1 and Section 16.1.2).
16.1.1 Windows
Install Windows OS patches as specified in URL http://support.microsoft.com/DST2007.
Refer to Section 16.2 on page 62 for an example of installing Windows patches on EMS Lite Server.
AudioCodes EMS
EMS Server IO&M Manual 62 Document #: LTRT-94114
16.1.2 Java 1. Open the EMS client and open menu option Help>About. Determine the home
directory of the Java installation that the EMS client uses.
2. Copy the JAVA patch file tzupdater.jar from the EMS software CD/DVD in the folder \Documentation\Patches and place it in directory bin under the Java home directory, whose path can be determined according to step 1.
3. Open the Command Line window and change the directory to bin under the Java home directory, whose path can be determined according to the instruction in step 1. E.g. cd C:\j2sdk1.4.2\bin
4. Install the patch by running the following command: java –jar tzupdater.jar –f –bc -v
Refer to Section 16.3 on page 63 for an example of installing the Java patch for the EMS client.
16.2 Example of Installing Windows Patches on the EMS Client
1. Install the Windows operating system patches as specified in URL:
http://support.microsoft.com/DST2007.
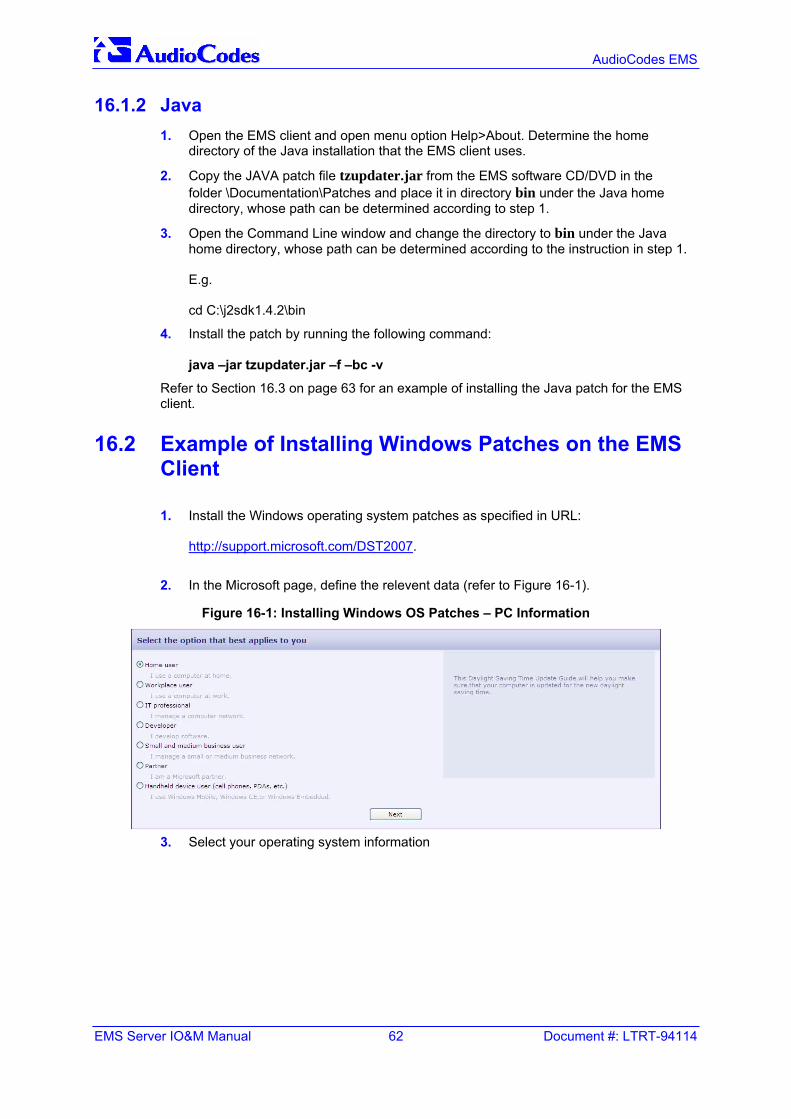
2. In the Microsoft page, define the relevent data (refer to Figure 16-1).
Figure 16-1: Installing Windows OS Patches – PC Information
3. Select your operating system information
EMS Server Appendix E – DST
Version 5.2 63 June 2007
Figure 16-2: Installing Windows OS Patches – Selecting the Operating System
4. Download and install the patch.
Figure 16-3: Installing Windows OS Patches – Download and Install
5. Continue the installation according to Microsoft’s instructions.
16.3 Example of Installing the Java Patch for the EMS Client 1. Open the EMS client.
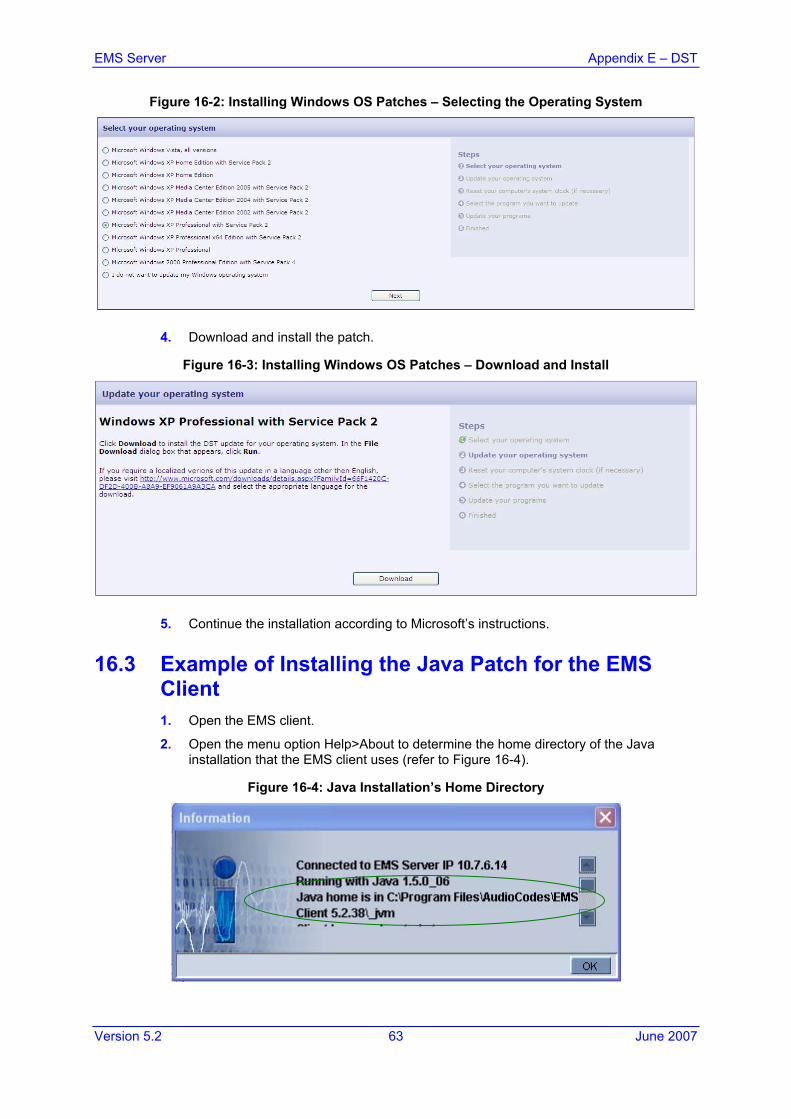
2. Open the menu option Help>About to determine the home directory of the Java installation that the EMS client uses (refer to Figure 16-4).
Figure 16-4: Java Installation’s Home Directory

AudioCodes EMS
EMS Server IO&M Manual 64 Document #: LTRT-94114
3. Copy the Java patch file tzupdater.jar from the EMS software CD/DVD in the folder \Documentation\Patches and place it in the directory bin under the Java home directory, whose path can be determined according to the instruction in step 2 (preceeding).
4. Open the Command Line window and change the directory to bin under the Java home directory, whose path can be determined according to the instruction in step 2 (preceeding) (refer to Figure 16-5).
Figure 16-5: Changing the Directory to ‘bin’
5. Install the patch (refer to Figure 16-6) by running command: java –jar tzupdater.jar –f –bc -v
Note: It’s important to manually input the command into the Command Line window and not to copy it.
Figure 16-6: Installing the Patch

EMS Server Appendix E – DST
Version 5.2 65 June 2007

Originalprinted on
recycled paperand available onCD or Web site
www.audiocodes.com