Embed Size (px)
Citation preview

EIA’s
(Enzyme Immunoassays) for Food Safety

EIA’s (Enzyme Immunoassays) for Food SafetyEIA’s are tests that use either an enzyme-bound antibody or enzyme-bound analyte to detect a particular antigen. The enzyme catalyzes a colour reaction when exposed to a substrate. Such tests can be used for semi-quantitative analysis of contaminants and residues in different biological matrices.

EIA’s for Food Safety
Competitive (Inhibition) EIA’s:For detection of low molecular weight components (residues and contaminants)
Non-Competitive (Sandwich) EIA’s:For detection of high molecular weight components (proteins)

Format of the Competitive EIA• Residue X = Target molecule• Horseradish Peroxidase (HRP) = Enzyme
Sheep anti-rabbit antibodySheep anti-rabbit antibody
Residue X (standard/sample)Residue X (standard/sample)
Microtitre plate wellMicrotitre plate well
Rabbit antibody to residue XRabbit antibody to residue X
Residue X - HRP conjugateResidue X - HRP conjugate

Target Molecules for the Competitive EIA’s
• Drugs and steroids
• Antibiotics
• Mycotoxins

Format of the Sandwich EIA
Biotinylated rabbit anti-protein YBiotinylated rabbit anti-protein Y
Streptavidin coated microtitre plate wellStreptavidin coated microtitre plate well
Protein Y (standard/sample)Protein Y (standard/sample)
Rabbit anti-protein Y-HRP conjugateRabbit anti-protein Y-HRP conjugate
• Protein Y = Target molecule• Horseradish Peroxidase (HRP) = Enzyme
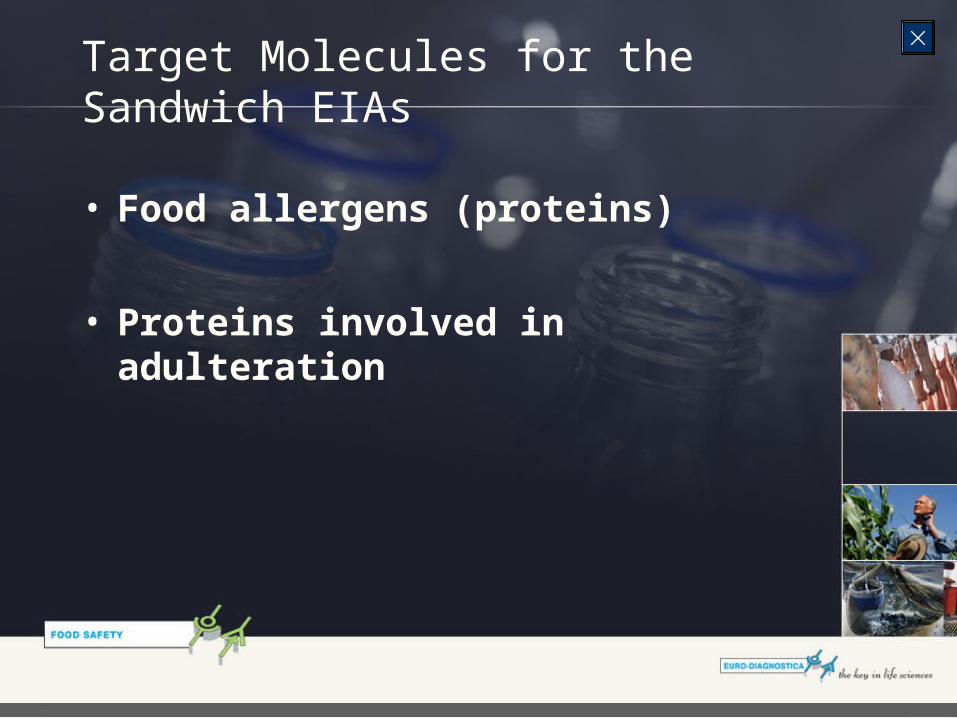
Target Molecules for the Sandwich EIAs
• Food allergens (proteins)
• Proteins involved in adulteration

Production of Immunogens and Antibodies
Residue XResidue X
Coupling to a carrier protein(BSA, BTG)
Coupling to a carrier protein(BSA, BTG)
Protein YProtein Y
Antibody productionAntibody production
Immunisation of mice or rabbitsImmunisation of mice or rabbits

Antibody PurificationRabbit Polyclonal or Mouse Monoclonal AntibodiesRabbit Polyclonal or Mouse Monoclonal Antibodies
Ammonium Sulfate PrecipitationAmmonium Sulfate Precipitation
Antibody FractionAntibody Fraction
Immunoaffinity ChromatographyImmunoaffinity Chromatography
Conjugation to HRP or biotin
Conjugation to HRP or biotin
Competitive AssayCompetitive Assay
Sandwich AssaySandwich Assay

Conjugate in the Competitive-EIAThe conjugate in the competitive-EIA consists of residue X that has been labelled with the enzyme horseradish peroxidase (HRP)
Residue XResidue X
++
HRPHRP Residue X - HRP conjugateResidue X - HRP conjugate

Conjugate in the Sandwich-EIAThe conjugate in the sandwich-EIA consists of an antibody (polyclonal or monoclonal) to protein Y that has been labelled with the enzyme horseradish peroxidase (HRP)
++
HRPHRP Anti-protein Y- HRP conjugate
Anti-protein Y- HRP conjugate
Antibodyto protein Y
Antibodyto protein Y

Different Steps in the Analysis of Samples• Collection of samples and transport
• Storage of samples
• Sample preparation
• Performing the EIA
• Calculation and interpretation of the results

Collection of Samples and Transport
• Take a representative amount of the product in question
• Prevent cross contamination of the samples• Label the samples• Record the shelf-life for the sample product• Treat all samples as being potentially infective or toxic• Make sure that the samples are transported at the
appropriate temperature• Be aware of possible microbial contamination in the
samples
The basis for obtaining good laboratory results is an
adequate collection of the samples and transport under controlled conditions

Storage of Samples
• The samples should be stored at the appropriate temperature (-20°C, +4°C, room temperature)
• The use of a sample registration system is recommended
• Divide the samples in aliquots
• Repeated freezing and thawing of the samples should be avoided
Take care of the following points during storage of the
samples

Sample Preparation 1
Liquid
Urine
Milk
Serum, Plasma
Fruit juice
Egg
Honey
Bile
Saliva
Solid
Tissue (muscle, organs, sea food)
Feed
Silage
Food (products)
Retina
Choroids
Fat
Hair
Depending on the nature of the material the sample
is either liquid (in all gradations) or solid

Sample Preparation 2
• The sample should be a representative part of the total batch
• The sample should be as homogeneous as possible• Be aware of matrix effects, i.e. high background
values• The sample should have the appropriate pH• Be aware of the dilution factor
Sample preparation demands attention to the following
critical points
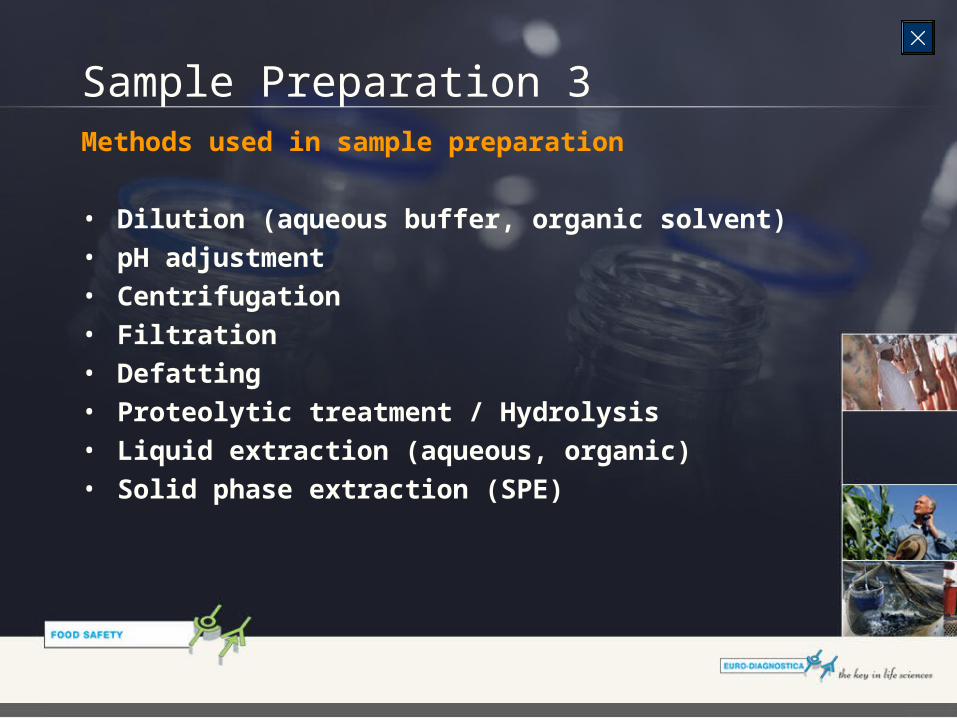
Sample Preparation 3Methods used in sample preparation
• Dilution (aqueous buffer, organic solvent)• pH adjustment• Centrifugation• Filtration• Defatting• Proteolytic treatment / Hydrolysis• Liquid extraction (aqueous, organic)• Solid phase extraction (SPE)

Performing the EIAExample: the chloramphenicol (CAP) kit
NC
OH
CH2 O
H
CHCl2
O2NOH
Structure of chloramphenicol (CAP)
detecting CAP in e.g. shrimps

Performing the CAP EIA 1
Planning
• Determine the number of samples and required amounts of reagents
• Determine the sample matrix
• Make a time frame
• Construct a pipetting scheme
• Place all kit components at room temperature prior to use
• Organise the appropriate equipment
• Prepare reagents exactly as described in the manual
• Carefully follow instructions as described in the manual
• Put samples in a pipetting bloc to facilitate the use of an 8 channel pipette
• Number the EIA strips to be used
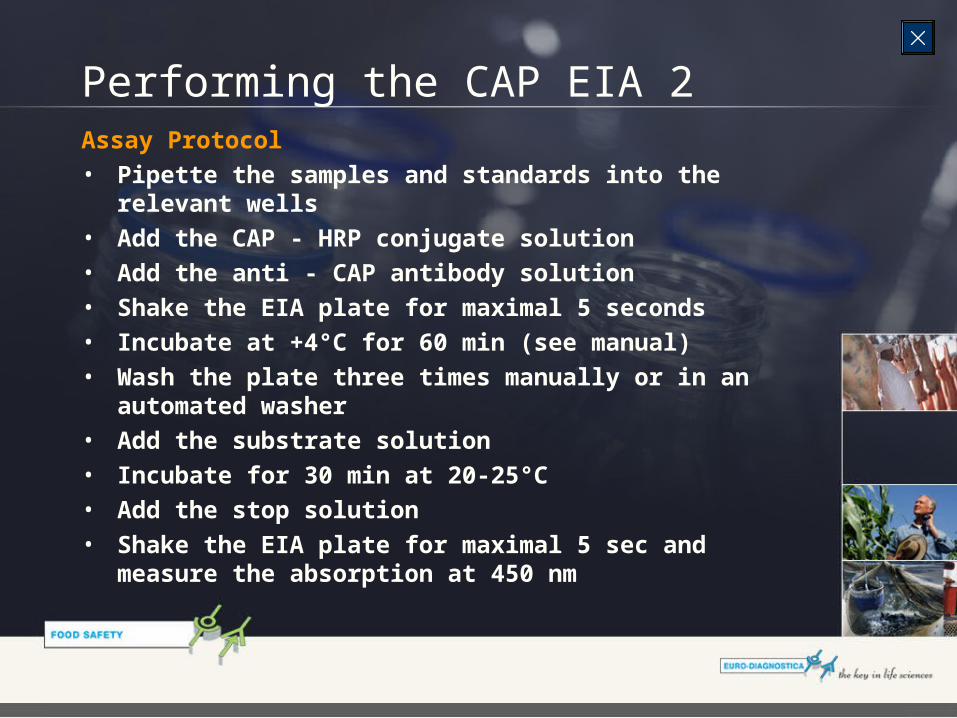
Performing the CAP EIA 2Assay Protocol
• Pipette the samples and standards into the relevant wells
• Add the CAP - HRP conjugate solution
• Add the anti - CAP antibody solution
• Shake the EIA plate for maximal 5 seconds
• Incubate at +4°C for 60 min (see manual)
• Wash the plate three times manually or in an automated washer
• Add the substrate solution
• Incubate for 30 min at 20-25°C
• Add the stop solution
• Shake the EIA plate for maximal 5 sec and measure the absorption at 450 nm

Performing the CAP EIA 31. The several reagents are added in order A, B, C
Sheep anti-rabbit antibodiesSheep anti-rabbit antibodies
Microtitre plate wellMicrotitre plate well
CAP standards, samplesCAP standards, samplesA
Rabbit anti - CAP antibodiesRabbit anti - CAP antibodiesC
CAP - HRP ConjugateCAP - HRP ConjugateB

2. The plate is incubated for 60 min at 4˚C
3. The wells are then washed with washing buffer
Two situations can now be considered:
• The sample contains a certain amount of CAP
• The sample contains no CAP
Performing the CAP EIA 4

Performing the CAP EIA 5Sample with CAP
CAP-HRP conjugate as well as free CAP can bind to the anti-CAP
antibodies
Sample without CAP
Only the CAP-HRP conjugate is available for binding to the anti-
CAP antibodies

Performing the CAP EIA 6
4. The substrate/chromogen (H2O2/TMB) is added
H2O2/TMBH2O2/TMB
5. The plate is incubated for 30 min at 20-25˚C
During incubation the colourless chromogen is converted
by the HRP enzyme into a blue reaction product
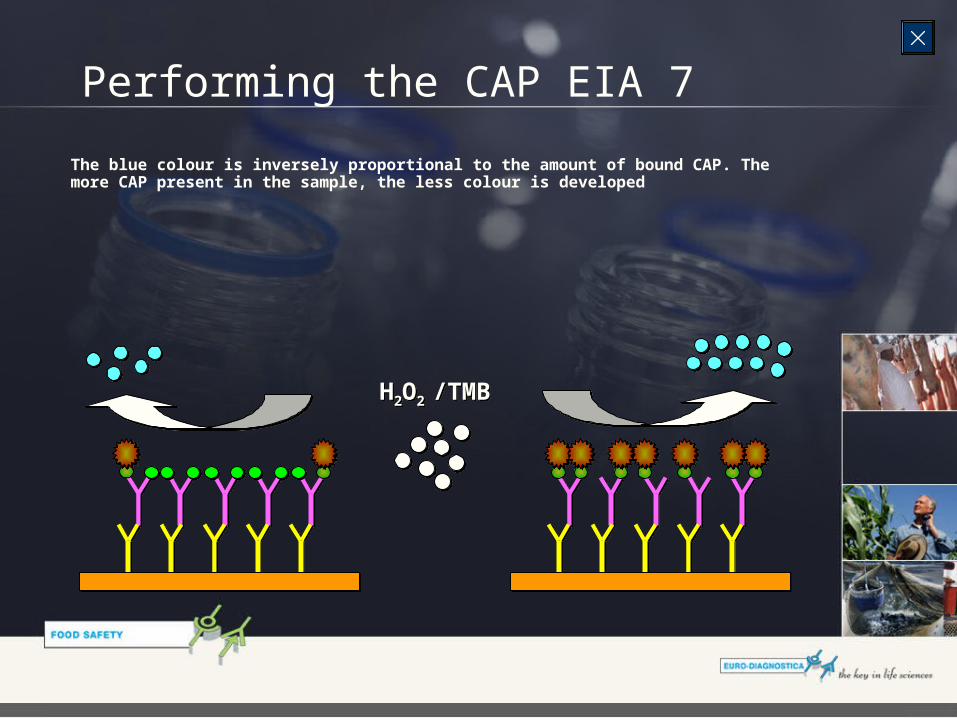
Performing the CAP EIA 7
The blue colour is inversely proportional to the amount of bound CAP. The more CAP present in the sample, the less colour is developed
H2O2 /TMBH2O2 /TMB

Performing the CAP EIA 8
6. The colour development is stopped by adding 0.5 M of sulfuric acid (H2SO4). In this acidic environment the blue colour changes into yellow

Performing the CAP EIA 97. The absorption of each
well (OD) is measured at 450 nm
8. The amount of CAP in the samples is calculated according to the calculation program ‘simple fit’

Pitfalls 1 General
• Before performing the Euro-Diagnostica Food Safety EIA read the complete Instruction Manual
• Take care of proper sampling and storage of the samples
• Apply the appropriate sample treatment• Treat all unknown samples as being potentially
infective or toxic• Turbid samples should be centrifuged or filtrated• Do not use kit components that have past the expiry
date• Do not intermix kit components with different lot
numbers

Pitfalls 2 General
• Use distilled water for preparation of the reagents• Take care that all reagents are prepared and all
equipment (including columns) are ready for use• Completely dissolve all reagents: check for
crystallisation or contaminations• Apply appropriate washing procedures• Avoid contact of the pipette tips with the coating of
the wells • All safety precautions, as valid in your laboratory and
reflected in the instruction manual should be strictly followed

Pitfalls 3 Evaporation
• Evaporation is an essential process during the extraction
• Use a solid heating block, and adjustable taps, to regulate the nitrogen flow
• Avoid cross-contamination• Organic solvents disturb the EIA. Take care to
evaporate all solvent but avoid overheating of the residue (<60°C)
• Use glass tubes when applying organic solvents. Some agents, e.g. aminoglycosides, adhere to glass. In such cases use siliconised glass (see manual)

Pitfalls 4 Evaporation
• Use control samples to estimate the recovery of the entire process
• Take care that the dry residue is completely dissolved before applying to the EIA
• When columns or tubes are re-used take care for proper cleaning to avoid contamination
Rinse with 100% methanol and wash with distilled water

Pitfalls 5 Matrix
• The nature of the matrix has a strong influence on the results in the EIA
• Dilution and/or extraction of samples reduce the matrix effect
• The pH value, salt concentration and protein contents of the samples influence the optical density value
• Optimal results are obtained when the standard line is made in the sample matrix

Pitfalls 6 Pipetting
• Prepare all reagents and equipment before starting the assay
• Too long pipetting time causes variation in incubation time, which influences the final results
• Use pipette formats in relation to the volumes to be used
• Use suitable pipette tips• Do not damage the coating surface with pipette tips• Use new pipette tips for each reagent
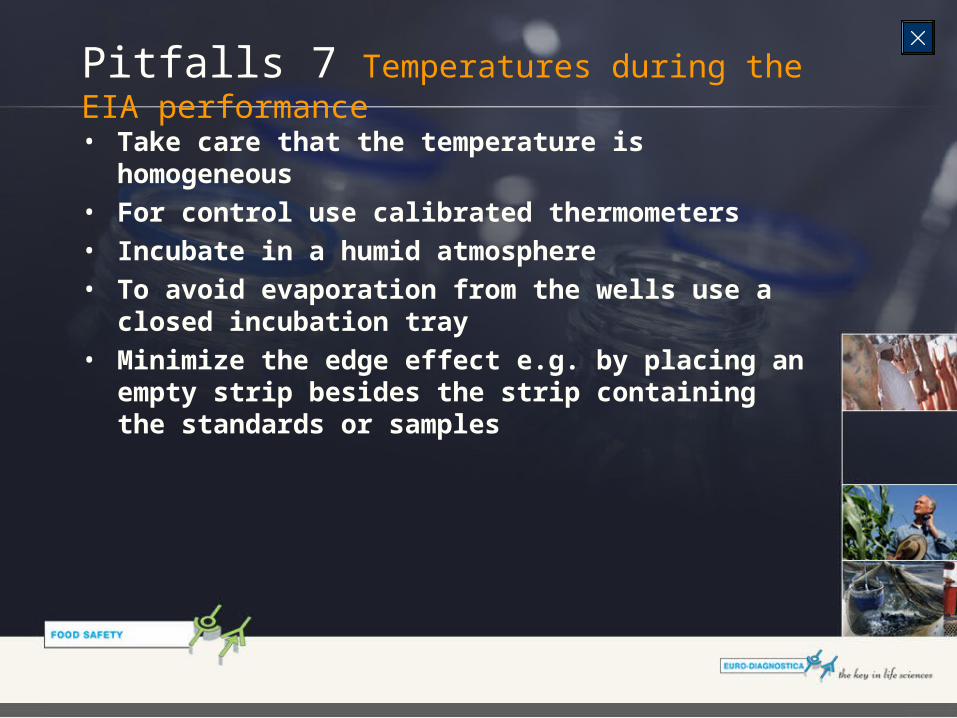
Pitfalls 7 Temperatures during the EIA performance
• Take care that the temperature is homogeneous• For control use calibrated thermometers• Incubate in a humid atmosphere• To avoid evaporation from the wells use a closed
incubation tray• Minimize the edge effect e.g. by placing an empty strip
besides the strip containing the standards or samples

Pitfalls 8 Temperature
Incubation at 37°C ± 2°C• Use an incubator with or without ventilation• Do not place the EIA plate close to the heating element
Incubation at room temperature • Optimal 22°C ± 4°C.• For higher or lower incubation temperatures it may be
necessary to monitor the incubation times
Incubation at +4°C• The regular refrigerator temperature is 2-8°C• The preferable temperature is 4-8°C• Do not place the EIA plates close to the freezing element

Pitfalls 9 Wash procedure
• Take care of proper rinsing without causing damage to the coating
• When using an automatic washer, take care that all needles are open
• Tap out all rinsing buffer. Note that phosphates in the rinsing buffer disturb the enzyme reaction
• Take care that the wells do not dry out before the substrate solution is added

Pitfalls 10 Substrate/Chromogen (H2O2/TMB)
• TMB crystallises at 2-8°C• TMB should be at room temperature before use and all
crystals should be completely dissolved• Blue colouring of the substrate in the pipetting tray is
caused by contamination or light radiation. Do not use such substrate (contact Euro-Diagnostica)
• Incubate TMB in the dark. Any direct action of light should be avoided
• TMB should not come in contact with glass. Therefore, use plastic trays and vials

Pitfalls 11 Reading OD values
• The reader should be validated, and ready-for-use according to the instruction manual
• Check the presence of an appropriate filter (450 nm)• Clean the bottom surface of the wells before reading• Avoid air bubbles in the wells. Remove bubbles with
a clean pipette tip• Read the absorbance values immediately, within
30 min

Pitfalls 12 Validation of the results
• It’s important that the c.v. between the duplicates is not higher than 10% to 20%, depending on the concentration read from the standard curve
• Note that when OD values < 0.8 the curve will become very flat. In that case, the interpretation is difficult and the results are not acceptable
• For in-house quality control it is advised to analyse one positive and one negative sample in each series
OD maximal signal > 0.8
OD blanc < 0.2
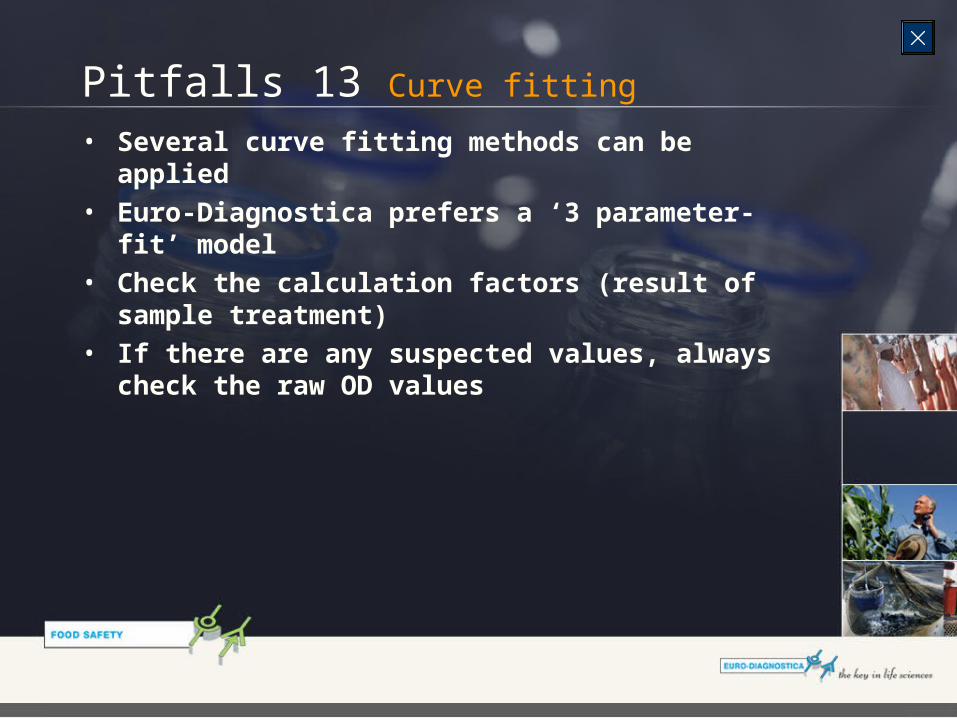
Pitfalls 13 Curve fitting
• Several curve fitting methods can be applied• Euro-Diagnostica prefers a ‘3 parameter-fit’ model• Check the calculation factors (result of sample
treatment)• If there are any suspected values, always check the
raw OD values

For further information you may contact our local distribution partners
For details, please visit our website:
www.eurodiagnostica.com