Embed Size (px)
Citation preview
YDAE 440MWF 1:30 – 3:20, PFEN 103
METHODS OF TEACHING AGRICULTURAL EDUCATIONCOURSE OUTLINEFall Semester 2012
Jerry L. PetersAgricultural Administration, Room 220A
Purdue UniversityOffice Phone: 49-48423
Email: [email protected] Hours: See instructor or call for an appointment time. In general, I will be in
the office available to see students on Monday, Wednesday, and Friday 9:00 - 11:00 a.m.
“Students with disabilities must be registered with Adaptive Programs in the Office of the Dean of Students before classroom accommodations can be provided. If you are eligible for academic accommodations because you have a documented disability that will impact your work in this class, please schedule an appointment with me as soon as possible to discuss your needs.”
“In the event of a major campus emergency, course requirements, deadlines and grading percentages are subject to changes that may be necessitated by a revised semester calendar or other circumstances. You may get information about changes in this course by emailing the instructor: [email protected] or calling my office phone: 494-8423.”
Purdue prohibits "dishonesty in connection with any University activity. Cheating, plagiarism, or knowingly furnishing false information to the University are examples of dishonesty." [Part 5, Section III-B-2-a, University Regulations] Furthermore, the University Senate has stipulated that "the commitment of acts of cheating, lying, and deceit in any of their diverse forms (such as the use of substitutes for taking examinations, the use of illegal cribs, plagiarism, and copying during examinations) is dishonest and must not be tolerated. Moreover, knowingly to aid and abet, directly or indirectly, other parties in committing dishonest acts is in itself dishonest." [University Senate Document 72-18, December 15, 1972
Course Texts: YDAE 440 Course Packet. Available only from the Youth Development and Agricultural Education
World Wide Web Home Page at: http://www.ydae.purdue.edu/download/course_packets/pac44009.pdf E-Moments. Available from the following website:
http://www.ydae.purdue.edu/download/undergrad/pdf/eMoments.pdf Newcomb, L.H., McCracken, J.D., Warmbrod, J.R. & Whittington, M.S. (2004). Methods of teaching
agriculture (3 rd Edition) . Pearson Prentice Hall. Task Stream/Portfolio System. Office of Professional Preparation and Licensure website link on securing an original teaching license:
http://www.teach.purdue.edu/licensure/initial.html Supplemental Reference: Lloyd J. Phipps; Edward W. Osborne; James E. Dyer; Anna L. Ball
(2008). Handbook on Agricultural Education in Public Schools (6 th Edition) . Thomson/Delmar. Purchase 2 CDs to copy the Indiana Agricultural Science Curriculum Lesson Plan Library and the
Indiana Agricultural Literacy (Middle School) CDs in the Technology Resource Center (TRC) located in BRNG 3287.
1

Purdue’s Agricultural Education program requires that middle and high school agricultural science and business teacher candidates practice teaching the content of their intended subject areas and take a subject-specific methods course in the area of certification. The methods course will focus on specific instructional strategies that will improve the delivery of content and provide a concurrent practicum in the form of a teaching laboratory that holds teacher candidates individually accountable for mastering instructional skills. When and where appropriate items from the Indiana Teacher Effectiveness Rubric (RISE) will be utilized to help agricultural science and business teacher candidates accurately assess their teacher effectiveness.
The following Indiana Content Standards will also be addressed in this course: 1.11 career opportunities in agricultural business, marketing, and related fields and knowledge and skills,
including leadership skills, required for employment in these fields 8.2 Common Core Standards of English language arts, mathematics, and science and their application in
agriculture; education settings 8.3 interdisciplinary strategies, scientific processes and methods, and procedures used in laboratory and
fieldwork investigations in the advanced life sciences 8.6 scientific methods and principles and their application in teaching agriculture 8.7 principles and practices for ensuring the safety of students in the classroom, field, laboratory, and
supervised agricultural experiences (SAEs) 8.8 personal characteristics and professional skills necessary for success in the workplace 8.9 strategies and techniques for helping students analyze career pathways and carry out self-assessment,
self-improvement, career exploration, and career planning and for encouraging students to be lifelong learners
8.10 outreach in agriculture education, including strategies for working with local advisory committees and promoting agricultural literacy and agricultural education opportunities in the community
8.11 strategies for professional development through participation in professional organizations in agriculture and agriculture education, including the National Association of Agricultural Educators (NAAE)
9.1 elements of the three-part agriculture education program model and how these elements complement each other to provide a total program approach to agriculture education
9.2 relationships among classroom and laboratory learning, supervised agricultural experiences (SAEs), and active participation in FFA
9.3 elements of a comprehensive agriculture education program, including community involvement, and systems for program evaluation, school financing and budgeting, and creative program funding
9.4 goals and purposes of SAEs and characteristics of different types of SAEs 9.7 purposes and goals of the National FFA Organization and the role of local FFA chapters in helping
students develop leadership, communication, citizenship, teamwork, and competitive skills 9.8 organizational structures of local state, and national FFA and the roles and responsibilities of student
offices in a local FFA chapter 9.10 role and responsibilities of FFA advisors in helping ensure the success of an FFA chapter10.1 Indiana Academic Standards for Agriculture Education10.2 instructional strategies and resources for integrating instruction that promotes students' achievement
of Common Core Standards in English language arts, mathematics, and science10.3 strategies and resources for integrating Science, Mathematics, Engineering, and Technology (STEM)
instruction; Curriculum for Agriscience Education (CASE); and Advance Life Science standards into agriculture instruction
10.4 instructional strategies and resources, including inquiry-based, and project-based instruction, and the application of these methods in teaching agriculture and advanced life sciences
10.5 strategies and skills for planning, designing, and delivering instruction in agriculture education, including the use of techniques and approaches that meet the needs of diverse learners
10.6 instructional strategies for promoting student learning and fostering the development of critical-thinking, higher-order thinking, problem-solving, and performance skills in agriculture education
2

10.7 strategies and skills for creating a productive learning environment using knowledge of student behavior, organizational skills, and classroom management skills
10.8 communication methods that promote student learning and foster active inquiry, interaction, and collaboration in the agriculture education classroom
10.9 strategies and skills for selecting, adapting and using technological resources to enhance teaching and learning about agriculture
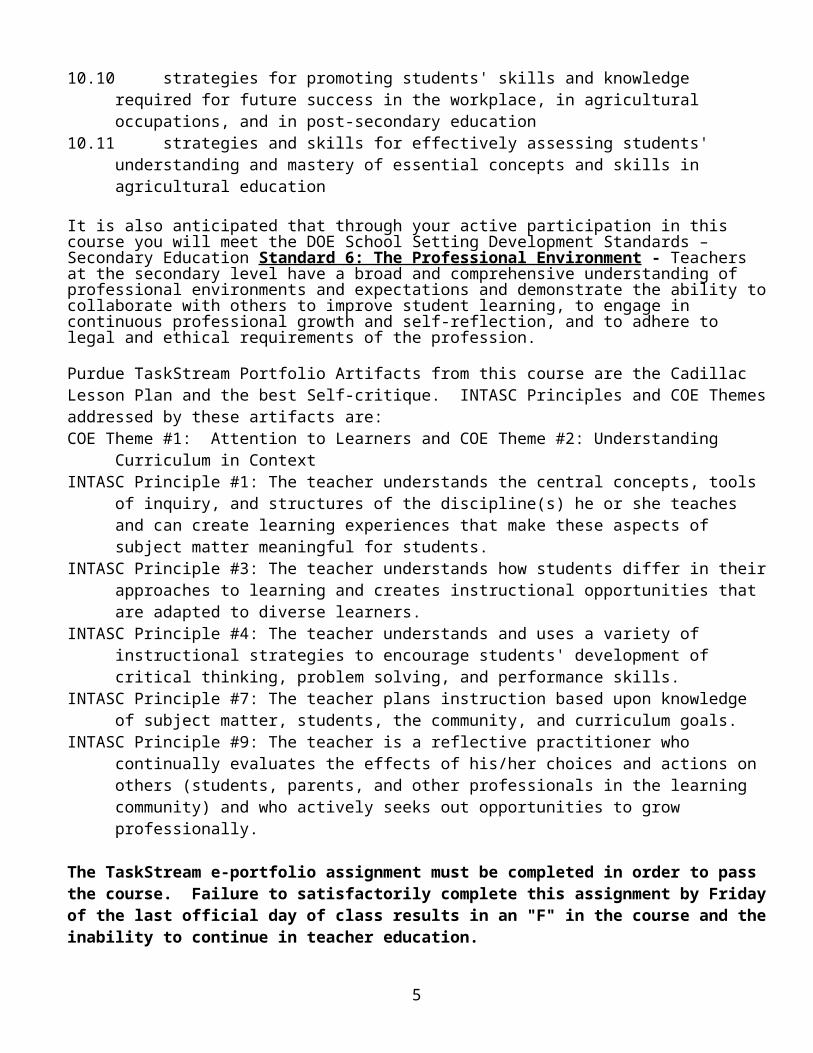
10.10 strategies for promoting students' skills and knowledge required for future success in the workplace, in agricultural occupations, and in post-secondary education
10.11 strategies and skills for effectively assessing students' understanding and mastery of essential concepts and skills in agricultural education
It is also anticipated that through your active participation in this course you will meet the DOE School Setting Development Standards – Secondary Education Standard 6: The Prof es sional Environment - Teachers at the secondary level have a broad and comprehensive understanding of professional environments and expectations and demonstrate the ability to collaborate with others to improve student learning, to engage in continuous professional growth and self-reflection, and to adhere to legal and ethical requirements of the profession.
Purdue TaskStream Portfolio Artifacts from this course are the Cadillac Lesson Plan and the best Self-critique. INTASC Principles and COE Themes addressed by these artifacts are:COE Theme #1: Attention to Learners and COE Theme #2: Understanding Curriculum in ContextINTASC Principle #1: The teacher understands the central concepts, tools of inquiry, and structures of the
discipline(s) he or she teaches and can create learning experiences that make these aspects of subject matter meaningful for students.
INTASC Principle #3: The teacher understands how students differ in their approaches to learning and creates instructional opportunities that are adapted to diverse learners.
INTASC Principle #4: The teacher understands and uses a variety of instructional strategies to encourage students' development of critical thinking, problem solving, and performance skills.
INTASC Principle #7: The teacher plans instruction based upon knowledge of subject matter, students, the community, and curriculum goals.
INTASC Principle #9: The teacher is a reflective practitioner who continually evaluates the effects of his/her choices and actions on others (students, parents, and other professionals in the learning community) and who actively seeks out opportunities to grow professionally.
The TaskStream e-portfolio assignment must be completed in order to pass the course. Failure to satisfactorily complete this assignment by Friday of the last official day of class results in an "F" in the course and the inability to continue in teacher education.
NOTE:“During the last two weeks of the semester, you will be provided an opportunity to evaluate this course and your instructor(s). To this end, Purdue has transitioned to online course evaluations. On Monday of the fifteenth week of classes, you will receive an official email from evaluation administrators with a link to the online evaluation site. You will have two weeks to complete this evaluation. Your participation in this evaluation is an integral part of this course. Your feedback is vital to improving education at Purdue University. I strongly urge you to participate in the evaluation system.
3
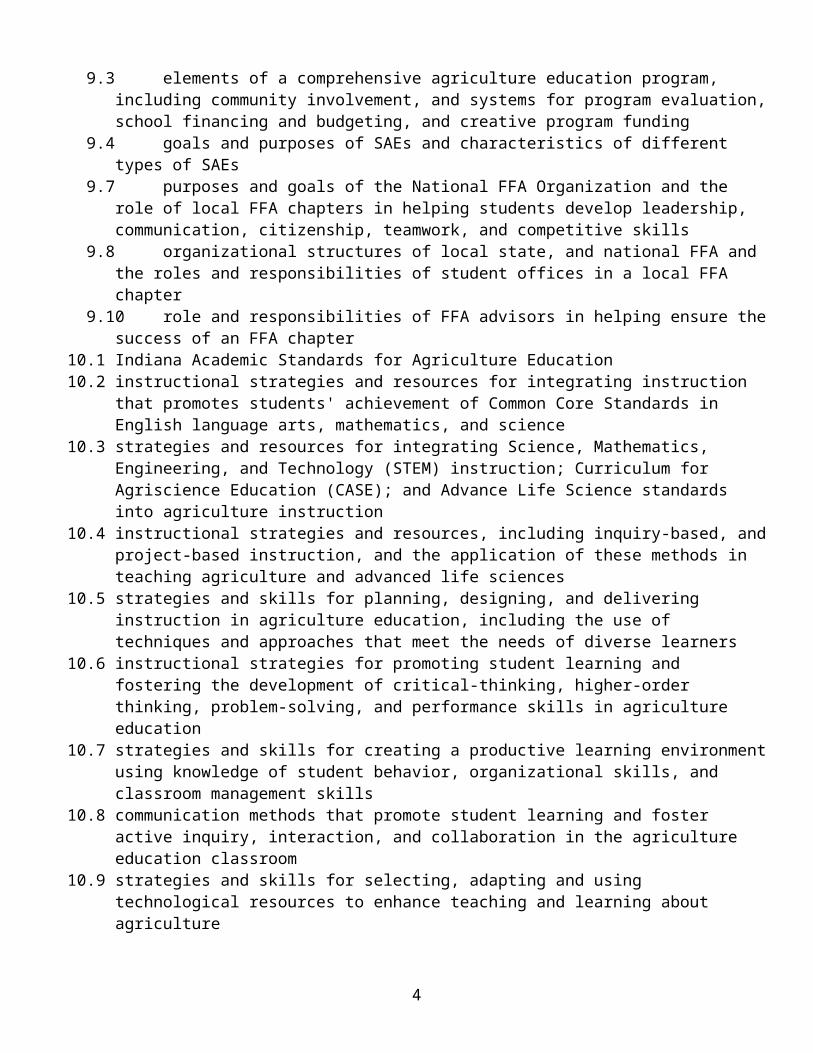
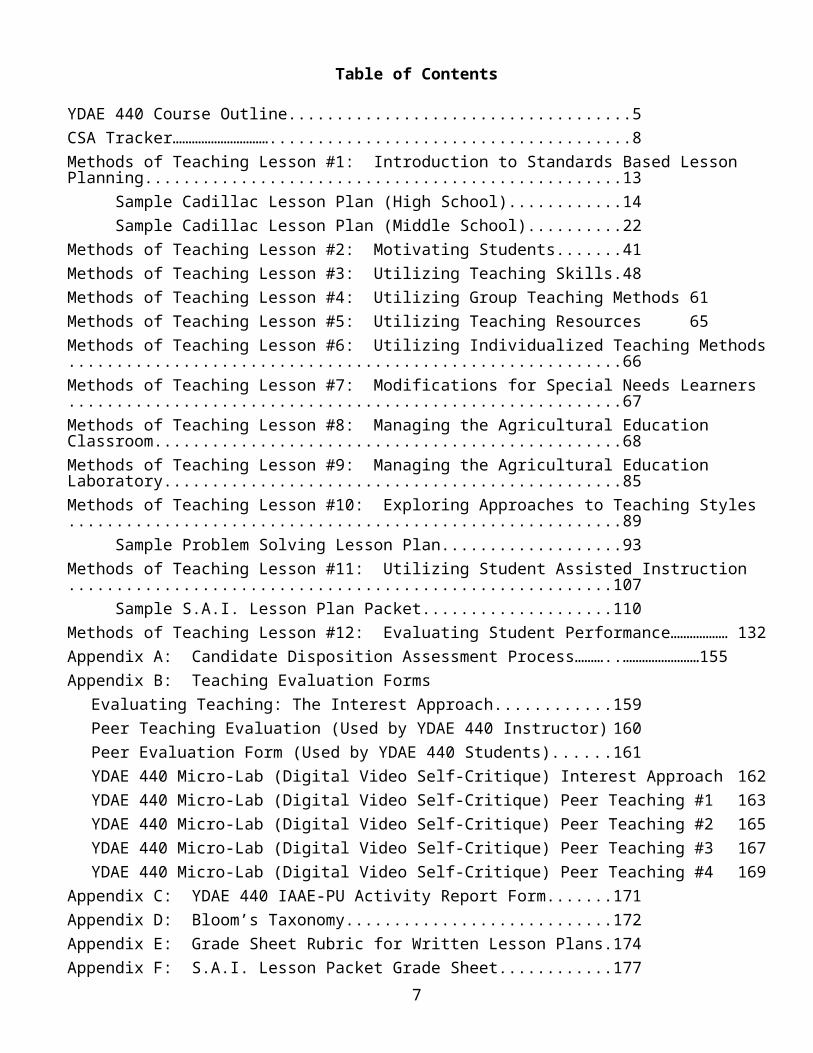
Table of Contents
YDAE 440 Course Outline............................................................................................... 5CSA Tracker…………………………..............................................................................8Methods of Teaching Lesson #1: Introduction to Standards Based Lesson Planning.....13
Sample Cadillac Lesson Plan (High School).......................................................14Sample Cadillac Lesson Plan (Middle School)....................................................22
Methods of Teaching Lesson #2: Motivating Students..................................................41Methods of Teaching Lesson #3: Utilizing Teaching Skills...........................................48Methods of Teaching Lesson #4: Utilizing Group Teaching Methods...........................61Methods of Teaching Lesson #5: Utilizing Teaching Resources....................................65Methods of Teaching Lesson #6: Utilizing Individualized Teaching Methods...............66Methods of Teaching Lesson #7: Modifications for Special Needs Learners ................67Methods of Teaching Lesson #8: Managing the Agricultural Education Classroom......68Methods of Teaching Lesson #9: Managing the Agricultural Education Laboratory......85Methods of Teaching Lesson #10: Exploring Approaches to Teaching Styles...............89
Sample Problem Solving Lesson Plan.................................................................93Methods of Teaching Lesson #11: Utilizing Student Assisted Instruction....................107
Sample S.A.I. Lesson Plan Packet....................................................................110Methods of Teaching Lesson #12: Evaluating Student Performance………………... .132Appendix A: Candidate Disposition Assessment Process……… ..……………………155Appendix B: Teaching Evaluation Forms
Evaluating Teaching: The Interest Approach..........................................................159Peer Teaching Evaluation (Used by YDAE 440 Instructor)....................................160Peer Evaluation Form (Used by YDAE 440 Students)............................................161YDAE 440 Micro-Lab (Digital Video Self-Critique) Interest Approach.................162YDAE 440 Micro-Lab (Digital Video Self-Critique) Peer Teaching #1..................163YDAE 440 Micro-Lab (Digital Video Self-Critique) Peer Teaching #2..................165YDAE 440 Micro-Lab (Digital Video Self-Critique) Peer Teaching #3..................167YDAE 440 Micro-Lab (Digital Video Self-Critique) Peer Teaching #4..................169
Appendix C: YDAE 440 IAAE-PU Activity Report Form..........................................171Appendix D: Bloom’s Taxonomy................................................................................172Appendix E: Grade Sheet Rubric for Written Lesson Plans.........................................174Appendix F: S.A.I. Lesson Packet Grade Sheet...........................................................177
4
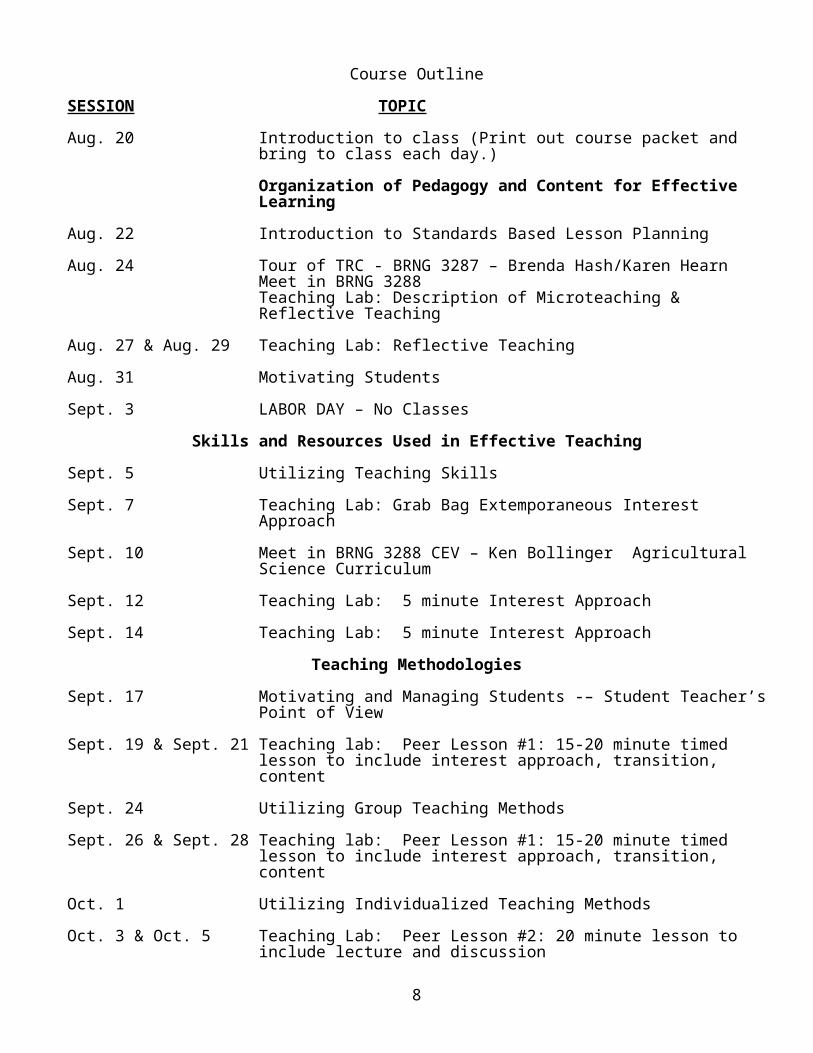
Course Outline
SESSION TOPIC
Aug. 20 Introduction to class (Print out course packet and bring to class each day.)
Organization of Pedagogy and Content for Effective Learning
Aug. 22 Introduction to Standards Based Lesson Planning
Aug. 24 Tour of TRC - BRNG 3287 – Brenda Hash/Karen HearnMeet in BRNG 3288Teaching Lab: Description of Microteaching & Reflective Teaching
Aug. 27 & Aug. 29 Teaching Lab: Reflective Teaching
Aug. 31 Motivating Students
Sept. 3 LABOR DAY – No Classes
Skills and Resources Used in Effective Teaching
Sept. 5 Utilizing Teaching Skills
Sept. 7 Teaching Lab: Grab Bag Extemporaneous Interest Approach
Sept. 10 Meet in BRNG 3288 CEV – Ken Bollinger Agricultural Science Curriculum
Sept. 12 Teaching Lab: 5 minute Interest Approach
Sept. 14 Teaching Lab: 5 minute Interest Approach
Teaching Methodologies
Sept. 17 Motivating and Managing Students -– Student Teacher’s Point of View
Sept. 19 & Sept. 21 Teaching lab: Peer Lesson #1: 15-20 minute timed lesson to include interest approach, transition, content
Sept. 24 Utilizing Group Teaching Methods
Sept. 26 & Sept. 28 Teaching lab: Peer Lesson #1: 15-20 minute timed lesson to include interest approach, transition, content
Oct. 1 Utilizing Individualized Teaching Methods
Oct. 3 & Oct. 5 Teaching Lab: Peer Lesson #2: 20 minute lesson to include lecture and discussion
5

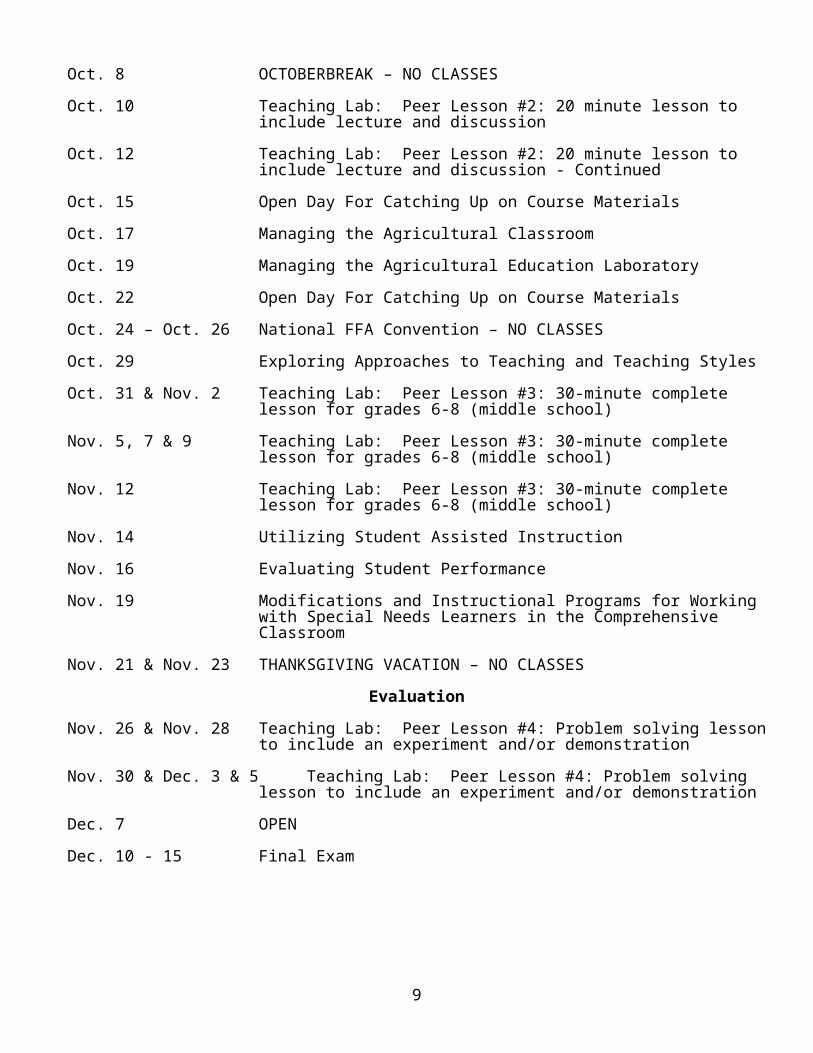
Oct. 8 OCTOBERBREAK – NO CLASSES
Oct. 10 Teaching Lab: Peer Lesson #2: 20 minute lesson to include lecture and discussion
Oct. 12 Teaching Lab: Peer Lesson #2: 20 minute lesson to include lecture and discussion - Continued
Oct. 15 Open Day For Catching Up on Course Materials
Oct. 17 Managing the Agricultural Classroom
Oct. 19 Managing the Agricultural Education Laboratory
Oct. 22 Open Day For Catching Up on Course Materials
Oct. 24 – Oct. 26 National FFA Convention – NO CLASSES
Oct. 29 Exploring Approaches to Teaching and Teaching Styles
Oct. 31 & Nov. 2 Teaching Lab: Peer Lesson #3: 30-minute complete lesson for grades 6-8 (middle school)
Nov. 5, 7 & 9 Teaching Lab: Peer Lesson #3: 30-minute complete lesson for grades 6-8 (middle school)
Nov. 12 Teaching Lab: Peer Lesson #3: 30-minute complete lesson for grades 6-8 (middle school)
Nov. 14 Utilizing Student Assisted Instruction
Nov. 16 Evaluating Student Performance
Nov. 19 Modifications and Instructional Programs for Working with Special Needs Learners in the Comprehensive Classroom
Nov. 21 & Nov. 23 THANKSGIVING VACATION – NO CLASSES
Evaluation
Nov. 26 & Nov. 28 Teaching Lab: Peer Lesson #4: Problem solving lesson to include an experiment and/or demonstration
Nov. 30 & Dec. 3 & 5 Teaching Lab: Peer Lesson #4: Problem solving lesson to include an experiment and/or demonstration
Dec. 7 OPEN
Dec. 10 - 15 Final Exam
6
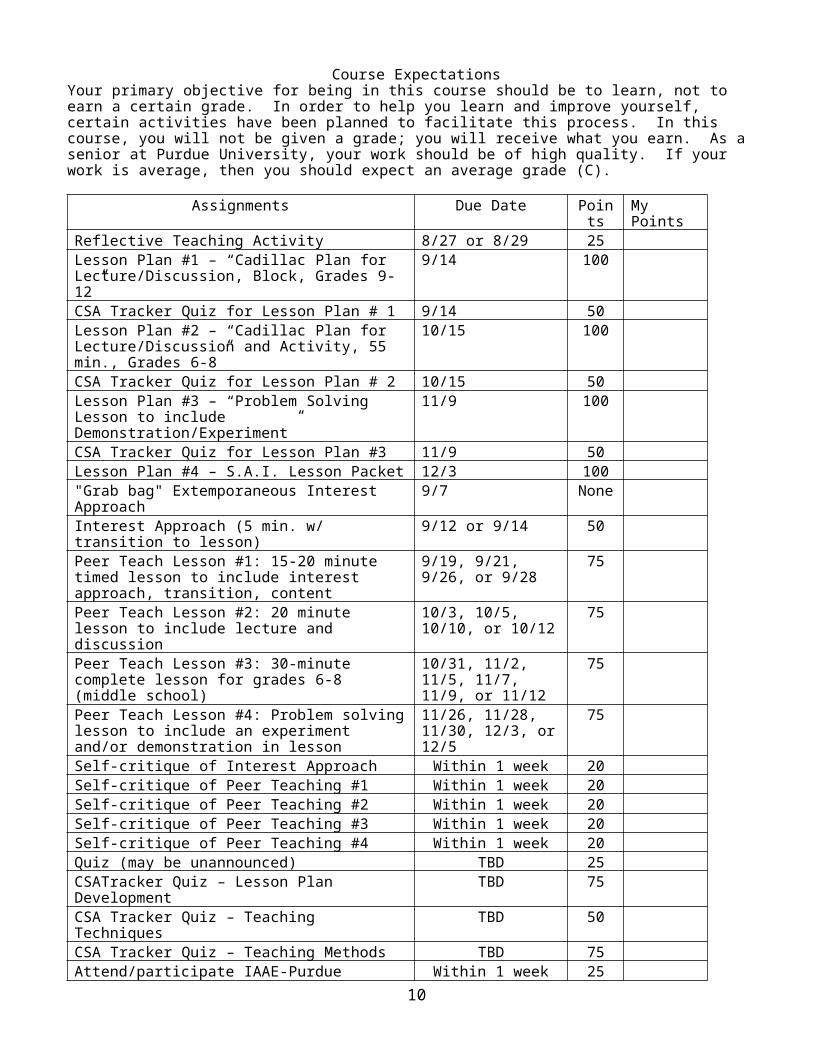
Course ExpectationsYour primary objective for being in this course should be to learn, not to earn a certain grade. In order to help you learn and improve yourself, certain activities have been planned to facilitate this process. In this course, you will not be given a grade; you will receive what you earn. As a senior at Purdue University, your work should be of high quality. If your work is average, then you should expect an average grade (C).
Assignments Due Date Points My PointsReflective Teaching Activity 8/27 or 8/29 25Lesson Plan #1 – “Cadillac Plan for Lecture/Discussion, Block, Grades 9-12”
9/14 100
CSA Tracker Quiz for Lesson Plan # 1 9/14 50Lesson Plan #2 – “Cadillac Plan for Lecture/Discussion and Activity, 55 min., Grades 6-8”
10/15 100
CSA Tracker Quiz for Lesson Plan # 2 10/15 50Lesson Plan #3 – “Problem Solving Lesson to include Demonstration/Experiment”
11/9 100
CSA Tracker Quiz for Lesson Plan #3 11/9 50Lesson Plan #4 – S.A.I. Lesson Packet 12/3 100"Grab bag" Extemporaneous Interest Approach 9/7 NoneInterest Approach (5 min. w/ transition to lesson) 9/12 or 9/14 50Peer Teach Lesson #1: 15-20 minute timed lesson to include interest approach, transition, content
9/19, 9/21, 9/26, or 9/28
75
Peer Teach Lesson #2: 20 minute lesson to include lecture and discussion
10/3, 10/5, 10/10, or 10/12
75
Peer Teach Lesson #3: 30-minute complete lesson for grades 6-8 (middle school)
10/31, 11/2, 11/5, 11/7, 11/9, or 11/12
75
Peer Teach Lesson #4: Problem solving lesson to include an experiment and/or demonstration in lesson
11/26, 11/28, 11/30, 12/3, or 12/5
75
Self-critique of Interest Approach Within 1 week 20Self-critique of Peer Teaching #1 Within 1 week 20Self-critique of Peer Teaching #2 Within 1 week 20Self-critique of Peer Teaching #3 Within 1 week 20Self-critique of Peer Teaching #4 Within 1 week 20Quiz (may be unannounced) TBD 25CSATracker Quiz – Lesson Plan Development TBD 75CSA Tracker Quiz – Teaching Techniques TBD 50CSA Tracker Quiz – Teaching Methods TBD 75Attend/participate IAAE-Purdue activity – IAAE-Purdue Callout
Within 1 week 25
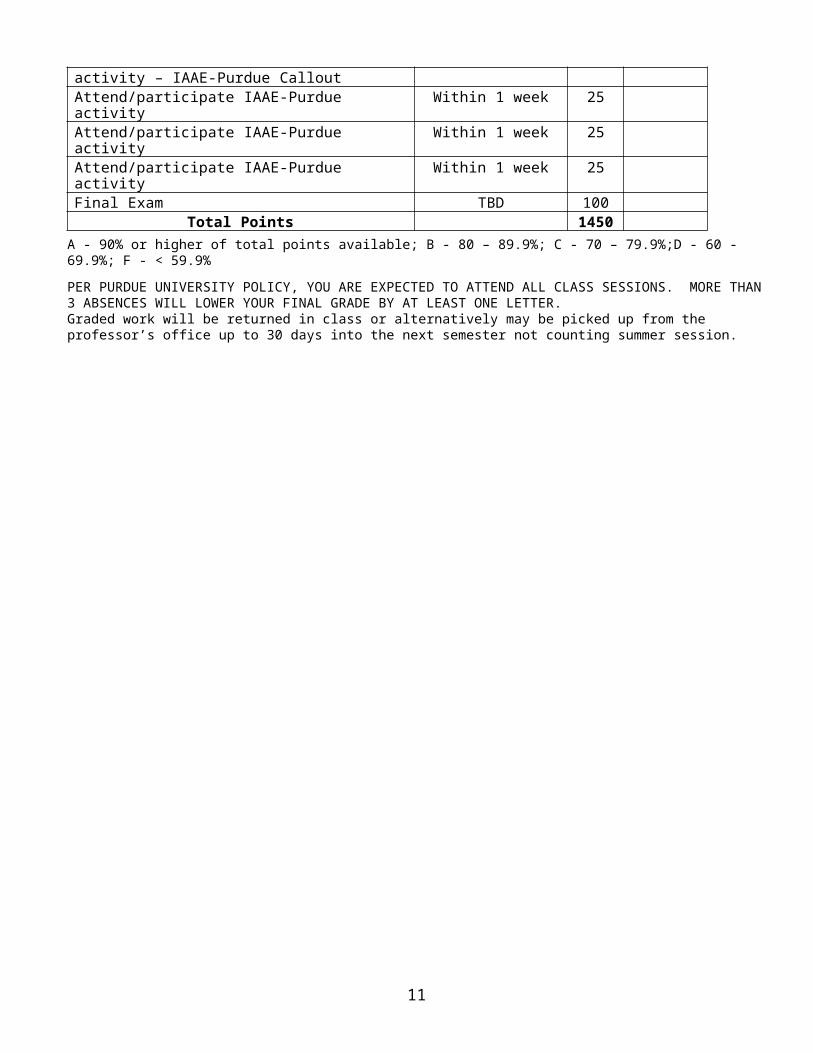
Attend/participate IAAE-Purdue activity Within 1 week 25Attend/participate IAAE-Purdue activity Within 1 week 25Attend/participate IAAE-Purdue activity Within 1 week 25Final Exam TBD 100
Total Points 1450A - 90% or higher of total points available; B - 80 – 89.9%; C - 70 – 79.9%;D - 60 - 69.9%; F - < 59.9%
PER PURDUE UNIVERSITY POLICY, YOU ARE EXPECTED TO ATTEND ALL CLASS SESSIONS. MORE THAN 3 ABSENCES WILL LOWER YOUR FINAL GRADE BY AT LEAST ONE LETTER.Graded work will be returned in class or alternatively may be picked up from the professor’s office up to 30 days into the next semester not counting summer session.
7
CSAT 2.0 User Guide- MyCAERT Interface www.MyCAERT.com
1. LOGGING INGo to www.MyCAERT.com
This page will be used by both teachers and students to log in.
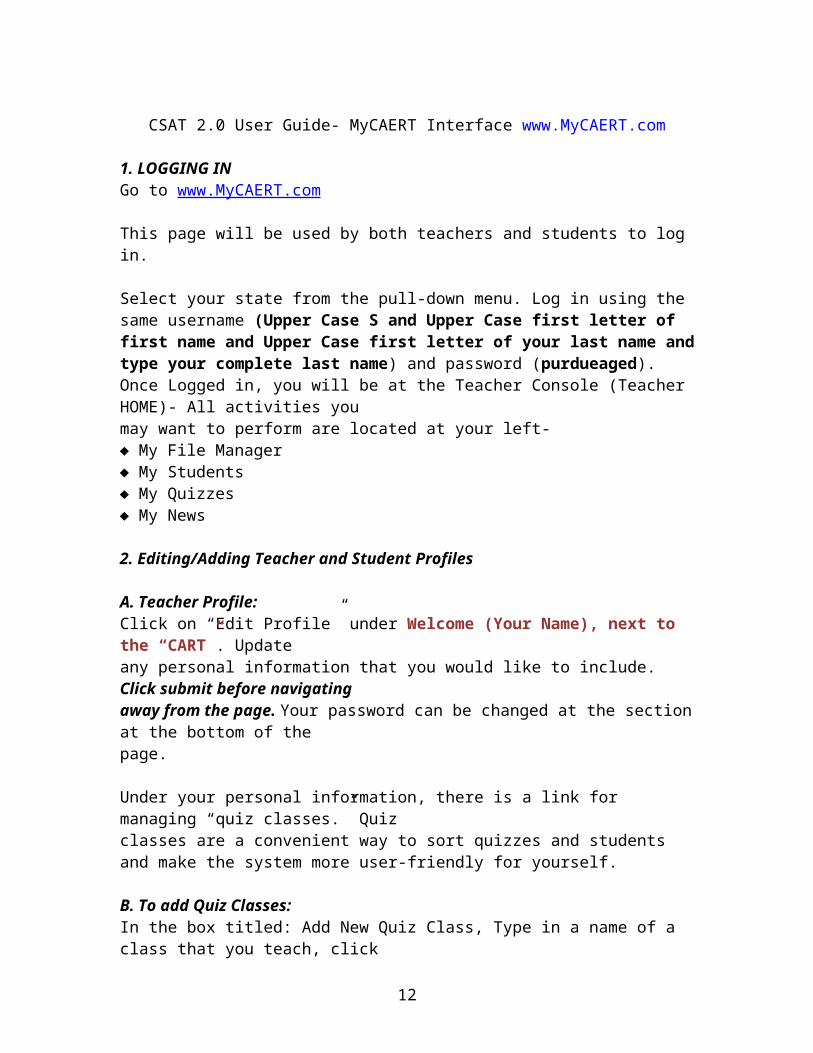
Select your state from the pull-down menu. Log in using the same username (Upper Case S and Upper Case first letter of first name and Upper Case first letter of your last name and type your complete last name) and password (purdueaged).Once Logged in, you will be at the Teacher Console (Teacher HOME)- All activities youmay want to perform are located at your left-♦ My File Manager♦ My Students♦ My Quizzes♦ My News
2. Editing/Adding Teacher and Student Profiles
A. Teacher Profile:Click on “Edit Profile” under Welcome (Your Name), next to the “CART”. Updateany personal information that you would like to include. Click submit before navigatingaway from the page. Your password can be changed at the section at the bottom of thepage.
Under your personal information, there is a link for managing “quiz classes.” Quizclasses are a convenient way to sort quizzes and students and make the system more user-friendly for yourself.
B. To add Quiz Classes:In the box titled: Add New Quiz Class, Type in a name of a class that you teach, click“Submit”. Once done, another box will appear to add your next class. Click on Submitafter each class is added. These will be alpha-numerically sorted, so if you prefer acertain order, use numbers or letter accordingly. The recommended way to add quizclasses is by each separate section of class that you teach.
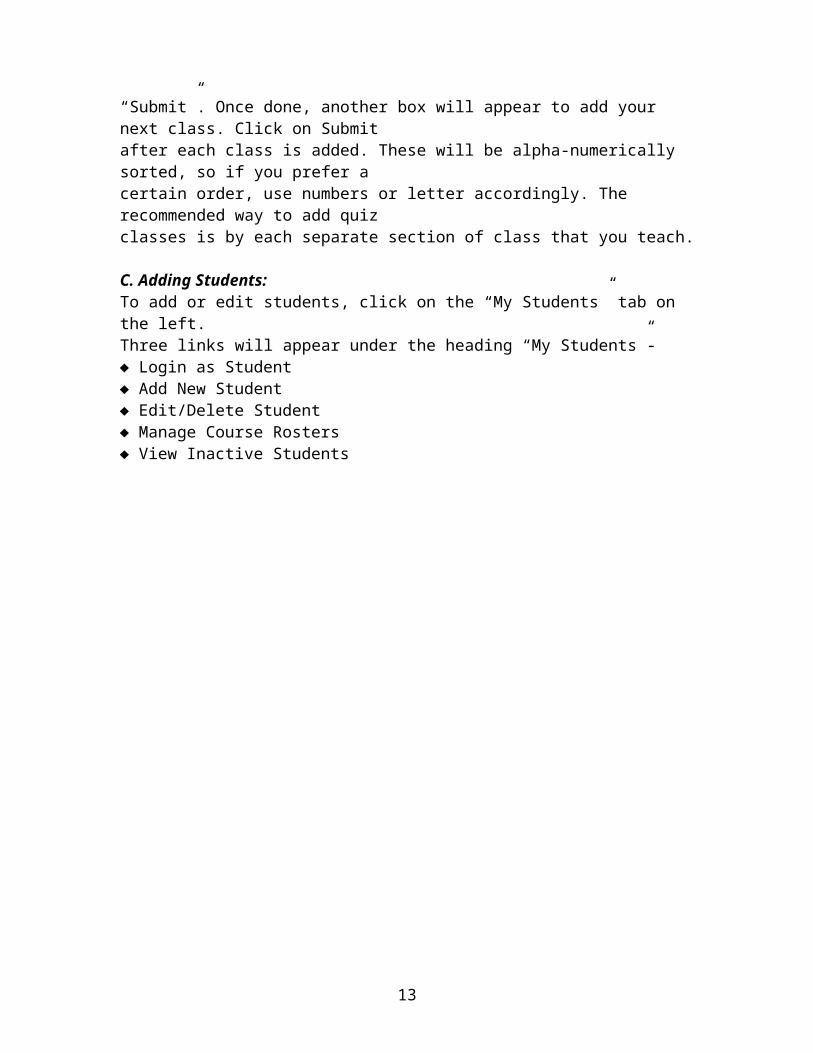
C. Adding Students:To add or edit students, click on the “My Students” tab on the left.Three links will appear under the heading “My Students”-♦ Login as Student♦ Add New Student♦ Edit/Delete Student♦ Manage Course Rosters♦ View Inactive Students
8
C1. To add a new student, Click on “Add New Student” Enter in all required (*)information. Most are self-explanatory- (First name, last name)
♦ Grade: allows you to sort info by graduation year♦ Special Needs: Setting to YES allows that student to see additional assistance that
you may choose to make available to them.♦ Viewable Quiz Classes: Choose all classes that this student should be able to
access.♦ Username and Password: All students must have a unique username from anyone
else in Indiana- passwords can all be the same if you choose. Email addresses orsome other type of unique naming is recommended. You might incorporateschool initials or some other identifier in the Username- Example- “Joe” isprobably not going to work as someone else may already be using it, but“MHSJoeSmith” might be able to be used.
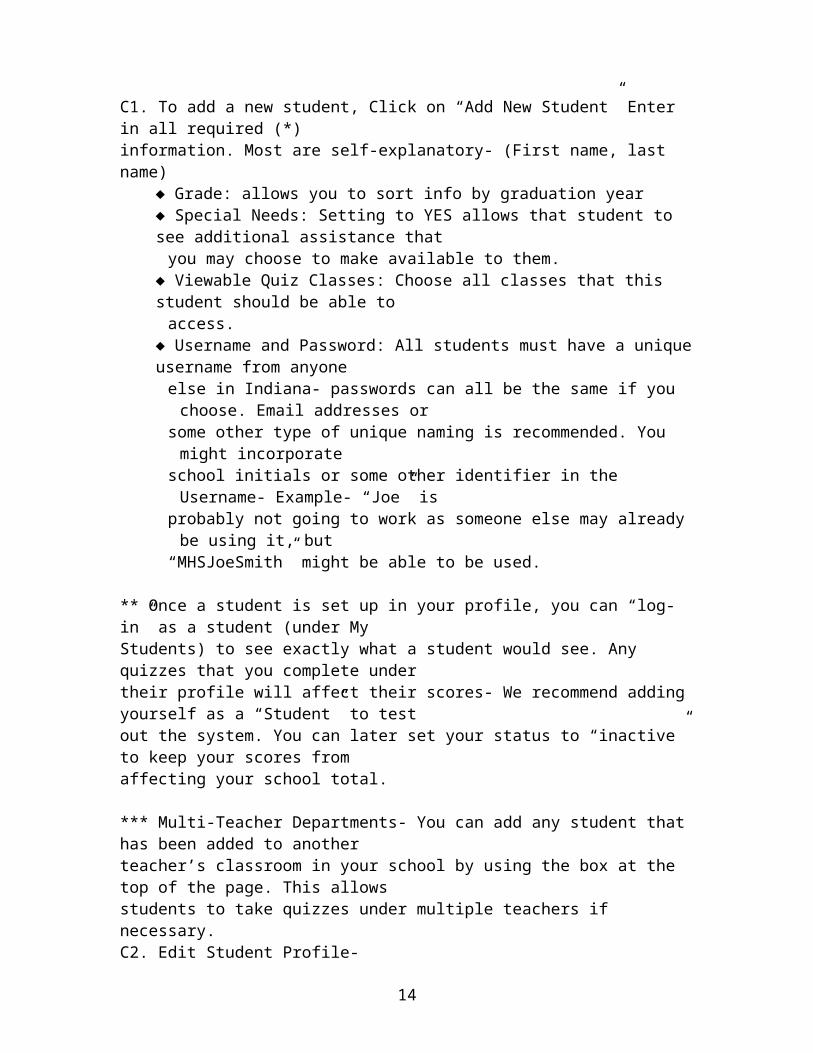
** Once a student is set up in your profile, you can “log-in” as a student (under MyStudents) to see exactly what a student would see. Any quizzes that you complete undertheir profile will affect their scores- We recommend adding yourself as a “Student” to testout the system. You can later set your status to “inactive” to keep your scores fromaffecting your school total.
*** Multi-Teacher Departments- You can add any student that has been added to anotherteacher’s classroom in your school by using the box at the top of the page. This allowsstudents to take quizzes under multiple teachers if necessary.C2. Edit Student Profile-
Click Edit/Delete Student under “My Students”- Sort Student list using the drop-downmenu. (Name, Grade, Quiz Class)Click on any student to edit their profile. Always click link at bottom (Submit) beforenavigating away from page.
C3. View Inactive Students-Click “View Inactive Students” under My Students to see a list of all inactive (or Active)students and change their “Status” Inactive students are not included in Current yearreports, and cannot log in to CSAT. A student should be set to inactive if they moveaway, or when they graduate.
3. CREATING AND MANAGING QUIZZES
A. Creating a New QuizTo create a new quiz, click on “Create New Quiz” under the “My Quizzes” section.A1. You will be taken to a “Parameters” page that allows you to control how the quiz isadministered. “Mouse Over” the symbol for information on what each parameter
9
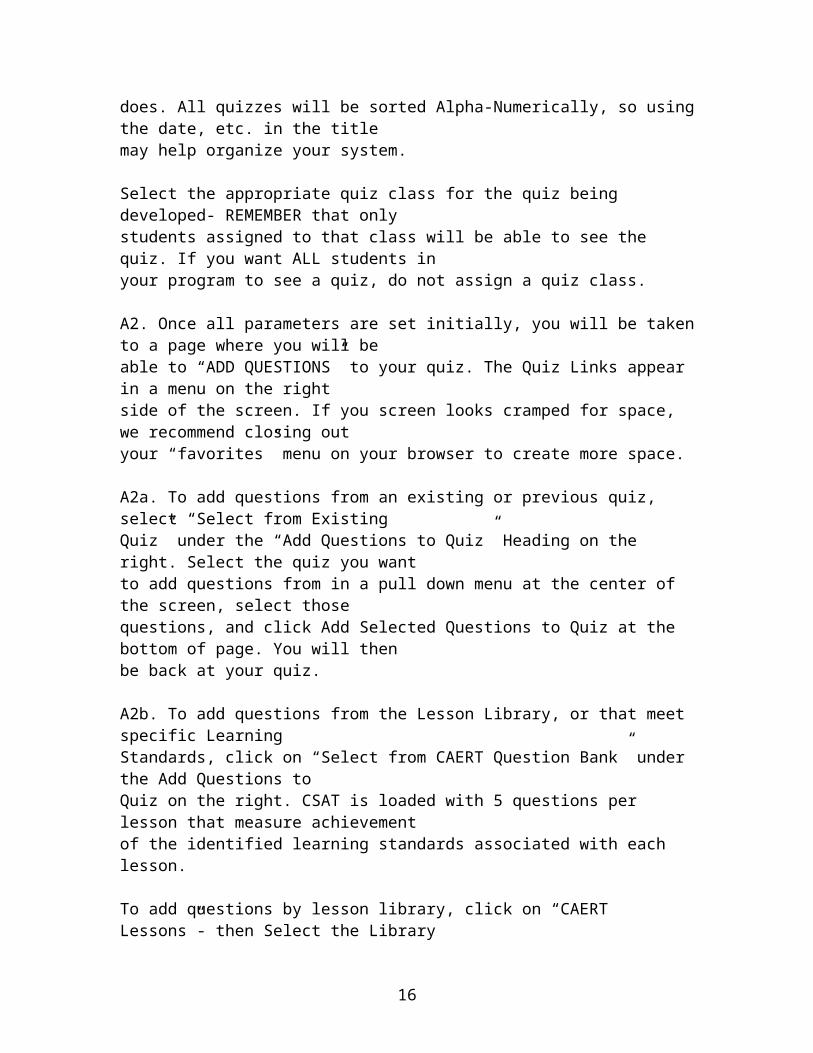
does. All quizzes will be sorted Alpha-Numerically, so using the date, etc. in the titlemay help organize your system.
Select the appropriate quiz class for the quiz being developed- REMEMBER that onlystudents assigned to that class will be able to see the quiz. If you want ALL students inyour program to see a quiz, do not assign a quiz class.
A2. Once all parameters are set initially, you will be taken to a page where you will beable to “ADD QUESTIONS” to your quiz. The Quiz Links appear in a menu on the rightside of the screen. If you screen looks cramped for space, we recommend closing outyour “favorites” menu on your browser to create more space.
A2a. To add questions from an existing or previous quiz, select “Select from ExistingQuiz” under the “Add Questions to Quiz” Heading on the right. Select the quiz you wantto add questions from in a pull down menu at the center of the screen, select thosequestions, and click Add Selected Questions to Quiz at the bottom of page. You will thenbe back at your quiz.
A2b. To add questions from the Lesson Library, or that meet specific LearningStandards, click on “Select from CAERT Question Bank” under the Add Questions toQuiz on the right. CSAT is loaded with 5 questions per lesson that measure achievementof the identified learning standards associated with each lesson.
To add questions by lesson library, click on “CAERT Lessons”- then Select the LibraryCluster you wish to add questions from- (Indiana has access to all libraries). Once CD isselected, pick units, and then lessons that you wish to see questions from. Scroll to thebottom of the page and click “Select Lessons.”Once you select the lessons you want questions from, a list of those questions is seen.Select each question you wish to add, then click “Add Selected Questions to Quiz”.
A2c. To type in your own question, or copy from existing quizzes you may have, select“Type Own Question” from the “Add Questions to Quiz” link. From this page, you canidentify if you want to align the question to a learning standard, the type of question it is,and if you want a “template” to copy from.
Once you have added the questions that you want in your quiz, click on “This Quiz isInactive- Click to Activate” at the top of the quiz page. This will make it available to anystudent who should have access to it.
A3. Enabling a “State Quiz”State quizzes are those that are made available for all teachers in the state to use. Thismight include old practice exams for Career Development Events, Certification Exams ifsuch exams are developed, or even administering a Statewide Career Development Eventthat your students could participate in right from your school.
10
Under the My Quizzes Link, click on Manage State Quizzes. A page will appear thatlists all State Quizzes that are currently available. Double-click on a quiz, and it willsend you to a page that allows you to view the quiz, assign it to one or more of your quizclasses, and set it as active so that your students can access it.
A4. Sharing Quizzes with other teachers.CSAT 2.0 allows you to share a quiz with other teachers in any school in your state.Once you have a quiz created with questions and parameters set the way you want, clickon “Edit Quiz” Toward the top of that page, directly above the first question, there is alink that says “Share Quiz with Another Teacher”. Clicking on that icon provides thefilters to select the teacher(s) you wish to share the quiz with.
To use a quiz shared by someone, click on “edit quiz”. In your list will be quizzes thatothers have shared with you, along with their name. Simply click on that quiz, set it to“Active”, and change any parameters you wish to make it work in your class.
4. TAKING QUIZZES (STUDENTS)
Once a teacher has a quiz set to “Active” and Questions are loaded, students can log in tothe system and take that quiz. Likewise, as a teacher, you can always log in as any ofyour students to see what they can see from their profile. As a teacher, underMyStudents, click on Log-in as a student. A list of all students will appear and you canlog in as any of them.
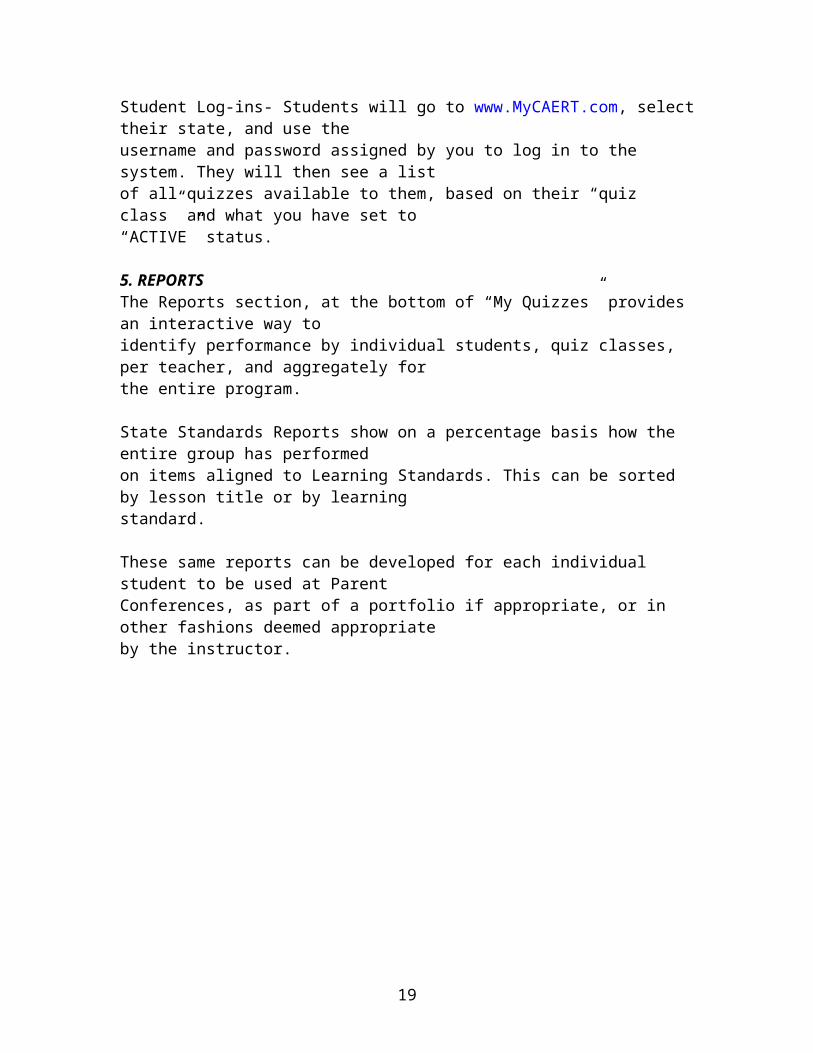
Student Log-ins- Students will go to www.MyCAERT.com, select their state, and use theusername and password assigned by you to log in to the system. They will then see a listof all quizzes available to them, based on their “quiz class” and what you have set to“ACTIVE” status.
5. REPORTSThe Reports section, at the bottom of “My Quizzes” provides an interactive way toidentify performance by individual students, quiz classes, per teacher, and aggregately forthe entire program.
State Standards Reports show on a percentage basis how the entire group has performedon items aligned to Learning Standards. This can be sorted by lesson title or by learningstandard.
These same reports can be developed for each individual student to be used at ParentConferences, as part of a portfolio if appropriate, or in other fashions deemed appropriateby the instructor.
11
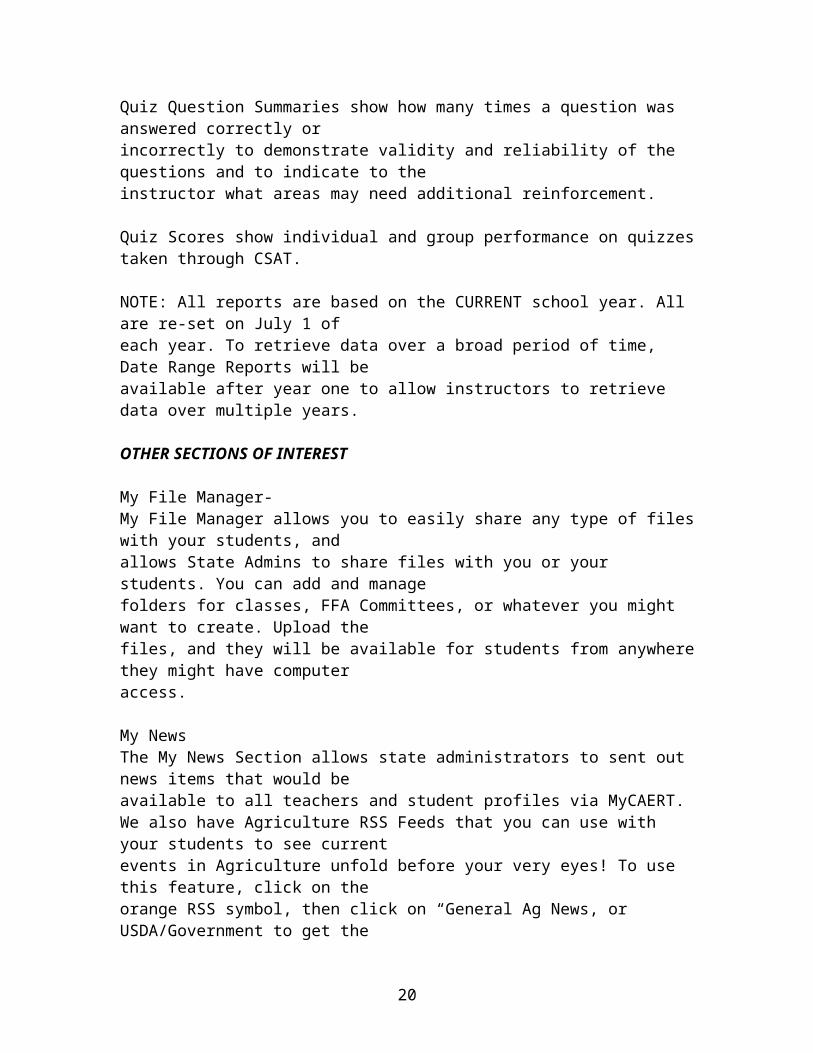
Quiz Question Summaries show how many times a question was answered correctly orincorrectly to demonstrate validity and reliability of the questions and to indicate to theinstructor what areas may need additional reinforcement.
Quiz Scores show individual and group performance on quizzes taken through CSAT.
NOTE: All reports are based on the CURRENT school year. All are re-set on July 1 ofeach year. To retrieve data over a broad period of time, Date Range Reports will beavailable after year one to allow instructors to retrieve data over multiple years.
OTHER SECTIONS OF INTEREST
My File Manager-My File Manager allows you to easily share any type of files with your students, andallows State Admins to share files with you or your students. You can add and managefolders for classes, FFA Committees, or whatever you might want to create. Upload thefiles, and they will be available for students from anywhere they might have computeraccess.
My NewsThe My News Section allows state administrators to sent out news items that would beavailable to all teachers and student profiles via MyCAERT.We also have Agriculture RSS Feeds that you can use with your students to see currentevents in Agriculture unfold before your very eyes! To use this feature, click on theorange RSS symbol, then click on “General Ag News, or USDA/Government to get thelatest news in those categories. These are fed through Brownfield Network on an hourlybasis.
12
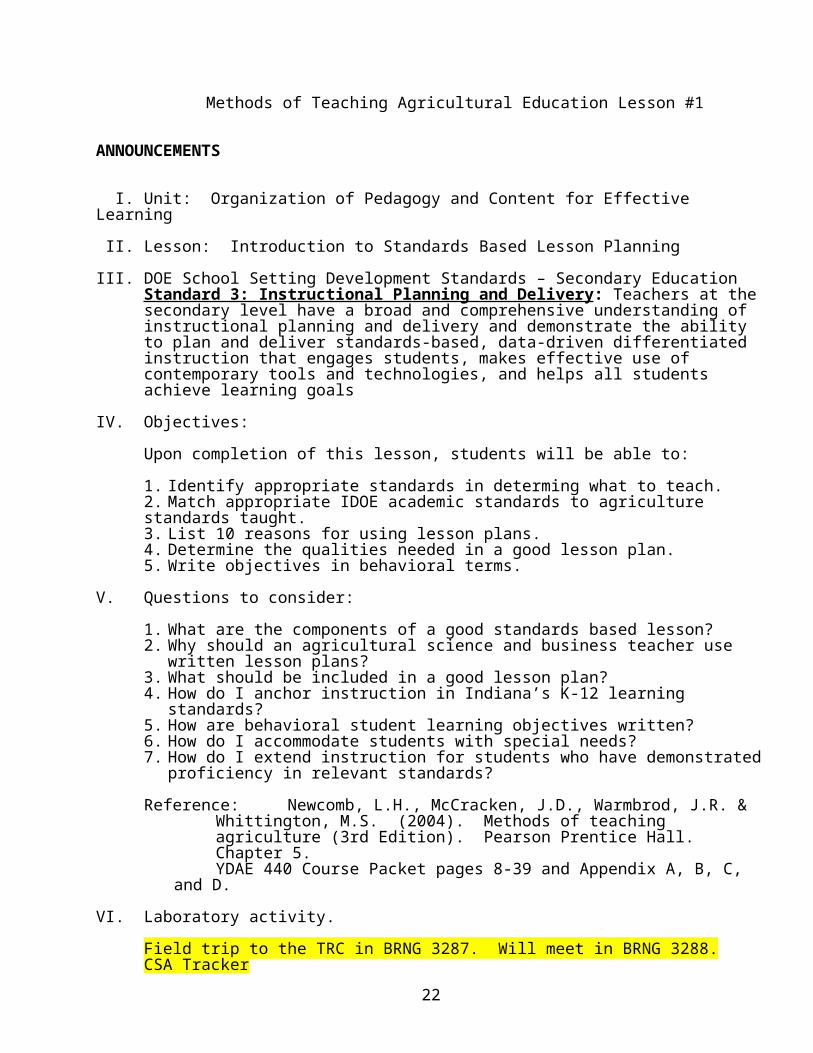
Methods of Teaching Agricultural Education Lesson #1
ANNOUNCEMENTS
I. Unit: Organization of Pedagogy and Content for Effective Learning
II. Lesson: Introduction to Standards Based Lesson Planning
III. DOE School Setting Development Standards – Secondary EducationStandard 3: Instructional Planning and Delivery: Teachers at the secondary level have a broad and comprehensive understanding of instructional planning and delivery and demonstrate the ability to plan and deliver standards-based, data-driven differentiated instruction that engages students, makes effective use of contemporary tools and technologies, and helps all students achieve learning goals
IV. Objectives:
Upon completion of this lesson, students will be able to:
1. Identify appropriate standards in determing what to teach.2. Match appropriate IDOE academic standards to agriculture standards taught.3. List 10 reasons for using lesson plans.4. Determine the qualities needed in a good lesson plan.5. Write objectives in behavioral terms.
V. Questions to consider:
1. What are the components of a good standards based lesson?2. Why should an agricultural science and business teacher use written lesson plans?3. What should be included in a good lesson plan?4. How do I anchor instruction in Indiana’s K-12 learning standards?5. How are behavioral student learning objectives written?6. How do I accommodate students with special needs?7. How do I extend instruction for students who have demonstrated proficiency in relevant
standards?
Reference: Newcomb, L.H., McCracken, J.D., Warmbrod, J.R. & Whittington, M.S. (2004). Methods of teaching agriculture (3rd Edition). Pearson Prentice Hall. Chapter 5.YDAE 440 Course Packet pages 8-39 and Appendix A, B, C, and D.
VI. Laboratory activity.
Field trip to the TRC in BRNG 3287. Will meet in BRNG 3288.CSA TrackerReflective Teaching.Microteaching.
13
Sample Cadillac Lesson PlanHigh School
Name: Date Last Revised:
Course Title: Horticultural Science
Domain: Plant Classification, Anatomy, and Physiology Unit: Horticultural Science (Horticulture Lesson Plan Library- Unit A)
Core Standard 1: Students apply knowledge of plant classification, plant anatomy and plant physiology to the production and management of plants.
Problem Area: Plant Anatomy and Physiology (Number 2)
Standard: HS-1.2 Apply knowledge of plant anatomy and the functions of plant structures to activities associated with plant systems.
Title of Lesson: Understanding Leaf Anatomy and Morphology (Lesson A2-4)
Student Learning Objectives: At the completion of this lesson, the students will be able to complete the following objectives with a score of 80% or higher, unless stated otherwise.:
1. Identify the main parts of a leaf.2. Describe some major types of leaves.3. Discuss common vein patterns found in leaves.4. Explain how a leaf is organized.5. Recall differences in leaf forms.
Situation: This lesson is being taught to a group of students in grades 10-12 in a rural community. Before this lesson the students of the Horticulture Science class, have had lessons on how to classify plants, root anatomy, and stem anatomy. After this lesson the students will be exploring flower anatomy and the factors that effect plant growth. It is important for the students to learn about these topic areas because in the upcoming weeks the class will be working in the greenhouse caring for their annual plant sale specimens. Class length is 70 minutes.
References and Teaching Aides:
1. Chalkboard and overhead projector. 2. Schroeder, Charles B., et al. Introduction to Horticulture, Third Edition. Danville, Illinois: Interstate
Publishers, Inc., 2000. One book per student.3. Leaf Anatomy Notes Study Guide, preferably on green colored paper. One for each student4. Extra writing utensils5. Leaf samples in a paper bag. Enough for all students to have one.6. “Parts of a Simple Dicot Leaf” transparency7. “Some Simple and Compound Leaves” transparency8. 5 Leaf samples with all of the venation and leaf type patterns among them. These can be pressed or
fresh samples9. 5 Leaf samples with leaf parts pointed at for identification
10. 10 place cards with numbers on them for quiz stations11. Leaf ID Quiz Sheet. One for each group12. Tootsie Rolls
Documentation of Competencies Met by This Lesson:
Connection to SAE/Career Development: Careers related to Horticulture include working in a greenhouse, farming, agronomic supply company, floral shop, forestry, plant genetics and breeding, and landscaping and design.
Proficiency areas related to Horticulture are Diversified Horticulture, Floriculture, Specialty Crop Production, Forest Management and Products, Fruit Production, Vegetable Production, Landscape Management, Nursery Operations
Connections to FFA/Leadership Development/Personal Growth: Horticulture 4-H/FFA Event, Practical Forestry CDE, Forestry 4-H/FFA Event, Floriculture CDE
Documentation of Academic Standards Met by This Lesson:
Science Concepts Taught: SCI.B.2.1 2010 Describe features common to all cells that are essential for growth and survival. Explain their functions.SCI.B.2.2 2010 Describe the structure of a cell membrane and explain how it regulates the transport of materials into and out of the cell and prevents harmful materials from entering the cell.
English/Language Arts Concepts Taught: EL.10.1.1 2006 Vocabulary and Concept Development: Understand technical vocabulary in subject area reading. EL.10.1.4 2006 Identify and use the literal and figurative meanings of words and understand origins of words.EL.10.5.7 2006 Use varied and expanded vocabulary, appropriate for specific forms and topics.EL.12.7.1 2006 Comprehension: Summarize a speaker's purpose and point of view, discuss, and ask questions to draw interpretations of the speaker's content and attitude toward the subject.
High School Speech and Communication Concepts Taught:EL.SPC.1.1 2006 Summarize a speaker's purpose and point of view, discuss, and ask questions to draw interpretations of the speaker's content and attitude toward the subject. [11.7.1/12.7.1]
Interest Approach: Walk around the room with a paper bag and have each student draw one specimen (leaf) out of the bag. Without telling the students what is in front of them have them examine the leaves. Ask the students what it is that they drew out of the bag. Pair the students in groups of two with a person around them. Go through the class and have each group point out one difference between their leaf and the leaf their partner has. No group can repeat an answer that is already used. After a group has answered give each person a tootsie roll and remind them to save their rappers and turn them in five at a time for one extra credit point.
Subject Matter Content Teaching Learning Activities
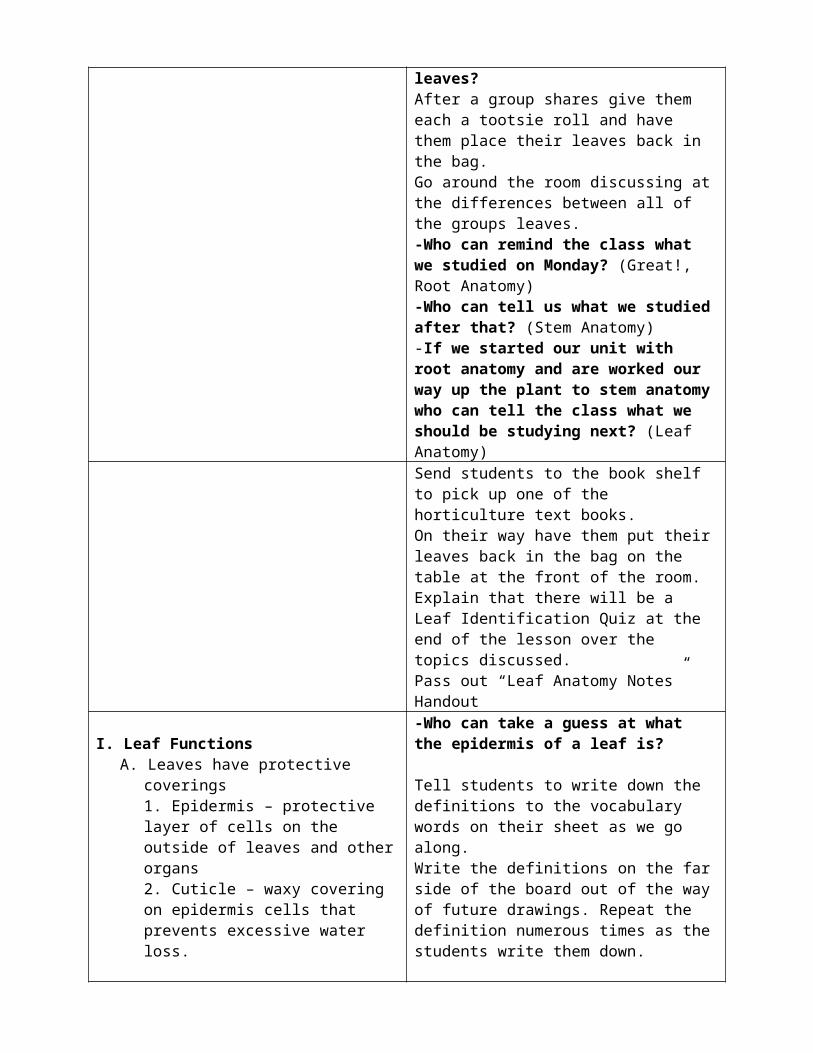
Before class set up leaf ID stations around the room for the students’ mini quiz on leaf anatomy. Place each leaf with a piece of paper beside it that says the leaf number on it. Make sure there is enough room around the stations for the groups to be separated.Have an example of all types of venation and all types of leaves. This will take AT LEAST five leaves. Also have 5 stations of leaf part identifications. Have a leaf at each station with an arrow pointing to the part needing identified.Have students draw leaf samples-Who can raise their hand and tell us what it is that they drew out of the bag?Divide the students into groups of two and have them compare their leaf to their partners.(E Moment) Stand up with your partner when you find a difference between your leaves-Who can share with the class one difference between their leaves?After a group shares give them each a tootsie roll and have them place their leaves back in the bag.Go around the room discussing at the differences between all of the groups leaves.-Who can remind the class what we studied on Monday? (Great!, Root Anatomy)-Who can tell us what we studied after that? (Stem Anatomy)-If we started our unit with root anatomy and are worked our way up the plant to stem anatomy who can tell the class what we should be studying next? (Leaf Anatomy)Send students to the book shelf to pick up one of the horticulture text books. On their way have them put their leaves back in the bag on the table at the front of the room. Explain that there will be a Leaf Identification Quiz at the end of the lesson over the topics discussed.Pass out “Leaf Anatomy Notes” Handout

I. Leaf FunctionsA. Leaves have protective coverings
1. Epidermis – protective layer of cells on the outside of leaves and other organs 2. Cuticle – waxy covering on epidermis cells that prevents excessive water loss.
-Who can take a guess at what the epidermis of a leaf is?
Tell students to write down the definitions to the vocabulary words on their sheet as we go along. Write the definitions on the far side of the board out of the way of future drawings. Repeat the definition numerous times as the students write them down.
-What on a human could you compare the epidermis to? (skin)
(E moment) – All together class, what is the protective layer of cells called?
-What could we compare a cuticle to? (sunscreen)
B. Transpiration is the loss of water from the plant through the leaves in the form of water vapor.1. Stomata – openings on the leaf that allow the exchange of carbon dioxide, oxygen, and water vapor.
a. Most found on underside of leaf.b. Open and close by a pair of guard
cells that fill with water.c. Open when light and water are
abundant.d. Close when water leaves guard
cells (night & water stress).e. Photosynthesis stops when stomata
are closed (no CO2).
Have students open their books to page 81 to look at the picture of the stomata
-What could we compare transpiration to for humans? (sweating)
-What could the guard cells be compared to on the human face? (mouth)
-Who can remind the class what photosynthesis is? (way leaves manufacture food for the plant by chemical reactions in which carbon dioxide and water are converted into oxygen)
II. Parts of LeavesA. Leaves come in all shapes, sizes, and
colorsB. Helpful when identifying plantsC. Two main parts of the leaf
1. Leaf blade – the largest surface area on the leafa. Margin – outer edge of the leaf
bladeb. Midrib – largest vein in the center
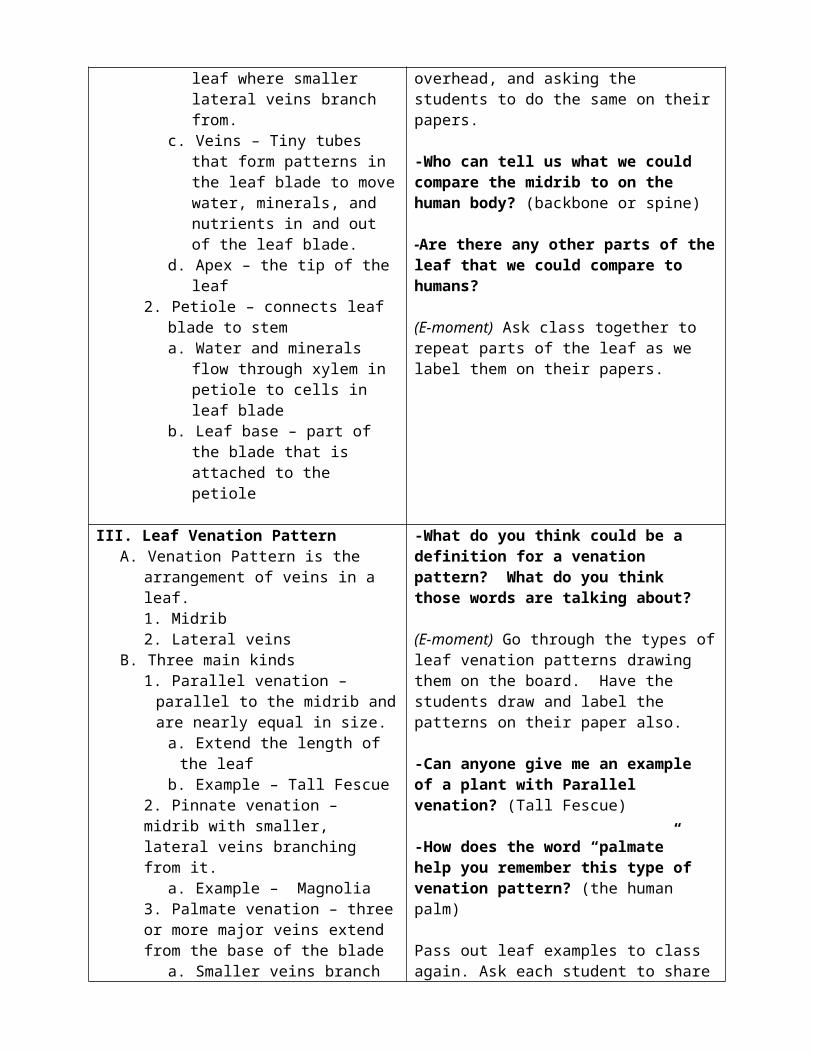
of the leaf where smaller lateral veins branch from.
c. Veins – Tiny tubes that form patterns in the leaf blade to move water, minerals, and nutrients in and out of the leaf blade.
d. Apex – the tip of the leaf2. Petiole – connects leaf blade to stem
Ask students to read silently the “Parts of Leaves” section of the textbook on pages 82-84
Set up the overhead projector to show transparency of “Parts of a Simple Dicot Leaf.”
Discus the parts of the leaf while drawing, labeling, and defining them on the chalkboard, showing them the example on the overhead, and asking the students to do the same on their papers.
-Who can tell us what we could compare the midrib to on the human body? (backbone or spine)
-Are there any other parts of the leaf that we could compare to humans?

a. Water and minerals flow through xylem in petiole to cells in leaf blade
b. Leaf base – part of the blade that is attached to the petiole
(E-moment) Ask class together to repeat parts of the leaf as we label them on their papers.
III. Leaf Venation PatternA. Venation Pattern is the arrangement of
veins in a leaf.1. Midrib2. Lateral veins
B. Three main kinds1. Parallel venation – parallel to the
midrib and are nearly equal in size. a. Extend the length of the leafb. Example – Tall Fescue
2. Pinnate venation – midrib with smaller, lateral veins branching from it.
a. Example – Magnolia3. Palmate venation – three or more major veins extend from the base of the blade
a. Smaller veins branch from these main veinsb. Example – Maple trees
-What do you think could be a definition for a venation pattern? What do you think those words are talking about?
(E-moment) Go through the types of leaf venation patterns drawing them on the board. Have the students draw and label the patterns on their paper also.
-Can anyone give me an example of a plant with Parallel venation? (Tall Fescue)
-How does the word “palmate” help you remember this type of venation pattern? (the human palm)
Pass out leaf examples to class again. Ask each student to share the type of venation pattern of the leaf they have. Make sure you repeat the type of venation pattern after each student and why it is that pattern. Pass the bag around with the students and have them place the leaves back in the bag.
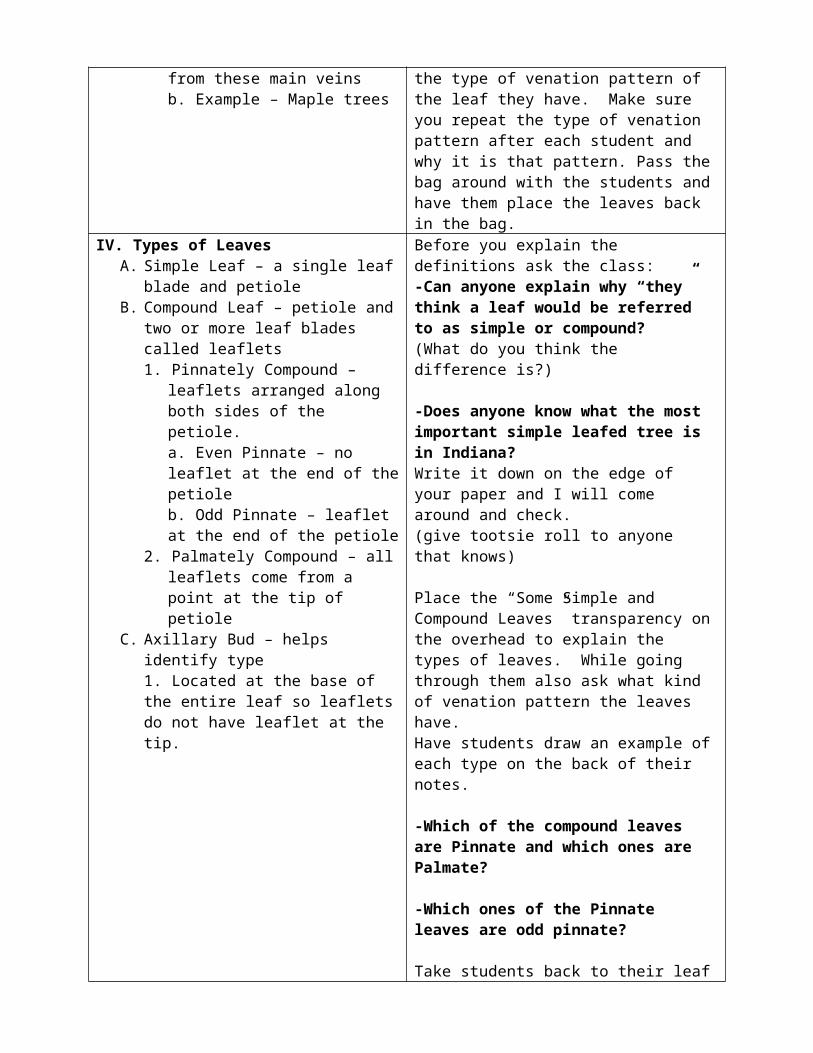
IV. Types of LeavesA. Simple Leaf – a single leaf blade and
petioleB. Compound Leaf – petiole and two or
more leaf blades called leaflets1. Pinnately Compound – leaflets
arranged along both sides of the petiole.a. Even Pinnate – no leaflet at the end of the petioleb. Odd Pinnate – leaflet at the end of the petiole
2. Palmately Compound – all leaflets come from a point at the tip of petiole
C. Axillary Bud – helps identify type1. Located at the base of the entire leaf so leaflets do not have leaflet at the tip.
Before you explain the definitions ask the class:-Can anyone explain why “they” think a leaf would be referred to as simple or compound?(What do you think the difference is?)
-Does anyone know what the most important simple leafed tree is in Indiana?Write it down on the edge of your paper and I will come around and check.(give tootsie roll to anyone that knows)
Place the “Some Simple and Compound Leaves” transparency on the overhead to explain the types of leaves. While going through them also ask what kind of venation pattern the leaves have.Have students draw an example of each type on the back of their notes.
-Which of the compound leaves are Pinnate and which ones are Palmate?
-Which ones of the Pinnate leaves are odd pinnate?
Take students back to their leaf drawings and have them draw and label the axillary bud.
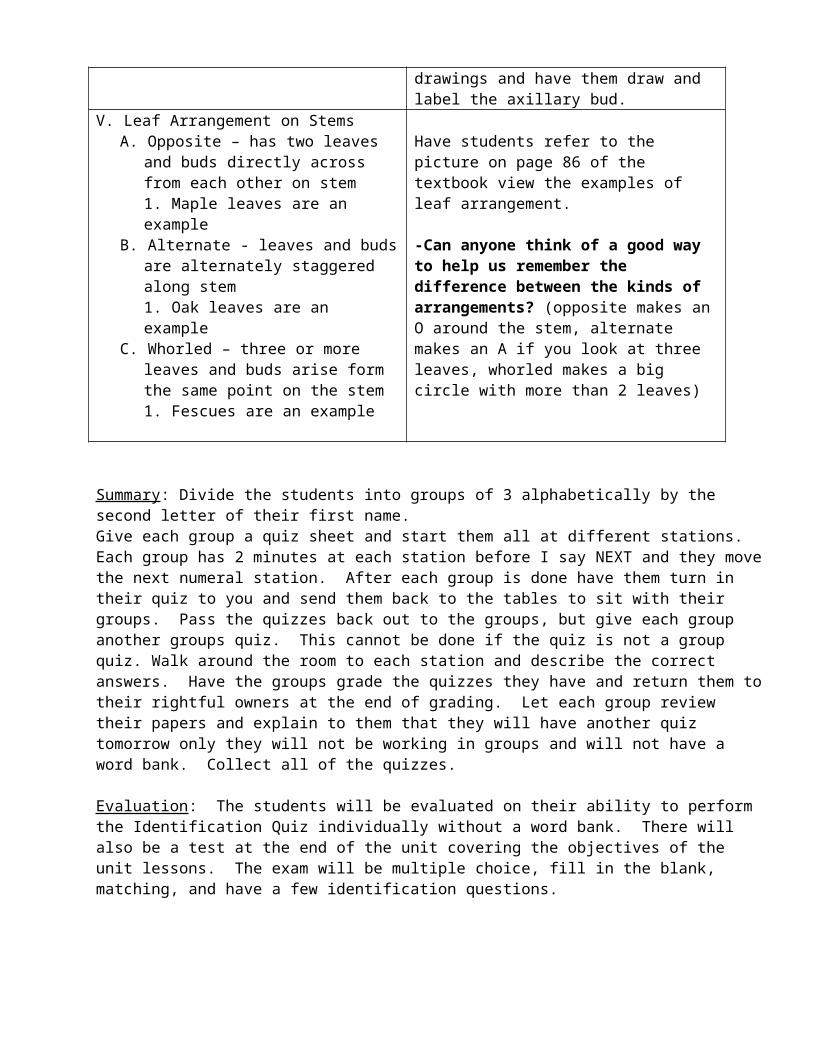
V. Leaf Arrangement on StemsA. Opposite – has two leaves and buds
directly across from each other on stem1. Maple leaves are an example
B. Alternate - leaves and buds are alternately staggered along stem1. Oak leaves are an example
C. Whorled – three or more leaves and buds arise form the same point on the stem1. Fescues are an example
Have students refer to the picture on page 86 of the textbook view the examples of leaf arrangement.
-Can anyone think of a good way to help us remember the difference between the kinds of arrangements? (opposite makes an O around the stem, alternate makes an A if you look at three leaves, whorled makes a big circle with more than 2 leaves)
Summary: Divide the students into groups of 3 alphabetically by the second letter of their first name. Give each group a quiz sheet and start them all at different stations. Each group has 2 minutes at each station before I say NEXT and they move the next numeral station. After each group is done have them turn in their quiz to you and send them back to the tables to sit with their groups. Pass the quizzes back out to the groups, but give each group another groups quiz. This cannot be done if the quiz is not a group quiz. Walk around the room to each station and describe the correct answers. Have the groups grade the quizzes they have and return them to their rightful owners at the end of grading. Let each group review their papers and explain to them that they will have another quiz tomorrow only they will not be working in groups and will not have a word bank. Collect all of the quizzes.
Evaluation: The students will be evaluated on their ability to perform the Identification Quiz individually without a word bank. There will also be a test at the end of the unit covering the objectives of the unit lessons. The exam will be multiple choice, fill in the blank, matching, and have a few identification questions.
TM: A2-4A
PARTS OF A SIMPLE DICOT LEAF
Blade
Apex
Stem
Axillary Bud Midrib
Petiole
Vein
Margin
Cuticle (Waxy coating) Base
Stipule
Epidermis
(Courtesy, Interstate Publishers, Inc.)
Indiana Horticulture Lesson Plan Library Unit A. Problem Area 2. Lesson 4.

TM: A2-4B
SOME SIMPLE AND COMPOUND LEAVES
SIMPLE
Elm Maple
COMPOUND
Magnolia
Pecan Locust Ash (Courtesy, Interstate Publishers, Inc.)
Indiana Horticulture Lesson Plan Library Unit A. Problem Area 2. Lesson 4.
Sample Cadillac Lesson PlanMiddle School
Name: Date Last Revised:
Course Title: 8th Grade Agriculture
Domain: Animal ScienceUnit: Animal Science and the Industry
(Animal, Plant and Soil Science Lesson Plan Library-Unit B)
Core Standard 6: Students prove the necessity for the modern animal science industry.Problem Area: Understanding the Animal Science Industry (Problem Area 1)
Standard: IAFNR-6.1 Examine the components, historical development, global implications and future trends of the animal systems industryTitle of the Lesson: Discovering Ways Animals Help People (Lesson 2)
Student Learning Objectives: At the end of this lesson, the students should be able to achieve the following objectives:
1. List ways animals provide food for people2. Describe how animals provide clothing for people3. Identify other ways that animals help people4. Define the assigned vocabulary words
Situation: This lesson is an introductory lesson on discovering different ways of how animals help people. I will be teaching this lesson to 8th graders. All of the 8th graders will have an agriculture class for 9 weeks. The class will last approximately 55 minutes.
References and Teaching Aides:
1. Chalkboard, chalk, and eraser2. Overhead project, overhead markers3. Markers, colored pencils, or crayons4. Construction paper5. Ways Animals Help People PowerPoint:
http://www.ydae.purdue.edu/download/undergrad/powerpoint/Ways Animals Help People-PP.ppt6. How Animals Provide Food for People Transparency (TM:B1-2A) 7. Ways Animals Help People Exam8. Stuffed Dog9. Stuffed Sheep

Documentation of Competencies Met by This Lesson:
Connection to SAE/Career Development: This lesson could connect to SAE’s that deal with any types of animals. Students who work in both small and large veterinary offices could benefit from this lesson. Also SAE’s that are about small animal care or companion animals would connect to the lesson.
Connection to FFA/Leadership Development/Personal Growth:Demonstrations dealing with animals or community service projects
Documentation of Academic Standards Met by This Lesson:
Social Studies Concepts Taught:SS.USG.5.7 2007 Explain and give examples of important citizen actions that monitor and influence local, state, and national government as individuals and members of interest groups.
English/Language Arts Concepts Taught:EL.8.5.5 2006 Write technical documents that: identify the sequence of activities needed to design a system, operate a tool, or explain the bylaws of an organization's constitution or guidelines.
• include all the factors and variables that need to be considered.• use formatting techniques, including headings and changing the fonts (typeface) to aid
comprehension. EL.8.5.6 2006 Write using precise word choices to make writing interesting and exact. EL.8.7.1 2006 Comprehension: Paraphrase (restate) a speaker's purpose and point of view and ask questions concerning the speaker's content, delivery, and attitude toward the subject.EL.8.7.11 2006 Deliver oral responses to literature that: interpret a reading and provide insight, connect personal responses to the writer's techniques and to specific textual references.
• make supported inferences about the effects of a literary work on its audience.• support judgments through references to the text, other works, other authors, or personal
knowledge.
Interest Approach: Start off by asking students to name what the two types of stuffed animals are. Then ask the class how many of them have sheep or a dog at home. Then ask if anyone knows of ways that the sheep can help people. After the students answer lead the discussion into how sheep provide food through their meat. Sheep can also help people by providing wool for clothing. Then ask the class how a dog such as the stuffed animal could help people. After listening to the various examples, lead the discussion into how dogs can guard property, herd animals, serve as a companion, or lead the visually impaired. Tell the class that there are many different ways that animals affect our daily lives and that some people might not even know how!
Subject Matter Content Teaching Learning ActivitiesAsk the students to name what type of animals the stuffed animals are. Answer: Sheep and dog
How many of you have dogs at home?
Raise your hand if you have sheep at home.
Does anyone know of ways that sheep can help people? After listening to answers, lead the discussion into how sheep provide food through their meat and help in providing clothing through their wool.
How do you think a dog can help people? After listening to answers, lead the discussion into how some dogs are used to guard property, herd animals, lead visually impaired or blind people or just serve as companion animals.
There are many different ways that animals affect our daily lives and that some people might not even know how!
Pass out sheets of construction paper to each student. Also have markers, crayons, or colored pencils set out throughout the room. Explain to the class that animals are important in each of our lives; some of us might not even know how animals effect our ways of life. Then have the students take the paper that was handed out and with the paper horizontal fold it in half. Tell the students that each of them is going to create a book about Discovering Ways Animals Help People. They can keep any
notes or pictures from the lesson in the booklet that would be helpful when preparing for quizzes or tests over the material. The booklets will be checked periodically throughout the lesson to make sure that only material about the lesson is included. The booklets will be worth 20 points.
Then explain to the students that they will have 3 minutes to make a cover for their book that will need to include a title and author. Also have the students number the pages of their books.
I. Ways Animals Provide Food for PeopleA. Foods that animals provide are high
in nutrients & help people live healthy lives.
B. Foods from animals are generally meat, milk and eggs. Some animals can provide two food products.
1. Meat Animalanimal raised especially for its meat
Cover SlideCan anyone name an animal that provides food for humans? There are many different types of animals that provide food for people such as you and me. These types of foods provide us with nutrients that we need to live a healthy life.
What are the 3 types of foods that animals provide for food?We talked about how animals can provide food for people, but do you know of any animals that provide more than one type of food for people? An example of this would be a chicken. Chickens provide both eggs and meat for food.
There are four different types of animals that we will be discussing: meat animals, dairy cattle, animals that provide eggs, and wild animals.
Slide #1 Meat AnimalThe first type of animal is raised especially for their meat. These animals are called meat animals. What types of animals are raised especially for their meat? Choral Response: Meat Animals
a. some animals raised for meat are cattle, fish, turkeys, chickens, swine & sheep
b. horses used for meat in some countries
c. can come from animals raised on farms, ranches, or be wild animals
2. Dairy Cattlecattle specially grown to produce milk
a. goats and other animals are sometimes used for milk
3. Eggs
a. primarily from chickensb. guineas & ducks are a few
other animals that produce eggs for human food
c. some people like caviar, which are fish eggs
4. Wild animalsa. livestock not included
b. wild animals used for food
Turn on overhead projector. Have the students interact by listing the animals that are raised for their meat. What are some of the animals raised for their meat? Possible Answers: Pigs, sheep, cow, deer, rabbit, fish, chickens, turkeys, goats—horses are sometimes eaten for meat in some countries
Then explain that the animals listed can live on farms, ranches or they could be wild animals.
Slide #2 Dairy CattleNext, are dairy cattle. Dairy cattle are grown specifically to produce milk. Use choral response to ask what dairy cattle produce. Ask students to raise their hands if they like milk.
Explain that some other animals like goats are also used for milk. Has anyone ever drunk goat’s milk? If so, did the goat’s milk taste any different?
Raise your hand if you enjoy eating eggs? Slide #3 Eggs & Wild AnimalsCall on a few of the students and ask if the eggs that they like were from chickens. Then explain to the class that primarily eggs do come from chickens but there are a few ducks and guineas that produce eggs that humans can eat.
Has anyone heard of the word caviar? Can anyone share with the class what they think caviar is? Caviar is eggs from fish that can be eaten.
The last type of animal that provide food for humans are wild animals. Wild animals are animals that live in the wild and have to search for their own food. Wild animals do not include livestock.
Turn overhead projector on and write down

include deer, rabbit, quail & fish
c. game is wildlife hunted for food or other uses
animals that students list if they are classified as wild. Can anyone list wild animals used for food? Possible Answers: Deer, rabbit, quail, fish
Explain that wildlife that is hunted for food or other uses is known as game.
Turn on overhead projector and put up the transparency about How Animals Provide Food for People (TM:B1-2A). Use the transparency to review the different types of food that animals provide. Ask students to list some of the meat animals that we discussed. Then show the students that depending on the age of the animal that the name of the food that it provides can vary.
II. Ways Animals Provide Clothing
A. Livestock provides fiber & skins for production of clothing
B. Clothing made from different by-products
1. By-producta product made from the parts of the animal that are not used for food
2. Demand for animal fibers for clothing has decreased because of increase use of synthetic fibers for clothing
C. Some animals raised specifically for products to make clothing
1. mink are most commonly used for their fur
2. certain breeds of sheep used mainly for wool
a. some fibers have decreased in demand, but wool has stayed constant over past 10 years.
3. special quality cloth is known as Mohair
D. Clothing may also be produced from animal skin (hide) or hair
1. prepared skin of animalsleather
Did you know that animals help to provide clothes that we wear? What do you think is used from animals to help produce clothing?
Animals provide both fiber and skin which help produce clothing.
The clothing that people wear is made from different by-products. Give the class the definition of by-product.
Slide #4 Explain how the demand for animal fibers has decreased over the years as the use of synthetic fibers has increased.
Then tell the class that just like dairy cattle being raised for their milk and meat animals for their meat, there are some animals that are raised specifically for the products that they produce that can help produce clothing.
Slide #5 MinkThe most common type of fur comes from mink.
How do you think sheep can help provide products for clothing? Only certain breeds of sheep are used for their wool.
Earlier we talked about how some fibers have decreased in demand over the years. Wool on the other hand has stayed constant in its demand over the past 10 years.
Explain what Mohair is to the class.
The hair or hide, which is the skin of the animal, are also parts that can help produce clothing.
Tell students that leather is skin of an

2. 5 to 10% market value of animals comes from sales of hides
3. bones, antlers, & other animal parts may also be used for products
animal that has been prepared.
Explain the market value that comes from the sale of hides.
What are other ways that animal parts might be used for things other than clothing?
IV. Ways Animals Help People
A. Some functions of livestock benefit all of society while others mainly benefit individual farms. Both are vital parts of the total agricultural industry of the nation.
B. Companionship & Pleasure
1. Companion animals provide benefits that help people enjoy life.
a. common examples: dogs, cats, ornamental fish
2. Some animals are used for sporting events
a. Horseback riding is a major source for recreation & pleasure
C. Service Animals
1. Animals that assist people in
What are some ways that you think that animals can help people?
At the beginning of the lesson we talked about how animals help benefit everyone but some of us may not even know it. Some livestock might benefit the entire society while others are just beneficial for individuals.
What are ways animals could offer companionship or pleasure to humans?
Slide #6 Companionship & PleasureHow many of you have pets at home? What kind of pets do you have? Choose a student and ask if when they get home their dog is happy to see them? Does that put a smile on your face? People often times have dogs, cats or even fish as something that will help bring joy to their lives. Pets or companion animals even become parts of people’s families.
Does anyone know of a type of sporting event where animals are used? A few examples would be dog sledding, dog racing, or horse racing.
Has anyone ever been horseback riding before? If so, where? Horseback riding is a major source of recreation and also pleasure. At state parks often times there are horses that you can rent out and then go trail riding throughout the park on. Horseback riding could be relaxing to a lot of people.
living and work
2. Used in many ways and may be given special training
a. dogs used to lead visually impaired, herd sheep, or guard property
b. some used in laboratories for finding new medicines to cure human diseases
c. police use dogs for canine units to help in fighting crime
D. Conservation
1. Livestock help conserve soil and soil fertility.
2. Crops then are fed to livestock and close to 80% of nutrient value excreted in manure—manure then is put back on soil which helps decrease rate of loss of soil fertility.
E. Stabilize Farm Economy
1. Raising livestock helps to make good use of resources already available to farmers.
Back before farmers had tractors, what did they use to pull the plows? Farmers used animals such as horses or ox to pull their plows through the fields. Animals can assist people not only in work but also living.
Slide #7 Service AnimalsCan anyone think of animals that have been given special training to do specific jobs?
Some dogs are trained to be seeing eye dogs for blind people. Other dogs could be used on farms to herd animals for farmers. And some people have dogs to guard their property against intruders.
Often time’s dogs are used in labs to help find new medicines that can be used to help in curing a human disease.
How can dogs be used to fight crime? Police dogs are sometimes brought into schools to conduct drug searches or they could be used to help find missing people.
Slide # 8 Conservation & Stabilize Farm Economy
What are ways that livestock animals that people have on their farms can help to conserve soil and soil fertility? Does anyone in the class have pigs at home? What does your family do with the manure from the pigs? My uncle, who is a hog farmer, sometimes takes the manure from his hogs and spreads it across his fields. This is one way of putting nutrients back into the soil.
We talked about how my uncle spreads manure on his field to put nutrients back into the soil. This is an example of how he is stabilizing the farm economy. By raising livestock and then utilizing
2. Can help increase farming income
3. Helps to spread risks involved in farming over more areas or enterprises
the manure to increase nutrients, he is making use of resources that he already has.
By doing this, he is helping to reduce the amount of expenses he has which in turn means he will make more profit.
Summary: The day before the test, time will be spent reviewing the material and answering any questions the students might have. During this lesson, students used the “Crayon E-Moment” to make their own books on Ways that Animals Help People. This book will serve as a study guide for the students when they are preparing for the evaluation.
Evaluation: Throughout this lesson the students were required to make a booklet about the material. At different times during the lesson, periodic checks were made of the booklets for only the material that was being studied. The booklet project is worth 20 points and the students will be required to turn it in when they hand in their exams. The exam that is attached will be given at the conclusion of the lesson to see if the students understand all of the objectives of the lesson. The exam will be multiple choice and matching questions.
TM: B1–2A
HOW ANIMALS PROVIDEFOOD FOR PEOPLE
imal Food Item Name*
Animal Food Item Name*Meat
CattleYounger than 3 months
Older animalsVealBeef
Swine (hogs) PorkSheep
Young (less than 1 year)Older (older than 1 year)
LambMutton
Goat Goat MuttonChicken
Young (less than 12 weeks)Neutered young male
Old hen
BroilerCaponHen
Turkey TurkeyFish Fish
MilkDairy cattle MilkGoats Goat’s milk
EggsChickens EggsFish Caviar*Variety meat is the general name for food made from organs and glands of different meat animals. Potted meat animals and Vienna sausage are examples.Meat
Indiana Animal, Plant, and Soil Science Lesson Plan LibraryUnit B. Problem Area 1. Lesson 2. Page 8.


Guide for Preparing a Cadillac Lesson Plan
Course The Indiana Department of Education (IDOE) provides a listing of the Agricultural Education course titles, descriptions, domains and standards under the three Agriculture Career Pathways (Agribusiness; Horticulture & Landscape Management; and Life Sciences) and can be found at:http://www.doe.in.gov/achievement/career-education/cluster-agriculture . Go to this website to select the specific agricultural education course you will be teaching.
Domain Is the title for a grouping of related Core Standards and Standards that should be taught together. Use the IDOE web link above to determine the specific Domain, Core Standard and Standard you will be teaching. Can also be called a Unit or Module. Be sure to not only list the name of the Domain but if there is also a corresponding Unit Title and its alphabetical letter, include those as well. In the Indiana Agricultural Science Curriculum Lesson Plan Library CD, Units are designated by capital letters (i.e, Unit A).
Core Standard Is the title for a grouping of related Standards on a specific Domain. There will usually be more than one Standard under each Domain. The Core Standard may also be known as the Problem Area and the corresponding Problem Area and its identification number (i.e, Number 3) should also be provided.
Standard Each standard is aimed at helping learners develop a portion of the understandings, attitudes and skills that lead to objectives/outcomes for the Core Standard and eventually the Domain. Separately, standards are fragmentary in that each is dependent upon the others in the Core Standard to accomplish the desired outcomes. A standard covers at least one class period. It may require several class periods to complete. List the name and number of the Standard. Another name for Standard is Lesson. Lessons are usually found under each Problem Area. Standards/Lesson titles must show action or activity.
Documentation of Competencies and Academic Standards Met by This Lesson Document the careers related to the lesson. This can be obtained from the National FFA Website “Career Explorer” at :https://www.ffa.org/APPCTR/Pages/CareerExplorer.aspx . The proficiency areas documented can be obtained at https://www.ffa.org/documents/prof_saelisting.pdf .Career Development Events (CDEs) are located at: https://www.ffa.org/Programs/Awards/CDE/Pages/default.aspx . To document the Indiana Academic Standards covered by the lesson plan visit the Learning Connection Indiana Academic Standards website at: https://learningconnection.doe.in.gov/Standards/Standards.aspx. Be sure to select the appropriate academic subject area and grade level(s) when identifying the academic standards.
Student Learning Objectives State or list the major objectives of Instruction planned for the specific Standard under the Core Standard. Be specific. Avoid being too general in formulating objectives. Carefully consider student needs. Do not state what the teacher plans to do. Rather, list the outcomes (changes in behavior) expected of students. Remember, objectives should be measurable and attainable. They also should
require various levels of student activity. This is the opportunity for you to demonstraste your ability to write behavioral objectives.
Situation Explain, with some detail, who the students are that will be receiving the instruction. You should also include additional information on the lessons they have covered prior to and what may be covered after this lesson is taught.
References and Teaching Aids List the major sources to be consulted in developing the objectives of the Standard. Keep in mind that visual aids, experience activities, references and other materials are all to be listed as they relate to the lesson under consideration. List the source, including page numbers, of the materials.
Interest Approach Explain the technique you plan to use in securing student interest in the Standard. The Technique should be interesting and grab the attention of the students. It should be explained in detail under the Teaching and Learning Activities column. If necessary information from the Interest Approach could be included under Subject Matter Content.
Subject Matter Content Develop a listing of information in sufficient detail to enable the teacher to guide the students in achieving the stated objectives of the Standard. The listings may vary from Standard to Standard. This section should be complete enough so that someone else could teach using your plan for meeting the Standard. It is also your safety outlet. If you forget some information while teaching, it should be located here. Lesson plans are to be used to meet the Standard. This is the "meat" of your plan for helping to demonstrate how you are meeting the standard. Putting your Subject Matter content in outline form will help with your presenting and discussing the information with your students.
Teaching-Learning Activities The heart of any instructional program is the sequence of teaching-learning activities. There is no one best procedure. The sequence of activities will vary from teacher to teacher and even from year to year for the same teacher. However, the importance of planning an approach to the lesson under study cannot be over-emphasized. Regardless of how well acquainted a teacher may be with the subject matter of the lesson involved, the teacher will find it necessary to plan an approach. The teacher will want to consider (1) where their learners are and (2) where they want to guide them. With these thoughts in mind, plan a sequence of learning activities. Well-informed teachers tend to dominate class activities. Center your sequence of activities around your students. Involve them in activities that leave them with a sense of individual accomplishment that inspires them to dig deeper and deeper for the facts, understanding, insights, etc., which lead to the objectives of the lesson and unit. Arrange opportunities for students to test their ideas and be commended for their achievements and informed of their mistakes. It is wise to write lead questions in this section. Stimulus variation should be built into the lesson at proper time intervals. A variety of teaching techniques and learning activities should be used throughout the lesson. This is a great place to add e-Moments as brain-based learning activities that will help students learn, comprehend, recall, and transfer information from the subject matter taught. It can also help to stimulate your students thinking and to engage them in the teaching/learning process.

Summary Explain how you plan to summarize your lesson. If you wish you can utlize an e-Moment to summarize the key points in the lesson. Relate the e-Moment to lesson objectives. You may not use the e-Moment that has been used in the YDAE 440 Course Packet. E-Moments are available from the following website: http://www.ydae.purdue.edu/download/undergrad/pdf/eMoments.pdf . There are several educational resources on the internet that can provide you with ideas on how you can summarize your lesson. Be creative and see how you can not only makeit fun but educational.
Evaluation Describe how the teacher plans to evaluate the lesson. The evaluation should relate to the objectives. Remember that evaluation can include traditional tests/quizzes (be specific), task performance, written/oral reports, and other methods depending on the lesson objectives and purposes of the evaluation.

A LESSON PLAN GUIDE*
Purposes: What am I trying to do?What would my pupil's related purposes be?
Materials: What materials will help me to achieve my purposes?A. Materials for my own preparation and use?B. Materials for pupil use?
Methods: What techniques seem most suitable for using these methods to achieve my purposes?
A. Lecture B. Demonstration C. Supervised StudyD. Recitation E. Committee work F. Audio-Visual
Getting Started: How will I get started with the class?A. Relate activities to the past and/or future.B. Show the "Why" of the activity to pupils if not apparent to them and genuinely accepted by them.C. Provision for routine matters, as attendance checks, so as not to interfere with opening learning activity.
Changing Pace: How will I change pace from one activity to another without confusion and disorder? Is there an e-Moment that would work?How will I decide on on-the-spot when the time is ripe for such changes?
Concluding How will I bring the lesson to a fitting close?the Lesson: What required or suggested assignments will I make to the students,
looking forward to the next day's activities?What will I do with a few minutes of extra time if we finish our work before the end of the period?
Special Items: A. Routine matters: Have I provided for them?B. Motivation: What problems will I meet? How will I meet them?C. Discipline: What positive forms of behavior control can I employ?D. Individual differences: How, specifically, can I provide for them in my lesson plan?E. Evaluating and grading: What tests, or other form of evaluation should I use to check on what I have actually taught?
*Prepared by the Department of Agricultural Education - South Dakota State University.
Selected Action Verbs Appropriate to the Domains of the Taxonomy
COGNITIVE AFFECTIVE
Knowledge Comprehensive Application Receiving
acquire associate apply acceptcount classify calculate accumulatedefine compare change askdraw compute classify chooseidentify contrast complete combineindicate convert demonstrate controllabel describe discover differentiatelist differentiate employ followmatch discuss examine listen (for)name distinguish illustrate replyoutline estimate manipulate selectpoint explain operate separatequote extrapolate practice set apartread predict prepare sharerecall rewrite producerecite translate relate Organizationrecognize solverecord use abstractrepeat Synthesis utilize adherestate altertabulate arrange Evaluation arrangetrace categorize balancewrite combine appraise combine
construct assess compareAnalysis create compare define
design critique discussanalyze develop determine formulateconstruct explain evaluate integratedetect formulate grade organizediagram generate judge preparedifferentiate generalize justify theorizeexplain integrate measureinter organize rankoutline plan rateseparate prepare recommendsubdivide prescribe selectsummarize produce support
propose testrearrangereconstructspecifysummarize
Selected Action Verbs Appropriate to the Domains of the Taxonomy
AFFECTIVE PSYCHOMOTOR
Responding Valuing
answer argue apply makeapprove assist assemble make-upcommend debate build manipulatecomply deny calibrate manufactureconform help change measurediscuss increase measure clear mixfollow proficiency in compose operatehelp increase numbers connect organizeplay in construct performpractice join correct planread protest cut positionvolunteer read demonstrate put together
relinquish design removeselect desire to respond restorespecify discover see
Characterization support dismantle selectdraw sense
act fabricate serviceavoid fasten sharpenchange fell simulatecomplete follow smelldisplay form touchrated high by peers gap tracerequire hear troubleshootresist imitate tryresolve install recognizerevise lay out useserve locate visualizesolve maintainsuperiors, or subordinateverify

Reflective Teaching: A Laboratory Teaching Experience
A laboratory is a place for experimentation where new knowledge can be generated and where existing knowledge can be confirmed and applied to actual conditions. In teacher education, a laboratory is a place where prospective teachers can discover what teaching is and how the many complex variables in the teaching-learning process interact with one another. The laboratory provides perspective teachers with a place in which to perform as teachers and in which they may investigate the results of their performance. As a means of improving the quality and quantity of laboratory teaching experiences provided for prospective teachers, Dr. Donald R. Cruickshank and his colleagues at The Ohio State University have developed a new form of laboratory teaching experience, reflective teaching.
What is Reflective Teaching?Reflective teaching is a form of peer teaching during which several students, acting as teachers, simultaneously teach the same short lesson to several small groups of their peers. The system is very simple and does not require audio-visual equipment or extra personnel.
More than twenty-eight reflective teaching lessons, or RTLs, that deal with some aspect of agriculture have been developed and classroom tested. The content of these RTLs ranges from teaching about angora goats to teaching the dance language of the honeybee. Each lesson meets six criteria: 1) the lesson must be interesting to teach and to learn; 2) the content of the lesson must be somewhat different than the regular academic curriculum, yet the material can be taught in the classroom; 3) the lesson must be short enough to be taught in 10 to 15 minutes; 4) the lesson must allow for some form of evaluation either measurable or observable in order to provide immediate feedback to the teacher; 5) the lesson must contain the information necessary for instruction; and 6) the lesson must foster a specific type of teaching behavior. Currently five different types of teaching behaviors are being used; explaining, demonstrating, fostering attitude change, describing, and a combination of explaining/demonstrating.
During reflective teaching a class of preservice or inservice teachers is divided into small groups of four to six people each. All "teachers" are then given an identical lesson to prepare to teach. The other small group members act as the learners. Those persons designated as teachers take the lesson and are given a few days in which to individually prepare to teach it to their small groups.
On the assigned day, the designated teachers all simultaneously teach their small groups the same lesson (or teach toward the same objective) with a time constraint of 10 to 15 minutes of teaching time. For example, the objective in the angora goat lesson is to get as many learners as possible to correctly answer test questions about angora goats. Additional constraints may be placed on the lessons if desired.
At the conclusion of the assigned period of time, the designated teachers must stop teaching and an evaluation is made of their students' achievement. This normally is in the form of a written test provided by the instructor or in the form of a demonstration by the students of the skill that was taught. The completion of the evaluation provides the designated teachers with immediate feedback concerning whether or not the students learned what was taught. At this time learner satisfaction and teacher satisfaction are also recorded using a series of questions concerning how satisfied learners were with their performance. A discussion then takes place in the small groups among the teachers and the
learners focusing upon the lesson taught, the performance of the teachers, and the sharing of ideas concerning pupil learning.
After approximately 10 to 15 minutes of small group discussion, the entire class gathers into a large group and discusses more general issues about the lesson taught and about teaching and learning. Each teacher explains to the class how he or she taught the lesson and why this particular approach was chosen. Learners offer their opinions concerning the approaches that were used and everyone is given the opportunity to express their thoughts and feeling about the experience. It is the small and large group discussions that make up the reflective portion of reflective teaching, as the students and teachers reflect upon what occurred and why. It is during this 30-35 minute period that time is given for seriously talking and thinking about teaching and the many variables that influence teaching and learning.
Upon completion of the large group discussion the course instructor may make additional observations or comments and select another set of designated teachers for the next lesson.
Advantages of Reflective TeachingThe advantages of using this new innovation, as compared to the more traditional types of laboratory teaching experience, are that reflective teaching:
1. Provides common or shared teaching opportunities.2. Provides the least expensive form of teaching practice by not requiring special
audio-visual equipment or extra personnel.3. Provides immediate feedback and knowledge of results regarding how well each participant does as a teacher.4. Is uncomplicated and therefore can easily be transported.5. Can easily be integrated into the course curricula.6. Provides the opportunity to explore teaching as a career and self as a teacher.7. Provides the opportunity to think about teaching and learning in an interrelated way.8. Provides the opportunity to try out teaching and learning in an interrelated way.9 Takes considerably less time on the part of the teacher educator.
Reflective teaching is currently being used at Purdue University in the Agricultural Education Methods Course; as well as the more traditional form of laboratory teaching experience, micro teaching. Students have rated this new form of teaching experience as a very valuable and worthwhile experience.
Disadvantages of Reflective TeachingCurrently few disadvantages of this new approach to providing laboratory teaching experience have surfaced. One of the few obvious disadvantages is that the teachers are unable to view themselves on Video. Videotaping could be adapted to reflective teaching, however, the number of Digital Video machines necessary would prove to be extremely costly.
Another disadvantage of reflective teaching is that the teachers are provided with the subject matter to be taught rather than having to find it on their own. However, this may not be of great significance or pose a very serious problem for agriculture teachers in this era of pre-developed lesson plans and instructional materials.
ConclusionReflective teaching is a laboratory teaching experience that can readily be used in this time of budget pinching, while at the same time allowing for an increase in the number of teaching experiences teacher education students may have without an increase in instructor time. It has been used with great success in the Agricultural Teacher Education classes at both The Ohio State University and Purdue University. Other agricultural education departments across the country may find reflective teaching of benefit and worthy of examination.
A Brief Description of MicroteachingMicroteaching is a scaled-down version of a real teaching situation in terms of time and number of students taught and introduces prospective teachers to the complexity of teaching. It was conceived of and first put into practice at Stanford University in the summer of 1963. The technique evolved from a practice in teacher education known as the demonstration lesson. One type of demonstration lesson was the practice lesson taught by preservice education students, usually to peers in their methods classes.
Videotaping was added as a means of improving feedback and retaining a record of progress in teaching ability. Videotaping is not an essential part of microteaching, but it enhances the technique and makes it a more powerful instructional tool.
The purpose of microteaching in YDAE 440 is to provide an opportunity for teacher trainees to obtain a liberal amount of practice, under optimum conditions and without endangering the learning of pupils. When trainees engage in a microteaching lesson in their subject area they focus upon a specific aspect of teaching (i.e. demonstration). The trainees prepare their lessons to be taught and present them to their peers. Each lesson usually lasts anywhere from 15 to 25 minutes in length. Upon completion, the trainees receive a critique of their presentations and a chance to view their performances on Digital Video.
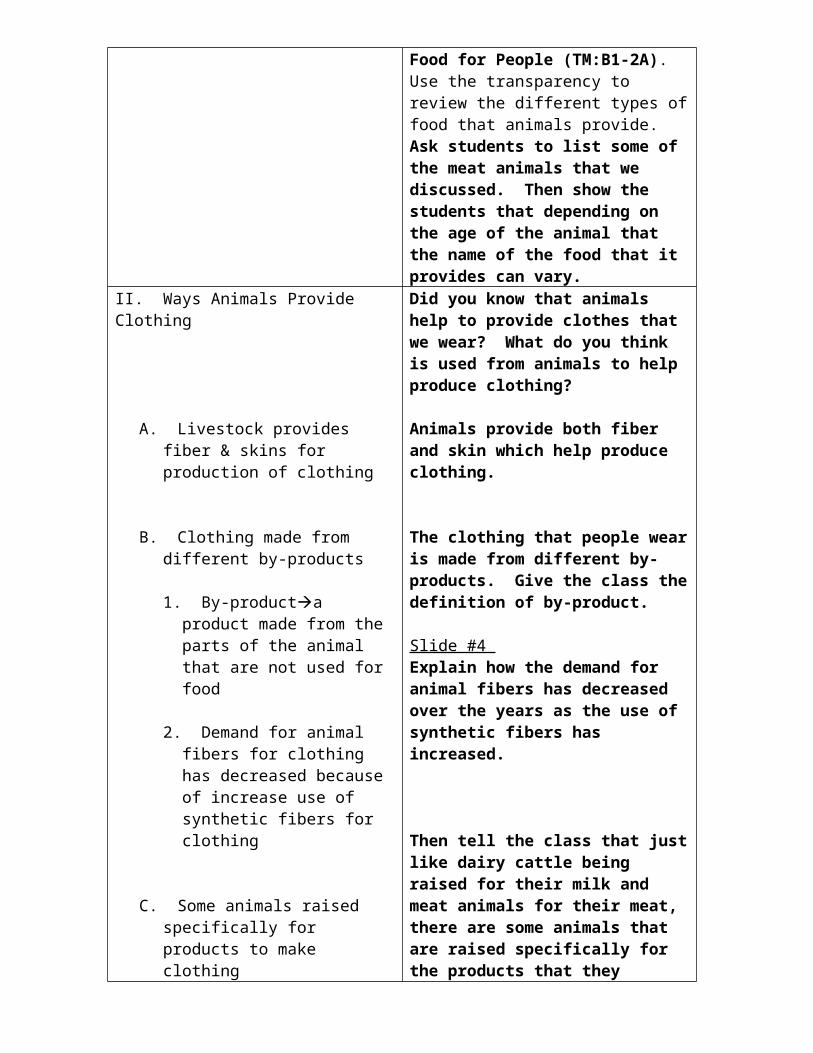
Methods of Teaching Agricultural Education Lesson #2
ANNOUNCEMENTS
I. Unit: Organization of Pedagogy and Content for Effective Learning
II. Lesson: Motivating Students
III. DOE School Setting Development Standards – Secondary EducationStandard 2: Learning P r ocesses : Teachers at the secondary level have a broad and comprehensive understanding of learning processes and demonstrate the ability to facilitate student achievement.
IV. Objectives:
Upon completion of this lesson, students will be able to:
1. Explain the importance of motivating students.2. Describe the five primary principles of interest and the seven secondary principles of
interest.3. List and explain at least 10 ways you can help your students want to learn.4. Utilize the primary and secondary principles of interest in developing effective interest
approaches.
V. Questions to consider:
1. Why does the beginning of a lesson need to interest the students in the topic?2. What are the principles that guide student motivation and interest?3. How is the first 5 minutes of a lesson organized?4. What are some techniques for gaining and maintaining student interest?
Reference: Newcomb, L.H., McCracken, J.D., Warmbrod, J.R. & Whittington, M.S. (2004). Methods of teaching agriculture (3rd Edition). Pearson Prentice Hall. Chapter 2.YDAE 440 Course Packet pages 40-46.
VI. Laboratory activity.
Interest approach #1Interest approach #2

MOTIVATION AND INSTRUCTIONS
Purpose of a Lesson Introduction
1. A well-planned lesson introduction orients students to the objectives of the lesson.
2. A well-planned lesson introduction gets and holds students’ attention.
Components of a Good Lesson Introduction
1. A specific statement of what the objective(s) of the lesson is/are in term of student behavior.
2. A number of opportunities for student response and participation.
3. An explanation of why the objective(s) is/are important in terms of student needs.
4. An explanation of how the student will proceed in accomplishing the objective(s) - what they will do; what is expected of them.
5. An explanation of how the lesson relates to past classroom activities, or to the students prior knowledge or experience.
6. A statement of how the students will know when they have achieved the objective(s).
7. A plan of how to use instructional aids, such as real objects, models, chalkboard, charts, etc., if appropriate.
Importance of Good Introduction
The way you introduce your lesson sets the tone for the entire class period. Careful planning will help to insure that the introduction will whet the students’ appetites for what is ahead. However, more than careful planning is required if your introduction is to gain maximum student interest in the lesson. You should support your planning efforts with your own enthusiasm. During your introduction, you should show your students that you are interested in, and enthusiastic about what they will soon be learning.
Some Approaches to Introduction of Lessons
1. Use a related story or incident.2. Provide thought provoking demonstration.3. Ask provocative questions.4. Make a startling statement.5. Use instructional aids, models, objects, live specimens, etc.6. Provide an interesting activity for student involvement.7. Provide the special setting needed for your lesson - golf green, farrowing house, flower shop,
dairy barn.8. Use special awards or goals - FFA, job related, project related, etc.
Know Your Students
Students and classes are different. You should understand the needs, interests and abilities of your students. An introduction that worked well in one class may fail to motivate another class.
Remember: Students must see the need or value in what they are learning.
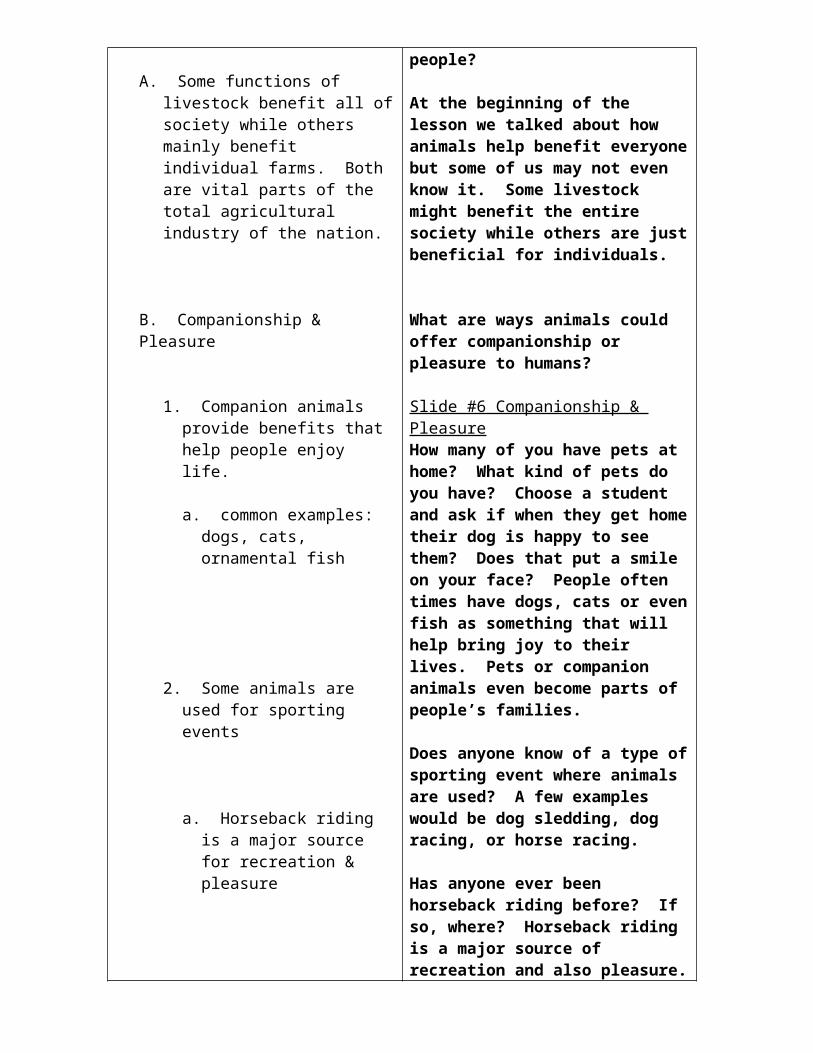
SOME PRINCIPLES BASIC TO TEACHING*
Interest Approach, Definition of Objectives, Definition of Problems
1. Students must be motivated to learn. Individuals possess some basic physical needs and some personality or social needs -- the desire for recognition, security, response, and new experiences. The wants, needs, and motives of students should be identified.
2. Learners progress in any area of learning only as far as they need in order to achieve their purposes. Often they do only well enough to "get by."
3. The principle of readiness must not be ignored when selecting instructional materials and techniques of instruction. Factors affecting readiness include:
a. Physiological and psychological maturityb. Previous experience including mastery of prerequisites, past success, or lack of success,
etc.c. Attitudesd. Personal adjustment
4. Learning is an active rather than a passive process.
5. Pupils think when they encounter an obstacle, difficulty, puzzle, or challenge in a cause of action that interests them. The process of thinking involves designing and testing plausible solutions for the problem as understood by the pupil.
6. Students learn at an early age that peer consensus is an important criterion; they are uncomfortable when they disagree with their peers.
7. Learning proceeds much more rapidly and is retained much longer when that which is learned possesses meaning, organization, and structure.
8. What is learned is most likely to be available for use if it is learned in a situation much like that in which it is to be used and immediately preceding the time when it is needed.
9. Motivation is strongest when the student perceives that learning can be useful.
10. Students are more apt to throw themselves wholeheartedly into any project if they have participated in the selection and planning of the project.
11. Genuine participation (not pretended sharing) increases motivation.
12. Success in achievement is one of the strongest motivating forces.
13. An effective means of motivation is the setting of goals by the group that leads to a greater identification of students with learning objectives.
Problem Solution--Evaluation
14. Learning is improved when approaches to teaching are used which emphasize that the student in their learning (and in the teaching that accompanies it) inquires into rather than be instructed in the subject matter. Learning is best accomplished through guided discovery, problem-oriented instruction, or inquiry.
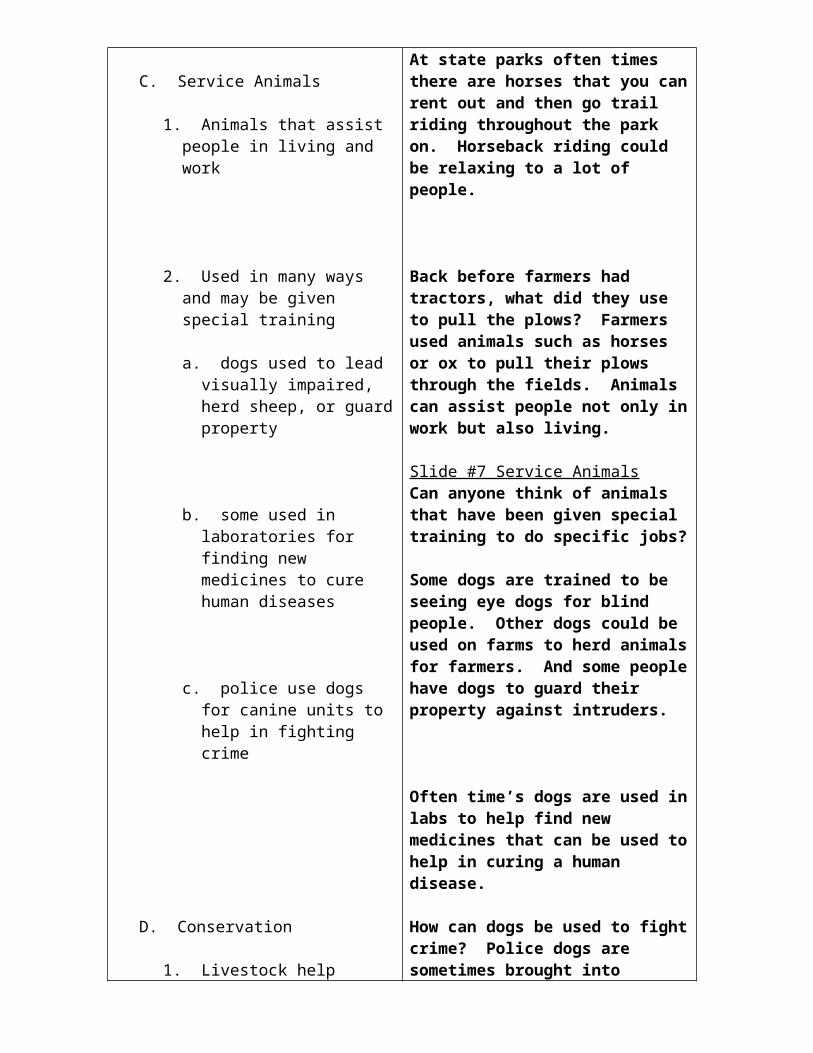
15. The use of group discussion has been shown to bring more ideas into the classroom, to make reading more interesting and more discriminating, and to result in a definite gain in the understanding of problems by students.
16. Learning from reading is facilitated more by time spent in recalling what has been read than by rereading.
17. Behaviors which are rewarded (reinforced) are more likely to recur. Reward, to be most effective, must follow almost immediately after the desired behavior and be clearly connected with that behavior in the mind of the learner.
18. Sheer repetition without indications of improvement or any kind of reinforcement (reward) is a poor way to attempt to learn. When students are aware of their learning progress, their performance will be superior to what it would have been without such knowledge.
19. Students who are successful and who therefore derive satisfaction from a learning activity are motivated toward additional learning.
20. The most effective effort is put forth by students when they attempt tasks which fall in the "range of challenge" -- not too easy and not too hard--where success seems quite possible but not certain.
21. The best way to help pupils form a general concept (principle) is to present the concept in numerous and varied specific situations, contrasting the experiences with and without the desired concept, then to encourage precise formulations of the general idea and its application in situations different from those in which the concept was learned. (There is evidence to indicate that it is better for the students to work out the principle or concept involved -- discovery method -- problem solving.)
22. The best kind of practice is that which occurs in a functional educational experience. Under such conditions, students use skills and apply facts and principles previously learned and thus maintain learning in a meaningful context.
23. "Directed" learning is more effective than "undirected" learning. In the development of concepts and in the guidance of students in problem solving, the teacher must present clues for directing the students to the successful discovery and application of the concepts, principles, understandings, and relationships.
24. To attain maximum transfer of learning:
a. Bring out the feature to be transferred. The "thing" to be transferred from one experience to another could be a fact, a method, a general principle, an attitude, or a way of life.
b. Develop meaningful generalizations. Transfer is more likely to take place when the thing to be transferred is a generalization, a general rule or a formula. It is important that the students become clearly aware of the formula, rule, or generalization to be transferred.
c. Whenever a principle or generalization is to be transferred, it is very important to use a variety of experiences to develop the generalization.
d. Practice the application of the "thing" to be transferred to other fields. Provide students practice in transfer. Just as students can learn to read, so they may learn to transfer.
*Taken from notes by Dr. J. Robert Warmbrod.
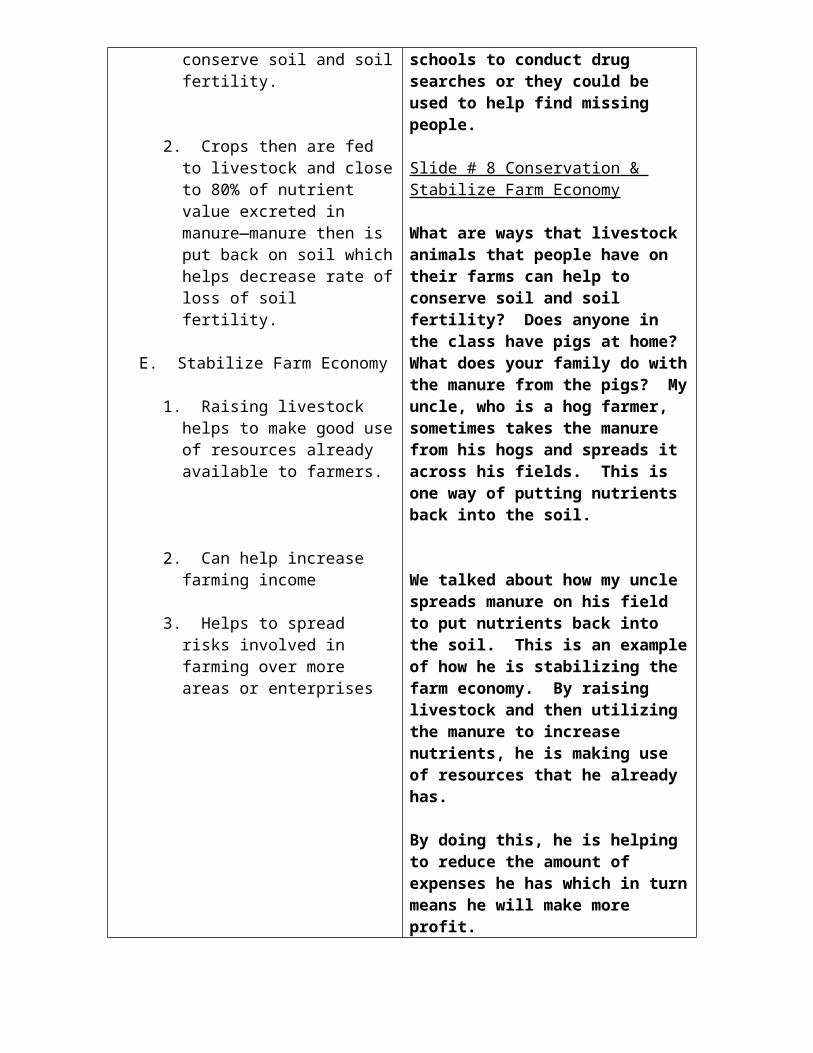
WAYS YOU CAN USE TO HELP YOUR STUDENTSWANT TO LEARN
For years you have heard the expression that "you can lead a horse to water but you can't make them drink." I believe you can always make them drink if you just salt them well first. The salt of interest will make students drink from your class. You can:
I. Arouse a feeling of need in the student for the subject matter.1. Base teaching on the real life problems of the students.2. Encourage students to raise problems or difficulties - to tell what they would like to study.3. Be aware of the problems and needs of the student in their home and community.4. Point out where someone has achieved success by mastering the knowledge proposed.5. Ask students to recall cases where failure or mediocrity has resulted from lack of this knowledge.6. Arouse this feeling of need in making the assignment, and then strengthening it as opportunities
are offered.7. Announce to your students that you are willing to justify any lesson assignment, or else they will
not be required to study it.
II. Make use of the natural impulses. (Or understand human nature, know your students, apply psychology, etc.)1. Become familiar with the impulses active in high school students. (Example, curiosity, activity,
love of advancement, love of praise, wonder, competition, etc.)2. Recognize the individual differences.3. In planning any selected lesson decide which impulse can be appealed to most effectively, and
how it can best be done.4. In teaching the lesson carry out the appeal as planned, even if the opportunity for using it must be
created.5. After teaching a lesson critically evaluate the appeals used and suggest improvements.6. Say the thing that will help tie the student's impulse to their problem.
III. Provide satisfactory physical conditions.1. As the class assembles check temperature, ventilation, and light.2. Provide comfortable chairs.3. Keep room in neat order and conveniently arranged.4. Display well selected, neatly framed agricultural pictures.5. Keep a live bulletin board.6. Request frosted glasses in lower sashes if outside distractions occur.7. Give consideration to students with defective eyesight, hearing, etc.
IV. Make use of illustrations, personal experiences, important people, events, etc.1. Introduce appropriately the experiences of students, self, and others.2. Refer to events in which members are interested.3. Refer to newspaper articles, bulletins, etc.4. Introduce humor, funny stories, etc., that illustrate the point.5. Recall appropriate poems, quotations, sayings, etc.
V. Make use of multi-sensory aids.1. Use actual materials - preserved, alive, or dried.2. Use pictures, charts, etc.3. Keep the visual aid away from view until ready or use.4. Use field trips and laboratory activities effectively.5. Prepare the class to see the visual aid (build-up, curiosity, directions).6. Use the blackboard for outlining teaching procedures, sketching, etc.
VI. Base your teaching on thinking rather than memory.1. Assign problems from the lives of the students.2. Ask questions that require thinking, judgment, and reasoning.3. Provide situations for comparisons, evolution, and improvements.4. Encourage class planning and performance.5. In examining pupils, ask for reactions to normal life situations.6. Encourage pupils to make their decisions and to give reasons.7. Ask each student and two others to score their complete shop projects.
VII. Create doubt, suspense, curiosity.1. Bring about, in class discussions, a division of opinion, (The more nearly equal the group the
surer the doubt.)2. If there is a strong majority (16-4), call on the weak side first. Restrain the strong side with a
doubting implication or statement. Suggest arguments that tend to support the weak side.3. Don't give away your point of view or position by handling the answers, facial expressions or
gestures.4. In making assignments, attempt to bring about curiosity or difference of opinions.5. In displaying experimental data, omit certain figures and ask the class to estimate the answer.
VIII. Keep the course well organized as a whole and in its units.1. Set up at the beginning of the course objectives, or outcomes of the course in terms of the
students.2. Introduce jobs or problems seasonally, and just before they are to be met on the form or job.3. Make clear to the students the relationship of different parts of the course and how they affect
them.4. Teach based on the psychological; organize for retention based on the logical.
IX. Improve your personality.1. Convince yourself that you are going to improve.2. Determine your weak points.
a. ask for opinion of someone else.b. self-analysis and comparison with others, or what should be.c. Use personality rating sheet, problems check list, and other.
3. Select the traits for immediate improvement.4. Recognize that trait improvement is as easy or as difficult as habit breaking and habit making.5. List the selected traits, and under it list method and technique of practicing them.6. Practice the technique early and often (never permit an exception; if one occurs, correct it at
once).7. Even go out of your way to provide additional opportunities for practice.8. Check on yourself to see if you can note progress.9. Confer with helpful friend throughout this process.
X. Build permanent interest in your pupils.1. Keep the teaching each day on as high an interest sense as possible.2. In the teaching process help the student to get started in applying the course (SAE, farming
program, ownership, skills, etc.)3. Offer help, further instruction, and motivation after the course is complete.4. Give praise and recognition for attainment reached, and suggest higher goals.5. Provide or suggest personal (and reading) contracts with those who are succeeding.6. Suggest membership in organizations that promote their special interest.7. At the close of the course leave the idea that there is other information equally interesting and
worthwhile.
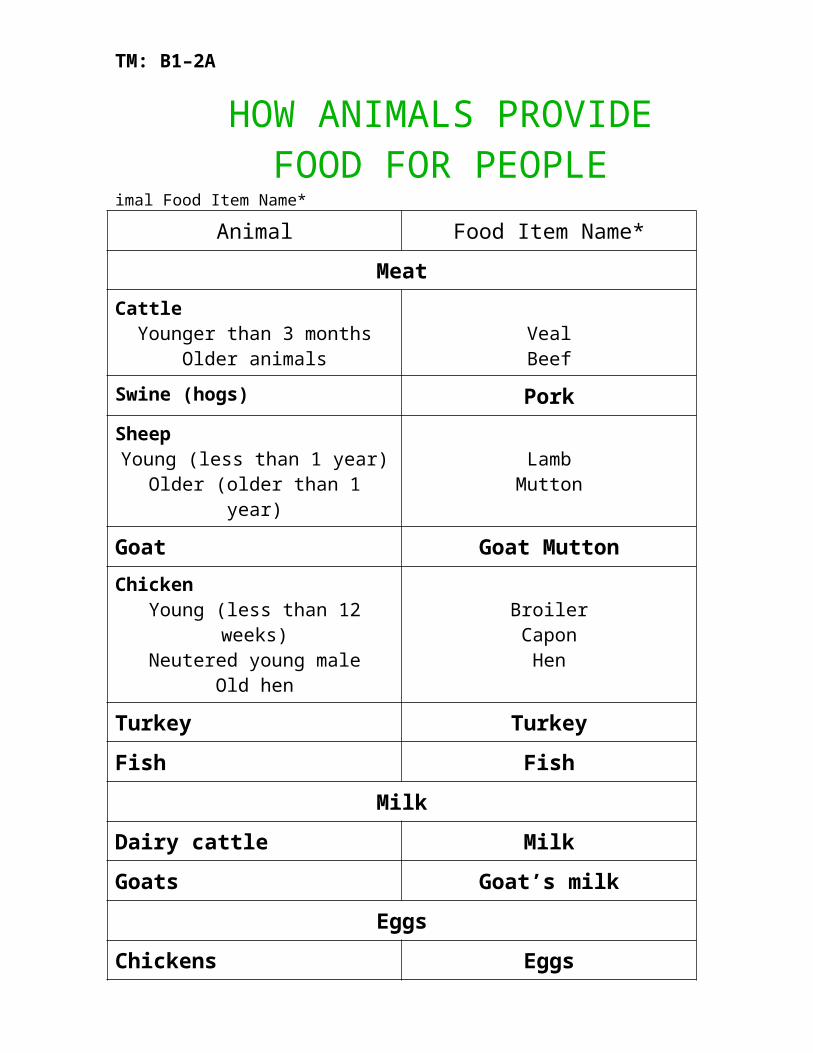
PRIMARY PRINCIPLES OF INTEREST
1. All interest apparently has its original source in the "so called" natural impulses, urges, or drives. The most useful are:
activity desire for approvallove of nature altruismcuriosity self-advancementcreativeness competitiongregariousness ownership
2. That is interesting which affects ourselves, others about us, or humanity at large.
3. Interest increases with an increase in related knowledge of any subject, provided such knowledge is well understood.
4. Interest increases with the acquisition of any given ability or skill.
5. Interest flows, or spreads, from any interesting thing into any uninteresting thing whenever the two are clearly connected in thought.
SECONDARY PRINCIPLES OF INTEREST
1. Thinking is essentially interesting; memorization, uninteresting.
2. Interest is contagious in the sense that one person may "take it" from another.
3. Interest is strengthened by a sense of progress.
4. Interest is created and sustained by a state of suspense.
5. An idea, when fully accepted, becomes a new interest center, from which interest will spread to any other thing that is seen to be connected with it.
6. The novel and unexpected are interesting.
7. Humor creates interest.

Methods of Teaching Agricultural Education Lesson #3
ANNOUNCEMENTS
I. Unit: Skills and Resources Used in Effective Teaching
II. Lesson: Utilizing Teaching Skills
III. DOE School Setting Development Standards – Secondary EducationStandard 1: Student Development and Diversity : Teachers at the secondary level have a broad and comprehensive understanding of student development and diversity and demonstrate the ability to provide instruction that is responsive to student differences and that promotes development and learning for all students.
IV. Objectives:
Upon completion of this lesson, students will be able to:
1. Explain the importance of using the teaching skills throughout the lesson.2. Compare and contrast how the skills are applied in various teaching situations, e.g.
traditional 50-minute class period and 75 or 90-minute block period.3. Identify technology applications that will boost instruction.4. Analyze the good and bad points of classroom presentations.5. Perform five teaching skills.
V. Questions to consider:
1. How does a teacher establish set at the beginning of the class?2. How does a teacher effectively use frame of reference?3. What are the types of questions used in a classroom?4. How does a teacher control student participation?5. How is feedback provided to students?6. How does the use of examples contribute to effective learning?7. Why is closure important for all lessons?
Reference: Newcomb, L.H., McCracken, J.D., Warmbrod, J.R. & Whittington, M.S. (2004). Methods of teaching agriculture (3rd Edition). Pearson Prentice Hall. Chapters 2 – Principles of Teaching and Learning and Chapter 5 – Planning for Instruction.YDAE 440 Course Packet pages 47-59.
VI. Laboratory activity.
Interest approach #1Interest approach #2

WHEN STUDENTS WON'T DISCUSS
1. When the topic is beyond the range of their interest, knowledge, or experience. 2. When the topic is not vital to them, not practical. 3. When the leader's introduction of the problem does not make it easy to approach. 4. When the thought isn't plowing deep enough to attract discussion. 5. When the discussion rambles too much. 6. When the discussion of one point becomes worn out. 7. When argument or debate take the place of group thinking. 8. When the group is too large (eight to twelve seems the ideal size.) 9. When the members are strangers to one another.10. When they don't wish others to know their real thoughts.11. When the physical surroundings are not favorable to discussion.12. When there is too much formality.13. When they are embarrassed by conditions or by the questions asked.14. When the discussion becomes "personal," killing the search for truth.15. When they fear ridicule or disapproval.16. When one is a radical in a group of conservatives.17. When one is a conservative in a group of radicals.18. When they are lost in thought.19. When one person "knows it all."20. When the leader is "teachy".21. When the leader is dogmatic, unfair, or intolerant.22. When the leader has the "I give-you take" attitude.23. When the leader likes to answer their own questions.24. When the leader talks too much.25. When one or two members "hog" the discussion.26. When they think the leader expects a set answer.27. When they are pressed or hurried.28. When the leader has the special pleader's attitude.29. When the particular question is ambiguously started.30. When the question is a leading one.31. When the question has too obvious an answer.32. When the question has too difficult an answer.33. When the question is one on which all are fully agreed.34. When the question is the "yes and no" variety (unless it is likely to split the group between yes
and no, leading to explanations.)35. When their educational system has put a premium on non-expression.
*Prepared by the Department of Agricultural Education - South Dakota State University.
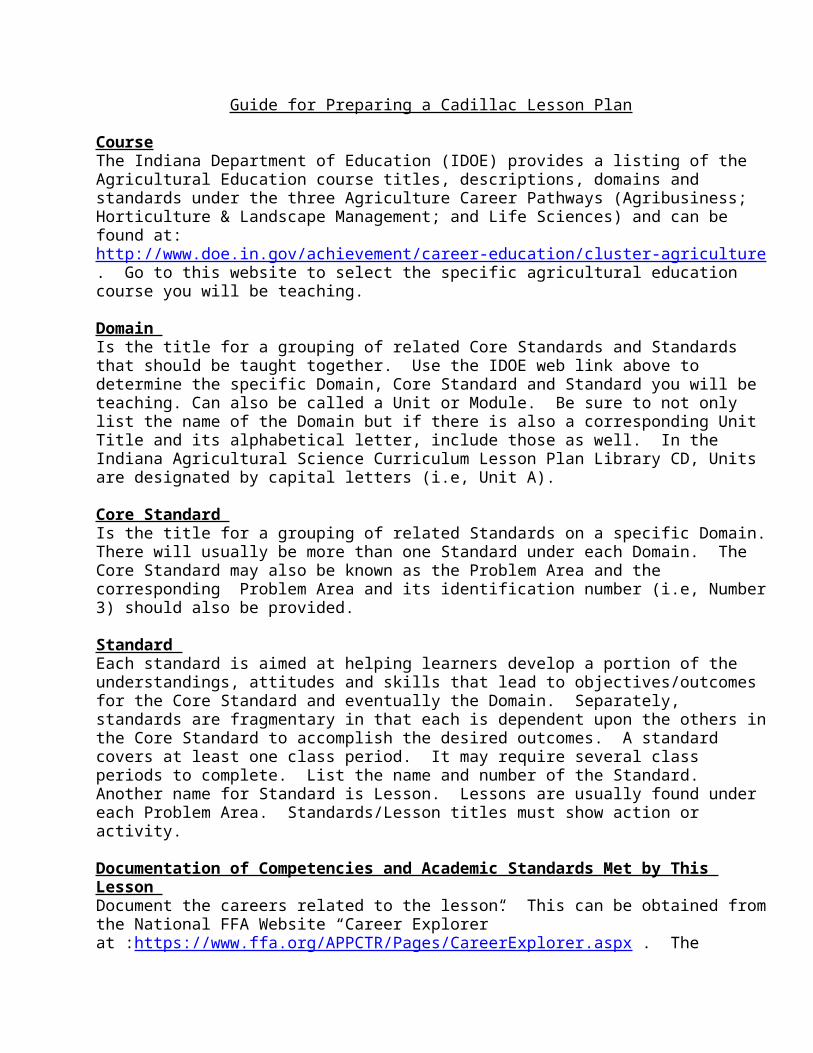
Teaching Skills1. Establishing Set:
The term set refers to the establishment of cognitive rapport between pupils and teacher to obtain immediate involvement in the lesson. This skill is concerned with properly preparing students for some upcoming activity. It includes an interesting or novel way of introducing the activity and establishing common frames of reference between the teacher and students in order to facilitate communication. It is basically an initiating activity by the teacher. Experience indicates a direct relationship between the effectiveness in establishing set and effectiveness in the total lesson. If the teacher succeeds in creating a positive set, the likelihood of pupil involvement in the lesson will be enhanced.
2. Establishing Appropriate Frames of Reference:A student's understanding of the material of a lesson can be increased if it is organized and taught from appropriate points of view. A single frame of reference provides a structure through which the student can gain an understanding of the materials. The use of several frames of reference broadens the general field of understanding more completely than is possible with only one. For example, the Emancipation Proclamation becomes more meaningful to the student when it is understood from the frames of references of the Northern white abolitionist, the Southern white, the European clothing manufacturer, and the political leaders of England, and as an example of the reserved powers of the American President, than if it is discussed simply as the document issued by Lincoln which freed the slaves.
3. Use of Examples:The use of examples is basic to good, sound, clear teaching. Examples are necessary to clarify, verify, or substantiate concepts. Both inductive (part to whole) and deductive (conclusion from premises, reasoning) uses of examples can be used effectively by the teacher. Effective use of examples includes starting with simple examples relevant to students' experience and knowledge relating the examples to the principles or ideas being taught, checking students to give examples which illustrate the main point, and using analogies and metaphors to relate the unknown to the known or to liven up the examples.
4. Using Questions Effectively:The ability to ask provocative, answerable, and appropriate questions, and thus to involve pupils actively, is one of the critical skills in teaching. Novice teachers tend to ask questions which are either so general as to be vague and impossible to answer satisfactorily or so specific that they require a one-word "fill-in" response which tends to kill further responses.
A. Closed Questions:Regulating or seeking a specific answer.
B. Open questions:Soliciting, inviting a variety of answers, attempting to spark conversation.
C. Probing Questions:Probing requires that teachers ask questions that require pupils to go beyond superficial "first answer" questions. This can be done by asking pupils for more information or more meaning; refocusing the pupil's or class's attention on a related issue; prompting the pupil or giving them hints; and bringing other students into the discussion by getting them to respond to the first student's answer.
D. Higher Order Questions:Higher order questions are defined as questions that cannot be answered from memory or simple sensory descriptions. They call for finding a rule or principle rather than defining one. The critical requirement for a "good" classroom question is that it prompts students to use ideas rather than just remembering them. Although some teachers intuitively ask questions of high quality, far too many overemphasize those that require only the simplest cognitive activity on the part of the students.
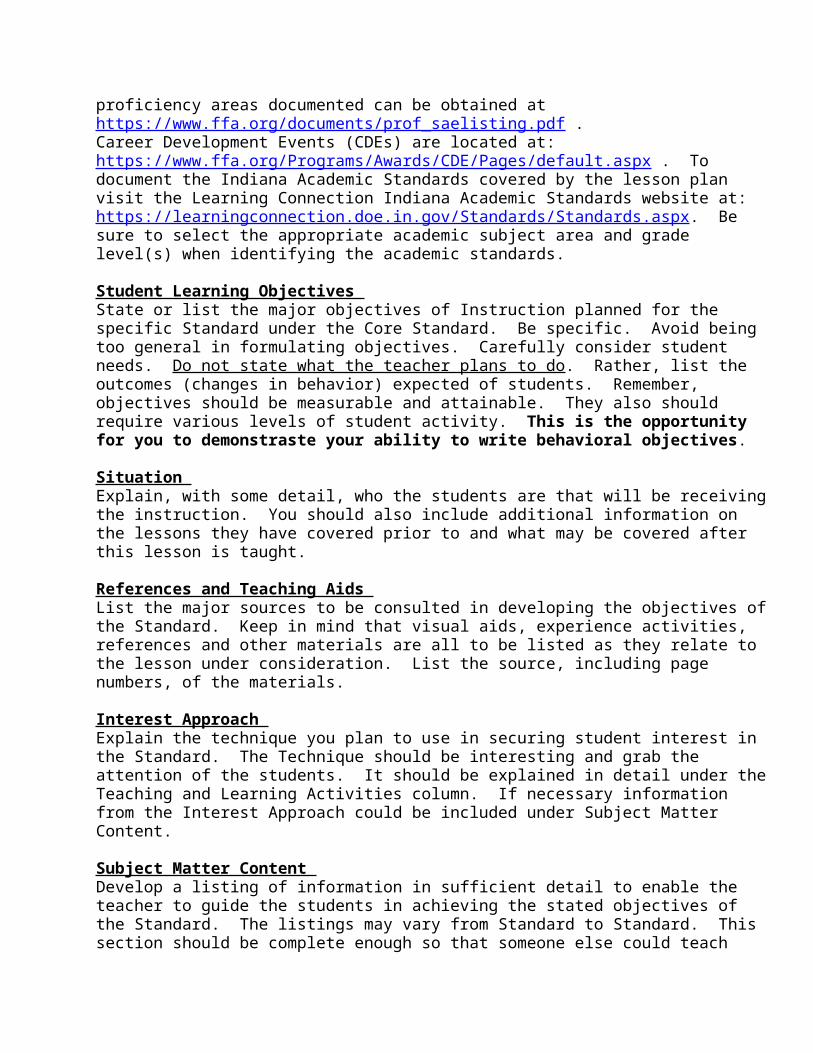
E. Divergent Questions:These questions are characterized by the fact that there are no "correct" answers. They are usually open-ended questions. They require the students to think creatively, to leave the comfortable confines of the known, and to reach out into the unknown. They ask students to make hypotheses and use their imaginations to reorganize concepts into novel patterns. This skill is designed to sensitize and alert the teacher to what is going on in their classroom by observing the cues their students present. The successful teacher, through visual cues, quickly notes indications of interest, or boredom, comprehension or bewilderment. Facial expressions, directions of the eyes, tilt of the head, activity or non-activity-directed behaviors, conversations, and bodily posture offer commonly recurrent clues which make it possible for the teacher to evaluate their classroom performance according to pupil's reactions. From these cues the teacher can make judgments about whether to continue the activity, change it, slow down, speed up, or use a different mode of instruction. Recognizing student attending behavior is a prerequisite for almost any kind of classroom instructional or management decision.
5. Control of Participation:The teacher's ability to analyze and to control the use of their accepting and rejecting remarks, their positive and negative reactions, their patterns of reward and punishment.
A. Reinforcement:This incentive skill is used by the teacher to reward students for proper behaviors. The teacher uses positive reinforcement to increase student participation in classroom discussions.
B. Silence and Nonverbal Cues:This skill is designed to allow the teacher to control and direct classroom discussions without talking. Nonverbal communication is one of the most neglected means of teacher-student communication, but one of the most powerful. The skill focuses on the controlled use of teacher silence to get students to speak and on techniques of nonverbal communication.
C. Stimulus Variation:This skill deals with both verbal and nonverbal techniques of stimulating students in order to preclude boredom and apathy in the classroom. It is basically concerned with the teacher varying their behavior in order to keep the students attentive and alert.
D. Cueing:This skill gives the teacher more control over the success a student has in answering a question or in making a comment. By cueing them ahead of time and through the kinds of cues given, the teacher can greatly increase their chances of making a worthwhile contribution to the class.
6. Providing Feedback:The feedback process may be simply stated as providing "knowledge of results". Questioning, visual cues, and informal examination of performance are immediate sources of feedback. Teachers unconsciously tap a variety of feedback sources, but unless they are sensitized, they tend to rely unevenly on a limited number of students as "indicators" and to rely on a restricted range of feedback cues.
7. Achieving Closure:Closure is complementary to set induction. It consists of teacher activities that will help the students perceive a logical organization of the main ideas and pieces of factual information presented in the lesson. In addition to pulling together the major points and acting as a cognitive link between past knowledge and new knowledge, closure provides the pupil with a needed feeling of achievement.
Closure is attained when the major purposes or portion of a lesson, are judged to have been learned so that the student can relate new knowledge to past knowledge. It is more than a quick summary. It pulls together the major points and acts as a cognitive link between past knowledge and achievement. Closure is not limited to the completion of a lesson. It is also needed at specific points within the lesson so that pupils may know where they are and where they are going.
TEN COMMANDMENTS FOR GOOD TEACHING
I will:
1. Base my teaching upon the needs of my students.
2. Make use of the natural impulses of my students.
3. Introduce appropriate illustrations from experience.
4. Use instructional materials appropriately.
5. Provide satisfactory physical conditions.
6. Base my teaching upon thinking rather than memorization.
7. Organize my course so my students can follow me.
8. Create doubt, curiosity, and suspense.
9. Develop a pleasing personality.
10. Build interest that will endure after the course is completed.
* Taken from Dr. W.F. Stewart Methods of Good Teaching
WHAT RESEARCH SAYS ABOUT EFFECTIVE TEACHING
VARIABLES FOUND TO CORRELATE HIGHLY WITH EFFECTIVE TEACHERS (APPROX. 50 STUDIES)
1. CLARITY (ORGANIZATION) (RS = .37 TO .71)
2. VARIABILITY (RS = .24 TO .54)
3. ENTHUSIASM (RS = .36 TO .62)
4. TASK-ORIENTED (BUSINESSLIKE) (RS = .42 TO .61)
*5. CRITICISM (RS = .38 TO .61)
6. TEACHER INDIRECTNESS (RS = .12 TO .51)
7. USE OF STRUCTURING COMMENTS (RS = .35 TO .69)
8. QUESTIONING
* Criticism was negatively correlated with effective teaching
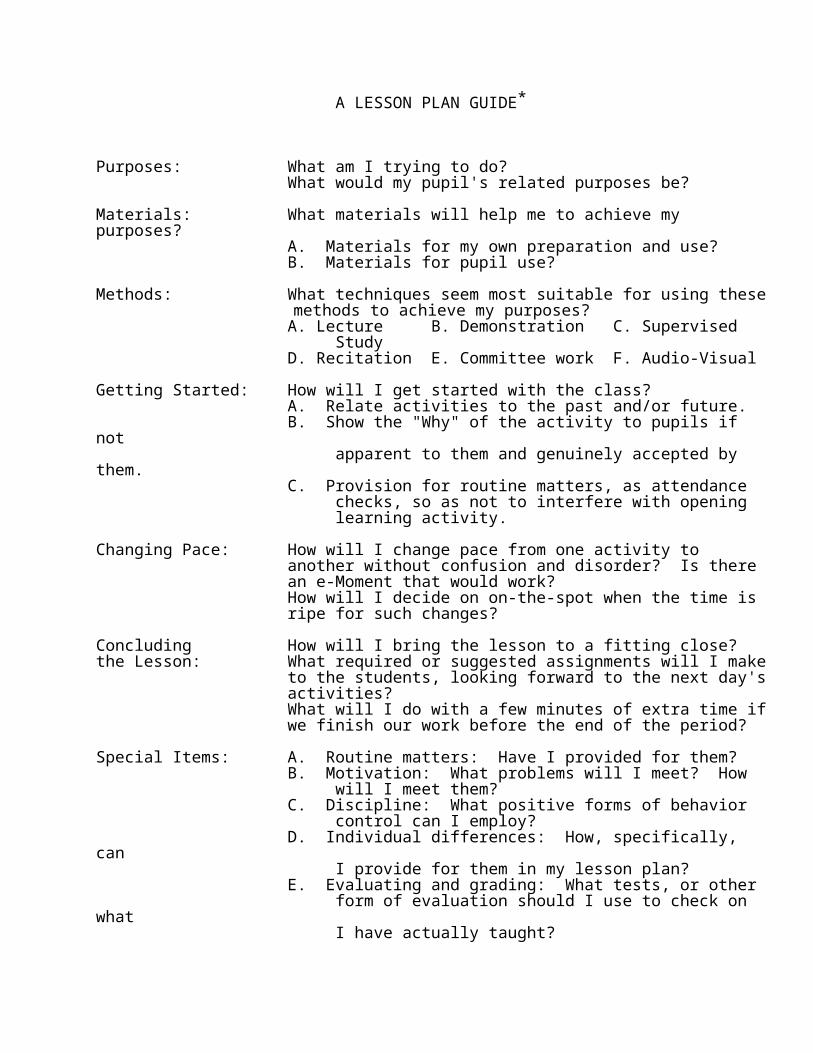
THE 17 CHARACTERISTICS OF AN EXCELLENT TEACHER
There are 17 characteristics that make for an excellent teacher, according to a study by Ruth Tschudin published in Instructor magazine. Tschudin, who took a year's leave from her position as third grade teacher at Hackensack, New Jersey, to complete the study, compared a group of 311 teachers judged excellent by institutions, administrators, and other teachers to a control group of 109 teachers.
The 311 differed from the control group teachers in the following respects:
--Excellent teachers set goals that develop student confidence.
--They gather ideas from a wide range of sources.
--They create better plans and are more willing to change them.
--They are better classroom designers.
--They use common resources in uncommon ways.
--They discipline students with less punishment.
--They work harder at individualizing instruction.
--They use a wider variety of teaching methods.
--They provide appealing activities.
--They actively involve their students.
--They use all the assistance they can get.
--They assign less homework.
--They use teacher-made tests sparingly.
--They use checklists and student folders as alternatives to the "little red gradebook."
--They are more involved in activities outside the classroom.
--They are more humorous and enthusiastic.
--They succeed through hard work.

A Basis for Effective Teaching
1. A motivated learner acquires what they have learned more readily than one who is not motivated. The relevant motives include both general and specific ones; for example, desire to learn, need for achievement (general), desire for a certain reward or to avoid a threatened punishment (specific).
2. Motivation that is too intense (especially pain, fear, anxiety) may be accomplished by distracting emotional states, so that excessive motivation may be less effective than moderate motivation for learning some kinds of tasks, especially those involving difficult discriminations.
3. Learning under the control of reward is usually preferable to learning under the control of punishment . . . learning motivated by success is preferable to learning motivated by failure. Even though the theoretical issue is still unresolved, the practical outcome must take into account the by-products, which tend to be more favorable under reward than under punishment.
4. Learning under intrinsic motivation is preferable to learning under extrinsic motivation.
5. Tolerance for failure is best taught through providing a backlog of success that compensates for experienced failure.
6. Individuals need practice in setting realistic goals for themselves, goals neither so low as to elicit little effort nor so high as to foreordain to failure. Realistic goal setting.
7. Active participation by a learner is preferable to passive reception when learning, for example, from a lecture or a motion picture.
8. Meaningful materials and meaningful tasks are learned more readily than nonsense materials and more rapidly than tasks not understood by the learner.
9. There is no substitute for repetitive practice in the overlearning of skills (for instance, the performance of a concert pianist), or in the memorization of unrelated facts that have to be authorized.
10. Information about the nature of a good performance, knowledge of their own mistakes, and knowledge of successful results, aid the learner.
11. Transfer to new tasks will be better if, in learning, the learner can discover relationships for themselves, and if they have experience during learning of applying the principles within a variety of tasks.
Other matters important to the teacher which are these:
1. The learner learns from their own activity, their own experience. Activity is essential to learning; it is during the activity (experience) that the principles of learning operate. The teacher cannot give the students any learning (in the sense that they can give them pencils).
2. Learning represents a change in behavior, a change that results from experience. The behavior change is proof of the learning. (There may be some learning before a behavior change can be detected.)
3. One's ability to learn depends importantly on what they have learned. Thus, how people are taught affects the development of their ability to learn.
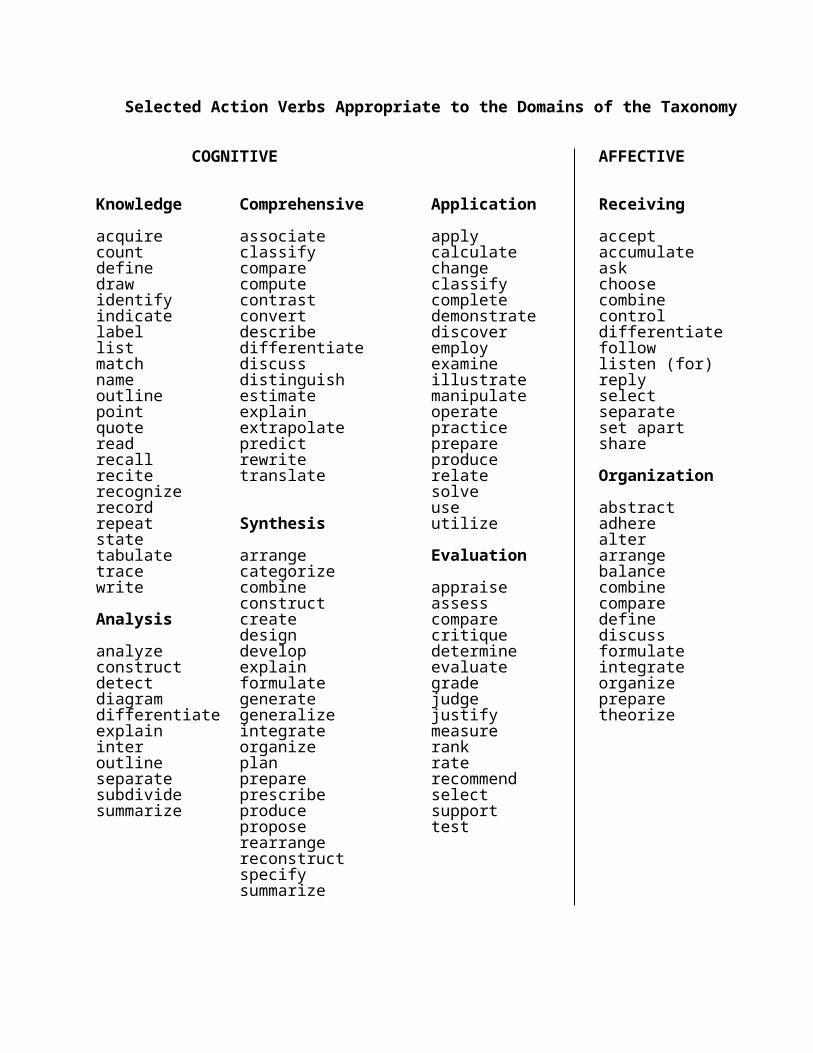
4. In effective teaching, the learner must find their behavior unsatisfactory to themselves. They must be uncomfortable in their "not-knowing" or "not-being-able-to-do" situation.
5. Enabling the learner to have immediate knowledge of the rightness of their responses is important to their learning.
6. Learning is facilitated by continuous knowledge of progress and a high diet of success.
7. At least a fair degree of overlearning or subsequent use of the learning or both are usually necessary for retention of the learning.
8. If the learning is not accepted by the learner to act on, the teacher should not hope for a change in what the learner does, in school or outside of school.
9. The notion that the learner has of themselves materially affects the learning they will do. They may not be expected to have a good self-concept if they are constantly filled with fear, discouragement, and dread.
10. A dominant element in a learning situation is the learner's purpose: What are they learning it for?
11. Goals are great determiners of human behavior. Success and error, from the learner's standpoint, and therefore the satisfaction and annoyance of their act to them, are related to their goal. Only when the learner has a goal should we expect them to exert energy to achieve it. It is the responsibility of the teacher to help the learner know the teaching goal.
12. It is very desirable that the learner be aware of the applicability of what they are learning-see the possibilities of its use. This has motivating value, and increases generalization and the likelihood of transfer.
13. Usually the learner should have opportunity for a good deal of "sequential" practice of the desired behavior, each time going more broadly or more deeply than before. Thus, the experience has new elements in it.
14. The learner should have appropriate tools to work with and materials to work on as they practice or acquire their experience. For example, if they are to acquire certain manipulative skills, they must have the opportunity to practice these skills, using appropriate tools.
15. The learner must have time, and use it, to engage in the activity from which the leaning will result. Effective school learning usually requires considerable preparation time. Many students do not spend nearly enough time in study (and other learning activities).
16. Teaching should be evaluated by evaluating the evidence of the learning that takes place as a result of the attempts at teaching. The evaluation should be used to improve learning and teaching.
17. The teacher should conceive of teaching as a process. Teaching implies a proposed and contemplated learning product, teaching objectives. The teacher who does not know what they intend to teach cannot very well plan their teaching, nor can they evaluate their attainment.
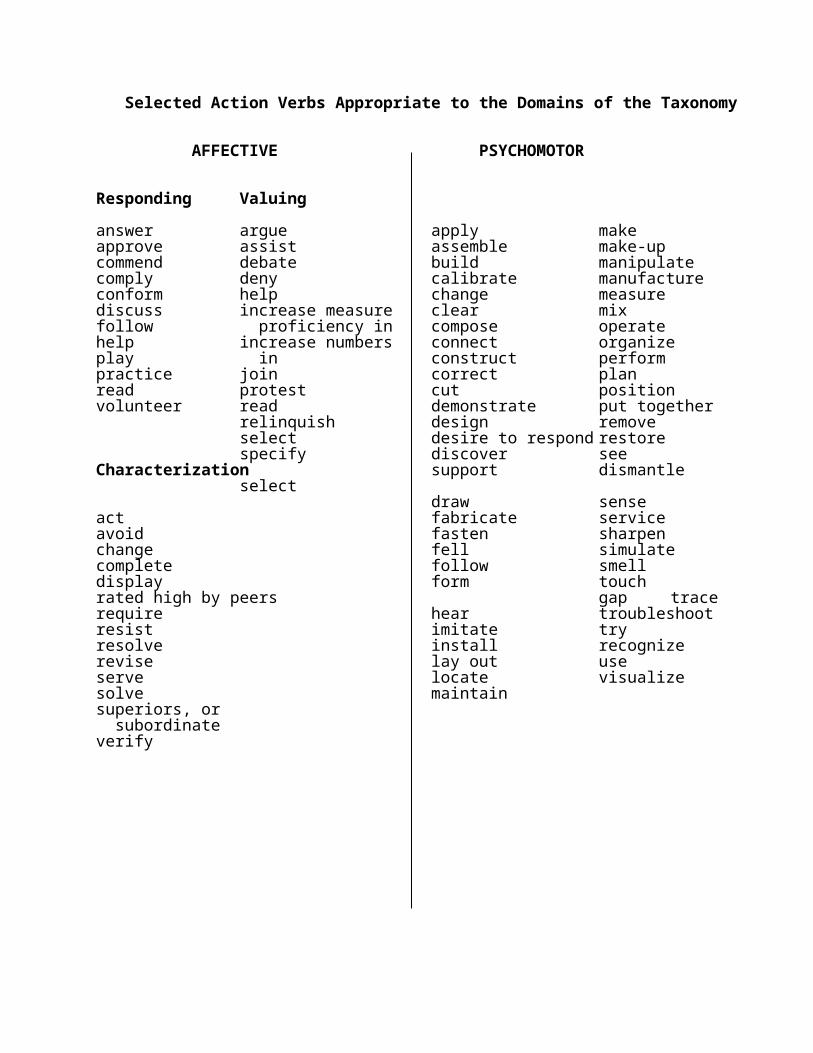
LECTURING, TELLING AND TALKING
In American-style education, much of the teaching is done by teachers telling things to students. Some years ago, P. J. Phillips of the University of Texas determined that pupils remember approximately
10% of what they read; 20% of what they hear; 30% of what they see; 50% of what they hear and see; 70% of what they say, and; 90% of what they say as they do a thing.
Methods of Instruction Recall 3 hours Later Recall 3 days LaterTelling When Used Alone 70% 10%Showing When Used Alone 72% 20%Blend of Telling and Showing 85% 65%
Phillip's observations, if correct, confirm that lectures and teacher talks may be rather ineffective teaching methods in many instances. In any classroom and with any subject, however, teachers must tell students things. Telling is an important ingredient in teaching. No teacher can get along without it. Thus, two conclusions might be drawn from this discourse. (1) teachers should avoid excessive telling (talking), and (2) telling/talking should be planned so that it contributes to student learning.
Recognizing student attention span limitations, the need to foster self-esteem in the classroom, and students' need to be active, lessons should generally be planned so that: (1) the teacher is talking/telling less than half the time, (2) every student has the opportunity to contribute and participate in some way, (3) every student experiences success, and (4) part of the class time is devoted to creative, thought-provoking activity.
Although textbooks abound with sound advise regarding use of lecture as a teaching method, I would share with you some thoughts of my own for your consideration. I strongly suspect that some who have passed through our doors remain oblivious to the knowledge and wisdom contained in textbooks--tactile learners, no doubt.
First, to be of any value, what the teacher says must be motivational or inspirational and must attract and maintain the students' attention. Use of challenging questions, arousing curiosity, posing practical problems, and citing examples, applications and anecdotes, along with the teacher's own obvious interest and enthusiasm will satisfy this often-neglected requirement.
Second, whatever the teacher talks about must be clear and well organized. When we talk, we are painting word pictures for someone else to visualize in their mind. Our experiences influence the way that we interpret words we use and those that are used by others. Vast differences exist between the experiences of teachers and students, and therefore between their respective interpretations of work pictures. Clarity can be greatly improved by use of visual aids, demonstrations, field trips, laboratory exercises, and even discussions. Organization also improves clarity and allows the student to more readily understand concepts in context and in logical order and sequence.
Third, one must remember that people (generally) learn in small doses rather than in large chunks of information at a time. Presentation of a single concept, followed by discussion, recitation, review, practice, or some other appropriate activity will help to assure that learning takes place.
Talking is an essential form of communication. The teacher, if nothing else, must be an effective communicator. Keep in mind, though, that talking should be only part of the communication between teacher and student, and that talking may not be the best way to achieve a desired learning objective. Enthusiasm, clarity, variety and activity will enhance communication in the classroom and result in greater student achievement and satisfaction.

Teaching Techniques by Richard E. WilsonON QUESTIONS AND QUESTIONING
One measure of the success of the superior teacher is the manner in which questions are used in the conduct of individual and group instruction. The teacher can improve questioning. A prerequisite is an understanding of the function of questions.
A. Education Functions of Oral Questions During Class Discussion
1. Stimulate learning by questions to:
--Reveal the need to know--Explore the benefit or advantage of knowing--Provoke desire to know--Promote the acceptance of knowledge offered--Evoke willingness to work to seek knowledge
2. Direct learning by questions to:
--Guide the search for knowledge--Identify what needs to be known--Consider most likely sources of knowledge--Weight relative worth of various knowledge available--Relate new knowledge to that previously known--Secure information possessed by specific individual--Seek recall of specific facts--Cause participation in discussion--Check accuracy of study in relation to knowledge needed--Provoke deduction by logical analysis--Focus attention, discipline, rebuff inattention, or censure dilatory effort
3. Evaluate learning by questions to:
--Gauge capacity or readiness to assimilate new knowledge--Test recognition of knowledge needed--Evaluate understanding of new conceptions--Reveal grasp of new knowledge in relation to previous study--Measure new knowledge gained--Test comprehension of relationships--Appraise the growth in perception of generalization, broad conclusions, or general principles
B. Do's and Don'ts of Questioning
Students' response habits are determined much by the teacher's questioning technique. This checklist will help the teacher to identify weaknesses in performance.
Check
_____ 1. Do evaluate the teaching continuously as the lesson unfolds. Ask questions to test comprehension, understanding, grasp of idea or relationship.
_____ 2. Do provoke and direct thinking by a series of questions asked in a logical sequence, each building on the preceding premise.
_____ 3. Do phrase questions precisely and carefully so students understand what you want answered.
_____ 4. Do ask challenging questions. Avoid the trite or ridiculously simple probe lest the answer be likewise.
_____ 5. Do get more "mileage" from questions. Ask several students before acknowledging the right or correct answer.
_____ 6. Don't ask questions students could not be expected to answer. The teacher must inevitably supply answer. Students build the lazy habit of quietly waiting for the teacher to answer the questions they could answer. Students may come to question teacher's good sense if they persist in asking questions they should now know.
_____ 7. Don't name student to respond before asking question. You telegraph idea all others can relax -- exception, when you have over-participation of students, addressing question aids in some control of the confusion, or you may desire a specific person's answer.
_____ 8. Don't always reject first wrong answer. Continue testing it on others who identify it as wrong rather than teacher doing so.
_____ 9. Don't supply answers to questions students should be able to answer -- unless teacher's desire is to demonstrate their knowledge.
_____10. Do ask questions to work the students, not the teacher.
_____11. Don't identify correct answers by facial expression if you wish to keep the students in doubt.
_____12. Don't ask questions leading to simple "yes" or "no." They provoke limited thought and little discussion. If asked, follow by "why?"
_____13. Don't over-question on one point. Cease when sufficient answers have stimulated thought, directed thought, or tested thought. To continue exhausts students' patience and interest.
_____14. Do raise questions, when lecturing, that premise the teacher's answer. Phrase questions as though student raised, "Now, you may ask . . .?" followed by the teacher's answer.
TYPES AND SAMPLES OF QUESTIONS
Open-ended: Tell me about the Purdue-Washington Rose Bowl game.Tell me about your interviewing experiences.
Direct Question: What was the Purdue defense like?What employment interviewing experiences have you had?
Closed Question: What scoring play did you like best?How do you start employment interviews?
Yes-No, bipolar: Did you see Drew Brees’ first touchdown pass?Do you always establish rapport in the opening?
Leading Question: You thought Purdue would win, didn't you?(yes response) I suppose you consciously try to present a good company image during employment
interviews.
Loaded Question: Are you still betting against Purdue?What do you think of the weird students colleges are turning out?
Probing Question: Why do you think Washington outplayed Purdue in the second half?Why do you think rapport should be optional?
Mirror Question: You say you think Washington outplayed Purdue in the second half?You think, then, that rapport is optional in an opening?
The following questions followed each other in an interview--you must infer the answers that must have occurred. Identify the questions as one of the eight types listed above.
What do you know about student evaluation of instructors?
How do you feel about the miserable rating you received?
Why do you say that the rating is unfair?
You mean you think some students were out to get you?
Had you ever been evaluated before?
Tell me about your TV lecture technique.
Are you going to purchase a copy of the student evaluation results?
Do you feel, like other instructors I have talked with, that the student evaluation committee
needed better organization?
How do you think President Jiscke will react to the evaluations?
Why do you think they will ignore the ratings?
Methods of Teaching Agricultural Education Lesson #4
ANNOUNCEMENTS
I. Unit: Teaching Methodologies
II. Lesson: Utilizing Group Teaching Methods
III. DOE School Setting Development Standards – Secondary EducationStandard 3: Instructional Planning and Delivery: Teachers at the secondary level have a broad and comprehensive understanding of instructional planning and delivery and demonstrate the ability to plan and deliver standards-based, data-driven differentiated instruction that engages students, makes effective use of contemporary tools and technologies, and helps all students achieve learning goals
IV. Objectives:
Upon completion of this lesson, students will be able to:
1. Describe and utilize five group teaching methods.2. Demonstrate desirable teaching behavior.
V. Questions to consider:
1. What methods are used in group instruction?2. What are some examples of how each method can be used?3. Who besides the teacher could use this method of instruction?
Note: Be sure to engage the students in discussion over each of the types of Group Teaching Methods and provide examples of how each can be used.
Reference: Newcomb, L.H., McCracken, J.D., Warmbrod, J.R. & Whittington, M.S. (2004). Methods of teaching agriculture (3rd Edition). Pearson Prentice Hall. Chapter 6.YDAE 440 Course Packet pages 60-63.
VI. Laboratory activity.
Peer teaching.

THE DEMONSTRATING METHODS OF TEACHING
The demonstration method is best used in teaching students how to perform manipulative operations. This method has several advantages: (a) saves time in teaching, (b) concentrates attention of students on relationships to be understood, (c) makes efficient use of "power of observation," (d) is a means of strong motivation, and (e) can be used in training groups or individuals.
In other words, the best way to teach "how" is to "show how".
A demonstration is "any planned performance by a teacher of an occupational skill, scientific principle or experiment". An effective demonstration follows three steps of the "learning cycle".
1. The stimulus step (introducing the problem).2. The assimilative step (demonstration and development of the understanding by the
learner).3. The application step.
The demonstration method should not be confused with the illustrated lecture method of teaching. An illustrated lecture involves the use of pictures or other materials to illustrate relationships. Slides, moving pictures, charts, specimens, or models are often used. No tools, physical materials, machines, or appliances are manipulated in the teaching process.
In teaching manipulative skills by the demonstration method, the teacher is concerned that the student learn the logical step-by-step procedures in doing the job, the principles that apply, and the related information.
Planning the logical step-by-step points or activities is the key to a successful demonstration. These points must be carefully demonstrated and explained to the learner. Only be developing and using a lesson plan can the teacher hope to do an effective job of teaching.
HOW TO GIVE A DEMONSTRATION
1. Preparing to give a demonstration
A. How to get ready to instruct learners:
1. Select suitable jobs, considering:a. jobs to be done, complexity, risks, and frequency.b. ability of the learners.c. need to learn skill.
2. Set up objectives for teaching - abilities pupil should develop.
B. Break down the job:
1. Select important steps.2. Pick out key points.3. Select the information associated with the steps.
C. Think through how to give a demonstration to determine:
1. How you will prepare the student.2. How you will teach them.3. How you will try them out.4. How you will follow them up.
D. Have in readiness:
1. Proper tools, equipment, and materials.2. A work place for comfort and efficiency.
II. Giving the demonstration
A. Step 1 - Prepare the learner:
1. Put them at ease.2. Find out what they know about the job.3. Explain importance of job.4. Get them interested in learning job.5. Place them in correct position to observe job.
B. Step 2 - Teach them the job:
1. Tell, show, illustrate, explain, and question carefully and patiently.2. Take one step at a time.3. Stress key points.4. Present information associated with and related to job.5. Emphasize safety factors.
C. Step 3 - Try them out:
1. Have them do job--guide them if necessary.2. Have them do job again, explaining steps, key points, and safety factors.3. Ask questions and prevent errors.4. Repeat until you know they know.
D. Step 4 - Follow them up:
1. Put them to work.2. Check often -- encourage questions.3. Tell them where to get help.4. Explain what to do in an emergency.
Additional tips: An effective demonstration should be given in a minimum of time--no longer than about 15 minutes. During the practice period, the teacher should be aware of the activities of each member of the class. As the students work individually, the teacher should move quickly from one student to another. Periodically, the teacher will want to station himself at a location from which they can observe the entire group of students. This will permit effective supervision as well as to allow students to come to them for help. If a number of students are having difficulty in learning a skill, the demonstration should be repeated. The students who have mastered the skill may assist the teacher with those who have not.

Process Outline for Giving a Demonstration
The teacher should try a "DRY RUN" on any demonstration prior to actually giving it. The "dry run" should follow the steps to be used in the actual demonstration.
1. Orient the students to the demonstration. - Explain what is to be demonstrated and how it relates to the instructional program. The purposes of the demonstration should be discussed.
2. Show the students, if possible, what the demonstration is to produce or achieve. - Having the finished product available for inspection will make it easier for the students to understand the demonstration.
3. Show and describe the equipment and materials to be used. - The group can be asked to name and describe equipment and materials needed with the teacher producing the items as they are named. The teacher can finish by showing items not named by the group.
4. Emphasize safety. - If goggles are required, students and teacher should be wearing them. The teacher should point out steps where accidents may occur and emphasize safe work habits at all times.
5. Give the demonstration. - Each step and important point should be identified and listed. Care must be taken to show and explain each step in a way students can see and understand. To the extent possible, the students can be asked to discuss the demonstration as it is being given. If additional time is available, related information may be injected into the procedures by the teacher. The amount of time to be used in this way should be estimated during the "dry run" so that appropriate preparation can be made.
6. Summarize as needed. - Depending on the situation and Student Learning Objectives, the teacher may summarize, a student may be called on to perform the demonstration, or the entire group may be directed to perform the activity demonstrated.

Methods of Teaching Agricultural Education Lesson #5
ANNOUNCEMENTS
I. Unit: Skills and Resources Used in Effective Teaching
II. Lesson: Utilizing Teaching Resources
III. DOE School Setting Development Standards – Secondary EducationStandard 3: Instructional Planning and Delivery: Teachers at the secondary level have a broad and comprehensive understanding of instructional planning and delivery and demonstrate the ability to plan and deliver standards-based, data-driven differentiated instruction that engages students, makes effective use of contemporary tools and technologies, and helps all students achieve learning goals
IV. Objectives:
Upon completion of this lesson, students will be able to:
1. Identify print, electronic, and other resources used by agricultural science and business teachers.
2. Identify sources of instructional materials.3. Identify types of media used by AgEd teachers4. Develop a personal appreciation for and use of instructional technology in the classroom.
V. Questions to consider:
1. What materials do agricultural science and business teachers use in their classrooms?2. What resources are available to assist agricultural science and business teachers in presenting
lessons?3. What are common media used in agricultural education?4. How are instructional materials developed and disseminated?5. How are textbooks used in the agricultural education classroom?
Reference: Links to Education Resources on the Agricultural Education website: http://www.YDAE.purdue.edu/aged/coursepackets/links.html
VI. Laboratory activity.
The Indiana Agricultural Education Curriculum and Lesson Plan Libraries supplements.
Methods of Teaching Agricultural Education Lesson #6
ANNOUNCEMENTS
I. Unit: Teaching Methodologies
II. Lesson: Utilizing Individualized Teaching Methods
III. DOE School Setting Development Standards – Secondary EducationStandard 1: Student Development and Diversity : Teachers at the secondary level have a broad and comprehensive understanding of student development and diversity and demonstrate the ability to provide instruction that is responsive to student differences and that promotes development and learning for all students.Standard 3: Instructional Planning and Delivery: Teachers at the secondary level have a broad and comprehensive understanding of instructional planning and delivery and demonstrate the ability to plan and deliver standards-based, data-driven differentiated instruction that engages students, makes effective use of contemporary tools and technologies, and helps all students achieve learning goals
III. Objectives:
Upon completion of this lesson, students will be able to:
1. Describe and utilize 10 individualized teaching methods.2. Demonstrate desirable teaching behavior.
IV. Questions to consider:
1. What methods are used in individualized instruction?2.3.4.5.
Reference: Newcomb, L.H., McCracken, J.D., Warmbrod, J.R. & Whittington, M.S. (2004). Methods of teaching agriculture (3rd Edition). Pearson Prentice Hall. Chapter 7.
V. Laboratory activity.
Peer teaching.

Methods of Teaching Agricultural Education Lesson #7
ANNOUNCEMENTS
I. Unit: Teaching Methodologies
II. Lesson: Modifications for Special Needs Learners in the Comprehensive Classroom
III. DOE School Setting Development Standards – Secondary EducationStandard 1: Student Development and Diversity : Teachers at the secondary level have a broad and comprehensive understanding of student development and diversity and demonstrate the ability to provide instruction that is responsive to student differences and that promotes development and learning for all students.
Standard 3: Instructional Planning and Delivery: Teachers at the secondary level have a broad and comprehensive understanding of instructional planning and delivery and demonstrate the ability to plan and deliver standards-based, data-driven differentiated instruction that engages students, makes effective use of contemporary tools and technologies, and helps all students achieve learning goals
Standard 5: Learning E nvironment : Teachers at the secondary level have a broad and comprehensive understanding of student learning environments and demonstrate the ability to establish positive, productive, well-managed, and safe learning environments for all students.
III. Objectives:
Upon completion of this lesson, students will be able to:
1. Define Least Restrictive Environment2. Adapt a Least Restrictive Environment for their students3. Respond to the needs of students requiring a Least Restrictive Environment
IV. Questions to consider:
1. What does Least Restrictive Environment Mean?2. What are the different types of Modifications that a teacher can make?3. What types of Personnel Supports are available to teachers?4. What is the purpose of an IEP?5. What are some examples of Academic Accommodations?
Reference: Students with Disabilities CD
V. Laboratory activity : Peer teaching.
Special Notes: The CD covers several different segments of Full Inclusion for students with disabilities in Math and Sciences. The first three segments of the CD are on Science. I would recommend the showing of the first two - three segments. The first segment, “The Winning Equation”, will talk
generally about students with disabilities and then present examples of modifications that can be made. It provides a step by step Modification Process used by a Chemistry teacher. The second segment, “Working Together”, lasts approximately 11 minutes and centers around science education and has actual students with disabilities talk about their situations. The third segment is, “The Computer” and is approximately 16 minutes in length. It focuses on how the computer can help as an adaptive piece of equipment. If you show all three segments it will take approximately 42 minutes.
Students need to be exposed to the following website: http://www.washington.edu/doit/. This website is mentioned several times during the film and is an excellent resource for teachers. Would recommend you surf this site with the students.
Distribute and Review the two Handouts: LRE Decision Process and Examples of Academic Accomodations
Methods of Teaching Agricultural Education Lesson #8
ANNOUNCEMENTS
I. Unit: Teaching Methodologies
II. Lesson: Managing the Agricultural Education Classroom
III. DOE School Setting Development Standards – Secondary EducationStandard 1: Student Development and Diversity : Teachers at the secondary level have a broad and comprehensive understanding of student development and diversity and demonstrate the ability to provide instruction that is responsive to student differences and that promotes development and learning for all students.
Standard 2: Learning P r ocesses : Teachers at the secondary level have a broad and comprehensive understanding of learning processes and demonstrate the ability to facilitate student achievement.
Standard 3: Instructional Planning and Delivery: Teachers at the secondary level have a broad and comprehensive understanding of instructional planning and delivery and demonstrate the ability to plan and deliver standards-based, data-driven differentiated instruction that engages students, makes effective use of contemporary tools and technologies, and helps all students achieve learning goals
Standard 5: Learning E nvironment : Teachers at the secondary level have a broad and comprehensive understanding of student learning environments and demonstrate the ability to establish positive, productive, well-managed, and safe learning environments for all students.
IV Objectives:
Upon completion of this lesson, students will be able to:
1. Establish a positive leraning environment and standards of classroom behavior2. Identify ways to prevent discipline problems.3. Develop guidelines for appropriate use of low profile desists for managing minimally
disruptive behavior.4. Develop guidelines for appropriate use of disciplinary action to handle significant student
misbehavior.5. Demonstrate desirable teaching behavior.6. Develop a personal philosophy of discipline.7. Recognize factors that create discipline problems.8. Develop strategy for utilizing school laboratory effectively.

V. Questions to consider:
1. What are the causes of classroom management problems?2. What are the common classroom management theories?3.4.5.
Reference: Newcomb, L.H., McCracken, J.D., Warmbrod, J.R. & Whittington, M.S. (2004). Methods of teaching agriculture (3rd Edition). Pearson Prentice Hall. Chapter 8.YDAE 440 Course Packet pages 68-83.
VI. Laboratory activity.
Peer teaching.
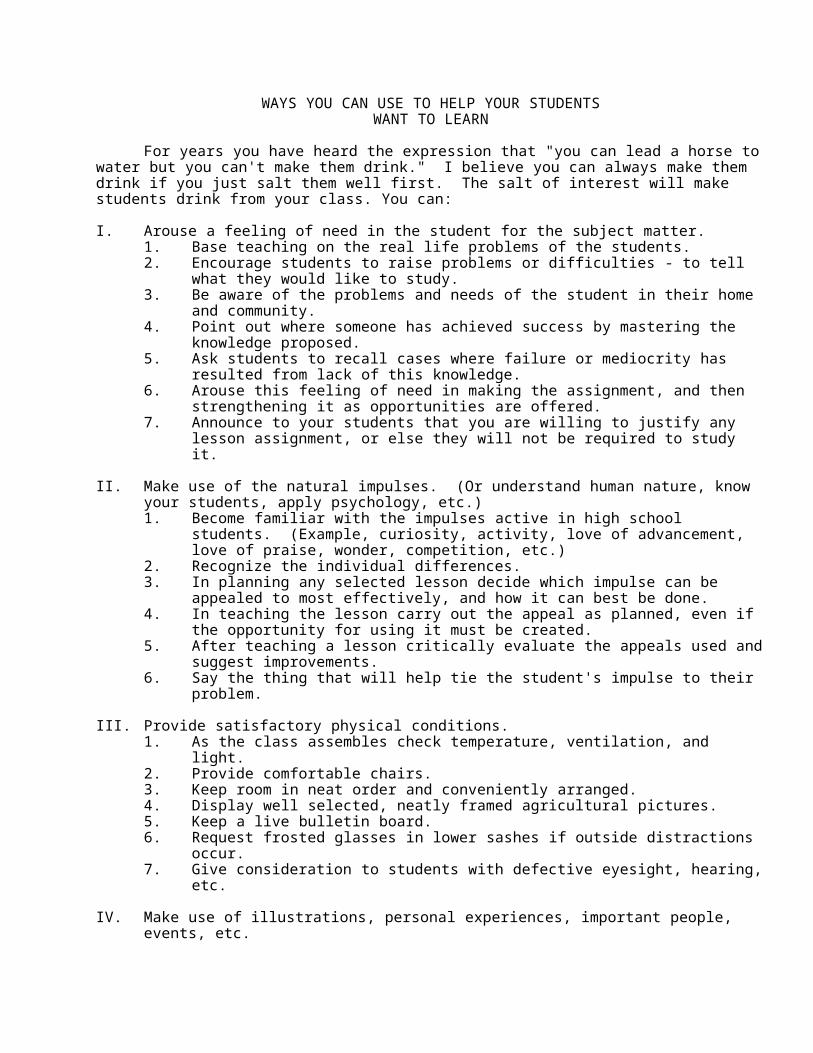
Why Do Students Misbehave?
According to Dr. Nicholson, there are five categories of discipline problems.
A. Causes originating with the student
1. Physical factors
a) Physical state of the childb) Nutritional condition of the childc) Physical handicaps and glandular deficienciesd) Phase of Growth and Development
2. Mental factors
a) Need for achievement by slow-learnersb) Need for recognition and improvement of work habits by gifted
3. Social and emotional factors
a) Need for affection, security, belongingb) Need for heterosexual acceptance
B. Causes originating with the student's group
1. Group climate
a) Punitive climateb) Hostile, competitive climatec) Distorted group pride
C. Causes originating with the teacher and school
1. Teacher's attitude - methods of instruction2. Physical factors of the school3. Curriculum4. Lack of guidance5. Lack of cooperation among faculty
D. Causes originating with the home and community
1. Family background2. Imitation of elders3. Attitudes of cliques
E. Causes originating in the larger social order
1. Change in the family role and status2. Breakdown in the primary group3. Anxiety of the times4. Prevalence of unethical culture5. Impact of urban culture6. Inequality of opportunity
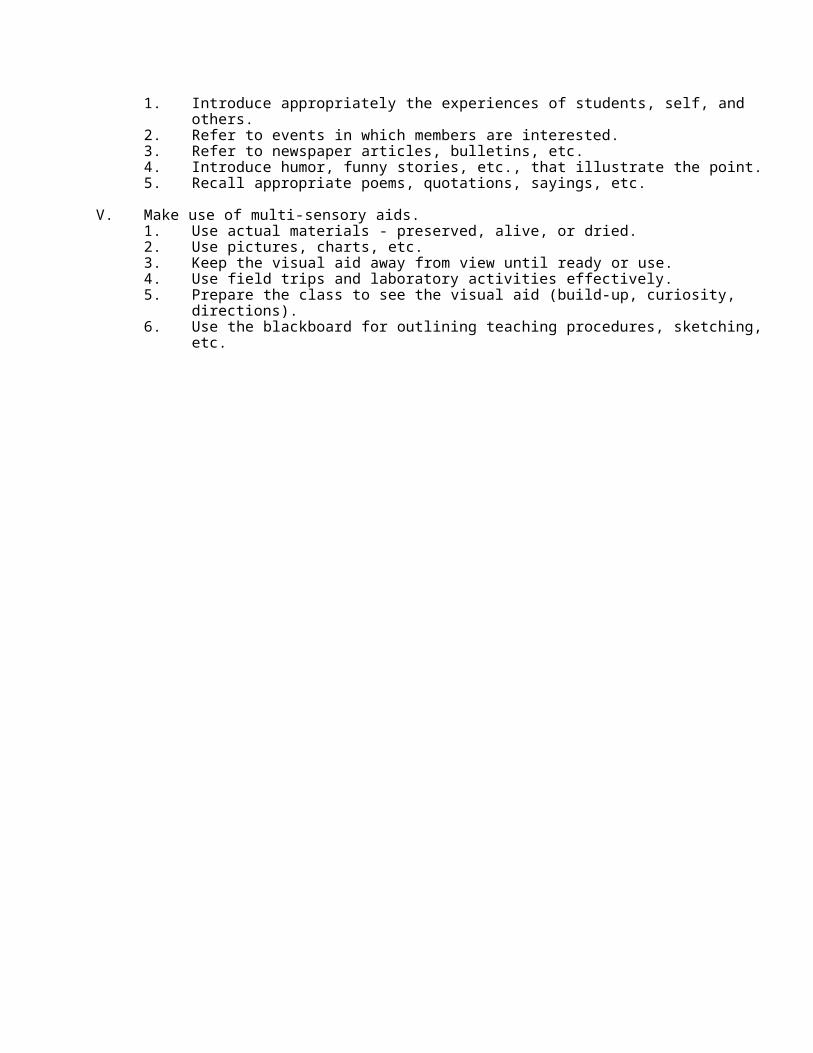
MAINTAINING GOOD DISCIPLINE
I. Meaning of discipline
1. Good discipline exists when individuals are in a favorable situation for learning. The teacher has "control" of the situation but is not autocratic. "Good" discipline for one situation may not be good discipline for another.
2. Definition - Discipline may be considered good when every member of the group is engaged in purposeful effort of the proper kind without annoyance or discomfort to their classmates or associates.
II. Evidence of poor discipline
1. General impression - the teacher has lost control.
2. This loss of control may be evidenced in many ways:a. boisterousness e. unjustified activityb. wisecracks f. pupil is quiet by inattentivec. all talking at once reads irrelevant material,d. many foolish requests of looks around, etc. the teacher
III. Principles to observe in controlling discipline
1. "Stop discipline problems before they start."
2. Have the group help you set up "rules" for governing the class.
3. Plan lessons carefully. "Be interesting," provide for individual differences, avoid monotony, have enthusiasm for what you are doing, provide good working conditions.
4. Know the individuals and their home conditions and problems.
5. Keep class involved in relevant activities.
6. Never make a threat that you are not prepared to carry out. Even if you are prepared, attempts at intimidation usually fail to get desired response.
7. Avoid sarcasm.
8. Know the rules and regulations of the school. Serious complications may result if you do not abide by them.
9. Hold a personal conference with the offending student. Many times they will respond to reason.
10. Let the punishment fit the offense.
11. Avoid public apologies.
12. Be consistent.

13. Punishment by "keeping in" to study the subject is a good way to kill interest.
14. Follow punishment soon after the offense but do not administer it under emotion.
15. Be impartial.
16. Make the attitude of the pupil the center of attention and strive to direct their thinking in such a way as to help them realize the social significance of their act.
17. Never parade the conduct of the pupil before the school. Deal with conduct problems through personal conference as far as possible.
18. The teacher must evidence a spirit of cooperation and helpfulness without a semblance of spying and policing.
19. Misconduct should not be regarded as a crime but as an opportunity for constructive moral education.
20. Create clear conceptions of what constitutes helpful social standards.
21. Rules and regulations should be worked out by the group.
22. Teacher's attitude should express confidence and assurance in the outcome.
23. Teacher should not be supersensitive or easily upset.
24. Teacher should be alert in observing and accurate in interpreting acts of pupils.
25. Do not deal with an angry pupil.
26. Control your own temper; do not assume the act was done to annoy you.
27. Do not decide hastily.
28. Give the pupil a chance to present their point of view; be sure that they understand what they are charged with.
29. Do not hold grudges. Let bygones be bygones when the case is settled.
30. Avoid asking anything in public that reflects on the child.
31. Avoid punishments that will punish you, such as keeping children after school.
32. Do not make remarks that you will whip any student who does certain things. Avoid threats.
33. In dealing with parents, allow parents to present their side and attempt to show them you were right; be sure to keep your head and use courtesy at all times.
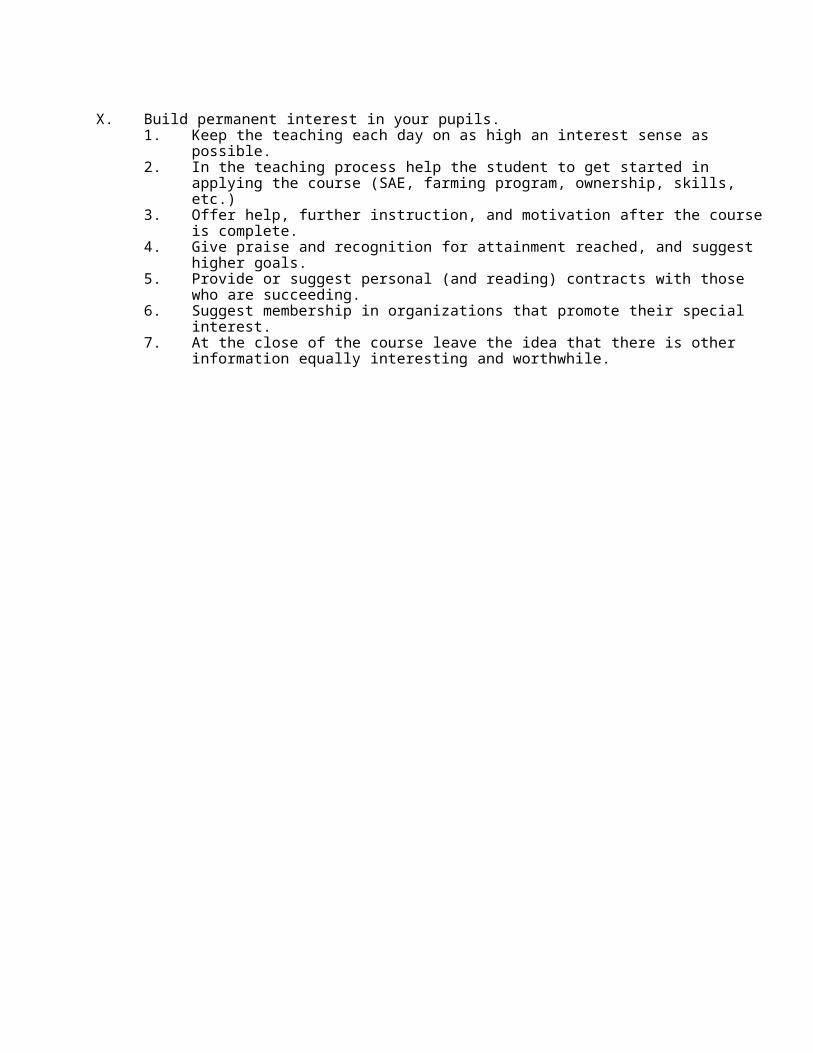
SUGGESTIONS TO IMPROVE CLASSROOM DISCIPLINE
1. Be prompt.2. Be prepared.3. Be impartial and be fair.4. Avoid interruptions.5. Reprimand in private.6. Be consistent.7. No politics - no favorites.8. Don't delay - don't let discipline problems drag out.9. Look for potential trouble spots.10. Don't threaten anything you can't carry out.11. Have a routine in all classroom procedures.12. Use your voice to advantage - it can soothe or enthuse. Never attempt to speak over a noisy
situation.13. Understand fads in dress, hair styles, language, social teenage customs. Do enforce school
policies, but do not try to change the world.14. Be flexible.15. Recognize behavior.16. Don't argue.17. Develop room standards.18. Don't ridicule.19. Be positive - give sincere praise.20. Don't punish the group.21. Give directions clearly.22. Show a sense of humor.23. Be formal - never accept any manner of address except Mr., Mrs., or Miss and your last name, or
permit other teachers to be referred to except in this manner.24. Be as quick to praise as to find fault.25. As a teacher - act your age - don't try to be one of the gang. Distinguish between friendliness
and familiarity.26. Acknowledge your errors and apologize when necessary.27. Handle your own discipline problems. Consult your fellow teachers and administrators, but
don't send pupils to the office except as a last resort. Sending students to the office is an admission of your own ineffectiveness.
28. There are occasions for sending pupils to the office. Find out what the office will back up.29. Personality traits conducive to good discipline:
Fair play, Friendliness, Sincerity, Firmness, Patience, Consistency, Sense of humor
FIVE WAYS TO LOSE RESPECT OF CHILDREN
1. Shifting responsibility. Any time you send a pupil to the office (or threaten to) you transfer your responsibility to another person.
2. Threatening. Threats set a price on disobedience. If the child is willing to pay the price, they disobeys. The threat may overstep the bounds of reason--then it's they who threatens who is in trouble. If they don't carry out the threat, they weaken their authority. If they do, they lose respect.
3. Inconsistency. E. G., punishing one child for an offense and letting another go unpunished for the same offense. For example, exacting one day, lax the next.
4. Showing temperament. Pupils have little respect for the teacher who "flies off the handle," or who is unpredictably either hard-boiled or overly sweet.
5. Belittling. Disparage a child, their work, their playmates, their goals, possessions and you become smaller in the child's eyes yourself. The worst form is to deprecate a child before their peers.
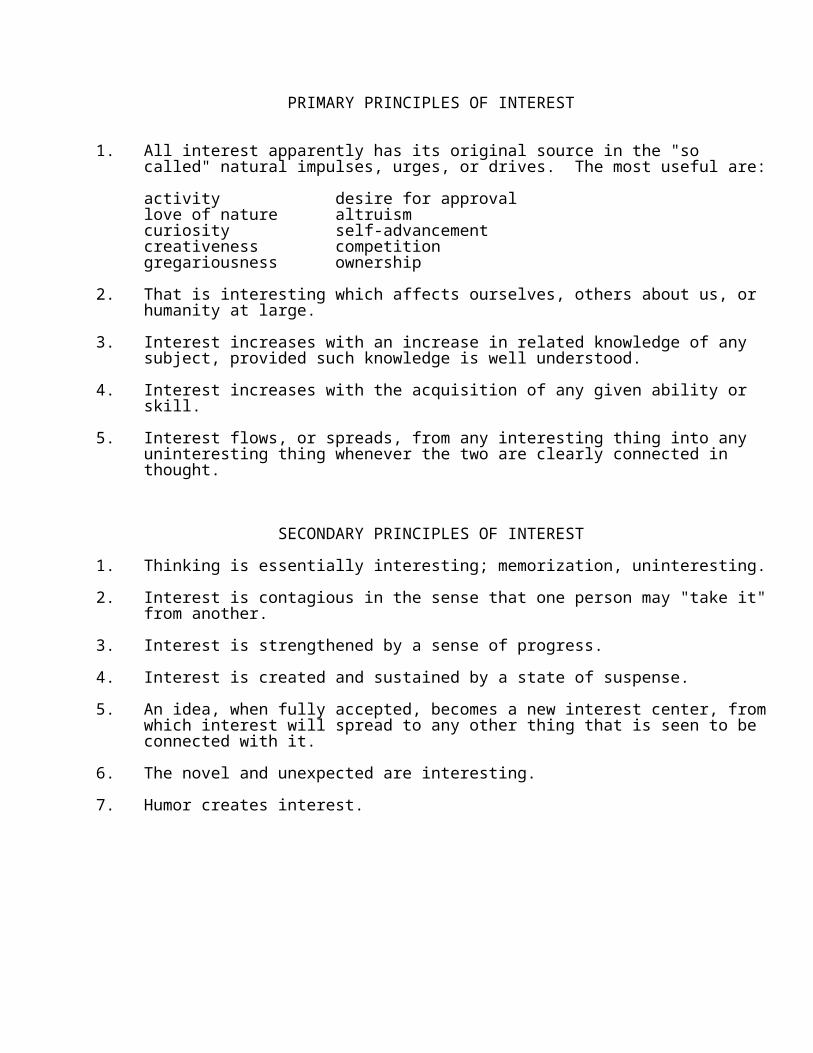
SOME DISCIPLINARY DEVICES
1. Win the class. Start with a proposal such as room organization, a play, some long-range project, to sell the class on yourself and your program.
2. Be as tough as you ever plan to be on the first day of school.
3. Get the class to want to do the things that you want done.
4. Keep them happy. Learning takes place most easily then. Anyway, to be happy is America's birthright to the child.
5. Keep them busy. Give them wholesome activities, or they will find activities of their own which may not be so wholesome.
6. Plan and have fun with your students. They'll respect your more, or less.
7. "There will be times when the child will want to do what they should; then they may. There will be times when the child will not want to do what they should; then they must." - H. H. Horne
8. Set a good example. The motto, "Do as I say, not as I do" will not work.
9. When trouble arises, face it; don't run away from it.
10. If you make a ruling, stick to it, no matter whom it hits. Never hedge.
11. In handling a disciplinary case, above all else be fair.
12. Take the attitude, "I like you, but I detest what you have done."
13. Never threaten. Be aware of the little word "if". If you do that again, I'll ..." If you must threaten, keep it general. "If you do that again, something very unpleasant will happen."
14. Never settle a disciplinary case when you are angry. Try to apply the same rule to the pupil.
15. Try to get at the real cause of the difficulty. Find out about the pupil's home. Consult their parents, if necessary.
16. Use your voice, eyes, dramatize, explain, appeal, before you punish.
17. If punishment becomes necessary, fit it to the offense. Use disapproval, isolation, deprivation, etc.
18. Keep a daily record on behavior, health habits, and study habits.
19. Paddle or strike yourself before you hit the student.
20. When you must punish, be sure to "take the sting out."
21. Use the attitude, "Let's try to forget and try again."
22. Practice good mental hygiene.
Copied from report given by: Edgar M. Finck, Toms River, NJ
CLASSROOM MANAGEMENT
Classroom Tips
Every teacher, every day, faces problems regarding student behavior. Every teacher meets these problems in their own way. Some enjoy much success; others, not so much. Why the difference? Part of the answer lies in the teacher's ability to prevent problems. Study of behavior difficulties indicates that many "problems" could have been prevented by different action on the part of the teacher. Consider these "traps" to avoid:
1. Disparaging remarks to or about pupils. "You are too dumb to be in school," "How dumb can you get," "Stupid," "Blockhead," etc. reflect more on the speaker than on the object.
2.. Personal emotional involvement. "You can't do that in my room." "I won't have it," "You can't do that to me."
3. Exaggerations. "You're never on time," "You're the worst..."4. Taking action while angry, hysterical or upset. You will usually be sorry.5. Acting in haste. Time to get facts may prevent a problem.6. Being "buddy-buddy" with youngsters. Leads, on occasion, to lack of respect.7. Easing up on routine. . . then, "crack-down" suddenly. This is common, but fruitless, in dealing with
tardiness, talking, etc.8. Failure to organize ordinary daily routine. Youngsters must know what is expected. Classes run smoothly
when they do so.9. Failure to make rules and regulations clear. Youngsters should know the "why" for rules...they will then
understand them and recognize them as fair. (Speaking out in class is common) How to get a chance to talk should be understood at the outset.
10. Failure to assume a fair share of personal responsibility for pupil behavior. Attempts to "funnel" all discipline to the office results in lack of stature in the classroom. Except for cases demanding "on the spot" action by the administrator, it is worth a try to iron out a problem on your own time and the student's -- in private.
11. Challenges to misbehave. "The next one who does 'such and such' will do 'so and so'."12. Stimulation of negative response. "She yelled at me so I yelled back."13. Slapping. Contrary to policy. Usually done in a fit of temper.14. Standing in the hall. "I told the student to stand outside the door ...then when I looked, the student was gone.15. Lack of voice control. Try not to raise your voice.16. Being out of the room when it happened. There are emergencies, of course.17. Tension and nervousness. We're all human, but these rub off on youngsters.18. Fretting over the uncontrollable. I.Q., pupil-teacher ratio, size of the room, dust, weather, etc.19. Expecting more or less than pupils can do. Often hard to judge, it's true.20. Use of the paddle, sticks and weapons in the classroom. The paddle has a place, but not in the classroom
ordinarily.
Assertive Discipline(a program created by Lee Canter)
Canter thinks that teachers fall into three basic categories concerning discipline-assertive, nonassertive, and hostile. He believes that nonassertive and/or hostile teachers are quite likely to be unsuccessful in their discipline efforts.
Successful, assertive teachers take the following positions regarding discipline in their classrooms:
* They will not tolerate any student preventing them from teaching.
* They will not tolerate any student preventing other students from learning.
* They will not tolerate students engaging in any behavior that is not in the student's best interests or in the best interest of other students in the classroom.
* Lastly, they insist that whenever a student chooses to behave appropriately, they immediately recognize and reinforce such good behavior.
An example of an appropriate action that an assertive teacher might take when a student begins to talk and disrupts others is to walk up to the student, look them in the eye, and say, "You must stop talking and get to work."
An effective first step is for the teacher to think through precisely what kind of desired behavior students should exhibit at all times. Most teachers want their students to follow directions, stay in their seats, raise their hands when they want to speak, come to class on time, not disrupt other students, not swear at or tease other students, bring the necessary supplies with them, and so on. The teacher must communicate clearly these expectations to the student, and reinforce them frequently until students do them automatically.
Assertive teachers must also set limits of behavior for students. They must explain the consequences for students. They must explain the consequences for students who do not function within these limits. Teachers might think of these consequences as the "discipline plan" for each particular classroom. When students violate classroom rules, they must be reminded of their action, and they must suffer the consequences that the teacher has explained in advance. Typically, these consequences will range from writing the student's name on the board as a warning to losing privileges, to more severe consequences such as contacting the principal and/or parent.
One key to creating a good classroom climate is for the teacher to systematically apply the classroom rules to all students at all times. This is especially important during the beginning of each class and at the beginning of the school year. If teachers systematically apply their discipline plan, students will quickly come to realize what is expected and usually will conform to the classroom behavior expected by the teacher.
It is equally important for the assertive teacher to systematically reinforce good behavior. This eventually becomes an automatic part of the teacher's actions. Our most effective teachers develop the ability to constantly praise students and reward them with smiles and nonverbal behavior such as little pats on the back or a wink. Research has shown that most students basically wish to please the teacher and receive the teacher's acknowledgment for good work and good behavior.
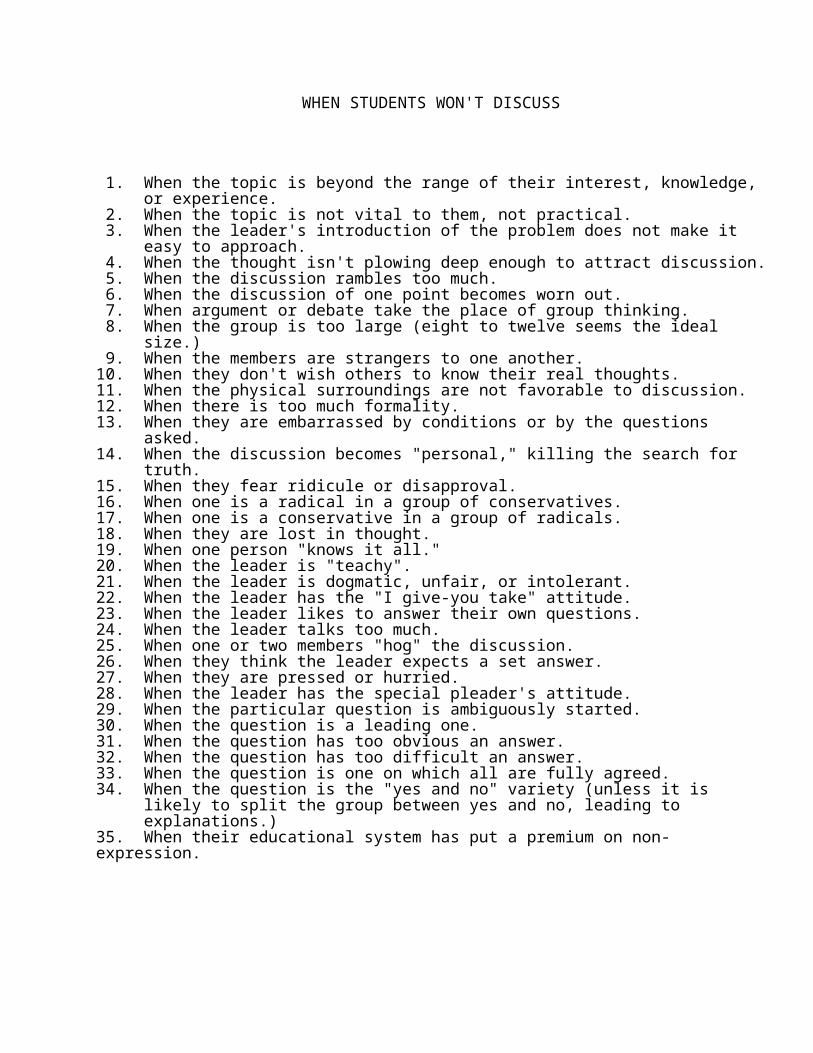
Teacher Effectiveness Training
(Another popular approach to guidance and discipline, developed by Thomas Gordon, is called "Teacher Effectiveness Training" (TET).4 Gordon originally worked with parents to help them develop better parenting skills. He called this approach "Parent Effectiveness Training" (PET). Both programs use the same basic techniques to improve adult-child interactions.)
* Consider the classroom space itself to see if changes there might help to improve the setting in which students work.
* Be aware of the little things that can be done ahead of time to help avoid the need for intervention.
* Three basic techniques teachers must identify who "owns" the problem. The teacher "owns" the problem when a student's behavior gets in the way of effective teaching.
* The problem is student-owned when a personal problem or something like a poor grade is upsetting or frustrating to the student.
When the student owns the problem, the teacher should use "active listening" to help the student deal with the situation. Through careful listening and questioning, the teacher can help the student understand, accept, and deal with the feelings associated with the problem.
* Teacher-owned problems require the use of "I-messages" or a clearly defined problem-solving procedure. When using I-messages, the teacher must clearly state the problem being caused by the student without being critical or hurtful. "I get angry and find it hard to teach when there is so much noise in the room." Communicating in this way informs the student then need to negotiate a solution that is acceptable to both parties.
* This negotiated solution may be developed through the use of the "No-Lose Method of Problem-Solving." This procedure requires six steps:
* Define the conflict.* Brainstorm with the student to generate as many potential solutions as possible.* Evaluate entries on the list.* See if there is one solution that fully satisfies both the teacher and student.* Decide how to implement the solution.* Evaluate later to see if the plan worked.
* The goal of Teacher Effectiveness Training is to resolve problems in ways that respect both the student's and teacher's rights.

Reality Therapy
(Developed by William Glasser. This approach is described in his book titled Schools Without Failure.)
* Glasser assumes that all behavior is the result of choices and that the cause of discipline problems is the selection of poor choices by students.
* A major task of teachers is to help students clearly understand the connections between their behavior (choices) and its consequences.
* Establish good working relationships between the teacher and the student.
* There is no relationship between the substitute teacher and the students. Students thus have little interest in following that substitute teacher's directions.
* The principles of Reality Therapy are put into practice through the use of classroom meetings, clearly defined rules and consequences, the use of plans or contracts with students, and a problem-solving process similar to the one described for Teacher Effectiveness Training.
* During class meetings the teacher learns about the concerns and lives of students; the class can work together to solve problems; and students think about and take responsibility for their actions.
* Three types of meetings: problem-solving to address students' social behavior; educational-diagnostic for understanding the curriculum; and open-ended. Meetings should occur on a regular basis throughout the school week. Younger children benefit from more frequent meetings.
* In order to be effective in guiding and disciplining students, the teacher must clearly state classroom rules.
* Students have some voice in making and changing the rules. Considerable discussion with students is essential to their understanding the need for classroom rules and the consequences of breaking the rules.
* Students who continue to misbehave are dealt with using a seven-step approach.
1. Build a relationship through communication.2. Identify the problem behavior.3. Ask the student to evaluate the behavior.4. Make a plan to improve behavior.5. Convince student to commit to the plan with a handshake, verbal commitment, or written
contract.6. Accept no excuses if the student does not follow the plan-just make a new plan.7. Avoid punishment because it breaks down relationships.
* Good communication is essential to implementing Reality Therapy techniques in the classroom. The teacher builds relationships, defines and modifies rules, and plans with students through the use of communication skills.
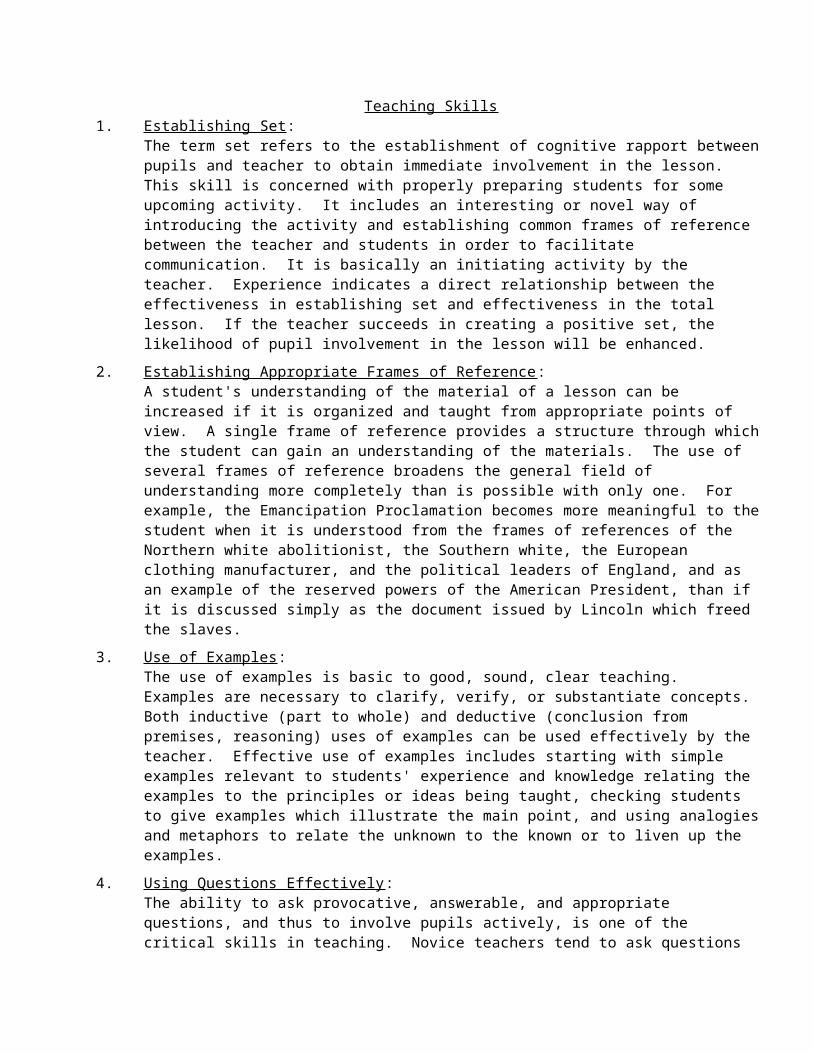
The Use of Corporal Punishment
Corporal punishment can be defined as the use of physical force on the part of the teacher or administrator to discipline a student. The most common form of corporal punishment might be a paddling.
It is interesting to note that the use of reasonable corporal punishment in schools has generally be upheld by our court systems. The Supreme Court ruled in Ingram vs. Wright that the use of corporal punishment does not necessarily constitute cruel and unusual punishment and thereby does not violate the Eight Amendment. there have been individual court decisions, however, that should warn teachers against using unusually hard forms of corporal punishment. For instance, a Fifth Circuit Court of Appeals ruled that the parents of an eight-year-old girl who had been tied to a chair much of the school day had the right to sue the teacher, the principal, and the school district. A Georgia court found a teacher guilty of criminal assault charges for severely paddling a student. A Louisiana special education teacher was convicted of cruelty to a juvenile and sentenced to one and one-half years of hard labor for using excessive corporal punishment. a Missouri court upheld the dismissal charges of a teacher for slapping a student. These are but a few examples of the growing number of cases in which the courts have determined that educators cannot use unusually harsh corporal punishment methods.
While it is legal in many states to use corporal punishment, and while the courts have generally upheld a teacher's right to use reasonable corporal punishment, most educators and authorities believe that it is best never to do so. The National Education Association has adopted a resolution opposing the use of corporal punishment in schools. The American Academy of Pediatrics and the National PTA have also advocated the abolishment of all forms of corporal punishment in our schools.
Corporal punishment doesn't teach better behavior, but rather, usually causes the students to become more aggressive. Furthermore, corporal punishment may cause long-lasting psychological problems for the students. Creative and effective teachers can develop much more positive ways to elicit desirable student behavior. The use of corporal punishment more often than not creates a barrier that prohibits a positive learning climate in the classroom. All of this, plus the fact that corporal punishment can lead to lawsuits and even teacher dismissal, strongly suggest that teachers should avoid the use of corporal punishment.
Encouraging Self-Discipline
There's a big difference between the way people define discipline and self-discipline.
1. Discipline, as most people refer to it, is imposed from the outside. Self-discipline, on the other hand, grows from the inside. It involves good judgment, courage, ethical conduct, and a sense of personal responsibility. For example: Discipline-a rule enforced by a coach-requires all team members to report to practice on time. But only self-discipline-decisions made by individual players-can induce the athletes to stay after practice and spend more time perfecting their skills.
2. Discipline often involves training people to obey rules. But self-discipline means more than just following orders. Self-disciplined individuals follow rules of behavior because they have accepted those rules for themselves.
3. Discipline can help schools provide quiet study times during the school day. But students need self-discipline to turn off the television set long enough to concentrate on their schoolwork at home.
4. Discipline often involves conforming to certain accepted standards of behavior. But truly self-disciplined individuals may not always conform to their peers, especially when doing so would violate their own codes of conduct or values.
5. Discipline can make young people obey rules prohibiting the use of alcohol or drugs on the school grounds. But only self-discipline will enable students to decide for themselves that they will not abuse drugs or alcohol away from school-even if their friends are experimenting.
Self-discipline involves the ability to weigh short-term interests against long-term goals.
Perhaps the most important thing to remember about self-discipline is that it grows from and, yes enhances self-esteem. Thus, self-discipline involves more than "just saying no." The truth is, helping students develop self-discipline involves helping them to say "yes"-accepting goals for appropriate behavior and deciding to act responsibly to meet those goals.
DISCIPLINE
A. Absolute rule violation
1. Students will be referred to the Principal for appropriate disciplinary action.
B. Classroom rule and Lab rule violation
1. First Offense
a. Student will receive one check mark in the grade book and a verbal warning.
2. Second Offense
a. Student will receive a second check mark in the grade book and will be referred for a lunch time detention. A note concerning the student’s conduct will be sent home to the parents. The note must be signed and returned the next school day.
3. Third Offense
a. Student will receive a third check mark in the grade book and will receive an extra assignment.
An extra assignment consists of a 1 1/2 page paper about a famous scientist. The student will be sent to the library to complete the assignment. They may not return to the class until the assignment is completed. The student is then responsible for making up the classroom activities and assignments that were missed during their absence.
4. Fourth Offense
a. Student will receive a fourth check mark in the grade book and will be sent to the Principal. A note to the parents may be sent home or a telephone call to the parent may be made. A parent teacher conference may be requested.
Students who cause severe disruption will be sent to the Principal.
During the first 9 weeks check marks will be erased each week.During the second 9 weeks check marks will be erased every two weeks.During the third 9 weeks check marks will be erased every three weeks.During the fourth 9 weeks check marks will be erased every four weeks.
The undersigned has read and understands the discipline procedure for the _______________ class.
Student signature_________________________________________________
Parents’ signature_________________________________________________
STUDENT CONDUCT
A. ABSOLUTE RULES:
1. The students will be in accordance with the student dress code, behavior code, and others as described in the student handbook.
2. Students will obey all state, administrative, and school rules.
B. CLASSROOM RULES:
1. Students will follow directions.
2. Students will be in their assigned seats when class begins.
3. Students will not be walking around or talking without permission after class begins.
4. Students will stay in their seats until dismissed.
5. Students conduct must be conducive to an educational atmosphere.
C. LAB RULES
1. Students will follow all safety procedures outlined in the text or given by the instructor.
2. All talking must be a conversational level.
3. Lab groups are responsible for the cleanliness of their work areas.
4. All equipment must be accounted for and returned to its proper place.
The undersigned has read and understands the rules of the student conduct in the ____________ class.
Student signature______________________________________________
Parent signature_______________________________________________
Student Classroom Policies
1. Have books, paper and pencil ready. Begin work immediately after the bell rings.
2. Participate and help in class planning and discussion.
3. Maintain an atmosphere that helps everyone to study.
4. Contribute to the class and help fellow students.
5. Always do your own assignments.
6. Get all work in on time and in acceptable form.
7. Help keep the room clean, neat and orderly.
8. Keep an individual progress record and try to keep improving it.
9. Take pride in clean speech, appropriate dress, and courteous manners.
10. Protect desks, books and other supplies and equipment.
11. Obey no tobacco rule (applies to all activities including shop, field trips, and FFA).
12. Check out all tools before using.
13. Be sure tools are clean when replacing.
14. Place tools back in proper place.
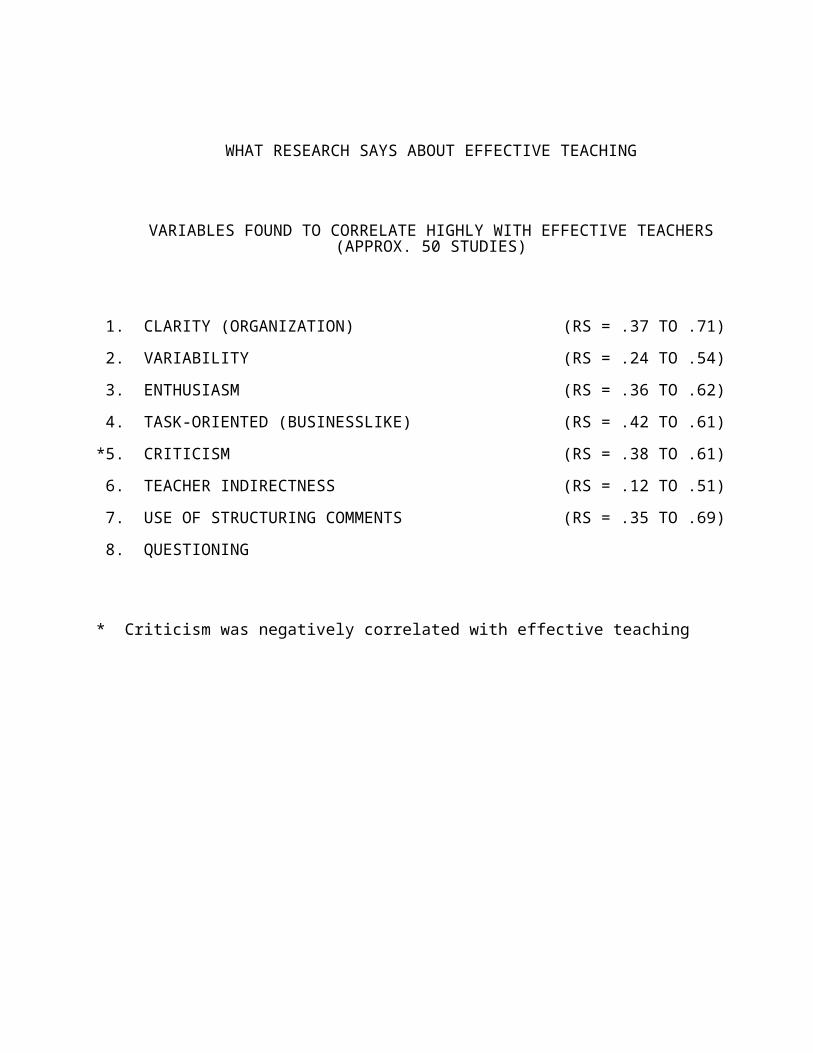
Methods of Teaching Agricultural Education Lesson #9
ANNOUNCEMENTS
I. Unit: Teaching Methodologies
II. Lesson: Managing the Agricultural Education Laboratory
III. DOE School Setting Development Standards – Secondary EducationStandard 5: Learning E nvironment : Teachers at the secondary level have a broad and comprehensive understanding of student learning environments and demonstrate the ability to establish positive, productive, well-managed, and safe learning environments for all students.
IV. Objectives:
Upon completion of this lesson, students will be able to:
1. Explain why application of learning is an important phase in the teaching-learning process.2. Develop a system for scheduling laboratory activities.3. Develop a plan for managing laboratory processes such as clean-up procedures.
V. Questions to consider:
1. What are the different types of laboratories in an agricultural science and business program?2. How do I use the laboratory for maximum student learning?3. How do I keep all students busy and working on projects?4.5.
Reference: Newcomb, L.H., McCracken, J.D., Warmbrod, J.R. & Whittington, M.S. (2004). Methods of teaching agriculture (3rd Edition). Pearson Prentice Hall. Chapters 9, 10, 11.YDAE 440 Course Packet pages 84-87.
VI. Have students create a, “My Laboratory WorkBook”A. Break Students into groups of 3.B. Have them answer question 1 and review responsesC. PowerPoint Slides on pictures of 3 Different LaboratoriesD. Group activity answering questions 2-3 using the 3 Different Laboratories
VII. Laboratory activity.
Peer teaching.
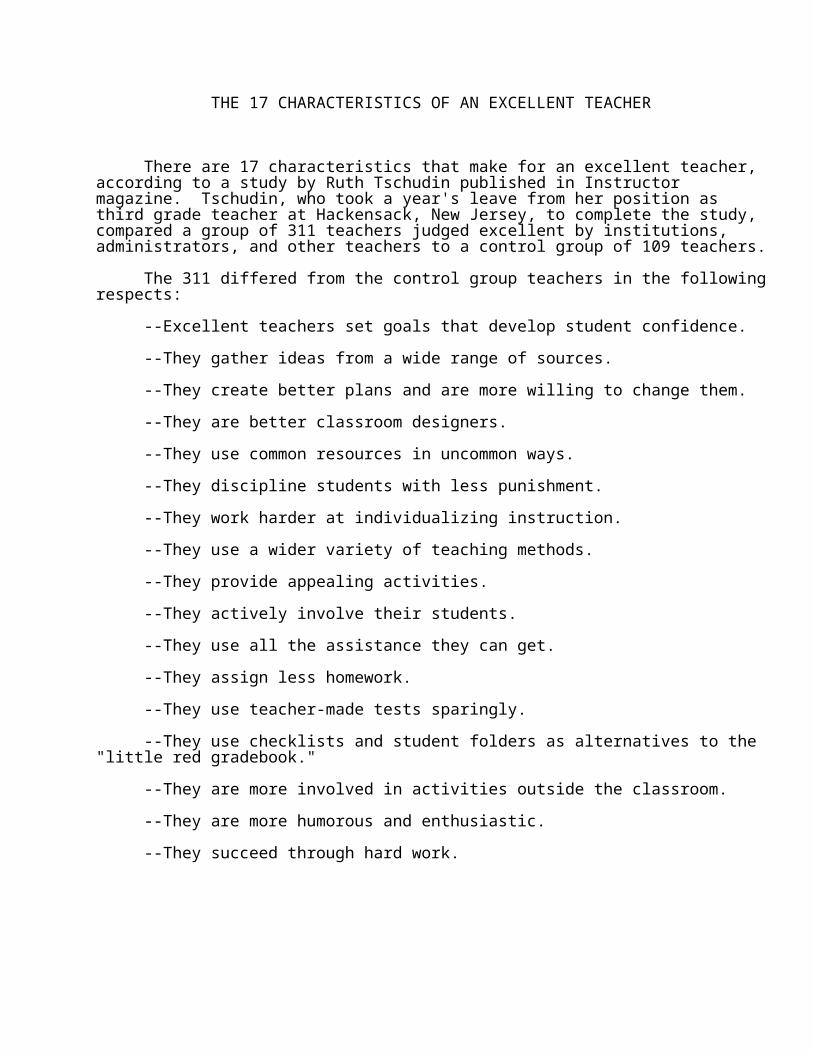
LABORATORY CLEANUP SCHEDULEEstablish a regular cleaning schedule. An established cleaning schedule will save the teacher from the task of policing the laboratory after each class, sweeping up sawdust or dirt, hosing down a green house, or returning tools to the storage area. Students do not mind cleaning up the laboratory, but they need some established pattern to follow. One possible cleaning schedule is illustrated in Figure 11-11.The example in Figure 11-1 is specifically for a class of 14 students. Different cleanup task can be increased or decreased in order to involve all students. After each laboratory class, the inner wheel should be moved one space in a clockwise direction. In this way, all students will share in the cleanup and be assigned a particular task. To make this device work effectively, all students should help with the cleanup, even if they have not worked in the laboratory that day. A brief explanation of each cleanup task follows, and it is important that all students understand the responsibility involved with each task."Cleanup" responsibility does not mean that those students assigned do all of the cleanup work. All students should clean up their own area and then help others. The cleanup assignment is to place responsibility for making sure the task is actually completed and doing as much as is needed of the actual cleanup work.Superintendent - The superintendent announces a cleanup time five to eight minutes before the end of the period and is responsible for seeing that each class member assumes a role in cleaning the laboratory. The superintendent checks to be sure that all projects are properly stored until the next laboratory period and is held responsible if the laboratory is not left in an acceptable condition.Sweep - The student in charge of this task must see that the entire laboratory is swept and that brooms are returned to the storage area. In an agricultural mechanics laboratory, a sweeping compound should be used once a week to remove fine dust from the floor.Tools - The assignment for this task involves making certain that all tools are returned to the proper storage.Trash - Supervision of this task includes seeing to it that all dirt and debris is collected and placed in the proper receptacle.Welding area - The responsibility for this task includes policing the welding area for unusual metal and having it removed, rearranging hoses and electrical cords, and making sure that all welding and oxyacetylene equipment is properly turned off.Doors, windows, lights - The student assigned to this task is responsible for making certain that all doors and windows are closed and that all lights in the laboratory are turned off. It is the teacher's responsibility to lock the overhead doors, windows, and the tool storage area after the tools have been removed.Electrical equipment - This task requires the student in charge to make sure that all electrical equipment is turned off at the end of the laboratory period. This task also includes checking the equipment for unsafe conditions and any other maintenance that needs to be performed on the equipment.Clean and sweep bench tops - Project activity during the laboratory period will result in sawdust, dirt, soil mixture, scrap lumber, or other scrap material being left on bench tops. Individuals assigned to this task should make certain that benches have been swept before the floor is swept. They should also check for items missed by other students in storing their projects until the next laboratory period. One member should be designated to be responsible for cleaning the sink.An alternative to the team responsibility approach to cleaning is to hold the student using a certain laboratory area and certain tools responsible for cleaning that particular area and for returning the tool to the proper storage area. Students are expected to assist their fellow students after completing their own cleanup. With this approach, the teacher is responsible for checking the final results.
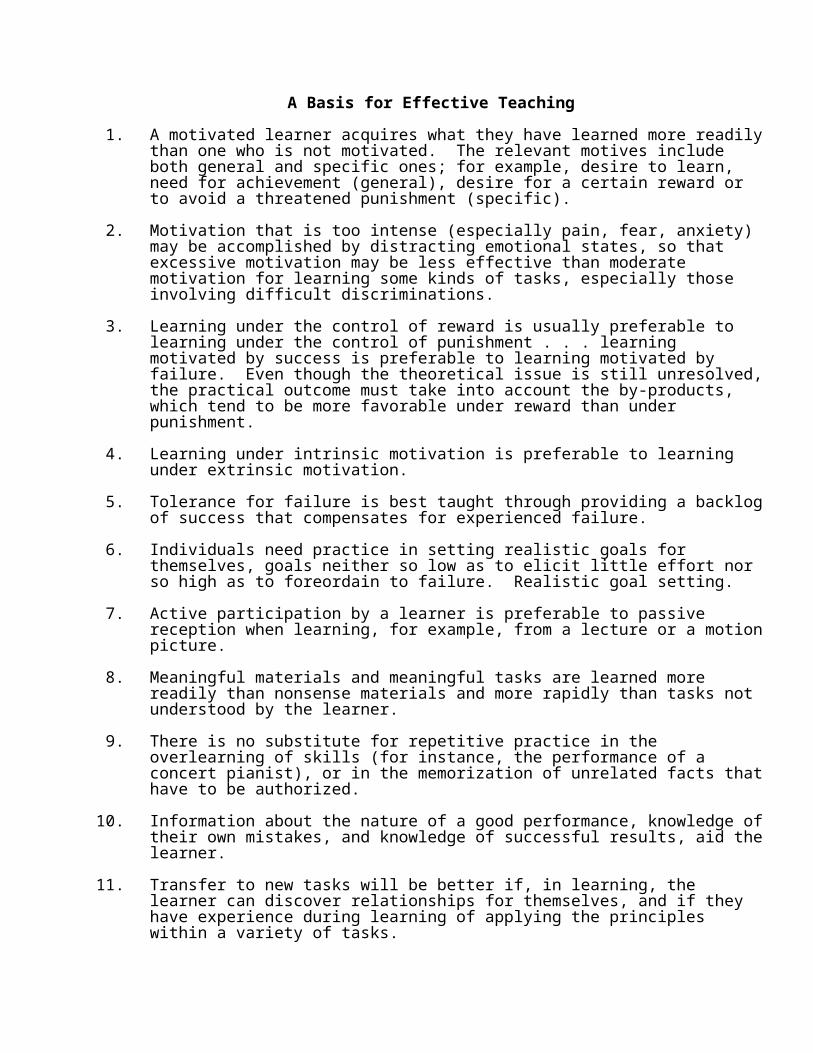
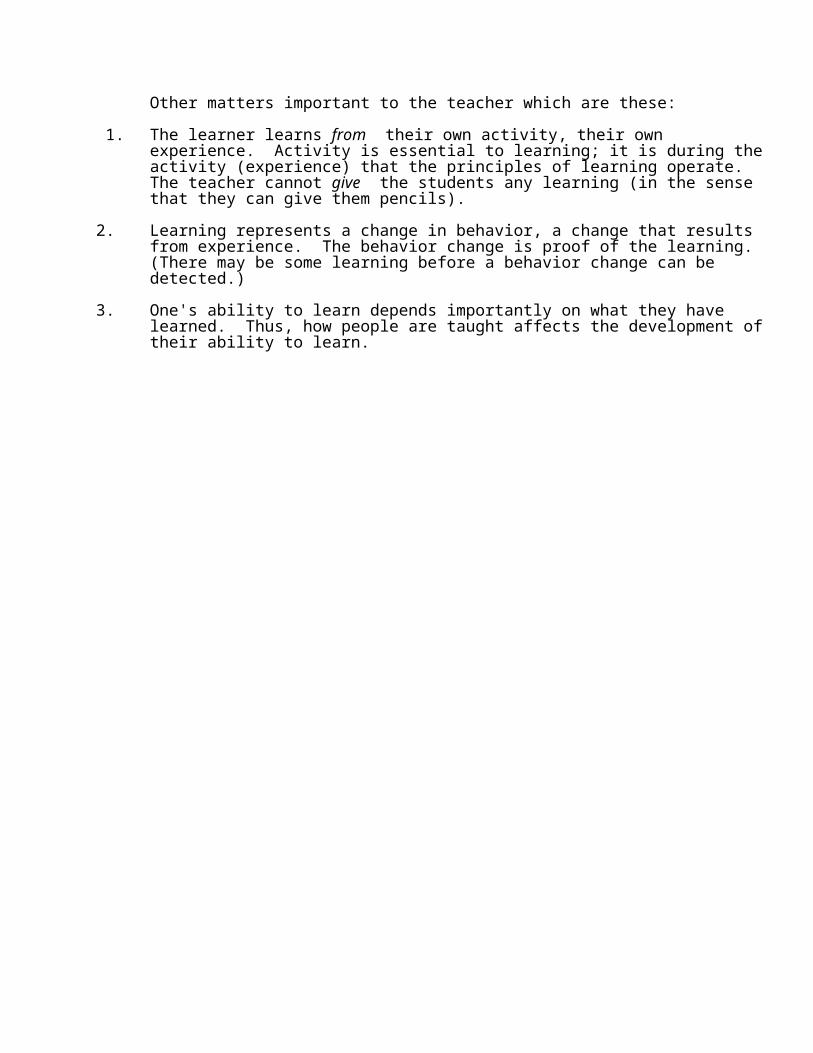
LABORATORY SHOP SCHEDULE
A B C D E
Don AdamsPaul BresJim BondSally Smith
Jerry CrowlLuther DodsonJill EasterLarry Toth
Carl MuscleGerri BlakeLloyd WaltonTom Neyer
Carol PurcelMike WallaceLoomis LinkousArchie Roarck
Roscoe PaineMary LutherConnie PriceRich Meredith
1st 1 week 2nd 2 weeks 3rd 2 weeks 4th 2 weeks 5th 2 weeks
A Orientation WoodworkSaw horse
Plumbing Electricity Project
B Orientation Small Engines WoodworkSawhorse
Plumbing Electricity
C Orientation Project Small Engines WoodworkSaw Horse
Plumbing
D Orientation Electricity Project Small Engines WoodworkSaw Horse
E Orientation Plumbing Electricity Project Small Engines
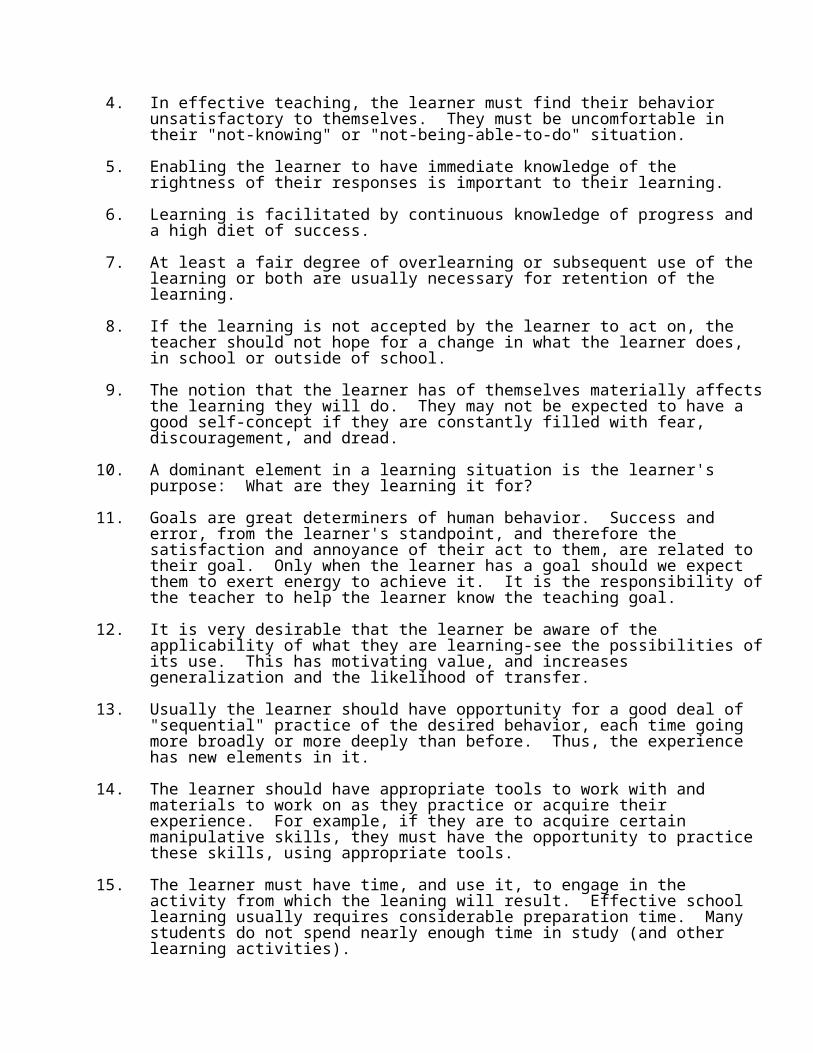
Methods of Teaching Agricultural Education Lesson #10
ANNOUNCEMENTS
I. Unit: Teaching Methodologies
II. Lesson: Exploring Approaches to Teaching Styles
III. DOE School Setting Development Standards – Secondary EducationStandard 1: Student Development and Diversity : Teachers at the secondary level have a broad and comprehensive understanding of student development and diversity and demonstrate the ability to provide instruction that is responsive to student differences and that promotes development and learning for all students.
Standard 2: Learning P r ocesses : Teachers at the secondary level have a broad and comprehensive understanding of learning processes and demonstrate the ability to facilitate student achievement.
Standard 3: Instructional Planning and Delivery: Teachers at the secondary level have a broad and comprehensive understanding of instructional planning and delivery and demonstrate the ability to plan and deliver standards-based, data-driven differentiated instruction that engages students, makes effective use of contemporary tools and technologies, and helps all students achieve learning goals
Standard 5: Learning E nvironment : Teachers at the secondary level have a broad and comprehensive understanding of student learning environments and demonstrate the ability to establish positive, productive, well-managed, and safe learning environments for all students.
IV. Objectives:
Upon completion of this lesson, students will be able to:
1. Define the following approaches to teaching and ascertain the advantages and disadvantages of each:
a. Problem-solving and Learning stylesb. Multiple Intelligencesc. Allen 4-stepd. Brain Compatible Teaching (4Mat)e. Thinking Maps
2. Differentiate between three teaching styles.3.
V. Questions to consider:
1.2.3.4.
Reference: Newcomb, L.H., McCracken, J.D., Warmbrod, J.R. & Whittington, M.S. (2004). Methods of teaching agriculture (3rd Edition). Pearson Prentice Hall. Chapter 4.YDAE 440 Course Packet pages 95-107.
VI. Laboratory activity.
Peer teaching.

CAN YOUR STUDENTS SOLVE PROBLEMS by Kerry S. Odell
Problem Solving Teaching: The DifferenceWhat makes agricultural education different from other public school education programs?
Many agricultural educators would quickly respond the FFA or supervised agricultural experience (SAE). Some might include the problem solving approach to teaching but not many. Ira Dickerson, in his address to the profession at the 1983 AVA Convention, stated that problem solving is what makes education in agriculture vocational. Many of the very early leaders in agricultural education were students of John Dewey. As a result, they used and promoted the problem solving approach for instruction in agriculture. The problem solving approach works hand-in-hand with the FFA and SAE components in agriculture which is very different from other public school instruction. Nowhere else are students given the opportunity to apply classroom learning to "real life' problems such as can be accomplished using the problem solving, SAE connection. Students are also given an opportunity to apply what they have learned through FFA activities and contests. No other program in the education of high school youth asks them what their content related problems are, and then uses these problems as the basis for instruction.
How Does Problem Solving Teaching Work and Why?Problem solving operates under the premise that people, irregardless of age, react to problem
situations about the same way. Through an understanding of the problem solving process people can more effectively and efficiently solve the many problems of daily life. John Dewey believed that problem solving came about as a result of reflective thought. He outlined the process of reflective thought and later related it as a process of learning. The reflective thought or learning process is outlined below.
The individual or learner:1. experiences a provocative situation,2. defines the problem,3. seeks data and information,4. formulates possible solutions to the problem,5. tests proposed solutions to the problem, and6. evaluates the results of the action.
SummaryProblem solving teaching is an effective teaching approach because:1. it draws on student needs and problems,2. it involves the student in the learning process,3. it can utilize a variety of instructional methods,4. it can be applied to almost any situation,5. it has concrete results that students can see and benefit from, and6. it is problem centered not subject centered.
References on Problem Solving TeachingCrunkilton, J.R. and Krebs, A.H. (1982). Teaching agriculture through problem solving (3rd ed.).
Danville, IL: Interstate.Crunkilton, J.R. (1984). Problem solving--The art and science of teaching. The Journal of the
American Association of Teacher Educators in Agriculture, 25 (2), 2, 11-14.Dickerson, I. (1984). A reexamination of the basics in agricultural education. The Journal of the
American Association of Teacher Educators in Agriculture, 25 (1), 2-11.Moore, G. E., and Moore, B.A. (1984). The problem solving approach to teaching: Has it outlived its
usefulness? The Journal of the American Association of Teacher Educators in Agriculture, 25 (2), 3-9.
Newcomb, L.H., McCracken, J.D., and Warmbrod, J.R. (1993). Methods of teaching agriculture (3rd Edition). Danville, IL: Interstate.
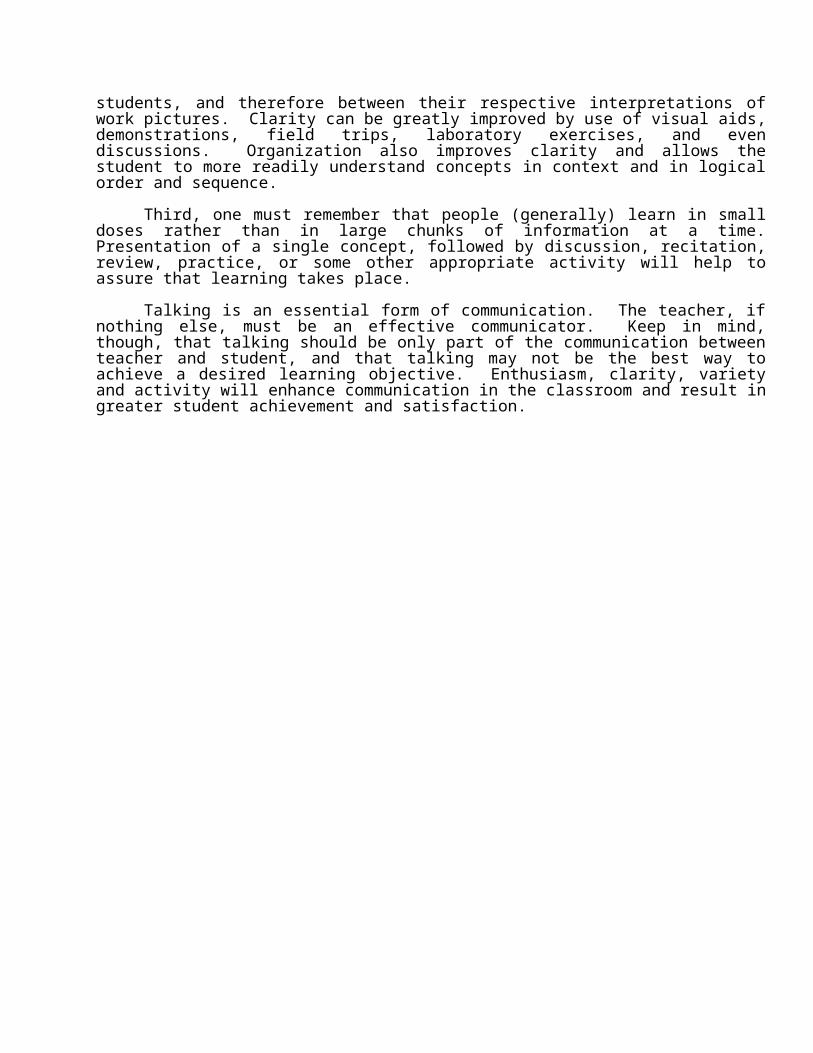
OUTLINE OF TEACHING PLAN FOR A PROBLEM AREA
I. Unit Title
II. Lesson Title
III. Situation
IV. Student Learning Objectives
V. Teaching Procedures
A. Interest Approach (Determining present practices and past experiences)1. Lead questions
2. Other techniques to be used (demonstration, field trip, etc.)
B. Anticipated group objectives1. Lead questions
2. Anticipated student response
C. Anticipated problems and concerns1. Lead questions.
Ask questions which lead students to list the things they need to know or know how to do in order to accomplish the objectives.What do we need to know and be able to do in order to………….?What do we need to know and be able to do to accomplish our goals?What decisions must we make if we are to …………..?What skills will we need if we are to……………?What information will we need if we are able to ………….?
2. List of anticipated problems and concernsAsk follow-up questions and use examples to draw out problems and questions not raised by students.Add problems and questions as needed to complete the content of the unit.State problems and concerns in question form.
D. Techniques to be used in solving problems (Steps in problem solving)
E (Brief statement or list of steps that will be used)Select a problemProblem introductionClass Presentation (can be a variety of methodologies)Conclusions
SOLVING THE PROBLEM (Subject Matter Outline)
F. References and teaching aids. (specific)
G. Special activities and events (specific plans for)
VI. Summary and EvaluationA. List of approved practices
B. Evaluation
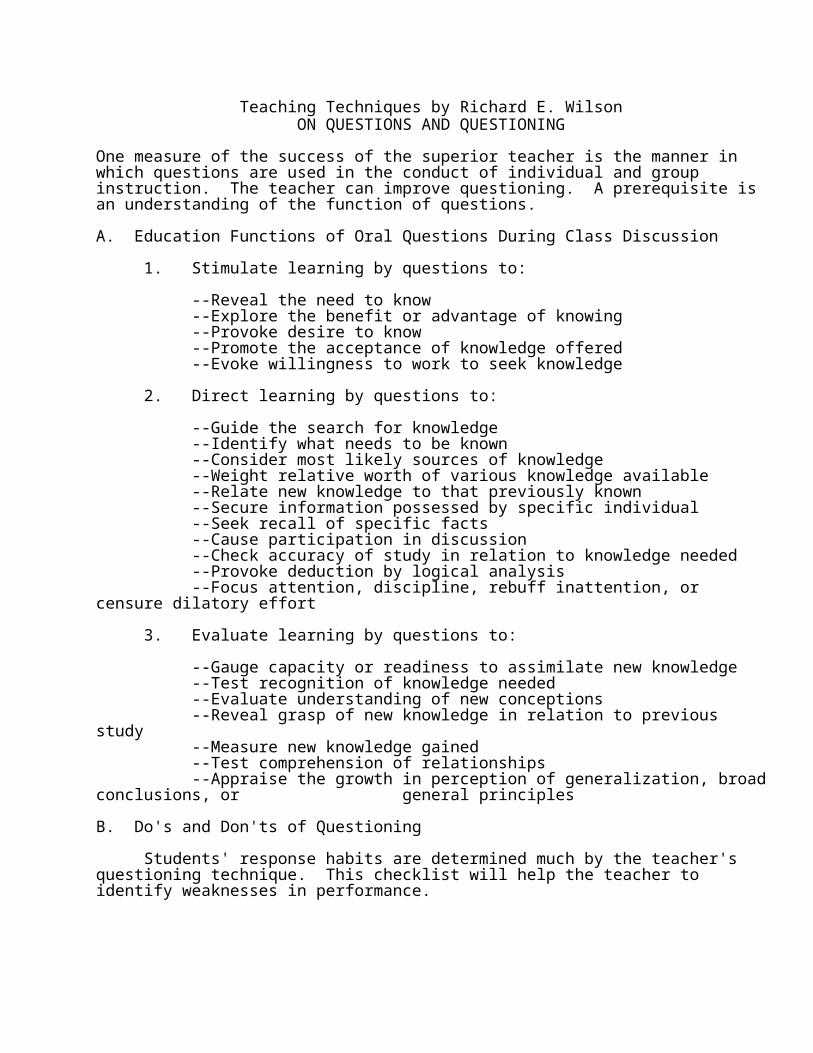
Sample Problem Solving Lesson Plan
Name: Date Last Revised:
Course Title: Food Science
Domain: Food Safety Principles and PracticesUnit: Handling and Processing Food (Food Science and Emerging Technology -Unit D)
Core Standard 5: Students apply safety and sanitation procedures to understand the handling, processing and storing of food products.
Standard: FS-5.1 Explain techniques and procedures for the safe handling of food productsLesson Title: Following Safe Methods in Handling and Preparing Foods in the Home (Student
Learning Objectives 1, 2, 3)[ D3-2]
Situation: This lesson will be taught to freshmen and sophomore level students in the Food Science class. Class length is 50 minutes. The lesson previously taught was safely storing food at home.
Student Learning Objectives:
1. Identify what principle government agency is responsible for food safety.2. Explain how cross contamination affects food safety.3. Match the proper cooking temperature to the designated meat.4. Describe how to properly use a knife.5. Associate food items with the proper storage temperature.6. Identify unsafe food preparation practices in your home.
Documentation of Competencies Met by This Lesson:Connection to SAE/Career Development: Careers related to food science include working in a restaurant, managing a food distribution center, preparing food in convenience store, and selling produce at a farmers’ market.
Proficiency areas are related to food science and technology, diversified crop production, beef production, swine production, dairy production, and vegetable production.
Connection to FFA/Leadership Development/Personal Growth: Food science and technology FFA event, meat evaluation and technology FFA event, dairy foods and dairy handlers FFA event
Documentation of Academic Standards Met by This Lesson:
English/Language Arts Concepts Taught: EL.10.1.1 2006 Vocabulary and Concept Development: Understand technical vocabulary in subject area reading. EL.10.1.4 2006 Identify and use the literal and figurative meanings of words and understand origins of words.EL.10.5.7 2006 Use varied and expanded vocabulary, appropriate for specific forms and topics.EL.12.7.1 2006 Comprehension: Summarize a speaker's purpose and point of view, discuss, and ask questions to draw interpretations of the speaker's content and attitude toward the subject.
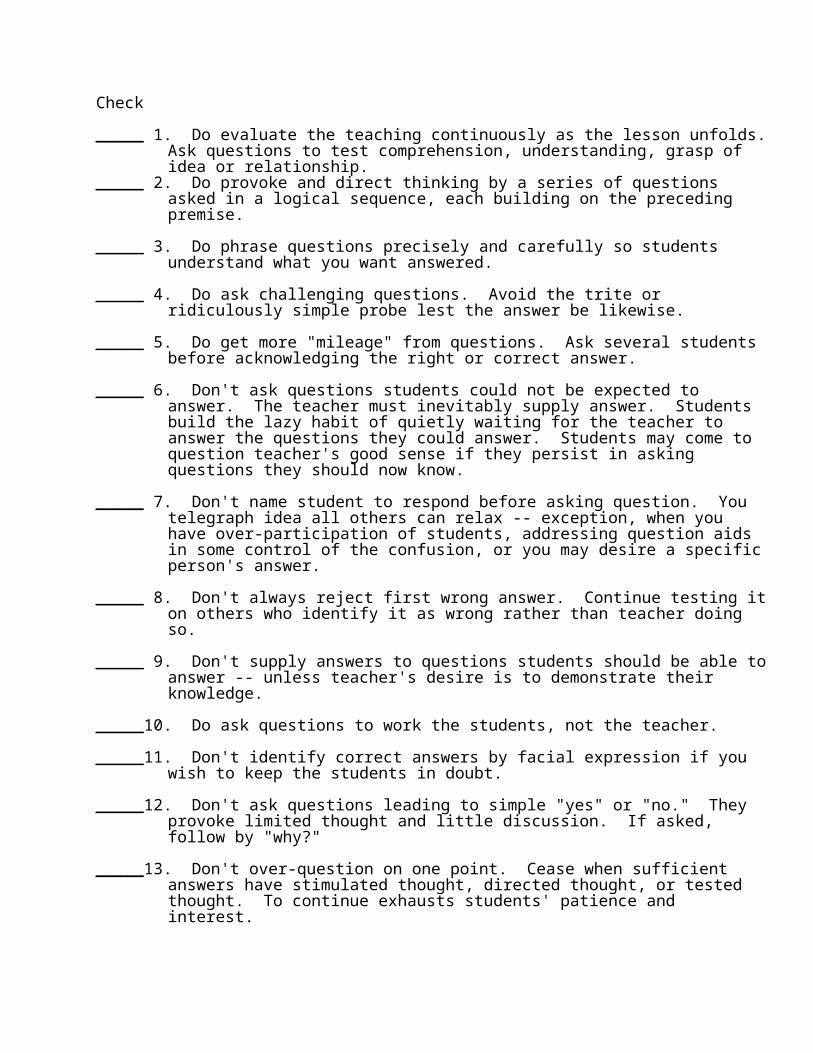
High School Speech and Communication Concepts Taught:EL.SPC.1.1 2006 Summarize a speaker's purpose and point of view, discuss, and ask questions to draw interpretations of the speaker's content and attitude toward the subject. [11.7.1/12.7.1]
Science Conepts Taught:SCI.B.1.3 2010 Explain and give examples of how the function and differentiation of cells is influenced by their external environment (e.g., temperature, acidity and the concentration of certain molecules) and changes in these conditions may affect how a cell functions.
Health & Wellness Concepts Taught:HW.8.1.3 2007 Analyze how the environment impacts personal health.HW.8.1.7 2007 Describe the benefits of and barriers to practicing healthy behaviors.HW.8.1.8 2007 Examine the likelihood of injury or illness if engaging in unhealthy behaviors.HW.8.1.9 2007 Examine the potential seriousness of injury or illness if engaging in unhealthy behaviors.
Teaching Procedures:A. Interest Approach: Have students pair up with a neighbor. Ask them to develop a list of
safety precautions their parents take at home when preparing a meal.
B. Anticipated group objectives: Why is it important that we know how to safely prepare foods at home?
Anticipated Student Responses
So we don’t get sick. So no one gets injured. So the food tastes good. Because we don’t want to contaminate what we’re going to eat.
C. Anticipated problems and concerns.1. What should we know and be able to do to safely prepare foods at home?
Why is it important to safely prepare foods? How do we handle food? How long do we cook meat? How do we safely use sharp objects? How do we use kitchen appliances? How do we store cooked food? How to clean dirty dishes
D. Steps in solving the problem.
1. Guide students to answer the question.2. Lead students in a discussion to find out how much knowledge they have.3. Use appropriate teaching methods to solve the problem based on students’ knowledge.4. Discuss and draw conclusions. 5. Repeat steps 1-4 for the next problem.
E. Plan for solving each problem.

1. Why is food preparation important?a. Discuss with students the importance of safely preparing food.b. Have students do online research looking for government regulations affecting food
preparation and safety. Take students to the computer lab and allow them 30 minutes to do research.
c. Have students present their findings to the class and explain how the law or act affects their lives.
d. Provide inspection reports of local restaurants from the newspaper.
2. How do we handle food?a. Have students get in groups of 4-5. Tell the students to come up with a list of items
needed and directions to make tacos. Ask them what they think they should do to make sure the food is prepared correctly. Allow them 6 minutes.
b. Show the students transparency material A (TM-A) and provide them with a handout. Discuss as a class if there directions considered cross contamination.
3. How long do we cook meat?a. Hold up a meat thermometer. Ask students if they can identify the item and explain
its purpose.b. Display transparency material B (TM-B) and provide them with a handout. Have
students volunteer reading each bulleted point. Show TM-C and provide them with a handout and ask students about how they order meat in a restaurant. How do you like your steak? Hamburgers? Then discuss the dangers of food borne illnesses like E. Coli.
4. How do we safely use sharp objects?a. Have one student come to the front of the classroom to take notes on the board.
Engage students in a class discussion. Have students brainstorm for ideas on how to safely use, hold, carry, store, and maintain the blade of a knife. Each student is responsible for copying the ideas into their notes.
5. How do we use kitchen appliances?a. Bring in advertisements from the Sunday paper. Have students go through the ad’s
looking for common kitchen appliances. Each student will cut out 5 appliances they may use in their kitchen. Each appliance will be glued to their paper and under each picture, they must include the name of the appliance, its sale price, and what it’s used for.
b. Students will present their information to the class after having 30 minutes to work on it.
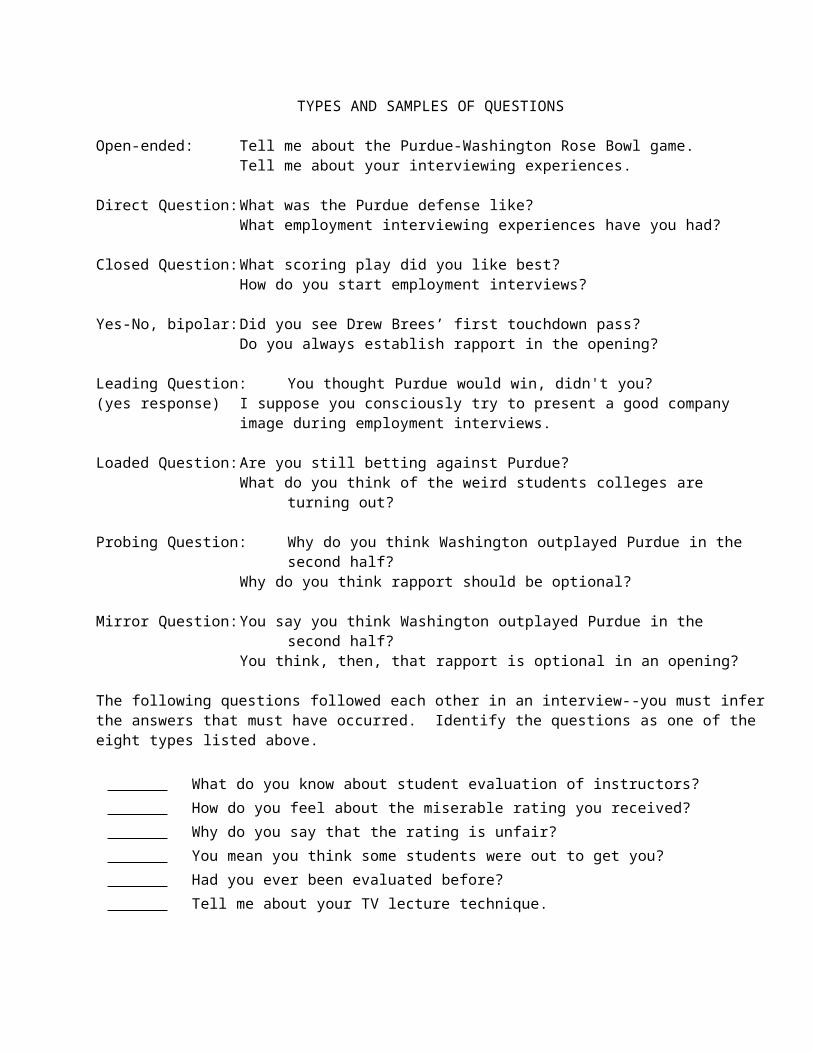
6. How do we store cooked food?a. Review with class, ways to store food. Ask class why food storage is important to our
lives.b. Have the class perform the strawberry experiment. Groups of 4 students will carry
out and describe the physical differences between the strawberries that were in a refrigerator for 7 days compared to the strawberries left on the counter for 7 days. Ask students which fruit they would like to eat for a snack today.
7. How to clean dirty dishes.a. Show class TM-D. Ask students about how they wash dishes at home. Discuss with
them the dangers of cooking with contaminated utensils or pots.b. Have head chef at cafeteria to take the students on a guided tour of the dish washing
room. Have him or her discuss how the trays and cleaned and how warm the water must be.
Subject Matter
Solving the ProblemA. Why is food preparation important?
1. It is critical to eliminate food poisoning2. It prevents cross contamination
a. Knivesb. Potsc. Cutting boardsd. Utensils
3. The Food and Drug Administration mandate all food regulations.a. Regulate all foodb. Food additivesc. Quality of foodd. Handle routine inspectionse. Mandate food recalls
B. How do we handle food?1. Preventing cross contamination is the most important aspect of food preparation.
a. This helps keep us safe from coming in contact with bacteria. 2. Foods must always be stored in there proper location: freezer, refrigerator, or
cabinets3. Always wash your hands first to reduce the spread of viruses.4. Only use clean utensils when cooking5. After cooking wash all dishes, pots, pans, and utensils.
a. Use a detergent and warm water.b. Use a general purpose cleaner to sanitize surfaces.c. Take special care in cleaning after handling meats.
6. Wash all fruits and produce with warm water and a mild detergent.

C. How long do we cook meat?1. It’s critical to properly cook meat to minimize the risk of food borne illnesses and
food contamination.2. Best way to cook meat properly is with a food thermometer.
a. Beef: Ground Beef cooked to a minimum of 160 degrees Fahrenheitb. Pork: Medium to 160 & well-done to 170c. Chicken should be 180 or until juices run clear
D. How do we safely use sharp objects?1. Keep knives sharp2. Always walk with the point down3. Never reach for a falling knife4. Always cut away from you5. Keep an arms length away from other people when cutting
E. How do we use kitchen appliances?1. A kitchen appliance is anything used in the kitchen that uses gas or electricity.
These are just a few examples.a. Stove,b. Refrigeratorc. Microwaved. Toastere. Coffee pot
2. It’s important to always read the directions and safety manuals before using the appliance.a. Each appliance operates differently.b. Contact the manufacturer if you have questions.
3. Remember these are tools to help prepare meals, and need to be cleaned just as well as pots and pans to prevent contamination.
F. How do we store cooked foods?1. “Keep hot foods hot and cold foods cold”
a. Cold foods stored below 60 degrees Fahrenheit.b. Hot foods stored above 140 degrees Fahrenheit.
2. Storing foods incorrectly can lead to microbial growth.a. Botulismb. Salmonellac. E. Colid. Bacteria
G. How do we clean dirty dishes?1. It’s important to wash dishes immediately after eating.
a. To prevent food from sticking
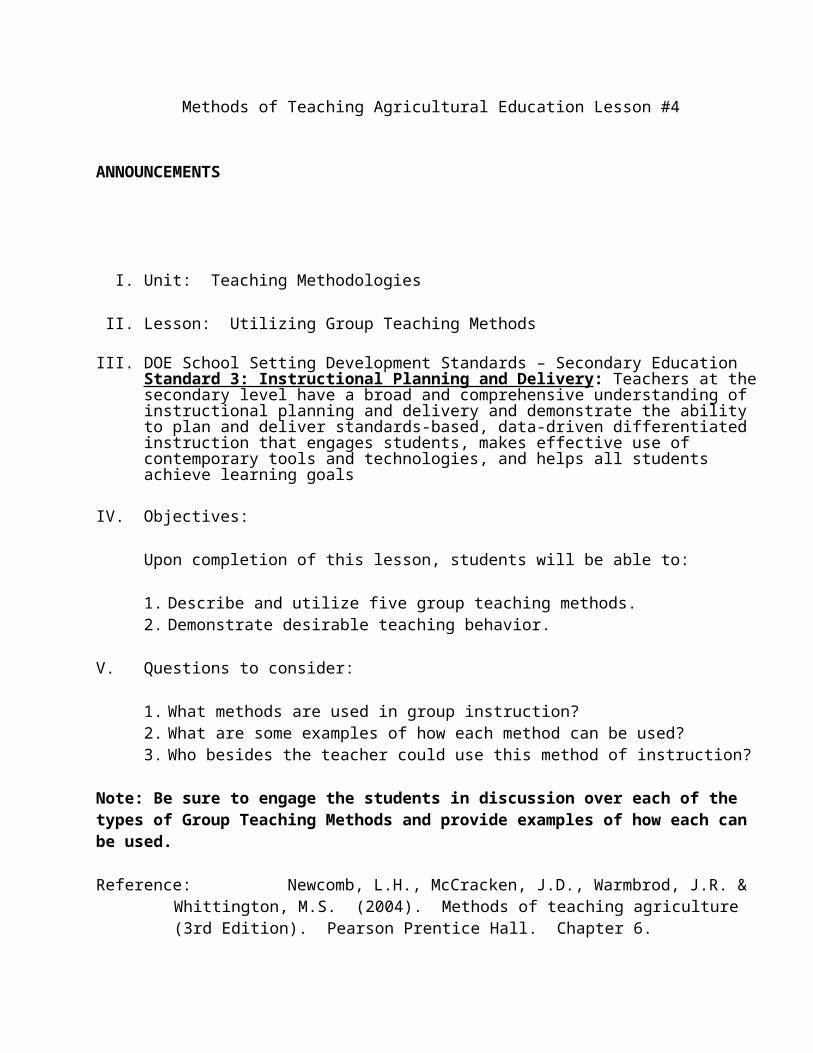
b. To reduce bacteria growthc. To improve cleanliness
2. Always use warm water and dish soap.a. Spongesb. A dishwasher or hand washing are both efficientc. Wash cloths need to be washed on a regular basis also
3. You must wash all dishes that you used, even if they look clean4. Bacteria are so small, you cannot see them5. Spend adequate time washing each item
a. Pots & pansb. Silver wearc. Platesd. Cupse. Cutting boards
References and Teaching Aids: Screen Overhead projector Two cases of Strawberries Strawberry experiment Lab Handout Copies of various inspection reports gathered from the Journal & Courier. Transparency material A “Safely Handling and Preparing Foods in the Home” and handout Transparency material B “Importance of Cooking Meats to the Proper Temperatures” and
handout Transparency material C “Meat Cooking Temperatures” and handout Transparency material D “Potential Safety Issues” and handout National Council for Agricultural Education. Food Science, Safety, and Nutrition Curriculum
Madison, WI: National FFA Foundation, 1993. (Unit 11)
Special Activities and Events: Have cafeteria manager provide tour or kitchen to students Set up experiment to test cold storage of strawberries Sign up for computer lab for students to do research on government regulations affecting food
preparation
Summary and Evaluation:A. List of approved practices
1. Cold foods should be stored below 60 degrees F and Hot foods above 140 degrees F. 2. Utensils and cutting boards must be washed well between handlings foods.3. Fruits and vegetables should always be washed in a mild detergent under warm water
before eating.4. Use a meat thermometer to make sure meat is cooked to the right temperature5. Always wash your hands before you start cooking and after handling raw meat.6. Avoid cross contamination by handling fresh produce first and meat second.
B. Evaluation

1. Quiz over the objectives, types of questions include: multiple choice, true/false, and fill in the blank.
2. Students will turn in their lab sheet over the “Strawberry Experiment” for lab points as well.
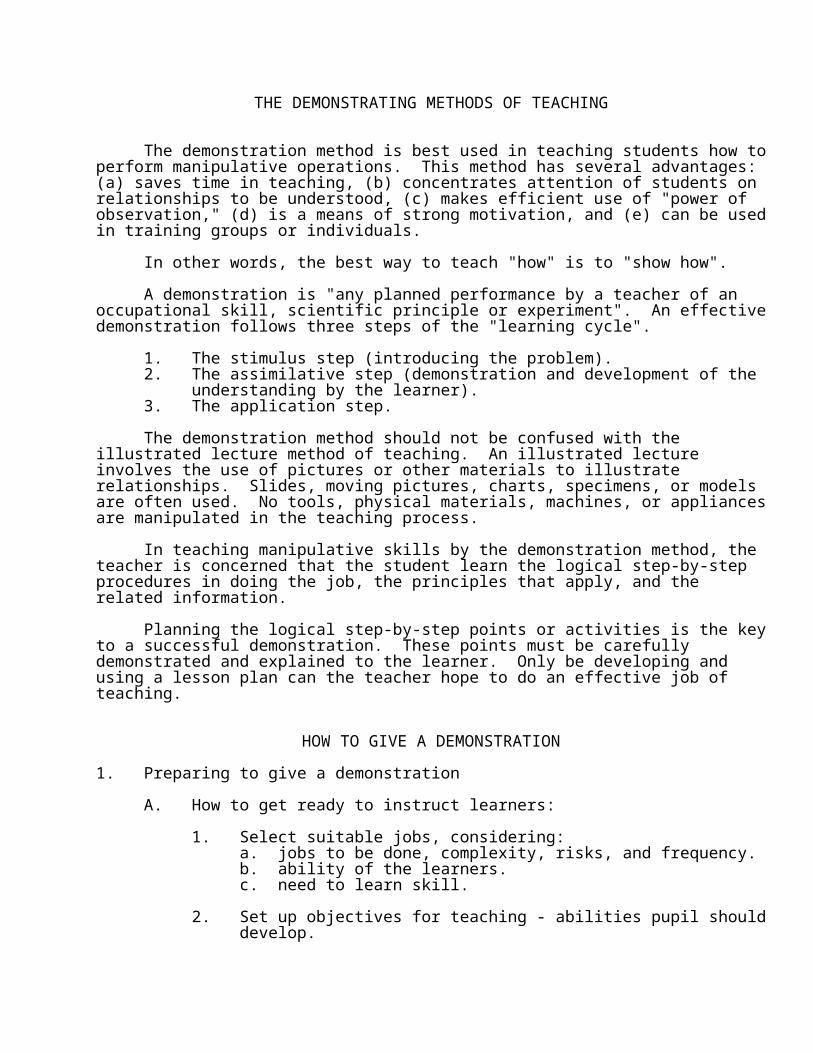
TM–SAFELY HANDLING AND PREPARING FOODS IN THE HOME
Proper food preparation and handling in the home are important to ensure food safety.
Cross contamination: Occurs when foods are placed on unclean surfaces or when an unclean utensil is used to handle the food.Utensils and cutting boards should be thoroughly
cleaned between handling each food item.Great care should be taken after handling raw
meats.
Proper temperatures: Storing foods at incorrect temperatures can cause microbiological growth. Cold foods should be stored below 60°F and hot foods
above 140°F.
Food cleanliness: Wash all vegetables and produce with fresh water and a mild detergent.
TM-A

TM–B
IMPORTANCE OF COOKING MEATS TO THE PROPER TEMPERATURES.
Cooking meats to the proper temperature is critical to reduce the risk of food-borne illnesses caused by bacteria and other microorganisms.
Cooking meats to the proper temperature will nearly eliminate the risk of food poisoning caused by meats.
The best way to determine meat temperature is with a food thermometer.
TM-B

MEAT COOKING TEMPERATURES
Beef: Ground beef — minimum of 160°F Rare — 140°F Medium beef — 160°F Well-done — 170°F
Pork: Medium — 160°F Well-done — 170°F Ham — 160°F
Chicken: 180°F or until juices run clear
Food
TM-C

POTENTIAL SAFETY ISSUES Food storage:
Foods should be properly stored, including foods stored in the freezer, refrigerator, or cabinets.
Food preparation:This includes proper cooking temperatures and
proper handling.A major concern is cross contamination, especially
if raw meats are handled.Personal hygiene is also necessary. This includes
washed hands and general cleanliness. Temperature control:
Meats should be cooked to the proper temperatures.
Foods should be held and served at proper temperatures.
Hot foods should be served hot (above 140°F) and cold foods should be served cold (below 60°F).
Cleanup:Dishes, pots, pans, and utensils should be
thoroughly cleaned with detergent and hot water.Cooking surfaces should be cleaned with a general
purpose cleaner to sanitize the surfaces.
TM-D
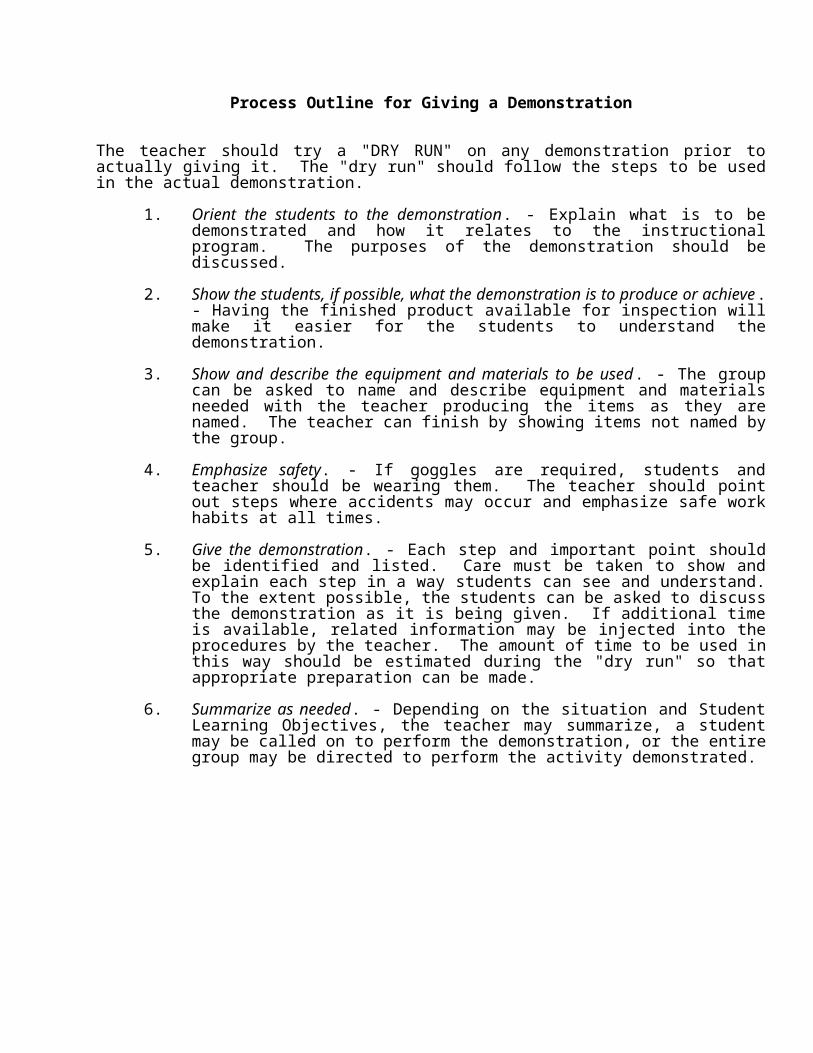
Strawberry Experiment
Name_______________Date________________Class________________
Today you will be evaluating the effectiveness of cold storage on produce (strawberries). The goal of this lab is to help you realize the importance of food storage in food preparation. You will need to arrange yourselves in groups of four students. On the back table, you will find two packages of Driscoll strawberries and zip lock baggies (purchased from Kroger’s food store). Directions: Each group will pick up 4 strawberries and 2 Ziplock bags. You are to put 2 strawberries in one bag and label it “cold”. Put the other two strawberries in the other bag and label the bag “room”. You will then put one bag into the refrigerator in the back room and leave the other bag in the back corner of the room. Don’t forget to put your class period and group name on the bag. The bags will be stored for 7 days. You are to answer the following questions based on this experiment to receive your 25 points.
What is the control in this experiment?
What is the treatment in this experiment?
What are your predications (hypothesis)?
What are your observations after 3 days?
What are your observations after 7 days?
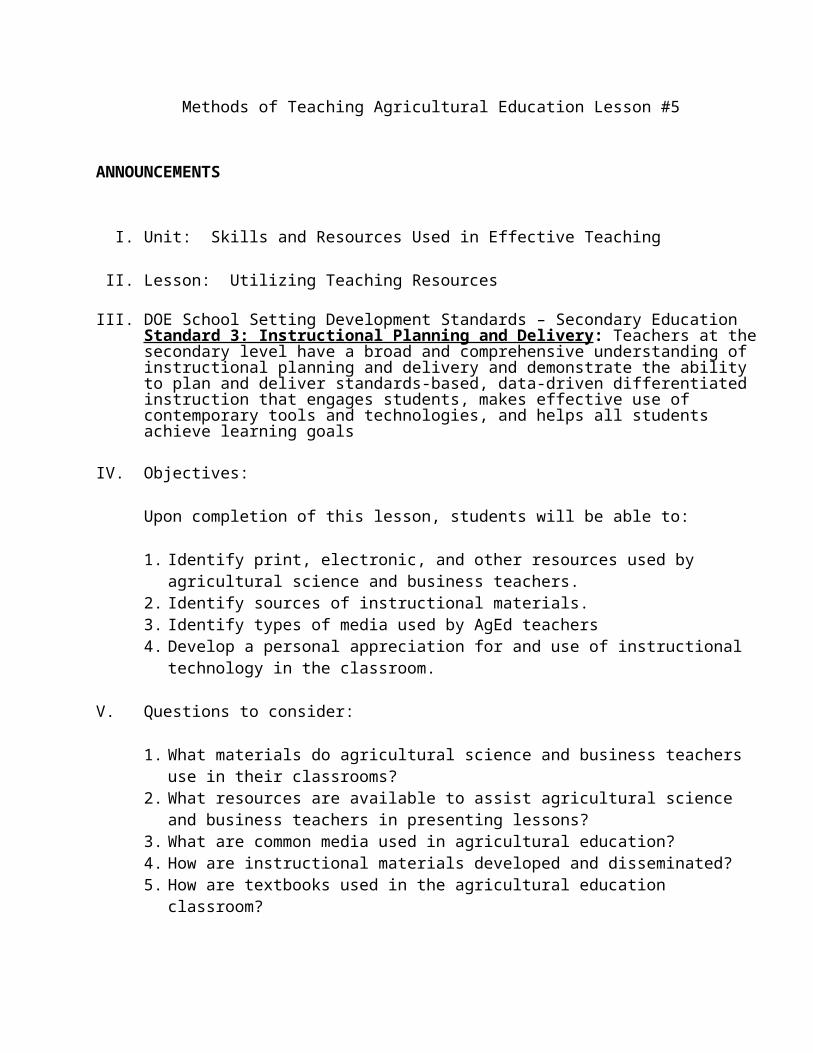
Why do you think this experiment is important to food science?
Name: __________________ Quiz: Handling and Processing Food
Instructions: This quiz is available to access online from 11/11/2010 to 12/25/2010. After 12/25/2010, you will no longer
be able to submit this quiz over the internet.
You are only allowed to submit this quiz times before it is disabled from online submission. Upon being disabled, each quiz will remain available for you to print out, however, you will no longer be able to submit the quiz for scoring.
Upon completing the entire quiz, your score will be automatically calculated and displayed for your convenience.
Upon completing the entire quiz, you will be prompted to view all incorrect answers. It is suggested you review any mistakes before exiting this quiz.
Multiple Choice:
Identify the letter of the choice that best completes the statement or answers the question.
1) Which of the following government agencies is responsible for food safety?
A. NAFTAB. Dept. of Homeland SecurityC. FDAD. ASPCA
Answer #1 c
2) Which of the following is an example of cross contamination?
A. Foods placed on clean surfaces.B. Storing foods at incorrect temperatures.C. Washing yours hands before cooking food.D. Washing all produce before eating.
Answer #2 b
3) The proper meat cooking temperature for ground beef is:
A. Below 140 degrees FB. 140 degrees F.C. 150 degrees F.D. At least 160 degrees F.
Answer #3 d
4) The proper meat cooking temperature for chicken is:
A. 160 degree FB. 170 degrees FC. 180 degree FD. You don't have to cook chicken before you eat it.
Answer #4 c
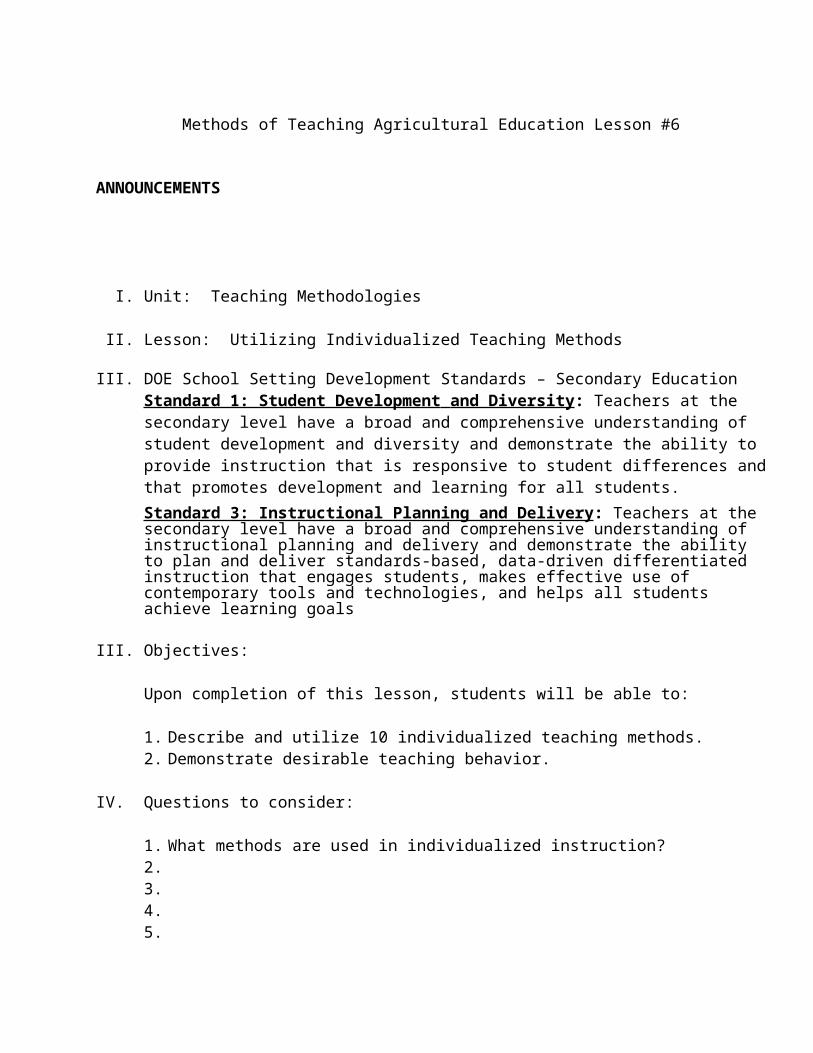
5) Identify the correct way to safely use a knife:
A. Always walk with a knife in handB. Never cut towards your handC. Never reach for a falling knife.D. All of the above
Answer #5 d
6) Cold foods should be stored:
A. Below 32 degree FB. Below 60 degree FC. Above 200 degrees CD. Cold foods can be stored at any temperature.
Answer #6 b
True/ False:
Indicate whether the sentence or statement is True or False.
7) It is okay to use the same knife to cut up vegetables after you cut up raw meat, if you rinse the knife in warm water first.
Answer #7 False
8) When preparing fruit and produce, it is safe to use warm water and a mild detergent to clean it. Answer #8 True
9) If you are having problem with your refrigerator, you should just ignore the problem, and hope it goes away.
Answer #9 False
10) The best way to prevent food borne diseases in meat, is to defrost it in the microwave, let it sit out all day, and just heat it up when you get home.
Answer #10 False

Methods of Teaching Agricultural Education Lesson #11
ANNOUNCEMENTS
I. Unit: Teaching Methodologies
II. Lesson: Utilizing Student Assisted Instruction
III. DOE School Setting Development Standards – Secondary EducationStandard 1: Student Development and Diversity : Teachers at the secondary level have a broad and comprehensive understanding of student development and diversity and demonstrate the ability to provide instruction that is responsive to student differences and that promotes development and learning for all students.
Standard 2: Learning P r ocesses : Teachers at the secondary level have a broad and comprehensive understanding of learning processes and demonstrate the ability to facilitate student achievement.
Standard 3: Instructional Planning and Delivery: Teachers at the secondary level have a broad and comprehensive understanding of instructional planning and delivery and demonstrate the ability to plan and deliver standards-based, data-driven differentiated instruction that engages students, makes effective use of contemporary tools and technologies, and helps all students achieve learning goals
Standard 5: Learning E nvironment : Teachers at the secondary level have a broad and comprehensive understanding of student learning environments and demonstrate the ability to establish positive, productive, well-managed, and safe learning environments for all students.
III. Objectives:
Upon completion of this lesson, students will be able to:
1. Define the following approaches to teaching and ascertain the advantages and disadvantages of each:
2. Differentiate between three teaching styles.3.
IV. Questions to consider:
1.2.3.
Reference: YDAE 440 Course Packet pages 105-129.
V. Laboratory activity.
Peer teaching.
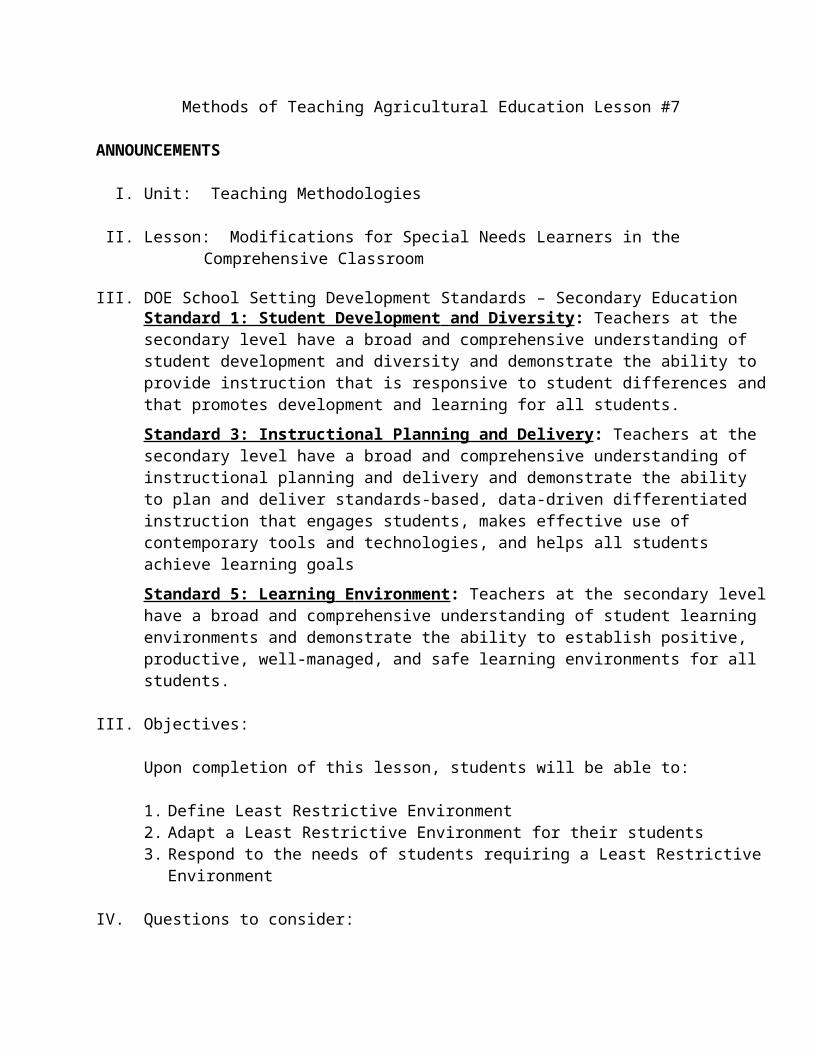
Student Assisted Instruction: A TeachingStrategy for the Agricultural Science and Business Classroom
Teachers are constantly in search of different approaches to use in presenting material to their students. Student Assisted Instruction (S.A.I.) is an approach which holds potential for use in classroom routine, by enabling the students to discover for themselves the difficulties encountered in teaching, and holding the capability for developing leadership skills.
What is S.A.I.?
S.A.I. is a form of peer teaching during which several students, acting as teachers, simultaneously teach the same short lesson to several small groups of their peers. S.A.I.'s potential for use in high school agricultural science and business classrooms is tremendous. The agricultural education teacher can divide the class into small groups of four to six students each, designate one person from each group as that group's teacher, and give all the "teachers" an identical lesson to prepare to teach. The lesson topics can be drawn directly from the material ordinarily covered in the course. Extension publications, portions of textbook chapters, and publications provided free by industries are examples of teaching materials that can be used. Selecting topics which can be covered adequately in the time allotted is of importance.
The students designated as teachers should be given a few days in which to individually prepare to teach the lesson to their small groups. On the assigned day, the designated teachers all simultaneously teach their small groups the same lesson (or teach toward the same objective) with a time constraint of 10 to 15 minutes. The objective of the lesson will depend upon what is being taught. For example, the objective of the lesson for students enrolled in an animal science class would be to correctly answer test questions on the care of baby animals at birth. An example for a plant and soil science class would be for students to be able to properly understand and use the basic skills necessary to take soil samples.
At the conclusion of the assigned period of time, the designated teachers must stop teaching. The students will then be allowed to reflect back and ask specific questions of their teacher concerning the material covered, allowing five to seven minutes for discussion. A short evaluation can then be made of the students' achievement. This short written test should be provided by the agricultural education teacher. Each group can grade their tests to see how well they did in comparison with the other groups. A large group discussion follows, conducted by the agricultural education teacher, to summarize the material that was taught. The teacher should involve all the students in a discussion of the lesson, bringing out key points that might have been stressed by the designated teachers. These key points can be written on the blackboard and should go into the students' notebooks to be used for reference at a later date.
The agricultural education teacher can easily have a new set of teachers and a new lesson the next day. With five students to a group, one week's worth of classes can be taught by the students, or perhaps a particular day of the week, such as Friday, can be set aside for S.A.I.
This approach to teaching high school agricultural science and business can provide a novel experience that students might enjoy from time to time. It can also provide students with the opportunity to see teaching from the instructor's point of view. (Who knows, this might help solve a few discipline problems or at least give the students a better understanding of some of the problems teachers encounter.) It can also have a positive effect on the leadership skills of class members by giving them more opportunities to speak in front of a group, although small, and hold a leadership role.
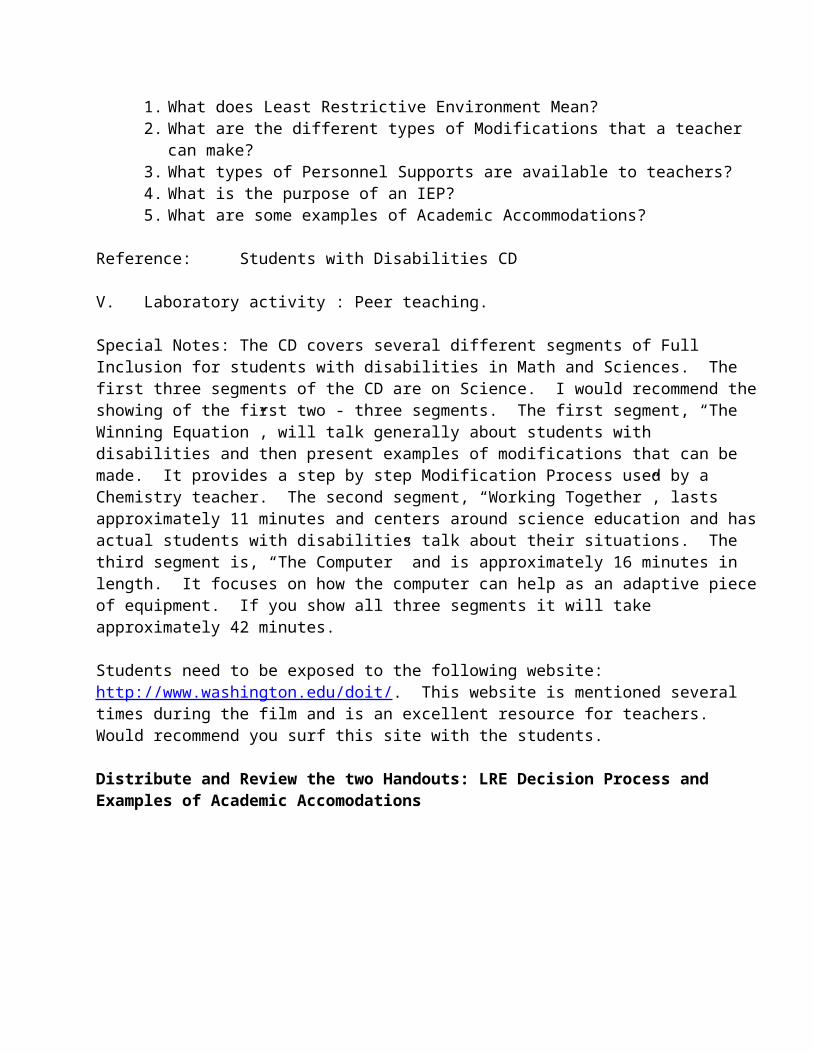
S.A.I. can also cut down on the number of reading assignments for the entire class by allotting certain reading assignments to just those designated as teachers. This may eliminate some of the problems that arise for teachers who do not have enough textbooks for all the students in the class. Only a handful of students at a time would need to make use of the books.
S.A.I. allows for a competitive atmosphere in the classroom, if that is how an instructor wishes to make use of it. It is thus possible to again assure oneself that the designated teachers will come prepared to teach and the students will be receptive to the material being covered by creating a competition between the small groups concerning the groups' achievement on the evaluation.
S.A.I. would initially require extra teacher time for the planning and construction of lessons to be taught. However, this is true of any new teaching strategy, and if a teacher is well organized and has lessons planned in advance, this should not pose a serious problem. Extension bulletins, free publications from industries and some textbooks may very easily supply the teaching material needed and thus solve this problem.
As teachers search for new approaches for presenting materials to their students, consideration should be given to this approach. It allows for a break in "normal" classroom routine, enables the students to discover the difficulties in teaching, and holds potential for developing leadership skills. Perhaps S.A.I. is a teaching strategy agricultural science and business teachers might find worthy of further examination.

Sample S.A.I. Lesson Plan Packet
Name: Date Last Revised:
Course Title: Agriculture Power Structure and Technology
Domain: LeadershipUnit Title : Employability in Agricultural/ Horticultural Industry (Unit B)
Core Standard 11: Students validate the necessity of leadership skills development in conjunction with participation in The National FFA Organization (FFA) as a critical component to a well rounded agricultural education.
Problem Area: Developing Communication Skills (Number 2)
Standards: APST-10.4 Demonstrate those qualities, attributes and skills necessary to succeed in, or further prepare for, a chosen career while effectively contributing to society.
APST-11.1 Demonstrate communication skills such as writing, public speaking, and listening while refining oral, written, and verbal skills.
APST-11.4 Acquire the skills necessary to positively influence others.APST-11.5 Develop a skill set to enhance the positive evolution of the whole person.
Presentation Titles: 5 SAI lessons include: Introduction to Communication, Understanding Effective Communication Techniques, Developing Listening Techniques, Identifying Effective Speaking Techniques, and Using Communication Skills in Appropriate Situations
Situation: This lesson is to be taught to a junior and senior Agriculture Power Structure and Technology class. There are approximately 25 students in the class. Students in this class will have taken Introduction to Agriculture Food and Natural Resources as a prerequisite. The class length is 50 minutes. This is the start of a new unit in the course. We just finished covering small engines.
Documentation of Competencies Met by this Lesson:Connection to SAE/Career Development:Building contractor, construction worker, carpenter, equipmentOperator Proficiencies Agricultural Mechanics, Agricultural Mechanics Energy Systems, Agricultural Mechanics Repair and Maintenance Entrepreneurship and Placement, Landscape contractor, nursery production and Community Development
Connection to FFA/Leadership Development and Personal Growth:Extemporaneous Public Speaking CDE and Parliamentary Procedure CDE
Documentation of Academic Standards Met by this Lesson:English/Language Arts Concepts Taught: EL.10.1.1 2006 Vocabulary and Concept Development: Understand technical vocabulary in subject area reading. EL.10.1.4 2006 Identify and use the literal and figurative meanings of words and understand origins of words.EL.10.5.7 2006 Use varied and expanded vocabulary, appropriate for specific forms and topics.
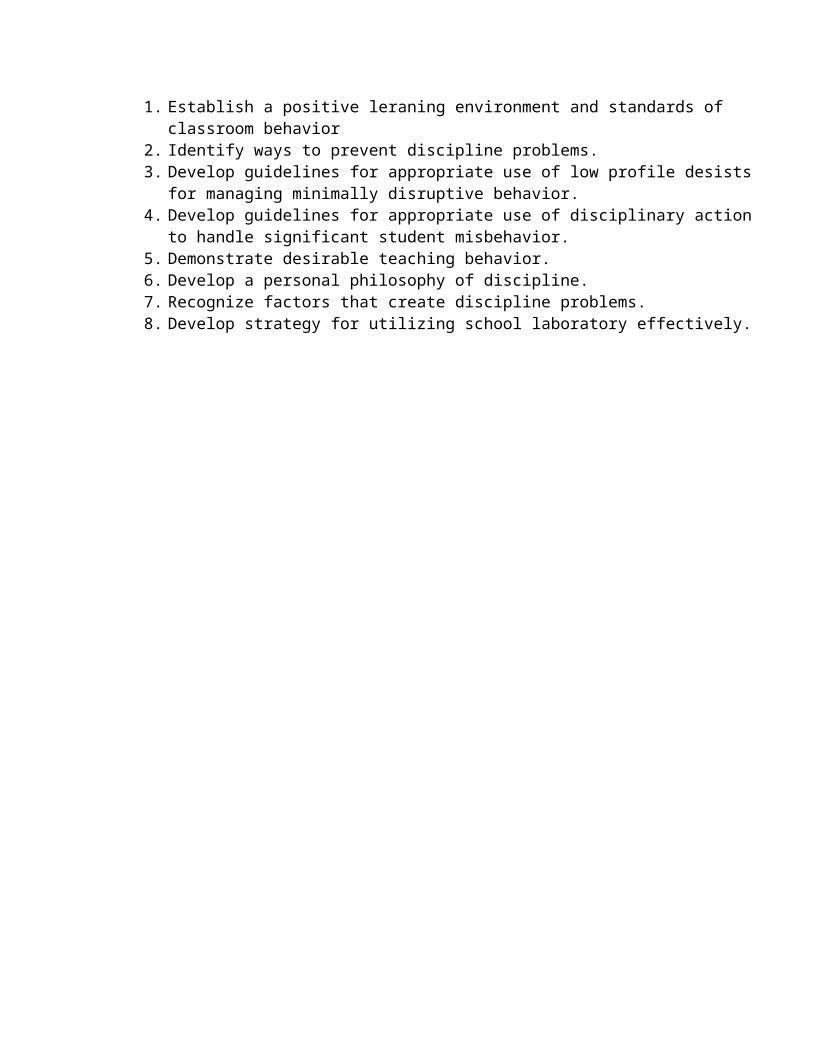
EL.11.7 2006 - LISTENING AND SPEAKING: Skills, Strategies, and ApplicationsStudents formulate thoughtful judgments about oral communication. They deliver focused and coherent presentations that convey clear and distinct perspectives and demonstrate solid reasoning. Students deliver polished formal and extemporaneous presentations that combine traditional speech strategies of narration, exposition, persuasion, and description. They use gestures, tone, and vocabulary appropriate to the audience and purpose. Students use the same Standard English conventions for oral speech that they use in their writing.EL.12.7.1 2006 Comprehension: Summarize a speaker's purpose and point of view, discuss, and ask questions to draw interpretations of the speaker's content and attitude toward the subject.
High School Speech and Communication Concepts Taught:EL.SPC.1.1 2006 Summarize a speaker's purpose and point of view, discuss, and ask questions to draw interpretations of the speaker's content and attitude toward the subject. [11.7.1/12.7.1]
Social Studies (Economics) Concepts Taught: SS.E.8.10 2007 Identify skills that individuals need to be successful in the global economy.

S.A.I.Lesson 1
Agricultural Mechanics and Technology
Presentation Title: Introduction to Communication
You will be the leader of your discussion group for the class period. Your objective is to present the material related to your topic in chapter 3 in Developing Leadership and Communication Skills page numbers 54-58 to the students in your group. You will be responsible for developing an outline of all the important details you will cover from the information provided on Introduction to Communication.
You will have 15 minutes to present this information outline to your group. After yourpresentation, there will be a short quiz given to your group over the material that you are to have covered. The quiz will be developed by the agricultural science and business instructor.
As leader, you will be evaluated on your performance. The leader of the group that scores thehighest on the quiz will be awarded 25 extra credit points. At the conclusion of your presentation you will submit your information outline that will be scored on a 0-10 point scale. The scoring will be based on the completeness and organization of your presentation outline. You will also be graded on your enthusiasm during your presentation. Time will be provided in class during supervised study for you to work on your presentation.
Teaching materials:Developing Leadership and Communication Skills. (2004), Chapter 3, pages 54-58.Prentice Hall Interstate Upper Saddle River, New Jersey

S.A.I.Lesson 1 Quiz
Agricultural Mechanics and Technology
Lesson: Introduction to Communication
Directions: Indicate on the line whether the following statement is TRUE or FALSE by a T or F respectively. This quiz is worth 10 points.
1. _____ Communication is the process of sending and receiving messages
2. _____The receiver wants to communicate something by speaking or writing
3. _____The message is the connection between a sender and receiver
4. _____One-to-one communication occurs when one communicates to oneself
5. _____Department meetings, board meetings, and business meetings are examples of public communication
6. _____In mass media communication the sender uses print, radio, or television to reach the receiver
7. _____Semantics, filtering, and credibility are all examples of barriers
8. _____Self-communication ends once the sender selects the message to send
9. _____In leadership, it’s only important to have interpersonal communication
10. _____Parliamentary procedure based on Roberts’ Rules of Order is only used by politicians at a national level

S.A.I Lesson 1
Agricultural Mechanics and Technology
Lesson Title: Introduction to CommunicationStudent Learning Objectives: Upon completion of this lesson, students should be able to display mastery of the following with 85% accuracy.
1. Define communication and its purpose2. List the components of the communication process3. Explain five different levels of communication4. Explain the barriers of successful communication5. Describe the importance of communication to effective leadership
Interest Approach: Ask one student to come up to the board and have the student make a list of all the different ways students say they communicate with their friends, family, teachers, or employers. Why are there so many different ways to communicate? Why is it important to be able to communicate effectively?
Subject Matter Outline:I. What is communication?
A. Communication is the process of sending and receiving messages so that two or more people achieve understanding
B. The three purposes of communication:1. To inform: Giving information to someone2. To influence: Persuading a person’s behavior3. To express feeling: The process of explaining feelings
II. What are the components in the communication process?A. Sender: Speaks, writes, or use non-verbal signals to communicate somethingB. Message: The information being transmitted from sender to receiver C. Receiver: Wants to understand the sender’s message by actively listening, reading, or
watching the non-verbal signals of visual information
III. What are the five levels of communication?A. Self: Directed to yourself, referred to as interpersonal conversation; really a never
ending processB. One-to-one: Individual communicates directly with another person
1. Can be formal or informal2. Most widely used form
C. Group: Discussion within groups of people1. Each person has equal chance to speak2. Often used in business meetings
D. Public: Presentations to groups of 20-25 participants1. Includes: press conferences, classroom settings, or workshops
E. Mass-media: Sender is separated by communication medium1. Includes: film, radio, or television,
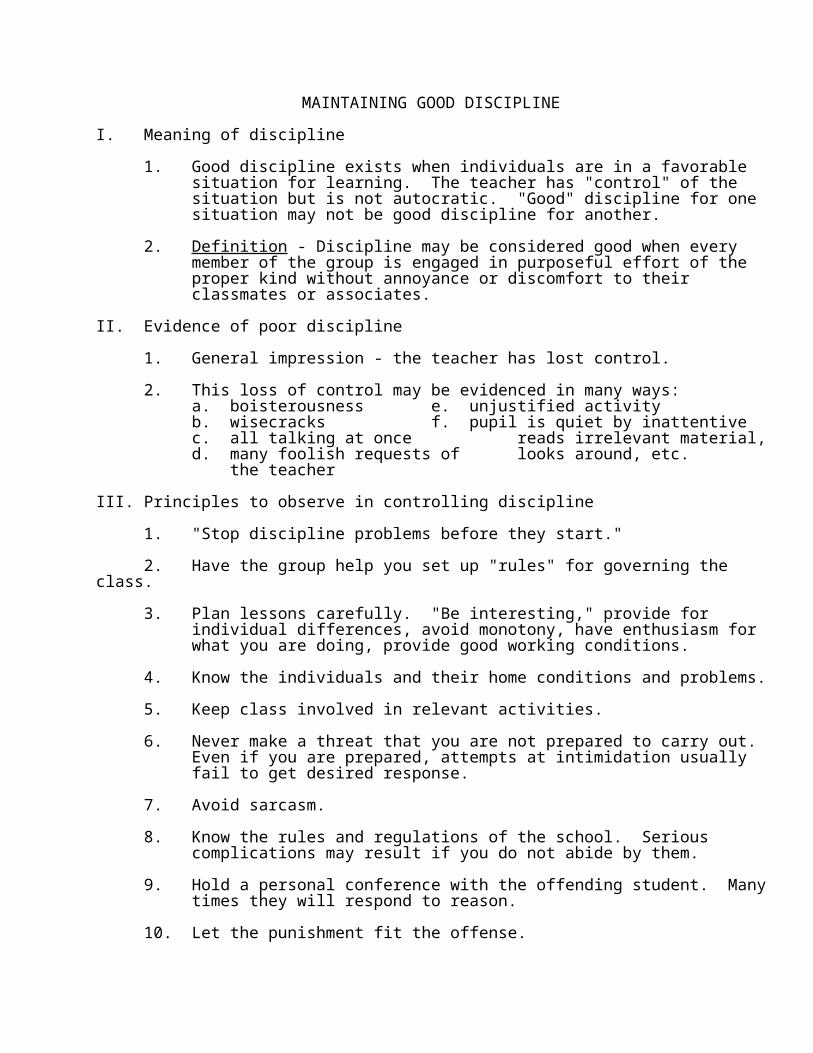
IV. What are the barriers of successful communication?A. Selective perception: People block out information they do not want to heardB. Poor listening skills: Receiver is not focused on the messageC. Credibility: Sender has poor credibility, so receiver perceives the message as insincereD. Semantics: The same words mean entirely different things to different people “slang”E. Filtering: Manipulating information so receivers only hear what they want to.F. Avoiding detail: Human beings struggle to remember many details in a short period of
time
V. What is the relationship between communication and leadership?A. Leadership is the ability to influence people to achieve a goalB. All forms of communication are important when working with peopleC. Parliamentary procedure; based on Roberts’ Rules of Order is the standard order for
holding meetingsD. Public speaking skills are utilized by people in leadership positions

S.A.I.Lesson 2
Agricultural Mechanics and Technology
Presentation Title: Understanding Effective Communication Techniques
You will be the leader of your discussion group for the class period. Your objective is to present the material related to your topic in chapter 3 in Developing Leadership and Communication Skills pages 58-61to the students in your group. You will be responsible for developing an outline of all the important details you will cover from the information provided on Understanding Effective Communication Techniques.
You will have 15 minutes to present this information outline to your group. After yourpresentation, there will be a short quiz given to your group over the material that you are to have covered. The quiz will be developed by the agricultural science and business instructor.
As leader, you will be evaluated on your performance. The leader of the group that scores thehighest on the quiz will be awarded 25 extra credit points. At the conclusion of your presentation you will submit your information outline that will be scored on a 0-10 point scale. The scoring will be based on the completeness and organization of your presentation outline. You will also be graded on your enthusiasm during your presentation. Time will be provided in class during supervised study for you to work on your presentation.
Teaching materials:Developing Leadership and Communication Skills (2004), Chapter 3, pages 58-61.Prentice Hall Interstate Upper Saddle River, New Jersey
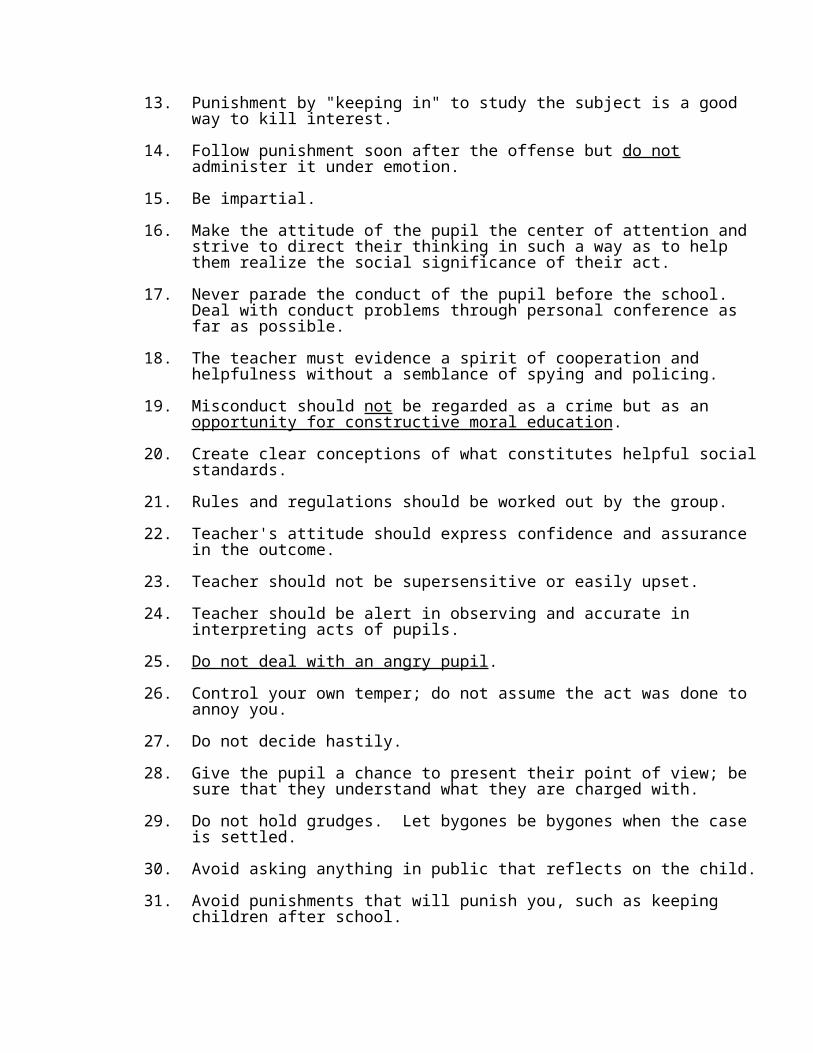
S.A.I.Lesson 2 Quiz
Agricultural Mechanics and Technology
Lesson: Understanding Effective Communication Techniques
Directions: Indicate on the line whether the following statement is TRUE or FALSE by a T or F respectively. This quiz is worth 10 points.
1. _____Filtering occurs when the receiver converts the message into a usable form
2. _____Interference is anything that could block the communication process
3. _____Non-verbal cues include sign language, paralanguage, and Braille
4. _____Decoding is the way the receiver responds to the message the sender is expressing
5. _____Scanning is used to locate specific detail mixed with other material in text
6. _____When you summarize, you are putting the writer’s ideas in your own words
7. _____In order to listen effectively, you should concentrate on the speaker, not the message
8. _____Who, what, when, where, and why are the five W’s of effective writing
9. _____It’s not important to organize material when presenting to an audience
10. _____Total communication exists when almost all the information the sender intends to convey is understood by the receiver

S.A.ILesson 2
Agricultural Mechanics and Technology
Lesson Title: Understanding Effective Communication Techniques
Student Learning Objectives: Upon completion of this lesson, students should be able to display mastery of the following with 85% accuracy.
1. Identify the techniques to effective communication2. Compose a list of writing skills that make communication effective3. Explain how to effectively use feedback4. Discuss ways to improve communication5. Identify types of nonverbal cues
Interest Approach: Show a short clip of “The Three Stooges” trying to communicate (http://www.youtube.com/watch?v=tUcIeiaIQrs). Follow this clip with a short five minute video of President Obama addressing US citizens. Ask them to explain the different communication techniques used. Why is it important to be able to communicate effectively?
Subject Matter Outline:I. What techniques make communication effective?
A. Effective skills in listening1. Listen with purpose2. Identify listening cues like the introduction, main idea, and conclusion3. Recognize patterns of organizing information4. Concentrate on the message
B. Effective skills in speaking1. Make sure the message matches the receiver2. Organize the message in a pattern the receiver can follow3. Deliver the message clearly
C. Effective skills in reading1. Scan for specific details2. Skim the reading for the main idea3. Summarize the ideas in your own words
II. What writing skills make communication effective?A. Use the five W’s
1. Who, what, when, where, and whyB. Plan your writing by asking yourself:
1. Who is the audience2. What it my purpose3. How will I organize my information4. What examples best illustrate my main idea
III. What makes feedback effective?A. Feedback is the way the receiver responds to the information
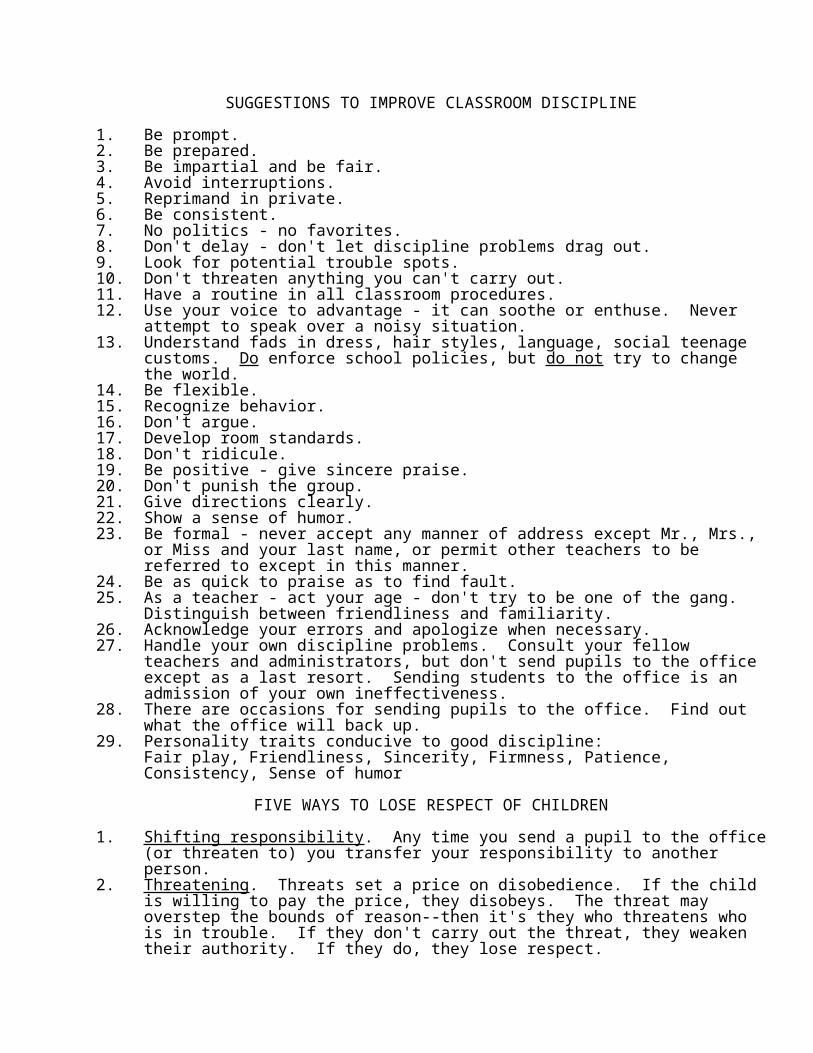
B. The object of feedback is to report to the sender what the receivers sees, hears, and feels toward the transmission
C. Total communication exists when all the information the sender wants to convey is comprehended by the receiver
D. Decoding is when the receiver takes the message and converts it into a more usable form of information
IV. How can communication be improved?A. Separate facts from opinionsB. Improve listening, speaking, and simplifying skillsC. Avoid interferences that might block the communication process
V. What are non-verbal cues in communication?A. Non-verbal communication is the exchange of information without the use of wordsB. These often indicate emotional state or attitudeC. There are four main types of non-verbal cues
1. Sign language: head movements and shoulder shrugs2. Action language: action or whole body movements3. Paralanguage: vocal sounds that influence spoken words4. Object language: physical items that convey messages
S.A.I.Lesson 3
Agricultural Mechanics and Technology
Presentation Title: Developing Listening Techniques
You will be the leader of your discussion group for the class period. Your objective is to present the material related to your topic in chapter 9 in Developing Leadership and Communication Skills pages 142-146 to the students in your group. You will be responsible for developing an outline of all the important details you will cover from the information provided on Developing Listening Techniques
You will have 15 minutes to present this information outline to your group. After yourpresentation, there will be a short quiz given to your group over the material that you are to have covered. The quiz will be developed by the agricultural science and business instructor.
As leader, you will be evaluated on your performance. The leader of the group that scores thehighest on the quiz will be awarded 25 extra credit points. At the conclusion of your presentation you will submit your information outline that will be scored on a 0-10 point scale. The scoring will be based on the completeness and organization of your presentation outline. You will also be graded on your enthusiasm during your presentation. Time will be provided in class during supervised study for you to work on your presentation.
Teaching materials:Developing Leadership and Communication Skills (2004), Chapter 9, pages 142-146.Prentice Hall Interstate Upper Saddle River, New Jersey

S.A.I.Lesson 3 Quiz
Agricultural Mechanics and Technology
Lesson: Developing Listening Techniques
Directions: Indicate on the line whether the following statement is TRUE or FALSE by a T or F respectively. This quiz is worth 10 points.
1. _____Interpreting is putting the information in a useable form
2. _____Information overload is too much information at one time
3. _____Thinking about your personal bias won’t impact your listening ability
4. _____Hearing is the desire or interest to learn
5. _____On average the listener hears about 90% of the message and remembers 50%
6. _____Listening is an active process that requires you to think
7. _____Receiving, understanding, attending, and recalling describes the order of the listening process
8. _____When recalling, you should remember the important message, and discard the rest
9. _____Interpreting is best accomplished by remembering the message verbatim
10. _____Completing the speaker’s sentence for him or her, shows your really listening

S.A.ILesson 3
Agricultural Mechanics and Technology
Lesson Title: Developing Listening Techniques
Student Learning Objectives: Upon completion of this lesson, students should be able to display mastery of the following with 85% accuracy.
1. Describe the importance of good listening skills in agribusiness2. Distinguish the difference between listening and hearing3. Identify the phases in the listening process4. Explain factors that diminish the listening process5. Identify techniques for effective listening
Interest Approach: Play this listening game to see how well students listen to directions. Read the following questions briefly and allow a short pause for students to respond.
Write yes no matter what letter your name begins with.Write no even if you think cement is heavier than feathers.If 3 times 2 equals 8, make a circle, if not make two dots.Give the wrong answer to this question: “Does wood come from trees?”If Washington was not the first President of the United States, write the shorter of the words red and green; if he was, sign your name?
Discuss the responses with students and ask them why it is important to listen well.
Subject Matter Outline:I. Why is it important to listen well in agribusiness?
A. Listening is the basis for successful communicationB. If you don’t listen carefully to the communicator, part of the message will be lostC. The listener is responsible for making the effort to understand the message
II. What’s the difference between listening and hearing?A. Hearing, the first part of listening, is the physical process of detecting soundsB. The listener hears only 70% of the message, and remembers 50% or lessC. Listening is a conscious mental effort to understand what you hearD. Listening consumes 45% of all the time spent communicatingE. Listening is an active process and requires effort
III. What are the phases of the listening process?A. Receiving, or hearing, is the first phase of listeningB. Attending, the interest to listen, is the second phaseC. Understanding, or interpreting the message, is the third phaseD. Recalling, remembering what was said, is the fourth phase
IV. What factors contribute to poor listening?A. Tuning out is when you hear but don’t listen
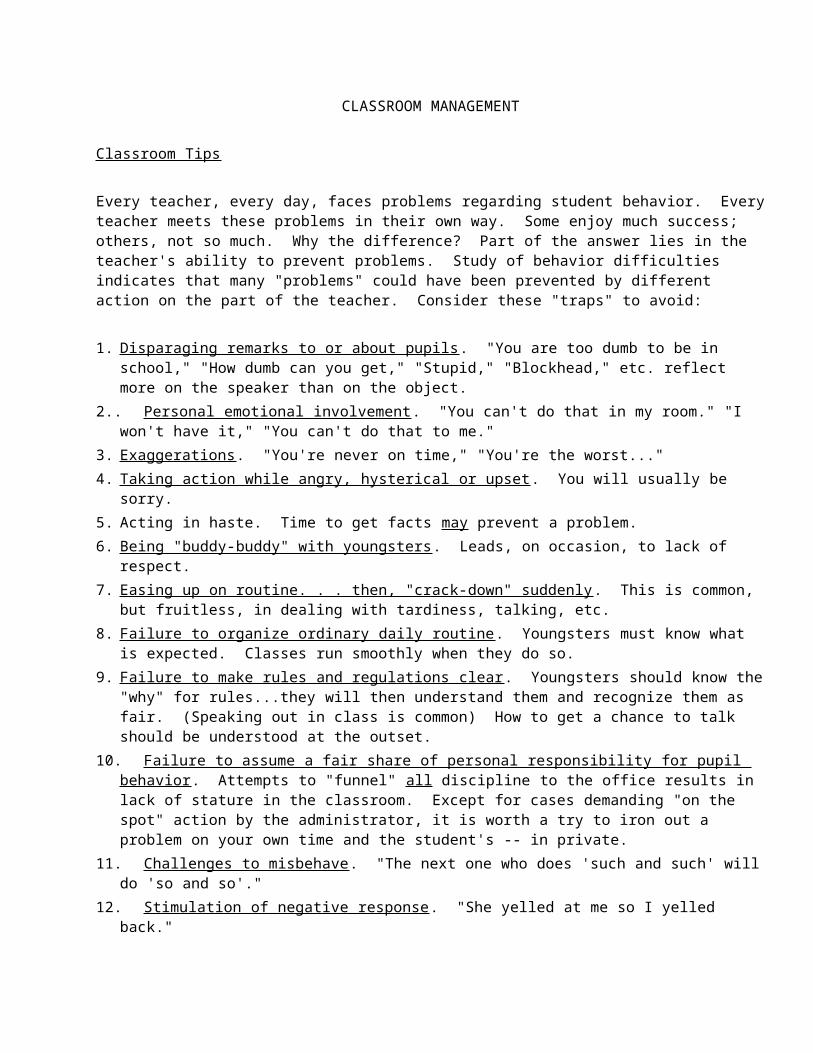
B. Interrupting the speaker while he or she is talkingC. Poor eye contactD. Bias opinions result in poor listeningE. Poor hearing conditionsF. Lack of effort on the receivers partG. Information overload on the speakers partH. Incorrect assumptions can lead to poor listening
V. How can you improve listening skills?A. Prepare yourself for listeningB. Listen with the intent to understandC. Control your emotionsD. Practice mental flexibilityE. Concentrate on the speakerF. Hear the person completely before respondingG. Take notes to listen activelyH. Organize information as you hear it
S.A.I.Lesson 4
Agricultural Mechanics and Technology
Presentation Title: Identifying Effective Speaking Techniques
You will be the leader of your discussion group for the class period. Your objective is to present the material related to your topic in chapter 24 in Developing Leadership and Communication Skills pages 301-305 to the students in your group. You will be responsible for developing an outline of all the important details you will cover from the information provided on Identifying Effective Speaking Techniques
You will have 15 minutes to present this information outline to your group. After yourpresentation, there will be a short quiz given to your group over the material that you are to have covered. The quiz will be developed by the agricultural science and business instructor.
As leader, you will be evaluated on your performance. The leader of the group that scores thehighest on the quiz will be awarded 25 extra credit points. At the conclusion of your presentation you will submit your information outline that will be scored on a 0-10 point scale. The scoring will be based on the completeness and organization of your presentation outline. You will also be graded on your enthusiasm during your presentation. Time will be provided in class during supervised study for you to work on your presentation.
Teaching materials:Developing Leadership and Communication Skills (2004), Chapter 24, pages 301-305.Prentice Hall Interstate Upper Saddle River, New Jersey
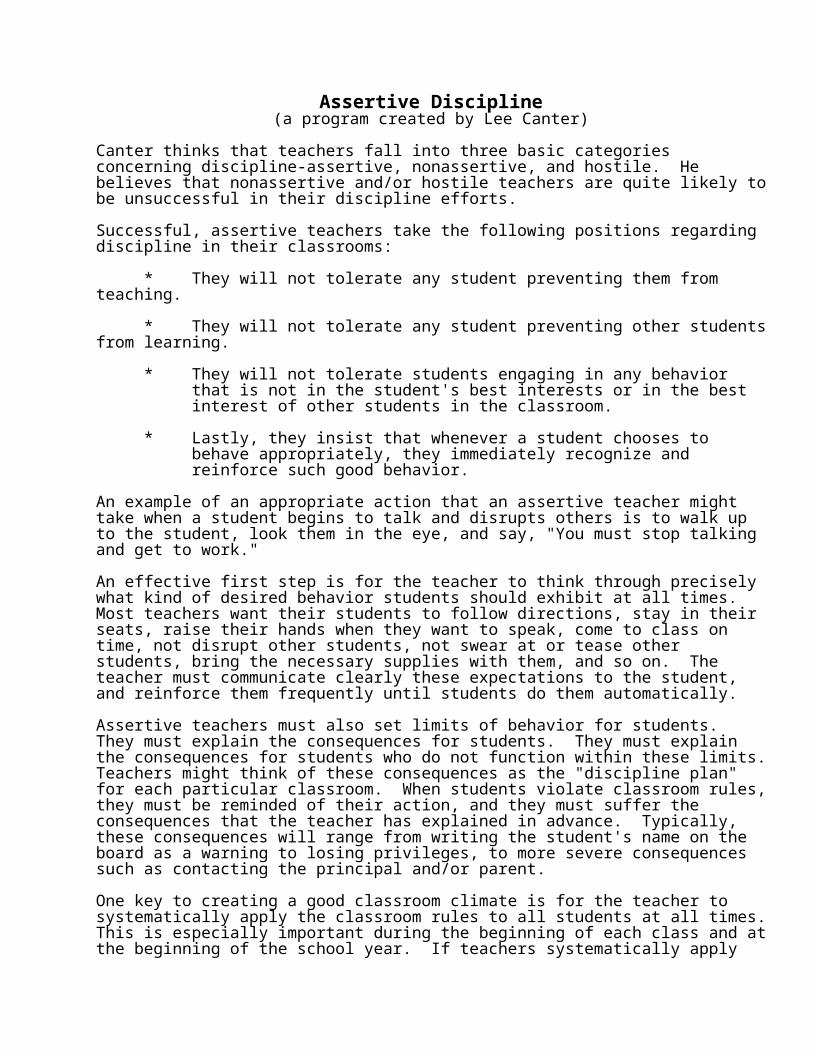
S.A.I.Lesson 4 Quiz
Agricultural Mechanics and Technology
Lesson: Identifying Effective Speaking Techniques
Directions: Indicate on the line whether the following statement is TRUE or FALSE by a T or F respectively. This quiz is worth 10 points.
1. _____Public speaking is only a skill needed by politicians
2. _____Chronological order is when you discuss information starting with the most recent and working backwards
3. _____It’s best to speak in one pitch throughout a speech, if you want to be professional
4. _____Eye contact can be described as looking into the eyes of the audience
5. _____Two-way communication does not acknowledge receiver participation at all
6. _____It’s important to be prepared, organized, and stay within the allotted time
7. _____Use attention getter’s and enthusiasm to keep your audience engaged
8. _____Maintaining eye contact is helpful, but not necessary
9. _____It is only important for people who work with customers to have good communication skills
10. _____Always match your message to the needs of the receiver

S.A.ILesson 4
Agricultural Mechanics and Technology
Lesson Title: Identifying Effective Speaking Techniques
Student Learning Objectives: Upon completion of this lesson, students should be able to display mastery of the following with 85% accuracy.
1. Describe oral communication2. Distinguish between one-way and two-way communication3. List 5 ways to make your speech stronger4. Describe the three techniques for effective speaking5. Explain the importance of effective speaking in agriculture business
Interest Approach: Ask the students to list three people they think are effective speakers. Show students a YouTube video (http://www.youtube.com/watch?v=laxxh2MPwzo&feature=related) of motivational speaker Harlan Cohen. Have students make a list of what the speaker does to make him an effective communicator. Why is it important in agriculture to be a strong communicator?
Subject Matter Outline:
I. What is oral communication?A. Oral communication is the process of sending and receiving information verbally and
creating meaning through speechB. One-way communication is the simplest approach to communication
a. Includes a sender, receiver, and messageC. Two-way communication involves the receiver’s reaction to the sender’s messageD. Public speaking incorporates oral communication and non-verbal symbols while
creating a message that relates to the audience
II. What skills should I master to improve by speaking abilities?A. Be prepared and organized ahead of timeB. Always use attention getters and enthusiasmC. Use good eye contact and vary facial expressionsD. Learn good techniques by watching professionalsE. Becoming an “expert” on your topicF. Avoid filler like “um” and “ya know”
III. What techniques make speaking effective?A. Selecting the message
1. Decide what you want to say2. Match your message to the receiver’s needs
B. Organizing the message1. Create a logical flow of information: Chronological order, priority, or cause an
effect2. Use appropriate phrases to make the pattern clean; first, second, next, finally
C. Presenting the message1. Use natural facial expressions, gestures, and posture
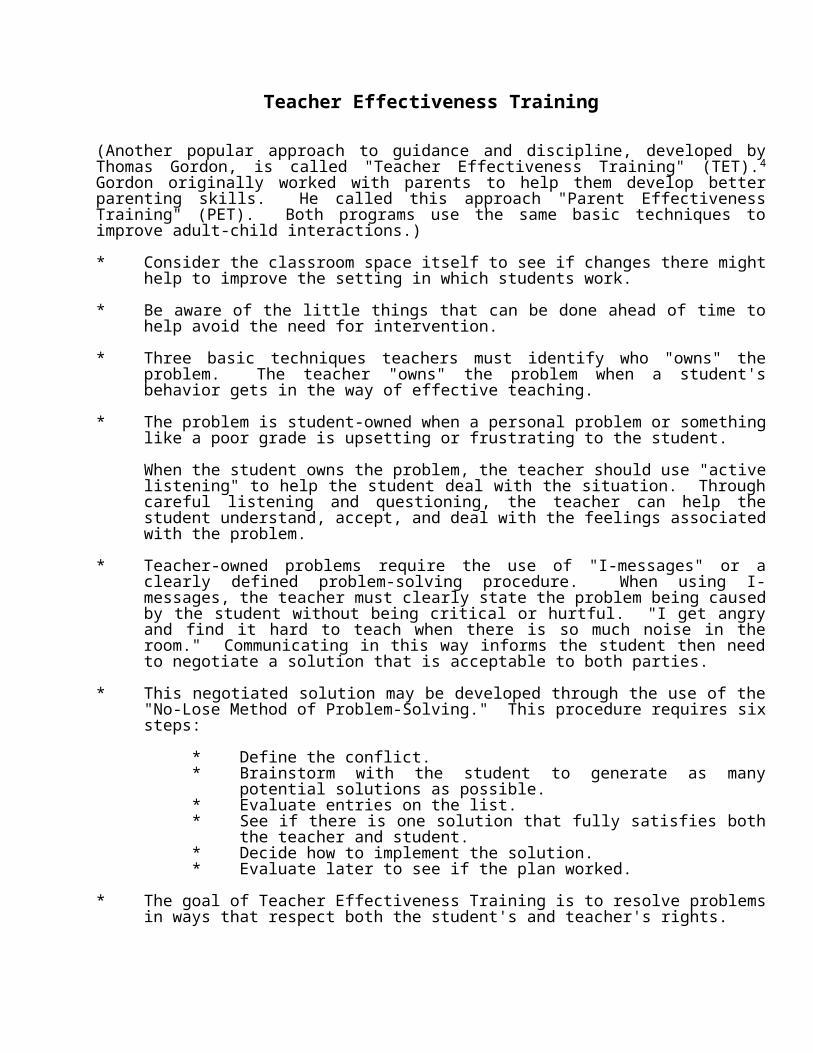
2. Deliver your information with enthusiasm3. Maintain eye contact and speak loudly
IV. Why are effective speaking techniques important to an agriculture business?A. In any business, communication is an essential skill to haveB. Effective speaking techniques are needed in production agriculture including
landscape construction and landscape maintenanceC. Communication is the number one skill employers are looking for in new hires

S.A.I.Lesson 5
Agricultural Mechanics and Technology
Presentation Title: Using Communication Skills in Appropriate Situations
You will be the leader of your discussion group for the class period. Your objective is to present the material related to your topic in chapter 9 in Developing Leadership and Communication Skills pages 147-152 to the students in your group. You will be responsible for developing an outline of all the important details you will cover from the information provided on Using Communication Skills in Appropriate Situations.
You will have 15 minutes to present this information outline to your group. After yourpresentation, there will be a short quiz given to your group over the material that you are to have covered. The quiz will be developed by the agricultural science and business instructor.
As leader, you will be evaluated on your performance. The leader of the group that scores thehighest on the quiz will be awarded 25 extra credit points. At the conclusion of your presentation you will submit your information outline that will be scored on a 0-10 point scale. The scoring will be based on the completeness and organization of your presentation outline. You will also be graded on your enthusiasm during your presentation. Time will be provided in class during supervised study for you to work on your presentation.
Teaching materials:Developing Leadership and Communication Skills (2004), Chapter 9, pages 147-152.Prentice Hall Interstate Upper Saddle River, New Jersey
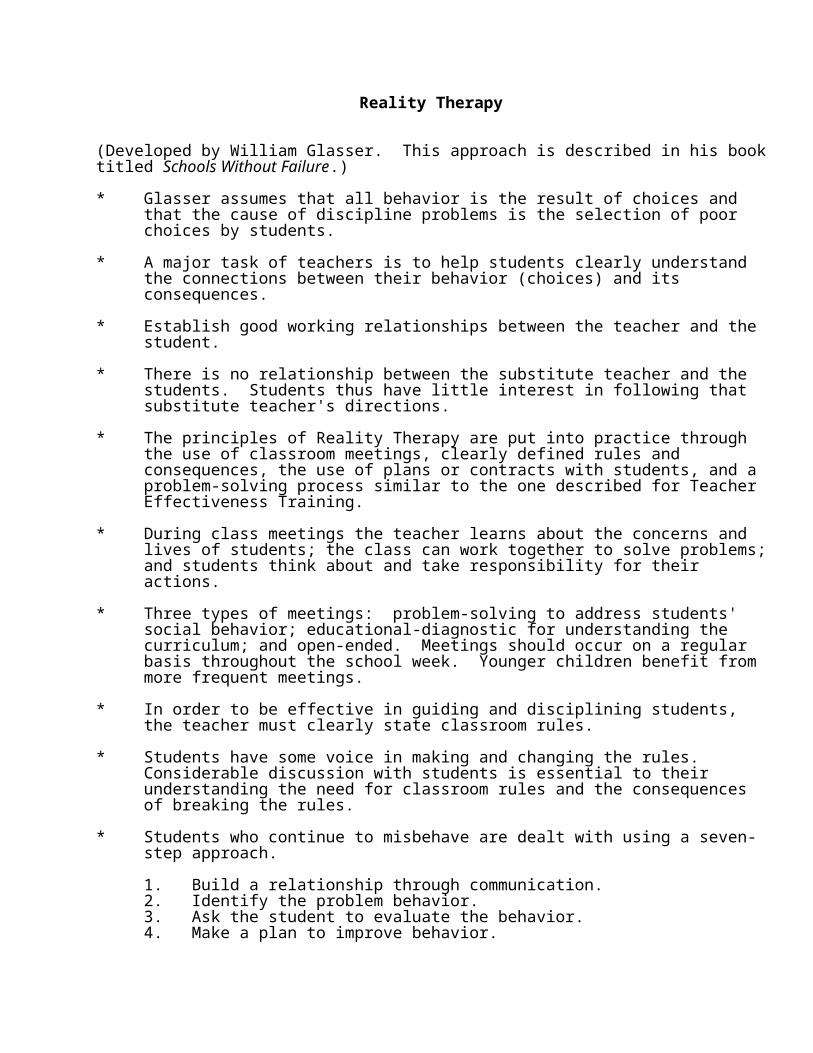
S.A.I.Lesson 5 Quiz
Agricultural Mechanics and Technology
Lesson: Using Communication Skills in Appropriate Situations
Directions: Indicate on the line whether the following statement is TRUE or FALSE by a T or F respectively. This quiz is worth 10 points.
1. _____A dominator is a type of personality that likes to control the group
2. _____A distracter is a type of personality that likes to compromise with everyone
3. _____A no-show is a type of personality that does not show up for activities
4. _____Being cooperative, inflexible, and respectful are all positive characteristics in a group environment
5 ._____It’s good to have people skills, but they won’t help you succeed in the workforce
6. _____Saying “thank you” “hello”, and “excuse me” are examples of using good people skills
7. _____It’s important to not gossip about other when they make mistakes
8. _____When presenting a problem to your supervisor, you should share your opinion along with the facts to give them a good overall idea of the problem
9. _____An important concept in requesting information from a supervisor, is always think before you speak
10. ____Communication is important in agribusiness because it allows you to inform
S.A.I Lesson 5
Agricultural Mechanics and Technology
Lesson Title: Using Communication Skills in Appropriate Situations
Student Learning Objectives: Upon completion of this lesson, students should be able to display mastery of the following with 85% accuracy.
1. Describe the role of communication skills in the workplace2. Identify different personality types3. Explain how to present a problem to a supervisor4. Identify the techniques used in requesting information5. Explain the role of written communication in an agribusiness setting
Interest Approach: In a role playing activity divide students in groups of three. One student in each group will be the supervisor, one student will be worker #1, and the third students will be worker #2. There was an accident and worker #1 set the building on fire. Worker #2 witnessed the accident. It’s up to the workers to describe how to tell their supervisor what happened. Students will be allotted 10 minutes to prepare and 3-5 minutes to present their skits. At the end of the skits the class will discuss the importance of using the right technique to share information in a professional workplace.
Subject Matter OutlineI. Why are communication skills important in the workplace?
A. People skills help professionals get along and work together1. People skills are highly sought after2. They help unite members in a group
B. Certain Traits denote good people skills1. Respecting other and being courteous2. Polite gestures: Thank you, hello, your welcome3. Commending other and seeking advice4. Recognizing different personality types5. Allowing others to make decisions6. Having empathy for others needs
II. What are personality types?A. Personality is the collection of a person’s distinct, individual qualities. It is the way a
person thinks, functions, and responds to others.B. There are some of the many different personality types:
1. Dominator, likes to control a group2. Compromiser, tries to see all sides of an issues3. Follower, goes along with the group4. Encourager, gives hope, confidence and support to the group5. Integrator, removes barriers that slow down the group6. Contributor, likes to share information and initiate projects7. Elaborator, usually elaborates on issues to the smallest detail8. Recognition-seeker, needs constant recognition9. No-show, one who usually does not show up or help
10. Distracter, does foolish things to get attention
C. Working with people involves positive characteristics1. Being cooperative and respecting authority2. Handling criticism well3. Doing quality work4. Being enthusiastic and flexible5. Offering compliments and assessing yourself
III. How do you present a problem to a supervisor?A. Make sure you understand the problem first
1. Decide if you can solve it by yourself first2. Major problems need immediate attentions, minor problems and can wait till your
supervisor has more time to help3. Go to your supervisor with possible solutions in mind
B. Explain the problem to your supervisor clearly1. Get to the point directly2. Focus on facts3. Think about ways to solve the problem
C. After expressing the problem you should:1. Be modest and not take all the credit2. Never gossip about another’s mistakes3. Don’t get frustrated if your idea isn’t used
IV. How do you request information from a supervisor?A. Plan your request, “Always things before you speak”B. Be specific about what information you are requestingC. Explain why you need the informationD. Keep the request simple, and politeE. Remember the three types of request: permission, information, action
V. What is the role of written communication in an agribusiness? A. The purpose of written communication is to informB. Several types of written documents include: reports, letters, and articles, but form are the
most commonC. A business letter has a purpose to either ask about a job, or request other informationD. Personal letters are what you write to friends or relatives
Methods of Teaching Agricultural Education Lesson #12
ANNOUNCEMENTS
I. Unit: Evaluation
II. Lesson: Evaluating Student Performance
III. DOE School Setting Development Standards – Secondary EducationStandard 4: Assessme n t : Teachers at the secondary level have a broad and comprehensive understanding of assessment principles and practices and demonstrate the ability to use assessment to monitor student progress and to use data to guide instructional decision making.
III. Objectives:
Upon completion of this lesson, students will be able to:
1. Prepare formative and summative classroom assessments.2.
IV. Questions to consider:
1. Demonstrate the proper method of wording test items.2. Explain criteria for grading students.3. Plan effective program evaluations.4.5.
Reference: Newcomb, L.H., McCracken, J.D., Warmbrod, J.R. & Whittington, M.S. (2004). Methods of teaching agriculture (3rd Edition). Pearson Prentice Hall. Chapter 14.YDAE 440 Course Packet pages 130-152.
V. Laboratory activity.
Peer teaching.
CRITERIA FOR EVALUATING A NOTEBOOK
Neatness POINTS
- Pages not torn or crumpled (10) _______
- No doodling or graffiti (10) _______
- Notes in order by date (10) _______
Organization
- All tabs in place (5) _______
- Notes filed under the tab you were told to use (10) _______
- Handouts included with notes (10) _______
- Each day's notes are dated (5) _______
Completeness (40) _______
_______
Total Points 100 _______

HOW TO BUILD A WRITTEN CLASSROOM TEST
ByLowell Hedges
As a teacher you have probably found that it is not easy to make a good test, for good tests are made after much thought and effort. However, if you understand and follow a few basic rules, then building a good classroom test will not seem like an insurmountable task.
In general, there are three common ways of testing: (1) practical or performance test, (2) oral or verbal test, and (3) written test. In this discussion, we will concern ourselves with the written test.
When building your next test, try applying these basic rules:
1. Have a specific objective for the test. Some objectives for a test may be: (a) to determine strengths and weaknesses of your students, (b) to determine how well you have taught and to help you do a better job of teaching, (c) to determine the effectiveness of teaching methods and visual aids, demonstrations, field trips and other instructional methods, (d) to help your students learn the basic fundamentals of the lessons, and (e) to help determine the student's grades.
2. Make a careful plan for the test questions. This plan should be written so as to enable you to recognize its strengths and weaknesses. For example, by the use of the test you want to get a general picture of class achievement with some indication of over-all areas of strengths and weaknesses in agricultural mathematics. You decide that you can classify the year's work into two areas: the kind of computation required (addition, subtraction, multiplication) and the way the problem was presented (word statements, thought questions). The questions you prepare would be testing the students in these two areas.
3. Prepare at least ten questions--preferably more. If your test is to diagnose student strengths and weaknesses, enough questions should be asked to sufficiently cover the subject matter.
4. Test on what was taught in class. But at the same time, ask the student to use their knowledge in new situations. Questions should go beyond what was merely to be remembered.
5. Test on critical points of learning. Test items should reveal a pupil's ability to apply known principles, to interpret, to draw conclusions from given data, and to solve problems. Do not emphasize inconsequential details. If you do, then students will also emphasize details and will neglect principles and generalizations.
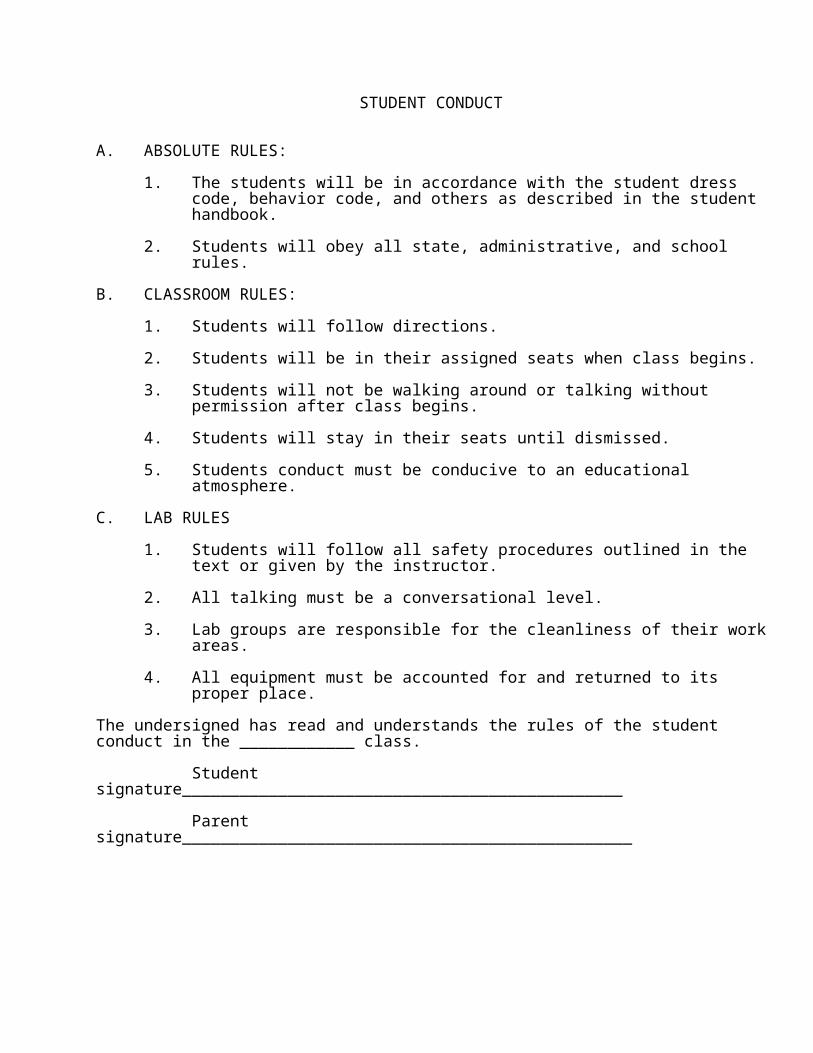
WHICH TYPE OF QUESTION TO USE?
There are two main types of written questions used to build a good written test: the essay-type question and the objective -type question.
There are no specific rules to tell you which type of question to use. However, it will be easier to decide which type to use if the characteristics of each are kept clearly in mind.
The position of the test in the lesson plan will also have an influence on the type of question used. Certain types lend themselves best to quizzes, while others are better suited to reviews, unit tests, weekly tests, or final examinations.
A quiz can be easily and quickly administered by using objective-type questions such as true-false, multiple-choice or completion type. These types can be easily graded by an interchange of students' papers and marked in class. The teacher may or may not wish to record the grades. Short answer essay-type questions may also be used, but should be graded by the teacher.
An examination should use a variety of types of questions. A balance can be achieved by using the essay-type and a combination of objective-type questions. Variety adds interest and also gives students of varying levels of ability and capacity a chance to achieve partial success in the examination.
The remainder of this discussion is concerned with a more detailed analysis of the two main types of questions. The teacher should familiarize themselves with the purpose and structure of each type of question.
HOW TO WRITE ESSAY-TYPE QUESTIONS
The essay-type item requires the student to give a relatively free written response to a question--usually a problem situation. The answer is usually one or more sentences in length. However, some essay questions may even require several pages for a complete answer.
The essay-type test is best adapted to measuring higher-level intellectual skills such as reasoning required in inference, organization of ideas, comparison and contrast. The student's ability to organize and express their ideas effectively can be judged by the use of the essay-type test. The pupil is forced to consider available facts, select those that are applicable, and express their conclusions or response in their own words.
A good essay-type test, in order to be reliable (stability of test scores) and valid (measure what it claims to measure), should be one which can be evaluated without bias, prejudice, or otherwise influenced by personal impressions. As a teacher, you must avoid being impressed with: (1) legibility of the handwriting, (2) the quantity of writing, (3) the style of writing rather than the content (beware of the student who says nothing, but who says it well with smooth flowing prose), (4) the inter-personal relationship that you have with the student (is the student a "good" student or a "bad" student?), (5) the previous work of the pupil in class during the year, and (6) the relative value of the paper when you compare it with others. Example: An average paper looks good when preceded by a series of poor papers; an average paper looks poor when preceded by excellent papers.
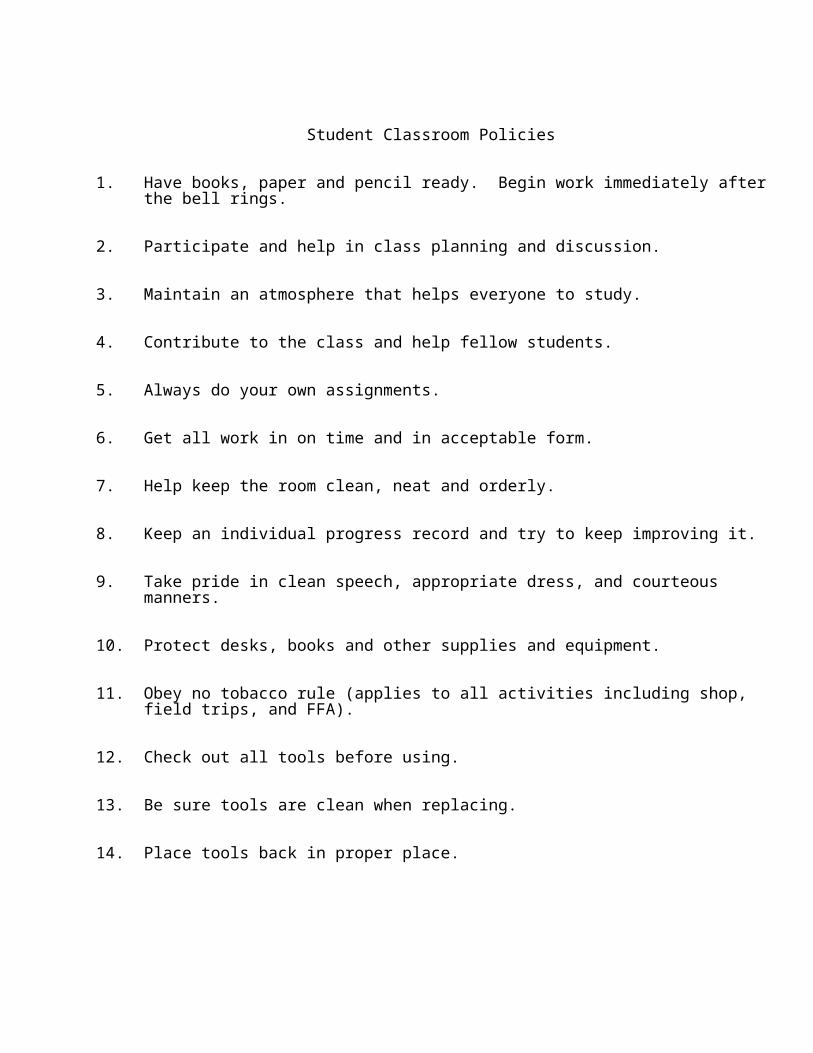
The above precautions emphasize some of the common criticisms aimed at the essay-type question. Another criticism is that the test-taker cannot clearly comprehend the meaning of the question. Such questions do not clearly indicate the response that you expect from the student.
Consider the following questions. Are the responses desired by you, the teacher, clear to the test-taker?
1. Tell what you know about feeding the poultry flock.
2. Tell what happens when grain is run through a combine.
The test-taker could write on the above questions for a considerable length of time and perhaps not give the response desired by the teacher. The student has wasted their time by guessing what you really want as a response. And you would waste your own time by reading the lengthy responses.
Let us re-write the above questions, limiting the scope of the answer to specific parts of the main topic.
1. Recommend a balanced ration for laying hens.
2. Describe the principle by which grain is separated from the straw in the combine.
Do's and Don'ts in Writing Essay-Type Questions
1. Begin the question with "why," "how," "with what consequences," or "with what significance." These words restrict the answer--specify more clearly the intent of the question. Avoid beginning the question with words such as, "discuss," "explain," or "outline." These invite too lengthy and many times irrelevant answers.
2. Do not permit the student a choice among several questions. It is difficult to arrive at comparable scores for students who answer different questions. Also, the student may use incorrect judgment in choosing the questions they feels they can best answer.
3. Before grading the test, list the basic facts that each question is to bring out. Assign specific credit points to each key fact. The weight given to each fact or item should be in proportion to its importance. This technique makes scoring more reliable--more objective, less subjective.
4. When grading the test, read all papers for one question at a time rather than all papers straight through. This way, comparisons of answers will be sharper.
5. Score separately from subject-matter content any credit give for penmanship, spelling, and grammatical expression.

HOW TO WRITE OBJECTIVE-TYPE QUESTIONS
Objective questions, generally speaking, are classified into five major types: (1) multiple-choice, (2) matching, (3) completion of fill-in, (4) true-false, and (5) interpretation of data. There are, of course, numerous variation among these types.
Objective questions--sometimes called "short answer" questions--properly constructed will help dispel the criticism that objective tests require little thought, insight, or understanding.
On the contrary, objective-type questions or tests have the following advantages over the essay-type test: (1) Better coverage of total course content. Students can answer many more questions in same amount of time. (2) Objectivity of scoring is relatively high. There is less chance for the teacher to use personal opinion in grading the test. Questions usually have only one acceptable response. (3) Much time is saved by the teacher in grading the test. Objective questions are easily and quickly graded. (4) Identification of student weaknesses is an easier job and results in a more dependable measure of what a student knows. Students are forced to answer a question directly, and have little opportunity to dodge the intent of the question.
A study and application of the following principles in constructing objective type questions will aid you in providing the value of objective tests.
THE MULTIPLE-CHOICE TYPE OF TEST
A multiple-choice test item consists of a direct question or incomplete statement followed by a series of possible responses or options. The question or incomplete statement is called the "stem". It is relatively long and the response or options are relatively short. There are usually four or five responses or options, only one being the best response. The others are to distract the student lacking in understanding.
The multiple-choice type of test can be used at most class levels and for most subject areas. Multiple-choice test items can be constructed to measure comprehension, information, ability to measure interpretation of data, and understanding of principles.
Do's and Don'ts in Writing Multiple-Choice Test Questions
1. Use at least four responses. Three choices are too few and five too difficult to devise.
2. All answer choices should appear plausible to the test-taker not knowing the correct answer. Incorrect (distracting) responses should distract, not confuse. Incorrect answers should represent common errors in student thinking.
3. Vary the position of the correct response. Put the right response in the first, second, third and fourth position equally often.
4. Avoid the use of "a" or "an" as final words in the question statement, or use any other words that will give a clue to the correct choice.
5. Make answer choices of relatively uniform length. Some test makers include largest number of words in the correct answer. Students soon detect this procedure.
X
6. The question statement or "stem" and each of the possible responses should make a complete sentence.
7. The responses should be concise and unambiguous.
8. When using an incomplete statement, let the blank that the correct choice will fill be at the end.
9. Have the student place the number or letter of the correct response on a blank to the left of the statement, or place an "X" through the corresponding number or letter.
10. Give instructions on answering the test items.
11. Give an example of how to answer the test questions.
12. Prepare a scoring key.
Example of a Multiple-Choice Type Test
Electric Arc Welding--Agricultural Mechanization
October 15, 2006 Student's Name______________________________
Section I. Multiple-Choice
Instructions: Each of the following statements or questions is followed by four possible answers. Read the statements and answer each carefully. Select the best answer, even though there may be several answers that appear to be correct. One answer is the best because it is most complete in answering the question or completing the statement. Draw an "X" through the number to the left of the statement that corresponds to the answer selected.
Example:
1..2..3..4…..1. The approximate length of the arc welding with a blue dot electrode is: (1) 1/8 inch; (2) 3/8 inch; (3) 1/2 inch; (4) 5/8 inch.
______________________________________________________________________________
1 2 3 4 1. If the weld bead is narrow and high, the trouble is probably:
1. too high an ampere setting.2. too low an ampere setting.3. too fast travel speed.4. too short an arc.
1 2 3 4 2. A bead has a large amount of spattering about it. The cause is probably:
1. too high an ampere setting.2. too low an ampere setting.3. too fast travel speed.4. too short an arc.
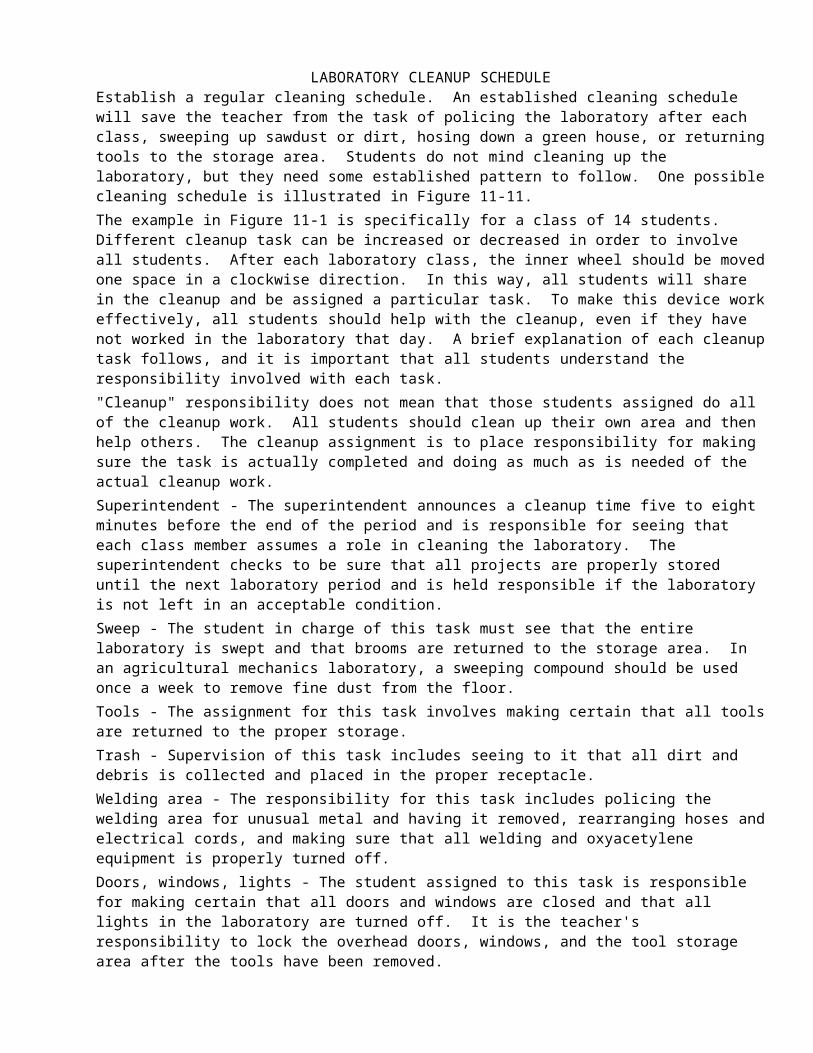
THE TRUE-FALSE TYPE OF TEST
The true-false test presents a series of statements or questions on which the student is to express judgment by indicating if they are true or false. The true-false test is best adapted to the testing of a large amount of subject matter in a relatively short period of time.
In using the true-false test, there is a danger of overstressing rote memory of detached and unrelated bits of information at the expense of understanding basic principles.
Do's and Don'ts in Writing True-False Test Questions
1. Avoid using items that are partly true and partly false.
2. Avoid use of double negatives.
3. Write your questions in language that is easy for your pupils to understand.
4. Avoid specific determiners, such as "always", "never", "all", "none", "every".
5. Include only one idea in the question or statement. Double statements are confusing.
6. Do not use trick or catch questions. Do not test on trivial bits of information.
7. Have about half of the questions true and false.
8. Do not follow a set pattern or sequence of true and false statements.
9. Avoid having one statement give answer to another.
10. Frame your questions so that there can be only one interpretation.
11. Avoid long, complicated statements.
12. Avoid quoting directly from the textbook.
13. Prepare a scoring key.
14. Correct score for a true-false test equals the number answered correctly minus the number wrong (S = R - W). This method presumably takes care of guessing.
X
Example of True-False Type Test
Basic Electricity--Agricultural Mechanization
October 10, 2006_________________________
Student's Name
Section I. True and False.
Instructions: Answer the following statements true or false. Draw an "X" through the T if the statement is true; an "X" through the F if the statement is false.
Example: T F 1. A blown fuse means that you either have a short in the circuit or an overload.
_____________________________________________________________________________
T F 1. A large diameter conductor will carry more current than a small one at a given voltage.
T F 2. A large diameter wire has a larger identification number than a smaller wire.

THE COMPLETION OR FILL-IN TYPE OF TEST
In the completion type of test, sentences are presented from which certain words or phrases have been omitted. The student is directed to complete the meaning of each sentence by filling in the work or words that have been omitted.
The completion-type test requires the student to recall the correct information. There is little chance for the student to guess.
This test is somewhat time-consuming in scoring because students usually provide a variety of answers that are only partially correct. Subjective judgment is therefore required by the teacher who must determine how much credit to give to the student responses.
Do's and Don'ts in Writing Completion or Fill-In Test Questions
1. Do not take direct quotations from the textbook. This encourages rote memorization on the part of the student. Re-phrase the language of the text.
2. Phrase the statement so that the blank calls for a single specific response. Omit words rather than phrases. Scoring will then be more objective.
3. Make all blanks same length and long enough to permit legible answers. Varied lengths of line offer clues as to correct answer.
4. Use language that students understand. Use correct grammar.5. Avoid clues to the answer. Do not make completions depend on grammatical "pat" or
textbook expressions. "A", "an", or verb forms may give away the answer.6. For lower grade students, use direct quotations rather than an incomplete declarative
sentence.7. In grading the test, be prepared to accept alternative answers if correct.8. Do not use too many blanks, especially if the sentence is short. This makes it difficult
for the test-taker to get the meaning of the sentence.9. Avoid having one statement give answer to another.10. Prepare a scoring key. Score by giving a specific weight to each blank correctly filled in.
Example of a Completion Test
Nursery Stock--Horticultural ScienceOctober 1, 2011
_________________________Student's Name
Section I. Completion.
Instructions: Each of the sentences below has one or more blank spaces, each blank indicating a word (or words) that has been omitted. Read each sentence carefully. You are to choose the one word or sets of words, which, when inserted in the sentence, best fits in with the meaning of the sentence as a whole. Place your answer on the line to the left of the sentence.
Example: two feet 1. The hole for balled plants should be _____
____________________ 1. The best time to transplant bare root plants is in the _______.
____________________ 2. Quick growing trees are usually ___________ lived trees.
____________________ 3. Background trees make a house look _____ than it really is.

THE MATCHING-TYPE TEST
The matching-type test usually consists of two parallel columns or lists; one of names, terms, labels, etc.; the other of definitions, achievements, charts and diagrams, and books, dates or events, etc. The pupil is required to match or associate each item of one column with the item that corresponds to it in the other column.
Do's and Don'ts in Writing Matching-Type Test Questions
1. Construct a test with more than five items but less than 10 or 15. Long lists require the test-taker to spend too much time hunting through them.
2. Select items from one subject field only. More than one subject field in the test is confusing to the student and makes it difficult for the teacher to spot student weaknesses.
3. Arrange names in alphabetical order; dates and numbers in sequence. This will save the test-taker time.
4. Have an excess number of items in the answer column. This lessens the chance of the test-taker matching an item by the process of elimination.
5. Keep the two lists entirely on the same page. This saves time and prevents flipping of pages.
6. Avoid giving away the answer with such clues as having some words singular and some plural. Also watch for revealing associations such as nationality, "slang" expressions, etc.
7. Prepare a scoring key. Score by giving a specific weight to each correctly matched item.
Example of a Matching Test
Feeds and Feeding--Animal ScienceOctober 1, 2011
_________________________Student's Name
Section I. Matching.
Instructions: From Column B, choose the items that match or connect with items in Column A. Place the corresponding letter of your answer on the line to the left of the number.
A B
Example: b 1. A carbohydrate feed. a. Linseed mealb. Cornc. Limestoned. Alfalfa Haye. B-12
______________________________________________________________________________
1. A mineral supplement. a. Linseed mealb. Corn
2. A vitamin. c. Limestoned. Alfalfa Hay
3. Can be fed to provide calcium. e. B-12
THE INTERPRETATION OF DATA-TYPE OF TESTIn this test, data are presented for the student to consider. Data may be in the form of charts or graphs. Interpretation of the data is also given. The student is required to recognize when an interpretation goes beyond the data and when an interpretation is within the data. The student is asked to "key" the individual interpretations according to a code.
Do's and Don'ts in Writing Interpretation of Data Test Questions1. Use data that are relevant to the subject area being tested.2. Include only one point in each statement. Avoid statements that are partly true according to the data given.3. Divide the interpretation statements fairly evenly among the various code divisions.4. Use correct grammar in constructing the interpretation statements.5. Do not follow a set pattern when listing the statements. Have an irregular sequence.6. Prepare a scoring key.
Example of Interpretation of Data Test
Dairy Cattle Breeding--Animal ScienceOctober 1, 2011
_________________________Student's Name
Section I. Interpretation of Data.
Instructions: Place an (A) in front of each statement that is true and can be proved by the data below. Place an (O) in front of each statement that may or may not be true, but cannot be answered sufficiently from the data below. Place an (I) in front of each statement that is incorrect according to the data below.
BelvedereBaron Belvedere
4th Duke of Duchess 32ndNorthumberland
BelvedereDuchess 34th
Duchess 29thDuchess 55th
HubbackNorfolk
NonpareilDuchess 38th
BelvedereDuchess 33rd
Duchess 19th
1A Test for Students of Vocational Agriculture on Dairy Cattle Breeding. Columbus Ohio: Agricultural Education Department, The Ohio State University.
Example: A 1. Baron Belvedere and Duchess 34th are from the same sire.______________________________________________________________________________
_______1. Duchess 19th and Duchess 29th are half sisters._______2. Belvedere is the dam of several animals in this pedigree._______3. Duchess 33rd and Baron Belvedere both carry the same amount of Belvedere blood.
TIPS ON ADMINISTERING TESTS
1. If large percentage of student's course grade depends on the test, announce date of test ahead of time so students can study.
2. Duplicate the test. Don't write questions on chalkboard or read them aloud.
3. Produce clean, legible copy. Run off extra copies.
4. Fit the test to the time available. Announce time allotted for test. Give warning five minutes before test is over.
5. Administer the test in a comfortable, familiar setting.
6. Seat the students in such a way as to lessen the temptation to copy. Keep "honest men honest".
7. Make sure all students are ready for the test; sharpened pencils, filled ink pens, proper materials, and desks clear of books, notes and other unneeded articles.
8. Distribute test papers face down. This permits all students to start at the same time.
9. Explain each test section and the instructions.
10. Supervise the test. Move quietly about the room during the test to make sure all students are following the directions. Do not perform other teacher duties while test is in progress.
11. Do not use the test as a form of disciplinary action. Do all you can to ease student tension. An encouraging smile is always helpful.
12. Make certain all students stop work promptly when time is called. Collect test booklets or answer sheets immediately while students are seated. Then call for any other materials.
13. Grade and return test papers promptly. Review with the class.
14. Have class evaluate the test. Ask them for suggestions about the test. Take steps to prevent shortcomings when preparing next test.

HOW TO RATE YOUR TESTS
Multiple Choice
Keep the reading difficulty of items low.
Do not lift a statement verbatim from a textbook.
Take care that one item does not provide clues for another item.
If an item is based on an opinion or authority, indicate whose opinion or what authority it was taken from.
Avoid the use of interlocking or interdependent items.
Let the occurrence of correct responses follow a random pattern.
Avoid trick or catch questions.
Avoid ambiguity.
Beware of items dealing with trivia.
Be sure there is one, and only one, correct or clearly best answer.
Items designed to measure understandings, insights, or the ability to apply principles should be presented in novel terms.
Beware of slang associations.
Beware of irrelevant grammatical clues.
Beware of the use of one pair of opposites if one of the pair is the correct or best answer.
Beware of the use of "none of these", "one of the above", or "all of the above" as options.
Use the negative sparingly in the stem of the item.
True/False
Must be limited to items that are definitely true or false.
Often used for specific, isolated, or trivial facts.
Can be used to test meanings and definitions of terms.
Has a high guess factor.
Beware of "specific determiners."
a. The question is usually false when "all", "always", "no", "never", and other all-inclusive terms are used.
b. The question is usually true when "usually" or "sometimes" is used.
Beware of ambiguous and indefinite terms of degree or amount (frequently, greatly, to a considerable degree).
Beware of negative statements and double negatives.
Beware of items that contain more than one statement, particularly when one is true and one is false.
Beware of items where the correct answer depends upon one insignificant word, phrase, or letter.
Matching
The items in a set should be homogeneous.
The number of answer choices should be greater than the number of problems presented.
The set of items should be relatively short.
Response options should be arranged in a logical order.
The directions should indicate whether an answer choice may be used more than once.
Short Answer and Completions
Good for testing knowledge of vocabulary, identification of concepts, ability to solve math problems.
Beware of indefinite or "open" completion items.
Omit only key words.
Do not leave too many blanks in the statements.
Blanks are better put near the end of a statement.
If a problem requires a numerical answer, indicate the units in which it is to be expressed.
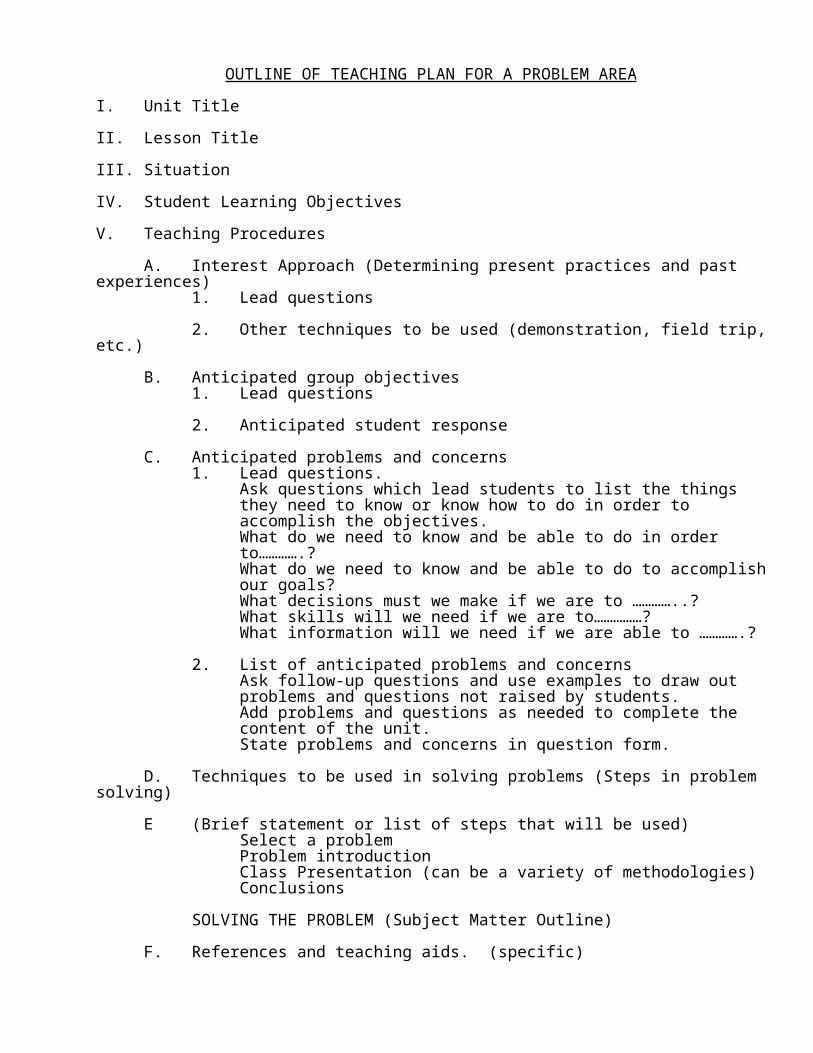
Essay Tests
Before writing the question, know exactly what mental process of the student you want to bring out.
Start essay questions with "compare", "contrast", "give the reasons for", "present the arguments for and against", "give original example of", "explain how or why".
Use clear, precise questions.
Don't ask "what do you think", or "in your opinion", or "write all you know about."
Do not have too many questions for time available.
Do not mix essay and objective questions when time is limited.
Do not offer a choice of questions to be answered.
Make a list of all pertinent points that should be covered in the student's answer for each question. Use these when grading.

PRINCIPLES AND PROCEDURES FOR THE MECHANICAL FEATURESOF
CLASSROOM TESTS
The mechanical features of a test - how the test is printed and arranged, what instructions are given to the candidates, how the test is to be scored - are no less important than the test items themselves to insure validity and reliability as well as usability. Careful attention by the teacher to test mechanics will not only enhance the value of the test as an evaluation tool but pay handsome dividends in saving teacher time and effort.
The principles and procedures outlined below can serve as a guideline for developing classroom tests. It may also help diagnose the effectiveness preventing factor in the mechanical features of a test. No "score" is possible.
MECHANICAL FEATURES OF CLASSROOM TESTS:
A. Item Format
1. Number each test item.
2. Be sure to complete each item on a page.
3. Have reference material for an item appear on the same page or on a facing page.
4. Arrange item responses for legibility and economy of space.
B. Scoring Arrangements
1. Consider the practicability of a separate answer sheet.
2. Have students indicate their answers with symbols rather than underlining or copying.
3. Arrange answer spaces in a vertical line for easy scoring.
4. If answer spaces are placed at the right of the page, clearly associate the answer space the corresponding item.
5. Use answer symbols that are free from possible ambiguity due to careless penmanship or deliberate hedging (circles and capital letters rather than lower case letters.)
6. Use answer symbols that are free from confusion with the content of the responses.
C. Distribution of Correct Responses
1. Distribute correct answers so that the same answer does not appear in a long series of consecutive questions.
2. Avoid an excessive proportion of items in the test with the same answer.
3. Avoid a fixed repeating sequence of answers.
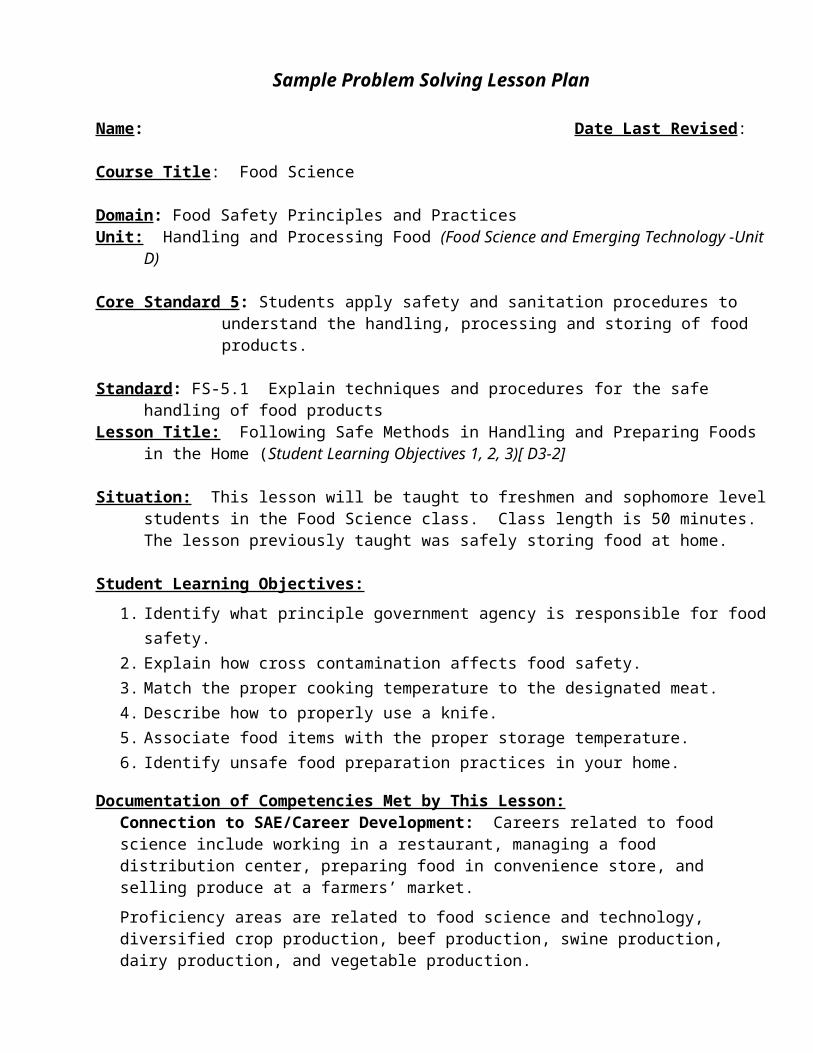
STEPS TO CONSTRUCTING EVALUATION DEVICES:
1. Determine the objectives for which you are trying to test.
2. List the facts or principles that contribute to the realization of each objective.
3. Construct the type of test item that will best measure the extent to which each objective has been reached.
4. Assemble the test items, group together those that are of the same form (all matching questions together), and within each group, arrange questions so that those, which deal with related material, will be together.
5. Prepare the necessary directions, making them clear, adequate, and concise.
6. Set the test aside and let it "rest" for a while.
7. Construct a key (acceptable answers), if a test.
8. Re-examine the device at a later time and before giving it to students see if it communicates what you intended. USE THE DEVICE YOURSELF.
9. Have some other person (another teacher, friend, your husband) criticize the test and if possible, actually take the test or use the device.
10. Make necessary revisions.
11. After the test has been administered, study the student responses carefully; correct any weaknesses in the test or device that their responses reveal; continue to revise and improve; add the "best" questions to your file of test items for future use.
COMMON ERRORS IN TEACHER-MADE TESTS:
--- Failing to test over material covered.
--- Failing to have definite objectives in advance of tests that the students know and understand and accept as their own.
--- "Loading" tests with trivial items (the small print in the book).
--- Testing for memorization and not for understanding.
--- Using ambiguous terms in questions presented in such a way that students interpret the meaning and a different way than intended.
--- Using a complicated method of recording answers (when a simple method would be more effective---especially for grading!!!)
--- Giving directions that are not clear or are misleading or time-consuming.
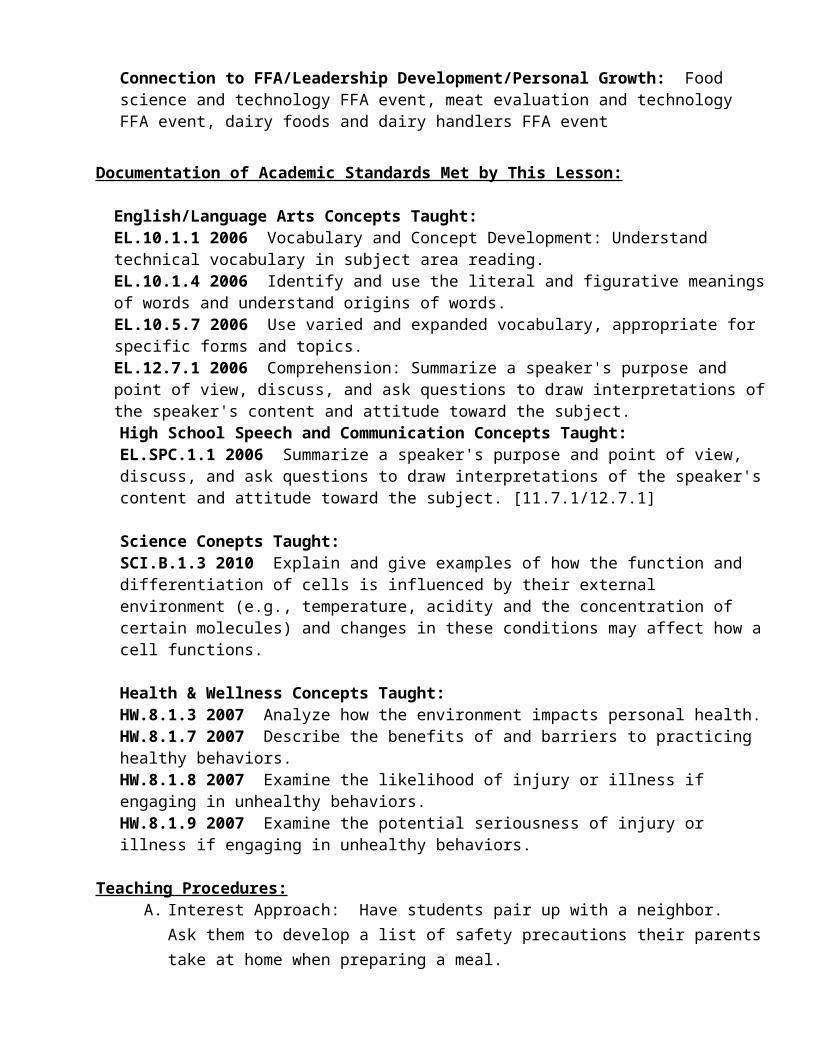
SUGGESTIONS FOR TEST CONSTRUCTION
A. Completion test question
1. Keep the ratio of words given to words omitted very high.2. Avoid too many blanks or overmutiliated statements.3. Make each blank call for the completion of a single idea.4. The blanks should refer only to omitted key words ad phrases, rather than trivial details.5. Make all blanks the same length to avoid giving clues.6. Avoid using sentences or paragraphs from the textbook.7. If the answer involves numerical units--ex/.20 yards, 72 miles, 8 points, -- do not leave
blanks for the names of the units.8. Make sure that the statement is sufficiently complete so that the pupil will complete the
item correctly.9. Avoid the omission of long phrases.10. Remember that unless a completion item is very carefully constructed, it is likely to
become a measure of general reasoning ability.11. Whenever possible, avoid "an" or "a" immediately before a blank.
B. True-False Item
1. Avoid statements that are broad generalizations, since such statements are practically always false.a. Always, never, all, no, none, nothing, only, alone are specific determiners which
usually indicate that the sentences are false.b. Generally, sometimes, usually, most are specific determiners that usually indicate
that the sentence is true.2. Avoid trivial and meaningless statements.3. In general, negative statements should be avoided in true-false items, chiefly because
they are misread.4. Avoid developing true-false tests by extracting statements from textbooks. Many
statements removed from context are ambiguous. The use of statements from the text encourage rote learning and memorizing attitude during study.
5. Avoid statements that are partly true and partly false.6. Avoid the use of the double negative.7. Avoid ambiguous statements since they may be either true or false according to the
particular interpretation given to them.8. If items express opinions, it is important to attribute the opinions to some source.9. Long and involved statements should never appear in true-false tests because they tend to
measure certain aspects of reading comprehension that are better measured by other techniques.
10. Trick questions and catch questions should never have place in an examination.11. True items and false items should have the same average length--true items tend to be
somewhat longer than false items.12. There should be a random distribution of true and false items, and there should not be
any definite proportion of true and false items.13. Avoid unfamiliar, figurative, or literary language.
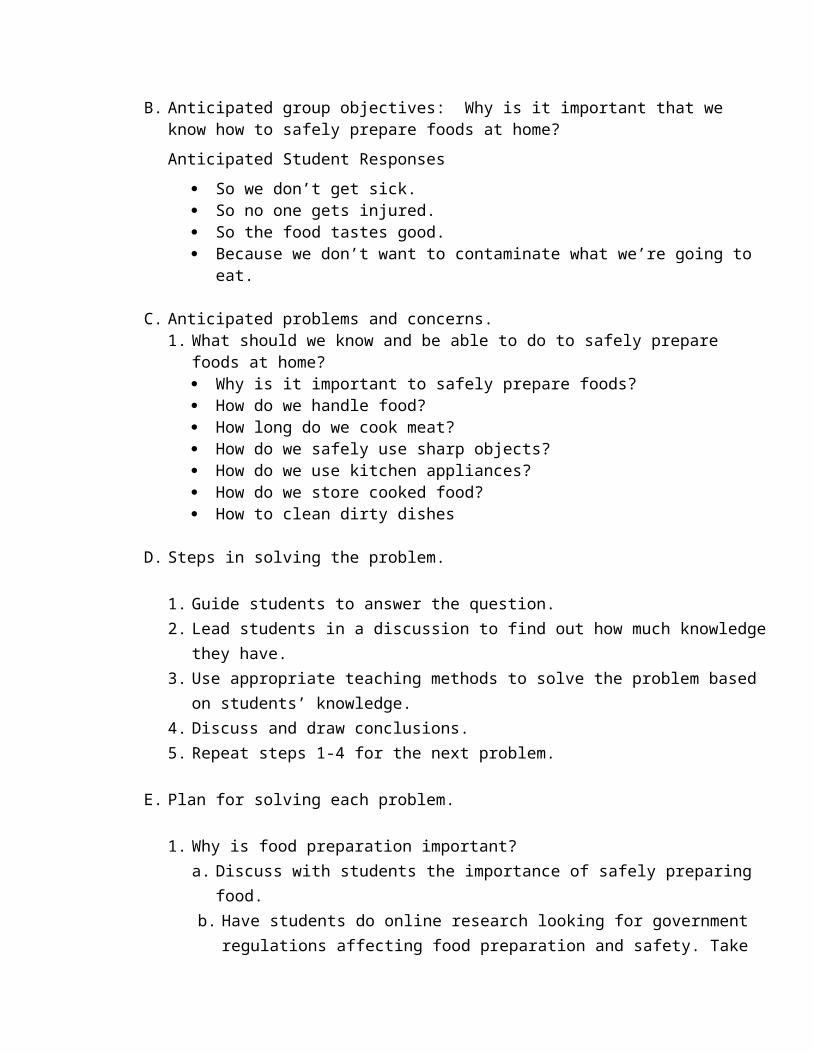
C. Multiple-Choice test questions
1. General rules
a. The item as a whole should present a problem of a kind that will enable the student, if they can solve it, to show evidence of the attainment of an important goal.
b. Items that attempt to measure insights must include an element or novelty.c. The language used in stating the problem should be appropriate to the subject
matter.d. The items in the test should be independent of one another, and the information
supplied in one item should not give away the answer to another.
2. Suggestions for stating a problem
a. The lead of the item must present a single central problem.b. The problem must be accurately stated.c. The problem should not measure the ability to understand complex sentence
structure except when it is desired to measure that particular ability.d. Only one type of multiple choice item should be used in the same questions of the
test.e. Use at least four or five possible responses in order to minimize chance successes.f. Do not mix items with varying number of possible responses in the same test if
the scores are to be corrected for guessing.g. Arrange the correct response to occur in the same position not more than two or
three times in succession.h. Make the first, second, third, fourth, - possible responses the correct one in about
equal number.i. Formulate all the possible responses in such a way that they will appear plausible
below the ability level at which the item is intended to discriminate.j. Use the direct questions form when possible because it is less unlikely to be
ambiguous and is the most natural form of the item.k. When the incomplete sentence for is used, make it equivalent to a direct question
and place the alternate response at the end of the statement.l. Avoid wording statements in such a way that clues are provided through work
matching, grammatical consistency or textbook phraseology.m. The problem should be stated in a positive form. If stated negatively words as
not and never and such prefixes an un in undesirable are capitalized in order to bring them to the attention of the reader.
n. If an item requires the student to express an opinion or value judgment, it should in most cases ask the student to express, not their own opinion, but that of the authority specified in the item.
3. Rules for developing suggested solutions
a. The right solution should unquestionably be right and at least two persons should review the items and agree upon the correct solution.
b. The suggested wrong answers should represent errors commonly made by students who are to be tested, not popular misconceptions held by people in general.
c. Irrelevant cues should direct the examinee away from the right answers, if they are unable to solve the problem. They should never direct them toward the right answer.
(1) Examples of "specific determiners"--cues that lead the student to choose an answer without having a rational basis for their choice.a) Close association through similarity of wording between the problem and correct answer.b) More association of a sound between a key work in the lead and a key word in an
alternative may result in the student selecting that alternative.c) Alternatives that are drawn from a different domain than the one under consideration can
be eliminated by the examinee without further understanding of the problem.d) Absolute and all inclusive terms such as never, always, sole and all should not be
included in wrong alternatives.e) Items do not make grammatically correct sentences in combination with each alternative.f) Inclusion of non-functional alternatives when functional alternatives cannot be found.g) Answers that are much longer or much shorter than others should be avoided.
D. Matching Items
1. Optimum number of pairs to be selected is probably between five and seven. When the number is large the student tends to waste time in hunting for the correct responses.
2. It is better to include two or three extra responses or to permit a response to be used more than once in order to prevent guessing and selection by elimination.
3. Always explain in the directions the basis upon which the matching is to be made and the fact that a response may be used more than once.
4. The material included in the matching should contain long statements, phrases or definitions: the response column should contain single words or short phrases unless the content of the item clearly indicates otherwise.
5. Items in the response column should be arranged systematically to facilitate finding them. They may be arranged alphabetically, chronological or in numerical sequence.
E. Free-Response items
1. Formulate the item in such a way that truly one response is correct: this response should be a word, number or at most a short phrase.
2. Avoid items that supply so much of the crucial information that may be answered correctly through the exercise of general intelligence.
3. Avoid words that afford clues as to correct response.4. If the blank spaces to be filled in are arranged in a vertical column, scoring is facilitated.5. Do not use exact statements copied from the textbook because this encourages a mental set
during study that results in memorizing rather than understanding.
GENERAL PRINCIPLES OF TEST CONSTRUCTION
A. Planning the test
1. Adequate provision should be made for evaluating all the important outcome of the instruction.
2. The test should reflect the approximate proportion of emphasis in the course.3. The nature of the test must take into consideration the purpose it is to serve.4. The nature of the test must take into consideration the conditions under which it is
administered.
B. Preparing the test
1. The preliminary draft of the test should be prepared as early as possible.2. As a rule the test should include more than one type of item.3. The content of the test should range from very easy to very difficult for the group being
measured.4. It is usually desirable to include more items in the preliminary draft of the test than will
be needed in the final form.5. After some time has elapsed, the test should be subjected to critical revision.6. The items should be so phrased that the content rather than the form of the statement will
determine the answer.7. The items should be so worded that the whole content functions in determining the
answer rather than part of it.8. All the items of a particular type should be placed together in a test.9. The items in the test should be arranged in order of difficulty.10. A regular sequence in the pattern of response should be avoided.11. Provision should be made for a convenient record of pupil responses.12. The directions to the pupils should be as clear, complete, and concise as possible.
C. Trying out the test
1. Every reasonable precaution should be taken to insure normal conditions for the test.2. The time allowance for the test should be generous.3. The scoring procedures should be as simple as possible.4. Before the actual scoring begins, answer keys and scoring keys should be prepared.
D. Evaluating the test
1. The difficulty of the test is a rough indication of its validity.2. The validity of the individual items in the test is determined by their ability to
discriminate between pupils who rank high and those who rank low on the test as a whole.
3. It is good practice to have the items interpreted or criticized by persons who have taken the test.
4. Whenever possible, the results of the test should be checked against outside criticism.5. It is sometimes desirable to obtain the reliability coefficient of the test.6. Leave adequate space for the pupil to write their responses, but avoid using blunt lines of
different lengths to indicate the length of the proper responses. 7. Use the direct question form in preference to the incomplete statement form.
Appendices
Appendix A Candidate Disposition Assessment Process
Appendix B Teaching Evaluation Forms
Appendix C Bloom’s Taxonomy
Appendix D Grade Sheet Rubric for Written Lesson Plans
Appendix E S.A.I. Lesson Packet Grade Sheet
Purdue UniversityTeacher Education Council
Candidate Disposition Assessment Process
Introduction:
All teacher education students, faculty, and academic counselors will be provided with a copy of the Dispositions To Be Assessed (Form D-1) and the Dispositional Assessment Form (Form D-2) via the Office of Professional Preparation and Licensure (OPPL). Students will be made aware that repeated violations of these dispositions will constitute grounds for a decision regarding separation from the Purdue University Teacher Education Program. This information will also be published in appropriate teacher education documents and reinforced throughout the program.
Procedure:
The Dispositional Assessment Form (Form D-2) may be utilized by all faculty, staff, and classroom teachers to bring a deficiency with regard to professional conduct to the attention of the Teacher Education Council Special Cases Committee. At the conclusion of each semester, course instructors will be asked to submit a Form D-2 for any student who has exhibited a deficiency with respect to the INTASC dispositions listed in Form D-1. The completed form will be distributed to the student, the student’s academic advisor, OPPL, and the Office of Field Experiences (OFE). The student’s academic advisor will monitor each student’s folder to ascertain if more than one D-2 form has been issued to the student.
If a student receives two D-2 forms, the academic counselor will notify the appropriate department head or program chair within 14 days of the filing of the second form. The department head or program chair will schedule a meeting with the student, the academic counselor, the course instructor/coordinator of the course in which a deficiency was observed, and with the individuals submitting the Form D-2s within 14 days to discuss the specific concerns that need to be addressed. (If notification of the second form D-2 falls at the end of a term, the department head or program chair will schedule the meeting within 14 days after the beginning of the next full term in which the student is enrolled.) If the meeting determines that a dispositional issue does exist, a list of actions that the student agrees to follow will be prepared in memo form, and both the student and department head or program chair will sign the agreed course of action to be taken. A copy of the actions to be taken will be placed in the student’s file and sent to OPPL and OFE. The student may also submit any additional information that s/he wishes to include in the record.
If a student receives a third D-2 form, the academic counselor will notify the appropriate department head or program chair within 14 days of the filing of the form. The department head will notify the student and the Director of Teacher Education (Dean of the COE) within 7 days of the third D-2 form. The Director of Teacher Education will convene the TEC Special Cases Committee within 14 days of notification and will provide documentation regarding the three D-2 forms and the Course of Action Memo. (If notification of the third form D-2 falls at the end of a term, the department head or program chair will schedule the meeting within 14 days after the beginning of the next full term in which the student is enrolled.) The student will be asked to provide any information s/he wishes regarding the three D-2 forms in writing to the TEC Special Cases Committee. The Special Cases Committee shall meet to review the documentation provided and also meet with the student and his or her academic counselor. The Special Cases Committee shall provide one of three recommendations to the Director of Teacher Education within the 14-day period. The recommendations can be: continue in the program, removal from the program, or not enough evidence was provided to make a decision in which case the student continues in the program. Within 14 days of receiving the recommendation from the TEC Special Cases Committee, the Director of Teacher Education shall make a decision on the case and notify all parties involved including the student, academic counselor, department head, OPPL, OFE, and TEC. The student may appeal further to the Office of the Provost within 14 days of receiving the decision of the Director of Teacher Education.
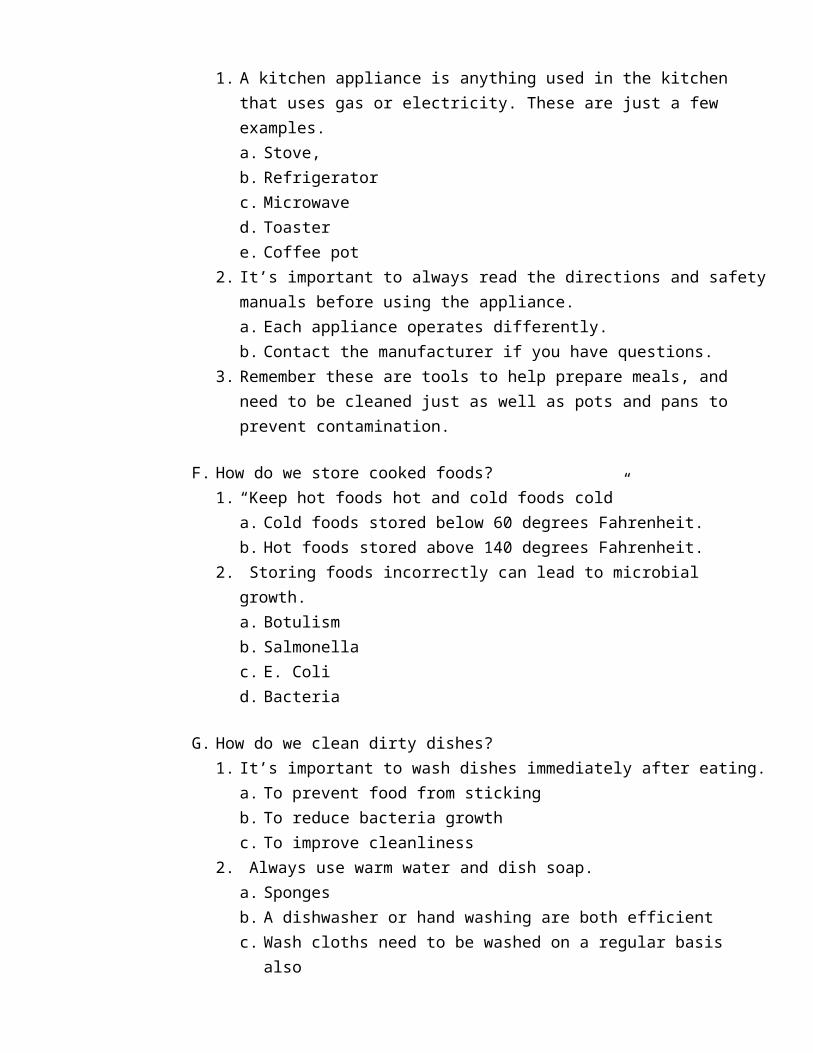
Purdue UniversityTeacher Education Council Form D-1
Dispositions to be Assessed
Note: Specific dispositions for each licensing area that are tied to the dispositions on Form D-1 may be found at the following website: http://www.doe.state.in.us/dps
Numbers in parentheses refer to the Interstate New Teacher Assessment and Support Consortium (INTASC) principles addressed.
1. Is sensitive to community and cultural norms, and engages in and supports appropriate professional practices for self and colleagues. (3) (9)
2. Demonstrates a willingness to work with other professionals to improve the overall learning environment for students. (7) (9) (10)
3. Takes responsibility for establishing a positive classroom climate and recognizes the importance of peer relationships in establishing a climate of learning. (3) (5)
4. Respects students as individuals and respects students' privacy and confidentiality of information. (3) (10)
5. Treats all students fairly and equitably, valuing individual differences and experiences. (2) (3) (5) (6) (8) (9)
6. Demonstrates an awareness of all aspects of a child’s well being (cognitive, emotional, social, and physical). (3) (6) (10)
7. Shows commitment to adapting instruction to students’ responses, ideas, and needs in order to facilitate the development of students’ critical thinking, independent problem solving, and performance capabilities. (1) (4) (5) (9)
8. Demonstrates flexibility and is open to adjustment and revision based on needs and changing circumstances. (1) (4) (7)
9. Exhibits behaviors that show a commitment to planning, reflection, assessment, and learning as on-going processes. (1) (5) (7) (8) (9)
10. Demonstrates thoughtful, effective verbal and nonverbal communication and responsive listening. (6)
11. Demonstrates enthusiasm for the discipline(s) taught, keeps abreast of new ideas and developments in the field, and sees connections to everyday life. (1)
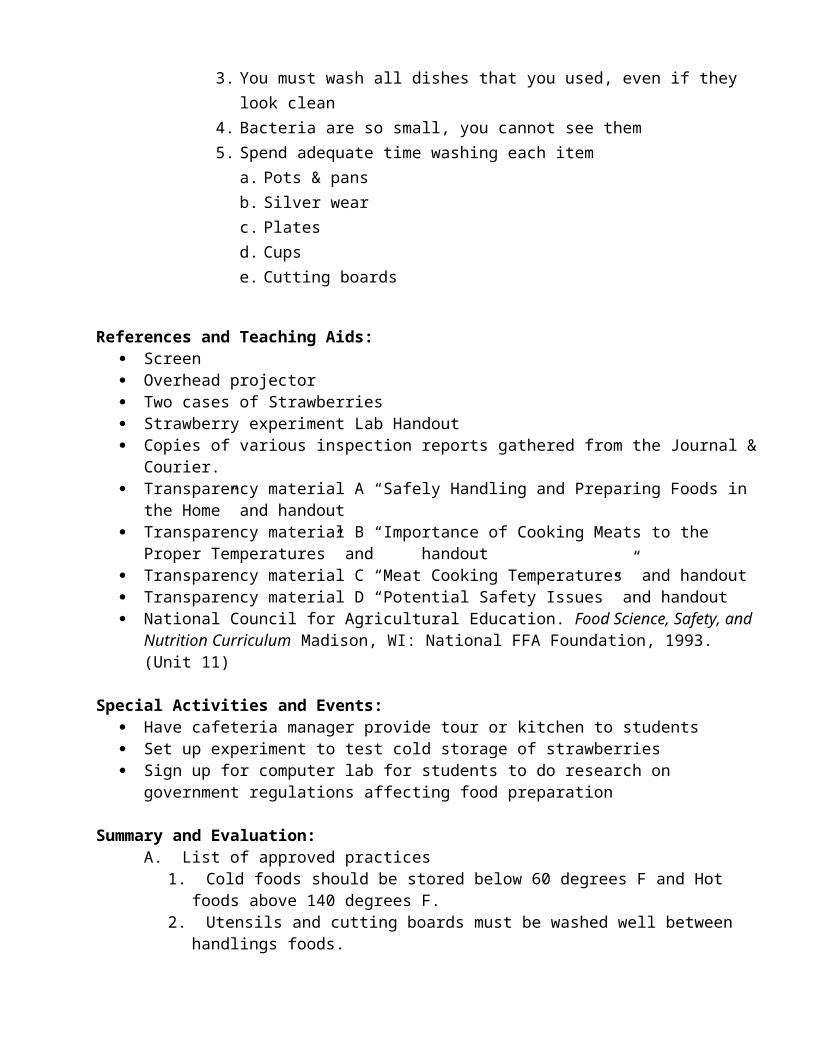
Purdue UniversityTeacher Education Council Form D-1, cont'd.
Assessment Categories and Examples of Deficiencies
The following categories of dispositions will be assessed. Examples of behaviors that might be consistent with dispositional deficiencies are given. This list is meant to be illustrative of possible dispositional deficiencies but is neither intended to be exhaustive nor prescriptive. (Numbers in parentheses refer to the eleven dispositions identified above.)
Legal/Ethical Conduct Engages in illegal or unethical conduct involving minor children or which would be grounds for
dismissal from a teaching position. (1) Fails to maintain privacy and confidentiality of student information. (4) Violates the Purdue University Code of Student Conduct. (1)
Attendance/Punctuality Is frequently late or absent except when excused in advance. (1)
Professional Appearance and Demeanor Fails to act or dress according to the standards of the school where the candidate is placed. (1) Fails to maintain composure in the classroom. (1) (3)
Reliability/Dependability Frequently fails to complete assignments, duties, or tasks on time. (1) (9)
Interactions with Others Fails to interact in a positive and professional manner with students, peers, teachers, university
personnel, and others. (2) (4) (5)Fairness/Lack of Bias
Shows overt bias, prejudice, or lack of fairness toward certain students or groups of people. (3) (4) (5)
Safety/Responsible Conduct Acts in a dangerous or irresponsible manner that might put students at risk. (1) (6)
Flexibility/Adaptability/Openness to Feedback Is unable to adapt teaching to changing classroom circumstances. (7) (8) Reacts defensively or antagonistically to feedback about performance. (1) (8)
Communicative Effectiveness Makes frequent errors in oral and/or written communications with students, peers, teachers,
university personnel, and others. (10)Commitment to Student Learning
Makes negative comments about students' abilities to learn. (6) (7) (9) Unable to adapt instruction to meet varying needs and abilities. (7) (8)
Commitment to Improving Teaching Performance Makes no effort to improve instructional practices and teaching activities. (7) (8) (9) (10)
Commitment to Profession Exhibits poor attitude toward the discipline and/or teaching profession. (1) (11)
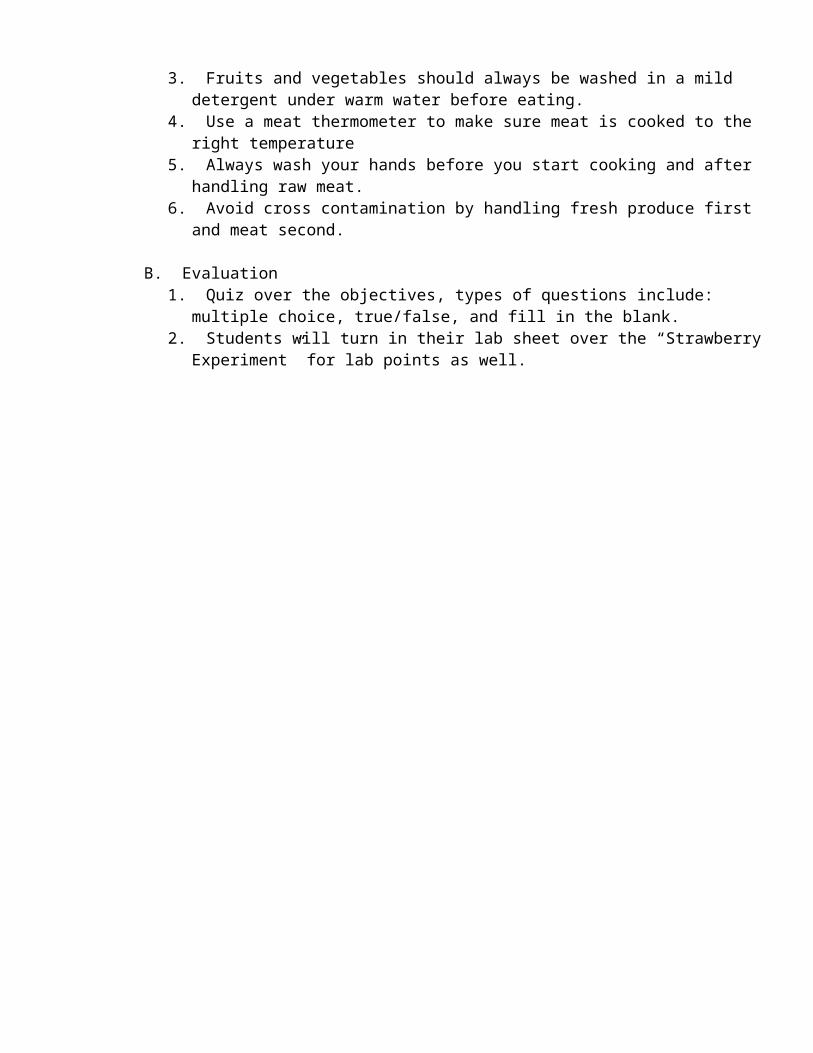
Purdue UniversityTeacher Education Council Form D-2
Dispositional Assessment Form
This form is to be used by faculty, staff or classroom teachers who observe a teacher education candidate's dispositional deficiency as related to their teacher education program of study. For a list of dispositions and possible deficiencies, please refer to Form D-1.
Please complete the entire form and submit it to the department or program area in which the candidate is majoring (e.g., elementary education-Department of Curriculum and Instruction) after you have discussed it with the student.
Candidate Name________________________ Student ID No.__________Date _______ Form Completed By___________________________ Phone Number ______________
Check any category for which a dispositional deficiency has been observed. Legal/Ethical Conduct
Attendance/Punctuality
Professional Appearance and Demeanor
Reliability/Dependability
Interactions with Others
Fairness/Lack of Bias
Safety/Responsible Conduct
Flexibility/Adaptability/ Openness to Feedback
Communicative Effective-ness
Commitment to Improving Teaching Performance
Commitment to Student Learning
Commitment to Profession
Other, please specify
For any dispositional area identified as deficient above, please describe the context of this assessment in specific, observable terms (e.g., course number and name, where situation occurred, specifically what transpired, date) and relate it to the deficiency area(s) addressed. Use the reverse side of the page and/or attach additional sheets if necessary.
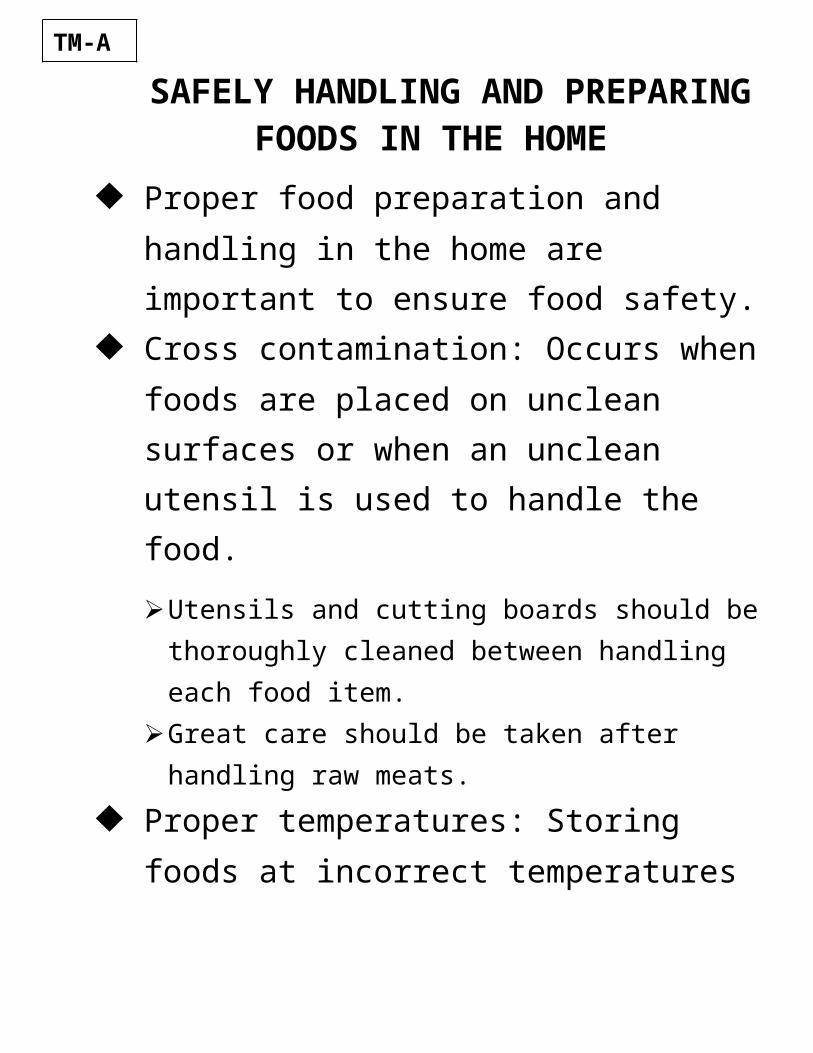
Name: Date of Presentation:
Title of Lesson:
YDAE 440
EVALUATING TEACHINGTHE INTEREST APPROACH
Rating*1. Arousing and maintaining interest:
a. The teacher incorporated differentiated instructionalstrategies to arouse the interest of the students byhelping them see the importance of the lesson interms of their needs. VP P F G VG E
10b. The teacher effectively engaged prior knowledge of
students in connecting to lesson and maintained the interest of the students by appealing to various student desires and values and by varying the types of student participation. VP P F G VG E
102. Stimulating student thinking:
a. The teacher used higher level questions to encourage student thinking and participation. VP P F G VG E
10b. The teacher used a variety of methods to check
for understanding. Questions helped the studentsto think and reason, to make judgments,and to analyze problem situations rather than emphasize memorization. VP P F G VG E
103. Use of instructional materials:
a. The teacher effectively integrated technology as a toolto engage students. Selected appropriate instructionalmaterials (Social Media, charts, samples, videos,reference books, pamphlets, chalkboard, clickers,Smartboard, PowerPoint, etc.) for the interest approach. VP P F G VG E
5b. The teacher effectively used ways of engaging with
content to reflect different learning modalities orintelligences. VP P F G VG E
5
Total Score
OVERALL EVALUATION OF INTEREST APPROACH VP P F G VG E
*Rating Scale: VP-very poor; P-poor; F-fair; G-good; VG-very good; and E-excellent

Agricultural EducationYDAE 440
Peer Teaching Evaluation (For use by YDAE 440 Instructor)
Name: Date of Presentation:
Title of Lesson:
The Teacher:Preparation Rating
1. Routines, transitions, and procedures are well executed. 2. Had all materials together before start of class (lesson plan to instructor).
Presentation
3. Importance of objective/lesson is explained so that students understandwhy they are learning what they are learning (Interest Approach).
4. Incorporates differentiated instructional strategies in planning to reachevery student at his/her level of understanding.
5. Incorporates a variety of assessments/checks for understanding as well assummative assessments where necessary.
6. Teacher restates and rephrases instruction in multiple wasy to increaseunderstanding.
7. Students participate in each others’ learning of content throughcollaboration during the lesson.
8. Teacher frequently develops higher-level understanding througheffective questioning.
9. Teacher responds to misunderstandings with effective scaffoldingtechniques.
10. Lesson is accessible and challenging to almost all students. 11. Lesson builds on students’ prior knowledge of key concepts and skills
and makes this connection evident to students. 12. Students have opportunity to meaningfully practice, apply, and
demonstrate that they are learning.
Materials/Media
13. Teacher effectively integrates technology as a tool to engage studentsin academic content.
14. Teacher uses a variety of methods to check for understanding.
General15. Appropriately handled discipline, used time wisely, used proper
teaching methods, appropriate content, other.
TOTAL FOR GRADE
Suggestions (Also see back):Rating Scale: 5 = A or not applicable4 = B3 = C2 = D1 = F
Agricultural Education Peer Evaluation Form (For use by YDAE 440 Students)
Name: Date of Presentation:
Title of Lesson:
The Teacher:Preparation
1. Routines, transitions, and procedures are well executed. 2. Had all materials together before start of class.
Presentation
3. Importance of objective/lesson is explained so that students understandwhy they are learning what they are learning (Interest Approach).
4. Incorporates differentiated instructional strategies in planning to reachevery student at his/her level of understanding.
5. Incorporates a variety of assessments/checks for understanding as well assummative assessments where necessary.
6. Teacher restates and rephrases instruction in multiple wasy to increaseunderstanding.
7. Students participate in each others’ learning of content throughcollaboration during the lesson.
8. Teacher frequently develops higher-level understanding througheffective questioning.
9. Teacher responds to misunderstandings with effective scaffoldingtechniques.
10. Lesson is accessible and challenging to almost all students.
11. Lesson builds on students’ prior knowledge of key concepts and skillsand makes this connection evident to students.
12. Students have opportunity to meaningfully practice, apply, anddemonstrate that they are learning.
Materials/Media
13. Teacher effectively integrates technology as a tool to engage studentsin academic content.
14. Teacher uses a variety of methods to check for understanding.
General15. Appropriately handled discipline, used time wisely, used proper teaching
methods, appropriate content, otherOverall Suggestions:

YDAE 440 MICRO-LAB(Digital Video Self-Critique of Interest Approach)
Name:_____________________________________ Date Lesson Taught:__________________
Critique of teaching: Interest Approach – Due one week after lesson is taught
Please answer the following questions while observing your Digital Video performance. The questions are purposely designed to be answered by the recording observance only so you will consciously evaluate yourselves. Remember that the lab is not a true classroom environment, but we'd like you to make it as real as possible. In doing this, you will make your student teaching more effective.
(1) Exactly how long did you teach? Minutes
(2) Rate yourself using the following variables:
E - ExcellentG - GoodP - PoorD - Desire Help
a. Enthusiasm __________
b. Developed successful interest approach __________
c. Audible voice __________
d. Right speed of voice _________
e. Use of high level questions to obtain student participation _________
f. Checked for understanding and modified lesson and responded accordingly __________
g. Used a variety of methods to check for understanding __________
h. Responded to misunderstandings with effective scaffolding techniques ___________
i. Effectively used instructional technology and visuals __________
j. Interest approach used one or more Principles of Learning __________
(3) Now that you've sat in the student's position, how effective were your differentiated instructional strategies in planning to reach every student? Be sure to explain how it was either effective or how you might change the teaching to make them more effective.

YDAE 440 MICRO-LAB(Digital Video Self-Critique of Peer Teaching #1)
Name:_________________________________________ Date Lesson Taught:__________________
Critique of teaching: Peer Teaching #1 - Due one week after lesson is taught
Please answer the following questions while observing your Digital Video performance. The questions are purposely designed to be answered by the recording observance only so you will consciously evaluate yourselves. Remember that the lab is not a true classroom environment, but we'd like you to make it as real as possible. In doing this, you will make your student teaching more effective.
(1) Exactly how long did you teach? Minutes
(2) Rate yourself using the following variables:
E - ExcellentG - GoodP - PoorD - Desire Help
a. Enthusiasm __________
b. Developed successful interest approach __________
c. Audible voice __________
d. Right speed of voice _________
e. Use of high level questions to obtain student participation _________
f. Checked for understanding and modified lesson and responded accordingly __________
g. Used a variety of methods to check for understanding __________
h. Responded to misunderstandings with effective scaffolding techniques ___________
i. Effectively used instructional technology and visuals __________
(3) Now that you've sat in the student's position, how effective were your differentiated instructional strategies in planning to reach every student? Be sure to explain how it was either effective or how you might change the teaching to make them more effective.
Continued on Next Page
(4) How did you explain the importance of the lesson so that students understood why they are learning what they are learning? How did your students demonstrate that they understood the connection between prior knowledge and this lesson?
(5) How did you restate and rephrase instruction in multiple ways to increase understanding? What questions or strategies did you use?
(6) List the areas you feel you need to work on for your next microteaching.

YDAE 440 MICRO-LAB(Digital Video Self-Critique of Peer Teaching #2)
Name:________________________________________ Date Lesson Taught:_______________
Critique of teaching: Peer Teaching #2 (Lecture-Discussion) - Due one week after lesson is taught
Please answer the following questions while observing your Digital Video performance. The questions are purposely designed to be answered by the recording observance only so you will consciously evaluate yourselves. Remember that the lab is not a true classroom environment, but we'd like you to make it as real as possible. In doing this, you will make your student teaching more effective.
(1) Exactly how long did you teach? Minutes
(2) Rate yourself using the following variables:
E - ExcellentG - GoodP - PoorD - Desire Help
a. Enthusiasm __________
b. Developed successful interest approach __________
c. Audible voice __________
d. Right speed of voice _________
e. Use of high level questions to obtain student participation _________
f. Checked for understanding and modified lesson and responded accordingly __________
g. Used a variety of methods to check for understanding __________
h. Responded to misunderstandings with effective scaffolding techniques __________
i. Students demonstrated through work or comments that they understand lesson ___________
j. Effectively used instructional technology and visuals __________
(3) Now that you've sat in the student's position, how effective were your differentiated instructional strategies in planning to reach every student? Be sure to explain how it was either effective or how you might change the teaching to make them more effective..
Continued on Next Page
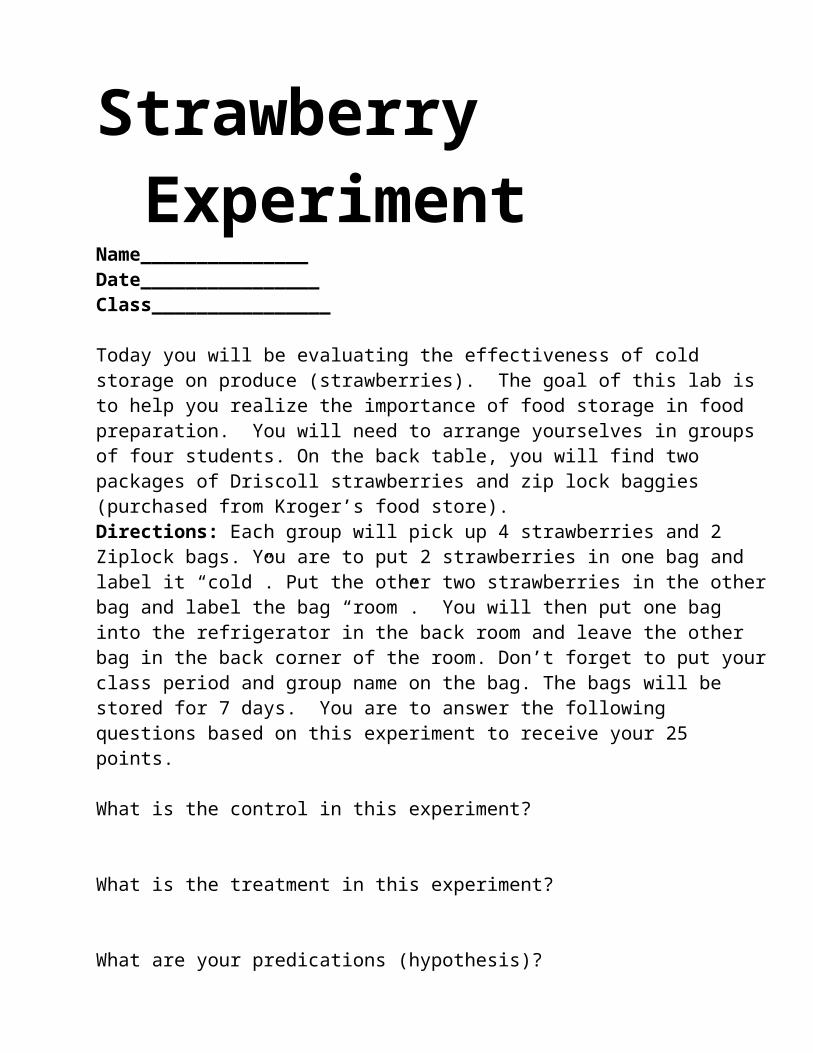
(4) How did you explain the importance of the lesson so that students understood why they are learning what they are learning? How did your students demonstrate that they understood the connection between prior knowledge and this lesson?
(5) How did you restate and rephrase instruction in multiple ways to increase understanding? What questions or strategies did you use?
(6) Explain how you provided students with the opportunity to meaningfully practice, apply, and/or demonstrate that they were learning.
(7) What methods did you use to check for understanding?
(8) List the areas you feel you need to work on for your next microteaching.
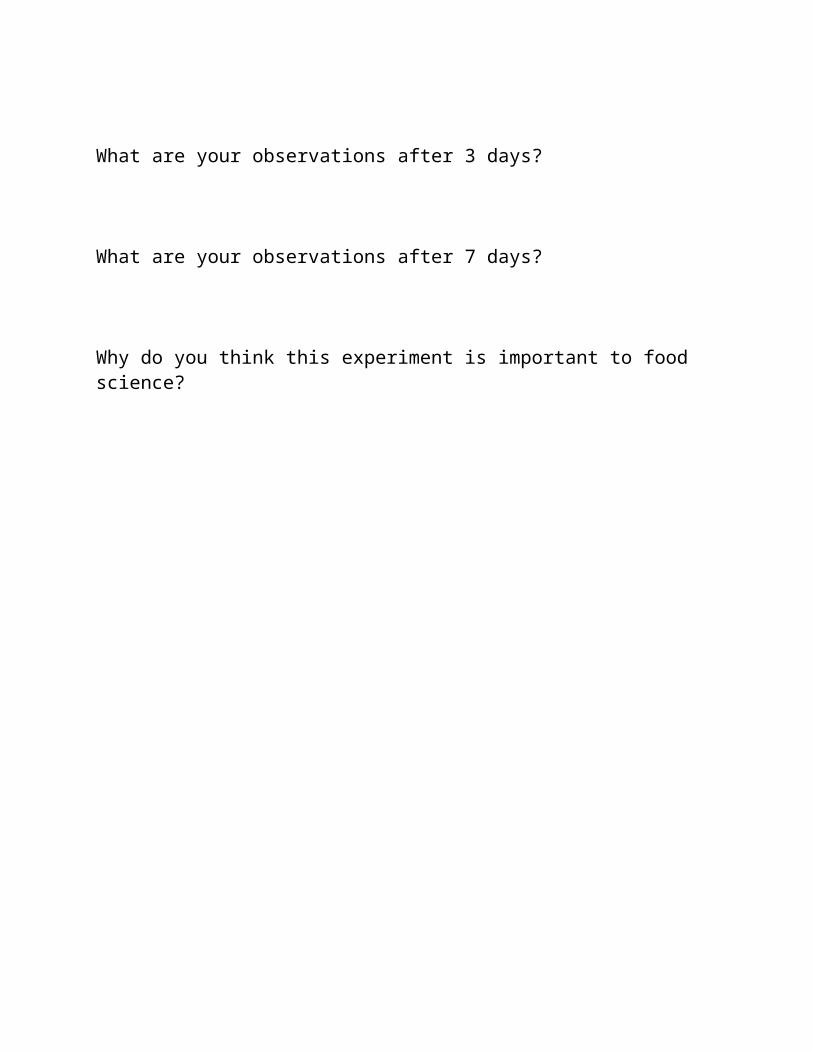
YDAE 440 MICRO-LAB(Digital Video Self-Critique of Peer Teaching #3)
Name:__________________________________________ Date Lesson Taught:_______________
Critique of teaching: Peer Teaching #3 (Middle School) - Due one week after lesson is taught
Please answer the following questions while observing your Digital Video performance. The questions are purposely designed to be answered by the recording observance only so you will consciously evaluate yourselves. Remember that the lab is not a true classroom environment, but we'd like you to make it as real as possible. In doing this, you will make your student teaching more effective.
(1) Exactly how long did you teach? Minutes
(2) Rate yourself using the following variables:
E - ExcellentG - GoodP - PoorD - Desire Help
a. Enthusiasm __________
b. Developed successful interest approach __________
c. Audible voice __________
d. Right speed of voice _________
e. Use of high level questions to obtain student participation _________
f. Checked for understanding and modified lesson and responded accordingly __________
g. Used a variety of methods to check for understanding __________
h. Responded to misunderstandings with effective scaffolding techniques __________
i. Students demonstrated through work or comments that they understand lesson ___________
j. Effectively used instructional technology and visuals __________
k. Effectively handled discipline problem(s) _____________
(3) Now that you've sat in the student's position, how effective were your differentiated instructional strategies in planning to reach every student? Be sure to explain how it was either effective or how you might change the teaching to make them more effective.
Continued on Next Page
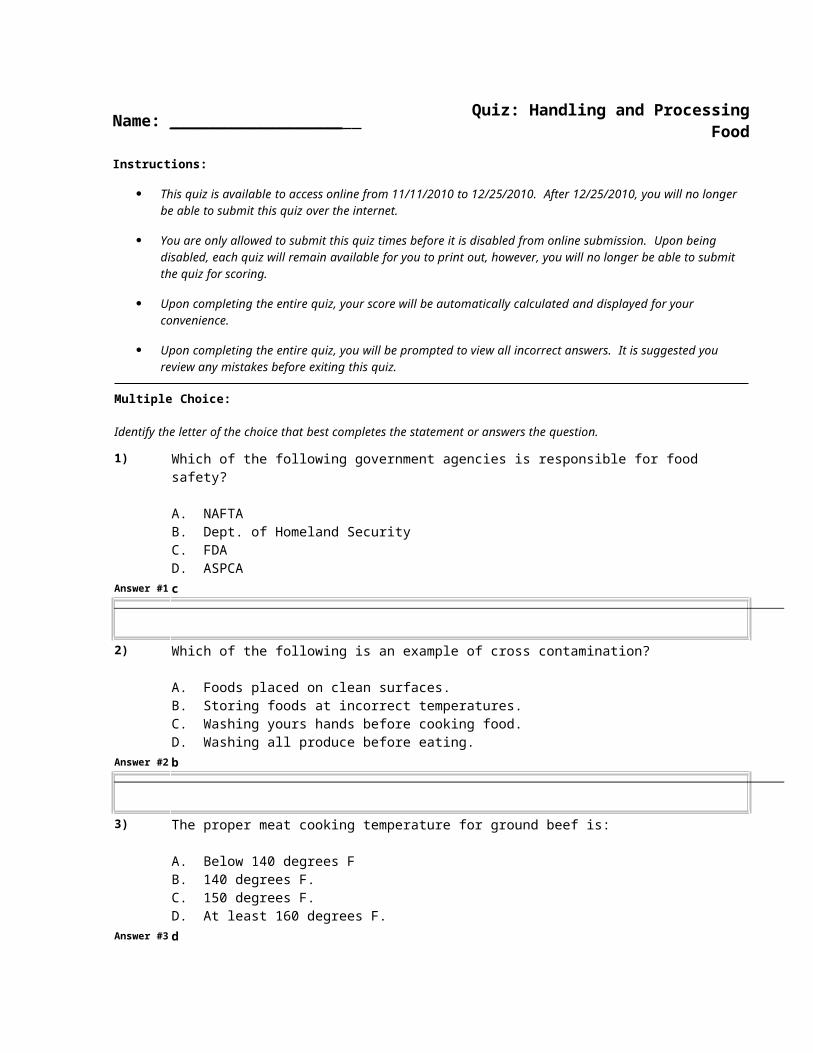
(4) How did you explain the importance of the lesson so that students understood why they are learning what they are learning? How did your students demonstrate that they understood the connection between prior knowledge and this lesson?
(5) How did you restate and rephrase instruction in multiple ways to increase understanding? What questions or strategies did you use?
(6) Explain how you provided students with the opportunity to meaningfully practice, apply, and/or demonstrate that they were learning.
(7) What methods did you use to check for understanding?
(8) List the attending behaviors you used as a teacher to prevent discipline problems before they could happen and those you used to handle discipline problems. If they were not effective, tell me why.
(9) List the areas you feel you need to work on for your next microteaching.
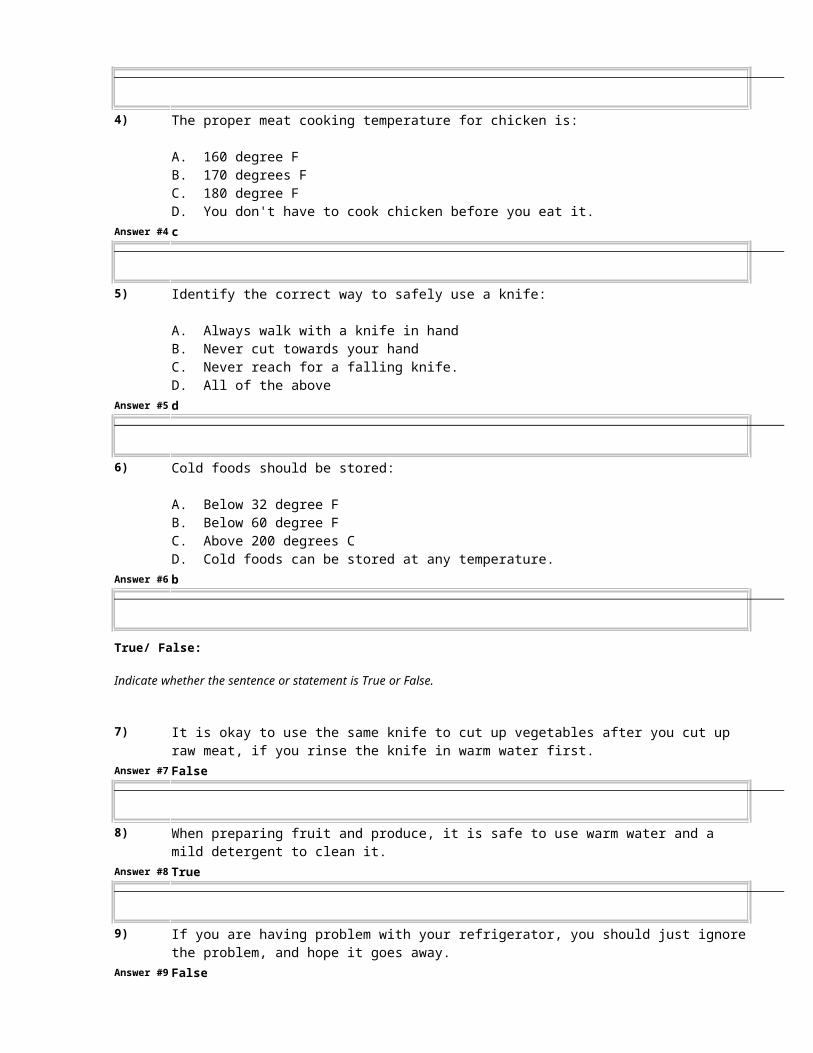
YDAE 440 MICRO-LAB(Digital Video Self-Critique of Peer Teaching #4)
Name:________________________________________ Date Lesson Taught:______________
Critique of teaching: Peer Teaching #4 (Problem Solving Lesson, Demonstration/Experiment) - Due one week after lesson is taught
Please answer the following questions while observing your Digital Video performance. The questions are purposely designed to be answered by the recording observance only so you will consciously evaluate yourselves. Remember that the lab is not a true classroom environment, but we'd like you to make it as real as possible. In doing this, you will make your student teaching more effective.
(1) Exactly how long did you teach? Minutes
(2) Rate yourself using the following variables:
E - ExcellentG - GoodP - PoorD - Desire Help
a. Enthusiasm __________
b. Developed successful interest approach __________
c. Audible voice __________
d. Right speed of voice _________
e. Use of high level questions to obtain student participation ___________
f. Checked for understanding and modified lesson and responded accordingly __________
g. Used a variety of methods to check for understanding __________
h. Responded to misunderstandings with effective scaffolding techniques __________
i. Students demonstrated through work or comments that they understand lesson ___________
j. Effectively used instructional technology and visuals __________
k. Effectively handled discipline problem(s) _____________ (3) Now that you've sat in the student's position, how effective were your differentiated instructional
strategies in planning to reach every student? Be sure to explain how it was either effective or how you might change the teaching to make them more effective.
Continued on Next Page

HINT: Newcomb, McCracken Warmbrod, and Whittington's book may help answer the following:
(4) Please list the lead question(s) you used in developing the anticipated group objectives and three or four of the objectives developed by the students. If you didn't develop group objectives why not? (Note: It is an expectation that you develop group objectives).
(5) Please list the lead question(s) that you used in developing the list of problems and concerns and list the problems and concerns developed by the students. If you didn't develop a list of problems and concerns why not? (Note: It is an expectation that you develop a list of problems and concerns).
(6) Describe how you set up (instructional and physically) the experiment/demonstration. Were the students able to see and follow the steps?
(7) Describe your discipline situation. List the attending behaviors you used to prevent problems and the steps you took during and after the discipline situation. Were you satisfied with your actions? Explain why or why not.
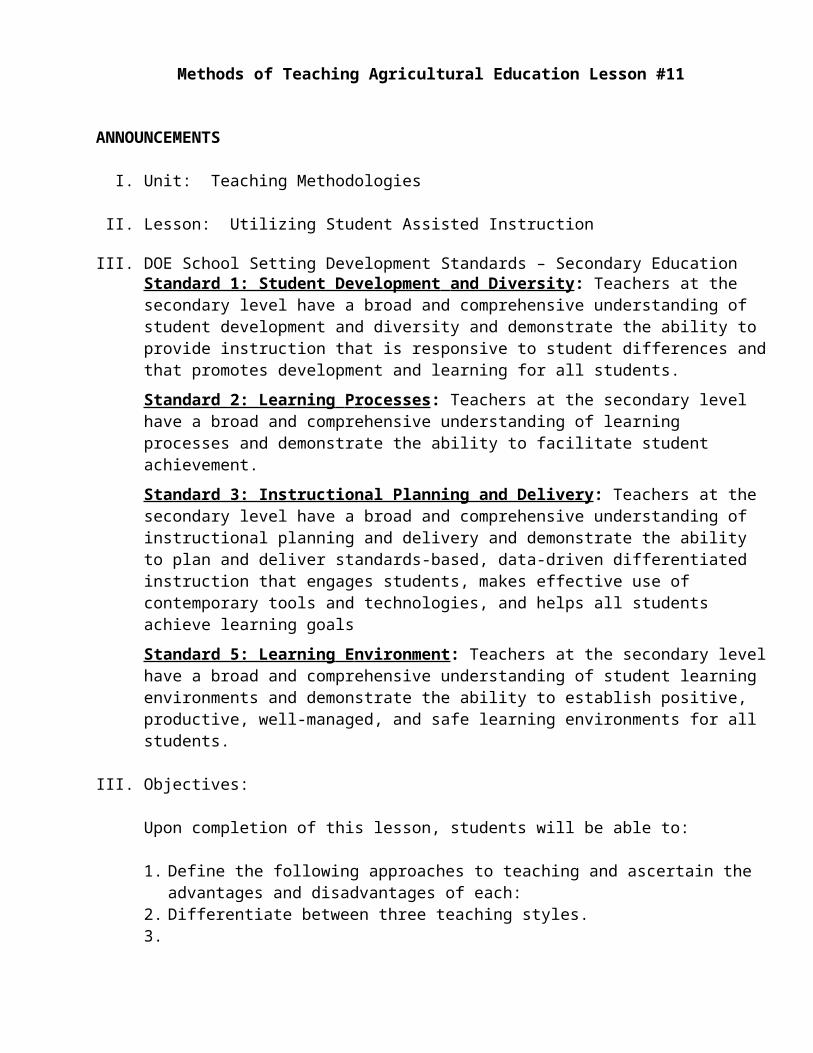
YDAE 440IAAE-Purdue
Activity Report Form
Explain what the activity is and where it takes place.
How would I use this activity as an Agricultural, Science and Business Teacher?
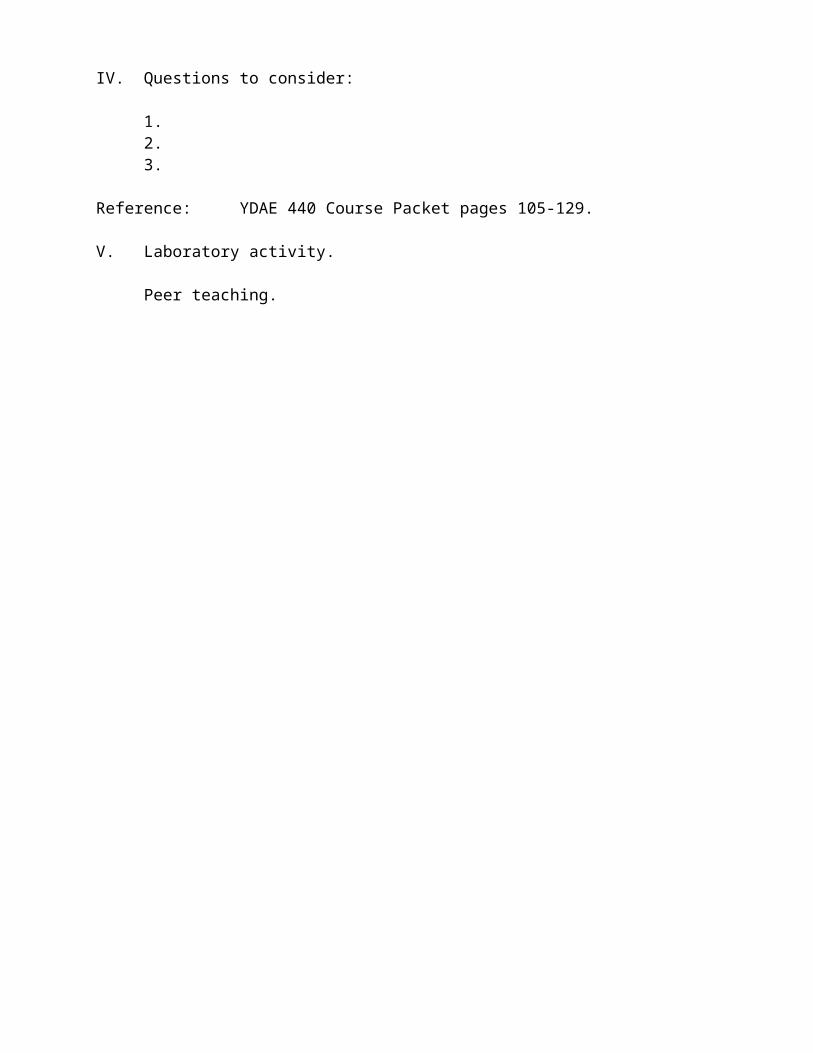
1. KNOWLEDGE
Can learners recall information?
Knowledge of:
- specifics, information- ways or means of dealing with specifics- the universals and abstractions in a field
You're expecting learners to:
- remember an idea, phenomenon, or a fact in somewhat the same form in which they learned it
Examples: Activities that require the learner to:
- Write (or tell) the formula for the area of a triangle.
- Spell the word "taxonomy."- List the freedoms included in the Bill of Rights.- Label the parts of a flower.- Memorize (or recite) the poem "Auto Wreck."- Define the following words . . . .
arrange name statecheck offer tallycite omit telldefine pick touchfind point to underlinegroup quote writeidentify recalllabel recitelist repeatlocate reproducematch saymemorize spell
2. COMPREHENSION
Can learners explain information?
Comprehension includes:
- transition- interpretation- extrapolation
You're expecting learners to:
- communicate information or an idea in a different form (translation)
- grasp the meaning of an idea and be able to explain it or see its relationships (interpretation)
- project the effect of things (extrapolation)
Examples: Activities that require the learner to:
- Reword the Pledge of Allegiance. (translation)- Explain the meaning of FDR's "Four Freedoms."
(interpretation)- Offer three ways life in prison might change if
inmates were allowed to dress as they please. (extrapolation)
Translate Interpret Extrapolatealter account for advancechange annotate calculateconvert describe contemplategroup explain contrivemoderate expound offerparaphrase generalize projectrestate group proposereword, retell infer schemetranslate interpret submittransform reviewvary summarize
3. APPLICATION
Can learners transfer information?
Application includes:
- using abstractions (such as concepts, principles, rules, generalizations) in specific and concrete situations
You're expecting learners to:
- apply rules, methods, concepts, principles, laws, theories to new situations
- use what they know (data) from a variety of areas to find solutions to problems
- demonstrate correct usage of a method or procedure
Examples: Activities that require the learner to:
- Demonstrate how to stay afloat for several hours using only the clothes one is wearing.
- Construct a graph or chart using given data.- Solve mathematical problems.- Interview students in class to determine their
favorite TV show.
apply mobilize tryadopt manipulate usecollect organize utilizeconstruct operate relateconsume put to use showdemonstrate profit by handledevote solve surveyemploy state rule exploitmake use of give example illustrateput in action interview
4. ANALYSIS
Can learners separate information?
Analysis of:
- elements- relationships- organizational principles
You're expecting learners to:
- break things down into their component parts- determine the distinguishing factors- uncover the special characteristics of something
Examples: Activities that require the learner to:
- Simplify ballet into its basic movements.- Inspect a house for poor workmanship.- Compare and contrast two Presidential addresses.- Study the painting of "The Last Supper" to
uncover as many principles of art as possible.
analyze diagram separateaudit differentiate siftbreak down dissect simplifycanvass distinguish sortcategorize divide specifycheck examine studyclassify inspect subdividecompare outline surveycontrast reason syllogizededuce screen take apartdetermine scrutinize test forfactors search uncoverdiagnose section
5. SYNTHESIS
Can learners combine information?
Synthesis includes:
- production of a unique communication- production of a plan for operation- derivation of a set of abstract relations
You're expecting learners to:
- think creatively (divergently)- combine "givens" into a new or original creation- formulate new patterns or structures
Examples: Activities that require the learner to:
- Formulate way to teach concept of adjectives.- Create a new song for the opening line of "Mary
had a Little Lamb."- Reorganize a chapter or unit from your textbook
the way you think it should be.- Combine elements of drama, music, dance into a
stage presentation.
blend effect planbreed evolve predictbuild find an producecause unusual way rearrangechange form reconstructcombine formulate reordercompile generate reorganizecompose hypothesize reviseconceive imagine structureconstruct invent suggestcreate make (up) supposedesign modify visualizedevelop originate discover
6. EVALUATION
Can learners make judgments?
Evaluation includes:
- judgments in terms of internal evidence- judgments in terms of external evidence
You're expecting learners to:
- judge the value of material based on definite criteria
- rate ideas, conditions, objects- accept or reject "things" based on standards
Examples: Activities that require the learner to:
- Decide which person would best fill a position.- Rank the principles of "good sportsmanship" in
order of importance to you.- Award the contract to the best proposal.- Judge paintings on the basis of specified criteria.
accept decide recommendadjudge decree refereeappraise defend rejectassess editorialize rule onarbitrate evaluate selectaward grade settlecensure judge supportchoose justify umpirecriticize prioritize weighcritique rankdebate rate
Student: _____________________________________ YDAE 440 LESSON PLAN GRADE SHEET
Name of Course and Title of Domain5 2 0
Course & Title of Domain are from one of the Agriculture courses listed under one of the three IDOE Agriculture Career Pathways.
Course & Title of Domain are not from one of the Agriculture courses listed under one of the three IDOE Agriculture Career Pathways. Not sure where the Course Title & Domain can be found in the IDOE Agriculture Career Pathways.
There is no Course & Title of Domain identified in this lesson plan.
_____
Title of Core Standard and Standard
5 2 0
Evidence is provided that the Core Standard and Standard are from one of the Agriculture courses listed under one of the three IDOE Agriculture Career Pathways
Core Standard and Standard are not from one of the Agriculture courses listed under one of the three IDOE Agriculture Career Pathways. Not sure where the Title of Core Standard and Standard can be found in the IDOE Agriculture Career Pathways.
There is no Core Standard and Standard Titles or evidence they can be found in one of the Agriculture courses listed under one of the three IDOE Agriculture Career Pathways.
_____
Documentation of Competencies and Academic Standards Met by This Lesson
10 5 0Documentation of Competencies and Academic Standards is complete and covers SAE, FFA, and the academic subject areas. Sources that document where to find the information is complete.
Documentation of Competencies and Academic Standards is not complete. Information on how the lesson relates to the competencies/standards and/or the citations for the information is missing.
There is no documentation of Competencies and Academic Standards or the sources for documenting this information.
_____
Student Learning Objectives
6 3 0
All objectives are written in performance terms; they are measurable, realistic and utilize various levels of the cognitive, affective and psychomotor domain.
The objectives are written in performance terms and are measurable and realistic; however they do not utilize various levels of the cognitive, affective or psychomotor domain.
The objectives are not objectives. _____
Situation
4 2 0
The situation is clearly explained. There is some information about the situation. There is no information about the situation. _____

References and Teaching Aids
5 2 0The list of references and teaching aids is complete. Page numbers are given for readings, sources are provided for videos, PowerPoints, etc.
The list of references and teaching aids is not complete. Page numbers are not given for readings, sources are not given for visuals.
There is no list of references or teaching aids. _____
Interest Approach
10 8 6Motivational technique is detailed and utilizes differentiated instructional strategies in planning to reach every student. It is interesting and should be successful.
Motivational technique could be better detailed or explained. It is interesting and will probably be successful.
Motivational technique well detailed or explained but is not particularly interesting or exciting.
_____
4 2 0Motivational technique is poorly explained or detailed but holds promise of working.
Motivational technique is poorly explained or detailed and doubtful of being successful.
Motivational technique does not provide evidence of using differentiated instructional strategies to reach every student.
Subject Matter Content
20 15 10The subject matter is included in the lesson plan. It is in outline form, in detail, and is complete.
The subject matter is included in the lesson plan. It is adequate in detail and is generally complete.
The subject matter is included in the lesson plan. It lists only the main points. Much is left out.
_____
8 4 0No subject matter is included in the lesson plan. A complete list of points to be covered is included.
No subject matter is included in the lesson plan. A partial list of points to be covered is included.
No subject matter is included in the lesson plan. There is no list of points to cover.
Teaching-Learning Activities
15 12 10The procedure for teaching the content is outlined in detail. The teaching method(s) to be used is(are) apparent and are appropriate for the lesson and objectives. The procedure for teaching is well thought out and should result in effective learning. Specific lead questions are used.
The procedure for teaching the content is outlined adequately. The teaching method(s) to be used is (are) compatible with the objectives and may result in effective learning.
The procedure for teaching the content is outlined adequately. However, the teaching method(s) to be used is(are) not well chosen, considering the objectives of the lesson. There are better methods available to meet the objectives.
_____
6 3 0The procedure for teaching the content is not well planned or organized. The methods mentioned may work but need to be reorganized into a more
The procedure for teaching the content is not well planned or organized. The methods are inappropriate.
The teaching-learning experience is totally inadequate or missing.

logical order.
Summary Implementation and Evaluation
8 4 0
There is a clear plan as to how the teacher will summarize the lesson using an e-Moment exercise and how the students will be evaluated. A CSA Tracker Quiz has been developed.
There is a plan of sorts as to how the teacher will summarize and evaluate the lesson. The CSA Tracker Quiz needs editing.
There is no plan or CSA Tracker Quiz. _____
The Lesson Plan in General
6 3 1
Is typed, neat, shows careful work, with correct spelling, punctuation and sentence structure.
Is neat, shows careful work, has a few errors in spelling, punctuation and/or sentence structure.
Is hand written, not neat, or has multiple errors. _____
Punctuality
1 0 -1
Lesson plan handed in during class on due date. Lesson plan handed in on day it is due. Lesson plan one day late. _____
-2 -3 etc.Lesson plan 2 days late Lesson plan 3 days late. -1 point for each day late.
Length
3 1 0
Lesson plan can be taught in 2-5 days. Lesson plan will require < 1 or > 5 days. Lesson plan length totally inadequate _____
Level
2 1 0
Lesson plan content and subject is appropriate for indicated students.
Lesson plan content and subject is not appropriate for indicated students.
Content and subject way off. _____
Grading Total ______100-90 A 89-80 B 79-70 C 69-60 D 59-0 F
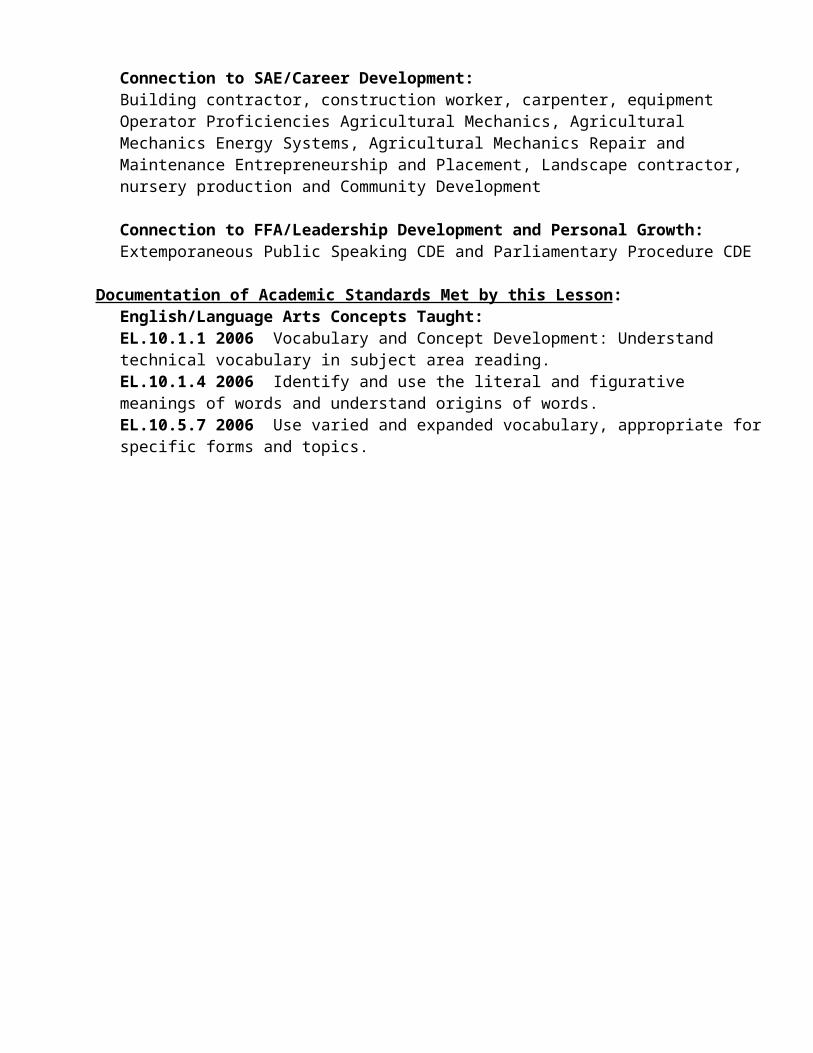
Name:_______________________
YDAE 440
S.A.I. Lesson Packet Grade Sheet
1. S.A.I. Lesson Packet Cover:
a. Course and Unit Title: 0 1 2
b. Problem Area and Lesson Title 0 1 2
c. Situation 0 1 2
d. Competencies and Academic Standards 0 1 2 3 4
2. Cover Page for Each S.A.I. Lesson:
a. Title of Lesson (2 pts. for each lesson) 0 1 2 3 4 5 6 7 8 9 10
b. Instructions (2 pts. for each lesson) 0 1 2 3 4 5 6 7 8 9 10
c. Teaching Materials (2 pts. for each lesson) 0 1 2 3 4 5 6 7 8 9 10
3. Attached References or Teaching Material for Each Lesson:1 2 3 4 5
4. Quiz for Each Lesson: 0 3 6 9 12 15
5. Teacher’s Lesson Plan for each S.A.I. Lesson:
a. Lesson Title (2 pts. for each lesson) 0 1 2 3 4 5 6 7 8 9 10
b. Student Learning Objectives (2 pts. for each lesson) 0 1 2 3 4 5 6 7 8 9 10
c. Interest Approach (2 pts. for each lesson) 0 1 2 3 4 5 6 7 8 9 10
d. Subject Matter Outline (2 pts. for each lesson) 0 1 2 3 4 5 6 7 8 9 10
Total:__________
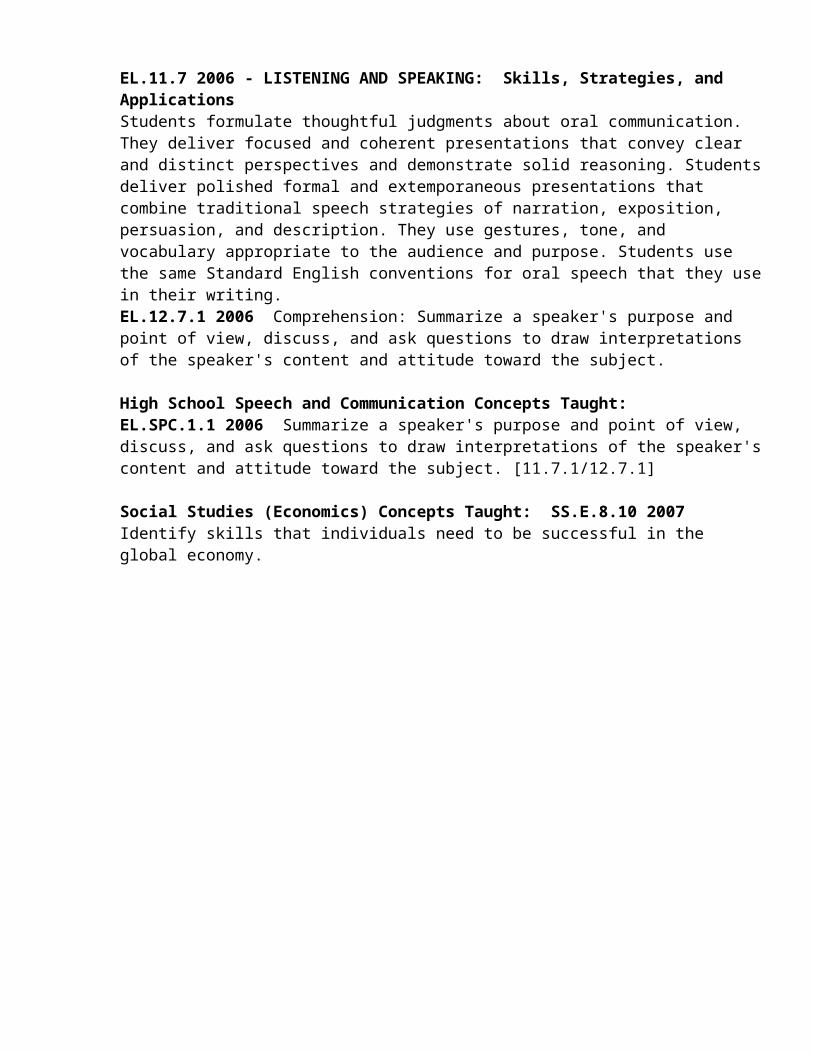
Comments: