Embed Size (px)
Citation preview
ECHO2
User Guide Version 1.2

Echo 2 User Guide
1
©2012 by Echo Digital Audio Corporation 402 E. Carrillo Street Suite A Santa Barbara, CA 93101
Echo® is a registered trademark of Echo Digital Audio Corporation.

Echo 2 User Guide
2
Important Safety Instructions
Please read the following safety instructions completely. It is very important to heed all warnings and follow all instructions while operating the Echo 2. Do not use the Echo 2 near water or any heat sources such as heaters, stoves, or amplifiers. Protect the power cord from being damaged in any way. Only use attachments/accessories specified by Echo. Unplug the Echo 2 during lightning storms and when not being used for long periods of time. If the Echo 2 requires servicing for any reason, please contact Echo customer service. Please protect your hearing by avoiding excessive volume from the headphones/earphones connected to the Echo 2.

Echo 2 User Guide
3
Contents
INTRODUCTION ............................................................................................................. 4
PACKAGE CONTENTS ..................................................................................................... 4
ECHO 2 CONNECTIONS ............................................................................................... 5
INPUTS ......................................................................................................................... 5
MAIN OUTPUTS ............................................................................................................. 6
HEADPHONE OUTPUT .................................................................................................... 6
POWER ......................................................................................................................... 7
USB ............................................................................................................................. 7
TOUCH PANEL .............................................................................................................. 8
INPUT SELECTION .......................................................................................................... 9
PHANTOM POWER ......................................................................................................... 9
LEVELS ....................................................................................................................... 10
MAIN MUTE ................................................................................................................. 11
EZ TRIM ..................................................................................................................... 12
INPUT MONITORING ..................................................................................................... 12
HEADPHONE ROUTING ................................................................................................. 13
SAVING SETTINGS ....................................................................................................... 13
USING ECHO 2 WITH A COMPUTER ......................................................................... 14
MAC OS X .................................................................................................................. 15
WINDOWS ................................................................................................................... 16
ASIO ......................................................................................................................... 17
SPECIFICATIONS ........................................................................................................ 19
ANALOG INPUTS .......................................................................................................... 19
ANALOG OUTPUT ......................................................................................................... 19
CONVERTERS .............................................................................................................. 19
DIMENSIONS ............................................................................................................... 19
WARRANTY ................................................................................................................. 20
DECLARATIONS OF CONFORMITY ........................................................................... 21

Echo 2 User Guide
4
Introduction Thank you for choosing the Echo 2. We think you’ll find it to be a flexible, high-quality tool for live or studio performance. The Echo 2's touch controls, built-in studio grade preamps, and compact design make it an ideal personal mixer. No additional hardware is required; you don't need a microphone preamp or an instrument direct box. Simply connect your instrument or microphone directly to the Echo 2, mount the Echo 2 on your microphone stand using the included bracket, and you have complete control over your mix at your fingertips. For more information, please see the "Echo 2 Connections" and "Touch Panel" sections of this user guide. In addition to working as a standalone live mixer, the Echo 2 is also a USB audio interface. It's great for recording, mixing, mastering, or just listening to a playlist. The separate headphone and main outputs are also ideal for DJ software. For more information, please refer to the "Using Echo 2 with a Computer" section of this user guide. We encourage you to register your product online at: http://www.echoaudio.com/support/register.php Registering gives us key information so that we may handle problems faster and inform you about upgrades and other news. Thank you in advance for registering. We hope you enjoy the Echo 2. Package Contents When you opened the box, you should have found the following:
• The Echo 2 device
• A universal power adapter
• A high-speed USB 2.0 cable
• Two 28” TRS to XLR female adapter cables
• A microphone stand bracket

Echo 2 User Guide
5
Echo 2 Connections The main inputs and outputs are the four jacks on the rear of the Echo 2:
Inputs The Echo 2 has two ¼” TRS (Tip-Ring-Shield) balanced input jacks labeled “IN1” and “IN2”. The inputs will accept virtually any type of analog signal, such as guitars, keyboards, microphones, line level signals, or mixer boards. Each input has a built-in, acoustically transparent, quiet, studio-grade preamp. You can plug a microphone directly into the Echo 2 without using an external preamp. The Echo 2 provides phantom power for condenser microphones. If your microphone has an XLR connector, use the included adapter cable. You can also connect guitars, keyboards, or other equipment using ¼” cables. Whenever possible, use balanced, shielded cables to limit external interference. Unbalanced signals such as those from RCA connectors and guitars should be connected using mono cables. Once you have connected the inputs, set the appropriate mode for the input using the touch panel. This will set up the internal preamp to match the incoming signal. If you prefer to use an external preamp, simply connect the preamp directly to the Echo 2’s input, and set it for line level with unity gain. This will preserve any unique sonic coloration or nuance.
Echo 2 User Guide
6
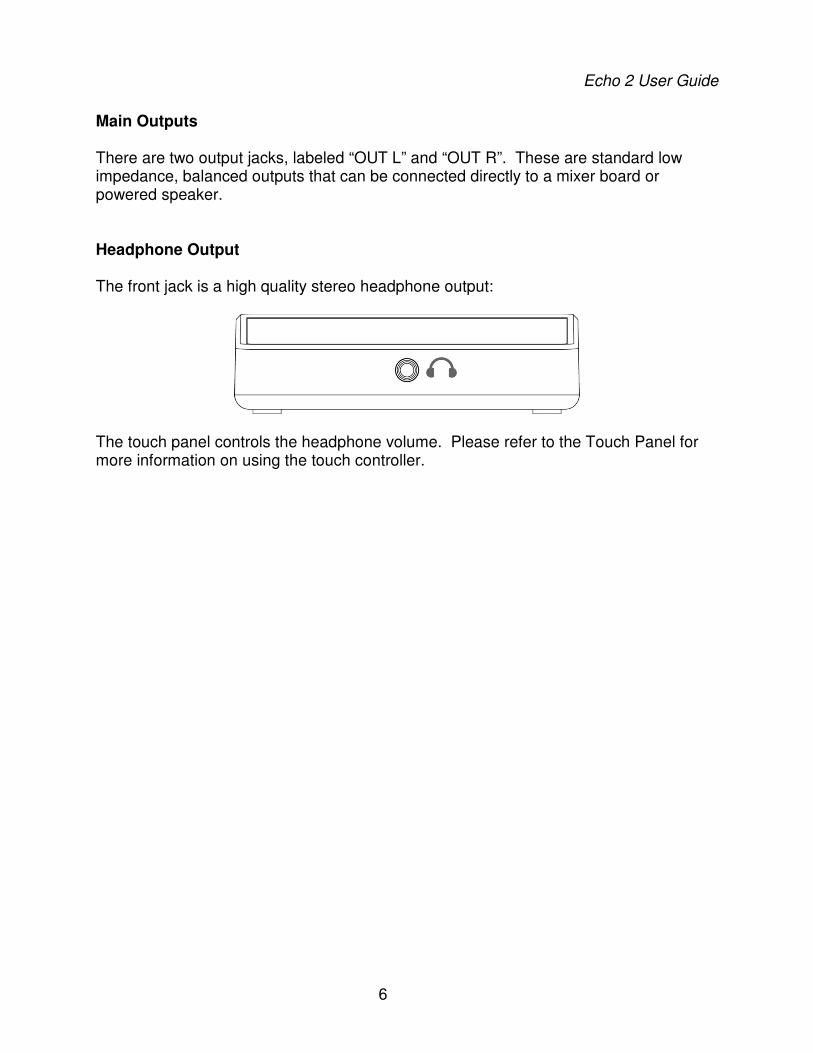
Main Outputs There are two output jacks, labeled “OUT L” and “OUT R”. These are standard low impedance, balanced outputs that can be connected directly to a mixer board or powered speaker. Headphone Output The front jack is a high quality stereo headphone output:
The touch panel controls the headphone volume. Please refer to the Touch Panel for more information on using the touch controller.

Echo 2 User Guide
7
Power The Echo 2 may be powered either from a computer over the USB cable, or with the included power adapter. The adapter plugs into the DC power jack on the right side as shown below:
Please note that the Echo 2 must be powered with the external AC adapter whenever phantom power is switched on. USB power can be noisy, resulting in audible ground hum, or decreased audio performance. If you are experiencing these problems, try using the external power adapter. USB When used for digital audio recording and playback, the Echo 2 connects to a computer using the USB mini-B jack on the rear of the case. The Echo 2 requires a cable that has been certified for USB 2.0 high-speed operation.

Echo 2 User Guide
8
Touch Panel The touch panel controls the Echo 2's built-in mixer. The panel uses capacitive touch technology to sense the touch of a finger. A light touch is all that is needed: the panel can’t differentiate between a light or hard press. The active area for each touch control is in the center of the rounded gray rectangle to the right of the LED indicator. For the slider, the active area is directly beneath the horizontal gray lines. To avoid accidental activation, each control must be touched for approximately half a second before the touch will be recognized. Some functions, such as EZ trim, are activated by a “long” touch of approximately two seconds. The front panel is scratch resistant, but can be scratched by hard or sharp objects. Care should be taken to protect it. Clean only with a soft, damp cloth.

Echo 2 User Guide
9
Input Selection Each input can be switched between one of three modes. Pressing either input button will cycle between MIC, LINE, and GUITAR. The default input type is LINE. Any time a cable is unplugged from the input jack, the input will revert to this setting. Changing the input type resets the input gain to 0 dB to avoid any potential audio feedback.
Phantom Power
Condenser microphones typically require power to operate. This is commonly known as phantom power, or +48 volts. The Echo 2 can provide phantom power when one of the inputs is set to MIC. To turn on phantom power, press the +48V button. If there are two microphones connected, phantom power will be provided to both simultaneously. To protect external equipment, phantom power is turned off whenever an input is set to LINE or GUITAR. In addition, phantom power will be turned off when the Echo 2 first powers up. Again, please note that phantom power requires powering the Echo 2 with the external power adapter. If you're unsure how to set up your inputs, please refer to the following table:
Signal source Echo 2 input mode +48V Dynamic microphone MIC OFF Condenser microphone MIC ON
Keyboard LINE n/a Mixer board LINE n/a MP3 player/iPod LINE n/a Guitar with passive pickups GUITAR n/a Guitar with active pickups LINE n/a External preamp LINE n/a

Echo 2 User Guide
10
Levels Input gains, monitoring, and output volumes are all controlled using the “slider” control in the middle of the touch panel. Touch one of the selector buttons to select what the slider does:
Input 1 gain
Input 2 gain
Monitor volume
Main output volume
Headphone volume
Touching one of these buttons changes the slider control to show the current setting for that selection The LED indicators on the left side of the slider show the current position. To change it, place your finger over the horizontal gray bar next to the topmost lit LED and slide it up or down. Moving too fast may cause the level to stop moving.
Echo 2 User Guide
11
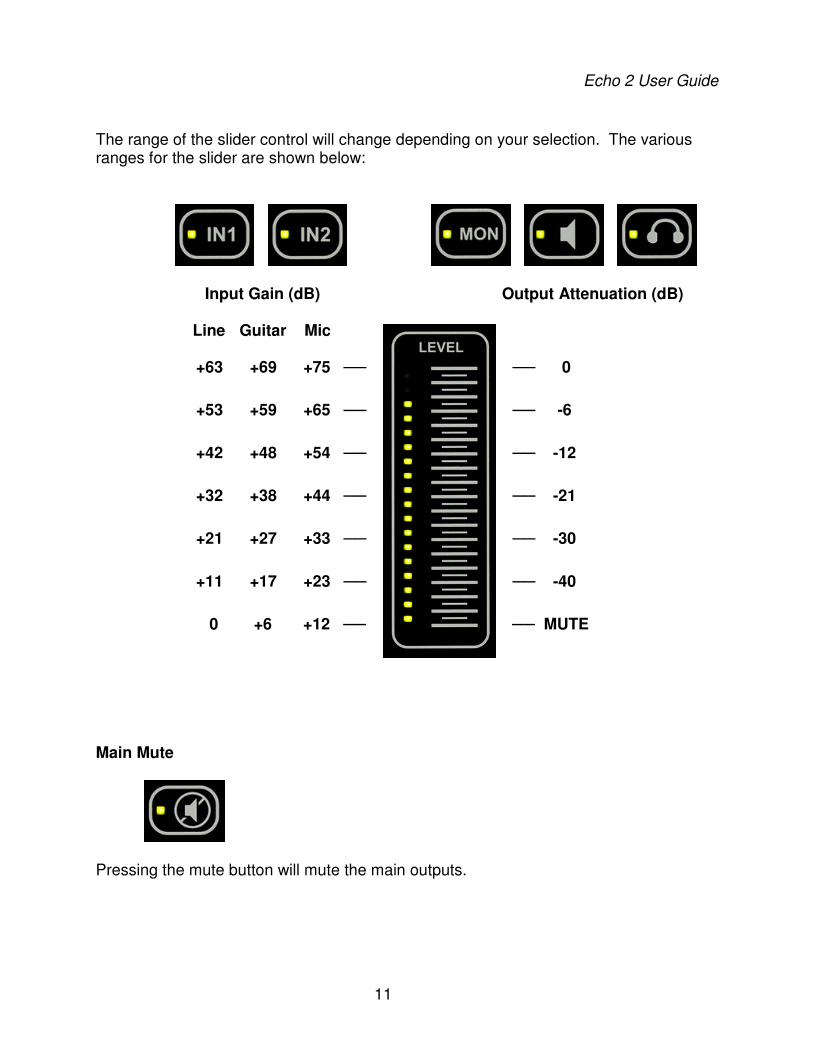
The range of the slider control will change depending on your selection. The various ranges for the slider are shown below:
Input Gain (dB) Output Attenuation (dB)
Line Guitar Mic
+63 +69 +75 ── ── 0
+53 +59 +65 ── ── -6
+42 +48 +54 ── ── -12
+32 +38 +44 ── ── -21
+21 +27 +33 ── ── -30
+11 +17 +23 ── ── -40
0 +6 +12 ── ── MUTE
Main Mute
Pressing the mute button will mute the main outputs.

Echo 2 User Guide
12
EZ Trim
The ideal input gain setting provides the maximum gain without clipping when the loudest signal is coming into the input. While it is possible to use the input gain slider control to set the gain while shouting into a microphone, pounding on drums, or wailing on a guitar, it’s both quicker and more accurate to let the Echo 2 do it automatically for you with EZ Trim. To engage EZ trim, simply press and hold one of the input buttons for two seconds until the indicator starts to flash. At this point the input gain will be lowered to its lowest level and the Echo 2 will keep track of the loudest signal. Now sing or play your loudest. All it takes is a few notes or strums of the guitar. To exit easy trim and have the level set to its optimum value, simply press the input button again or wait 12 seconds from when the indicator started to flash. Pressing any other button cancels EZ Trim and the input level will be left untouched. Upon exiting EZ Trim, the input level will be set so that the loudest signal it received will register 2dB below full scale, or clipping. This extra headroom can be useful if you happen to play or sing a bit louder than during the sample period. Input Monitoring
Each input may be monitored, or passed through to the outputs. The slider control sets the monitor level from muted at the bottom to full (0dB) at the top. There are two different monitoring modes to choose from. To switch from one to the other press the MON button for two seconds. The MON indicator LED will either be on steady or slowly flash to show which monitor mode is currently being used.
Steady LED – “Live” mode. Each input is monitored equally through both outputs (center panned).
Flashing LED – “Studio” mode. IN 1 is monitored through OUTL (panned hard left) and IN 2 is monitored through OUTR (panned hard right).
Echo 2 User Guide
13
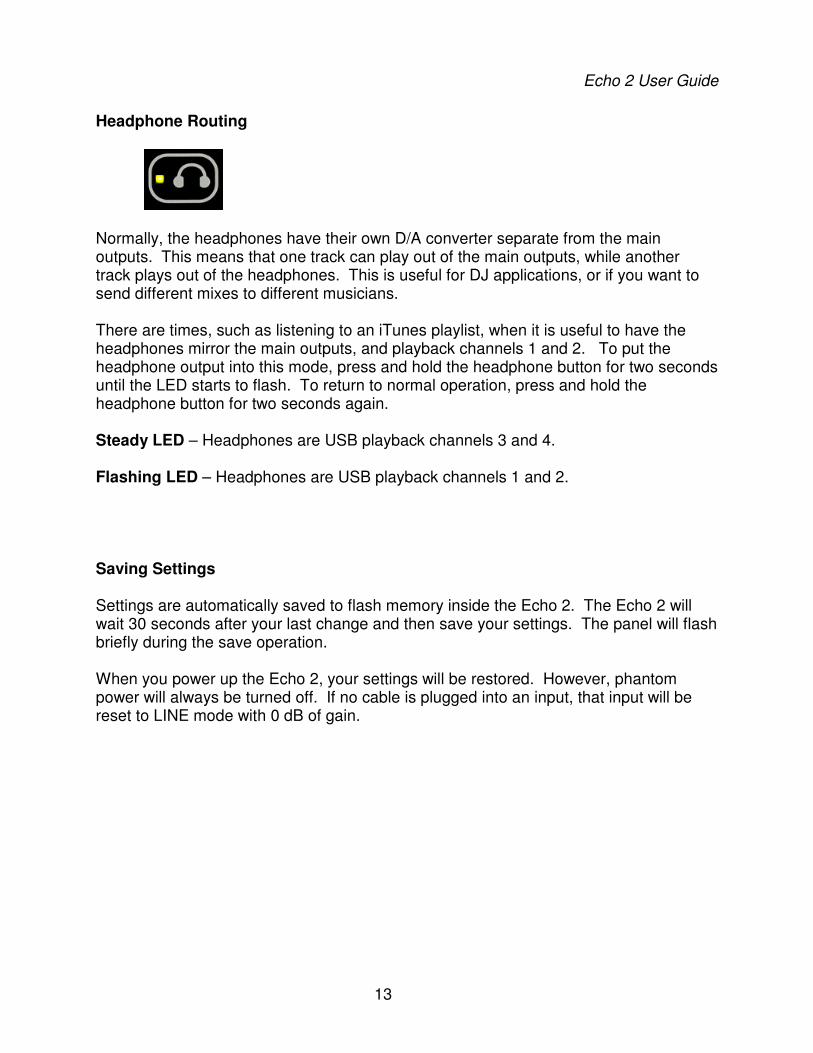
Headphone Routing
Normally, the headphones have their own D/A converter separate from the main outputs. This means that one track can play out of the main outputs, while another track plays out of the headphones. This is useful for DJ applications, or if you want to send different mixes to different musicians. There are times, such as listening to an iTunes playlist, when it is useful to have the headphones mirror the main outputs, and playback channels 1 and 2. To put the headphone output into this mode, press and hold the headphone button for two seconds until the LED starts to flash. To return to normal operation, press and hold the headphone button for two seconds again. Steady LED – Headphones are USB playback channels 3 and 4. Flashing LED – Headphones are USB playback channels 1 and 2. Saving Settings Settings are automatically saved to flash memory inside the Echo 2. The Echo 2 will wait 30 seconds after your last change and then save your settings. The panel will flash briefly during the save operation. When you power up the Echo 2, your settings will be restored. However, phantom power will always be turned off. If no cable is plugged into an input, that input will be reset to LINE mode with 0 dB of gain.

Echo 2 User Guide
14
Using Echo 2 with a Computer To use the Echo 2 with a Windows or Mac computer, you will need an available USB 2.0 or 3.0 port, and a high-speed USB 2.0 cable, such as the one supplied with the Echo 2. The Echo 2 can be powered directly from the computer USB port. However, if you want to use phantom power, you will need to use the external power supply supplied with the Echo 2. For best audio performance, do not use a USB hub. Instead, connect the Echo 2 directly to your computer. Note that all of the touch controls continue to work if the Echo 2 is connected to a computer.
Echo 2 User Guide
15
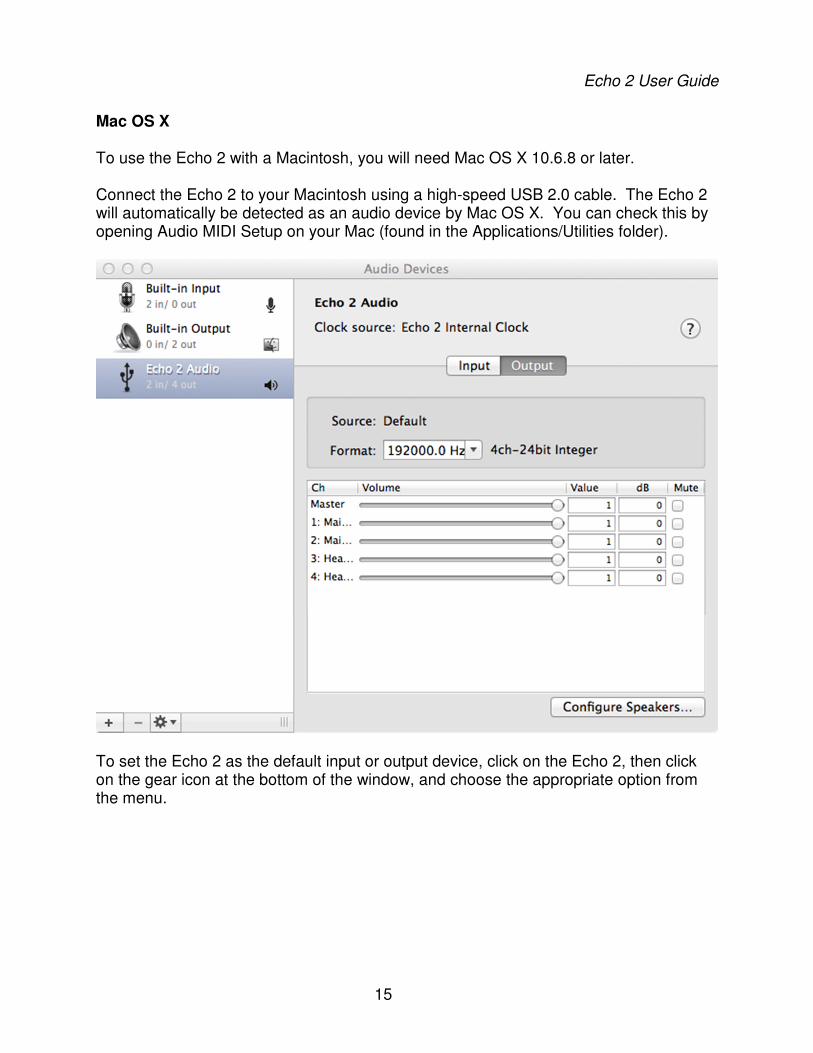
Mac OS X To use the Echo 2 with a Macintosh, you will need Mac OS X 10.6.8 or later. Connect the Echo 2 to your Macintosh using a high-speed USB 2.0 cable. The Echo 2 will automatically be detected as an audio device by Mac OS X. You can check this by opening Audio MIDI Setup on your Mac (found in the Applications/Utilities folder).
To set the Echo 2 as the default input or output device, click on the Echo 2, then click on the gear icon at the bottom of the window, and choose the appropriate option from the menu.

Echo 2 User Guide
16
Windows To use the Echo 2 with a Windows computer, you'll need Windows XP, Windows Vista, and Windows 7. Both 32-bit and 64-bit versions of Windows Vista and Windows 7 are supported. You will also need an available USB 2.0 or 3.0 port; USB 1.0 or 1.1 ports will not work. First, you will need to install the Echo 2 driver. Drivers are available on our website: http://www.echoaudio.com/echo2 Leave the Echo 2 disconnected from your computer, and download the driver. Once you've downloaded the driver, run the setup program:
The installer will prompt you to connect the Echo 2 to your computer. Go ahead and do that, making sure you're using a high-speed USB 2.0 cable. Click OK; the installer will detect the Echo 2 and complete the installation process. This can take several minutes, depending on whether or not the Echo 2 has been installed before. Once the installation is complete, the Echo 2 will be available as an audio device in the Windows Sound control panel.
Echo 2 User Guide
17
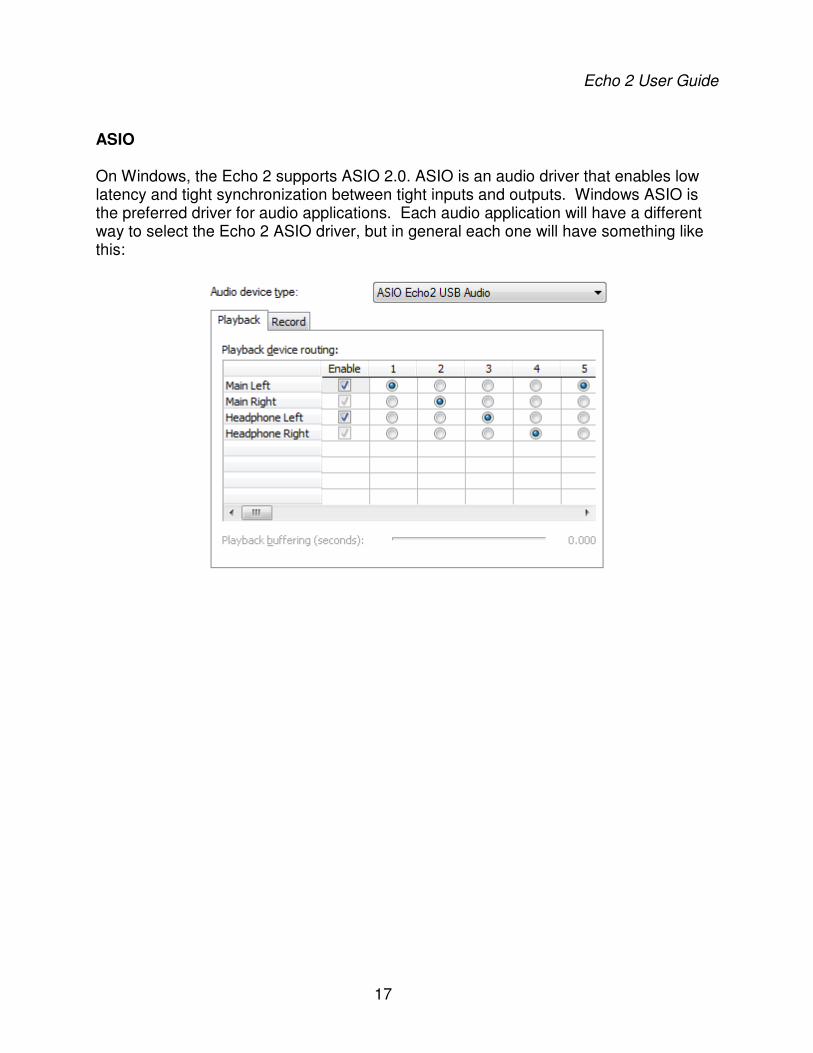
ASIO On Windows, the Echo 2 supports ASIO 2.0. ASIO is an audio driver that enables low latency and tight synchronization between tight inputs and outputs. Windows ASIO is the preferred driver for audio applications. Each audio application will have a different way to select the Echo 2 ASIO driver, but in general each one will have something like this:

Echo 2 User Guide
18
The Echo 2 ASIO driver can be configured to balance low latency performance with reliability. The Echo 2 control panel allows you to set both the USB buffer size and the ASIO buffer size:
In general, you will want to get the buffer sizes as low as possible without audio playback or recording breaking up. The USB buffer size controls how often buffers of audio data are exchanged with the USB host controller. The ASIO buffer size controls how often your audio application will process audio data. The optimal settings will depend on your computer, what other software and drivers are running, and what type of USB host controller you have. Please enjoy using the Echo 2.

Echo 2 User Guide
19
Specifications Analog Inputs
• Two ¼" TS/TRS inputs with selectable microphone, balanced line, or high-impedance instrument.
• Switchable +48 V phantom power • EZ Trim - Precisely set your inputs to the optimal level with the touch of a button • Low noise (-129 dBu EIN) studio grade mic preamps, up to 75 dB of gain • Input impedance - Mic: 1.8K ohms, Line: 20K ohms, Instrument: 1 Meg • Two female XLR to male 1/4" TRS cables included • Frequency Response: 10 Hz – 20 kHz, +/- 0.1 dB • Dynamic Range: 115 dB A-weighted • THD+N: .001% A-weighted
Analog Output
• Two ¼" TS/TRS outputs • Frequency Response: 10 Hz – 20 kHz, +/- 0.1 dB • Dynamic Range: 113 dB A-weighted • THD+N: .0015% A-weighted • Line output impedance: 120 Ohm • One ⅛" headphone output with adjustable volume and monitor levels and main
mute • Max output level headphones: 10 dBu • Max output current headphones: 60 mA • Headphone output impedance: 1 Ohm • Supports full duplex 2 channels in, 4 channels out operation at 24 bit,
up to 192 kHz sample rate • Near zero latency hardware monitoring
Converters
• 128x oversampling converters • Low jitter with less than 4 ps internal clock • 24 bit data resolution maintained throughout signal path • Multiple standard sampling rates supported: 44.1k, 48k, 88.2k, 96k, 192k
Dimensions
• 5.4” x 3.6” x 1” (137mm x 92mm x 26mm) – 0.5 lbs.

Echo 2 User Guide
20
Warranty Echo Digital Audio Corporation warrants this product, when purchased at an Authorized Echo Dealer in the United States of America, to be free of defects in materials and manufacturing workmanship for a period of one year from the date of original purchase. During the warranty period Echo shall, at its option, either repair or replace any product that proves to be defective upon inspection by Echo. Final determination of warranty coverage lies solely with Echo. Echo reserves the right to update any unit returned for repair, and reserves the right to change or improve the design of the product at any time without notice. This is your sole warranty. Echo does not authorize any third party, including any dealer or sales representative, to assume any liability on behalf of Echo or to make any warranty for Echo. Service and repairs of Echo products are to be performed only at the factory (see below) unless otherwise authorized in advance by the Echo Service Department. Unauthorized service, repair or modification will void this warranty. To obtain factory service: Contact Echo Digital Audio Corporation at (805) 880-5590, 9AM to 4PM Monday through Friday (Pacific Time) or email: [email protected]. If necessary, you will be given a return authorization number. Products returned without an RA number will be refused. Echo may, at its option, require proof of the original date of purchase in the form of a dated copy of the original authorized dealer’s invoice or sales receipt. Pack the product in its original shipping carton and attach a description of the problem along with your name and a phone number where Echo can contact you if necessary. Ship the product insured and freight prepaid to:
Echo Digital Audio Corporation
402 E. Carrillo Street Suite A Santa Barbara, CA 93101
DISCLAIMER AND LIMITATION OF WARRANTY Echo makes no other warranties, express, implied, or otherwise, regarding Echo products, and specifically disclaims any warranty for merchantability or fitness for a particular purpose. The exclusion of implied warranties is not permitted in some states and the exclusions specified herein may not apply to you. This warranty provides you with specific legal rights. There may be other rights that you have which vary from state to state. In no event will Echo be liable for any lost profits, or for any consequential, direct or indirect damages, however caused and on any theory of liability, arising from this warranty and sale.

Echo 2 User Guide
21
Declarations of Conformity USA This equipment has been tested and found to comply with the limits of a Class B digital device, pursuant to Part 15 of the FCC Rules. These limits are designed to provide reasonable protection against harmful interference in a residential installation. This equipment generates, uses, and can radiate radio frequency energy and, if not installed and used in accordance with the instructions, may cause harmful interference to radio communications. However, there is no guarantee that interference will not occur in a particular installation. If this equipment does cause harmful interference to radio or television reception, which can be determined by turning the equipment off and on, the user is encouraged to try to correct the interference by one or more of the following measures:
1. Re-orient or relocate the receiving antenna. 2. Increase the separation between the equipment and receiver. 3. Connect the equipment into an outlet on a different circuit from that to which the receiver is
connected.
CAUTION: Changes or modifications not expressly approved by the Echo Digital Audio could void the user’s authority to operate the equipment under FCC rules. Canada This device complies with RSS-210 of Industry Canada. Operation is subject to the following two conditions: 1. This device may not cause harmful interference 2. This device must accept any interference received, including interference that may cause undesired operation. Le présent appareil est conforme aux CNR d'Industrie Canada applicables aux appareils radio exempts de licence. L'exploitation est autorisée aux deux conditions suivantes : (1) l'appareil ne doit pas produire de brouillage (2) l'utilisateur de l'appareil doit accepter tout brouillage radioélectrique subi, même si le brouillage est susceptible d'en compromettre le fonctionnement.

Echo 2 User Guide
22
CE This product complies with the European Unicon Council Directives and Standards relating to electromagnetic compatibility EMC Directive (2006/95/EC) and the Low Voltage Directive (2004/108/EC)
RoHS Notice Echo Digital Audio has conformed and this product conforms, where applicable, to the European Union’s Directive 2002/95/EC on Restrictions of Hazardous Substances (RoHS) as well as the following sections of California law which refer to RoHS, namely sections 25214.10, 25214.10.2, and 58012, Health and Safety Code; Section 42475.2, Public Resources Code.
REACh This product is compliant with the European Union Directive EC1907/206 for the Registration, Evaluation, Authorization and Restriction of chemicals (REACh) and contains none or less than 0.1% of the chemicals listed as hazardous chemicals in the REACh regulation.
WEEE
As with the disposal of all old electrical and electronic equipment, this product is not to be treated as regular household waste. Instead it shall be handed over to the applicable collection point for the recycling of electrical and electronic equipment.