Embed Size (px)
DESCRIPTION
Easy WiFi Controller Documentation
Citation preview

Easy WiFi Controller Documentation
Introduction
Easy WiFi Controller allows users to easily use their mobile phone or tablet as a controller in their unity
application. No messing about with sockets or other networking technologies is required we've done all
the heavy lifting such as creating common gamepad types, automatically discovering controllers on your
wifi network, creating simple components to add to your game objects, and much more!

Controller Types Included
Joystick
Dpad
Button
Switch
Touchpad
Horizontal Slider
Vertical Slider
Pinch/Zoom Touchpad
Accelerometer
Gyro
Data Forward and Backchannel Types Included
bool
int
string
decimal
float
double
Features
Flexible layout design, simply drag and drop our premade controls anyway you want to make a
controller that fits your game's exact needs
Uses Unity's new 4.6 GUI so that you can have these controls scale to any size device. Simply
anchor and size them as you wish!
Auto discovery of as many phones/tablets that you have on your WiFi. You can either connect
automatically or use our connection widget for easy connect and disconnect
Custom protocol and message definitions already defined you can focus on your game logic
Utilize our easy backchannel to send back information to the phone controller to animate nice
UI's for your controller (example: a speedometer in a racing game)

Example Scenes Included
Easy WiFi Controller comes with 8 example scenes to showcase the power of our Unity asset. Each
example is a pair of scenes (one to deploy to your game and one to deploy to your mobile controller).
Ensure that both devices are connected to the same LAN (either wired or WiFI is fine). Below is a
description of the 8 Examples and what they highlight.
Kitchen Sink Controls example- This example showcases one of each of the 7 controls we provide (dpad,
joystick, touchpad, button, switch, accelerometer, and gyro). It's a very easy to understand scene and
showcases each controls ease of use.
Drawing example- This example showcases that multiple server controls can be attached to the same
object (switches and touchpad both on same object). It also showcases how custom controllers can be
used to do unique things. This example turns the mobile device into a simple painting application!
Multiplayer Controller Select example- This example showcases a simple controller select screen in the
style of Super Smash Bros. This is the only example pair where there are two parts to the server side
(the controller select screen and the game scene part1 and 2 respectively). Don't forget when running
the server to add both to your build settings. Each controller that is connected gets an icon to move
around. You simply select the player you want to be by clicking in the center of the area you want. When
everyone is ready click the Start game button and you'll see that you've successfully selected which
player you want.
Multiplayer Dynamic example- This example showcases connecting multiple phones/tablets to your
game. In this example you see how easy it is to use more than one player via Easy WiFi controller. Also,
this example showcases manual connection via our easy connection widget. This is useful for a player
select screen for letting players choose which player they want to be.
Steering Wheel example- This example allows you to roll a ball with you phone's accelerometer. It also
showcases a custom accelerometer server control since we let the accelerometer modify the ball's
rigidbody not just position. In addition, it also showcases our backchannel as we've animated a
speedometer on the controller that visualizes how fast you are going.
Precomputed Steering example- This example rolls the ball not from user input but instead from the
computer without User Input. This showcases that if your controller gets complex and you want to
communicate data only without a UI that this is possible with Easy WiFi Controller
Unity UI Navigation example- This example allows you to see how you can navigate your menus
automatically without needed to code anything. Easy WiFi Controller has it's own custom input module
that makes using the new Unity UI easy.
Pan/Tilt/Zoom example- This example allows you to see how our pinch/zoom touchpad can easily work
on a camera with no coding necessary. Simply use the control with one touch panning the camera,
pinch/spread zooming the camera, and a 3 finger drag tilting the camera.
Dual Stick Zoom example- This example shows a pretty typical configuration in modern games (two
analog sticks). This shows that standard controllers (no coding) can accommodate a wide range of
scenarios including modern control styles. In addition, we included a vertical slider to control zoom
factor.
Normal Use case from scratch
Diving right in to our asset, the most common use of Easy Wifi Controller is to use your mobile phone as
a game controller for a local multiplayer game. Controllers are expensive and nowadays most people
already have a smartphone available to use. Setting up your game only requires 3 easy steps below.
1. Drag and drop our client controls into the layout you wish to make (ex. NES style controller,
xbox, etc.) and deploy this controller to your device (after development you would publish your
controller on the app store)
2. Add our premade server components to your existing game (ex dpad server controller, button
server controller, etc.)
3. Ensure that the client and server control name inspector match and they will discover each
other automatically
That's all there is to it! Words are one thing but let's show this in more detail. Starting from scratch the
usual starting point is designing a controller that fits your game. Below we have an empty scene the first
step is to add Easy WiFi Manager from the Game Object menu as shown below.

EasyWiFiManager
After added you will see this object in the scene and there are a few options to be aware of in the
inspector.
Server Socket Port- the port in which the server is listening on
Client Socket Port- the port in which the client is listening on (can be the same but then in development
you can't test both pieces on the same machine)
Peer Type- Client or Server
Client Connect Automatically (client only)- will we connect automatically? If unchecked you should add
our connection widget to your client scene so you can connect/disconnect whenever you want. In local
multiplayer games you will usually want to connect manually on a controller selection screen before
loading your game scene. Automatic is good for during development to save time.
Client Max Send Rate (client only)- The rate at which the client will send it's controls data to the server.
This is especially important for multiplayer games so that high end phones don't "drown out" your wifi
and prevent others from getting through. 60 Hz is good for most games but you can tweak as you desire.
Heartbeat Timeout(client only)- When you set to something besides 0 this is activated. This is the rate at
which the client checks for server heartbeats. If this check fails twice in a row the client assumes it's
been disconnected from the server.
Client Timeout(server only)- When you set to something besides 0 this is activated. If the server doesn't
hear from a particular controller in this amount of seconds it will mark the controller as disconnected.
Server Send Backchannel(server only)- When checked the server will also send backchannel data to the
controller. This is used for more advanced controller UI's that want to visualize game data. It is optional
to send backchannel data
Server Send Heartbeat rate(server only)- When you set to something besides 0 this is activated. This is
rate at which the server will send heartbeat messages to each client. This is how the client controllers
will know if it gets disconnected from the server.
Log Verbose- When checked we log all the network traffic. This makes troubleshooting easy as you will
see all the controller data being sent over your wifi in your log. If both the client and server check this
the server will also log the client messages so that you have one easy log to inspect for both ends.
Application Name- Your application name
Implementation notes: Easy WiFi manager is what initializes and destroys the main class for all of our
socket communication (EasyWifiController.cs). In addition, it is also the coordinator for the controller
data stream and optionally it is also the coordinator for the backchannel server data stream. Being the
coordinator allows us to send only one UDP message that contains all the client controls
data/backchannels instead of separate packets for each client control (which if you have many players
will help mitigate wifi collisions by reducing the number of UDP packets). This coordination requires this
monobehavior script to execute before the other client controls, if you add this via the gameobject
menu this is done for you automatically. If you create this object manually just make sure to change
your script execution order so this occurs. Also, note that EasyWiFiManager if you use it across multiple

scenes will automatically detect if one is left over from a previous scene and keep that one with all it's
connections so you don't have to worry about it.
After We've added EasyWiFiManager and setting our options in the inspector, we simply add whatever
client controls our game needs from the game object menu.
Adding Client Controls
Below is what you will see if we have added the Dpad control.

As you can see we are using the new Unity GUI that was added recently to make using our premade
client controls easy. You'll notice that when you add your first client control we automatically create a
canvas and a panel for you. Depending on your game you will want to position and anchor your controls
and adjust their size as you see fit. Simply use the Rect Transform to place the control anywhere you
wish. Our automatically created canvas is in Screen Space Overlay mode aligned to the height of the
device so it will scale nicely regardless of whether your device is a small 800 x 480 or a QHD high res
display. Our client controls also already contain all the logic for detecting both touch and mouse inputs
so you really just need to place them where you wish and you are good to go.
Implementation notes: We provide client controls for Dpad, Joystick, Button, Switch, Touchpad,
Accelerometer, Gyro, and our Connection Widget. All of these except the accelerometer and the gyro
have UI elements that use the Unity GUI (naturally accelerometer and gyro have no UI but send their
controls data over automatically). The way our controls automatically detect touch/mouse relies on the
canvas being in screen space - overlay and point anchors (meaning not set to stretch). You can certainly
change this if you wish but then you will need to modify the input detection logic for your custom needs.
In addition, if you don't want to use our widgets at all (perhaps you already use EasyTouch,
FingerGestures, or other assets) you can certainly easily integrate those assets with our WiFi controller
stream with minimal coding needed. Our images can also be easily swapped out if you prefer a style
that better suits your game. Although we are Using the new Unity UI (canvas, panel, images, etc) it's
important to note that client side we are not using EventSystem mainly because we need to know
precisely where on the controls you pressed. As a best practice we recommend that if you have an
additional hud to place on the controller that you create a separate canvas in addition to the
"ClientControlCanvas" that we automatically create for you when you add controls via the menu. This

way there is a clean seperation and it is clear which you are working on. A merged canvas will work but
might get a bit cluttered.
Inspector closer look
Control Name - All of our controls have a Control Name Field. This field is how the client and server side
know how to map to each other automatically. If we ended up modeling our controller after an xbox
controller we would end up having 2 joysticks, a dpad, and numerous buttons. It is important that each
of these controls have a unique name so that we can map the controls individually to your game objects.
Low Threshold (only certain controls)- Most movement controls don't send their data unless a certain
threshold has been reached (since controls are never precisely calibrated). All our controls normalize
the data stream so effectively any value in the above example below .2 will be treated like it's 0. On a
dpad this is useful for when we press in the center of the dpad since we would not want any movement
when that happens.
High Threshold (only certain controls)- Just like low threshold there are certain thresholds where we
want to register the input as full movement. On a joystick this is useful so that we don't have to fully
move the joystick to the edge to designate we want the character to run.
Action Sprites (only certain controls)- Buttons and other controls might use more than one sprite to give
visual feedback (ie. button pressed and button not pressed). Those controls will have the sprite listed in
the inspector and can be changed if you wish.
That's all there is to the client side (your controller) when we've added all the controls the controller
might look like below if we were modelling it after a simple version of the NES controller. In your game
you would want to add a combination of controls that suits your game best and perhaps swap out the
sprites to match your UI theme (i.e. if it was a racing game you'd probably want to change the button
sprites to a gas and brake pedal).
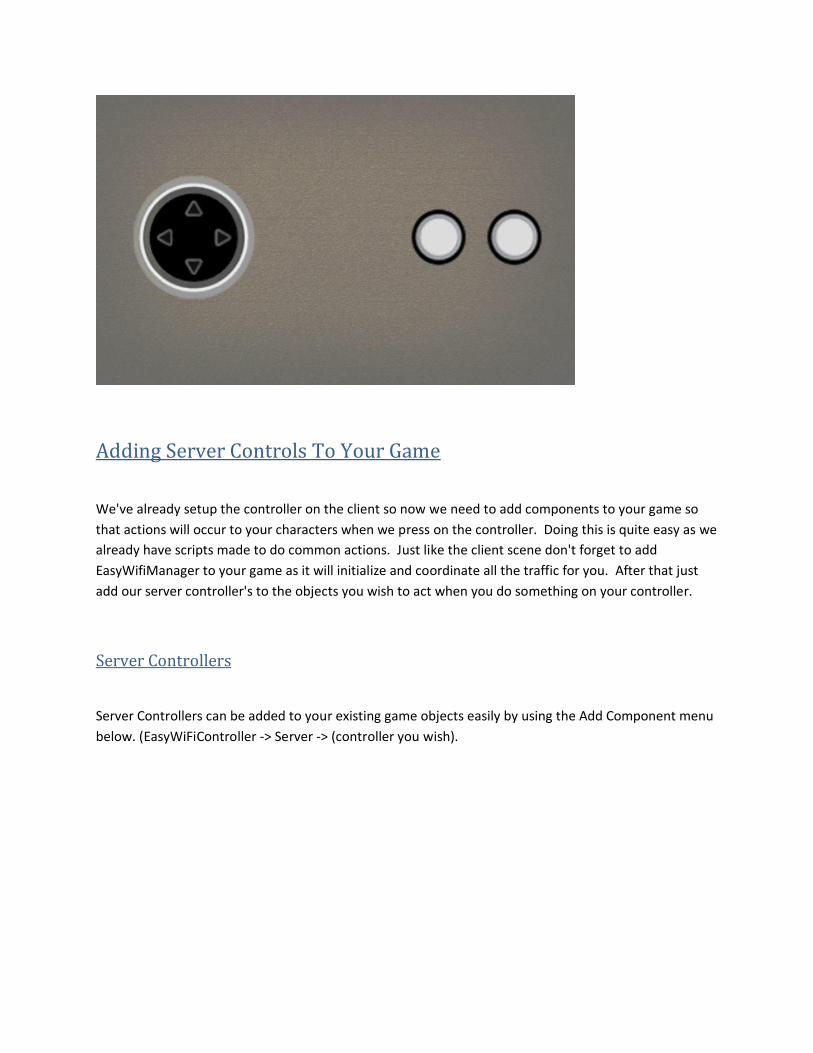
Adding Server Controls To Your Game
We've already setup the controller on the client so now we need to add components to your game so
that actions will occur to your characters when we press on the controller. Doing this is quite easy as we
already have scripts made to do common actions. Just like the client scene don't forget to add
EasyWifiManager to your game as it will initialize and coordinate all the traffic for you. After that just
add our server controller's to the objects you wish to act when you do something on your controller.
Server Controllers
Server Controllers can be added to your existing game objects easily by using the Add Component menu
below. (EasyWiFiController -> Server -> (controller you wish).

You'll notice that all controls have a custom controller and most have a standard controller. I will
explain the difference below.
Standard Controllers
Standard controllers are by far the easiest to use and are very useful to accomplish common things
without having to code anything. Below is what a standard Dpad server controller Inspector looks like.
Control- Here we match the string that we created in the control name on the client side. The matching
strings is what let's us create the link automatically and no other coding is necessary. The control above
will react when "DPad1" is pressed.
Player- In a given game we can certainly have multiple players each using their own phone. The
controller layout you give each is naturally the same but we still need a way to distinguish player 1,
player 2, etc. In the above example the first phone/tablet (player 1) is what will affect this object and not
any other player. You can have as many players as you wish as long as they are all on the same wifi
network. Certain Controls also lend itself to selecting "any player" for things like menus.
Horizontal- Specifying which axis the horizontal client control press will affect. (You can specify positive
or negative or if you only want one axis you can set the other axis to none).
Vertical- Specifying which axis the vertical client control press will affect. (You can specify positive or
negative or if you only want one axis you can set the other axis to none).

Action- Specify what action is to take place (position, rotation, local position, local rotation, or local
scale)
Sensitivity- A multiplier if we want more effect. Remember the controls are coming in normalized so this
will help make effect larger or smaller if that's what we want.
In the above example that would be all that we need to make the gameobject that we attach this to
(most likely your player) to respond to the dpad1 control. Left and right presses would make the x-axis
position change and up and down presses would make the y-axis position change. Simply set the
dropdowns accordingly and the coding is already done for you.
Custom Controllers
Custom Controllers are for the situations where you want to do something custom. In game "actions"
like jump or shoot are usually tightly coupled to code you have already created. Shoot probably spawns
some bullet prefabs and jump probably is a custom method that probably sets up some animations and
moves the player accordingly. In any case these are probably already defined functions in your code and
you simply want to call them. Below is the example of the inspector you'd see on a custom Controller.
Control- Same description as on the standard controller. Above we are tying this script to "Button2" on
the client side controller.
Player- Same description as on the standard controller. Above we are specifying that player 1.
Notify Method- Method we want to call that is attached to this object. This is usually located in a
separate script on the same object simply enter the string of this method name and it will be called
when appropriate.
Implementation notes- The notify method utilizes unity's sendMessage API and passes in the control
type as the argument. You can access the controls full data inside your method if you wish. In this
fashion you can do some quite custom things if you wish. See the example drawing scene for how far
you can extend this. In it we've turned the touchpad control into a simple painting application and
attached the custom touchpad server controller to the server side canvas. In this way totally unique
functionality was accomplished by just passing the controller data to a notify method. SendMessage
assumes the method is also on this object but it can be changed to broadcastMethod if you wish to
Invoke a method on other objects.

Custom Controller method code block- The method you provide (in our above example "changeColor"
should have the following signature so that you can act on the latest controller data in anyway you wish.
The example passes a ButtonControllerType (because its button) but each control will pass it's own
ControllerType (Joystick, Button, Slider, etc.). It's worth noting that custom controllers get called every
frame by default (you can change this in code if you wish). Each controller type has it's own data
(Button has BUTTON_STATE_IS_PRESSED a bool) so you should look at the data that corresponds to the
custom control you wish to create.
Backchannel Data
Server side
Backchannel Data as the name implies involves sending data back to the controller. This is primarily
useful when we want to have a UI look and feel very customized to the game you are making. A normal
example is if you were making a racing game you might want to have an animated speedometer on the
controller to indicate your speed. While the controller and its controls work fine without a backchannel
to control your car if you want to know how fast you are currently going the game needs to send that
info back to the controller (in this case a float) in order to animate it. Backchannels are always going to
be custom to your game and on the server side will require a few lines of code to push the data into the
server backchannel script. In the below example the steering script is going to push the float into our
backchannel script. In the steering script it will only need the following additional lines of code to
accomplish that (obviously this is in addition to your normal game logic for the steering or whatever you
are trying to accomplish).

Your Game Script
declare a public backchannel object for the type you want
call setValue on that backchannel object and we will communicate to the controller
Backchannel Script
Control- Same description as on the server controllers Above we are tying this script to "Float1" on the
client side controller.
Player- Same description as on the server controller. Above we are specifying that player 1.
Implementation notes- Just like the client controller EasyWiFiManager is going to be a coordinator for
all the various backchannel types you have (cuts down on WiFi traffic with only one packet for all your
backchannels). We are only providing low level types because it is important to keep traffic size per
packet to a minimum (we've already done this on our controls going to the server even kitchen sink with
7 controls is under 512 bytes per packet). If we provided higher level objects (transforms, rigidbodies,
arrays, etc) it is easy to be oblivious to just how many properties these objects have (and if your packet
size gets to large collisions are more likely and packet fragmentation is possible). Packet size should be
trying to keep under 512 bytes and serializing all these properties or arrays it would be very easy to
exceed that (and that's assuming you only sent back one backchannel not multiple). For that very
reason we are supplying only low level types as backchannels to force you to think about what you need
to send and keep that to a minimum.
Client Side
On the client side for backchannels it is exactly like the custom server controls. You simply match the
string and specify the name of the method you want us to call
Control Name- Same description as on the standard controller. Above we are tying this script to "Float1"
on the client side controller.

Notify Method- Method we want to call that is attached to this object. This is usually located in a
separate script on the same object simply enter the string of this method name and it will be called
when appropriate.
Forward Data Channel If your controller UI gets quite complex there are (rare) instances where you might want to send over
data without User Interaction. In general any AI that you do is best to be accomplished from your game
(server side) but there are some cases where you might want to handle this from the controller and then
communicate it to the server. Just like the backchannel in the above section we provide a way to send
this data. You add these to any object on your controller scene via the component menu instead of the
main toolbar in Unity. This is because these objects do not have a corresponding UI and don't need to be
added to the canvas (can be added to any object). Just like the user controls, these data controls do
have a string field that should be matched with the corresponding custom data control on the server
side.
Unity UI (EasyWiFiInputModule) When you turn your phone into a controller there is usually one other large item that you want to do
which is allow your phone to navigate pause menus, character selection screens, etc. Starting with Unity
4.6 the new Unity UI makes these menu's easy to create and supplies input modules for mouse and
touch. These input modules can be found under the EventSystem object that is created on your menu's
canvas. To make things really easy we have created our own input module so that your phone/tablet
can just as easily navigate Unity UI menu's as well. Simply attach the Easy WiFi Input Module to your
existing Canvas's EventSystem and that's it you can now navigate the menus. You can specify any dpad
or joystick for menu movement and specify which buttons you want to submit and cancel.
Connection System Starting with version 1.8 Easy WiFi Controller has a brand new and more robust connection system. You
no longer need to restart the controller in development when you have server only changes. This new
connection system revolves around the settings in EasyWiFiManager. Specifically, important are the
clientTimeout (server), heartbeat rate(server), and heartbeatTimeout(client). Easy WiFiController uses
UDP so there is never really a "connection" but this data flow and heartbeats allow each end to sense
when the "connection" has been broken and respond appropriately. Likewise there is a new callback on

the serverside that will be fired anytime a player connects or disconnects and passes an int for the
player number and a bool that lets you know whether this is a connection or disconnection. Each of the
server controls included shows an example of how to subscribe to this callback if you want to use it for
custom purposes. Internally, this is also used to support the new "Any Player" option for the server
controls. The connection system by default supports up to 16 players, as well as supports having the
client and server on the same machine or separate machines for devolpment if you wish. Please note
that multiple clients cannot be on the same machine though.
Any Player Option Server controls can now support an "Any Player" option similar to the Unity API. Joysticks, Dpads, Sliders
work well with this scheme without issue. Other controls like buttons it's important to write your
custom fuction carefully when you set it to "Any Player" keep in mind that for buttons most of the time
one controller might be sending a pressed while the other might send a not pressed and will fight with
eachother. If you use "Any Player" with buttons make sure to code your custom fuction appropriately
which is to say most of the time you want to respond with pressed if any controller presses the button.
Other controls like the accelerometer and gyro rarely make sense for the any player option. The
telemetry will usually be fighting with eachother.
Summary That's all there is to it! You'll notice that in most cases no coding was required at all unless you want to
do something custom. If you do need to do something custom it is easy to call your custom methods to
do whatever you need. As far as the underlying networking, discovery, and over the wire definitions
they are all handled for you which lets you focus on your game. If you are curious on the
implementation or want to tweak anything though we do not hide anything in a dll. All the logic is
available to be seen or modified as you wish.
Support If you are confused about anything there are multiple avenues to get in touch and get support. First we
frequent our Unity forum thread often and you can usually find out good information and ask us
anything there. In addition our website http://ladmertech.com has videos and other information
regarding Easy WiFi Controller. Also, on the website is a contact us page if you want to mail us directly
and we do our best to get back to you promptly. We hope you enjoy our asset and good luck making
your games!