Embed Size (px)
Citation preview

Australian Curriculum Earth Science activities
with links to other subjects.
YEAR 2 EARTH’S RESOURCES

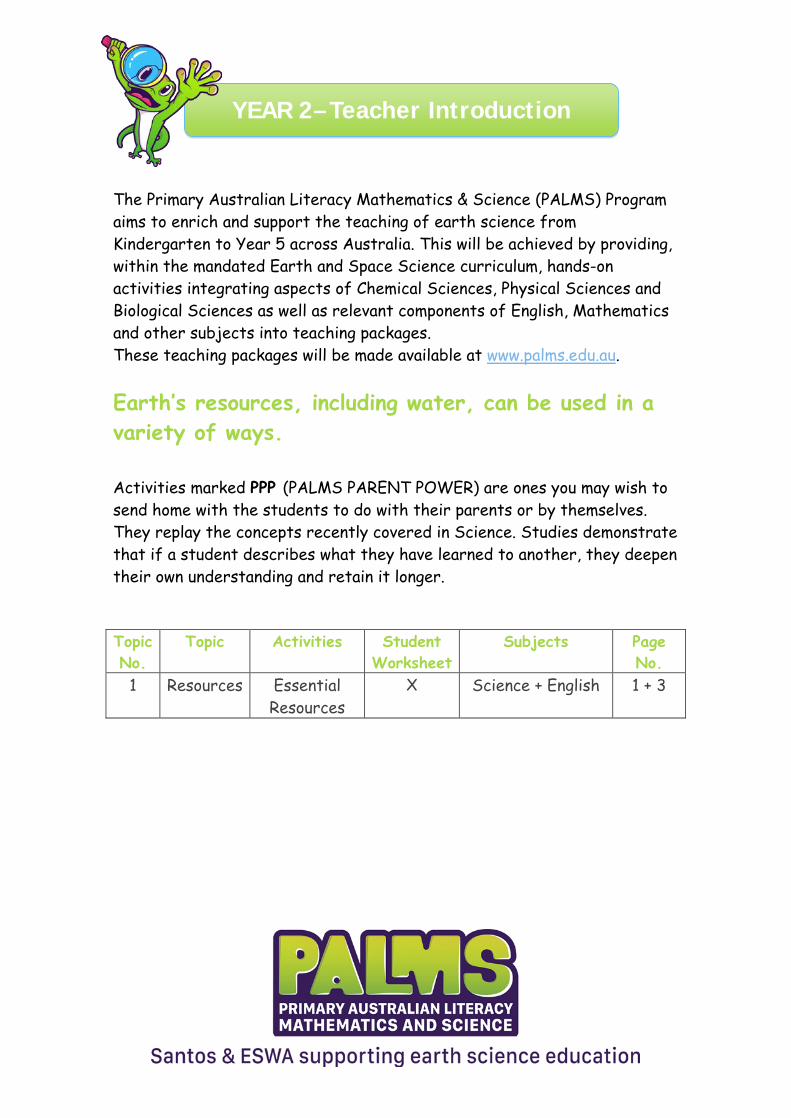
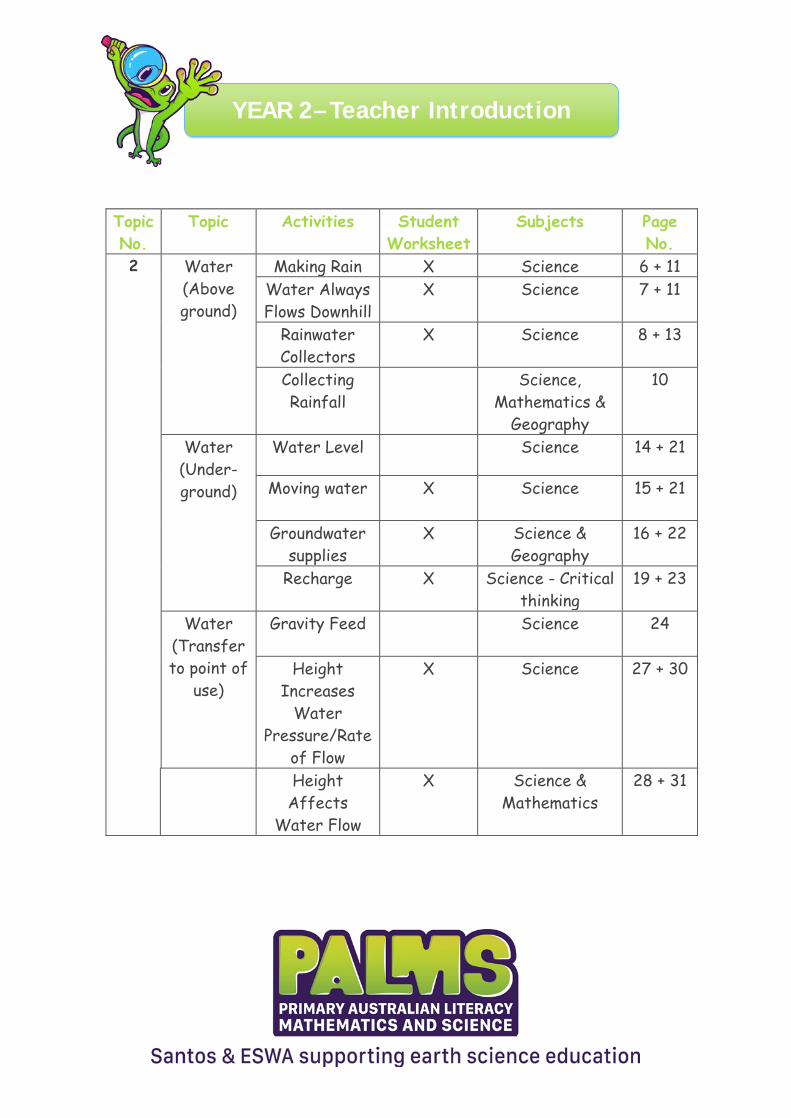
YEAR 2– Teacher Introduction
The Primary Australian Literacy Mathematics & Science (PALMS) Program aims to enrich and support the teaching of earth science from Kindergarten to Year 5 across Australia. This will be achieved by providing, within the mandated Earth and Space Science curriculum, hands-on activities integrating aspects of Chemical Sciences, Physical Sciences and Biological Sciences as well as relevant components of English, Mathematics and other subjects into teaching packages. These teaching packages will be made available at www.palms.edu.au.
Earth’s resources, including water, can be used in a variety of ways. Activities marked PPP (PALMS PARENT POWER) are ones you may wish to send home with the students to do with their parents or by themselves. They replay the concepts recently covered in Science. Studies demonstrate that if a student describes what they have learned to another, they deepen their own understanding and retain it longer. Topic No.
Topic Activities Student Worksheet
Subjects Page No.
1 Resources Essential Resources
X Science + English 1 + 3
YEAR 2– Teacher Introduction
Topic No.
Topic Activities Student Worksheet
Subjects Page No.
2 Water (Above ground)
Making Rain X Science 6 + 11 Water Always Flows Downhill
X Science 7 + 11
Rainwater Collectors
X Science 8 + 13
Collecting Rainfall
Science, Mathematics &
Geography
10
Water (Under- ground)
Water Level Science 14 + 21
Moving water
X Science 15 + 21
Groundwater supplies
X Science & Geography
16 + 22
Recharge X Science - Critical thinking
19 + 23
Water (Transfer to point of
use)
Gravity Feed
Science 24
Height Increases
Water Pressure/Rate
of Flow
X Science 27 + 30
Height Affects
Water Flow
X Science & Mathematics
28 + 31
YEAR 2– Teacher Introduction
Topic No.
Topic Activities Student Workshe
et
Subjects Page No.
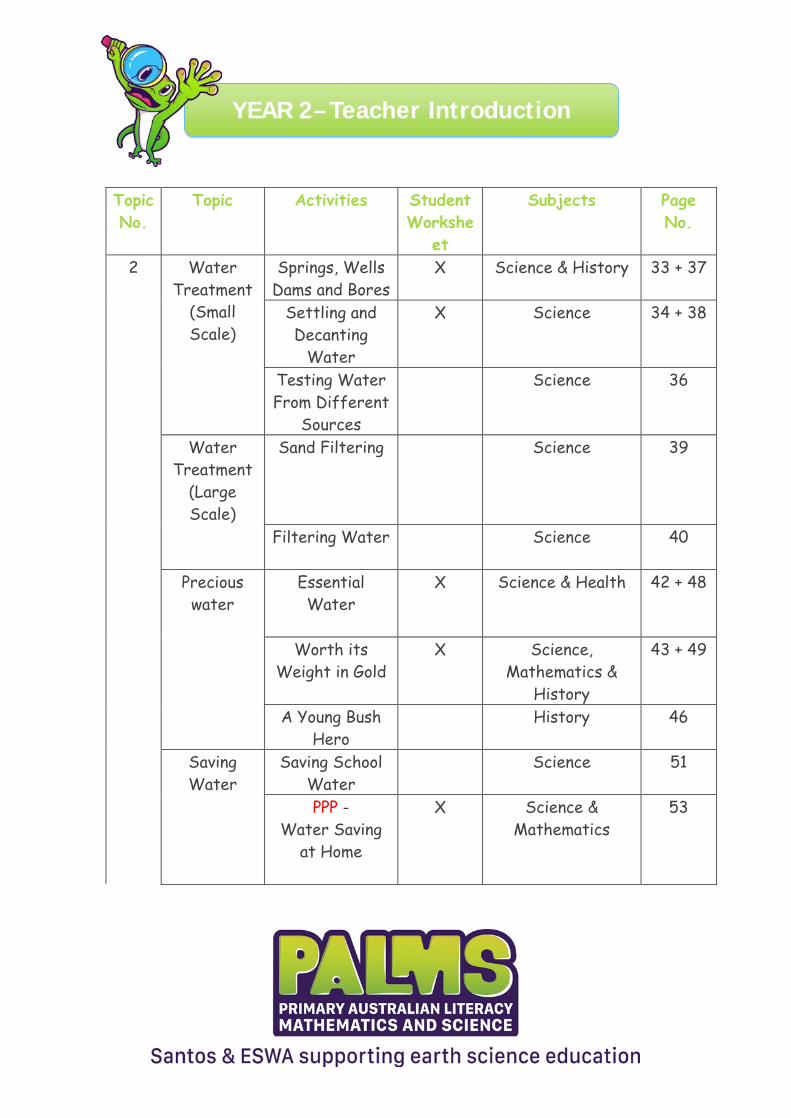
2 Water Treatment
(Small Scale)
Springs, Wells Dams and Bores
X Science & History 33 + 37
Settling and Decanting
Water
X Science 34 + 38
Testing Water From Different
Sources
Science 36
Water Treatment
(Large Scale)
Sand Filtering
Science 39
Filtering Water
Science 40
Precious water
Essential Water
X Science & Health 42 + 48
Worth its Weight in Gold
X Science, Mathematics &
History
43 + 49
A Young Bush Hero
History 46
Saving Water
Saving School Water
Science 51
PPP - Water Saving
at Home
X Science & Mathematics
53
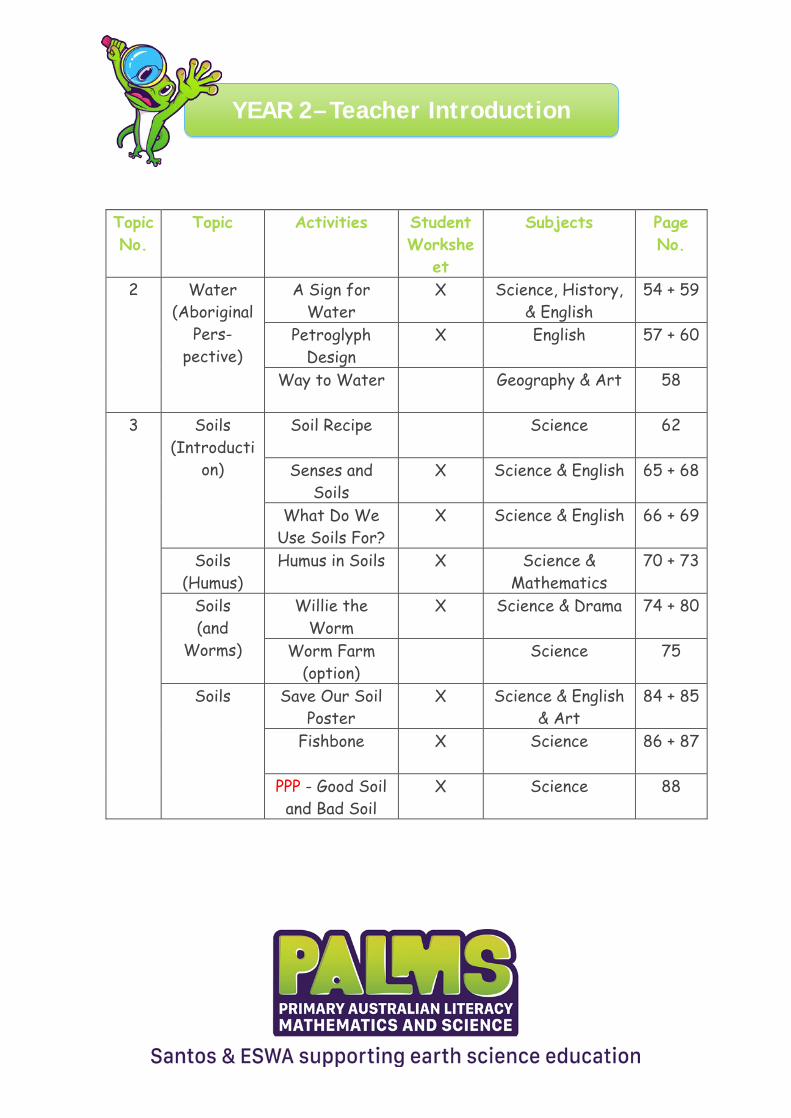
YEAR 2– Teacher Introduction
Topic No.
Topic Activities Student Workshe
et
Subjects Page No.
2 Water (Aboriginal
Pers- pective)
A Sign for Water
X Science, History, & English
54 + 59
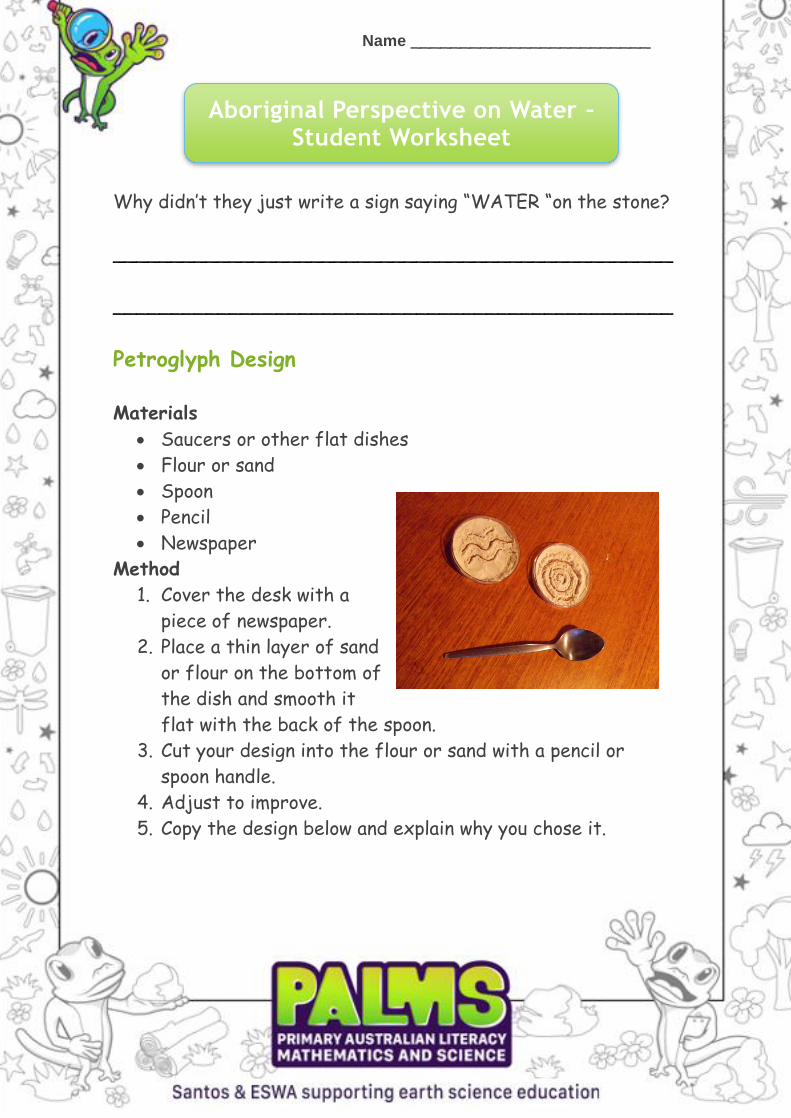
Petroglyph Design
X English 57 + 60
Way to Water
Geography & Art 58
3 Soils (Introducti
on)
Soil Recipe Science 62
Senses and Soils
X Science & English 65 + 68
What Do We Use Soils For?
X Science & English 66 + 69
Soils (Humus)
Humus in Soils X Science & Mathematics
70 + 73
Soils (and
Worms)
Willie the Worm
X Science & Drama 74 + 80
Worm Farm (option)
Science 75
Soils Save Our Soil Poster
X Science & English & Art
84 + 85
Fishbone
X Science 86 + 87
PPP - Good Soil and Bad Soil
X Science 88
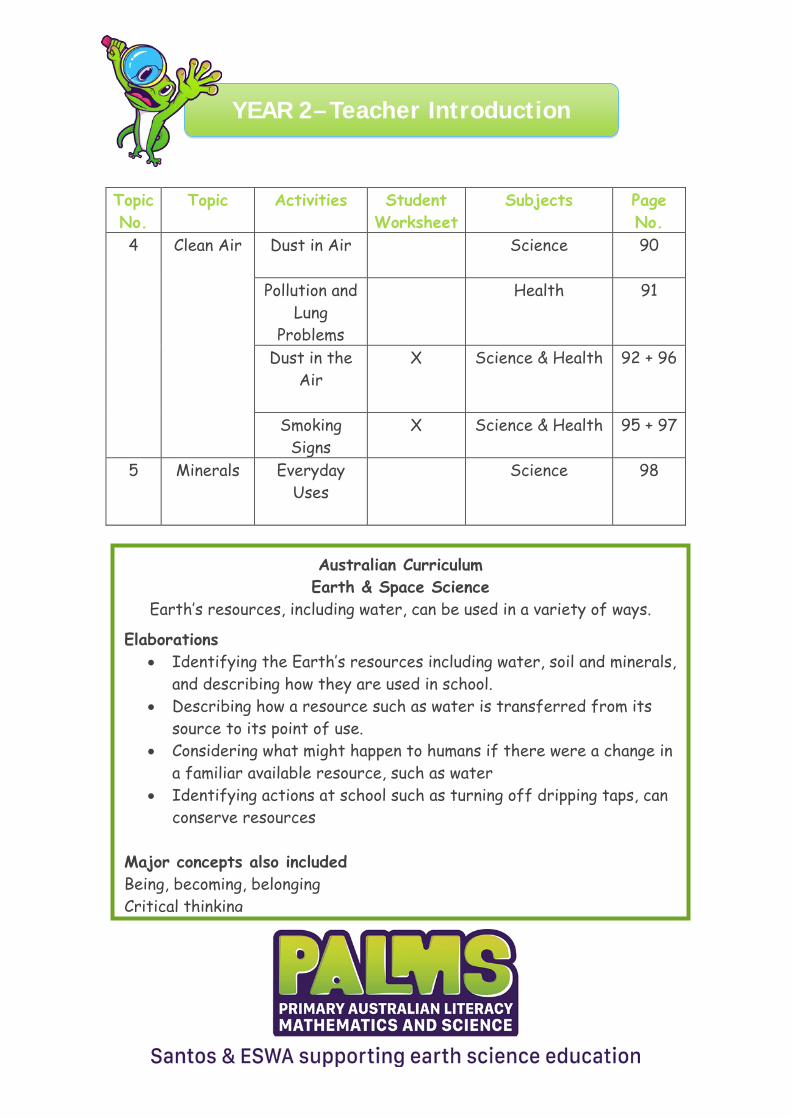
YEAR 2– Teacher Introduction
Topic No.
Topic Activities Student Worksheet
Subjects Page No.
4 Clean Air Dust in Air
Science 90
Pollution and Lung
Problems
Health 91
Dust in the Air
X Science & Health 92 + 96
Smoking Signs
X Science & Health 95 + 97
5 Minerals Everyday Uses
Science 98
Australian Curriculum Earth & Space Science
Earth’s resources, including water, can be used in a variety of ways.
Elaborations • Identifying the Earth’s resources including water, soil and minerals,
and describing how they are used in school. • Describing how a resource such as water is transferred from its
source to its point of use. • Considering what might happen to humans if there were a change in
a familiar available resource, such as water • Identifying actions at school such as turning off dripping taps, can
conserve resources Major concepts also included Being, becoming, belonging Critical thinking
YEAR 2– Teacher Introduction
English Language for different texts or purposes Identify text structures, language features to describe characters, settings & events. Text organization. Listen for specific purpose. Rehearse and deliver short presentations.
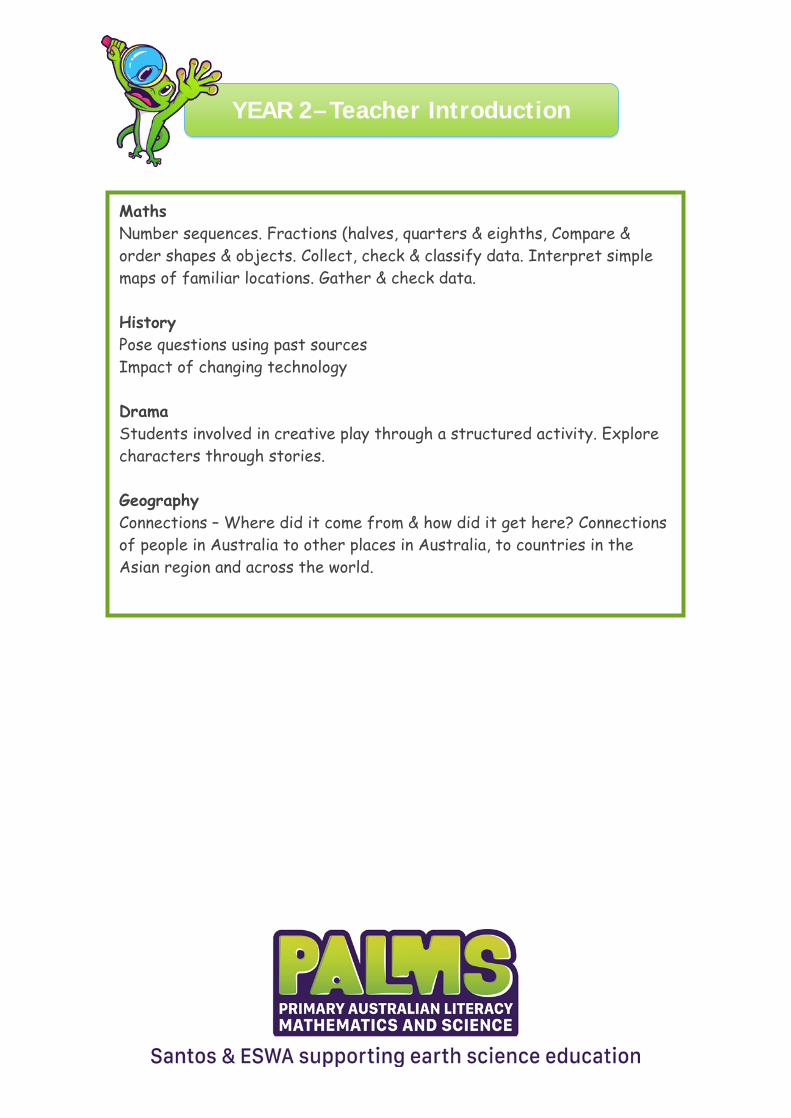
Maths Number sequences. Fractions (halves, quarters & eighths, Compare & order shapes & objects. Collect, check & classify data. Interpret simple maps of familiar locations. Gather & check data. History Pose questions using past sources Impact of changing technology Drama Students involved in creative play through a structured activity. Explore characters through stories. Geography Connections – Where did it come from & how did it get here? Connections of people in Australia to other places in Australia, to countries in the Asian region and across the world.
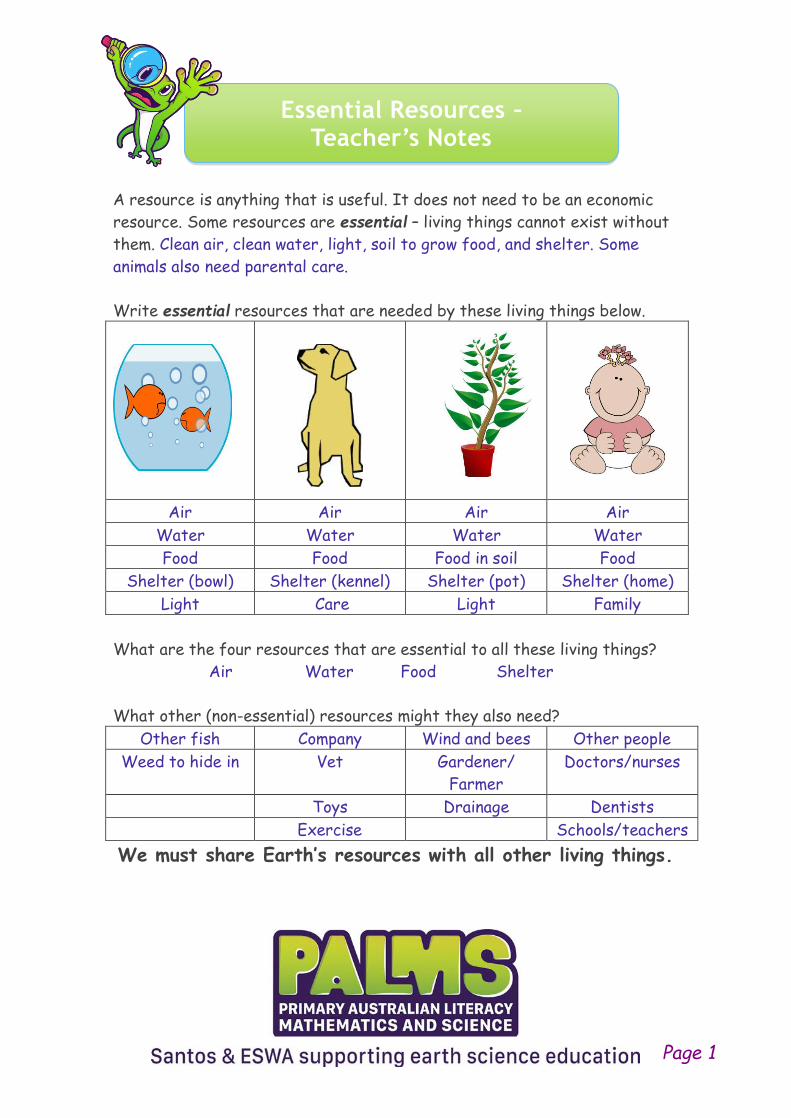
Essential Resources – Teacher’s Notes
A resource is anything that is useful. It does not need to be an economic
resource. Some resources are essential – living things cannot exist without
them. Clean air, clean water, light, soil to grow food, and shelter. Some
animals also need parental care.
Write essential resources that are needed by these living things below.
Air Air Air Air
Water Water Water Water
Food Food Food in soil Food
Shelter (bowl) Shelter (kennel) Shelter (pot) Shelter (home)
Light Care Light Family
What are the four resources that are essential to all these living things?
Air Water Food Shelter
What other (non-essential) resources might they also need?
Other fish Company Wind and bees Other people
Weed to hide in Vet Gardener/
Farmer
Doctors/nurses
Toys Drainage Dentists
Exercise Schools/teachers
We must share Earth’s resources with all other living things.
Page 1
Essential Resources – Teacher’s Notes
Resources for your day Name and draw 4 non-essential resources you have used since you woke up
this morning.
Answers will vary
Should people also be counted as resources? Yes. People look after each
other and train children to become useful as adults.
Your school as a resource for you - Think, pair, share
How can your school teach you to become a more resourceful person?
It can teach you to :
Read, write, count, measure, be polite, be patient, understand road safety,
learn the rules of sports, help people, cook, understand which foods to eat,
and know more about the world we live in.
Page 2
Name ________________________
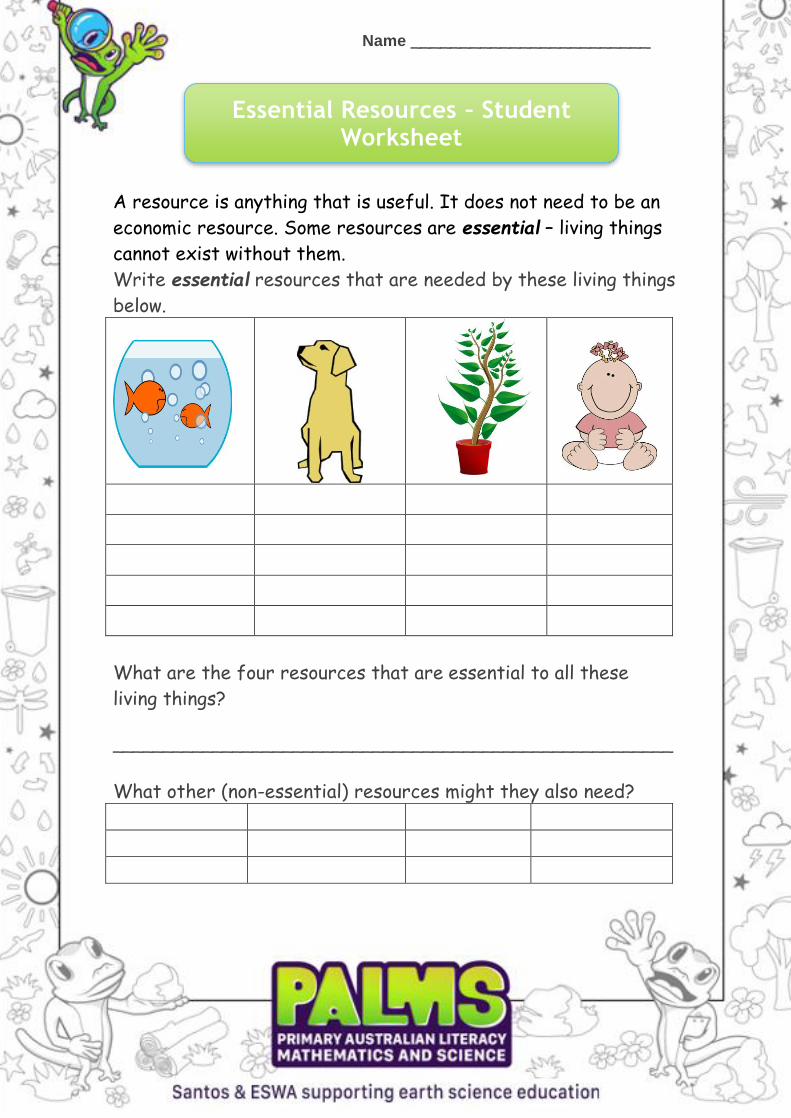
Essential Resources – Student Worksheet
A resource is anything that is useful. It does not need to be an
economic resource. Some resources are essential – living things
cannot exist without them.
Write essential resources that are needed by these living things
below.
What are the four resources that are essential to all these
living things?
________________________________________________________
What other (non-essential) resources might they also need?
Name ________________________
Essential Resources – Student Worksheet
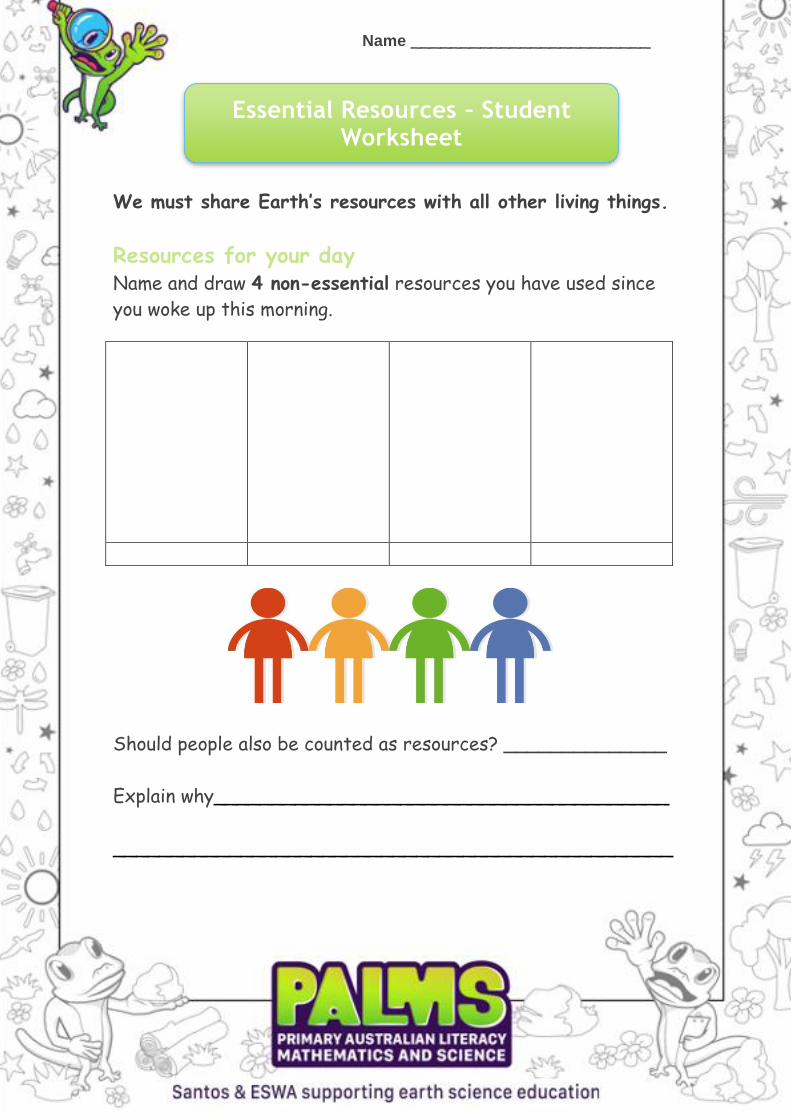
We must share Earth’s resources with all other living things.
Resources for your day Name and draw 4 non-essential resources you have used since
you woke up this morning.
Should people also be counted as resources? ______________
Explain why_______________________________________
________________________________________________
Name ________________________
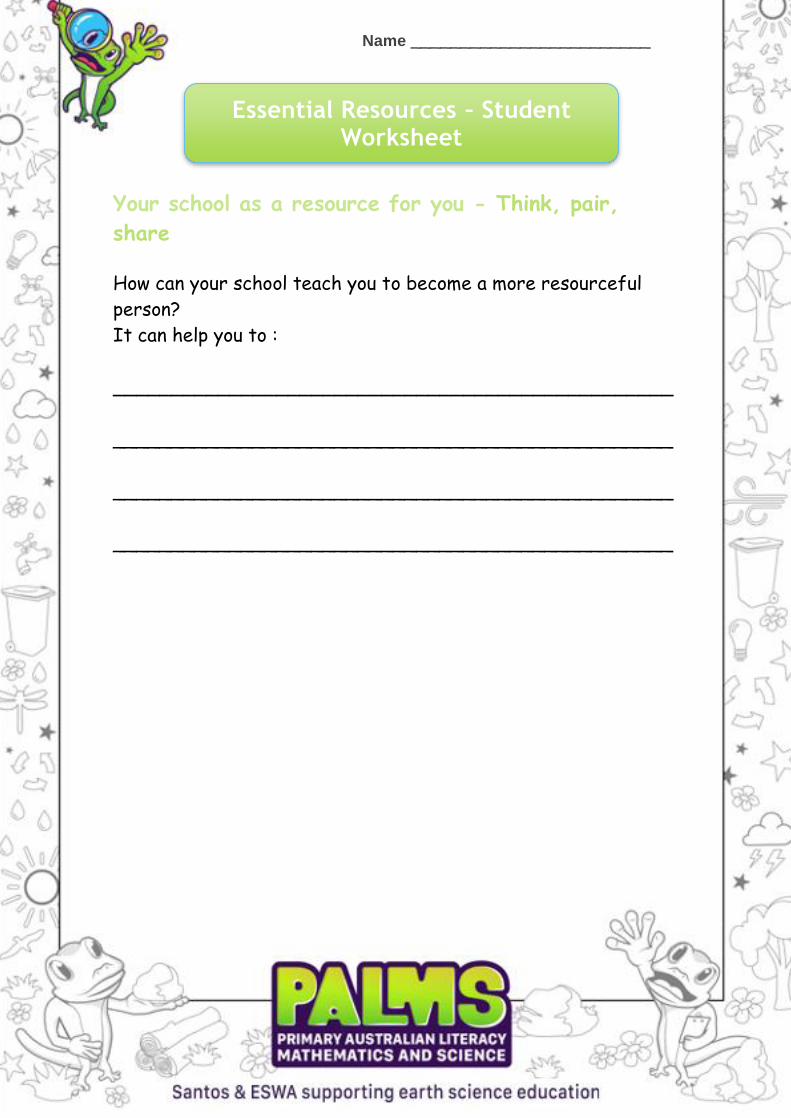
Essential Resources – Student Worksheet
Your school as a resource for you - Think, pair,
share
How can your school teach you to become a more resourceful
person?
It can help you to :
________________________________________________
________________________________________________
________________________________________________
________________________________________________
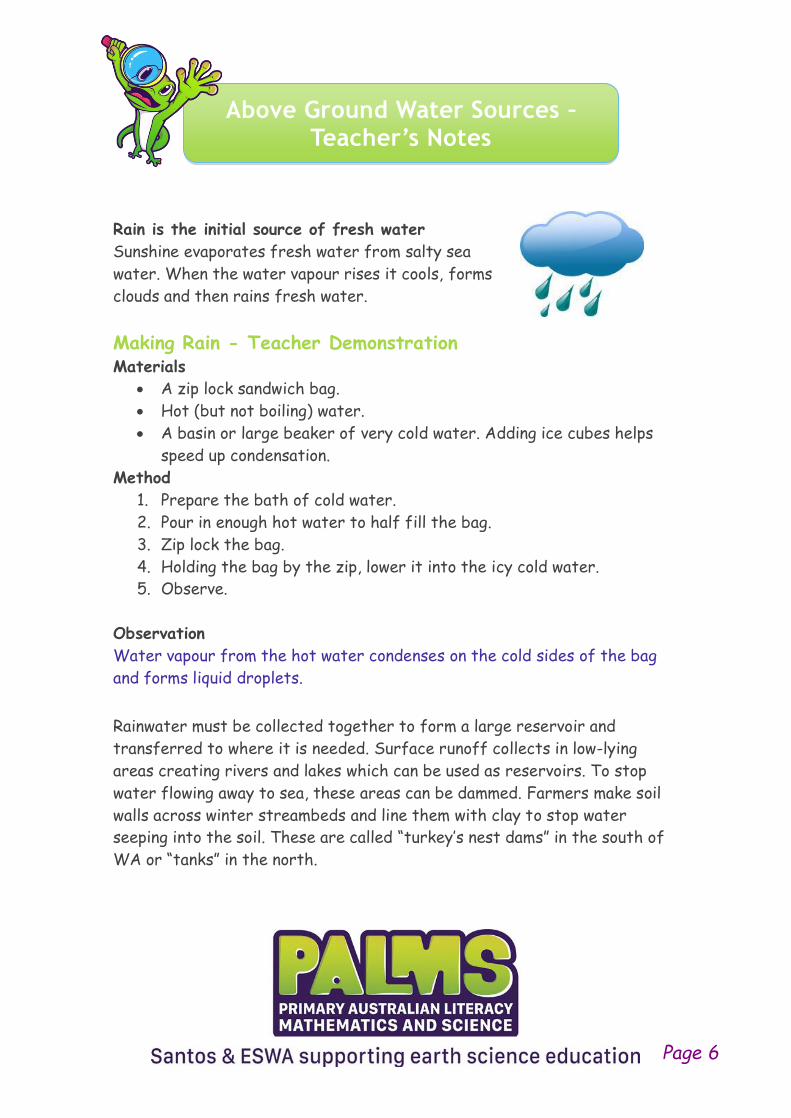
Above Ground Water Sources – Teacher’s Notes
Rain is the initial source of fresh water
Sunshine evaporates fresh water from salty sea
water. When the water vapour rises it cools, forms
clouds and then rains fresh water.
Making Rain - Teacher Demonstration Materials
• A zip lock sandwich bag.
• Hot (but not boiling) water.
• A basin or large beaker of very cold water. Adding ice cubes helps
speed up condensation.
Method
1. Prepare the bath of cold water.
2. Pour in enough hot water to half fill the bag.
3. Zip lock the bag.
4. Holding the bag by the zip, lower it into the icy cold water.
5. Observe.
Observation
Water vapour from the hot water condenses on the cold sides of the bag
and forms liquid droplets.
Rainwater must be collected together to form a large reservoir and
transferred to where it is needed. Surface runoff collects in low-lying
areas creating rivers and lakes which can be used as reservoirs. To stop
water flowing away to sea, these areas can be dammed. Farmers make soil
walls across winter streambeds and line them with clay to stop water
seeping into the soil. These are called “turkey’s nest dams” in the south of
WA or “tanks” in the north.
Page 6
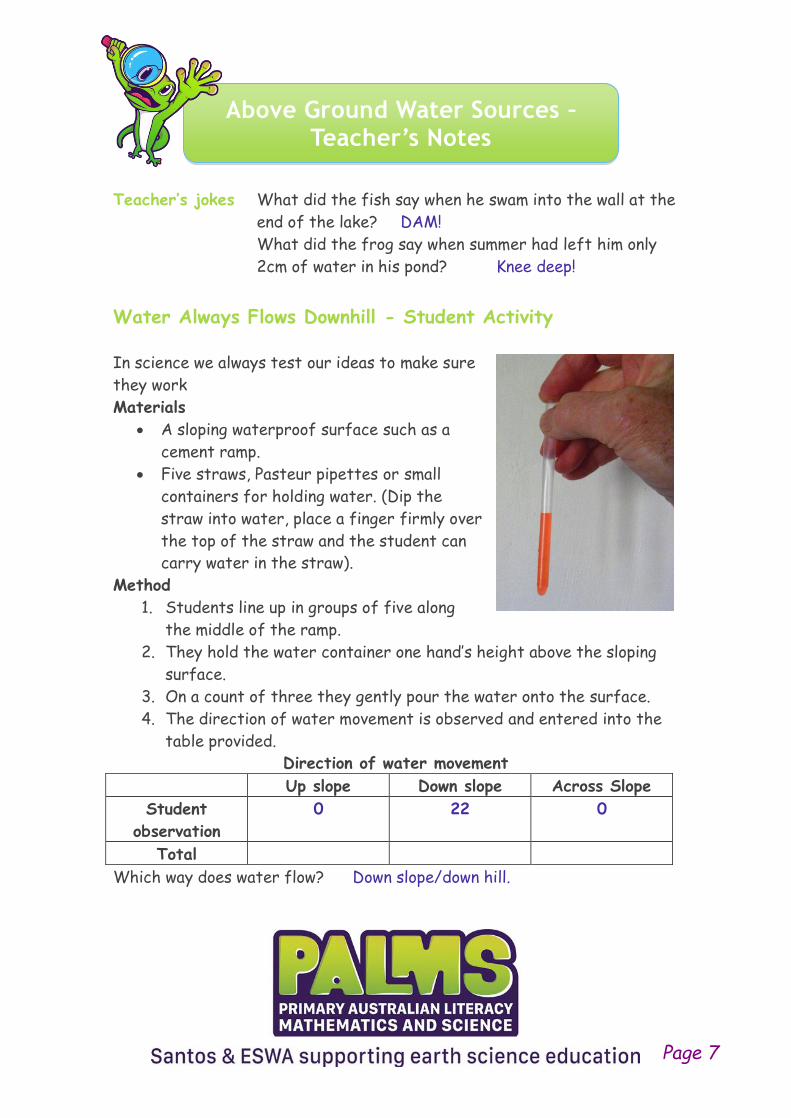
Above Ground Water Sources – Teacher’s Notes
Teacher’s jokes What did the fish say when he swam into the wall at the
end of the lake? DAM!
What did the frog say when summer had left him only
2cm of water in his pond? Knee deep!
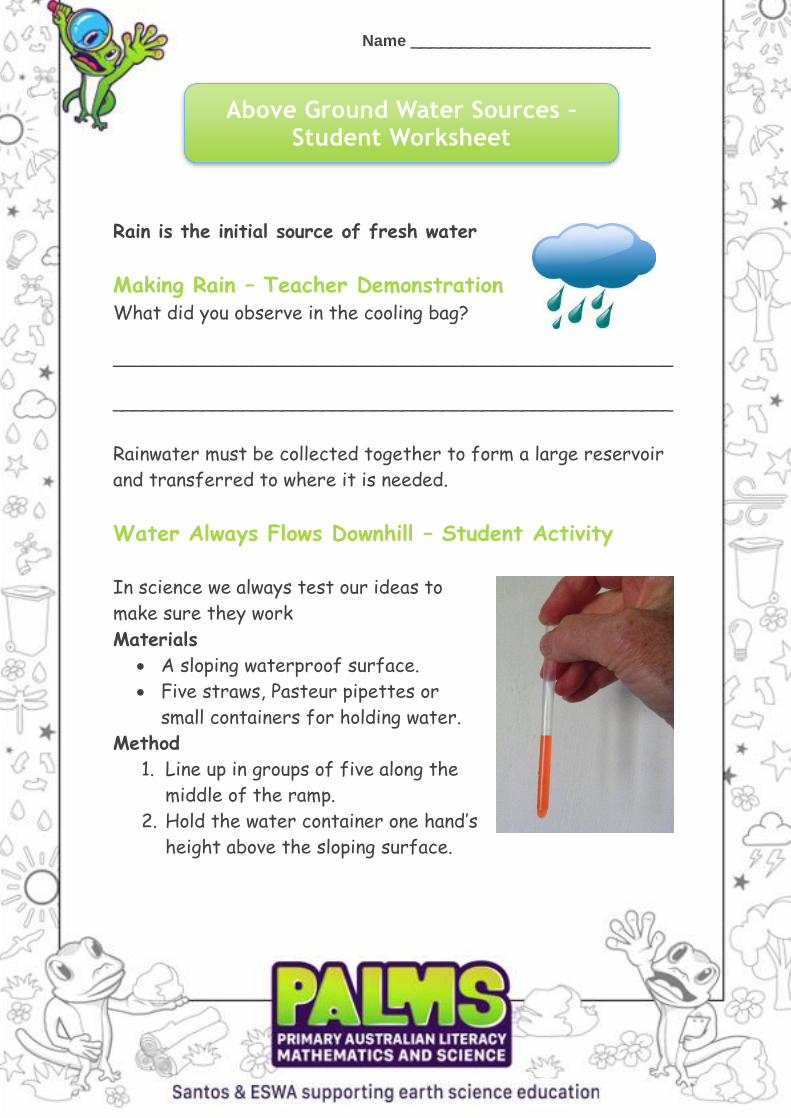
Water Always Flows Downhill - Student Activity
In science we always test our ideas to make sure
they work
Materials
• A sloping waterproof surface such as a
cement ramp.
• Five straws, Pasteur pipettes or small
containers for holding water. (Dip the
straw into water, place a finger firmly over
the top of the straw and the student can
carry water in the straw).
Method
1. Students line up in groups of five along
the middle of the ramp.
2. They hold the water container one hand’s height above the sloping
surface.
3. On a count of three they gently pour the water onto the surface.
4. The direction of water movement is observed and entered into the
table provided.
Direction of water movement
Up slope Down slope Across Slope
Student
observation
0 22 0
Total
Which way does water flow? Down slope/down hill.
Page 7
Above Ground Water Sources – Teacher’s Notes
Why is there always a hollow or depression around a drain in the
schoolyard? To drain away the rainwater.
Why isn’t the bottom of your shower at home flat? To allow the water to
drain away.
Why do some areas of the schoolyard always have puddles? They are low
lying and don’t have drains.
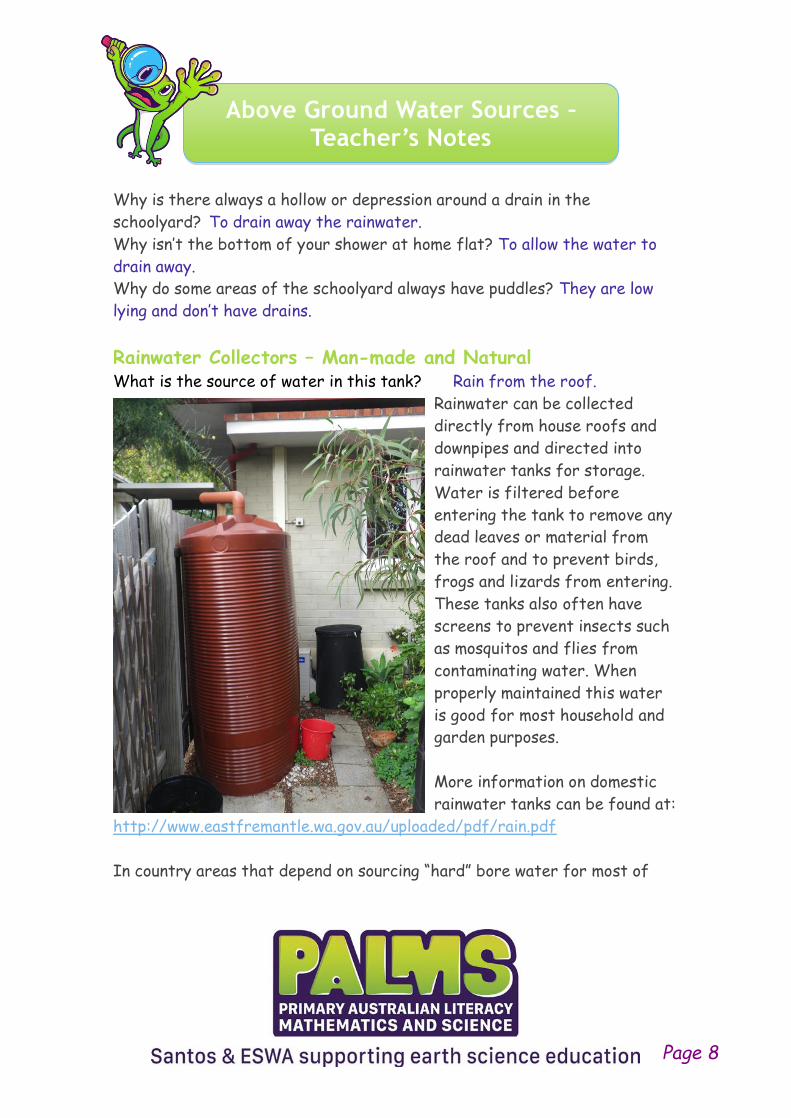
Rainwater Collectors – Man-made and Natural What is the source of water in this tank? Rain from the roof.
Rainwater can be collected
directly from house roofs and
downpipes and directed into
rainwater tanks for storage.
Water is filtered before
entering the tank to remove any
dead leaves or material from
the roof and to prevent birds,
frogs and lizards from entering.
These tanks also often have
screens to prevent insects such
as mosquitos and flies from
contaminating water. When
properly maintained this water
is good for most household and
garden purposes.
More information on domestic
rainwater tanks can be found at:
http://www.eastfremantle.wa.gov.au/uploaded/pdf/rain.pdf
In country areas that depend on sourcing “hard” bore water for most of
Page 8
Above Ground Water Sources – Teacher’s Notes
their needs. rainwater is highly prized for drinking, cooking and rinsing
washed hair, leaving it silky and not curiously crunchy.
In rural India, most households are primarily dependent on roof rainwater
for all household needs. A large cistern is constructed under each house to
hold all their private supply.
An excellent short (17m 14s) talk on TED explaining an Indian perspective
on water collection can be found at:
https://www.ted.com/talks/anupam_mishra_the_ancient_ingenuity_of_wat
er_harvesting?language=en
It has recently become possible to buy huge plastic membrane bags that
can be inserted under our Australian houses to hold rainwater in a similar
fashion. They are insulated from the sun’s heat by the mass of the house
and are sealed to reduce evaporation. (Mending leaks can be problematic
however).
Rainwater falling over large rocky outcrops or areas of concrete can also be
collected as runoff into town dams. The rock or concrete does not allow the
water to penetrate into it, a clay or asphalt base stops it seeping
underground. In this way water from a large area of rain falling on the
ground is directed into a smaller holding dam.
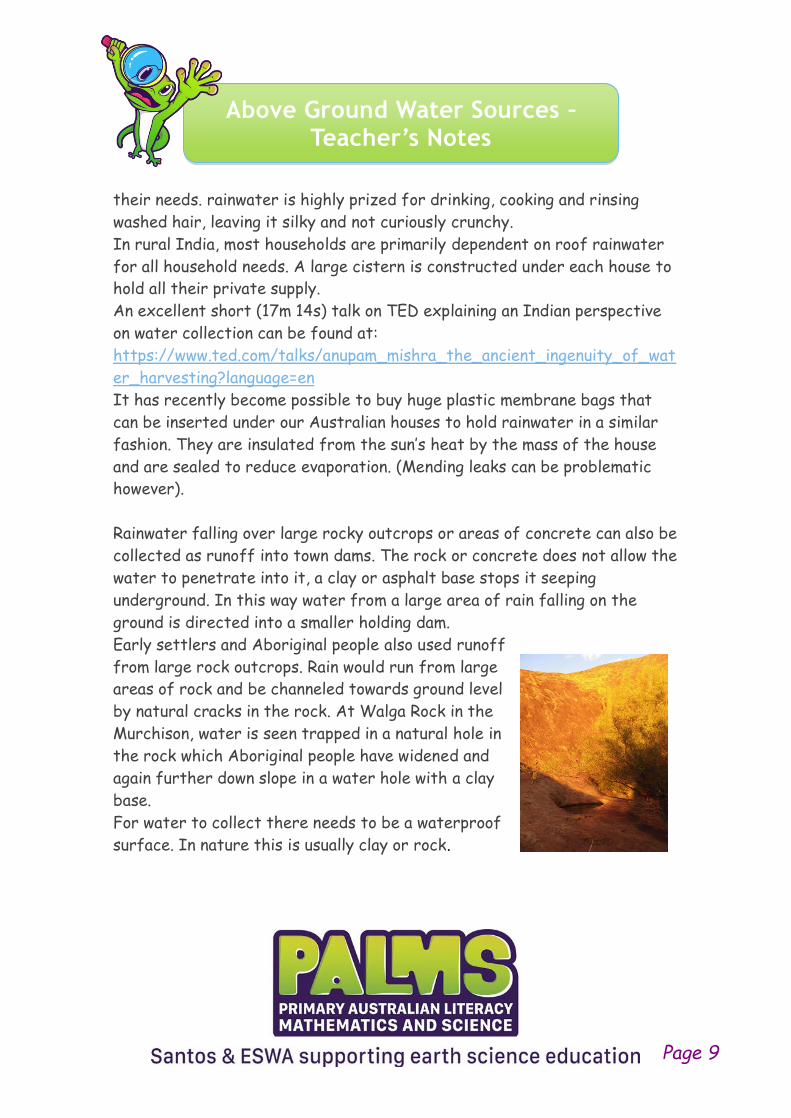
Early settlers and Aboriginal people also used runoff
from large rock outcrops. Rain would run from large
areas of rock and be channeled towards ground level
by natural cracks in the rock. At Walga Rock in the
Murchison, water is seen trapped in a natural hole in
the rock which Aboriginal people have widened and
again further down slope in a water hole with a clay
base.
For water to collect there needs to be a waterproof
surface. In nature this is usually clay or rock.
Page 9
Above Ground Water Sources – Teacher’s Notes
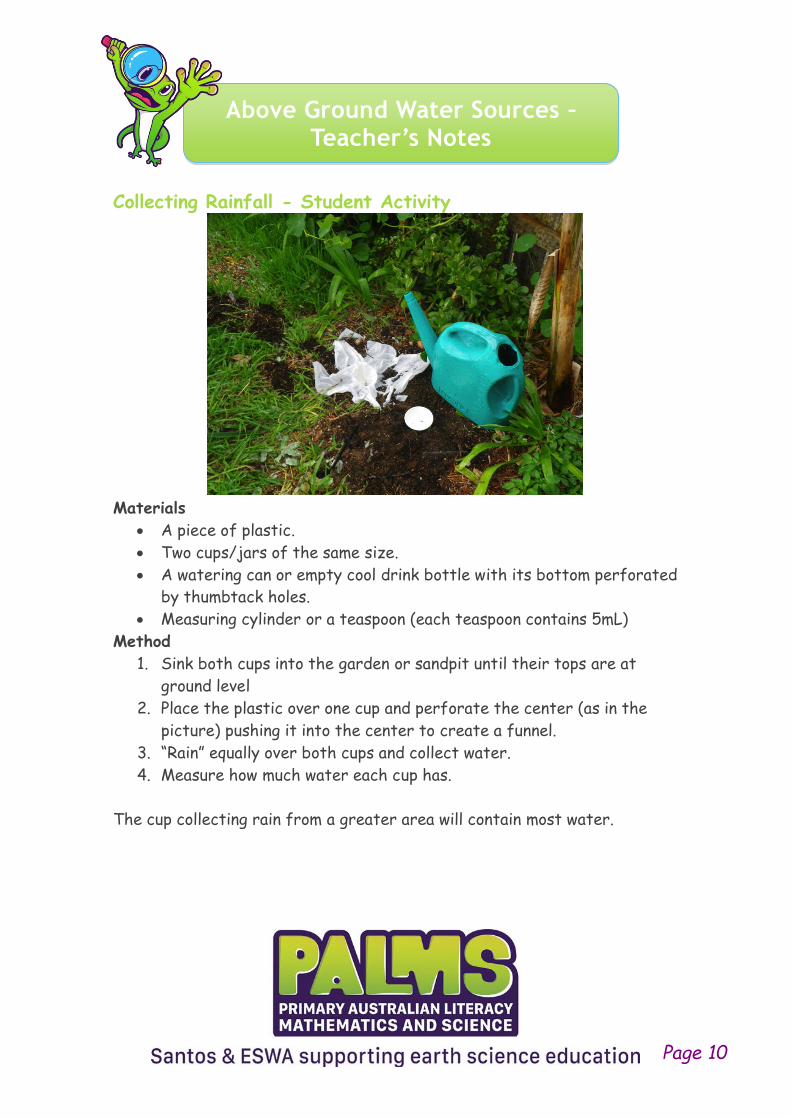
Collecting Rainfall - Student Activity
Materials
• A piece of plastic.
• Two cups/jars of the same size.
• A watering can or empty cool drink bottle with its bottom perforated
by thumbtack holes.
• Measuring cylinder or a teaspoon (each teaspoon contains 5mL)
Method
1. Sink both cups into the garden or sandpit until their tops are at
ground level
2. Place the plastic over one cup and perforate the center (as in the
picture) pushing it into the center to create a funnel.
3. “Rain” equally over both cups and collect water.
4. Measure how much water each cup has.
The cup collecting rain from a greater area will contain most water.
Page 10
Name ________________________
Above Ground Water Sources – Student Worksheet
Rain is the initial source of fresh water
Making Rain – Teacher Demonstration What did you observe in the cooling bag?
________________________________________________________
________________________________________________________
Rainwater must be collected together to form a large reservoir
and transferred to where it is needed.
Water Always Flows Downhill – Student Activity
In science we always test our ideas to
make sure they work
Materials
• A sloping waterproof surface.
• Five straws, Pasteur pipettes or
small containers for holding water.
Method
1. Line up in groups of five along the
middle of the ramp.
2. Hold the water container one hand’s
height above the sloping surface.
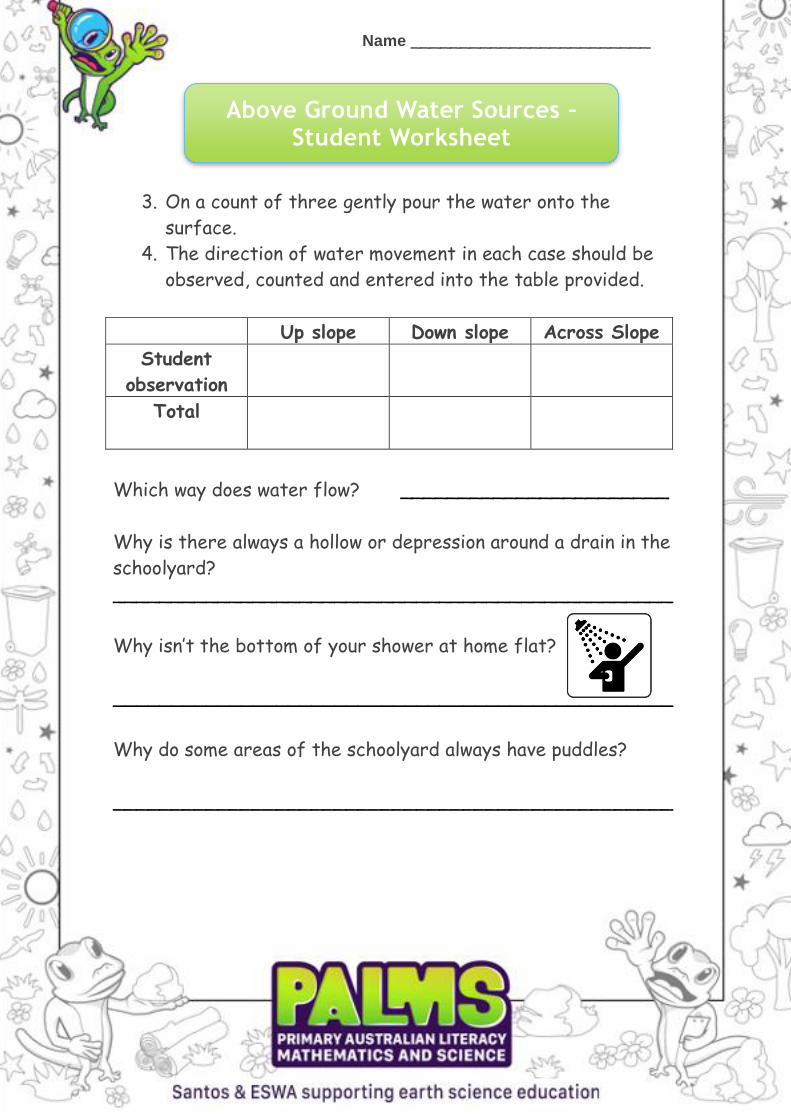
Name ________________________
Above Ground Water Sources – Student Worksheet
3. On a count of three gently pour the water onto the
surface.
4. The direction of water movement in each case should be
observed, counted and entered into the table provided.
Up slope Down slope Across Slope
Student
observation
Total
Which way does water flow? _______________________
Why is there always a hollow or depression around a drain in the
schoolyard?
________________________________________________
Why isn’t the bottom of your shower at home flat?
________________________________________________
Why do some areas of the schoolyard always have puddles?
________________________________________________

Name ________________________
Above Ground Water Sources – Student Worksheet
Rainwater Collectors
What is the source of water in this tank? _______________
Water can be collected from house
roofs and downpipes and directed into
rainwater tanks for storage. It is
filtered to remove any dead leaves or
material from the roof and to prevent
birds, frogs and lizards from entering.
Does your house have a rainwater
tank?
_________________________
Does your school collect rainwater?________________
Rainwater falling over large rocky outcrops or
areas of concrete can also be collected as
runoff into town dams. The rock or concrete
does not allow the water to sink into the soil.
These are relatively common in the Central
Wheatbelt of WA.
Does your town have a water collecting rock?
____________________________
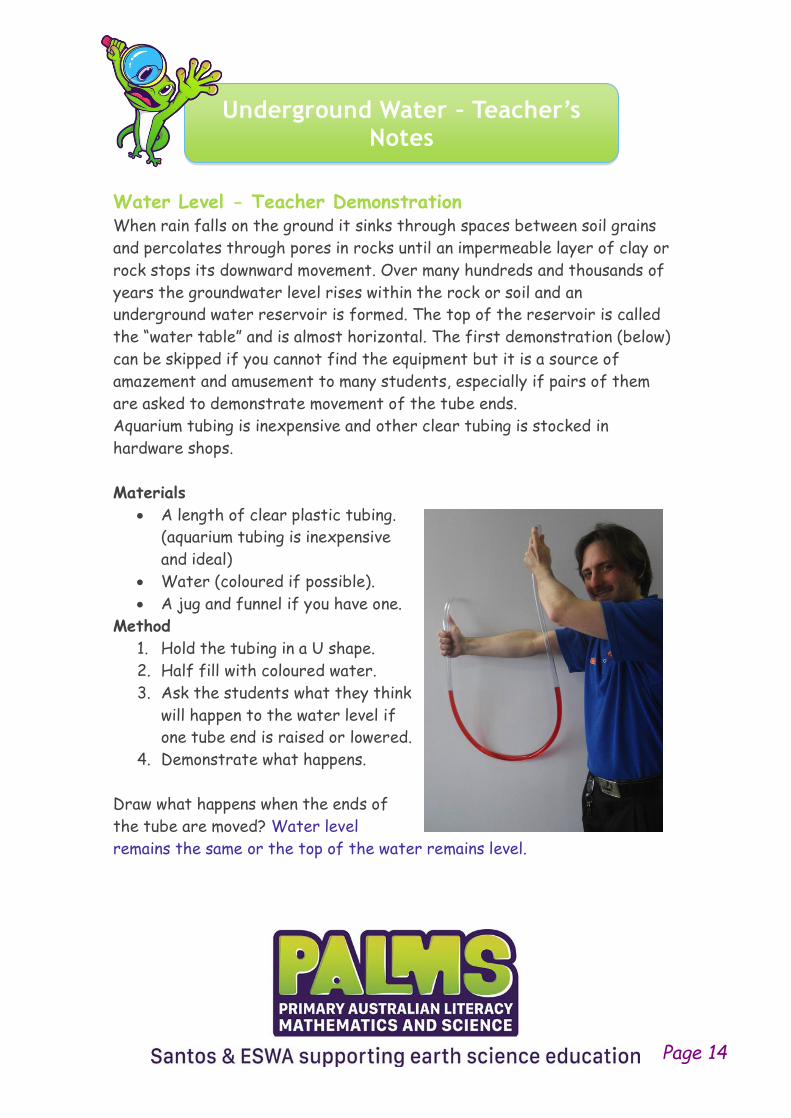
Underground Water – Teacher’s Notes
Water Level - Teacher Demonstration When rain falls on the ground it sinks through spaces between soil grains
and percolates through pores in rocks until an impermeable layer of clay or
rock stops its downward movement. Over many hundreds and thousands of
years the groundwater level rises within the rock or soil and an
underground water reservoir is formed. The top of the reservoir is called
the “water table” and is almost horizontal. The first demonstration (below)
can be skipped if you cannot find the equipment but it is a source of
amazement and amusement to many students, especially if pairs of them
are asked to demonstrate movement of the tube ends.
Aquarium tubing is inexpensive and other clear tubing is stocked in
hardware shops.
Materials • A length of clear plastic tubing.
(aquarium tubing is inexpensive
and ideal)
• Water (coloured if possible).
• A jug and funnel if you have one.
Method
1. Hold the tubing in a U shape.
2. Half fill with coloured water.
3. Ask the students what they think
will happen to the water level if
one tube end is raised or lowered.
4. Demonstrate what happens.
Draw what happens when the ends of
the tube are moved? Water level
remains the same or the top of the water remains level.
Page 14
Underground Water – Teacher’s Notes
Since ancient times, builders have used this technique to test that
foundations are level. A small channel was cut into the outer edge of the
base and this was filled with water. If the foundations were level the
channel would fill and no water would spill. If the foundations were not
level, water would spill out of the lowest point.
The carpenter’s spirit level works on the same principle to test if beams
are truly horizontal or vertical.
Moving Water - Student Activity This activity tests for concept transference.
Materials
• A beaker, a jam jar or a glass.
• An eraser or book to chock up the beaker at an angle.
• Coloured water in a jug.
• A pencil (the same colour as the water if possible).
Method
1. Pour water into the beaker until it is about one third full.
2. Draw what this looks like on your diagram.
Page 15
Underground Water – Teacher’s Notes
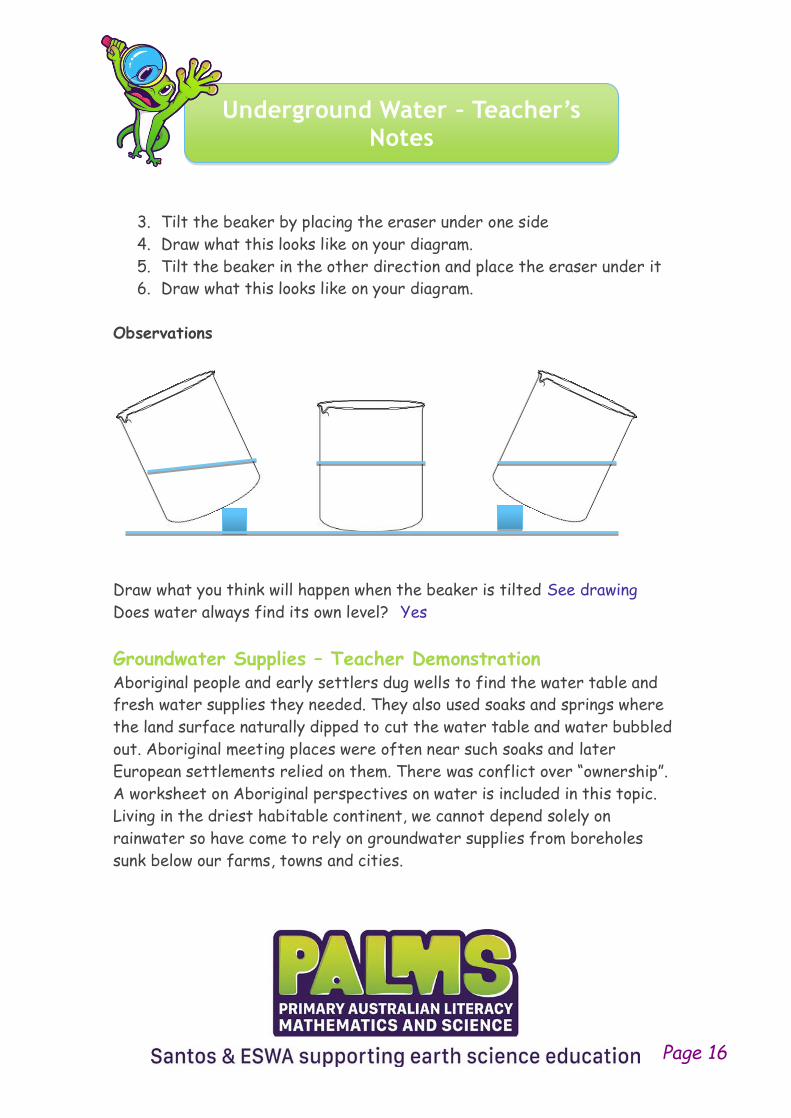
3. Tilt the beaker by placing the eraser under one side
4. Draw what this looks like on your diagram.
5. Tilt the beaker in the other direction and place the eraser under it
6. Draw what this looks like on your diagram.
Observations
Draw what you think will happen when the beaker is tilted See drawing
Does water always find its own level? Yes
Groundwater Supplies – Teacher Demonstration Aboriginal people and early settlers dug wells to find the water table and
fresh water supplies they needed. They also used soaks and springs where
the land surface naturally dipped to cut the water table and water bubbled
out. Aboriginal meeting places were often near such soaks and later
European settlements relied on them. There was conflict over “ownership”.
A worksheet on Aboriginal perspectives on water is included in this topic.
Living in the driest habitable continent, we cannot depend solely on
rainwater so have come to rely on groundwater supplies from boreholes
sunk below our farms, towns and cities.
Page 16
Underground Water – Teacher’s Notes
There is a major student misconception that underground water is found in
great lakes in caverns below the surface. The water really only fills pore
spaces within sands, sandstone and limestone. There is no huge hole or
empty space. Water from rain falls on the ground and seeps downward until
something stops it. Impermeable layers of clay or igneous rock underlying
them can trap water above. The trapped water is called groundwater and
the reservoir an aquifer (water maker). Aquifers can take millions of years
to build up.
When the water table lies below the surface, as in the model, some plants
can send roots down to get water, but animals must depend on water drawn
from wells or raised by windmills and other pumps.
If too much water is pumped from the aquifer and is not replaced by
rainfall the water table will drop, trees die and bores have to be deepened.
In Perth we are drawing on water supplies that have formed over thousands
of years. Because the dams, which were built to collect rainfall runoff, are
no longer sufficient for the needs of our much greater population we now
rely on groundwater and desalinated seawater.
Most major cities in Western Australia depend on bore water from their
underlying aquifers.
Materials
• A large transparent container. Old fish tanks or worm farms are
excellent. School canteens often have large glass jars, which
contained mayonnaise, which work well.
• Washed gravel or aquarium pebbles. The model in the photograph had
pathway gravel but loose road gravel works well. Place in a sieve and
rinse well. No need to dry as it will mostly be wet.
• A piece of tubing to represent the well or bore. I used garden hose
but if that isn’t available, cut about 7cm from the top of an empty
cool drink bottle and use that.
• Some plants with roots.
Page 17
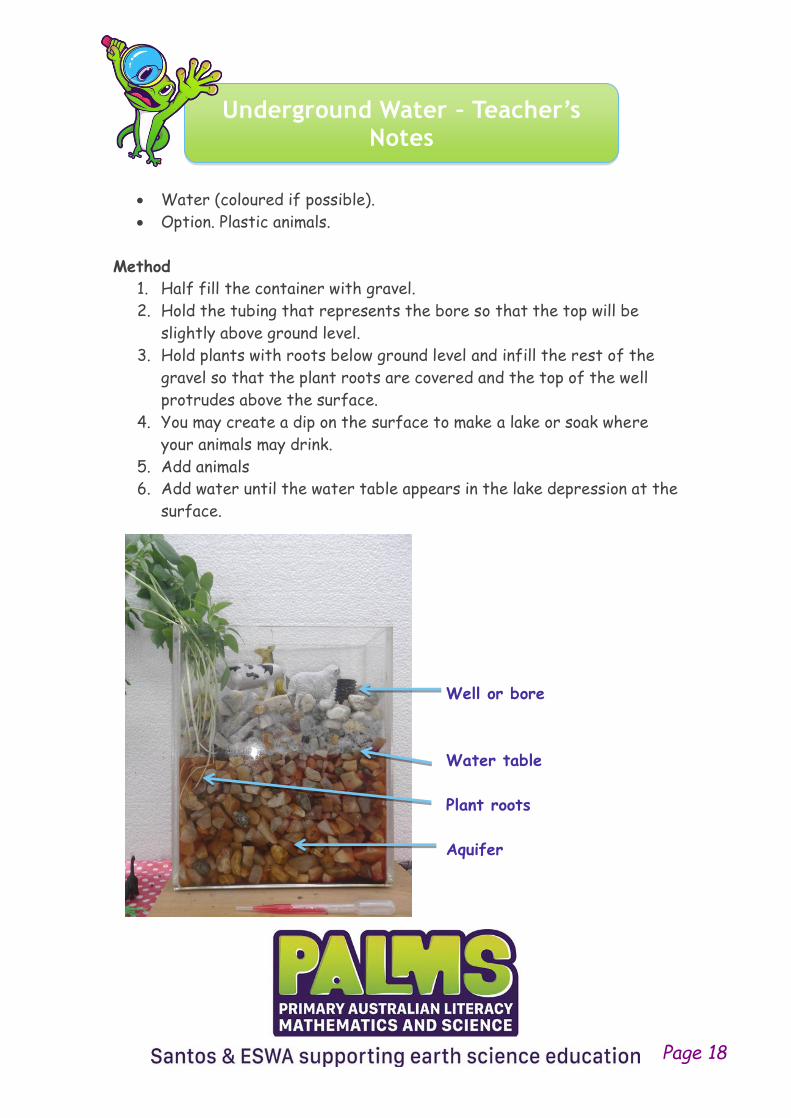
Underground Water – Teacher’s Notes
• Water (coloured if possible).
• Option. Plastic animals.
Method
1. Half fill the container with gravel.
2. Hold the tubing that represents the bore so that the top will be
slightly above ground level.
3. Hold plants with roots below ground level and infill the rest of the
gravel so that the plant roots are covered and the top of the well
protrudes above the surface.
4. You may create a dip on the surface to make a lake or soak where
your animals may drink.
5. Add animals
6. Add water until the water table appears in the lake depression at the
surface.
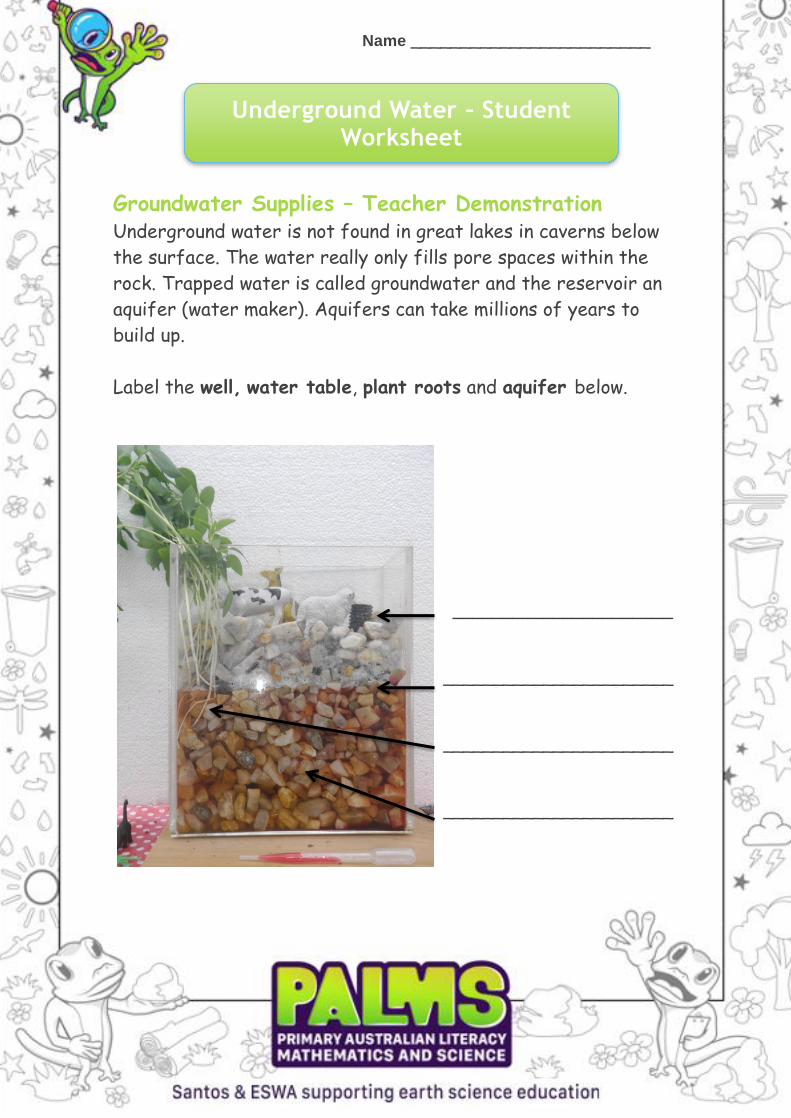
Well or bore
Water table
Plant roots
Aquifer
Page 18
Underground Water – Teacher’s Notes
You can demonstrate a drop in the water table either by simulating summer
leaving the model in the sunshine causing water to evaporate, or by drawing
water from the well using a pipette or drinking straw and watching the
water disappear for the animal’s drinking hole/soak/lake. In either case
animals and plants are deprived of water.
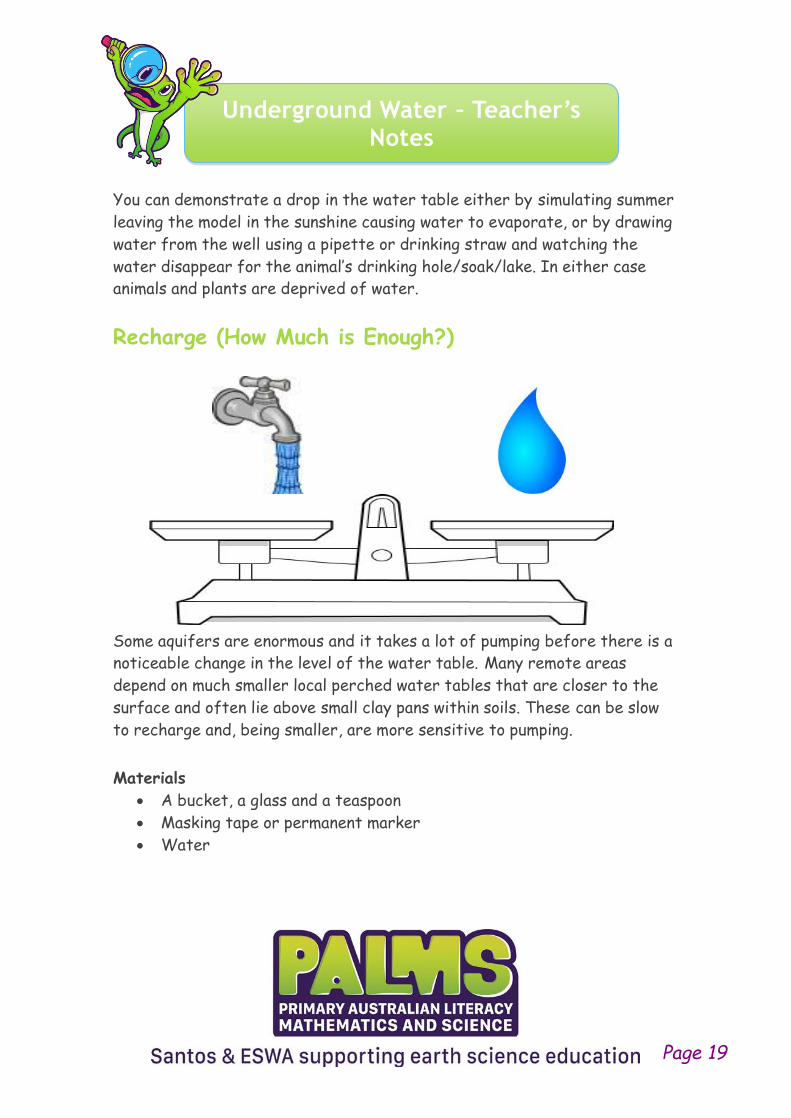
Recharge (How Much is Enough?)
Some aquifers are enormous and it takes a lot of pumping before there is a
noticeable change in the level of the water table. Many remote areas depend on much smaller local perched water tables that are closer to the
surface and often lie above small clay pans within soils. These can be slow
to recharge and, being smaller, are more sensitive to pumping.
Materials
• A bucket, a glass and a teaspoon
• Masking tape or permanent marker
• Water
Page 19
Underground Water – Teacher’s Notes
Method
Almost fill the bucket and the glass with water
Mark water levels on both
Remove two teaspoons (10mL) of water from each
Observe any change of water level
Observation
Water loss/a drop in water level is hardly noticeable in the bucket but is
much more apparent in the glass.
A water bore has always supplied this household with water. The garden
does not need to be watered and the animals can drink at a nearby soak or
billabong because the water table is close to the surface.
What will happen if;
More water is needed for a new swimming pool? This will lower the water
table. If sufficient water is removed, the plants will die because their
roots are not long enough and the soaks will dry killing the animals
Rainfall is halved? Again the level of the water table will drop because it is
not being recharged
The family moves away and stops drawing water from the bore? The level
of the water table will eventually recover and rise. With luck plants and
animals will return.
Page 20
Name ________________________
Underground Water – Student Worksheet
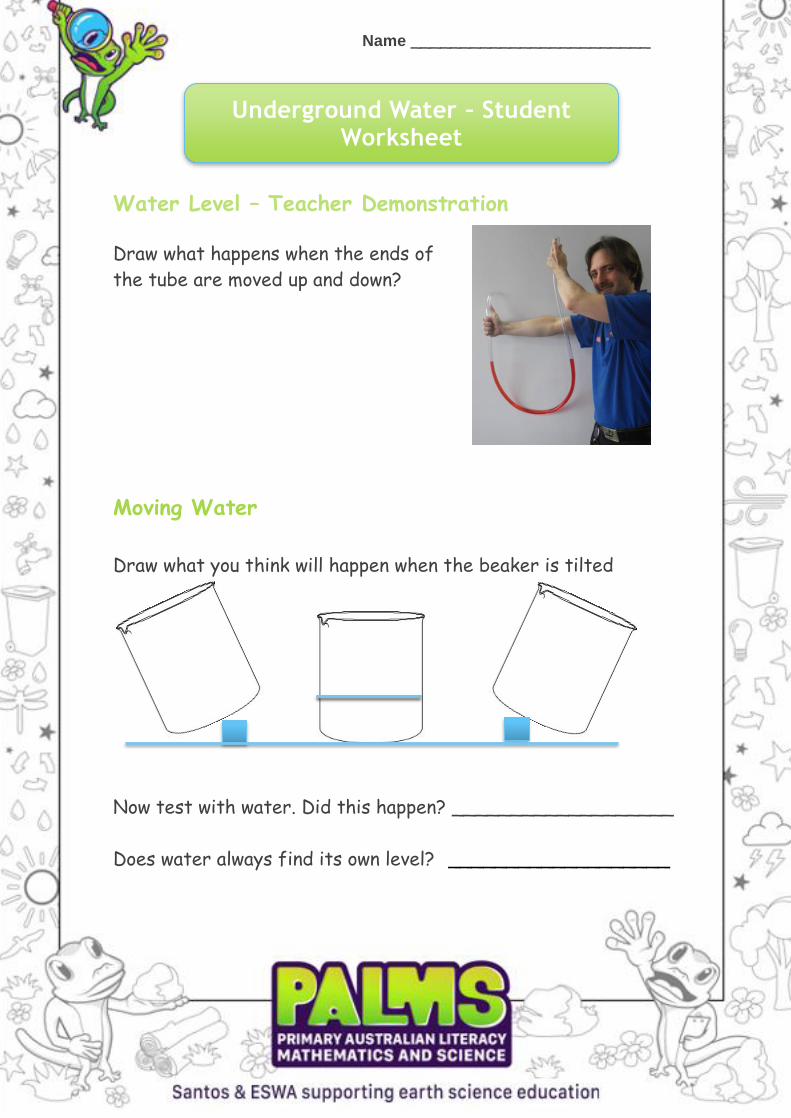
Water Level – Teacher Demonstration
Draw what happens when the ends of
the tube are moved up and down?
Moving Water
Draw what you think will happen when the beaker is tilted
Now test with water. Did this happen? ___________________
Does water always find its own level? ___________________
Name ________________________
Underground Water – Student Worksheet
Groundwater Supplies – Teacher Demonstration Underground water is not found in great lakes in caverns below
the surface. The water really only fills pore spaces within the
rock. Trapped water is called groundwater and the reservoir an
aquifer (water maker). Aquifers can take millions of years to
build up.
Label the well, water table, plant roots and aquifer below.
______________________
_______________________
_______________________
_______________________
Name ________________________
Underground Water – Student Worksheet
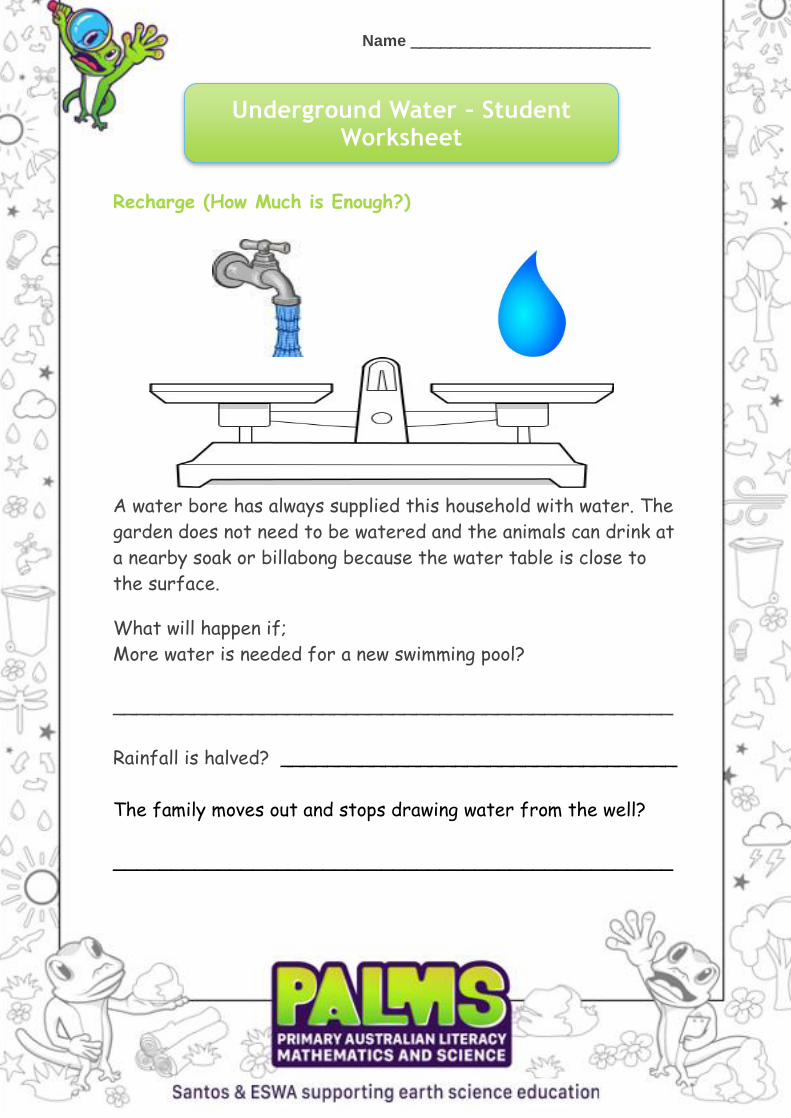
Recharge (How Much is Enough?)
A water bore has always supplied this household with water. The
garden does not need to be watered and the animals can drink at
a nearby soak or billabong because the water table is close to
the surface.
What will happen if;
More water is needed for a new swimming pool?
________________________________________________
Rainfall is halved? __________________________________
The family moves out and stops drawing water from the well?
________________________________________________
Transfer of Water to Point of Use – Teacher’s Notes
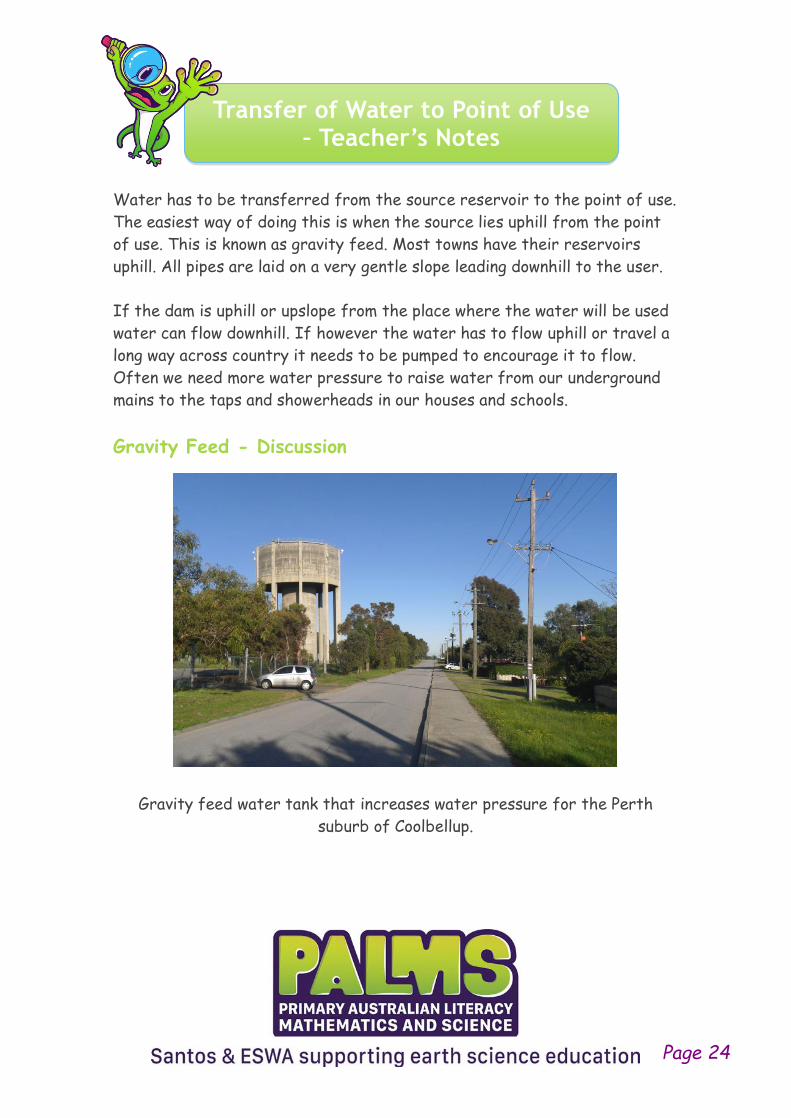
Water has to be transferred from the source reservoir to the point of use.
The easiest way of doing this is when the source lies uphill from the point
of use. This is known as gravity feed. Most towns have their reservoirs
uphill. All pipes are laid on a very gentle slope leading downhill to the user.
If the dam is uphill or upslope from the place where the water will be used
water can flow downhill. If however the water has to flow uphill or travel a
long way across country it needs to be pumped to encourage it to flow.
Often we need more water pressure to raise water from our underground
mains to the taps and showerheads in our houses and schools.
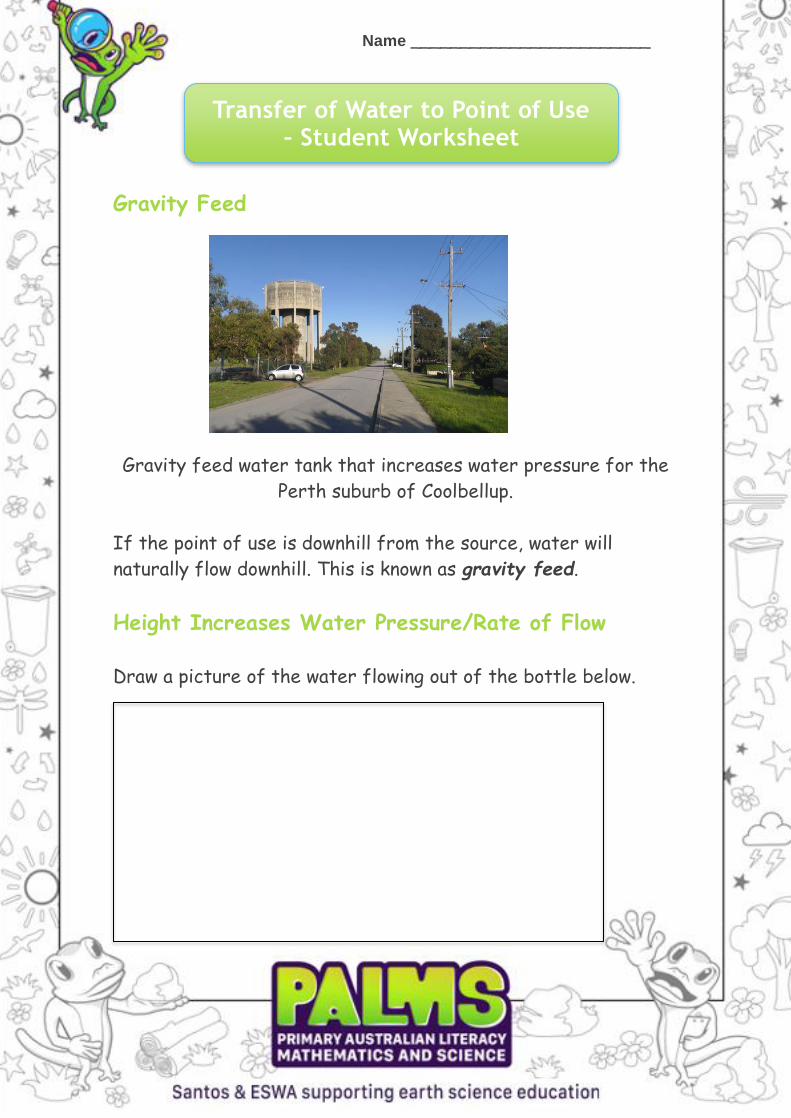
Gravity Feed - Discussion
Gravity feed water tank that increases water pressure for the Perth
suburb of Coolbellup.
Page 24
Transfer of Water to Point of Use – Teacher’s Notes
If the point of use is downhill from the source, water will naturally flow
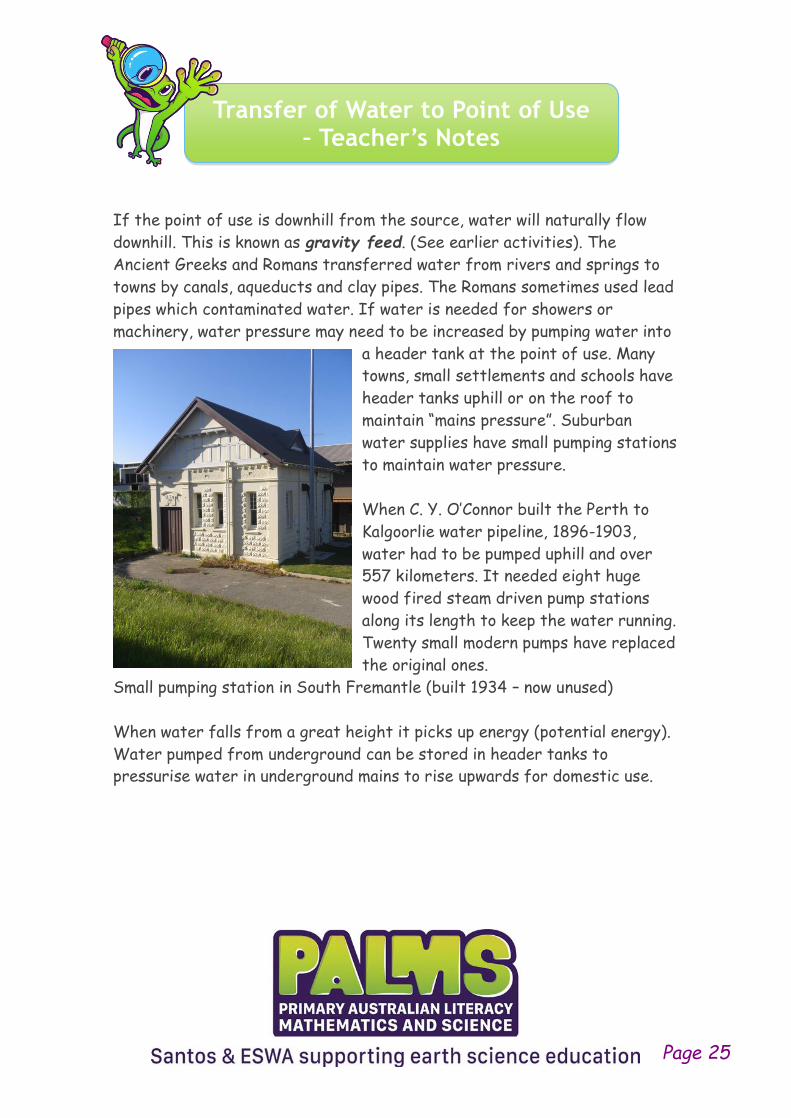
downhill. This is known as gravity feed. (See earlier activities). The
Ancient Greeks and Romans transferred water from rivers and springs to
towns by canals, aqueducts and clay pipes. The Romans sometimes used lead
pipes which contaminated water. If water is needed for showers or
machinery, water pressure may need to be increased by pumping water into
a header tank at the point of use. Many
towns, small settlements and schools have
header tanks uphill or on the roof to
maintain “mains pressure”. Suburban
water supplies have small pumping stations
to maintain water pressure.
When C. Y. O’Connor built the Perth to
Kalgoorlie water pipeline, 1896-1903,
water had to be pumped uphill and over
557 kilometers. It needed eight huge
wood fired steam driven pump stations
along its length to keep the water running.
Twenty small modern pumps have replaced
the original ones.
Small pumping station in South Fremantle (built 1934 – now unused)
When water falls from a great height it picks up energy (potential energy).
Water pumped from underground can be stored in header tanks to
pressurise water in underground mains to rise upwards for domestic use.
Page 25
Transfer of Water to Point of Use – Teacher’s Notes
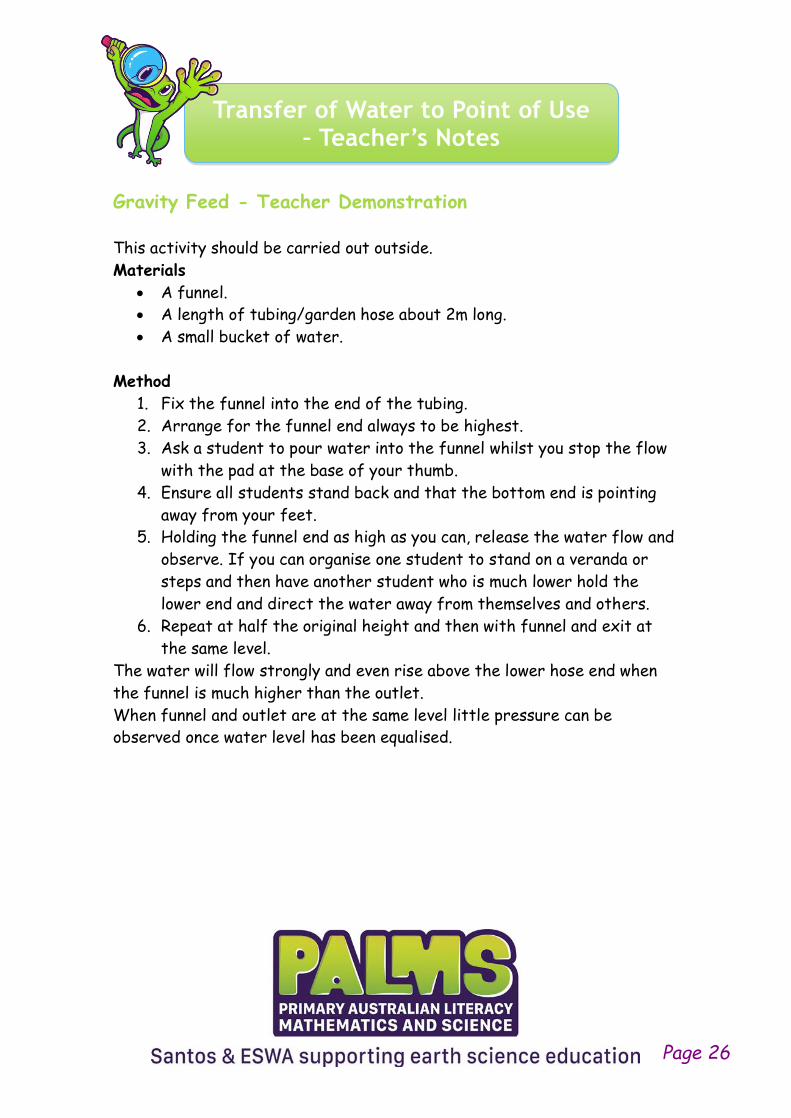
Gravity Feed - Teacher Demonstration
This activity should be carried out outside.
Materials
• A funnel.
• A length of tubing/garden hose about 2m long.
• A small bucket of water.
Method
1. Fix the funnel into the end of the tubing.
2. Arrange for the funnel end always to be highest.
3. Ask a student to pour water into the funnel whilst you stop the flow
with the pad at the base of your thumb.
4. Ensure all students stand back and that the bottom end is pointing
away from your feet.
5. Holding the funnel end as high as you can, release the water flow and
observe. If you can organise one student to stand on a veranda or
steps and then have another student who is much lower hold the
lower end and direct the water away from themselves and others.
6. Repeat at half the original height and then with funnel and exit at
the same level.
The water will flow strongly and even rise above the lower hose end when
the funnel is much higher than the outlet.
When funnel and outlet are at the same level little pressure can be
observed once water level has been equalised.
Page 26
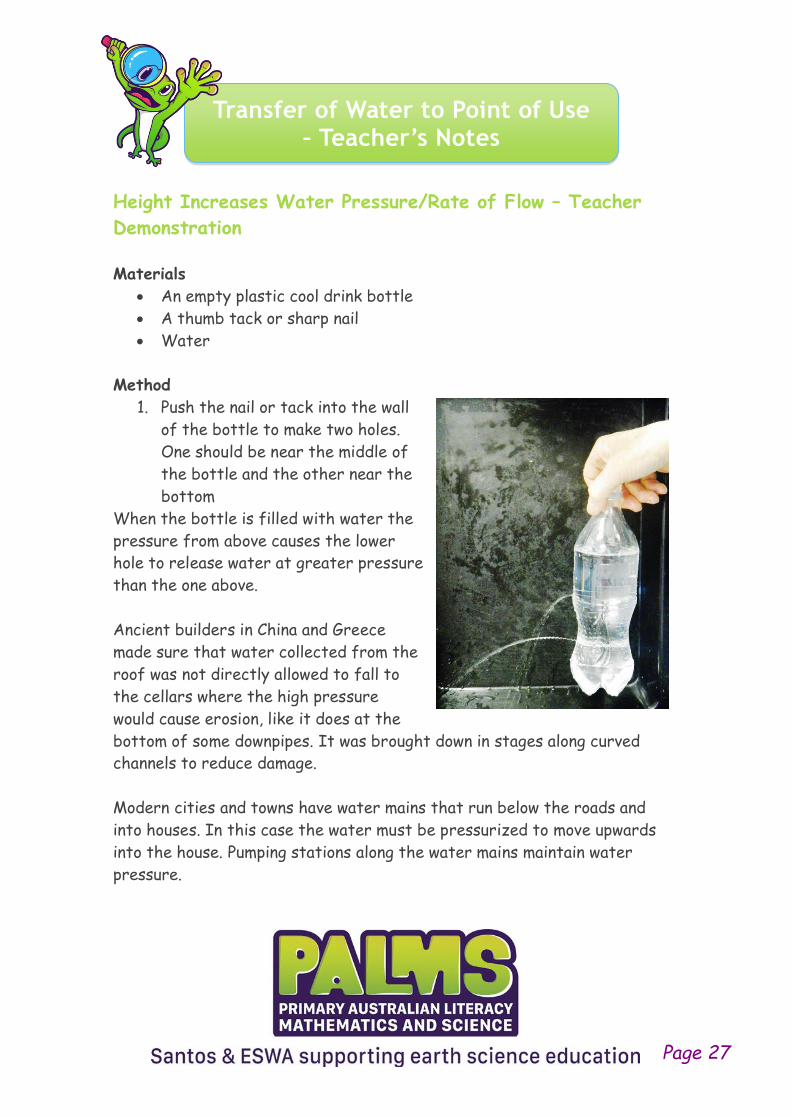
Transfer of Water to Point of Use – Teacher’s Notes
Height Increases Water Pressure/Rate of Flow – Teacher
Demonstration
Materials
• An empty plastic cool drink bottle
• A thumb tack or sharp nail
• Water
Method
1. Push the nail or tack into the wall
of the bottle to make two holes.
One should be near the middle of
the bottle and the other near the
bottom
When the bottle is filled with water the
pressure from above causes the lower
hole to release water at greater pressure
than the one above.
Ancient builders in China and Greece
made sure that water collected from the
roof was not directly allowed to fall to
the cellars where the high pressure
would cause erosion, like it does at the
bottom of some downpipes. It was brought down in stages along curved
channels to reduce damage.
Modern cities and towns have water mains that run below the roads and
into houses. In this case the water must be pressurized to move upwards
into the house. Pumping stations along the water mains maintain water
pressure.
Page 27
Transfer of Water to Point of Use – Teacher’s Notes
Height Affects Water Flow - Student Activity
This activity is best performed over the sink or outside. If it is performed
in the sandpit students may notice that the holes drilled into sand become
deeper as the height above ground increases. If it is also performed on
cement or tarmac, students may notice how much more water from the top
container splashes. Remember to repeat to confirm observations.
Materials
• 3 students to hold the cups or bags and 3 students to test the
strength of water flow.
• 3 Paper cups or three zip-lock sandwich bags the same size
• A large nail or scissors
Method
1. Make a hole near the base of each cup or bag and ask students to
seal it with their finger or with a piece of plasticine
2. Fill each cup or bag with the same amount of water
3. Ask the first student to hold their water container at head height,
the second to hold theirs at waist height and the third at knee
height.
4. Making sure that the cups are held with the hole pointing away from
the student, remove/push out the stoppers from the cups or cut the
corner pointing away from the student from each plastic bag.
5. Using their hands, ask students to rate which flow was strongest,
medium or weakest.
6. Observe the difference that height of source makes on water flow
and what happens when it hits the ground. Draw the observations
into the table below.
Page 28
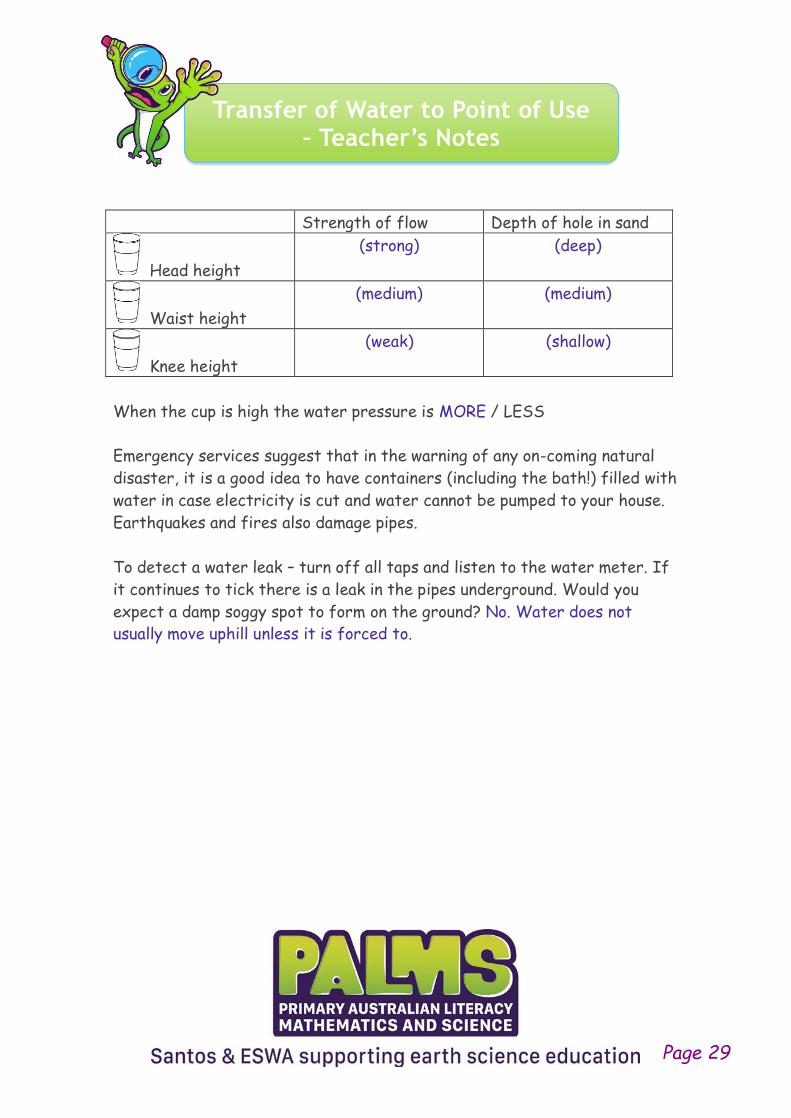
Transfer of Water to Point of Use – Teacher’s Notes
Strength of flow Depth of hole in sand
Head height
(strong) (deep)
Waist height
(medium) (medium)
Knee height
(weak) (shallow)
When the cup is high the water pressure is MORE / LESS
Emergency services suggest that in the warning of any on-coming natural
disaster, it is a good idea to have containers (including the bath!) filled with
water in case electricity is cut and water cannot be pumped to your house.
Earthquakes and fires also damage pipes.
To detect a water leak – turn off all taps and listen to the water meter. If
it continues to tick there is a leak in the pipes underground. Would you
expect a damp soggy spot to form on the ground? No. Water does not
usually move uphill unless it is forced to.
Page 29
Name ________________________
Transfer of Water to Point of Use – Student Worksheet
Gravity Feed
Gravity feed water tank that increases water pressure for the
Perth suburb of Coolbellup.
If the point of use is downhill from the source, water will
naturally flow downhill. This is known as gravity feed.
Height Increases Water Pressure/Rate of Flow
Draw a picture of the water flowing out of the bottle below.

Name ________________________
Transfer of Water to Point of Use – Student Worksheet
Height Affects Water Flow
Materials
• 3 students to hold the cups or bags and 3 students to test
the strength of water flow.
• 3 paper cups or three zip-lock sandwich bags the same size
• A large nail or scissors
Method
1. Make a hole near the base of each cup or bag and seal it
with their finger or with a piece of plasticine
2. Fill each cup or bag with the same amount of water
3. One student holds their water container at head height,
the second to holds theirs at waist height and the third at
knee height above the sandpit.
4. Hold the cups with the hole pointing away from you,
remove/push out the stoppers from the cups or remove
your finger.
5. Decide which flow was strongest, medium or weakest.
6. Observe what happened to the sandpit under each.
Name ________________________
Transfer of Water to Point of Use – Student Worksheet
Strength of flow Depth of hole in
sand
Head height
Waist height
Knee height
When the cup is high the water pressure is MORE / LESS
Emergency services suggest that in the warning of any on-coming
natural disaster, it is a good idea to have containers (including
the bath!) filled with water in case electricity is cut and water
cannot be pumped to your house.
To detect a water leak – turn off all taps and listen to the water
meter. If it continues to tick there is a leak in the pipes
underground. Would you expect a damp soggy spot to form on
the ground?
______________________________________________
Small Scale Water Treatment – Teacher’s Notes
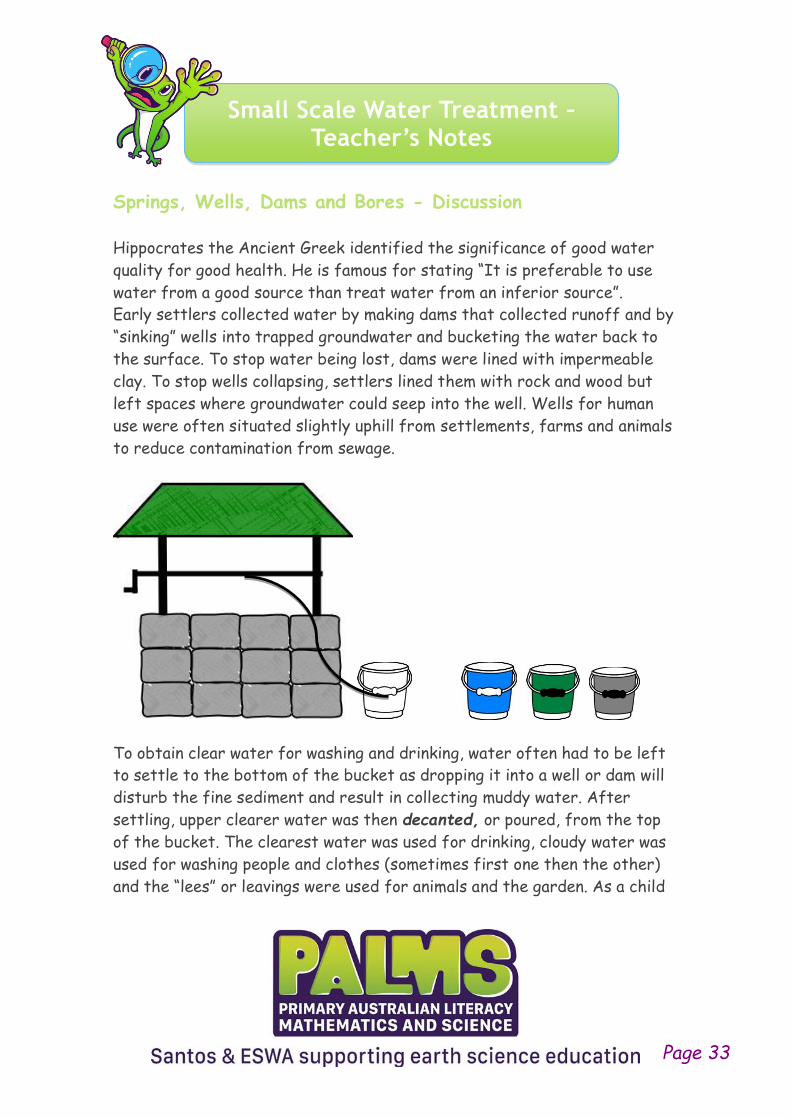
Springs, Wells, Dams and Bores - Discussion
Hippocrates the Ancient Greek identified the significance of good water
quality for good health. He is famous for stating “It is preferable to use
water from a good source than treat water from an inferior source”.
Early settlers collected water by making dams that collected runoff and by
“sinking” wells into trapped groundwater and bucketing the water back to
the surface. To stop water being lost, dams were lined with impermeable
clay. To stop wells collapsing, settlers lined them with rock and wood but
left spaces where groundwater could seep into the well. Wells for human
use were often situated slightly uphill from settlements, farms and animals
to reduce contamination from sewage.
To obtain clear water for washing and drinking, water often had to be left
to settle to the bottom of the bucket as dropping it into a well or dam will
disturb the fine sediment and result in collecting muddy water. After
settling, upper clearer water was then decanted, or poured, from the top
of the bucket. The clearest water was used for drinking, cloudy water was
used for washing people and clothes (sometimes first one then the other)
and the “lees” or leavings were used for animals and the garden. As a child
Page 33
Small Scale Water Treatment – Teacher’s Notes
I remember pouring the clearest water into a blue enamel bucket which
went into the kitchen, the slightly cloudy water into a green bucket which
went into the washroom/laundry and the lees (leftovers) were poured into a
grey galvanised bucket for chickens, pigs, dogs and the garden. Even today
not everyone is connected to mains water supplies.
Settling and Decanting Water - Teacher Demonstration or
Student Activity If this is to be a teacher demonstration, mix the sand and water in A
transparent container in front of the class before and leave it to settle
while you discuss the need for clear water. When decanting, it is important
to slowly angle the bottle, pour and stop as soon as the dirty layer reaches
the rim of the container. If you only have red pindan soil it can take two or
three days before the colloidal red mud settles out.
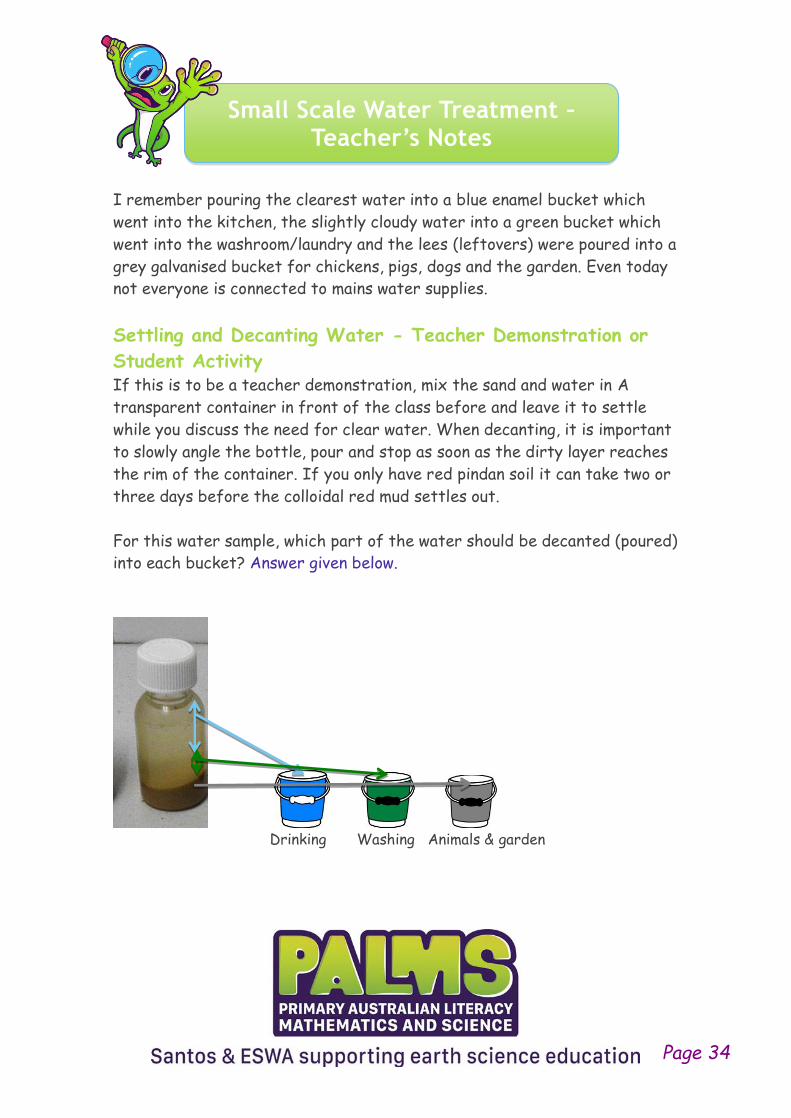
For this water sample, which part of the water should be decanted (poured)
into each bucket? Answer given below.
Drinking Washing Animals & garden
Page 34
Small Scale Water Treatment – Teacher’s Notes
Materials per group
• A screw top bottle or jar. Empty cool drink bottles are fine.
• A beaker or container for the clear decanted water. A white cup
provides good contrast.
• A teaspoon.
• Water
• Old newspaper to protect desks.
Method
1. Cover desks with newspaper.
2. Place 2 teaspoons full of soil into each bottle.
3. Add water until half full.
4. Screw on lid firmly.
5. Shake until completely mixed (about 1 minute).
6. Leave for about 5 minutes to settle.
7. Decant clear water at top into another container.
8. Compare the samples of decanted water.
9. The winner is the student who has the largest and clearest water
sample.
And the winner was? ________________
Please note that this water is clear.
It may not be clean enough to drink.
For human consumption this water needs to be boiled, disinfected or
treated with UV light to kill off microbes and their toxins.
Page 35

Small Scale Water Treatment – Teacher’s Notes
Aboriginal people used to cover their “gnamma” holes with rocks or brush to
stop animals disturbing their water making it murky or fouling it. They did
not drink murky water because they said the snake which made the
waterhole was still swimming in it. They would let it settle and then stoop
down beside it and scoop up water from the top. IT may be clear but it will
not be sterile and can carry germs.
Testing Water from Different Sources - Extension
Ask students to collect samples of water from local natural water sources
e.g. ponds, rivers and dams. Compare the settlement rates and water quality
from these sources.
Water samples from four wells Water samples after being allowed to
settle for 5 minutes
Page 36
Name ________________________
Small Scale Water Treatment – Student Worksheet
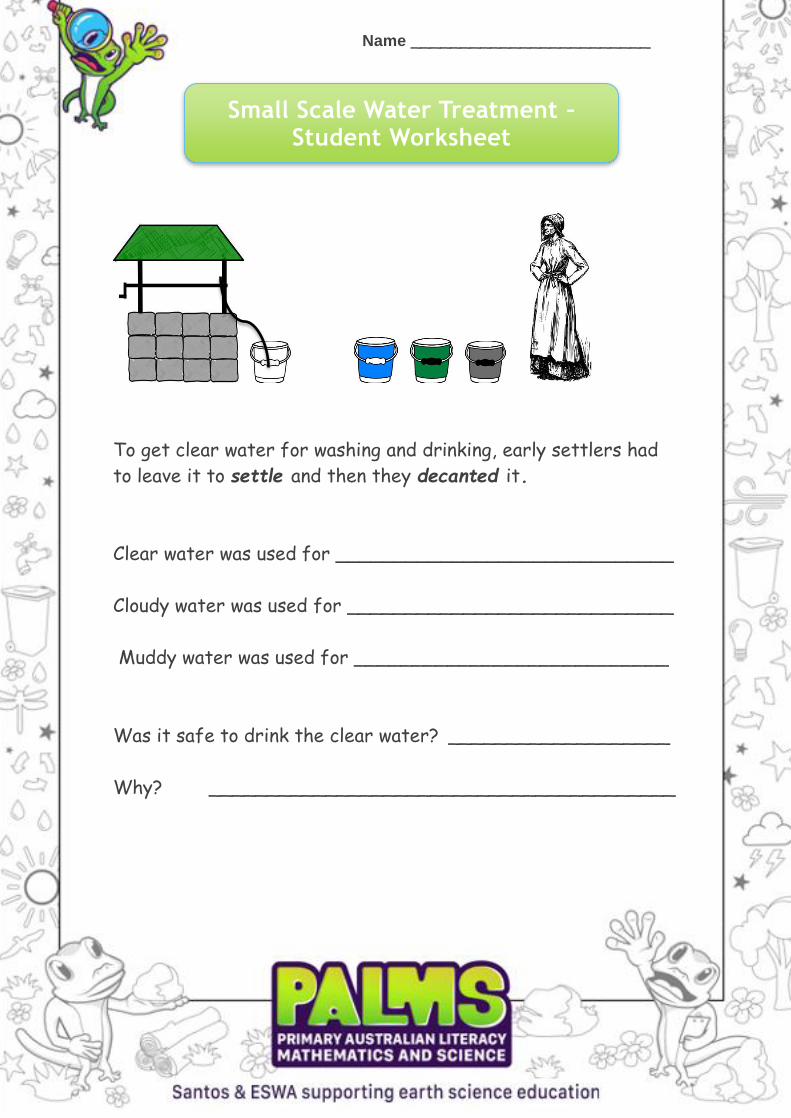
To get clear water for washing and drinking, early settlers had
to leave it to settle and then they decanted it.
Clear water was used for _____________________________
Cloudy water was used for ____________________________
Muddy water was used for ___________________________
Was it safe to drink the clear water? ___________________
Why? ________________________________________
Name ________________________
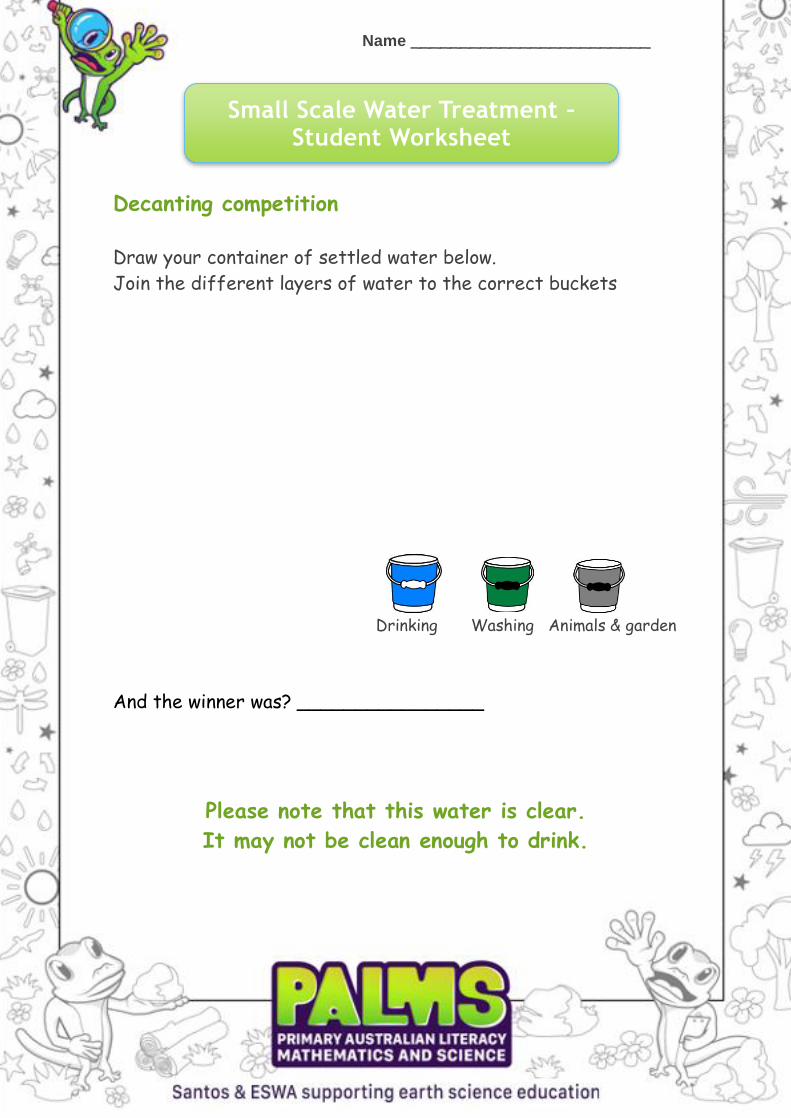
Small Scale Water Treatment – Student Worksheet
Decanting competition
Draw your container of settled water below.
Join the different layers of water to the correct buckets
Drinking Washing Animals & garden
And the winner was? ________________
Please note that this water is clear.
It may not be clean enough to drink.
Large Scale Water Treatment – Teacher’s Notes
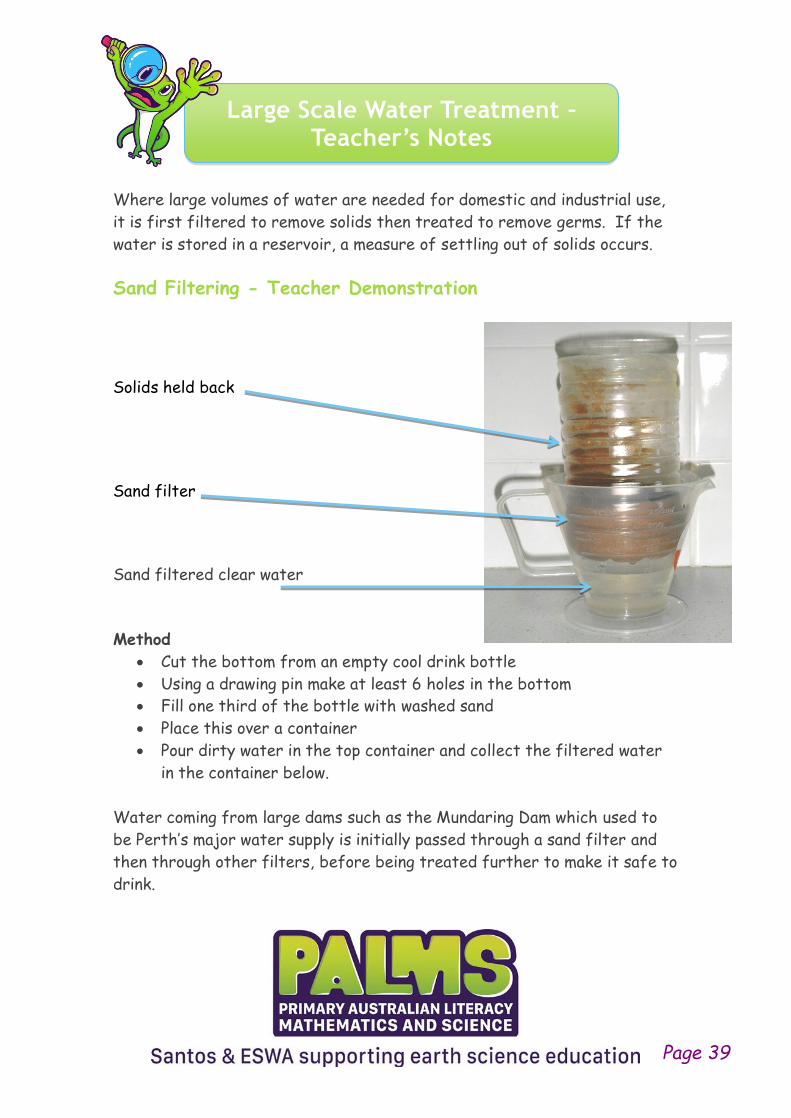
Where large volumes of water are needed for domestic and industrial use,
it is first filtered to remove solids then treated to remove germs. If the
water is stored in a reservoir, a measure of settling out of solids occurs.
Sand Filtering - Teacher Demonstration
Solids held back
Sand filter
Sand filtered clear water
Method
• Cut the bottom from an empty cool drink bottle
• Using a drawing pin make at least 6 holes in the bottom
• Fill one third of the bottle with washed sand
• Place this over a container
• Pour dirty water in the top container and collect the filtered water
in the container below.
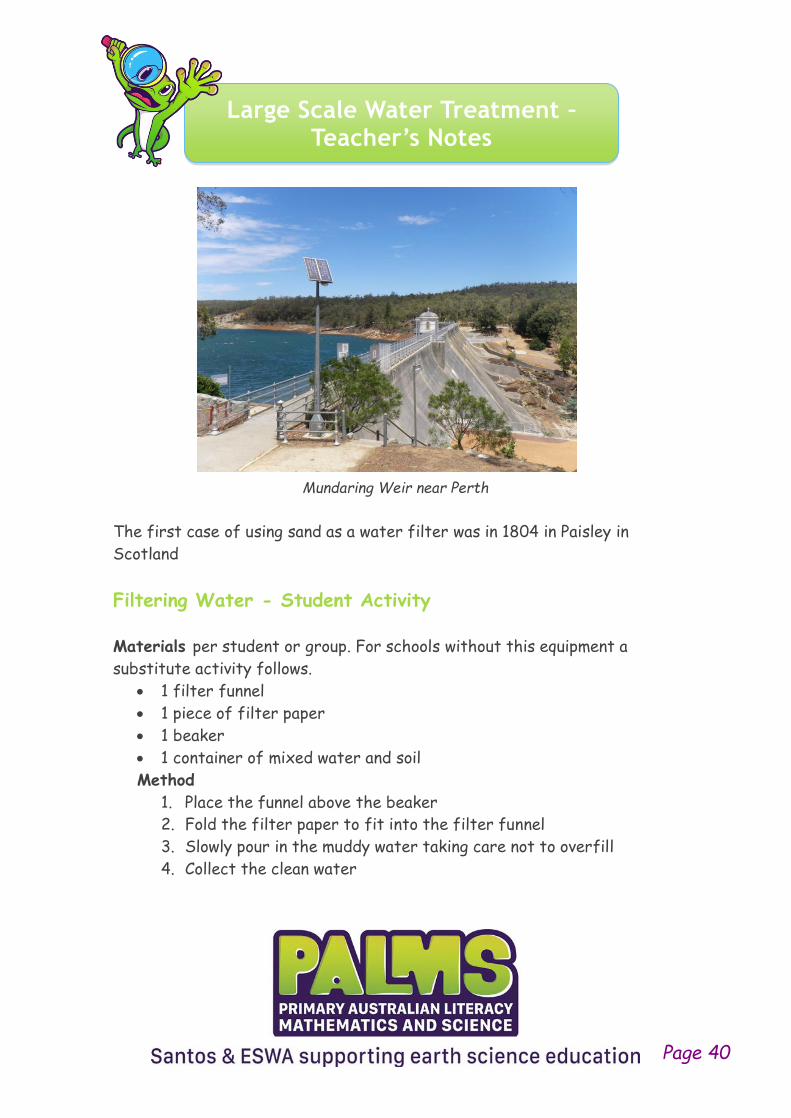
Water coming from large dams such as the Mundaring Dam which used to
be Perth’s major water supply is initially passed through a sand filter and
then through other filters, before being treated further to make it safe to
drink.
Page 39
Large Scale Water Treatment – Teacher’s Notes
Mundaring Weir near Perth
The first case of using sand as a water filter was in 1804 in Paisley in
Scotland
Filtering Water - Student Activity
Materials per student or group. For schools without this equipment a
substitute activity follows.
• 1 filter funnel
• 1 piece of filter paper
• 1 beaker
• 1 container of mixed water and soil
Method
1. Place the funnel above the beaker
2. Fold the filter paper to fit into the filter funnel
3. Slowly pour in the muddy water taking care not to overfill
4. Collect the clean water
Page 40
Large Scale Water Treatment – Teacher’s Notes
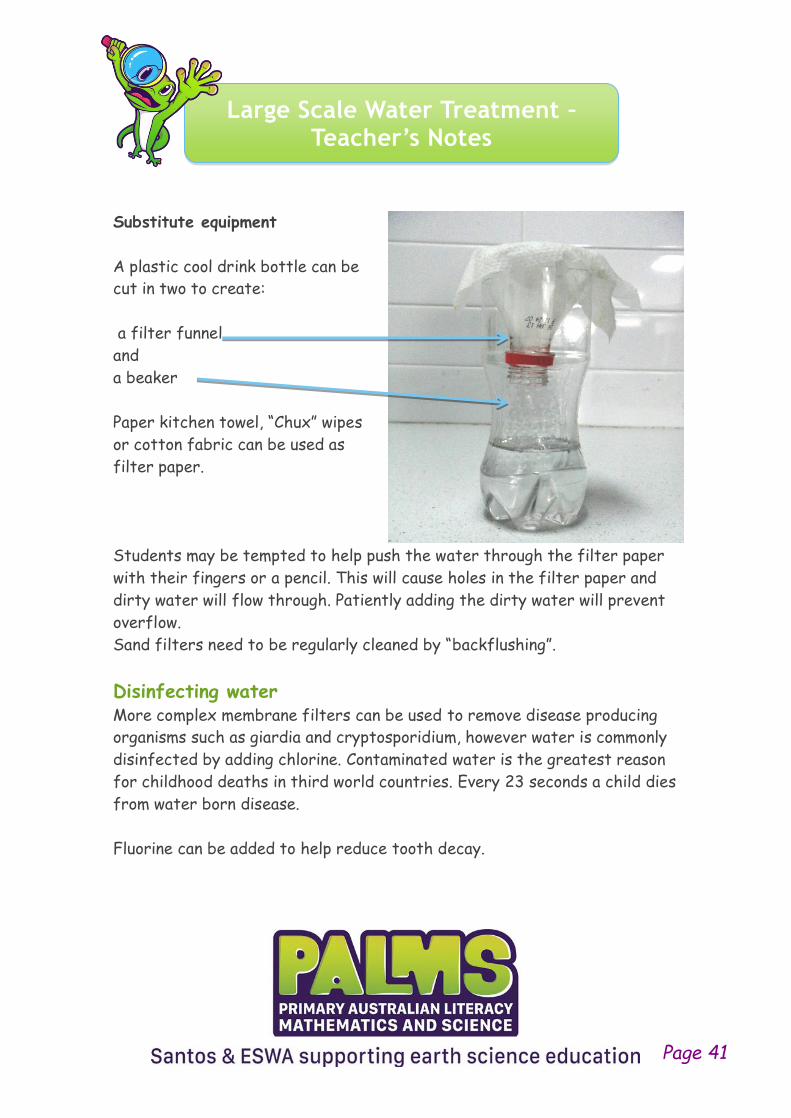
Substitute equipment
A plastic cool drink bottle can be
cut in two to create:
a filter funnel
and
a beaker
Paper kitchen towel, “Chux” wipes
or cotton fabric can be used as
filter paper.
Students may be tempted to help push the water through the filter paper
with their fingers or a pencil. This will cause holes in the filter paper and
dirty water will flow through. Patiently adding the dirty water will prevent
overflow.
Sand filters need to be regularly cleaned by “backflushing”.
Disinfecting water More complex membrane filters can be used to remove disease producing
organisms such as giardia and cryptosporidium, however water is commonly
disinfected by adding chlorine. Contaminated water is the greatest reason
for childhood deaths in third world countries. Every 23 seconds a child dies
from water born disease.
Fluorine can be added to help reduce tooth decay.
Page 41
Precious Water – Teacher’s Notes
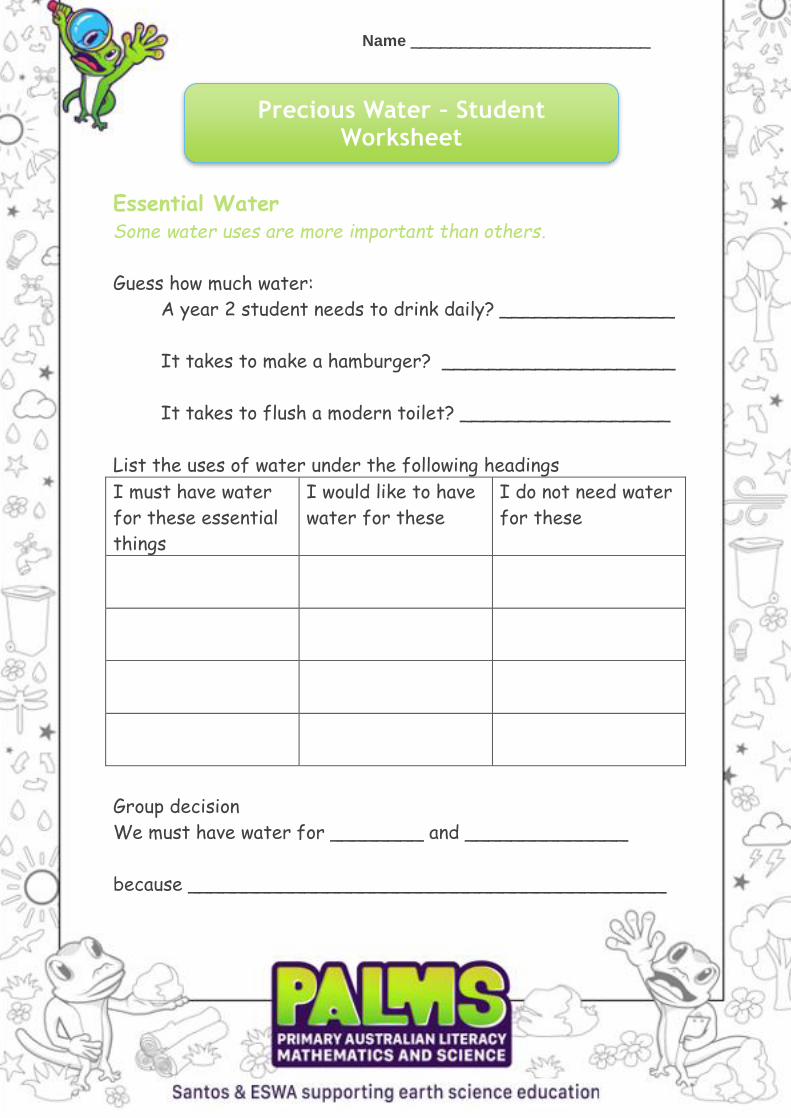
Essential Water - Discussion Some water uses are more important than others.
In modern Australia:
• The average person requires 370L of water per day. In WA most of
this goes on gardens.
• The average household requires 900L per day
• Industry and commerce uses a further 150L per day
Guess how much water:
1. Should a year 2 student drink? 1L. Add 1L more if you are
exercising
2. Does it take to make a hamburger? 2,500L. Most of this is drunk by
the cow as it grows
3. It takes to flush a modern toilet? 5L
Method
• Read the data above and ask students what activities they use water
for.
• Board student ideas.
• Ask students to classify their answers in their worksheet under the
headings of:
o I must have
o I would prefer to have
o I do not need
• Board student’s answers
• Students break into groups which select two “must haves” from the
board and each group discusses why having fresh water for their
“must have” is absolutely necessary. Alternatively allocate “must
haves” to each group.
• Students write their explanations into their worksheet and share
them with the class.
Page 42
Precious Water – Teacher’s Notes
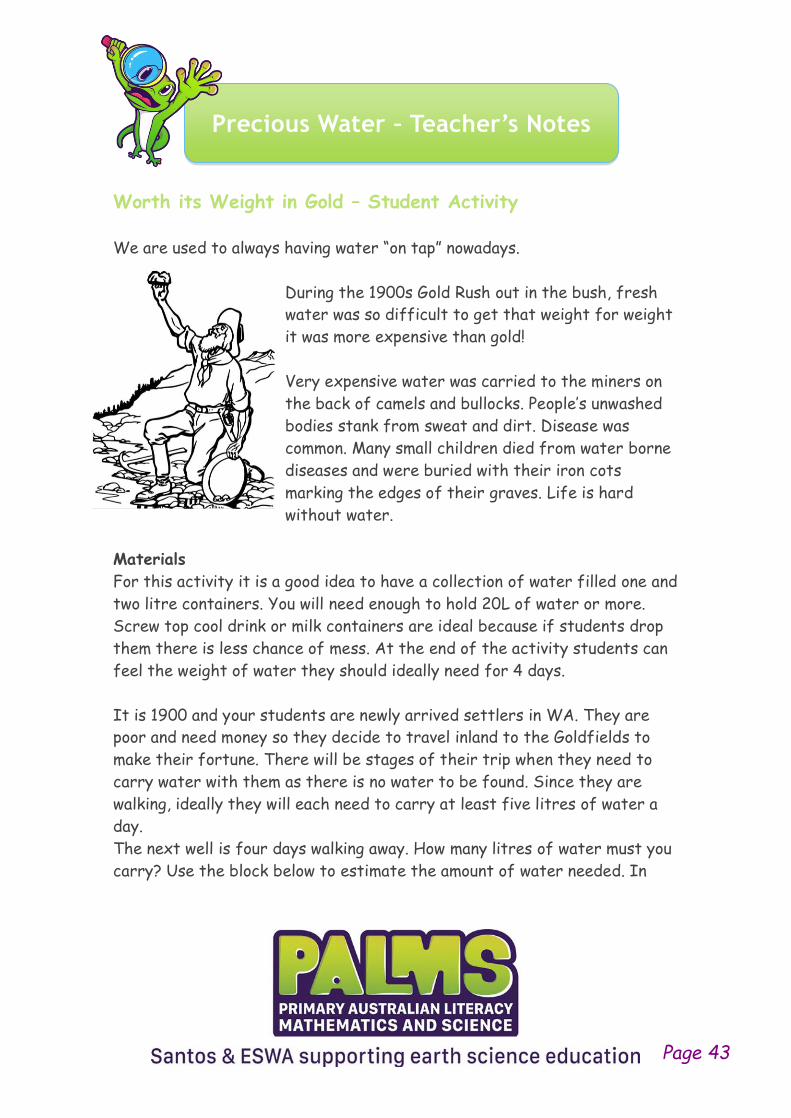
Worth its Weight in Gold – Student Activity
We are used to always having water “on tap” nowadays.
During the 1900s Gold Rush out in the bush, fresh
water was so difficult to get that weight for weight
it was more expensive than gold!
Very expensive water was carried to the miners on
the back of camels and bullocks. People’s unwashed
bodies stank from sweat and dirt. Disease was
common. Many small children died from water borne
diseases and were buried with their iron cots
marking the edges of their graves. Life is hard
without water.
Materials
For this activity it is a good idea to have a collection of water filled one and
two litre containers. You will need enough to hold 20L of water or more.
Screw top cool drink or milk containers are ideal because if students drop
them there is less chance of mess. At the end of the activity students can
feel the weight of water they should ideally need for 4 days.
It is 1900 and your students are newly arrived settlers in WA. They are
poor and need money so they decide to travel inland to the Goldfields to
make their fortune. There will be stages of their trip when they need to
carry water with them as there is no water to be found. Since they are
walking, ideally they will each need to carry at least five litres of water a
day.
The next well is four days walking away. How many litres of water must you
carry? Use the block below to estimate the amount of water needed. In
Page 43
Precious Water – Teacher’s Notes
year 2 students need to drink at least one litre of water a day. They need
to add another litre if it is hot and yet another if they are exercising. Toss
a coin to decide if each day will be hot or not. (Heads is hot)
Estimating drinking water
DAY Drink Exercise Hot weather
1 X X ?
2 X X ?
3 X X ?
4 X X ?
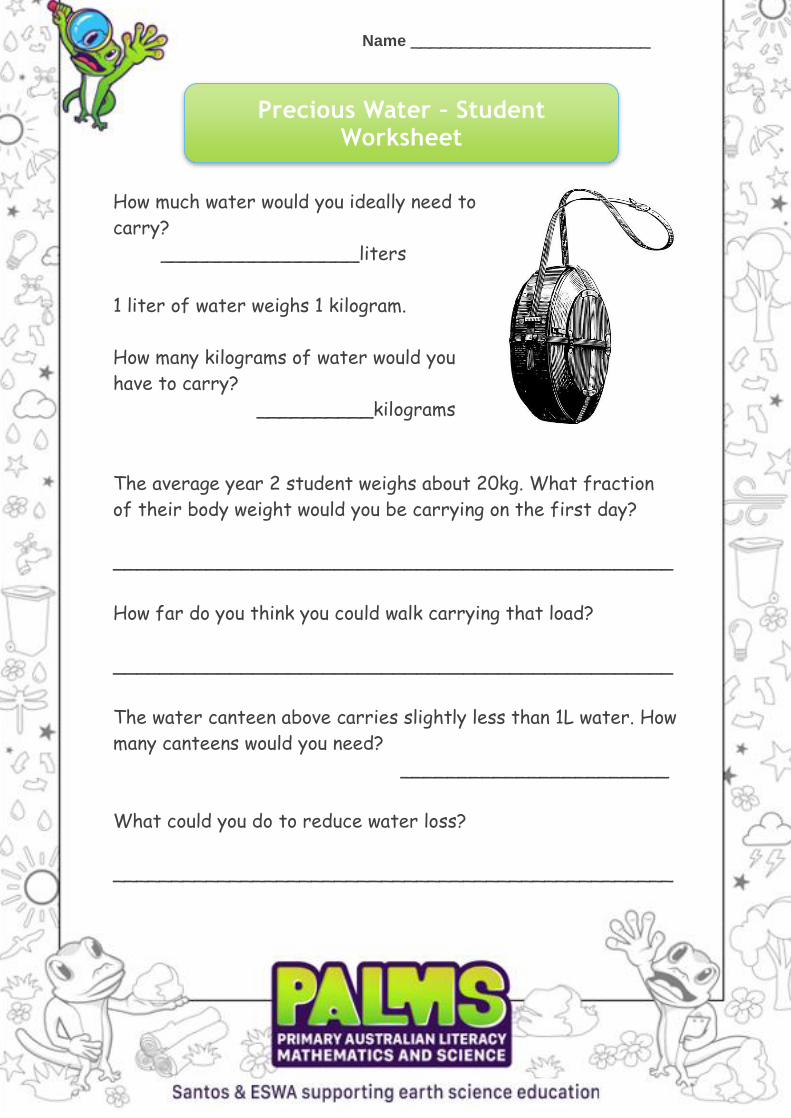
How much water do you ideally need to carry? Between 8 and 10L
depending on the weather.
1L of water weighs 1kg. What weight of water would you need to carry? 8-
10kg. The average year 2 student weighs about 20kg.
What fraction of your body weight would you be carrying on the first day?
They would need to carry almost half their own body weight!
Of course the load would reduce each day.
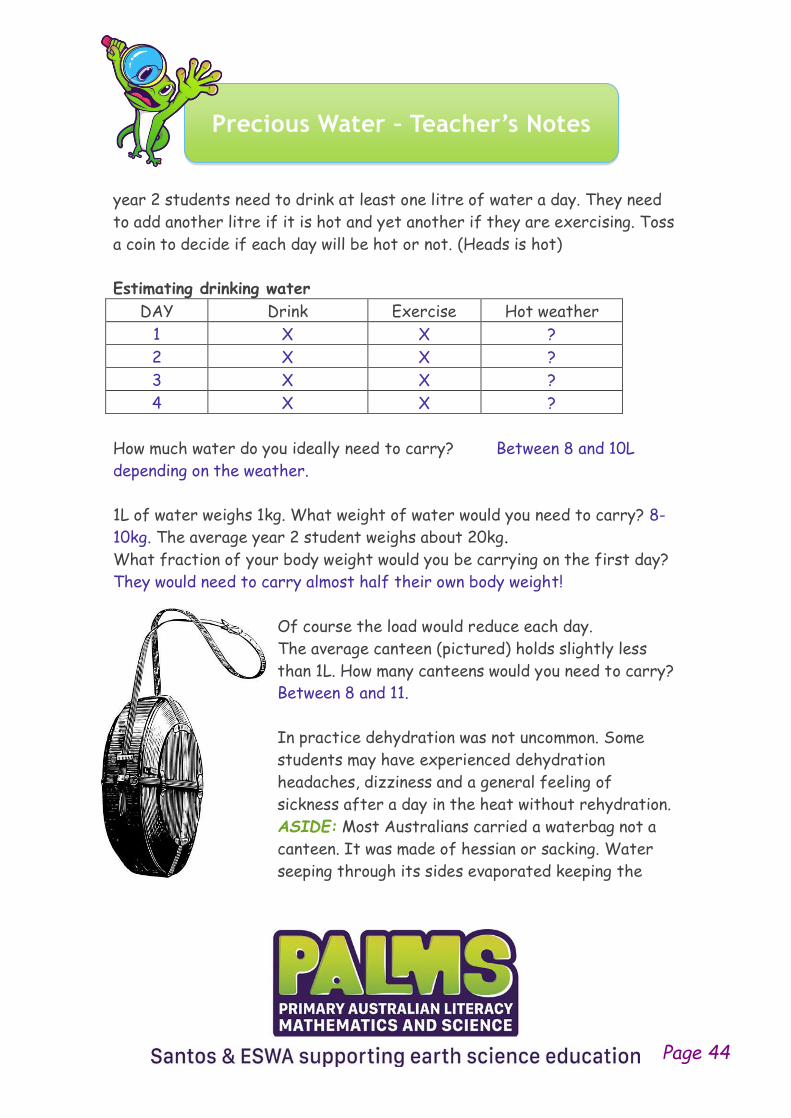
The average canteen (pictured) holds slightly less
than 1L. How many canteens would you need to carry?
Between 8 and 11.
In practice dehydration was not uncommon. Some
students may have experienced dehydration
headaches, dizziness and a general feeling of
sickness after a day in the heat without rehydration.
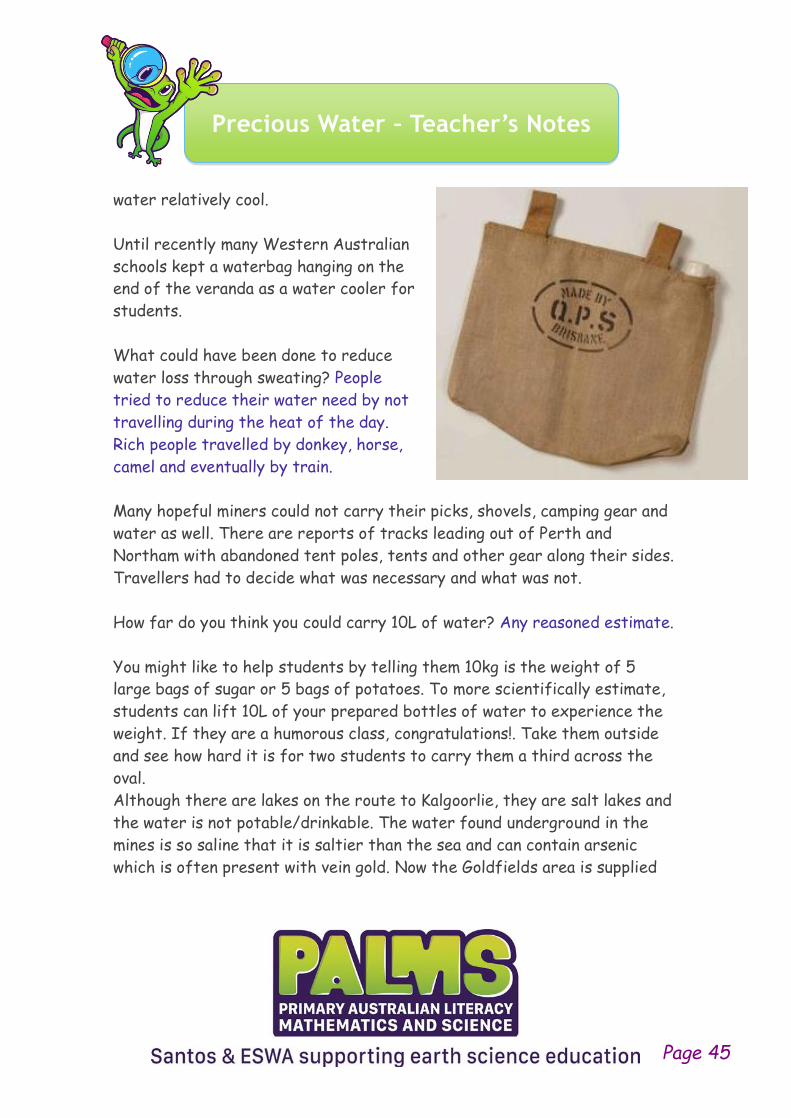
ASIDE: Most Australians carried a waterbag not a
canteen. It was made of hessian or sacking. Water
seeping through its sides evaporated keeping the
Page 44
Precious Water – Teacher’s Notes
water relatively cool.
Until recently many Western Australian
schools kept a waterbag hanging on the
end of the veranda as a water cooler for
students.
What could have been done to reduce
water loss through sweating? People
tried to reduce their water need by not
travelling during the heat of the day.
Rich people travelled by donkey, horse,
camel and eventually by train.
Many hopeful miners could not carry their picks, shovels, camping gear and
water as well. There are reports of tracks leading out of Perth and
Northam with abandoned tent poles, tents and other gear along their sides.
Travellers had to decide what was necessary and what was not.
How far do you think you could carry 10L of water? Any reasoned estimate.
You might like to help students by telling them 10kg is the weight of 5
large bags of sugar or 5 bags of potatoes. To more scientifically estimate,
students can lift 10L of your prepared bottles of water to experience the
weight. If they are a humorous class, congratulations!. Take them outside
and see how hard it is for two students to carry them a third across the
oval.
Although there are lakes on the route to Kalgoorlie, they are salt lakes and
the water is not potable/drinkable. The water found underground in the
mines is so saline that it is saltier than the sea and can contain arsenic
which is often present with vein gold. Now the Goldfields area is supplied
Page 45
Precious Water – Teacher’s Notes
with freshwater from a pipeline running from Mundaring Dam near Perth
560 km to Kalgoorlie. It was designed by C Y O’Connor and finished in 1903.
A Young Bush Hero - Story
You may wish to read this to your students. It tells of a very resourceful
and brave young West Australian boy. His care for his brothers and sisters
in desperate circumstances captured admiration across the British Empire
and monies were raised to award him a medal for bravery. He lived near
Lennonville in the Mt Magnet Goldfields.
More than a hundred years ago, ten-year-old Vincent Atkinson had to set
off through bush tracks in blistering summer heat with his three younger
brothers and a sister, the puppy and the baby sharing the go-cart with the
waterbag. His father was away prospecting when his mother dropped dead
while hanging up the washing. Vincent’s first thought was to walk 12 miles
(almost 18 km) to where his father was camped but he would have had to
leave the little ones behind and he would not have reached his father by
nightfall. He decided to walk to where he knew his uncle was working in a
mine near Mt Magnet. There would be people there to help.
Before leaving their isolated camp he first fed and watered the hens and
then switched off the windmill, so that precious water would not be wasted.
He sat his brothers, Robert aged 8 and Arthur aged 3 and his sister Isabel
aged 5 down to eat a meal of bread and butter before explaining what they
had to do. He filled a waterbag for the children and took an enamel mug to
feed water to the baby.
Walking barefoot in temperatures over 42oC was terrible. The baby needed
water frequently and the exhausted puppy soon joined it in the go-cart.
Page 46
Precious Water – Teacher’s Notes
Then his three-year-old brother had to be carried because his feet were
so badly blistered. Although suffering from heat and exhaustion himself,
he successfully shepherded his family to the mine.
When his story was told in the newspapers in London people raised money
to give him a medal for his foresight and bravery.
I should like to thank Mary Callaghan and Geraldton Museum for their help
in checking the facts of this event.
Page 47
Name ________________________
Precious Water – Student Worksheet
Essential Water Some water uses are more important than others.
Guess how much water:
A year 2 student needs to drink daily? _______________
It takes to make a hamburger? ____________________
It takes to flush a modern toilet? __________________
List the uses of water under the following headings
I must have water
for these essential
things
I would like to have
water for these
I do not need water
for these
Group decision
We must have water for ________ and ______________
because _________________________________________
Name ________________________
Precious Water – Student Worksheet
Water Worth its Weight in Gold
We are used to always having water
“on tap” nowadays.
During the 1870s Gold Rush out in the
bush, fresh water was so difficult to
get that weight for weight it was more
expensive than gold! People’s bodies
stank from sweat and dirt. Many small
children died from water borne
diseases and were buried with their
iron cots marking the edges of their
graves.
Life is hard without water.
You are a “new chum” on your way to dig for gold. You have to
walk for four days across country with no water holes. You
ideally need to carry 1 liter of water to drink, wash your face
and share with others, another liter if you are exercising
(walking) and another if it is hot.
Calculate how much water you need to carry
DAY Drink Walk Hot weather
Name ________________________
Precious Water – Student Worksheet
How much water would you ideally need to
carry?
_________________liters
1 liter of water weighs 1 kilogram.
How many kilograms of water would you
have to carry?
__________kilograms
The average year 2 student weighs about 20kg. What fraction
of their body weight would you be carrying on the first day?
________________________________________________
How far do you think you could walk carrying that load?
________________________________________________
The water canteen above carries slightly less than 1L water. How
many canteens would you need?
_______________________
What could you do to reduce water loss?
________________________________________________

Saving School Water – Teacher’s Notes
School Water Use Audit - Thirteen Suggestions
Your school’s ability to save water and to use it efficiently will depend on
its age, climate, community involvement and funding. The Water
Corporation program for “waterwise” schools can be accessed at:
http://www.watercorporation.com.au/home/teachers/waterwise-schools-
program
Some suggestions follow to help students identify actions at school which
can conserve water resources.
1. Set a tap to “drip” into a measuring cylinder or
jug. Estimate how much water would be lost if
students didn’t turn taps off properly. (1L is
about 4,000 drips)
2. If washers in taps are not renewed regularly
they will drip. Who would you tell in your school
if you found a dripping tap?
3. Younger students may not be strong enough to
turn off a tap properly. Older students should help them.
4. Toilets should be dual flush to minimize
water use. In some Japanese schools’
“intelligent” toilets are installed. There the
water used to wash your hands is held in a
basin at the top of the toilet then channeled
down to flush the toilet too! The Water
Corporation has a lovely video of a singing
toilet for National Toilet Day.
Page 51
Saving School Water – Teacher’s Notes
5. Where possible taps in toilets should be spring loaded to switch
themselves off automatically.
6. Lawns and gardens should only be
watered on the correct days and at
the correct times, early in the
morning and in the evening. Water
sprayed in the middle of the day is
mostly evaporated. Sprinkler systems
should be adjusted to work
automatically.
7. Where possible waterwise planting
with native plants or plants with low
water needs is advised.
8. Applying mulch and compost retains
water in soils.
9. Does your school have a worm farm? How would that help retain
water?
10. Drip irrigation uses less water than sprinklers and more water
reaches plant roots.
11. Trees and bushes provide shade and humidify the air around them.
Treat them with respect.
12. Is water collected from the roof channeled into the garden beds and
water tanks?
13. Use sealed paths around grassed areas rather than walking across
them. This creates bare dry areas.
Q Who is responsible for stopping water waste at your
school?
A EVERYBODY!
Page 52
Name ________________________
Water Saving at Home - PPP
Two experiments that can easily be done at home In Science we have been looking at water and how it is used.
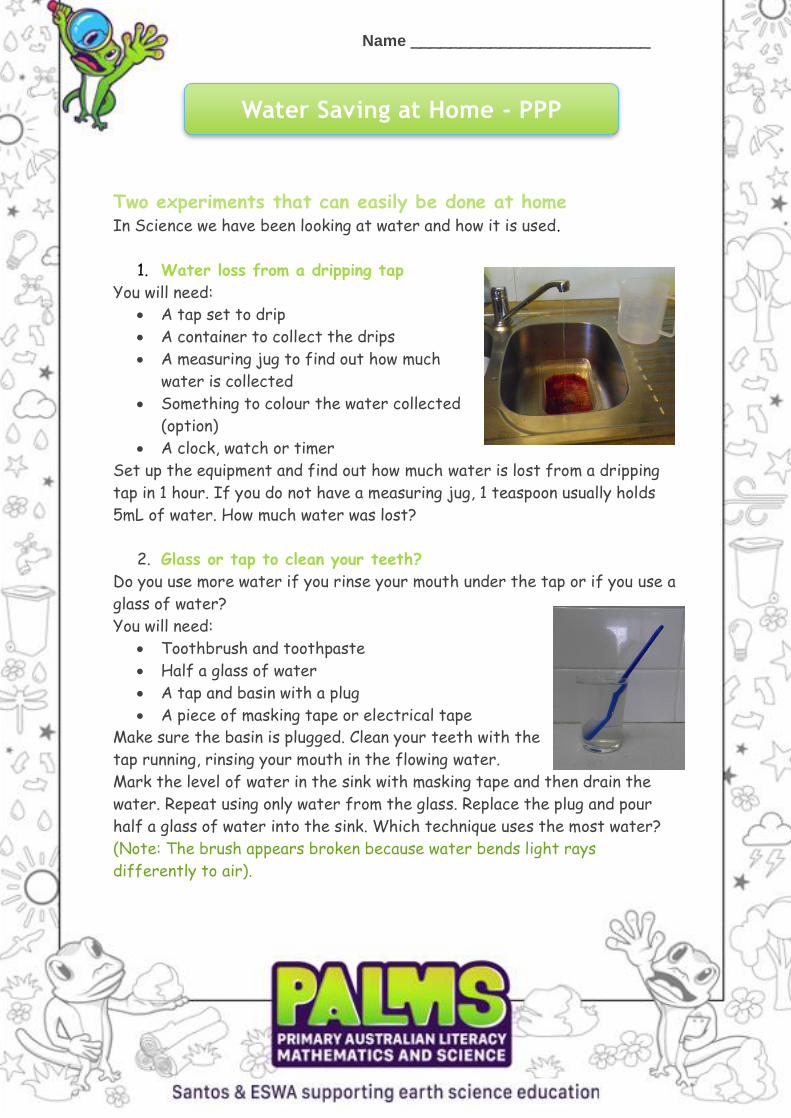
1. Water loss from a dripping tap
You will need:
• A tap set to drip
• A container to collect the drips
• A measuring jug to find out how much
water is collected
• Something to colour the water collected
(option)
• A clock, watch or timer
Set up the equipment and find out how much water is lost from a dripping
tap in 1 hour. If you do not have a measuring jug, 1 teaspoon usually holds
5mL of water. How much water was lost?
2. Glass or tap to clean your teeth?
Do you use more water if you rinse your mouth under the tap or if you use a
glass of water?
You will need:
• Toothbrush and toothpaste
• Half a glass of water
• A tap and basin with a plug
• A piece of masking tape or electrical tape
Make sure the basin is plugged. Clean your teeth with the
tap running, rinsing your mouth in the flowing water.
Mark the level of water in the sink with masking tape and then drain the
water. Repeat using only water from the glass. Replace the plug and pour
half a glass of water into the sink. Which technique uses the most water?
(Note: The brush appears broken because water bends light rays
differently to air).
Aboriginal Perspective on Water – Teacher’s Notes
Although Antarctica is the driest continent on Earth, Australia is the
driest inhabited continent. About 40-50,000 years ago, towards the end of
the last Ice Age, world sea level was lower because rain water which would
have normally run down to the sea was still trapped in great glaciers and ice
caps. This allowed people to walk over land now covered by sea.
The first waves of ancestral Aboriginal people arrived from the north
about 40,000 – 50,000 years ago. They were able to walk, sail and island
hop on rafts southwards to the north coast of Australia. Radiocarbon
dating and cultural relicts suggest there were at least two waves of
Aboriginal settlement. Genetic evidence suggests that the dingo arrived
with a late settlement wave about 18,000 years ago. The longest consistent
culture on Earth is of the Australian aborigine. (In comparison, Ancient
Egyptian civilization only started 3,100 years ago).
Once they had arrived on the north coast they travelled southward across
the continent mostly following the coast where there was best access to
fresh water and food. People also followed the great rivers inland.
Men mostly hunted large game and women hunted small game and gathered
fruits and seeds. When their descendants reached the south coast they
were even able to walk across to Tasmania. Then the climate warmed, the
ice melted, the sea level rose and Bass Strait became sea again isolating
Tasmania.
Because food sources were poor they followed seasonal fruits and game,
movement living a hunter-gatherer lifestyle. Their “walkabout” lifestyle was
essential so that they did not exhaust any resource, be it food or water.
They also travelled in small groups because resources were limited. Children
were raised to believe that they had to look after “country” . They
belonged to the land and were responsible for its maintenance. They were
custodians of Air, Water, Living Things and Land.
Page 54
Aboriginal Perspective on Water – Teacher’s Notes
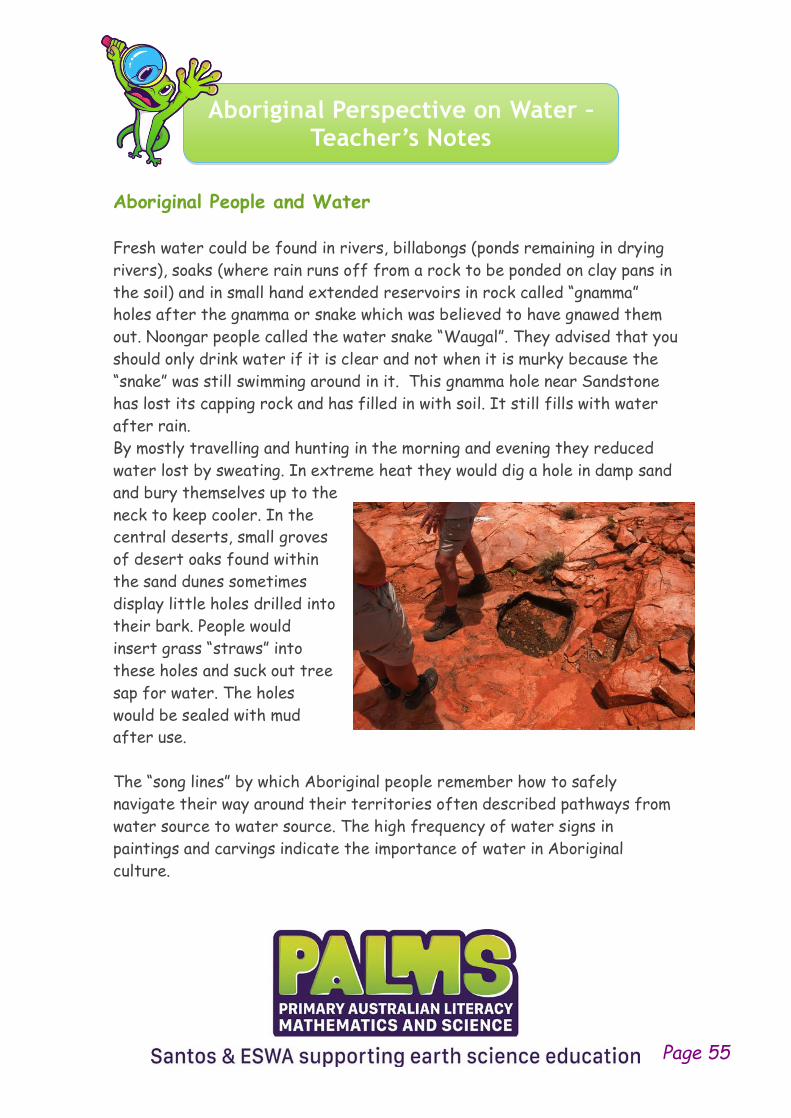
Aboriginal People and Water
Fresh water could be found in rivers, billabongs (ponds remaining in drying
rivers), soaks (where rain runs off from a rock to be ponded on clay pans in
the soil) and in small hand extended reservoirs in rock called “gnamma”
holes after the gnamma or snake which was believed to have gnawed them
out. Noongar people called the water snake “Waugal”. They advised that you
should only drink water if it is clear and not when it is murky because the
“snake” was still swimming around in it. This gnamma hole near Sandstone
has lost its capping rock and has filled in with soil. It still fills with water
after rain.
By mostly travelling and hunting in the morning and evening they reduced
water lost by sweating. In extreme heat they would dig a hole in damp sand
and bury themselves up to the
neck to keep cooler. In the
central deserts, small groves
of desert oaks found within
the sand dunes sometimes
display little holes drilled into
their bark. People would
insert grass “straws” into
these holes and suck out tree
sap for water. The holes
would be sealed with mud
after use.
The “song lines” by which Aboriginal people remember how to safely
navigate their way around their territories often described pathways from
water source to water source. The high frequency of water signs in
paintings and carvings indicate the importance of water in Aboriginal
culture.
Page 55
Aboriginal Perspective on Water – Teacher’s Notes
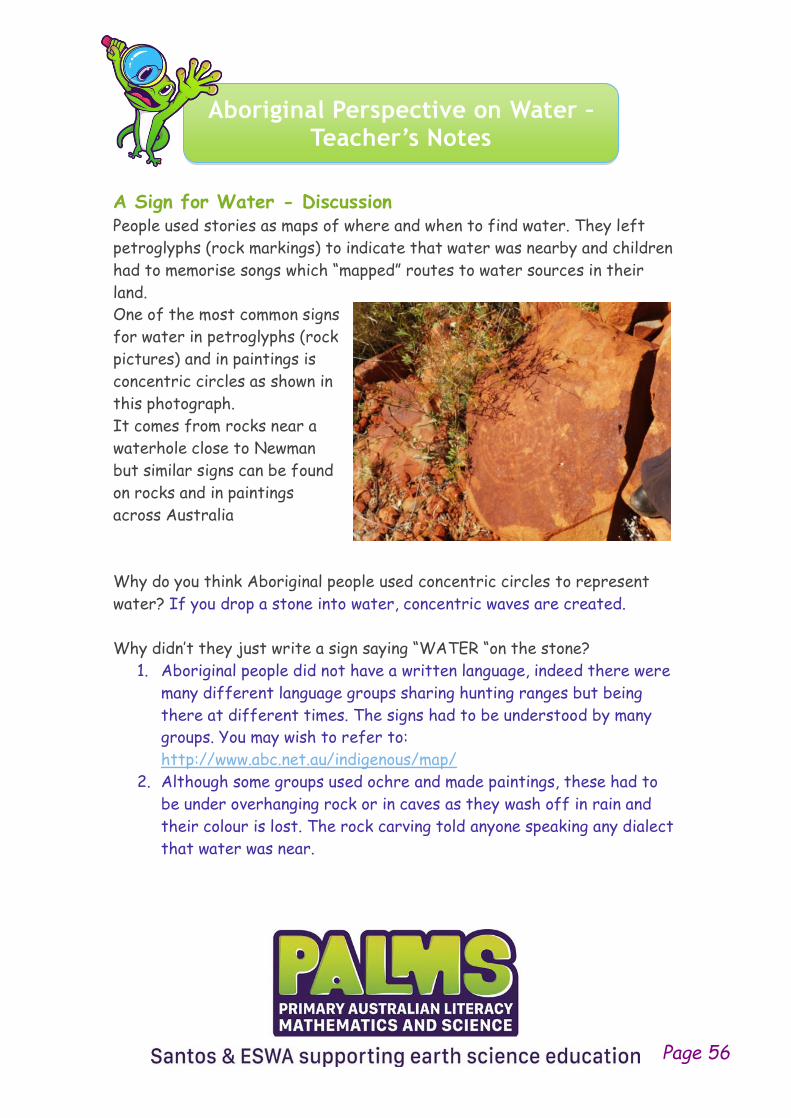
A Sign for Water - Discussion People used stories as maps of where and when to find water. They left
petroglyphs (rock markings) to indicate that water was nearby and children
had to memorise songs which “mapped” routes to water sources in their
land.
One of the most common signs
for water in petroglyphs (rock
pictures) and in paintings is
concentric circles as shown in
this photograph.
It comes from rocks near a
waterhole close to Newman
but similar signs can be found
on rocks and in paintings
across Australia
Why do you think Aboriginal people used concentric circles to represent
water? If you drop a stone into water, concentric waves are created.
Why didn’t they just write a sign saying “WATER “on the stone?
1. Aboriginal people did not have a written language, indeed there were
many different language groups sharing hunting ranges but being
there at different times. The signs had to be understood by many
groups. You may wish to refer to:
http://www.abc.net.au/indigenous/map/
2. Although some groups used ochre and made paintings, these had to
be under overhanging rock or in caves as they wash off in rain and
their colour is lost. The rock carving told anyone speaking any dialect
that water was near.
Page 56
Aboriginal Perspective on Water – Teacher’s Notes
3. The petroglyphs were made by scratching through the redder
weathered rock on the surface to make lighter lines from the rock
below. Carving into rock is very difficult and time consuming. Their
creation and maintenance over thousands of years is an indication of
their importance.
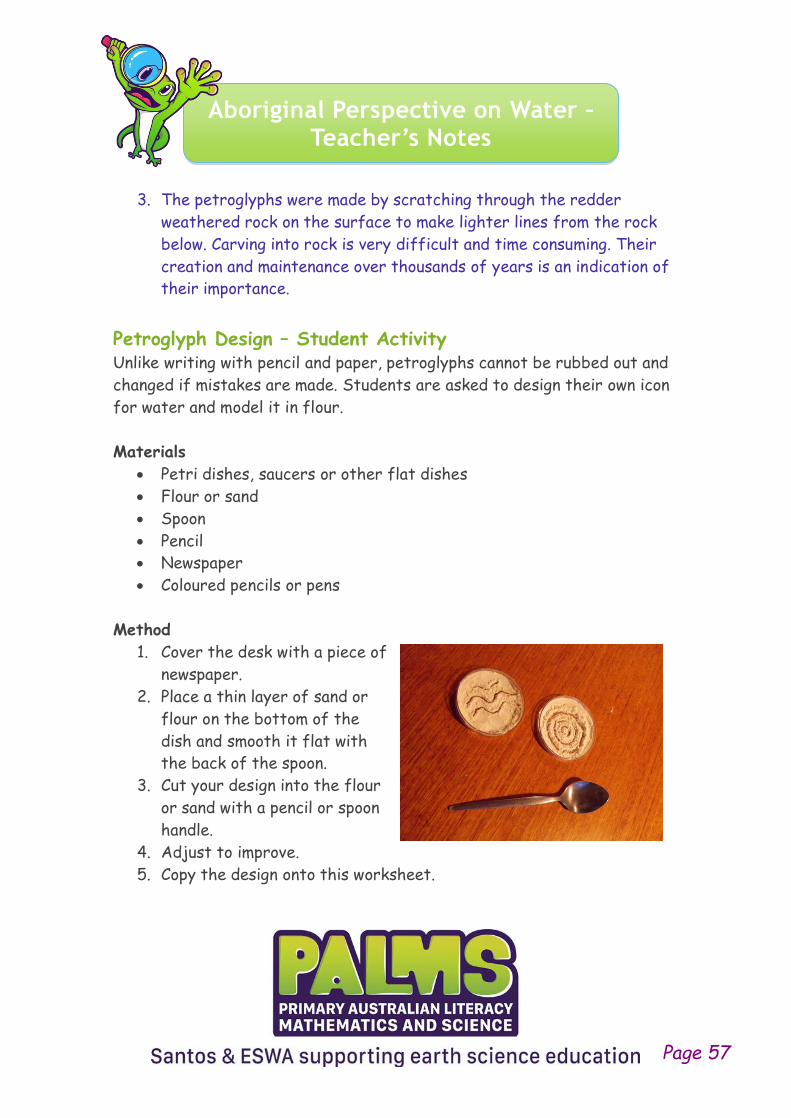
Petroglyph Design – Student Activity Unlike writing with pencil and paper, petroglyphs cannot be rubbed out and
changed if mistakes are made. Students are asked to design their own icon
for water and model it in flour.
Materials
• Petri dishes, saucers or other flat dishes
• Flour or sand
• Spoon
• Pencil
• Newspaper
• Coloured pencils or pens
Method
1. Cover the desk with a piece of
newspaper.
2. Place a thin layer of sand or
flour on the bottom of the
dish and smooth it flat with
the back of the spoon.
3. Cut your design into the flour
or sand with a pencil or spoon
handle.
4. Adjust to improve.
5. Copy the design onto this worksheet.
Page 57
Aboriginal Perspective on Water – Teacher’s Notes
Draw your sign for water below and explain why you chose it.
WATER
Why I chose it
___________________________________________________
___________________________________________________
Way to Water - Extension
Students may wish to create a dot painting indicating the route from their
desk to the nearest drinking fountain. Icons for footsteps and landmarks
would have to be selected.
Materials
• Paper
• PVA paint in jam jar lids
• Blunt brushes or the ends of pencils. Plastic drinking straws make
excellent dots if recharged frequently.
Page 58
Name ________________________
Aboriginal Perspective on Water – Student Worksheet
About 40-50,000 years ago, Aboriginal people moved south into
Australia. Water was very important to their survival. Their
“walkabout” lifestyle was essential so that they did not exhaust
any resource, be it food or water. Children were raised to
believe that they had to look after “country”. They were
custodians of Air, Water, Living Things and Land.
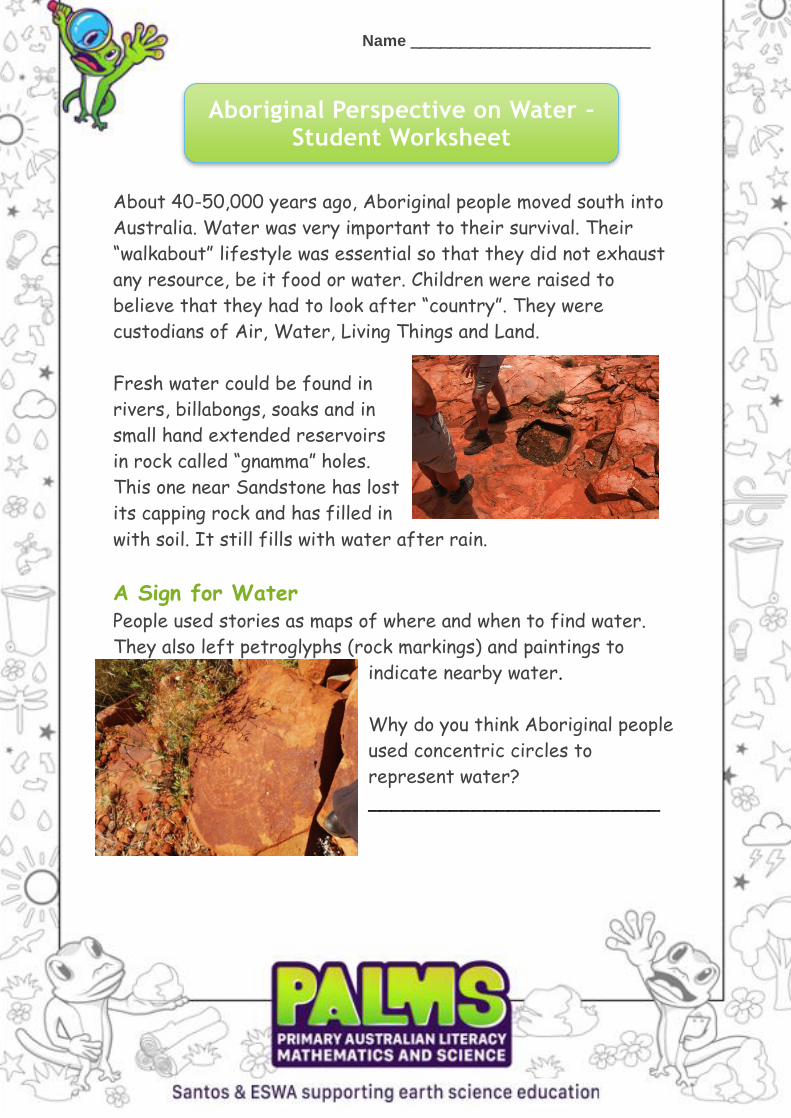
Fresh water could be found in
rivers, billabongs, soaks and in
small hand extended reservoirs
in rock called “gnamma” holes.
This one near Sandstone has lost
its capping rock and has filled in
with soil. It still fills with water after rain.
A Sign for Water People used stories as maps of where and when to find water.
They also left petroglyphs (rock markings) and paintings to
indicate nearby water.
Why do you think Aboriginal people
used concentric circles to
represent water?
_________________________
Name ________________________
Aboriginal Perspective on Water – Student Worksheet
Why didn’t they just write a sign saying “WATER “on the stone?
________________________________________________
________________________________________________
Petroglyph Design
Materials
• Saucers or other flat dishes
• Flour or sand
• Spoon
• Pencil
• Newspaper
Method
1. Cover the desk with a
piece of newspaper.
2. Place a thin layer of sand
or flour on the bottom of
the dish and smooth it
flat with the back of the spoon.
3. Cut your design into the flour or sand with a pencil or
spoon handle.
4. Adjust to improve.
5. Copy the design below and explain why you chose it.
Name ________________________
Aboriginal Perspective on Water – Student Worksheet
My design
I chose this design because ___________________________
________________________________________________
________________________________________________

Introduction to Soils – Teacher’s Notes
Soils are the product of rock weathering, erosion and deposition, modified
by living things and their products.
Some Western Australian soils
From left to right
Top Rockingham Mingenew Geraldton
Bottom Esperance Spearwood Perth
The colour of soil depends on the nature of the original rock fragments and
later modification by living things.
Some interesting soil facts
• One tablespoon of soil has more living organisms in it than there are
people on Earth.
• It takes more than 200 years to create 1cm of fertile topsoil.
• Nearly all modern antibiotics used to fight infections are obtained
from soil organisms.
Page 62
Introduction to Soils – Teacher’s Notes
• Parts of coastal Western Australia arguably have the second worst
soils in the World.
Soils are useful resources for:
• Growing food, wood, shelter and recreation areas.
• Making rammed earth buildings.
• Sheltering decomposers and other animals.
• Holding and filtering water.
• Burning for fuel (peat).
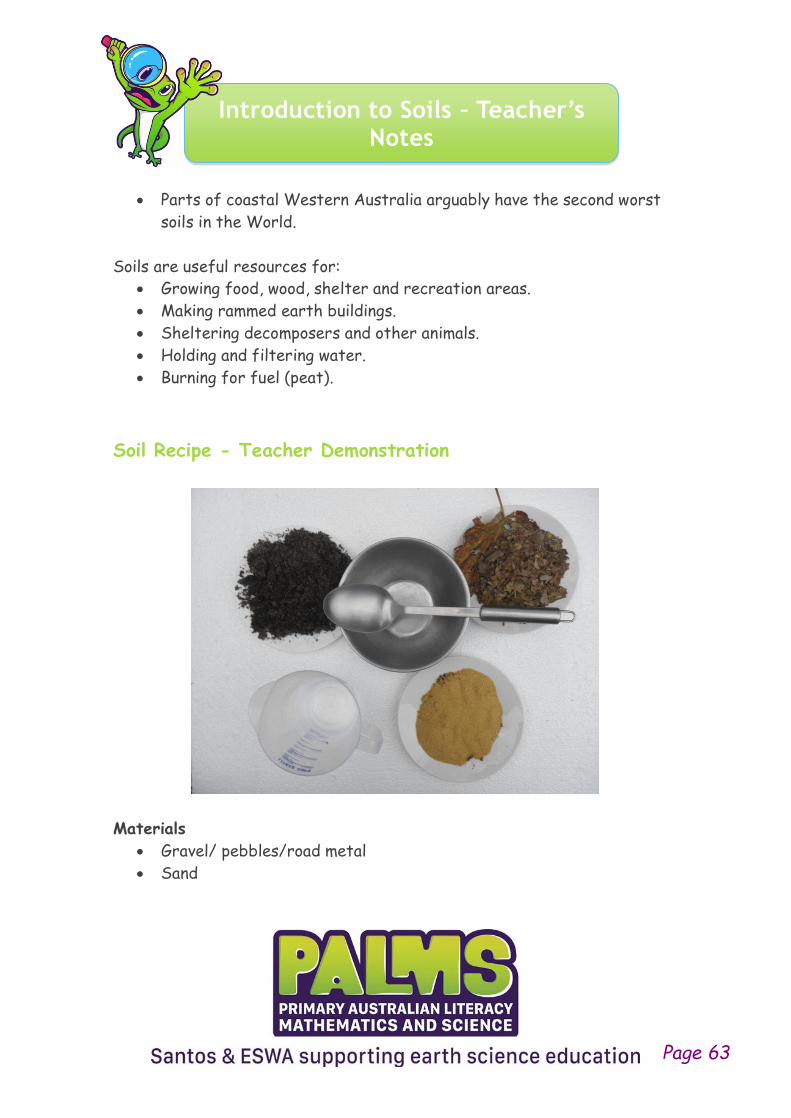
Soil Recipe - Teacher Demonstration
Materials
• Gravel/ pebbles/road metal
• Sand
Page 63
Introduction to Soils – Teacher’s Notes
• Dried leaves/grass (crushed if large)
• Compost
• Water
• Mixing bowl
Method
1. Ask the students where they think each component comes from.
2. Gravel – broken/weathered rock
3. Sand even more broken/weathered rock
4. Leaves from trees and bushes
5. Compost from compost heap/bin or worm farm. If you don’t have
compost use potting mix.
6. Mix about half a handful of each into a larger container, add about 2
tablespoons of water and ask the students what they think you are
trying to make. They may say “soils”.
7. Ask the student what ingredient/thing is still missing. They may say
the brown part or living things such as worms and slaters (woodlice).
This mix also doesn’t have fungi and bacteria that are needed to
decompose dead plants and animals to make humus.
8. Discuss with the students how much of each component should be
added to make a good soil for the garden. (Recipe for a good soil).
9. Ask the students why all soils are not the same. The different
sources of rock and percentage of components result in different
soil types.
If you have some good soil from your garden or the school garden, students
can compare the soil you have mixed with the real thing.
This activity is based on an activity from Earth Learning Ideas web site
www.earthlearningideas.com
Page 64
Introduction to Soils – Teacher’s Notes
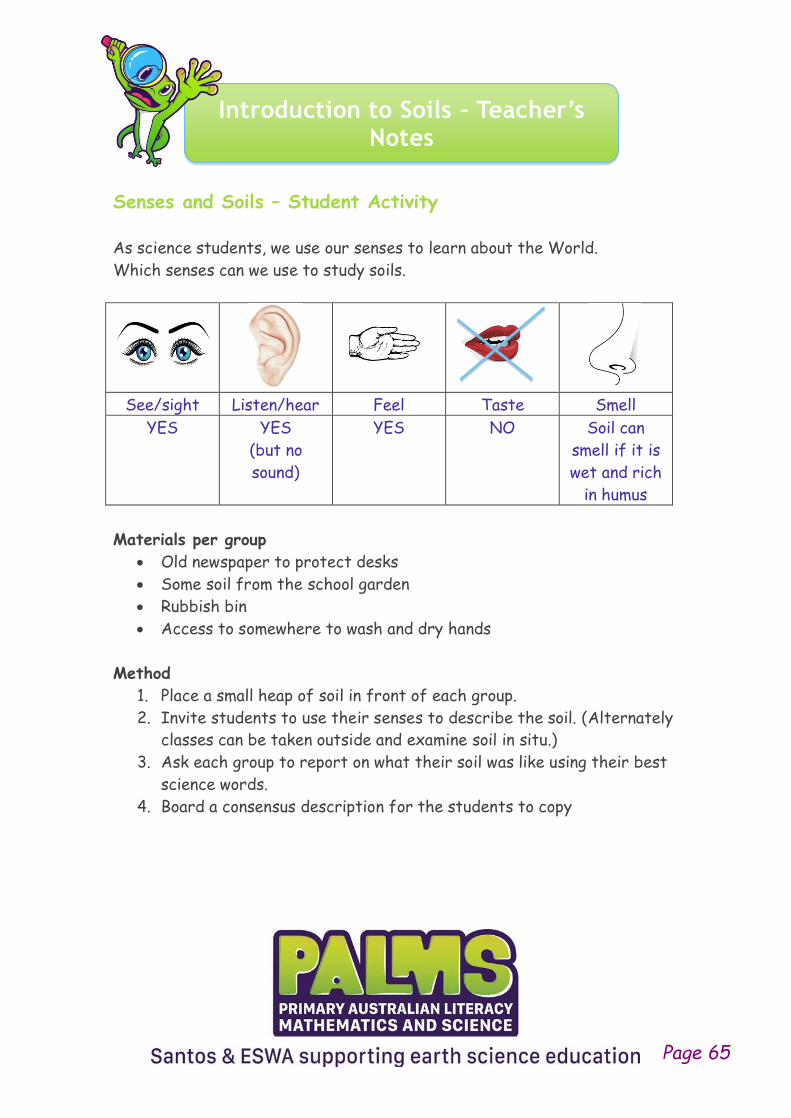
Senses and Soils – Student Activity
As science students, we use our senses to learn about the World.
Which senses can we use to study soils.
See/sight Listen/hear Feel Taste Smell
YES YES
(but no
sound)
YES NO Soil can
smell if it is
wet and rich
in humus
Materials per group
• Old newspaper to protect desks
• Some soil from the school garden
• Rubbish bin
• Access to somewhere to wash and dry hands
Method
1. Place a small heap of soil in front of each group.
2. Invite students to use their senses to describe the soil. (Alternately
classes can be taken outside and examine soil in situ.)
3. Ask each group to report on what their soil was like using their best
science words.
4. Board a consensus description for the students to copy
Page 65

Introduction to Soils – Teacher’s Notes
Soil description words
• Colours
• Coarse, medium, fine grained
• Living things visible or not
• Wet damp or dry
• Clay, sand and grit
Soils contain living things. What lives in soils in Australia?
Worms, insects, roots from plants. Wombats, lizards and snakes live part
of the time in burrows in soil as do some birds.
Soil is a resource. What is a resource? Something that is useful.
What Do We Use Soils For? - Student Brainstorm Activity
At Home On the farm In school
Materials per group
• Paper for rough copy of ideas of what we use soils for
• Worksheet
• Pencils
Page 66
Introduction to Soils – Teacher’s Notes
Method
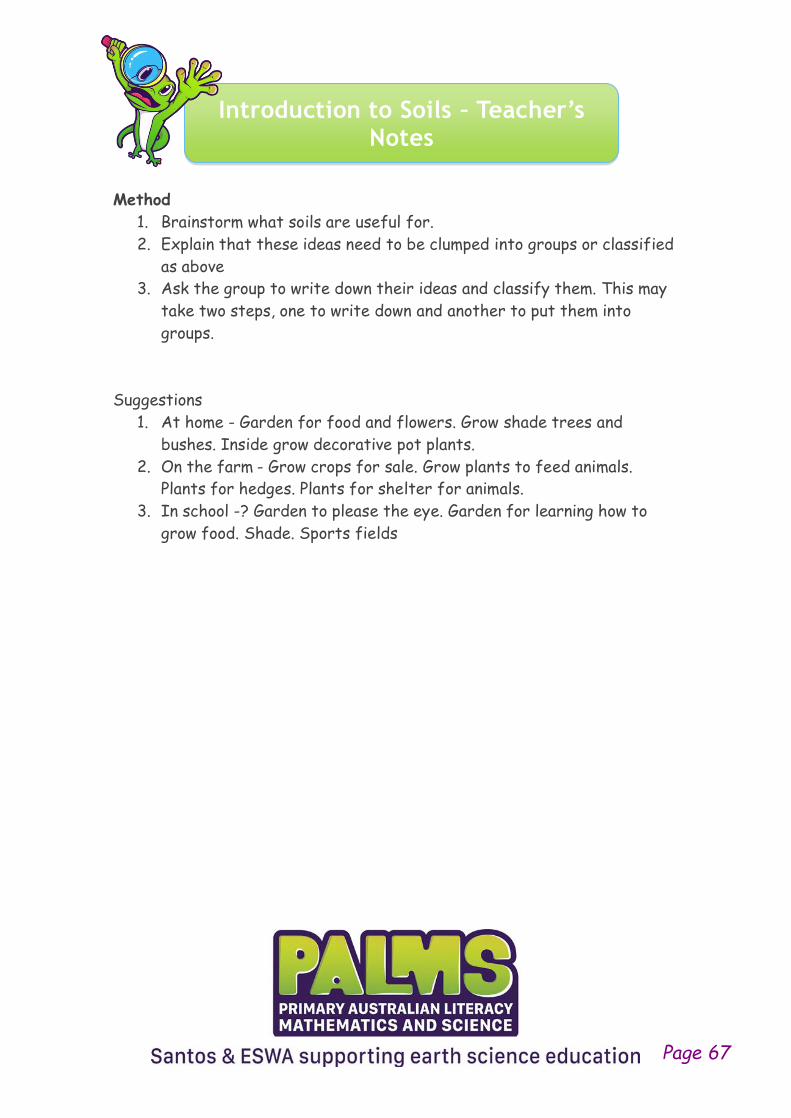
1. Brainstorm what soils are useful for.
2. Explain that these ideas need to be clumped into groups or classified
as above
3. Ask the group to write down their ideas and classify them. This may
take two steps, one to write down and another to put them into
groups.
Suggestions
1. At home - Garden for food and flowers. Grow shade trees and
bushes. Inside grow decorative pot plants.
2. On the farm - Grow crops for sale. Grow plants to feed animals.
Plants for hedges. Plants for shelter for animals.
3. In school -? Garden to please the eye. Garden for learning how to
grow food. Shade. Sports fields
Page 67
Name ________________________
Introduction to Soils – Student Worksheet
Senses and Soils
As science students, we use our senses to learn about the
World.
Which senses can we use to study soils?
Soils contain living things. What lives in soils in Australia?
________________________________________________
________________________________________________
Soil is a resource. What is a resource? ___________________
________________________________________________
Name ________________________
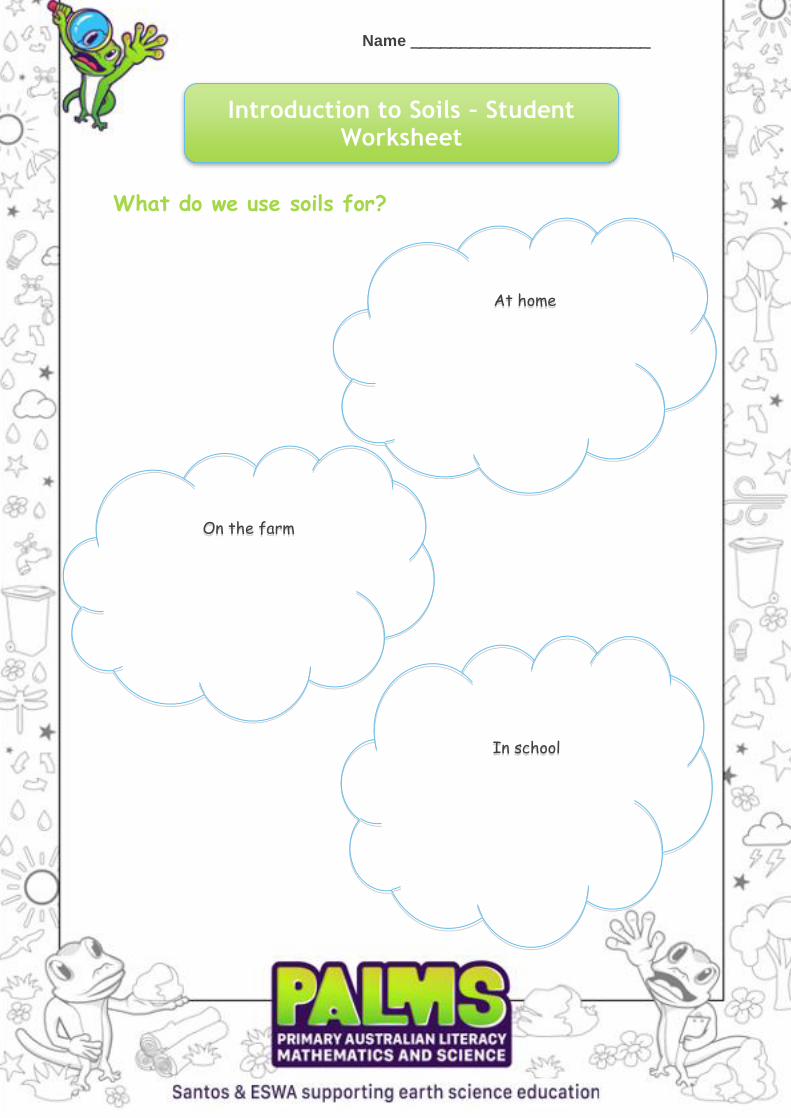
Introduction to Soils – Student Worksheet
What do we use soils for?
At home
On the farm
In school
Humus in Soil – Teacher’s Notes
Humus is living material that has been broken down and composted by
worms, insects, fungi and bacterial to create a magnificent soil conditioner.
Humus does not usually add fertiliser to the soil but it provides the
chemical conditions which allows important elements such as nitrogen,
magnesium and potassium to be bound to soil’s mineral grains and remain
available to plants. In our poor “gutless” soils fertiliser can wash straight
through the soil and enter the aquifers and rivers causing algal blooms. The
added ability of humus to retain water means that dissolved fertiliser
becomes more available to plants.
Materials per student or group
• About 2 tablespoons of garden soil. Make sure to collect samples
from below the mulch layer.
• A container that seals. An empty cool drink bottle or jam jar are
fine. If students use test tubes they must be careful to seal the top
with their fingers or thumbs.
• Water in a jug
• A piece of scrap paper and a pencil
Method
1. Place a specimen of soil in the container.
2. Lay the paper alongside the soil and make a mark to measure the soil
level in the container.
3. Half fill with water.
4. Seal and give it a good shake for 1 minute
5. Hold upright without moving for at least two minutes to allow the soil
settle. Clay rich soils may take longer to settle.
6. Lay the paper along the container and measure the thickness of the
humus layer
Page 70
Humus in Soil – Teacher’s Notes
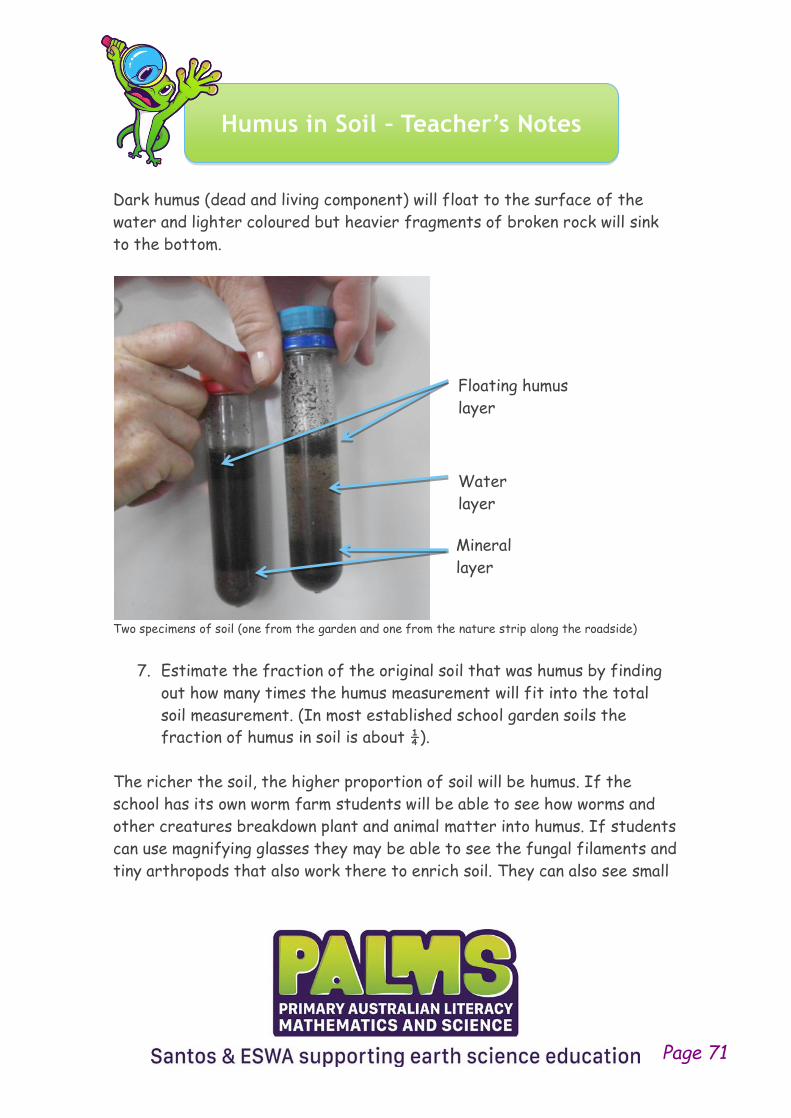
Dark humus (dead and living component) will float to the surface of the
water and lighter coloured but heavier fragments of broken rock will sink
to the bottom.
Two specimens of soil (one from the garden and one from the nature strip along the roadside)
7. Estimate the fraction of the original soil that was humus by finding
out how many times the humus measurement will fit into the total
soil measurement. (In most established school garden soils the
fraction of humus in soil is about ¼).
The richer the soil, the higher proportion of soil will be humus. If the
school has its own worm farm students will be able to see how worms and
other creatures breakdown plant and animal matter into humus. If students
can use magnifying glasses they may be able to see the fungal filaments and
tiny arthropods that also work there to enrich soil. They can also see small
Floating humus
layer
Water
layer
Mineral
layer
Page 71
Humus in Soil – Teacher’s Notes
pieces of rock.
Broken down rock minerals in soil feed not only the plants and animals on
land but also those in the sea. Rocks are broken down into small pieces of
gravel, sand and clay initially by weathering and by mosses and lichen. They
are further digested and chemically altered by microscopic bacteria and
fungi. Worms and insects mix and aerate the humus allowing water and air
to enter.
More information about humus
Humus can hold up to 90% of its weight in water. Most plants need at least
10% humus in the soil to grow. Humus has a negative charge which means
that ammonium (a source of nitrogen), calcium, magnesium and phosphorous
are attracted to it. This stops rainwater washing these precious nutrients
away. Adding too much organic matter can make the soil too acid. It will not
break down quickly forming a peat layer that is only suited to a few plants.
Mulch and compost Mulch is organic or inorganic material that is added to cover the surface of
the soil. This keeps it cool, retains some water and reduces weed growth.
Mulch can be dead leaves, newspaper, and black plastic or even stones.
When the Israelis were revegetating the Sinai desert they placed at least
three large stones around each tree planting to aid plant survival. Mulch can
take 10 to twenty years to breakdown. Leaves from some Australian trees,
such as eucalypts actually need to remove nitrogen from the soil to break
down.
Compost is organic matter that is in the process of decomposition.
A good gardener has a layer of mulch above a layer of compost and then a
humus rich soil.
Page 72

Name ________________________
Humus in Soils – Student Worksheet
Humus is made from living things.
Humus keeps soil healthy.
Draw your soil and label the humus layer, water and mineral
layer.
What fraction of your soil is humus? ___________________
Soil and Worms – Teacher’s Notes
Willie the worm needs a new home
To replay the understanding that soil has living and non- living components
and why it is an essential resource, the following activity “Willie the worm
needs a new home”, can be used.
The activity might be preceded by a visit to the school’s worm farm or
mulch heap to view working worms (and other decomposers) that live there
and break down organic matter to enrich soil. If you are not familiar with
worm farms, the layer under shredded newspaper often contains lots of
worms.
The worksheet and pictures may be uploaded to a Smart Board or
projector and the class can discuss possible answers before filling in their
own worksheets.
This also provides an opportunity for students to create a puppet show or
drama relating this story and its characters.
Students can take the parts of:
• Narrator
• Willie the worm
• The farmer
• The cow
• The wheat
• Willie’s friends, the worms, the bacteria and the fungi
Worm information
Would you please ask students to only handle worms minimally as they are
sensitive to heat from human’s hands.
Page 74
Soil and Worms – Teacher’s Notes
The garden earthworm is a segmented worm. It has little hooks or chaetae
on the underside of its segments that it uses to pull its way along. It moves
forward in waves of contraction and extension along its body.
One end of the worm has sensitive tissue that reacts to light and heat.
This is the shorter portion in front of the thick saddle. Worms move away
from light. A bird has to be up early to catch a worm on the surface of the
grass. At daybreak light drives them underground. If it rains heavily and
their tunnels are filled with water you may also find them at the surface.
Worms are hermaphroditic being both male and female. They can fertilise
each other and both lay eggs. (Perhaps our worm should be called
Willie/Wilhemina?)
In soft earth it pushes its head forward through the soil, however if the
soil is hard, it can also eat its way through. It leaves tunnels that allow air
into the soil and water to penetrate easily. Plants depend on air and water
reaching their roots. They depend on nutrients dissolved in water. Worm
castings are a very valuable type of fertiliser.
Worm Farm OptionUsing an old aquarium or other large transparent container, fill with thick
layers of soil, shredded newspaper (visit the school office?) and vegetable
waste (canteen?). It should be kept warm and damp, not wet.
saddle
Page 75
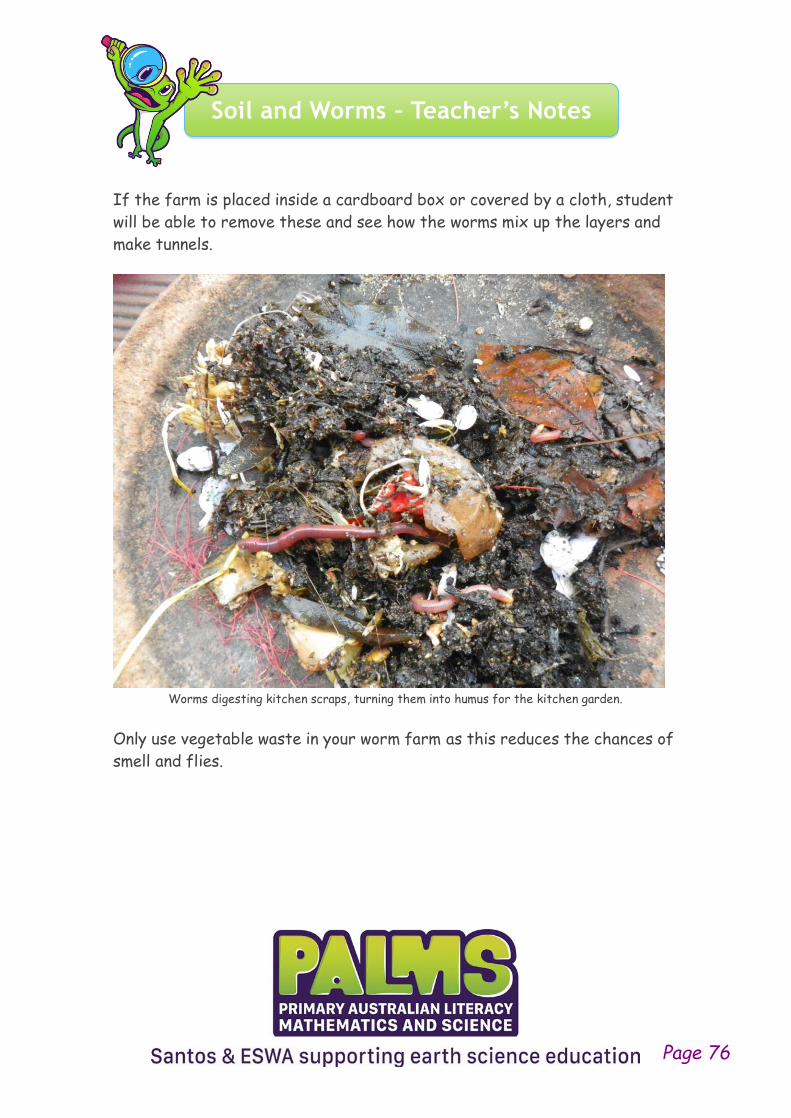
Soil and Worms – Teacher’s Notes
If the farm is placed inside a cardboard box or covered by a cloth, student
will be able to remove these and see how the worms mix up the layers and
make tunnels.
Worms digesting kitchen scraps, turning them into humus for the kitchen garden.
Only use vegetable waste in your worm farm as this reduces the chances of
smell and flies.
Page 76
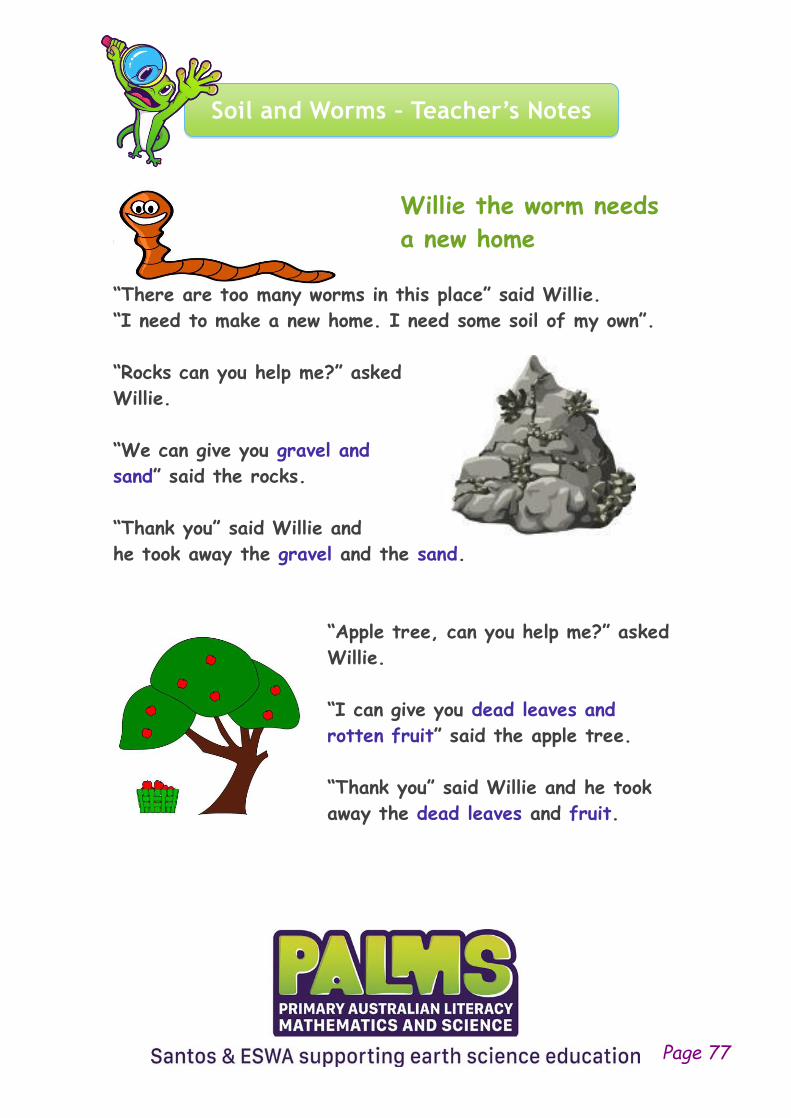
Soil and Worms – Teacher’s Notes
Willie the worm needs
a a new home
“There are too many worms in this place” said Willie.
“I need to make a new home. I need some soil of my own”.
“Rocks can you help me?” asked
Willie.
“We can give you gravel and
sand” said the rocks.
“Thank you” said Willie and
he took away the gravel and the sand.
“Apple tree, can you help me?” asked
Willie.
“I can give you dead leaves and
rotten fruit” said the apple tree.
“Thank you” said Willie and he took
away the dead leaves and fruit.
Page 77
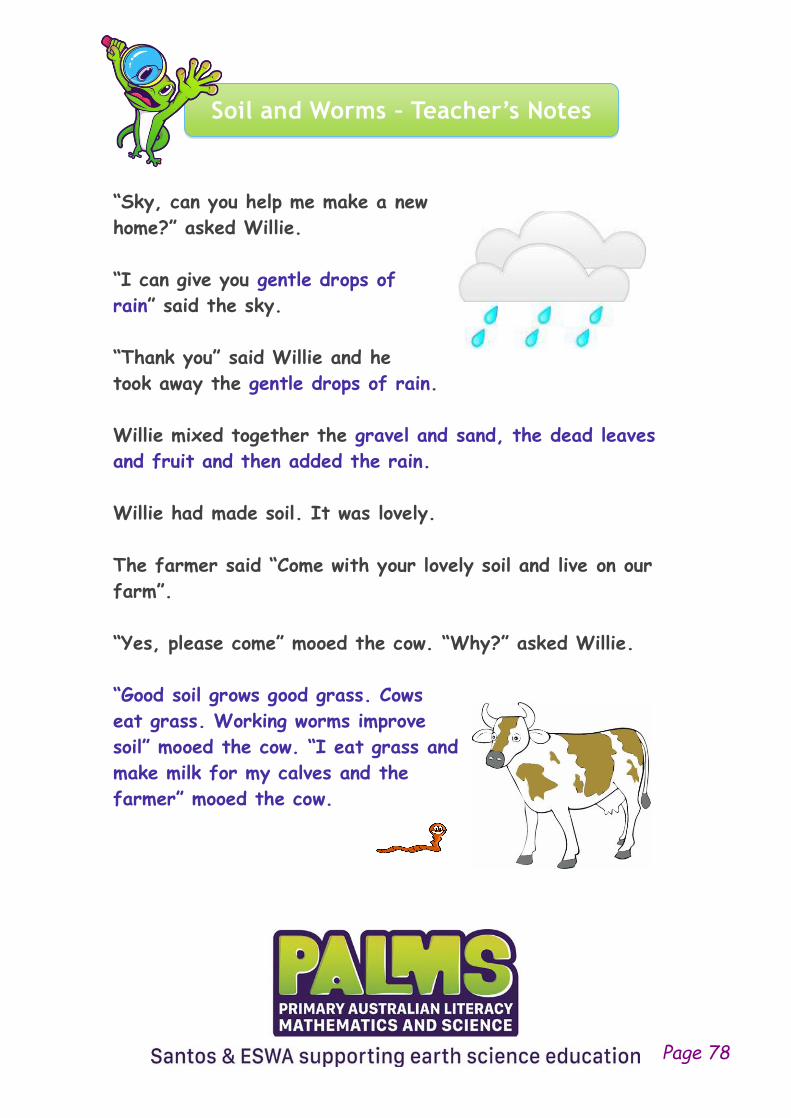
Soil and Worms – Teacher’s Notes
“Sky, can you help me make a new
home?” asked Willie.
“I can give you gentle drops of
rain” said the sky.
“Thank you” said Willie and he
took away the gentle drops of rain.
Willie mixed together the gravel and sand, the dead leaves
and fruit and then added the rain.
Willie had made soil. It was lovely.
The farmer said “Come with your lovely soil and live on our
farm”.
“Yes, please come” mooed the cow. “Why?” asked Willie.
“Good soil grows good grass. Cows
eat grass. Working worms improve
soil” mooed the cow. “I eat grass and
make milk for my calves and the
farmer” mooed the cow.
Page 78
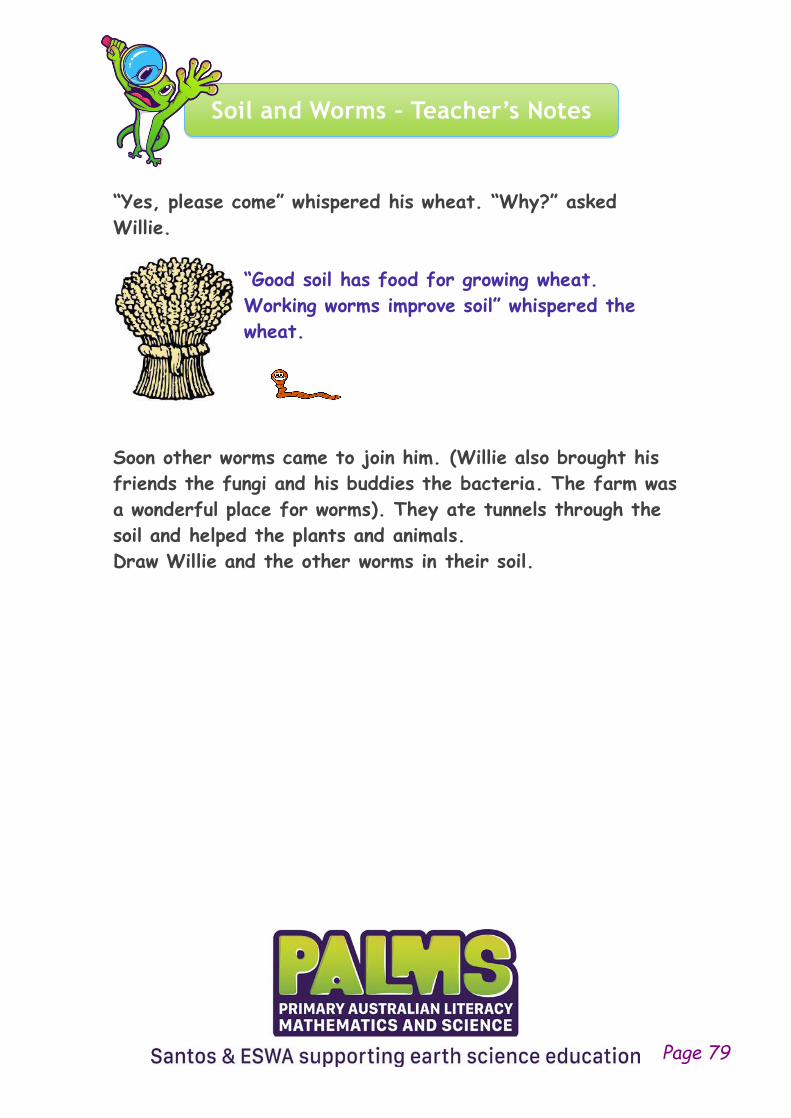
Soil and Worms – Teacher’s Notes
“Yes, please come” whispered his wheat. “Why?” asked
Willie.
“Good soil has food for growing wheat.
Working worms improve soil” whispered the
wheat.
Soon other worms came to join him. (Willie also brought his
friends the fungi and his buddies the bacteria. The farm was
a wonderful place for worms). They ate tunnels through the
soil and helped the plants and animals.
Draw Willie and the other worms in their soil.
Page 79
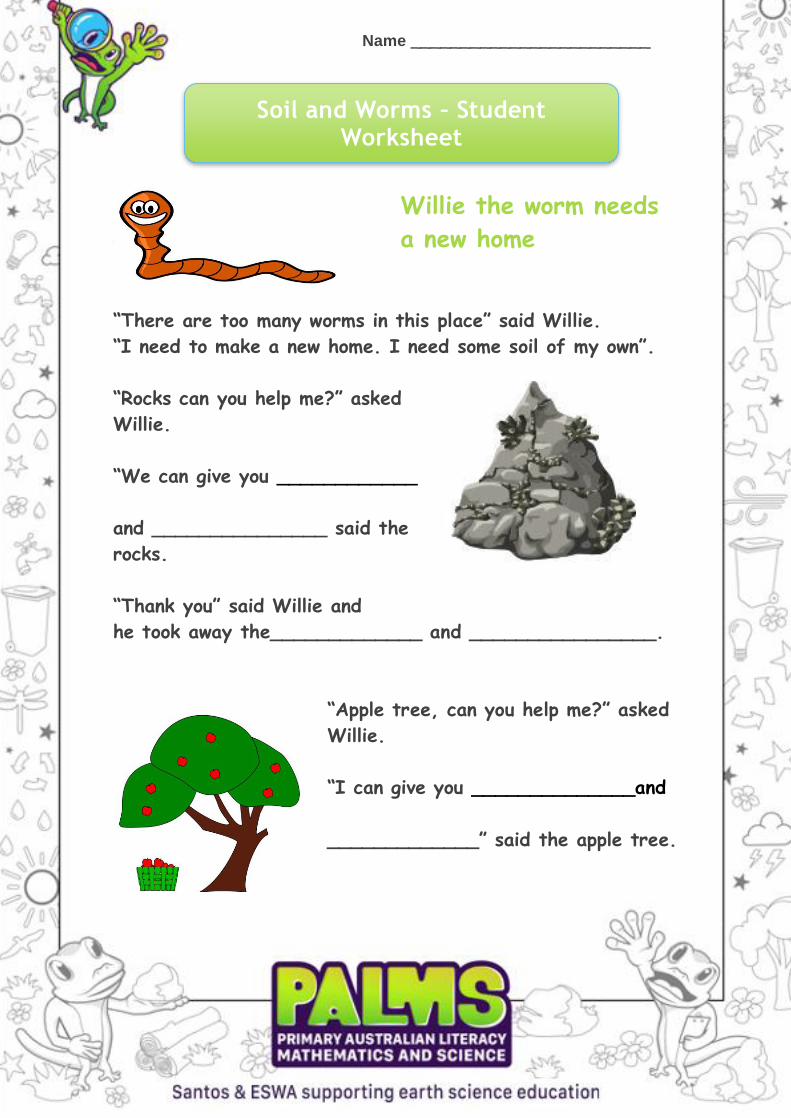
Name ________________________
Soil and Worms – Student Worksheet
Willie the worm needs
a a new home
“There are too many worms in this place” said Willie.
“I need to make a new home. I need some soil of my own”.
“Rocks can you help me?” asked
Willie.
“We can give you ____________
and _______________ said the
rocks.
“Thank you” said Willie and
he took away the_____________ and ________________.
“Apple tree, can you help me?” asked
Willie.
“I can give you ______________and
_____________” said the apple tree.
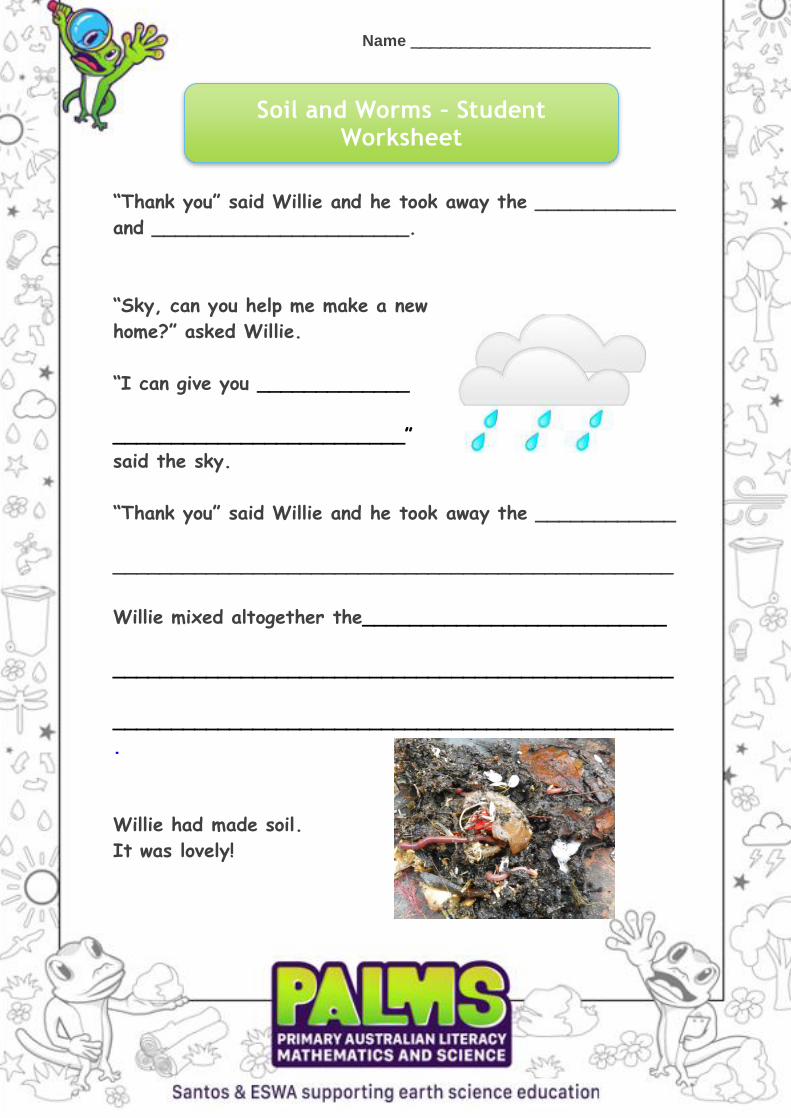
Name ________________________
Soil and Worms – Student Worksheet
“Thank you” said Willie and he took away the ____________
and ______________________.
“Sky, can you help me make a new
home?” asked Willie.
“I can give you _____________
_________________________”
said the sky.
“Thank you” said Willie and he took away the ____________
________________________________________________
Willie mixed altogether the__________________________
________________________________________________
________________________________________________
.
Willie had made soil.
It was lovely!
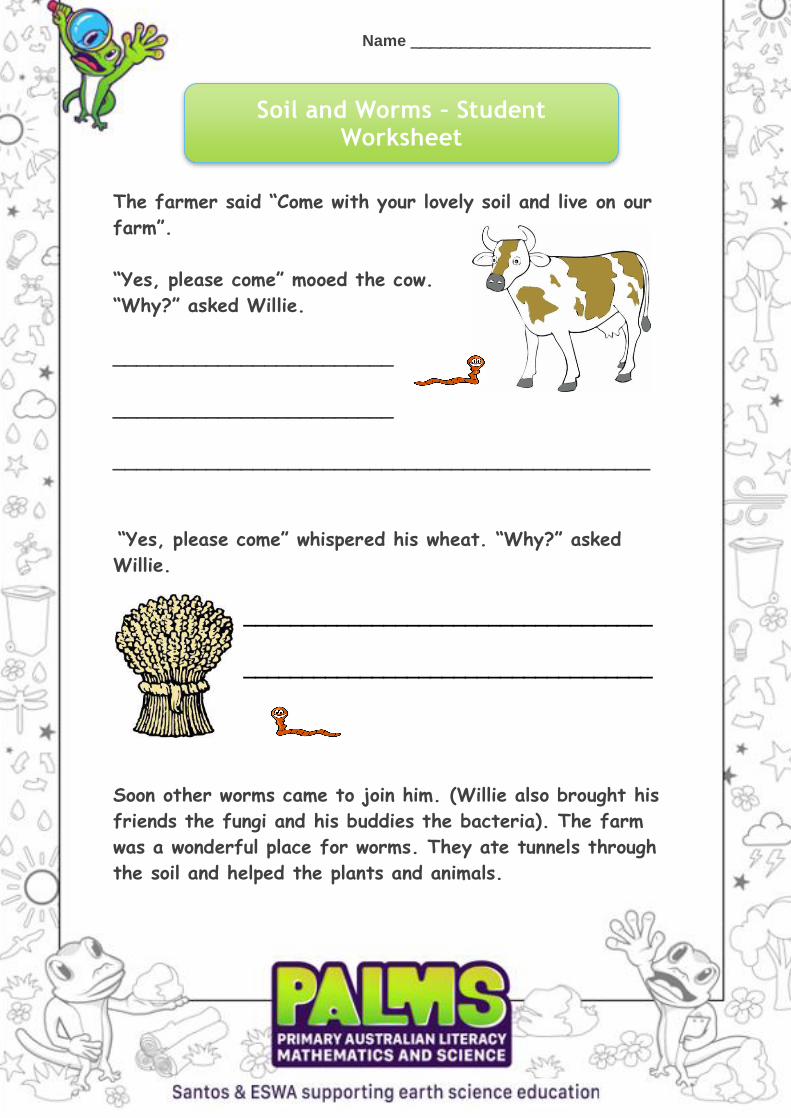
Name ________________________
Soil and Worms – Student Worksheet
The farmer said “Come with your lovely soil and live on our
farm”.
“Yes, please come” mooed the cow.
“Why?” asked Willie.
________________________
________________________
______________________________________________
“Yes, please come” whispered his wheat. “Why?” asked
Willie.
___________________________________
___________________________________
Soon other worms came to join him. (Willie also brought his
friends the fungi and his buddies the bacteria). The farm
was a wonderful place for worms. They ate tunnels through
the soil and helped the plants and animals.
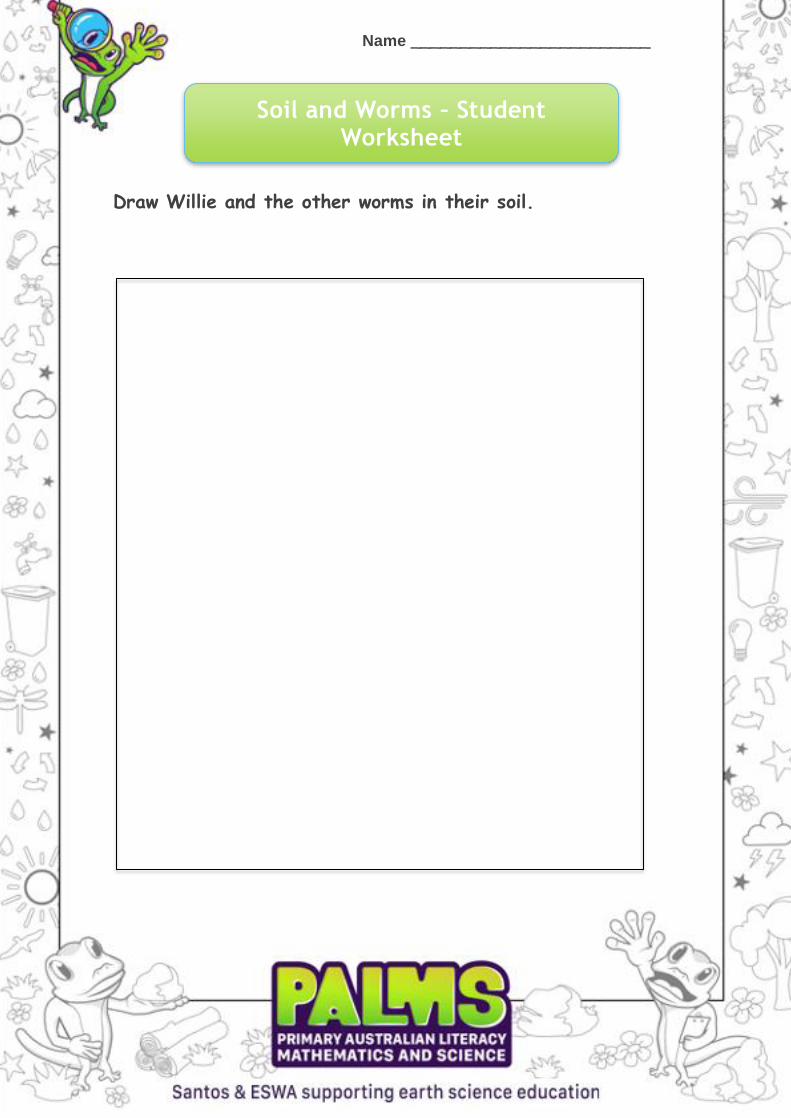
Name ________________________
Soil and Worms – Student Worksheet
Draw Willie and the other worms in their soil.
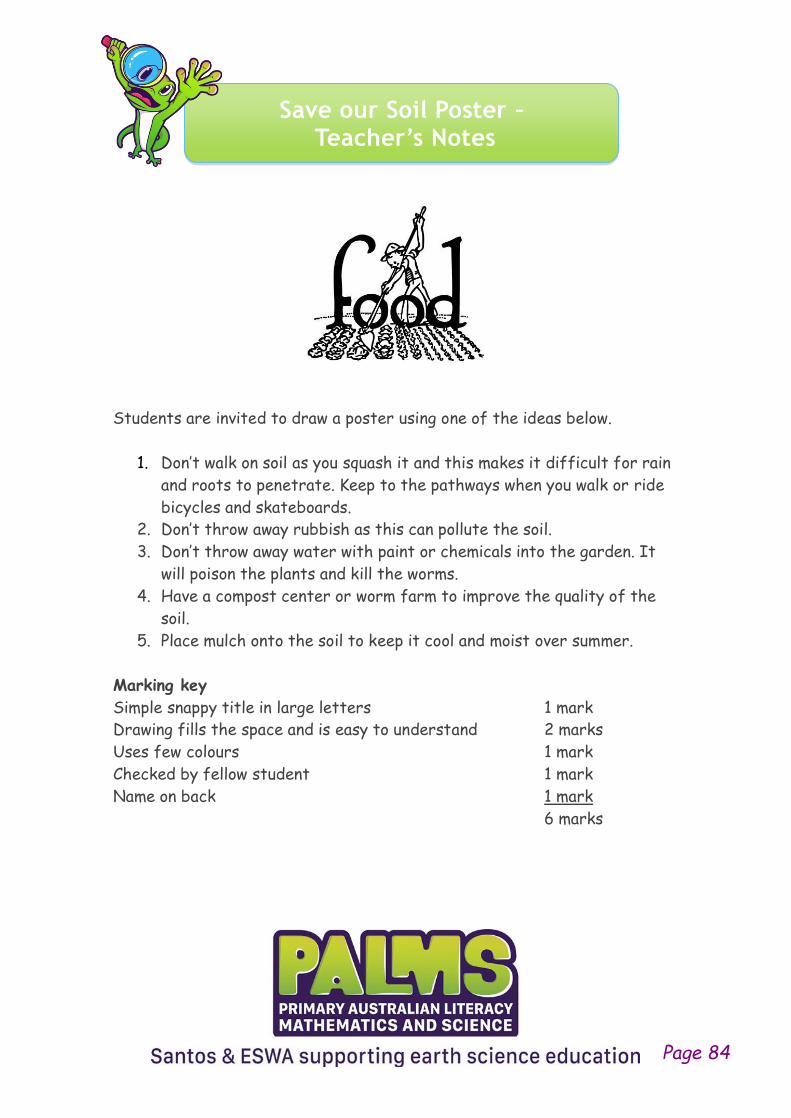
Save our Soil Poster – Teacher’s Notes
Students are invited to draw a poster using one of the ideas below.
1. Don’t walk on soil as you squash it and this makes it difficult for rain
and roots to penetrate. Keep to the pathways when you walk or ride
bicycles and skateboards.
2. Don’t throw away rubbish as this can pollute the soil.
3. Don’t throw away water with paint or chemicals into the garden. It
will poison the plants and kill the worms.
4. Have a compost center or worm farm to improve the quality of the
soil.
5. Place mulch onto the soil to keep it cool and moist over summer.
Marking key
Simple snappy title in large letters 1 mark
Drawing fills the space and is easy to understand 2 marks
Uses few colours 1 mark
Checked by fellow student 1 mark
Name on back 1 mark
6 marks
Page 84

Name ________________________
Save our Soil Poster – Student Worksheet
Text goes here
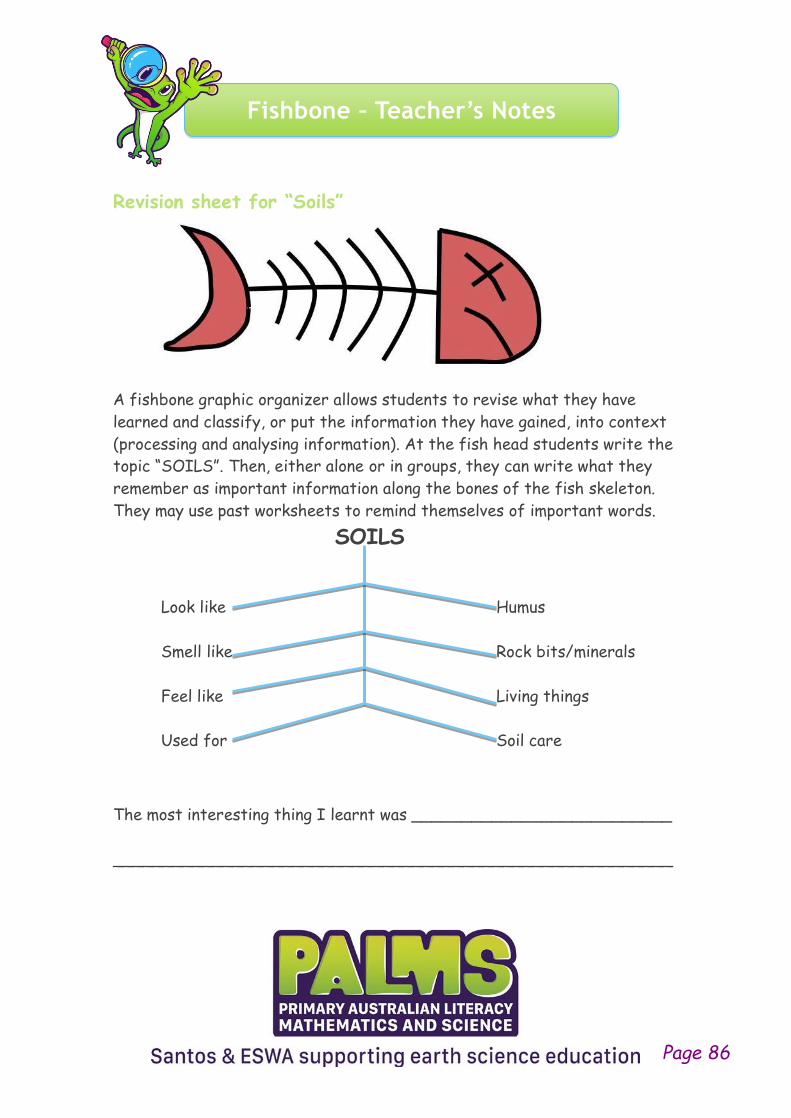
Fishbone – Teacher’s Notes
Revision sheet for “Soils”
A fishbone graphic organizer allows students to revise what they have
learned and classify, or put the information they have gained, into context
(processing and analysing information). At the fish head students write the
topic “SOILS”. Then, either alone or in groups, they can write what they
remember as important information along the bones of the fish skeleton.
They may use past worksheets to remind themselves of important words.
SOILS
Look like Humus
Smell like Rock bits/minerals
Feel like Living things
Used for Soil care
The most interesting thing I learnt was __________________________
________________________________________________________
Page 86
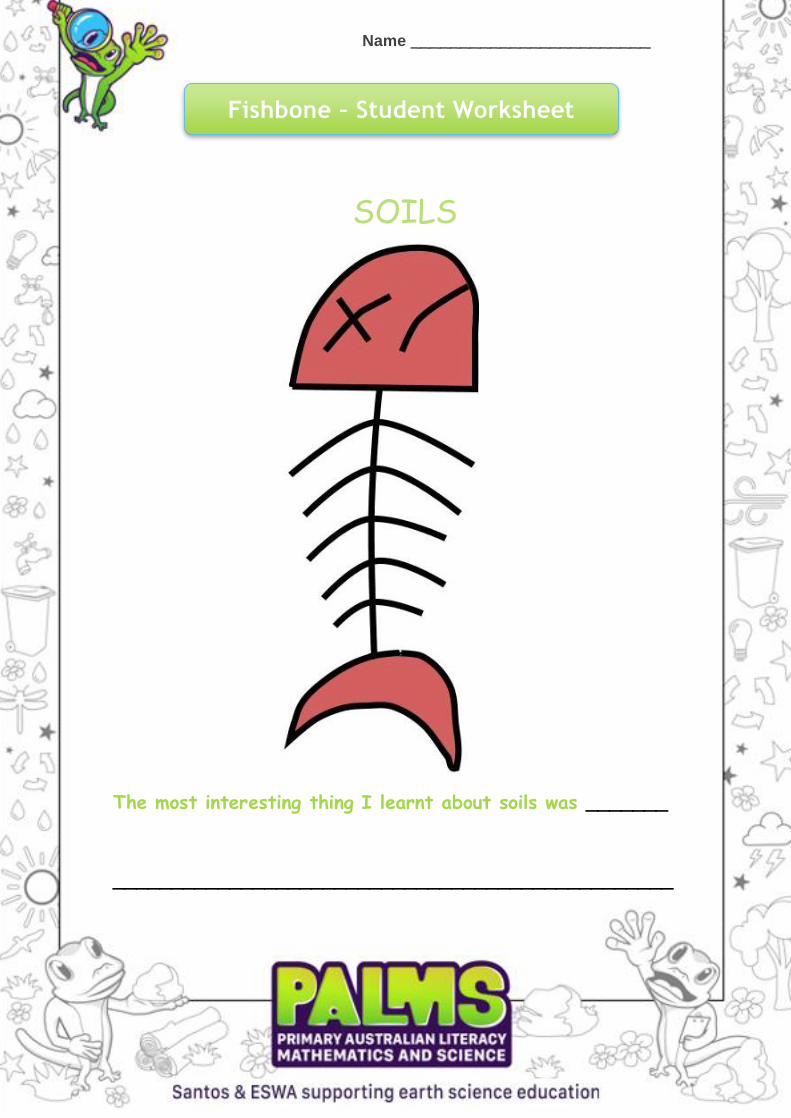
Name ________________________
Fishbone – Student Worksheet
SOILS
The most interesting thing I learnt about soils was _______
________________________________________________

Name ________________________
Good Soil and Bad Soil - PPP
We have been studying “soils” in our Science class. If you give your
student:
• An empty jam jar or small cool drink bottle.
• Enough soil from your garden to 1/3 fill the container.
• Enough water to 2/3 fill the container.
They will tell you how much humus is in your garden soil by sealing and
shaking the container.
Humus is a wonderful soil conditioner. It is made from living and dead
matter. It not only retains moisture in the soil, it helps the soil retain
fertiliser and grow healthy plants.
An experiment to demonstrate this at home
Materials
• Two containers such as plant pots or yoghurt pots. (Make sure there
are holes in the bottom to allow water to drain away.
• Permanent ink labeling pen
• Two different soils (perhaps one from the garden and another from
the roadside).
• Fast growing seeds such as alfalfa, mung beans or peas
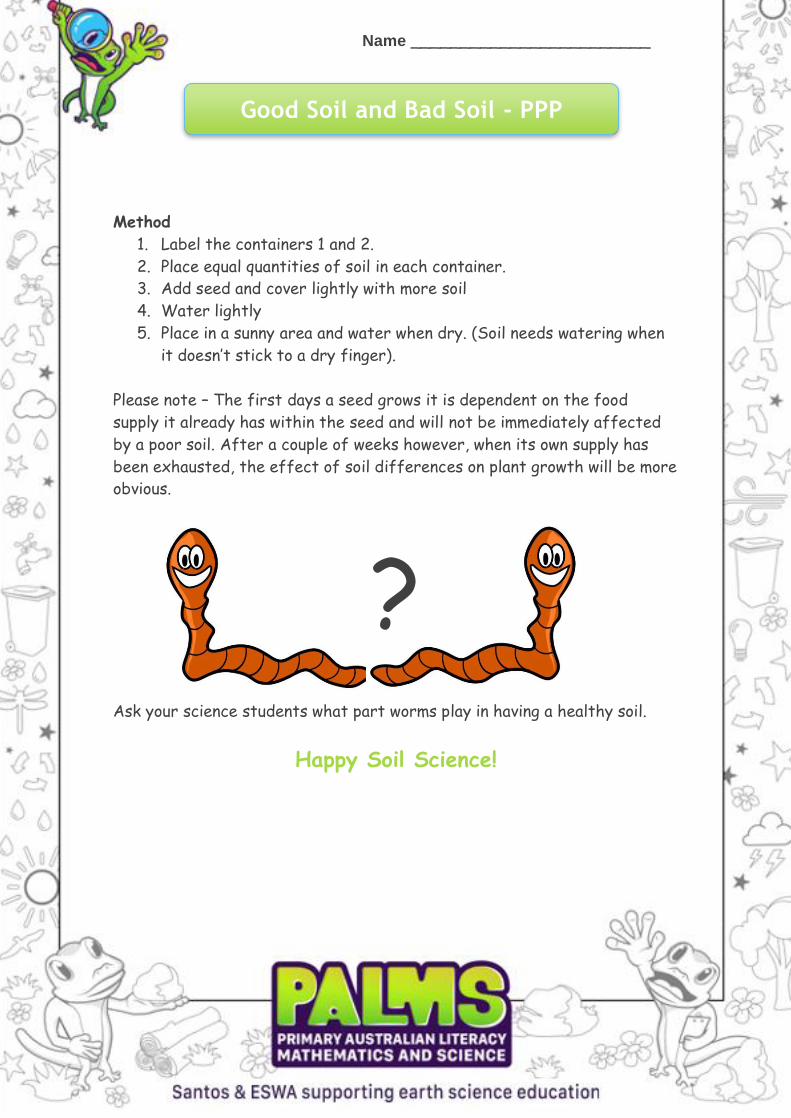
Name ________________________
Good Soil and Bad Soil - PPP
Method
1. Label the containers 1 and 2.
2. Place equal quantities of soil in each container.
3. Add seed and cover lightly with more soil
4. Water lightly
5. Place in a sunny area and water when dry. (Soil needs watering when
it doesn’t stick to a dry finger).
Please note – The first days a seed grows it is dependent on the food
supply it already has within the seed and will not be immediately affected
by a poor soil. After a couple of weeks however, when its own supply has
been exhausted, the effect of soil differences on plant growth will be more
obvious.
?Ask your science students what part worms play in having a healthy soil.
Happy Soil Science!
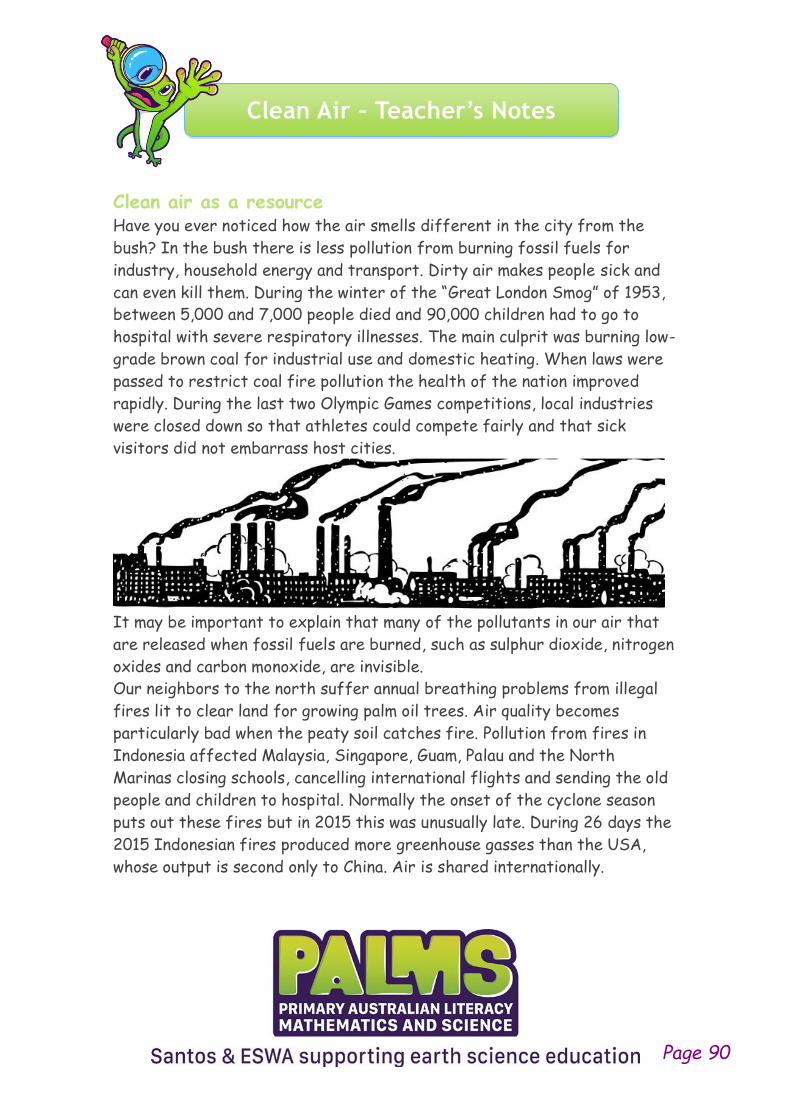
Clean Air – Teacher’s Notes
Clean air as a resource Have you ever noticed how the air smells different in the city from the
bush? In the bush there is less pollution from burning fossil fuels for
industry, household energy and transport. Dirty air makes people sick and
can even kill them. During the winter of the “Great London Smog” of 1953,
between 5,000 and 7,000 people died and 90,000 children had to go to
hospital with severe respiratory illnesses. The main culprit was burning low-
grade brown coal for industrial use and domestic heating. When laws were
passed to restrict coal fire pollution the health of the nation improved
rapidly. During the last two Olympic Games competitions, local industries
were closed down so that athletes could compete fairly and that sick
visitors did not embarrass host cities.
It may be important to explain that many of the pollutants in our air that
are released when fossil fuels are burned, such as sulphur dioxide, nitrogen
oxides and carbon monoxide, are invisible.
Our neighbors to the north suffer annual breathing problems from illegal
fires lit to clear land for growing palm oil trees. Air quality becomes
particularly bad when the peaty soil catches fire. Pollution from fires in
Indonesia affected Malaysia, Singapore, Guam, Palau and the North
Marinas closing schools, cancelling international flights and sending the old
people and children to hospital. Normally the onset of the cyclone season
puts out these fires but in 2015 this was unusually late. During 26 days the
2015 Indonesian fires produced more greenhouse gasses than the USA,
whose output is second only to China. Air is shared internationally.
Page 90
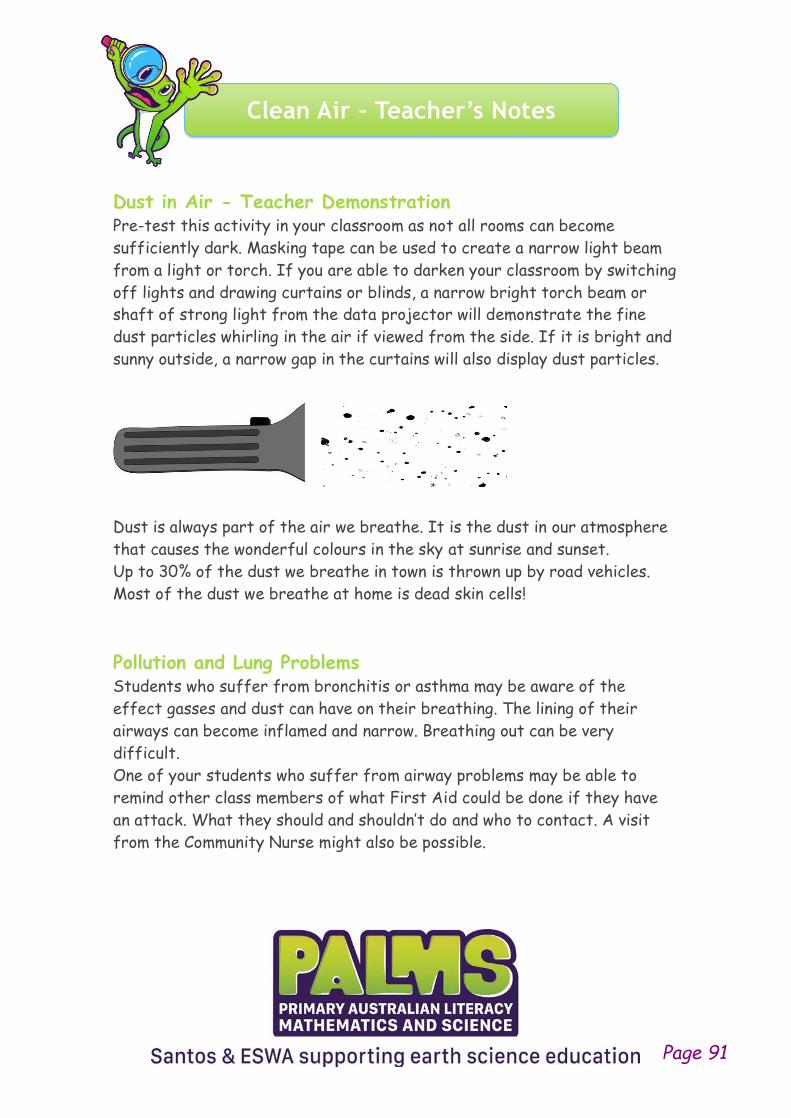
Clean Air – Teacher’s Notes
Dust in Air - Teacher Demonstration Pre-test this activity in your classroom as not all rooms can become
sufficiently dark. Masking tape can be used to create a narrow light beam
from a light or torch. If you are able to darken your classroom by switching
off lights and drawing curtains or blinds, a narrow bright torch beam or
shaft of strong light from the data projector will demonstrate the fine
dust particles whirling in the air if viewed from the side. If it is bright and
sunny outside, a narrow gap in the curtains will also display dust particles.
Dust is always part of the air we breathe. It is the dust in our atmosphere
that causes the wonderful colours in the sky at sunrise and sunset.
Up to 30% of the dust we breathe in town is thrown up by road vehicles.
Most of the dust we breathe at home is dead skin cells!
Pollution and Lung Problems Students who suffer from bronchitis or asthma may be aware of the
effect gasses and dust can have on their breathing. The lining of their
airways can become inflamed and narrow. Breathing out can be very
difficult.
One of your students who suffer from airway problems may be able to
remind other class members of what First Aid could be done if they have
an attack. What they should and shouldn’t do and who to contact. A visit
from the Community Nurse might also be possible.
Page 91

Clean Air – Teacher’s Notes
Dust in the Air - Student Activity We shall be examining “particulate matter” or DUST. (This activity should
not be done immediately after rain, as most of the dust will be washed off).
Have you ever breathed in a lot of dust? What happened?
You may have to remind students of hiding under the bed, hiding in a
wardrobe playing “hide and seek” or standing round a camp fire and getting
a face full of smoke. Coughing, wheezing, eyes water, sneezing.
Early settlers often were troubled by dust storms caused by clearing
vegetation from the land.
Air quality in our school
When scientists test air for dust they use a machine like a vacuum cleaner.
Air is sucked in through fine filters and the quantity and volume of dust
estimated. We shall be using an air filter from Nature.
Plants take in air through holes (stomata) in their leaves and use parts of it
(carbon dioxide) to make food for
themself and for us. If we wipe the
surface of leaves around the school
we can sample the amount of dust in
the air. Dust on the top of the leaf
is more liable to be washed away by
rain. Samples taken where teachers park their cars are usually pretty
dusty. Some indoor plants, which do not get washed by rain or blown by
wind, can be pretty dusty too! Thank goodness that few students smoke
because in years gone bye “Smoker’s Corner” was outstanding for its
pollution. If you fear your class may severely defoliate the school grounds,
wiping windowsills or the outside of windows can be substituted.
Page 92
Clean Air – Teacher’s Notes
Materials
• Scissors
• Worksheet and pen
• Map of the school. Students may already have been shown how to use
a map in Geography. Alternatively display the map on a Smart Board.
• 6 Pre-cut pieces of tissue (toilet paper sheets cut in quarters are
fine).
• Access to stapler or glue stick
Method
1. Issue student groups with worksheet and map of the school help
them select 6 locations. Place the numbered locations on the map.
2. Board the number and name of each location.
3. Issue each student with six pieces of double tissue.
4. Accompany students to each location and ask them to firmly wipe the
underside of leaves at each location six times. Explain that leaves
are to remain undamaged on the trees or bushes.
5. Return to the classroom and fix the paper in the correct square with
the stapler or glue.
6. Discuss your findings and range your locations from least dusty to
most dusty.
Page 93
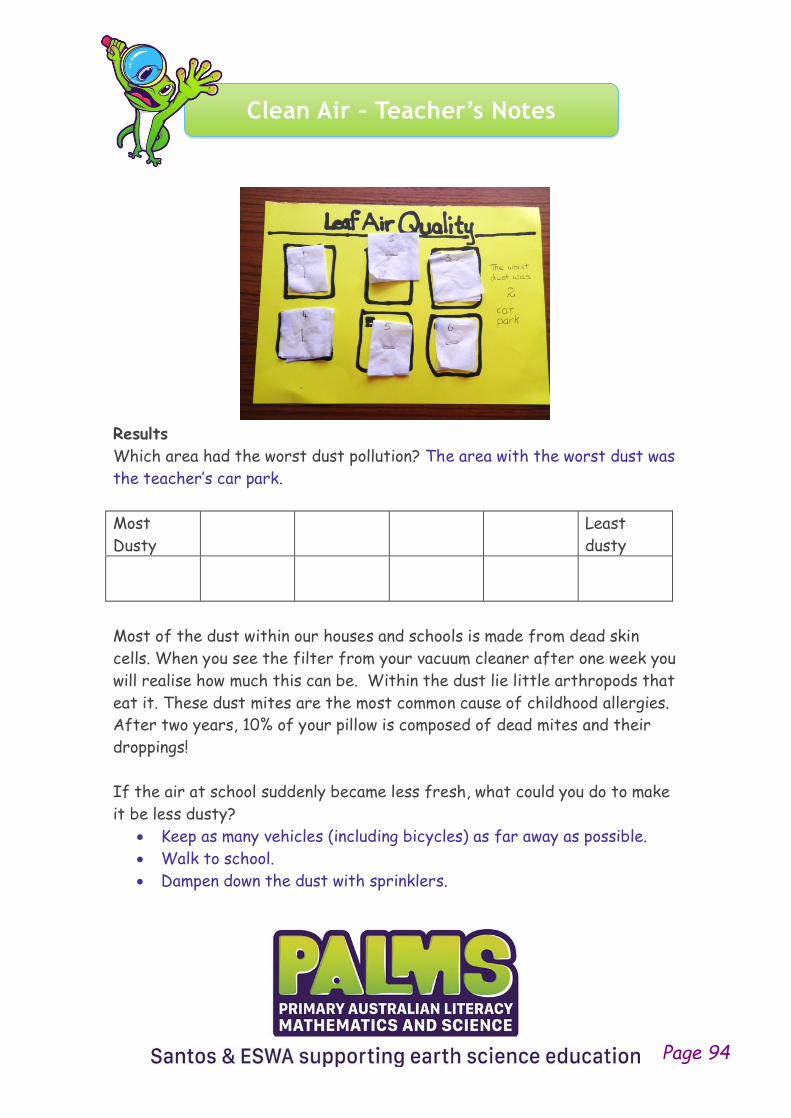
Clean Air – Teacher’s Notes
Results
Which area had the worst dust pollution? The area with the worst dust was
the teacher’s car park.
Most
Dusty
Least
dusty
Most of the dust within our houses and schools is made from dead skin
cells. When you see the filter from your vacuum cleaner after one week you
will realise how much this can be. Within the dust lie little arthropods that
eat it. These dust mites are the most common cause of childhood allergies.
After two years, 10% of your pillow is composed of dead mites and their
droppings!
If the air at school suddenly became less fresh, what could you do to make
it be less dusty?
• Keep as many vehicles (including bicycles) as far away as possible.
• Walk to school.
• Dampen down the dust with sprinklers.
Page 94
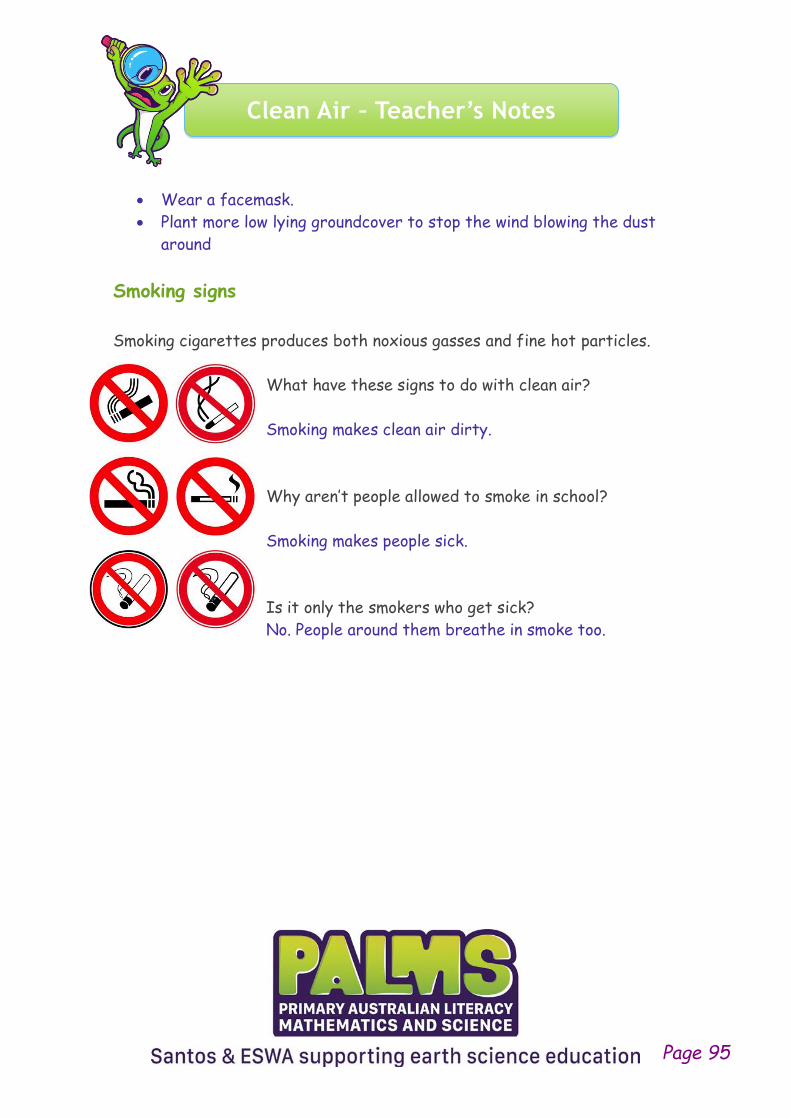
Clean Air – Teacher’s Notes
• Wear a facemask.
• Plant more low lying groundcover to stop the wind blowing the dust
around
Smoking signs
Smoking cigarettes produces both noxious gasses and fine hot particles.
What have these signs to do with clean air?
Smoking makes clean air dirty.
Why aren’t people allowed to smoke in school?
Smoking makes people sick.
Is it only the smokers who get sick?
No. People around them breathe in smoke too.
Page 95
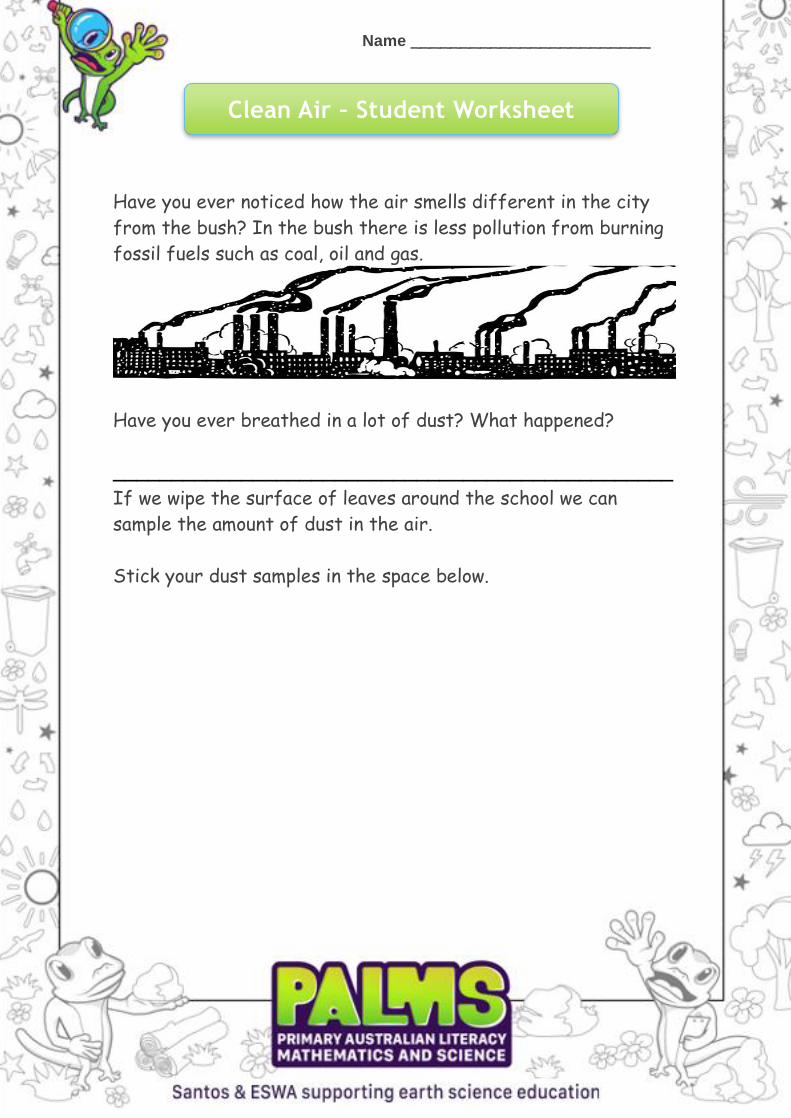
Name ________________________
Clean Air – Student Worksheet
Have you ever noticed how the air smells different in the city
from the bush? In the bush there is less pollution from burning
fossil fuels such as coal, oil and gas.
Have you ever breathed in a lot of dust? What happened?
________________________________________________
If we wipe the surface of leaves around the school we can
sample the amount of dust in the air.
Stick your dust samples in the space below.
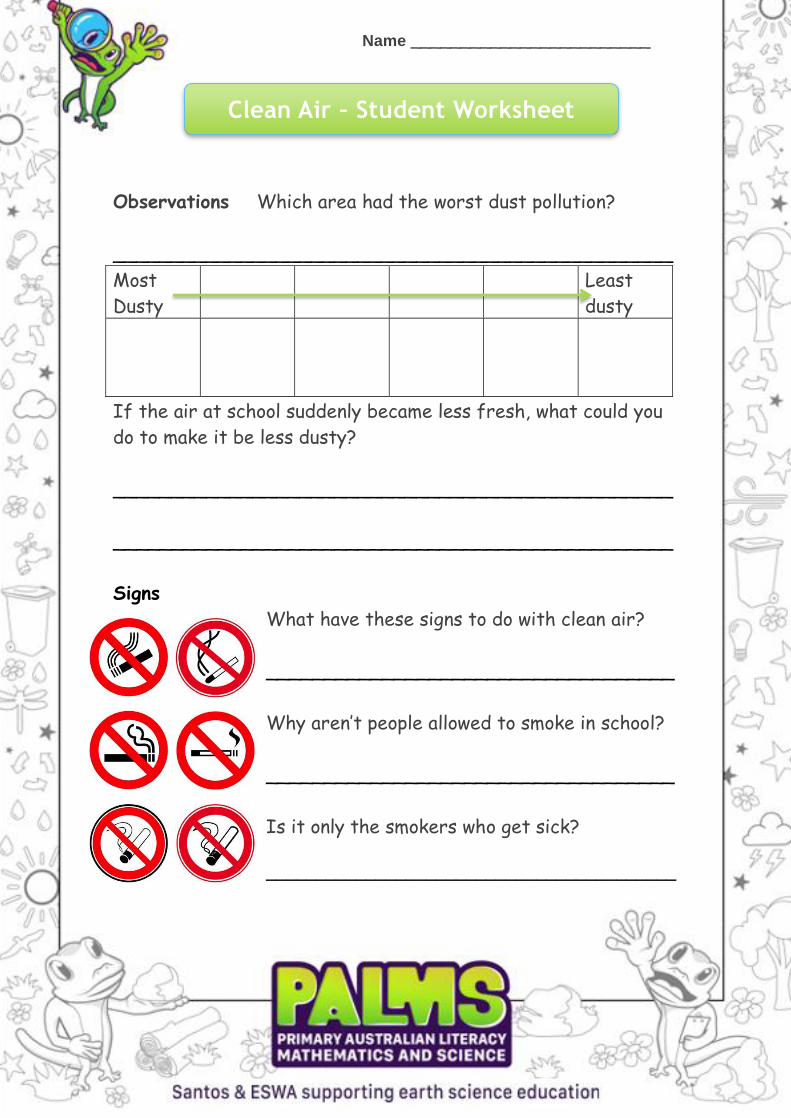
Name ________________________
Clean Air – Student Worksheet
Observations Which area had the worst dust pollution?
________________________________________________
Most
Dusty
Least
dusty
If the air at school suddenly became less fresh, what could you
do to make it be less dusty?
________________________________________________
________________________________________________
Signs
What have these signs to do with clean air?
___________________________________
Why aren’t people allowed to smoke in school?
___________________________________
Is it only the smokers who get sick?
_________________________________________

Minerals – Teacher’s Notes
Although commonly the word “mineral” is used to denote a metal, minerals
are any inorganic (non-living) thing which has an almost constant chemical
composition and whose crystals have the same geometric shapes.
In Earth Science minerals include iron ore, diamonds, clay and even quartz
sand.
Oresome Resources have a fine lesson recognising everyday uses for
minerals at:
http://www.oresomeresources.com/resources_view/resource/lesson_every
day_objects_made_from_minerals_year_2
If you visit the Earth Science Western Australia website
www.earthsciencewa.com.au you will find how to access free teachers loan
boxes with a selection of minerals and activities with teacher’s guides. You
can modify to suit your class
Page 98