Embed Size (px)
Citation preview

Home learningcollection
Suitable for
7 to 11-year-olds
This collection of CREST SuperStar activities allows children to explore everyday problems using science.
#Scienceathome #CRESTathome

Start using CREST SuperStar
The activities in this pack have been selected from our library of CREST SuperStar challenges. Children need to complete eight challenges to achieve a CREST SuperStar Award. If you want, you can mix and match challenges from different packs, as long as children complete eight SuperStar challenges.
Preparation1. Download a SuperStar Passport: primarylibrary.crestawards.org/crest-
superstar-passport/62595359. Use the Organiser Cards in this pack toprepare for each challenge
Run the challenges in this pack1. Each challenge will take 45 minutes
to an hour and involves hands-oninvestigation, decision making and discussion.You can run the activities with one child orwith a group. Adult supervision is important.Children can discuss their ideas with an adultor with each other.
2. Use the Passport to keep track of the
challenges you have completed.
4. Congratulations on completing CRESTSuperStar!
5. If you want to use your own activities,that’s fine! Find out more about what aSuperStar activity should look like here:
help.crestawards.org/portal/kb/articles/star-and-superstar-activity-structure
What next? Why not challenge children further and try a full day project next? A CREST Discovery Day is a one day facilitated project, ideal for ages 10+. You can find out more and download all the resources you need
here: www.crestawards.org/crest-discovery
Encourage others to take part in CREST projects. To get more ideas on how to get started visit: www.crestawards.org
British Science Association Registered
Charity No. 212479 and SC039236
Awarded to
of
on
Supported by:
Managed by:
Katherine Mathieson
Chief Executive of the
British Science Association

About Page
4
10
14
18
22
26
30
Activity
A Sticky Problem
Bridge Blunder
Cheesy Challenge
Crafty Rafts
Fantastic Fingerprints
Fossil Folly
Get Set Jellies
Investigating Ink
Racing Rockets
Super Spinners
Yummy Yoghurt Makers
Investigate different recipes for glue from common kitchen ingredients.
Design and construct a bridge and test it's strength and stability.
Try making your own cheese at home with just milk and lemon juice.
Make a raft and test how well it floats and holds weights.
Explore finger prints and ways to lift them from different surfaces.
Make models of dinosaurs to help you investigate how they supported themselves and moved around.
Find out which fruits make the best jellies in this experiment.
Use your detective skills and investigate different inks to help solve a crime.
Make your own rocket and experiment to make it travel further.
Make your own spinner inspired by nature and investigate how the shape affects the way it moves.
Try making your own yogurt at home from milk and live yogurt.
34
Contents
CREST SuperStar home learning challenges have been selected and put together to help you run open ended science investigations at home with children. These activities are recommended for ages 7-11.
Make sure you read the instructions carefully including the health and safety guidance before you begin. Children should be supervised by an adult at all times when carrying out practical challenges.
Find more activities like these in our CREST resources library: library.crestawards.org
40
46
50

About the activity
Kit list
This activity is designed to get children thinking about the different properties of glue.
The children have been asked to read a letter printed in the Weekly Woodworker magazine from Ineda Bond. She’s not sure which glue is the most suitable to build a cart and needs some help.
Through this activity you will support your group to:
• Make three different glue recipes
• Conduct different tests on all their glue mixtures to compare different properties
• Write a letter to tell Weekly Woodworker magazine about their results
Glue ingredients:
• Flour
• Vinegar
• Skimmed milk (or non-fat milk powderwith hot tap water)
• Baking soda (bicarbonate of soda,NOT baking powder)
• Cornflour
For testing:
• Glue spreaders
• Small blocks of wood, card or cork, woodenlolly sticks
• Force meters (optional)
• Funnel
• Beaker
• Paper towels
• Bowls or pots to make the glues in
• Samples of cloth, large bowl of warm soapywater, timer
• Labels, or pens to label the different glues
Organiser’s CardA Sticky Problem

Things to think aboutYou should be able to store the glue in plastic containers in the fridge for a short time. Keep the containers sealed. If the paste dries up, just put the sealed container in a bowl of warm water.
The only way to measure glue performance accurately is through laboratory testing. Because of this, the children’s tests will not be perfect, but it is important that they are encouraged to try to make fair comparisons between glues.
Keywords
• Glue
• Adhesive
• Bonds
• Properties
Watch out!These glues can be messy but are perfectly safe. Pay extra attention where hot water is used. Children need to wash their hands and rinse equipment when finished. They may need plastic aprons and gloves.
British Science Association Registered Charity No. 212479 and SC039236
1. Introduce the activity using the letter fromIneda Bond. Ask them about the differentproperties of glue.
2. Give out activity cards and equipment tothe children.
3. Explain that they will be using the equipmentprovided to make three different glue mixturesand test them.
4. Encourage children to discuss their ideasand how to carry out their investigations.Prompt questions:• What makes a ‘good’ glue?
• What properties will they test and how willthey test them?
• How will they record their results?• How will they make sure their test is fair?
5. Support children to conduct their tests andmake their own records of their results. Theycould also take photographs or make drawings.
6. Ask the children to present their findings tothe rest of the group, they can be as creativein their presentation as they want, the activitycard suggests they could write a reply toWeekly Woodworker magazine. Could also takephotographs or make drawings.
What to do

Can you help Ineda Bond to find out what kind of glue would work best for her box cart? Make and compare some different recipes for glue.
Some of your fellow investigators have had some ideas to get started with.
Your challenge
A Sticky ProblemActivity Card
Dear Weekly Woodworker
magazine,
I am making a box cart and
could do with some advice.
I need to know:
• Which glue is the strongest
(in case it’s a bumpy race)?
• Which glue is the most
waterproof after it dries
(in case it’s a rainy day)?
• Which glue will clean offmy clothes most easily(in case of accidents)?I hope you can help me tosolve my sticky problem.
Yours faithfully,
Ineda Bond(age 9)
Ineda
“Let’s find out about glue strength. I think we can glue two blocks of wood together and see how easy it is to pull the blocks apart once the glue has dried. We could even use a force meter to measure the force needed.”
“We could find out about how waterproof the glues are. I think we could stick two lolly sticks together with the glue. We will find out how strong the glue is when it is dry and then after we have wet it.”
“I think we should find out if the glues can be removed from cloth. I think we could stain some cloth with different glues and wait for them to dry. Then we can stir the cloth in soapy water for a minute, squeeze out the water and see what has happened to the glue.”

Discuss
Do you think that all glues are the same?
What do you think are the most important properties for glue?
How are you going to test the glue recipes to find out how well they work?
What will you try to stick together?
What will you need to observe or measure in your tests?
Getting startedNow make and test your glue recipes. Remember to label your containers of glue.
Recipe A
Ingredients
1/4 cup of water
1/2 cup of flour
Method
Add 1/4 cup of water to
1/2 cup of flour and mix
until smooth.
Recipe BIngredients2 tablespoonsof vinegar
1/2 cup of hot skimmed milk (or non-fat milkpowder mixed with water froma hot tap)1/2 teaspoon ofbicarbonate of soda (NOT baking powder)
2 teaspoons ofwater
Method
Pour 2 tablespoons of vinegar into a cup and stirin 1/2 cup of hot skimmedmilk (or non-fat milk powder mixed with waterfrom a hot tap). Let the mixture sit forabout 3 minutes.Line a funnel (or sieve)with a paper towel.Carefully pour the mixture into the funneland catch any liquid that drips through in anempty cup.You should have a solidlump collected in thepaper towel.
Scrape this into an empty cup and stir in 1/2 teaspoon of bicarbonateof soda (NOT baking powder) and 2 teaspoonsof water. Watch for bubbles of gas.When no more bubblescan be seen, you havemade glue.
Recipe C
Ingredients
3 tablespoons
of cornflour
4 tablespoons
of cold water
2 cups of
boiling water
Method
Mix 3 tablespoons
of cornflour and 4
tablespoons of cold
water in a small bowl.
Pour in 2 cups of boiling
water, stirring all the time.
When liquid is clear and
thick, let it cool for your
finished glue.
Test your ideas
Share your ideas
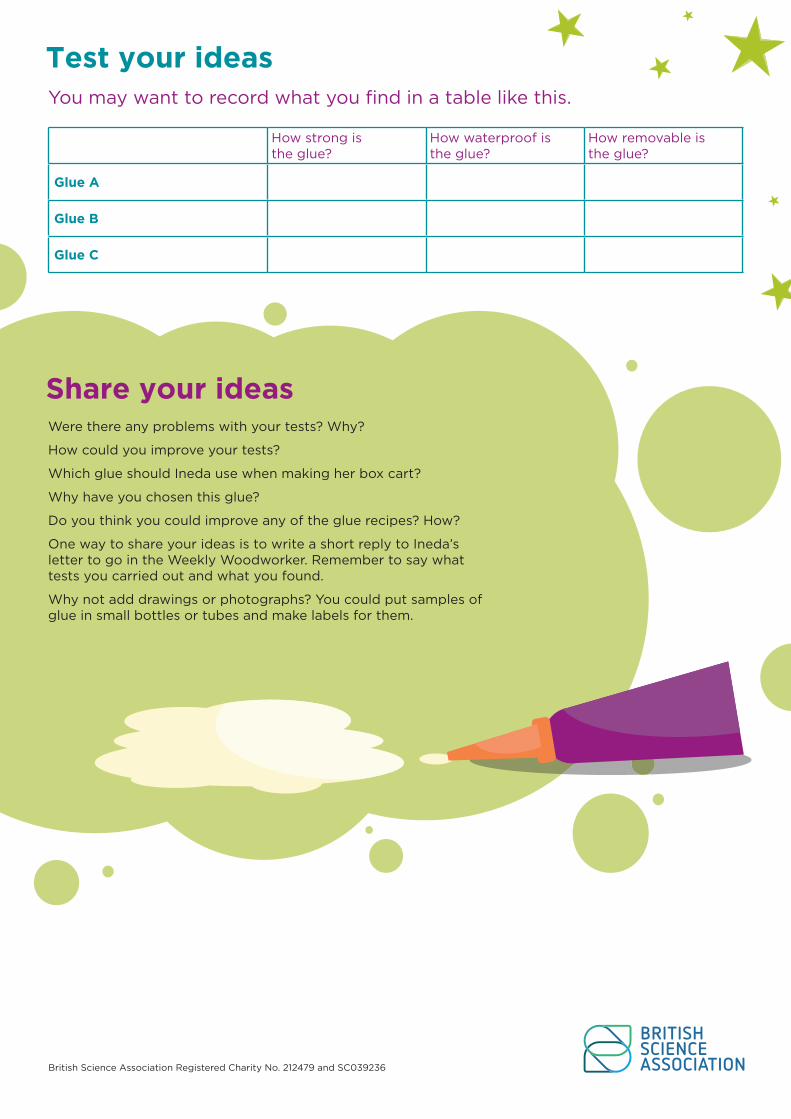
You may want to record what you find in a table like this.
Were there any problems with your tests? Why?
How could you improve your tests?
Which glue should Ineda use when making her box cart?
Why have you chosen this glue?
Do you think you could improve any of the glue recipes? How?
One way to share your ideas is to write a short reply to Ineda’s letter to go in the Weekly Woodworker. Remember to say what tests you carried out and what you found.
Why not add drawings or photographs? You could put samples of glue in small bottles or tubes and make labels for them.
British Science Association Registered Charity No. 212479 and SC039236
How strong is the glue?
How waterproof is the glue?
How removable is the glue?
Glue A
Glue B
Glue C

Organiser’s Card
About the activity
Kit list
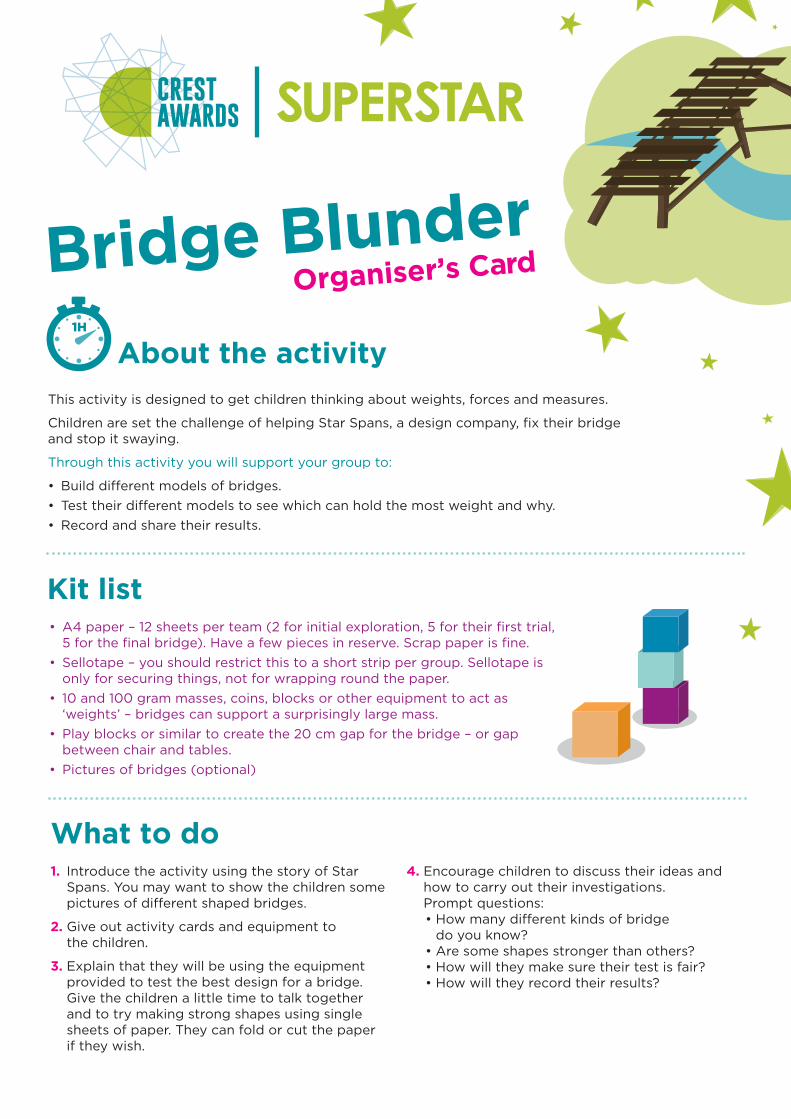
This activity is designed to get children thinking about weights, forces and measures.
Children are set the challenge of helping Star Spans, a design company, fix their bridge and stop it swaying.
Through this activity you will support your group to:
• Build different models of bridges.
• Test their different models to see which can hold the most weight and why.
• Record and share their results.
• A4 paper – 12 sheets per team (2 for initial exploration, 5 for their first trial,5 for the final bridge). Have a few pieces in reserve. Scrap paper is fine.
• Sellotape – you should restrict this to a short strip per group. Sellotape isonly for securing things, not for wrapping round the paper.
• 10 and 100 gram masses, coins, blocks or other equipment to act as‘weights’ – bridges can support a surprisingly large mass.
• Play blocks or similar to create the 20 cm gap for the bridge – or gapbetween chair and tables.
• Pictures of bridges (optional)
What to do1. Introduce the activity using the story of Star
Spans. You may want to show the children somepictures of different shaped bridges.
2. Give out activity cards and equipment tothe children.
3. Explain that they will be using the equipmentprovided to test the best design for a bridge.Give the children a little time to talk togetherand to try making strong shapes using singlesheets of paper. They can fold or cut the paperif they wish.
4. Encourage children to discuss their ideas andhow to carry out their investigations.Prompt questions:• How many different kinds of bridge
do you know?• Are some shapes stronger than others?• How will they make sure their test is fair?• How will they record their results?
Bridge Blunder

Things to think aboutMake sure the weights are placed, not dropped, on the bridges.
You can decide to spread weights evenly across the bridge (like the children in the story) or focus them in the centre. To make fair comparisons between the bridges the same test should be carried out on each one.
Do not fasten the ends of the bridge to the supports. This does strengthen the bridge but if well fastened it can require large weights to make even a single piece of paper collapse.
There are many solutions to this problem. The shape is all important.
The weakest bridge is often a flat sheet of paper. It can be made stronger by flat folding, creating a triangular prism shape or rolling the paper along its length. Walls can add strength as can pillars or arches. Suspending the bridge can also help.
We have used the term ‘weights’, rather than the more scientifically accurate ‘masses’, since this is the term that young children are more likely to know.
5. Now give each group 5 sheets of paper and asmall amount of tape. Tell them they have 10minutes to try out ideas for how they mightmake their bridge. This will not be the finalbridge. Let each group test their bridge withweights as they go along. You will need todecide together where to put the weights on thebridges to test them.
6. Encourage children to evaluate the design. Whatdo they need to change to make the bridgestronger? Now they will make their final bridge.
They will need more paper. Warn them that they are not allowed to use any of the old paper but can use their earlier ideas to help them.
7. Support children to conduct their tests and maketheir own records of their results. They couldalso take photographs or make drawings. Afterchildren have tested their bridges, provide timefor them to talk through what was successfuland what didn’t work.
8. Ask the children to present their bridge to therest of the group and test it.
Keywords
Take it further
Watch out!
• Construction
• Weights
• Masses
• Suspension
• Support
Children could act out a design award to showcase the bridge or bridges that were the strongest.
Children could sketch their bridge and make notes about how it worked.
Avoid weights falling from a height.
If bridges are high, you will need a bucket of sand or cardboard box filled with crumpled paper underneath to catch falling weights.
!
British Science Association Registered Charity No. 212479 and SC039236British Science Association Registered Charity No. 212479 and SC039236
10 100

Can you help Star Spans design a bridge that can be used safely?
When people design bridges they build models. This is what you will need to do.
Your challenge
Bridge BlunderActivity Card
Discuss• How many different kinds of bridge do you know?
• Are some shapes stronger than others?
A sparkling new footbridge has been built in Startown. Class 4 of Startown Primary School were invited to the grand opening. All the children stood on the bridge as their classmate Anil (aged 8) cut the official tape.
Even before the cheers had died down the bridge began to sway and bend. All the children were hastily rushed to one end and the bridge was closed.
Star Spans, the designers of the bridge, looked very red faced.
Your bridge needs to span 20 cm. Think about which shapes are the strongest.
Try exploring bridge shapes with single pieces of paper. You can cut the paper if you wish.
Why not try rolling, curving and folding the paper.
Getting started
“We’re not sure what went wrong. The bridge was such a beautiful shape. What do we do now? Can anyone help us?”

2/2Test your ideasTest it with weights.
Does it matter where you put the weights?
Remember the children were standing across the whole length of the bridge when it started to wobble.
Now make one final model.
You might like to record your results in a table like this:
Share your ideas
Extra things to do
Show your bridge to the rest of the class.
You could take pictures and add notes about what you think might make your bridge stronger and more stable.
Can you find out about the highest and longest bridges in the world?
What did people in ancient times use to build bridges? How does this compare to bridges built today?
You could find out about different bridges and make models of them to show how they work.
British Science Association Registered Charity No. 212479 and SC039236
10 100
Bridge Maximum weight bridge could hold
Bridge #1
Bridge #2
Bridge #3

About the activity
Kit list
This activity is designed to get children thinking about how milk is changed into cheese.
Cosmic and Gem are confused about how milk turns into cheese. Can the children make their own cheese?
Through this activity you will support your group to:
• Think about what they already know about cheese
• Make their own cheese
• Research other milk products
• A cup of semi skimmed or skimmed milk each
• Lemon juice (or vinegar)
• A spoon, a bowl (for heating in the microwave)or a small pan (for heating on the cooker)
• A sieve, a bowl and a piece of very clean, thincloth to strain the milk
• Salt
• Other flavourings (optional)
Organiser’s CardCheesy Challenge
1. Introduce the activity using the story.
2. Give out activity cards and equipment tothe children.
3. Explain that they will be making their owncheese today.
4. Encourage children to discuss their ideas andhow cheese is made.
5. Support children to follow the cheese recipe onthe activity card and make their own records oftheir results.
6. Ask the children to present their findings to therest of the group, they can be as creative in theirpresentation as they want.
What to do

Things to think aboutSkimmed milk works well for this activity. The fat, which is used to make other milk products such as cream, is not needed to make cheese.
If you leave the cheese for a while to let more of the liquid drain out you will get a slightly firmer cheese.
The liquid (whey), which is left over after making the cheese, can be used in recipes to make food such as bread, soup and cakes.
Lots of children may be dairy or lactose intolerant. As with previous activities, you could encourage them to find out what happens if they use alternative.
Keywords
Watch out!
• Milk
• Curdling
• Cheese
• State
• Reversible changes
• Irreversible changes
The milk needs to be heated. This must be done with adult supervision. Cover tables with clean paper cloths. The cheese can be eaten if everything has been kept clean. Do not eat the cheese unless it is fresh.
British Science Association Registered Charity No. 212479 and SC039236
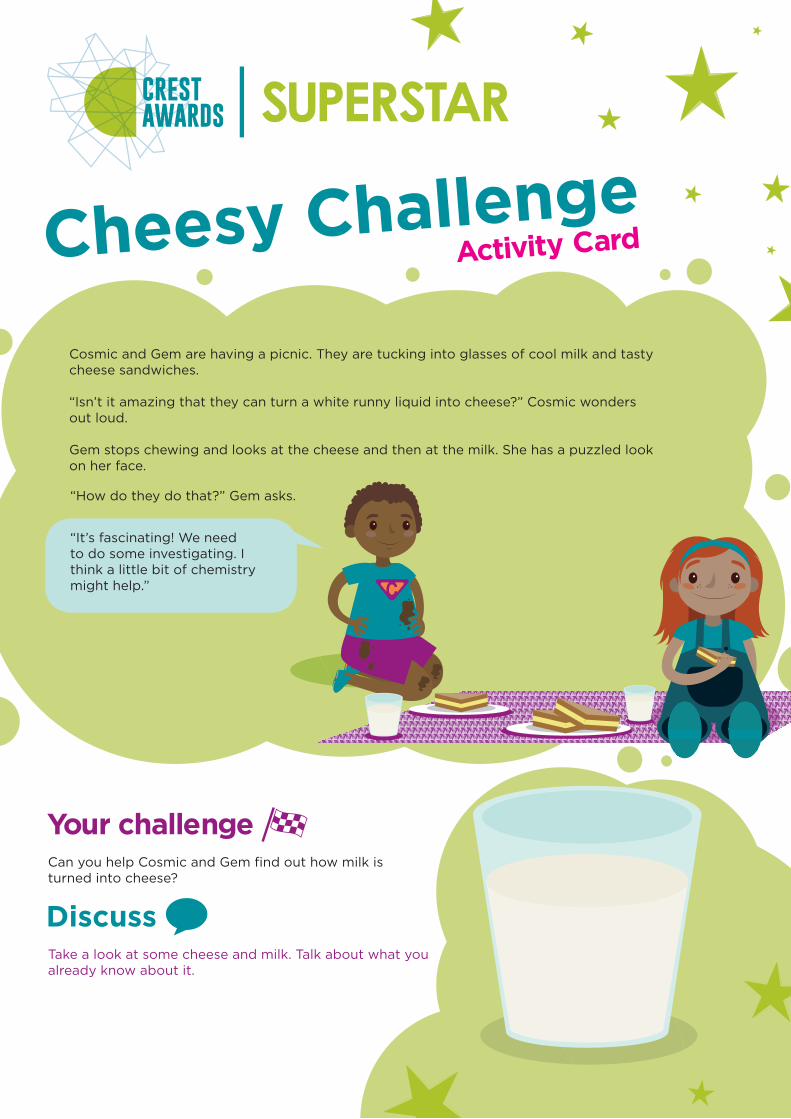
Can you help Cosmic and Gem find out how milk is turned into cheese?
Your challenge
Cheesy ChallengeActivity Card
DiscussTake a look at some cheese and milk. Talk about what you already know about it.
Cosmic and Gem are having a picnic. They are tucking into glasses of cool milk and tasty cheese sandwiches.
“Isn’t it amazing that they can turn a white runny liquid into cheese?” Cosmic wonders out loud.
Gem stops chewing and looks at the cheese and then at the milk. She has a puzzled look on her face.
“How do they do that?” Gem asks.
“It’s fascinating! We need to do some investigating. I think a little bit of chemistry might help.”

Test your ideas
Share your ideas
Extra things to doHere are some other milk products. Can you find out how they are made and what they are used for? Not all milk comes from animals. Can you spot which ones do not and find out more about them?
Yoghurt
Lassi
Cream
Butter
Condensed milk
Kaymak
Sour cream
Ghee
Smetana
Clotted cream
Creme fraiche
Buttermilk
What kind of cheese have you made?
Does it look like any of the cheese that you buy in the shops?
What does it taste like?
Make a poster showing how a little chemistry helps to turn milk into cheese. Put it on display.
Is cheese only made from cow’s milk?
What different types of cheese are there? Are they all made in the same way?
Do people eat cheese everywhere around the world?
When was cheese first made?
Can the whey be used for anything?
Getting started
British Science Association Registered Charity No. 212479 and SC039236
Cheese Recipe
Ingredients
A cup of semi skimmed or
skimmed milk
Lemon juice
A spoon, a bowl (for
heating in the microwave)
or a small pan (for heating
on the cooker)
A sieve, a bowl and a piece
of very clean, thin cloth to
strain the milk
Salt and other flavourings
(optional)
Clean hands, equipment
and table
Method
1. Pour 1 cup of milk into a bowl or small pan. Heat it in the
microwave or on the cooker until the milk just begins to
boil. If it is on the cooker, keep stirring to stop it burning.
2. Remove from the heat. Add lemon juice a few drops at a
time and keep stirring gently.
3. Keeping adding lemon juice until the milk starts to go
very lumpy (curdle). Let it cool.
4. Put a sieve on top of a bowl and put a cloth in the sieve.
5. Pour the milk into the sieve and let all the liquid (the
whey) run through into the bowl. The lumps (called curds)
will stay in the cloth.
6. Lift up the cloth and gently squeeze out more of
the liquid.
You have now made some cheese!
Add a little salt and any other flavours that you like.

Crafty RaftsOrganiser’s Card
About the activity
Kit list
This activity is designed to get children designing and making a raft that floats.
The children have been asked to design a raft. The Cub Scouts and Brownies of Startown are having a problem making a raft that floats.
Through this activity you will support your group to:
• Design and make a model raft using just a piece of paper
• Conduct a fair test to see which raft design can hold the most weight
• Record and present their results.
• Plastic tanks or bowls of water – 1 per group
• A square sheet of paper (20 cm x 20 cm) or A4 – 6per group plus spare sheets
• Foil (optional as an alternative to paper)
• A set of marbles all the same size – 30 per group pluslots of spares
• Sellotape, masking tape, staplers, or other fasteners –provide the same for each group
• Waterproof coverings if you are working onwooden desks

Things to think aboutMake sure that the water is deep enough for the loaded rafts to float and not touch the bottom.
It’s best if children use one sheet of paper at a time and are left to experiment with their own raft shapes.
Some children may add the objects to the raft too quickly or unevenly. Let them experiment on their own. They learn more when it goes wrong.
The children will need to agree on how they will know when a raft has officially sunk. This could be when it sinks below the water line or when it lands on the bottom of the container.
An object that is normally unable to float can be made to float by changing its shape. Different shapes will float in different ways. You will find a wide flat raft is very stable when it floats but can tip if it is loaded on one side. If the children are investigating carefully, the best raft is likely to be one with a large base and with sides approximately 1.5 cms deep.
A good raft will hold a surprisingly large number of objects.
Keywords
Watch out!
• Floating
• Buoyancy
• Paper
• Building
• Weights
Mop up water spills quickly and collect escaped marbles to avoid accidents.
What to do1. Introduce the activity using the story.
2. Give out activity cards and equipmentto the children.
3. Explain that they will be designing and makingrafts, and testing how much weight they cancarry before sinking.
4. Encourage children to discuss their ideas andhow to carry out their investigations. Giveeach group access to sheets of paper or foil.Remind them they can only use one piece ata time. Challenge groups to make several raftsof different shapes and sizes. They can do thisby folding the paper or foil and securing the
corners. Give children time to discuss which shapes might work and to practise ways of folding the paper to make different rafts.
5. Support children to conduct their investigationand make their own records of their results. Setthem off on the challenge to build a raft ableto hold the largest number of objects before itsinks. They can float their rafts in a container ofwater and add cubes or marbles until the raftssink. The raft that carries the greatest number ofobjects will be the winner.
6. Ask the children to present their findings to therest of the group, they can be as creative in theirpresentation as they want.
British Science Association Registered Charity No. 212479 and SC039236

Can you help them to decide the best design for a raft?
You can make models out of paper. What shape of raft will hold the largest number of objects before it sinks? You can only use one sheet of paper at a time.
Your challenge
Crafty RaftsActivity CardActivity Card
CRAFTY RAFTS
Cub Scouts and Brownies
from Startown built their
own rafts to race on the
Boating Lake yesterday
evening. There was fun and
laughter as the rafts became
overloaded and sank. The
competition was abandoned
as the last raft disappeared
beneath the water.
Natty Nodrum the Brownie
pack leader said, “We’re
not sure what went wrong.
Perhaps one of your readers
could give us some advice.”
NEWSCRAFTY RAFTSCub Scouts and Browniesfrom Startown built theirown rafts to race on theBoating Lake yesterday evening. There was fun and laughter as the rafts becameoverloaded and sank. The competition was abandonedas the last raft disappearedbeneath the water.
Natty Nodrum the Browniepack leader said, “We’re not sure what went wrong. Perhaps one of your readers could give us some advice.”
NEWS
CRAFTY RAFTS
Cub Scouts and Brownies
from Startown built their
own rafts to race on the
Boating Lake yesterday
evening. There was fun and
laughter as the rafts became
overloaded and sank. The
competition was abandoned
CRAFTY RAFTS
Cub Scouts and Brownies
from Startown built their
own rafts to race on the
Boating Lake yesterday
evening. There was fun and
laughter as the rafts became
overloaded and sank. The
competition was abandoned
as the last raft disappeared
beneath the water.
Natty Nodrum the Brownie
NEWSCRAFTY RAFTSCub Scouts and Browniesfrom Startown built their own rafts to race on the Boating Lake yesterday evening. There was fun and laughter as the rafts became overloaded and sank. The competition was abandoned as the last raft disappeared beneath the water.
Natty Nodrum the Brownie pack leader said, “We’re not sure what went wrong. Perhaps one of your readers could give us some advice.”
NEWS
CRAFTY RAFTS
Cub Scouts and Brownies
from Startown built their
own rafts to race on the
Boating Lake yesterday
evening. There was fun and
laughter as the rafts became
overloaded and sank. The
competition was abandoned
as the last raft disappeared
beneath the water.
Natty Nodrum the Brownie
pack leader said, “We’re
not sure what went wrong.
Perhaps one of your readers
could give us some advice.”
NEWS
DiscussWhat do you know about rafts?
Have you ever made one?
What shapes do you think might make good rafts?
Test your ideas
Share your ideas
Extra things to doWould it matter if you use different types of paper?
Could you make the raft without fasteners?
What other materials can you use to make a raft?
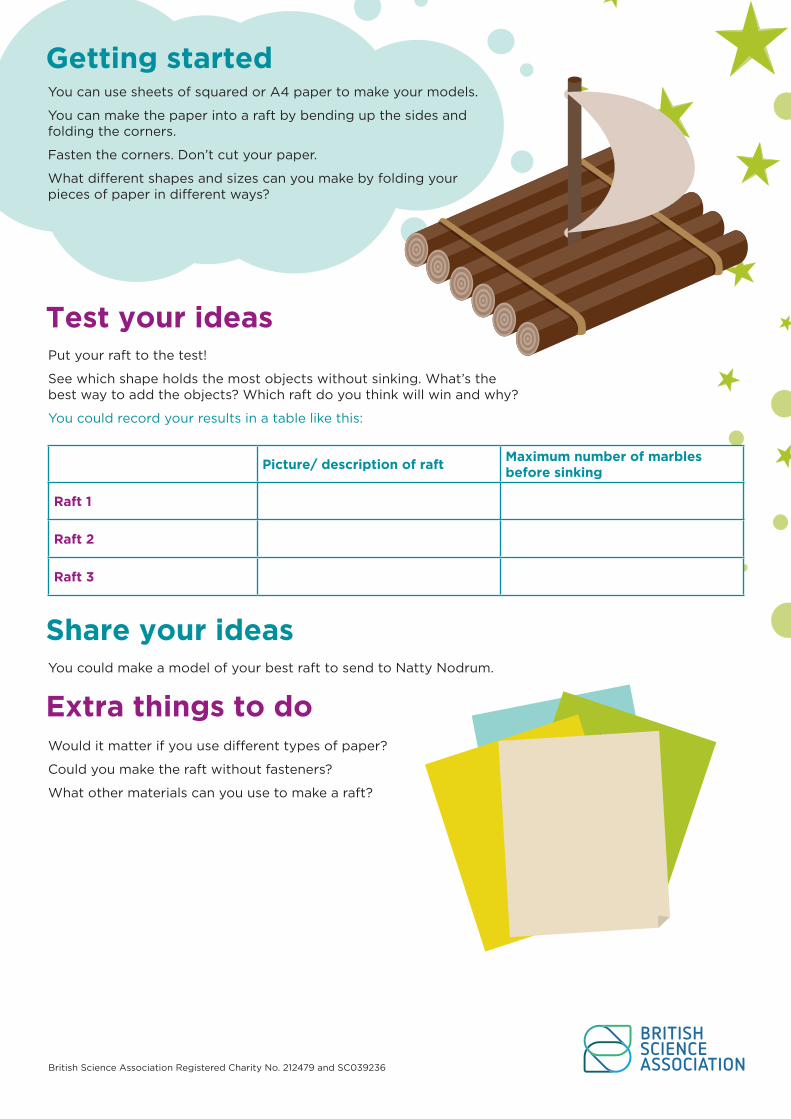
You could make a model of your best raft to send to Natty Nodrum.
Put your raft to the test!
See which shape holds the most objects without sinking. What’s the best way to add the objects? Which raft do you think will win and why?
You could record your results in a table like this:
Getting startedYou can use sheets of squared or A4 paper to make your models.
You can make the paper into a raft by bending up the sides and folding the corners.
Fasten the corners. Don’t cut your paper.
What different shapes and sizes can you make by folding your pieces of paper in different ways?
British Science Association Registered Charity No. 212479 and SC039236
Picture/ description of raftMaximum number of marbles before sinking
Raft 1
Raft 2
Raft 3

About the activity
Kit list
This activity is designed to get children thinking about fingerprints.
The investigators have been given a news article about fingerprints. Teachers at Startown Primary School are wondering if they can use fingerprints to identify the students. Are the students’ fingerprints that different?
Through this activity you will support your group to:
• Collect their fingerprints
• Compare different fingerprints and identify patterns
• Record and present their results
• Dust (flour, chalk, talc, cocoa powder)
• Soft pencils
• Blank paper (white paper for pencil and cocoaprints; black paper for white powder prints)
• Other things to investigate e.g. oil or cream(leaves a print on OHT film or plastic),non-permanent markers etc.
• Sellotape
• Scissors
• Hand lenses or magnifying glasses
Organiser’s Card
1. Introduce the activity using the news article.Ask them if they have taken a fingerprint before.
2. Give out activity cards and equipment tothe children.
3. Explain that they will be investigatingfingerprints today. Give children time to talkabout what they know about fingerprints. Letthem look at their own fingerprints with handlenses or microscopes.
4. Demonstrate how to take a fingerprint
5. Support the children to design and carry outa test and to make their own records of their
results. Draw children’s attention to the different patterns found in fingerprints (loops, arches and whorls)
6. Ask the children to present their findings tothe rest of the group, they can be as creativein their presentation as they want. The printscould be projected for the entire group to see.The children could try to work out which printbelongs to which person. They could draw largeimages of their fingerprints.
What to do
Fantastic Fingerprints
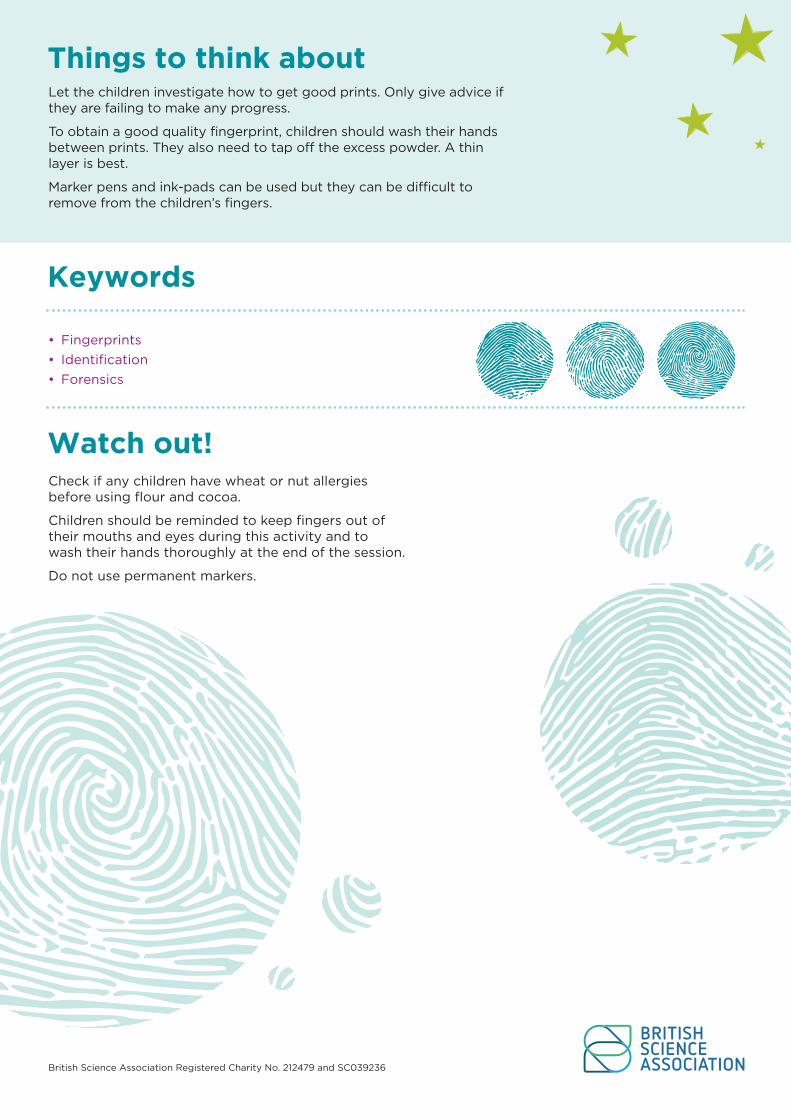
Things to think aboutLet the children investigate how to get good prints. Only give advice if they are failing to make any progress.
To obtain a good quality fingerprint, children should wash their hands between prints. They also need to tap off the excess powder. A thin layer is best.
Marker pens and ink-pads can be used but they can be difficult to remove from the children’s fingers.
Keywords
Watch out!
• Fingerprints
• Identification
• Forensics
Check if any children have wheat or nut allergies before using flour and cocoa.
Children should be reminded to keep fingers out of their mouths and eyes during this activity and to wash their hands thoroughly at the end of the session.
Do not use permanent markers.
British Science Association Registered Charity No. 212479 and SC039236

Find out if everyone’s fingerprints really are different.
Your challenge
Fantastic FingerprintsActivity Card
DiscussHow do you think fingerprints are collected?
Look at your fingerprints with a hand lens or microscope.
What do your own fingerprints look like? Are they the same as your partner’s prints?
Fantastic
Fingerprints
Teachers at Startown Primary
School are wondering if they
can use fingerprints to take
registers, log children on
to computers and borrow
library books.
The fingerprint pad designer
told our reporter, “Electronic
pads scan the fingerprints. They
change the fingerprint pattern
into a code. The code is saved
on a computer. Children only
need to touch a pad to register.
The possibilities are endless.”
Mrs Teachem, the school’s Head
told our reporter, “I’m not sure it
will work. Are fingerprints really
all different? I would like to
know what your readers think.”
NEWSFantastic FingerprintsTeachers at Startown PrimarySchool are wondering if theycan use fingerprints to takeregisters, log children onto computers and borrowlibrary books.
The fingerprint pad designertold our reporter, “Electronic pads scan the fingerprints. Theychange the fingerprint patterninto a code. The code is savedon a computer. Children only need to touch a pad to register.The possibilities are endless.”Mrs Teachem, the school’s Headtold our reporter, “I’m not sure itwill work. Are fingerprints reallyall different? I would like to know what your readers think.”
NEWS
Fantastic
Fingerprints
Teachers at Startown Primary
School are wondering if they
can use fingerprints to take
registers, log children on
to computers and borrow
library books.
The fingerprint pad designer
told our reporter, “Electronic
pads scan the fingerprints. They
change the fingerprint pattern
into a code. The code is saved
know what your readers think.”
NEWSFantastic FingerprintsTeachers at Startown Primary School are wondering if they can use fingerprints to take registers, log children on to computers and borrow library books.
The fingerprint pad designer told our reporter, “Electronic pads scan the fingerprints. They change the fingerprint pattern into a code. The code is saved on a computer. Children only need to touch a pad to register. The possibilities are endless.” Mrs Teachem, the school’s Head told our reporter, “I’m not sure it will work. Are fingerprints really all different? I would like to know what your readers think.”
NEWSFantastic Fingerprints
Teachers at Startown Primary
School are wondering if they
can use fingerprints to take
registers, log children on
to computers and borrow
library books.
The fingerprint pad designer
told our reporter, “Electronic
pads scan the fingerprints. They
change the fingerprint pattern
into a code. The code is saved
on a computer. Children only
need to touch a pad to register.
The possibilities are endless.”
Mrs Teachem, the school’s Head
told our reporter, “I’m not sure it
will work. Are fingerprints really
all different? I would like to
know what your readers think.”
NEWS

Test your ideas
Share your ideas
Extra things to doLook for fingerprints on surfaces such as glass. Can you identify who made them?
Some people think children’s fingerprints should not be used as records in schools. What do you think?
Can you find out other ways of identifying individuals?
Share all the fingerprints. Can you work out which are yours? You could let Mrs Teachem have copies or drawings of fingerprints.
Look at the prints, do you have any of these patterns?
Getting startedYou either need to rub pencil onto a piece of paper or you can sprinkle a small amount of dust on a table.
Now put your thumb in the dust or on the pencil rubbing. Place your thumb firmly on the sticky side of a piece of sellotape. Now stick your sellotape onto a piece of paper.
You may need to experiment to get clear prints.
British Science Association Registered Charity No. 212479 and SC039236
Compare your prints with other people. Are they all different?
Can you find other ways to collect fingerprints?
ARCH LOOP WHORL

About the activity
Kit list
This activity is designed to get children thinking about dinosaurs.
Dina Digg isn’t sure how to put together a dinosaur in the right way. Can the children help to work out the best orientation?
Through this activity you will support your group to:
• Investigate the strength and stability of dinosaur shapes
• Think about why dinosaurs come in different shapes and sizes
• Record and present their findings
• Soft modelling clay
• Art straws
• Pipe cleaners
• Cocktail or kebab sticks
Organiser’s Card
1. Introduce the activity using the story of DinaDigg. Ask the children what they know aboutdinosaurs, what do different dinosaurs look like?
2. Give out activity cards and equipment tothe children.
3. Explain that they will be designing and makingmodels of different dinosaur shapes.
4. Support children to design and build theirmodels. Encourage the children to think aboutsize, shape and weight.
5. Support the children to design and carry outtests on their models and to make their ownrecords of their results.
6. Ask the children to present their findings to therest of the group, they can be as creative in theirpresentation as they want.
What to do
Fossil Folly
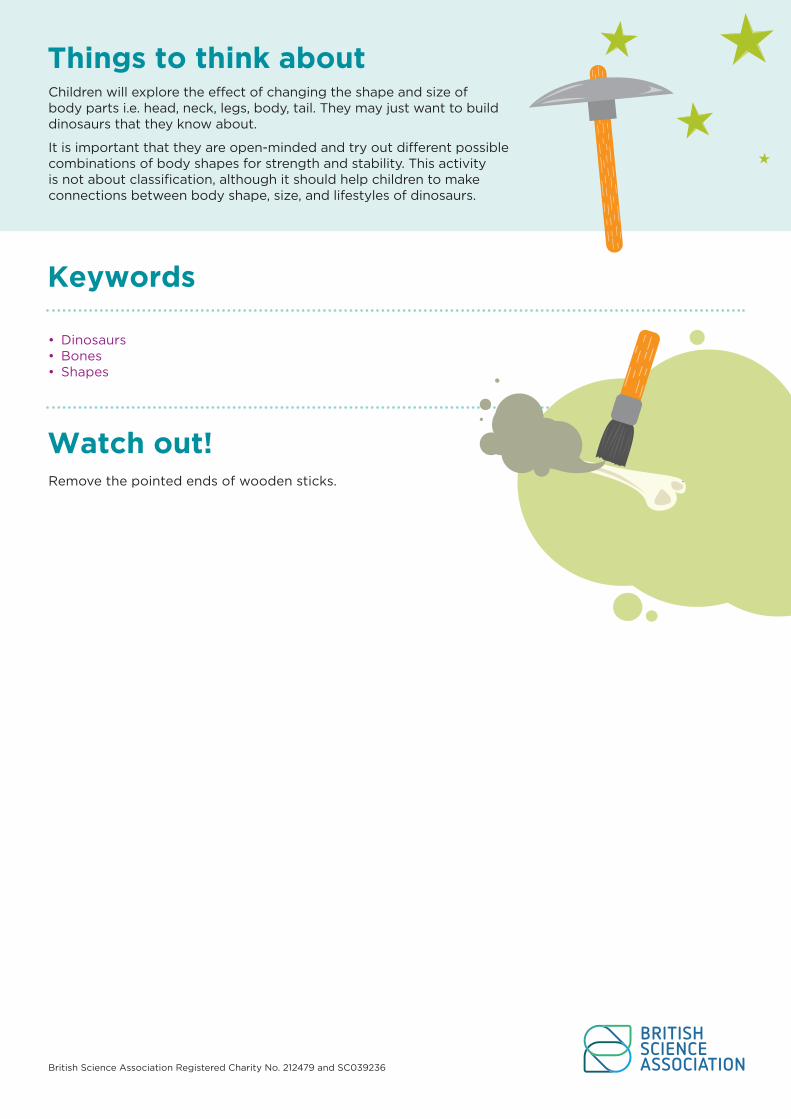
Things to think aboutChildren will explore the effect of changing the shape and size of body parts i.e. head, neck, legs, body, tail. They may just want to build dinosaurs that they know about.
It is important that they are open-minded and try out different possible combinations of body shapes for strength and stability. This activity is not about classification, although it should help children to make connections between body shape, size, and lifestyles of dinosaurs.
Keywords
Watch out!
• Dinosaurs• Bones• Shapes
Remove the pointed ends of wooden sticks.
British Science Association Registered Charity No. 212479 and SC039236

Can you help Dina Digg to figure out how to put the dinosaur bones together? Is it a new dinosaur, unlike any ever found before? Has she got it wrong?
Your challenge
Fossil FollyActivity Card
DiscussDo you have a favourite dinosaur? What did they look like? A few other investigators have had some ideas:
A box of bones has been delivered to Dina Digg at the Dinosaur Museum and she has tried to put them together, but she’s not sure she’s got it right.
No one has ever seen a living, moving dinosaur, but lots of dinosaurs’ bones have been found. Putting them together is not always an easy job. There have been plenty of dinosaur debates about the right way to assemble a skeleton.
I like the ostrich dinosaurs like Gallimimus. Their long legs helped them to run very fast.
Stegosaurus rules! It was a medium sized dinosaur with a solid body and short legs. It had tail spikes and defensive plates on its back.
Iguanodon’s the one for me. It had a small head but a bulky body and a stiff tail. This meant it could stand on its back legs as well as walking on all four feet.
My favourite is the 26m long, plant-eating Diplodocus. It was built like a suspension bridge – with a very long neck and tail.
My vote goes to the agile Velociraptor. A small but deadly carnivore! It ran on two legs and had a long stiff tail that acted as a counterbalance.

Test your ideas
Share your ideasYou could design a poster for Dina Digg at the Dinosaur Museum. You could include:
• Drawings or photos of your dinosaurs and your ideas about why theywere successful or not
• Pictures of different dinosaurs that match the shapes that you have made
• Explanations of why some dinosaur shapes helped them to survive.
Now decide whether the dinosaur put together at the Dinosaur Museum is definitely a dinosaur or a dinosaur disaster!
Make a table to show which shapes work well together. Can you explain why?
Getting startedMake model dinosaurs to find out which combinations of body shapes are:
• Most stable on two legs
• Most stable on four legs
• Best for reaching high leaves
Which combinations work and which ones do not?
Scientists compare fossil bones with the skeletons of living creatures to work out how to fit them together. Do the shapes that you made remind you of any living or extinct animals?
British Science Association Registered Charity No. 212479 and SC039236
Body shape Stable on two legs Stable on four legs Good for reaching high leaves

About the activity
Kit list
This activity is designed to get children making and testing different jelly recipes.
It’s Uncle Astro’s birthday so Cosmic and Gem have made him a special jelly with fresh pineapple rather than tinned. But the jelly won’t set! What could be causing it?
Through this activity you will support your group to:
• Make and test jellies with different types of fruit added.
• Record their results
• Produce a guide to making fruit jelly.
• Jelly (any flavour will do)
• Kettle and water
• Spoons
• Measuring jugs
• Little dishes to put the jelly in
• Pineapple – fresh and tinned (frozen optional)
• Other types of fruit (optional)
Organiser’s Card
1. Introduce the activity using the story. Ask themif they have made jelly before.
2. Give out activity cards and equipment tothe children.
3. Explain that they will be making some differentjellies and comparing them.
4. Support children to make their jelly recipe.Ensure that the jelly is made following thenormal instructions on the packet. The childrenshould focus on adding different fruit ratherthan changing the way the jelly is made.Encourage them to explore a range of fruit.They will find that there are others that will
stop the jelly setting properly. It is helpful to make a jelly without fruit to compare how it sets with ones that contain fruit. Scientists call this a control.
5. Support the children to compare their jelly tothe other jellies, and to design a way to recordtheir results.
6. Ask the children to present their findings to therest of the group, they can be as creative in theirpresentation as they want.
What to do
Get Set JelliesCosmic Gem
Uncle
Astro

Things to think aboutFor many reasons, such as religion, some children cannot eat gelatine. Be sensitive to the group’s needs, perhaps they could try using alternatives to see what happens.
Keywords
Watch out!
• Jelly
• Gelatine
• Setting
The main safety issue is attached to making the jelly. It does need to be made with hot water so will need to be done with adult supervision. Do not taste the food unless hygiene is scrupulous. Also ensure that the hot jelly is not carried around until it has cooled.
British Science Association Registered Charity No. 212479 and SC039236

Find out if the fresh pineapple could have stopped Uncle Astro’s jelly setting.
Your challenge
Get Set JelliesActivity Card
DiscussTalk about how to make jelly. Think about what might have stopped the jelly setting.
How will you decide if the fresh pineapple stopped the jelly setting?
What tests can you do to find out why the jelly didn’t set?
How will you make sure that your test is fair and safe?
What will you observe or measure in each of your tests?
Uncle Astro loves jelly. His favourite fruit is pineapple. Cosmic and Gem have made a pineapple jelly for his birthday. Normally they use tinned pineapples but, because it is a special day, this time they have used big chunks of fresh juicy pineapple. Now it is time to enjoy some lovely, wibbly, wobbly jelly. Uncle Astro laughs with excitement as he tips the bowl over to let the jelly drop out. Oh no! The jelly hasn’t set!
Uncle Astro laughed! “How fascinating! I wonder if it has something to do with the pineapple? We need to do some investigating. I think a little chemistry might help.”
Uncle AstroCosmic
Gem

Test your ideas
Share your ideas
Extra things to do
Why not design a guide to show how knowing a little chemistry can help people to make very wibbly, wobbly fruit jelly.
What happens if you use different fruit in your jellies? Try making small jellies to compare different fruit. Does it make a difference if you use tinned or frozen fruit?
You could try apples, strawberries, raspberries, lemons, tangerines, kiwi fruit, fresh figs, mango, grapes, peaches and/or any other fruit that you like.
Which jellies set and which ones did not? Is there a problem when you use fresh pineapple? Does it make a difference if the pineapple comes from a tin or has been frozen?`
You might want to make a table like the one below to compare the jellies.
Getting startedSome other investigators have had a few ideas to get you started:
British Science Association Registered Charity No. 212479 and SC039236
Jelly 1 – Fresh pineappleJelly 2 – Tinned pineapple
Jelly 3 – No pineapple
What happened?
Why don’t we try making the same jelly with and without pineapple?
I think we could try using different amounts of fresh pineapple.
I think we could use fresh, frozen and tinned pineapple.
What will you do?

INVESTIGATING INK
About the activity
Investigating InkOrganiser’s Card
This activity is designed to get children thinking about how to identify different inks using chromatography.
Lady Felicity Feline’s prize winning Cocker Spaniel has been dog napped and a note has been sent asking for a ransom. Can the investigators work out which one of the four suspects wrote the note based on the type of ink used?
Through this activity you will support your group to:
• Experiment with different ink pens using chromatography
• Design an experiment to help them identify the pen used to write a note
• Share their conclusion and present evidence to support it.
Kit list• Absorbent paper e.g. blotting paper, white filter paper, white coffee filters
• Four pens (not biros) with black water-soluble ink inside, labelled with the suspects’ names – it’s better to have a set per group
• Additional pen or black ink for the initial exploration – you must check that the colour separates
• Ransom note (written using one of the pens prior to the activity). Don’t worry if it spreads a bit.
• Beakers or pots
• Scissors
• Extra non-permanent marker pens in various colours
• Plain paper for wanted posters
INVESTIGATING INK
INVESTIGATING INK
INVESTIGATING INK

Things to think aboutTest the pens/ink prior to the activity by putting marks on pieces of blotting paper and dropping water on them.
Some black inks will separate better than others. You need the criminal’s pen to produce a different pattern from the others.
Your ransom note must be written on absorbent paper e.g. blotting paper. Write a large note so there is enough for everyone. Your note could read: Lady Feline. If you want Colin returned safely, put £100,000 in a brown paper bag and leave it under the big oak tree by the town hall at 5.15 pm prompt tomorrow.
Keywords
Take it further
Watch out!
• Ink
• Chromatography
• Separation
• Mixture
• Absorbancy
• Water-soluble
Use plastic beakers for this activity.
Any spills should be cleaned up quickly to avoid accidents.
Avoid using permanent marker pens
Ink is made up of a mixture of different colours. Different inks will be made up of different colours even if they look the same. With water-soluble inks you can separate the colours from one another using water (chromatography).
The colour from some other items such as food colouring, jelly beans and other sweets can be separated in the same way.
Chromatography is used to separate and identify all sorts of substances in police work. Drugs can be identified in urine and blood samples, often with the aid of chromatography.
British Science Association Registered Charity No. 212479 and SC039236
What to do1. In advance prepare the ransom note according
to the instructions in the kit list.
2. Introduce the activity by reading the news storytogether and examining the ransom note withthe children. Show the children the suspects’pens.
3. Give the children time to talk about ways ofidentifying which ink was used to write theransom note. Give them a black pen or a blobof black ink and some white paper towel toexplore the effect of water on ink.
4. Let the children explore the pens and the note.You will need to cut the ransom note into stripsso that groups can each try out their tests.
Cut more strips than you need to have some spares. You will probably need plenty of them!
5. Some children may need help to examine thedifferent patterns and colours produced byeach pen.
6. Give children time to talk about their evidenceand decide who they think the culprit is.
7. Children can now create a wanted poster tohelp detectives track down the criminal theyhave identified. Encourage them to include allthe evidence they have collected.
8. Encourage children to use the evidence fromtheir experiment to justify their decision.
INVESTIGATING INK

Investigating InkActivity Card
The four main suspects are:
Ivor Swagbag
Robyn Banks
Kitty Catburglar
Nick Goods
Help the detectives to match the ink from the ransom note to one of the suspects’ pens to find out who has Colin the Cocker Spaniel.
Your challenge
Cocker Spaniel caught up
in Canine Crime Spree
Earlier this week, Lady Felicity Feline
received a ransom note demanding
£100,000 for the safe return of Colin, her
prize-winning cocker spaniel. Detectives
have seized black pens from four prime
suspects so that they can carry out ink
investigations to find out who sent the
note.
“Someone had splashed a drop of water
on the note and we spotted something
very interesting,” Inspector Khan told our
reporter. “With a bit of help we should
soon have Colin back.”
NEWS INVESTIGATING INK
INVESTIGATING INK
INVESTIGATING INK
INV
ES
TIG
AT
ING
INK

Getting startedPens write differently and the colour of the ink can vary. Perhaps you can see these differences if you look closely.
If you have explored what water does to some ink, can you use what you have found out to investigate the suspects’ pens? This process is called chromatography.
DiscussWhat ways could you use to tell the difference between the black pens?
Drop water on black ink and watch what happens.
How might this help to solve the crime?
Test your ideasOne way to test the ink is to drip water onto a sample of the ransom note. Watch what happens. Compare this with blobs of ink from the suspects’ pens.
Try to gather as much different evidence as you can.
Can you find out who the dog napper is?
Extra things to doIs it only black pens that you can test with chromatography?
Are there other things that are coloured that you can test such as jelly beans or food colouring?
Are there other ways of doing chromatography?
Share your ideasWhy not make a wanted poster which includes all the evidence to help detectives track down the criminal you have identified?
British Science Association Registered Charity No. 212479 and SC039236
INV
ES
TIG
AT
ING
INK
INVESTIGATING INK

RACING ROCKETS
About the activity
Racing RocketsOrganiser’s Card
This activity is designed to get the children to think about rocket designs and build a rocket that can go as high as possible.
The children have seen a poster about a new rocket competition inviting them to design and fly a rocket. The competitors need to set their sights high and produce creative ideas.
Through this activity you will support your group to:
• Think about different shapes of rockets
• Test different rocket shapes and sizes
• Share their findings with the rest of the group
Kit list• Pencils or dowel to roll the rockets
• Strips of paper or card (cut to 1/4 of an A4 sheet)
• Sellotape
• Scissors
• Plastic straws – 1 per child
• Metre ruler or tape measure
• Plasticine, Blu-Tack or paperclips to add weight
• Extra card to make fins
RACING ROCKETS

Things to think aboutThe rockets will not work very well unless one end is flattened, folded and sealed. Let them explore this for themselves first.
Watch out for children launching rockets by hand rather than blowing.
The children will need to agree on where to launch their rockets from and how the flight will be measured.
Take it further
What to do
1. Read the ACTIVITY CARD to familiarise yourselfwith the activity.
2. Check the Kit list to ensure you have the correctresources.
3. Set the scene using the poster and invite thechildren to enter the competition.
4. Give children a short time to talk about rocketsand share their ideas.
5. Give each team the resources that they willneed for the challenge.
6. Let children explore making and flying the basictube shape. Give support to any groups thatseem to be struggling.
7. Once they have the basic shape working, givechildren plenty of time to experiment to findout what makes a difference to how the rocketflies. They may need to make several versions tocompare them.
8. When the time is up, all the children gather topresent and test their rockets.
9. Measure the distance that each rocket travels.Test them three times each. It is up to you todecide if children can repair or adjust theirrockets after each test.
10. Give points to each rocket according to thedistance travelled. You can give extra pointsfor design.
11. Announce the winners of the competition.
12. Encourage children to decide what made adifference to how each rocket flew. They coulddo a design report for Windy Astralbody.
13. The winning designs can be displayed on apodium.
RACING ROCKETS
Once children have the basic rocket shape there is plenty of scope for investigation such as size, materials and shape. Three important things affect the way rockets fly – aerodynamics, stability and balance.
Flattening and folding one end will help to make the rocket more aerodynamic and prevent air escaping. Children might experiment with trying to make the nose more cone-shaped.
Children can try attaching fins in different positions. This will affect the stability of the rocket. Fins at the tail end tend to be the most stable.
Weight will also affect the flight. A little additional weight at the tail end can help. If it is too heavy it may not fly at all.
RACING ROCKETS

British Science Association Registered Charity No. 212479 and SC039236
Keywords
• Aerodynamics
• Flight
• Rocket
Watch out!Remind children to stand behind the rockets as they are launched. Do not let children swap straws.
Remind children not to over-exert when blowing the rockets
RACING ROCKETS
RACING ROCKETS


Racing RocketsActivity Card
Can you design a rocket that will go the furthest? Building a proper rocket is difficult but you could investigate rocket shapes that might look something like this.
You’ve seen a poster on the noticeboard in town:
Your challenge
A new RoCket Competition is being lAunChed todAY bY the spACe ReseARCh AssoCiAtion, ‘RACing RoCkets’.
the competition invites children to design and fly a rocket.
RA
CIN
G R
OC
KET
S
director windy Astralbody told us, “it’s a tall order but we hope competitors will set their sights high and maybe even break some records. we are looking for really creative ideas. who knows, one day the winners might get to fly into space in a real rocket.”
RA
CIN
G R
OCKETS
RACING ROCKETS
RACING ROCKETS
RACING ROCKETS

discussAre all rockets the same shape?
What is important about the shape of rockets?
Does everyone agree?
getting startedthis is how you make your basic rocket shape.
Roll a strip of paper or card round a pencil (not too tightly) to make a tube.
Tape it in three places to keep it together, then take the pencil out.
Flatten one end of the tube, fold it over and secure it with tape.
Slide the tube onto a straw.
Blow your rocket across the room and see how far it goes. Don’t blow too hard.
test your ideasHow you can improve its flight? Do you think fins will help? Where is the best place to put them? What shape should they be? What about the size of the rocket? Is card better than paper? Does it help to put some weight in the rocket? Try different rockets and choose the one that you think is best.
share your ideasHold the ‘Racing Rockets’ competition. Each team needs to tell everyone else about their rocket design and then measure how far the rockets travel. Test each one three times. You could send your designs to Windy Astralbody and put the winning rockets on a podium.
extra things to doWhat other ways could you make a rocket? Find out what you can from books and the internet, then make and test some.
You could write a consumer report to compare and contrast rockets.
Several countries are trying to use rockets to travel into space. Can you find out more about them?
British Science Association Registered Charity No. 212479 and SC039236
RA
CIN
G R
OCKETS
RACING ROCKETS
RACING ROCKETS

SUPER SPINNERS
About the activity
Super SpinnersOrganiser’s Card
This activity is designed to get the children thinking about helicopter blades, and how different blade sizes change the way a paper spinner falls.
Mr Sycamore arrived for work in a helicopter, amazing the students. He’s testing which helicopter is best. Can the students help to find out if a longer blade design will make a difference?
Through this activity you will support your group to:
• Think about what makes paper fall in different ways
• Test whether a paper spinner falls in different ways with different blade sizes
• Share their ideas with the group
Kit listTo make the spinners they will need:
• A4 Paper
• 30 cm ruler
• Metre ruler
• Paperclips or Blu–Tack
• Scissors
• One ready–made spinner to show the children how they work
• Large and small templates for spinners (if you think children will need them) –see following page
• Stopwatches
• Other types of paper and card
SUPER SPINNERS
SUPER SPINNERS

Things to think aboutEncourage children to drop their spinners from the same height. This should be as high as possible so that the spinners can twirl before they hit the ground.
Very large spinners require a long drop to see any effect. You may need to drop them.
If they are too flimsy they will not spin. Very tiny spinners can spin extremely quickly.
It is difficult timing the spinners if they fall quickly. However, if children want to try timing, you should let them have a go to see if works.
Adding paperclips or Blu-Tack can increase spin speed.
What to do1. Read the ACTIVITY CARD to familiarise yourself
with the activity.
2. Check the Kit list, including preparing a spinnerand templates if you think that they might beneeded.
3. Set the scene by discussing the news story andshow the children a spinner falling.
4. Give children time to explore flat and screwedup paper and to think about what might bemaking a difference to the way that they fall.
5. Encourage the children to make their own largeand small spinners. It is important to let themexplore their ideas on their own. Have templatesavailable if children need them. Some mayneed help to work out how to cut and fold thespinners.
6. Now let children try the spinners to see whathappens.
7. Remind them about safety, particularly about not climbing to drop the spinners
8. Give children some time to talk about their observations and ideas. You could show children other spinners with different blade lengths and ask them to predict how they will fall.
9. Children can share their ‘best’ spinner or they can create a display by sticking their spinners onto paper with advice for Mr Sycamore. Avoid too much writing by composing text message replies.
10. There are extra challenges on the ACTIVITY CARD. These can be used if there is any spare time or if the children want to try out more ideas and earn a bonus sticker.
SUPER SPINNERS
British Science Association Registered Charity No. 212479 and SC039236
Keywords
Take it further
Watch out!
• Flight
• Shape
• Size
• Aerodynamics
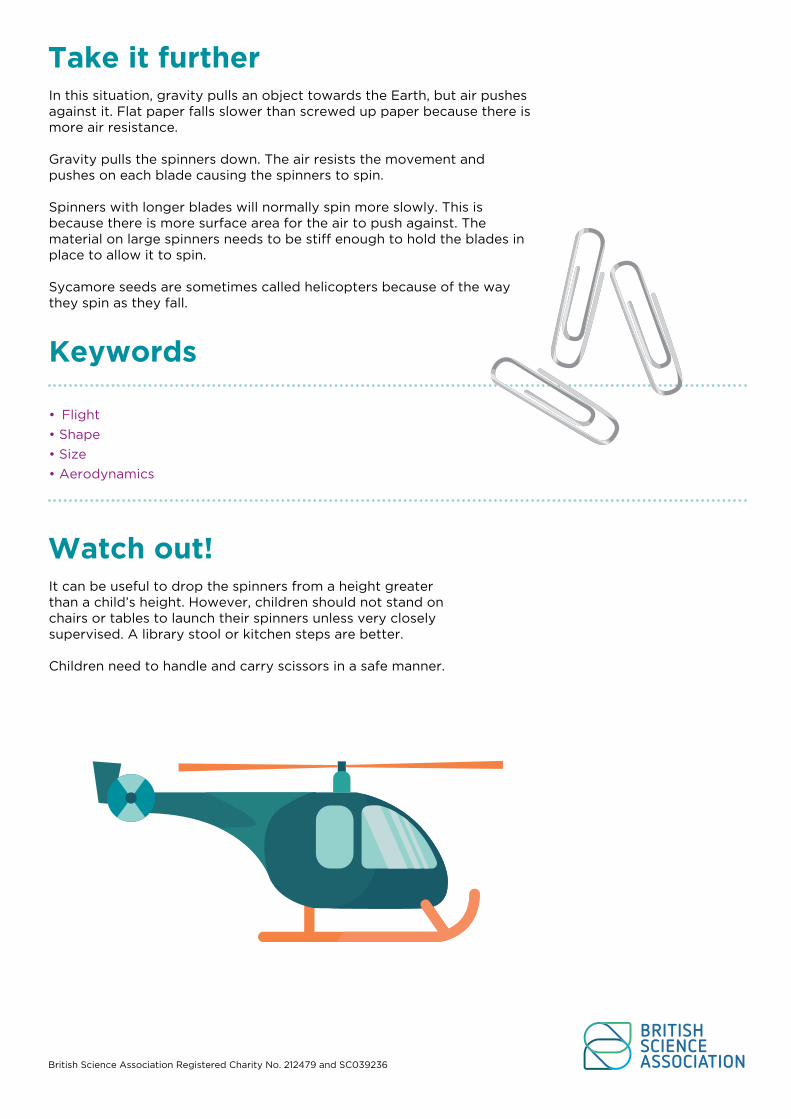
It can be useful to drop the spinners from a height greater than a child’s height. However, children should not stand on chairs or tables to launch their spinners unless very closely supervised. A library stool or kitchen steps are better.
Children need to handle and carry scissors in a safe manner.
In this situation, gravity pulls an object towards the Earth, but air pushes against it. Flat paper falls slower than screwed up paper because there is more air resistance.
Gravity pulls the spinners down. The air resists the movement and pushes on each blade causing the spinners to spin.
Spinners with longer blades will normally spin more slowly. This is because there is more surface area for the air to push against. The material on large spinners needs to be stiff enough to hold the blades in place to allow it to spin.
Sycamore seeds are sometimes called helicopters because of the way they spin as they fall.
SUPER SPINNERS
SUPER SPINNERS


Super SpinnersActivity Card
Can you help Mr Sycamore decide if the size of the blades makes a difference?
Building full size helicopters is difficult but you can have fun making paper helicopter blades and watching how they fall.
Mr Sycamore, class 5 teacher at Startown Primary School, amazed pupils and staff when he arrived for work in a helicopter!
“It’s a bit of a hobby really,” said Mr Sycamore, “I’m flying a different one every day and then I’ll buy the one I like the best. This helicopter has a short blade design, I wonder if the size of blade makes a difference? I’ll need some Super Spinner test pilots to help me decide!”
Your challenge
DiscussWhat happens if you drop flat and scrunched up paper?
What do you notice about the way that they fall?
What might be making a difference to the way that they fall?
SUPER SPINNERS
SUPER SPINNERS
SUPER SPINNERS
SUPER SPINNERS
SUPER SPINNERS

Getting startedYou can make paper spinners to use as a model. You will need to put a paper clip on the bottom to help them to fall properly. What sizes will you make them? How big will you make the blades? How many clips will you add?
British Science Association Registered Charity No. 212479 and SC039236
Extra things to doDoes the spinner act differently if you change its shape?
What if you make spinners from different kinds of paper?
What else could you change?
Can you make a bar chart to show your results?
Share your ideasYou could make a display for Mr Sycamore using your spinners to show him what happened.
Test your ideasWatch the spinners carefully as they fall. Can you make them go faster and slower? You could try landing them on a target and score points for where they land. Remember to change only one thing at a time.
SUPER SPINNERS
SUPER SPINNERS

Organiser’s Card
About the activity
Kit list
This activity is designed to get children thinking about reversible and irreversible reactions.
The children have been sent an email by Mita Gabbar on behalf of Practical Action, who help farmers turn milk into yoghurt in rural Bangladesh in order to make the most money. Can the students help to find the most delicious flavour?
Through this activity you will support your group to:
• Make different varieties of yoghurt
• Conduct a taste test scientifically
• Record and present their results to the group
• Think about the lives of those living in a developing country`
• Different types of milk (full fat cow’s milk,skimmed and/or semi-skimmed cow’s milk, goat’smilk, sheep’s milk, soya milk, almond milk, etc).
• Flasks
• Saucepans
• Cooker, hot plate or some other source of heat
• Large spoons for stirring
• Small spoons for tasting
• Yoghurt (make sure it is ‘live’ yoghurt)
• Dried milk powder (if using)
• Ready-made yoghurt samples, prepared theday before
• Blindfolds made from pieces of fabric
• Thermometer
• Selection of finely chopped or pureed fruit
What to do1. Prepare a selection of yoghurt samples the day
before this activity so that children can testthem. Remember to use a variety of milks.
2. Introduce the activity using the email from Mita. Children may be surprised that in othercountries children don’t always go to school.Tell them how people around the worldare trying to change this as one of theGlobal Goals. For information go to https://www.globalgoals.org/4-quality-education/
3. Give out activity cards and equipment tothe children.
4. Encourage children to discuss their ideas andhow they will use the resources to carry outtheir investigations.
5. Encourage the children to predict the type ofyoghurt the different milks will make. Will theyoghurt be thick, runny, sweet or sour?
Yummy Yoghurt Makers

Things to think aboutTo make 500ml of yoghurt you will need 500ml of any milk and 3 tablespoons of fresh, live, plain yoghurt. Using 25g of dried milk powder for every 500ml of milk will help your yoghurt set. Some types of milk take longer to set.
Heat the milk in a saucepan. When the milk reaches 46°C take it off the heat and stir in the yoghurt. The temperature of the milk is important. Help the children measure the temperature of the milk carefully.
Pour the mixture into a flask and leave overnight. In the morning it should have thickened and turned into yoghurt.
Making yoghurt is an irreversible reaction. Once the bacteria have fermented the milk you cannot turn it back into milk. This activity it a good opportunity to think about which reactions they know that are reversible, for example turning water into ice.
Keywords
Find out more
Watch out!
• Yoghurt
• Cultures
• Fermentation
• Reactions
In developing countries like Bangladesh, education is especially important. However, with no national provision, families have to pay to send their children to school. Making and selling yoghurt is one way that families can generate an income for school fees.
To help pupils find out more about the lives of children in Bangladesh take a look at some of Practical Action’s other activities for Primary including the Floating Garden Challenge, an investigation into growing food in areas of Bangladesh prone to flooding. practicalaction.org/primary
Emphasise washing hands and keeping work spaces and equipment clean when preparing food.
Ensure adult supervision when children make the yoghurt.
Check for any food allergies.
British Science Association Registered Charity No. 212479 and SC039236
6. Help the children to make their own batches ofyoghurt using different ingredients. Make sureyou have a ready-made yoghurt sample for eachof the types of milk the children will be using tomake their own yoghurt.
7. Support children to conduct their investigationand make their own records of their results.Allow the children to do blind taste tests of theready-made yoghurt samples. Can they guesswhich milk was used to make each yoghurtsample? Were their predictions right? Children
can vote for their favourite yoghurt. Can they make it even tastier by adding chopped or pureed fruit?
8. Ask the children to present their findings to therest of the group, they can be as creative in theirpresentation as they want e.g. they could make apictogram of each person’s vote to show whichyoghurt was the most popular. They could writeto Mita to tell her what they found out aboutmaking yoghurt and to share their recipes.

Investigate how to make the tastiest yoghurt from milk. Did the different types of milk make different types of yoghurt?
Which flavours work best?
Your challenge
Activity Card
DiscussHave you eaten yoghurt before? Which kind is your favourite?
What type of milk do you think will work best?
Why do you need to start with fresh yoghurt to make more?
How will you test the yoghurts? You could do a blind taste test.
You
Mita Gabbar
RE: Yummy Yoghurt
Dear Investigators,
I work for Practical Action. We do lots of things all over the world to help people who live in poverty. We work with farmers in Bangladesh. They sell milk from their cows at the local market but if they turn their milk into yoghurt and sell that instead they can get more money. We help them to do that. In Bangladesh, school is expensive. Farmers can use the money they make from yoghurt to send their children to school. Can you investigate the best way to make yoghurt?
Don’t forget to send me the recipe for the most delicious flavour!
Mita Gabbar
Yummy Yoghurt Makers

Design a poster to sell your yoghurt at market.
Find out what else you can make from milk.
Find out more about the food people eat in Bangladesh. Draw a picture of a meal a child your age might eat in Bangladesh...and include yoghurt!
Extra things to do
Share your ideasMake a pictogram of each person’s vote – which yoghurt is most popular? Write to Mita to tell her what you have found out about making yoghurt.
British Science Association Registered Charity No. 212479 and SC039236
Getting startedBefore you start wash your hands with soap and water
Pour your milk into a saucepan and gently heat it up.
When it is 46 degrees celcius take it off the heat. Use a thermometer to help you.
The yoghurt culture has live bacteria in it. Stir this into the warm milk.
Pour the new mixture into a flask.
In the morning the milk will have turned into yoghurt!
Test your ideasYou might like to record your results in a table like this one. You could use a tally to keep track.
Yoghurt 1 Yoghurt 2 Yoghurt 3
Number of votes for favourite yoghurt

British Science Association
Wellcome Wolfson Building
165 Queen’s Gate
London
SW7 5HD
crestawards.orgBritish Science Association Registered Charity No. 212479 and SC039236
Managed by