Embed Size (px)
Citation preview
EAM Plus - Help
Help file for EAM Plus Facilities Management version 4
Document Code: CIBS-PFM-001 Revision: 20 Created: 2012-07-09 Created by: Gareth Robinson Updated: 2012-07-31 Updated by: Gareth Robinson
Contents Introduction ............................................................................................................................................ 5
Login ................................................................................................................................................ 6
Test Connection .............................................................................................................................. 6
Cancel .............................................................................................................................................. 6
Remember Tenant .......................................................................................................................... 6
Login Failure ........................................................................................................................................ 6
User Error ........................................................................................................................................ 6
System Error .................................................................................................................................... 6
Logging into the System .......................................................................................................................... 7
System Layout ......................................................................................................................................... 8
Display ..................................................................................................................................................... 9
Screen ................................................................................................................................................. 9
Icons .................................................................................................................................................... 9
Colour Schemes .................................................................................................................................. 9
Screen Tabs ....................................................................................................................................... 10
List View ........................................................................................................................................ 10
Record View .................................................................................................................................. 10
Combo View .................................................................................................................................. 10
Comments ..................................................................................................................................... 10
Entering Data ........................................................................................................................................ 11
Mandatory Fields .............................................................................................................................. 11
Optional Fields .................................................................................................................................. 11
Protected Fields ................................................................................................................................ 11
Drop-down Boxes .............................................................................................................................. 11
Lookups ............................................................................................................................................. 11
System Contents ................................................................................................................................... 12
Screen Menus ................................................................................................................................... 12
File ................................................................................................................................................. 12
Operations .................................................................................................................................... 13
Reports .......................................................................................................................................... 14
Screens .................................................................................................................................................. 17
Containers ......................................................................................................................................... 17
Under the File Menu ............................................................................................................................. 17
Setup ..................................................................................................................................................... 17
E-Mails ................................................................................................................................................... 17
Mail Templates ................................................................................................................................. 17
Path ............................................................................................................................................... 17
Mail Timers ....................................................................................................................................... 17
Path ............................................................................................................................................... 17
Surveys .................................................................................................................................................. 18
Survey Templates .............................................................................................................................. 18
Path ............................................................................................................................................... 18
Survey Timers .................................................................................................................................... 18
Path ............................................................................................................................................... 18
Classes ................................................................................................................................................... 19
Functions ............................................................................................................................................... 21
Holidays ................................................................................................................................................. 23
Reports .................................................................................................................................................. 25
System Codes ........................................................................................................................................ 27
Custom Codes ....................................................................................................................................... 27
Path ............................................................................................................................................... 27
Field Definitions ............................................................................................................................ 27
Creating a Custom Code................................................................................................................ 28
Editing an Existing Custom Code ................................................................................................... 28
Deleting a Custom Code through the Record View ...................................................................... 28
Deleting a Custom Code through the List View ............................................................................ 28
User Codes ............................................................................................................................................ 29
Security ................................................................................................................................................. 31
Install Parameters ................................................................................................................................. 31
Path ............................................................................................................................................... 31
Field Definitions ............................................................................................................................ 31
Creating an Installation Parameter ............................................................................................... 32
Editing an Existing Installation Parameter .................................................................................... 32
Deleting an Installation Parameter through the Record View ...................................................... 32
Deleting an Installation Parameter through the List View ........................................................... 32
Sessions ................................................................................................................................................. 33
Users ..................................................................................................................................................... 35
Under the Operations Menu ................................................................................................................. 38
Objects .................................................................................................................................................. 38
Objects .................................................................................................................................................. 38
Equipment ............................................................................................................................................. 40
Locations ............................................................................................................................................... 42
Positions ................................................................................................................................................ 44
Systems ................................................................................................................................................. 46
Call Centre ............................................................................................................................................. 48
Contact Information .............................................................................................................................. 50
Venue Booking ...................................................................................................................................... 51
Venue Booking Centre .......................................................................................................................... 51
Work Orders .......................................................................................................................................... 54
Reports .................................................................................................................................................. 56
Introduction Welcome to EAM Plus Facilities Management version 4. The EAM Plus Facilities Management System is an extension of the Infor EAM system and is used to Manage Facilities related actions such as:
Reporting maintenance issues
Attending to the maintenance issues reported
Feedback to the client regarding the maintenance issue reported
Reporting on the maintenance issues during the course of the month
Booking Venues at the facility for social or business related events
Booking Parking at the facility whether short or long term
Managing Visitors to the facility and recording their presence
Surveying the client to ensure high standards are achieved
Managing the Service Level Agreements in place at the facility

Login Open the web browser on your Computer
Enter the web address supplied (http://plus4.inforapp.co.za:2082) o The web page should open on the login screen.
Enter the Tenant name in the top field (your company or Organisation name)
Enter the User Name in the field directly below (your Name as the User)
Enter the Password supplied (The secure Password assigned to you)
Click ok o This should log you into the system start screen.
Test Connection By clicking on the ‘Test’ button instead of the ‘Ok’ button the system will test your connection and return a
confirmation message such as: ‘Welcome to Crowded Igloo Portal Application Version: 1.2.3456.7890123 Your IP: 123.456.7.89’
Cancel In order to cancel the login before clicking on the ok button simply click on cancel
o This should take you safely back to your web browser, no harm done
Remember Tenant There is a checkbox on the login screen which, when checked, is set to remember the Tenant name only,
There are advantages to doing this such as a quicker login in future.
Login Failure There may be various reasons why the potential Login could have failed such as:
User Error Incorrect Tenant entered – Check name and spelling – Try again
o If the Incorrect Credentials were entered a message will return saying ‘ Invalid Credentials’
Incorrect Username entered – Check spelling - Try again.
Incorrect Password entered – Carefully enter Password being mindful of spelling as well as Case sensitivity
System Error If the system is not accessible due to a technical fault a message should return stating one of two messages:
o ‘ The system is currently unable to process requests ‘ – wait and try again o ‘ The Database is currently Offline, Please try again in a minute, If this is not the first time you are
seeing this message, please contact support ‘ – Simply click ‘Ok’ and do as the message says and try again in 1 minute, allow time for at least two re-tries and then contact support
There are many reasons why the system may be rendered inaccessible, ranging from routine maintenance to server errors which are all possible but highly unlikely
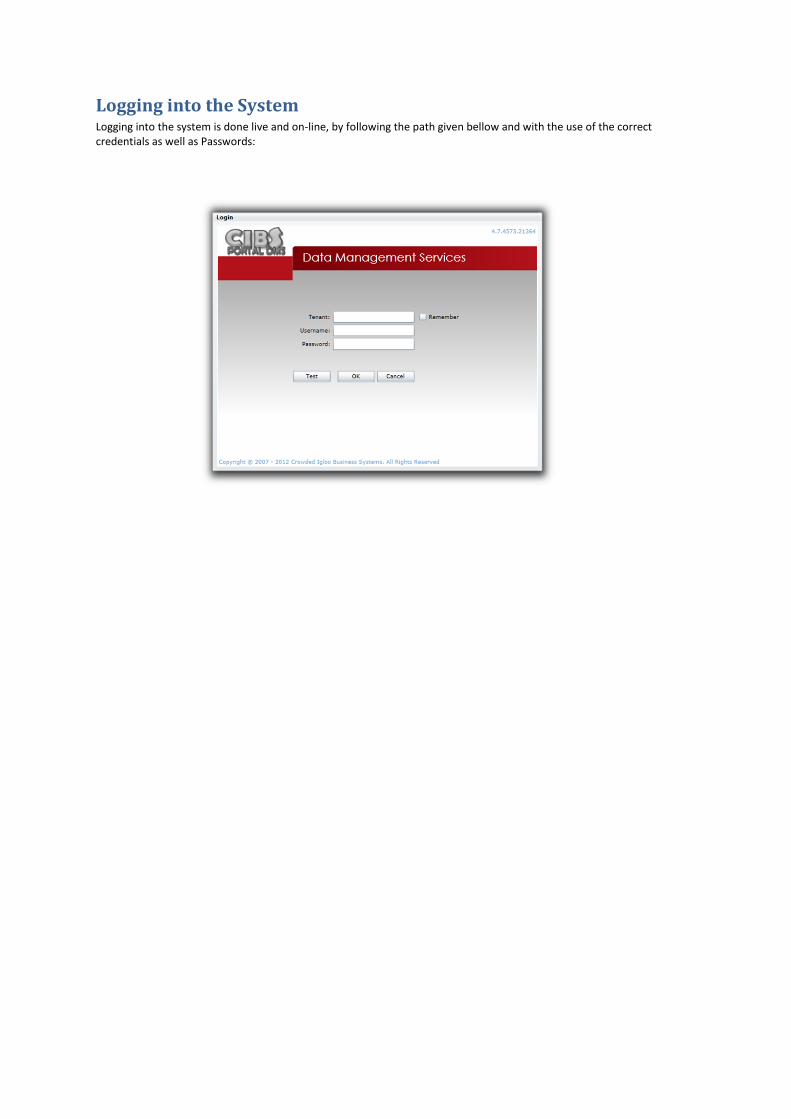
Logging into the System Logging into the system is done live and on-line, by following the path given bellow and with the use of the correct credentials as well as Passwords:
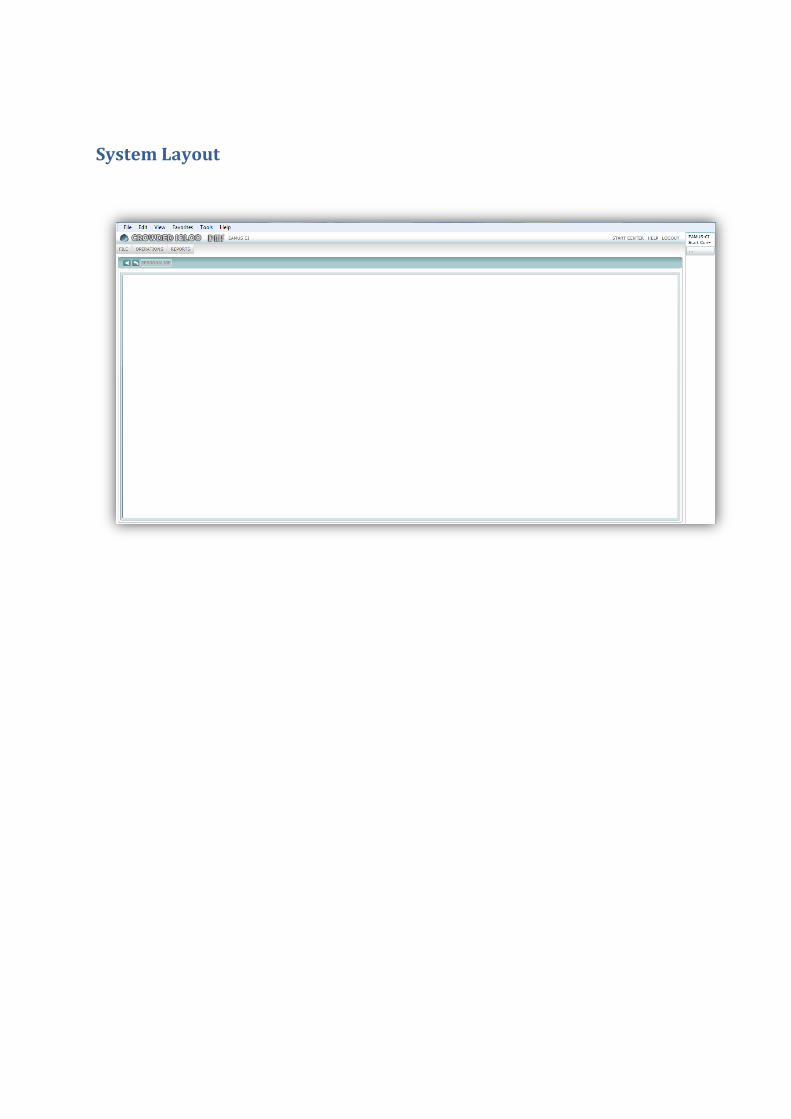
System Layout
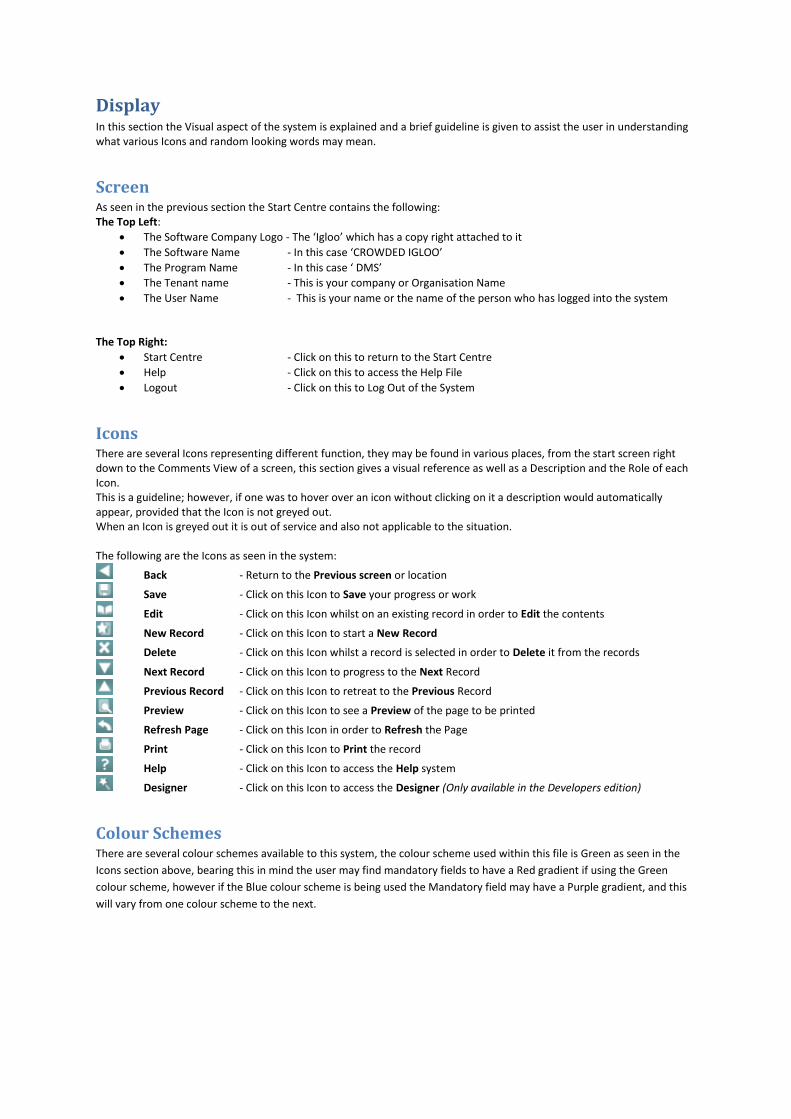
Display In this section the Visual aspect of the system is explained and a brief guideline is given to assist the user in understanding what various Icons and random looking words may mean.
Screen As seen in the previous section the Start Centre contains the following: The Top Left:
The Software Company Logo - The ‘Igloo’ which has a copy right attached to it
The Software Name - In this case ‘CROWDED IGLOO’
The Program Name - In this case ‘ DMS’
The Tenant name - This is your company or Organisation Name
The User Name - This is your name or the name of the person who has logged into the system
The Top Right:
Start Centre - Click on this to return to the Start Centre
Help - Click on this to access the Help File
Logout - Click on this to Log Out of the System
Icons There are several Icons representing different function, they may be found in various places, from the start screen right down to the Comments View of a screen, this section gives a visual reference as well as a Description and the Role of each Icon. This is a guideline; however, if one was to hover over an icon without clicking on it a description would automatically appear, provided that the Icon is not greyed out. When an Icon is greyed out it is out of service and also not applicable to the situation. The following are the Icons as seen in the system:
Back - Return to the Previous screen or location
Save - Click on this Icon to Save your progress or work
Edit - Click on this Icon whilst on an existing record in order to Edit the contents
New Record - Click on this Icon to start a New Record
Delete - Click on this Icon whilst a record is selected in order to Delete it from the records
Next Record - Click on this Icon to progress to the Next Record
Previous Record - Click on this Icon to retreat to the Previous Record
Preview - Click on this Icon to see a Preview of the page to be printed
Refresh Page - Click on this Icon in order to Refresh the Page
Print - Click on this Icon to Print the record
Help - Click on this Icon to access the Help system
Designer - Click on this Icon to access the Designer (Only available in the Developers edition)
Colour Schemes There are several colour schemes available to this system, the colour scheme used within this file is Green as seen in the
Icons section above, bearing this in mind the user may find mandatory fields to have a Red gradient if using the Green
colour scheme, however if the Blue colour scheme is being used the Mandatory field may have a Purple gradient, and this
will vary from one colour scheme to the next.
Screen Tabs This section describes the Screen Tabs found within each screen and their function. There are 3 Tabs most commonly found on each screen, this is a general rule, however, there are certain screens which may contain more than 3 tabs and in some cases may contain less than 3 tabs. These Tabs are List View, Record View and Comments.
List View
By clicking on this Tab the user is taken into the List view screen of the relevant screen being worked on or referenced. In the List view existing records are displayed a list with the fields displayed from left to right horizontally across the top of the screen and the relevant data or records being displayed as a single horizontal line below the Field names and are ordered alpha-numerically.
Record View By Clicking on the Record View Tab the user is taken to the Record View of the relevant screen being worked on or referenced, which is laid out with the fields on the page and their data in blocks to the right of the field, multiple Columns are used as are multiple lines, in some cases there are collapsible containers housing several other fields.
Combo View Within certain screens in the system a Combo-view or Combination view is found, this is basically a combination of a list view and a record view, list in the top half of the screen and record in the bottom half of the screen, both halves have their own options Icons and the Icons for each view do not act on nr interfere with the other view displayed in the same screen rendering them separate but still together, both the List and Record parts of a combo-view are 100% identical to their respective types, the List view half is a List view screen and the same accounts for the Record view, just sharing a screen for ease of use when referencing.
Comments By clicking on the Comments tab the user is taken to the section containing the comments of the specific screen being worked in or being viewed, this contains 2 collapsible containers, one for viewing Comment which already exist , which is also expanded by default and the other section is the Add/Edit Comments section which is used exactly for this purpose, to either add or Editing an existing Comment, by clicking on the arrow to the left of the header a container may be Expanded or Collapsed. Note: Even though there are a full set of Icons at the top left hand side of the screen there are a set of 3 Icons specifically for the Add/ Edit Comment section, these Icons are Save Comment, New Comment and Delete Comment.
Entering Data When entering data it is important to know which of the fields bear which attributes, there are several attributes here following:
Mandatory Fields The mandatory fields are generally identified by a highlight gradient which may differ depending on which colour scheme has been chosen, in the case of the green scheme the mandatory fields have a red gradient. Failure to enter data into any of the mandatory fields will cause the field border to get a red line around it and validation text to pop up when clicked on or when the cursor is hovered over the small arrow corner at the top right side of the field which reads ‘The xxx is missing or invalid’ (xxx denoting the field), the system still allows for the correct data to be entered, this is also the case for data which is not valid for this field.
Optional Fields Optional fields also have an assigned colour which again may vary depending on the colour scheme chosen by the user, and again in the case of using the green scheme the optional field has a pale green gradient much the same as the screen background colour, these fields are optional, however, in the interest of accurate records being kept it is strongly advised to attempt to fill these fields as well, this should make referencing information easier and yield a much lower error rate.
Protected Fields These fields are signified by a dark grey tone and are not accessible not able to be edited under any circumstance, the reason for this is to protect inherently sensitive or vital information relating to a record (such as Created By or the Revision count).
Drop-down Boxes The drop-down boxes are identified by 2 traits, firstly they bear a small triangular black down facing arrow on the far right side of the field which when clicked on opens a drop down box containing options relating to the field, which is indicated by the label assigned to that specific field, and secondly the field is white, it bears no colour irrespective of the colour scheme chosen by the user.
Lookups Lookups are laid out in various manners, however, the user seldom notices the subtle differences, and the important thing to remember regarding lookups is that they may bear the gradient of a mandatory field or that of an optional field but never that of a protected field. The primary use of lookups is to look up information which is referenced by the screen but contained elsewhere within the system. Lookups are identified by a grey gradiented small square block attached to the right side of a field, it also contains 3 dots in a parallel sequence. Lookups may return a short list of options or an extended list from which to choose, the user may know the value to be entered into the field and thus find that there is no need to use the lookup, this allows the option to enter data directly into the field by simply clicking on the field, after which the cursor will flicker intermittently indicating the field active, alternately by clicking on the lookup box the list will present itself and the user may make a selection.
System Contents
Screen Menus In order to find screens within the system it is essential to understand the basic layout as well as the sections or groups of screens and their functions respectively, In the section which follows a basic layout is offered as well as the screens and their respective locations within the system. As seen in the System Layout section the inner most section of the Start Centre is the Screen to be displayed, getting to this screen depends on the path followed through the Menus at the top left hand side of the screen, they are as follows:
File This is the first of 3 Menus displayed Within the File Menu there is a drop-list of 4 options dealt with below:
Start Centre When clicking on the Start Centre a blank screen appears with 3 Icons:
Back
Refresh
Personalise
Setup The Setup option has an extension arrow indicating the fact that it contains further options within itself, when clicked on the extension displays a further 6 screen options to select from, Namely:
E-Mails There are 2 screen options contained inside the E-mails option, o Mail Templates o Mail Timers
Surveys There are 2 screen options contained inside the Surveys option, o Survey Templates o Survey Timers
Classes
Functions
Holidays
Reports
System Codes The System Codes option has an extension arrow indicating the fact that it contains further options within itself, when clicked on the extension displays a further 2 screen options to select from, Namely:
Custom Codes
User Codes
Security The Security option has an extension arrow indicating the fact that it contains further options within itself, when clicked on the extension displays a further 2 screen options to select from, Namely:
Install Parameters
Sessions
Operations This is the Second of 3 tabs displayed Within the File Menu there is a drop-list of 5 options dealt with below:
Objects The Setup option has an extension arrow indicating the fact that it contains further options within itself, when clicked on the extension displays a further 5 screen options to select from, Namely:
Objects
Equipment
Locations
Positions
Systems
Call Centre There aren’t any extensions contained within this option, this leads directly to the Call Centre screen
Contact Information There aren’t any extensions contained within this option, this leads directly to the Contact Information screen
Venue Booking The Setup option has an extension arrow indicating the fact that it contains further options within itself, when clicked on the extension displays 1 additional screen options to select from, Namely:
Venue Booking
Work Orders There aren’t any extensions contained within this option, this leads directly to the Work Orders screen
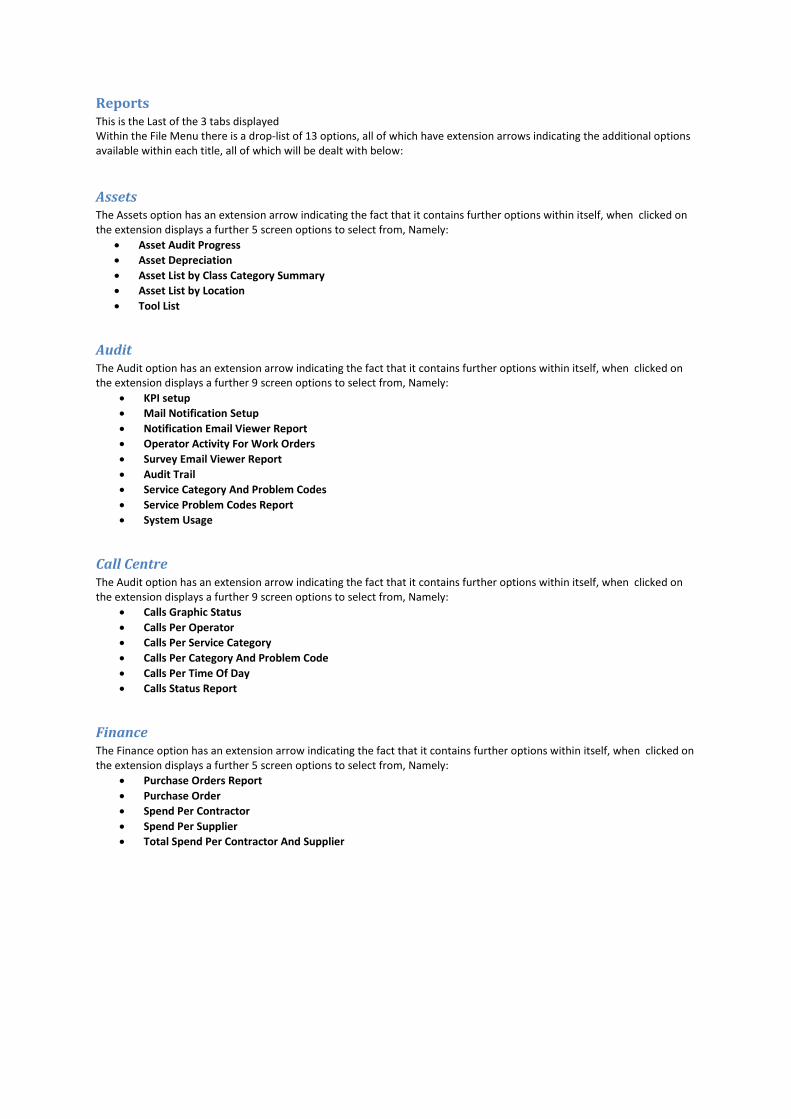
Reports This is the Last of the 3 tabs displayed Within the File Menu there is a drop-list of 13 options, all of which have extension arrows indicating the additional options available within each title, all of which will be dealt with below:
Assets The Assets option has an extension arrow indicating the fact that it contains further options within itself, when clicked on the extension displays a further 5 screen options to select from, Namely:
Asset Audit Progress
Asset Depreciation
Asset List by Class Category Summary
Asset List by Location
Tool List
Audit The Audit option has an extension arrow indicating the fact that it contains further options within itself, when clicked on the extension displays a further 9 screen options to select from, Namely:
KPI setup
Mail Notification Setup
Notification Email Viewer Report
Operator Activity For Work Orders
Survey Email Viewer Report
Audit Trail
Service Category And Problem Codes
Service Problem Codes Report
System Usage
Call Centre The Audit option has an extension arrow indicating the fact that it contains further options within itself, when clicked on the extension displays a further 9 screen options to select from, Namely:
Calls Graphic Status
Calls Per Operator
Calls Per Service Category
Calls Per Category And Problem Code
Calls Per Time Of Day
Calls Status Report
Finance The Finance option has an extension arrow indicating the fact that it contains further options within itself, when clicked on the extension displays a further 5 screen options to select from, Namely:
Purchase Orders Report
Purchase Order
Spend Per Contractor
Spend Per Supplier
Total Spend Per Contractor And Supplier
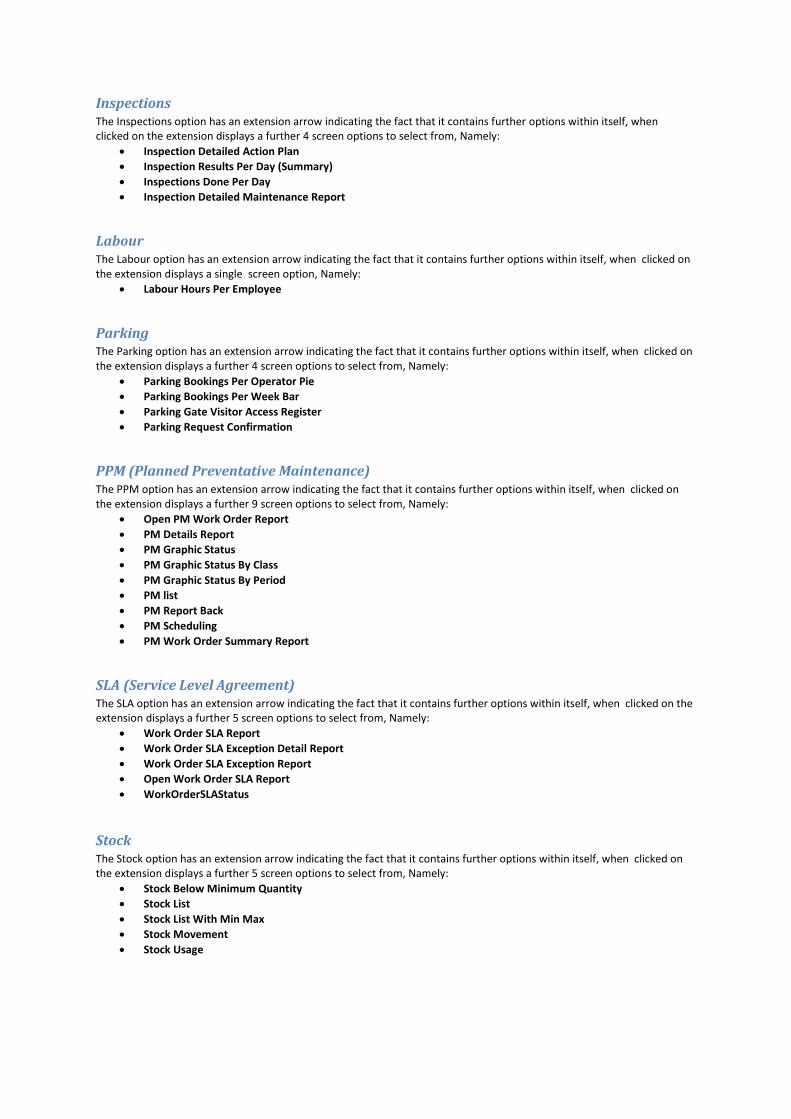
Inspections The Inspections option has an extension arrow indicating the fact that it contains further options within itself, when clicked on the extension displays a further 4 screen options to select from, Namely:
Inspection Detailed Action Plan
Inspection Results Per Day (Summary)
Inspections Done Per Day
Inspection Detailed Maintenance Report
Labour The Labour option has an extension arrow indicating the fact that it contains further options within itself, when clicked on the extension displays a single screen option, Namely:
Labour Hours Per Employee
Parking The Parking option has an extension arrow indicating the fact that it contains further options within itself, when clicked on the extension displays a further 4 screen options to select from, Namely:
Parking Bookings Per Operator Pie
Parking Bookings Per Week Bar
Parking Gate Visitor Access Register
Parking Request Confirmation
PPM (Planned Preventative Maintenance) The PPM option has an extension arrow indicating the fact that it contains further options within itself, when clicked on the extension displays a further 9 screen options to select from, Namely:
Open PM Work Order Report
PM Details Report
PM Graphic Status
PM Graphic Status By Class
PM Graphic Status By Period
PM list
PM Report Back
PM Scheduling
PM Work Order Summary Report
SLA (Service Level Agreement) The SLA option has an extension arrow indicating the fact that it contains further options within itself, when clicked on the extension displays a further 5 screen options to select from, Namely:
Work Order SLA Report
Work Order SLA Exception Detail Report
Work Order SLA Exception Report
Open Work Order SLA Report
WorkOrderSLAStatus
Stock The Stock option has an extension arrow indicating the fact that it contains further options within itself, when clicked on the extension displays a further 5 screen options to select from, Namely:
Stock Below Minimum Quantity
Stock List
Stock List With Min Max
Stock Movement
Stock Usage
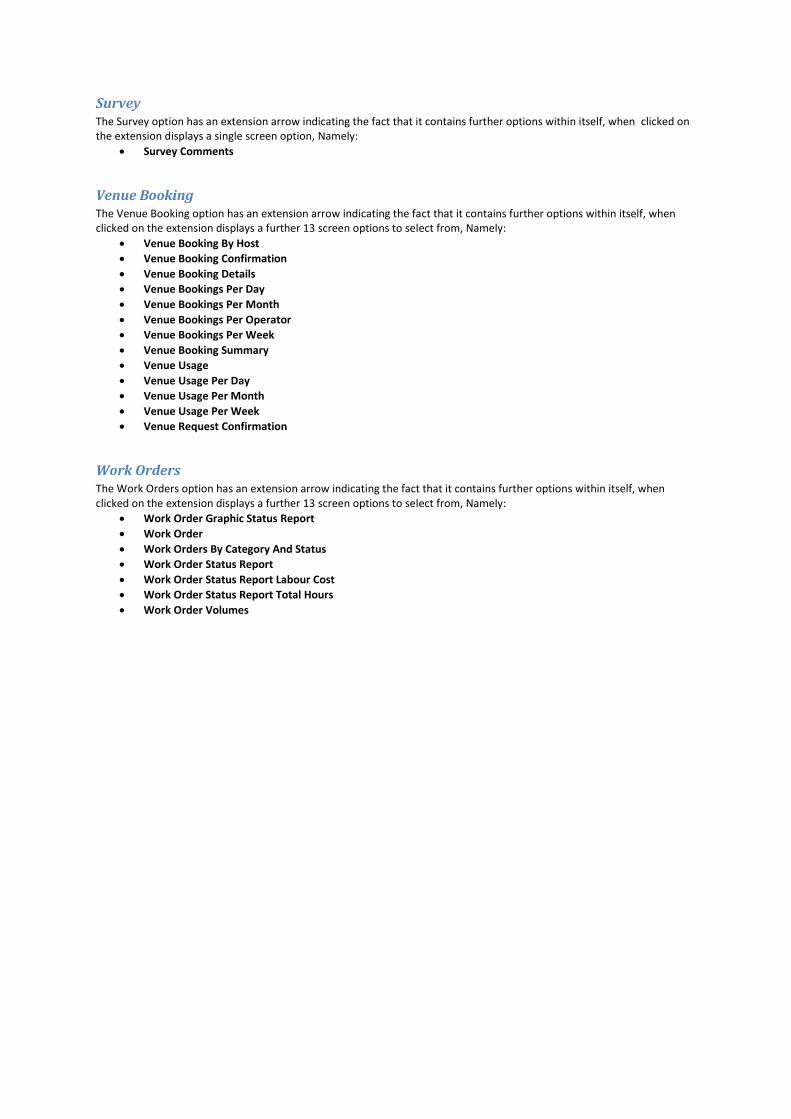
Survey The Survey option has an extension arrow indicating the fact that it contains further options within itself, when clicked on the extension displays a single screen option, Namely:
Survey Comments
Venue Booking The Venue Booking option has an extension arrow indicating the fact that it contains further options within itself, when clicked on the extension displays a further 13 screen options to select from, Namely:
Venue Booking By Host
Venue Booking Confirmation
Venue Booking Details
Venue Bookings Per Day
Venue Bookings Per Month
Venue Bookings Per Operator
Venue Bookings Per Week
Venue Booking Summary
Venue Usage
Venue Usage Per Day
Venue Usage Per Month
Venue Usage Per Week
Venue Request Confirmation
Work Orders The Work Orders option has an extension arrow indicating the fact that it contains further options within itself, when clicked on the extension displays a further 13 screen options to select from, Namely:
Work Order Graphic Status Report
Work Order
Work Orders By Category And Status
Work Order Status Report
Work Order Status Report Labour Cost
Work Order Status Report Total Hours
Work Order Volumes
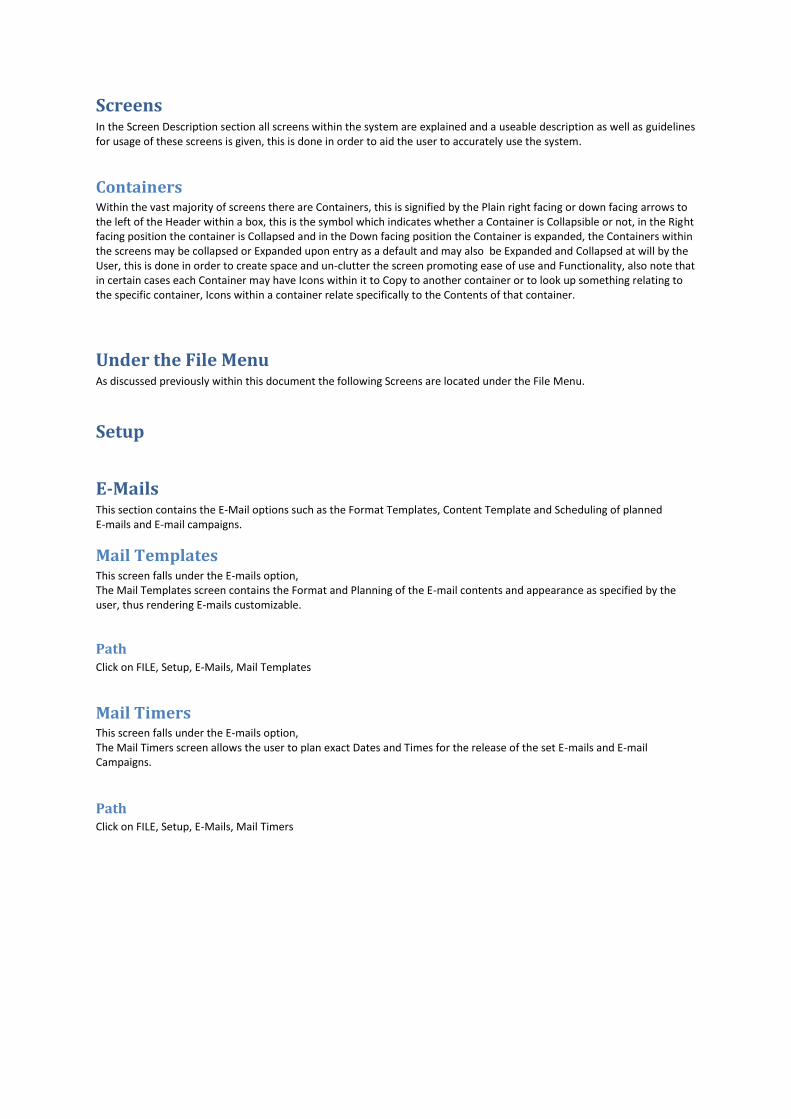
Screens In the Screen Description section all screens within the system are explained and a useable description as well as guidelines for usage of these screens is given, this is done in order to aid the user to accurately use the system.
Containers Within the vast majority of screens there are Containers, this is signified by the Plain right facing or down facing arrows to the left of the Header within a box, this is the symbol which indicates whether a Container is Collapsible or not, in the Right facing position the container is Collapsed and in the Down facing position the Container is expanded, the Containers within the screens may be collapsed or Expanded upon entry as a default and may also be Expanded and Collapsed at will by the User, this is done in order to create space and un-clutter the screen promoting ease of use and Functionality, also note that in certain cases each Container may have Icons within it to Copy to another container or to look up something relating to the specific container, Icons within a container relate specifically to the Contents of that container.
Under the File Menu As discussed previously within this document the following Screens are located under the File Menu.
Setup
E-Mails This section contains the E-Mail options such as the Format Templates, Content Template and Scheduling of planned E-mails and E-mail campaigns.
Mail Templates This screen falls under the E-mails option, The Mail Templates screen contains the Format and Planning of the E-mail contents and appearance as specified by the user, thus rendering E-mails customizable.
Path Click on FILE, Setup, E-Mails, Mail Templates
Mail Timers This screen falls under the E-mails option, The Mail Timers screen allows the user to plan exact Dates and Times for the release of the set E-mails and E-mail Campaigns.
Path Click on FILE, Setup, E-Mails, Mail Timers
Surveys This section contains the Survey options such as the Format Templates, Content Templates including questions and Scheduling of planned Surveys and Survey campaigns.
Survey Templates The Survey Templates screen contains the Format and Planning of the Survey contents and appearance as specified by the user, thus rendering Surveys customizable.
Path Click on FILE, Setup, Surveys, Survey Templates
Survey Timers The Survey Timers screen allows the user to plan exact Dates and Times for the release of the set Surveys and Survey Campaigns.
Path Click on FILE, Setup, Surveys, Survey Timers
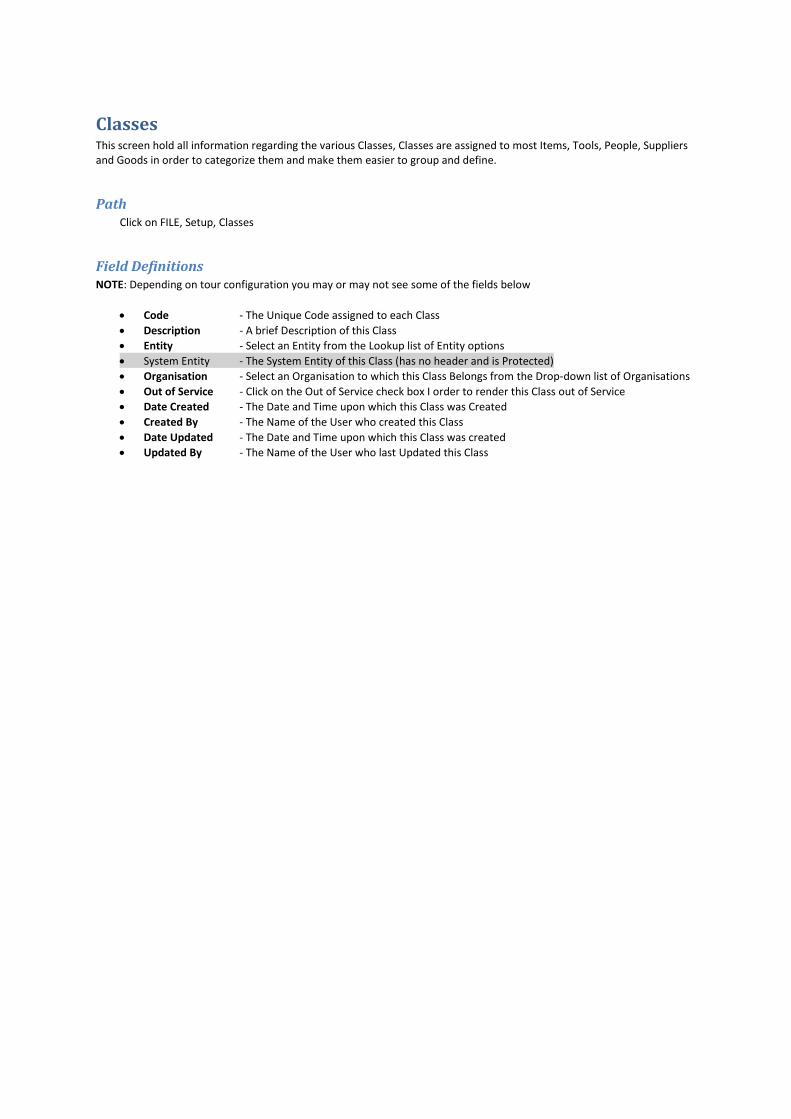
Classes This screen hold all information regarding the various Classes, Classes are assigned to most Items, Tools, People, Suppliers and Goods in order to categorize them and make them easier to group and define.
Path Click on FILE, Setup, Classes
Field Definitions NOTE: Depending on tour configuration you may or may not see some of the fields below
Code - The Unique Code assigned to each Class
Description - A brief Description of this Class
Entity - Select an Entity from the Lookup list of Entity options
System Entity - The System Entity of this Class (has no header and is Protected)
Organisation - Select an Organisation to which this Class Belongs from the Drop-down list of Organisations
Out of Service - Click on the Out of Service check box I order to render this Class out of Service
Date Created - The Date and Time upon which this Class was Created
Created By - The Name of the User who created this Class
Date Updated - The Date and Time upon which this Class was created
Updated By - The Name of the User who last Updated this Class
Creating a Class 1. Open the Classes screen as before. The system displays the List View page 2. Click on the Record View Tab 3. Enter Data into the fields as required with regard to the field attributes as discussed in the ‘Attributes’ section 4. Click Save Record. The system saves the record. 5. A message should display ‘Record inserted successfully’ 6. If there was an Error a an Error message will be displayed with an Error code
Editing an Existing Record 1. Open the Classes screen as before. The system displays the List View page 2. Select an existing record 3. Click the Record View tab 4. The system now displays the Record View page with the Record which was selected 5. By Clicking on the edit icon which is the 3
rd icon above the List view, record View and Comments tabs, the icon
should be an open book 6. Change the relevant Information 7. Once the record has been updated it may be saved by clicking on the save icon 8. A message should display ‘Record updated successfully’ 9. If there was an Error a an Error message will be displayed with an Error code
Deleting a Record through the Record View 1. Open the Classes screen as before. The system displays the List View page 2. Select an existing record 3. Click the Record View tab 4. The system now displays the Record View page with the Record which was selected 5. By Clicking on the Delete icon which is the 5
th icon above the List view, record View and Comments tabs, the icon
should be an X 6. A message should appear asking if you are sure you want to delete this record 7. Click yes 8. A message should display ‘Record Removed Successfully’ 9. If there was an Error a an Error message will be displayed with an Error code
Deleting a Record through the List View 1. Open the Classes screen as before. The system displays the List View page 2. Select an existing record 3. Click on the 5
th icon displaying the X
4. A message should appear asking if you are sure you want to delete this record 5. Click yes 6. A message should display ‘Record Removed Successfully’ 7. If there was an Error a an Error message will be displayed with an Error code
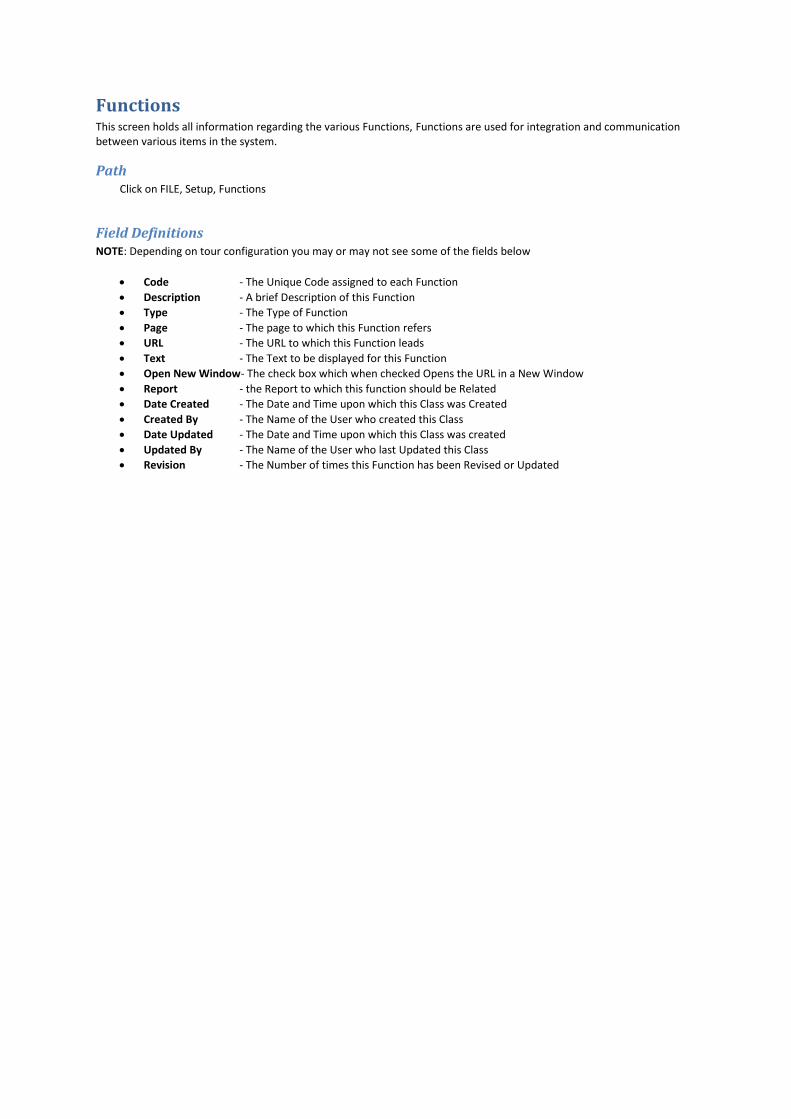
Functions This screen holds all information regarding the various Functions, Functions are used for integration and communication between various items in the system.
Path Click on FILE, Setup, Functions
Field Definitions NOTE: Depending on tour configuration you may or may not see some of the fields below
Code - The Unique Code assigned to each Function
Description - A brief Description of this Function
Type - The Type of Function
Page - The page to which this Function refers
URL - The URL to which this Function leads
Text - The Text to be displayed for this Function
Open New Window- The check box which when checked Opens the URL in a New Window
Report - the Report to which this function should be Related
Date Created - The Date and Time upon which this Class was Created
Created By - The Name of the User who created this Class
Date Updated - The Date and Time upon which this Class was created
Updated By - The Name of the User who last Updated this Class
Revision - The Number of times this Function has been Revised or Updated

Creating a Function 1. Open the Function screen as before. The system displays the List View page 2. Click on the Record View Tab 3. Enter Data into the fields as required with regard to the field attributes as discussed in the ‘Attributes’ section 4. Click Save Record. The system saves the record. 5. A message should display ‘Record inserted successfully’ 6. If there was an Error a an Error message will be displayed with an Error code
Editing an Existing Record 1. Open the Functions screen as before. The system displays the List View page. 2. Select an existing record. 3. Click the Record View tab. 4. The system now displays the Record View page with the Record which was selected. 5. By Clicking on the edit icon which is the 3
rd icon above the List view, record View and Comments tabs, the icon
should be an open book. 6. Change the relevant Information 7. Once the record has been updated it may be saved by clicking on the save icon 8. A message should display ‘Record updated successfully’ 9. If there was an Error a an Error message will be displayed with an Error code
Deleting a Record through the Record View 1. Open the Functions screen as before. The system displays the List View page. 2. Select an existing record. 3. Click the Record View tab. 4. The system now displays the Record View page with the Record which was selected. 5. By Clicking on the Delete icon which is the 5
th icon above the List view, record View and Comments tabs, the icon
should be an X. 6. A message should appear asking if you are sure you want to delete this record, Click yes. 7. Another message should appear stating that the record has been removed successfully
Deleting a Record through the List View 1. Open the Functions screen as before. The system displays the List View page. 2. Select an existing record. 3. Click on the 5
th icon displaying the X.
4. A message should appear asking if you are sure you want to delete this record, Click yes. 5. Another message should appear stating that the record has been removed successfully
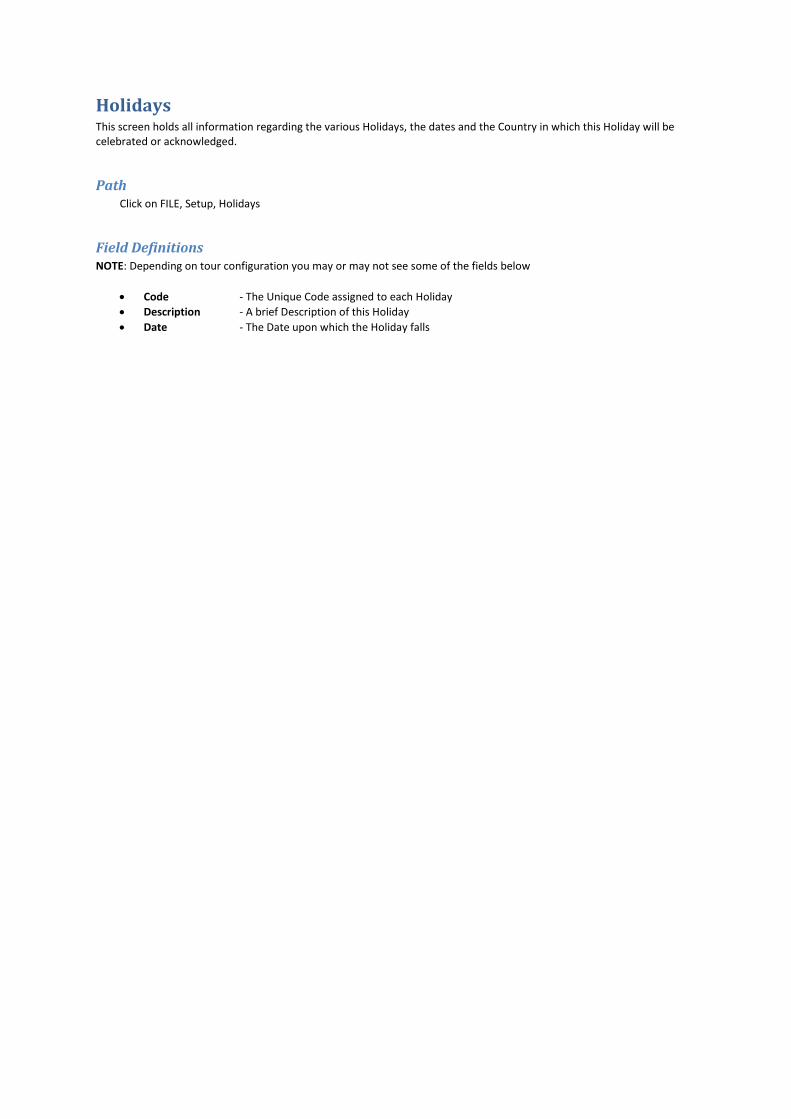
Holidays This screen holds all information regarding the various Holidays, the dates and the Country in which this Holiday will be celebrated or acknowledged.
Path Click on FILE, Setup, Holidays
Field Definitions NOTE: Depending on tour configuration you may or may not see some of the fields below
Code - The Unique Code assigned to each Holiday
Description - A brief Description of this Holiday
Date - The Date upon which the Holiday falls

Creating a Class 1. Open the Holidays screen as before. The system displays the List View page 2. Click on the Record View Tab 3. Enter Data into the fields as required with regard to the field attributes as discussed in the ‘Attributes’ section 4. Click Save Record. The system saves the record. 5. A message should display ‘Record inserted successfully’ 6. If there was an Error a an Error message will be displayed with an Error code
Editing an Existing Record 1. Open the Holidays screen as before. The system displays the List View page 2. Select an existing record. 3. Click the Record View tab. 4. The system now displays the Record View page with the Record which was selected 5. By Clicking on the edit icon which is the 3
rd icon above the List view, record View and Comments tabs, the icon
should be an open book 6. Change the relevant Information 7. Once the record has been updated it may be saved by clicking on the save icon 8. A message should display ‘Record updated successfully’ 9. If there was an Error a an Error message will be displayed with an Error code
Deleting a Record through the Record View 1. Open the Holidays screen as before. The system displays the List View page 2. Select an existing record 3. Click the Record View tab 4. The system now displays the Record View page with the Record which was selected 5. By Clicking on the Delete icon which is the 5
th icon above the List view, record View and Comments tabs, the icon
should be an X 6. A message should appear asking if you are sure you want to delete this record, Click yes 7. Another message should appear stating that the record has been removed successfully
Deleting a Record through the List View 1. Open the Holidays screen as before. The system displays the List View page 2. Select an existing record 3. Click on the 5
th icon displaying the X
4. A message should appear asking if you are sure you want to delete this record, Click yes 5. Another message should appear stating that the record has been removed successfully
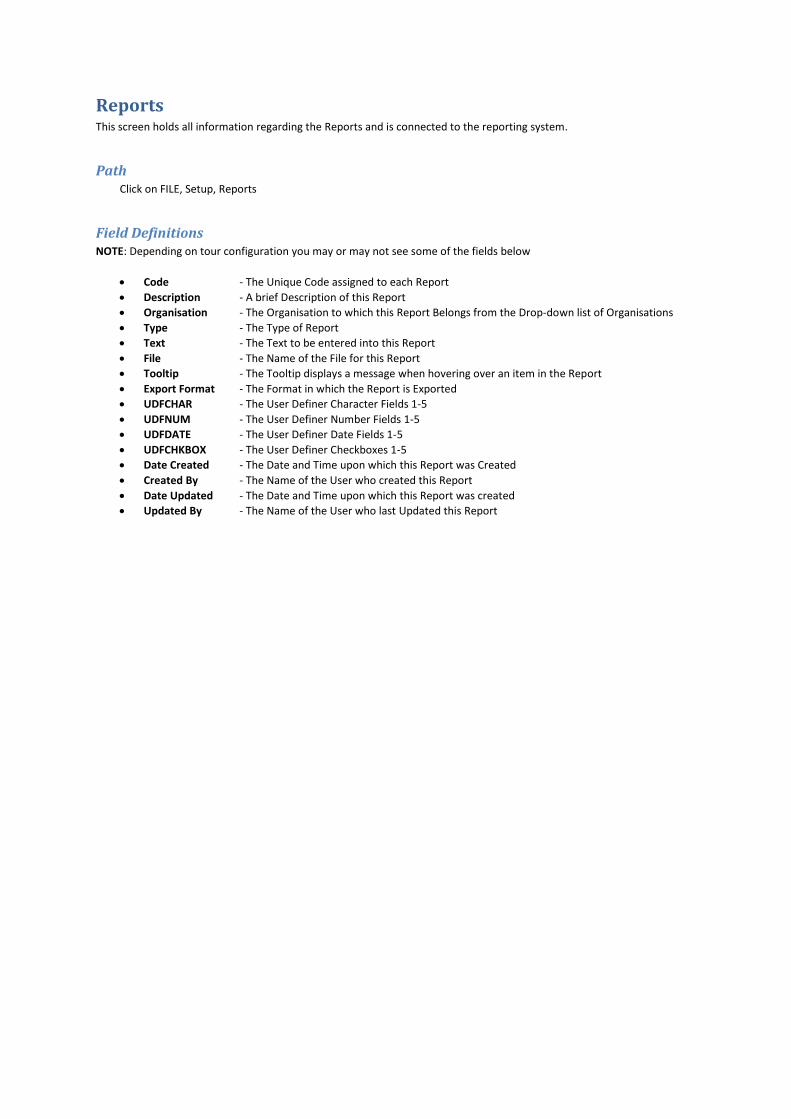
Reports This screen holds all information regarding the Reports and is connected to the reporting system.
Path Click on FILE, Setup, Reports
Field Definitions NOTE: Depending on tour configuration you may or may not see some of the fields below
Code - The Unique Code assigned to each Report
Description - A brief Description of this Report
Organisation - The Organisation to which this Report Belongs from the Drop-down list of Organisations
Type - The Type of Report
Text - The Text to be entered into this Report
File - The Name of the File for this Report
Tooltip - The Tooltip displays a message when hovering over an item in the Report
Export Format - The Format in which the Report is Exported
UDFCHAR - The User Definer Character Fields 1-5
UDFNUM - The User Definer Number Fields 1-5
UDFDATE - The User Definer Date Fields 1-5
UDFCHKBOX - The User Definer Checkboxes 1-5
Date Created - The Date and Time upon which this Report was Created
Created By - The Name of the User who created this Report
Date Updated - The Date and Time upon which this Report was created
Updated By - The Name of the User who last Updated this Report

Creating a Report 1. Open the Reports screen as before. The system displays the List View page 2. Click on the Record View Tab 3. Enter Data into the fields as required with regard to the field attributes as discussed in the ‘Attributes’ section 4. Click Save Record. The system saves the record. 5. A message should display ‘Record inserted successfully’ 6. If there was an Error a an Error message will be displayed with an Error code
Editing an Existing Record 1. Open the Reports screen as before. The system displays the List View page 2. Select an existing record 3. Click the Record View tab 4. The system now displays the Record View page with the Record which was selected 5. By Clicking on the edit icon which is the 3
rd icon above the List view, record View and Comments tabs, the icon
should be an open book 6. Change the relevant Information 7. Once the record has been updated it may be saved by clicking on the save icon 8. A message should display ‘Record updated successfully’ 9. If there was an Error a an Error message will be displayed with an Error code
Deleting a Record through the Record View 1. Open the Reports screen as before. The system displays the List View page 2. Select an existing record 3. Click the Record View tab 4. The system now displays the Record View page with the Record which was selected 5. By Clicking on the Delete icon which is the 5
th icon above the List view, record View and Comments tabs, the icon
should be an X 6. A message should appear asking if you are sure you want to delete this record, Click yes 7. Another message should appear stating that the record has been removed successfully
Deleting a Record through the List View 1. Open the Reports screen as before. The system displays the List View page 2. Select an existing record 3. Click on the 5
th icon displaying the X
4. A message should appear asking if you are sure you want to delete this record, Click yes 5. Another message should appear stating that the record has been removed successfully
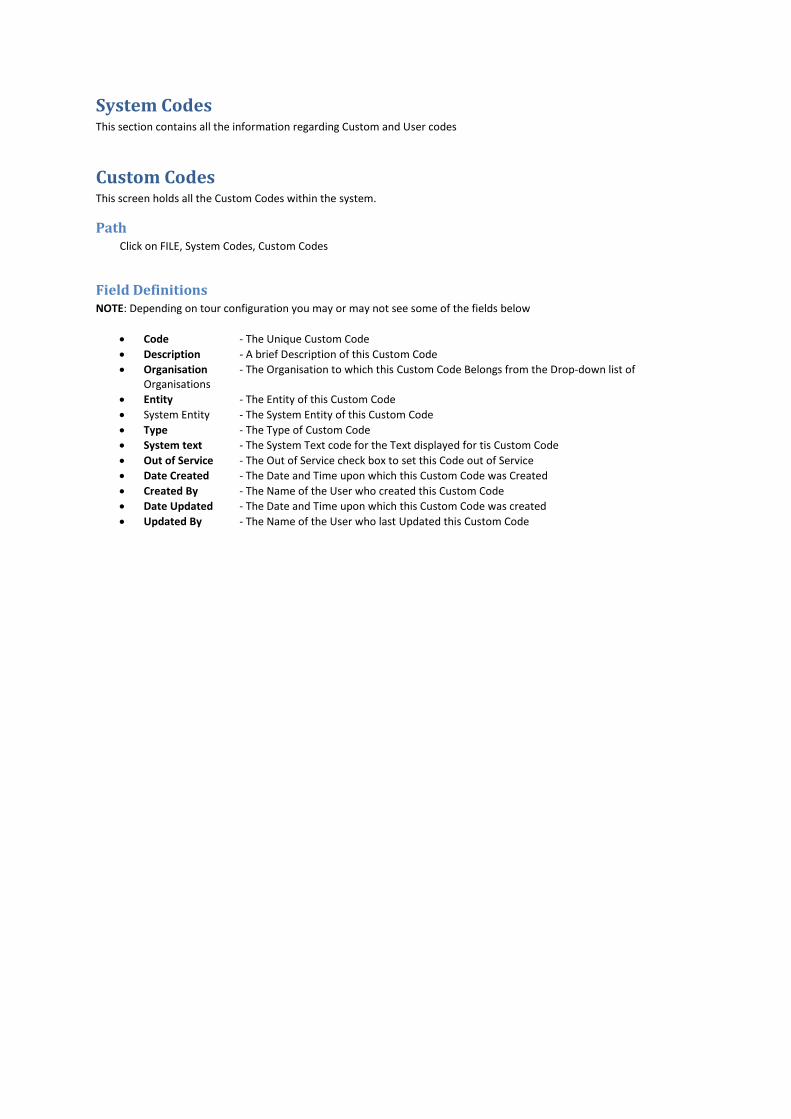
System Codes This section contains all the information regarding Custom and User codes
Custom Codes This screen holds all the Custom Codes within the system.
Path Click on FILE, System Codes, Custom Codes
Field Definitions NOTE: Depending on tour configuration you may or may not see some of the fields below
Code - The Unique Custom Code
Description - A brief Description of this Custom Code
Organisation - The Organisation to which this Custom Code Belongs from the Drop-down list of Organisations
Entity - The Entity of this Custom Code
System Entity - The System Entity of this Custom Code
Type - The Type of Custom Code
System text - The System Text code for the Text displayed for tis Custom Code
Out of Service - The Out of Service check box to set this Code out of Service
Date Created - The Date and Time upon which this Custom Code was Created
Created By - The Name of the User who created this Custom Code
Date Updated - The Date and Time upon which this Custom Code was created
Updated By - The Name of the User who last Updated this Custom Code
Creating a Custom Code 1. Open the Custom Codes screen as before. The system displays the List View page 2. Click on the Record View Tab 3. Enter Data into the fields as required with regard to the field attributes as discussed in the ‘Attributes’ section 4. Click Save Record. The system saves the record. 5. A message should display ‘Record inserted successfully’ 6. If there was an Error a an Error message will be displayed with an Error code
Editing an Existing Custom Code 1. Open the Reports screen as before. The system displays the List View page 2. Select an existing record 3. Click the Record View tab 4. The system now displays the Record View page with the Record which was selected 5. By Clicking on the edit icon which is the 3
rd icon above the List view, record View and Comments tabs, the icon
should be an open book 6. Change the relevant Information 7. Once the record has been updated it may be saved by clicking on the save icon 8. A message should display ‘Record updated successfully’ 9. If there was an Error a an Error message will be displayed with an Error code
Deleting a Custom Code through the Record View 1. Open the Reports screen as before. The system displays the List View page 2. Select an existing record 3. Click the Record View tab 4. The system now displays the Record View page with the Record which was selected 5. By Clicking on the Delete icon which is the 5
th icon above the List view, record View and Comments tabs, the icon
should be an X 6. A message should appear asking if you are sure you want to delete this record, Click yes 7. Another message should appear stating that the record has been removed successfully
Deleting a Custom Code through the List View 1. Open the Reports screen as before. The system displays the List View page 2. Select an existing record 3. Click on the 5
th icon displaying the X
4. A message should appear asking if you are sure you want to delete this record, Click yes 5. Another message should appear stating that the record has been removed successfully
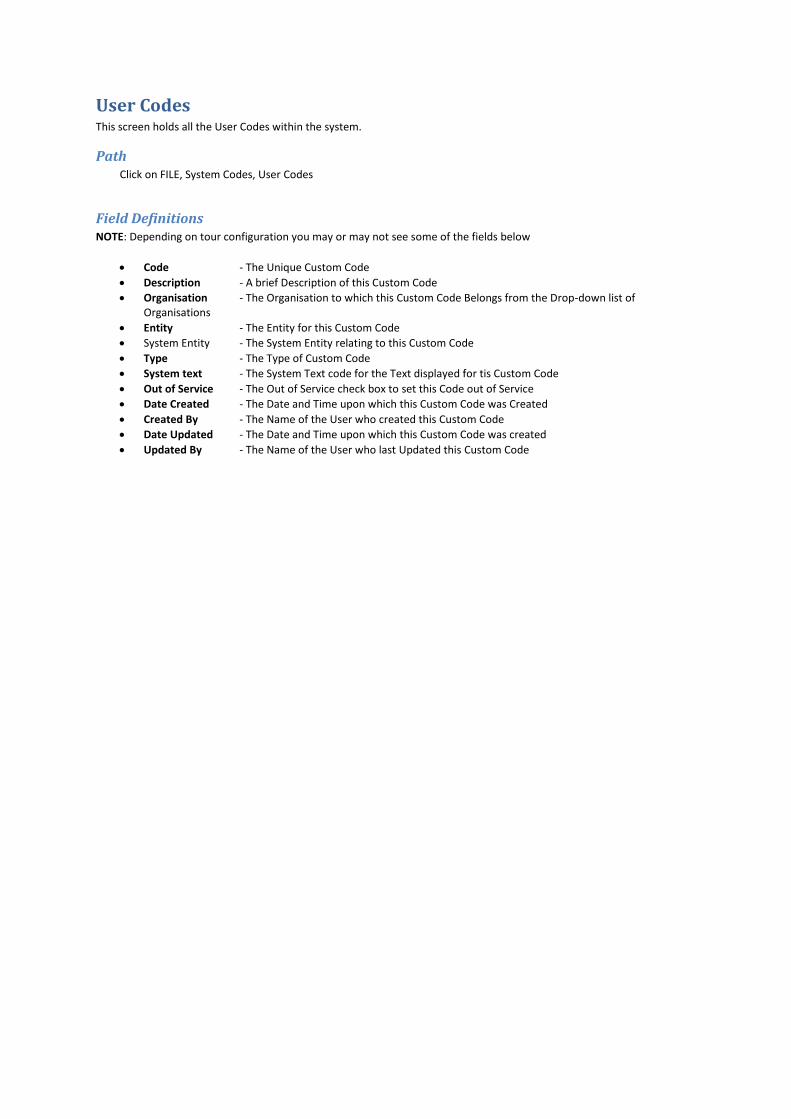
User Codes This screen holds all the User Codes within the system.
Path Click on FILE, System Codes, User Codes
Field Definitions NOTE: Depending on tour configuration you may or may not see some of the fields below
Code - The Unique Custom Code
Description - A brief Description of this Custom Code
Organisation - The Organisation to which this Custom Code Belongs from the Drop-down list of Organisations
Entity - The Entity for this Custom Code
System Entity - The System Entity relating to this Custom Code
Type - The Type of Custom Code
System text - The System Text code for the Text displayed for tis Custom Code
Out of Service - The Out of Service check box to set this Code out of Service
Date Created - The Date and Time upon which this Custom Code was Created
Created By - The Name of the User who created this Custom Code
Date Updated - The Date and Time upon which this Custom Code was created
Updated By - The Name of the User who last Updated this Custom Code

Creating a User Code 1. Open the User Codes screen as before. The system displays the List View page 2. Click on the Record View Tab. 3. Enter Data into the fields as required with regard to the field attributes as discussed in the ‘Attributes’ section 4. Click Save Record. The system saves the record. 5. A message should display ‘Record inserted successfully’ 6. If there was an Error a an Error message will be displayed with an Error code
Editing an Existing User Code 1. Open the User Codes screen as before. The system displays the List View page. 2. Select an existing record. 3. Click the Record View tab. 4. The system now displays the Record View page with the Record which was selected. 5. By Clicking on the edit icon which is the 3
rd icon above the List view, record View and Comments tabs, the icon
should be an open book. 6. Change the relevant Information 7. Once the record has been updated it may be saved by clicking on the save icon 8. A message should display ‘Record updated successfully’ 9. If there was an Error a an Error message will be displayed with an Error code
Deleting a User Code through the Record View 1. Open the User Codes screen as before. The system displays the List View page. 2. Select an existing record. 3. Click the Record View tab. 4. The system now displays the Record View page with the Record which was selected. 5. By Clicking on the Delete icon which is the 5
th icon above the List view, record View and Comments tabs, the icon
should be an X. 6. A message should appear asking if you are sure you want to delete this record, Click yes. 7. Another message should appear stating that the record has been removed successfully
Deleting a Custom Code through the List View 1. Open the User Codes screen as before. The system displays the List View page. 2. Select an existing record. 3. Click on the 5
th icon displaying the X.
4. A message should appear asking if you are sure you want to delete this record, Click yes. 5. Another message should appear stating that the record has been removed successfully
Security
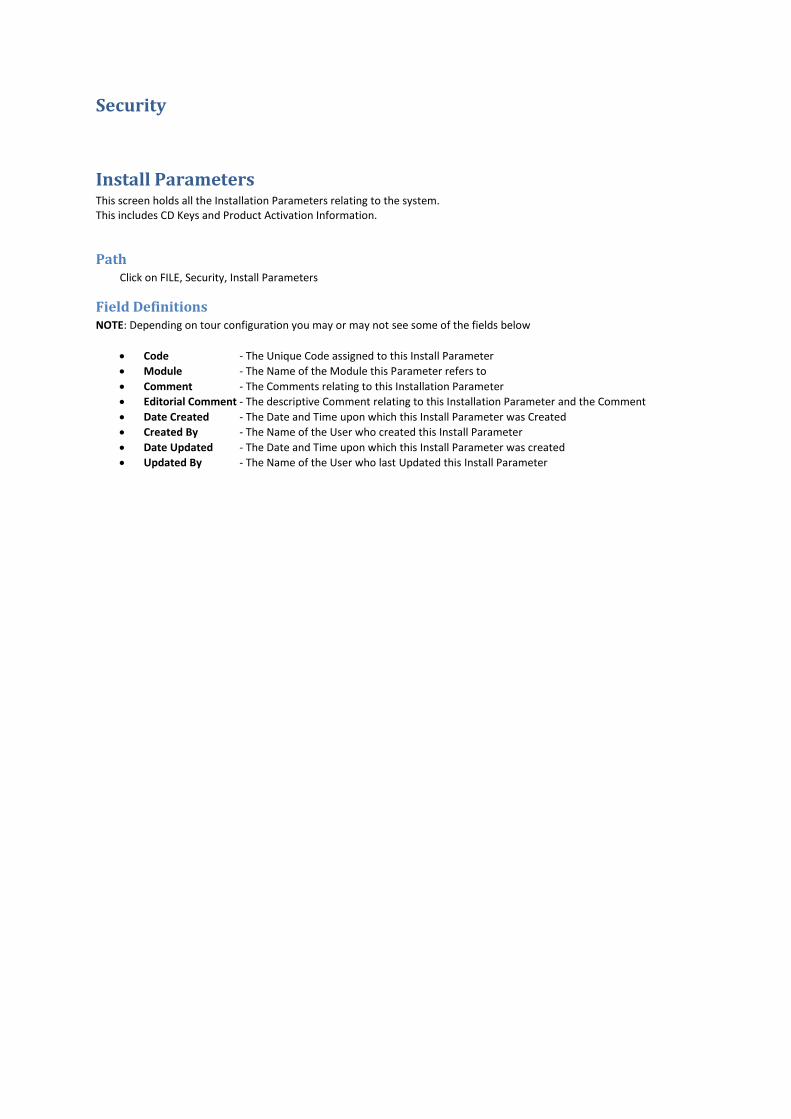
Install Parameters This screen holds all the Installation Parameters relating to the system. This includes CD Keys and Product Activation Information.
Path Click on FILE, Security, Install Parameters
Field Definitions NOTE: Depending on tour configuration you may or may not see some of the fields below
Code - The Unique Code assigned to this Install Parameter
Module - The Name of the Module this Parameter refers to
Comment - The Comments relating to this Installation Parameter
Editorial Comment - The descriptive Comment relating to this Installation Parameter and the Comment
Date Created - The Date and Time upon which this Install Parameter was Created
Created By - The Name of the User who created this Install Parameter
Date Updated - The Date and Time upon which this Install Parameter was created
Updated By - The Name of the User who last Updated this Install Parameter
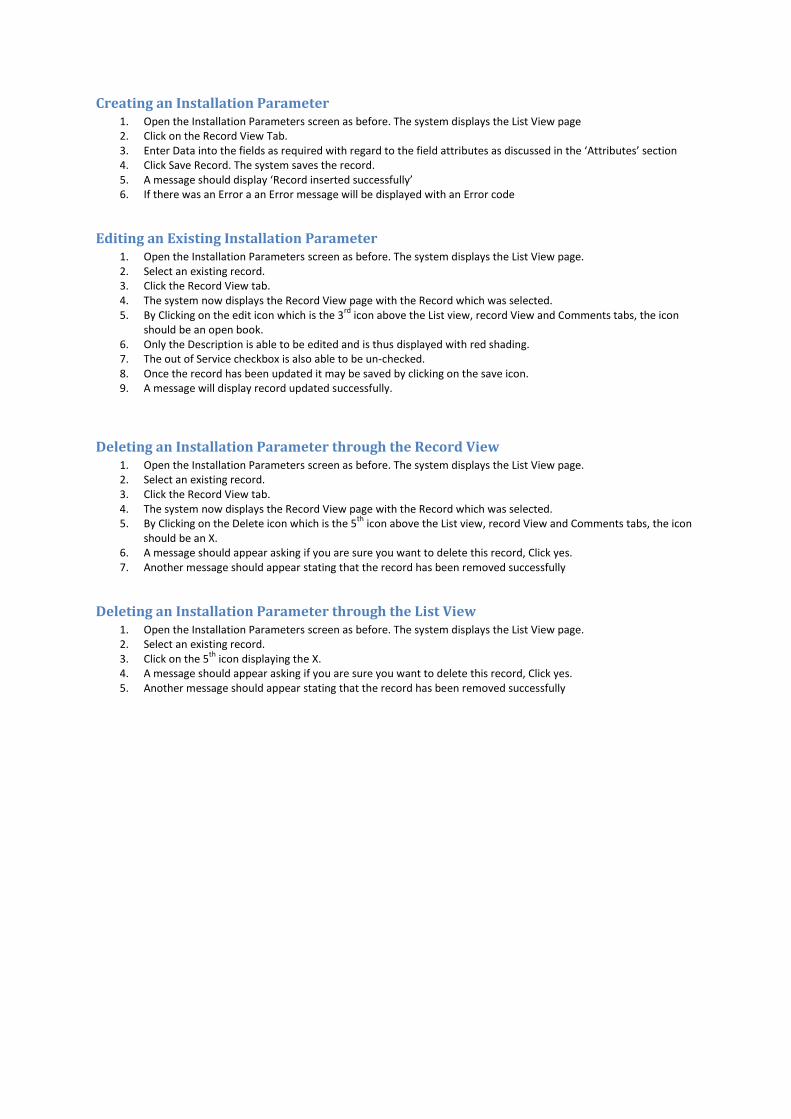
Creating an Installation Parameter 1. Open the Installation Parameters screen as before. The system displays the List View page 2. Click on the Record View Tab. 3. Enter Data into the fields as required with regard to the field attributes as discussed in the ‘Attributes’ section 4. Click Save Record. The system saves the record. 5. A message should display ‘Record inserted successfully’ 6. If there was an Error a an Error message will be displayed with an Error code
Editing an Existing Installation Parameter 1. Open the Installation Parameters screen as before. The system displays the List View page. 2. Select an existing record. 3. Click the Record View tab. 4. The system now displays the Record View page with the Record which was selected. 5. By Clicking on the edit icon which is the 3
rd icon above the List view, record View and Comments tabs, the icon
should be an open book. 6. Only the Description is able to be edited and is thus displayed with red shading. 7. The out of Service checkbox is also able to be un-checked. 8. Once the record has been updated it may be saved by clicking on the save icon. 9. A message will display record updated successfully.
Deleting an Installation Parameter through the Record View 1. Open the Installation Parameters screen as before. The system displays the List View page. 2. Select an existing record. 3. Click the Record View tab. 4. The system now displays the Record View page with the Record which was selected. 5. By Clicking on the Delete icon which is the 5
th icon above the List view, record View and Comments tabs, the icon
should be an X. 6. A message should appear asking if you are sure you want to delete this record, Click yes. 7. Another message should appear stating that the record has been removed successfully
Deleting an Installation Parameter through the List View 1. Open the Installation Parameters screen as before. The system displays the List View page. 2. Select an existing record. 3. Click on the 5
th icon displaying the X.
4. A message should appear asking if you are sure you want to delete this record, Click yes. 5. Another message should appear stating that the record has been removed successfully
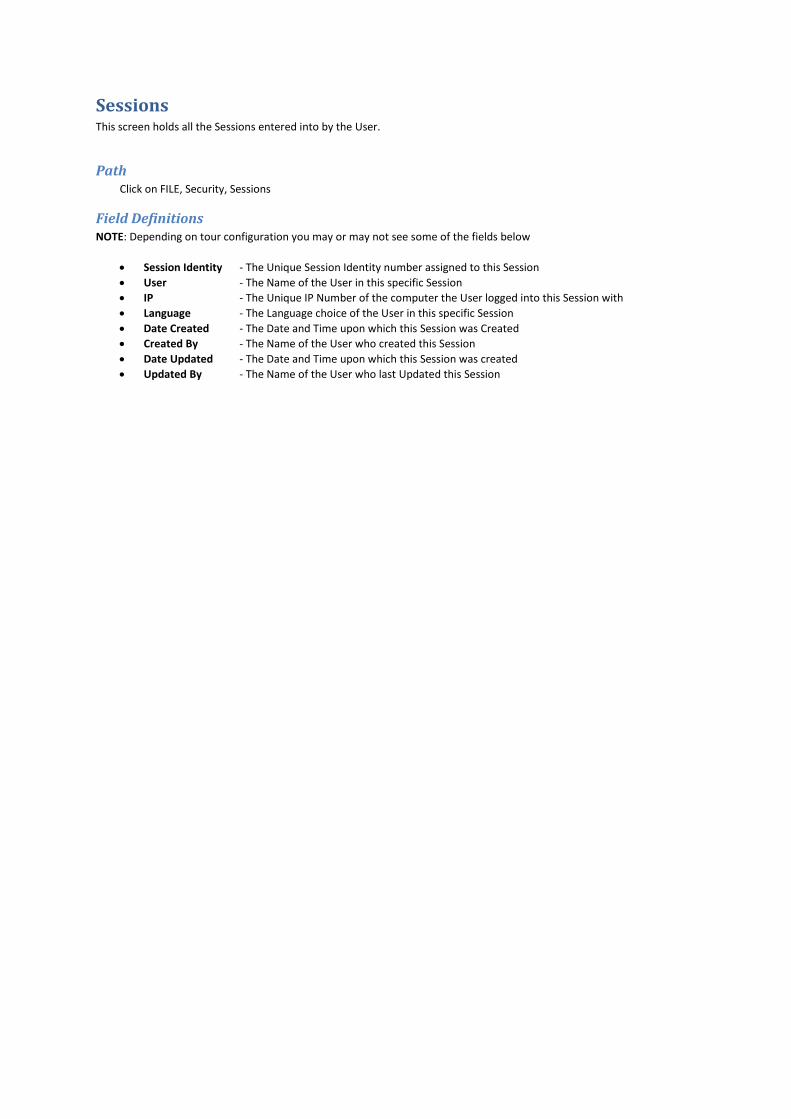
Sessions This screen holds all the Sessions entered into by the User.
Path Click on FILE, Security, Sessions
Field Definitions NOTE: Depending on tour configuration you may or may not see some of the fields below
Session Identity - The Unique Session Identity number assigned to this Session
User - The Name of the User in this specific Session
IP - The Unique IP Number of the computer the User logged into this Session with
Language - The Language choice of the User in this specific Session
Date Created - The Date and Time upon which this Session was Created
Created By - The Name of the User who created this Session
Date Updated - The Date and Time upon which this Session was created
Updated By - The Name of the User who last Updated this Session

Creating a Session Session information is automatically created by the system every time any User creates a session by logging into the system for any reason or for any amount of time.
Editing an Existing Session Sessions are User specific and should thus not be altered Edited or Changed.
Deleting an Session through the Record View 1. Open the Sessions screen as before. The system displays the List View page. 2. Select an existing record. 3. Click the Record View tab. 4. The system now displays the Record View page with the Record which was selected. 5. By Clicking on the Delete icon which is the 5
th icon above the List view, record View and Comments tabs, the icon
should be an X. 6. A message should appear asking if you are sure you want to delete this record, Click yes. 7. Another message should appear stating that the record has been removed successfully
Deleting an Session through the List View 1. Open the Sessions screen as before. The system displays the List View page. 2. Select an existing record. 3. Click on the 5
th icon displaying the X.
4. A message should appear asking if you are sure you want to delete this record, Click yes. 5. Another message should appear stating that the record has been removed successfully
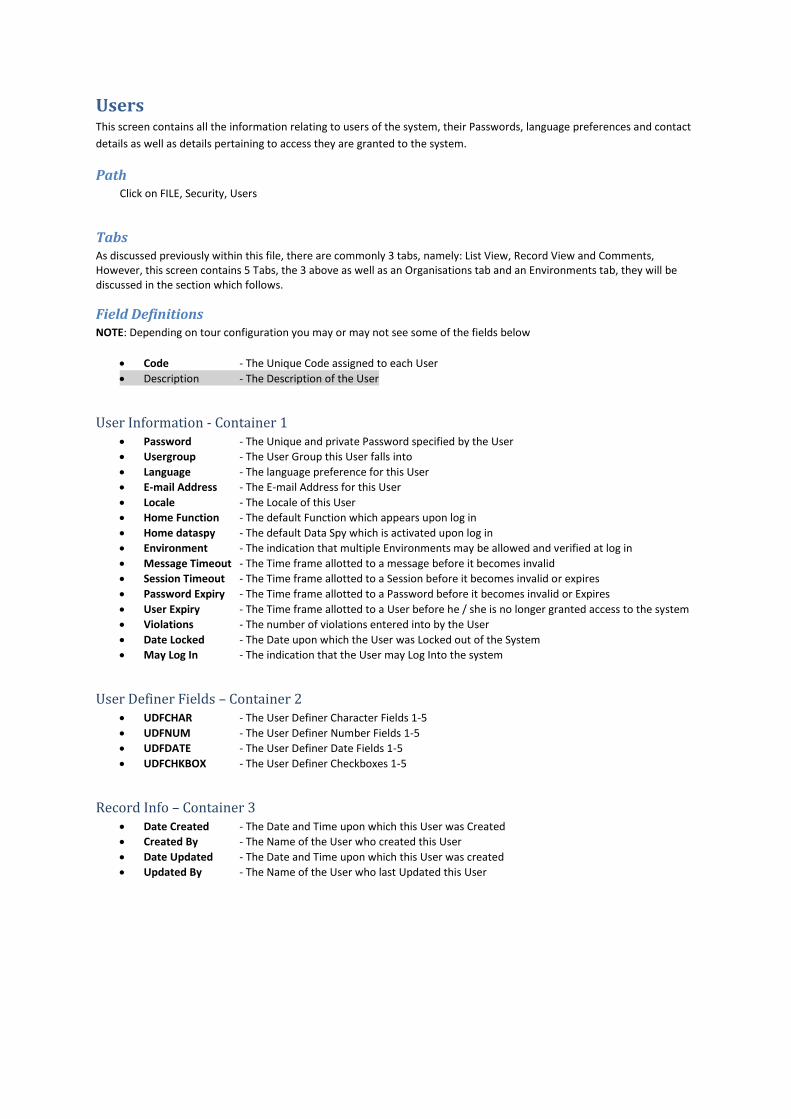
Users This screen contains all the information relating to users of the system, their Passwords, language preferences and contact
details as well as details pertaining to access they are granted to the system.
Path Click on FILE, Security, Users
Tabs As discussed previously within this file, there are commonly 3 tabs, namely: List View, Record View and Comments, However, this screen contains 5 Tabs, the 3 above as well as an Organisations tab and an Environments tab, they will be discussed in the section which follows.
Field Definitions NOTE: Depending on tour configuration you may or may not see some of the fields below
Code - The Unique Code assigned to each User
Description - The Description of the User
User Information - Container 1 Password - The Unique and private Password specified by the User
Usergroup - The User Group this User falls into
Language - The language preference for this User
E-mail Address - The E-mail Address for this User
Locale - The Locale of this User
Home Function - The default Function which appears upon log in
Home dataspy - The default Data Spy which is activated upon log in
Environment - The indication that multiple Environments may be allowed and verified at log in
Message Timeout - The Time frame allotted to a message before it becomes invalid
Session Timeout - The Time frame allotted to a Session before it becomes invalid or expires
Password Expiry - The Time frame allotted to a Password before it becomes invalid or Expires
User Expiry - The Time frame allotted to a User before he / she is no longer granted access to the system
Violations - The number of violations entered into by the User
Date Locked - The Date upon which the User was Locked out of the System
May Log In - The indication that the User may Log Into the system
User Definer Fields – Container 2 UDFCHAR - The User Definer Character Fields 1-5
UDFNUM - The User Definer Number Fields 1-5
UDFDATE - The User Definer Date Fields 1-5
UDFCHKBOX - The User Definer Checkboxes 1-5
Record Info – Container 3 Date Created - The Date and Time upon which this User was Created
Created By - The Name of the User who created this User
Date Updated - The Date and Time upon which this User was created
Updated By - The Name of the User who last Updated this User
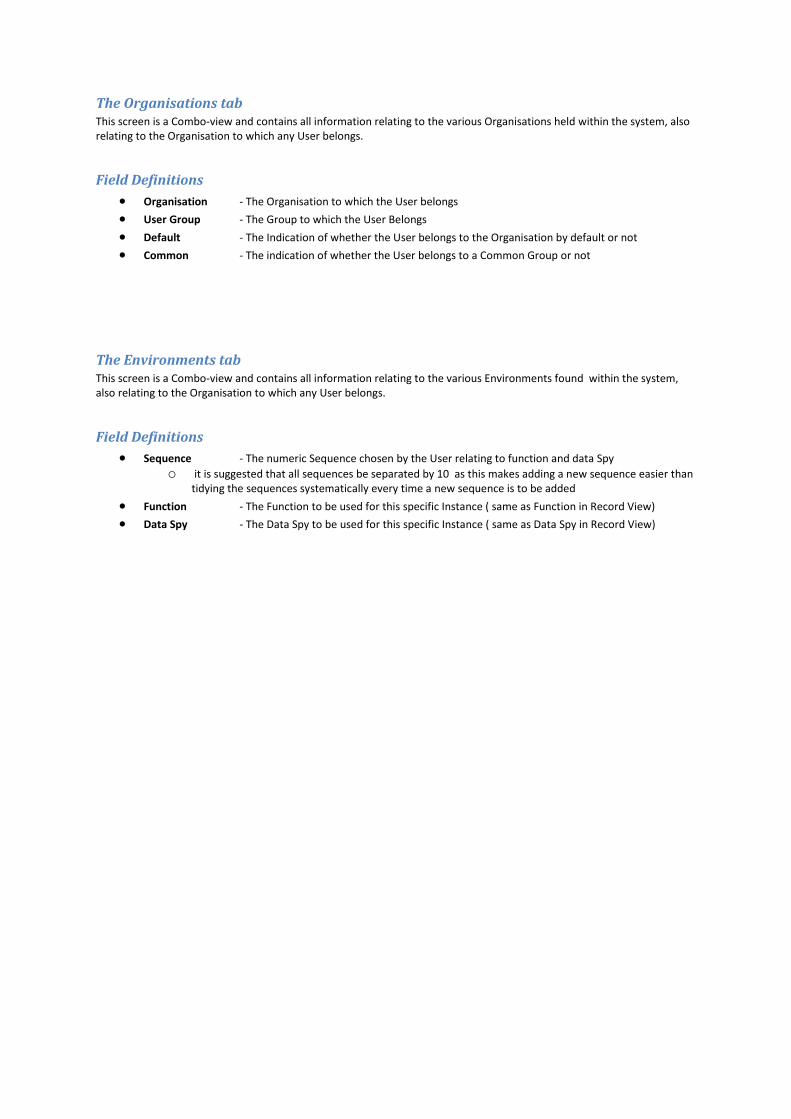
The Organisations tab This screen is a Combo-view and contains all information relating to the various Organisations held within the system, also relating to the Organisation to which any User belongs.
Field Definitions
Organisation - The Organisation to which the User belongs
User Group - The Group to which the User Belongs
Default - The Indication of whether the User belongs to the Organisation by default or not
Common - The indication of whether the User belongs to a Common Group or not
The Environments tab This screen is a Combo-view and contains all information relating to the various Environments found within the system, also relating to the Organisation to which any User belongs.
Field Definitions
Sequence - The numeric Sequence chosen by the User relating to function and data Spy o it is suggested that all sequences be separated by 10 as this makes adding a new sequence easier than
tidying the sequences systematically every time a new sequence is to be added
Function - The Function to be used for this specific Instance ( same as Function in Record View)
Data Spy - The Data Spy to be used for this specific Instance ( same as Data Spy in Record View)
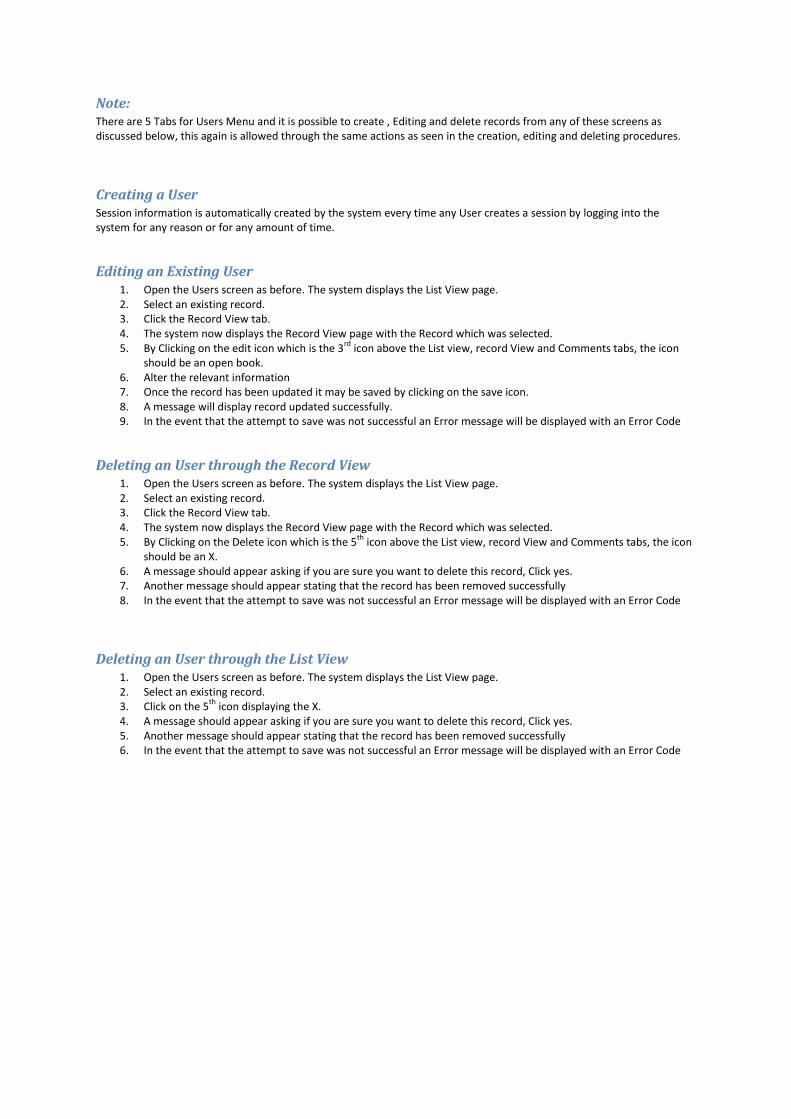
Note: There are 5 Tabs for Users Menu and it is possible to create , Editing and delete records from any of these screens as discussed below, this again is allowed through the same actions as seen in the creation, editing and deleting procedures.
Creating a User Session information is automatically created by the system every time any User creates a session by logging into the system for any reason or for any amount of time.
Editing an Existing User 1. Open the Users screen as before. The system displays the List View page. 2. Select an existing record. 3. Click the Record View tab. 4. The system now displays the Record View page with the Record which was selected. 5. By Clicking on the edit icon which is the 3
rd icon above the List view, record View and Comments tabs, the icon
should be an open book. 6. Alter the relevant information 7. Once the record has been updated it may be saved by clicking on the save icon. 8. A message will display record updated successfully. 9. In the event that the attempt to save was not successful an Error message will be displayed with an Error Code
Deleting an User through the Record View 1. Open the Users screen as before. The system displays the List View page. 2. Select an existing record. 3. Click the Record View tab. 4. The system now displays the Record View page with the Record which was selected. 5. By Clicking on the Delete icon which is the 5
th icon above the List view, record View and Comments tabs, the icon
should be an X. 6. A message should appear asking if you are sure you want to delete this record, Click yes. 7. Another message should appear stating that the record has been removed successfully 8. In the event that the attempt to save was not successful an Error message will be displayed with an Error Code
Deleting an User through the List View 1. Open the Users screen as before. The system displays the List View page. 2. Select an existing record. 3. Click on the 5
th icon displaying the X.
4. A message should appear asking if you are sure you want to delete this record, Click yes. 5. Another message should appear stating that the record has been removed successfully 6. In the event that the attempt to save was not successful an Error message will be displayed with an Error Code
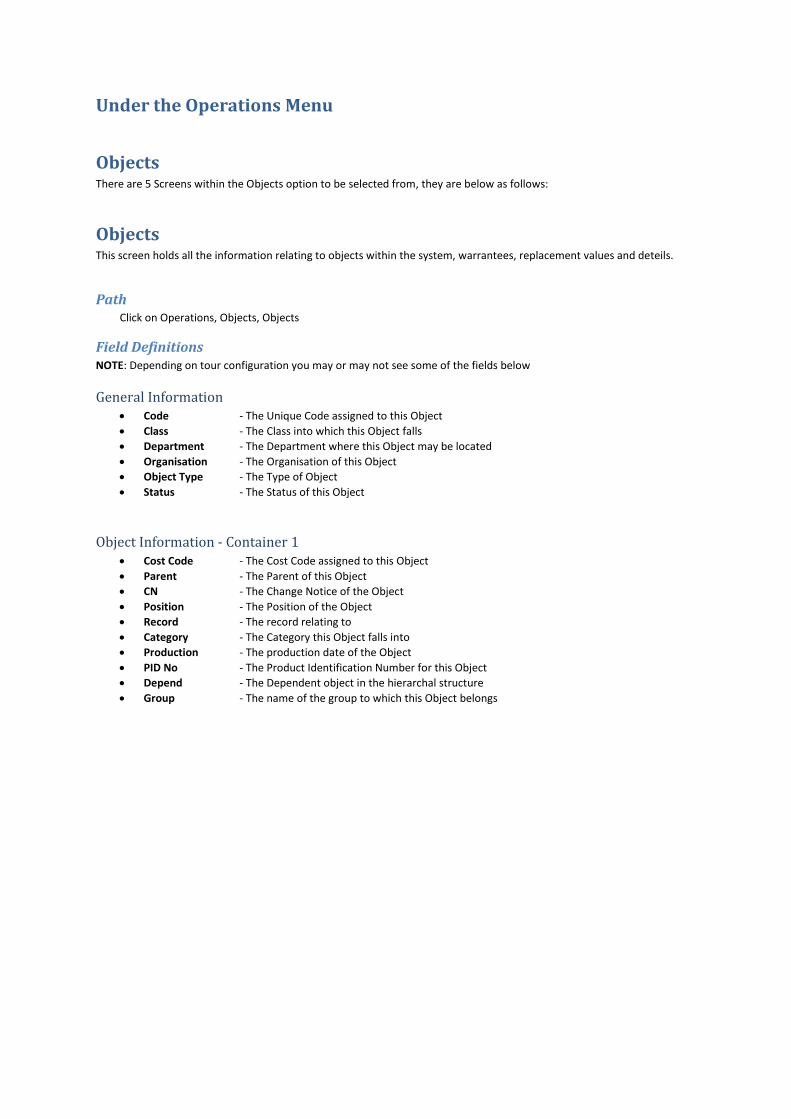
Under the Operations Menu
Objects There are 5 Screens within the Objects option to be selected from, they are below as follows:
Objects This screen holds all the information relating to objects within the system, warrantees, replacement values and deteils.
Path Click on Operations, Objects, Objects
Field Definitions NOTE: Depending on tour configuration you may or may not see some of the fields below
General Information Code - The Unique Code assigned to this Object
Class - The Class into which this Object falls
Department - The Department where this Object may be located
Organisation - The Organisation of this Object
Object Type - The Type of Object
Status - The Status of this Object
Object Information - Container 1 Cost Code - The Cost Code assigned to this Object
Parent - The Parent of this Object
CN - The Change Notice of the Object
Position - The Position of the Object
Record - The record relating to
Category - The Category this Object falls into
Production - The production date of the Object
PID No - The Product Identification Number for this Object
Depend - The Dependent object in the hierarchal structure
Group - The name of the group to which this Object belongs
Production Details - Container 2 Manufactured - The Date upon which this Object was Produced
Serial - The unique Serial Number of this Object
Transfer Date - The Date upon which this Object was Transferred
Process Total from -
Process Range From -
Replacement Value - The Replacement Value of this Object
ACD -
Part - The Part number for this Object
Store - The Store in which this Object is kept
Sold Date - The Date upon which this Object was sold
Process Total To -
Process Range To -
Cost of Needed Repairs - The total Cost of impending Repairs to an Object
Prevent Job Complete – The date
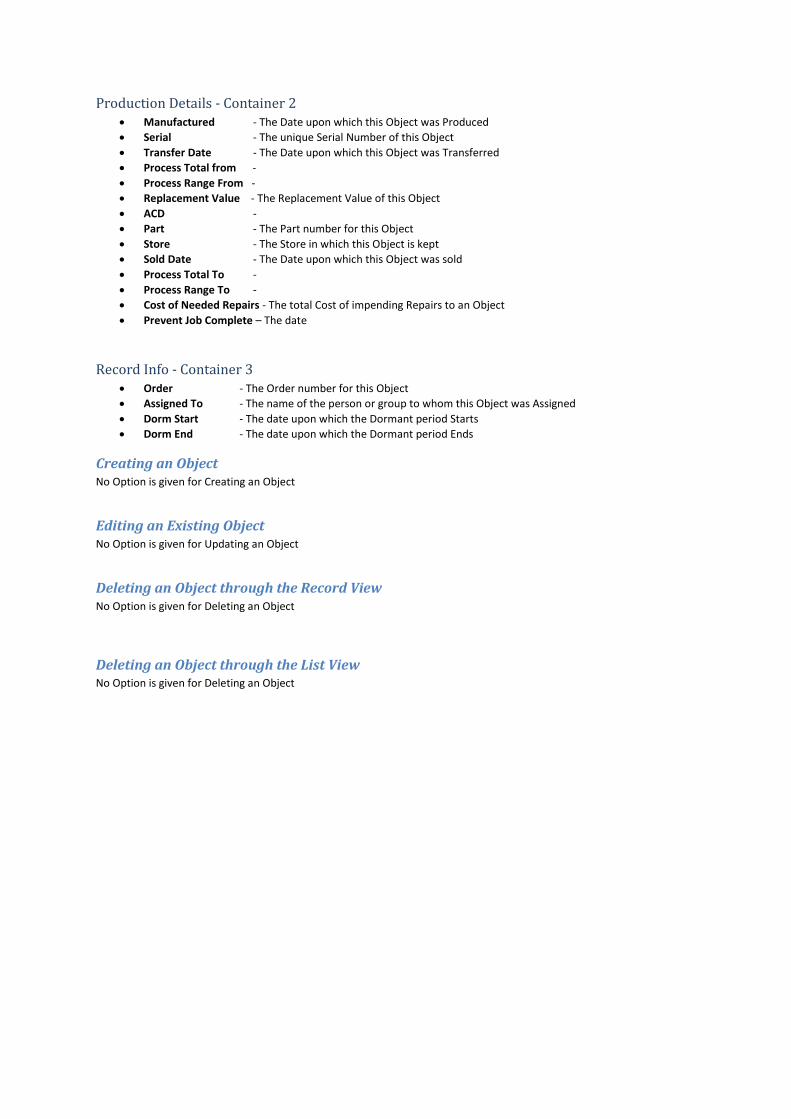
Record Info - Container 3 Order - The Order number for this Object
Assigned To - The name of the person or group to whom this Object was Assigned
Dorm Start - The date upon which the Dormant period Starts
Dorm End - The date upon which the Dormant period Ends
Creating an Object No Option is given for Creating an Object
Editing an Existing Object No Option is given for Updating an Object
Deleting an Object through the Record View No Option is given for Deleting an Object
Deleting an Object through the List View No Option is given for Deleting an Object
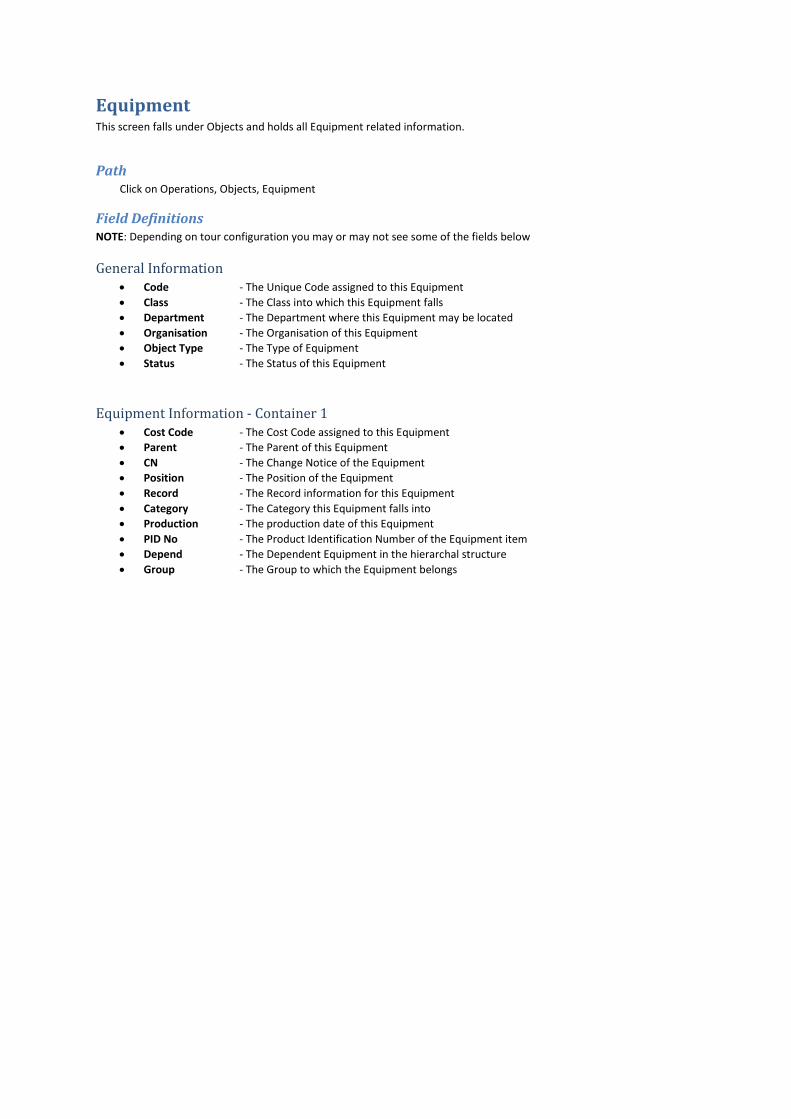
Equipment This screen falls under Objects and holds all Equipment related information.
Path Click on Operations, Objects, Equipment
Field Definitions NOTE: Depending on tour configuration you may or may not see some of the fields below
General Information Code - The Unique Code assigned to this Equipment
Class - The Class into which this Equipment falls
Department - The Department where this Equipment may be located
Organisation - The Organisation of this Equipment
Object Type - The Type of Equipment
Status - The Status of this Equipment
Equipment Information - Container 1 Cost Code - The Cost Code assigned to this Equipment
Parent - The Parent of this Equipment
CN - The Change Notice of the Equipment
Position - The Position of the Equipment
Record - The Record information for this Equipment
Category - The Category this Equipment falls into
Production - The production date of this Equipment
PID No - The Product Identification Number of the Equipment item
Depend - The Dependent Equipment in the hierarchal structure
Group - The Group to which the Equipment belongs
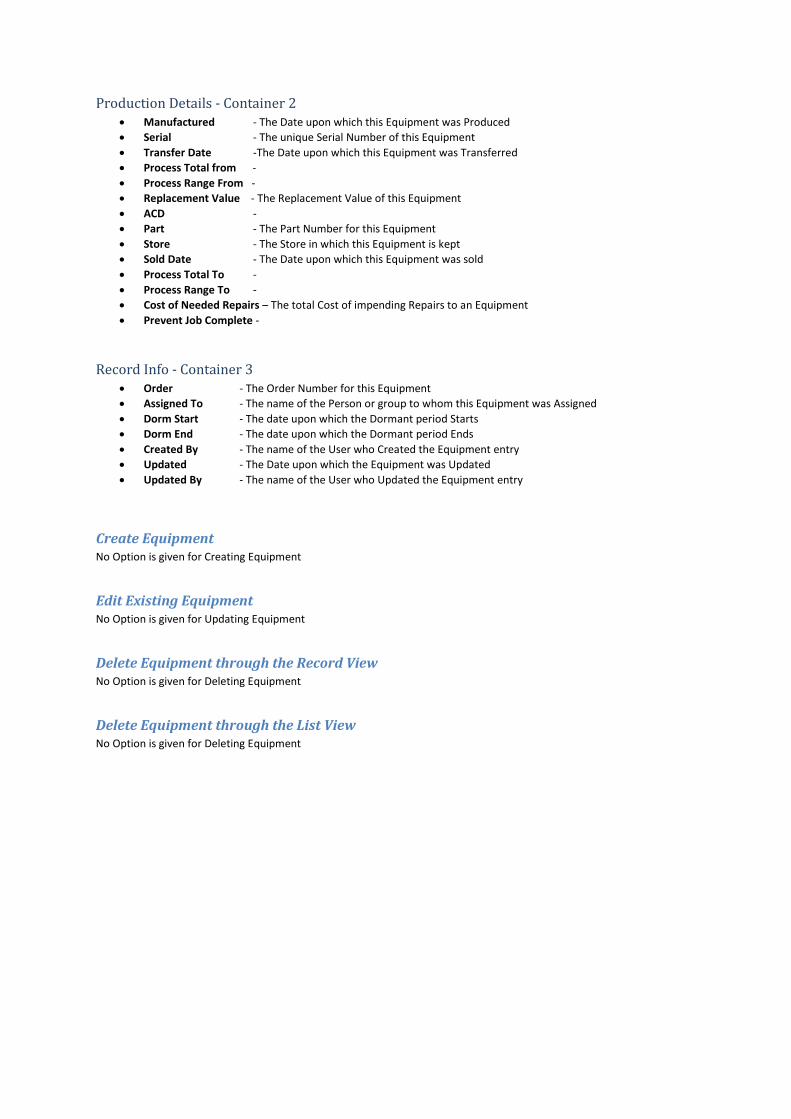
Production Details - Container 2 Manufactured - The Date upon which this Equipment was Produced
Serial - The unique Serial Number of this Equipment
Transfer Date -The Date upon which this Equipment was Transferred
Process Total from -
Process Range From -
Replacement Value - The Replacement Value of this Equipment
ACD -
Part - The Part Number for this Equipment
Store - The Store in which this Equipment is kept
Sold Date - The Date upon which this Equipment was sold
Process Total To -
Process Range To -
Cost of Needed Repairs – The total Cost of impending Repairs to an Equipment
Prevent Job Complete -
Record Info - Container 3 Order - The Order Number for this Equipment
Assigned To - The name of the Person or group to whom this Equipment was Assigned
Dorm Start - The date upon which the Dormant period Starts
Dorm End - The date upon which the Dormant period Ends
Created By - The name of the User who Created the Equipment entry
Updated - The Date upon which the Equipment was Updated
Updated By - The name of the User who Updated the Equipment entry
Create Equipment No Option is given for Creating Equipment
Edit Existing Equipment No Option is given for Updating Equipment
Delete Equipment through the Record View No Option is given for Deleting Equipment
Delete Equipment through the List View No Option is given for Deleting Equipment
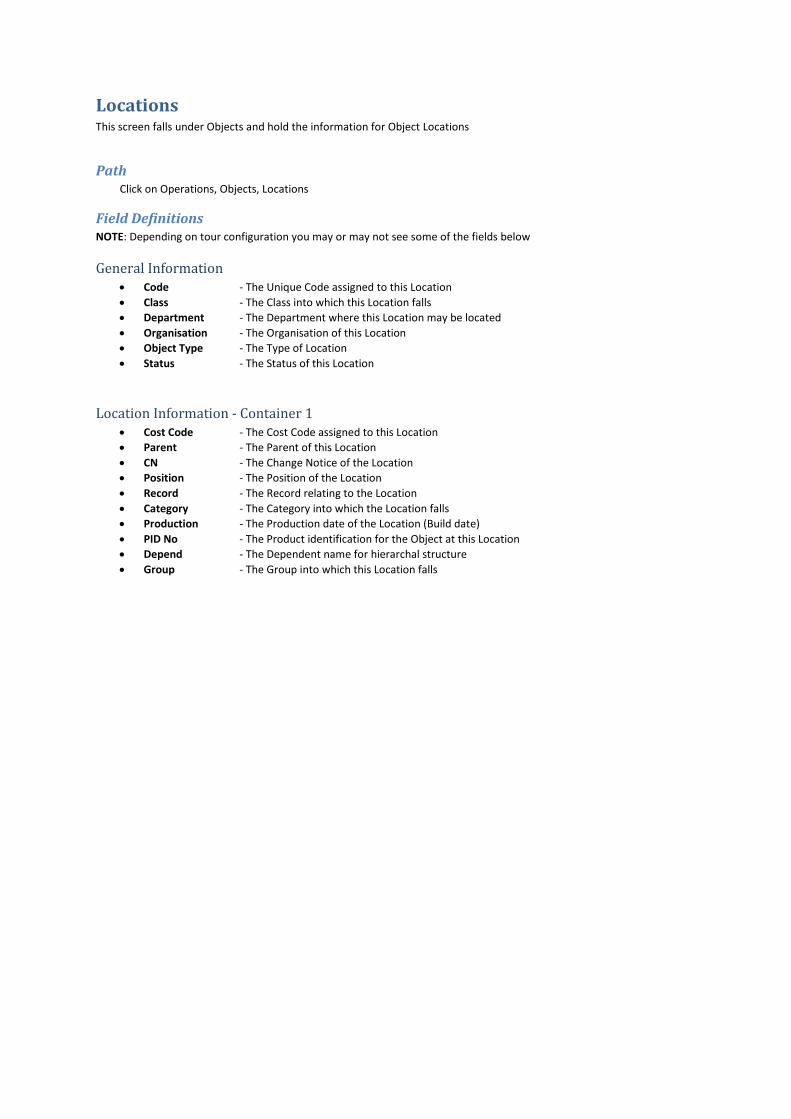
Locations This screen falls under Objects and hold the information for Object Locations
Path Click on Operations, Objects, Locations
Field Definitions NOTE: Depending on tour configuration you may or may not see some of the fields below
General Information Code - The Unique Code assigned to this Location
Class - The Class into which this Location falls
Department - The Department where this Location may be located
Organisation - The Organisation of this Location
Object Type - The Type of Location
Status - The Status of this Location
Location Information - Container 1 Cost Code - The Cost Code assigned to this Location
Parent - The Parent of this Location
CN - The Change Notice of the Location
Position - The Position of the Location
Record - The Record relating to the Location
Category - The Category into which the Location falls
Production - The Production date of the Location (Build date)
PID No - The Product identification for the Object at this Location
Depend - The Dependent name for hierarchal structure
Group - The Group into which this Location falls
Production Details - Container 2 Manufactured - The Date upon which this Object was Produced
Serial - The unique Serial Number of this Object
Transfer Date -The Date upon which this Object was Transferred
Process Total from -
Process Range From -
Replacement Value - The Replacement Value of this Object
ACD -
Part - The Part Number for the object at this Location
Store - The Store in which this Object is kept
Sold Date - The date upon which this Object was Sold
Process Total To -
Process Range To -
Cost of Needed Repairs – The total Cost of impending Repairs to an Object
Prevent Job Complete -
Record Info - Container 3 Order - The Order Number for this Location
Assigned To - The name of the Person or group to whom this Location was Assigned
Dorm Start - The date upon which the Dormant period Starts
Dorm End - The date upon which the Dormant period Ends
Created By - The name of the User who Created the Location entry
Updated - The Date upon which the Location was Updated
Updated By - The name of the User who Updated the Location entry
Creating an Object No Option is given for Creating a Location
Editing an Existing Object No Option is given for Updating a Location
Deleting an Object through the Record View No Option is given for Deleting a Location
Deleting an Object through the List View No Option is given for Deleting a Location
Positions This screen falls under Objects and holds all information for the Object Positions
Path Click on Operations, Objects, Positions
Field Definitions NOTE: Depending on tour configuration you may or may not see some of the fields below
General Information Code - The Unique Code assigned to this Position
Class - The Class into which this Position falls
Department - The Department where this Position may be located
Organisation - The Organisation of this Position
Object Type - The Type of Position
Status - The Status of this Position
Position Information - Container 1 Cost Code - The Cost Code assigned to this Position
Parent - The Parent of this Position
CN - The Change Notice of the Position
Position - The Position of the Position
Record - The Record relating to the Position
Category - The Category into which the Position falls
Production - The Production date of the Position(Build date)
PID No - The Product identification for the Object at this Position
Depend - The Dependent name for hierarchal structure
Group - The Group into which this Position falls

Production Details - Container 2 Manufactured - The Date upon which this Object was Produced
Serial - The unique Serial Number of this Object
Transfer Date -The Date upon which this Object was Transferred
Process Total from -
Process Range From -
Replacement Value - The Replacement Value of this Object
ACD -
Part -The Part number for the Object at this Position
Store - The Store in which this Object is kept
Sold Date - The Date upon which the Object as Sold
Process Total To -
Process Range To -
Cost of Needed Repairs - The total Cost of impending Repairs to an Object
Prevent Job Complete -
Record Info - Container 3 Order - The Order Number for this Location
Assigned To - The name of the Person or group to whom this Location was Assigned
Dorm Start - The date upon which the Dormant period Starts
Dorm End - The date upon which the Dormant period Ends
Created By - The name of the User who Created the Location entry
Updated - The Date upon which the Location was Updated
Updated By - The name of the User who Updated the Location entry
Creating an Object No Option is given for Creating a Position
Editing an Existing Object No Option is given for Updating a Position
Deleting an Object through the Record View No Option is given for Deleting a Position
Deleting an Object through the List View No Option is given for Deleting a Position
Systems This screen falls under Objects and holds all information for Systems relating to the Objects
Path Click on Operations, Objects, Systems
Field Definitions NOTE: Depending on tour configuration you may or may not see some of the fields below
General Information Code - The Unique Code assigned to this System
Class - The Class into which this System falls
Department - The Department where this System may be located
Organisation - The Organisation of this System
Object Type - The Type of System
Status - The Status of this System
System Information - Container 1 Cost Code - The Cost Code assigned to this System
Parent - The Parent of this System
CN - The Change Notice of the System
Position - The Position of the System
Record - The Record relating to the System
Category - The Category into which the System falls
Production - The Production date of the System
PID No - The Product identification for the Object at this System
Depend - The Dependent name for hierarchal structure
Group - The Group into which this System falls
Production Details - Container 2 Manufactured - The Date upon which this Object was Produced
Serial - The unique Serial Number of this Object
Transfer Date -The Date upon which this Object was Transferred
Process Total from -
Process Range From -
Replacement Value - The Replacement Value of this Object
ACD -
Part - The Part Number of the Object in this system
Store - The Store in which this Object is kept
Sold Date - The Date upon which the item was Sold
Process Total To -
Process Range To -
Cost of Needed Repairs – The total Cost of impending Repairs to an Object
Prevent Job Complete -
Record Info - Container 3 Order - The Order number for this record
Assigned To - The Name of the person or group to whom this object or job was Assigned
Dorm Start - The Date upon which the Dormant period Starts
Dorm End - The Date upon which the Dormant period Ends
Creating an Object No Option is given for Creating a System
Editing an Existing Object No Option is given for Updating a System
Deleting an Object through the Record View No Option is given for Deleting a System
Deleting an Object through the List View No Option is given for Deleting a System
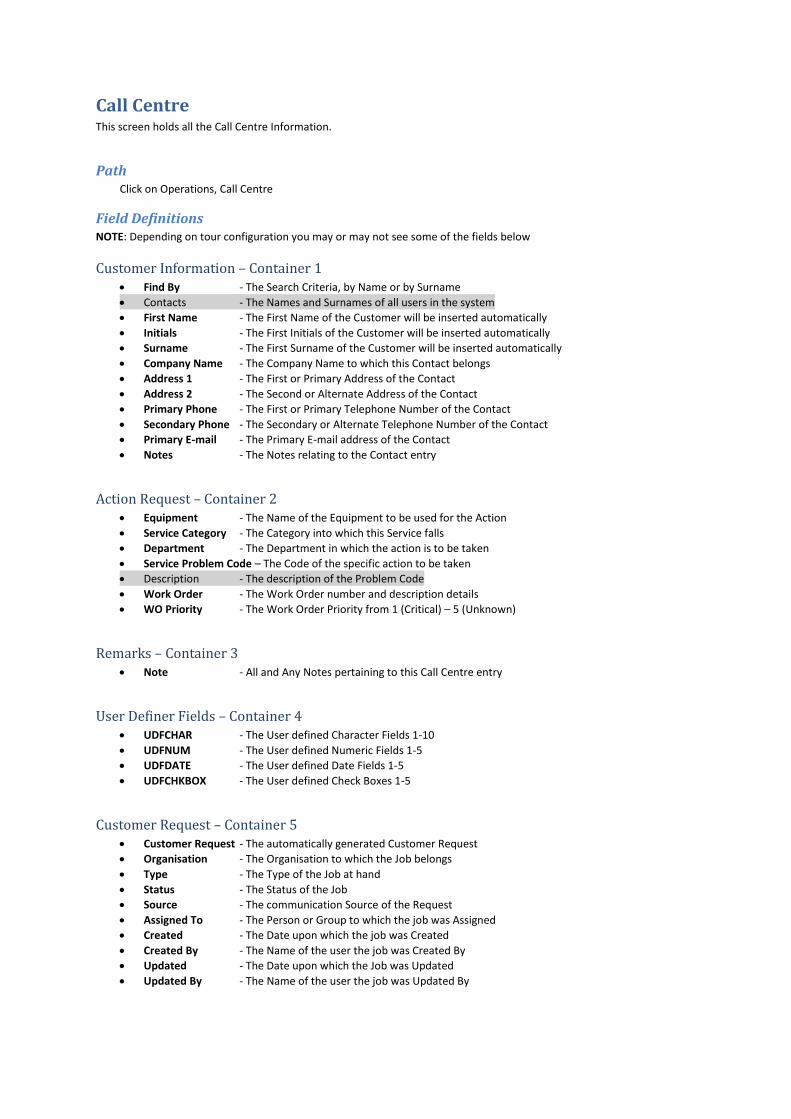
Call Centre This screen holds all the Call Centre Information.
Path Click on Operations, Call Centre
Field Definitions NOTE: Depending on tour configuration you may or may not see some of the fields below
Customer Information – Container 1 Find By - The Search Criteria, by Name or by Surname
Contacts - The Names and Surnames of all users in the system
First Name - The First Name of the Customer will be inserted automatically
Initials - The First Initials of the Customer will be inserted automatically
Surname - The First Surname of the Customer will be inserted automatically
Company Name - The Company Name to which this Contact belongs
Address 1 - The First or Primary Address of the Contact
Address 2 - The Second or Alternate Address of the Contact
Primary Phone - The First or Primary Telephone Number of the Contact
Secondary Phone - The Secondary or Alternate Telephone Number of the Contact
Primary E-mail - The Primary E-mail address of the Contact
Notes - The Notes relating to the Contact entry
Action Request – Container 2 Equipment - The Name of the Equipment to be used for the Action
Service Category - The Category into which this Service falls
Department - The Department in which the action is to be taken
Service Problem Code – The Code of the specific action to be taken
Description - The description of the Problem Code
Work Order - The Work Order number and description details
WO Priority - The Work Order Priority from 1 (Critical) – 5 (Unknown)
Remarks – Container 3 Note - All and Any Notes pertaining to this Call Centre entry
User Definer Fields – Container 4 UDFCHAR - The User defined Character Fields 1-10
UDFNUM - The User defined Numeric Fields 1-5
UDFDATE - The User defined Date Fields 1-5
UDFCHKBOX - The User defined Check Boxes 1-5
Customer Request – Container 5 Customer Request - The automatically generated Customer Request
Organisation - The Organisation to which the Job belongs
Type - The Type of the Job at hand
Status - The Status of the Job
Source - The communication Source of the Request
Assigned To - The Person or Group to which the job was Assigned
Created - The Date upon which the job was Created
Created By - The Name of the user the job was Created By
Updated - The Date upon which the Job was Updated
Updated By - The Name of the user the job was Updated By
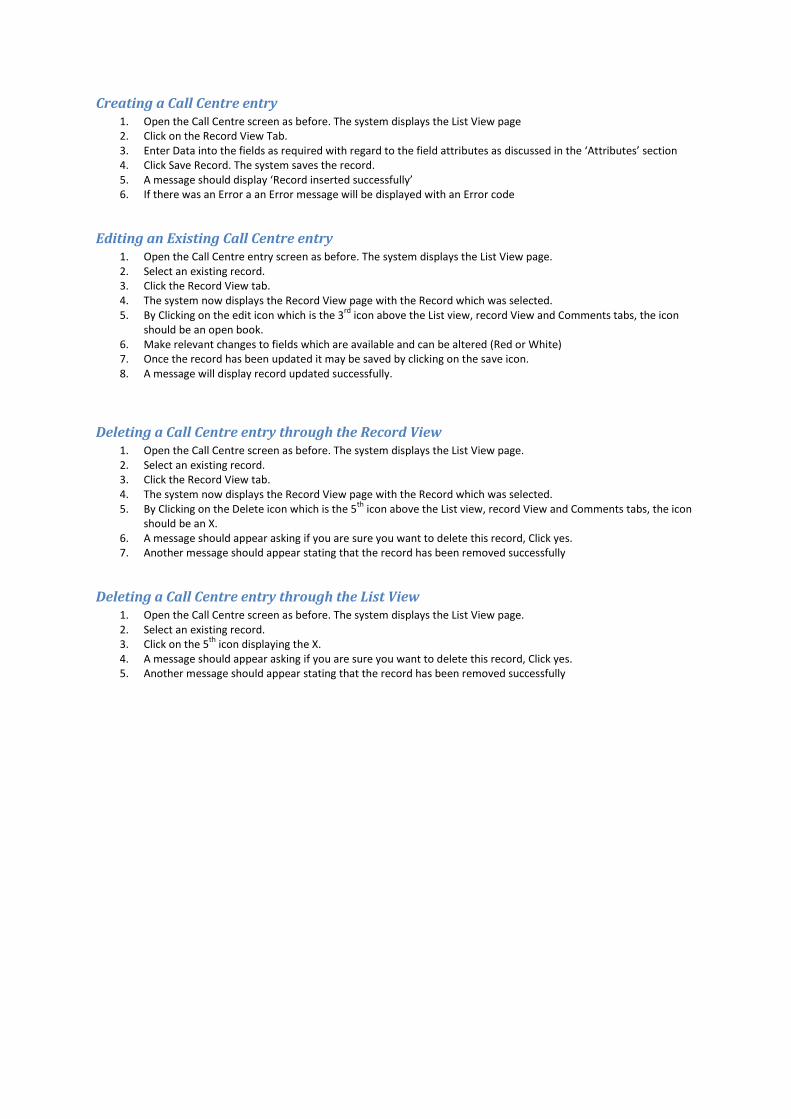
Creating a Call Centre entry 1. Open the Call Centre screen as before. The system displays the List View page 2. Click on the Record View Tab. 3. Enter Data into the fields as required with regard to the field attributes as discussed in the ‘Attributes’ section 4. Click Save Record. The system saves the record. 5. A message should display ‘Record inserted successfully’ 6. If there was an Error a an Error message will be displayed with an Error code
Editing an Existing Call Centre entry 1. Open the Call Centre entry screen as before. The system displays the List View page. 2. Select an existing record. 3. Click the Record View tab. 4. The system now displays the Record View page with the Record which was selected. 5. By Clicking on the edit icon which is the 3
rd icon above the List view, record View and Comments tabs, the icon
should be an open book. 6. Make relevant changes to fields which are available and can be altered (Red or White) 7. Once the record has been updated it may be saved by clicking on the save icon. 8. A message will display record updated successfully.
Deleting a Call Centre entry through the Record View 1. Open the Call Centre screen as before. The system displays the List View page. 2. Select an existing record. 3. Click the Record View tab. 4. The system now displays the Record View page with the Record which was selected. 5. By Clicking on the Delete icon which is the 5
th icon above the List view, record View and Comments tabs, the icon
should be an X. 6. A message should appear asking if you are sure you want to delete this record, Click yes. 7. Another message should appear stating that the record has been removed successfully
Deleting a Call Centre entry through the List View 1. Open the Call Centre screen as before. The system displays the List View page. 2. Select an existing record. 3. Click on the 5
th icon displaying the X.
4. A message should appear asking if you are sure you want to delete this record, Click yes. 5. Another message should appear stating that the record has been removed successfully
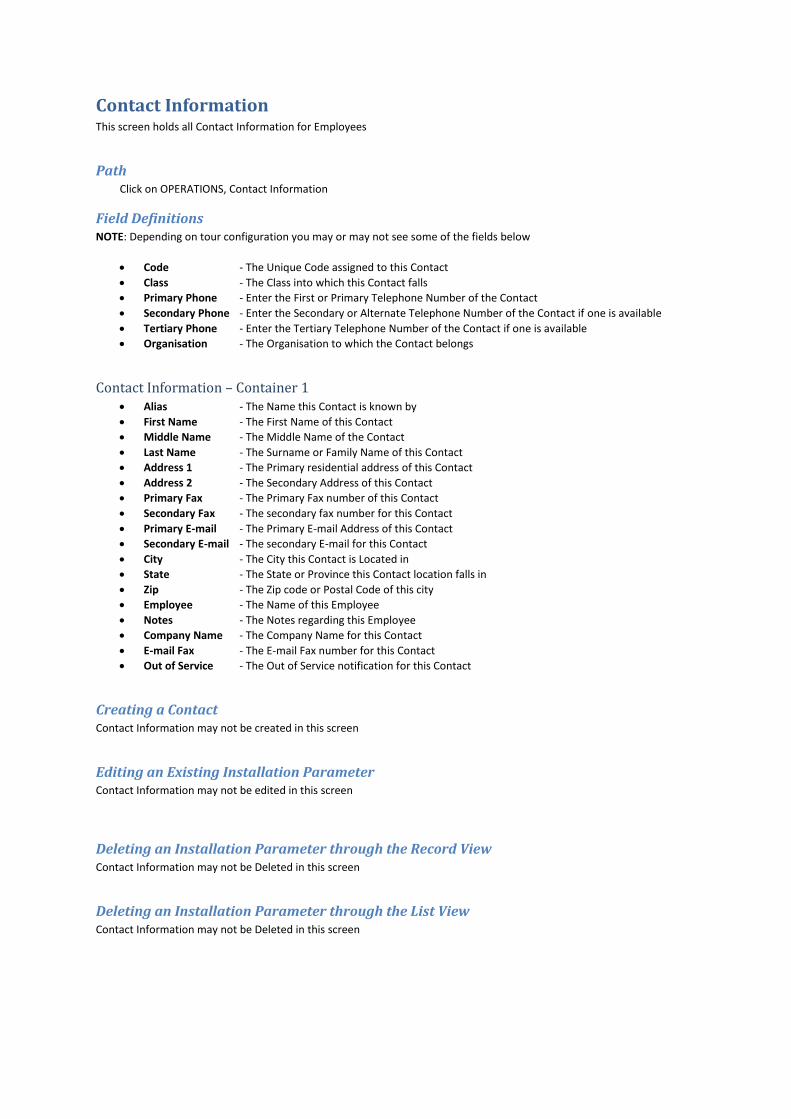
Contact Information This screen holds all Contact Information for Employees
Path Click on OPERATIONS, Contact Information
Field Definitions NOTE: Depending on tour configuration you may or may not see some of the fields below
Code - The Unique Code assigned to this Contact
Class - The Class into which this Contact falls
Primary Phone - Enter the First or Primary Telephone Number of the Contact
Secondary Phone - Enter the Secondary or Alternate Telephone Number of the Contact if one is available
Tertiary Phone - Enter the Tertiary Telephone Number of the Contact if one is available
Organisation - The Organisation to which the Contact belongs
Contact Information – Container 1 Alias - The Name this Contact is known by
First Name - The First Name of this Contact
Middle Name - The Middle Name of the Contact
Last Name - The Surname or Family Name of this Contact
Address 1 - The Primary residential address of this Contact
Address 2 - The Secondary Address of this Contact
Primary Fax - The Primary Fax number of this Contact
Secondary Fax - The secondary fax number for this Contact
Primary E-mail - The Primary E-mail Address of this Contact
Secondary E-mail - The secondary E-mail for this Contact
City - The City this Contact is Located in
State - The State or Province this Contact location falls in
Zip - The Zip code or Postal Code of this city
Employee - The Name of this Employee
Notes - The Notes regarding this Employee
Company Name - The Company Name for this Contact
E-mail Fax - The E-mail Fax number for this Contact
Out of Service - The Out of Service notification for this Contact
Creating a Contact Contact Information may not be created in this screen
Editing an Existing Installation Parameter Contact Information may not be edited in this screen
Deleting an Installation Parameter through the Record View Contact Information may not be Deleted in this screen
Deleting an Installation Parameter through the List View Contact Information may not be Deleted in this screen
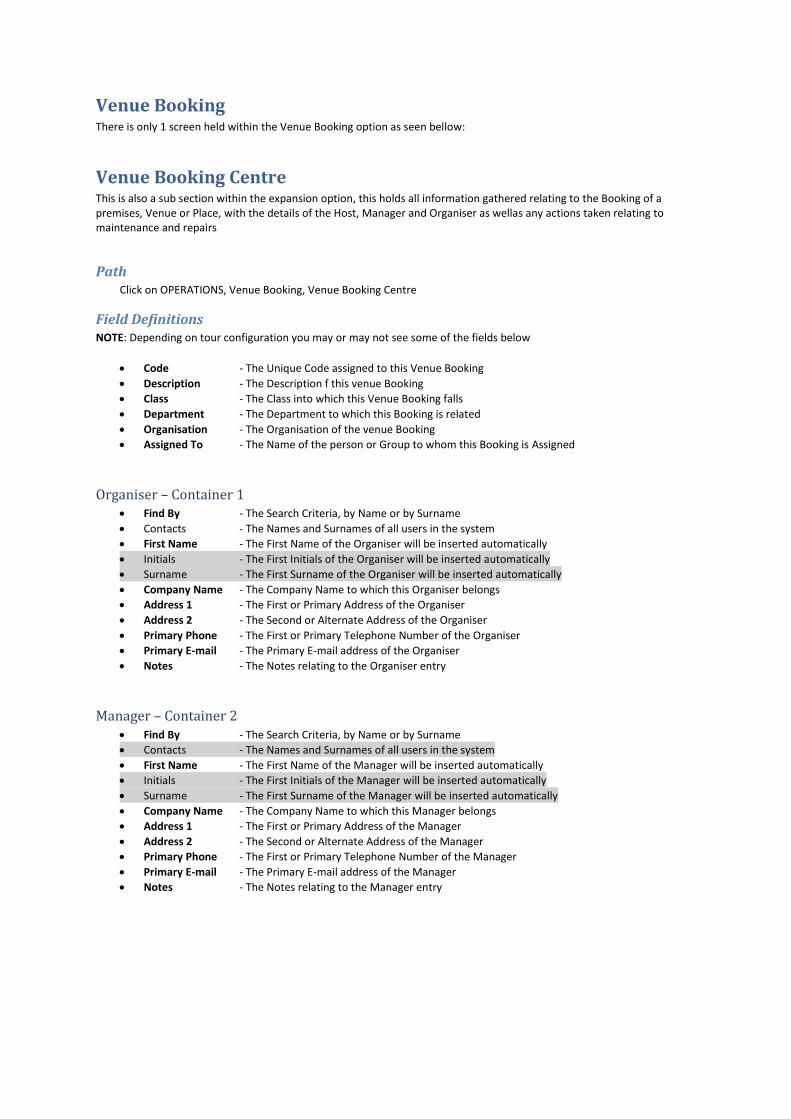
Venue Booking There is only 1 screen held within the Venue Booking option as seen bellow:
Venue Booking Centre This is also a sub section within the expansion option, this holds all information gathered relating to the Booking of a premises, Venue or Place, with the details of the Host, Manager and Organiser as wellas any actions taken relating to maintenance and repairs
Path Click on OPERATIONS, Venue Booking, Venue Booking Centre
Field Definitions NOTE: Depending on tour configuration you may or may not see some of the fields below
Code - The Unique Code assigned to this Venue Booking
Description - The Description f this venue Booking
Class - The Class into which this Venue Booking falls
Department - The Department to which this Booking is related
Organisation - The Organisation of the venue Booking
Assigned To - The Name of the person or Group to whom this Booking is Assigned
Organiser – Container 1 Find By - The Search Criteria, by Name or by Surname
Contacts - The Names and Surnames of all users in the system
First Name - The First Name of the Organiser will be inserted automatically
Initials - The First Initials of the Organiser will be inserted automatically
Surname - The First Surname of the Organiser will be inserted automatically
Company Name - The Company Name to which this Organiser belongs
Address 1 - The First or Primary Address of the Organiser
Address 2 - The Second or Alternate Address of the Organiser
Primary Phone - The First or Primary Telephone Number of the Organiser
Primary E-mail - The Primary E-mail address of the Organiser
Notes - The Notes relating to the Organiser entry
Manager – Container 2 Find By - The Search Criteria, by Name or by Surname
Contacts - The Names and Surnames of all users in the system
First Name - The First Name of the Manager will be inserted automatically
Initials - The First Initials of the Manager will be inserted automatically
Surname - The First Surname of the Manager will be inserted automatically
Company Name - The Company Name to which this Manager belongs
Address 1 - The First or Primary Address of the Manager
Address 2 - The Second or Alternate Address of the Manager
Primary Phone - The First or Primary Telephone Number of the Manager
Primary E-mail - The Primary E-mail address of the Manager
Notes - The Notes relating to the Manager entry
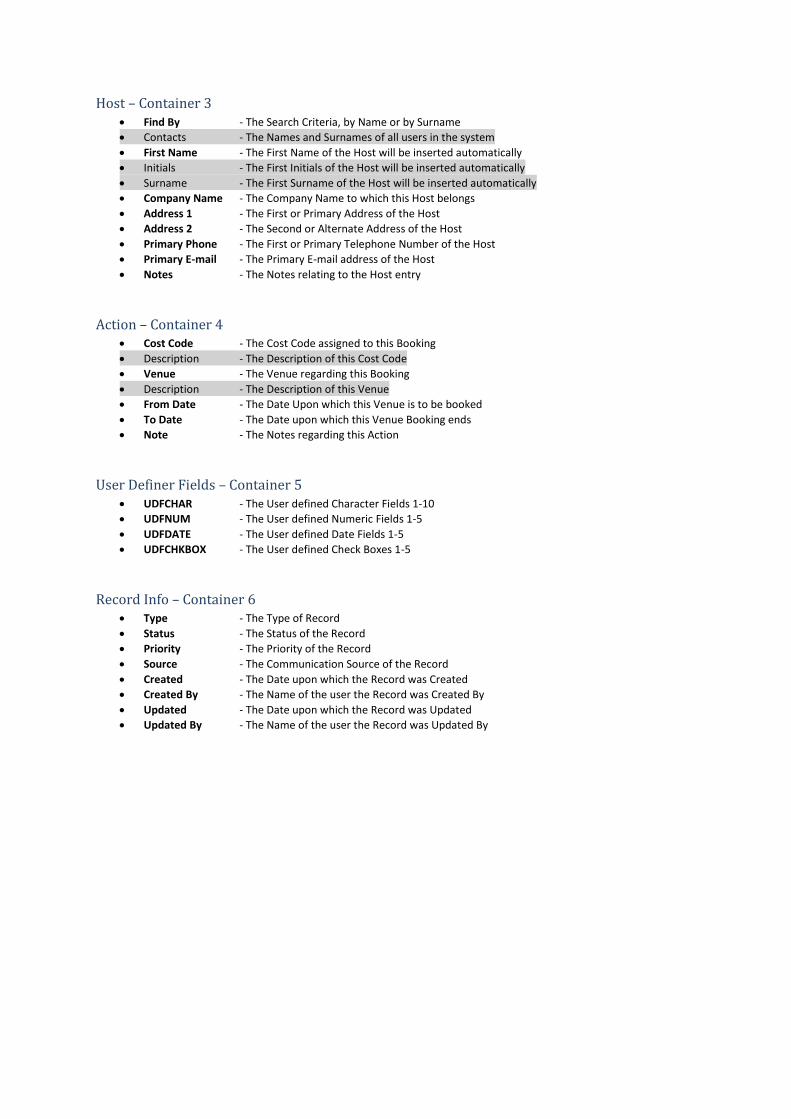
Host – Container 3 Find By - The Search Criteria, by Name or by Surname
Contacts - The Names and Surnames of all users in the system
First Name - The First Name of the Host will be inserted automatically
Initials - The First Initials of the Host will be inserted automatically
Surname - The First Surname of the Host will be inserted automatically
Company Name - The Company Name to which this Host belongs
Address 1 - The First or Primary Address of the Host
Address 2 - The Second or Alternate Address of the Host
Primary Phone - The First or Primary Telephone Number of the Host
Primary E-mail - The Primary E-mail address of the Host
Notes - The Notes relating to the Host entry
Action – Container 4 Cost Code - The Cost Code assigned to this Booking
Description - The Description of this Cost Code
Venue - The Venue regarding this Booking
Description - The Description of this Venue
From Date - The Date Upon which this Venue is to be booked
To Date - The Date upon which this Venue Booking ends
Note - The Notes regarding this Action
User Definer Fields – Container 5 UDFCHAR - The User defined Character Fields 1-10
UDFNUM - The User defined Numeric Fields 1-5
UDFDATE - The User defined Date Fields 1-5
UDFCHKBOX - The User defined Check Boxes 1-5
Record Info – Container 6 Type - The Type of Record
Status - The Status of the Record
Priority - The Priority of the Record
Source - The Communication Source of the Record
Created - The Date upon which the Record was Created
Created By - The Name of the user the Record was Created By
Updated - The Date upon which the Record was Updated
Updated By - The Name of the user the Record was Updated By

Creating a Venue Booking 1. Open the Venue Bookings screen as before. The system displays the List View page 2. Click on the Record View Tab. 3. Enter Data into the fields as required with regard to the field attributes as discussed in the ‘Attributes’ section 4. Click Save Record. The system saves the record. 5. A message should display ‘Record inserted successfully’ 6. If there was an Error a an Error message will be displayed with an Error code
Editing an Existing Venue Booking 1. Open the Venue Bookings screen as before. The system displays the List View page. 2. Select an existing record. 3. Click the Record View tab. 4. The system now displays the Record View page with the Record which was selected. 5. By Clicking on the edit icon which is the 3
rd icon above the List view, record View and Comments tabs, the icon
should be an open book. 6. Amend or edit the relevant fields from the relevant container. 7. Once the record has been updated it may be saved by clicking on the save icon. 8. A message will display record updated successfully.
Deleting a Venue Booking through the Record View 1. Open the Venue Bookings screen as before. The system displays the List View page. 2. Select an existing record. 3. Click the Record View tab. 4. The system now displays the Record View page with the Record which was selected. 5. By Clicking on the Delete icon which is the 5
th icon above the List view, record View and Comments tabs, the icon
should be an X. 6. A message should appear asking if you are sure you want to delete this record, Click yes. 7. Another message should appear stating that the record has been removed successfully
Deleting a Venue Booking through the List View 1. Open the Venue Bookings screen as before. The system displays the List View page. 2. Select an existing record. 3. Click on the 5
th icon displaying the X.
4. A message should appear asking if you are sure you want to delete this record, Click yes. 5. Another message should appear stating that the record has been removed successfully
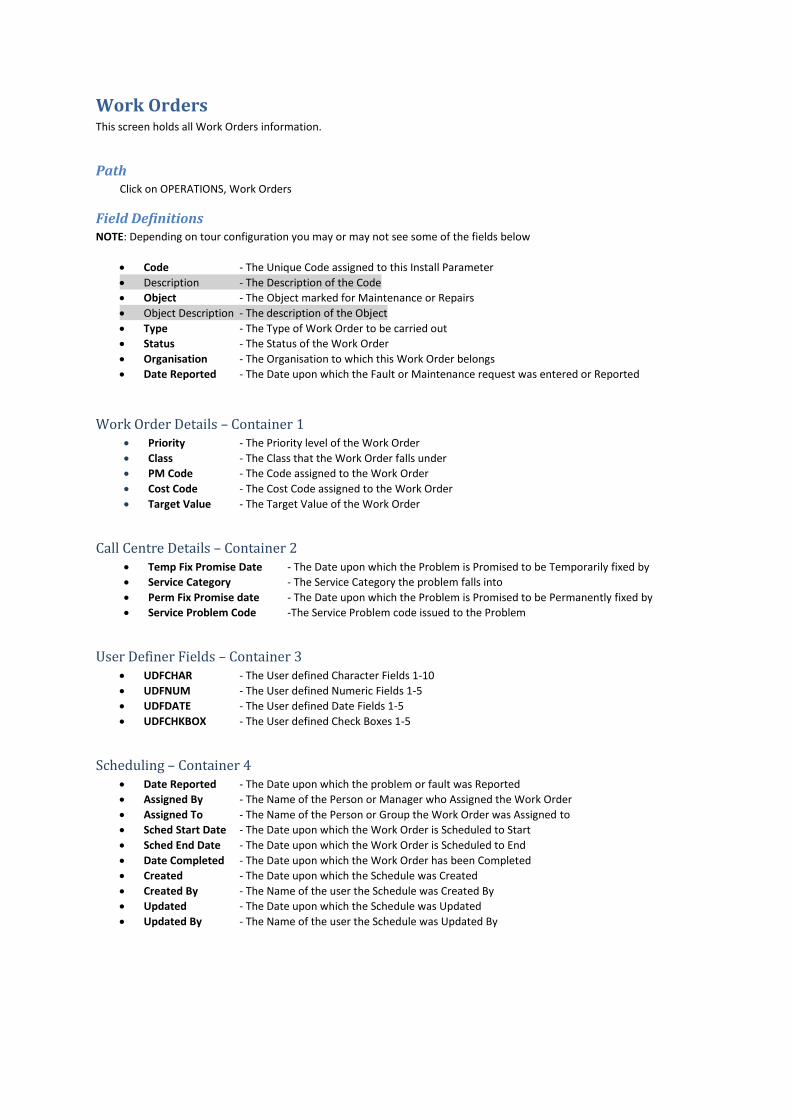
Work Orders This screen holds all Work Orders information.
Path Click on OPERATIONS, Work Orders
Field Definitions NOTE: Depending on tour configuration you may or may not see some of the fields below
Code - The Unique Code assigned to this Install Parameter
Description - The Description of the Code
Object - The Object marked for Maintenance or Repairs
Object Description - The description of the Object
Type - The Type of Work Order to be carried out
Status - The Status of the Work Order
Organisation - The Organisation to which this Work Order belongs
Date Reported - The Date upon which the Fault or Maintenance request was entered or Reported
Work Order Details – Container 1 Priority - The Priority level of the Work Order
Class - The Class that the Work Order falls under
PM Code - The Code assigned to the Work Order
Cost Code - The Cost Code assigned to the Work Order
Target Value - The Target Value of the Work Order
Call Centre Details – Container 2 Temp Fix Promise Date - The Date upon which the Problem is Promised to be Temporarily fixed by
Service Category - The Service Category the problem falls into
Perm Fix Promise date - The Date upon which the Problem is Promised to be Permanently fixed by
Service Problem Code -The Service Problem code issued to the Problem
User Definer Fields – Container 3 UDFCHAR - The User defined Character Fields 1-10
UDFNUM - The User defined Numeric Fields 1-5
UDFDATE - The User defined Date Fields 1-5
UDFCHKBOX - The User defined Check Boxes 1-5
Scheduling – Container 4 Date Reported - The Date upon which the problem or fault was Reported
Assigned By - The Name of the Person or Manager who Assigned the Work Order
Assigned To - The Name of the Person or Group the Work Order was Assigned to
Sched Start Date - The Date upon which the Work Order is Scheduled to Start
Sched End Date - The Date upon which the Work Order is Scheduled to End
Date Completed - The Date upon which the Work Order has been Completed
Created - The Date upon which the Schedule was Created
Created By - The Name of the user the Schedule was Created By
Updated - The Date upon which the Schedule was Updated
Updated By - The Name of the user the Schedule was Updated By
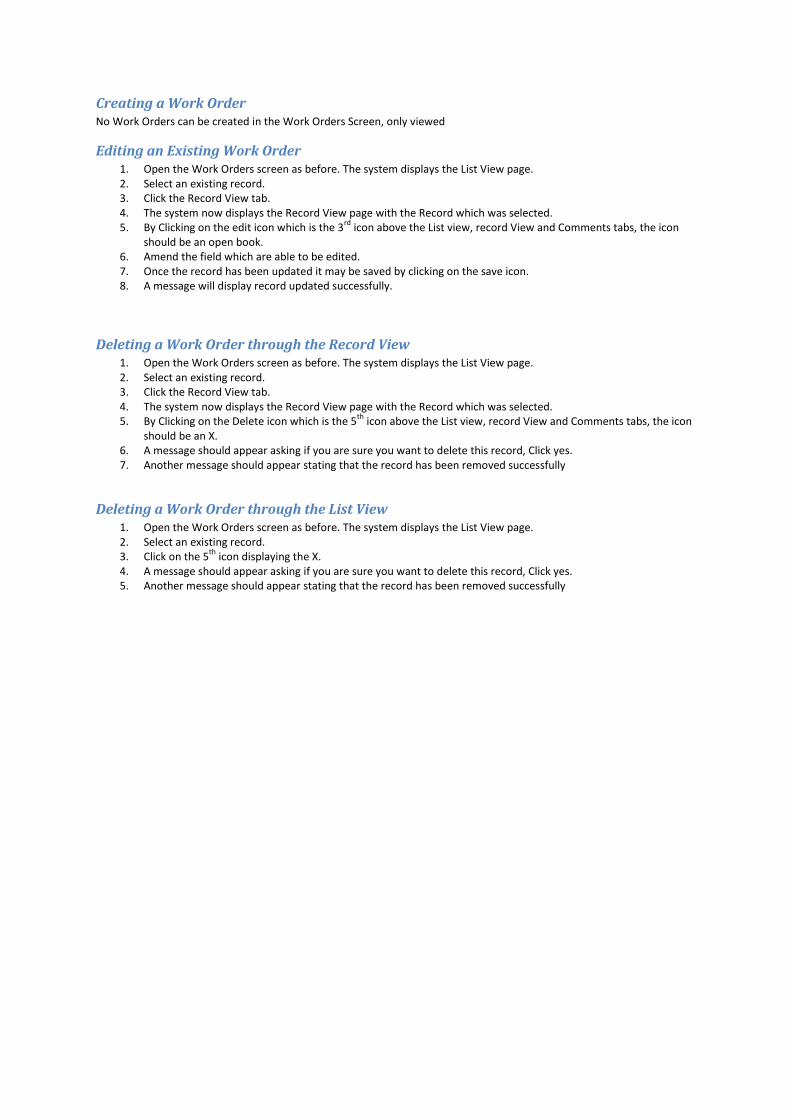
Creating a Work Order No Work Orders can be created in the Work Orders Screen, only viewed
Editing an Existing Work Order 1. Open the Work Orders screen as before. The system displays the List View page. 2. Select an existing record. 3. Click the Record View tab. 4. The system now displays the Record View page with the Record which was selected. 5. By Clicking on the edit icon which is the 3
rd icon above the List view, record View and Comments tabs, the icon
should be an open book. 6. Amend the field which are able to be edited. 7. Once the record has been updated it may be saved by clicking on the save icon. 8. A message will display record updated successfully.
Deleting a Work Order through the Record View 1. Open the Work Orders screen as before. The system displays the List View page. 2. Select an existing record. 3. Click the Record View tab. 4. The system now displays the Record View page with the Record which was selected. 5. By Clicking on the Delete icon which is the 5
th icon above the List view, record View and Comments tabs, the icon
should be an X. 6. A message should appear asking if you are sure you want to delete this record, Click yes. 7. Another message should appear stating that the record has been removed successfully
Deleting a Work Order through the List View 1. Open the Work Orders screen as before. The system displays the List View page. 2. Select an existing record. 3. Click on the 5
th icon displaying the X.
4. A message should appear asking if you are sure you want to delete this record, Click yes. 5. Another message should appear stating that the record has been removed successfully
Reports There is an entire menu regarding Reports, these reports are currently reports which would be used within the system , however, Reports are customizable and the user may require different reports therefore the reporting section has no explanations nor sequences with which to create new Reports.