Embed Size (px)
Citation preview
EagleSoft Instructions for using Scanner Interface Version: 11.0 Date Created: 9/1/04 Last Modified: 9/3/04 Filename: 11 Scanner Interface.doc
Required materials: Required EagleSoft modules: Install on the following computers: • TWAIN compliant Flatbed
Scanner • Video Capture, Digital X-
Ray or Both
• Installed with the License Key or disk
• Usable on the computer with the Scanner attached
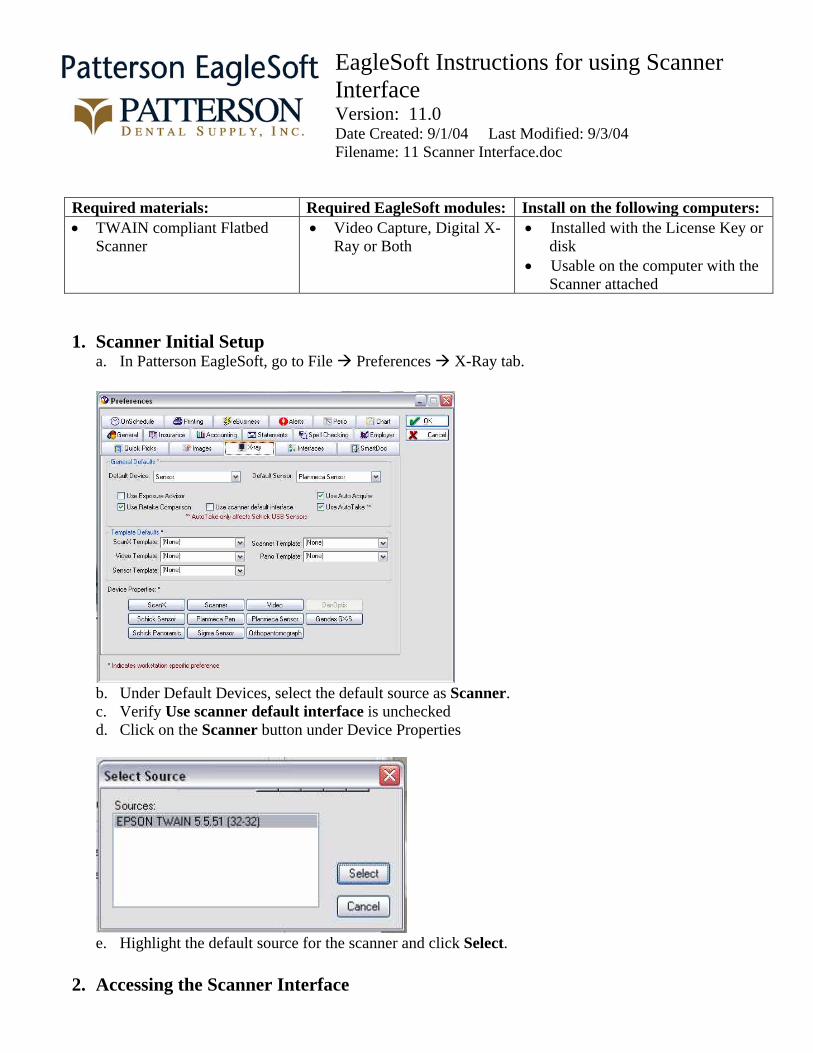
1. Scanner Initial Setup a. In Patterson EagleSoft, go to File Preferences X-Ray tab.
b. Under Default Devices, select the default source as Scanner. c. Verify Use scanner default interface is unchecked d. Click on the Scanner button under Device Properties
e. Highlight the default source for the scanner and click Select.
2. Accessing the Scanner Interface
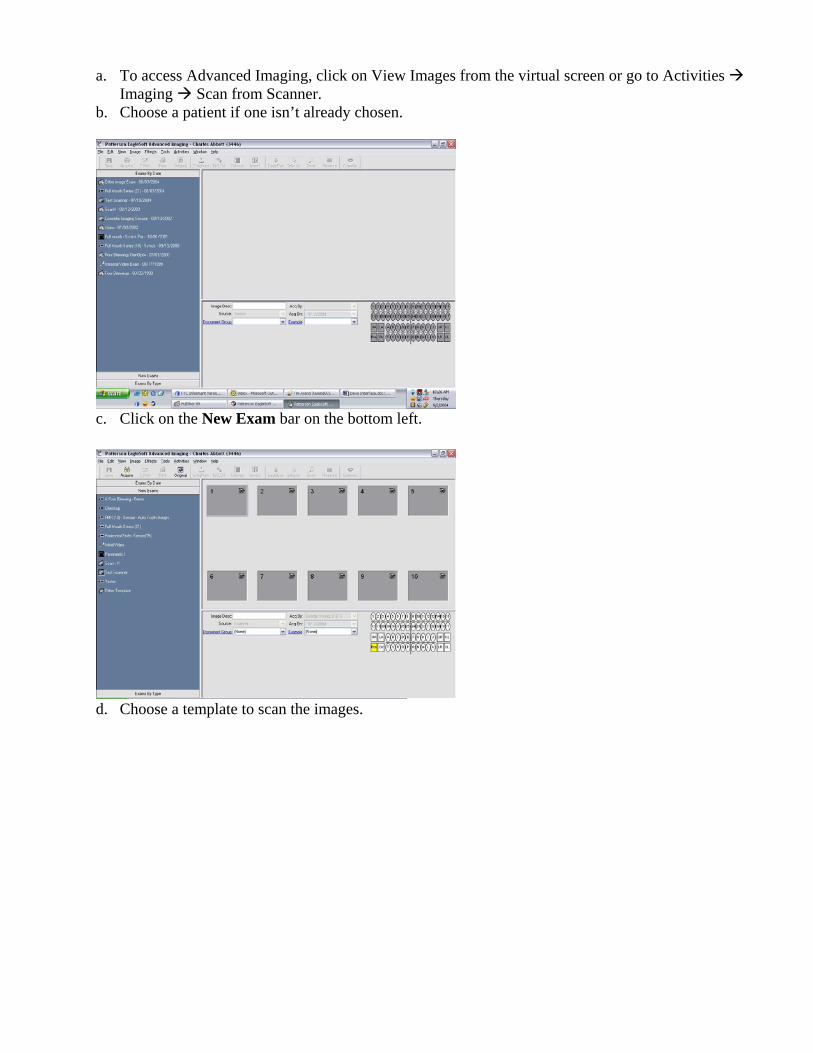
a. To access Advanced Imaging, click on View Images from the virtual screen or go to Activities
Imaging Scan from Scanner. b. Choose a patient if one isn’t already chosen.
c. Click on the New Exam bar on the bottom left.
d. Choose a template to scan the images.

e. Click on the Acquire button in the upper left corner or right mouse click and choose Acquire from
Scanner.
f. The scanner interface window will appear.
3. Explanation of Scanner Interface Window
a. Source 1. The driver that is used for the scanner. 2. Defaults to the source selected in preferences.
b. Type 1. The colors the scanner is going to use to make the image. 2. Options are
• 24 Bit Color • 8 Bit Color • 8 Bit Grey Scale • Black and White
c. Resolution 1. The quality of the image being scanned in, the higher the resolution the better the quality. 2. Choose from
• 50 • 75
• 100 • 150 • 200 • 300 • 600
d. Reduction 1. The amount the file size is reduced to. 2. Choose from
• 50 % • 75 % • 100 % • 150 %
e. Tolerance 1. Used with the X-Ray Mount button in order for the interface to determine what it considers to be
an x-ray. 2. Sliding bar that changes the value depending on where it is at; values are from 1 to 255.
f. Use Backlight 1. Used when scanning in x-rays. 2. Used in conjunction with 8 Bit Gray Scale.
g. Get Preview 1. Brings in an image from whatever is currently on the scanner. 2. If changing documents on the scanner, click this button to refresh the current image on the
screen. h. X-Ray Mount
1. The software tries to determine what / where the x-rays are when you click on this button. 2. Used in conjunction with the tolerance bar in order to try and get the selection to be as accurate
as possible. i. Scan
1. Creates images from the currently selected areas in order to be saved in the template. 2. If nothing selected, creates an image from the entire document that is being previewed.
j. Cancel 1. Closes the scanner interface window. 2. If images scanned they will be lost.
k. Get Images 1. Brings the currently scanned images into the template for the exam.
l. Auto-Preview 1. Whenever the scanner interface is first opened it will automatically bring in a preview of
whatever is on the scanner bed. 2. If a change to the preferences or options is made it will automatically get a new preview of
whatever is on the scanner bed.
4. Acquiring Documents with the Scanner Interface ** Auto-Acquire DOES work with the scanner and templates ** a. If Auto-Preview IS NOT checked
1. Select the options that you want to use for the scan (Ex: 24 Bit Color, 8 Bit Gray Scale, Use Backlight, etc.)
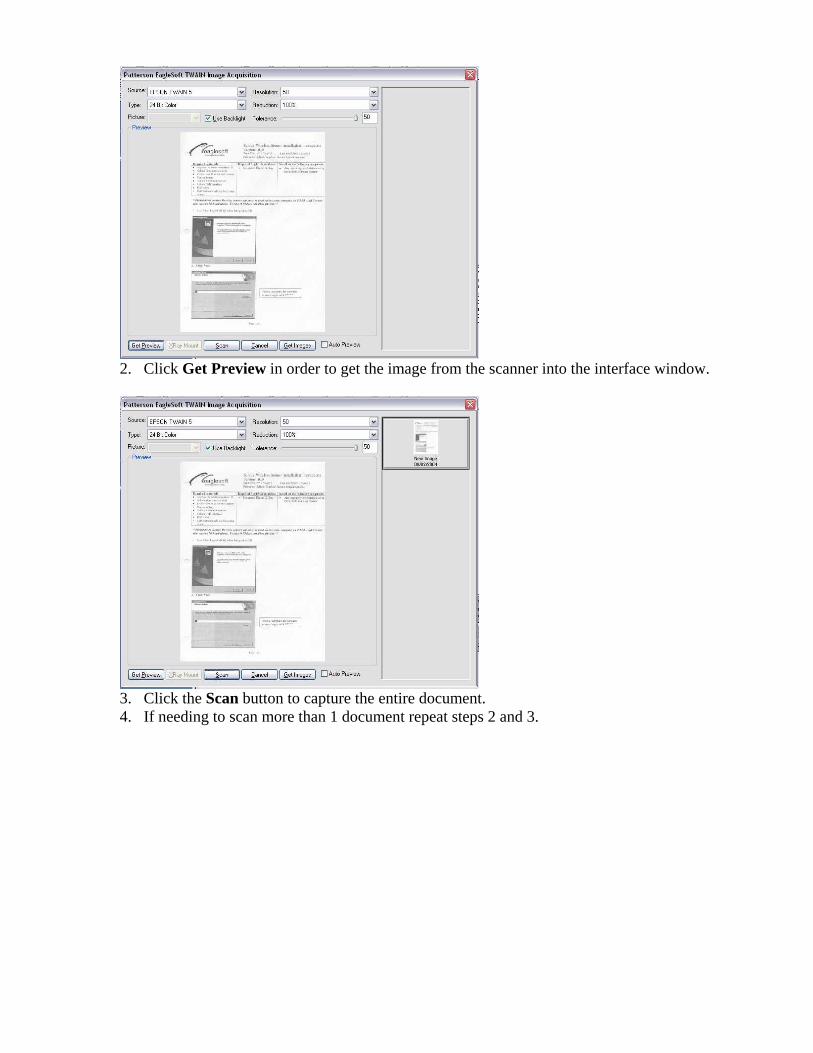
2. Click Get Preview in order to get the image from the scanner into the interface window.
3. Click the Scan button to capture the entire document. 4. If needing to scan more than 1 document repeat steps 2 and 3.
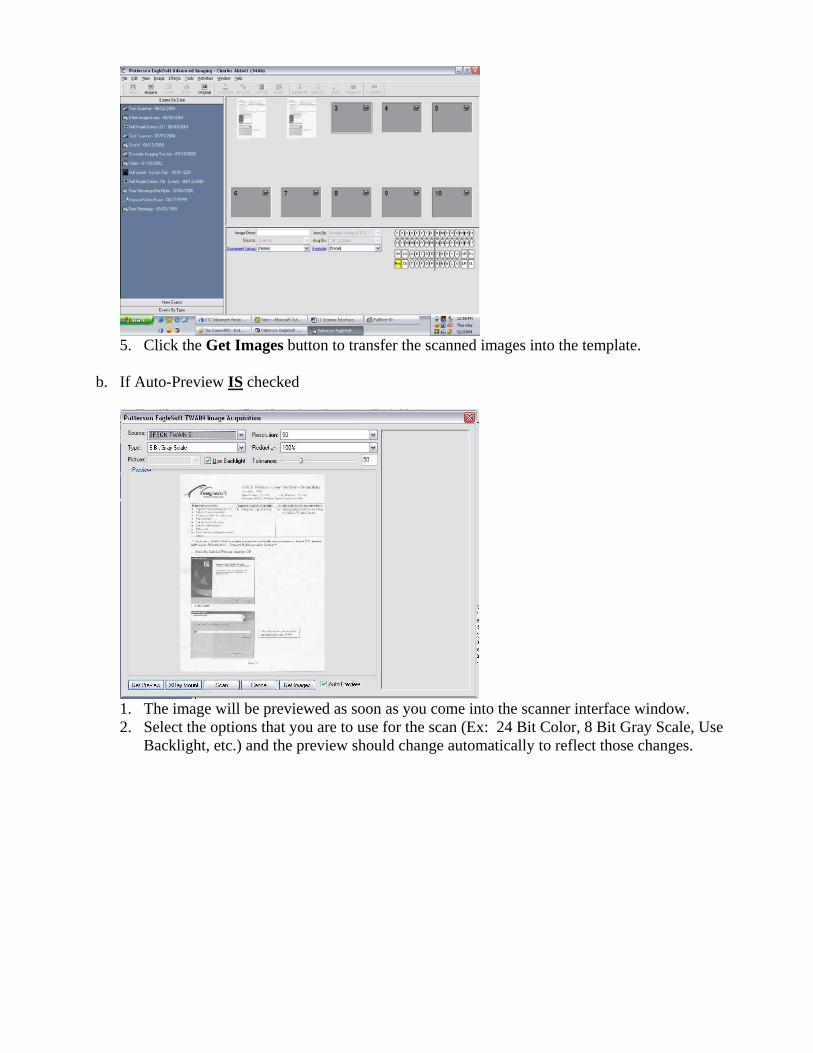
5. Click the Get Images button to transfer the scanned images into the template.
b. If Auto-Preview IS checked
1. The image will be previewed as soon as you come into the scanner interface window. 2. Select the options that you are to use for the scan (Ex: 24 Bit Color, 8 Bit Gray Scale, Use
Backlight, etc.) and the preview should change automatically to reflect those changes.
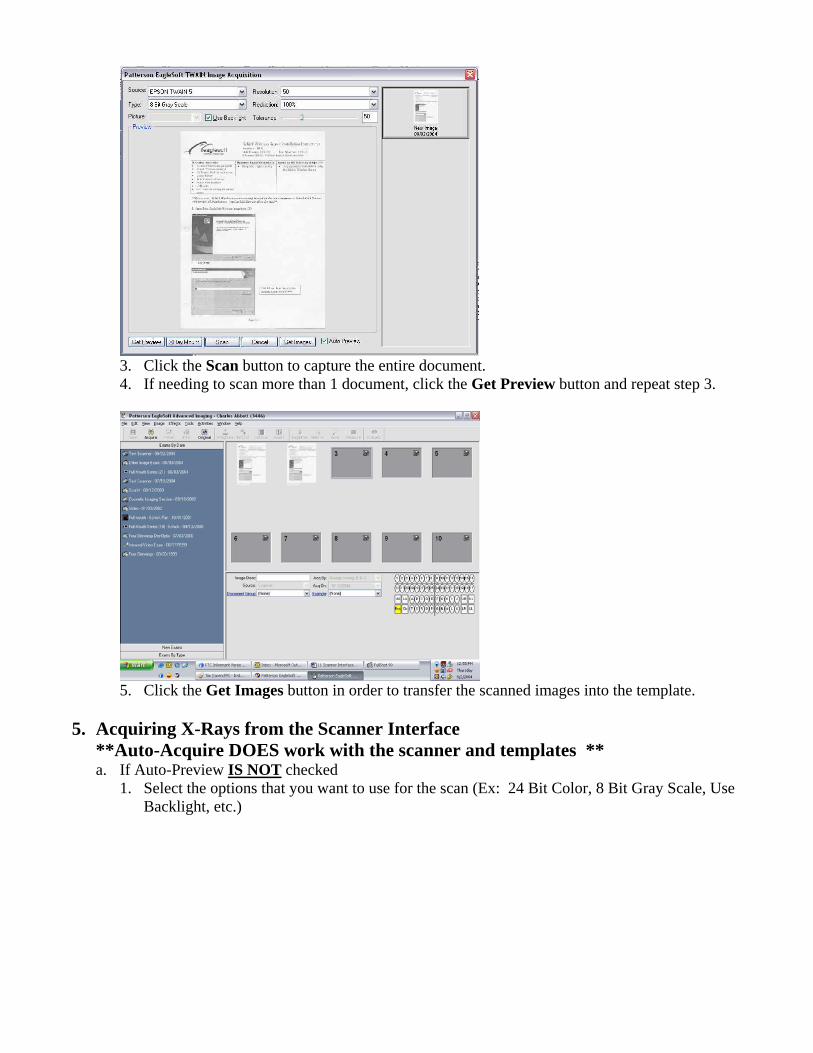
3. Click the Scan button to capture the entire document. 4. If needing to scan more than 1 document, click the Get Preview button and repeat step 3.
5. Click the Get Images button in order to transfer the scanned images into the template.
5. Acquiring X-Rays from the Scanner Interface
**Auto-Acquire DOES work with the scanner and templates ** a. If Auto-Preview IS NOT checked
1. Select the options that you want to use for the scan (Ex: 24 Bit Color, 8 Bit Gray Scale, Use Backlight, etc.)
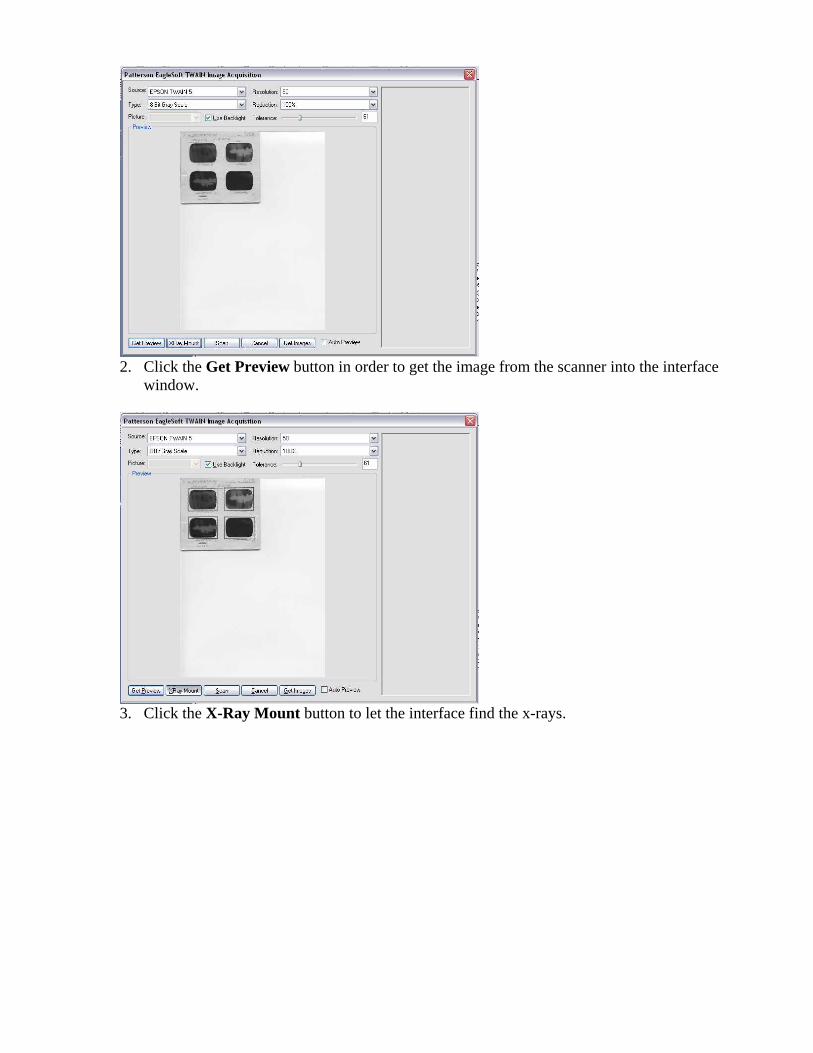
2. Click the Get Preview button in order to get the image from the scanner into the interface
window.
3. Click the X-Ray Mount button to let the interface find the x-rays.
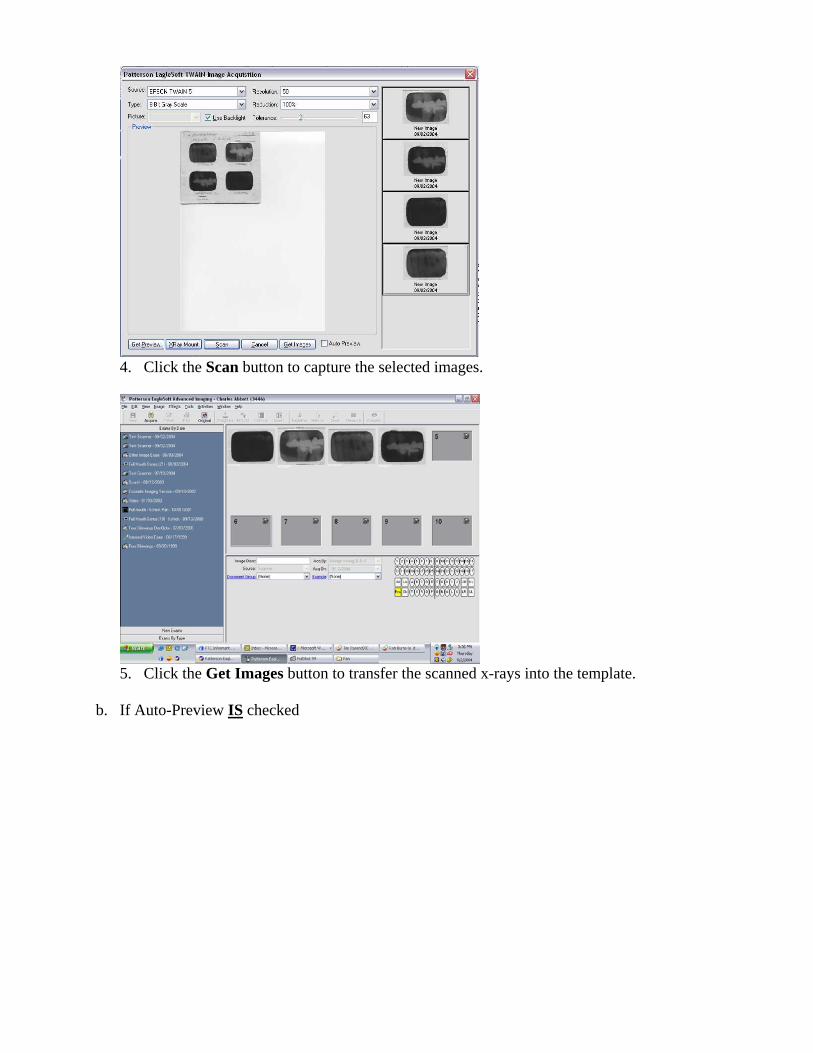
4. Click the Scan button to capture the selected images.
5. Click the Get Images button to transfer the scanned x-rays into the template.
b. If Auto-Preview IS checked
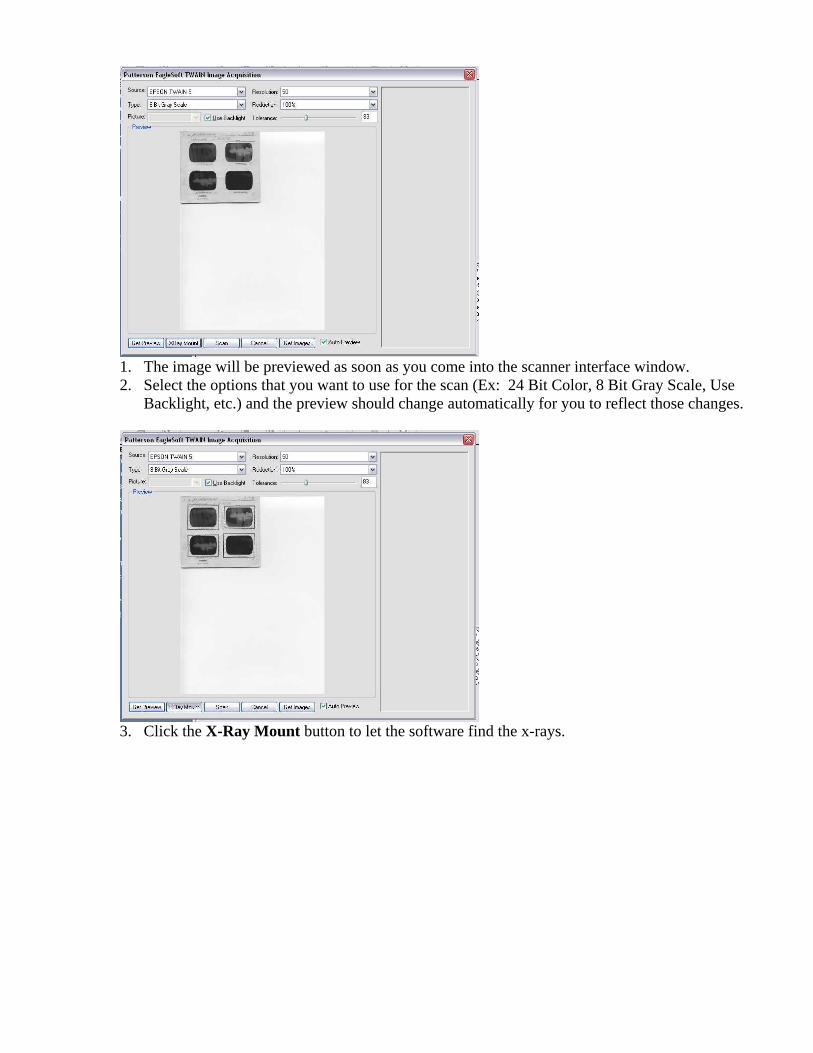
1. The image will be previewed as soon as you come into the scanner interface window. 2. Select the options that you want to use for the scan (Ex: 24 Bit Color, 8 Bit Gray Scale, Use
Backlight, etc.) and the preview should change automatically for you to reflect those changes.
3. Click the X-Ray Mount button to let the software find the x-rays.
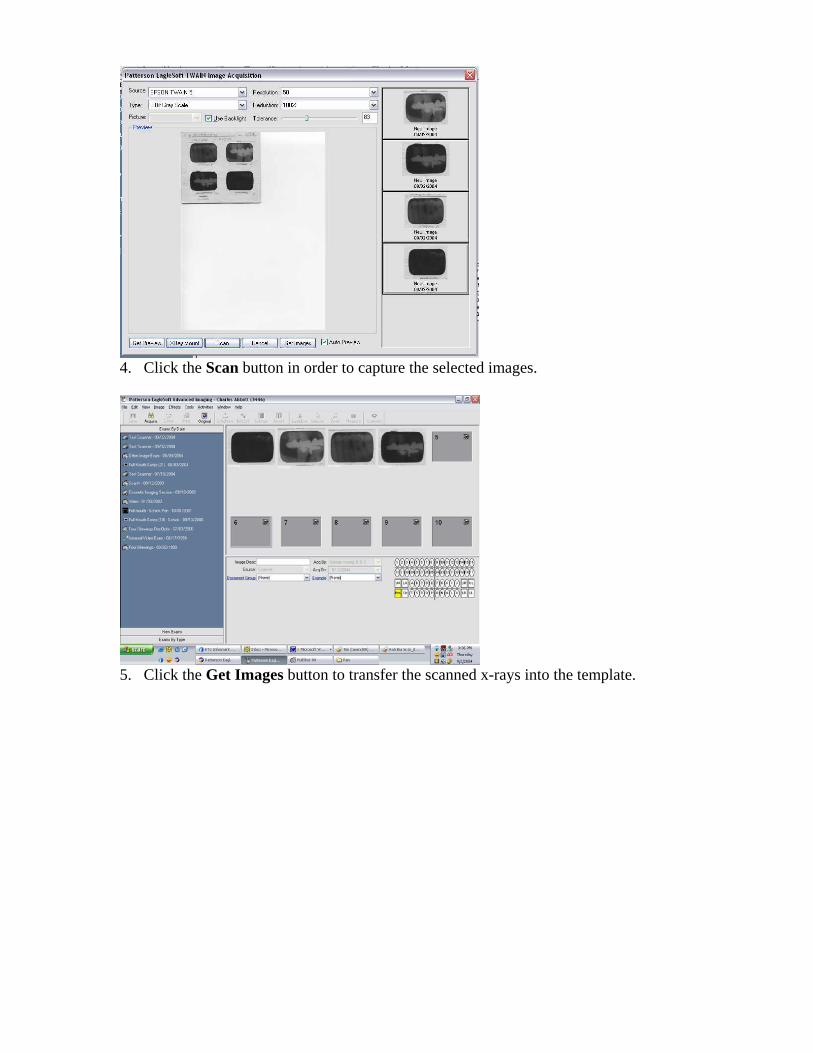
4. Click the Scan button in order to capture the selected images.
5. Click the Get Images button to transfer the scanned x-rays into the template.