Embed Size (px)
Citation preview
© Dana-Farber Cancer Institute, Patient and Family Education Committee. Last revised 08/2019. Page 1 of 8
Flushing Your Central Line Catheter
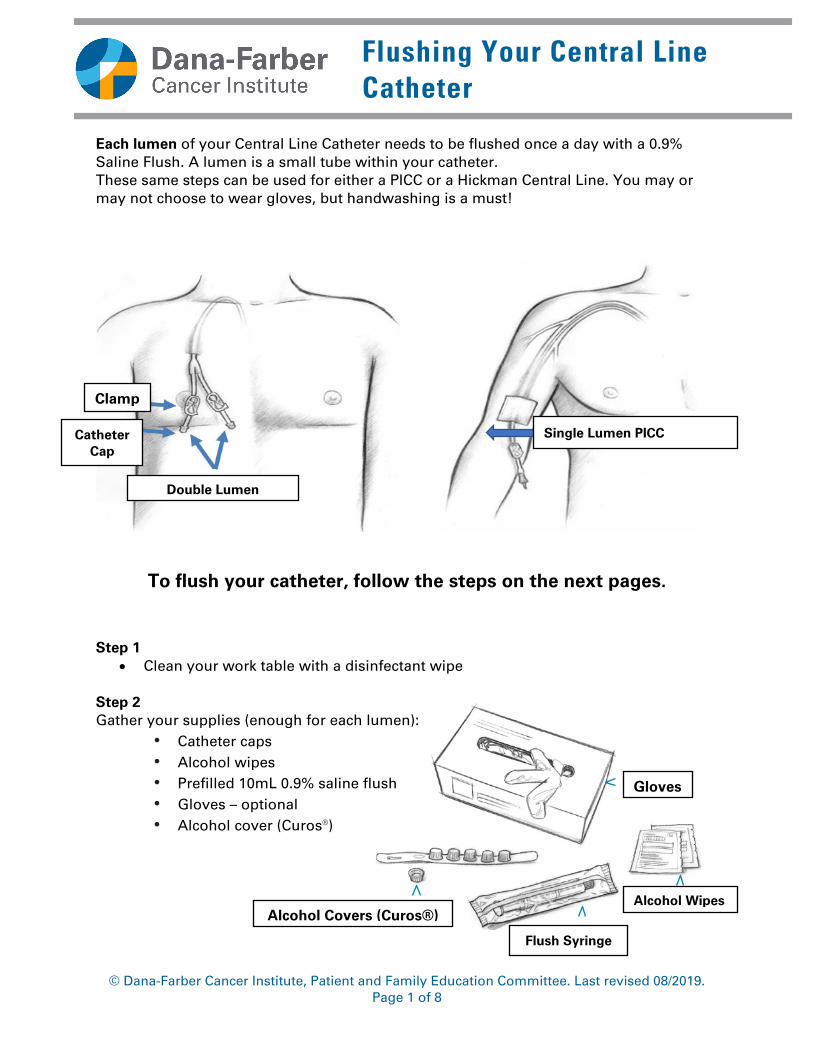
Each lumen of your Central Line Catheter needs to be flushed once a day with a 0.9% Saline Flush. A lumen is a small tube within your catheter. These same steps can be used for either a PICC or a Hickman Central Line. You may or may not choose to wear gloves, but handwashing is a must!
To flush your catheter, follow the steps on the next pages. Step 1
• Clean your work table with a disinfectant wipe Step 2 Gather your supplies (enough for each lumen):
• Catheter caps • Alcohol wipes • Prefilled 10mL 0.9% saline flush • Gloves – optional • Alcohol cover (Curos®)
Clamp Catheter
Cap
Double Lumen
Gloves
Alcohol Wipes
Flush Syringe
Alcohol Covers (Curos®)
Single Lumen PICC
© Dana-Farber Cancer Institute, Patient and Family Education Committee. Page 2 of 8 .
FLUSHING A CENTRAL LINE
Step 3 • Wash your hands well with soap and water. • Dry your hands with a clean paper towel. • You may also use an alcohol-based hand sanitizer.
Step 4
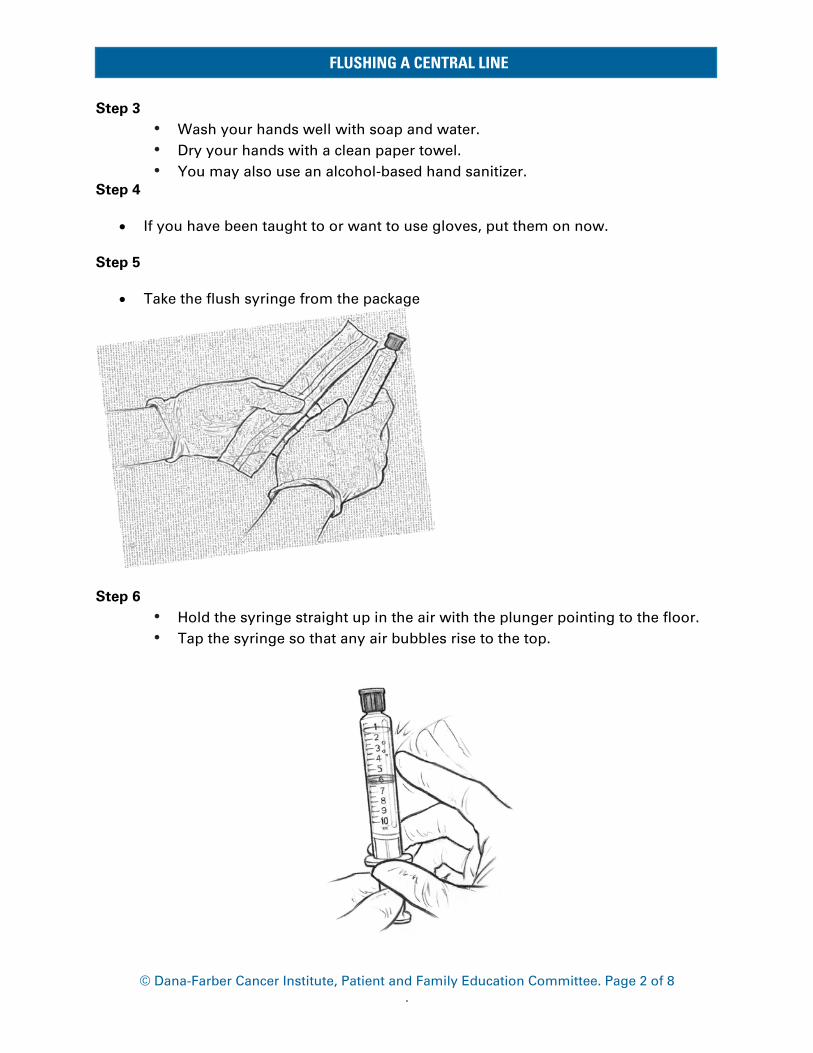
• If you have been taught to or want to use gloves, put them on now. Step 5
• Take the flush syringe from the package
Step 6
• Hold the syringe straight up in the air with the plunger pointing to the floor. • Tap the syringe so that any air bubbles rise to the top.

© Dana-Farber Cancer Institute, Patient and Family Education Committee. Page 3 of 8 .
FLUSHING A CENTRAL LINE
Step 7
• Take off the syringe cap Step 8
• Push the plunger to the 10mL mark. This will take out any air and extra flush from the syringe.
Some flush may drip out. This is okay.
• Hold the syringe upright. Do not let the syringe touch anything!
Plunger
© Dana-Farber Cancer Institute, Patient and Family Education Committee. Page 4 of 8 .
FLUSHING A CENTRAL LINE
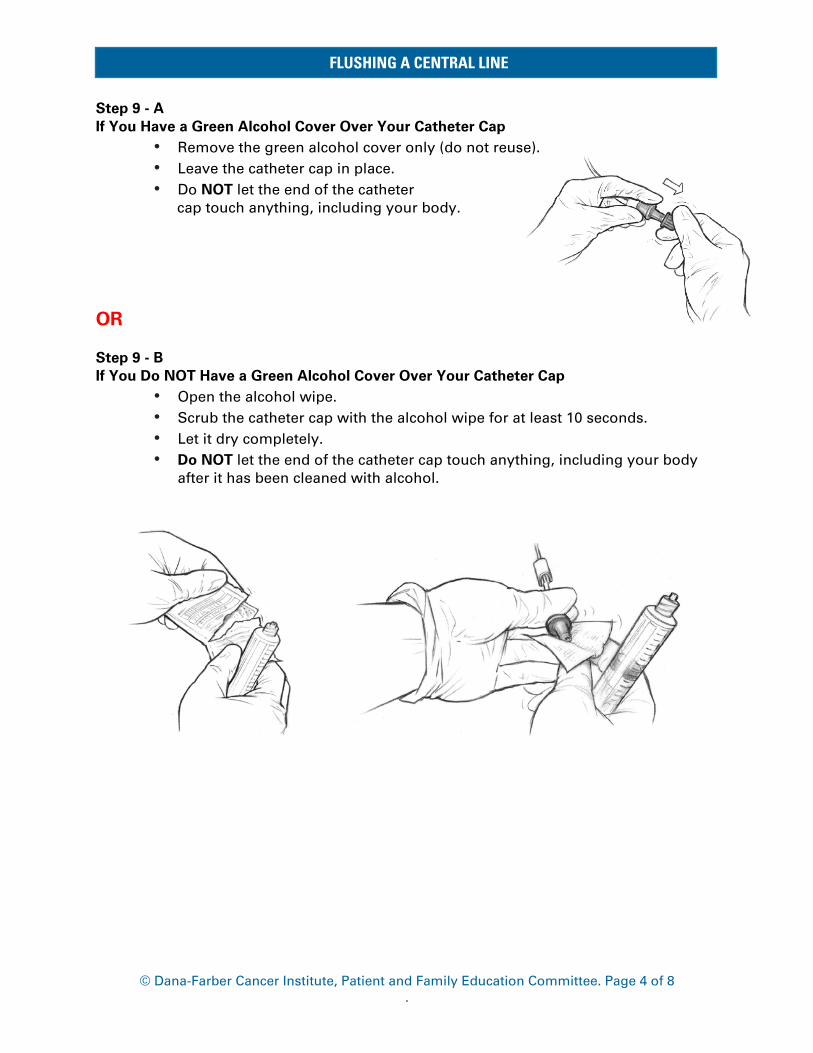
Step 9 - A If You Have a Green Alcohol Cover Over Your Catheter Cap
• Remove the green alcohol cover only (do not reuse). • Leave the catheter cap in place. • Do NOT let the end of the catheter
cap touch anything, including your body.
OR Step 9 - B If You Do NOT Have a Green Alcohol Cover Over Your Catheter Cap
• Open the alcohol wipe. • Scrub the catheter cap with the alcohol wipe for at least 10 seconds. • Let it dry completely. • Do NOT let the end of the catheter cap touch anything, including your body
after it has been cleaned with alcohol.
© Dana-Farber Cancer Institute, Patient and Family Education Committee. Page 5 of 8 .
FLUSHING A CENTRAL LINE
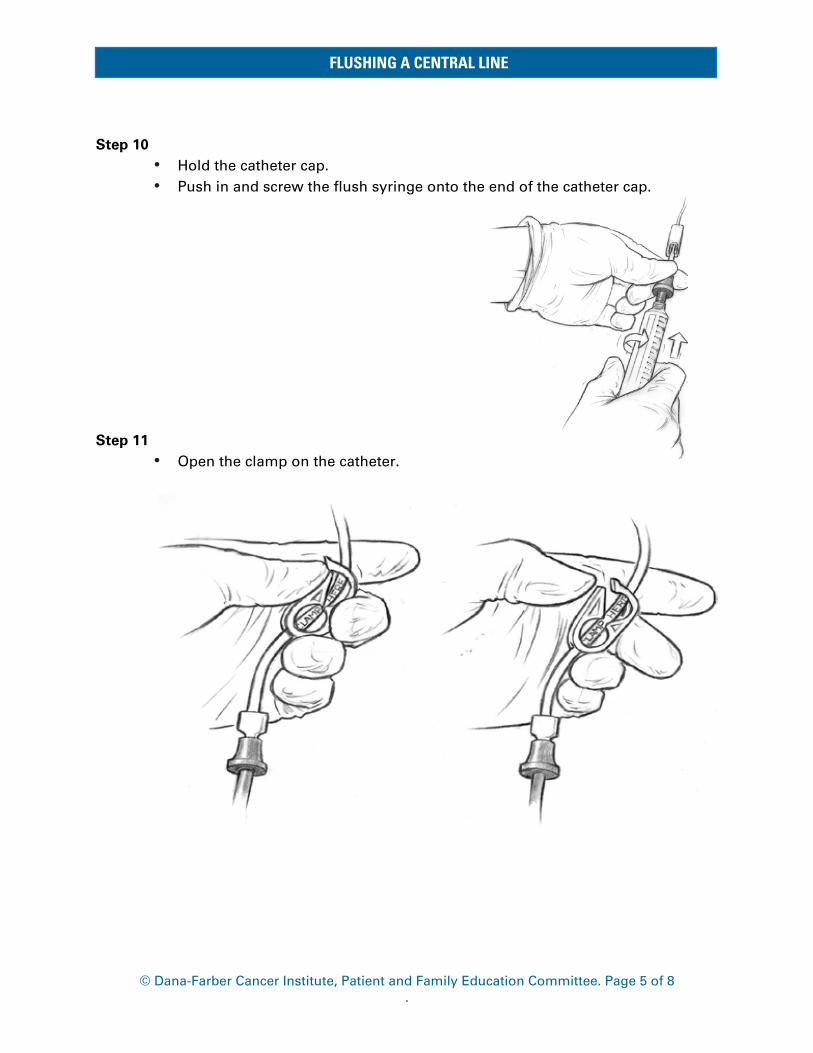
Step 10
• Hold the catheter cap. • Push in and screw the flush syringe onto the end of the catheter cap.
Step 11
• Open the clamp on the catheter.

© Dana-Farber Cancer Institute, Patient and Family Education Committee. Page 6 of 8 .
FLUSHING A CENTRAL LINE
Step 12
• Flush the line with the saline using a push pause method. The turbulence helps to keep your line clear.
• Firmly push 1cc then pause • Continue to push 1cc and pause until
the line is flushed with all 10 cc’s. • If it is hard to push the flush, go to Step 19. • Do not use force to flush.
Step 13
• Be sure that the clamp is over the wording “clamp here.”
• Close the clamp on the catheter. You should hear a click.

© Dana-Farber Cancer Institute, Patient and Family Education Committee. Page 7 of 8 .
FLUSHING A CENTRAL LINE
Step 14
• Hold the catheter cap tightly and unscrew the syringe from the catheter. • Be careful not to loosen the catheter cap from
the catheter.
Step 15 Important! Always check to be sure the catheter cap is on tight!
Step 16
• Put a new green alcohol cover (Curos®) onto the catheter cap.

© Dana-Farber Cancer Institute, Patient and Family Education Committee. Page 8 of 8 .
FLUSHING A CENTRAL LINE
Step 17 • Now flush all the other lumens of the catheter. Do Steps 1 through 16 again.
Step 18
• After you flush all your lumens, throw your supplies away. Step 19
• If it is hard to push the flush, check to make sure the clamp is open. If it was clamped, open the clamp, and try Step 12 again.
• If it is still hard to push, STOP. Do not push the flush.
Close the clamp. Unscrew and remove the syringe.
Call your doctor or Oncology Nurse Navigator. You may need to come into clinic to have it looked at.
The above information contains some, but not necessarily all, of the information that you may need to care for your central line. Please speak with your doctor or nurse if you have questions or issues you may experience. This document should not take the place of conversations with members of your health care team about your treatment and affects you may experience during and after the use of a central line. If you experience any significant change in your health during or after treatment, contact a member of your health care team right away. Developed by the Dana-Farber Cancer Institute and Brigham and Women’s Hospital Central Line Education Team, August 2013. Updated July 2019.