Embed Size (px)
Citation preview

Integrated Engineering MK7 & MQB Catch Can Kit Install Thank you for purchasing another high quality Integrated Engineering product! This instruction guide is used for installation of Integrated Engineerings Catch Can Kit for VW MK7 2.0T with EA888 Gen 3 engines. Integrated Engineering is not responsible for any damage caused by incorrect installation. Before you begin, open your IE Catch Can Kit, inspect all components, and verify their quantities.

1. Park your car on level surface and apply the parking brake. It is also recommended to allow the car to cool before beginning this install procedure.
2. Start the installation procedure by removing the stock engine cover, pull up on the corners to release the grommets and set aside.

3. Using a 10mm socket, remove the 4 nuts located on the right hand side of the coilpacks.
4. Carefully lift and remove all 4 eyelets from the coilpack posts.

5. Carefully disconnect all coilpack harness connectors from the coilpacks.
6. Using a 10mm socket, remove the coilpack post completely from the #3 cylinder coilpack.
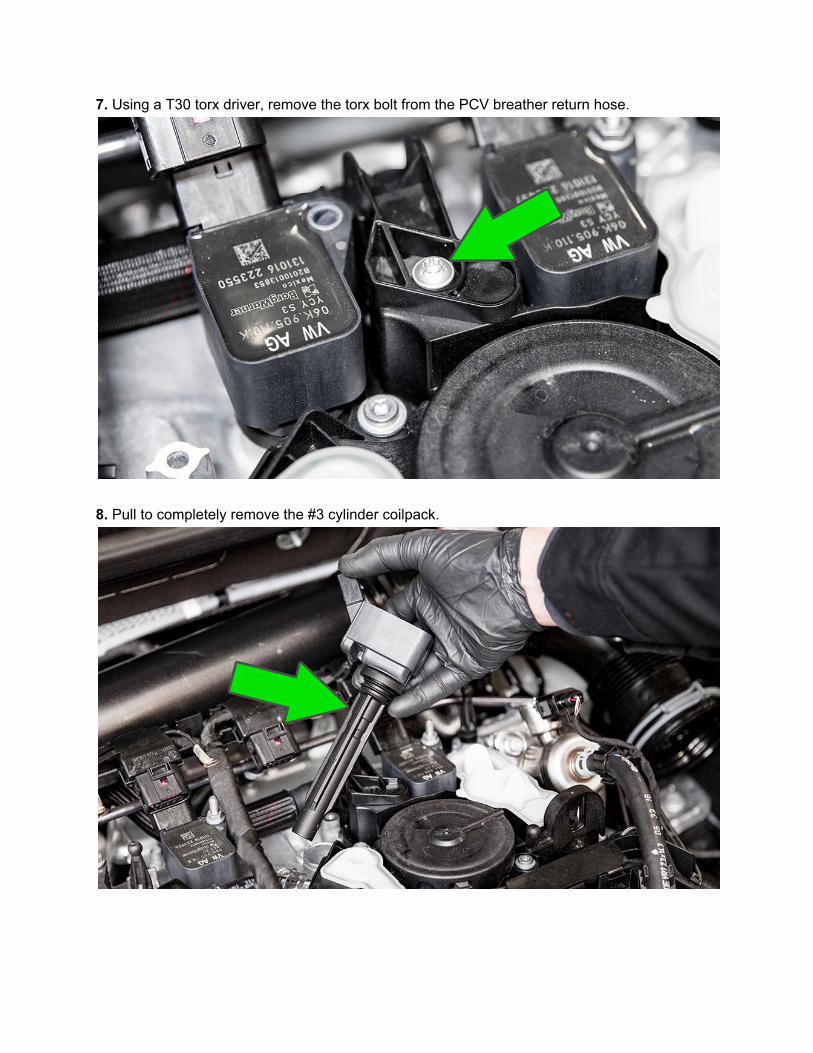
7. Using a T30 torx driver, remove the torx bolt from the PCV breather return hose.
8. Pull to completely remove the #3 cylinder coilpack.

9. With the #3 cylinder coilpack out of the way, carefully push to release the o-ring sealed PCV breather return from the breather plate.
10. Using the OE tool or a flathead screwdriver, remove the rubber evap hose from the PCV valve.

11. Using a torx driver, loosen the seven T30 torx bolts from the PCV valve and remove it from the valve cover.
12. Carefully remove the factory gasket from the bottom of the factory PCV valve. Take special care not to tear the gasket. If there is any damage to the gasket, replace it with a new one.

13. Wrap the supplied vacuum fitting threads with sealing tape. Note: Do not over-tighten this fitting, it may strip the threads in your plate. Tighten until snug only.
14. Install the vacuum fitting to the top port of the IE breather plate. Note: Make sure the vacuum fitting is installed pointing in the direction shown below.
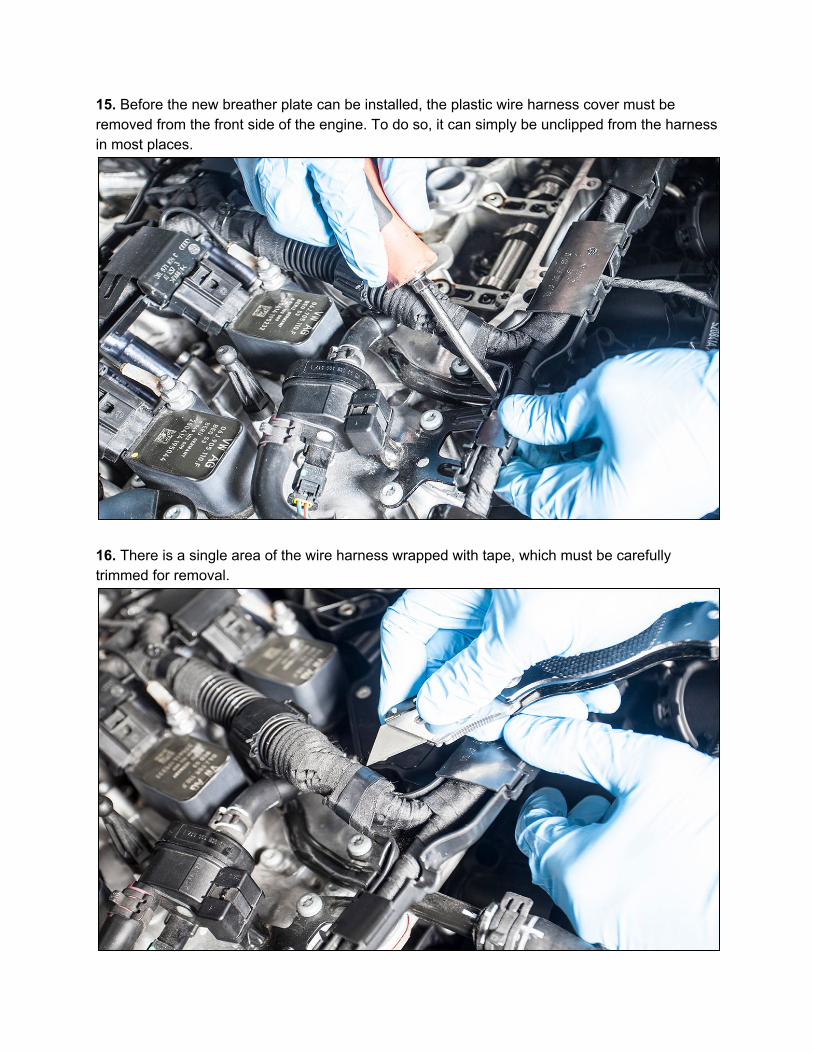
15. Before the new breather plate can be installed, the plastic wire harness cover must be removed from the front side of the engine. To do so, it can simply be unclipped from the harness in most places.
16. There is a single area of the wire harness wrapped with tape, which must be carefully trimmed for removal.

17. Ensure that the gasket mating surface on the valve cover is free of dirt and debris.
18. To ensure a proper seal, apply a small amount of silicone sealant to the new IE breather plate as shown below..

19. Install the factory PCV gasket to the new IE breather plate.
20. Place the IE breather plate into position, install the M6X35mm front bolt between the inlet and outlet barbs using a 5mm allen.

21. install the rear breather hose into the breather plate along with the included M6X12mm bolt, tighten using a 5mm allen.
22. Install the remaining six M6x20mm bolts to the breather plate and tighten.

23. Reinstall coilpack, coilpack post, eyelits, coilpack harness connectors, and 10mm nuts.
24. Carefully remove the clamp holding the short rubber hose to the evap solenoid on the valve cover. Replace it with the included vacuum line and check valve. Connect it to the vacuum fitting on the breather plate and secure all ends with the included zip ties. Note: Take care to install the check valve correctly, arrow on check valve should be pointing towards from the breather plate.

25. Reroute the wiring harness that runs across the front of the engine beneath the inlet and outlet of the breather plate. Secure harness to bracket near the evap solenoid using two of the included cable ties.
26. Wrap the brass drain valve threads with sealing tape, then install into bottom of catch can.

27. Wrap NPT threaded ends of both inlet and outlet fittings and install to catch can as shown below. Note: Make sure to only wrap the NPT threads, do not wrap the AN threads with tape.
28. Install hose with 90 degree end onto 90 degree fitting using an AN wrench. Note: Do not over tighten hose onto fitting, they only need to be snug to properly seal.

29. Using supplied M6x10mm button head screws, install bracket onto catch can.
30. Mount catch can to engine mount using included M6x35MM bolt, M6 washer, and 3/4" spacer.

31. Attach the 45 degree end of the shorter hose to other catch can inlet.
32. Connect the straight end of the inlet hose to the left side of the breather adapter. Tighten using an AN wrench.
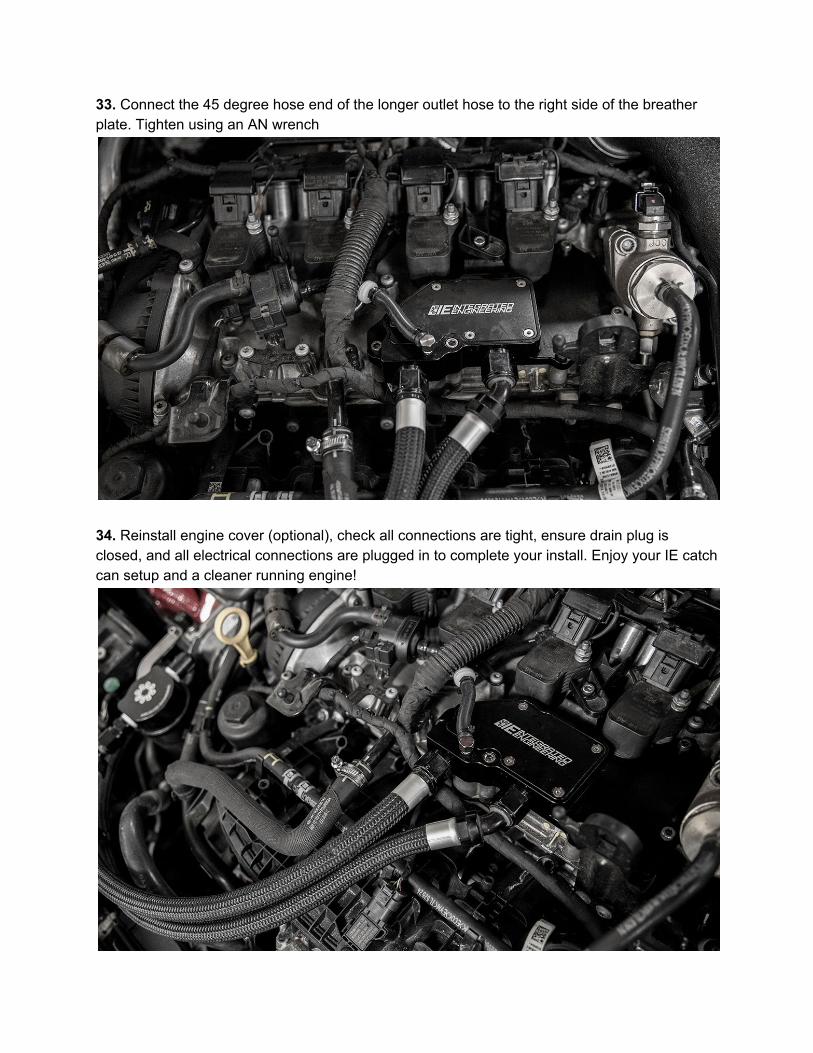
33. Connect the 45 degree hose end of the longer outlet hose to the right side of the breather plate. Tighten using an AN wrench
34. Reinstall engine cover (optional), check all connections are tight, ensure drain plug is closed, and all electrical connections are plugged in to complete your install. Enjoy your IE catch can setup and a cleaner running engine!

Thank you for purchasing another Integrated Engineering product. We are dedicated to serving your VW/Audi engine and performance needs. Please check our website frequently for new product releases. If you have any questions or concerns about this product please do not hesitate to contact us. Integrated Engineering 801.484.2021 [email protected] www.performancebyie.com