Embed Size (px)
Citation preview
Chris Carlson & Rich Satore
Historicon 2016
Admiralty Trilogy & Seekrieg Seminar
Dynamic Beats of the Great War at Sea

Outline
Briefly survey three significant battles from World War I
– Battle of Falkland Islands
– Battle of Dogger Bank
– Battle of Jutland
Why these three? Because they are excellent examples of the
employment of capital ships during the war
– Trade protection, scouting, fleet action
Examine each battle and look at:
– Setup and Results
– Highlight key issues that affected the outcome
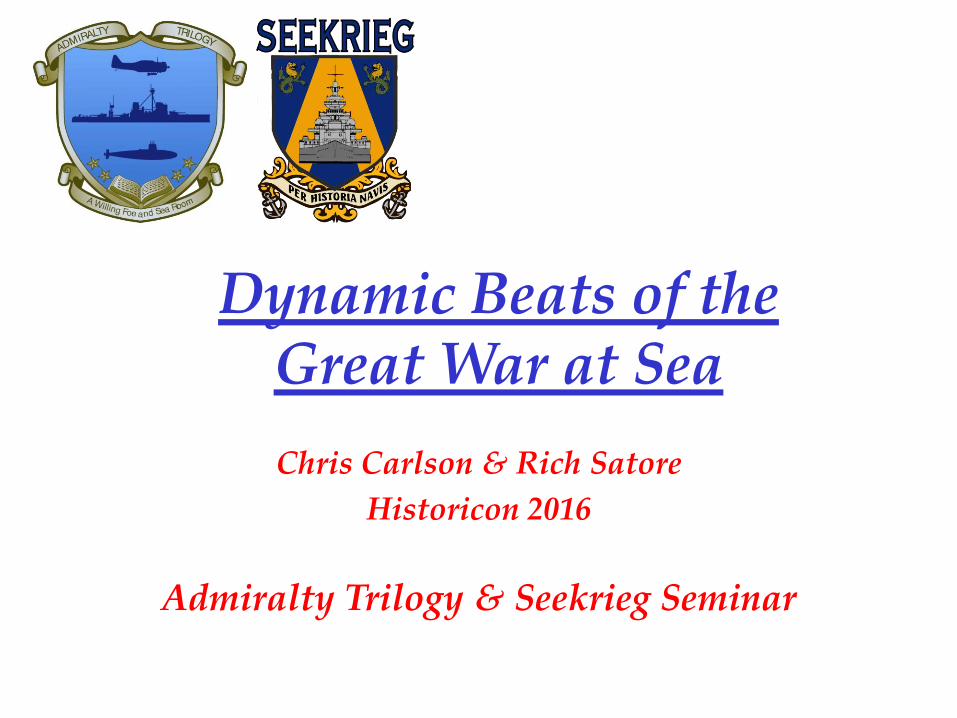
Battle of the Falkland Islands
Battle took place on the morning of 8 December 1914
Spee intended to shell the wireless tower on Hooker’s Point, near Port
Stanley, and destroy the harbor facilities–especially the coaling station
– Spee’s captains/most of the senior staff wanted to give the Falklands a wide berth
Sturdee arrived with Invincible and Inflexible on 7 December 1914
– Leisurely transit – 15 knot average, reluctant to tax the propulsion plant
– Began coaling his cruisers that evening, battle cruisers would coal in the morning
VADM Sir Doveton Sturdee VADM Maximilian, Graf Von Spee
Battle of the Falkland Islands
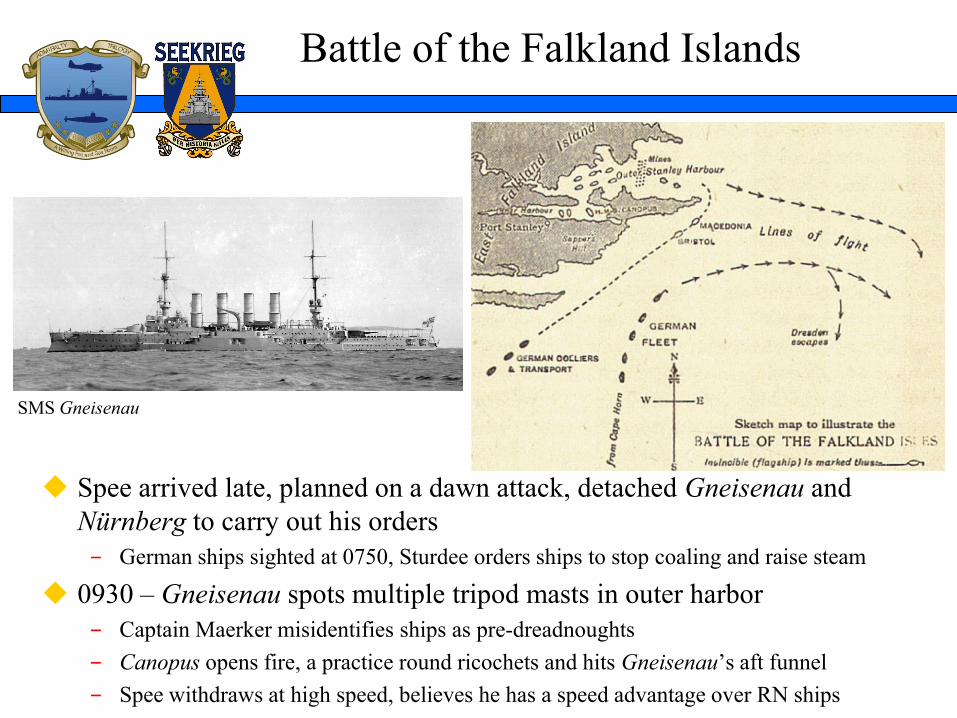
Spee arrived late, planned on a dawn attack, detached Gneisenau and
Nürnberg to carry out his orders
– German ships sighted at 0750, Sturdee orders ships to stop coaling and raise steam
0930 – Gneisenau spots multiple tripod masts in outer harbor
– Captain Maerker misidentifies ships as pre-dreadnoughts
– Canopus opens fire, a practice round ricochets and hits Gneisenau’s aft funnel
– Spee withdraws at high speed, believes he has a speed advantage over RN ships
SMS Gneisenau
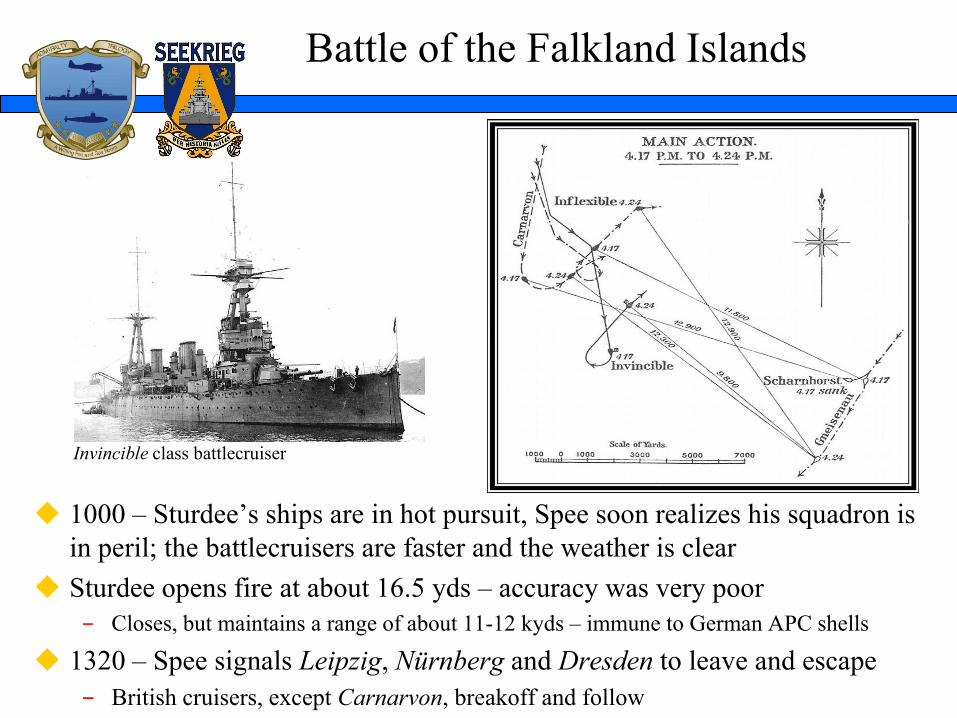
1000 – Sturdee’s ships are in hot pursuit, Spee soon realizes his squadron is
in peril; the battlecruisers are faster and the weather is clear
Sturdee opens fire at about 16.5 yds – accuracy was very poor
– Closes, but maintains a range of about 11-12 kyds – immune to German APC shells
1320 – Spee signals Leipzig, Nürnberg and Dresden to leave and escape
– British cruisers, except Carnarvon, breakoff and follow
Battle of the Falkland Islands
Invincible class battlecruiser

The battle was a foregone conclusion, the Germans were overmatched
– Scharnhorst, Gneisenau, Nürnberg, and Leipzig were all sunk with heavy loss of life
– Sturdee’s ship suffered very light casualties
German gunnery was excellent, but ineffective. British gunnery was
initially poor, but improved as range was reduced to their training norm
– Neither battlecruiser had been fitted with a director
– Sturdee was cautious, under orders to not let the battlecruisers get badly damaged
– Smoke interference and poor APC shells made Sturdee’s work harder
The errors made by the Germans were fatal
– Attempting an attack on Port Stanley
– Misidentifying the tripod masts
– Spee assuming he had a speed advantage when he broke off
Protecting merchant trade from cruiser warfare was a crucial consideration
in the development of the battlecruiser
– At the Falklands, Fisher’s “greyhounds of the sea” did what they were designed to do
Battle of the Falkland Islands
Battle of Dogger Bank
Battle took place on the morning of 24 January 1915
Hipper wanted to conduct a sweep of Dogger Bank, find and eliminate spy
trawlers with wireless sets acting as fishing vessels
– Von Ingenohl approved the foray, but did not deploy the High Seas Fleet
– CinC signal sent to 1st and 2nd Scouting Groups mid-morning on 23 January
Signal was intercepted and dashed to Room 40
– By early afternoon, Churchill ordered Beatty to ready the Battle Cruiser Fleet for sea
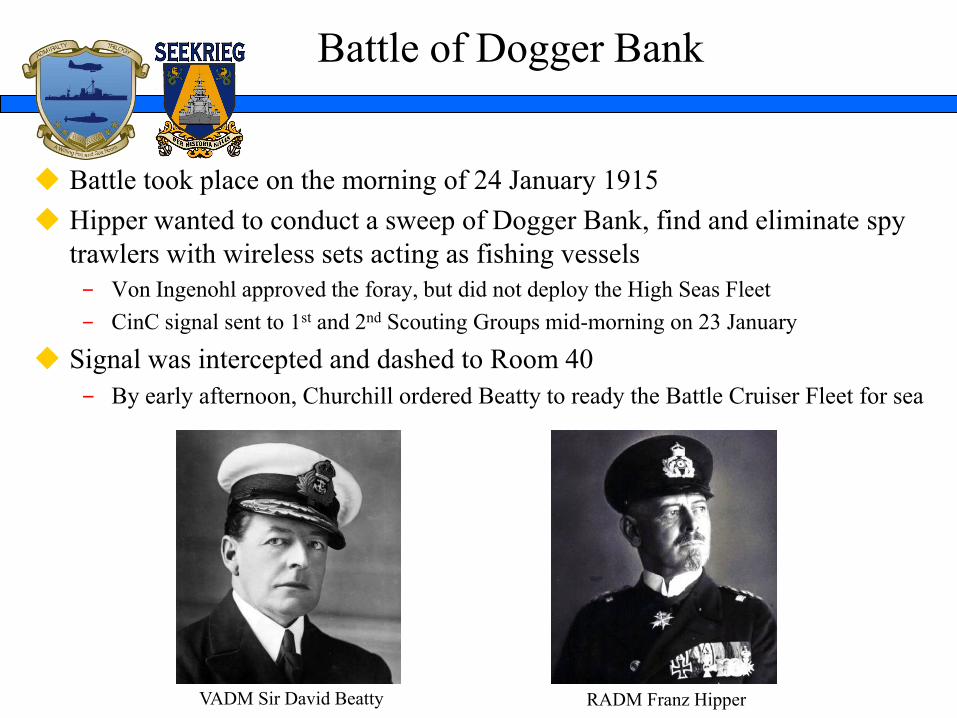
VADM Sir David Beatty RADM Franz Hipper
Battle of Dogger Bank
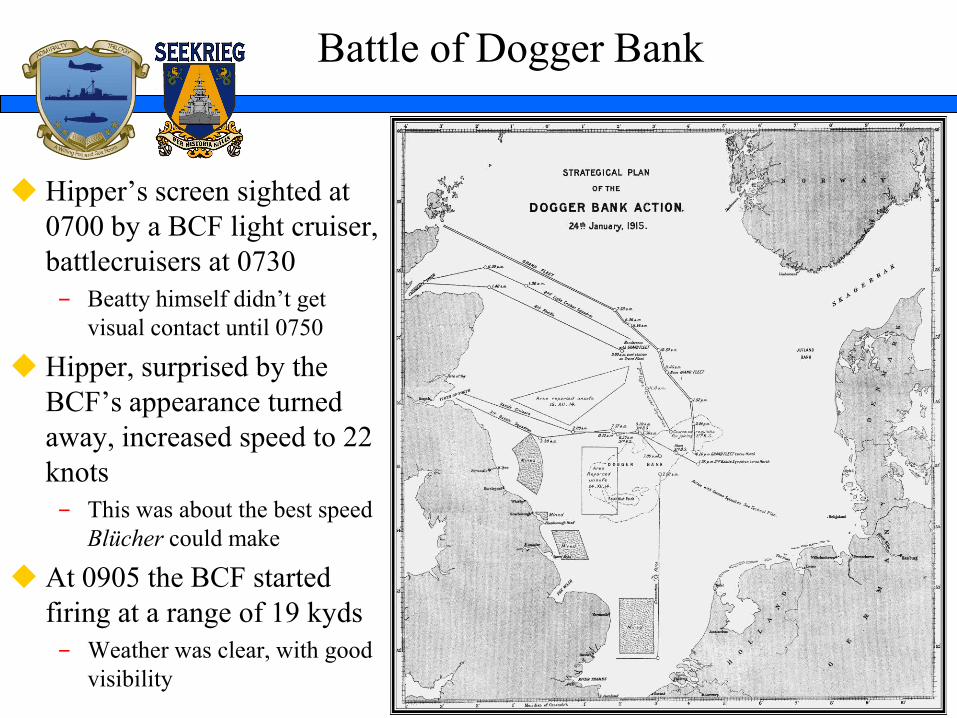
Hipper’s screen sighted at
0700 by a BCF light cruiser,
battlecruisers at 0730
– Beatty himself didn’t get
visual contact until 0750
Hipper, surprised by the
BCF’s appearance turned
away, increased speed to 22
knots
– This was about the best speed
Blücher could make
At 0905 the BCF started
firing at a range of 19 kyds
– Weather was clear, with good
visibility
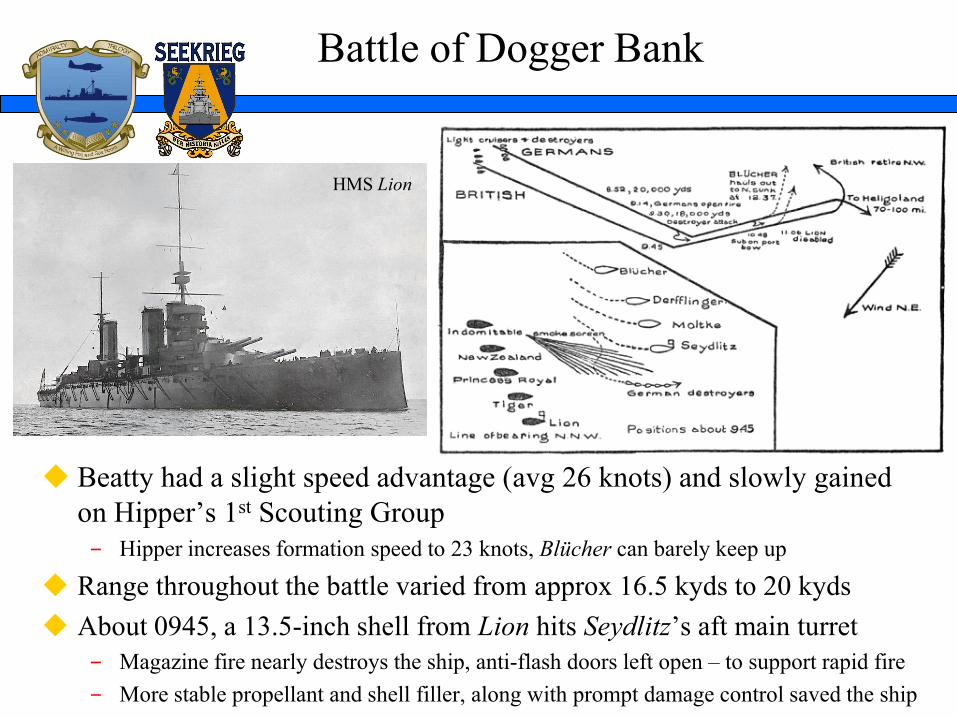
Beatty had a slight speed advantage (avg 26 knots) and slowly gained
on Hipper’s 1st Scouting Group
– Hipper increases formation speed to 23 knots, Blücher can barely keep up
Range throughout the battle varied from approx 16.5 kyds to 20 kyds
About 0945, a 13.5-inch shell from Lion hits Seydlitz’s aft main turret
– Magazine fire nearly destroys the ship, anti-flash doors left open – to support rapid fire
– More stable propellant and shell filler, along with prompt damage control saved the ship
Battle of Dogger Bank
HMS Lion

Both Lion and Blücher were badly damaged and began to slow down
Two confusing signals from Lion effectively ended the chase
– Beatty ordered an 8 point (90°) turn to port after he thought he saw a periscope
– Seymour’s combination of two separate signals caused the rest of BCF to close on
Blücher – “Course North East. Attack the enemy’s rear” was read as “Attack rear
of the enemy, bearing North East”
Blücher was summarily pummeled by the British battlecruisers, at short
range (≤6 kyds) until she capsized and sank
Battle of Dogger Bank
SMS Seydlitz
SMS Blücher capsizing
British gunnery was quite poor – really only one good hit on Seydlitz
– Germans scored 25 hits on the BCF, the British only scored 6 hits on the German
battlecruisers and about 70 on Blücher, but the vast majority were at the end of the battle
1st Scouting Group out shot the BCF by about 2:1 (not counting Blücher’s pummeling)
Germans had some issues with dud shells
– British battlecruisers didn’t have their directors – Lion and Tiger fitted in May 1915
– Smoke interfered with coincidence rangefinders, stereoscopic rangefinders less so
– Both the FQ2 and Bg3m were beyond their effective rangefinding range, but the German
gunnery system handled longer ranges better
1912-13 IGN conducted training at 13-14 kyds, the Royal Navy was training at 10-12 kyds
Poor ammunition handling procedures by the Germans nearly cost them
Seydlitz, the more stable RP C/12 propellant and TNT filler along with
good damage control by the crew saved the ship
Poor communication practice by Lion caused the BCF to break off
pursuit and focus their undivided attention on Blücher
All three issues would haunt the British at Jutland
Battle of Dogger Bank
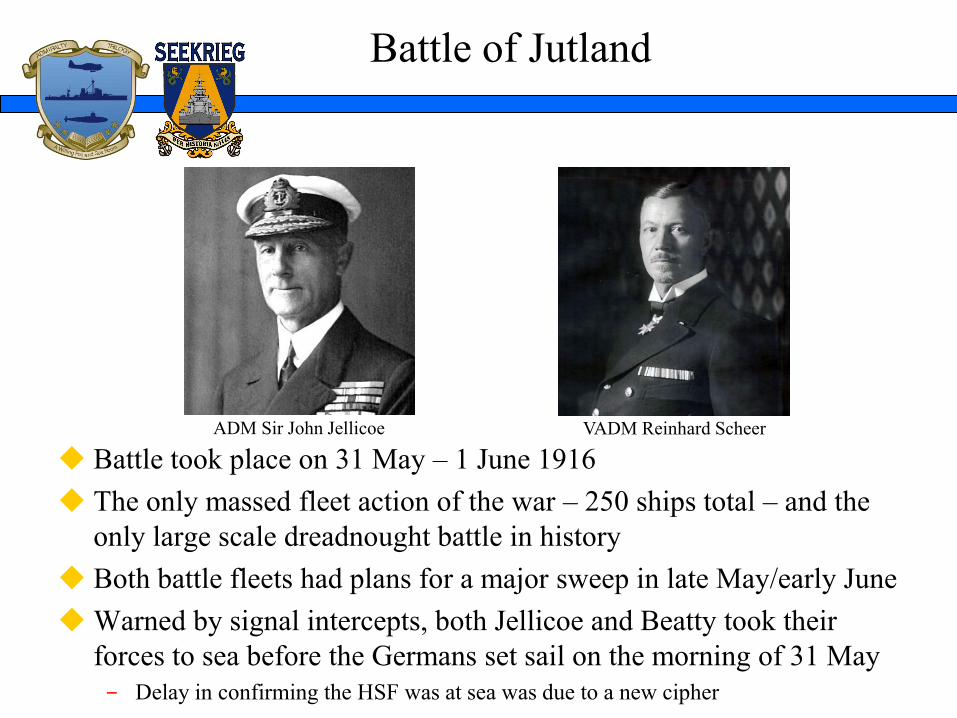
Battle took place on 31 May – 1 June 1916
The only massed fleet action of the war – 250 ships total – and the
only large scale dreadnought battle in history
Both battle fleets had plans for a major sweep in late May/early June
Warned by signal intercepts, both Jellicoe and Beatty took their
forces to sea before the Germans set sail on the morning of 31 May
– Delay in confirming the HSF was at sea was due to a new cipher
Battle of Jutland
ADM Sir John Jellicoe VADM Reinhard Scheer

Elements of both the Grand
Fleet and BCF were spotted by
U-boats as they sortied
– Scheer and Hipper were warned
Poor weather prevented any
follow up by Zeppelins due to
low cloud cover
Contact was first made at 1410
when the German cruiser Elbing
and two destroyers stopped the
Danish tramp steamer, NJ Fjord
– Galatea spotted the German ships
BCF and 1st Scouting Group
sight one another about 1520
Battle of Jutland
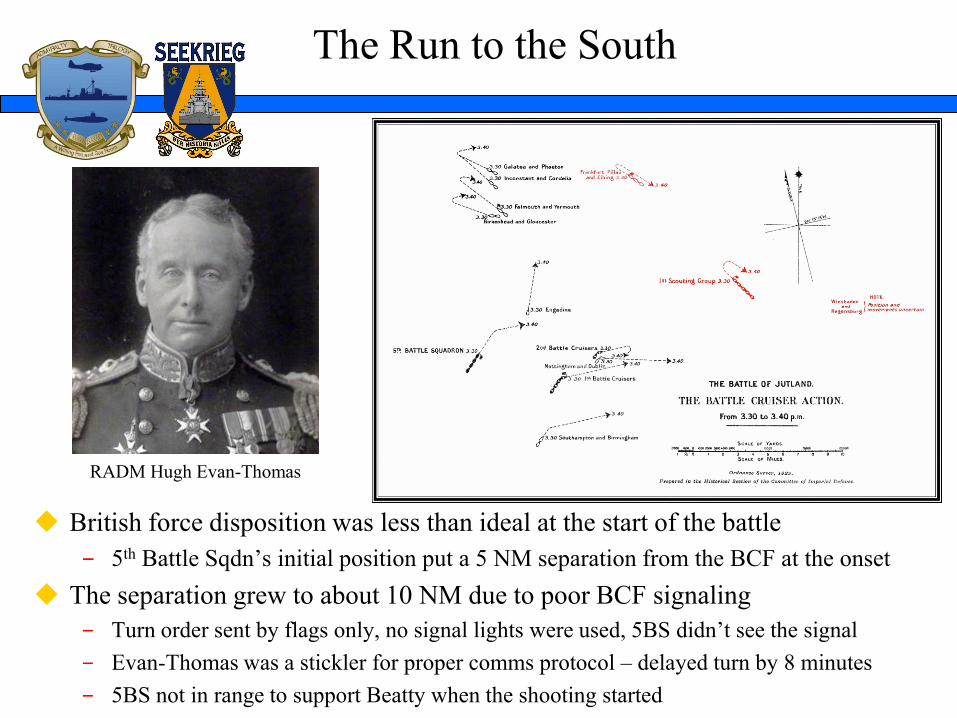
The Run to the South
British force disposition was less than ideal at the start of the battle
– 5th Battle Sqdn’s initial position put a 5 NM separation from the BCF at the onset
The separation grew to about 10 NM due to poor BCF signaling
– Turn order sent by flags only, no signal lights were used, 5BS didn’t see the signal
– Evan-Thomas was a stickler for proper comms protocol – delayed turn by 8 minutes
– 5BS not in range to support Beatty when the shooting started
RADM Hugh Evan-Thomas

BCF and 1st Scouting Group open fire nearly
simultaneously - 1548
– Initial range was about 15.3 kyds, Hipper was
pleasantly surprised at the delay
– BCF first shots were grossly off – nearly a full
nautical mile long
Poor ammunition handling in the BCF
resulted in the catastrophic loss of two ships
– Indefatigable blew up at 1605
– Queen Mary blew up at 1626
– Lion very nearly blew up as well (≈1628)
– BCF training emphasized rate of fire, left flash
doors open and stacked shells/bags in turret
Declining visibility and smoke hamper the
BCF’s shooting
5BS opened fire around 1610
The Run to the South
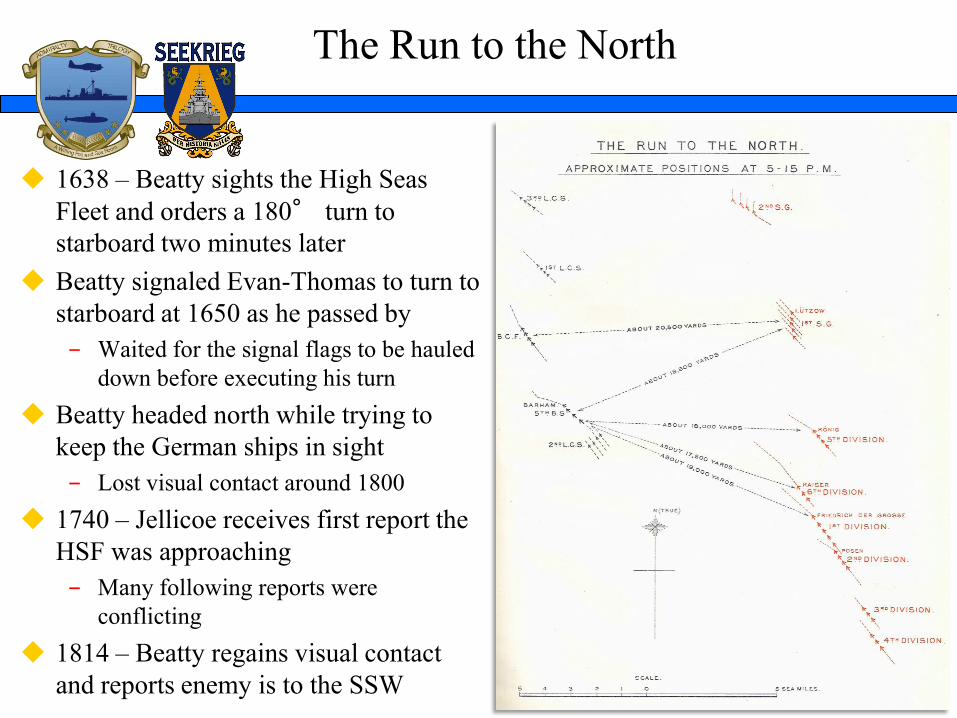
1638 – Beatty sights the High Seas
Fleet and orders a 180° turn to
starboard two minutes later
Beatty signaled Evan-Thomas to turn to
starboard at 1650 as he passed by
– Waited for the signal flags to be hauled
down before executing his turn
Beatty headed north while trying to
keep the German ships in sight
– Lost visual contact around 1800
1740 – Jellicoe receives first report the
HSF was approaching
– Many following reports were
conflicting
1814 – Beatty regains visual contact
and reports enemy is to the SSW
The Run to the North
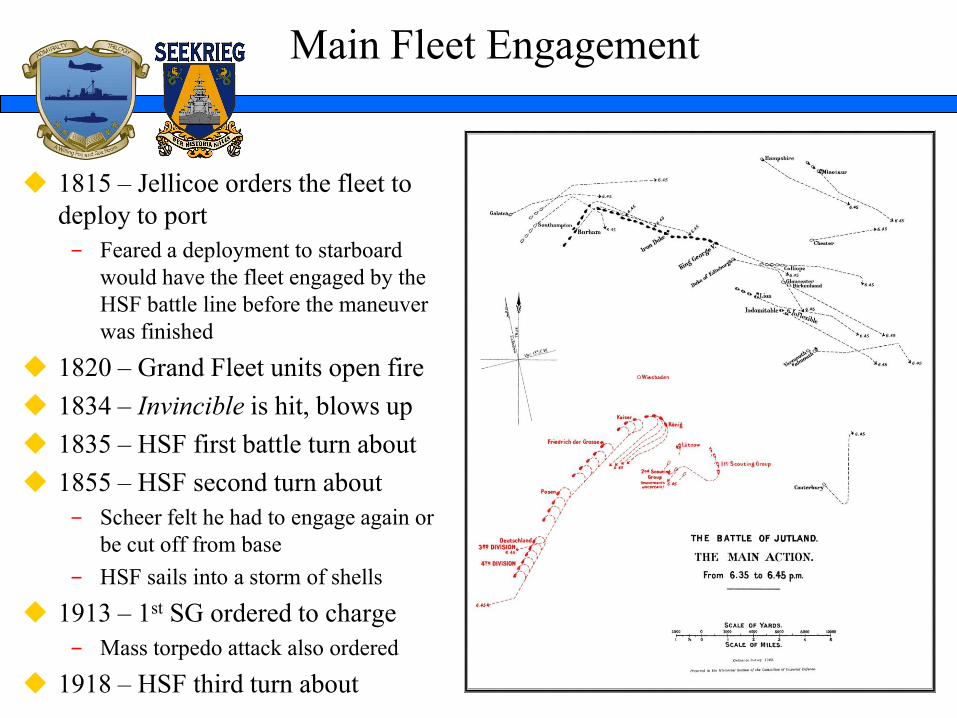
1815 – Jellicoe orders the fleet to
deploy to port
– Feared a deployment to starboard
would have the fleet engaged by the
HSF battle line before the maneuver
was finished
1820 – Grand Fleet units open fire
1834 – Invincible is hit, blows up
1835 – HSF first battle turn about
1855 – HSF second turn about
– Scheer felt he had to engage again or
be cut off from base
– HSF sails into a storm of shells
1913 – 1st SG ordered to charge
– Mass torpedo attack also ordered
1918 – HSF third turn about
Main Fleet Engagement
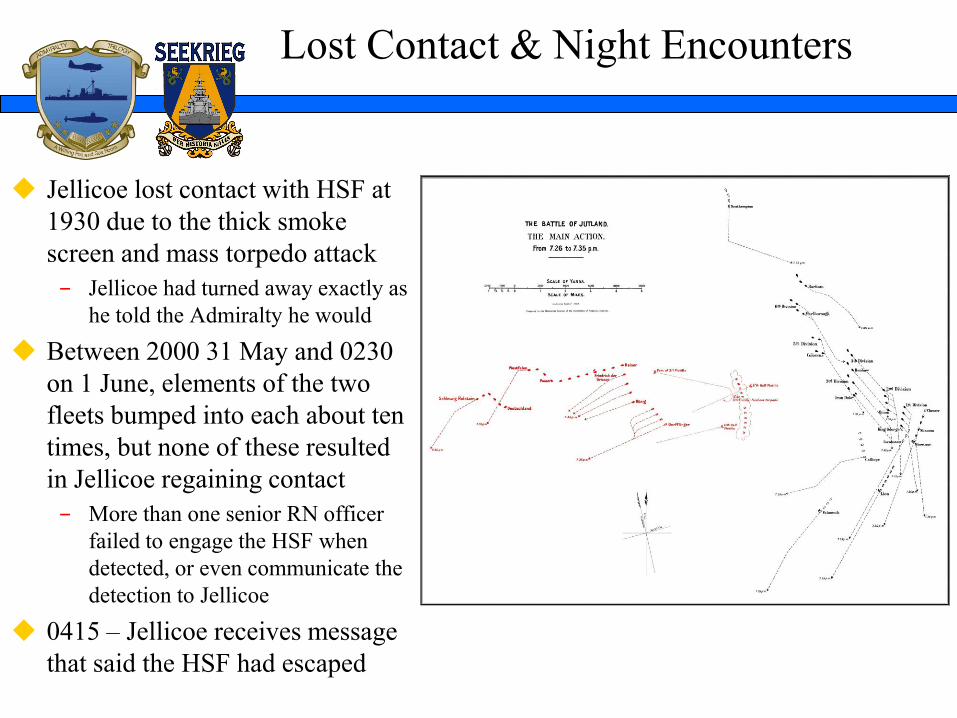
Jellicoe lost contact with HSF at
1930 due to the thick smoke
screen and mass torpedo attack
– Jellicoe had turned away exactly as
he told the Admiralty he would
Between 2000 31 May and 0230
on 1 June, elements of the two
fleets bumped into each about ten
times, but none of these resulted
in Jellicoe regaining contact
– More than one senior RN officer
failed to engage the HSF when
detected, or even communicate the
detection to Jellicoe
0415 – Jellicoe receives message
that said the HSF had escaped
Lost Contact & Night Encounters
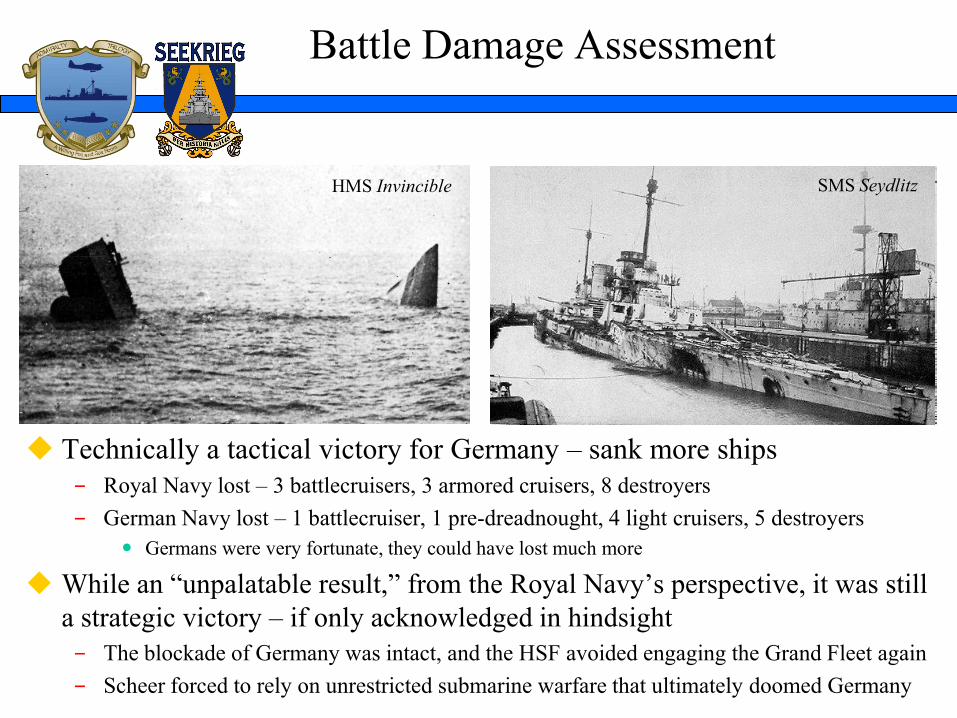
Technically a tactical victory for Germany – sank more ships
– Royal Navy lost – 3 battlecruisers, 3 armored cruisers, 8 destroyers
– German Navy lost – 1 battlecruiser, 1 pre-dreadnought, 4 light cruisers, 5 destroyers
Germans were very fortunate, they could have lost much more
While an “unpalatable result,” from the Royal Navy’s perspective, it was still
a strategic victory – if only acknowledged in hindsight
– The blockade of Germany was intact, and the HSF avoided engaging the Grand Fleet again
– Scheer forced to rely on unrestricted submarine warfare that ultimately doomed Germany
Battle Damage Assessment
SMS Seydlitz HMS Invincible

Lessons Learned
Finding and fixing a target’s location is critical
– Scouting is the hardest part of naval warfare, and usually glossed over in wargames
– Players have far more information than they have any right to
Communicating is laborious, dull and difficult, but absolutely essential
– Non-reporting, or worse bad reporting, can cost a commander victory
– BCF’s poor comms practices repeatedly interfered with achieving their mission
Advanced technology isn’t a benefit if it doesn’t work
– Both sides suffered from ordnance problems, but the Royal Navy suffered far worse
Shock sensitive shells and propellants contributed to the loss of three ships at Jutland
Robbed them of at least two more ships – Seydlitz and Derfflinger
Advanced technology isn’t a benefit if it a crew doesn’t train properly
– Battle Cruiser Fleet’s shooting through out the war was uniformly poor
Accuracy at ranges of 15+ kyds much worse than the IGN and the rest of the Grand Fleet
– The emphasis on rate of fire pushed ships to bypass/ignore safety measures and procedures
High rate of fire did little to improve hit rate, and cost the Royal Navy dearly