Embed Size (px)
Citation preview
INSTALLING DSPACE ON
WINDOWS
Prepared by Archana S.N.
Professional Assistant University Library
Cochin University of Science And Technology ********************
Prerequisite software
Java 1.5.0 (jdk1.5.0_14) http://java.sun.com/javase/downloads/index_jdk5.jsp
Apache Ant http://ant.apache.org/bindownload.cgi
Apache Tomcat http://tomcat.apache.org/download-55.cgi
PostgreSQL 8.2 http://www.postgresql.org/ftp/binary/v8.2.6/win32/
DSpace1.4.2 http://sourceforge.net/projects/dspace/
STEPS
1) Create a folder in the C drive named “installdspace” 2) Download all the above mentioned software to this folder. (If you are provided
with a CD, then copy and paste all the items in it to this folder) 3) Check the computer to ensure that the above mentioned softwares are not
already installed in it. If so remove it from the system by clicking the “Add/Remove Program” button in the control panel and select and remove the item
4) Install Java • Click the .exe file and follow instructions
5) Install Apache Ant • Unzip the apache ant file(Right click the file and click “extract all”/ “open
with winzip”) • Copy and paste the same folder to C drive
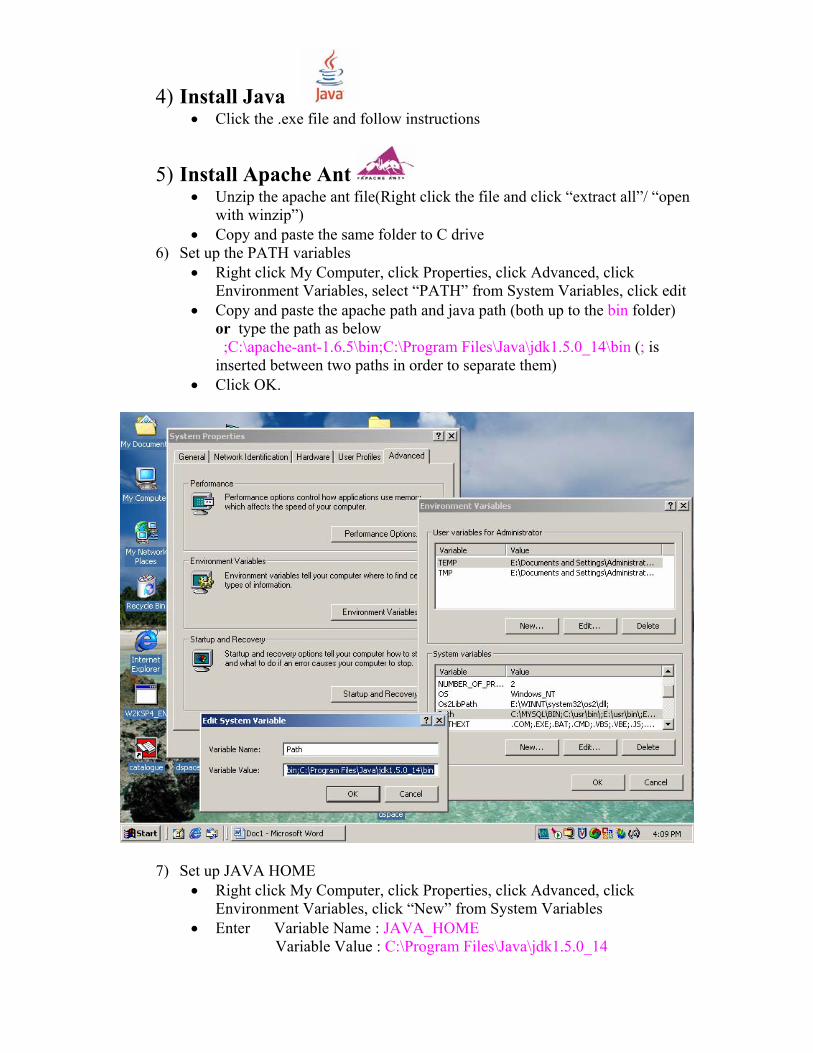
6) Set up the PATH variables • Right click My Computer, click Properties, click Advanced, click
Environment Variables, select “PATH” from System Variables, click edit • Copy and paste the apache path and java path (both up to the bin folder)
or type the path as below ;C:\apache-ant-1.6.5\bin;C:\Program Files\Java\jdk1.5.0_14\bin (; is
inserted between two paths in order to separate them) • Click OK.
7) Set up JAVA HOME • Right click My Computer, click Properties, click Advanced, click
Environment Variables, click “New” from System Variables • Enter Variable Name : JAVA_HOME Variable Value : C:\Program Files\Java\jdk1.5.0_14
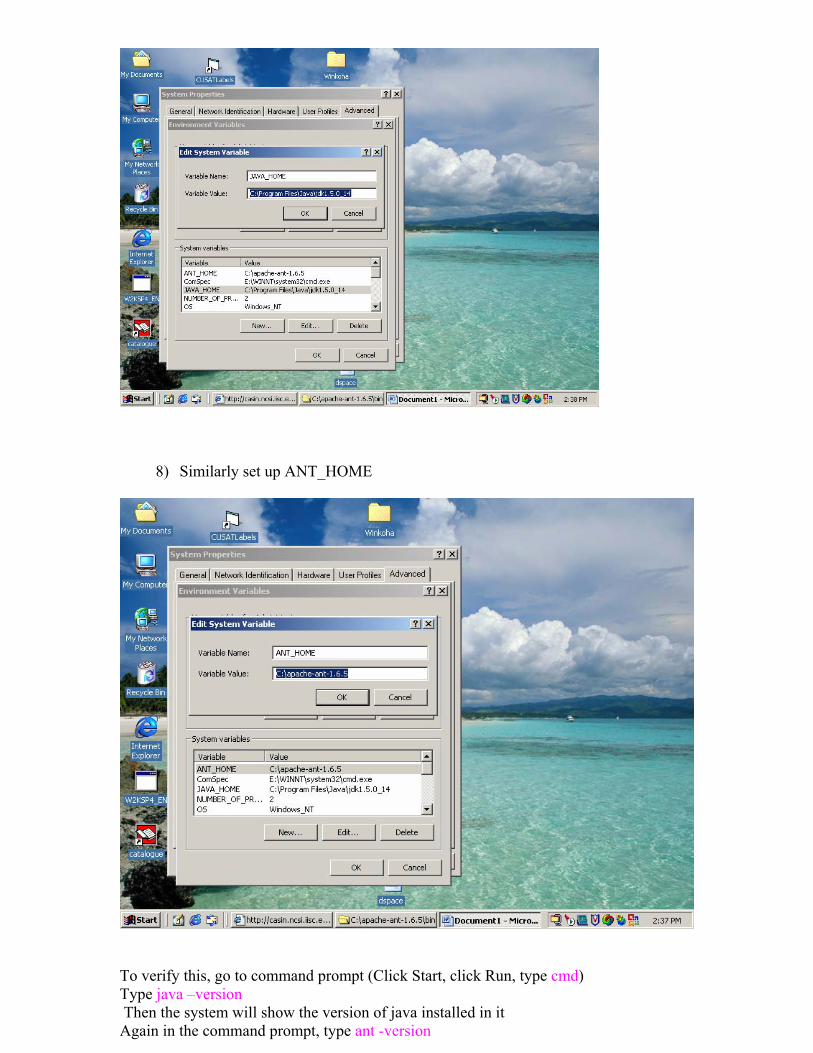
8) Similarly set up ANT_HOME
To verify this, go to command prompt (Click Start, click Run, type cmd) Type java –version Then the system will show the version of java installed in it Again in the command prompt, type ant -version
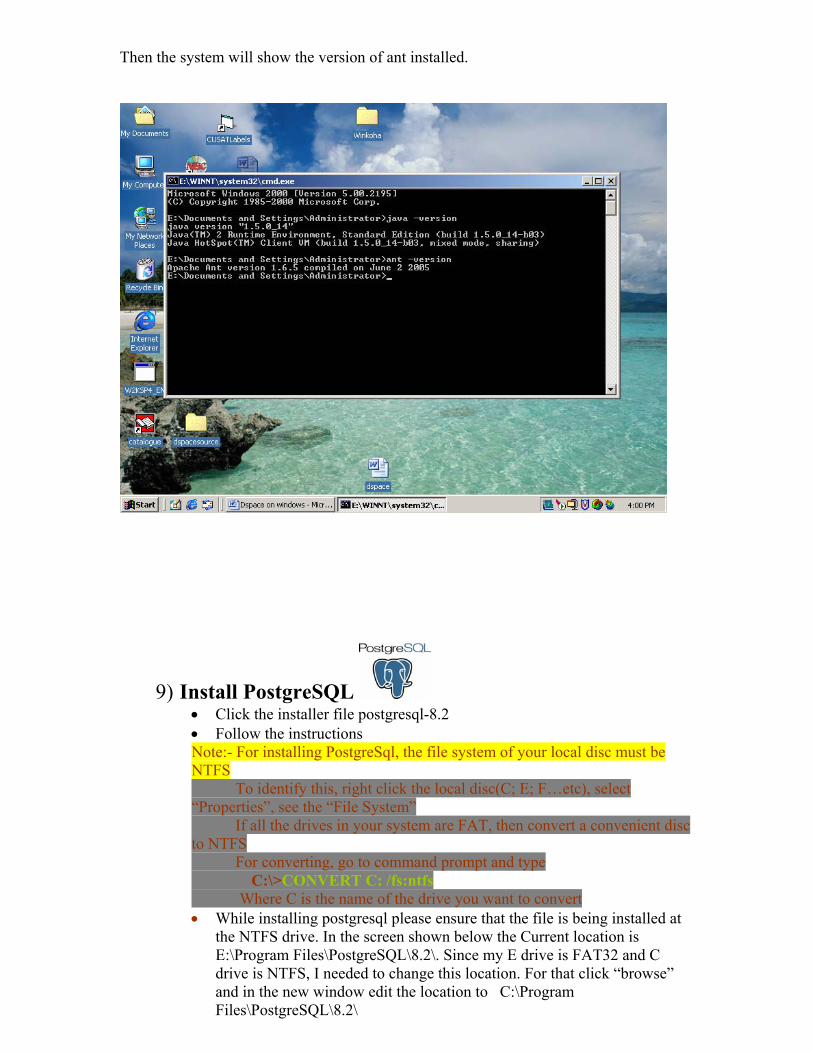
Then the system will show the version of ant installed.
9) Install PostgreSQL • Click the installer file postgresql-8.2 • Follow the instructions Note:- For installing PostgreSql, the file system of your local disc must be NTFS To identify this, right click the local disc(C; E; F…etc), select “Properties”, see the “File System” If all the drives in your system are FAT, then convert a convenient disc to NTFS For converting, go to command prompt and type C:\>CONVERT C: /fs:ntfs Where C is the name of the drive you want to convert • While installing postgresql please ensure that the file is being installed at
the NTFS drive. In the screen shown below the Current location is E:\Program Files\PostgreSQL\8.2\. Since my E drive is FAT32 and C drive is NTFS, I needed to change this location. For that click “browse” and in the new window edit the location to C:\Program Files\PostgreSQL\8.2\
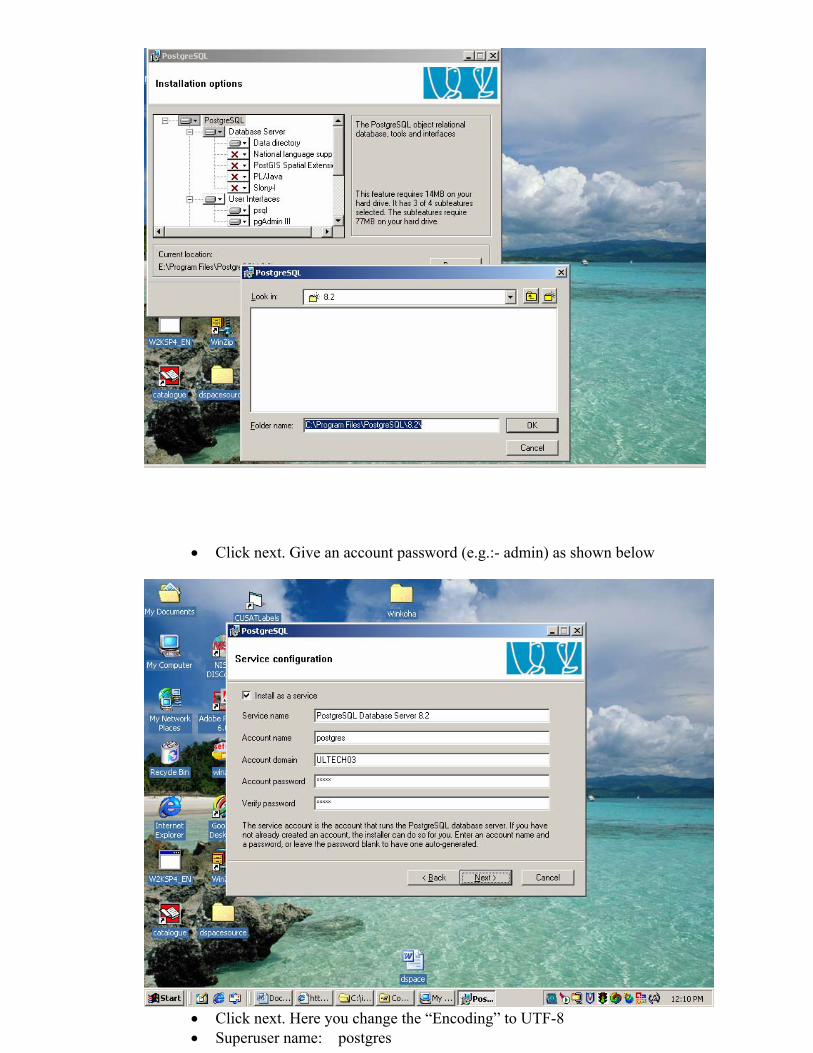
• Click next. Give an account password (e.g.:- admin) as shown below
• Click next. Here you change the “Encoding” to UTF-8 • Superuser name: postgres
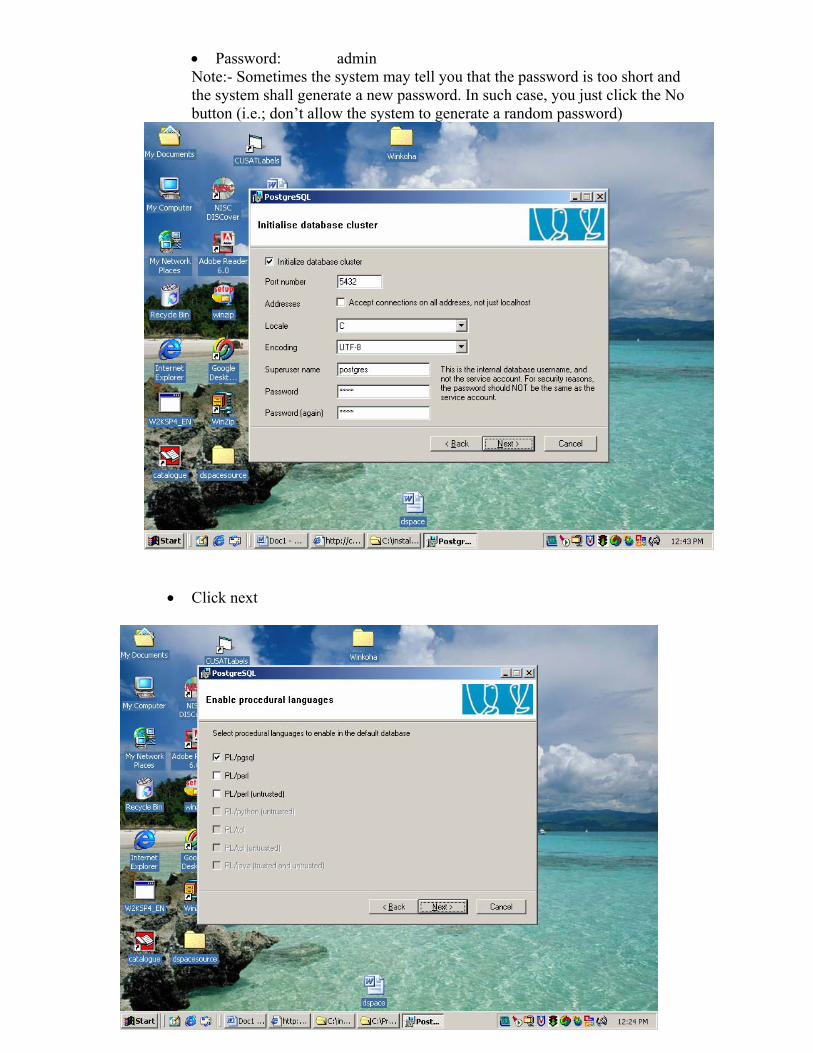
• Password: admin Note:- Sometimes the system may tell you that the password is too short and the system shall generate a new password. In such case, you just click the No button (i.e.; don’t allow the system to generate a random password)
• Click next
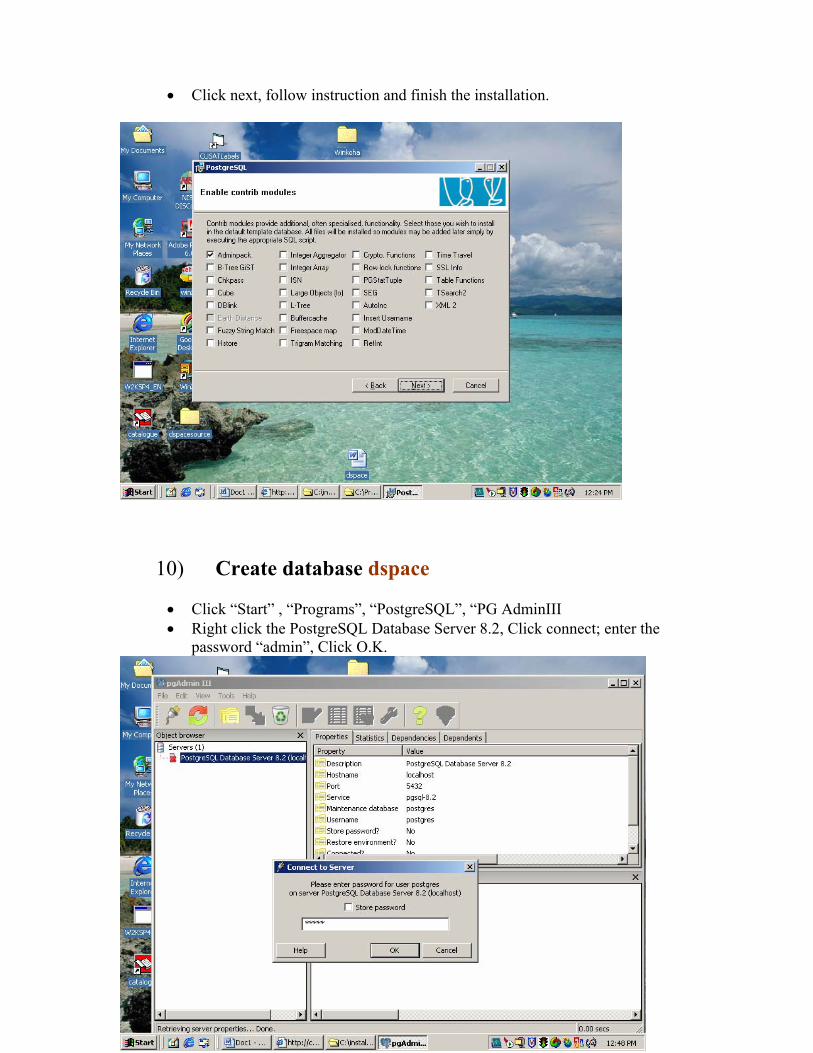
• Click next, follow instruction and finish the installation.
10) Create database dspace
• Click “Start” , “Programs”, “PostgreSQL”, “PG AdminIII • Right click the PostgreSQL Database Server 8.2, Click connect; enter the
password “admin”, Click O.K.
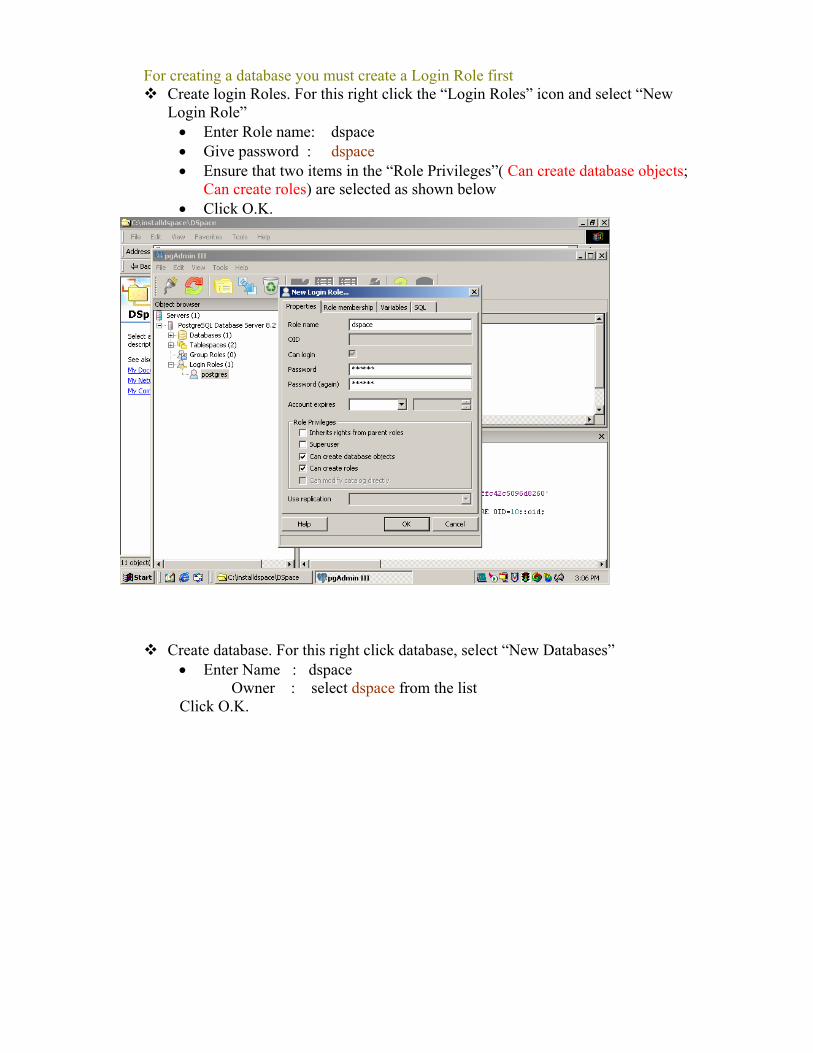
For creating a database you must create a Login Role first
Create login Roles. For this right click the “Login Roles” icon and select “New Login Role” • Enter Role name: dspace • Give password : dspace • Ensure that two items in the “Role Privileges”( Can create database objects;
Can create roles) are selected as shown below • Click O.K.
Create database. For this right click database, select “New Databases” • Enter Name : dspace Owner : select dspace from the list Click O.K.
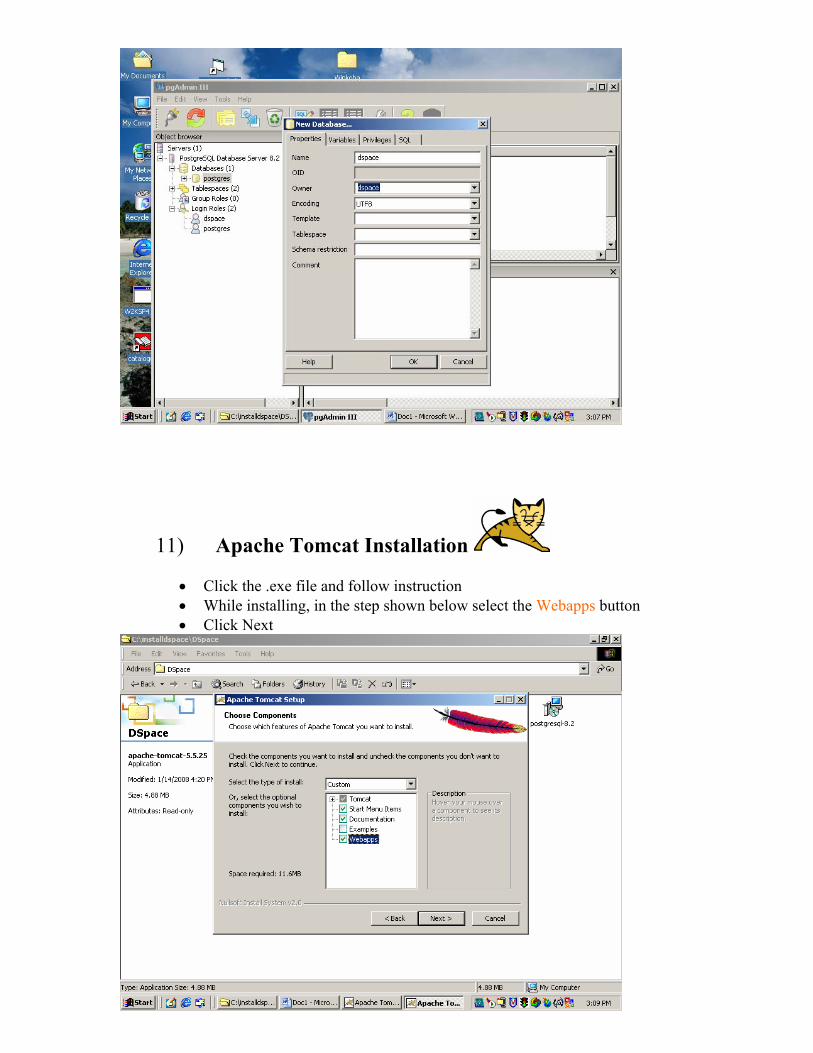
11) Apache Tomcat Installation
• Click the .exe file and follow instruction • While installing, in the step shown below select the Webapps button • Click Next
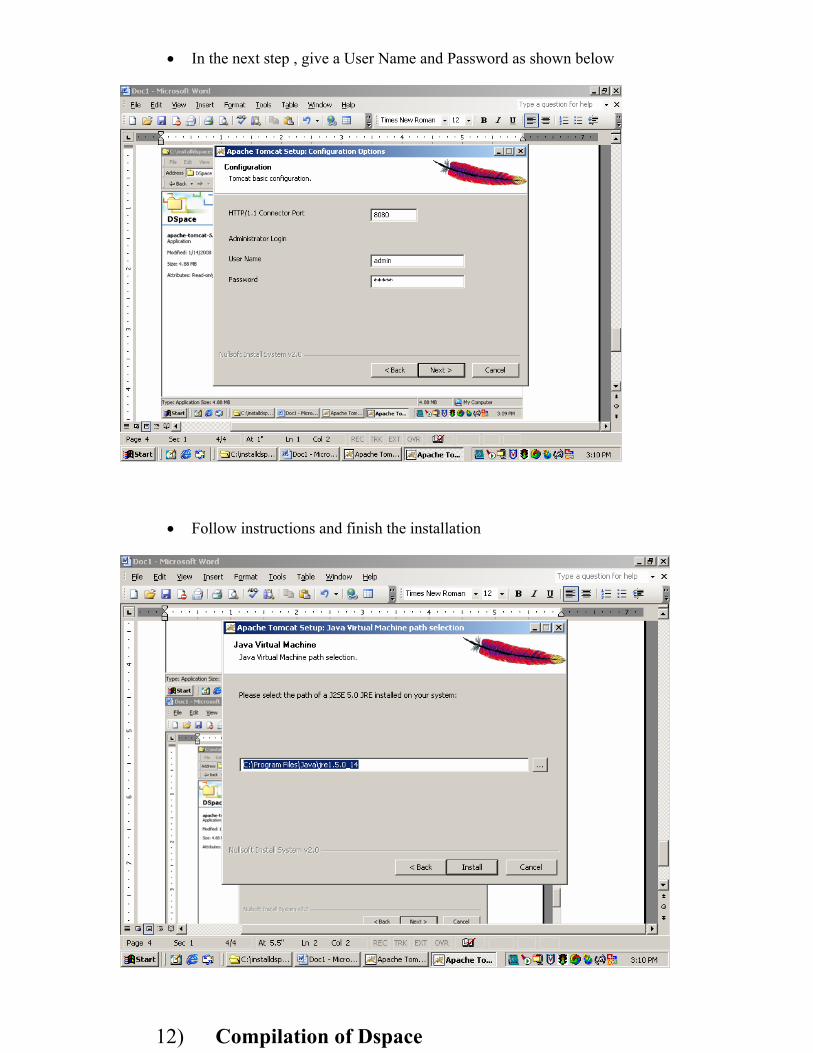
• In the next step , give a User Name and Password as shown below
• Follow instructions and finish the installation
12) Compilation of Dspace
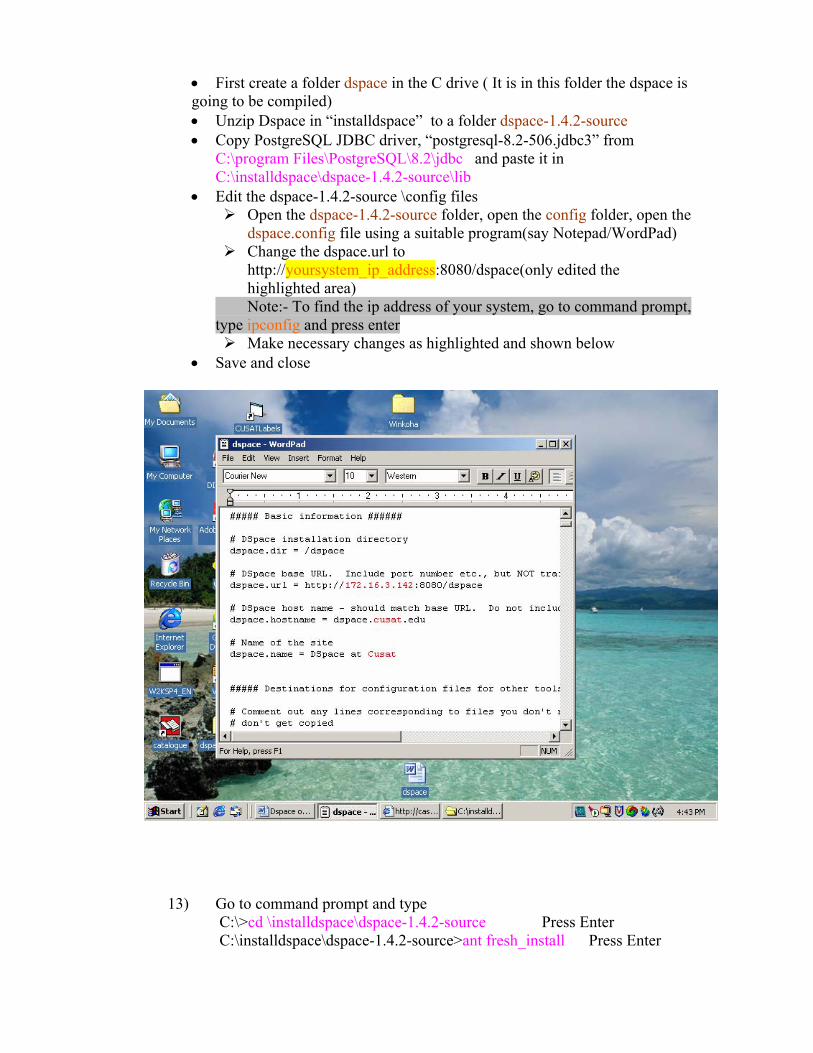
• First create a folder dspace in the C drive ( It is in this folder the dspace is going to be compiled) • Unzip Dspace in “installdspace” to a folder dspace-1.4.2-source • Copy PostgreSQL JDBC driver, “postgresql-8.2-506.jdbc3” from
C:\program Files\PostgreSQL\8.2\jdbc and paste it in C:\installdspace\dspace-1.4.2-source\lib
• Edit the dspace-1.4.2-source \config files Open the dspace-1.4.2-source folder, open the config folder, open the
dspace.config file using a suitable program(say Notepad/WordPad) Change the dspace.url to
http://yoursystem_ip_address:8080/dspace(only edited the highlighted area)
Note:- To find the ip address of your system, go to command prompt, type ipconfig and press enter
Make necessary changes as highlighted and shown below • Save and close
13) Go to command prompt and type C:\>cd \installdspace\dspace-1.4.2-source Press Enter C:\installdspace\dspace-1.4.2-source>ant fresh_install Press Enter
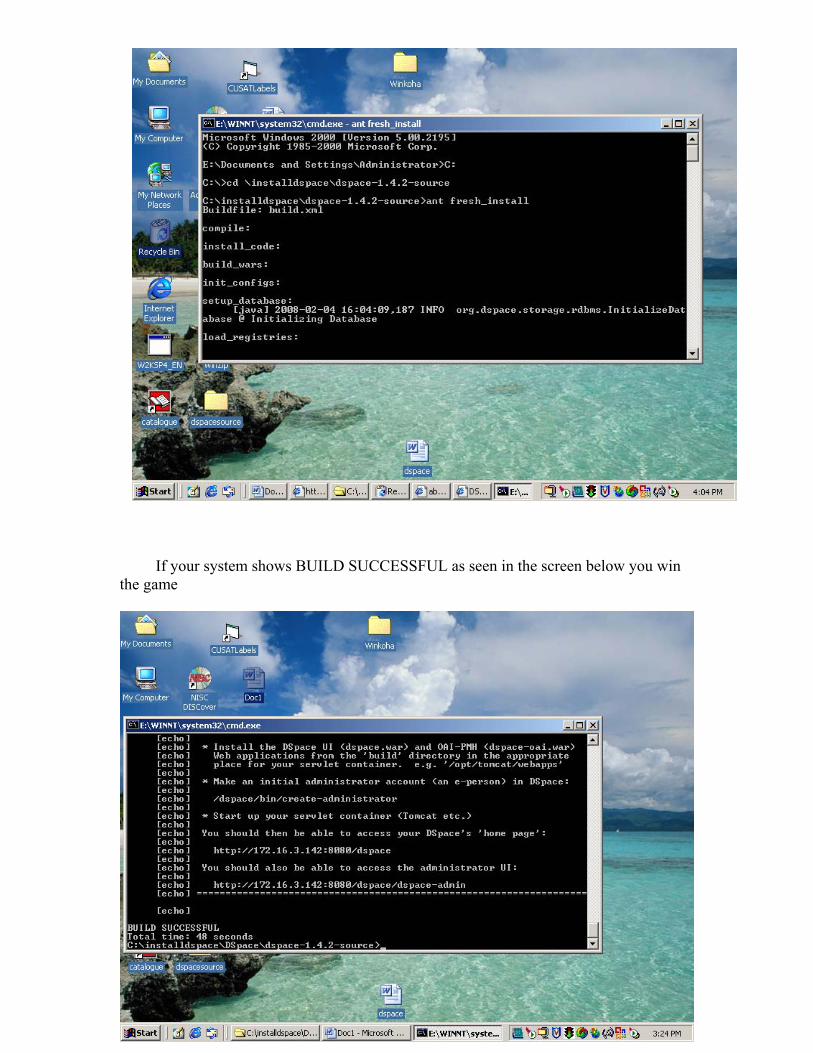
If your system shows BUILD SUCCESSFUL as seen in the screen below you win the game
14) Copy WAR files (2No.s) from the build folder of dspace-1.4.2-source to C:\ProgramFiles\Apache Software Foundation\Tomcat 5.5\webapps
15) Run Apache • Start, Programs, Apache Tomcat5.5,click “Monitor Tomcat” • You will get an icon in your taskbar. Right click it, click “Start service”
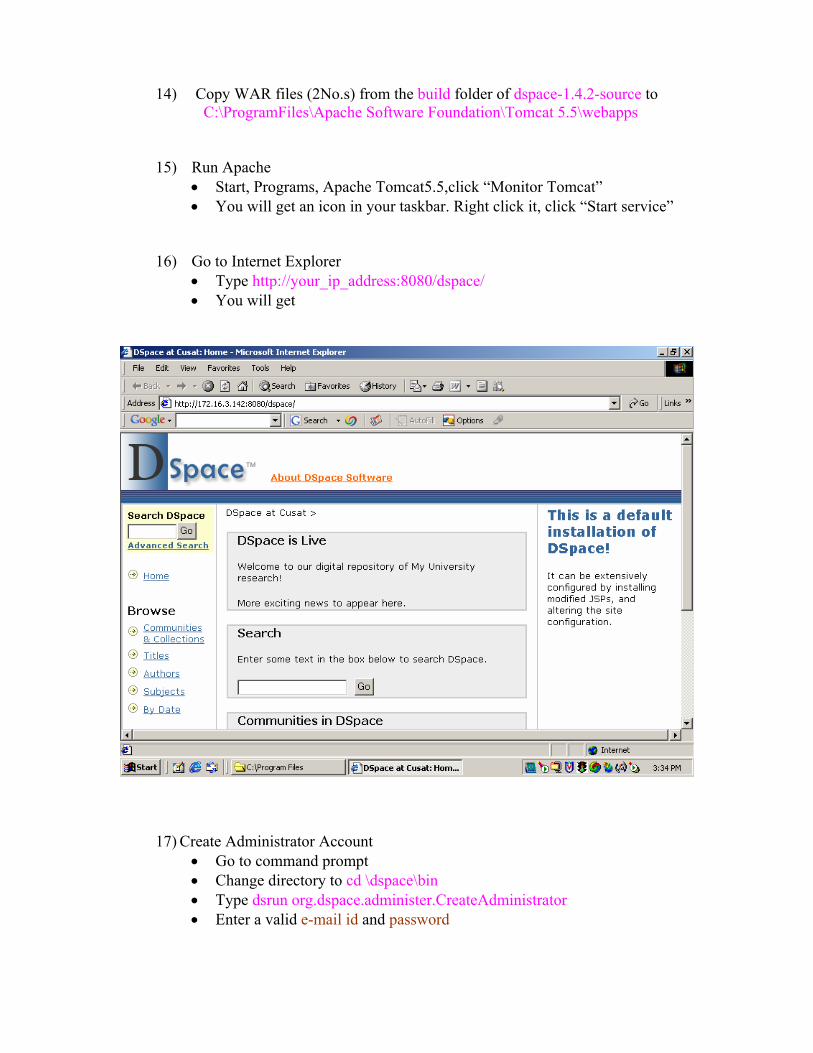
16) Go to Internet Explorer • Type http://your_ip_address:8080/dspace/ • You will get
17) Create Administrator Account • Go to command prompt • Change directory to cd \dspace\bin • Type dsrun org.dspace.administer.CreateAdministrator • Enter a valid e-mail id and password
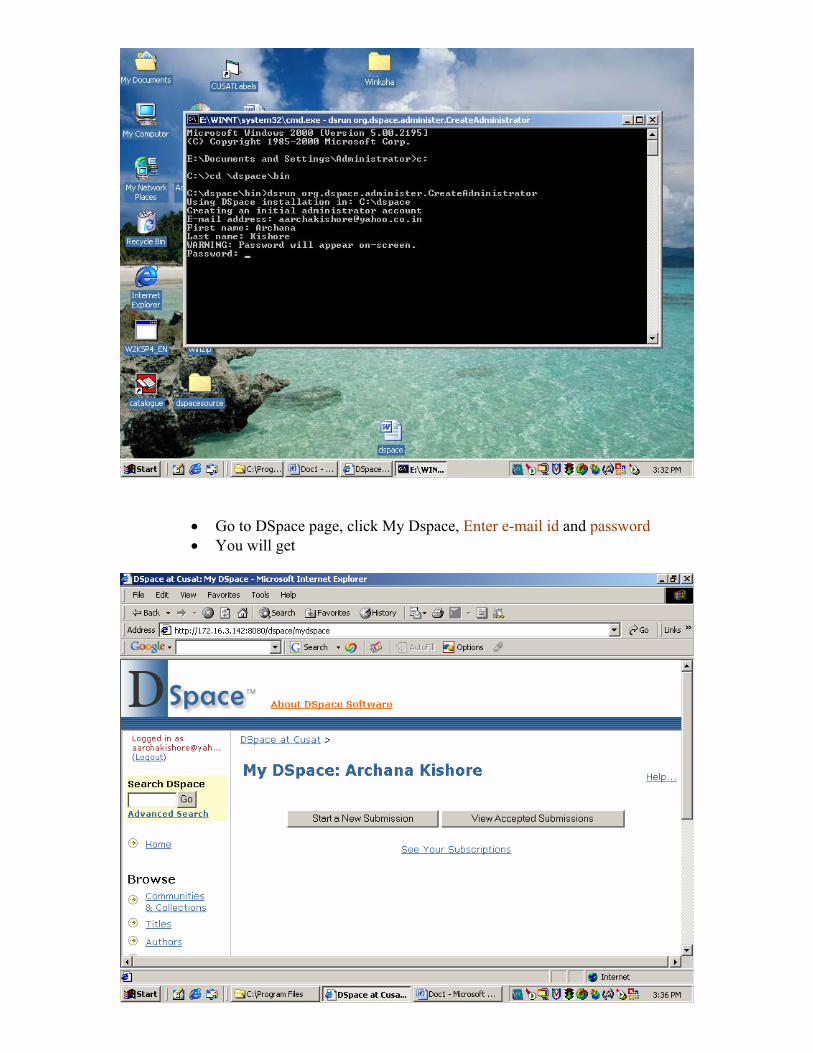
• Go to DSpace page, click My Dspace, Enter e-mail id and password • You will get

THANKYOU TRY IT OUT