Embed Size (px)
Citation preview
Installation guide
GuideDragon speech recognitionNuance Dragon Professional Individual for Mac, v6
For v6 of:

Contents
Dragon Professional for Mac Installation Guide 1
Preparing to Install Dragon Professional Individual for Mac 3
System Requirements 3
Installing Dragon Professional Individual for Mac 4
Enabling Accessibility 9
Activating Dragon Professional Individual for Mac 10
Register for Support 12
Upgrading to Dragon Professional Individual for Mac 16
All Upgrades 16Upgrading from Dragon for Mac 5 16Upgrading from Dragon Dictate 4 17
2

Preparing to Install Dragon Professional Individual for MacThis section contains information on the prerequisites for installing Dragon, Dragon system requirements, and information on which Dragon products you can install on the same computer.
System Requirements
Before you install Dragon Professional Individual for Mac version 6, make sure your system meets the following requirements:
RAM: 4GB, 8GB+ recommended
CPU: Intel-based Mac computer (Minimum: 2.4 Ghz Intel Core 2 Duo. Intel Core i3, i5 or i7 recommended.)
Free hard disk space: 4GB (installation disc); 8GB (downloaded installer)
Supported Operating Systems: OS X El Capitan (10.11) or higher
You will also need:
l An Internet connection for automatic product activation (a quick anonymous process) and access to online help.
l A built-in Mac microphone or a Nuance-approved microphone. See http://support.nuance.com/compatibility/default.asp for details on supported microphones.
Before installing, modifying, or upgrading Dragon:
l Make sure your OS User is an administrator on your computer. l Close all open applications.
3

Installing Dragon Professional Individual for Mac 1. First, close any Web browsers that are currently running on your Mac. 2. Start the installer:
l If you have a DVD, insert it. l If you've downloaded Dragon for Mac, you should see a Dragon for Mac.dmg file in your Downloads
folder. Double-click this file.
In both cases, a new window opens.
3. Double-click Install Dragon.
4

The Installer opens.
4. Click Continue.
The Read Me screen appears.
5. Read the information on the screen. Click Print… or Save… if you would like a copy of this information. If not, click Continue.
5

The Software License Agreement screen appears.
6. Read the Software License Agreement. Click Print… or Save… if you would like a copy of this agreement. If not, click Continue.
A confirmation dialog appears.
7. Click Agree.
6

The Installation Type screen appears.
8. To begin a standard installation of Dragon (recommended) on your hard drive disk, click Install.
If you want to choose a different disk to install onto, click Change Install Location… and choose a different disk.
9. OS X warns you that the Dragon Installer is trying to install software on your computer. Enter the password for your user, then click Install Software.
If your OS User has limited permissions, you may need to contact your IT department for help installing Dragon.
7

10. When the installation is complete, you will see a message confirming that Dragon for Mac has been installed successfully. Click Close to exit the Installer.
11. You have now installed Dragon for Mac. Go to the Applications folder on your hard drive and double-click Dragon.
8

Enabling AccessibilityThe first time you launch Dragon, you may see a dialog box like this one:
1. Click the Open System Preferences button.
System Preferences will open to Security & Privacy > Privacy.
2. Click Accessibility. 3. Click the lock icon at the bottom left of the window. You will be asked for your administrator password. 4. Select the checkbox next to Dragon.
5. Close System Preferences. 6. Find Dragon in the Applications folder and double-click to launch.
9
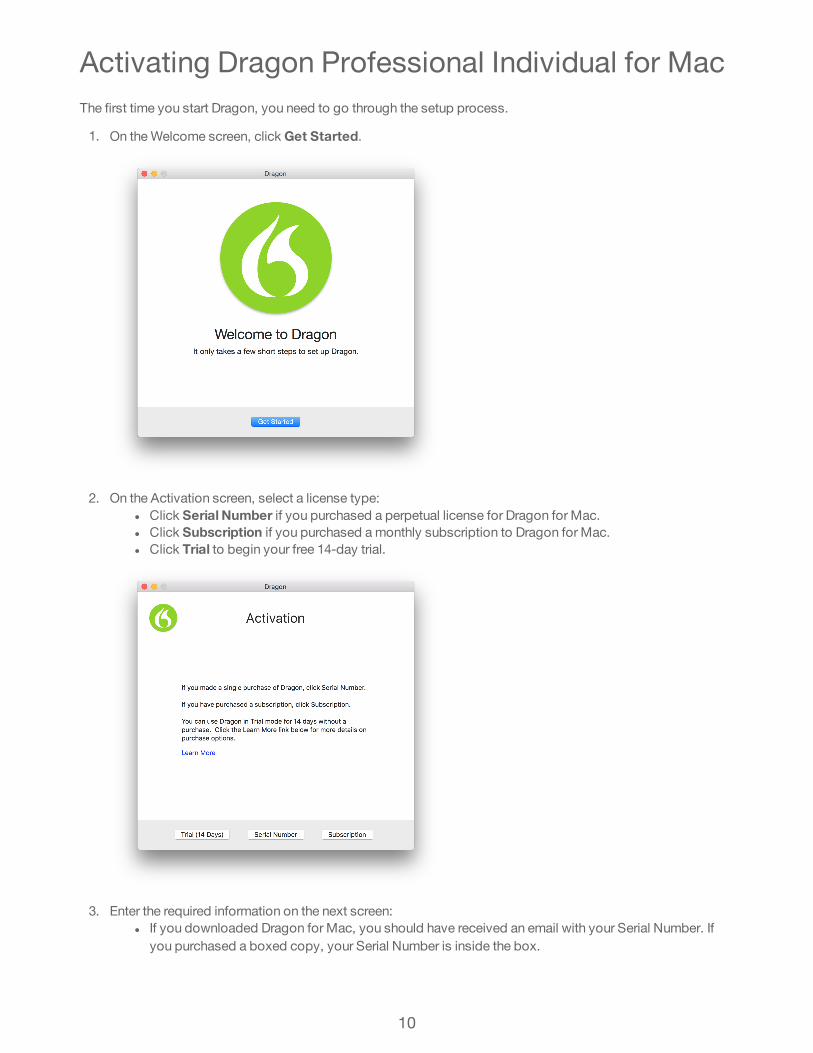
Activating Dragon Professional Individual for MacThe first time you start Dragon, you need to go through the setup process.
1. On the Welcome screen, click Get Started.
2. On the Activation screen, select a license type: l Click Serial Number if you purchased a perpetual license for Dragon for Mac. l Click Subscription if you purchased a monthly subscription to Dragon for Mac. l Click Trial to begin your free 14-day trial.
3. Enter the required information on the next screen: l If you downloaded Dragon for Mac, you should have received an email with your Serial Number. If
you purchased a boxed copy, your Serial Number is inside the box.
10
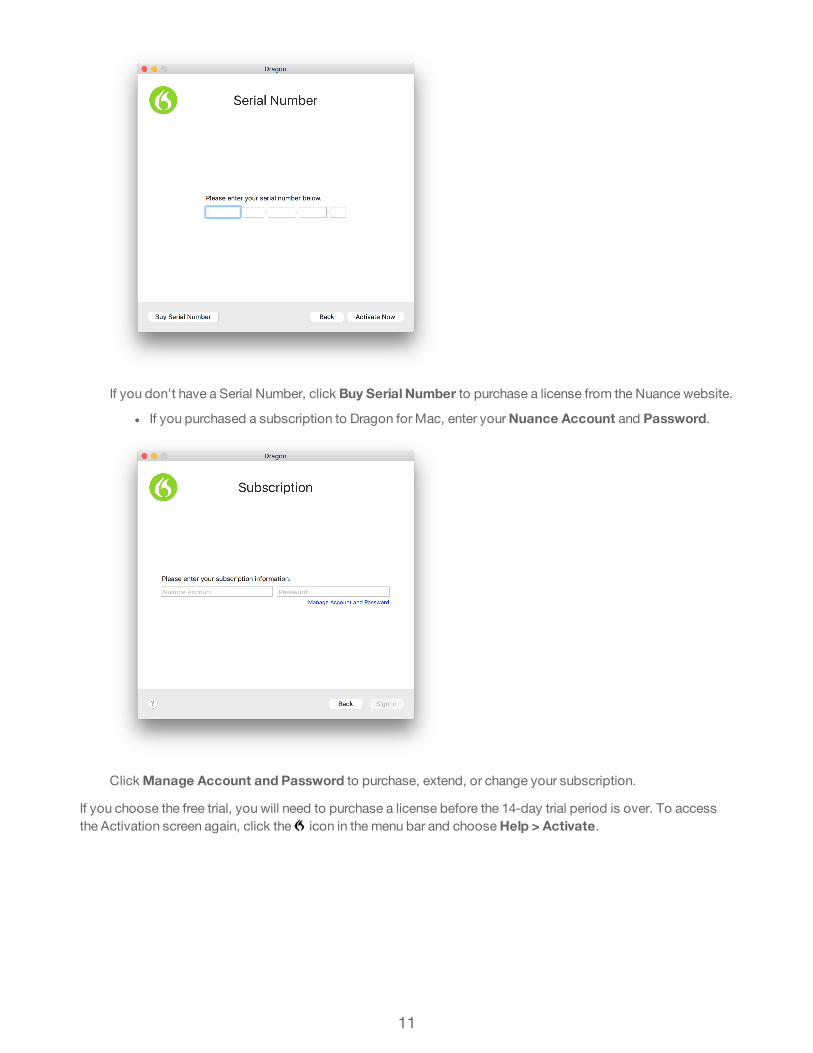
If you don't have a Serial Number, click Buy Serial Number to purchase a license from the Nuance website.
l If you purchased a subscription to Dragon for Mac, enter your Nuance Account and Password.
Click Manage Account and Password to purchase, extend, or change your subscription.
If you choose the free trial, you will need to purchase a license before the 14-day trial period is over. To access the Activation screen again, click the icon in the menu bar and choose Help > Activate.
11

Register for SupportOnce you have activated your Dragon Professional Individual for Mac license, Dragon asks you to register. Registering your product has many benefits, including activating your warranty and giving you access to special features.
1. Choose whether you are a new or existing Nuance customer, then click Continue. l If you choose to skip registration, you can access it at any time by clicking the icon in the menu bar
and selecting Help > Register for Support.
12

2. Existing Users: Enter your username and password, then skip to step 4.New Users: Enter your email address, a password, and your first and last name, then click Continue.
Your password can be up to 12 characters, and should not contain punctuation or symbols.
3. Enter your company name, street address, city, state, postal or Zip code, country and phone number. You must select a country from the dropdown list: the other fields are optional. Click Continue when finished.
13

4. Dragon will confirm the Model, Memory, and Processor Speed and Cores for your Mac. Click Yes to allow Dragon to collect this information for support purposes, or No to opt out. Then click Continue.
5. Complete the survey (optional), and check which products you want to receive news and offers about. Then click Complete Registration.
14

6. You will be asked whether you would like to share anonymous data with Dragon to help us improve the product. Click the checkbox if you would like to share data anonymously, then click Continue.
l You can opt in or out at any time by clicking the icon in the menu bar and selecting Preferences… Click the Advanced icon, then check or uncheck Send anonymous usage data at the bottom of the pane.
7. You are now ready to start using Dragon! We highly recommend that you go through the Tutorial to familiarize yourself with the product. Click the Tutorial button, or click Start Dictating if you are already familiar with Dragon for Mac.
You can visit the Tutorial at any time by clicking the icon in the menu bar and selecting Help > Tutorial.
15

Upgrading to Dragon Professional Individual for MacBelow are some frequently asked questions about upgrading to Dragon Professional Individual for Mac 6. For more detailed information, click the icon in the menu bar and select Help > Dragon Help to launch the online help in your default browser.
All Upgrades
I just finished upgrading – is there anything I can delete to save disk space?
You can remove old Dragon files from your hard drive once you are sure that Dragon for Mac 6 is working properly:
1. In the Finder, select Go > Go to Folder… 2. Copy and paste the following: /Library/Application Support/Dragon 3. Click the Go button.
A Finder window opens, displaying the contents of the specified folder.
4. Drag the file named Speech Engine Data (English) 4.0 or Speech Engine Data (English) 5.0 to the Trash.
Important: Do not move any other files in the Dragon folder.
5. Once you have successfully upgraded your profile and verified that it works as expected, you can delete the backup copies of your old profiles. In the /Documents/Dragon/Support folder, find the zipped backup copies of your old profiles and drag them to the Trash.
My profile won't upgrade. What can I do?
Make sure the microphones listed as Dictation sources in your profile are connected. Missing microphones are
marked with a in the Profiles pane. Make sure the microphones listed as audio sources in your profile are connected.
What happened to Transcription sources?
Transcription sources are no longer stored in the Profiles pane. If your Dragon for Mac 5 or Dragon Dictate 4 profile included Transcription sources, they are available in the Speaker dropdown list in the Transcription window.
Upgraded Transcription sources appear in the format "<Transcription source> (<Profile name>)." For example, if you had a Transcription source named "iPhone" and a user named "Marie," the Speaker appears as "iPhone (Marie)."
Upgrading from Dragon for Mac 5
How has the Status Window changed?
Dragon for Mac 6 features a new, compact Status window. Here's what you need to know:
l Guidance is now its own window. Click the button and select Show Guidance to view hints and common commands based on your current state.
16
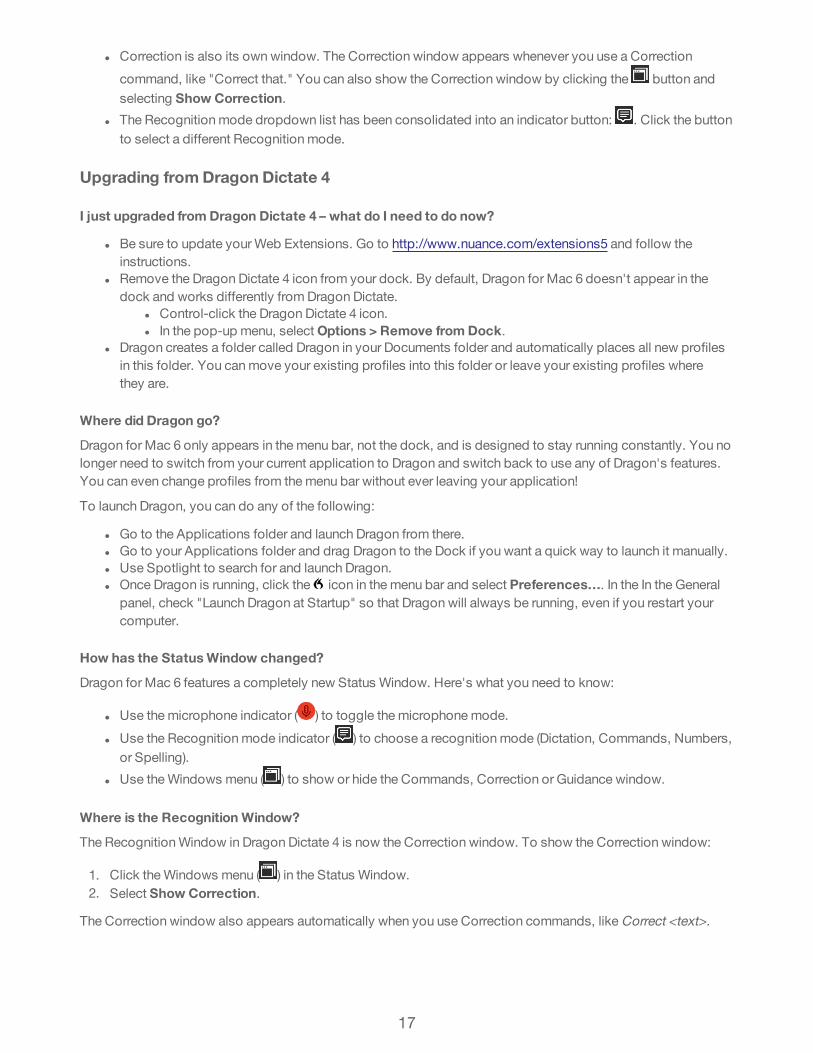
l Correction is also its own window. The Correction window appears whenever you use a Correction
command, like "Correct that." You can also show the Correction window by clicking the button and selecting Show Correction.
l The Recognition mode dropdown list has been consolidated into an indicator button: . Click the button to select a different Recognition mode.
Upgrading from Dragon Dictate 4
I just upgraded from Dragon Dictate 4 – what do I need to do now?
l Be sure to update your Web Extensions. Go to http://www.nuance.com/extensions5 and follow the instructions.
l Remove the Dragon Dictate 4 icon from your dock. By default, Dragon for Mac 6 doesn't appear in the dock and works differently from Dragon Dictate.
l Control-click the Dragon Dictate 4 icon. l In the pop-up menu, select Options > Remove from Dock.
l Dragon creates a folder called Dragon in your Documents folder and automatically places all new profiles in this folder. You can move your existing profiles into this folder or leave your existing profiles where they are.
Where did Dragon go?
Dragon for Mac 6 only appears in the menu bar, not the dock, and is designed to stay running constantly. You no longer need to switch from your current application to Dragon and switch back to use any of Dragon's features. You can even change profiles from the menu bar without ever leaving your application!
To launch Dragon, you can do any of the following:
l Go to the Applications folder and launch Dragon from there. l Go to your Applications folder and drag Dragon to the Dock if you want a quick way to launch it manually. l Use Spotlight to search for and launch Dragon. l Once Dragon is running, click the icon in the menu bar and select Preferences…. In the In the General
panel, check "Launch Dragon at Startup" so that Dragon will always be running, even if you restart your computer.
How has the Status Window changed?
Dragon for Mac 6 features a completely new Status Window. Here's what you need to know:
l Use the microphone indicator ( ) to toggle the microphone mode.
l Use the Recognition mode indicator ( ) to choose a recognition mode (Dictation, Commands, Numbers, or Spelling).
l Use the Windows menu ( ) to show or hide the Commands, Correction or Guidance window.
Where is the Recognition Window?
The Recognition Window in Dragon Dictate 4 is now the Correction window. To show the Correction window:
1. Click the Windows menu ( ) in the Status Window. 2. Select Show Correction.
The Correction window also appears automatically when you use Correction commands, like Correct <text>.
17

Where is the NotePad?
In Dragon Dictate, you could use the Note Pad to edit text and mix talking with typing. In Dragon for Mac 6, fully supported applications like Microsoft Word 2016 or TextEdit can be used to replace the functionality of the Note Pad.
Check the Guidance window for information about what Dragon can do in your current application. If you don’t see the Dragon menu, Click the icon in the menu bar and select Show Guidance.
Where is the Express Editor?
The Express Editor has been renamed the DragonPad. It has the same features as the Express Editor.
You may find that using TextEdit to edit text and then copying and pasting into another application is a better workflow.
What happened to Text Macros?
Text Macros are now Auto-texts. They work just like Text Macros.
To add an Auto-text, click the icon in the menu bar and select Add New Auto-text…
Once you have created Auto-texts, they are listed in the Commands window under Auto-texts.
18