Embed Size (px)
Citation preview
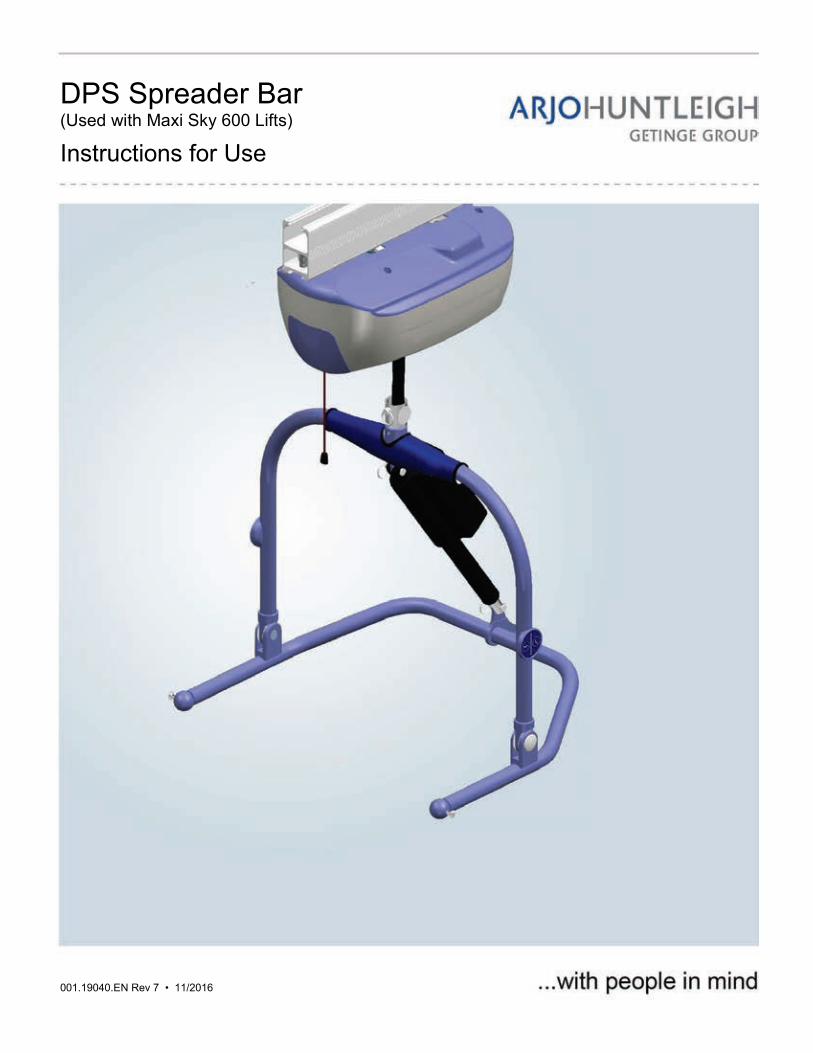
DPS Spreader Bar (Used with Maxi Sky 600 Lifts)
Instructions for Use
001.19040.EN Rev 7 • 11/2016

001.
1904
0.E
N re
v. 7
Design Policy and Copyright ® and ™ are trademarks belonging to the ArjoHuntleigh group of companies. © ArjoHuntleigh 2016. As our policy is one of continuous improvement, we reserve the right to modify designs without prior notice. The content of this publication may not be copied either whole or in part without the consent of ArjoHuntleigh.

Table of Contents
3
001.
1904
0.E
N re
v. 7
Symbols .......................................................................................................................... 4
Technical Data ................................................................................................................ 5
Safety Instructions and Warnings .................................................................................... 6
Assembling the DPS ....................................................................................................... 7
Restrictions: ............................................................................................................................ 7 Assembling the Dynamic Positioning System Spreader Bar .................................................... 7 Installation of the DPS Spreader Bar Interconnection System into the Maxi Sky 600 lift ......... 8 Installation of the DPS Spreader Bar on the Maxi Sky 600 Lift .............................................. 10 Positioning the DPS spreader bar on the Maxi Sky 600 lift .................................................... 11
Operating the DPS Spreader Bar .................................................................................. 12
Sling Attachment .................................................................................................... 13 Straight Attachment ............................................................................................ 13
Crossed Attachment ........................................................................................... 13
Maintenance and Cleaning ............................................................................................ 14
WARNING: ............................................................................................................. 14 Daily Check List ..................................................................................................... 14 Inspection and Cleaning ......................................................................................... 14 Annual Inspection ................................................................................................... 14
Troubleshooting ............................................................................................................ 15
Log Book ....................................................................................................................... 16
Symbols
4
001.
1904
0.E
N re
v. 7
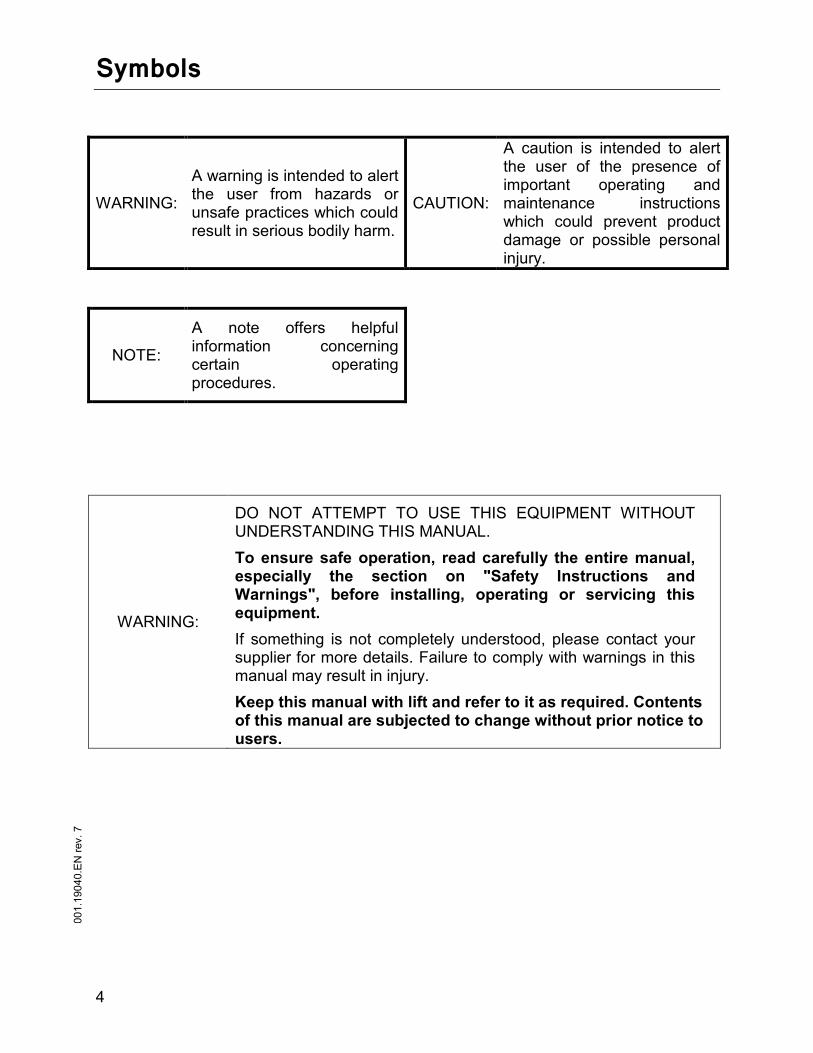
Symbols
WARNING:
A warning is intended to alert the user from hazards or unsafe practices which could result in serious bodily harm.
CAUTION:
A caution is intended to alert the user of the presence of important operating and maintenance instructions which could prevent product damage or possible personal injury.
NOTE:
A note offers helpful information concerning certain operating procedures.
WARNING:
DO NOT ATTEMPT TO USE THIS EQUIPMENT WITHOUT UNDERSTANDING THIS MANUAL. To ensure safe operation, read carefully the entire manual, especially the section on "Safety Instructions and Warnings", before installing, operating or servicing this equipment. If something is not completely understood, please contact your supplier for more details. Failure to comply with warnings in this manual may result in injury. Keep this manual with lift and refer to it as required. Contents of this manual are subjected to change without prior notice to users.

Technical Data
5
001.
1904
0.E
N re
v. 7
Technical Data
DIMENSIONS
WEIGHT DATA
DPS position: Description kg lb
SITTING LYING DPS spreader bar 7 15 mm in mm in Shipping 9 20
A 90 3,5 190 7,5
B 305 12 527 20.8
C 639 251 495 19.5
mm in
D 590 23.2 TECHNICAL DATA E 465 18.3 Description kg lb
F 77° Safe working load (SWL) 272 600
IP rating IP65
Control voltage output (Vdc) 24
Current limiting (Amp.) 5
Fuse size (Amp.) 5
Duty Cycle 10% 6 min/h
Sound power level ( dBA ) 40
ENVIRONMENTAL CONDITIONS: Normal operation: 10 C̊ to 40 C̊, 0% to 90% R.H., 700-1060hPa. Equipment is not suitable for use in the presence of flammable anaesthetic mixture with air or with nitrous oxide.
Equipment classification with respect to protection from electric shock: internally powered. Degree of protection against electric shock: Type BF applied parts

Safety Instructions and Warnings
6
001.
1904
0.E
N re
v. 7
Safety Instructions and Warnings
IMPORTANT – READ THESE INSTRUCTIONS CAREFULLY OR SERIOUS INJURY MAY
RESULT. KEEP THESE INSTRUCTIONS WITH THE PRODUCT AT ALL TIMES. READ AND UNDERSTAND OPERATING AND MAINTENANCE INSTRUCTIONS IN THIS
MANUAL BEFORE INSTALLING, OPERATING, OR SERVICING THIS EQUIPMENT. This equipment MUST ONLY be installed by personnel qualified to do so. ArjoHuntleigh spreader bars MUST be installed by an authorized contractor or installer. ONLY a qualified technician or installer can remove and reinstall the spreader bar on the lift. Your spreader bar is for transferring patients only. DO NOT use it for any other purpose. ALWAYS carry out the daily checklist before using the spreader bar. ArjoHuntleigh DPS spreader bar is specifically designed for ArjoHuntleigh ceiling lift
systems, slings and accessories. Accessories designed by any other manufacturer are prohibited and will prevent ArjoHuntleigh from being able to guarantee a safe transfer. USE ONLY ArjoHuntleigh spreader bars and accessories to maintain patient safety and product utility.
ArjoHuntleigh DPS spreader bar is intended to be used for patients within the specified weight limit indicated for the lift. DO NOT attempt to lift more than the weight limit indicated.
Before attempting to transfer, the patient MUST be assessed by a qualified professional. ArjoHuntleigh ceiling lifts and DPS spreader bars MUST be used by a caregiver with proper
training to work with the patient to be transferred. This patient lift SHOULD NEVER be used by patients on their own.
ONLY trained and qualified caregivers should transfer a patient. DO NOT attempt to use the lift and the DPS spreader bar if you have not been properly trained to do so.
ALWAYS be prepared before attempting to transfer a patient. DO NOT use a sling that is not recommended for the lift and DPS spreader bar. DO NOT drop the DPS spreader bar. Dropping the DPS spreader bar may cause internal
damage that is not easily seen. If the DPS spreader bar is suspected to be damaged, contact an authorized technician for servicing.
IMPORTANT: Keep all components of the DPS spreader bar clean and dry, and have electrical and mechanical safety checkpoints done as instructed in the "Maintenance" section of this manual.
AVOID violent impact during transportation.

Assembling the DPS
7
001.
1904
0.E
N re
v. 7
Assembling the DPS
Restrictions • The DPS spreader bar fits on all standard Maxi Sky 600 lifts with serial
#LDXXXX16000. • Serial numbers below #LDXXXX16000 require a cab adaptor kit #700.14500.33. • The DPS spreader bar cannot be installed on a Maxi Sky 600 lift equipped with
an infra-red hand control. • The DPS spreader bar is sold separately.
Assembling the Dynamic Positioning System Spreader Bar 1. Remove the DPS spreader bar from the carton and inner boxes. 2. Check for any shipping damage. Do not discard carton or packing material
until you are completely sure there is no damage to the lift. 3. Unfold the DPS spreader bar.
4. Attach the actuator as shown below using the supplied clevis pin and split
ring.
WARNING: Make sure the clevis pin is properly secured by the split ring.

Assembling the DPS
8
001.
1904
0.E
N re
v. 7
Installation of the DPS Spreader Bar Interconnection System into the Maxi Sky 600 lift
1. Remove the cover from the Maxi Sky 600 lift (picture A).
2. Remove the plastic part from the Maxi Sky 600 cover by pushing on it (pictures B and C).
3. Insert the metal plate that fixes the interconnection system to the lift (as shown on pictures D and E). Wires must be at the rear side of the Maxi Sky 600 cover.
B C
A
D E

Assembling the DPS
9
001.
1904
0.E
N re
v. 7
4. Push the metal plate in place. The interconnection system will lock (pictures F and G).
5. Using an 8 mm socket screwdriver, fix it to the lift.
6. Disconnect the red/white wire from the lift and replace it with the DPS spreader bar interconnection system red wire (picture I). 7. Reconnect the red/white wire (of the lift) on the red wire of the adaptor (picture J).
8. Repeat steps 6 and 7 for the black/white cable of the lift and the black wire of the interconnection of the DPS spreader bar. 9. Pass the wire through guides in order to prevent it from being wedged (see picture K). 10. Reinstall the Maxi Sky 600 cover.
Properly inserted
F G
H
I J
K

Assembling the DPS
10
001.
1904
0.E
N re
v. 7
Installation of the DPS Spreader Bar on the Maxi Sky 600 Lift
WARNING:
Secure the DPS spreader bar to the Maxi Sky 600 using the clevis pin and split ring. Make sure that the spreader bar is correctly fastened and the split ring is in place.
Assembling the DPS
11
001.
1904
0.E
N re
v. 7
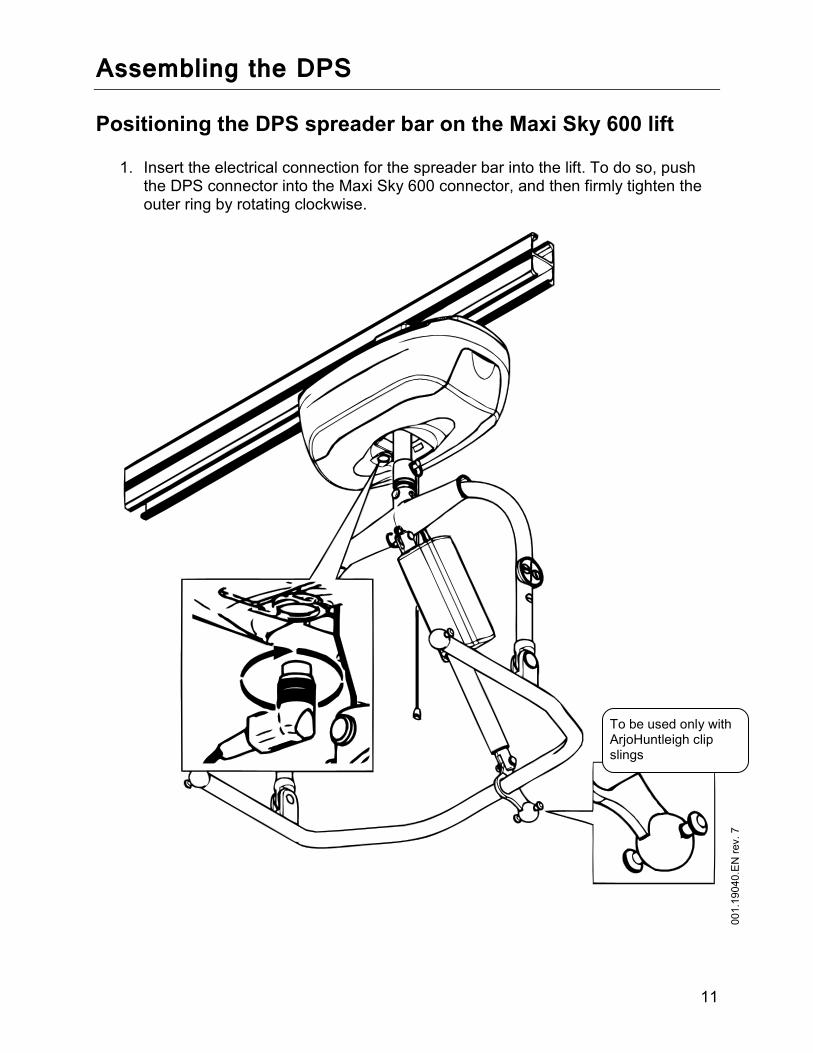
Positioning the DPS spreader bar on the Maxi Sky 600 lift
1. Insert the electrical connection for the spreader bar into the lift. To do so, push the DPS connector into the Maxi Sky 600 connector, and then firmly tighten the outer ring by rotating clockwise.
To be used only with ArjoHuntleigh clip slings
Operating the DPS Spreader Bar
12
001.
1904
0.E
N re
v. 7
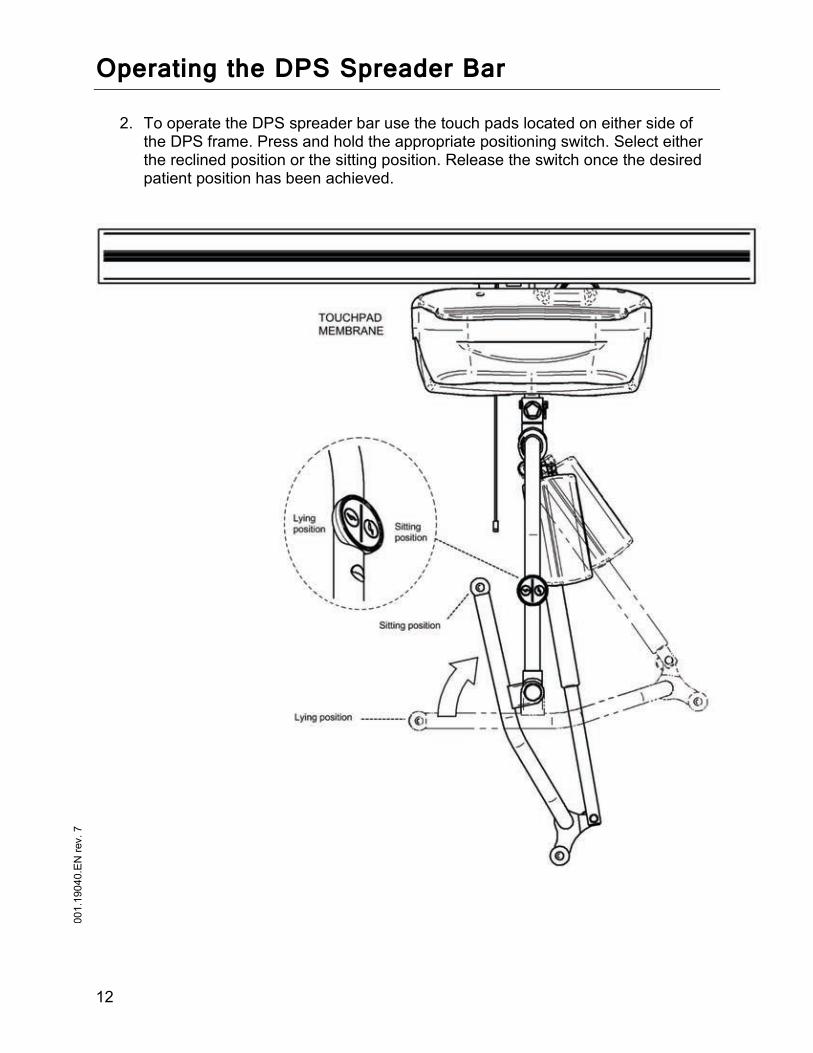
2. To operate the DPS spreader bar use the touch pads located on either side of
the DPS frame. Press and hold the appropriate positioning switch. Select either the reclined position or the sitting position. Release the switch once the desired patient position has been achieved.
Operating the DPS Spreader Bar

Operating the DPS Spreader Bar
13
001.
1904
0.E
N re
v. 7
Sling Attachment
WARNING:
Always check that all the sling attachment clips are fully in position before and during the lifting cycle, and in tension as the patient’s weight is gradually taken up (see labels near the DPS’s sling attachment lugs on the lower frame).
Straight Attachment For most patients, the straight attachment of the leg clips is a recommended use (see Figure 1).
Crossed Attachment If the patient is prone to kicking off the leg clip, the crossed attachment of the leg clips shall be applied which will prohibit the clip from being kicked off (see Figure 2).
Apply the leg clips of the sling onto the lugs so that they become positioned vertically.
Figure 1
Figure 2
Cross the leg pieces of the sling when attaching them
to the lugs.
Maintenance and Cleaning
14
001.
1904
0.E
N re
v. 7
Maintenance and Cleaning
WARNING:
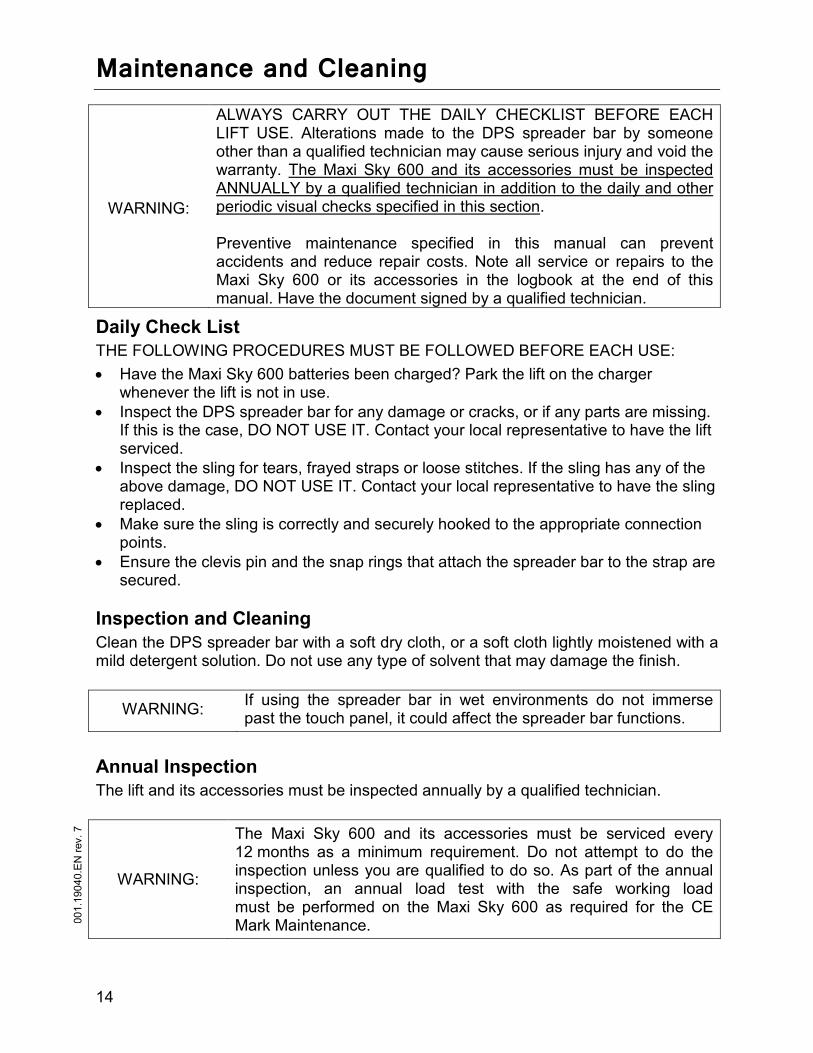
ALWAYS CARRY OUT THE DAILY CHECKLIST BEFORE EACH LIFT USE. Alterations made to the DPS spreader bar by someone other than a qualified technician may cause serious injury and void the warranty. The Maxi Sky 600 and its accessories must be inspected ANNUALLY by a qualified technician in addition to the daily and other periodic visual checks specified in this section. Preventive maintenance specified in this manual can prevent accidents and reduce repair costs. Note all service or repairs to the Maxi Sky 600 or its accessories in the logbook at the end of this manual. Have the document signed by a qualified technician.
Daily Check List THE FOLLOWING PROCEDURES MUST BE FOLLOWED BEFORE EACH USE: • Have the Maxi Sky 600 batteries been charged? Park the lift on the charger
whenever the lift is not in use. • Inspect the DPS spreader bar for any damage or cracks, or if any parts are missing.
If this is the case, DO NOT USE IT. Contact your local representative to have the lift serviced.
• Inspect the sling for tears, frayed straps or loose stitches. If the sling has any of the above damage, DO NOT USE IT. Contact your local representative to have the sling replaced.
• Make sure the sling is correctly and securely hooked to the appropriate connection points.
• Ensure the clevis pin and the snap rings that attach the spreader bar to the strap are secured.
Inspection and Cleaning Clean the DPS spreader bar with a soft dry cloth, or a soft cloth lightly moistened with a mild detergent solution. Do not use any type of solvent that may damage the finish.
WARNING: If using the spreader bar in wet environments do not immerse past the touch panel, it could affect the spreader bar functions.
Annual Inspection The lift and its accessories must be inspected annually by a qualified technician.
WARNING:
The Maxi Sky 600 and its accessories must be serviced every 12 months as a minimum requirement. Do not attempt to do the inspection unless you are qualified to do so. As part of the annual inspection, an annual load test with the safe working load must be performed on the Maxi Sky 600 as required for the CE Mark Maintenance.

Troubleshooting
15
001.
1904
0.E
N re
v. 7
Troubleshooting
PROBLEM VERIFICATION ACTION ITEM
The DPS spreader bar does not work.
Verify if the batteries of the device where the DPS spreader bar is connected are fully charged. Is the coil power cable properly connected to the lifter?
Read the user manual of the device where the DPS spreader bar is connected. If the batteries are fully charged and the coil power cable is properly connected to the device, contact a technician.
The DPS spreader bar operates very slowly.
Verify if the batteries of the device where the DPS spreader bar is connected are fully charged.
If the batteries are fully charged, contact a technician.
One of the buttons of the touchpad membrane does not work.
Contact a technician.

Log Book
16
001.
1904
0.E
N re
v. 7
Log Book
Product Name: DPS SPREADER BAR FOR MAXI SKY 600
Product Serial Number:
Date of Purchase:
Warranty Period:
Distributed by:
Owner Checklist: • Ensure the lift is serviced regularly. • Contact an authorised distributor/service agent immediately if there are any problems with the operation of the
device. • Ensure the logbook is completed and signed. • Record any repairs required. • Withdraw the spreader bar from service if inspection reveals that user safety is jeopardised in any way from use
of the patient lifter. TO BE COMPLETED AFTER EACH SERVICE OR INSPECTION Service type: Pre-delivery Periodic inspection Minor Major
Condition report: Action taken: Date : _________________
Inspected by: ____________________ ____________________ Printed Signature
Service type: Pre-delivery Periodic inspection Minor Major
Condition report: Action taken: Date: _________________
Inspected by: ____________________ ____________________ Printed Signature
Log Book
17
001.
1904
0.E
N re
v. 7
Service type: Pre-delivery Periodic inspection Minor Major
Condition report: Action taken: Date: _________________
Inspected by: ____________________ ____________________ Printed Signature
Service type: Pre-delivery Periodic inspection Minor Major
Condition report: Action taken: Date: _________________
Inspected by: ____________________ ____________________ Printed Signature
Service type Pre-delivery Periodic inspection Minor Major
Condition report: Action taken: Date: _________________
Inspected by: ____________________ ____________________ Printed Signature
Service type: Pre-delivery Periodic inspection Minor Major
Condition report: Action taken: Date: _________________
Inspected by: ____________________ ____________________ Printed Signature
Log Book
18
001.
1904
0.E
N re
v. 7
Service type Pre-delivery Periodic inspection Minor Major
Condition report: Action taken: Date: _________________
Inspected by: ____________________ ____________________ Printed Signature
Service type: Pre-delivery Periodic inspection Minor Major
Condition report: Action taken: Date: _________________
Inspected by: ____________________ ____________________ Printed Signature
Service type: Pre-delivery Periodic inspection Minor Major
Condition report: Action taken: Date: _________________
Inspected by: ____________________ ____________________ Printed Signature
Service type: Pre-delivery Periodic inspection Minor Major
Condition report: Action taken: Date: _________________
Inspected by: ____________________ ____________________ Printed Signature

Log Book
19
001.
1904
0.E
N re
v. 7
Service type Pre-delivery Periodic inspection Minor Major
Condition report: Action taken: Date: _________________
Inspected by: ____________________ ____________________ Printed Signature
Service type: Pre-delivery Periodic inspection Minor Major
Condition report: Action taken: Date: _________________
Inspected by: ____________________ ____________________ Printed Signature
Service type: Pre-delivery Periodic inspection Minor Major
Condition report: Action taken: Date: _________________
Inspected by: ____________________ ____________________ Printed Signature
Service type: Pre-delivery Periodic inspection Minor Major
Condition report: Action taken: Date: _________________
Inspected by: ____________________ ____________________ Printed Signature