Embed Size (px)
Citation preview

Printing from a Windows 2000 or Windows XP Client
Download Drivers
1. Open your web browser and type the following URL: http://www.xerox.com
2. Click on Support and drivers.
3. Scroll to Production Systems.
4. Select DocuTech.
DocuTech Family
Page 1 of 14DocuTech Family
11/17/2004file://D:\Profiles\US00W179\My%20Documents\PRODUCTS\Docusp\drivers\format-tes...
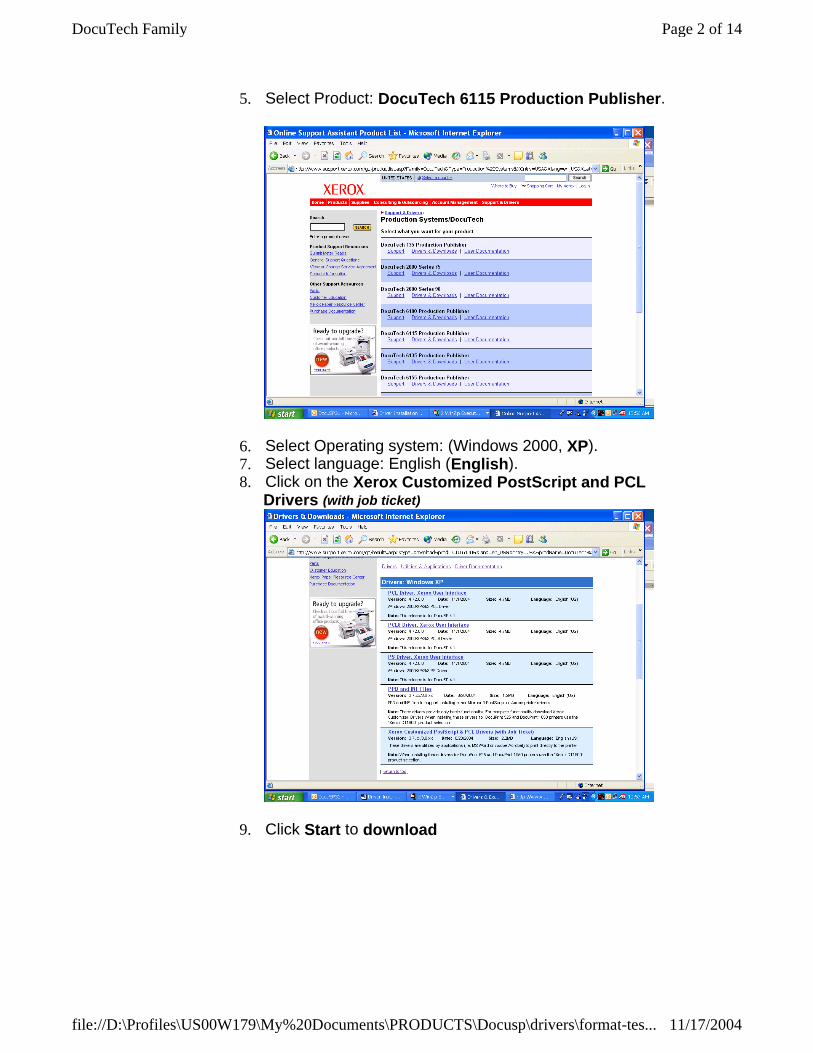
5. Select Product: DocuTech 6115 Production Publisher.
6. Select Operating system: (Windows 2000, XP). 7. Select language: English (English). 8. Click on the Xerox Customized PostScript and PCL
Drivers (with job ticket)
9. Click Start to download
Page 2 of 14DocuTech Family
11/17/2004file://D:\Profiles\US00W179\My%20Documents\PRODUCTS\Docusp\drivers\format-tes...

10. Run this program from its current location. 11. Click on the [Run] or [Open] button.
12. Security Warning box [Run] 13. WinZip Self-Extractor dialog, accept the settings in the
"Unzip to folder" field and click on the [Unzip] button.
Page 3 of 14DocuTech Family
11/17/2004file://D:\Profiles\US00W179\My%20Documents\PRODUCTS\Docusp\drivers\format-tes...

14. Click on the [OK] button and then on the [Close] button to
close the WinZip dialog. The drivers will unzip to c:Web_xpps
Install Drivers
15. [Start] Settings > Printers 16. Add Printer
17. Add Printer Wizard: [Next>] 18. Local Printer (do not select "Automatically detect
and install my Plug and Play printer): [Next>]
Page 4 of 14DocuTech Family
11/17/2004file://D:\Profiles\US00W179\My%20Documents\PRODUCTS\Docusp\drivers\format-tes...

19. Create a new port: Standard TCP/IP Port: [Next>]
Welcome to the Add Standard TCP/IP Printer Port Wizard: [Next>]
20. Add ip address (Make sure that the Port Name that the wizard automatically creates for you isn't already used by another port. You can change it manually.): [Next>]
Page 5 of 14DocuTech Family
11/17/2004file://D:\Profiles\US00W179\My%20Documents\PRODUCTS\Docusp\drivers\format-tes...

21. Additional Port Information Required dialog box:
22. Device Type: Custom [Settings...]
23. Protocol: LPR 24. LPR Settings: enter queue name (important: use
an actual queue that is set to hold) and enable LPR Byte Counting [OK]
Page 6 of 14DocuTech Family
11/17/2004file://D:\Profiles\US00W179\My%20Documents\PRODUCTS\Docusp\drivers\format-tes...
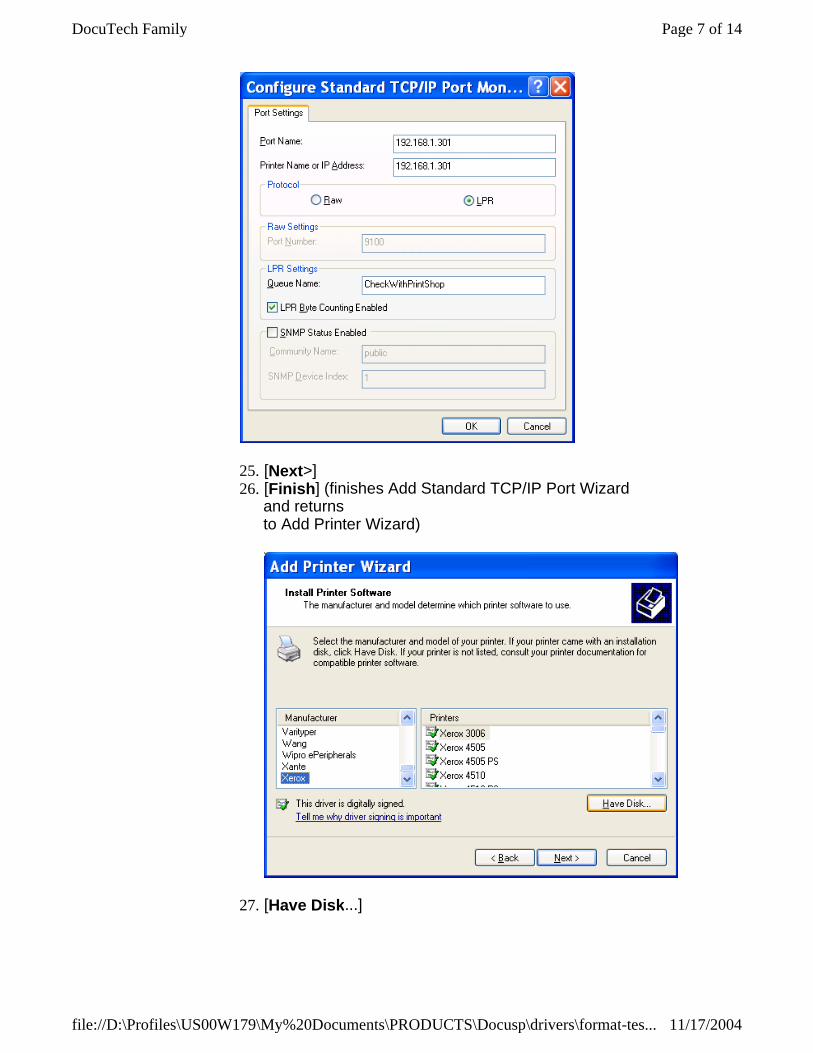
25. [Next>] 26. [Finish] (finishes Add Standard TCP/IP Port Wizard
and returns to Add Printer Wizard)
27. [Have Disk...]
Page 7 of 14DocuTech Family
11/17/2004file://D:\Profiles\US00W179\My%20Documents\PRODUCTS\Docusp\drivers\format-tes...
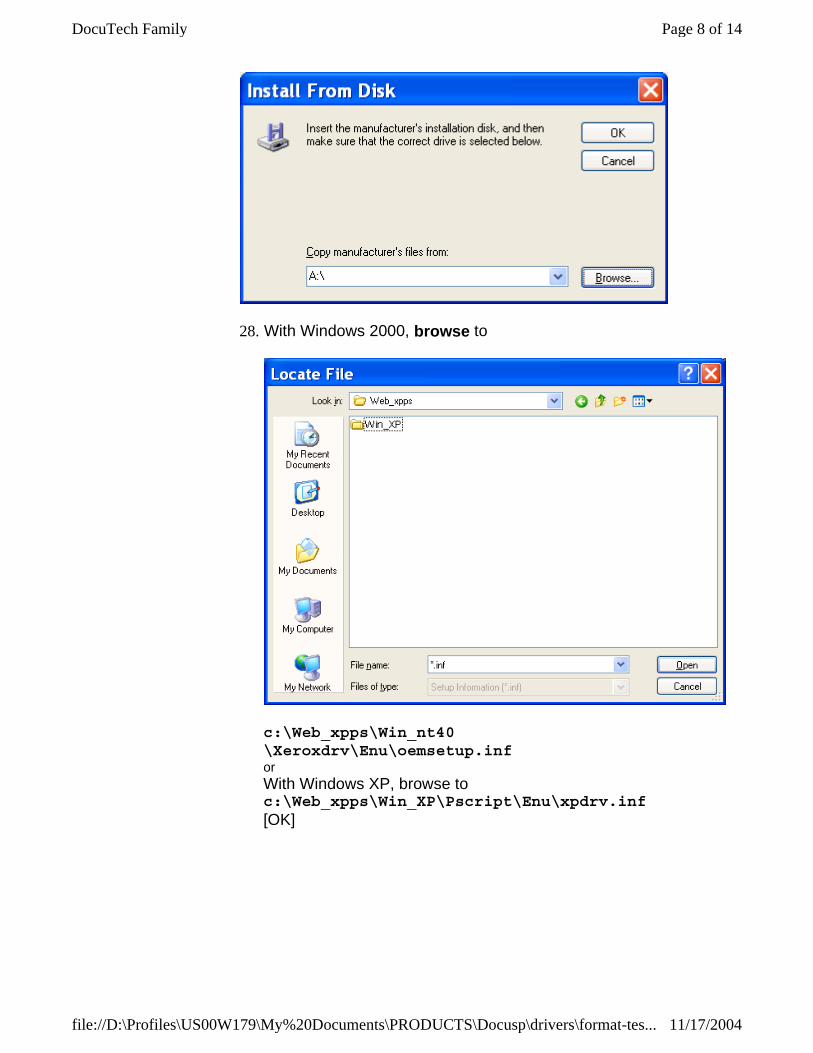
28. With Windows 2000, browse to
c:\Web_xpps\Win_nt40\Xeroxdrv\Enu\oemsetup.inf or With Windows XP, browse to c:\Web_xpps\Win_XP\Pscript\Enu\xpdrv.inf [OK]
Page 8 of 14DocuTech Family
11/17/2004file://D:\Profiles\US00W179\My%20Documents\PRODUCTS\Docusp\drivers\format-tes...
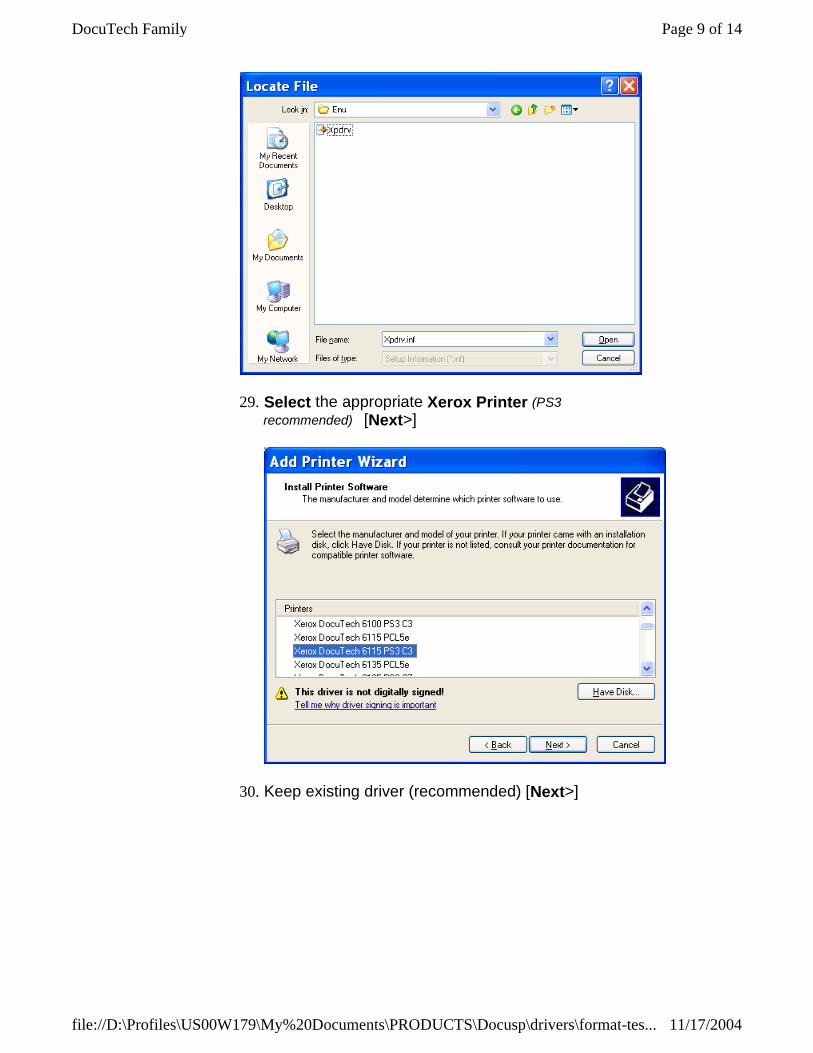
29. Select the appropriate Xerox Printer (PS3 recommended) [Next>]
30. Keep existing driver (recommended) [Next>]
Page 9 of 14DocuTech Family
11/17/2004file://D:\Profiles\US00W179\My%20Documents\PRODUCTS\Docusp\drivers\format-tes...
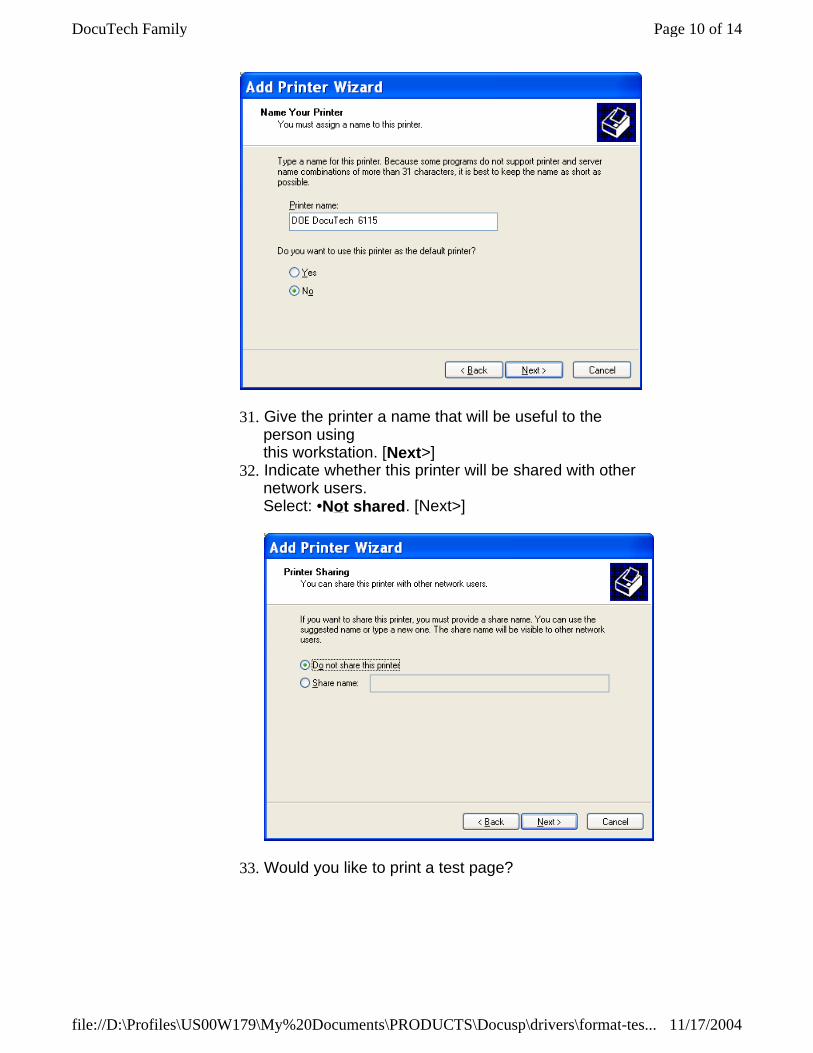
31. Give the printer a name that will be useful to the person using this workstation. [Next>]
32. Indicate whether this printer will be shared with other network users. Select: •Not shared. [Next>]
33. Would you like to print a test page?
Page 10 of 14DocuTech Family
11/17/2004file://D:\Profiles\US00W179\My%20Documents\PRODUCTS\Docusp\drivers\format-tes...

Select: No or Yes (whether or not you want to test at this time). [Next>]
34. [Finish]
Configure Queue
35. Open the W2K/WinXP queue's printing preferences
36. Select the Layout Tab and click on the [Advanced] button.
Page 11 of 14DocuTech Family
11/17/2004file://D:\Profiles\US00W179\My%20Documents\PRODUCTS\Docusp\drivers\format-tes...

37. Change Graphic/TrueType font from Substitute with Device Font to Download as Softfont.
38. Change PostScript Options/PostScript Output Option
from Optimize for Speed to Optimize for Portability.
Page 12 of 14DocuTech Family
11/17/2004file://D:\Profiles\US00W179\My%20Documents\PRODUCTS\Docusp\drivers\format-tes...

39. Close your Printing Preferences dialog box. 40. Right-click on your printer queue icon. 41. Left-click on Properties.
Page 13 of 14DocuTech Family
11/17/2004file://D:\Profiles\US00W179\My%20Documents\PRODUCTS\Docusp\drivers\format-tes...
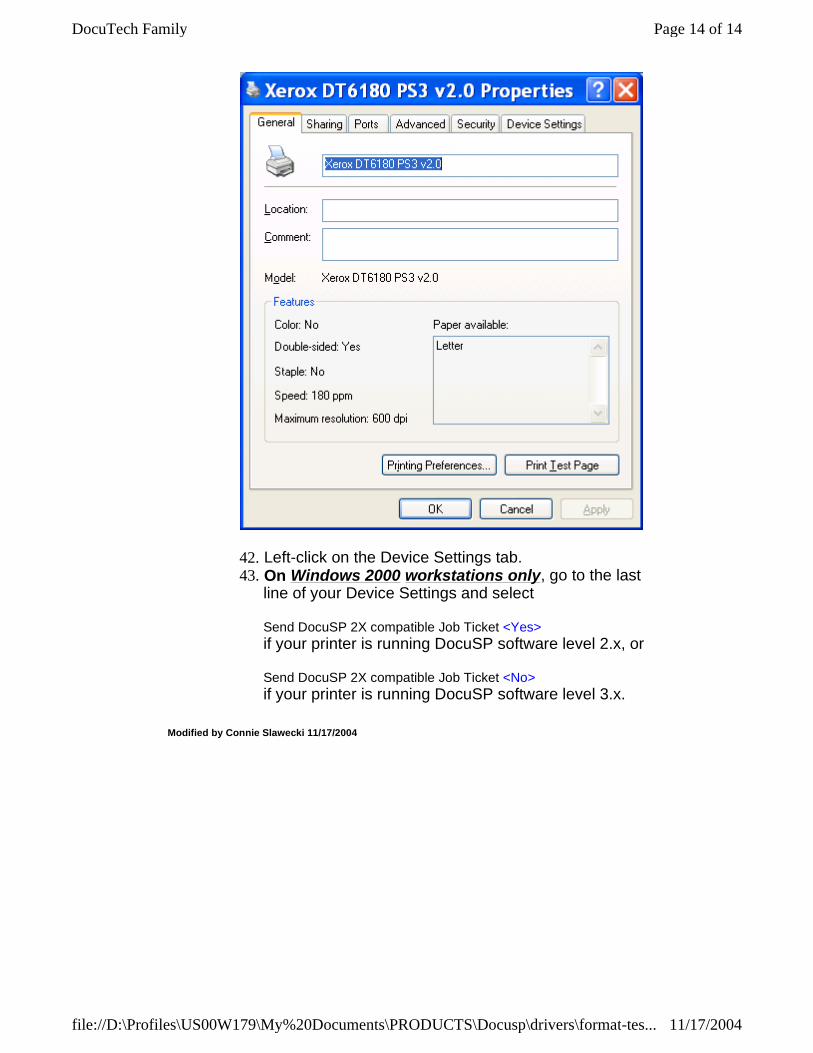
42. Left-click on the Device Settings tab. 43. On Windows 2000 workstations only, go to the last
line of your Device Settings and select Send DocuSP 2X compatible Job Ticket <Yes> if your printer is running DocuSP software level 2.x, or Send DocuSP 2X compatible Job Ticket <No> if your printer is running DocuSP software level 3.x.
Modified by Connie Slawecki 11/17/2004
Page 14 of 14DocuTech Family
11/17/2004file://D:\Profiles\US00W179\My%20Documents\PRODUCTS\Docusp\drivers\format-tes...