Embed Size (px)
Citation preview

DOCUMENT RESUME
EL 071 967 SO 005 207
AUTHORTITLE
Dubocq, Edward R.Three Dimensional Design (Sculpture), Art:6681.09.
INSTITUTION Dade County Public Schools, Miami, Fla.PUB DATE 71NOTE 47p.; Authorized Course of Instruction for the
Quinmester Program
EDRS PRICE MF-S0.65 HC-S3.29DESCRIPTORS *Art Appreciation; *Art Education; Behavioral
Objectives; Course Content; Course Objectives;Curriculum Guides; Guidelines; Learning Activities;Resource Guides; *Sculpture; Secondary Grades;*Visual Arts
IDENTIFIERS Florida; *Quinmester Program
ABSTRACTThe elective quinmestex art course, designed for
grades seven through twelve, focuses on helping students develop anappreciation for sculpture, creative abilities, and "sculpturalawareness", i.e., realize the impact that various forms of sculpturein the environment have on individuals. The curriculum guide includesoutlined sections on rationale, guidelines, behavioral objectives,course content, course procedures, strategies, suggested learningactivities, and film and textbc.ok resources for pupils and teachers.Related documents are SO 005 269, SO 005 271, and SO 005 273.(SJIM)
r"-DO.'r---4r._
CD
LW
FILMED FROM BEST AVAILABLE COPY
AUTHORIZED COURSES OF STUDY FOR THE
4------
G")X
THREE DIMENSIONAL DESIGN(SCULPTURE)
6681.09
Art Education
CV3:0t=,rrsC",CD==--I
"ID=CCIf"C,CMC,=CDCDr"-"'CM
DIVISION OF INSTRUCTIONBULLETIN IQJANUARY 1972

U S DEPARTMENT OF HEALTH.EDUCATION & WELFAREOFFICE. OF EDUCATION
THIS DOCUMENT HAS BEEN REPRODUCED EXACTLY AS RECEIVEC ROMTHE PERSON OR ORGANIZATION ORIGINATING IT POINTS OF VIEW OR OPINIONS STATED DO NOT NECESSARILYREPRESENT OFFICIAL OFFICE OF EDUCATION POSITION OR POLICY
ART
ThREE DIMENSIONAL DESIGN
(SCULPTURE)
(Tentative Course Outline)
6681.096682.096683.10
Written by Edward R. Dubocq
for the
DIVISION OF INSTRUCTION
Dade County Public SchoolsMiami, Florida
1971
DADE COUNTY SCHOOL BOARD
Mr. William Lehman.. ChairmanMr. G. Holmes Braddock, Vice-Chairman
Mrs. Ethel BeckhamMrs. Crutcher Harrison
Mrs. Anna Brenner MeyersDr. Ben Sheppard
Mr. William H. Turner
Dr. E. L. Whigham, Superintendent of SchoolsDade County Public Schools
Miami, Florida 33132
Published by the Dade County School Board
Copies of this publication may be obtained through
Textbook Services2210 S. W. Third StreetMiami, Florida 33135

TABLE OF CONTENTS
Page
I. COURSE TITLE 1
II. COURSE NUEERS 1
III. RATIONALE 1
IV. COURSE DESCRIPTION 2
A. Description
S. Textbooks
C. ':ocational Scheme
D. Method (y week)
E. Synopsis
V. ENROLLENT GUIDELINES 4
A. Prior Courses
E. Evaluative Device
C. Concurrent Programs
VI. BEHAVIORAL OBJECTIVES 4
A. Competencies Expected
B. Conditions
C. Acceptable Performance
VII. COURSE CONTENT 7
VIII. COURSE PROCEDURES, STRATEGIES, AND SUGGESTEDLEARNING ACTIVITIES 9
A. Vocabulary List 9
11
Page
B. Procedure 11
C. Supplies and Materials 14
D. Studio Procedures 15
E. Hints for Instructors 16
F. Work Sheets 17
(Plaster)
Plaster and ermiculite 18
Solid Plaster Carving 20
Plaster Over Armature Sculpture 22
Master Draping 24
(Clay)
Slab, Cylinder and Sphere 26
Direct Carving 28
Armature Construction 30
waste Mold 33
Combined Media 37
3IBLIOGRAPHY
IX. RESOURCES FOR PUPILS 39
X. RESOURCES FOR INSTRUCTORS 41
A. Films
B. Textbouks
ill
I. COURSE TITLE:
ART: THREE DIrENSIONAL DESIGN(SCULPTURE)
II. COURSE NINBERS: 6681.096682.096683.10
III. RATIONALE:
Sculpture: "Plastic, or hard materials that have
been welded, carved, engraved, molded or con-
structed into a primarily three dimensional work
of art." *
We are constantly surrounded by varying forms of
sculpture in our natural environment. "Sculpture"
can entail any three-dimensional form around us
from a tree to an ornate building. Sculpture,
in one way or another, affects every day of our
lives; through an object that is pleasing to the
eye, or a functional unit of sculptured steel -
the modern automobile.
This course has been designed with a three fold
purposes first, to create an awareness of the
effect sculptured forms have on our environment.
Secondly, to introduce the area of sculptural art
appreciation, and, thirdly, to develop the creative
abilities of the student.
IV. COURSE DESCRIPTION:
A. Elective, grades 7-12, exploratory
B. Textbooks and Other Materials:
Text materials, visuals, vocabulary lists, etc.
are provided in parts IX and X of this Quinmester
Course of Study. It is suggested that references
marked with an asterisk be kept on hand for
students use in the classroom.
C, Vocational Scheme:
To prepare the student for more advanced courses
in the area (..i sculptural art and for activities
where a background of basic sculpture skills is
required.
D. Method: (by week)
Lecture, demonstration, research, problem solving,
s;:udio work, critique and final evaluation.
E, Synopsis:
Note: There are suggested presentation outlines
for each of the sub-headings in this section. They
are located in part VIII.
2
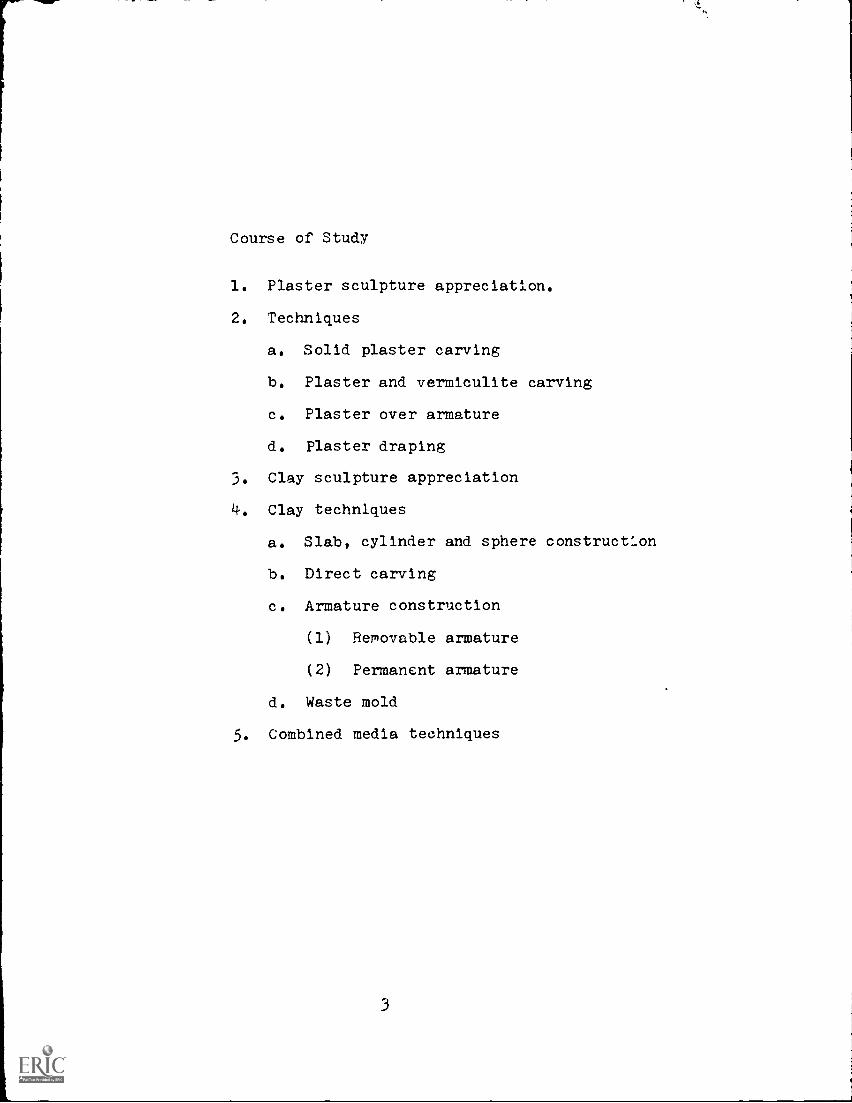
Course of Study
1. Plaster sculpture appreciation.
2. Techniques
a. Solid plaster carving
b. Plaster and vermiculite carving
c. Plaster over armature
d. Plaster draping
3. Clay sculpture appreciation
4. Clay techniques
a. Slab, cylinder and sphere construction
b. Direct carving
c. Armature construction
(1) Removable armature
(2) Permanent armature
d. Waste mold
5. Combined media techniques
V. ENROLLMENT GUIDELINES
A. Prior course: None
B. Evaluative device:
Empirical testing should be followed.
O. Concurrent programs:
There is no specific program that must be
taken concurrently.
VI. EEHAVIORAL OBJECTIVES
A. Competencies expected upon completion of
this course: The student will be able to:
1. List correctly the procedures for the
following plaster techniques:
a. Solid plaster carving
b. Plaster and vermiculite carving
c. Plaster over armature
d. Plaster draping
2. Define verbally or in writing, the follow-
ing vocabulary terms listed in part VIII.
3. List and identify a minimum of three plaster
sculptors historical and/or contemporary.
4. Demonstrate the correct care and use of
plaster sculpturing tools and related materials.
4
5. Demonstrate the correct procedures for
working in a plaster sculpture studio.
6. Create open and closed forms in plaster.
7. Create and present for grade a minimum
of two sculptural examples (selected
from the four presented on plaster in
part VIII of this course outline).
8. List and define correctly, the following
procedures for clay sculpture.
a. Slab, cyiinder and sphere construction
b. Direct carving
c. Armature construction
(1) Removable armature
(2) Permanent armature
d. Waste mold
e. Combined media
. List and identify 8 minimum of three his
torical and/or contemporary clay sculptors.
10. Create open and closed forms in clay.
11. Create and present for grade a minimum of
two sculptural examples selected from the
five presented on clay in part VIII of this
course outline.
-
12. Demonstrate the correct care for, and
use of clay sculpting tools and re-
lated materials.
13. Demonstrate the correct procedures for
working in a clay studio.
14. Properly knead and wedge clay.
15. Correctly loin clay pieces by painting
on slip and scoring.
The student will demonstrate competencies
under the following conditions:
1. Classroom discussion
2. Individual research
Individual studio procedure
4. Group critique
5. Empirical testing
C. Accept-ale performance will be determined by
the individual instructor on the basis of
required projects turned in for grade, r-Ld
empirical testing.
6
VII. COURSE CONTENT:
A. Introduction Plaster Sculpture
1. Lecture
2. Films
3. Demonstration
4. Resources
5. Discussion
B. Plaster Studio Procedures
1. Materials
2. Tools
3. Storage
C. Plaster Sculpture Techniques
1. Solid plaster carving
2. Plaster and vermiculite carving
3. Plaster over an armature
4. Plaster draping
D. Studio work
E. Critique
F. Introduction clay sculpture
G. Clay studio procedures
1. Materials
2. Tools
3. Storage

H. Clay Sculpture Techniques
1. Slab
2. Cylinder
3. Sphere
4. Direct carving
5. Armature construction
a. Removable armature
b. Permanent armature
6. Waste mold
I. Combined Media
J. Studio Work
K. Critique
8
VIII. COURSE PROCEDURES, STRATEGIES, AND SUGGESTED
LEARNING ACTIVITIES:
A. Vocabulary List *
Instructor may use definitions provided,
or have students research definitions as
an assignment.
1. Armature: A framework built as a support
for clay figures or object during con-
struction.
2. Closed form: A form being solid in appear-
ance; having no holes or cavities. A form
that encloses space.
3. Direct ,alluna: r^ ve a sculpture from
one solid piece of media without building
up or adding on of more material.
4. Draping: The process by which material
is soaked in wet plaster and laid over an
armature, creating a free flowing form.
5. GlazinE: A process by which a piece of
ceramic ware is coated with glass, by
painting on and firing of a glaze.
6. Media (Sculpture): Any substance used in
the construction of plaster or clay sculpture,
9
7. Open form: A form containing hollow
areas, cavities, or holes (as opposed
to closed forms).
8. Plaster: A composition .df lime, sand
and water.
9. Scoring: A process by which two pieces
of clay are permanently joined by
texturing the surfaces, painting with
slip and pressed together.
10. Sculpture: Plastic, or hard materials
that have been welded, narved, engraved,
molded, or constructed into a primarily
three dimensional work of art.
11. Sculptor: One who sculpes, or creates
sculpture.
12. Sizing: A process in which a soap solution
is used to coat the inside surface of a
plaster mold to prevent sticking.
13. Slip: A mixture of clay and water used
primarily in scoring and pouring casts
14. Studio: Any area designated for, or in
which artistic creation takes place.
15. Texture: The structure of the surface of
any work of art.
10
16. Vermiculite: A material formed by
alteration of common mica used
primarily for heating and in-
sulation.
17. Waste mold: A mold used for convert-
ing sculptural pieces from clay to
plaster. Only useable one t]me.
B. Procedure:
(Suggested instructor demonstration aid.)
The general procedures that apply to
all forms of sculpture are discussed
in this section. Individual procedures
fcr specific sculpture projects are
listed on the work sheets.
The primary guideline applying to all
forms of sculpture is good three-dimen-
sional design. In sculpture, one must
relate his design to a free standing
form that will be viewed from all sides.
One should keep this fact in mind when
designing his sketches or models. If
a sculpture has been well designed, it
will be pleasing to the eye from any angle.
11

As in painting or collage, the design
should be developed through a series
of thumbnail sketches. Develop an
idea of what you want the sculpture
to look like before you actually begin
to carve. By doing a series of quick
"shape" or "form" sketches, one will
discover certain forms that appeal to
a desired style of sculpting.
Another item to consider is the base or
stand that will be used for the sculpture.
It is easy to make the mistake of design-
ing a base that destroys the visual impact
of the sculpture. A well designed base
will not detract from the interest created
by the sculpture it is supporting. When
the base is connected, it becomes a part
of the sculpture. It should relate to the
sculpture, and yet be subtle in its relation-
ship.
Finally, in creating the sculpture, the
finished piece should show "movement".
A piece of sculpture that appears to
show "movement" or "action" has a
much greater and more pleasing visual
impact than one that appears to be
stagnant, or unmoving.
There are more specific procedures and
points that apply to your sculpture and
they may be found on the individual work
sheets.
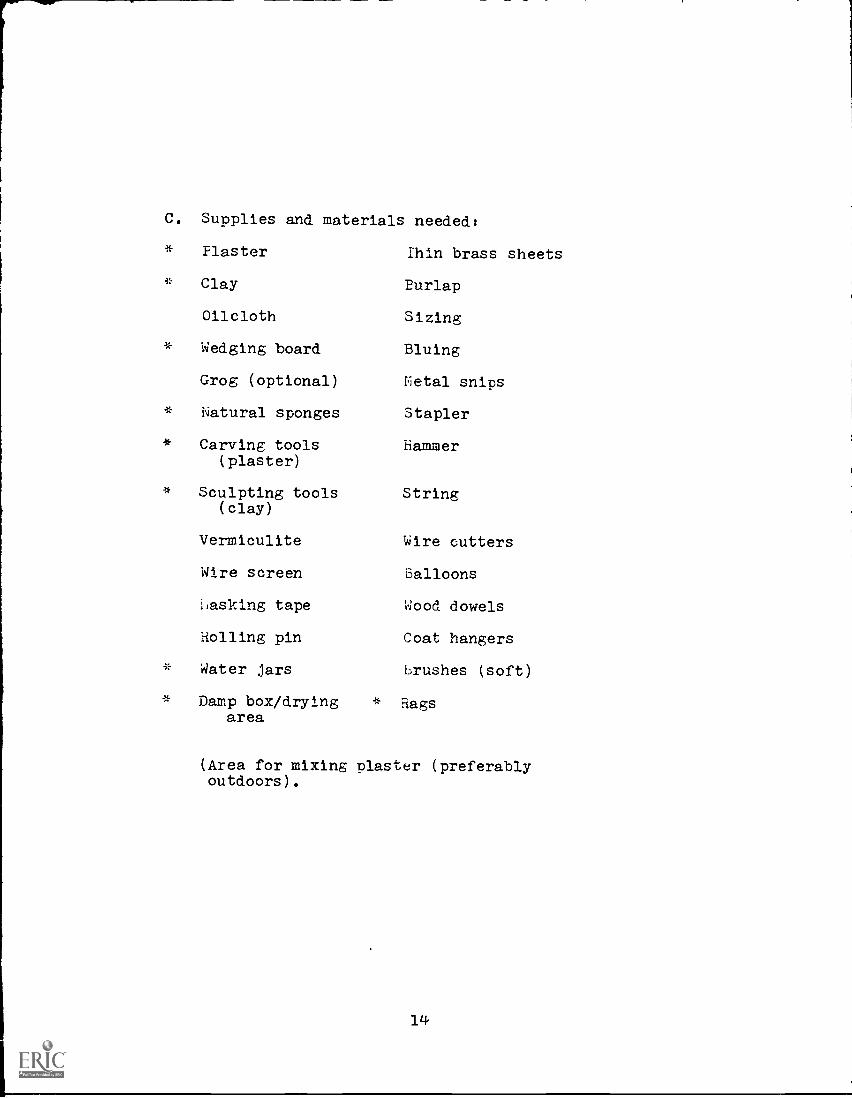
C. Supplies and materials needed:
Plaster Thin brass sheets
Clay Burlap
Oilcloth Sizing
Wedging board Bluing
Grog (optional) Metal snips
Natural sponges Stapler
Carving tools hammer(plaster)
Sculpting tools String(clay)
Vermiculite Wire cutters
Wire screen Balloons
masking tape Wood dowels
dolling pin Coat hangers
* Water jars brushes (soft)
* Damp box/drying * Ragsarea
(Area for mixing plaster (preferablyoutdoors).
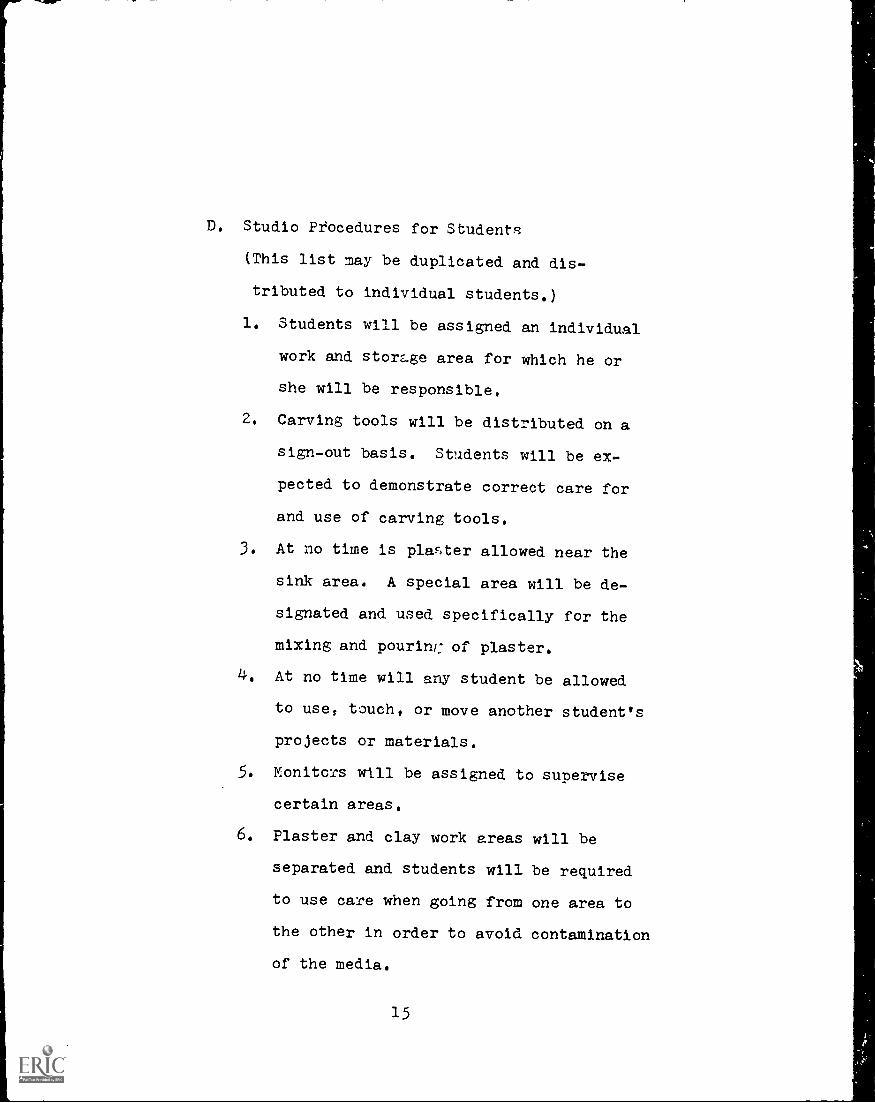
D. Studio Ptocedures for Students
(This list may be duplicated and dis-
tributed to individual students.)
1. Students will be assigned an individual
work and stomge area for which he or
she will be responsible.
2. Carving tools will be distributed on a
sign-out basis. Students will be ex-
pected to demonstrate correct care for
and use of carving tools.
3. At no time is plaster allowed near the
sink area. A special area will be de-
signated and used specifically for the
mixing and pourinc of plaster.
4. At no time will any student be allowed
to use, touch, or move another student's
projects or materials.
5. Monitors will be assigned to supervise
certain areas.
6. Plaster and clay work areas will be
separated and students will be required
to use care when going from one area to
the other in order to avoid contamination
of the media,
15
7. All students will be required to furnish
newspaper, and a "soft" mixing container
(e.g , tupperware bowl).
8. At all times students wil] be expected
to maintain a professional attitude
towards their work, supplies, and fellow
artists.
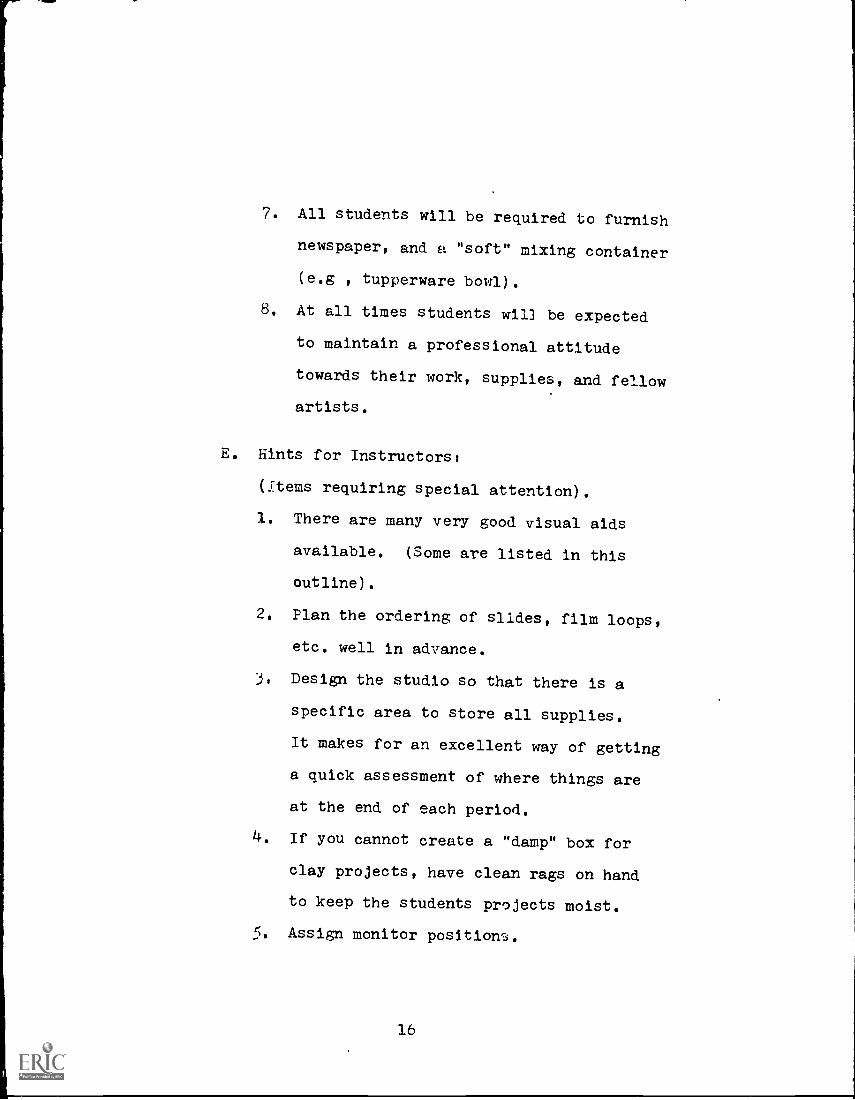
E. Hints for Instructors:
(Items requiring special attention).
1. There are many very good visual aids
available. (Some are listed in this
outline).
2. Plan the ordering of slides, film loops,
etc. well in advance.
j. Design the studio so that there is a
specific area to store all supplies.
It makes for an excellent way of getting
a quick assessment of where things are
at the end of each period.
4. If you cannot create a "damp" box for
clay projects, have clean rags on hand
to keep the students projects moist.
5. Assign monitor positions.
16
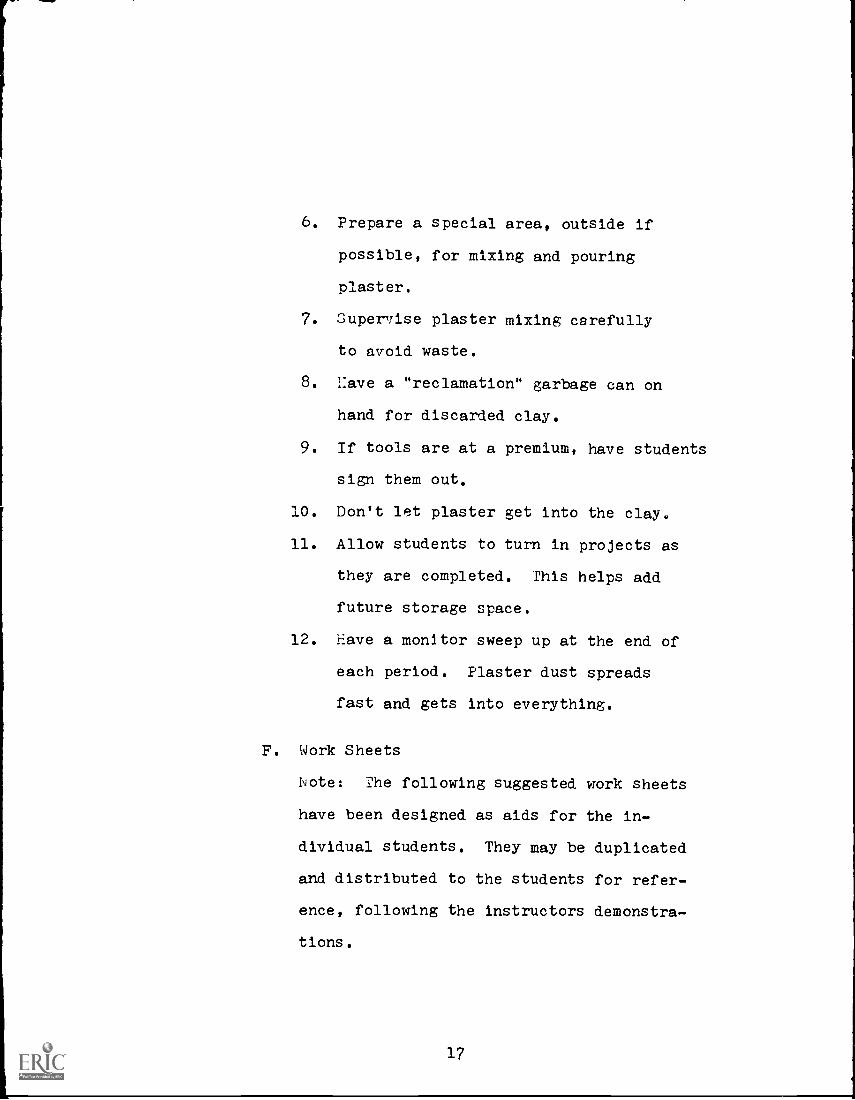
6. Prepare a special area, outside if
possible, for mixing and pouring
plaster.
7. Superirise plaster mixing carefully
to avoid waste.
8. Have a "reclamation" garbage can on
hand for discarded clay.
9. If tools are at a premium, have students
sign them out.
10. Don't let plaster get into the clay.
11. Allow students to turn in projects as
they are completed. This helps add
future storage space.
12. Have a monftor sweep up at the end of
each period. Plaster dust spreads
fast and gets into everything.
F. Work Sheets
Note: The following suggested work sheets
have been designed as aids for the in-
dividual students. They may be duplicated
and distributed to the students for refer-
ence, following the instructors demonstra-
tions.
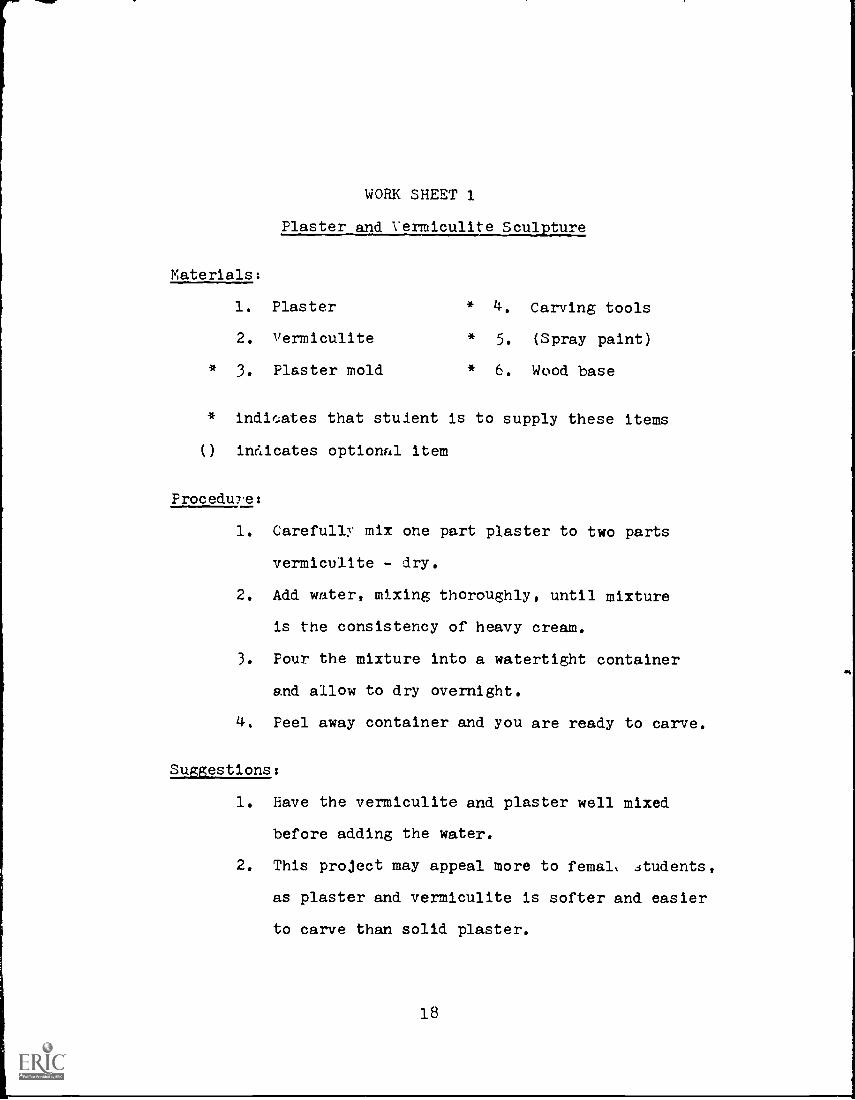
WORK SHEET 1
Plaster and Vermiculite Sculpture
Materials:
1. Plaster * 4. Carving tools
2. vermiculite * 5. (Spray paint)
* 3. Plaster mold * 6. Wood base
* indif.:ates that stuient is to supply these items
inekicates optional item
Procedure:
1. Carefully mix one part plaster to two parts
vermiculite - dry.
2. Add water, mixing thoroughly, until mixture
is the consistency of heavy cream.
3. Pour the mixture into a watertight container
and allow to dry overnight.
4. Peel away container and you are ready to carve.
Suggestions:
1. Have the vermiculite and plaster well mixed
before adding the water.
2. This project may appeal more to ferns), .students ,
as plaster and vermiculite is softer and easier
to carve than solid plaster.
18
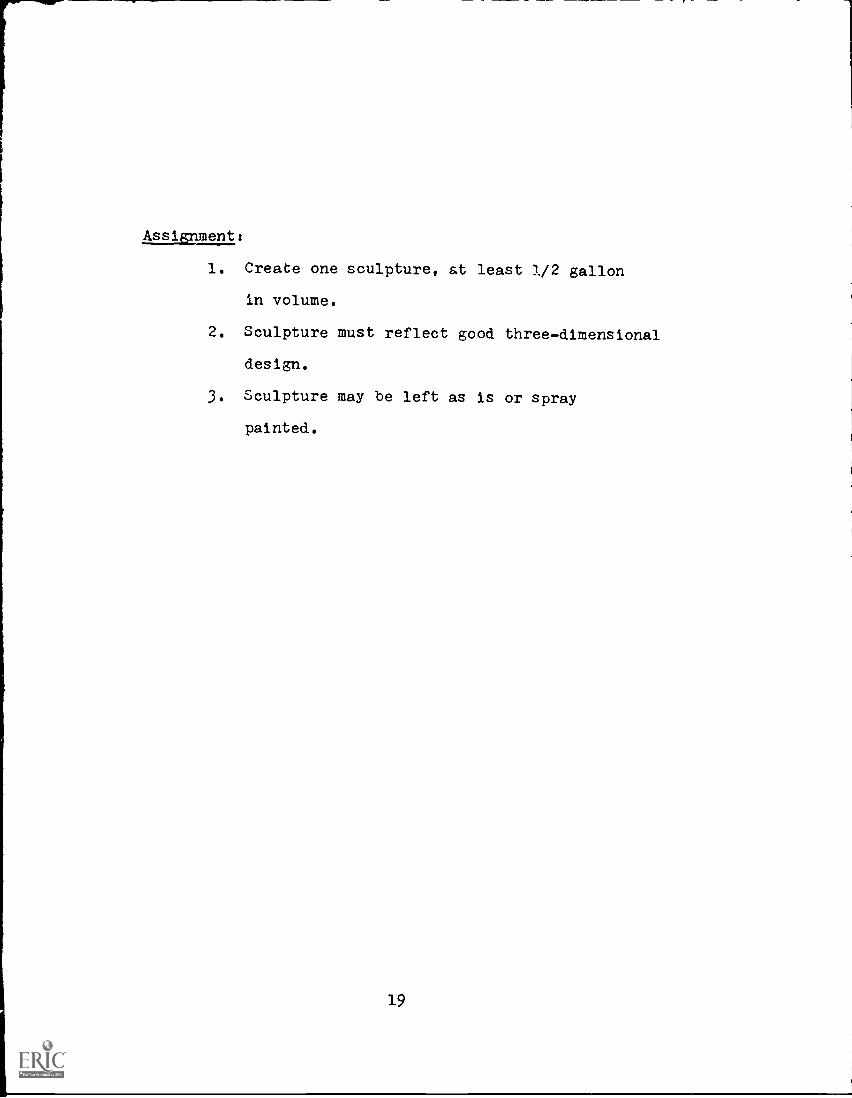
Assignment:
1. Create one sculpture, at least 1/2 gallon
in volume.
2. Sculpture must reflect good three-dimensional
design.
3. Sculpture may be left as is or spray
painted.
19
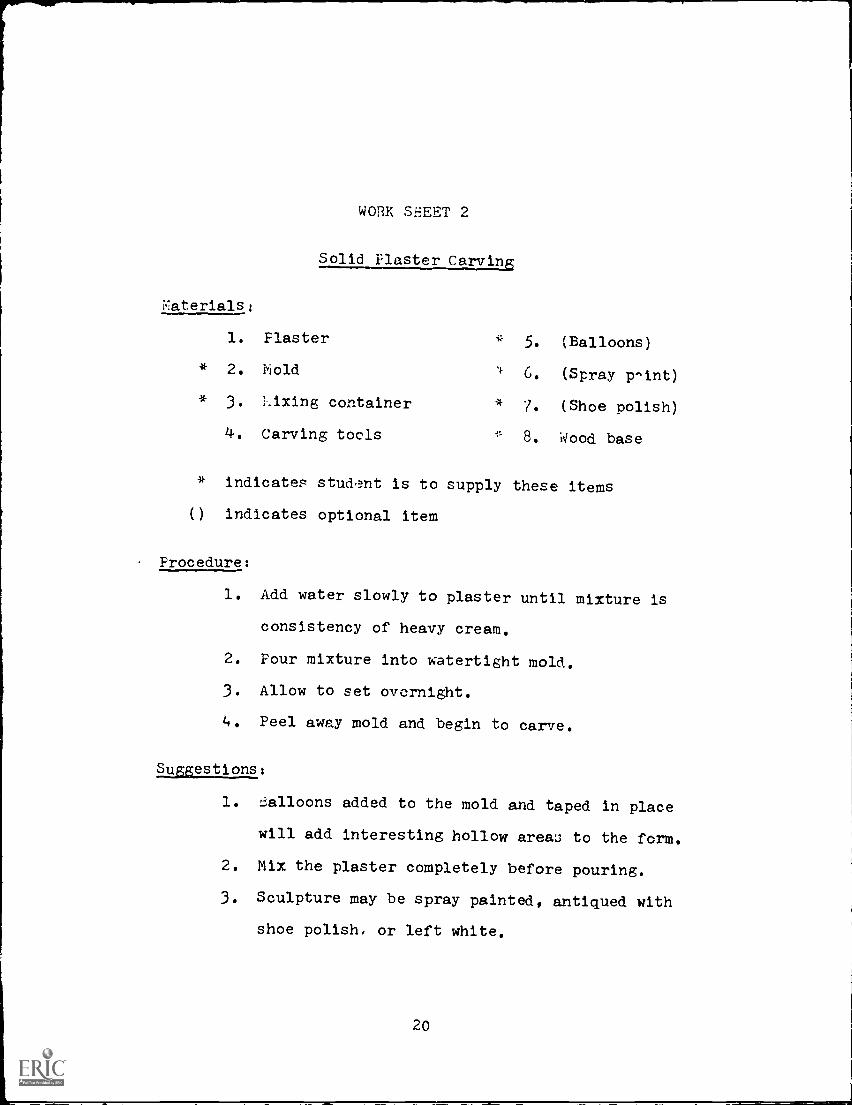
WORK SHEET 2
Solid Plaster Carylas,
Plaster * 5. (Balloons)1.
* 2. Mold'} G. (Spray p-int)
* 3. :Axing container * 7. (Shoe polish)
4. Carving tools * 8. Wood base
* indicates stud,mt is to supply these items
() indicates optional item
Procedure:
1. Add water slowly to plaster until mixture is
consistency of heavy cream.
2. Four mixture into watertight mold.
3. Allow to set overnight.
4. Peel away mold and begin to carve.
Suggestions:
1. balloons added to the mold and taped in place
will add interesting hollow areau to the form.
2, Mix the plaster completely before pouring.
3. Sculpture may be spray painted, antiqued with
shoe polish, or left white,
20

Assignment:
1. Create one sculpture, 1t least 1/2 gallon
in volume.
2. Sculpture must reflect good three-dimensional
design.
3. Sculpture may be left as is, or decorated
(see Suggestions: y3)
21
Materials:
1.
* 2.
* 3.
* 4.
* 5.
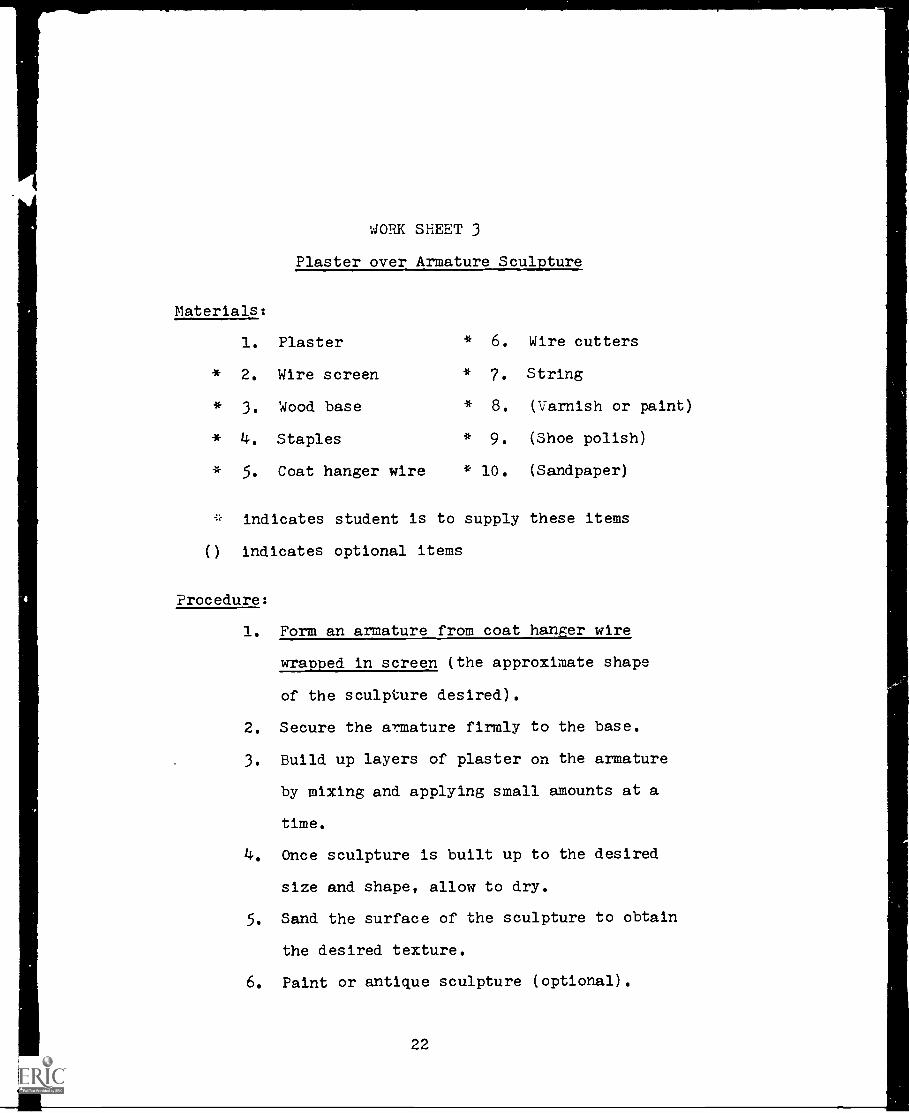
WORK SHEET 3
Plaster over Armature Sculpture
Plaster * 6. Wire cutters
Wire screen * 7. String
Wood base * 8. (Varnish or paint)
Staples * 9. (Shoe polish)
Coat hanger wire * 10. (Sandpaper)
* indicates student is to supply these items
() indicates optional items
Procedure:
1. Form an armature from coat hanger wire
wrapped in screen (the approximate shape
of the sculpture desired).
2. Secure the armature firmly to the base.
3. Build up layers of plaster on the armature
by mixing and applying small amounts at a
time.
4. Once sculpture is built up to the desired
size and shape, allow to dry.
5. Sand the surface of the sculpture to obtain
the desired texture.
6. Paint or antique sculpture (optional).
22
Suggestions:
1. Plaster is difficult to sand, so try to
apply it as smoothly as possible.
2. Mix small amounts of plaster, or it will
set before you can apply it properly,
causing waste.
Assignment:
1. Create one sculpture: minimum size - one
foot square.
2. Sculpture may be decorated, or left white.
3. Sculpture must reflect good three-dimensional
design.
23
WORK SHEET 4
Plaster Draping
Materials:
1. Plaster * 6. String
2. Coat hangers * 7. (Paint)
* 3. Cheesecloth 8. Wire cutters
* 4. Wood base
* 5. Staples
* indicates student is to supply these items
() indicates optional items
Procedure:
1. Design an armature out of wire and fasten
it to the base.
2. Zix a small amount of plaster.
3. Dip a piece of cheesecloth into the plaster,
then drape it over the armature in a flow-
ing motion, making full use of folds and
creases.
4. Allow plaster to dry as is, or build up
desired areas with more plaster.
5. Sand, if desired.
6. Decorate, if desired.
24
Suggestions:
1. Do not make the armature shape too involved.
Simple flowing lines are most effective.
2. Have the armature well secured to the base.
Assignment:
1. Create one sculpture, minimum size, one cubic
foot.
2. Sculpture must reflect good three-dimensional
design.
3. Sculpture may be left as is or decorated.
25

WORK SHEET 5
CLAY
Slab, Cylinder and Sphere Construction
Materials:
1. Clay 5. Oilcloth
2. Carving tools * 6. Water jar
3. Rolling pin * 7. Clean rags
4. Sponge * 8. Temporary base
* 9. Permanent base
* student is to furnish these materials
Procedure:
1. Wedge clay.
2. Prepare small model of subject.
3. Divide model visually into slabs, cylinders,
and spheres.
4. Slabs may be created by rolling out a lump
of clay and trimming to size.
5. Cylinders are slabs with the ends scored
together.
6. Spheres may be created by rolling a lump of
clay into a ball, then neatly slicing the ball
in half and hollowing the halves. The two
halves may then be scored together- -Be sure
to leave a hole for ventilation.
26.
7, Score all the pieces together, forming the
desired shape, and smooth.
8. Add detail and allow to dry slowly.
Suggestions:
1. Leave ventilating holes in the piece to
avoid accidents.
2. When allowing the piece to remain overnight,
keep it moist by wrapping it in damp cloth.
3. Do not leave the piece more than 1/2" thick
in any given area.
ASSIGNMENT:
1. Create one sculpture, using slab, cylinder
and sphere construction.
2. Sculpture must weigh at least two pounds
when completed.
3. Sculpture must reflect good three-dimensional
design.
4. Sculpture may be left as is or glazed. (If
sculpture is to be glazed, student should re-
search glazing techniques found in texts from
part IX. )
27
WORK SHEET 6
Direct Carving - Clay Sculpture
Materials:
1. Clay 4. Sponge
2. Carving tools 5. Water jar
3. Temporary base 6. Clean rags
7. Final base
* student is to furnish these materials
Procedure:
1. Wedge clay.
2. Prepare small model of subject.
3. Roughly shape a piece of wedged clay into
the size of the finished object you want
to sculpt.
4. Begin to directly carve the desired shape.
5. Before detail work is added, hollow the
piece by either:
a. Carving from the underside.
b. Removing a piece of clay from the surface,
hollowing the interior and replacing the
piece.
6. Smooth and add detail work.
7. Allow to dry slowly.
28
Suggestions:
1. When allowing the piece to set overnight,
keep it moist by wrapping it in damp rags.
2. Leave ventilating holes in the piece to
avoid accidents in the kiln.
3. Do not leave the clay more than 1/2" thick
in any given area.
Assi&pment:
1. Create one sculpture using the direct carving
method.
2. Sculpture must weigh at least two pounds
when completed.
3. Sculpture must reflect good three-dimensional
design.
4. Sculpture may be left as is or glazed. (If
sculpture is to be glazed, student should
research glazing techniques found in texts
from part IX).
29
WORK SHEET 7
CLAY
Armature Construction
Materials:
1. Wood dowels * 4. Newspaper
* 2. Base 5. Tape
* 3. Wire
* indicates items to be supplied by students
Procedure:
1. Removable Armature:
This is an armature that is designed so
that it may be removed easily from the
sculpture. In this way the clay figure
may be fired. Removable armatures are
usually very simple in construction, such
as a dowel stick that can be pulled out
of the figure. If the .7.bject to be
sculptured is simple in design, the remov-
able armature may be built up with news-
paper to save time. However, this will
later involve cutting the subject in half
in order to remove the armature. The two
halves are then reconnected.
30

2. Permanent Armatures
This type of an armature is used in
sculptures that the artist intends to
make a cast from. Since the armature
cannot be removed, the piece cannot
be fired in the kiln.
Basically whatever the artist has on
hand may be used for a permanent armature,
as he does not have to worry about remov-
ing the subject from the armature. The
clay may later be salvaged in pieces after
the cast has been made.
Suggestions:
1. An armature should only be used on a figure
that needs that type of support.
2. When removing the figure from an armature,
cut it off carefully - you will have to sew
it together again.
3. Be sure to remove all armature material from
the clay figure before firing.
Assignment:
1. Create one sculpture, on either permanent or
removable armature. Sculpture must be at least
three pounds in weight (including armature).
31
2. Sculpture must reflect good three-dimensional
design.
3. Sculpture may be left in bisque state, or
glazed. (If student desires to glaze the
piece, he must research glazing techniques
from the texts in part IX).
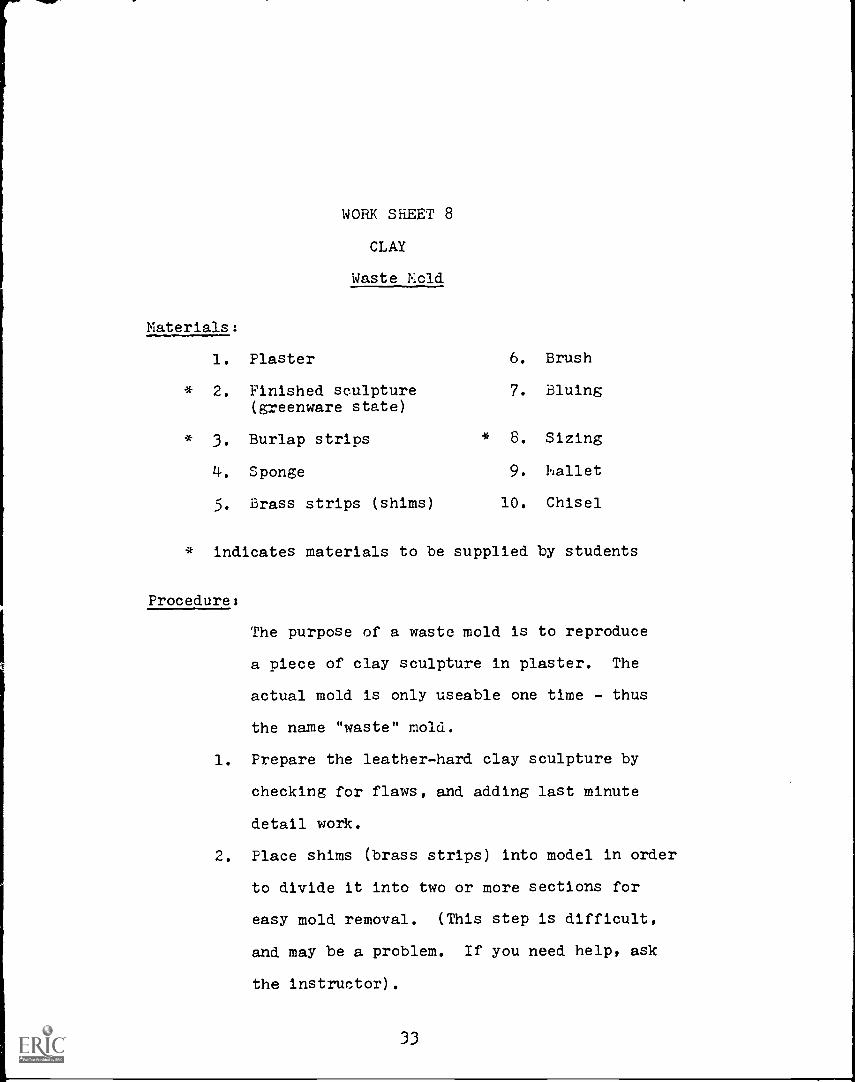
WORK SHEET 8
CLAY
Waste Mold
Materials:
1. Plaster 6. Brush
* 2. Finished sculpture 7. Bluing(greenware state)
* 3. Burlap strips * 8. Sizing
4. Sponge 9. Piallet
5. Brass strips (shims) 10. Chisel
* indicates materials to be supplied by students
Procedure:
The purpose of a waste mold is to reproduce
a piece of clay sculpture in plaster. The
actual mold is only useable one time - thus
the name "waste" mold.
1. Prepare the leather-hard clay sculpture by
checking for flaws, and adding last minute
detail work.
2. Place shims (brass strips) into model in order
to divide it into two or more sections for
easy mold removal. (This step is difficult,
and may be a problem. If you need help, ask
the instructor).
33
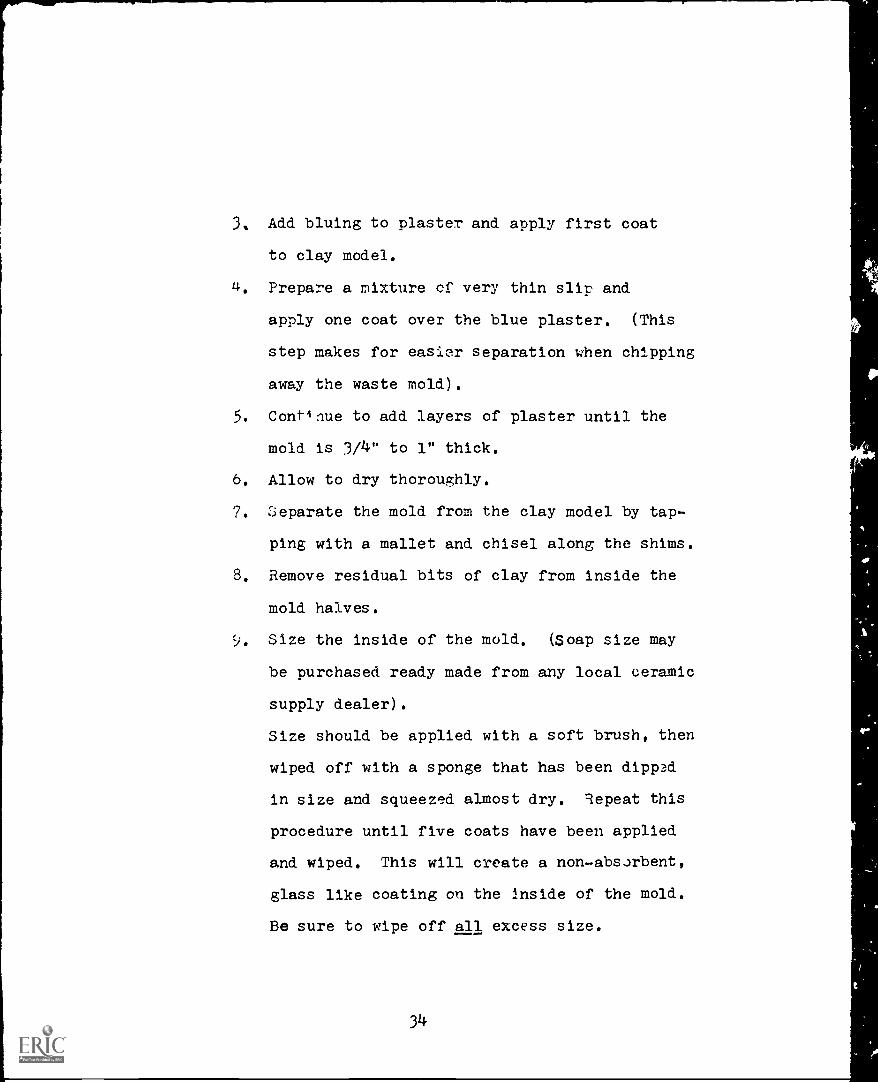
3, Add bluing to plaster and apply first coat
to clay model.
4. Prepare a mixture of very thin slip and
apply one coat over the blue plaster. (This
step makes for easier separation when chipping
away the waste mold).
5. Continue to add layers of plaster until the
mold is 3/4" to 1" thick.
6. Allow to dry thoroughly.
7. Separate the mold from the clay model by tap-
ping with a mallet and chisel along the shims.
8. Remove residual bits of clay from inside the
mold halves.
9. Size the inside of the mold. (Soap size may
be purchased ready made from any local ceramic
supply dealer).
Size should be applied with a soft brush, then
wiped off with a sponge that has been dipp3d
in size and squeezed almost dry. Repeat this
procedure until five coats have been applied
and wiped. This will create a non-absirbent,
glass like coating on the inside of the mold.
Be sure to wipe off all excess size.

* 10. Plaster should be poured within 1/2 hour of
sizing. Fasten the pieces of the mold
together, using curlap strips dipped in
plaster along the seams. Allow to dry.
11. Pour a small quantity of plaster into the
mold and tip from side to side. By repeat-
ing this process several times, th, casting
can be built up to 1/2" in thickness. (The
casting may be reinforced, if desired, by
adding strips to the inside of the casting).
12. Allow casting to dry.
13. Carefully chip away the waste mold from the
casting.
Note: When you reach the blue layer of plaster,
take extra care in chipping. The casting sur-
face lies just below that layer.
Suggestions:
1. Be sure you have placed the shims correctly.
2. Do the sizing carefully. Do not allow the
layers of size to build up thi3kly, as they
will ruin the surface texture of the casting.
3. Once sizing has been applied, do not wait
longer than 1/2 hour before pouring the casting.
35
4, Chip the waste mold off carefully:
Assignment:
1. Create one casting from an original
sculpture, by the waste mold process.
2. The original sculpture must be two
pounds or more in weight.
3. Sculpture must reflect good three-dimen-
sional design.
36
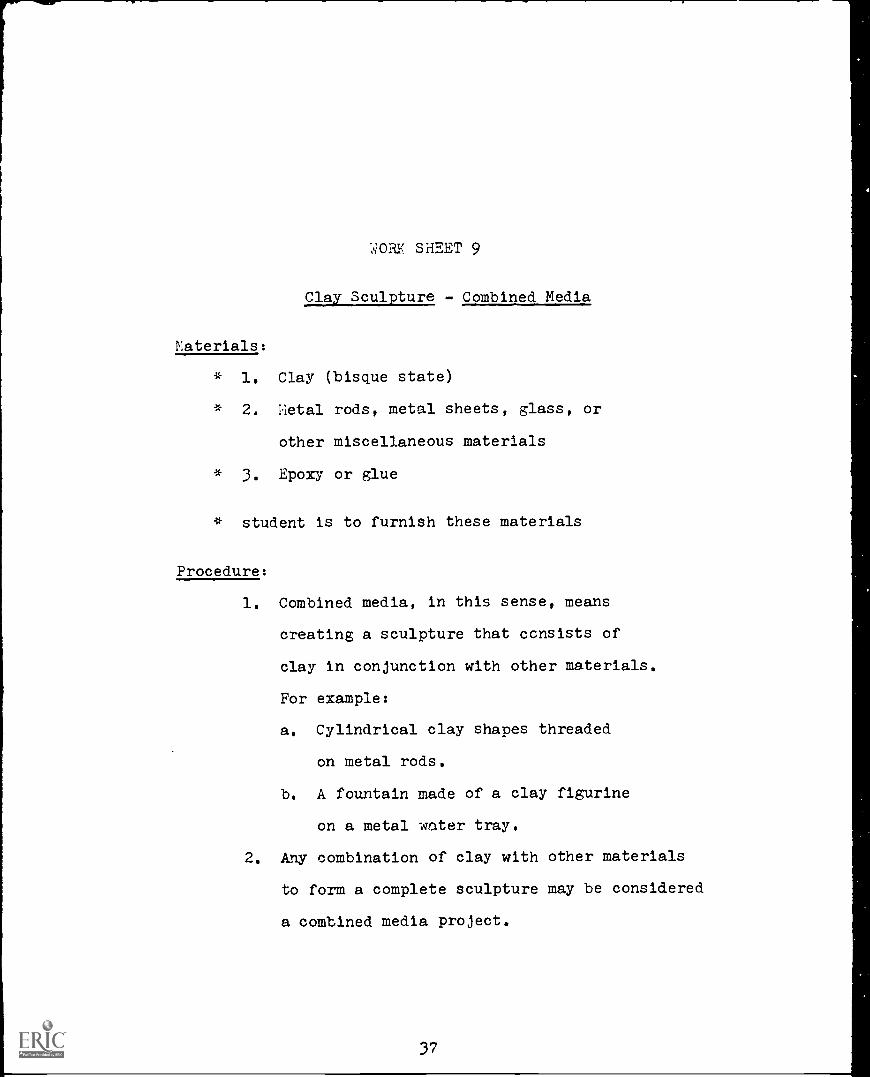
WORK SHEET 9
Clay Sculpture - Combined Media
Materials:
* 1. Clay (bisque state)
* 2. Netal rods, metal sheets, glass, or
other miscellaneous materials
* 3. Epoxy or glue
* student is to furnish these materials
Procedure:
1. Combined media, in this sense, means
creating a sculpture that consists of
clay in conjunction with other materials.
For example:
a. Cylindrical clay shapes threaded
on metal rods.
b. A fountain made of a clay figurine
on a metal water tray.
2. Any combination of clay with other materials
to form a complete sculpture may be considered
a combined media project.
37
Suggestions:
1. Most media works well with clay. Use care
in your selection. If in doubt, check with
your instructor.
2. Check the type of glue, epoxies, etc.,
you use to be sure they adhere to the
materials selected.
3. Do not combine too many different types of
media. It will tend to make your sculpture
too complIcated.
Assignment:
1. Create one sculpture, using the combined
media process. The finished sculpture
must be at least two pounds in weight.
2. Sculpture must reflect good three- dimensional
design.
3. Sculpture may be left in bisque state or
glazed. (If sculpture is to be glazed,
student should research glazing techniques
in rexts included in part IX).
3a
EI3LIOGRAPHY
IX. RESOURCES FOR PUPILS:
(It is suggested that resources marked with an
asterisk be kept on hand in the classroom).
Baldwin, John, 12porcultiesConter,Reinhold, 1967.
Chandler, Maurice Henry, Ceramics in the Modern
World, Doubleday, 1968.
Charleston, Robert T., World Ceramics, McGraw-hill,
1968.
* Clarke, Geoffrey, A Sculptors Manual, Reinhold,
1968.
Craven, Wayne, Sculpture in America, Crowell,
1968.
Dangerfield, Marjorie, The Fun and Fundamentals
of Sculpture, Scribner, 1963.
Di Valentin, Maria, Sculpture for Beginners,
Sterling, 1965.
Kenny, John B., Ceramic Design, Chilton Company,
1965.
39
* Kenny, John B., Ceramic Sculpturc, Chilton Co.,
1967.
Mills, John W., The Technique of Sculpture,
Reinhold, 1967.
Paine, Roberta, Lookin:cat Sculpture, Lothrop
Lee & Shepard, 1968.
* Reed, Sir Herbert Edward, History of Modern
Sculpture, Praeger, 1964.
Stevens, Harold, Art in the Rourid, Reinhold,
1965.
Struppeck, Jules, The Creation of Sculpture,
Holt, 1952.
Supensky, Thomas G., Creative Art in the School
Program, Davis Publications, 1968.
Weiss, Harvey, Clay, Wood and Wire, Scott, 1956.
Zaidenberg, Arthur, Anyone Can Sculpt, harper,
1952.
BIBLIOGRAPHY
X. RESOURCES FOR INSTRUCTORS:
Note: Movies marked with an asterisk have been
selected during previewing as those most
effective.
A. Movies, Films - Available through Dade County
Board of Public Instruction - instructional
materials division.
Clay Modeling for Beginners
22' BW EJS Tabletoppers 1-11644
* Craftsmanshi in Cla : Sim le Slab Methods
10' C JS Indiana Univ. 1-04136
Press Mold Ceramics
10' C EJS Allan Moore
* Sculpture from Life
10' C JS Allan Moore
* 12111 Century Sculpture
C
1-04153
1-04131
JST 5-20158
* Dth centsusulpture
C JST
41
1-20159
B, Textbooks:
Clarke, Geoffrey, A Sculptor's Manual, Reinhold,
1968.
Kenny, John B., Ceramic Sculpture, Chilton Co.,
1967.
Graham, Collier, Form) Space and Vision,
Prentice Hall, Englewood Cliffs, New Jersey,
1967.
42