Embed Size (px)
Citation preview

PeopleSoft Enterprise HRMS 8.8x toHRMS and Campus Solutions 9.0,Including Pay/Bill ManagementUpgrade
February 2007

PeopleSoft Enterprise HRMS 8.8x to HRMS and Campus Solutions 9.0, Including Pay/Bill ManagementUpgradeSKU uhrfo9_021507_uhrms88xto90_paybillCopyright © 2007, Oracle. All rights reserved.
The Programs (which include both the software and documentation) contain proprietary information; they areprovided under a license agreement containing restrictions on use and disclosure and are also protected by copyright,patent, and other intellectual and industrial property laws. Reverse engineering, disassembly, or decompilation of thePrograms, except to the extent required to obtain interoperability with other independently created software or asspecified by law, is prohibited.
The information contained in this document is subject to change without notice. If you find any problems in thedocumentation, please report them to us in writing. This document is not warranted to be error-free. Except as maybe expressly permitted in your license agreement for these Programs, no part of these Programsmay be reproduced ortransmitted in any form or by anymeans, electronic or mechanical, for any purpose.If the Programs are delivered to the United States Government or anyone licensing or using the Programs on behalf ofthe United States Government, the following notice is applicable:
U.S. GOVERNMENT RIGHTSPrograms, software, databases, and related documentation and technical data delivered to U.S. Governmentcustomers are “commercial computer software” or “commercial technical data” pursuant to the applicable FederalAcquisition Regulation and agency-specific supplemental regulations. As such, use, duplication, disclosure,modification, and adaptation of the Programs, including documentation and technical data, shall be subject tothe licensing restrictions set forth in the applicable Oracle license agreement, and, to the extent applicable, theadditional rights set forth in FAR 52.227-19, Commercial Computer Software--Restricted Rights (June 1987).Oracle Corporation, 500 Oracle Parkway, Redwood City, CA 94065.The Programs are not intended for use in any nuclear, aviation, mass transit, medical, or other inherently dangerousapplications. It shall be the licensee’s responsibility to take all appropriate fail-safe, backup, redundancy and othermeasures to ensure the safe use of such applications if the Programs are used for such purposes, and we disclaimliability for any damages caused by such use of the Programs.The Programsmay provide links toWeb sites and access to content, products, and services from third parties.Oracle is not responsible for the availability of, or any content provided on, third-partyWeb sites. You bear all risksassociated with the use of such content. If you choose to purchase any products or services from a third party, therelationship is directly between you and the third party. Oracle is not responsible for: (a) the quality of third-partyproducts or services; or (b) fulfilling any of the terms of the agreement with the third party, including delivery ofproducts or services and warranty obligations related to purchased products or services. Oracle is not responsible forany loss or damage of any sort that youmay incur from dealing with any third party.Oracle, JD Edwards, PeopleSoft, and Siebel are registered trademarks of Oracle Corporation and/or its affiliates.Other namesmay be trademarks of their respective owners.
Open Source DisclosureOracle takes no responsibility for its use or distribution of any open source or shareware software or documentationand disclaims any and all liability or damages resulting from use of said software or documentation. The followingopen source software may be used in Oracle’s PeopleSoft products and the following disclaimers are provided.Apache Software FoundationThis product includes software developed by the Apache Software Foundation (http://www.apache.org/). Copyright© 2000-2003. The Apache Software Foundation. All rights reserved. Licensed under the Apache License, Version2.0 (the “License”); youmay not use this file except in compliance with the License. Youmay obtain a copy of theLicense at http://www.apache.org/licenses/LICENSE-2.0.Unless required by applicable law or agreed to in writing, software distributed under the License is distributed on an“AS IS” BASIS,WITHOUTWARRANTIESORCONDITIONSOFANYKIND, either express or implied. See theLicense for the specific language governing permissions and limitations under the License.

OpenSSLCopyright © 1998-2005 The OpenSSL Project. All rights reserved.This product includes software developed by the OpenSSL Project for use in the OpenSSL Toolkit(http://www.openssl.org/).THIS SOFTWARE IS PROVIDEDBYTHEOpenSSL PROJECT “AS IS” ANDANYEXPRESSEDORIMPLIEDWARRANTIES, INCLUDING, BUTNOTLIMITEDTO, THE IMPLIEDWARRANTIESOFMERCHANTABILITYANDFITNESS FORAPARTICULAR PURPOSEAREDISCLAIMED. INNOEVENTSHALLTHEOpenSSL PROJECTOR ITSCONTRIBUTORSBELIABLE FORANYDIRECT, INDIRECT,INCIDENTAL, SPECIAL, EXEMPLARY, ORCONSEQUENTIALDAMAGES (INCLUDING, BUTNOTLIMITEDTO, PROCUREMENTOF SUBSTITUTEGOODSORSERVICES; LOSSOFUSE, DATA, ORPROFITS; ORBUSINESS INTERRUPTION)HOWEVERCAUSEDANDONANYTHEORYOFLIABILITY,WHETHER INCONTRACT, STRICT LIABILITY, OR TORT (INCLUDINGNEGLIGENCEOROTHERWISE)ARISING INANYWAYOUTOFTHEUSEOFTHIS SOFTWARE, EVEN IFADVISEDOFTHE POSSIBILITYOF SUCHDAMAGE.Loki LibraryCopyright © 2001 byAndrei Alexandrescu. This code accompanies the book: Alexandrescu, Andrei. “Modern C++Design: Generic Programming and Design Patterns Applied”. Copyright © 2001Addison-Wesley. Permission touse, copy, modify, distribute and sell this software for any purpose is hereby granted without fee, provided that theabove copyright notice appear in all copies and that both that copyright notice and this permission notice appear insupporting documentation.Helma ProjectCopyright © 1999-2004 Helma Project. All rights reserved. THIS SOFTWARE IS PROVIDED “AS IS”ANDANYEXPRESSEDOR IMPLIEDWARRANTIES, INCLUDING, BUTNOTLIMITEDTO, THEIMPLIEDWARRANTIESOFMERCHANTABILITYANDFITNESS FORAPARTICULARPURPOSEAREDISCLAIMED. INNOEVENT SHALL THEHELMAPROJECTOR ITSCONTRIBUTORSBE LIABLE FORANYDIRECT, INDIRECT, INCIDENTAL, SPECIAL, EXEMPLARY, ORCONSEQUENTIALDAMAGES(INCLUDING, BUTNOTLIMITEDTO, PROCUREMENTOF SUBSTITUTEGOODSOR SERVICES;LOSSOFUSE, DATA, OR PROFITS; ORBUSINESS INTERRUPTION) HOWEVERCAUSEDANDONANYTHEORYOFLIABILITY,WHETHER INCONTRACT, STRICT LIABILITY, OR TORT (INCLUDINGNEGLIGENCEOROTHERWISE) ARISING INANYWAYOUTOF THEUSEOF THIS SOFTWARE, EVEN IFADVISEDOFTHE POSSIBILITYOF SUCHDAMAGE.Helma includes third party software released under different specific license terms. See the licenses directory in theHelma distribution for a list of these license.SarissaCopyright © 2004Manos Batsis.This library is free software; you can redistribute it and/or modify it under the terms of the GNULesser GeneralPublic License as published by the Free Software Foundation; either version 2.1 of the License, or (at your option)any later version.This library is distributed in the hope that it will be useful, butWITHOUTANYWARRANTY; without even theimplied warranty ofMERCHANTABILITY or FITNESS FORAPARTICULARPURPOSE. See the GNULesserGeneral Public License for more details.You should have received a copy of the GNULesser General Public License along with this library; if not, write tothe Free Software Foundation, Inc., 59 Temple Place, Suite 330, Boston,MA 02111-1307 USA.ICUICU License - ICU 1.8.1 and later COPYRIGHTANDPERMISSIONNOTICECopyright © 1995-2003International BusinessMachines Corporation and others. All rights reserved.

Permission is hereby granted, free of charge, to any person obtaining a copy of this software and associateddocumentation files (the “Software”), to deal in the Software without restriction, including without limitation therights to use, copy, modify, merge, publish, distribute, and/or sell copies of the Software, and to permit personsto whom the Software is furnished to do so, provided that the above copyright notice(s) and this permissionnotice appear in all copies of the Software and that both the above copyright notice(s) and this permission noticeappear in supporting documentation. THE SOFTWARE IS PROVIDED “AS IS,”WITHOUTWARRANTYOFANYKIND, EXPRESSOR IMPLIED, INCLUDINGBUTNOTLIMITEDTOTHEWARRANTIESOFMERCHANTABILITY, FITNESS FORAPARTICULAR PURPOSEANDNONINFRINGEMENTOFTHIRDPARTYRIGHTS. INNOEVENT SHALL THECOPYRIGHTHOLDERORHOLDERS INCLUDED IN THISNOTICEBELIABLE FORANYCLAIM, ORANYSPECIAL INDIRECTORCONSEQUENTIALDAMAGES,ORANYDAMAGESWHATSOEVERRESULTING FROMLOSSOFUSE, DATAORPROFITS,WHETHER INANACTIONOFCONTRACT, NEGLIGENCEOROTHERTORTIOUSACTION, ARISINGOUTOFOR INCONNECTIONWITHTHEUSEOR PERFORMANCEOF THIS SOFTWARE. Except as contained in this notice,the name of a copyright holder shall not be used in advertising or otherwise to promote the sale, use or other dealingsin this Software without prior written authorization of the copyright holder.All trademarks and registered trademarks mentioned herein are the property of their respective owners.Sun’s JAXB Implementation – JDSDK 1.5 relaxngDatatype.jar 1.0 LicenseCopyright © 2001, Thai Open Source Software Center Ltd, SunMicrosystems. All rights reserved.THIS SOFTWARE IS PROVIDEDBYTHECOPYRIGHTHOLDERSANDCONTRIBUTORS “ASIS” ANDANYEXPRESSOR IMPLIEDWARRANTIES, INCLUDING, BUTNOTLIMITEDTO, THEIMPLIEDWARRANTIESOFMERCHANTABILITYANDFITNESS FORAPARTICULARPURPOSEAREDISCLAIMED. INNOEVENT SHALLTHEREGENTSORCONTRIBUTORSBELIABLE FORANYDIRECT, INDIRECT, INCIDENTAL, SPECIAL, EXEMPLARY, ORCONSEQUENTIALDAMAGES(INCLUDING, BUTNOTLIMITEDTO, PROCUREMENTOF SUBSTITUTEGOODSOR SERVICES;LOSSOFUSE, DATA, OR PROFITS; ORBUSINESS INTERRUPTION) HOWEVERCAUSEDANDONANYTHEORYOF LIABILITY,WHETHER INCONTRACT, STRICT LIABILITY, ORTORT (INCLUDINGNEGLIGENCEOROTHERWISE) ARISING INANYWAYOUTOF THEUSEOF THIS SOFTWARE, EVEN IFADVISEDOFTHE POSSIBILITYOF SUCHDAMAGE.W3C IPR SOFTWARENOTICECopyright © 2000WorldWideWeb Consortium, (Massachusetts Institute of Technology, Institut National deRecherche en Informatique et en Automatique, Keio University). All Rights Reserved.Note: The original version of theW3C Software Copyright Notice and License could be found athttp://www.w3.org/Consortium/Legal/copyright-software-19980720.THIS SOFTWAREANDDOCUMENTATION IS PROVIDED “AS IS,” ANDCOPYRIGHTHOLDERSMAKENOREPRESENTATIONSORWARRANTIES, EXPRESSOR IMPLIED, INCLUDINGBUTNOTLIMITEDTO,WARRANTIESOFMERCHANTABILITYOR FITNESS FORANYPARTICULAR PURPOSEORTHATTHEUSEOFTHE SOFTWAREORDOCUMENTATIONWILLNOT INFRINGEANYTHIRD PARTYPATENTS,COPYRIGHTS, TRADEMARKSOROTHERRIGHTS. COPYRIGHTHOLDERSWILLNOTBELIABLE FORANYDIRECT, INDIRECT, SPECIALORCONSEQUENTIALDAMAGESARISINGOUTOFANYUSEOFTHE SOFTWAREORDOCUMENTATION.

Contents
PrefaceAbout This Documentation... . . . . . . . . . . . . . . . . . . . . . . . . . . . .. . . . . . . . . . . . . . . . . . . . . . . . . . . . . . . . . . . . . . . . . . . . . . .xxviiUnderstanding This Documentation.. . . . . . . . . . . . . . . . . . . . . . . . . . . . . . . . . . . . . . . . . . . . . . . . . . . . . . . . . . . . . . . . . . . . . . . . . . . . . .xxviiPrerequisites.. . . . . . . . . . . . . . . . . . . . . . . . . . . . . . . . . . . . . . . . . . . . . . . . . . . . . . . . . . . . . . . . . . . . . . . . . . . . . . . . . . . . . . . . . . . . . . . . . . . . . . . . .xxviiAudience.. . . . . . . . . . . . . . . . . . . . . . . . . . . . . . . . . . . . . . . . . . . . . . . . . . . . . . . . . . . . . . . . . . . . . . . . . . . . . . . . . . . . . . . . . . . . . . . . . . . . . . . . . . . . . .xxviiOrganization.. . . . . . . . . . . . . . . . . . . . . . . . . . . . . . . . . . . . . . . . . . . . . . . . . . . . . . . . . . . . . . . . . . . . . . . . . . . . . . . . . . . . . . . . . . . . . . . . . . . . . . . . . .xxviiRelated Information.. . . . . . . . . . . . . . . . . . . . . . . . . . . . . . . . . . . . . . . . . . . . . . . . . . . . . . . . . . . . . . . . . . . . . . . . . . . . . . . . . . . . . . . . . . . . . . . .xxviii
Chapter 1Prepare Your Database... .. . . . . . . . . . . . . . . . . . . . . . . . . . . . . . . . . . . . . . . . . . . . . . . . . . . . . . . . . . . . . . . . . . . . . . . . . . . . . . . . . . . .1Understanding Database Preparation.. . . . . . . . . . . . . . . . . . . . . . . . . . . . . . . . . . . . . . . . . . . . . . . . . . . . . . . . . . . . . . . . . . . . . . . . . . . . . . . .2Understanding Your Upgrade.. . . . . . . . . . . . . . . . . . . . . . . . . . . . . . . . . . . . . . . . . . . . . . . . . . . . . . . . . . . . . . . . . . . . . . . . . . . . . . . . . . . . . . . . . .2
Understanding PeopleSoft Upgrades.. . . . . . . . . . . . . . . . . . . . . . . . . . . . . . . . . . . . . . . . . . . . . . . . . . . . . . . . . . . . . . . . . . .. . . . . . . . . .2Verifying the Software Installation.. . . . . . . . . . . . . . . . . . . . . . . . . . . . . . . . . . . . . . . . . . . . . . . . . . . . . . . . . . . . . . . . . . . . . . .. . . . . . . . . .2Defining Upgrade Databases.. . . . . . . . . . . . . . . . . . . . . . . . . . . . . . . . . . . . . . . . . . . . . . . . . . . . . . . . . . . . . . . . . . . . . . . . . . . .. . . . . . . . . .3Reviewing Upgrade Notes and Tips... . . . . . . . . . . . . . . . . . . . . . . . . . . . . . . . . . . . . . . . . . . . . . . . . . . . . . . . . . . . . . . . . . . .. . . . . . . . . .3
Copying Your Production Database .. . . . . . . . . . . . . . . . . . . . . . . . . . . . . . . . . . . . . . . . . . . . . . . . . . . . . . . . . . . . . . . . . . . . . . . . . . . . . . . . . .5Making a Copy of Production Database.. . . . . . . . . . . . . . . . . . . . . . . . . . . . . . . . . . . . . . . . . . . . . . . . . . . . . . . . . . . . . . . .. . . . . . . . . .5Increasing Database Space.. . . . . . . . . . . . . . . . . . . . . . . . . . . . . . . . . . . . . . . . . . . . . . . . . . . . . . . . . . . . . . . . . . . . . . . . . . . . . .. . . . . . . . . .5
Applying Upgrade Planning Files.. . . . . . . . . . . . . . . . . . . . . . . . . . . . . . . . . . . . . . . . . . . . . . . . . . . . . . . . . . . . . . . . . . . . . . . . . . . . . . . . . . . . . .6Understanding Applying Upgrade Planning Files.. . . . . . . . . . . . . . . . . . . . . . . . . . . . . . . . . . . . . . . . . . . . . . . . . . . . .. . . . . . . . . .6Applying the UPGOPT Project. . . . . . . . . . . . . . . . . . . . . . . . . . . . . . . . . . . . . . . . . . . . . . . . . . . . . . . . . . . . . . . . . . . . . . . . . . . .. . . . . . . . . .6Building the UPGOPT Project.. . . . . . . . . . . . . . . . . . . . . . . . . . . . . . . . . . . . . . . . . . . . . . . . . . . . . . . . . . . . . . . . . . . . . . . . . . . .. . . . . . . . . .7Applying the UPGOPTPB Project. . . . . . . . . . . . . . . . . . . . . . . . . . . . . . . . . . . . . . . . . . . . . . . . . . . . . . . . . . . . . . . . . . . . . . . .. . . . . . . . . .7Building the UPGOPTPB Project. . . . . . . . . . . . . . . . . . . . . . . . . . . . . . . . . . . . . . . . . . . . . . . . . . . . . . . . . . . . . . . . . . . . . . . . .. . . . . . . . . .8Setting Up Upgrade Planning Security. . . . . . . . . . . . . . . . . . . . . . . . . . . . . . . . . . . . . . . . . . . . . . . . . . . . . . . . . . . . . . . . . .. . . . . . . . . .9
Editing Upgrade Planning DB2 Scripts.. . . . . . . . . . . . . . . . . . . . . . . . . . . . . . . . . . . . . . . . . . . . . . . . . . . . . . . . . . . . . . . . . . . . . . . . . . . . . . .9Running Upgrade Planning Scripts.. . . . . . . . . . . . . . . . . . . . . . . . . . . . . . . . . . . . . . . . . . . . . . . . . . . . . . . . . . . . . . . . . . . . . . . . . . . . . . . . .10
Understanding Running Upgrade Planning Scripts. . . . . . . . . . . . . . . . . . . . . . . . . . . . . . . . . . . . . . . . . . . . . . . . . . . .. . . . . . . .10Exporting Planning Messages and Strings.. . . . . . . . . . . . . . . . . . . . . . . . . . . . . . . . . . . . . . . . . . . . . . . . . . . . . . . . . . . . .. . . . . . . .10Importing Planning Messages and Strings.. . . . . . . . . . . . . . . . . . . . . . . . . . . . . . . . . . . . . . . . . . . . . . . . . . . . . . . . . . . . .. . . . . . . .10Importing Upgrade Default Options.. . . . . . . . . . . . . . . . . . . . . . . . . . . . . . . . . . . . . . . . . . . . . . . . . . . . . . . . . . . . . . . . . . . . .. . . . . . . .11
Updating Statistics... . . . . . . . . . . . . . . . . . . . . . . . . . . . . . . . . . . . . . . . . . . . . . . . . . . . . . . . . . . . . . . . . . . . . . . . . . . . . . . . . . . . . . . . . . . . . . . . . . . .11Running Initial Audit Reports.. . . . . . . . . . . . . . . . . . . . . . . . . . . . . . . . . . . . . . . . . . . . . . . . . . . . . . . . . . . . . . . . . . . . . . . . . . . . . . . . . . . . . . . . .11
Copyright © 2007, Oracle. All rights reserved. v

Contents
Understanding Running Initial Audit Reports. . . . . . . . . . . . . . . . . . . . . . . . . . . . . . . . . . . . . . . . . . . . . . . . . . . . . . . . . . .. . . . . . . .12Run the Initial DDDAUDIT Report. . . . . . . . . . . . . . . . . . . . . . . . . . . . . . . . . . . . . . . . . . . . . . . . . . . . . . . . . . . . . . . . . . . . . . . .. . . . . . . .12Run the Initial SYSAUDIT Report. . . . . . . . . . . . . . . . . . . . . . . . . . . . . . . . . . . . . . . . . . . . . . . . . . . . . . . . . . . . . . . . . . . . . . . .. . . . . . . .12Create the INITALTAUD Project. . . . . . . . . . . . . . . . . . . . . . . . . . . . . . . . . . . . . . . . . . . . . . . . . . . . . . . . . . . . . . . . . . . . . . . . . .. . . . . . . .13Run the Initial Alter Audit. . . . . . . . . . . . . . . . . . . . . . . . . . . . . . . . . . . . . . . . . . . . . . . . . . . . . . . . . . . . . . . . . . . . . . . . . . . . . . . . . .. . . . . . . .13Review the Initial Audits. . . . . . . . . . . . . . . . . . . . . . . . . . . . . . . . . . . . . . . . . . . . . . . . . . . . . . . . . . . . . . . . . . . . . . . . . . . . . . . . . . .. . . . . . . .14
Exporting and Loading PayBill Data. . . . . . . . . . . . . . . . . . . . . . . . . . . . . . . . . . . . . . . . . . . . . . . . . . . . . . . . . . . . . . . . . . . . . . . . . . . . . . . . .15Loading Front Office Data.. . . . . . . . . . . . . . . . . . . . . . . . . . . . . . . . . . . . . . . . . . . . . . . . . . . . . . . . . . . . . . . . . . . . . . . . . . . . . . . .. . . . . . . .15Importing Old NonStable Project Definition. . . . . . . . . . . . . . . . . . . . . . . . . . . . . . . . . . . . . . . . . . . . . . . . . . . . . . . . . . . . .. . . . . . . .16Importing New NonStable Project Definition.. . . . . . . . . . . . . . . . . . . . . . . . . . . . . . . . . . . . . . . . . . . . . . . . . . . . . . . . . . .. . . . . . . .16Copying Old NonStable Tables to File.. . . . . . . . . . . . . . . . . . . . . . . . . . . . . . . . . . . . . . . . . . . . . . . . . . . . . . . . . . . . . . . . . .. . . . . . . .16Copying New NonStable Tables to File.. . . . . . . . . . . . . . . . . . . . . . . . . . . . . . . . . . . . . . . . . . . . . . . . . . . . . . . . . . . . . . . . .. . . . . . . .17Copying Old NonStable Tables From File.. . . . . . . . . . . . . . . . . . . . . . . . . . . . . . . . . . . . . . . . . . . . . . . . . . . . . . . . . . . . . .. . . . . . . .17Exporting PayBill Stable Tables.. . . . . . . . . . . . . . . . . . . . . . . . . . . . . . . . . . . . . . . . . . . . . . . . . . . . . . . . . . . . . . . . . . . . . . . . . .. . . . . . . .17Exporting PayBill NonStable Tables.. . . . . . . . . . . . . . . . . . . . . . . . . . . . . . . . . . . . . . . . . . . . . . . . . . . . . . . . . . . . . . . . . . . . .. . . . . . . .18Copying New NonStable Tables From File.. . . . . . . . . . . . . . . . . . . . . . . . . . . . . . . . . . . . . . . . . . . . . . . . . . . . . . . . . . . . .. . . . . . . .18
Verifying Global Payroll. . . . . . . . . . . . . . . . . . . . . . . . . . . . . . . . . . . . . . . . . . . . . . . . . . . . . . . . . . . . . . . . . . . . . . . . . . . . . . . . . . . . . . . . . . . . . . . .19Running Application Audits.. . . . . . . . . . . . . . . . . . . . . . . . . . . . . . . . . . . . . . . . . . . . . . . . . . . . . . . . . . . . . . . . . . . . . . . . . . . . . . . . . . . . . . . . . . .19
Running Upgrade Reports.. . . . . . . . . . . . . . . . . . . . . . . . . . . . . . . . . . . . . . . . . . . . . . . . . . . . . . . . . . . . . . . . . . . . . . . . . . . . . . . .. . . . . . . .19Correcting Garnishment Payee Data.. . . . . . . . . . . . . . . . . . . . . . . . . . . . . . . . . . . . . . . . . . . . . . . . . . . . . . . . . . . . . . . . . . .. . . . . . . .21Running Person Relationship Audit Report. . . . . . . . . . . . . . . . . . . . . . . . . . . . . . . . . . . . . . . . . . . . . . . . . . . . . . . . . . . . .. . . . . . . .23Running Dynamic ChartFields Audits.. . . . . . . . . . . . . . . . . . . . . . . . . . . . . . . . . . . . . . . . . . . . . . . . . . . . . . . . . . . . . . . . . . .. . . . . . . .25
Preparing Approvals for Upgrade.. . . . . . . . . . . . . . . . . . . . . . . . . . . . . . . . . . . . . . . . . . . . . . . . . . . . . . . . . . . . . . . . . . . . . . . . . . . . . . . . . . .27Understanding Approvals Upgrade.. .. . . . . . . . . . . . . . . . . . . . . . . . . . . . . . . . . . . . . . . . . . . . . . . . . . . . . . . . . . . . . . . . . . . .. . . . . . . .27Upgrading Appraisal Approvals.. . . . . . . . . . . . . . . . . . . . . . . . . . . . . . . . . . . . . . . . . . . . . . . . . . . . . . . . . . . . . . . . . . . . . . . . . .. . . . . . . .27Completing eProfile Approvals.. . . . . . . . . . . . . . . . . . . . . . . . . . . . . . . . . . . . . . . . . . . . . . . . . . . . . . . . . . . . . . . . . . . . . . . . . . .. . . . . . . .28Completing ePerformance Approvals.. . . . . . . . . . . . . . . . . . . . . . . . . . . . . . . . . . . . . . . . . . . . . . . . . . . . . . . . . . . . . . . . . . .. . . . . . . .28Completing Absence Management Approvals.. . . . . . . . . . . . . . . . . . . . . . . . . . . . . . . . . . . . . . . . . . . . . . . . . . . . . . . . .. . . . . . . .29
Preparing the Benefits Upgrade.. . . . . . . . . . . . . . . . . . . . . . . . . . . . . . . . . . . . . . . . . . . . . . . . . . . . . . . . . . . . . . . . . . . . . . . . . . . . . . . . . . . . .29Preparing Benefits Administration.. . . . . . . . . . . . . . . . . . . . . . . . . . . . . . . . . . . . . . . . . . . . . . . . . . . . . . . . . . . . . . . . . . . . . . .. . . . . . . .29Preparing COBRA Administration. . . . . . . . . . . . . . . . . . . . . . . . . . . . . . . . . . . . . . . . . . . . . . . . . . . . . . . . . . . . . . . . . . . . . . . .. . . . . . . .30
Preparing for System Element Deletions.. . . . . . . . . . . . . . . . . . . . . . . . . . . . . . . . . . . . . . . . . . . . . . . . . . . . . . . . . . . . . . . . . . . . . . . . . . .30Understanding System Element Deletions.. . . . . . . . . . . . . . . . . . . . . . . . . . . . . . . . . . . . . . . . . . . . . . . . . . . . . . . . . . . . .. . . . . . . .30Viewing Element Relationships.. . . . . . . . . . . . . . . . . . . . . . . . . . . . . . . . . . . . . . . . . . . . . . . . . . . . . . . . . . . . . . . . . . . . . . . . . .. . . . . . . .32Finding System Elements to Delete.. . . . . . . . . . . . . . . . . . . . . . . . . . . . . . . . . . . . . . . . . . . . . . . . . . . . . . . . . . . . . . . . . . . . .. . . . . . . .33Reviewing Reports and Interface Setup.. . . . . . . . . . . . . . . . . . . . . . . . . . . . . . . . . . . . . . . . . . . . . . . . . . . . . . . . . . . . . . . .. . . . . . . .34
Finding Multiple Distributions.. . . . . . . . . . . . . . . . . . . . . . . . . . . . . . . . . . . . . . . . . . . . . . . . . . . . . . . . . . . . . . . . . . . . . . . . . . . . . . . . . . . . . . . .34Auditing Global Payroll Settings.. . . . . . . . . . . . . . . . . . . . . . . . . . . . . . . . . . . . . . . . . . . . . . . . . . . . . . . . . . . . . . . . . . . . . . . . . . . . . . . . . . . . .35
Understanding Global Payroll Settings .. . . . . . . . . . . . . . . . . . . . . . . . . . . . . . . . . . . . . . . . . . . . . . . . . . . . . . . . . . . . . . . . .. . . . . . . .35Verifying PIN Element Numbers.. . . . . . . . . . . . . . . . . . . . . . . . . . . . . . . . . . . . . . . . . . . . . . . . . . . . . . . . . . . . . . . . . . . . . . . . .. . . . . . . .35
vi Copyright © 2007, Oracle. All rights reserved.

Contents
Making Functional Decisions.. . . . . . . . . . . . . . . . . . . . . . . . . . . . . . . . . . . . . . . . . . . . . . . . . . . . . . . . . . . . . . . . . . . . . . . . . . . . . . . . . . . . . . . .36Understanding Making Functional Decisions.. . . . . . . . . . . . . . . . . . . . . . . . . . . . . . . . . . . . . . . . . . . . . . . . . . . . . . . . . .. . . . . . . .36Assigning Upgrade Default Values.. . . . . . . . . . . . . . . . . . . . . . . . . . . . . . . . . . . . . . . . . . . . . . . . . . . . . . . . . . . . . . . . . . . . . .. . . . . . . .36Assigning Training Employee Record Default Values.. . . . . . . . . . . . . . . . . . . . . . . . . . . . . . . . . . . . . . . . . . . . . . . .. . . . . . . .43Exporting Upgrade Default Options.. . . . . . . . . . . . . . . . . . . . . . . . . . . . . . . . . . . . . . . . . . . . . . . . . . . . . . . . . . . . . . . . . . . . .. . . . . . . .43
Reporting Row Count for Tables.. . . . . . . . . . . . . . . . . . . . . . . . . . . . . . . . . . . . . . . . . . . . . . . . . . . . . . . . . . . . . . . . . . . . . . . . . . . . . . . . . . . . .44Preparing Your Database .. . . . . . . . . . . . . . . . . . . . . . . . . . . . . . . . . . . . . . . . . . . . . . . . . . . . . . . . . . . . . . . . . . . . . . . . . . . . . . . . . . . . . . . . . . . .44
Understanding Database Preparation.. . . . . . . . . . . . . . . . . . . . . . . . . . . . . . . . . . . . . . . . . . . . . . . . . . . . . . . . . . . . . . . . . .. . . . . . . .44Verify Database Integrity. . . . . . . . . . . . . . . . . . . . . . . . . . . . . . . . . . . . . . . . . . . . . . . . . . . . . . . . . . . . . . . . . . . . . . . . . . . . . . . . . . .. . . . . . . .44Clean the PSOBJCHNG Table.. . . . . . . . . . . . . . . . . . . . . . . . . . . . . . . . . . . . . . . . . . . . . . . . . . . . . . . . . . . . . . . . . . . . . . . . . . .. . . . . . . .45Drop PeopleTools Tables.. . . . . . . . . . . . . . . . . . . . . . . . . . . . . . . . . . . . . . . . . . . . . . . . . . . . . . . . . . . . . . . . . . . . . . . . . . . . . . . . .. . . . . . . .45Shrink Images.. . . . . . . . . . . . . . . . . . . . . . . . . . . . . . . . . . . . . . . . . . . . . . . . . . . . . . . . . . . . . . . . . . . . . . . . . . . . . . . . . . . . . . . . . . . . . .. . . . . . . .46Purge Message Queues.. . . . . . . . . . . . . . . . . . . . . . . . . . . . . . . . . . . . . . . . . . . . . . . . . . . . . . . . . . . . . . . . . . . . . . . . . . . . . . . . . .. . . . . . . .47
Backing Up Demo Databases.. . . . . . . . . . . . . . . . . . . . . . . . . . . . . . . . . . . . . . . . . . . . . . . . . . . . . . . . . . . . . . . . . . . . . . . . . . . . . . . . . . . . . . .47Backing Up Copy of Current Demo... . . . . . . . . . . . . . . . . . . . . . . . . . . . . . . . . . . . . . . . . . . . . . . . . . . . . . . . . . . . . . . . . . . .. . . . . . . .48Backing Up New Release Demo... . . . . . . . . . . . . . . . . . . . . . . . . . . . . . . . . . . . . . . . . . . . . . . . . . . . . . . . . . . . . . . . . . . . . . .. . . . . . . .48
Renaming Records and Fields .. . . . . . . . . . . . . . . . . . . . . . . . . . . . . . . . . . . . . . . . . . . . . . . . . . . . . . . . . . . . . . . . . . . . . . . . . . . . . . . . . . . . . .48Understanding Renaming Records and Fields.. . . . . . . . . . . . . . . . . . . . . . . . . . . . . . . . . . . . . . . . . . . . . . . . . . . . . . . .. . . . . . . .48Running the RNHCGPI02 Script. . . . . . . . . . . . . . . . . . . . . . . . . . . . . . . . . . . . . . . . . . . . . . . . . . . . . . . . . . . . . . . . . . . . . . . . . .. . . . . . . .49Running the RNHCUPI01 Script. . . . . . . . . . . . . . . . . . . . . . . . . . . . . . . . . . . . . . . . . . . . . . . . . . . . . . . . . . . . . . . . . . . . . . . . . .. . . . . . . .50Retaining the Target Rename Log Files.. . . . . . . . . . . . . . . . . . . . . . . . . . . . . . . . . . . . . . . . . . . . . . . . . . . . . . . . . . . . . . . .. . . . . . . .50Running RNHCGPI02 Script on Copy of Current Demo.. . . . . . . . . . . . . . . . . . . . . . . . . . . . . . . . . . . . . . . . . . . . .. . . . . . . .50Running RNHCUPI01 Script on Copy of Current Demo... . . . . . . . . . . . . . . . . . . . . . . . . . . . . . . . . . . . . . . . . . . . .. . . . . . . .50
Comparing Customizations.. . . . . . . . . . . . . . . . . . . . . . . . . . . . . . . . . . . . . . . . . . . . . . . . . . . . . . . . . . . . . . . . . . . . . . . . . . . . . . . . . . . . . . . . . .51Modifying Compare Report Options.. . . . . . . . . . . . . . . . . . . . . . . . . . . . . . . . . . . . . . . . . . . . . . . . . . . . . . . . . . . . . . . . . . . . .. . . . . . . .51Running Compare UPGCUST... . . . . . . . . . . . . . . . . . . . . . . . . . . . . . . . . . . . . . . . . . . . . . . . . . . . . . . . . . . . . . . . . . . . . . . . . .. . . . . . . .52Running UPGCUST Filter Script. . . . . . . . . . . . . . . . . . . . . . . . . . . . . . . . . . . . . . . . . . . . . . . . . . . . . . . . . . . . . . . . . . . . . . . . . .. . . . . . . .53Reviewing UPGCUST Compare Log.. . . . . . . . . . . . . . . . . . . . . . . . . . . . . . . . . . . . . . . . . . . . . . . . . . . . . . . . . . . . . . . . . . .. . . . . . . .54Restoring Copy of Current Demo... . . . . . . . . . . . . . . . . . . . . . . . . . . . . . . . . . . . . . . . . . . . . . . . . . . . . . . . . . . . . . . . . . . . . . .. . . . . . . .54
Identifying Customizations.. . . . . . . . . . . . . . . . . . . . . . . . . . . . . . . . . . . . . . . . . . . . . . . . . . . . . . . . . . . . . . . . . . . . . . . . . . . . . . . . . . . . . . . . . . .54Preparing for the Application Upgrade.. . . . . . . . . . . . . . . . . . . . . . . . . . . . . . . . . . . . . . . . . . . . . . . . . . . . . . . . . . . . . . . . . . . . . . . . . . . . . .56
Creating a Copy of Translate Values.. . . . . . . . . . . . . . . . . . . . . . . . . . . . . . . . . . . . . . . . . . . . . . . . . . . . . . . . . . . . . . . . . . . .. . . . . . . .56Creating a Copy of RecField Definitions.. . . . . . . . . . . . . . . . . . . . . . . . . . . . . . . . . . . . . . . . . . . . . . . . . . . . . . . . . . . . . . . .. . . . . . . .57Copying Time and Labor Temp Table List. . . . . . . . . . . . . . . . . . . . . . . . . . . . . . . . . . . . . . . . . . . . . . . . . . . . . . . . . . . . . . .. . . . . . . .57Reversing Renames for Microsoft SQL Server. . . . . . . . . . . . . . . . . . . . . . . . . . . . . . . . . . . . . . . . . . . . . . . . . . . . . . . . .. . . . . . . .57Deleting Old Pagelet Wizard Data... . . . . . . . . . . . . . . . . . . . . . . . . . . . . . . . . . . . . . . . . . . . . . . . . . . . . . . . . . . . . . . . . . . . . .. . . . . . . .58Editing the System Data Swap Script. . . . . . . . . . . . . . . . . . . . . . . . . . . . . . . . . . . . . . . . . . . . . . . . . . . . . . . . . . . . . . . . . . . .. . . . . . . .59Editing the PeopleTools Swap Script. . . . . . . . . . . . . . . . . . . . . . . . . . . . . . . . . . . . . . . . . . . . . . . . . . . . . . . . . . . . . . . . . . . . .. . . . . . . .59
Backing Up After Prepare Your Database.. . . . . . . . . . . . . . . . . . . . . . . . . . . . . . . . . . . . . . . . . . . . . . . . . . . . . . . . . . . . . . . . . . . . . . . . . .59
Copyright © 2007, Oracle. All rights reserved. vii

Contents
Chapter 2Apply PeopleTools Changes... . . . . . . . . . . . . . . . . . . . . . . . . . . . . . . . . . . . . . . . . . . . . . . . . . . . . . . . . . . . . . . . . . . . . . . . . . . . .61Understanding PeopleTools Changes.. . . . . . . . . . . . . . . . . . . . . . . . . . . . . . . . . . . . . . . . . . . . . . . . . . . . . . . . . . . . . . . . . . . . . . . . . . . . . .62Verifying Upgrade User.. . . . . . . . . . . . . . . . . . . . . . . . . . . . . . . . . . . . . . . . . . . . . . . . . . . . . . . . . . . . . . . . . . . . . . . . . . . . . . . . . . . . . . . . . . . . . . .62Performing Script Modifications.. . . . . . . . . . . . . . . . . . . . . . . . . . . . . . . . . . . . . . . . . . . . . . . . . . . . . . . . . . . . . . . . . . . . . . . . . . . . . . . . . . . . .62
Understanding Script Modifications.. . . . . . . . . . . . . . . . . . . . . . . . . . . . . . . . . . . . . . . . . . . . . . . . . . . . . . . . . . . . . . . . . . . . .. . . . . . . .63Update Configuration Manager Profile. . . . . . . . . . . . . . . . . . . . . . . . . . . . . . . . . . . . . . . . . . . . . . . . . . . . . . . . . . . . . . . . . . .. . . . . . . .63Run a DBTSFIX Report.. . . . . . . . . . . . . . . . . . . . . . . . . . . . . . . . . . . . . . . . . . . . . . . . . . . . . . . . . . . . . . . . . . . . . . . . . . . . . . . . . . .. . . . . . . .64Edit the DBTSFIX Output Scripts.. . . . . . . . . . . . . . . . . . . . . . . . . . . . . . . . . . . . . . . . . . . . . . . . . . . . . . . . . . . . . . . . . . . . . . . .. . . . . . . .65Edit the GRANT Script. . . . . . . . . . . . . . . . . . . . . . . . . . . . . . . . . . . . . . . . . . . . . . . . . . . . . . . . . . . . . . . . . . . . . . . . . . . . . . . . . . . . .. . . . . . . .66Edit the PSLANGUAGES Script. . . . . . . . . . . . . . . . . . . . . . . . . . . . . . . . . . . . . . . . . . . . . . . . . . . . . . . . . . . . . . . . . . . . . . . . . .. . . . . . . .66Edit the TLSUPGNONCOMP Script. . . . . . . . . . . . . . . . . . . . . . . . . . . . . . . . . . . . . . . . . . . . . . . . . . . . . . . . . . . . . . . . . . . . .. . . . . . . .66Edit the PTxxxTLS Scripts.. . . . . . . . . . . . . . . . . . . . . . . . . . . . . . . . . . . . . . . . . . . . . . . . . . . . . . . . . . . . . . . . . . . . . . . . . . . . . . . .. . . . . . . .66Edit the DB2 Scripts.. . . . . . . . . . . . . . . . . . . . . . . . . . . . . . . . . . . . . . . . . . . . . . . . . . . . . . . . . . . . . . . . . . . . . . . . . . . . . . . . . . . . . . .. . . . . . . .67Edit Move to Production Import Scripts.. . . . . . . . . . . . . . . . . . . . . . . . . . . . . . . . . . . . . . . . . . . . . . . . . . . . . . . . . . . . . . . . .. . . . . . . .68Edit Move to Production Password.. .. . . . . . . . . . . . . . . . . . . . . . . . . . . . . . . . . . . . . . . . . . . . . . . . . . . . . . . . . . . . . . . . . . . .. . . . . . . .69Edit the DDLDB2 Script.. . . . . . . . . . . . . . . . . . . . . . . . . . . . . . . . . . . . . . . . . . . . . . . . . . . . . . . . . . . . . . . . . . . . . . . . . . . . . . . . . . .. . . . . . . .69Edit the DDLDBX Script. . . . . . . . . . . . . . . . . . . . . . . . . . . . . . . . . . . . . . . . . . . . . . . . . . . . . . . . . . . . . . . . . . . . . . . . . . . . . . . . . . .. . . . . . . .70Edit the DDLORA Script. . . . . . . . . . . . . . . . . . . . . . . . . . . . . . . . . . . . . . . . . . . . . . . . . . . . . . . . . . . . . . . . . . . . . . . . . . . . . . . . . . .. . . . . . . .70Edit the DDLIFX Script. . . . . . . . . . . . . . . . . . . . . . . . . . . . . . . . . . . . . . . . . . . . . . . . . . . . . . . . . . . . . . . . . . . . . . . . . . . . . . . . . . . . .. . . . . . . .70Edit the MSGTLSUPG Script. . . . . . . . . . . . . . . . . . . . . . . . . . . . . . . . . . . . . . . . . . . . . . . . . . . . . . . . . . . . . . . . . . . . . . . . . . . . .. . . . . . . .70Edit the Integration Broker Script. . . . . . . . . . . . . . . . . . . . . . . . . . . . . . . . . . . . . . . . . . . . . . . . . . . . . . . . . . . . . . . . . . . . . . . . .. . . . . . . .71Edit Multilingual Step Properties.. . . . . . . . . . . . . . . . . . . . . . . . . . . . . . . . . . . . . . . . . . . . . . . . . . . . . . . . . . . . . . . . . . . . . . . . .. . . . . . . .71Edit Data Type Steps.. . . . . . . . . . . . . . . . . . . . . . . . . . . . . . . . . . . . . . . . . . . . . . . . . . . . . . . . . . . . . . . . . . . . . . . . . . . . . . . . . . . . . .. . . . . . . .72
Updating PeopleTools System Tables .. . . . . . . . . . . . . . . . . . . . . . . . . . . . . . . . . . . . . . . . . . . . . . . . . . . . . . . . . . . . . . . . . . . . . . . . . . . . .72Understanding Updating PeopleTools System Tables. . . . . . . . . . . . . . . . . . . . . . . . . . . . . . . . . . . . . . . . . . . . . . . . .. . . . . . . .73Clean Up Message Data... . . . . . . . . . . . . . . . . . . . . . . . . . . . . . . . . . . . . . . . . . . . . . . . . . . . . . . . . . . . . . . . . . . . . . . . . . . . . . . . .. . . . . . . .73Update System Catalog Views.. . . . . . . . . . . . . . . . . . . . . . . . . . . . . . . . . . . . . . . . . . . . . . . . . . . . . . . . . . . . . . . . . . . . . . . . . . .. . . . . . . .74Update PeopleTools System Tables.. . . . . . . . . . . . . . . . . . . . . . . . . . . . . . . . . . . . . . . . . . . . . . . . . . . . . . . . . . . . . . . . . . . .. . . . . . . .74Grant Privileges to the CONNECT ID... . . . . . . . . . . . . . . . . . . . . . . . . . . . . . . . . . . . . . . . . . . . . . . . . . . . . . . . . . . . . . . . . .. . . . . . . .74Update the Product License Code... . . . . . . . . . . . . . . . . . . . . . . . . . . . . . . . . . . . . . . . . . . . . . . . . . . . . . . . . . . . . . . . . . . . .. . . . . . . .75Update PeopleTools Patch Information.. . . . . . . . . . . . . . . . . . . . . . . . . . . . . . . . . . . . . . . . . . . . . . . . . . . . . . . . . . . . . . . . .. . . . . . . .76Create Temporary Performance Indexes.. . . . . . . . . . . . . . . . . . . . . . . . . . . . . . . . . . . . . . . . . . . . . . . . . . . . . . . . . . . . . . .. . . . . . . .76Export PeopleTools System Tables.. . . . . . . . . . . . . . . . . . . . . . . . . . . . . . . . . . . . . . . . . . . . . . . . . . . . . . . . . . . . . . . . . . . . .. . . . . . . .77Import PeopleTools System Tables.. . . . . . . . . . . . . . . . . . . . . . . . . . . . . . . . . . . . . . . . . . . . . . . . . . . . . . . . . . . . . . . . . . . . . .. . . . . . . .77Reset Database Options Flag.. . . . . . . . . . . . . . . . . . . . . . . . . . . . . . . . . . . . . . . . . . . . . . . . . . . . . . . . . . . . . . . . . . . . . . . . . . . .. . . . . . . .77Rerun Update Statistics for DB2 zOS... . . . . . . . . . . . . . . . . . . . . . . . . . . . . . . . . . . . . . . . . . . . . . . . . . . . . . . . . . . . . . . . . .. . . . . . . .78Rerun RUNSTATS Report for DB2 UNIX NT... . . . . . . . . . . . . . . . . . . . . . . . . . . . . . . . . . . . . . . . . . . . . . . . . . . . . . . . .. . . . . . . .78Rerun Update Statistics for DB2 UNIX NT.. . . . . . . . . . . . . . . . . . . . . . . . . . . . . . . . . . . . . . . . . . . . . . . . . . . . . . . . . . . . .. . . . . . . .78Rerun Update Statistics for Informix. . . . . . . . . . . . . . . . . . . . . . . . . . . . . . . . . . . . . . . . . . . . . . . . . . . . . . . . . . . . . . . . . . . . .. . . . . . . .78
viii Copyright © 2007, Oracle. All rights reserved.

Contents
Rerun Update Statistics for Oracle . . . . . . . . . . . . . . . . . . . . . . . . . . . . . . . . . . . . . . . . . . . . . . . . . . . . . . . . . . . . . . . . . . . . . .. . . . . . . .79Turning Off Change Control . . . . . . . . . . . . . . . . . . . . . . . . . . . . . . . . . . . . . . . . . . . . . . . . . . . . . . . . . . . . . . . . . . . . . . . . . . . . . . . . . . . . . . . . . .79Loading Model Definition Data.. . . . . . . . . . . . . . . . . . . . . . . . . . . . . . . . . . . . . . . . . . . . . . . . . . . . . . . . . . . . . . . . . . . . . . . . . . . . . . . . . . . . . . .79
Understanding Model Definition Data Load Process.. . . . . . . . . . . . . . . . . . . . . . . . . . . . . . . . . . . . . . . . . . . . . . . . .. . . . . . . .80Load Model Definitions for DB2 zOS... . . . . . . . . . . . . . . . . . . . . . . . . . . . . . . . . . . . . . . . . . . . . . . . . . . . . . . . . . . . . . . . . . .. . . . . . . .80Load Model Definitions for DB2 UNIX NT... . . . . . . . . . . . . . . . . . . . . . . . . . . . . . . . . . . . . . . . . . . . . . . . . . . . . . . . . . . . .. . . . . . . .80Load Model Definitions for Oracle.. . . . . . . . . . . . . . . . . . . . . . . . . . . . . . . . . . . . . . . . . . . . . . . . . . . . . . . . . . . . . . . . . . . . . . .. . . . . . . .80Load Model Definitions for Informix. . . . . . . . . . . . . . . . . . . . . . . . . . . . . . . . . . . . . . . . . . . . . . . . . . . . . . . . . . . . . . . . . . . . . .. . . . . . . .80Load Model Definitions for Microsoft. . . . . . . . . . . . . . . . . . . . . . . . . . . . . . . . . . . . . . . . . . . . . . . . . . . . . . . . . . . . . . . . . . . . .. . . . . . . .81Load Model Definitions for Sybase.. . . . . . . . . . . . . . . . . . . . . . . . . . . . . . . . . . . . . . . . . . . . . . . . . . . . . . . . . . . . . . . . . . . . . .. . . . . . . .81
Loading Message Data. . . . . . . . . . . . . . . . . . . . . . . . . . . . . . . . . . . . . . . . . . . . . . . . . . . . . . . . . . . . . . . . . . . . . . . . . . . . . . . . . . . . . . . . . . . . . . . .81Reviewing PeopleTools Objects.. . . . . . . . . . . . . . . . . . . . . . . . . . . . . . . . . . . . . . . . . . . . . . . . . . . . . . . . . . . . . . . . . . . . . . . . . . . . . . . . . . . . .81Exporting and Copying Projects .. . . . . . . . . . . . . . . . . . . . . . . . . . . . . . . . . . . . . . . . . . . . . . . . . . . . . . . . . . . . . . . . . . . . . . . . . . . . . . . . . . . .83
Understanding Exporting and Copying Projects.. . . . . . . . . . . . . . . . . . . . . . . . . . . . . . . . . . . . . . . . . . . . . . . . . . . . . . .. . . . . . . .83Export and Copy PPLTLS84CUR Project. . . . . . . . . . . . . . . . . . . . . . . . . . . . . . . . . . . . . . . . . . . . . . . . . . . . . . . . . . . . . . .. . . . . . . .84Export and Copy PPLTLS84CURML Project. . . . . . . . . . . . . . . . . . . . . . . . . . . . . . . . . . . . . . . . . . . . . . . . . . . . . . . . . . .. . . . . . . .84Export and Copy PPLTLSML Project. . . . . . . . . . . . . . . . . . . . . . . . . . . . . . . . . . . . . . . . . . . . . . . . . . . . . . . . . . . . . . . . . . . .. . . . . . . .85Export and Copy PPLTLS84CURDEL Project. . . . . . . . . . . . . . . . . . . . . . . . . . . . . . . . . . . . . . . . . . . . . . . . . . . . . . . . . .. . . . . . . .86Export and Copy PATCH84X Project. . . . . . . . . . . . . . . . . . . . . . . . . . . . . . . . . . . . . . . . . . . . . . . . . . . . . . . . . . . . . . . . . . . .. . . . . . . .86Export and Copy PATCH84XML Project. . . . . . . . . . . . . . . . . . . . . . . . . . . . . . . . . . . . . . . . . . . . . . . . . . . . . . . . . . . . . . . . .. . . . . . . .87
Populating Tablespace Data.. . . . . . . . . . . . . . . . . . . . . . . . . . . . . . . . . . . . . . . . . . . . . . . . . . . . . . . . . . . . . . . . . . . . . . . . . . . . . . . . . . . . . . . . .87Create Application Tablespaces.. . . . . . . . . . . . . . . . . . . . . . . . . . . . . . . . . . . . . . . . . . . . . . . . . . . . . . . . . . . . . . . . . . . . . . . . .. . . . . . . .88Populate Tablespace Data.. . . . . . . . . . . . . . . . . . . . . . . . . . . . . . . . . . . . . . . . . . . . . . . . . . . . . . . . . . . . . . . . . . . . . . . . . . . . . . .. . . . . . . .88Update Tablespace Names.... . . . . . . . . . . . . . . . . . . . . . . . . . . . . . . . . . . . . . . . . . . . . . . . . . . . . . . . . . . . . . . . . . . . . . . . . . . . .. . . . . . . .89
Building Updated PeopleTools Project. . . . . . . . . . . . . . . . . . . . . . . . . . . . . . . . . . . . . . . . . . . . . . . . . . . . . . . . . . . . . . . . . . . . . . . . . . . . . . .90Generate Updated PeopleTools Script.. . . . . . . . . . . . . . . . . . . . . . . . . . . . . . . . . . . . . . . . . . . . . . . . . . . . . . . . . . . . . . . . . .. . . . . . . .90Edit the Updated PeopleTools Script. . . . . . . . . . . . . . . . . . . . . . . . . . . . . . . . . . . . . . . . . . . . . . . . . . . . . . . . . . . . . . . . . . . . .. . . . . . . .90Run the Updated PeopleTools Script. . . . . . . . . . . . . . . . . . . . . . . . . . . . . . . . . . . . . . . . . . . . . . . . . . . . . . . . . . . . . . . . . . . .. . . . . . . .91
Migrating Records to New Tablespaces.. . . . . . . . . . . . . . . . . . . . . . . . . . . . . . . . . . . . . . . . . . . . . . . . . . . . . . . . . . . . . . . . . . . . . . . . . . . .91Understanding Migration of Records to New Tablespaces.. . . . . . . . . . . . . . . . . . . . . . . . . . . . . . . . . . . . . . . . . . .. . . . . . . .91Export and Copy the PT84TBLSPC Project. . . . . . . . . . . . . . . . . . . . . . . . . . . . . . . . . . . . . . . . . . . . . . . . . . . . . . . . . . . .. . . . . . . .91Build the Tablespace Alter Script. . . . . . . . . . . . . . . . . . . . . . . . . . . . . . . . . . . . . . . . . . . . . . . . . . . . . . . . . . . . . . . . . . . . . . . . .. . . . . . . .92Edit the Tablespace Alter Script. . . . . . . . . . . . . . . . . . . . . . . . . . . . . . . . . . . . . . . . . . . . . . . . . . . . . . . . . . . . . . . . . . . . . . . . . .. . . . . . . .92Run the Tablespace Alter Script. . . . . . . . . . . . . . . . . . . . . . . . . . . . . . . . . . . . . . . . . . . . . . . . . . . . . . . . . . . . . . . . . . . . . . . . . .. . . . . . . .92
Loading Base Data.. . . . . . . . . . . . . . . . . . . . . . . . . . . . . . . . . . . . . . . . . . . . . . . . . . . . . . . . . . . . . . . . . . . . . . . . . . . . . . . . . . . . . . . . . . . . . . . . . . . .93Loading Language Data.. . . . . . . . . . . . . . . . . . . . . . . . . . . . . . . . . . . . . . . . . . . . . . . . . . . . . . . . . . . . . . . . . . . . . . . . . . . . . . . . . . . . . . . . . . . . . .93
Populate Languages.. . . . . . . . . . . . . . . . . . . . . . . . . . . . . . . . . . . . . . . . . . . . . . . . . . . . . . . . . . . . . . . . . . . . . . . . . . . . . . . . . . . . . .. . . . . . . .93Load Language Data.. . . . . . . . . . . . . . . . . . . . . . . . . . . . . . . . . . . . . . . . . . . . . . . . . . . . . . . . . . . . . . . . . . . . . . . . . . . . . . . . . . . . . .. . . . . . . .94
Loading PeopleTools Data.. . . . . . . . . . . . . . . . . . . . . . . . . . . . . . . . . . . . . . . . . . . . . . . . . . . . . . . . . . . . . . . . . . . . . . . . . . . . . . . . . . . . . . . . . . .94Load NonComparable Objects.. . . . . . . . . . . . . . . . . . . . . . . . . . . . . . . . . . . . . . . . . . . . . . . . . . . . . . . . . . . . . . . . . . . . . . . . . . .. . . . . . . .94
Copyright © 2007, Oracle. All rights reserved. ix

Contents
Load English Messages.. . . . . . . . . . . . . . . . . . . . . . . . . . . . . . . . . . . . . . . . . . . . . . . . . . . . . . . . . . . . . . . . . . . . . . . . . . . . . . . . . .. . . . . . . .94Load English String Data.. . . . . . . . . . . . . . . . . . . . . . . . . . . . . . . . . . . . . . . . . . . . . . . . . . . . . . . . . . . . . . . . . . . . . . . . . . . . . . . . .. . . . . . . .95Load Stored Statements Data.. . . . . . . . . . . . . . . . . . . . . . . . . . . . . . . . . . . . . . . . . . . . . . . . . . . . . . . . . . . . . . . . . . . . . . . . . . .. . . . . . . .95
Loading PeopleTools Definition Group.. . . . . . . . . . . . . . . . . . . . . . . . . . . . . . . . . . . . . . . . . . . . . . . . . . . . . . . . . . . . . . . . . . . . . . . . . . . . .95Converting PeopleTools Objects .. . . . . . . . . . . . . . . . . . . . . . . . . . . . . . . . . . . . . . . . . . . . . . . . . . . . . . . . . . . . . . . . . . . . . . . . . . . . . . . . . . . .96
Update REN Server Configuration.. . . . . . . . . . . . . . . . . . . . . . . . . . . . . . . . . . . . . . . . . . . . . . . . . . . . . . . . . . . . . . . . . . . . . .. . . . . . . .96Populate MCF Data. . . . . . . . . . . . . . . . . . . . . . . . . . . . . . . . . . . . . . . . . . . . . . . . . . . . . . . . . . . . . . . . . . . . . . . . . . . . . . . . . . . . . . . .. . . . . . . .96Convert Portal Objects.. . . . . . . . . . . . . . . . . . . . . . . . . . . . . . . . . . . . . . . . . . . . . . . . . . . . . . . . . . . . . . . . . . . . . . . . . . . . . . . . . . . .. . . . . . . .97Convert Query Prompt Headings.. . . . . . . . . . . . . . . . . . . . . . . . . . . . . . . . . . . . . . . . . . . . . . . . . . . . . . . . . . . . . . . . . . . . . . . .. . . . . . . .98Encrypt Connector Passwords.. . . . . . . . . . . . . . . . . . . . . . . . . . . . . . . . . . . . . . . . . . . . . . . . . . . . . . . . . . . . . . . . . . . . . . . . . . .. . . . . . . .98Load Conversion Data.. . . . . . . . . . . . . . . . . . . . . . . . . . . . . . . . . . . . . . . . . . . . . . . . . . . . . . . . . . . . . . . . . . . . . . . . . . . . . . . . . . . .. . . . . . . .98Report Conversion Details. . . . . . . . . . . . . . . . . . . . . . . . . . . . . . . . . . . . . . . . . . . . . . . . . . . . . . . . . . . . . . . . . . . . . . . . . . . . . . . .. . . . . . . .98Run Data Conversion.. . . . . . . . . . . . . . . . . . . . . . . . . . . . . . . . . . . . . . . . . . . . . . . . . . . . . . . . . . . . . . . . . . . . . . . . . . . . . . . . . . . . .. . . . . . . .99
Creating PeopleTools Views.. . . . . . . . . . . . . . . . . . . . . . . . . . . . . . . . . . . . . . . . . . . . . . . . . . . . . . . . . . . . . . . . . . . . . . . . . . . . . . . . . . . . . . . . .99Create Updated PeopleTools Views.. . . . . . . . . . . . . . . . . . . . . . . . . . . . . . . . . . . . . . . . . . . . . . . . . . . . . . . . . . . . . . . . . . . . .. . . . . . . .99
Converting Integration Broker.. . . . . . . . . . . . . . . . . . . . . . . . . . . . . . . . . . . . . . . . . . . . . . . . . . . . . . . . . . . . . . . . . . . . . . . . . . . . . . . . . . . . . . . .99Understanding Converting Integration Broker. . . . . . . . . . . . . . . . . . . . . . . . . . . . . . . . . . . . . . . . . . . . . . . . . . . . . . . . . .. . . . . . .100Updating Integration Broker Defaults. . . . . . . . . . . . . . . . . . . . . . . . . . . . . . . . . . . . . . . . . . . . . . . . . . . . . . . . . . . . . . . . . . . .. . . . . . .100Creating Integration Broker Objects.. . . . . . . . . . . . . . . . . . . . . . . . . . . . . . . . . . . . . . . . . . . . . . . . . . . . . . . . . . . . . . . . . . . . .. . . . . . .100Saving Application Messaging Objects.. . . . . . . . . . . . . . . . . . . . . . . . . . . . . . . . . . . . . . . . . . . . . . . . . . . . . . . . . . . . . . . . .. . . . . . .100Exporting Node Transactions.. . . . . . . . . . . . . . . . . . . . . . . . . . . . . . . . . . . . . . . . . . . . . . . . . . . . . . . . . . . . . . . . . . . . . . . . . . . .. . . . . . .101Preparing Integration Broker Deletes.. . . . . . . . . . . . . . . . . . . . . . . . . . . . . . . . . . . . . . . . . . . . . . . . . . . . . . . . . . . . . . . . . . .. . . . . . .101Deleting Application Messaging Objects.. . . . . . . . . . . . . . . . . . . . . . . . . . . . . . . . . . . . . . . . . . . . . . . . . . . . . . . . . . . . . . .. . . . . . .101Deleting Node Transactions.. . . . . . . . . . . . . . . . . . . . . . . . . . . . . . . . . . . . . . . . . . . . . . . . . . . . . . . . . . . . . . . . . . . . . . . . . . . . . .. . . . . . .101
Setting Object Version Numbers.. . . . . . . . . . . . . . . . . . . . . . . . . . . . . . . . . . . . . . . . . . . . . . . . . . . . . . . . . . . . . . . . . . . . . . . . . . . . . . . . . . .102Converting Database Data Types.. . . . . . . . . . . . . . . . . . . . . . . . . . . . . . . . . . . . . . . . . . . . . . . . . . . . . . . . . . . . . . . . . . . . . . . . . . . . . . . . . .102
Understanding Converting Database Data Types.. . . . . . . . . . . . . . . . . . . . . . . . . . . . . . . . . . . . . . . . . . . . . . . . . . . . .. . . . . . .103Backing Up Before Platform Changes.. . . . . . . . . . . . . . . . . . . . . . . . . . . . . . . . . . . . . . . . . . . . . . . . . . . . . . . . . . . . . . . . . .. . . . . . .104Running Long Data Audit. . . . . . . . . . . . . . . . . . . . . . . . . . . . . . . . . . . . . . . . . . . . . . . . . . . . . . . . . . . . . . . . . . . . . . . . . . . . . . . . . .. . . . . . .104Validating Microsoft Database.. . . . . . . . . . . . . . . . . . . . . . . . . . . . . . . . . . . . . . . . . . . . . . . . . . . . . . . . . . . . . . . . . . . . . . . . . . .. . . . . . .104Reviewing Microsoft Settings.. . . . . . . . . . . . . . . . . . . . . . . . . . . . . . . . . . . . . . . . . . . . . . . . . . . . . . . . . . . . . . . . . . . . . . . . . . . .. . . . . . .105Creating Microsoft Conversion Project. . . . . . . . . . . . . . . . . . . . . . . . . . . . . . . . . . . . . . . . . . . . . . . . . . . . . . . . . . . . . . . . . .. . . . . . .105Generating Microsoft Conversion Script. . . . . . . . . . . . . . . . . . . . . . . . . . . . . . . . . . . . . . . . . . . . . . . . . . . . . . . . . . . . . . . . .. . . . . . .106Running Microsoft Conversion Script. . . . . . . . . . . . . . . . . . . . . . . . . . . . . . . . . . . . . . . . . . . . . . . . . . . . . . . . . . . . . . . . . . . .. . . . . . .106Granting Permissions to the CONNECT ID.. . . . . . . . . . . . . . . . . . . . . . . . . . . . . . . . . . . . . . . . . . . . . . . . . . . . . . . . . . . .. . . . . . .106Running Microsoft Conversion Report. . . . . . . . . . . . . . . . . . . . . . . . . . . . . . . . . . . . . . . . . . . . . . . . . . . . . . . . . . . . . . . . . . .. . . . . . .106Validating Oracle Database.. . . . . . . . . . . . . . . . . . . . . . . . . . . . . . . . . . . . . . . . . . . . . . . . . . . . . . . . . . . . . . . . . . . . . . . . . . . . . .. . . . . . .107Creating Oracle Audit Tables.. . . . . . . . . . . . . . . . . . . . . . . . . . . . . . . . . . . . . . . . . . . . . . . . . . . . . . . . . . . . . . . . . . . . . . . . . . . . .. . . . . . .107Auditing Duplicate Length Constraints.. . . . . . . . . . . . . . . . . . . . . . . . . . . . . . . . . . . . . . . . . . . . . . . . . . . . . . . . . . . . . . . . . .. . . . . . .107Auditing Disabled Constraints.. . . . . . . . . . . . . . . . . . . . . . . . . . . . . . . . . . . . . . . . . . . . . . . . . . . . . . . . . . . . . . . . . . . . . . . . . . . .. . . . . . .108
x Copyright © 2007, Oracle. All rights reserved.

Contents
Reviewing Oracle Settings.. . . . . . . . . . . . . . . . . . . . . . . . . . . . . . . . . . . . . . . . . . . . . . . . . . . . . . . . . . . . . . . . . . . . . . . . . . . . . . .. . . . . . .108Generating Oracle Conversion Scripts. . . . . . . . . . . . . . . . . . . . . . . . . . . . . . . . . . . . . . . . . . . . . . . . . . . . . . . . . . . . . . . . . .. . . . . . .109Running Long to LOB Script 1.. . . . . . . . . . . . . . . . . . . . . . . . . . . . . . . . . . . . . . . . . . . . . . . . . . . . . . . . . . . . . . . . . . . . . . . . . . .. . . . . . .110Running Long to LOB Script 2.. . . . . . . . . . . . . . . . . . . . . . . . . . . . . . . . . . . . . . . . . . . . . . . . . . . . . . . . . . . . . . . . . . . . . . . . . . .. . . . . . .111Running Long to LOB Script 3.. . . . . . . . . . . . . . . . . . . . . . . . . . . . . . . . . . . . . . . . . . . . . . . . . . . . . . . . . . . . . . . . . . . . . . . . . . .. . . . . . .111Running Long to LOB Script 4.. . . . . . . . . . . . . . . . . . . . . . . . . . . . . . . . . . . . . . . . . . . . . . . . . . . . . . . . . . . . . . . . . . . . . . . . . . .. . . . . . .111Running Long to LOB Script 5.. . . . . . . . . . . . . . . . . . . . . . . . . . . . . . . . . . . . . . . . . . . . . . . . . . . . . . . . . . . . . . . . . . . . . . . . . . .. . . . . . .111Running Long to LOB Script 6.. . . . . . . . . . . . . . . . . . . . . . . . . . . . . . . . . . . . . . . . . . . . . . . . . . . . . . . . . . . . . . . . . . . . . . . . . . .. . . . . . .111Running Long to LOB Script 7.. . . . . . . . . . . . . . . . . . . . . . . . . . . . . . . . . . . . . . . . . . . . . . . . . . . . . . . . . . . . . . . . . . . . . . . . . . .. . . . . . .112Running Long to LOB Script 8.. . . . . . . . . . . . . . . . . . . . . . . . . . . . . . . . . . . . . . . . . . . . . . . . . . . . . . . . . . . . . . . . . . . . . . . . . . .. . . . . . .112Auditing Long to LOB Conversion.. . . . . . . . . . . . . . . . . . . . . . . . . . . . . . . . . . . . . . . . . . . . . . . . . . . . . . . . . . . . . . . . . . . . . . .. . . . . . .112Running Character Length Script 1. . . . . . . . . . . . . . . . . . . . . . . . . . . . . . . . . . . . . . . . . . . . . . . . . . . . . . . . . . . . . . . . . . . . . .. . . . . . .112Running Character Length Script 2. . . . . . . . . . . . . . . . . . . . . . . . . . . . . . . . . . . . . . . . . . . . . . . . . . . . . . . . . . . . . . . . . . . . . .. . . . . . .113Running Character Length Script 3. . . . . . . . . . . . . . . . . . . . . . . . . . . . . . . . . . . . . . . . . . . . . . . . . . . . . . . . . . . . . . . . . . . . . .. . . . . . .113Running Character Length Script 4. . . . . . . . . . . . . . . . . . . . . . . . . . . . . . . . . . . . . . . . . . . . . . . . . . . . . . . . . . . . . . . . . . . . . .. . . . . . .113Running Character Length Script 5. . . . . . . . . . . . . . . . . . . . . . . . . . . . . . . . . . . . . . . . . . . . . . . . . . . . . . . . . . . . . . . . . . . . . .. . . . . . .113Running Character Length Script 6. . . . . . . . . . . . . . . . . . . . . . . . . . . . . . . . . . . . . . . . . . . . . . . . . . . . . . . . . . . . . . . . . . . . . .. . . . . . .114Running Character Length Script 7. . . . . . . . . . . . . . . . . . . . . . . . . . . . . . . . . . . . . . . . . . . . . . . . . . . . . . . . . . . . . . . . . . . . . .. . . . . . .114Running Character Length Script 8. . . . . . . . . . . . . . . . . . . . . . . . . . . . . . . . . . . . . . . . . . . . . . . . . . . . . . . . . . . . . . . . . . . . . .. . . . . . .114Auditing Character Length Semantics. . . . . . . . . . . . . . . . . . . . . . . . . . . . . . . . . . . . . . . . . . . . . . . . . . . . . . . . . . . . . . . . . . .. . . . . . .114Reviewing Conversion Reports.. . . . . . . . . . . . . . . . . . . . . . . . . . . . . . . . . . . . . . . . . . . . . . . . . . . . . . . . . . . . . . . . . . . . . . . . . .. . . . . . .115Updating Database Options.. . . . . . . . . . . . . . . . . . . . . . . . . . . . . . . . . . . . . . . . . . . . . . . . . . . . . . . . . . . . . . . . . . . . . . . . . . . . . .. . . . . . .115
Backing Up After PeopleTools Upgrade.. . . . . . . . . . . . . . . . . . . . . . . . . . . . . . . . . . . . . . . . . . . . . . . . . . . . . . . . . . . . . . . . . . . . . . . . . . .116
Chapter 3Run and Review Compare Reports... . . . . . . . . . . . . . . . . . . . . . . . . . . . . . . . . . . . . . . . . . . . . . . . . . . . . . . . . . . . . . . . . . . .117Understanding Compare Reports. . . . . . . . . . . . . . . . . . . . . . . . . . . . . . . . . . . . . . . . . . . . . . . . . . . . . . . . . . . . . . . . . . . . . . . . . . . . . . . . . . .117Preparing for Application Changes.. . . . . . . . . . . . . . . . . . . . . . . . . . . . . . . . . . . . . . . . . . . . . . . . . . . . . . . . . . . . . . . . . . . . . . . . . . . . . . . . .117
Running Drop Table Script. . . . . . . . . . . . . . . . . . . . . . . . . . . . . . . . . . . . . . . . . . . . . . . . . . . . . . . . . . . . . . . . . . . . . . . . . . . . . . . .. . . . . . .117Loading HR Ethnicities Table.. . . . . . . . . . . . . . . . . . . . . . . . . . . . . . . . . . . . . . . . . . . . . . . . . . . . . . . . . . . . . . . . . . . . . . . . . . . .. . . . . . .118Exporting Project Definitions.. . . . . . . . . . . . . . . . . . . . . . . . . . . . . . . . . . . . . . . . . . . . . . . . . . . . . . . . . . . . . . . . . . . . . . . . . . . . .. . . . . . .118Importing Project Definitions.. . . . . . . . . . . . . . . . . . . . . . . . . . . . . . . . . . . . . . . . . . . . . . . . . . . . . . . . . . . . . . . . . . . . . . . . . . . . .. . . . . . .119Dropping View ADP_ACCT_CD_VW... . . . . . . . . . . . . . . . . . . . . . . . . . . . . . . . . . . . . . . . . . . . . . . . . . . . . . . . . . . . . . . . . .. . . . . . .119Dropping the Personal Data View... . . . . . . . . . . . . . . . . . . . . . . . . . . . . . . . . . . . . . . . . . . . . . . . . . . . . . . . . . . . . . . . . . . . . .. . . . . . .119Renaming Fields for Microsoft SQL Server. . . . . . . . . . . . . . . . . . . . . . . . . . . . . . . . . . . . . . . . . . . . . . . . . . . . . . . . . . . . .. . . . . . .120
Renaming Tables.. . . . . . . . . . . . . . . . . . . . . . . . . . . . . . . . . . . . . . . . . . . . . . . . . . . . . . . . . . . . . . . . . . . . . . . . . . . . . . . . . . . . . . . . . . . . . . . . . . . . .120Understanding Renamed Tables.. . . . . . . . . . . . . . . . . . . . . . . . . . . . . . . . . . . . . . . . . . . . . . . . . . . . . . . . . . . . . . . . . . . . . . . .. . . . . . .120Running the RNHCUPI02MSS Script . . . . . . . . . . . . . . . . . . . . . . . . . . . . . . . . . . . . . . . . . . . . . . . . . . . . . . . . . . . . . . . . . . .. . . . . . .121Running the RNHCUPI02DB2 Script. . . . . . . . . . . . . . . . . . . . . . . . . . . . . . . . . . . . . . . . . . . . . . . . . . . . . . . . . . . . . . . . . . . .. . . . . . .121
Copyright © 2007, Oracle. All rights reserved. xi

Contents
Running the RNHCUPI02DBX Script. . . . . . . . . . . . . . . . . . . . . . . . . . . . . . . . . . . . . . . . . . . . . . . . . . . . . . . . . . . . . . . . . . . .. . . . . . .121Running the RNHCUPI02IFX Script. . . . . . . . . . . . . . . . . . . . . . . . . . . . . . . . . . . . . . . . . . . . . . . . . . . . . . . . . . . . . . . . . . . . .. . . . . . .121Running the RNHCUPI02ORA Script. . . . . . . . . . . . . . . . . . . . . . . . . . . . . . . . . . . . . . . . . . . . . . . . . . . . . . . . . . . . . . . . . . . .. . . . . . .122Running the RNHCUPI02SYB Script. . . . . . . . . . . . . . . . . . . . . . . . . . . . . . . . . . . . . . . . . . . . . . . . . . . . . . . . . . . . . . . . . . . .. . . . . . .122
Running New Release Compare Reports.. . . . . . . . . . . . . . . . . . . . . . . . . . . . . . . . . . . . . . . . . . . . . . . . . . . . . . . . . . . . . . . . . . . . . . . . .122Understanding the New Release Compare.. . . . . . . . . . . . . . . . . . . . . . . . . . . . . . . . . . . . . . . . . . . . . . . . . . . . . . . . . . . .. . . . . . .123Preserving Local Message Node... . . . . . . . . . . . . . . . . . . . . . . . . . . . . . . . . . . . . . . . . . . . . . . . . . . . . . . . . . . . . . . . . . . . . . .. . . . . . .123Modifying New Release Compare Options.. . . . . . . . . . . . . . . . . . . . . . . . . . . . . . . . . . . . . . . . . . . . . . . . . . . . . . . . . . . . .. . . . . . .123Running New Release UPGCUST Compare.. . . . . . . . . . . . . . . . . . . . . . . . . . . . . . . . . . . . . . . . . . . . . . . . . . . . . . . . . .. . . . . . .125Running New Release UPGCUSTIB Compare.. . . . . . . . . . . . . . . . . . . . . . . . . . . . . . . . . . . . . . . . . . . . . . . . . . . . . . . .. . . . . . .125Resetting Take Action Flags in UPGCUST... . . . . . . . . . . . . . . . . . . . . . . . . . . . . . . . . . . . . . . . . . . . . . . . . . . . . . . . . . . .. . . . . . .125Running UPGCUSTIB Filter Script. . . . . . . . . . . . . . . . . . . . . . . . . . . . . . . . . . . . . . . . . . . . . . . . . . . . . . . . . . . . . . . . . . . . . . .. . . . . . .125
Reviewing New Release Compare Reports. . . . . . . . . . . . . . . . . . . . . . . . . . . . . . . . . . . . . . . . . . . . . . . . . . . . . . . . . . . . . . . . . . . . . . .126Reviewing New Release Changes.. . . . . . . . . . . . . . . . . . . . . . . . . . . . . . . . . . . . . . . . . . . . . . . . . . . . . . . . . . . . . . . . . . . . . .. . . . . . .126Reviewing NonComparable Objects.. . . . . . . . . . . . . . . . . . . . . . . . . . . . . . . . . . . . . . . . . . . . . . . . . . . . . . . . . . . . . . . . . . . .. . . . . . .127
Chapter 4Apply Application Changes..... . . . . . . . . . . . . . . . . . . . . . . . . . . . . . . . . . . . . . . . . . . . . . . . . . . . . . . . . . . . . . . . . . . . . . . . . . . .129Understanding Application Changes.. . . . . . . . . . . . . . . . . . . . . . . . . . . . . . . . . . . . . . . . . . . . . . . . . . . . . . . . . . . . . . . . . . . . . . . . . . . . . . .130Customizing the New Release.. . . . . . . . . . . . . . . . . . . . . . . . . . . . . . . . . . . . . . . . . . . . . . . . . . . . . . . . . . . . . . . . . . . . . . . . . . . . . . . . . . . . . .130
Understanding New Release Customizations.. . . . . . . . . . . . . . . . . . . . . . . . . . . . . . . . . . . . . . . . . . . . . . . . . . . . . . . . .. . . . . . .130Copying the UPGCUST Project. . . . . . . . . . . . . . . . . . . . . . . . . . . . . . . . . . . . . . . . . . . . . . . . . . . . . . . . . . . . . . . . . . . . . . . . . .. . . . . . .130Reviewing Copy Results.. . . . . . . . . . . . . . . . . . . . . . . . . . . . . . . . . . . . . . . . . . . . . . . . . . . . . . . . . . . . . . . . . . . . . . . . . . . . . . . . . .. . . . . . .130
Running New Release Upgrade Copy... . . . . . . . . . . . . . . . . . . . . . . . . . . . . . . . . . . . . . . . . . . . . . . . . . . . . . . . . . . . . . . . . . . . . . . . . . . .131Exporting Selected PeopleTools Tables.. . . . . . . . . . . . . . . . . . . . . . . . . . . . . . . . . . . . . . . . . . . . . . . . . . . . . . . . . . . . . . . .. . . . . . .131Importing Selected PeopleTools Tables. . . . . . . . . . . . . . . . . . . . . . . . . . . . . . . . . . . . . . . . . . . . . . . . . . . . . . . . . . . . . . . . .. . . . . . .132Copying the UPGCUSTIB Project. . . . . . . . . . . . . . . . . . . . . . . . . . . . . . . . . . . . . . . . . . . . . . . . . . . . . . . . . . . . . . . . . . . . . . . .. . . . . . .132Swapping PeopleTools Tables.. . . . . . . . . . . . . . . . . . . . . . . . . . . . . . . . . . . . . . . . . . . . . . . . . . . . . . . . . . . . . . . . . . . . . . . . . . .. . . . . . .132Creating the UPGIBCOPY Project. . . . . . . . . . . . . . . . . . . . . . . . . . . . . . . . . . . . . . . . . . . . . . . . . . . . . . . . . . . . . . . . . . . . . . .. . . . . . .133Copying the UPGIBCOPY Project.. . . . . . . . . . . . . . . . . . . . . . . . . . . . . . . . . . . . . . . . . . . . . . . . . . . . . . . . . . . . . . . . . . . . . . .. . . . . . .134Updating Target Values.. . . . . . . . . . . . . . . . . . . . . . . . . . . . . . . . . . . . . . . . . . . . . . . . . . . . . . . . . . . . . . . . . . . . . . . . . . . . . . . . . . .. . . . . . .134Copying the UPGNONCOMP Project. . . . . . . . . . . . . . . . . . . . . . . . . . . . . . . . . . . . . . . . . . . . . . . . . . . . . . . . . . . . . . . . . . . .. . . . . . .134Reviewing Project Copy Results. .. . . . . . . . . . . . . . . . . . . . . . . . . . . . . . . . . . . . . . . . . . . . . . . . . . . . . . . . . . . . . . . . . . . . . . . .. . . . . . .135Exporting New Release Objects.. . . . . . . . . . . . . . . . . . . . . . . . . . . . . . . . . . . . . . . . . . . . . . . . . . . . . . . . . . . . . . . . . . . . . . . . .. . . . . . .135Importing New Release Objects.. . . . . . . . . . . . . . . . . . . . . . . . . . . . . . . . . . . . . . . . . . . . . . . . . . . . . . . . . . . . . . . . . . . . . . . . .. . . . . . .135Resetting Object Version Numbers.. . . . . . . . . . . . . . . . . . . . . . . . . . . . . . . . . . . . . . . . . . . . . . . . . . . . . . . . . . . . . . . . . . . . . .. . . . . . .135Backing Up New Release Demo Again.. . . . . . . . . . . . . . . . . . . . . . . . . . . . . . . . . . . . . . . . . . . . . . . . . . . . . . . . . . . . . . . . .. . . . . . .136
Updating Database Overrides.. . . . . . . . . . . . . . . . . . . . . . . . . . . . . . . . . . . . . . . . . . . . . . . . . . . . . . . . . . . . . . . . . . . . . . . . . . . . . . . . . . . . . .136Understanding Database Overrides.. . . . . . . . . . . . . . . . . . . . . . . . . . . . . . . . . . . . . . . . . . . . . . . . . . . . . . . . . . . . . . . . . . . . .. . . . . . .136
xii Copyright © 2007, Oracle. All rights reserved.

Contents
Set Index Parameters After Copy .. . . . . . . . . . . . . . . . . . . . . . . . . . . . . . . . . . . . . . . . . . . . . . . . . . . . . . . . . . . . . . . . . . . . . . .. . . . . . .137Set Tablespace Names After Copy.. . . . . . . . . . . . . . . . . . . . . . . . . . . . . . . . . . . . . . . . . . . . . . . . . . . . . . . . . . . . . . . . . . . . . .. . . . . . .137Set Record Parameters After Copy.. . . . . . . . . . . . . . . . . . . . . . . . . . . . . . . . . . . . . . . . . . . . . . . . . . . . . . . . . . . . . . . . . . . . .. . . . . . .137Create New Tablespaces.. . . . . . . . . . . . . . . . . . . . . . . . . . . . . . . . . . . . . . . . . . . . . . . . . . . . . . . . . . . . . . . . . . . . . . . . . . . . . . . . .. . . . . . .138
Backing Up After the Upgrade Copy.. . . . . . . . . . . . . . . . . . . . . . . . . . . . . . . . . . . . . . . . . . . . . . . . . . . . . . . . . . . . . . . . . . . . . . . . . . . . . . .140Importing the Front Office Project. . . . . . . . . . . . . . . . . . . . . . . . . . . . . . . . . . . . . . . . . . . . . . . . . . . . . . . . . . . . . . . . . . . . . . . . . . . . . . . . . . .140Modifying the Database Structure... . . . . . . . . . . . . . . . . . . . . . . . . . . . . . . . . . . . . . . . . . . . . . . . . . . . . . . . . . . . . . . . . . . . . . . . . . . . . . . . .141
Understanding Modifying the Database Structure.. . . . . . . . . . . . . . . . . . . . . . . . . . . . . . . . . . . . . . . . . . . . . . . . . . . . .. . . . . . .142Backing Up for DB2... . . . . . . . . . . . . . . . . . . . . . . . . . . . . . . . . . . . . . . . . . . . . . . . . . . . . . . . . . . . . . . . . . . . . . . . . . . . . . . . . . . . . .. . . . . . .142Building the Upgrade Tables Script.. . . . . . . . . . . . . . . . . . . . . . . . . . . . . . . . . . . . . . . . . . . . . . . . . . . . . . . . . . . . . . . . . . . . . .. . . . . . .142ReCreating Upgrade Tables.. . . . . . . . . . . . . . . . . . . . . . . . . . . . . . . . . . . . . . . . . . . . . . . . . . . . . . . . . . . . . . . . . . . . . . . . . . . . . .. . . . . . .143Building Renamed Tables Script.. . . . . . . . . . . . . . . . . . . . . . . . . . . . . . . . . . . . . . . . . . . . . . . . . . . . . . . . . . . . . . . . . . . . . . . . .. . . . . . .143Running the Renamed Tables Script. . . . . . . . . . . . . . . . . . . . . . . . . . . . . . . . . . . . . . . . . . . . . . . . . . . . . . . . . . . . . . . . . . . . .. . . . . . .143Creating the ALLTEMPTABS Project. . . . . . . . . . . . . . . . . . . . . . . . . . . . . . . . . . . . . . . . . . . . . . . . . . . . . . . . . . . . . . . . . . . .. . . . . . .144Building the Create Temp Tables Script. . . . . . . . . . . . . . . . . . . . . . . . . . . . . . . . . . . . . . . . . . . . . . . . . . . . . . . . . . . . . . . . .. . . . . . .144Creating the ALLTABS Project. . . . . . . . . . . . . . . . . . . . . . . . . . . . . . . . . . . . . . . . . . . . . . . . . . . . . . . . . . . . . . . . . . . . . . . . . . . .. . . . . . .144Building the Create and Alter Scripts.. . . . . . . . . . . . . . . . . . . . . . . . . . . . . . . . . . . . . . . . . . . . . . . . . . . . . . . . . . . . . . . . . . .. . . . . . .145Editing the Create and Alter Scripts.. . . . . . . . . . . . . . . . . . . . . . . . . . . . . . . . . . . . . . . . . . . . . . . . . . . . . . . . . . . . . . . . . . . . .. . . . . . .145Creating Temporary Tables.. . . . . . . . . . . . . . . . . . . . . . . . . . . . . . . . . . . . . . . . . . . . . . . . . . . . . . . . . . . . . . . . . . . . . . . . . . . . . . .. . . . . . .146Creating Tables. . . . . . . . . . . . . . . . . . . . . . . . . . . . . . . . . . . . . . . . . . . . . . . . . . . . . . . . . . . . . . . . . . . . . . . . . . . . . . . . . . . . . . . . . . . . .. . . . . . .146Altering Tables.. . . . . . . . . . . . . . . . . . . . . . . . . . . . . . . . . . . . . . . . . . . . . . . . . . . . . . . . . . . . . . . . . . . . . . . . . . . . . . . . . . . . . . . . . . . . .. . . . . . .147Creating Indexes... . . . . . . . . . . . . . . . . . . . . . . . . . . . . . . . . . . . . . . . . . . . . . . . . . . . . . . . . . . . . . . . . . . . . . . . . . . . . . . . . . . . . . . . . .. . . . . . .147ReCreating Triggers.. . . . . . . . . . . . . . . . . . . . . . . . . . . . . . . . . . . . . . . . . . . . . . . . . . . . . . . . . . . . . . . . . . . . . . . . . . . . . . . . . . . . . . .. . . . . . .147Reviewing the Create Indexes Log.. . . . . . . . . . . . . . . . . . . . . . . . . . . . . . . . . . . . . . . . . . . . . . . . . . . . . . . . . . . . . . . . . . . . . .. . . . . . .148Dropping Indexes for Data Conversion. . . . . . . . . . . . . . . . . . . . . . . . . . . . . . . . . . . . . . . . . . . . . . . . . . . . . . . . . . . . . . . . . .. . . . . . .148Dropping Triggers for Data Conversion.. . . . . . . . . . . . . . . . . . . . . . . . . . . . . . . . . . . . . . . . . . . . . . . . . . . . . . . . . . . . . . . . .. . . . . . .148Creating Indexes for Data Conversion.. . . . . . . . . . . . . . . . . . . . . . . . . . . . . . . . . . . . . . . . . . . . . . . . . . . . . . . . . . . . . . . . . .. . . . . . .149Setting Index Parameters.. . . . . . . . . . . . . . . . . . . . . . . . . . . . . . . . . . . . . . . . . . . . . . . . . . . . . . . . . . . . . . . . . . . . . . . . . . . . . . . . .. . . . . . .152Setting Temp Table Tablespace Names... . . . . . . . . . . . . . . . . . . . . . . . . . . . . . . . . . . . . . . . . . . . . . . . . . . . . . . . . . . . . . .. . . . . . .152Setting Tablespace Names... . . . . . . . . . . . . . . . . . . . . . . . . . . . . . . . . . . . . . . . . . . . . . . . . . . . . . . . . . . . . . . . . . . . . . . . . . . . . .. . . . . . .152Setting Record Parameters.. . . . . . . . . . . . . . . . . . . . . . . . . . . . . . . . . . . . . . . . . . . . . . . . . . . . . . . . . . . . . . . . . . . . . . . . . . . . . .. . . . . . .153Generating a DB2 UNIX RUNSTATS Script . . . . . . . . . . . . . . . . . . . . . . . . . . . . . . . . . . . . . . . . . . . . . . . . . . . . . . . . . . . .. . . . . . .153Updating Statistics for DB2 UNIX.. . . . . . . . . . . . . . . . . . . . . . . . . . . . . . . . . . . . . . . . . . . . . . . . . . . . . . . . . . . . . . . . . . . . . . .. . . . . . .153Updating Statistics for DB2 zOS... . . . . . . . . . . . . . . . . . . . . . . . . . . . . . . . . . . . . . . . . . . . . . . . . . . . . . . . . . . . . . . . . . . . . . . .. . . . . . .154Updating Statistics for Informix.. . . . . . . . . . . . . . . . . . . . . . . . . . . . . . . . . . . . . . . . . . . . . . . . . . . . . . . . . . . . . . . . . . . . . . . . . .. . . . . . .154Updating Statistics for Oracle. . . . . . . . . . . . . . . . . . . . . . . . . . . . . . . . . . . . . . . . . . . . . . . . . . . . . . . . . . . . . . . . . . . . . . . . . . . . .. . . . . . .154
Loading Data for Data Conversion.. . . . . . . . . . . . . . . . . . . . . . . . . . . . . . . . . . . . . . . . . . . . . . . . . . . . . . . . . . . . . . . . . . . . . . . . . . . . . . . . .154Swapping Languages on System Data.. . . . . . . . . . . . . . . . . . . . . . . . . . . . . . . . . . . . . . . . . . . . . . . . . . . . . . . . . . . . . . . . .. . . . . . .155Exporting Application Messages.. . . . . . . . . . . . . . . . . . . . . . . . . . . . . . . . . . . . . . . . . . . . . . . . . . . . . . . . . . . . . . . . . . . . . . . . .. . . . . . .155Importing Application Messages.. . . . . . . . . . . . . . . . . . . . . . . . . . . . . . . . . . . . . . . . . . . . . . . . . . . . . . . . . . . . . . . . . . . . . . . . .. . . . . . .156
Copyright © 2007, Oracle. All rights reserved. xiii

Contents
Exporting Record Groups.. . . . . . . . . . . . . . . . . . . . . . . . . . . . . . . . . . . . . . . . . . . . . . . . . . . . . . . . . . . . . . . . . . . . . . . . . . . . . . . . .. . . . . . .156Importing Record Groups.. . . . . . . . . . . . . . . . . . . . . . . . . . . . . . . . . . . . . . . . . . . . . . . . . . . . . . . . . . . . . . . . . . . . . . . . . . . . . . . . .. . . . . . .156Exporting the System Setup Data .. . . . . . . . . . . . . . . . . . . . . . . . . . . . . . . . . . . . . . . . . . . . . . . . . . . . . . . . . . . . . . . . . . . . . .. . . . . . .157Importing the System Setup Data.. . . . . . . . . . . . . . . . . . . . . . . . . . . . . . . . . . . . . . . . . . . . . . . . . . . . . . . . . . . . . . . . . . . . . . .. . . . . . .158Exporting the PW Pagelet Data.. . . . . . . . . . . . . . . . . . . . . . . . . . . . . . . . . . . . . . . . . . . . . . . . . . . . . . . . . . . . . . . . . . . . . . . . . .. . . . . . .158Importing the PW Pagelet Data.. . . . . . . . . . . . . . . . . . . . . . . . . . . . . . . . . . . . . . . . . . . . . . . . . . . . . . . . . . . . . . . . . . . . . . . . . .. . . . . . .158Exporting the Pagelet Wizard Data.. . . . . . . . . . . . . . . . . . . . . . . . . . . . . . . . . . . . . . . . . . . . . . . . . . . . . . . . . . . . . . . . . . . . . .. . . . . . .158Importing the Pagelet Wizard Data.. . . . . . . . . . . . . . . . . . . . . . . . . . . . . . . . . . . . . . . . . . . . . . . . . . . . . . . . . . . . . . . . . . . . . .. . . . . . .159Exporting Upgrade Defaults. . . . . . . . . . . . . . . . . . . . . . . . . . . . . . . . . . . . . . . . . . . . . . . . . . . . . . . . . . . . . . . . . . . . . . . . . . . . . . .. . . . . . .159Importing Upgrade Defaults. . . . . . . . . . . . . . . . . . . . . . . . . . . . . . . . . . . . . . . . . . . . . . . . . . . . . . . . . . . . . . . . . . . . . . . . . . . . . . .. . . . . . .159Exporting Application Conversion Data.. . . . . . . . . . . . . . . . . . . . . . . . . . . . . . . . . . . . . . . . . . . . . . . . . . . . . . . . . . . . . . . . .. . . . . . .160Importing Application Conversion Data.. . . . . . . . . . . . . . . . . . . . . . . . . . . . . . . . . . . . . . . . . . . . . . . . . . . . . . . . . . . . . . . . .. . . . . . .160Exporting Data Conversion Driver Data. . . . . . . . . . . . . . . . . . . . . . . . . . . . . . . . . . . . . . . . . . . . . . . . . . . . . . . . . . . . . . . . .. . . . . . .160Importing Data Conversion Driver Data. . . . . . . . . . . . . . . . . . . . . . . . . . . . . . . . . . . . . . . . . . . . . . . . . . . . . . . . . . . . . . . . .. . . . . . .160Populating Control Tables for Data Conversion.. . . . . . . . . . . . . . . . . . . . . . . . . . . . . . . . . . . . . . . . . . . . . . . . . . . . . . .. . . . . . .161
Restoring New Release Demo... . . . . . . . . . . . . . . . . . . . . . . . . . . . . . . . . . . . . . . . . . . . . . . . . . . . . . . . . . . . . . . . . . . . . . . . . . . . . . . . . . . . .161Applying Updates Before Data Conversion.. . . . . . . . . . . . . . . . . . . . . . . . . . . . . . . . . . . . . . . . . . . . . . . . . . . . . . . . . . . . . . . . . . . . . . .161Configuring Scheduler and Server.. . . . . . . . . . . . . . . . . . . . . . . . . . . . . . . . . . . . . . . . . . . . . . . . . . . . . . . . . . . . . . . . . . . . . . . . . . . . . . . . .162Backing Up Before Data Conversion.. . . . . . . . . . . . . . . . . . . . . . . . . . . . . . . . . . . . . . . . . . . . . . . . . . . . . . . . . . . . . . . . . . . . . . . . . . . . . .163Running Data Conversion .. . . . . . . . . . . . . . . . . . . . . . . . . . . . . . . . . . . . . . . . . . . . . . . . . . . . . . . . . . . . . . . . . . . . . . . . . . . . . . . . . . . . . . . . . .163
Reviewing Data Conversion Tips.. . . . . . . . . . . . . . . . . . . . . . . . . . . . . . . . . . . . . . . . . . . . . . . . . . . . . . . . . . . . . . . . . . . . . . . .. . . . . . .163Running Data Conversion for Group 12.. . . . . . . . . . . . . . . . . . . . . . . . . . . . . . . . . . . . . . . . . . . . . . . . . . . . . . . . . . . . . . . .. . . . . . .166Running Data Conversion for Group 1.. . . . . . . . . . . . . . . . . . . . . . . . . . . . . . . . . . . . . . . . . . . . . . . . . . . . . . . . . . . . . . . . . .. . . . . . .166Running Data Conversion for Group 2.. .. . . . . . . . . . . . . . . . . . . . . . . . . . . . . . . . . . . . . . . . . . . . . . . . . . . . . . . . . . . . . . . .. . . . . . .167Running Data Conversion for Group 3.. . . . . . . . . . . . . . . . . . . . . . . . . . . . . . . . . . . . . . . . . . . . . . . . . . . . . . . . . . . . . . . . . .. . . . . . .167Running Data Conversion for Group 4.. . . . . . . . . . . . . . . . . . . . . . . . . . . . . . . . . . . . . . . . . . . . . . . . . . . . . . . . . . . . . . . . . .. . . . . . .167Running Data Conversion for Group 7.. .. . . . . . . . . . . . . . . . . . . . . . . . . . . . . . . . . . . . . . . . . . . . . . . . . . . . . . . . . . . . . . . .. . . . . . .167Running Data Conversion for Group 8.. . . . . . . . . . . . . . . . . . . . . . . . . . . . . . . . . . . . . . . . . . . . . . . . . . . . . . . . . . . . . . . . . .. . . . . . .167
Backing Up After Data Conversion.. . . . . . . . . . . . . . . . . . . . . . . . . . . . . . . . . . . . . . . . . . . . . . . . . . . . . . . . . . . . . . . . . . . . . . . . . . . . . . . . .168Finalizing the Database Structure.. . . . . . . . . . . . . . . . . . . . . . . . . . . . . . . . . . . . . . . . . . . . . . . . . . . . . . . . . . . . . . . . . . . . . . . . . . . . . . . . . .168
Understanding Final Database Structure.. . . . . . . . . . . . . . . . . . . . . . . . . . . . . . . . . . . . . . . . . . . . . . . . . . . . . . . . . . . . . . .. . . . . . .168Building the Alter with Deletes Scripts.. . . . . . . . . . . . . . . . . . . . . . . . . . . . . . . . . . . . . . . . . . . . . . . . . . . . . . . . . . . . . . . . . .. . . . . . .168Altering Tables with Deletes.. . . . . . . . . . . . . . . . . . . . . . . . . . . . . . . . . . . . . . . . . . . . . . . . . . . . . . . . . . . . . . . . . . . . . . . . . . . . . .. . . . . . .169Creating Indexes Again.. . . . . . . . . . . . . . . . . . . . . . . . . . . . . . . . . . . . . . . . . . . . . . . . . . . . . . . . . . . . . . . . . . . . . . . . . . . . . . . . . . .. . . . . . .169Creating Triggers.. . . . . . . . . . . . . . . . . . . . . . . . . . . . . . . . . . . . . . . . . . . . . . . . . . . . . . . . . . . . . . . . . . . . . . . . . . . . . . . . . . . . . . . . . .. . . . . . .169Running the AE SYNCIDGEN Process.. . . . . . . . . . . . . . . . . . . . . . . . . . . . . . . . . . . . . . . . . . . . . . . . . . . . . . . . . . . . . . . . .. . . . . . .170Creating All Views.. . . . . . . . . . . . . . . . . . . . . . . . . . . . . . . . . . . . . . . . . . . . . . . . . . . . . . . . . . . . . . . . . . . . . . . . . . . . . . . . . . . . . . . . .. . . . . . .170
Loading Data to Complete System Setup.. . . . . . . . . . . . . . . . . . . . . . . . . . . . . . . . . . . . . . . . . . . . . . . . . . . . . . . . . . . . . . . . . . . . . . . . .170Exporting Strings.. . . . . . . . . . . . . . . . . . . . . . . . . . . . . . . . . . . . . . . . . . . . . . . . . . . . . . . . . . . . . . . . . . . . . . . . . . . . . . . . . . . . . . . . . .. . . . . . .171Importing Strings.. . . . . . . . . . . . . . . . . . . . . . . . . . . . . . . . . . . . . . . . . . . . . . . . . . . . . . . . . . . . . . . . . . . . . . . . . . . . . . . . . . . . . . . . . . .. . . . . . .171
xiv Copyright © 2007, Oracle. All rights reserved.

Contents
Exporting EDI Statements.. . . . . . . . . . . . . . . . . . . . . . . . . . . . . . . . . . . . . . . . . . . . . . . . . . . . . . . . . . . . . . . . . . . . . . . . . . . . . . . .. . . . . . .172Importing EDI Statements. . . . . . . . . . . . . . . . . . . . . . . . . . . . . . . . . . . . . . . . . . . . . . . . . . . . . . . . . . . . . . . . . . . . . . . . . . . . . . . . .. . . . . . .172Exporting Mass Change Data... . . . . . . . . . . . . . . . . . . . . . . . . . . . . . . . . . . . . . . . . . . . . . . . . . . . . . . . . . . . . . . . . . . . . . . . . . .. . . . . . .172Importing Mass Change Data.. . . . . . . . . . . . . . . . . . . . . . . . . . . . . . . . . . . . . . . . . . . . . . . . . . . . . . . . . . . . . . . . . . . . . . . . . . . .. . . . . . .173Exporting XML Service Information.. . . . . . . . . . . . . . . . . . . . . . . . . . . . . . . . . . . . . . . . . . . . . . . . . . . . . . . . . . . . . . . . . . . . .. . . . . . .173Importing XML Service Information.. . . . . . . . . . . . . . . . . . . . . . . . . . . . . . . . . . . . . . . . . . . . . . . . . . . . . . . . . . . . . . . . . . . . .. . . . . . .173Exporting Related Language System Data.. . . . . . . . . . . . . . . . . . . . . . . . . . . . . . . . . . . . . . . . . . . . . . . . . . . . . . . . . . . .. . . . . . .173Importing Related Language System Data.. . . . . . . . . . . . . . . . . . . . . . . . . . . . . . . . . . . . . . . . . . . . . . . . . . . . . . . . . . . . .. . . . . . .174Editing the System Data Scripts.. . . . . . . . . . . . . . . . . . . . . . . . . . . . . . . . . . . . . . . . . . . . . . . . . . . . . . . . . . . . . . . . . . . . . . . . .. . . . . . .174Exporting Application System Data.. . . . . . . . . . . . . . . . . . . . . . . . . . . . . . . . . . . . . . . . . . . . . . . . . . . . . . . . . . . . . . . . . . . . .. . . . . . .174Importing Application System Data.. . . . . . . . . . . . . . . . . . . . . . . . . . . . . . . . . . . . . . . . . . . . . . . . . . . . . . . . . . . . . . . . . . . . . .. . . . . . .175Exporting Data for Your Upgrade Path.. . . . . . . . . . . . . . . . . . . . . . . . . . . . . . . . . . . . . . . . . . . . . . . . . . . . . . . . . . . . . . . . . .. . . . . . .175Importing Data for Your Upgrade Path.. . . . . . . . . . . . . . . . . . . . . . . . . . . . . . . . . . . . . . . . . . . . . . . . . . . . . . . . . . . . . . . . . .. . . . . . .175Exporting Common Portal System Options.. . . . . . . . . . . . . . . . . . . . . . . . . . . . . . . . . . . . . . . . . . . . . . . . . . . . . . . . . . . .. . . . . . .176Importing Common Portal System Options.. . . . . . . . . . . . . . . . . . . . . . . . . . . . . . . . . . . . . . . . . . . . . . . . . . . . . . . . . . . .. . . . . . .176Exporting Setup Data.. . . . . . . . . . . . . . . . . . . . . . . . . . . . . . . . . . . . . . . . . . . . . . . . . . . . . . . . . . . . . . . . . . . . . . . . . . . . . . . . . . . . .. . . . . . .176Importing Setup Data.. . . . . . . . . . . . . . . . . . . . . . . . . . . . . . . . . . . . . . . . . . . . . . . . . . . . . . . . . . . . . . . . . . . . . . . . . . . . . . . . . . . . . .. . . . . . .176Importing PayBill Data.. . . . . . . . . . . . . . . . . . . . . . . . . . . . . . . . . . . . . . . . . . . . . . . . . . . . . . . . . . . . . . . . . . . . . . . . . . . . . . . . . . . .. . . . . . .177Exporting Approval Framework Definitions... . . . . . . . . . . . . . . . . . . . . . . . . . . . . . . . . . . . . . . . . . . . . . . . . . . . . . . . . . . .. . . . . . .177Importing Approval Framework Definitions.. . . . . . . . . . . . . . . . . . . . . . . . . . . . . . . . . . . . . . . . . . . . . . . . . . . . . . . . . . . . .. . . . . . .177Exporting Generic Notifications.. . . . . . . . . . . . . . . . . . . . . . . . . . . . . . . . . . . . . . . . . . . . . . . . . . . . . . . . . . . . . . . . . . . . . . . . . .. . . . . . .178Importing Generic Notifications.. . . . . . . . . . . . . . . . . . . . . . . . . . . . . . . . . . . . . . . . . . . . . . . . . . . . . . . . . . . . . . . . . . . . . . . . . .. . . . . . .178Exporting Global Payroll Switzerland Tax Rates.. . . . . . . . . . . . . . . . . . . . . . . . . . . . . . . . . . . . . . . . . . . . . . . . . . . . . .. . . . . . .178Importing Global Payroll Switzerland Tax Rates.. . . . . . . . . . . . . . . . . . . . . . . . . . . . . . . . . . . . . . . . . . . . . . . . . . . . . . .. . . . . . .179
Loading Stored Statements.. . . . . . . . . . . . . . . . . . . . . . . . . . . . . . . . . . . . . . . . . . . . . . . . . . . . . . . . . . . . . . . . . . . . . . . . . . . . . . . . . . . . . . . . .179Setting PSOPTIONS for COBOL... . . . . . . . . . . . . . . . . . . . . . . . . . . . . . . . . . . . . . . . . . . . . . . . . . . . . . . . . . . . . . . . . . . . . . .. . . . . . .179Running the STOREBAS Script. . . . . . . . . . . . . . . . . . . . . . . . . . . . . . . . . . . . . . . . . . . . . . . . . . . . . . . . . . . . . . . . . . . . . . . . . .. . . . . . .180Running the STOREGP Script. . . . . . . . . . . . . . . . . . . . . . . . . . . . . . . . . . . . . . . . . . . . . . . . . . . . . . . . . . . . . . . . . . . . . . . . . . . .. . . . . . .180Running the STOREHRM Script. . . . . . . . . . . . . . . . . . . . . . . . . . . . . . . . . . . . . . . . . . . . . . . . . . . . . . . . . . . . . . . . . . . . . . . . . .. . . . . . .180Running the STOREPAY Script. . . . . . . . . . . . . . . . . . . . . . . . . . . . . . . . . . . . . . . . . . . . . . . . . . . . . . . . . . . . . . . . . . . . . . . . . . .. . . . . . .180Running the STOREPEN Script. . . . . . . . . . . . . . . . . . . . . . . . . . . . . . . . . . . . . . . . . . . . . . . . . . . . . . . . . . . . . . . . . . . . . . . . . .. . . . . . .180Running the STOREPYI Script. . . . . . . . . . . . . . . . . . . . . . . . . . . . . . . . . . . . . . . . . . . . . . . . . . . . . . . . . . . . . . . . . . . . . . . . . . .. . . . . . .181
Running Final Update Statistics.. . . . . . . . . . . . . . . . . . . . . . . . . . . . . . . . . . . . . . . . . . . . . . . . . . . . . . . . . . . . . . . . . . . . . . . . . . . . . . . . . . . .181Generating Final RUNSTATS for DB2 UNIX.. . . . . . . . . . . . . . . . . . . . . . . . . . . . . . . . . . . . . . . . . . . . . . . . . . . . . . . . . . .. . . . . . .181Running Final Statistics for DB2 UNIX.... . . . . . . . . . . . . . . . . . . . . . . . . . . . . . . . . . . . . . . . . . . . . . . . . . . . . . . . . . . . . . . .. . . . . . .181Running Final Statistics for DB2 zOS... . . . . . . . . . . . . . . . . . . . . . . . . . . . . . . . . . . . . . . . . . . . . . . . . . . . . . . . . . . . . . . . . .. . . . . . .182Running Final Statistics for Informix. . . . . . . . . . . . . . . . . . . . . . . . . . . . . . . . . . . . . . . . . . . . . . . . . . . . . . . . . . . . . . . . . . . . .. . . . . . .182Running Final Statistics for Oracle.. . . . . . . . . . . . . . . . . . . . . . . . . . . . . . . . . . . . . . . . . . . . . . . . . . . . . . . . . . . . . . . . . . . . . .. . . . . . .182
Completing Application Processes.. . . . . . . . . . . . . . . . . . . . . . . . . . . . . . . . . . . . . . . . . . . . . . . . . . . . . . . . . . . . . . . . . . . . . . . . . . . . . . . . .183Refreshing Personal Data Table.. . . . . . . . . . . . . . . . . . . . . . . . . . . . . . . . . . . . . . . . . . . . . . . . . . . . . . . . . . . . . . . . . . . . . . . . .. . . . . . .183
Copyright © 2007, Oracle. All rights reserved. xv

Contents
Exporting Setup Data for Rules.. . . . . . . . . . . . . . . . . . . . . . . . . . . . . . . . . . . . . . . . . . . . . . . . . . . . . . . . . . . . . . . . . . . . . . . . . .. . . . . . .183Importing Setup Data for Rules.. . . . . . . . . . . . . . . . . . . . . . . . . . . . . . . . . . . . . . . . . . . . . . . . . . . . . . . . . . . . . . . . . . . . . . . . . .. . . . . . .183Exporting Payroll Interface Tables.. . . . . . . . . . . . . . . . . . . . . . . . . . . . . . . . . . . . . . . . . . . . . . . . . . . . . . . . . . . . . . . . . . . . . . .. . . . . . .184Importing Payroll Interface Tables.. . . . . . . . . . . . . . . . . . . . . . . . . . . . . . . . . . . . . . . . . . . . . . . . . . . . . . . . . . . . . . . . . . . . . . .. . . . . . .184Exporting GL Interface Setup Tables.. . . . . . . . . . . . . . . . . . . . . . . . . . . . . . . . . . . . . . . . . . . . . . . . . . . . . . . . . . . . . . . . . . . .. . . . . . .184Importing GL Interface Setup Tables.. . . . . . . . . . . . . . . . . . . . . . . . . . . . . . . . . . . . . . . . . . . . . . . . . . . . . . . . . . . . . . . . . . . .. . . . . . .185Exporting US Custom Garnishment Rules.. . . . . . . . . . . . . . . . . . . . . . . . . . . . . . . . . . . . . . . . . . . . . . . . . . . . . . . . . . . . .. . . . . . .186Importing US Custom Garnishment Rules.. . . . . . . . . . . . . . . . . . . . . . . . . . . . . . . . . . . . . . . . . . . . . . . . . . . . . . . . . . . . .. . . . . . .186
Updating Language Data.. . . . . . . . . . . . . . . . . . . . . . . . . . . . . . . . . . . . . . . . . . . . . . . . . . . . . . . . . . . . . . . . . . . . . . . . . . . . . . . . . . . . . . . . . . . .186Understanding Updating Language Data.. . . . . . . . . . . . . . . . . . . . . . . . . . . . . . . . . . . . . . . . . . . . . . . . . . . . . . . . . . . . . . .. . . . . . .187Run the TSRECPOP Script. . . . . . . . . . . . . . . . . . . . . . . . . . . . . . . . . . . . . . . . . . . . . . . . . . . . . . . . . . . . . . . . . . . . . . . . . . . . . . .. . . . . . .187
Completing PeopleTools Conversion.. . . . . . . . . . . . . . . . . . . . . . . . . . . . . . . . . . . . . . . . . . . . . . . . . . . . . . . . . . . . . . . . . . . . . . . . . . . . . .187Updating Object Version Numbers.. . . . . . . . . . . . . . . . . . . . . . . . . . . . . . . . . . . . . . . . . . . . . . . . . . . . . . . . . . . . . . . . . . . . . . . . . . . . . . . . .187Running the Final Audit Reports... . . . . . . . . . . . . . . . . . . . . . . . . . . . . . . . . . . . . . . . . . . . . . . . . . . . . . . . . . . . . . . . . . . . . . . . . . . . . . . . . . .188
Run the Final DDDAUDIT Report. . . . . . . . . . . . . . . . . . . . . . . . . . . . . . . . . . . . . . . . . . . . . . . . . . . . . . . . . . . . . . . . . . . . . . . .. . . . . . .188Run the Final SYSAUDIT Report. . . . . . . . . . . . . . . . . . . . . . . . . . . . . . . . . . . . . . . . . . . . . . . . . . . . . . . . . . . . . . . . . . . . . . . . .. . . . . . .188Create the FNLALTAUD Project. . . . . . . . . . . . . . . . . . . . . . . . . . . . . . . . . . . . . . . . . . . . . . . . . . . . . . . . . . . . . . . . . . . . . . . . . .. . . . . . .189Run the Final Alter Audit. . . . . . . . . . . . . . . . . . . . . . . . . . . . . . . . . . . . . . . . . . . . . . . . . . . . . . . . . . . . . . . . . . . . . . . . . . . . . . . . . . .. . . . . . .189Review the Final Audits.. . . . . . . . . . . . . . . . . . . . . . . . . . . . . . . . . . . . . . . . . . . . . . . . . . . . . . . . . . . . . . . . . . . . . . . . . . . . . . . . . . .. . . . . . .189Run a Final SETINDEX Report. . . . . . . . . . . . . . . . . . . . . . . . . . . . . . . . . . . . . . . . . . . . . . . . . . . . . . . . . . . . . . . . . . . . . . . . . . .. . . . . . .190Run a Final SETTABLE Report. . . . . . . . . . . . . . . . . . . . . . . . . . . . . . . . . . . . . . . . . . . . . . . . . . . . . . . . . . . . . . . . . . . . . . . . . . .. . . . . . .190
Chapter 5Complete Database Changes... . . . . . . . . . . . . . . . . . . . . . . . . . . . . . . . . . . . . . . . . . . . . . . . . . . . . . . . . . . . . . . . . . . . . . . . . . .193Understanding Database Changes.. . . . . . . . . . . . . . . . . . . . . . . . . . . . . . . . . . . . . . . . . . . . . . . . . . . . . . . . . . . . . . . . . . . . . . . . . . . . . . . .194Configuring the Upgrade Environment.. . . . . . . . . . . . . . . . . . . . . . . . . . . . . . . . . . . . . . . . . . . . . . . . . . . . . . . . . . . . . . . . . . . . . . . . . . . .194
Configure Application Server.. . . . . . . . . . . . . . . . . . . . . . . . . . . . . . . . . . . . . . . . . . . . . . . . . . . . . . . . . . . . . . . . . . . . . . . . . . . . .. . . . . . .194Configure Portal. . . . . . . . . . . . . . . . . . . . . . . . . . . . . . . . . . . . . . . . . . . . . . . . . . . . . . . . . . . . . . . . . . . . . . . . . . . . . . . . . . . . . . . . . . . . .. . . . . . .194
Reapplying Customizations.. . . . . . . . . . . . . . . . . . . . . . . . . . . . . . . . . . . . . . . . . . . . . . . . . . . . . . . . . . . . . . . . . . . . . . . . . . . . . . . . . . . . . . . . .195Understanding the Reapplication.. . . . . . . . . . . . . . . . . . . . . . . . . . . . . . . . . . . . . . . . . . . . . . . . . . . . . . . . . . . . . . . . . . . . . . . .. . . . . . .195Performing Customized Object Adjustment.. . . . . . . . . . . . . . . . . . . . . . . . . . . . . . . . . . . . . . . . . . . . . . . . . . . . . . . . . . . .. . . . . . .196Registering Portal Navigation Objects.. . . . . . . . . . . . . . . . . . . . . . . . . . . . . . . . . . . . . . . . . . . . . . . . . . . . . . . . . . . . . . . . . .. . . . . . .196
Setting Up Security. . . . . . . . . . . . . . . . . . . . . . . . . . . . . . . . . . . . . . . . . . . . . . . . . . . . . . . . . . . . . . . . . . . . . . . . . . . . . . . . . . . . . . . . . . . . . . . . . . . .197Understanding Security. . . . . . . . . . . . . . . . . . . . . . . . . . . . . . . . . . . . . . . . . . . . . . . . . . . . . . . . . . . . . . . . . . . . . . . . . . . . . . . . . . . .. . . . . . .197Set Up Security. . . . . . . . . . . . . . . . . . . . . . . . . . . . . . . . . . . . . . . . . . . . . . . . . . . . . . . . . . . . . . . . . . . . . . . . . . . . . . . . . . . . . . . . . . . . .. . . . . . .197Synchronize CREF Permissions.. . . . . . . . . . . . . . . . . . . . . . . . . . . . . . . . . . . . . . . . . . . . . . . . . . . . . . . . . . . . . . . . . . . . . . . . .. . . . . . .198Grant Access to Personalize Homepage... . . . . . . . . . . . . . . . . . . . . . . . . . . . . . . . . . . . . . . . . . . . . . . . . . . . . . . . . . . . . .. . . . . . .199
Completing Portal Data Conversion.. . . . . . . . . . . . . . . . . . . . . . . . . . . . . . . . . . . . . . . . . . . . . . . . . . . . . . . . . . . . . . . . . . . . . . . . . . . . . . .200Reviewing Pagelet and Collection Log.. . . . . . . . . . . . . . . . . . . . . . . . . . . . . . . . . . . . . . . . . . . . . . . . . . . . . . . . . . . . . . . . .. . . . . . .200
xvi Copyright © 2007, Oracle. All rights reserved.

Contents
Enabling Pagelet Publishing.. . . . . . . . . . . . . . . . . . . . . . . . . . . . . . . . . . . . . . . . . . . . . . . . . . . . . . . . . . . . . . . . . . . . . . . . . . . . .. . . . . . .201Updating Department Security.. . . . . . . . . . . . . . . . . . . . . . . . . . . . . . . . . . . . . . . . . . . . . . . . . . . . . . . . . . . . . . . . . . . . . . . . . . . . . . . . . . . . . .201
Understanding Department Security. . . . . . . . . . . . . . . . . . . . . . . . . . . . . . . . . . . . . . . . . . . . . . . . . . . . . . . . . . . . . . . . . . . . .. . . . . . .202Refreshing Operator Security. . . . . . . . . . . . . . . . . . . . . . . . . . . . . . . . . . . . . . . . . . . . . . . . . . . . . . . . . . . . . . . . . . . . . . . . . . . . .. . . . . . .202Refreshing Transaction Records.. . . . . . . . . . . . . . . . . . . . . . . . . . . . . . . . . . . . . . . . . . . . . . . . . . . . . . . . . . . . . . . . . . . . . . . .. . . . . . .202
Backing Up Before Manual Changes.. . . . . . . . . . . . . . . . . . . . . . . . . . . . . . . . . . . . . . . . . . . . . . . . . . . . . . . . . . . . . . . . . . . . . . . . . . . . . .203Converting Retirees with Pay.. . . . . . . . . . . . . . . . . . . . . . . . . . . . . . . . . . . . . . . . . . . . . . . . . . . . . . . . . . . . . . . . . . . . . . . . . . . . . . . . . . . . . . .203
Understanding the Conversion for Retirees with Pay.. . . . . . . . . . . . . . . . . . . . . . . . . . . . . . . . . . . . . . . . . . . . . . . . .. . . . . . .203Running Retiree Additional Pay Report UVPYT05... . . . . . . . . . . . . . . . . . . . . . . . . . . . . . . . . . . . . . . . . . . . . . . . . . .. . . . . . .206Running Retiree Additional Pay Report UVPYT06... . . . . . . . . . . . . . . . . . . . . . . . . . . . . . . . . . . . . . . . . . . . . . . . . . .. . . . . . .207Running Retiree Additional Pay Report UVPYT07... . . . . . . . . . . . . . . . . . . . . . . . . . . . . . . . . . . . . . . . . . . . . . . . . . .. . . . . . .207Running Upgrade Conversion for Retirees with Pay.. . . . . . . . . . . . . . . . . . . . . . . . . . . . . . . . . . . . . . . . . . . . . . . . . .. . . . . . .208Rebuilding Job Flags.. . . . . . . . . . . . . . . . . . . . . . . . . . . . . . . . . . . . . . . . . . . . . . . . . . . . . . . . . . . . . . . . . . . . . . . . . . . . . . . . . . . . . .. . . . . . .208
Running the Person Organization Audits.. . . . . . . . . . . . . . . . . . . . . . . . . . . . . . . . . . . . . . . . . . . . . . . . . . . . . . . . . . . . . . . . . . . . . . . . . .209Understanding the Person Organization Audits. . . . . . . . . . . . . . . . . . . . . . . . . . . . . . . . . . . . . . . . . . . . . . . . . . . . . . . .. . . . . . .209Running Conversion Audits.. . . . . . . . . . . . . . . . . . . . . . . . . . . . . . . . . . . . . . . . . . . . . . . . . . . . . . . . . . . . . . . . . . . . . . . . . . . . . .. . . . . . .210
Upgrading Global Payroll Country Extensions.. . . . . . . . . . . . . . . . . . . . . . . . . . . . . . . . . . . . . . . . . . . . . . . . . . . . . . . . . . . . . . . . . . . .210Understanding Global Payroll Country Extensions Upgrade.. . . . . . . . . . . . . . . . . . . . . . . . . . . . . . . . . . . . . . . .. . . . . . .211Creating Country Extensions Rule Packages.. . . . . . . . . . . . . . . . . . . . . . . . . . . . . . . . . . . . . . . . . . . . . . . . . . . . . . . . . .. . . . . . .212Applying the Licensed Rule Package.. . . . . . . . . . . . . . . . . . . . . . . . . . . . . . . . . . . . . . . . . . . . . . . . . . . . . . . . . . . . . . . . . . .. . . . . . .214Applying the Unlicensed Rule Package.. . . . . . . . . . . . . . . . . . . . . . . . . . . . . . . . . . . . . . . . . . . . . . . . . . . . . . . . . . . . . . . .. . . . . . .216Creating the Final Rule Package.. . . . . . . . . . . . . . . . . . . . . . . . . . . . . . . . . . . . . . . . . . . . . . . . . . . . . . . . . . . . . . . . . . . . . . . .. . . . . . .217Applying the Final Rule Package.. . . . . . . . . . . . . . . . . . . . . . . . . . . . . . . . . . . . . . . . . . . . . . . . . . . . . . . . . . . . . . . . . . . . . . . .. . . . . . .219Creating the Consolidated NonRule Package.. . . . . . . . . . . . . . . . . . . . . . . . . . . . . . . . . . . . . . . . . . . . . . . . . . . . . . . . .. . . . . . .221Creating Individual NonRule Packages.. . . . . . . . . . . . . . . . . . . . . . . . . . . . . . . . . . . . . . . . . . . . . . . . . . . . . . . . . . . . . . . . .. . . . . . .222Applying the Consolidated NonRule Package.. . . . . . . . . . . . . . . . . . . . . . . . . . . . . . . . . . . . . . . . . . . . . . . . . . . . . . . . .. . . . . . .224Applying Individual NonRule Packages.. . . . . . . . . . . . . . . . . . . . . . . . . . . . . . . . . . . . . . . . . . . . . . . . . . . . . . . . . . . . . . . . .. . . . . . .226Creating the Rule Delete Package.. . . . . . . . . . . . . . . . . . . . . . . . . . . . . . . . . . . . . . . . . . . . . . . . . . . . . . . . . . . . . . . . . . . . . .. . . . . . .228Applying the Rule Delete Package.. . . . . . . . . . . . . . . . . . . . . . . . . . . . . . . . . . . . . . . . . . . . . . . . . . . . . . . . . . . . . . . . . . . . . .. . . . . . .230Finalizing the Rule Delete Process.. . . . . . . . . . . . . . . . . . . . . . . . . . . . . . . . . . . . . . . . . . . . . . . . . . . . . . . . . . . . . . . . . . . . . .. . . . . . .233Updating Install Options on the Target Database.. . . . . . . . . . . . . . . . . . . . . . . . . . . . . . . . . . . . . . . . . . . . . . . . . . . . .. . . . . . .233Setting the Store Option for System Elements. . . . . . . . . . . . . . . . . . . . . . . . . . . . . . . . . . . . . . . . . . . . . . . . . . . . . . . . .. . . . . . .234Exporting HR Rate Codes.. . . . . . . . . . . . . . . . . . . . . . . . . . . . . . . . . . . . . . . . . . . . . . . . . . . . . . . . . . . . . . . . . . . . . . . . . . . . . . . .. . . . . . .234Importing HR Rate Codes.. . . . . . . . . . . . . . . . . . . . . . . . . . . . . . . . . . . . . . . . . . . . . . . . . . . . . . . . . . . . . . . . . . . . . . . . . . . . . . . .. . . . . . .235Configuring Self Service Payslip Options.. . . . . . . . . . . . . . . . . . . . . . . . . . . . . . . . . . . . . . . . . . . . . . . . . . . . . . . . . . . . . .. . . . . . .235Setting Up Global Payroll for Switzerland.. . . . . . . . . . . . . . . . . . . . . . . . . . . . . . . . . . . . . . . . . . . . . . . . . . . . . . . . . . . . . .. . . . . . .236Setting Up Global Payroll for France.. . . . . . . . . . . . . . . . . . . . . . . . . . . . . . . . . . . . . . . . . . . . . . . . . . . . . . . . . . . . . . . . . . . .. . . . . . .242
Validating Alternative Overtime Upgrade.. . . . . . . . . . . . . . . . . . . . . . . . . . . . . . . . . . . . . . . . . . . . . . . . . . . . . . . . . . . . . . . . . . . . . . . . . .246Updating Payroll Interface Definitions.. . . . . . . . . . . . . . . . . . . . . . . . . . . . . . . . . . . . . . . . . . . . . . . . . . . . . . . . . . . . . . . . . . . . . . . . . . . . .246
Understanding Updates to Payroll Interface Definitions.. . . . . . . . . . . . . . . . . . . . . . . . . . . . . . . . . . . . . . . . . . . . . .. . . . . . .247
Copyright © 2007, Oracle. All rights reserved. xvii

Contents
Running Validate PI Field References Report. . . . . . . . . . . . . . . . . . . . . . . . . . . . . . . . . . . . . . . . . . . . . . . . . . . . . . . . . .. . . . . . .247Updating PS Table Definitions.. . . . . . . . . . . . . . . . . . . . . . . . . . . . . . . . . . . . . . . . . . . . . . . . . . . . . . . . . . . . . . . . . . . . . . . . . . .. . . . . . .248Updating Field Definition Table.. . . . . . . . . . . . . . . . . . . . . . . . . . . . . . . . . . . . . . . . . . . . . . . . . . . . . . . . . . . . . . . . . . . . . . . . . .. . . . . . .248Updating Instance Table Definitions.. . . . . . . . . . . . . . . . . . . . . . . . . . . . . . . . . . . . . . . . . . . . . . . . . . . . . . . . . . . . . . . . . . . . .. . . . . . .249
Modifying Post Process Formulas.. . . . . . . . . . . . . . . . . . . . . . . . . . . . . . . . . . . . . . . . . . . . . . . . . . . . . . . . . . . . . . . . . . . . . . . . . . . . . . . . . .249Verifying Record and RecordField References.. . . . . . . . . . . . . . . . . . . . . . . . . . . . . . . . . . . . . . . . . . . . . . . . . . . . . . . . . . . . . . . . . . .250Deleting Obsolete Accumulators.. . . . . . . . . . . . . . . . . . . . . . . . . . . . . . . . . . . . . . . . . . . . . . . . . . . . . . . . . . . . . . . . . . . . . . . . . . . . . . . . . . .251
Understanding Obsolete Accumulators Deletion.. . . . . . . . . . . . . . . . . . . . . . . . . . . . . . . . . . . . . . . . . . . . . . . . . . . . . .. . . . . . .251Reviewing Obsolete Accumulators.. . . . . . . . . . . . . . . . . . . . . . . . . . . . . . . . . . . . . . . . . . . . . . . . . . . . . . . . . . . . . . . . . . . . . .. . . . . . .251Deleting Obsolete Payroll Accumulators.. . . . . . . . . . . . . . . . . . . . . . . . . . . . . . . . . . . . . . . . . . . . . . . . . . . . . . . . . . . . . . .. . . . . . .251
Updating Jobs and Process for GP Packager.. . . . . . . . . . . . . . . . . . . . . . . . . . . . . . . . . . . . . . . . . . . . . . . . . . . . . . . . . . . . . . . . . . . .252Understanding Updates for Global Payroll Packager.. . . . . . . . . . . . . . . . . . . . . . . . . . . . . . . . . . . . . . . . . . . . . . . . .. . . . . . .252Updating Job Definitions for GP Packager. . . . . . . . . . . . . . . . . . . . . . . . . . . . . . . . . . . . . . . . . . . . . . . . . . . . . . . . . . . . . .. . . . . . .252Updating the Process Definition for GP Packager. . . . . . . . . . . . . . . . . . . . . . . . . . . . . . . . . . . . . . . . . . . . . . . . . . . . .. . . . . . .253
Upgrading Rules.. . . . . . . . . . . . . . . . . . . . . . . . . . . . . . . . . . . . . . . . . . . . . . . . . . . . . . . . . . . . . . . . . . . . . . . . . . . . . . . . . . . . . . . . . . . . . . . . . . . . . .254Understanding Rules Upgrade... . . . . . . . . . . . . . . . . . . . . . . . . . . . . . . . . . . . . . . . . . . . . . . . . . . . . . . . . . . . . . . . . . . . . . . . . .. . . . . . .254Running the Dropped Temp Tables Report. . . . . . . . . . . . . . . . . . . . . . . . . . . . . . . . . . . . . . . . . . . . . . . . . . . . . . . . . . . . .. . . . . . .254Recompiling Template Built Rules.. . . . . . . . . . . . . . . . . . . . . . . . . . . . . . . . . . . . . . . . . . . . . . . . . . . . . . . . . . . . . . . . . . . . . . .. . . . . . .255Customizing Template Built Rules.. . . . . . . . . . . . . . . . . . . . . . . . . . . . . . . . . . . . . . . . . . . . . . . . . . . . . . . . . . . . . . . . . . . . . . .. . . . . . .257Reviewing and Modifying User Exit Rules.. . . . . . . . . . . . . . . . . . . . . . . . . . . . . . . . . . . . . . . . . . . . . . . . . . . . . . . . . . . . . .. . . . . . .259
Setting Up General Ledger Interface.. . . . . . . . . . . . . . . . . . . . . . . . . . . . . . . . . . . . . . . . . . . . . . . . . . . . . . . . . . . . . . . . . . . . . . . . . . . . . .260Understanding GL Interface Setup.. . . . . . . . . . . . . . . . . . . . . . . . . . . . . . . . . . . . . . . . . . . . . . . . . . . . . . . . . . . . . . . . . . . . . .. . . . . . .260Setting Up the Liability Accounts.. . . . . . . . . . . . . . . . . . . . . . . . . . . . . . . . . . . . . . . . . . . . . . . . . . . . . . . . . . . . . . . . . . . . . . . .. . . . . . .260Setting Up the GL Activity Groupings.. . . . . . . . . . . . . . . . . . . . . . . . . . . . . . . . . . . . . . . . . . . . . . . . . . . . . . . . . . . . . . . . . . .. . . . . . .262Setting Up the Expenses ChartField Mappings.. . . . . . . . . . . . . . . . . . . . . . . . . . . . . . . . . . . . . . . . . . . . . . . . . . . . . . . .. . . . . . .263
Configuring PayBill. . . . . . . . . . . . . . . . . . . . . . . . . . . . . . . . . . . . . . . . . . . . . . . . . . . . . . . . . . . . . . . . . . . . . . . . . . . . . . . . . . . . . . . . . . . . . . . . . . . .264Setting Up Staffing Installation Values.. . . . . . . . . . . . . . . . . . . . . . . . . . . . . . . . . . . . . . . . . . . . . . . . . . . . . . . . . . . . . . . . . .. . . . . . .264Setting Up Rapid Time Prompts. . . . . . . . . . . . . . . . . . . . . . . . . . . . . . . . . . . . . . . . . . . . . . . . . . . . . . . . . . . . . . . . . . . . . . . . . .. . . . . . .264
Validating EE Garn Payee Data.. . . . . . . . . . . . . . . . . . . . . . . . . . . . . . . . . . . . . . . . . . . . . . . . . . . . . . . . . . . . . . . . . . . . . . . . . . . . . . . . . . . .265Understanding EE Garn Payee Data Validation.. . . . . . . . . . . . . . . . . . . . . . . . . . . . . . . . . . . . . . . . . . . . . . . . . . . . . . .. . . . . . .265Running the EE Garn Payee Data Validation Report. . . . . . . . . . . . . . . . . . . . . . . . . . . . . . . . . . . . . . . . . . . . . . . . . .. . . . . . .265Updating Garn Payee Data... . . . . . . . . . . . . . . . . . . . . . . . . . . . . . . . . . . . . . . . . . . . . . . . . . . . . . . . . . . . . . . . . . . . . . . . . . . . . .. . . . . . .266
Setting Up US Custom Garnishment Rules.. . . . . . . . . . . . . . . . . . . . . . . . . . . . . . . . . . . . . . . . . . . . . . . . . . . . . . . . . . . . . . . . . . . . . . .269Understanding US Custom Garnishment Rules Setup.. . . . . . . . . . . . . . . . . . . . . . . . . . . . . . . . . . . . . . . . . . . . . . .. . . . . . .269Creating US Custom Garnishment Rules.. . . . . . . . . . . . . . . . . . . . . . . . . . . . . . . . . . . . . . . . . . . . . . . . . . . . . . . . . . . . . .. . . . . . .270Cloning US Custom Garnishment Rules. . . . . . . . . . . . . . . . . . . . . . . . . . . . . . . . . . . . . . . . . . . . . . . . . . . . . . . . . . . . . . . .. . . . . . .270
Validating EE Garn Rule Data.. . . . . . . . . . . . . . . . . . . . . . . . . . . . . . . . . . . . . . . . . . . . . . . . . . . . . . . . . . . . . . . . . . . . . . . . . . . . . . . . . . . . . .271Understanding EE Garn Rule Data Validation.. . . . . . . . . . . . . . . . . . . . . . . . . . . . . . . . . . . . . . . . . . . . . . . . . . . . . . . . .. . . . . . .271Running the EE Garn Rule Data Validation Report. . . . . . . . . . . . . . . . . . . . . . . . . . . . . . . . . . . . . . . . . . . . . . . . . . . .. . . . . . .271Updating Garn Rule Data.. . . . . . . . . . . . . . . . . . . . . . . . . . . . . . . . . . . . . . . . . . . . . . . . . . . . . . . . . . . . . . . . . . . . . . . . . . . . . . . . .. . . . . . .273
xviii Copyright © 2007, Oracle. All rights reserved.

Contents
Reviewing PeopleTools Functionality. . . . . . . . . . . . . . . . . . . . . . . . . . . . . . . . . . . . . . . . . . . . . . . . . . . . . . . . . . . . . . . . . . . . . . . . . . . . . . .275Preparing the Content Provider Registry.. . . . . . . . . . . . . . . . . . . . . . . . . . . . . . . . . . . . . . . . . . . . . . . . . . . . . . . . . . . . . . . . . . . . . . . . . .276Updating the Portal Options Data.. . . . . . . . . . . . . . . . . . . . . . . . . . . . . . . . . . . . . . . . . . . . . . . . . . . . . . . . . . . . . . . . . . . . . . . . . . . . . . . . . .277Stamping the Database... . . . . . . . . . . . . . . . . . . . . . . . . . . . . . . . . . . . . . . . . . . . . . . . . . . . . . . . . . . . . . . . . . . . . . . . . . . . . . . . . . . . . . . . . . . . .278Reviewing Change Control. . . . . . . . . . . . . . . . . . . . . . . . . . . . . . . . . . . . . . . . . . . . . . . . . . . . . . . . . . . . . . . . . . . . . . . . . . . . . . . . . . . . . . . . . . .278Backing Up Before Testing.. . . . . . . . . . . . . . . . . . . . . . . . . . . . . . . . . . . . . . . . . . . . . . . . . . . . . . . . . . . . . . . . . . . . . . . . . . . . . . . . . . . . . . . . . .279Testing Your Copy of Production.. . . . . . . . . . . . . . . . . . . . . . . . . . . . . . . . . . . . . . . . . . . . . . . . . . . . . . . . . . . . . . . . . . . . . . . . . . . . . . . . . . .280
Chapter 6Apply Changes to Production Database..... . . . . . . . . . . . . . . . . . . . . . . . . . . . . . . . . . . . . . . . . . . . . . . . . . . . . . . . . . . .281Understanding the Move to Production.. . . . . . . . . . . . . . . . . . . . . . . . . . . . . . . . . . . . . . . . . . . . . . . . . . . . . . . . . . . . . . . . . . . . . . . . . . . .281Testing the Move to Production.. . . . . . . . . . . . . . . . . . . . . . . . . . . . . . . . . . . . . . . . . . . . . . . . . . . . . . . . . . . . . . . . . . . . . . . . . . . . . . . . . . . . .281
Understanding the Move to Production Test. . . . . . . . . . . . . . . . . . . . . . . . . . . . . . . . . . . . . . . . . . . . . . . . . . . . . . . . . . . .. . . . . . .281Understand Move to Production.. . . . . . . . . . . . . . . . . . . . . . . . . . . . . . . . . . . . . . . . . . . . . . . . . . . . . . . . . . . . . . . . . . . . . . . . .. . . . . . .282Creating a New Change Assistant Job.. . . . . . . . . . . . . . . . . . . . . . . . . . . . . . . . . . . . . . . . . . . . . . . . . . . . . . . . . . . . . . . . .. . . . . . .283
Testing Once More.. . . . . . . . . . . . . . . . . . . . . . . . . . . . . . . . . . . . . . . . . . . . . . . . . . . . . . . . . . . . . . . . . . . . . . . . . . . . . . . . . . . . . . . . . . . . . . . . . . .284Performing the Move to Production.. . . . . . . . . . . . . . . . . . . . . . . . . . . . . . . . . . . . . . . . . . . . . . . . . . . . . . . . . . . . . . . . . . . . . . . . . . . . . . . .284Completing the Upgrade Survey .. . . . . . . . . . . . . . . . . . . . . . . . . . . . . . . . . . . . . . . . . . . . . . . . . . . . . . . . . . . . . . . . . . . . . . . . . . . . . . . . . . .284
Chapter 7Appendices.... . . . . . . . . . . . . . . . . . . . . . . . . . . . . . . . . . . . . . . . . . . . . . . . . . . . . . . . . . . . . . . . . . . . . . . . . . . . . . . . . . . . . . . . . . . . . . . . .287Understanding Appendices.. . . . . . . . . . . . . . . . . . . . . . . . . . . . . . . . . . . . . . . . . . . . . . . . . . . . . . . . . . . . . . . . . . . . . . . . . . . . . . . . . . . . . . . . .287
Appendix AApplying Fixes Required for Upgrade..... . . . . . . . . . . . . . . . . . . . . . . . . . . . . . . . . . . . . . . . . . . . . . . . . . . . . . . . . . . . . . .289Preparing to Apply Fixes.. . . . . . . . . . . . . . . . . . . . . . . . . . . . . . . . . . . . . . . . . . . . . . . . . . . . . . . . . . . . . . . . . . . . . . . . . . . . . . . . . . . . . . . . . . . .289Applying Fixes During Installation.. . . . . . . . . . . . . . . . . . . . . . . . . . . . . . . . . . . . . . . . . . . . . . . . . . . . . . . . . . . . . . . . . . . . . . . . . . . . . . . . . .290Applying Fixes After Copying Project. . . . . . . . . . . . . . . . . . . . . . . . . . . . . . . . . . . . . . . . . . . . . . . . . . . . . . . . . . . . . . . . . . . . . . . . . . . . . . .290Applying Fixes After Data Conversion.. . . . . . . . . . . . . . . . . . . . . . . . . . . . . . . . . . . . . . . . . . . . . . . . . . . . . . . . . . . . . . . . . . . . . . . . . . . . .291Applying Fixes Between Upgrade Passes.. . . . . . . . . . . . . . . . . . . . . . . . . . . . . . . . . . . . . . . . . . . . . . . . . . . . . . . . . . . . . . . . . . . . . . . .291Applying Fixes in Move to Production.. . . . . . . . . . . . . . . . . . . . . . . . . . . . . . . . . . . . . . . . . . . . . . . . . . . . . . . . . . . . . . . . . . . . . . . . . . . . .292
Appendix BChanging the User Interface.... . . . . . . . . . . . . . . . . . . . . . . . . . . . . . . . . . . . . . . . . . . . . . . . . . . . . . . . . . . . . . . . . . . . . . . . . . . .293Change the User Interface.. . . . . . . . . . . . . . . . . . . . . . . . . . . . . . . . . . . . . . . . . . . . . . . . . . . . . . . . . . . . . . . . . . . . . . . . . . . . . . . . . . . . . . . . . .293Change the User Interface for Mobile.. . . . . . . . . . . . . . . . . . . . . . . . . . . . . . . . . . . . . . . . . . . . . . . . . . . . . . . . . . . . . . . . . . . . . . . . . . . . . .295
Copyright © 2007, Oracle. All rights reserved. xix

Contents
Appendix CImproving Performance... . . . . . . . . . . . . . . . . . . . . . . . . . . . . . . . . . . . . . . . . . . . . . . . . . . . . . . . . . . . . . . . . . . . . . . . . . . . . . . . . .297Understanding Performance Improvement. . . . . . . . . . . . . . . . . . . . . . . . . . . . . . . . . . . . . . . . . . . . . . . . . . . . . . . . . . . . . . . . . . . . . . . .297Planning Your Upgrade for Performance.. . . . . . . . . . . . . . . . . . . . . . . . . . . . . . . . . . . . . . . . . . . . . . . . . . . . . . . . . . . . . . . . . . . . . . . . . .297Performing the Upgrade.. . . . . . . . . . . . . . . . . . . . . . . . . . . . . . . . . . . . . . . . . . . . . . . . . . . . . . . . . . . . . . . . . . . . . . . . . . . . . . . . . . . . . . . . . . . . .298
Verifying the Database Structure Task... . . . . . . . . . . . . . . . . . . . . . . . . . . . . . . . . . . . . . . . . . . . . . . . . . . . . . . . . . . . . . . . .. . . . . . .298Creating and Altering SQL Scripts.. . . . . . . . . . . . . . . . . . . . . . . . . . . . . . . . . . . . . . . . . . . . . . . . . . . . . . . . . . . . . . . . . . . . . .. . . . . . .298Performing Data Conversion.. . . . . . . . . . . . . . . . . . . . . . . . . . . . . . . . . . . . . . . . . . . . . . . . . . . . . . . . . . . . . . . . . . . . . . . . . . . . .. . . . . . .298
Improving Performance for Your Platform... . . . . . . . . . . . . . . . . . . . . . . . . . . . . . . . . . . . . . . . . . . . . . . . . . . . . . . . . . . . . . . . . . . . . . . .298Using Oracle.. . . . . . . . . . . . . . . . . . . . . . . . . . . . . . . . . . . . . . . . . . . . . . . . . . . . . . . . . . . . . . . . . . . . . . . . . . . . . . . . . . . . . . . . . . . . . . .. . . . . . .299Using DB2... . . . . . . . . . . . . . . . . . . . . . . . . . . . . . . . . . . . . . . . . . . . . . . . . . . . . . . . . . . . . . . . . . . . . . . . . . . . . . . . . . . . . . . . . . . . . . . . .. . . . . . .299
Consulting the Global Support Center. . . . . . . . . . . . . . . . . . . . . . . . . . . . . . . . . . . . . . . . . . . . . . . . . . . . . . . . . . . . . . . . . . . . . . . . . . . . . .300
Appendix DPlanning for Upgrade Testing.... . . . . . . . . . . . . . . . .. . . . . . . . . . . . . . . . . . . . .. . . . . . . . . . . . . . . . . . . . . .. . . . . . . . . . . . . .301Understanding Testing Techniques.. . . . . . . . . . . . . . . . . . . . . . . . . . . . . . . . . . . . . . . . . . . . . . . . . . . . . . . . . . . . . . . . . . . . . . . . . . . . . . . . .301Deciding When to Test. . . . . . . . . . . . . . . . . . . . . . . . . . . . . . . . . . . . . . . . . . . . . . . . . . . . . . . . . . . . . . . . . . . . . . . . . . . . . . . . . . . . . . . . . . . . . . . .301Evaluating Your Testing Requirements.. . . . . . . . . . . . . . . . . . . . . . . . . . . . . . . . . . . . . . . . . . . . . . . . . . . . . . . . . . . . . . . . . . . . . . . . . . . .302Defining Your Testing Strategy.. . . . . . . . . . . . . . . . . . . . . . . . . . . . . . . . . . . . . . . . . . . . . . . . . . . . . . . . . . . . . . . . . . . . . . . . . . . . . . . . . . . . . .302
Understanding Your Testing Strategy.. . . . . . . . . . . . . . . . . . . . . . . . . . . . . . . . . . . . . . . . . . . . . . . . . . . . . . . . . . . . . . . . . . .. . . . . . .302Evaluating Unit Testing .. . . . . . . . . . . . . . . . . . . . . . . . . . . . . . . . . . . . . . . . . . . . . . . . . . . . . . . . . . . . . . . . . . . . . . . . . . . . . . . . . . .. . . . . . .303Evaluating System Testing.. . . . . . . . . . . . . . . . . . . . . . . . . . . . . . . . . . . . . . . . . . . . . . . . . . . . . . . . . . . . . . . . . . . . . . . . . . . . . . .. . . . . . .303Evaluating Integration Testing... . . . . . . . . . . . . . . . . . . . . . . . . . . . . . . . . . . . . . . . . . . . . . . . . . . . . . . . . . . . . . . . . . . . . . . . . . .. . . . . . .303Evaluating Parallel Testing.. . . . . . . . . . . . . . . . . . . . . . . . . . . . . . . . . . . . . . . . . . . . . . . . . . . . . . . . . . . . . . . . . . . . . . . . . . . . . . .. . . . . . .304Evaluating Performance Testing.. . . . . . . . . . . . . . . . . . . . . . . . . . . . . . . . . . . . . . . . . . . . . . . . . . . . . . . . . . . . . . . . . . . . . . . . .. . . . . . .304Evaluating User Acceptance Testing.. . . . . . . . . . . . . . . . . . . . . . . . . . . . . . . . . . . . . . . . . . . . . . . . . . . . . . . . . . . . . . . . . . . .. . . . . . .304Evaluating Regression Testing.. . . . . . . . . . . . . . . . . . . . . . . . . . . . . . . . . . . . . . . . . . . . . . . . . . . . . . . . . . . . . . . . . . . . . . . . . . .. . . . . . .305
Determining the Testing Conditions.. . . . . . . . . . . . . . . . . . . . . . . . . . . . . . . . . . . . . . . . . . . . . . . . . . . . . . . . . . . . . . . . . . . . . . . . . . . . . . . .305Developing Your Test Plan.. . . . . . . . . . . . . . . . . . . . . . . . . . . . . . . . . . . . . . . . . . . . . . . . . . . . . . . . . . . . . . . . . . . . . . . . . . . . . . . . . . . . . . . . . .305Developing Test Scripts.. . . . . . . . . . . . . . . . . . . . . . . . . . . . . . . . . . . . . . . . . . . . . . . . . . . . . . . . . . . . . . . . . . . . . . . . . . . . . . . . . . . . . . . . . . . . . .306Reviewing Tips and Techniques.. . . . . . . . . . . . . . . . . . . . . . . . . . . . . . . . . . . . . . . . . . . . . . . . . . . . . . . . . . . . . . . . . . . . . . . . . . . . . . . . . . . .307
Reducing the Time of Upgrade Process.. . . . . . . . . . . . . . . . . . . . . . . . . . . . . . . . . . . . . . . . . . . . . . . . . . . . . . . . . . . . . . . .. . . . . . .307Performing Security Testing.. . . . . . . . . . . . . . . . . . . . . . . . . . . . . . . . . . . . . . . . . . . . . . . . . . . . . . . . . . . . . . . . . . . . . . . . . . . . . .. . . . . . .308Performing Testing on Up to Date Data.. . . . . . . . . . . . . . . . . . . . . . . . . . . . . . . . . . . . . . . . . . . . . . . . . . . . . . . . . . . . . . . . .. . . . . . .308Performing Test Move to Production.. . . . . . . . . . . . . . . . . . . . . . . . . . . . . . . . . . . . . . . . . . . . . . . . . . . . . . . . . . . . . . . . . . . .. . . . . . .308Tracking Issues.. . . . . . . . . . . . . . . . . . . . . . . . . . . . . . . . . . . . . . . . . . . . . . . . . . . . . . . . . . . . . . . . . . . . . . . . . . . . . . . . . . . . . . . . . . . .. . . . . . .308Reviewing Testing Tools.. . . . . . . . . . . . . . . . . . . . . . . . . . . . . . . . . . . . . . . . . . . . . . . . . . . . . . . . . . . . . . . . . . . . . . . . . . . . . . . . . .. . . . . . .308Discussing Change Control. . . . . . . . . . . . . . . . . . . . . . . . . . . . . . . . . . . . . . . . . . . . . . . . . . . . . . . . . . . . . . . . . . . . . . . . . . . . . . .. . . . . . .309Discussing Back Up Procedures.. . . . . . . . . . . . . . . . . . . . . . . . . . . . . . . . . . . . . . . . . . . . . . . . . . . . . . . . . . . . . . . . . . . . . . . .. . . . . . .309
xx Copyright © 2007, Oracle. All rights reserved.

Contents
Evaluating Unexpected Results. . . . . . . . . . . . . . . . . . . . . . . . . . . . . . . . . . . . . . . . . . . . . . . . . . . . . . . . . . . . . . . . . . . . . . . . . .. . . . . . .309Evaluating Reasons for Failure.. . . . . . . . . . . . . . . . . . . . . . . . . . . . . . . . . . . . . . . . . . . . . . . . . . . . . . . . . . . . . . . . . . . . . . . . . .. . . . . . .309
Appendix EPreserving Queries and Tree Objects... . . . . . . . . . . . . . . . .. . . . . . . . . . . . . . . . . . . . . . . . . . . . . . . . . . . . . . . . . . . . . . . .311Understanding Preserve Queries and Trees.. . . . . . . . . . . . . . . . . . . . . . . . . . . . . . . . . . . . . . . . . . . . . . . . . . . . . . . . . . . . . . . . . . . . . .311Preparing the Database.. . . . . . . . . . . . . . . . . . . . . . . . . . . . . . . . . . . . . . . . . . . . . . . . . . . . . . . . . . . . . . . . . . . . . . . . . . . . . . . . . . . . . . . . . . . . .312Creating a New Project. . . . . . . . . . . . . . . . . . . . . . . . . . . . . . . . . . . . . . . . . . . . . . . . . . . . . . . . . . . . . . . . . . . . . . . . . . . . . . . . . . . . . . . . . . . . . . .312Comparing the New Project.. . . . . . . . . . . . . . . . . . . . . . . . . . . . . . . . . . . . . . . . . . . . . . . . . . . . . . . . . . . . . . . . . . . . . . . . . . . . . . . . . . . . . . . . .313Copying the Project. . . . . . . . . . . . . . . . . . . . . . . . . . . . . . . . . . . . . . . . . . . . . . . . . . . . . . . . . . . . . . . . . . . . . . . . . . . . . . . . . . . . . . . . . . . . . . . . . . .314Testing the Project. . . . . . . . . . . . . . . . . . . . . . . . . . . . . . . . . . . . . . . . . . . . . . . . . . . . . . . . . . . . . . . . . . . . . . . . . . . . . . . . . . . . . . . . . . . . . . . . . . . . .314ReExporting the PeopleTools Tables.. . . . . . . . . . . . . . . . . . . . . . . . . . . . . . . . . . . . . . . . . . . . . . . . . . . . . . . . . . . . . . . . . . . . . . . . . . . . . .314
Appendix FReviewing Batch Program Changes.... . . . . . . . . . . . . . .. . . . . . . . . . . . . .. . . . . . . . . . . . .. . . . . . . . . . . . .. . . . . . . . . . .317Reviewing Batch Program Changes.. . . . . . . . . . . . . . . . . . . . . . . . . . . . . . . . . . . . . . . . . . . . . . . . . . . . . . . . . . . . . . . . . . . . . . . . . . . . . . .317
Appendix GReviewing Benefits Changes.... .. . . . . . . . . . . . . . . . . . . . . . . . . . . . . . . . . . . . . . . . . . . . . . . . . . . . . . . . . . . . . . . . . . . . . . . . .319Reviewing Benefit System Indicator on Job.. . . . . . . . . . . . . . . . . . . . . . . . . . . . . . . . . . . . . . . . . . . . . . . . . . . . . . . . . . . . . . . . . . . . . .319Reviewing Benefit Record Number Display.. . . . . . . . . . . . . . . . . . . . . . . . . . . . . . . . . . . . . . . . . . . . . . . . . . . . . . . . . . . . . . . . . . . . . . .320Reviewing Effective Dating of Dependents. . . . . . . . . . . . . . . . . . . . . . . . . . . . . . . . . . . . . . . . . . . . . . . . . . . . . . . . . . . . . . . . . . . . . . . .320Reviewing Effective Dating of Company Cars.. . . . . . . . . . . . . . . . . . . . . . . . . . . . . . . . . . . . . . . . . . . . . . . . . . . . . . . . . . . . . . . . . . . .320Reviewing Savings Management Enhancements.. . . . . . . . . . . . . . . . . . . . . . . . . . . . . . . . . . . . . . . . . . . . . . . . . . . . . . . . . . . . . . . .321Understanding Benefit Program Enhancement.. . . . . . . . . . . . . . . . . . . . . . . . . . . . . . . . . . . . . . . . . . . . . . . . . . . . . . . . . . . . . . . . . . .321Reviewing Changes to Relationship Usage.. . . . . . . . . . . . . . . . . . . . . . . . . . . . . . . . . . . . . . . . . . . . . . . . . . . . . . . . . . . . . . . . . . . . . . .321
Understanding Changes to Relationship Usage.. . . . . . . . . . . . . . . . . . . . . . . . . . . . . . . . . . . . . . . . . . . . . . . . . . . . . . .. . . . . . .321Reviewing Cobra Event Rules.. . . . . . . . . . . . . . . . . . . . . . . . . . . . . . . . . . . . . . . . . . . . . . . . . . . . . . . . . . . . . . . . . . . . . . . . . . .. . . . . . .322Reviewing Dependent Relationship Rules. . . . . . . . . . . . . . . . . . . . . . . . . . . . . . . . . . . . . . . . . . . . . . . . . . . . . . . . . . . . . .. . . . . . .322Reviewing HIPAA Changes.. . . . . . . . . . . . . . . . . . . . . . . . . . . . . . . . . . . . . . . . . . . . . . . . . . . . . . . . . . . . . . . . . . . . . . . . . . . . . .. . . . . . .322
Reviewing Spending Account Changes.. . . . . . . . . . . . . . . . . . . . . . . . . . . . . . . . . . . . . . . . . . . . . . . . . . . . . . . . . . . . . . . . . . . . . . . . . . .322Understanding Spending Account Setup.. . . . . . . . . . . . . . . . . . . . . . . . . . . . . . . . . . . . . . . . . . . . . . . . . . . . . . . . . . . . . . .. . . . . . .322Reviewing Changes to Spending Account Pledge Limits. . . . . . . . . . . . . . . . . . . . . . . . . . . . . . . . . . . . . . . . . . . . .. . . . . . .323Reviewing FSA Claims Processing Setup .. . . . . . . . . . . . . . . . . . . . . . . . . . . . . . . . . . . . . . . . . . . . . . . . . . . . . . . . . . . . .. . . . . . .323
Reviewing Consolidation of Benefit Rates.. . . . . . . . . . . . . . . . . . . . . . . . . . . . . . . . . . . . . . . . . . . . . . . . . . . . . . . . . . . . . . . . . . . . . . . .324Reviewing Consolidation of Coverage Calculations.. . . . . . . . . . . . . . . . . . . . . . . . . . . . . . . . . . . . . . . . . . . . . . . . . . . . . . . . . . . . .325
Copyright © 2007, Oracle. All rights reserved. xxi

Contents
Appendix HReviewing HRMS Changes... . . . . . . . . . . . . . . . . . . . . . . . . . . . . . . . . . . . . . . . . . . . . . . . . . . . . . . . . . . . . . . . . . . . . . . . . . . . . .327Reviewing Record and Field Conversions.. . . . . . . . . . . . . . . . . . . . . . . . . . . . . . . . . . . . . . . . . . . . . . . . . . . . . . . . . . . . . . . . . . . . . . . .327
Understanding Record and Field Conversions.. . . . . . . . . . . . . . . . . . . . . . . . . . . . . . . . . . . . . . . . . . . . . . . . . . . . . . . .. . . . . . .327Status Conversions.. . . . . . . . . . . . . . . . . . . . . . . . . . . . . . . . . . . . . . . . . . . . . . . . . . . . . . . . . . . . . . . . . . . . . . . . . . . . . . . . . . . . . . . .. . . . . . .327Reviewing Profile Management Table Deletions.. . . . . . . . . . . . . . . . . . . . . . . . . . . . . . . . . . . . . . . . . . . . . . . . . . . . . .. . . . . . .328
Reviewing Records with Duplicate Key Structures.. . . . . . . . . . . . . . . . . . . . . . . . . . . . . . . . . . . . . . . . . . . . . . . . . . . . . . . . . . . . . .328Reviewing the National ID Expiration Record.. . . . . . . . . . . . . . . . . . . . . . . . . . . . . . . . . . . . . . . . . . . . . . . . . . . . . . . . . . . . . . . . . . . .329Reviewing Schedule Defaults. . . . . . . . . . . . . . . . . . . . . . . . . . . . . . . . . . . . . . . . . . . . . . . . . . . . . . . . . . . . . . . . . . . . . . . . . . . . . . . . . . . . . . . .329
Reviewing Shift and Workdays Upgrade.. . . . . . . . . . . . . . . . . . . . . . . . . . . . . . . . . . . . . . . . . . . . . . . . . . . . . . . . . . . . . . .. . . . . . .329Determining the Effective Date of Schedule Definitions.. . . . . . . . . . . . . . . . . . . . . . . . . . . . . . . . . . . . . . . . . . . . . .. . . . . . .330Reviewing Schedule Override Tables.. . . . . . . . . . . . . . . . . . . . . . . . . . . . . . . . . . . . . . . . . . . . . . . . . . . . . . . . . . . . . . . . . . .. . . . . . .330
Appendix IReviewing Tablespaces... ... . . . . . . . . . . . . . . . . . . . . . . . . . . . . . . . . . . . . . . . . . . . . . . . . . . . . . . . . . . . . . . . . . . . . . . . . . . . . . . .333Understanding Tablespace Review... . . . . . . . . . . . . . . . . . . . . . . . . . . . . . . . . . . . . . . . . . . . . . . . . . . . . . . . . . . . . . . . . . . . . . . . . . . . . . .333Reviewing PeopleSoft 8.8x Table Names... . . . . . . . . . . . . . . . . . . . . . . . . . . . . . . . . . . . . . . . . . . . . . . . . . . . . . . . . . . . . . . . . . . . . . . .333
Appendix JSizing Tables for the Upgrade.... ... . . . . . . . . . . . . . . . . . . . . . . . . . . . . . . . . . . . . . . . . . . . . . . . . . . . . . . . . . . . . . . . . . . . . . .335Sizing Tables.. . . . . . . . . . . . . . . . . . . . . . . . . . . . . . . . . . . . . . . . . . . . . . . . . . . . . . . . . . . . . . . . . . . . . . . . . . . . . . . . . . . . . . . . . . . . . . . . . . . . . . . . . .335
Appendix KUnderstanding Dynamic ChartFields Changes... . . . . . . . . . . . . . . . . . . . . . . . . . . . . . . . . . . . . . . . . . . . . . . . . . . . .349Understanding Dynamic ChartFields Upgrade.. . . . . . . . . . . . . . . . . . . . . . . . . . . . . . . . . . . . . . . . . . . . . . . . . . . . . . . . . . . . . . . . . . .349Understanding Changes in the Account Code Table.. . . . . . . . . . . . . . . . . . . . . . . . . . . . . . . . . . . . . . . . . . . . . . . . . . . . . . . . . . . .349
Understanding Combination Codes.. . . . . . . . . . . . . . . . . . . . . . . . . . . . . . . . . . . . . . . . . . . . . . . . . . . . . . . . . . . . . . . . . . . . .. . . . . . .349Understanding FDM_HASH... . . . . . . . . . . . . . . . . . . . . . . . . . . . . . . . . . . . . . . . . . . . . . . . . . . . . . . . . . . . . . . . . . . . . . . . . . . . .. . . . . . .350
Understanding Changes in GL Interface Setup.. . . . . . . . . . . . . . . . . . . . . . . . . . . . . . . . . . . . . . . . . . . . . . . . . . . . . . . . . . . . . . . . . .351Understanding GL Interface Setup.. . . . . . . . . . . . . . . . . . . . . . . . . . . . . . . . . . . . . . . . . . . . . . . . . . . . . . . . . . . . . . . . . . . . . .. . . . . . .352Understanding Liability Accounts.. . . . . . . . . . . . . . . . . . . . . . . . . . . . . . . . . . . . . . . . . . . . . . . . . . . . . . . . . . . . . . . . . . . . . . . .. . . . . . .352Understanding GL Activity Grouping.. . . . . . . . . . . . . . . . . . . . . . . . . . . . . . . . . . . . . . . . . . . . . . . . . . . . . . . . . . . . . . . . . . . .. . . . . . .355Understanding Expenses ChartField Mapping.. . . . . . . . . . . . . . . . . . . . . . . . . . . . . . . . . . . . . . . . . . . . . . . . . . . . . . . .. . . . . . .360
Upgrading Time and Labor ChartFields. . . . . . . . . . . . . . . . . . . . . . . . . . . . . . . . . . . . . . . . . . . . . . . . . . . . . . . . . . . . . . . . . . . . . . . . . . . .365
xxii Copyright © 2007, Oracle. All rights reserved.

Contents
Appendix LUnderstanding Garnishments Changes... . . . . . . . . . . . . . . . . . . . . . . . . . . . . . . . . . . . . . . . . . . . . . . . . . . . . . . . . . . . . .367Understanding Garnishments Upgrade.. .. . . . . . . . . . . . . . . . . . . . . . . . . . . . . . . . . . . . . . . . . . . . . . . . . . . . . . . . . . . . . . . . . . . . . . . . . .367Understanding Payee Changes.. . . . . . . . . . . . . . . . . . . . . . . . . . . . . . . . . . . . . . . . . . . . . . . . . . . . . . . . . . . . . . . . . . . . . . . . . . . . . . . . . . . .367
Understanding Changes to Payee Data.. . . . . . . . . . . . . . . . . . . . . . . . . . . . . . . . . . . . . . . . . . . . . . . . . . . . . . . . . . . . . . . .. . . . . . .368Updating Payee Data During the Initial Pass.. . . . . . . . . . . . . . . . . . . . . . . . . . . . . . . . . . . . . . . . . . . . . . . . . . . . . . . . . .. . . . . . .368Updating Payee Data During Move to Production.. . . . . . . . . . . . . . . . . . . . . . . . . . . . . . . . . . . . . . . . . . . . . . . . . . . . .. . . . . . .369
Understanding Rules Changes.. . . . . . . . . . . . . . . . . . . . . . . . . . . . . . . . . . . . . . . . . . . . . . . . . . . . . . . . . . . . . . . . . . . . . . . . . . . . . . . . . . . . .369Understanding Changes to Garnishment Rules.. . . . . . . . . . . . . . . . . . . . . . . . . . . . . . . . . . . . . . . . . . . . . . . . . . . . . . .. . . . . . .370Updating Rules During the Initial Pass.. . . . . . . . . . . . . . . . . . . . . . . . . . . . . . . . . . . . . . . . . . . . . . . . . . . . . . . . . . . . . . . . .. . . . . . .370Updating Rules During Move to Production.. . . . . . . . . . . . . . . . . . . . . . . . . . . . . . . . . . . . . . . . . . . . . . . . . . . . . . . . . . . .. . . . . . .371
Appendix MUnderstanding Person Model Changes..... . . . . . . . . . . . . . . . . . . . . . . . . . . . . . . . . . . . . . . . . . . . . . . . . . . . . . . . . . . . .373Understanding Changes.. . . . . . . . . . . . . . . . . . . . . . . . . . . . . . . . . . . . . . . . . . . . . . . . . . . . . . . . . . . . . . . . . . . . . . . . . . . . . . . . . . . . . . . . . . . . .373Understanding Entity Relationships.. . . . . . . . . . . . . . . . . . . . . . . . . . . . . . . . . . . . . . . . . . . . . . . . . . . . . . . . . . . . . . . . . . . . . . . . . . . . . . . .374
Understanding PeopleSoft 8.0 Entity Relationships. . . . . . . . . . . . . . . . . . . . . . . . . . . . . . . . . . . . . . . . . . . . . . . . . . .. . . . . . .374Understanding PeopleSoft 8.8 Entity Relationships. . . . . . . . . . . . . . . . . . . . . . . . . . . . . . . . . . . . . . . . . . . . . . . . . . .. . . . . . .375Understanding PeopleSoft New Release Entity Relationships.. . . . . . . . . . . . . . . . . . . . . . . . . . . . . . . . . . . . . .. . . . . . .376
Understanding Record and Table Changes.. . . . . . . . . . . . . . . . . . . . . . . . . . . . . . . . . . . . . . . . . . . . . . . . . . . . . . . . . . . . . . . . . . . . . . .380Understanding Record Changes.. . . . . . . . . . . . . . . . . . . . . . . . . . . . . . . . . . . . . . . . . . . . . . . . . . . . . . . . . . . . . . . . . . . . . . . .. . . . . . .380Understanding Table Changes.. . . . . . . . . . . . . . . . . . . . . . . . . . . . . . . . . . . . . . . . . . . . . . . . . . . . . . . . . . . . . . . . . . . . . . . . . . .. . . . . . .396
Appendix NUpgrading Front Office and PayBill... . . . . . . . . . . . . . . . . . . . . . . . . . . . . . . . . . . . . . . . . . . . . . . . . . . . . . . . . . . . . . . . . . . .401Understanding Front Office and PayBill. . . . . . . . . . . . . . . . . . . . . . . . . . . . . . . . . . . . . . . . . . . . . . . . . . . . . . . . . . . . . . . . . . . . . . . . . . . .401Reviewing the FSCM and HRMS Upgrade.. . . . . . . . . . . . . . . . . . . . . . . . . . . . . . . . . . . . . . . . . . . . . . . . . . . . . . . . . . . . . . . . . . . . . . .402Reviewing the Front Office FSCM PayBill Upgrade.. . . . . . . . . . . . . . . . . . . . . . . . . . . . . . . . . . . . . . . . . . . . . . . . . . . . . . . . . . . . .402
Appendix OUpgrading System Element Deletions.. . . . . . . . . . . . . . . . . . . . . . . . . . . . . . . . . . . . . . . . . . . . . . . . . . . . . . . . . . . . . . . . .403Retaining System Element Functionality. . . . . . . . . . . . . . . . . . . . . . . . . . . . . . . . . . . . . . . . . . . . . . . . . . . . . . . . . . . . . . . . . . . . . . . . . . .403
Understanding System Element Functionality Retention.. . . . . . . . . . . . . . . . . . . . . . . . . . . . . . . . . . . . . . . . . . . . .. . . . . . .403Defining a Variable.. . . . . . . . . . . . . . . . . . . . . . . . . . . . . . . . . . . . . . . . . . . . . . . . . . . . . . . . . . . . . . . . . . . . . . . . . . . . . . . . . . . . . . . .. . . . . . .403Defining an Array.. . . . . . . . . . . . . . . . . . . . . . . . . . . . . . . . . . . . . . . . . . . . . . . . . . . . . . . . . . . . . . . . . . . . . . . . . . . . . . . . . . . . . . . . . .. . . . . . .405
Changing References to System Elements .. . . . . . . . . . . . . . . . . . . . . . . . . . . . . . . . . . . . . . . . . . . . . . . . . . . . . . . . . . . . . . . . . . . . . .409Changing Rule Definitions.. . . . . . . . . . . . . . . . . . . . . . . . . . . . . . . . . . . . . . . . . . . . . . . . . . . . . . . . . . . . . . . . . . . . . . . . . . . . . . . .. . . . . . .409
Copyright © 2007, Oracle. All rights reserved. xxiii

Contents
Verifying Non-Rule Definitions.. . . . . . . . . . . . . . . . . . . . . . . . . . . . . . . . . . . . . . . . . . . . . . . . . . . . . . . . . . . . . . . . . . . . . . . . . . .. . . . . . .410Reviewing Record Field Usage.. . . . . . . . . . . . . . . . . . . . . . . . . . . . . . . . . . . . . . . . . . . . . . . . . . . . . . . . . . . . . . . . . . . . . . . . . .. . . . . . .412Changing Array Definitions.. . . . . . . . . . . . . . . . . . . . . . . . . . . . . . . . . . . . . . . . . . . . . . . . . . . . . . . . . . . . . . . . . . . . . . . . . . . . . . .. . . . . . .413Changing Trigger Definitions... . . . . . . . . . . . . . . . . . . . . . . . . . . . . . . . . . . . . . . . . . . . . . . . . . . . . . . . . . . . . . . . . . . . . . . . . . . .. . . . . . .414
Appendix PUpgrading the Content Provider Registry.... . . . . . . . . . . . . . . . . . . . . . . . . . . . . . . . . . . . . . . . . . . . . . . . . . . . . . . . . . .415Understanding the Content Provider Registry Upgrade.. . . . . . . . . . . . . . . . . . . . . . . . . . . . . . . . . . . . . . . . . . . . . . . . . . . . . . . . .415Copying Your Enterprise Portal Database.. . . . . . . . . . . . . . . . . . . . . . . . . . . . . . . . . . . . . . . . . . . . . . . . . . . . . . . . . . . . . . . . . . . . . . . .417Upgrading Enterprise Portal PeopleTools.. . . . . . . . . . . . . . . . . . . . . . . . . . . . . . . . . . . . . . . . . . . . . . . . . . . . . . . . . . . . . . . . . . . . . . . . .417Updating Registry Permission Lists.. . . . . . . . . . . . . . . . . . . . . . . . . . . . . . . . . . . . . . . . . . . . . . . . . . . . . . . . . . . . . . . . . . . . . . . . . . . . . . . .417
Understanding Registry Permission Lists Updates.. . . . . . . . . . . . . . . . . . . . . . . . . . . . . . . . . . . . . . . . . . . . . . . . . . .. . . . . . .417Updating Portal Registry.. . . . . . . . . . . . . . . . . . . . . . . . . . . . . . . . . . . . . . . . . . . . . . . . . . . . . . . . . . . . . . . . . . . . . . . . . . . . . . . . . .. . . . . . .418Deleting the Database Cache... . . . . . . . . . . . . . . . . . . . . . . . . . . . . . . . . . . . . . . . . . . . . . . . . . . . . . . . . . . . . . . . . . . . . . . . . . .. . . . . . .418
Creating the Portal Project. . . . . . . . . . . . . . . . . . . . . . . . . . . . . . . . . . . . . . . . . . . . . . . . . . . . . . . . . . . . . . . . . . . . . . . . . . . . . . . . . . . . . . . . . . .418Understanding Portal Project Creation.. . . . . . . . . . . . . . . . . . . . . . . . . . . . . . . . . . . . . . . . . . . . . . . . . . . . . . . . . . . . . . . . .. . . . . . .419Creating the Target Enterprise Portal Project. . . . . . . . . . . . . . . . . . . . . . . . . . . . . . . . . . . . . . . . . . . . . . . . . . . . . . . . . . .. . . . . . .419Cleaning the Target Enterprise Portal Project. . . . . . . . . . . . . . . . . . . . . . . . . . . . . . . . . . . . . . . . . . . . . . . . . . . . . . . . . .. . . . . . .420Deleting the Target Enterprise Portal Database Cache.. . . . . . . . . . . . . . . . . . . . . . . . . . . . . . . . . . . . . . . . . . . . . .. . . . . . .420Copying the Target Enterprise Portal Project Definition.. . . . . . . . . . . . . . . . . . . . . . . . . . . . . . . . . . . . . . . . . . . . . .. . . . . . .421Creating the Copy of Production Portal Project.. . . . . . . . . . . . . . . . . . . . . . . . . . . . . . . . . . . . . . . . . . . . . . . . . . . . . . . .. . . . . . .421Cleaning the Copy of Production Portal Project. . . . . . . . . . . . . . . . . . . . . . . . . . . . . . . . . . . . . . . . . . . . . . . . . . . . . . . .. . . . . . .424Deleting the Copy of Production Database Cache.. . . . . . . . . . . . . . . . . . . . . . . . . . . . . . . . . . . . . . . . . . . . . . . . . . . .. . . . . . .424
Comparing the Portal Project. . . . . . . . . . . . . . . . . . . . . . . . . . . . . . . . . . . . . . . . . . . . . . . . . . . . . . . . . . . . . . . . . . . . . . . . . . . . . . . . . . . . . . . .424Reviewing the Portal Project. . . . . . . . . . . . . . . . . . . . . . . . . . . . . . . . . . . . . . . . . . . . . . . . . . . . . . . . . . . . . . . . . . . . . . . . . . . . . . . . . . . . . . . . .425Copying the Portal Project. . . . . . . . . . . . . . . . . . . . . . . . . . . . . . . . . . . . . . . . . . . . . . . . . . . . . . . . . . . . . . . . . . . . . . . . . . . . . . . . . . . . . . . . . . .425
Understanding Portal Project Copying.. . . . . . . . . . . . . . . . . . . . . . . . . . . . . . . . . . . . . . . . . . . . . . . . . . . . . . . . . . . . . . . . . .. . . . . . .425Copying the Portal Project.. . . . . . . . . . . . . . . . . . . . . . . . . . . . . . . . . . . . . . . . . . . . . . . . . . . . . . . . . . . . . . . . . . . . . . . . . . . . . . . .. . . . . . .426Deleting the Enterprise Portal Database Cache.. . . . . . . . . . . . . . . . . . . . . . . . . . . . . . . . . . . . . . . . . . . . . . . . . . . . . . .. . . . . . .426
Copying Portal Project to Production.. . . . . . . . . . . . . . . . . . . . . . . . . . . . . . . . . . . . . . . . . . . . . . . . . . . . . . . . . . . . . . . . . . . . . . . . . . . . . .426Understanding Portal Project to Production Copying.. . . . . . . . . . . . . . . . . . . . . . . . . . . . . . . . . . . . . . . . . . . . . . . . .. . . . . . .427Copying the Portal Project to File.. . . . . . . . . . . . . . . . . . . . . . . . . . . . . . . . . . . . . . . . . . . . . . . . . . . . . . . . . . . . . . . . . . . . . . .. . . . . . .427Copying the Portal Project from File. . . . . . . . . . . . . . . . . . . . . . . . . . . . . . . . . . . . . . . . . . . . . . . . . . . . . . . . . . . . . . . . . . . . .. . . . . . .427Deleting the Enterprise Portal Database Cache Again. . . . . . . . . . . . . . . . . . . . . . . . . . . . . . . . . . . . . . . . . . . . . . . .. . . . . . .428
Deleting Obsolete Folders.. . . . . . . . . . . . . . . . . . . . . . . . . . . . . . . . . . . . . . . . . . . . . . . . . . . . . . . . . . . . . . . . . . . . . . . . . . . . . . . . . . . . . . . . . . .428Understanding Obsolete Folder Deletion.. . . . . . . . . . . . . . . . . . . . . . . . . . . . . . . . . . . . . . . . . . . . . . . . . . . . . . . . . . . . . . .. . . . . . .428Deleting Obsolete Folders on Enterprise Portal 8.4.. . . . . . . . . . . . . . . . . . . . . . . . . . . . . . . . . . . . . . . . . . . . . . . . . . .. . . . . . .428Deleting Obsolete Folders on Enterprise Portal 8.8.. . . . . . . . . . . . . . . . . . . . . . . . . . . . . . . . . . . . . . . . . . . . . . . . . . .. . . . . . .429
Updating Registry Folder Permissions.. . . . . . . . . . . . . . . . . . . . . . . . . . . . . . . . . . . . . . . . . . . . . . . . . . . . . . . . . . . . . . . . . . . . . . . . . . . .429
xxiv Copyright © 2007, Oracle. All rights reserved.

Contents
Understanding Registry Folder Permissions Updates.. . . . . . . . . . . . . . . . . . . . . . . . . . . . . . . . . . . . . . . . . . . . . . . .. . . . . . .429Updating the Enterprise Portal Registry Folder Permissions.. . . . . . . . . . . . . . . . . . . . . . . . . . . . . . . . . . . . . . . .. . . . . . .429Deleting the Enterprise Portal Cache.. . . . . . . . . . . . . . . . . . . . . . . . . . . . . . . . . . . . . . . . . . . . . . . . . . . . . . . . . . . . . . . . . . .. . . . . . .430
Appendix QUpgrading with Tax Updates... . . . . . . . . . . . . . . . . . . . . . . . . . . . . . . . . . . . . . . . . . . . . . . . . . . . . . . . . . . . . . . . . . . . . . . . . . . .431Upgrading with Tax Updates.. . . . . . . . . . . . . . . . . . . . . . . . . . . . . . . . . . . . . . . . . . . . . . . . . . . . . . . . . . . . . . . . . . . . . . . . . . . . . . . . . . . . . . . .431
Appendix RUsing Data Conversion Utilities... . . . . . . . . . . . . . . . . . . . . . . . . . . . . . . . . . . . . . . . . . . . . . . . . . . . . . . . . . . . . . . . . . . . . . . .433Understanding Data Conversion Utilities.. . . . . . . . . . . . . . . . . . . . . . . . . . . . . . . . . . . . . . . . . . . . . . . . . . . . . . . . . . . . . . . . . . . . . . . . . .433Using the Upgrade Driver Program... . . . . . . . . . . . . . . . . . . . . . . . . . . . . . . . . . . . . . . . . . . . . . . . . . . . . . . . . . . . . . . . . . . . . . . . . . . . . . .433Using the Upgrade Drivers Page... . . . . . . . . . . . . . . . . . . . . . . . . . . . . . . . . . . . . . . . . . . . . . . . . . . . . . . . . . . . . . . . . . . . . . . . . . . . . . . . . .433
Understanding Upgrade Drivers Page... . . . . . . . . . . . . . . . . . . . . . . . . . . . . . . . . . . . . . . . . . . . . . . . . . . . . . . . . . . . . . . . .. . . . . . .433Accessing the Upgrade Drivers Page.... . . . . . . . . . . . . . . . . . . . . . . . . . . . . . . . . . . . . . . . . . . . . . . . . . . . . . . . . . . . . . . . .. . . . . . .434Adding New Upgrade Drivers Section Page.. . . . . . . . . . . . . . . . . . . . . . . . . . . . . . . . . . . . . . . . . . . . . . . . . . . . . . . . . . .. . . . . . .434Inactivating Upgrade Drivers Section.. . . . . . . . . . . . . . . . . . . . . . . . . . . . . . . . . . . . . . . . . . . . . . . . . . . . . . . . . . . . . . . . . . .. . . . . . .435
Reviewing the Data Conversion Report. . . . . . . . . . . . . . . . . . . . . . . . . . . . . . . . . . . . . . . . . . . . . . . . . . . . . . . . . . . . . . . . . . . . . . . . . . . .436
Appendix SUsing the Comparison Process... . . . . . . . . . . . . . . . . . . . . . . . . . . . . . . . . . . . . . . . . . . . . . . . . . . . . . . . . . . . . . . . . . . . . . . .437Understanding the Comparison Process.. . . . . . . . . . . . . . . . . . . . . . . . . . . . . . . . . . . . . . . . . . . . . . . . . . . . . . . . . . . . . . . . . . . . . . . . . .437
Reviewing Source and Target Columns.. . . . . . . . . . . . . . . . . . . . . . . . . . . . . . . . . . . . . . . . . . . . . . . . . . . . . . . . . . . . . . . .. . . . . . .438Reviewing the Action Column... . . . . . . . . . . . . . . . . . . . . . . . . . . . . . . . . . . . . . . . . . . . . . . . . . . . . . . . . . . . . . . . . . . . . . . . . . .. . . . . . .439Reviewing the Upgrade Column... . . . . . . . . . . . . . . . . . . . . . . . . . . . . . . . . . . . . . . . . . . . . . . . . . . . . . . . . . . . . . . . . . . . . . . .. . . . . . .439Putting it All Together.. . . . . . . . . . . . . . . . . . . . . . . . . . . . . . . . . . . . . . . . . . . . . . . . . . . . . . . . . . . . . . . . . . . . . . . . . . . . . . . . . . . . . .. . . . . . .440
Understanding Upgrade Compare Reports.. . . . . . . . . . . . . . . . . . . . . . . . . . . . . . . . . . . . . . . . . . . . . . . . . . . . . . . . . . . . . . . . . . . . . . .440Reviewing Report Columns.. . . . . . . . . . . . . . . . . . . . . . . . . . . . . . . . . . . . . . . . . . . . . . . . . . . . . . . . . . . . . . . . . . . . . . . . . . . . . .. . . . . . .441Using Reports.. . . . . . . . . . . . . . . . . . . . . . . . . . . . . . . . . . . . . . . . . . . . . . . . . . . . . . . . . . . . . . . . . . . . . . . . . . . . . . . . . . . . . . . . . . . . . .. . . . . . .441
Index .... . . . . . . . . . . . . . .. . . . . . . . . . . . . . . .. . . . . . . . . . . . . . . . .. . . . . . . . . . . . . . . .. . . . . . . . . . . . . . . .. . . . . . . . . . . . . .. . . . . . . . . . .445
Copyright © 2007, Oracle. All rights reserved. xxv

Contents
xxvi Copyright © 2007, Oracle. All rights reserved.

About This Documentation
Understanding This DocumentationThis documentation is designed to direct you through the process of upgrading to your new PeopleSoft release.
This section describes information you should know before you begin working with Oracle’s PeopleSoftEnterprise products and documentation, including specific documentation conventions.
PrerequisitesYou must complete the tasks in the document Getting Started on Your PeopleSoft Upgrade before beginningthis upgrade. If you have not yet completed these tasks, do so now.
See Oracle/PeopleSoft Customer Connection (Implement Optimize + Upgrade, Upgrade Guide, UpgradeDocumentation and Software, Upgrade Documentation and Scripts).
AudienceThis documentation assumes you have a basic understanding of the PeopleSoft system. One of the mostimportant components of a successful upgrade of your PeopleSoft installation is your onsite experience.
You should be familiar with your operating hardware environment and have the necessary skills to support thatenvironment. You should also have a working knowledge of:
• SQL and SQL command syntax.
• PeopleSoft system navigation.
• PeopleSoft windows, menus, and pages (and how to modify them).
• The World Wide Web.
• Microsoft Windows or Windows NT graphical user interface.
PeopleSoft recommends that you complete training before performing this upgrade.
See Oracle/PeopleSoft Customer Connection (Oracle University).
OrganizationThis documentation is divided into chapters, each containing tasks that represent major milestones in theupgrade process:
• Prepare Your Database
Copyright © 2007, Oracle. All rights reserved. xxvii

Preface
• Apply PeopleTools Changes• Run and Review Compare Reports• Apply Application Changes• Complete Database Changes• Apply Changes to Production Database
This documentation may also contain appendices. When additional information is required to complete anupgrade task, you will be directed to the appropriate appendix.
Related InformationOracle provides additional information that may help with your upgrade. The following information (as wellas updates to our upgrade) is available on Oracle/PeopleSoft Customer Connection:
• PeopleSoft Release Notes. Before you begin your upgrade, read the PeopleTools and PeopleSoftapplication release notes to determine what has changed in the system and to familiarize yourself with thenew features in this release. The release notes also indicate whether you need to upgrade other portions ofyour system, such as your RDBMS software or batch files.
• Upgrades Documentation. The upgrade documentation on Customer Connection contains informationposted after shipment of this release that may not be included in these upgrade instructions. Thisinformation may include updates and fixes required at upgrade. Always check the upgrade documentationfor the most current documentation and information.
• Getting Started on Your PeopleSoft Upgrade. Before beginning a PeopleSoft upgrade, you must completethe tasks in the document Getting Started on Your PeopleSoft Upgrade. This document guides you throughplanning your upgrade as well as installing the software necessary to upgrade to the next PeopleSoftrelease. If you did not complete the tasks in this documentation, do so now.
Important! Before upgrading, it is imperative that you check the upgrade documentation on CustomerConnection for updates to the upgrade instructions. We continually post updates as we refine the upgradeprocess.
See Oracle/PeopleSoft Customer Connection (Implement Optimize + Upgrade, Upgrade Guide, UpgradeDocumentation and Software, Upgrade Documentation and Scripts, Release, Enterprise).
xxviii Copyright © 2007, Oracle. All rights reserved.

CHAPTER 1
Prepare Your Database
This chapter discusses:
• Understanding Database Preparation
• Understanding Your Upgrade
• Copying Your Production Database
• Applying Upgrade Planning Files
• Editing Upgrade Planning DB2 Scripts
• Running Upgrade Planning Scripts
• Updating Statistics
• Running Initial Audit Reports
• Exporting and Loading PayBill Data
• Verifying Global Payroll
• Running Application Audits
• Preparing Approvals for Upgrade
• Preparing the Benefits Upgrade
• Preparing for System Element Deletions
• Finding Multiple Distributions
• Auditing Global Payroll Settings
• Making Functional Decisions
• Reporting Row Count for Tables
• Preparing Your Database
• Backing Up Demo Databases
• Renaming Records and Fields
• Comparing Customizations
• Identifying Customizations
• Preparing for the Application Upgrade
• Backing Up After Prepare Your Database
Copyright © 2007, Oracle. All rights reserved. 1

Prepare Your Database Chapter 1
Understanding Database PreparationYou must make a copy of your production database before you start preparations for the technical portion of theupgrade. Unless otherwise noted, run these tasks on your Copy of Production database (not the New ReleaseDemo database). These tasks do not use the new PeopleSoft release. You should use your current codeline andcurrent Oracle’s PeopleSoft PeopleTools release to perform these tasks unless instructed otherwise.
Important! You must read the documentation Getting Started on Your PeopleSoft Upgrade before youcontinue with your upgrade. This getting started guide explains the upgrade process, terminology, and setuptasks that must be performed prior to starting your upgrade.
Task 1-1: Understanding Your UpgradeThis section discusses:
• Understanding PeopleSoft Upgrades
• Verifying the Software Installation
• Defining Upgrade Databases
• Reviewing Upgrade Notes and Tips
Understanding PeopleSoft UpgradesThis task reviews information you need to know before you begin your upgrade. It explains the differenttypes of databases that you will use and provides useful upgrade tips and information that you may need toapply before beginning your upgrade.
Task 1-1-1: Verifying the Software InstallationBefore continuing with the upgrade, you must complete all of the tasks in Getting Started on Your PeopleSoftUpgrade, “Install the Software Release.” Verify that the following tasks are complete:
• Installing the new release.• Applying PeopleTools patches.• Applying updates required for upgrade.• Installing the Change Assistant.• Creating and configuring an upgrade job.• Setting Configuration Manager profile.• Reviewing upgrade step properties.
2 Copyright © 2007, Oracle. All rights reserved.

Chapter 1 Prepare Your Database
Properties
DatabaseOrientation
Initial or MTP Products Platforms Languages
Source Initial All All All
Task 1-1-2: Defining Upgrade DatabasesThe following databases will be used during your upgrade:
• The New Release Demo database always refers to the database delivered with your new PeopleSoft release.It contains the new and changed database objects that you want to add. The New Release Demo databaseis also referred to as the Demo database later in the upgrade.
• The Copy of Production database refers to the copy of your production database, into which you will addthe new and changed objects for this release from the New Release Demo database.
Note. You will create more than one Copy of Production database. Your second and subsequent copiesare referred to as the New Copy of Production.
• The Copy of Current Demo refers to the copy of the demo database for the release that you are currentlyusing.
Properties
DatabaseOrientation
Initial or MTP Products Platforms Languages
Target Initial All All All
Task 1-1-3: Reviewing Upgrade Notes and TipsThis section contains information that may apply to your upgrade product. Review the information in thissection before beginning your upgrade.
• Upgrading Staffing Front Office and Pay/Bill Management scenariosReview the appendix for information on the possible upgrade scenarios associated with Staffing FrontOffice, FSCM, and HRMS Pay/Bill Management.
See Appendix: “Upgrading Front Office and PayBill.”• Performance RecommendationsBefore beginning your upgrade, you should plan for performance issues.
See Appendix: “Improving Performance.”• Tax Update Status for Payroll SitesPeopleSoft HRMS 9.0 is current through Tax Update 06-D.Oracle recommends that you run your upgrade using your Copy of Production at the same Tax Update levelas the HRMS New Release Demo database. If your New Release Demo database is not at the same TaxUpdate level as listed above, follow the recommendations in the appendix “Upgrading with Tax Updates.”
Copyright © 2007, Oracle. All rights reserved. 3

Prepare Your Database Chapter 1
Note. If you are unsure of what tax update level you are on, from your Copy of Production select SetUp HRMS, Product Related, North American Payroll, Tax Table Reports, Tax Update, and note thelatest date that is listed.
• Making Changes to Company, Company State Taxes, Company Local Taxes, Wage Loss Plan Table, andDeduction Table During the UpgradeIf you are using non-commitment accounting in Payroll for North America, after you create your Copyof Production database in the initial pass, do not make any changes in your production database forCompany, Company State Taxes, Company Local Taxes, Wage Loss Plan Table, and Deduction Tableuntil you complete the upgrade. If you make any changes to these tables, you will not be able to use theimport script during Move to Production pass to import data that you set up in the initial pass. Youwill either need to synchronize the data between production and copy of the production in the initialpass before you set up data and do the export, or manually set up data in your copy of the productionduring the Move to Production pass.If you are using Time and Labor and integrate with PeopleSoft projects, then you must read and follow theimpact of the ChartField upgrade in the appendix “Understanding Dynamic ChartFields Changes.”
• Upgrading Approvals for Job Openings and Job OffersThis upgrade will not upgrade the approvals for job openings and job offers. To upgrade your approvalsafter completing this upgrade, see Customer Connection for the Approval Documentation. If you do notwant to use the documentation from Customer Connection, all job openings and job offers must already beapproved or not started before beginning this upgrade.
• Reviewing HRMS Record ChangesMany record changes in the new PeopleSoft release will affect the data in your system. These changeswill be made through data conversion. To fully understand these changes, please review the appendixesreferenced below.
See Appendix: “Reviewing Benefits Changes.”
See Appendix: “Reviewing HRMS Changes.”
See Appendix: “Understanding Person Model Changes.”• Upgrading Time and Labor RulesYour custom Time and Labor Rules will be manually recompiled during your initial upgrade pass only.You should not create any new custom rules in your production database after you have created your Copyof Production database for the initial pass until after you have completed your final Move to Productionand have gone live with the new PeopleSoft release. If you do create new Time and Labor Rules inproduction, you should manually create them again in your upgraded Copy of Production database fromthe previous pass before starting your next pass. This is the database that will be the source database foryour Move to Production pass.
• Microsoft SQL Server Column StatisticsAs of Microsoft SQL Server 2000, user-defined statistics can be created on columns within a table.This feature is not supported by PeopleTools. If you added user-defined statistics to any columns inyour PeopleSoft application, it may cause errors to occur during the upgrade steps that alter tables.PeopleSoft recommends that you drop all user-defined statistics on columns of PeopleSoft tables beforeproceeding with your upgrade.
4 Copyright © 2007, Oracle. All rights reserved.

Chapter 1 Prepare Your Database
Properties
DatabaseOrientation
Initial or MTP Products Platforms Languages
Target Both All All All
Task 1-2: Copying Your Production DatabaseThis section discusses:
• Making a Copy of Production Database
• Increasing Database Space
Task 1-2-1: Making a Copy of Production DatabaseMake a copy of your production database. You will upgrade this database, rather than performing the upgradedirectly on your production database. Performing an upgrade on a copy of your production database enablesyou to test your upgrade in a controlled environment. Refer to the administration guide for your databaseplatform for information on copying databases.
Note. Move to Production: This is a second Copy of Production sometimes referred to as the New Copy ofProduction. The first Copy of Production, or “old” Copy of Production, will now be the source database (it wasthe target database in the initial test pass). The second, or “new” Copy of Production, is now the target database.
Properties
DatabaseOrientation
Initial or MTP Products Platforms Languages
Target Both All All All
Task 1-2-2: Increasing Database SpaceTo prepare for the upgrade, you may need to increase the space allocated to your Copy of Production database.Depending on your relational database management system (RDBMS), this may include allocating space totablespaces or allocating database primary space and log files. Be aware that your new environment needs toaccommodate both the existing data in your Copy of Production database as well as the new data, new datastructures, and new database objects. Every site and configuration is different, so Oracle cannot offer aguaranteed estimate of your database sizing needs.
As part of the initial upgrade pass, you may need to revisit your initial space allocation settings more than onceas you progress through the upgrade. At the end of the initial pass, the final space allocation settings willclosely reflect the space you will need to complete any subsequent Move to Production passes. Work with yourDBA to ensure that your environment is set up appropriately for both the initial and Move to Production passes.
See Appendix: “Sizing Tables for the Upgrade.”
See the PeopleSoft installation documentation for your product line and release.
Copyright © 2007, Oracle. All rights reserved. 5

Prepare Your Database Chapter 1
Note. Oracle RDBMS customers also need to alter the tablespace for PSIMAGE and increase it to 200MB; autoextend on next 10 MB; maxsize unlimited.
Properties
DatabaseOrientation
Initial or MTP Products Platforms Languages
Target Both All All All
Task 1-3: Applying Upgrade Planning FilesThis section discusses:
• Understanding Applying Upgrade Planning Files
• Applying the UPGOPT Project
• Building the UPGOPT Project
• Applying the UPGOPTPB Project
• Building the UPGOPTPB Project
• Setting Up Upgrade Planning Security
Understanding Applying Upgrade Planning FilesIn this task, you apply the upgrade planning files that you downloaded from the Upgrade database on CustomerConnection to your current codeline. These files may include Structured Query Report (SQR) programs andscripts that you will execute in later tasks, and a project that you will apply to your Copy of Productiondatabase. This project may include records, fields, pages, menus, queries, and process definitions that allowfunctional users to define conversion information needed for later upgrade tasks.
Task 1-3-1: Applying the UPGOPT ProjectIn this step, apply the UPGOPT project to your Copy of Production database using the Copy Project fromFile process.
To apply the UPGOPT project:
1. Using your current codeline, launch Application Designer and sign in to your Copy of Production database.2. Select Tools, Copy Project, From File.3. From the dialog box, select the import directory PS_HOME\PROJECTS\ (current codeline).4. Click UPGOPT in the Projects box, and then click Select.5. Click Copy.This copies the UPGOPT project onto your Copy of Production database.
6. Using your current codeline, launch Data Mover and sign on to your Copy of Production database.
6 Copyright © 2007, Oracle. All rights reserved.

Chapter 1 Prepare Your Database
7. Run the following script to load Access Groups and the Upgrade Query Tree:
\PS_HOME\SCRIPTS\UPGOPT_HC88.DMS
Properties
DatabaseOrientation
Initial or MTP Products Platforms Languages
Target Both All All All
Task 1-3-2: Building the UPGOPT ProjectIn this step you create and alter tables, and create views.
To build the UPGOPT project:
1. Using your current codeline, launch Application Designer and sign in to your Copy of Production database.2. Select File, Open...3. In the Definition drop-down list box, select Project and click Open to display the list of projects.4. Select UPGOPT and click Open again.5. Select Build, Project...6. Under Build Options, select Create Tables, Create Views.7. Click Settings...8. On the Create tab, select Recreate View if it already exists and Recreate Table if it already exists.9. On the Logging tab, select Fatal errors, warnings, and informational messages.10. On the Scripts tab, select Output to separate files.11. In the Script File Names box, give your scripts a unique name that reflects this task number and theobject being created.
12. Click OK.13. Under Build Execute Options, select Build script file.14. Click Build.15. Using the appropriate SQL query tool for your platform, run the scripts created in the step above.Run the scripts in the following order: Create Tables, Create Views, Create Indexes.
Properties
DatabaseOrientation
Initial or MTP Products Platforms Languages
Target Both All All All
Task 1-3-3: Applying the UPGOPTPB ProjectIn this step, apply the Pay/Bill Management (PB) UPGOPTPB project to your Copy of Production databaseusing the Copy Project from File process.
Copyright © 2007, Oracle. All rights reserved. 7

Prepare Your Database Chapter 1
Apply the UPGOPTPB to your HRMS database by following the instructions below.
To apply the UPGOPTPB project:
1. Using your current codeline, launch Application Designer and sign in to your Copy of Production database.2. Select Tools, Copy Project, From File.3. From the dialog box, select the import directory PS_HOME\PROJECTS\ (current codeline).4. Click UPGOPTPB in the Projects box, and then click Select.5. Click Copy.This copies the UPGOPTPB project onto your Copy of Production database.
Properties
DatabaseOrientation
Initial or MTP Products Platforms Languages
Target Both Pay/BillManagement
All All
Task 1-3-4: Building the UPGOPTPB ProjectIn this step, you create and alter tables, and create views.
To build the UPGOPTPB project:
1. Using your current codeline, launch Application Designer and sign in to your Copy of Production database.
2. Select File, Open…
3. In the Definition drop-down list box, select Project and click Open to display the list of projects.
4. Select UPGOPTPB and click Open again.
5. Select Build, Project…
6. Under Build Options, select Create Tables, Create Views.
7. Click Settings...
8. On the Create tab, select Recreate View if it already exists and Recreate Table if it already exists.
9. On the Logging tab, select Fatal errors, warnings, and informational messages.
10. On the Scripts tab, select Output to separate files.
11. In the Script File Names box, give your scripts a unique name that reflects this task number and theobject being created.
12. Click OK.13. Under Build Execute Options, select Build script file.
14. Click Build.15. Using the appropriate SQL query tool for your platform, run the scripts created in the step above.
Run the scripts in the following order: Create Tables, Create Views, Create Indexes.
8 Copyright © 2007, Oracle. All rights reserved.

Chapter 1 Prepare Your Database
Properties
DatabaseOrientation
Initial or MTP Products Platforms Languages
Target Both Pay/BillManagement
All All
Task 1-3-5: Setting Up Upgrade Planning SecurityIn this step you set up security on your Copy of Production database.
To set up security:
1. Select PeopleTools, Security, Permissions and Roles, Permission Lists.2. Enter the permission list for the users who will be reviewing and setting up functional requirements for theupgrade, then click Search.
3. On the Pages tab, select or insert the menu UPG_DEFINE_DEFAULTS and click Edit Components.4. Select all of the items in the menu.5. Click OK.6. Click Save.7. Select PeopleTools, Security, Permissions and Roles, Permission Lists.8. Select the permission list for the users that review and set up functional requirements for the upgrade.9. Select the Query tab.10. Select Access Group Permissions.11. Add one row with the tree name UPG_QUERY_TREE and the access group UPG_ACCESS_GROUP.12. Select OK, Save.
Properties
DatabaseOrientation
Initial or MTP Products Platforms Languages
Target Both All All All
Task 1-4: Editing Upgrade Planning DB2 ScriptsPerform this step only if your database platform is DB2 z/OS. DB2 z/OS scripts that create tables need a setcurrent sqlid statement so that the tables are created with the correct owner ID. Open each script listedbelow, then uncomment and modify all of the DB2-specific statements to reflect your environment.
For SQL scripts, if the script does not contain DB2-specific statements, add the following line to the top of thescript and edit it for your environment, inserting the appropriate owner ID in uppercase characters:
set current sqlid = ’OWNER_ID’;
Copyright © 2007, Oracle. All rights reserved. 9

Prepare Your Database Chapter 1
For Data Mover scripts (DMS), if the script does not contain DB2-specific statements, add the following line tothe top of the script and edit it for your environment, inserting the appropriate owner ID in uppercase characters:
set execute_sql set current sqlid = ’OWNER_ID’;
The following is a list of scripts that you need to edit:PUUPX07.DMS
PUHCTLW01.DMS
PUHCTLW02.DMS
PUHCUPI09.DMS
Properties
DatabaseOrientation
Initial or MTP Products Platforms Languages
Target Both All DB2 z/OS All
Task 1-5: Running Upgrade Planning ScriptsThis section discusses:
• Understanding Running Upgrade Planning Scripts
• Exporting Planning Messages and Strings
• Importing Planning Messages and Strings
• Importing Upgrade Default Options
Understanding Running Upgrade Planning ScriptsIn this task, you run scripts that will load data needed to complete the task Making Functional Decisionslater in the upgrade.
Task 1-5-1: Exporting Planning Messages and StringsThis script loads messages and strings needed for the Upgrade Planning Pages. The script name isPUHCUPS10E.DMS.
Properties
DatabaseOrientation
Initial or MTP Products Platforms Languages
Source Initial All All All
Task 1-5-2: Importing Planning Messages and StringsThis script loads messages and strings needed for the Upgrade Planning Pages. The script name isPUHCUPS10I.DMS.
10 Copyright © 2007, Oracle. All rights reserved.

Chapter 1 Prepare Your Database
Properties
DatabaseOrientation
Initial or MTP Products Platforms Languages
Target Initial All All All
Task 1-5-3: Importing Upgrade Default OptionsIn this step, you import the upgrade default options defined during the previous pass for use during Move toProduction.
The script name for your upgrade is:
PUHCHRW01I.DMS
Properties
DatabaseOrientation
Initial or MTP Products Platforms Languages
Target MTP All All All
Task 1-6: Updating StatisticsRun this task to improve performance of your compare and copy processes. Have your database administratorupdate statistics on your database before proceeding with your upgrade. Later in the upgrade, you will updateyour statistics again due to changes in the database structure.
See Appendix: “Improving Performance.”
Properties
DatabaseOrientation
Initial or MTP Products Platforms Languages
Target Both All All All
Task 1-7: Running Initial Audit ReportsThis section discusses:
• Understanding Running Initial Audit Reports
• Run the Initial DDDAUDIT Report
• Run the Initial SYSAUDIT Report
• Create the INITALTAUD Project
Copyright © 2007, Oracle. All rights reserved. 11

Prepare Your Database Chapter 1
• Run the Initial Alter Audit
• Review the Initial Audits
Understanding Running Initial Audit ReportsIn this task, you run and review your initial DDDAUDIT, SYSAUDIT, and Alter Audit reports. Running thesereports ensures that your database is as clean as possible for the remainder of the upgrade.
Task 1-7-1: Run the Initial DDDAUDIT ReportDDDAUDIT is an SQR script that compares your production SQL data tables with the PeopleTools recorddefinitions to identify inconsistencies.
In this step, DDDAUDIT is run using SQR from your current (old) release of PeopleSoft against the Copy ofProduction to ensure that you are starting with a clean database.
You will review the output from the report in a later step.
See Review the Initial Audits.
See the Enterprise PeopleTools PeopleBook: System and Server Administration for your current release.
Properties
DatabaseOrientation
Initial or MTP Products Platforms Languages
Target Both All All All
Task 1-7-2: Run the Initial SYSAUDIT ReportSYSAUDIT is an SQR script used to identify “orphaned” PeopleSoft objects. For example, SYSAUDIT canidentify a module of PeopleCode that exists but does not relate to any other objects in the system. SYSAUDITalso identifies other inconsistencies within your database.
In this step, SYSAUDIT is run using SQR from your current (old) release of PeopleSoft against the Copy ofProduction to ensure that you are starting with a clean database.
You will review the output from the report in a later step.
See Review the Initial Audits.
See the Enterprise PeopleTools PeopleBook: System and Server Administration for your current release.
Properties
DatabaseOrientation
Initial or MTP Products Platforms Languages
Target Both All All All
12 Copyright © 2007, Oracle. All rights reserved.

Chapter 1 Prepare Your Database
Task 1-7-3: Create the INITALTAUD ProjectIn this step, you create the INITALTAUD project and use it to run your initial Alter Audit. Creating this newproject now ensures that all of the records with type Table in your system are audited. This project alsoincludes any custom records that you created in your system.
Note. If your old PeopleTools release is 8.44 or later, this step can be automatically run by Change Assistant.To run this step automatically, open the step properties for this step in Change Assistant and change the typefrom ManualStop to CreateProject. Then run your job.
To create the INITALTAUD project:
1. Launch PeopleTools and sign in to the Target database.
2. From Application Designer, select File, New…
3. Select Project, and then click OK.
4. Select Insert, Definitions into Project...
5. Select Records from the Object Type drop-down list box.
6. Select Table from the Type drop-down list box.
7. Click Insert, and then click Select All.
8. Click Insert, and then click Close.
9. Select File, Save All.
10. Enter the project name INITALTAUD.
Warning! You must name the project INITALTAUD or the next step will fail.
11. Click OK.
Properties
DatabaseOrientation
Initial or MTP Products Platforms Languages
Target Both All All All
Task 1-7-4: Run the Initial Alter AuditTo verify that the PeopleTools definitions are synchronized with the underlying SQL data tables in yourdatabase, run the PeopleTools alter record process on all records in your system. This process, called an AlterAudit, compares the data structures of your database tables with the PeopleTools definitions to identifyinconsistencies. Alter Audit then creates SQL scripts with the data definition language (DDL) changes that arerequired to synchronize your database with the PeopleTools definitions.
Copyright © 2007, Oracle. All rights reserved. 13

Prepare Your Database Chapter 1
Properties
DatabaseOrientation
Initial or MTP Products Platforms Languages
Target Both All All All
Task 1-7-5: Review the Initial AuditsIn this step, you review the audits you that performed earlier in this task. Review the audits before proceedingwith the upgrade.
Review the output from the SYSAUDIT and DDDAUDIT reports and correct any discrepancies. Whenapplication tables are deleted from the Application Designer, they are not automatically deleted from thesystem tables. Oracle takes this precaution in case you have customized information that you want to preserve.When you review your DDDAUDIT listing, these tables are listed as a discrepancy between the PeopleSoftapplication and the database.
Now you must decide whether to drop these tables or retain them. In most cases, you will want to drop thetables, using your SQL tool to drop the tables from the system catalogs. If you have customized information orprocesses that access these tables, you may want to retain them in the system tables even though they will nolonger be accessed or updated by the PeopleSoft system. Drop any unnecessary deleted tables now so that yourfuture DDDAUDIT reports will be as clean as possible.
The Alter Audit produces the scripts INITALTAUD_ALTTBL.SQL, INITALTAUD_CRTIDX.SQL, andINITALTAUD_CRTTRG.SQL. These scripts contain SQL that corrects any discrepancies between yourPeopleTools Record definitions and the database system catalog table definitions. Review the Alter Auditoutput and correct any discrepancies.
Note. Triggers are always dropped and re-created during the alter process and will always show up in thegenerated Alter Audit script. You can ignore the generated script for triggers.
Note. For Microsoft SQL Server and DB2 UNIX/NT platforms, if your database has tables containing theMSSCONCATCOL or DBXCONCATCOL column, you will see SQL alter the tables and re-create theirassociated indexes, even though the underlying tables and indexes may not have changed.
Note. You will rerun the DDDAUDIT and SYSAUDIT SQR scripts later in the upgrade. If you want topreserve the log files generated by Change Assistant from this run, you will need to rename the files manuallyafter completing this task.
See the Enterprise PeopleTools PeopleBook: System and Server Administration for your current release.
Properties
DatabaseOrientation
Initial or MTP Products Platforms Languages
Target Both All All All
14 Copyright © 2007, Oracle. All rights reserved.

Chapter 1 Prepare Your Database
Task 1-8: Exporting and Loading PayBill DataThis section discusses:
• Loading Front Office Data
• Importing Old NonStable Project Definition
• Importing New NonStable Project Definition
• Copying Old NonStable Tables to File
• Copying New NonStable Tables to File
• Copying Old NonStable Tables From File
• Exporting PayBill Stable Tables
• Exporting PayBill NonStable Tables
• Copying New NonStable Tables From File
Task 1-8-1: Loading Front Office DataThis step loads data from your Staffing Front Office database, which was discontinued in release 8.9, into theHRMS database.
Note. Only run this step if you currently have a Staffing Front Office database installed.
Important! Before you can run this import script, you must complete the step, Exporting PayBill NonStableTables in your Staffing Front Office and FSCM 8.8x to 9.0 Upgrade.
See PeopleSoft Enterprise Staffing Front Office 8.8 and FSCM 8.8x to FSCM 9.0 Upgrade, “Prepare YourDatabase,” Loading Front Office and PayBill Data, Exporting PayBill NonStable Tables.
Note. If you need to rerun this script, please ensure that you do not reimport into the tables that have alreadybeen imported successfully because this will cause duplicate-rows errors in data conversion.
The script for your upgrade path is:
PUHCFOR22I.DMS
To run the script automatically:
1. Select this step.2. Select Edit, Step Properties.The Step Properties dialog box opens.
3. Change the Type from ManualStop to DataMoverBootstrap, and click OK.4. In your upgrade job, mark the step as Run.
Copyright © 2007, Oracle. All rights reserved. 15

Prepare Your Database Chapter 1
Properties
DatabaseOrientation
Initial or MTP Products Platforms Languages
Target Both Pay/BillManagement
(Staffing FrontOffice)
All All
Task 1-8-2: Importing Old NonStable Project DefinitionThis step imports your previous release project definition for non-stable tables from file to be used duringyour Move to Production pass.
The project for your upgrade is:
PBNONSTABLETABLES_OLD_881
Properties
DatabaseOrientation
Initial or MTP Products Platforms Languages
Target Initial Pay/BillManagement
All All
Task 1-8-3: Importing New NonStable Project DefinitionThis step imports the New Release project definition for non-stable tables from file. This project definitionwill be used during your Move to Production pass.
The project for your upgrade is:
PBNONSTABLETABLES_NEW
Properties
DatabaseOrientation
Initial or MTP Products Platforms Languages
Target MTP Pay/BillManagement
All All
Task 1-8-4: Copying Old NonStable Tables to FileThis step copies your existing non-stable table structure, that you imported in the step Importing Old NonStableProject Definition, to file. These definitions will be used during your Move to Production pass.
The project for your upgrade is:
PBNONSTABLETABLES_OLD_881
16 Copyright © 2007, Oracle. All rights reserved.

Chapter 1 Prepare Your Database
Properties
DatabaseOrientation
Initial or MTP Products Platforms Languages
Target Initial Pay/BillManagement
All All
Task 1-8-5: Copying New NonStable Tables to FileThis step copies the new non-stable tables to a file to preserve the table structures during your Move toProduction.
The project for your upgrade is:
PBNONSTABLETABLES_NEW
Properties
DatabaseOrientation
Initial or MTP Products Platforms Languages
Target MTP Pay/BillManagement
All All
Task 1-8-6: Copying Old NonStable Tables From FileThis step copies the non-stable table definitions (that you previously copied to file in the step Copying OldNonStable Tables to File during your initial pass) from file to be used during your Move to Productionpass. These tables will be exported from your HRMS database later in the upgrade and imported duringyour FSCM 9.0 upgrade.
The project for your upgrade is:
PBNONSTABLETABLES_OLD_881
Properties
DatabaseOrientation
Initial or MTP Products Platforms Languages
Target MTP Pay/BillManagement
All All
Task 1-8-7: Exporting PayBill Stable TablesThis step exports the Pay/Bill Management stable tables. These tables contain information that will be loadedduring the FSCM 9.0 upgrade.
The script for your upgrade path is:
PUHCFOR20E.DMS
Copyright © 2007, Oracle. All rights reserved. 17

Prepare Your Database Chapter 1
Important! You must run this export before you begin the task Loading PayBill Data in the FSCM 9.0upgrade. Store this data for use during the FSCM upgrade.
See PeopleSoft Enterprise Staffing Front Office 8.8 and FSCM 8.8x to FSCM 9.0 Upgrade, “Prepare YourDatabase,” Loading PayBill Data.
Properties
DatabaseOrientation
Initial or MTP Products Platforms Languages
Target Both Pay/BillManagement
All All
Task 1-8-8: Exporting PayBill NonStable TablesThis step exports the Pay/Bill Management non-stable tables. These tables will be used during the dataconversion process to access HRMS data that is relevant to the FSCM 9.0 upgrade.
The script for your upgrade path is:
PUHCFOR21E.DMS
Important! You must run this export before you begin the task Loading PayBill Data in the FSCM 9.0upgrade. Store this data for use during the FSCM upgrade.
See PeopleSoft Enterprise Staffing Front Office 8.8 and FSCM 8.8x to FSCM 9.0 Upgrade, “Prepare YourDatabase,” Loading PayBill Data.
Properties
DatabaseOrientation
Initial or MTP Products Platforms Languages
Target Both Pay/BillManagement
All All
Task 1-8-9: Copying New NonStable Tables From FileThis step copies the new non-stable tables (that you previously copied to file in the step Copying NewNonStable Tables to File) from file to preserve the table definitions for your Move to Production pass.
The project for your upgrade is:
PBNONSTABLETABLES_NEW
18 Copyright © 2007, Oracle. All rights reserved.

Chapter 1 Prepare Your Database
Properties
DatabaseOrientation
Initial or MTP Products Platforms Languages
Target MTP Pay/BillManagement
All All
Task 1-9: Verifying Global PayrollComplete this step if you have Global Payroll installed.
As part of performing the upgrade process, it is important that all Payroll activities are in a state of completion.Verify that all calendar group IDs were finalized, and that any payroll dependent interfaces were alsoprocessed; such as transactions sent to Banking, General Ledger, or other third-party vendors. Also, make surethat you do not have any packages that are in the process of being upgraded from one database to another. Allpackager-related processing needs to be completed before starting the upgrade process.
Properties
DatabaseOrientation
Initial or MTP Products Platforms Languages
Target Both Global Payroll Core All All
Task 1-10: Running Application AuditsThis section discusses:
• Running Upgrade Reports
• Correcting Garnishment Payee Data
• Running Person Relationship Audit Report
• Running Dynamic ChartFields Audits
Task 1-10-1: Running Upgrade ReportsThis section discusses:
• Running Upgrade Reports
• Running the Account Code Table Audit Report
• Running the US Custom Garnishment Rules Audit Report
• Running the Institution Report for France
Copyright © 2007, Oracle. All rights reserved. 19

Prepare Your Database Chapter 1
Running Upgrade ReportsIn this step, you run upgrade reports that list erroneous data that you need to clean up before starting theupgrade.
To run the application audit reports:
1. From your web browser, sign in to the Copy of Production database.2. Select Set Up HRMS, Upgrade, Reports.3. Select the appropriate reports.
Note. Reports are identified and explained in the remainder of this task. You will need to perform thisstep for all reports identified below.
4. Select Add a New Value.5. Enter the run control UPGRADE.6. Click Add.7. Click the Run button.8. On the Process Scheduler Request page, click OK.9. Click the Process Monitor link to monitor the program’s process.10. Repeat the steps above for all reports identified in the remainder of this task.
Running the Account Code Table Audit ReportRun the Account Code Table Audit Report, PUPYW01.SQR.
This report lists all account codes that have the following ChartField setup:
• No ChartFields defined.• Some ChartFields are defined but account has not been defined.
Records without defined ChartFields are not converted during the upgrade. If you have any recordsdefined without defined ChartFields and you want to convert them to the new PeopleSoft release, updateACCT_CD_TBL with at least the Account value.
Records with some ChartFields defined but without Account ChartField value will still be converted during theupgrade unless it has not been used for distribution anywhere in PeopleSoft HRMS. However, if you have anyrecords defined like this, you must update ACCT_CD_TBL with Account value. Account is a mandatory fieldin the new PeopleSoft release and conversion without that value cannot complete correctly.
To update the Account Code Table with ChartField values:
1. Using your current codeline, sign on to your Copy of Production database using the PIA environment.
2. Select Set Up HRMS, Common Definitions, Payroll, Account Code Table or Set Up HRMS, ProductRelated, Commitment Accounting, Budget Information <country>, Account Code Table, where <country>is, for example, CAN or USA.
3. Enter the account code from the report.
4. Click Search.
5. Insert new effective date and update ChartFields Details.
6. Click Save.
20 Copyright © 2007, Oracle. All rights reserved.

Chapter 1 Prepare Your Database
Running the US Custom Garnishment Rules Audit ReportRun the U.S. Custom Garnishment Rules Audit Report, PUPYT04.SQR.
This report has the same layout as the Garnishment Rules Report, except it lists only U. S. rules maintainedby you.
If there are any rules listed in this report, you have two options:
• You may decide that you no longer need the custom rule, in which case you will have to update all activegarnishment orders to replace your rule with another rule later in the upgrade.
• You may decide that you still need your custom rule, in which case you will have to re-create that rulelater in the upgrade.
If there are no rules listed in this report, you do not have any U. S. custom garnishment rules and do nothave to take any action.
See Appendix: “Understanding Garnishments Changes.”
Running the Institution Report for FranceRun the Institution Report for France, PUFRS01.SQR.
Run this report if you have implemented Human Resources for France. This report lists institutions associatedwith more than one pension code.
A given institution should be attached to only one pension code. In the current application, the institutionslisted in this report are attached to several pension codes.
To update the Pension/Contingency Funds definitions:
1. Select Set Up HRMS, Product Related, Workforce Monitoring, Regulatory Requirements FRA,Pension/Contingency Funds.
2. On the Pension/Contingency Funds page, review the Pension/Contingency Funds definitions and removeany duplicate institution names so that each institution name appears in only one Pension/ContingencyFunds definition.
3. Rerun the report to verify that all institutions are attached to only one pension code.
Properties
DatabaseOrientation
Initial or MTP Products Platforms Languages
Target Both All All All
Task 1-10-2: Correcting Garnishment Payee DataThis section discusses:
• Understanding Garnishment Payee Data
• Running the Garnishment Payee Audit Report
• Updating Garnishment Orders
• Updating Payee Information in the Payee Table
Copyright © 2007, Oracle. All rights reserved. 21

Prepare Your Database Chapter 1
Understanding Garnishment Payee DataIf you are using AP Interface and running the Extract Non-Tax Deductions program, you have to ensure thatthe payee defined in the active garnishment order is set up in the Payee Table. The extract program will not beable to create an invoice if the payee is missing from the Payee Table.
To verify garnishment payee data, you should run the Garnishment Payee Audit report.
The report has two sections:
• Active garnishment orders (orders with the status Approved or Received)
• Inactive garnishment orders (orders with any status other than Approved or Received)
If there are any active orders listed in the report, you will have to correct the data. You can correct the data eitherby correcting the payee data on the garnishment order, or you can add payee information to the Payee Table.
If there are any inactive orders listed in the report, you can decide either to leave the data as is, or to correct thedata. Leaving inactive orders without updating them is acceptable. Inactive orders will not be processed afterthe upgrade; therefore, you will not need to create an invoice. However, if you decide to correct the history,you can proceed with updates the same way as for active orders.
If there are no orders listed in the report, your data is clean and you do not have to take any action.
See Appendix: “Understanding Garnishments Changes.”
Running the Garnishment Payee Audit ReportRun the Garnishment Payee Audit Report, PUPYT03.SQR.
This report lists all garnishment orders with a payee that does not exist in the Payee Table.
To run the Garnishment Payee Audit Report:
1. From your web browser, sign in to the Copy of Production database.
2. Select Set Up HRMS, Upgrade, Reports.
3. Select the Garnishment Payee Audit Report
4. Click the Run button.
5. Click the Process Monitor link to monitor the program’s process.
Updating Garnishment OrdersTo update an order with the correct payee data:
1. From your web browser, sign in to the Copy of Production database.
2. Select North American Payroll, Employee Pay Data, Deductions, Create Garnishments or North AmericanPayroll, Employee Pay Data <country>, Deductions, Create Garnishments where country is, for example,CAN or USF.
3. Enter the employee ID and the company from the report.
4. Click Search.
5. If there is more than one garnishment order for the same employee, select the row with the garnishment IDfrom the report.
6. Click the Garnishment Spec Data 2 tab.
7. Update any of the following fields: SetID, VendorID, or Address.
22 Copyright © 2007, Oracle. All rights reserved.

Chapter 1 Prepare Your Database
8. Click Save.9. Repeat steps 3 – 8 for each garnishment order you want to update.
Updating Payee Information in the Payee TableTo add payee information to the Payee Table:
1. From your web browser, sign in to the Copy of Production database.2. Select Set Up HRMS, Product Related, North American Payroll, Garnishments, Payee Table.3. Select the Add a New Value tab.4. Enter the SetID and VendorID from the report.5. Click Add.6. Enter all required information for the payee you are setting up.7. Click Save.8. Repeat steps 3 – 7 for each payee you want to add.
Properties
DatabaseOrientation
Initial or MTP Products Platforms Languages
Target Both Payroll for NorthAmerica
All All
Task 1-10-3: Running Person Relationship Audit ReportThis section discusses:
• Understanding the Person Relationship Audit Report
• Running the Person Relationship Audit Report
• Correcting Invalid Relationships
Understanding the Person Relationship Audit ReportThe validation report PUHCI02.SQR shows invalid relationships among tables PERS_DATA_EFFDT,PERSONAL_DATA, PERSON, JOB, EMPLOYMENT, PA_RT_EMP_SETUP, ASGN_HOME_HOST,ASSIGNMENT.
These must be corrected before running the data conversion or they will remain orphaned.
Running the Person Relationship Audit ReportFollow the steps below to run the person relationship audit report:
1. From your web browser, sign in to the Copy of Production database.2. Select Set Up HRMS, Upgrade, Reports, Relationships Validation.3. Click Add a New Value.4. Enter the run control UPG_PERSON_AUDIT.5. Click Add.
Copyright © 2007, Oracle. All rights reserved. 23

Prepare Your Database Chapter 1
6. Click the Run button.7. On the Process Scheduler Request page, click OK.8. Click the Process Monitor link to monitor the program’s process.
Correcting Invalid RelationshipsThis audit reveals any missing or inaccurate relationships that exist in your current Person and Job data. Thesuccess of the conversion process depends on this data being correct.
The actions you must take will depend on the results of your investigation. If data exists in one record withoutbeing in another, then one of two things is needed. You should either delete the record from the table on whichit appears, or add the record to the table from which it is missing.
If you need to add a missing row, you will need to do some functional research to determine what datashould be entered.
The information below will help you correct invalid relationships:
PUHCI02.SQR lists:
• All EMPLIDs in PERSON that are not in PERS_DATA_EFFDT
PERSON is the Parent record to PERS_DATA_EFFDT. A row is required in PERS_DATA_EFFDTfor every row in PERSON.
Any entry in this report means that a row exists in PERSON but does not exist in PERS_DATA_EFFDT.
• All EMPLIDs in PERSON that are not in EMPLOYMENT
PERSON is the Parent record to EMPLOYMENT. A row is required in EMPLOYMENT for every row inPERSON, unless you are using Campus Solutions.
• All EMPLIDs in PERS_DATA_EFFDT that are not in PERSON
PERSON is the Parent record to PERS_DATA_EFFDT. A row is required in PERS_DATA_EFFDTfor every row in PERSON.
• All EMPLIDs in EMPLOYMENT that are not in PERSON
PERSON is the Parent record to EMPLOYMENT. A row is required in EMPLOYMENT for everyrow in PERSON.
• All EMPLID/EMPL_RCDS in EMPLOYMENT that are not in JOB
EMPLOYMENT is the Parent record to JOB. A row is required in JOB for every distinctEMPLID/EMPL_RCD in EMPLOYMENT.
• All EMPLID/EMPL_RCDS in JOB that are not in EMPLOYMENT
EMPLOYMENT is the Parent record to JOB. A row is required in EMPLOYMENT for every distinctEMPLID/EMPL_RCD in JOB.
• All EMPLIDs with PER_TYPE = P in PERS_DATA_EFFDT that are not in PA_RT_EMP_SETUP asEMPLID or EMPLID_PAYEE
PER_TYPE = ‘P’ is for Pension non-employees. Anyone with this PER_TYPE should also be inPA_RT_EMP_SETUP. If they are not, then the PER_TYPE is probably incorrect and should be fixedbefore running the conversion.
• All EMPLID_PAYEE /EMPL_RCD_PAYEE in PA_RT_EMP_SETUP that are not in EMPLOYMENT
Any record in PA_RT_EMP_SETUP should have a corresponding row in EMPLOYMENT. This iswhen the EMPLID is in the EMPLID_PAYEE field in PA_RT_EMP_SETUP. If not, then they will not
24 Copyright © 2007, Oracle. All rights reserved.

Chapter 1 Prepare Your Database
be correctly processed as Pension Payees. Determine whether the Pension data is correct and createEmployment/JOB/JOB_JR data if it is. Otherwise, delete the Pension data.
• All EMPLID/EMPL_RCD in PA_RT_EMP_SETUP that are not in EMPLOYMENTAny record in PA_RT_EMP_SETUP should have a corresponding row in EMPLOYMENT. This iswhen the EMPLID is in the EMPLID field in PA_RT_EMP_SETUP. If not, then they will not becorrectly processed as Pension Payees. Determine whether the Pension data is correct and createEmployment/JOB/JOB_JR data if it is. Otherwise, delete the Pension data.
• All EMPLID/EMPL_RCDs flagged as HOST records that are not in the Global Assignment tablePS_ASGN_HOME_HOSTThis report shows all EMPLID/EMPL_RCDs flagged as HOST records that are not in the GlobalAssignment table PS_ASGN_HOME_HOST. Either create the Assignment and Assignment Home/hostrecords or change the value in the HOME_HOST_CLASS field to M in the EMPLOYMENT table.
• All EMPLID/EMPL_RCDs flagged as HOST records that are not in the Global AssignmentPS_ASSIGNMENTThis report shows all EMPLID/EMPL_RCDs flagged as HOME records that are not in the GlobalAssignment PS_ASSIGNMENT. Either create the Assignment and Assignment Home/host records orchange the value in the HOME_HOST_CLASS field to M in the EMPLOYMENT table.
• All EMPLID/EMPL_RCDs flagged as HOST records that were created with HIRE not ASGHost Records must have been created with the Action ASG. These records should be changed to have theEMPLOYMENT.HOME_HOST_CLASS field set to M.
Properties
DatabaseOrientation
Initial or MTP Products Platforms Languages
Target Both All All All
Task 1-10-4: Running Dynamic ChartFields AuditsThis section discusses:
• Understanding Dynamic ChartFields Audit Reports
• Running the Dynamic ChartFields Audit Reports
Understanding Dynamic ChartFields Audit ReportsIn this task, you run and review the Dynamic ChartFields Audit reports. Running these reports helps youdecide how you want to set up data for the General Ledger Interface.
Note. Run this step only if you are using non-commitment accounting in Payroll for North America.
There are four reports, listed below:
• ChartKey Usage by Company and Business Unit: This report indicates the Company Earnings Accounts,Company Deduction Accounts, US Company Tax Accounts, and Canadian Company Tax Accounts.
• ChartKey Usage by Expense Type: This report shows Earnings Expense Accounts, Deduction ExpenseAccounts, US Tax Expense Accounts, and Canadian Tax Expense Accounts.
Copyright © 2007, Oracle. All rights reserved. 25

Prepare Your Database Chapter 1
• Liability ChartField Usage: This report displays Local Tax Liability ChartFields and Deduction LiabilityChartFields.
• List Payroll-GL Chart Key Mappings: This is an existing report and shows all ChartField records.
The reports list the existing setup for expenses and liability accounts. You should work with the GeneralLedger staff to decide how to group payroll activities, what ChartField combination to use for each group,and what liability accounts to use to offset the credit transactions for payroll activities. After making thosedecisions, you will manually set up the data in tables used for the General Ledger Interface. You will performthis task later in the upgrade process.
See “Complete Database Changes,” Setting Up General Ledger Interface.
See Appendix: “Understanding Dynamic ChartFields Changes.”
Running the Dynamic ChartFields Audit ReportsTo run the reports:
1. From your web browser, sign in to the Copy of Production database.2. Select Set Up HRMS, Upgrade, Reports, ChartField Audit Reports.3. Select Add a New Value.4. Enter the run control UPG_PUPYI01_RUN.5. Click Add.6. Click Run.7. Select all reports.8. Click OK.9. Click the Process Monitor link to monitor the program’s process.10. Select North American Payroll, Payroll Distribution, GL Interface Reports, Chartkey Values.11. Select Add a New Value.12. Enter the run control Chartkey.13. Click Add.14. Click Run.15. Click OK.16. Click the Process Monitor link to monitor the program’s process.
See “Complete Database Changes,” Setting Up General Ledger Interface.
See Appendix: “Understanding Dynamic ChartFields Changes.”
Properties
DatabaseOrientation
Initial or MTP Products Platforms Languages
Target Initial Payroll for NorthAmerica
All All
26 Copyright © 2007, Oracle. All rights reserved.

Chapter 1 Prepare Your Database
Task 1-11: Preparing Approvals for UpgradeThis section discusses:
• Understanding Approvals Upgrade
• Upgrading Appraisal Approvals
• Completing eProfile Approvals
• Completing ePerformance Approvals
• Completing Absence Management Approvals
Understanding Approvals UpgradeYou will have to complete all ePerformance approval transactions and eProfile Promotions, transfers, andreporting changes, and Absence Management approval transactions currently in process before upgrading tothe new Approvals Framework.
You will have to complete all ePerformance approval transactions and eProfile Promotions, transfers, andreporting changes currently in process before upgrading to the new Approvals Framework.
Task 1-11-1: Upgrading Appraisal ApprovalsAppraisals that have been created but not submitted and use one of the delivered rule sets for approval will beupgraded to the new Approvals Framework. The upgrade will update these appraisal records, as well as anyothers that have not been submitted, to use the new framework when submitted for approval.
During the upgrade, the new release approving manager user list will be set to the equivalent old releasedirect reports access type used for EP_APPRAISAL_ORG. This upgrade will only take place if one ofthe following access types is configured:
• By SupervisorId• By Department Manager• By Reports To Position• By Part Posn Mgmt Supervisor• By Part Posn Mgmt Dept Mgr
If you have configured your transaction to use “By Department Security Tree” or “By Group Id,” the approvingmanager user list will not be updated, since these access types will not be pre-configured for the approvalframework.
Transactions that have been created but not submitted and use a customized rule set will not be upgraded, butwe will deliver some documentation and unsupported starting SQL that will explain what you may want to doto upgrade these customized rule sets. These SQL statements will not be supported for upgrade or otherwise.In order to upgrade customized rule sets, you will need to complete the following steps.
To upgrade customized rule sets:
1. Determine whether the delivered transaction registry for ePerformance can be used instead of thecustomized rule set.
2. Determine whether the delivered approval process definitions for ePerformance can be used instead ofthe customized rule set.
Copyright © 2007, Oracle. All rights reserved. 27

Prepare Your Database Chapter 1
3. If the answer to either of the above steps is no, then you must create the objects for them.Once this is done, you will run SQL statements to update EP_TMPL_DEFN, EP_REVW_TYP_TBL, andEP_APPR to set the new values for the approval process definition (PTAFDEFN_ID).
Properties
DatabaseOrientation
Initial or MTP Products Platforms Languages
Target Both ePerformance All All
Task 1-11-2: Completing eProfile ApprovalsYou need to complete approvals, promotions, transfers, and reporting changes currently in process beforeupgrading to the new release. In this step, you run a series of queries to determine which transactions needto be completed and then complete them. If you do not complete these transactions, the data cannot beadded to the new approval framework. For instructions on completing these transactions, see your currentrelease eProfile PeopleBook.
To run the eProfile Approvals query reports:
1. Select Reporting Tools, Query, Query Manager.2. Run the following query reports:• UPG_EL_PROMOTIONS to determine which promotions need to be completed or cancelled.• UPG_EL_TRANSFERS to determine which transfers need to be completed or cancelled.• UPG_EL_REPORTINGS to determine which reporting changes need to be completed or cancelled.
See PeopleSoft 8.8 eProfile PeopleBook.
Properties
DatabaseOrientation
Initial or MTP Products Platforms Languages
Target Both eProfile All All
Task 1-11-3: Completing ePerformance ApprovalsYou need to complete approvals currently in process before upgrading to the new release. In this step, you runa query to determine which transactions need to be completed and then complete them. If you do not completethese transactions, the data cannot be added to the new approval framework. For instructions on completingthese transactions, see your current release ePerformance PeopleBook.
To run the ePerformance Approvals query report:
1. Select Reporting Tools, Query, Query Manager.
2. Run the following query report:
UPG_EP_APPROVALS
See PeopleSoft 8.8 ePerformance PeopleBook.
28 Copyright © 2007, Oracle. All rights reserved.

Chapter 1 Prepare Your Database
Properties
DatabaseOrientation
Initial or MTP Products Platforms Languages
Target Both ePerformance All All
Task 1-11-4: Completing Absence Management ApprovalsIn the previous release, Absence Management began utilizing the Approval Workflow Engine. This is a newand more powerful approval engine that allows you to set up multiple levels of approvals, notifications, andworkflow.
Because this new system utilizes a new architecture, there is no upgrade provided and it will be necessaryfor you to complete any pending transactions in your current workflow system prior to the upgrade. TheApproval Workflow Engine is not backwards compatible with any other approvals and workflow mechanismpreviously delivered.
Properties
DatabaseOrientation
Initial or MTP Products Platforms Languages
Target Both AbsenceManagement
All All
Task 1-12: Preparing the Benefits UpgradeThis section discusses:
• Preparing Benefits Administration
• Preparing COBRA Administration
Task 1-12-1: Preparing Benefits AdministrationThis step is performed by the Benefits Administrator. Run this step if you are licensed for PeopleSoft BenefitsAdministration.
You need to create events for all pending data changes that could affect Benefits eligibility because dataconversion cannot convert pending data change "triggers." To create events, perform a single EventMaintenance (EM) run (using any single arbitrary existing EM schedule; the smaller the schedule the lessimpact this will have on your timeline). Then review all Benefits Administration messages to ensure that allpending activity has been successfully processed to events in at least a "prepared" status. The events do nothave to be finalized or closed. After running Event Maintenance, confirm that no more pending changes existby verifying on the BAS Activity page that the BAS Activity grid is empty.
Copyright © 2007, Oracle. All rights reserved. 29

Prepare Your Database Chapter 1
Properties
DatabaseOrientation
Initial or MTP Products Platforms Languages
Target Both BenefitsAdministration
All All
Task 1-12-2: Preparing COBRA AdministrationThis step is to be performed by the Benefits Administrator. Run this step if you are using the COBRAAdministration module within Base Benefits.
You need to create events for all pending data changes that could trigger COBRA qualification because dataconversion cannot convert pending data change "triggers." To create events, perform a COBRA process run.Then review all COBRA Administration messages to ensure that all pending activity has been processed toevents. The events do not have to be finalized or closed. After running the COBRA process, confirm that nomore pending changes exist by verifying that the COBRA Activity grid is empty on the COBRA Activity page.
Properties
DatabaseOrientation
Initial or MTP Products Platforms Languages
Target Both All All All
Task 1-13: Preparing for System Element DeletionsThis section discusses:
• Understanding System Element Deletions
• Viewing Element Relationships
• Finding System Elements to Delete
• Reviewing Reports and Interface Setup
Note. Complete this task if you have Global Payroll installed.
Understanding System Element DeletionsWith the upgrade to the new PeopleSoft release, some system elements will be deleted for Global Payroll. Youmay not use these system elements or the record fields that correspond to these system elements. However,you will need to complete the steps below to verify if you are using these elements or record fields. If youfind that you do use the system elements or record fields that will be deleted, you will be referred to anappendix where you will find procedures to retain the functionality that was provided by the system elementor record field usage.
In addition, you view the element relationships and run PUGPW10.SQR. You need to manually review anycustomized reports/interface setup you have to see if they were referencing these system elements or recordfields.
30 Copyright © 2007, Oracle. All rights reserved.

Chapter 1 Prepare Your Database
There are a number of system elements that are being deleted from the Global Payroll Core Product. ThePIN Codes for these elements are shown below:
• AGE 18+ ALL• CPAMID FRA ALL• EXPCT MILIT DT DEU ALL
• HCE ALL• ENTRY DT FRA ALL• MILIT STATUS FRA ALL
• MEDICARE ENTLD DT ALL
• MILITARY STATUS ALL
• PERSON TYPE ALL• PREV HCE ALL• SMOKER ALL• US WORK ELIGIBILITY ALL
• YRS OF WORK EXPER ALL
Each of these are “database” system elements. The record field that corresponds to each will be removed;therefore, the system element will be removed as well.
The System Element Mapping Table, provided below, details the record field that the system elementmapped to.
PIN Code Record Field
AGE 18+ ALL PERS_DATA_EFFDT AGE_STATUS
CPAMID FRA ALL PERS_DATA_EFFDT CPAMID
EXPCTMILIT DT DEU ALL PERS_DATA_EFFDT EXPCTD_MILITARY_DT
ENTRYDT FRA ALL PERS_DATA_EFFDT ENTRY_DT_FRA
HCE ALL PERSON HIGHLY_COMP_EMPL_C
MILIT STATUS FRA ALL PERS_DATA_EFFDT MILIT_SITUATN_FRA
MEDICARE ENTLD DT ALL PERS_DATA_EFFDT MEDICARE_ENTLD_DT
MILITARY STATUS ALL PERS_DATA_EFFDT MILITARY_STATUS
PERSON TYPE ALL PERS_DATA_EFFDT PER_TYPE
PREVHCE ALL PERSON HIGHLY_COMP_EMPL_P
SMOKER ALL PERS_DATA_EFFDT SMOKER
Copyright © 2007, Oracle. All rights reserved. 31

Prepare Your Database Chapter 1
PIN Code Record Field
USWORK ELIGIBILITY ALL PERS_DATA_EFFDT US_WORK_ELIGIBILITY
YRS OFWORK EXPER ALL PERS_DATA_EFFDT YEARS_OF_EXP
Task 1-13-1: Viewing Element RelationshipsThis section discusses:
• Understanding Element Relationships
• Rebuilding the Element Relationship Map
• Finding System Elements in Rules
Understanding Element RelationshipsThis step determines if the system element is used in a rule definition. First you need to rebuild the elementrelationship map.
Rebuilding the Element Relationship MapTo rebuild the element relationship map:
1. Select Set Up HRMS, Product Related, Global Payroll, Elements, Define Element Relationships.2. Click Rebuild Effdt Element Map.3. Ensure that the map builds successfully with no errors.
See PeopleSoft Global Payroll PeopleBook, for your current release.
Finding System Elements in RulesYou will need to repeat the following instructions for each system element being deleted. If you do not, thedata will be left in an inconsistent state after the upgrade.
To find system elements in rules:
1. Select Set Up HRMS, Product Related, Global Payroll, Elements, Supporting Elements, View SystemElements by Source.
2. On the Search page specify the following:• For System Element Source, select Database-Field.• For Record Name, enter the record name.Refer to the System Element Mapping Table at the beginning of this task.
See Preparing for System Element Deletions.• Look for the field that corresponds to your system element and look for the Element Name from that row.Make note of this Element Name, as you will use this information in step 4 below.
3. Select Set Up HRMS, Product Related, Global Payroll, Elements, View Element Relationships to checkwhether the system element is used in any rule.
4. On the Search page, specify the following:• For Element Type, select SY.
32 Copyright © 2007, Oracle. All rights reserved.

Chapter 1 Prepare Your Database
• For Element Name, enter the system element name.5. Click Search.6. Click Used By.7. Specify As Of Date to be the date used in your system (the effective date used in your rule definitions).8. If no data is returned, the system element has not been used in any rule. Continue to the next systemelement. When finished with all system elements, proceed to the next step.
9. If data is returned, make note of it now. You will need these values later in the upgrade.Refer to the appendix “Upgrading System Element Deletions” after you complete the step “FindingSystem Elements to Delete.”
Note. PeopleSoft Global Payroll Germany customers: The system element WRKS_CNCL_MEM_DEU isused in the rule Writable Array DE_RP_000,1delivered and maintained by PeopleSoft. Changes tothis rule are not necessary as the update is delivered with the upgrade rules packages from PeopleSoftGlobal Payroll Germany.
10. Repeat these steps for each system element in the system element mapping table at the beginning ofthis task.
See Preparing for System Element Deletions.
See Finding System Elements to Delete.
See Appendix: “Upgrading System Element Deletions.”
Properties
DatabaseOrientation
Initial or MTP Products Platforms Languages
Target Both Global Payroll Core All All
Task 1-13-2: Finding System Elements to DeleteRun the report Pre-Delete System Elements, PUGPW10.SQR. This SQR looks for references of systemelements in non-rules (anything not covered in the step Viewing Element Relationships) as well as recordsfield usage. If you have used the system element or record field, the results of this SQR will report them. Ifvalues are returned, refer to the appendix “Upgrading System Element Deletions” now.
To run the Find System Elements to Delete Report:
1. Sign on to the Copy of Production database.2. Select Set Up HRMS, Upgrade, Reports, Pre-Delete System Elements.3. Enter UPG_GP_FIND_ELEMENTS on the Run Control selection panel and click OK.4. Click Run.5. Click OK from the Process Scheduler Request panel.6. Click the Process Monitor link to monitor the program’s process.
See Viewing Element Relationships.
See Appendix: “Upgrading System Element Deletions.”
Copyright © 2007, Oracle. All rights reserved. 33

Prepare Your Database Chapter 1
Properties
DatabaseOrientation
Initial or MTP Products Platforms Languages
Target Both Global Payroll Core All All
Task 1-13-3: Reviewing Reports and Interface SetupYou will need to manually review any customized reports/interface setup you have to see if they are referencingthese system elements and record fields. Refer to the appendix “Upgrading System Element Deletions” if youfind you have referenced these elements or fields. This appendix contains procedures to retain the functionalitythat was provided by the system element and record field usage.
See Appendix: “Upgrading System Element Deletions.”
Properties
DatabaseOrientation
Initial or MTP Products Platforms Languages
Target Both Global Payroll Core All All
Task 1-14: Finding Multiple DistributionsIn prior releases, the system allowed more than one cash and one check net distribution transaction to bespecified in the Employee’s Net Distribution instructions. This is no longer true in the new release. There arechecks in place to make sure that only one cash and one check are entered. This report will list employeeswith more than one cash/check net distribution order. You will need to review the net distribution instructionswith these employees to determine which distribution to remove. Then remove or make an adjustment sothat only one cash and one check payment method remains. Any employee listed on the report that does notresolve this problem will receive errors when accessing their net distributions on the new release. The reportyou will be running is PUGPI01.SQR.
Note. Only Global Payroll licensees need to perform this task.
To run the Multiple Cash/Check Distribution Report:
1. Sign on to the Copy of Production database using your current version of PeopleTools.2. Select Set Up HRMS, Upgrade, Reports, Cash/Check Net Distribution, Specify Net Pay Elections.3. Click Add a New Value.4. Enter UPG_GP_DISTRIBUTIONS on the Run Control selection panel and click Add.5. Click Run.6. Click OK from the Process Scheduler Request panel.7. Click the Process Monitor link to monitor the program’s process.
To review and update the employee’s net distribution instructions:
34 Copyright © 2007, Oracle. All rights reserved.
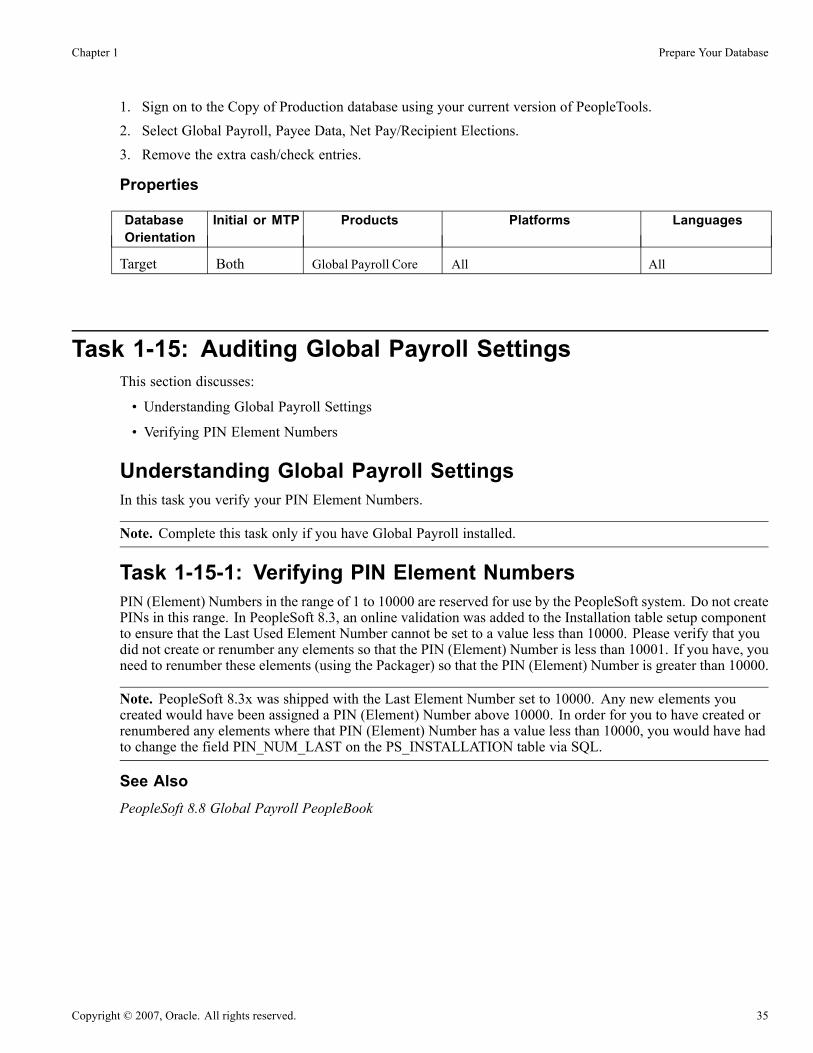
Chapter 1 Prepare Your Database
1. Sign on to the Copy of Production database using your current version of PeopleTools.2. Select Global Payroll, Payee Data, Net Pay/Recipient Elections.3. Remove the extra cash/check entries.
Properties
DatabaseOrientation
Initial or MTP Products Platforms Languages
Target Both Global Payroll Core All All
Task 1-15: Auditing Global Payroll SettingsThis section discusses:
• Understanding Global Payroll Settings
• Verifying PIN Element Numbers
Understanding Global Payroll SettingsIn this task you verify your PIN Element Numbers.
Note. Complete this task only if you have Global Payroll installed.
Task 1-15-1: Verifying PIN Element NumbersPIN (Element) Numbers in the range of 1 to 10000 are reserved for use by the PeopleSoft system. Do not createPINs in this range. In PeopleSoft 8.3, an online validation was added to the Installation table setup componentto ensure that the Last Used Element Number cannot be set to a value less than 10000. Please verify that youdid not create or renumber any elements so that the PIN (Element) Number is less than 10001. If you have, youneed to renumber these elements (using the Packager) so that the PIN (Element) Number is greater than 10000.
Note. PeopleSoft 8.3x was shipped with the Last Element Number set to 10000. Any new elements youcreated would have been assigned a PIN (Element) Number above 10000. In order for you to have created orrenumbered any elements where that PIN (Element) Number has a value less than 10000, you would have hadto change the field PIN_NUM_LAST on the PS_INSTALLATION table via SQL.
See AlsoPeopleSoft 8.8 Global Payroll PeopleBook
Copyright © 2007, Oracle. All rights reserved. 35

Prepare Your Database Chapter 1
Properties
DatabaseOrientation
Initial or MTP Products Platforms Languages
Target Both Global Payroll Core All All
Task 1-16: Making Functional DecisionsThis section discusses:
• Understanding Making Functional Decisions
• Assigning Upgrade Default Values
• Assigning Training Employee Record Default Values
• Exporting Upgrade Default Options
Understanding Making Functional DecisionsIn this task, you choose the default values that will be assigned to fields by conversion programs duringthe upgrade.
Task 1-16-1: Assigning Upgrade Default ValuesThis section discusses:
• Understanding Upgrade Default Values
• Opening the Upgrade Defaults Dialog Box
• Setting Values for Alternative Overtime Upgrade
• Assigning Schedule Defaults
• Assigning Recruiting Solutions Upgrade Defaults
• Assigning Profile Management Options
• Assigning HR Default Values
• Defining the Person Model Conversion Method
Understanding Upgrade Default ValuesThis upgrade contains many new fields that need default values. In addition, current values will need tobe mapped to new values. In this step, you choose your default values that will be assigned to fields byconversion programs during the upgrade. You will also structure some of the mapping to the way in whichyou will use the system.
Note. The Alternative Overtime upgrade is for sites with North American Payroll installed. If you do not havethis product installed, clear the Perform Upgrade check box on the Alternative Overtime page. If you havethis product, you need to review the Alternative Overtime feature in the new release to determine whetheryou want the upgrade steps performed.
36 Copyright © 2007, Oracle. All rights reserved.

Chapter 1 Prepare Your Database
Opening the Upgrade Defaults Dialog BoxTo open the Upgrade Defaults dialog box:
1. From your web browser, sign in to the Copy of Production database using your current release ofPeopleTools.
2. Select Set Up HRMS, Upgrade, Define Defaults, Product Defaults.The Upgrade Defaults dialog box appears.
3. Follow the instructions in the remainder of this task to complete the Upgrade Default pages.
Setting Values for Alternative Overtime UpgradeThe Alternative Overtime upgrade is for sites with North American Payroll installed. If you do not havethis product installed, clear the Perform Upgrade check box on the Alternative Overtime page. If you havethis product, you need to review the Alternative Overtime feature in the new release to determine whetheryou want the upgrade steps performed.
In this step, you specify whether you want to do the Alternative Overtime Upgrade. If so, enter values in theEffective Date for Upgrade, SetID, and State Code fields.
To set the fields required for Alternative Overtime functionality:
1. Select the Alt Overtime tab.
Alt Overtime tab
2. Select the Perform Upgrade check box if you want to perform the Alternative Overtime Upgrade.
Copyright © 2007, Oracle. All rights reserved. 37

Prepare Your Database Chapter 1
If you select this check box, you must enter all other fields on this page.3. Enter a date in the Effective Date for Upgrade field. Do not confuse this date with the effective date on theAlternative Overtime State table, which will be set to 1900/01/01 by default. The date specified here willbe used for inserting new effective dated rows into the Job table with a new FLSA status of Alt OT for allemployees who meet all of the following criteria:• Currently have FLSA Status = Nonexempt• HR Status is not equal to Terminated• Work in a state specified on the Alt Overtime upgrade defaults page
4. Enter a setID in the SetID field.The setID specified here will be used for inserting rows into the Alternative Overtime State table. EachsetID will be associated with all states listed below.
5. Add or delete states by entering or deleting values in the State Code field, as needed. The list of states ispre-populated with the states that require Alternative Overtime processing.All states will be associated with each setID listed above.
Assigning Schedule DefaultsIn this step, you populate the new setID and Schedule Group fields that have been added to scheduling objects.
To map setID and schedule groups:
1. Select the Schedules tab.
Schedules tab
38 Copyright © 2007, Oracle. All rights reserved.

Chapter 1 Prepare Your Database
2. If only a single schedule group and setID will be used, complete the following fields in the ScheduleDefaults section to set up the upgrade for the schedule objects:• Enter a setID in the Schedule SetID field.The setID specified here will be used to populate the SetID field on all scheduling objects (Shift,Workdays, Schedule Definitions, and Schedule Overrides). This setID must already be defined.
• Enter a value in the Schedule Group field that is to be associated with the above setID.The value cannot be greater than 10 characters in length. The upgrade process creates this schedule group.
• Enter a description of the schedule group in the Description field (no more than 20 characters in length).3. If schedules will be split up and assigned to more than one schedule group or setID, complete the followingfields in the Additional Schedule Groups section, entering a row in this section for each additional schedulegroup to be created during the upgrade:• Enter a value in the Schedule Group field that will be associated with the above setID (no more than 10characters in length).This schedule group will be created by the upgrade process.
• Enter a setID in the SetID field.The setID specified here will be used to populate the setID field for the associated schedule groupwhen it is created during the upgrade. Each schedule group must be associated with a setID. ThissetID must already be defined.
• Enter a description of the schedule group in the Description field (no more than 30 characters in length).Each schedule group must be given a description.
4. If you have schedules that will not use the default schedule group and setID, complete the fields in theSchedule Mapping section to define the associated schedule group.Each schedule can only be associated with one schedule group. The setID assigned to the schedulewill be the setID of the selected schedule group.• Enter a value in the Schedule ID field.The schedule ID will be associated with the schedule group.
• Enter a value for the schedule group that is to be associated with the above schedule ID.The value must be defined in the Additional Schedule Groups section.
Note. The Schedule Group field on employee Schedule Assignments, Time and Labor Workgroups,and GP Paygroup will be populated using the schedule group associated with the schedule to whichthey are assigned.
The Alternate SetID and Schedule Group fields are populated wherever an alternate schedule ID ispresent, using the same mappings that are used for the primary schedule.
For additional information about effective date and schedule definition, as well as schedule ID, see thereference below.
See Appendix: “Reviewing HRMS Changes,” Reviewing Schedule Defaults.
Assigning Recruiting Solutions Upgrade DefaultsIn this step, you determine the default values used in data conversion for the Recruiting Solutions upgrade.
Copyright © 2007, Oracle. All rights reserved. 39

Prepare Your Database Chapter 1
In previous recruitment releases, all (non-automatch) saved applicant searches and result sets were essentiallyshared and had no specific owner. In the new release, all saved searches must have an owner assigned forauthorization purposes.
In previous PeopleSoft releases, each PeopleSoft installation represented a single site. In the new release,support for multiple Self Service (Careers) sites is supported. All applicant job agent profiles from previousreleases need to be migrated to a specific site during the new release upgrade.
Previously, when an applicant was associated to a requisition (for example, applied for a job) the applicantstatus code (disposition) was associated with and stored under the job requisition record. This was known asthe job requisition status. In the new release, the applicant disposition is no longer tracked under job requisitionbut is now tracked by a new Recruitment record. Essentially, the applicant disposition has been moved fromthe job opening to the recruitment record. This means that the applicant status code associated with the jobrequisition previously can be deleted and replaced with a true job opening status of 010 – Open.
To assign Recruiting Solutions Upgrade defaults:
1. Select the Upgrade RS tab.
Upgrade RS tab
2. Enter a value in the UserID field that you want to assign as the new owner of any anonymous savedsearches.
3. Enter a value in the Site ID field for the Self Service (Career) site that you intend to use in the new release.If multiple sites are not being used in the new release installation, then enter 1 for the default site ID.
4. Select the Delete Job Opening App Status check box to delete the applicant status codes previouslyassociated with job requisitions.
Assigning Profile Management OptionsIn this step, you determine the default values to be used in data conversion for the Profile Managementupgrade. If no values are supplied, the defaults described below will be applied by the conversion program.
To set Profile Management options:
1. Select the Profile Management tab.
40 Copyright © 2007, Oracle. All rights reserved.

Chapter 1 Prepare Your Database
Profile Management Tab
2. In the Profile ID Length field, enter the number of characters that you will need for the new profile ID.
The default value is 6. During conversion, new auto-generated numeric profile IDs will be created forPerson Profiles, Clusters, Roles, and Job Profiles. Once in production, new profiles will be assigned anauto-generated number (stored in a character field). The default value supplied is intended to accommodateall profile IDs generated during conversion as well as a vast supply of IDs once in production. The defaultvalue also accommodates characters for a prefix to be used when creating IDs in production, if designated.
If there is concern that your company will be upgrading more than 899,999 profiles, this would be a goodtime to increase the profile ID length, though the conversion will not error if profile IDs longer than theprofile ID length specified are created. This value can be increased after the upgrade if special needsshould be accommodated for profiles created while in production.
3. Set the Last Profile ID Used field to the starting number you want to use.
In the new release, Profile Management uses profile ID in a numeric sequence. The default is to start thesequence at 100,000, thus the first profile that will be created during the upgrade will have a profile ID of100,001. You may want to start at a number other than 100,000. Set this field to the starting number youwish to use; however, be aware of the profile ID length, ensuring that the starting number you enter canaccommodate profiles being converted and still remain within the profile ID length. In most cases there isno need to change this number. A valid case would be if a custom process were used import profiles froman alternative source having unique profile IDs that need to be protected.
4. Set the Last Item Key ID Used field to the starting number you want to use.
In the new release, Profile Management will assign a unique numeric ID to all items in a profile. Thedefault is to start the sequence at 0; therefore, the first profile item created will have a starting number of1. If you want to start with another number, set this field to that number. In most cases there is no needto change this number. A valid case would be if a custom process were used to import profiles from analternative source having a series of IDs that need to be reserved.
5. Set the Job Profile Description Effective As Of field to the effective date that you want to use.
In the new release, the Job Profiles description field can have only one effective date per job profile. It willdefault to the most current effective dated description (as of the date of the conversion run). That maymean a description dated for the future. If you want this default to use a different date, set this field to theeffective date that should be used (for example, 1900-01-01 if you want the oldest date or 3000-01-01 ifyou want the description that is the most future dated.)
Copyright © 2007, Oracle. All rights reserved. 41

Prepare Your Database Chapter 1
Assigning HR Default ValuesIn the new release, the EXPIRATION_DATE field is added to the BADGE_TBL record. TheEXPIRATION_DATE field also exists on the new Employee Security Clearance record, HR_EE_SEC_CLR.Application errors may occur when the expiration date is before the effective date. To avoid potential errors,specify values for the Badge Expiration Date and Security Clearance Expiration Date fields on the DefineHR Defaults page.
Define HR Defaults page
Defining the Person Model Conversion MethodIn this step, you define the person model conversion method. Review the appendix “Understanding PersonModel Changes.” It discusses features in the new release and the default method for converting your data.If you are satisfied with the design of the conversion, you can skip the Person Model Defaults page. If youprefer to have your Non-Employees converted as Persons of Interest instead of Contingent Workers, select theconversion method option “Upgrade Training & Other Non-Employees as Person of Interest” on this page.
Person Model Dflts page
Changing the default conversion method will result in your data converting as follows:
Chart 2 - Upgrade Conversion Chart for PER_STATUS and PER_TYPE
Note. This chart only outlines the differences from what is described in the appendix “Understanding PersonModel Changes.”
42 Copyright © 2007, Oracle. All rights reserved.

Chapter 1 Prepare Your Database
Properties
DatabaseOrientation
Initial or MTP Products Platforms Languages
Target Initial All All All
Task 1-16-2: Assigning Training Employee Record Default ValuesIn the new release, the EMPL_RCD field is added to the TRAINING and TRN_INSTRCT_TBL records as akey. In this step, you assign the proper employee record having training association for trainees and instructorswith multiple employee job records.
Define Training Employee Record page
To assign training employee record values:
1. Select Set Up HRMS, Upgrade, Define Defaults, Product Defaults, Training Empl Rcd.
2. Click the Load Upg Training Default Page button.
This displays all trainees and instructors with multiple employee records in PS_JOB.
3. Select the “Upgrade?” check box next to the EMPL_RCD value to populate the TRAINING andTRN_INSTRUCT_TBL records during the conversion process.
Note. Failure to select the EMPL_RCD to upgrade will result in default values of zero.
Properties
DatabaseOrientation
Initial or MTP Products Platforms Languages
Target Both All All All
Task 1-16-3: Exporting Upgrade Default OptionsIn this step, you export the upgrade default options defined in the previous steps for use during Move toProduction.
The script name for your upgrade is:
PUHCHRW01E.DMS
Copyright © 2007, Oracle. All rights reserved. 43

Prepare Your Database Chapter 1
Properties
DatabaseOrientation
Initial or MTP Products Platforms Languages
Target Both All All All
Task 1-17: Reporting Row Count for TablesYou may find it helpful to run a report that identifies any table without rows, that is, any table not used inyour production database. This information can help you determine whether to accept a change from the NewRelease Demo database. The UPGCOUNT process reports the row counts of all PeopleSoft tables in yourdatabase. You can find the resulting report (UPGCOUNT.LIS) in the TEMP directory specific to your machine.
Properties
DatabaseOrientation
Initial or MTP Products Platforms Languages
Target Initial All All All
Task 1-18: Preparing Your DatabaseThis section discusses:
• Understanding Database Preparation
• Verify Database Integrity
• Clean the PSOBJCHNG Table
• Drop PeopleTools Tables
• Shrink Images
• Purge Message Queues
Understanding Database PreparationIn this task, you perform a variety of steps in preparation for the PeopleTools upgrade. These steps preventerrors in tasks later in the upgrade.
Task 1-18-1: Verify Database IntegrityThe DBCC CHECKDB command is run to perform a database consistency check on your Copy of Productiondatabase. A database consistency check ensures that your database platform environment is clean andminimizes any potential upgrade errors due to possible database corruption.
44 Copyright © 2007, Oracle. All rights reserved.

Chapter 1 Prepare Your Database
Properties
DatabaseOrientation
Initial or MTP Products Platforms Languages
Target Both All MS SQL Server
Sybase
All
Task 1-18-2: Clean the PSOBJCHNG TableThis step deletes all data stored in the PSOBJCHNG table, which contains all renamed records and fields. Thedata stored in the PSOBJCHNG table must be deleted before starting your upgrade. The build process looks inthis table when running alter renames. Change Assistant will execute the following SQL:
DELETE FROM PSOBJCHNG
Note. Move to Production: If you rename records or fields later in your upgrade, you should expect to seerows in the PSOBJCHNG table at the end of the upgrade pass. During the Move to Production these rowswill be copied from your old Copy of Production to your new Copy of Production. Thus, this step is notnecessary during Move to Production.
See “Apply Application Changes,” Modifying the Database Structure.
Properties
DatabaseOrientation
Initial or MTP Products Platforms Languages
Target Initial All All All
Task 1-18-3: Drop PeopleTools TablesIn this step, you drop PeopleTools tables to ensure the successful completion of your upgrade. You will dropthe following tables, if they exist in your database, using the SQL tool of your choice.
Drop the following tables:
• PS_PSMCFQUEUESLANG
Note. The table, PS_PSMCFQUEUESLANG, contains no data and can be safely dropped. Do notdrop the table PSMCFQUEUESLANG.
• PSOPTSTATUSThe table, PSOPTSTATUS, will be converted into a view and can be safely dropped. Do not drop theview PSOPTSTATUS.
Copyright © 2007, Oracle. All rights reserved. 45

Prepare Your Database Chapter 1
Properties
DatabaseOrientation
Initial or MTP Products Platforms Languages
Target Both All All All
Task 1-18-4: Shrink ImagesIf you have customized images stored in your database, you may need to shrink these images before updatingPeopleTools system tables later in the upgrade. Large image fields could cause that step to fail because it is notpossible to bind long raw data that is longer than 32 KB.
To shrink images using a PeopleTools release later than 8.44.14:
1. Launch Configuration Manager and select the Profile tab.2. Select the profile for the upgrade database and click Edit.3. Select the Common tab.4. Select the option that is labeled either Convert and Shrink Images to Image Size Limit, or Convert DIB andBMP images to JPG.
5. Click OK.
Note. If you re-shrink images, select Don’t Convert, but Shrink Images to Image Size Limit. Specify thenumber of bytes for the image size limit.
6. Launch Application Designer.7. Select Tools, Upgrade, Convert Images...8. Select Convert Static Images in Image Catalog.9. Click Start to convert or shrink images.10. Select Tools, Upgrade, Convert Images...11. Select Convert Dynamic Images for fields. Select the box for all of the fields listed.12. Click Start to convert or shrink images.
If you are using a PeopleTools release earlier than 8.44.15, you will need to manually save and temporarilyremove any custom images greater than 32 KB. Using your SQL query tool, run the following SQL to identifyimages greater than 32 KB:
-- CREATE A TABLE TO HOLD THE CONVERTED IMAGE
CREATE TABLE PS_CONVIMG (CONTNAME VARCHAR2(30), IMAGESIZE BLOB);
-- LOAD CONVERTED DATA INTO THE TABLE
INSERT INTO PS_CONVIMG SELECT CONTNAME,TO_LOB(CONTDATA) FROM PSCONTDEFN;
-- RETRIEVE IMAGES OVER 32K
SELECT CONTNAME, DBMS_LOB.GETLENGTH(IMAGESIZE) IMAGESIZE FROM PS_CONVIMG WHERE⇒DBMS_LOB.GETLENGTH(IMAGESIZE) > 32768;
To manually save images greater than 32 KB:
1. In Application Designer, insert your images into a project.Select Insert, Definitions into Project.
46 Copyright © 2007, Oracle. All rights reserved.

Chapter 1 Prepare Your Database
2. Save the project.3. Copy the images to file.Select Tools, Upgrade, Copy Project to File.
4. Delete the rows for the images in your project from the PSCONTDEFN table.5. When you are finished with the upgrade, copy the project from file to restore your custom images.Select Tools, Upgrade, Copy Project from File.
See “Apply PeopleTools Changes,” Updating PeopleTools System Tables.
Properties
DatabaseOrientation
Initial or MTP Products Platforms Languages
Target Both All Oracle All
Task 1-18-5: Purge Message QueuesEnsure that all of your message transactions are complete before starting the upgrade. Message functionalityand structure changed in the new release, which will prevent old messages from processing successfully.
This step runs the following Data Mover script (DMS), found in the %PS_HOME\SCRIPTS directory of yourold release codeline, on your Copy of Production database to purge your message queues:
APPMSGPURGEALL.DMS
Warning! A script of the same name is found in the codeline of the release to which you are upgrading.Do not use this script; it will not run successfully.
Properties
DatabaseOrientation
Initial or MTP Products Platforms Languages
Target Both All All All
Task 1-19: Backing Up Demo DatabasesThis section discusses:
• Backing Up Copy of Current Demo
• Backing Up New Release Demo
Copyright © 2007, Oracle. All rights reserved. 47

Prepare Your Database Chapter 1
Task 1-19-1: Backing Up Copy of Current DemoBack up your Copy of Current Demo database now. This upgrade requires you to run scripts on this database.Before the upgrade starts, you need to take a backup of this environment to preserve your Oracle-delivereddemo implementation.
Properties
DatabaseOrientation
Initial or MTP Products Platforms Languages
Copy ofCurrent Demo
Initial All All All
Task 1-19-2: Backing Up New Release DemoBack up your New Release Demo database now. This upgrade requires you to run scripts on this database.Before the upgrade starts, you need to take a backup of this environment to preserve your Oracle-delivereddemo implementation.
Properties
DatabaseOrientation
Initial or MTP Products Platforms Languages
Source Initial All All All
Task 1-20: Renaming Records and FieldsThis section discusses:
• Understanding Renaming Records and Fields
• Running the RNHCGPI02 Script
• Running the RNHCUPI01 Script
• Retaining the Target Rename Log Files
• Running RNHCGPI02 Script on Copy of Current Demo
• Running RNHCUPI01 Script on Copy of Current Demo
Understanding Renaming Records and FieldsDuring development of new releases, PeopleSoft sometimes renames records, fields, or specific occurrences ofa field on a record (recfield renames). In this task, you will execute scripts to rename those same objects inyour Copy of Production and in the Copy of Current Demo.
With these commands, Data Mover renames the objects in the record and field definitions in ApplicationDesigner and then logs an entry on the table PSOBJCHNG. It also changes all references to these objects inpages and PeopleCode. This will not rename the objects on the database tables at this time.
48 Copyright © 2007, Oracle. All rights reserved.

Chapter 1 Prepare Your Database
Later in the upgrade, you will generate the SQL that will alter the tables on the database. This alter processreads PSOBJCHNG and will rename these tables and fields. The SQL generated to perform that task willbe different depending on the build options you select and your database platform, however the result is thesame. For record renames, the old table no longer exists and the new table contains the data from the oldtables. For field and recfield renames, any affected tables will contain the new column with data from the oldcolumn; the old column no longer exists on the tables.
If a field rename does not go through this process, the alter SQL will not recognize it as a rename. After thealter, both old and new columns exist on the table and a data conversion process is required to copy the datafrom the old column to the new. This is an important distinction to make.
Important! It is very important to resolve any errors with these rename scripts. Do not skip any lines thaterror. It is not possible to recover from missed renames. The consequences of skipping a rename are evidentlater in the upgrade when you are in the middle of running data conversion programs.
A few different things could happen: the conversion program could error because the PeopleSoft system isexpecting only the new column on the table, but you have both old and new, or you may lose data. Because ofthe rename, the PeopleSoft system expects the data to be handled in the SQL alter process. If the data doesn’tmove in the SQL alter process, and you don’t write a data conversion program to move the data, the processdrops the old column without having copied the data to the new column.
There are several advantages to using this rename process. Any references to the renamed records or fields inyour customizations will also be modified. The number of differences on the compare reports is reduced. TheSQL alter moves the data from old to new efficiently and no additional data conversion steps are required.
Task 1-20-1: Running the RNHCGPI02 ScriptThis script will rename recfield GPJP_TAX_ESTAB.NAME to GPJP_NAME on the Copy of Productiondatabase. Check to see that this rename has not already been done on your Copy of Production, if it hasnot, set this step to run on your job. If the rename has already been done on your Copy of Production, youcan skip this step.
This rename should only execute during the initial upgrade pass, not during the Move to Production passes.
If you want to automate this step, follow the procedure below.
To make this step automated:
1. Select the step Running the RNHCGPI02 Script in Change Assistant.2. Open the Step Properties dialog box.3. Change the Type from ManualStop to DataMoverUser.4. Click OK.5. In your upgrade job, mark the step as Run.
Properties
DatabaseOrientation
Initial or MTP Products Platforms Languages
Target Initial All All All
Copyright © 2007, Oracle. All rights reserved. 49

Prepare Your Database Chapter 1
Task 1-20-2: Running the RNHCUPI01 ScriptThis script will rename records, fields, and recfields on the Copy of Production database. These renamesshould only execute during the initial upgrade pass, not during the move to production passes.
Properties
DatabaseOrientation
Initial or MTP Products Platforms Languages
Target Initial All All All
Task 1-20-3: Retaining the Target Rename Log FilesIn order to retain a copy of the log files for the preceding rename script steps run against the Copy ofProduction database, you must resave the logs for those steps with new file names. Otherwise, these logs willbe overwritten by the following rename script steps run against the Copy of Current Demo database.
Properties
DatabaseOrientation
Initial or MTP Products Platforms Languages
Target Initial All All All
Task 1-20-4: Running RNHCGPI02 Script on Copyof Current DemoThe RNHCGPI02.DMS script will rename records, fields, and recfields on the Copy of Current Demodatabase. These renames should only execute during the initial upgrade pass, not the Move to Productionpasses. Run this script in Data Mover user mode.
Properties
DatabaseOrientation
Initial or MTP Products Platforms Languages
Copy ofCurrent Demo
Initial All All All
Task 1-20-5: Running RNHCUPI01 Script on Copyof Current DemoThe RNHCUPI01.DMS script will rename records, fields, and recfields on the Copy of Current Demodatabase. These renames should only execute during the initial upgrade pass, not the Move to Productionpasses. Run this script in Data Mover user mode.
50 Copyright © 2007, Oracle. All rights reserved.

Chapter 1 Prepare Your Database
Properties
DatabaseOrientation
Initial or MTP Products Platforms Languages
Copy ofCurrent Demo
Initial All All All
Task 1-21: Comparing CustomizationsThis section discusses:
• Modifying Compare Report Options
• Running Compare UPGCUST
• Running UPGCUST Filter Script
• Reviewing UPGCUST Compare Log
• Restoring Copy of Current Demo
Note. In this task, you identify customizations on the Copy of Production by running a database compareagainst the Copy of Current Demo database.
Task 1-21-1: Modifying Compare Report OptionsPeopleSoft Change Assistant templates are delivered with the default report filters turned on. This limits thesize of the reports and keeps them manageable. Before you start the compare, review the compare options inyour Change Assistant template step properties and modify them based on your specific requirements.
If you decide not to modify the compare options, the objects are still compared. However, the results are onlyavailable online in Application Designer, and are not written into the compare reports. The compare reports aretools to help you review changed objects. However, based on the report filters you select, you may need toreview the action flags for other objects in the compare project in Application Designer.
For example, you can modify the compare options so the report contains customized objects that are present inyour Copy of Production database but are absent from the Copy of Current Demo database. Alternatively, youcan review these objects online, through Application Designer, after the database compare.
To modify the upgrade compare options:
1. Highlight the Run Compare UPGCUST step and right-click.2. Select Step PropertiesThe Step Definition dialog box appears.
3. Click Upgrade.The Compare and Report dialog box appears.
4. Click Options.5. Select the Report Filter tab.The default options include your custom changes on the reports.
Copyright © 2007, Oracle. All rights reserved. 51

Prepare Your Database Chapter 1
6. Change the default options as necessary and click OK.
Upgrade Options page, Report Filter tab
7. In the Compare and Report dialog box, click OK.8. In the Step Definition dialog box, click OK.9. Select File, Save Job.
Properties
DatabaseOrientation
Initial or MTP Products Platforms Languages
Target Initial All All All
Task 1-21-2: Running Compare UPGCUSTThis step creates a project on your Copy of Production database called UPGCUST and executes a databasecompare of all comparable object types. This compare is run to identify all customizations on the Copy ofProduction database. The database compare occurs between your Copy of Production and the Copy of CurrentDemo database. The following comparable object types are omitted from the comparison:
52 Copyright © 2007, Oracle. All rights reserved.

Chapter 1 Prepare Your Database
• Application packages.• Application package PeopleCode.• File reference type codes.• IB queues.• Java portlet user preferences.• Messages.• Message catalog entries.• Message PeopleCode.• Portal registry user favorites.• Portal registry user home pages.• Services• Service operations.• Service operations handlers.• Service operation versions.• Service operation routings.
Message catalog entries are exported and imported with Data Mover in a later step. Portal registry user homepages, portal registry user favorites, file reference type codes, and Java portlet user preferences remain inthe Copy of Production environment and are not copied from the New Release Demo database. IntegrationBroker objects will be compared later in the upgrade.
Properties
DatabaseOrientation
Initial or MTP Products Platforms Languages
Copy ofCurrent Demo
Initial All All All
Task 1-21-3: Running UPGCUST Filter ScriptThis step removes all objects from the UPGCUST project that are not marked *Changed or *Unchanged inyour Copy of Production environment. It is used to isolate only custom objects in the UPGCUST project.
The script name for your upgrade is:
PUUPX99.DMS
See Appendix: “Using the Comparison Process.”
Copyright © 2007, Oracle. All rights reserved. 53

Prepare Your Database Chapter 1
Properties
DatabaseOrientation
Initial or MTP Products Platforms Languages
Target Initial All All All
Task 1-21-4: Reviewing UPGCUST Compare LogIn this step, review the log file and compare reports generated by the database compare in the previous step toensure that it completed successfully. A detailed analysis of these compare reports is not necessary. Laterin the upgrade, you will review a new set of compare reports when customizations are compared to theNew Release Demo database.
Properties
DatabaseOrientation
Initial or MTP Products Platforms Languages
Target Initial All All All
Task 1-21-5: Restoring Copy of Current DemoRestore your Copy of Current Demo database from the backup taken earlier in the upgrade. The backup wastaken before rename scripts ran against the Copy of Current Demo. This is done to restore the environment toan Oracle-delivered demo implementation.
Properties
DatabaseOrientation
Initial or MTP Products Platforms Languages
Copy ofCurrent Demo
Initial All All All
Task 1-22: Identifying CustomizationsIn this task, identify your modifications to Mass Change, EDI, Message Catalog, SQR Strings, XML ServiceInformation, Verity Based Indexes, Setup Manager data, Pagelet Wizard objects, and related language systemdata, so that you can reload them later in the upgrade process.
The upgrade tasks will replace all Mass Change processes, Verity Based Indexes, and Setup Manager data.Only modifications to delivered Pagelet Wizard objects will be overwritten because any non-delivered customPagelet Wizard objects will be preserved during the upgrade. You cannot print Mass Change code. Be surethat you have extracted your modifications to reapply them later. You must extract your modifications, usingcut and paste, to a file for manual reapplication later. EDI tables must be handled in the same way. Reloadadditional data and review customizations in Oracle-delivered data.
Message sets 0-19,999 will be overlaid during the upgrade, so any customizations you have made in thisrange will be lost. In addition, all SQR strings will be replaced. To save your customizations, cut and pasteyour changes to a file and manually reapply them.
54 Copyright © 2007, Oracle. All rights reserved.

Chapter 1 Prepare Your Database
Be aware that the data loaded by the PeopleSoft software must not be overwritten.
If you have multiple languages loaded, you should save any custom data you have in related language tablesfor system data. For these tables, data will be exported from the New Release Demo database when you exportrelated language system data, and imported to your Copy of Production when you import related languagesystem data. The import may delete your custom data, depending on the import option.
The tables that need to be reviewed are listed in the following scripts. These scripts can be found in your newrelease PS_HOME\SCRIPTS directory.
Important! The scripts below are delivered with and run from your new PeopleSoft release. These scripts arenot run in this task. You will run these scripts later in the upgrade process.
Review the tables that will be overwritten in these scripts:
Tables Script
Message Catalog DLUPX01E.DMS
SQR Strings DLUPX04E.DMS
EDI DLUPX05E.DMS
Mass Change DLUPX06E.DMS
XML Service Information DLUPX13E.DMS
Setup Manager, Verity Based Indexes, and OptimizationModels
DLUPX16E.DMS
Pagelet Wizard DLUPX14E.DMS
If your database contains translations, review the list of related language system data tables that will beexported and imported in these scripts:
DLHCLASYSE.DMS
DLHCLASYSI.DMS
Note. Move to Production: Once you have reapplied these customizations at the end of your initial upgradepass, you will not need to apply them again. The affected tables are moved from the old Copy of Production tothe New Copy of Production by the scripts listed in the following table:
Tables Scripts
Mass Change MVAPPEXP.DMS
MVAPPIMP.DMS
EDI MVPRDEXP.DMS
MVPRDIMP.DMS
Strings MVAPPEXP.DMS
MVAPPIMP.DMS
Copyright © 2007, Oracle. All rights reserved. 55

Prepare Your Database Chapter 1
Tables Scripts
Messages MVAPPEXP.DMS
MVAPPIMP.DMS
XML Service Information MVPRDEXP.DMS
MVPRDIMP.DMS
Setup Manager, Verity Based Indexes, and OptimizationModels
MVAPPEXP.DMS
MVAPPIMP.DMS
Pagelet Wizard MVUPX16E.DMS
See Also“Apply Application Changes,” Loading Data for Data Conversion.
“Apply Application Changes,” Loading Data to Complete System Setup.
Properties
DatabaseOrientation
Initial or MTP Products Platforms Languages
Target Initial All All All
Task 1-23: Preparing for the Application UpgradeThis section discusses:
• Creating a Copy of Translate Values
• Creating a Copy of RecField Definitions
• Copying Time and Labor Temp Table List
• Reversing Renames for Microsoft SQL Server
• Deleting Old Pagelet Wizard Data
• Editing the System Data Swap Script
• Editing the PeopleTools Swap Script
Task 1-23-1: Creating a Copy of Translate ValuesThis script creates a temporary table PS_UPG_HR_XLAT_TMP containing translation values from thePSXLATITEM for the field values that will be used during the data conversion.
The script name for your path is:
PUHCHRS10.DMS
56 Copyright © 2007, Oracle. All rights reserved.

Chapter 1 Prepare Your Database
Properties
DatabaseOrientation
Initial or MTP Products Platforms Languages
Target Both All All All
Task 1-23-2: Creating a Copy of RecField DefinitionsThis step creates a copy of the contents of PSRECFIELD, before the upgrade is begun. It is used by the dataconversion code to determine the structure of tables that may have been impacted by fixes you applied.The script name is:
PUUPX07.DMS
Note. If you upgraded your system before, you may need to drop PSRECFIELD_TMP prior to runningthis script.
Properties
DatabaseOrientation
Initial or MTP Products Platforms Languages
Target Both All All All
Task 1-23-3: Copying Time and Labor Temp Table ListThis script makes a copy of the temp tables list used in the process TL_TIMEADMIN. After the upgrade iscomplete, you run a report to see which tables were removed from the new release. You then need to modifyany of your custom Time and Labor Rules and Time Administration Application Engine steps that use thetemp tables.
The script name is:
PUHCTLW01.DMS
Properties
DatabaseOrientation
Initial or MTP Products Platforms Languages
Target Initial Time and Labor All All
Task 1-23-4: Reversing Renames for Microsoft SQL ServerDuring the PeopleTools upgrade, all tables will be altered for the new data type conversion. This alter will alsoalter the tables for the records and field renames run earlier in the upgrade. If a field has been deleted from atable in the new release, it would not normally be renamed, but this process will rename it. This will causeproblems during data conversion when the original field name is being converted.
This step runs a script that will reverse those renames so that the PeopleTools data type conversion does notalter those tables for rename. The rename will be reapplied after the PeopleTools upgrade so that your compareto the New Release Demo database is consistent with your previous compare.
Copyright © 2007, Oracle. All rights reserved. 57

Prepare Your Database Chapter 1
The script for your path is:
RNHCUPI04.DMS
Properties
DatabaseOrientation
Initial or MTP Products Platforms Languages
Target Initial All MS SQL Server All
Task 1-23-5: Deleting Old Pagelet Wizard DataThis step is only applicable if you have already upgraded your production application to PeopleTools 8.46or greater.
In this step, you run a script to delete the Common Component Pagelet Wizard (PW) data to ensure thatwhen the UPGPT846PP conversion program is run subsequently, the old existing Common ComponentsPagelet Wizard data is not re-entered into the PeopleTools Pagelet Wizard tables. If you do not run thescript, then items that were removed from the PeopleTools version of Pagelet Wizard, but still exist in theCommon Components version of Pagelet Wizard, will be copied back into the PeopleTools version when theUPGPT846PP conversion program is run.
The script also updates the Common Component portal option tables with the existing values in thePeopleTools portal options tables. If you do not run the script, then changes made to the current PeopleToolsoptions tables may be overwritten with values from the Common Components portal options when theUPGPT846PP conversion program is run. The affected values include the default registry prefix, defaultowner ID, and the default style sheet.
Only run the script if both of the following conditions are met.
• Your current production application release database is already on PeopleTools 8.46 or greater.• The table PS_EOPPB_LINKPATHS exists on the Target database.
If both of the above conditions are met, then run the following script:
PTPPB_EOPPB.DMS
To run the step automatically:
1. In Change Assistant, open your upgrade job.2. In the task Preparing for the Application Upgrade, right-click on the step Deleting Old Pagelet WizardData, and select Step Properties.
3. In the Step Properties dialog box, change the Type from ManualStop to DataMoverUser, and click OK.4. Select Edit, Run.
Properties
DatabaseOrientation
Initial or MTP Products Platforms Languages
Target Both All All All
58 Copyright © 2007, Oracle. All rights reserved.

Chapter 1 Prepare Your Database
Task 1-23-6: Editing the System Data Swap ScriptThis step should only be completed if your Copy of Production has a base language other than English. Ina later step you will swap PeopleTools Managed Object tables that have related language on your NewRelease Demo database, so that it is translated correctly when you copy to your Copy of Production. Inthis step, you edit the swap script to set your New Release Demo database language to the same languageas your Copy of Production.
To do this, follow the edit instructions in the script.
The swap system data script for your path is:
DLHCLASWAP.DMS
Properties
DatabaseOrientation
Initial or MTP Products Platforms Languages
Target Initial All All Non-English BaseLanguage
Task 1-23-7: Editing the PeopleTools Swap ScriptThis step should only be completed if your Copy of Production has a base language other than English. In alater step you will swap all PeopleTools Managed Object tables that have related languages on your DemoDatabase so that it is translated correctly when you copy to your Copy of Production. In this step you edit theswap script to set your Demo database language to the same language as your Copy of Production.
To do this, follow the edit instructions in the script.
The swap script for your upgrade path is:
PT_RELEASE_SWAP.DMS
Properties
DatabaseOrientation
Initial or MTP Products Platforms Languages
Target Initial All All Non-English BaseLanguage
Task 1-24: Backing Up After Prepare Your DatabaseBack up your Copy of Production database now. This enables you to restart your upgrade from this point,should you experience any database integrity problems during the remaining tasks in the upgrade process.
Copyright © 2007, Oracle. All rights reserved. 59

Prepare Your Database Chapter 1
Properties
DatabaseOrientation
Initial or MTP Products Platforms Languages
Target Both All All All
60 Copyright © 2007, Oracle. All rights reserved.

CHAPTER 2
Apply PeopleTools Changes
This chapter discusses:
• Understanding PeopleTools Changes
• Verifying Upgrade User
• Performing Script Modifications
• Updating PeopleTools System Tables
• Turning Off Change Control
• Loading Model Definition Data
• Loading Message Data
• Reviewing PeopleTools Objects
• Exporting and Copying Projects
• Populating Tablespace Data
• Building Updated PeopleTools Project
• Migrating Records to New Tablespaces
• Loading Base Data
• Loading Language Data
• Loading PeopleTools Data
• Loading PeopleTools Definition Group
• Converting PeopleTools Objects
• Creating PeopleTools Views
• Converting Integration Broker
• Setting Object Version Numbers
• Converting Database Data Types
• Backing Up After PeopleTools Upgrade
Copyright © 2007, Oracle. All rights reserved. 61

Apply PeopleTools Changes Chapter 2
Understanding PeopleTools ChangesTo implement a successful upgrade, you must apply the necessary PeopleTools changes. This involvesupdating PeopleTools system tables, copying and building PeopleTools projects, loading PeopleTools seeddata, and converting PeopleTools objects. From this point forward, you run all steps using your newly installedversion of PeopleTools.
Note. Unless otherwise indicated, all scripts can be found in your new release PeopleSoft codelinePS_HOME\SCRIPTS directory. The actual script name is indicated in the description of each step inuppercase letters.
Task 2-1: Verifying Upgrade UserIn this task, you verify that the user performing the upgrade steps has proper permissions to completethe upgrade.
Ensure that your upgrade user has PeopleSoft administrator privileges. This allows access to the PeopleSoftportal to make necessary security changes for the upgrade and to run the Portal Application Engine upgradeprogram. You use this ID to update the security setting for your other users so they can sign on after the upgrade.
Warning! You must perform this step now using your old version of PeopleTools. If you skip this step,or if your user has insufficient PeopleSoft administrator privileges, you will not be able to complete yourupgrade. You cannot complete this step later in the upgrade process. Perform the following steps to grantadministrator privileges now.
To grant your upgrade user PeopleSoft administrator privileges:
1. From the browser, select PeopleTools, Security, User Profiles, User Profiles.2. Select the user ID for your upgrade user.3. Select the Roles tab.4. Add the role PeopleSoft Administrator if it is not already granted to your upgrade user.5. Save the user profile.
See the Enterprise PeopleTools PeopleBook: Security Administration for your new release.
Properties
DatabaseOrientation
Initial or MTP Products Platforms Languages
Target Both All All All
Task 2-2: Performing Script ModificationsThis section discusses:
• Understanding Script Modifications
62 Copyright © 2007, Oracle. All rights reserved.

Chapter 2 Apply PeopleTools Changes
• Update Configuration Manager Profile
• Run a DBTSFIX Report
• Edit the DBTSFIX Output Scripts
• Edit the GRANT Script
• Edit the PSLANGUAGES Script
• Edit the TLSUPGNONCOMP Script
• Edit the PTxxxTLS Scripts
• Edit the DB2 Scripts
• Edit Move to Production Import Scripts
• Edit Move to Production Password
• Edit the DDLDB2 Script
• Edit the DDLDBX Script
• Edit the DDLORA Script
• Edit the DDLIFX Script
• Edit the MSGTLSUPG Script
• Edit the Integration Broker Script
• Edit Multilingual Step Properties
• Edit Data Type Steps
Understanding Script ModificationsIn this task, you perform preparation steps and make manual modifications to scripts delivered with yournew PeopleSoft release. You must make the following modifications before proceeding with the remainderof your upgrade.
Note. Move to Production: These steps will be repeated in the Move to Production (MTP) pass. The script thatyou previously edited may be acceptable, or you may need to change it again if your New Copy of Productionhas a different security or data definition language (DDL) configuration.
Task 2-2-1: Update Configuration Manager ProfileThe Configuration Manager default profile needs to be updated to use values for your new release PS_HOME.Change Assistant uses this information to run automated steps for the rest of the upgrade. These are settings onthe workstation and you need to do this for each workstation that you may use during the upgrade.
To update the profile:
1. Open Configuration Manager.
2. On the Profile tab, select the Default profile, click Edit, and select the Common tab.
Copyright © 2007, Oracle. All rights reserved. 63

Apply PeopleTools Changes Chapter 2
Edit Profile - Default dialog box
Note. The Input Directory must be <PS_HOME>\data\, substituting <PS_HOME> with your directory.The Output Directory must be the same.
3. The Log Directory is set by Change Assistant and should be left as is.4. Select the Process Scheduler tab and verify that your SQR settings. Change Assistant will use thesesettings to launch SQR.
Properties
DatabaseOrientation
Initial or MTP Products Platforms Languages
Target Both All All All
Task 2-2-2: Run a DBTSFIX ReportThe DBTSFIX.SQR script aligns the tablespaces in the delivered release scripts with the Target database usedduring the upgrade. This process generates new release scripts, conforming to the RELxxxDBTSFIX.SQLnaming convention that you run in a later task. Run this script to preserve your existing table-to-tablespacemapping in the Target database. The result of this task will be a RELxxxDBTSFIX.SQL script in which xxxrepresents a release number (for example, 800, 810, 811, 812, and so on) associated with your particular path.
64 Copyright © 2007, Oracle. All rights reserved.

Chapter 2 Apply PeopleTools Changes
Note. Before running this step, verify that the PS_HOME values are set correctly in the Change Assistantenvironment for your upgrade job. Change Assistant uses the PS_HOME information to determine whichscripts need to be generated.
Important! Do not run the new release script at this point. You will be instructed to run this script laterin the upgrade process.
Properties
DatabaseOrientation
Initial or MTP Products Platforms Languages
Target Both All Oracle
Informix
DB2 UNIX/NT
DB2 z/OS
All
Task 2-2-3: Edit the DBTSFIX Output ScriptsEdit the generated RELxxxDBTSFIX scripts according to the comments within each script. Verify that the datadefinition language (DDL) is accurate for your environment for tablespaces, database names, owner IDs, andso forth. The scripts can be found in your Change Assistant output directory for this upgrade path.
Warning! Do not run output scripts at this time. At this point in the upgrade process, you must only reviewthe DBTSFIX output scripts.
Note. For DB2 z/OS customers only: When upgrading from one PeopleSoft release to the next, it is possible tomove tables from a tablespace using a 4-KB buffer pool to one using a 32-KB buffer pool. The tablespacesPSIMAGE and PSIMGR use 32-KB buffer pools in Oracle-delivered applications. To maintain the tablespaceschema used at your site, the DBTSFIX.SQR script will revise the upgrade scripts with the database andtablespace information from your database (the Target database). Tables assigned to tablespaces PSIMAGEor PSIMGR in the upgrade scripts are the exception to this approach. Note that Oracle has reassigned sometables to PSIMAGE or PSIMGR because they now require a 32-KB buffer pool. You must manually edit the“Create Table” statements in the upgrade scripts to replace the tablespace name PSIMAGE or PSIMGR withan appropriate tablespace name in your implementation that utilizes a 32-KB buffer pool. The database namemust also be replaced with the value corresponding to the tablespace you are using.
Copyright © 2007, Oracle. All rights reserved. 65

Apply PeopleTools Changes Chapter 2
Properties
DatabaseOrientation
Initial or MTP Products Platforms Languages
Target Both All Oracle
Informix
DB2 UNIX/NT
DB2 z/OS
All
Task 2-2-4: Edit the GRANT ScriptEdit PS_HOME\SCRIPTS\GRANT.SQL and make the necessary modifications as documented in the script.
Properties
DatabaseOrientation
Initial or MTP Products Platforms Languages
Target Both All All All
Task 2-2-5: Edit the PSLANGUAGES ScriptEdit PS_HOME\SCRIPTS\PSLANGUAGES.DMS and make the necessary modifications as documented inthe script.
Properties
DatabaseOrientation
Initial or MTP Products Platforms Languages
Target Both All DB2 z/OS All
Task 2-2-6: Edit the TLSUPGNONCOMP ScriptEdit PS_HOME\SCRIPTS\TLSUPGNONCOMP.DMS and make the necessary modifications as documented inthe script.
Properties
DatabaseOrientation
Initial or MTP Products Platforms Languages
Target Both All DB2 z/OS All
Task 2-2-7: Edit the PTxxxTLS ScriptsThis step applies only if you are running on a DB2 z/OS platform.
To edit the PTxxxTLS scripts:
66 Copyright © 2007, Oracle. All rights reserved.

Chapter 2 Apply PeopleTools Changes
1. Edit all of the scripts in the PS_HOME\SCRIPTS directory on the file server that conform to this filenaming convention:
PTxxxTLS.DMS
PTxxxTLSyyy.DMS
The xxx represents a PeopleTools release greater than your current PeopleTools release and yyy representsthe three-letter language code.
2. Uncomment and modify the set owner ID command within each script, as in the following example:
set execute_sql set current sqlid = ’OwnerId In Upper Case’;
Properties
DatabaseOrientation
Initial or MTP Products Platforms Languages
Target Both All DB2 z/OS All
Task 2-2-8: Edit the DB2 ScriptsPerform this step only if your database platform is DB2 z/OS. DB2 z/OS scripts that create tables need theset current sqlid statement so that the tables are created with the correct owner ID. Open each scriptlisted below, then uncomment and modify all of the DB2-specific statements to reflect your environment.
For SQL scripts, if the script does not contain DB2-specific statements, add the following line to the top of thescript and edit it for your environment:
set current sqlid = ’OWNERID (in uppercase)’;
For Data Mover scripts (DMSs), if the script does not contain DB2-specific statements, add the following lineto the top of the script and edit it for your environment:
set execute_sql set current sqlid = ’OWNERID (in uppercase)’;
Following is a list of the scripts that you need to edit:DB2TMPIDXCREATE.SQL
DLUPX02I.DMS
DLUPX13I.DMS
DLUPX14I.DMS
DLUPX96I.DMS
PT_RELEASE_IMPORT.DMS
DB2ALLCCSIDUPD.SQL
DLHCSYSI.DMS
DLHCLASYSI.DMS
DLHCHRW01.DMS
RNHCUPI02DB2.SQL
DLUPX16I.DMS
DLUPX95.DMS
DLHCUPT01I.DMS
DLHCUPT04I.DMS
DLHCUPW10I.DMS
Copyright © 2007, Oracle. All rights reserved. 67

Apply PeopleTools Changes Chapter 2
DLHCUPS01.DMS
DLHCGCHS10I.SQL
Note. The DLUPX96I.DMS script will run on your Source database. Remember to edit this script for yourSource database. All of the other scripts listed will run against the Target database.
In several steps in the upgrade process, project definitions are copied into the database. Any DB2 z/OS scriptsthat are built from these project definitions will need to be modified before you run them. Set the followingsteps in your Change Assistant job to a manual stop and edit the scripts for correct database/tablespaceinformation. When you build the SQL scripts after copying the project, the database/tablespace names are thedefault values. You need to change these to the Target database specific values. To set a step as a manual stopin Change Assistant, highlight the step and select Edit, Stop from the menu bar.
In chapter 4, “Apply Application Changes,” set the step ReCreating Upgrade Tables (in the task Modifying theDatabase Structure) as a manual stop and edit the UPGCONVERT_CRTTBL.SQL script.
Properties
DatabaseOrientation
Initial or MTP Products Platforms Languages
Target Both All DB2 z/OS All
Task 2-2-9: Edit Move to Production Import ScriptsPerform this step only if your database platform is DB2 z/OS.
During the Move to Production, there are several scripts that export data from the previous Copy of Productionto the New Copy of Production. These scripts export the tables to a DAT file. When the tables are exported, allthe table attributes, including the database specific information (table owner, database name, and tablespacename), are stored in the DAT file. When you run the import script, it tries to create the tables and indexes usingthe database-specific information from the DAT file. So even though you ran the import script against yourCopy of Production, you would still create tables in the upgraded database (which is the source database forthe Move to Production step). To create the tables in the Target database, open each script listed below, thenuncomment and modify all of the DB2-specific statements to reflect your environment.
You will also need to add the following command into MVPRDIMP.DMS, near the end of the script, justafter the REPLACE_DATA PSSTATUS command, but before the REPLACE_VIEW PSTEMPTBLCNTVWcommand, to change ownerid to the owner ID of your database.
Update PSSTATUS set OWNERID=’OWNERID (in uppercase)’;
Following is a list of the scripts that you need to edit:MVAPPIMP.DMS
MVPRDIMP.DMS
MVHCPYW01I.DMS
MVHCPYT05I.DMS
MVHCPIT01I.DMS
MVHCHCW01I.DMS
MVHC88IMP.DMS
If you prefer, you can copy these overrides from the xxDMODBO.DMS script that was generated fromDBSetup while installing your database. Make sure you remove the SET NO RECORD if you copy from theDBSetup generated file.
68 Copyright © 2007, Oracle. All rights reserved.

Chapter 2 Apply PeopleTools Changes
See the Enterprise PeopleTools PeopleBook: Data Management for your new release.
See “Apply Changes to Production Database,” Performing the Move to Production.
Properties
DatabaseOrientation
Initial or MTP Products Platforms Languages
Target MTP All DB2 z/OS All
Task 2-2-10: Edit Move to Production PasswordIf your access ID and access password are different in the Copy of Production database than in the New Copyof Production database, you need to reset the access password in the MVPRDIMP.DMS script.
To modify passwords in your New Copy of Production database, append the following to yourMVPRDIMP.DMS script and replace ownerID, accessID, and accesspswd with your values in the NewCopy of Production database:
UPDATE PSSTATUS set OWNERID = ’ownerID’;
UPDATE PSACCESSPRFL SET ACCESSID = ’accessID’,
ACCESSPSWD = ’accesspswd’, ENCRYPTED = 0;
ENCRYPT_PASSWORD *;
Properties
DatabaseOrientation
Initial or MTP Products Platforms Languages
Target MTP All All All
Task 2-2-11: Edit the DDLDB2 ScriptEdit PS_HOME\SCRIPTS\DDLDB2.DMS. At the bottom of this script, you will see an insert intoPSDDLDEFPARMS. This insert contains default information used when creating a table, an index, a uniqueindex, or a tablespace. Verify with your database administrator that the last value for each row is appropriatefor your environment by checking the values currently stored in your PSDDLDEFPARMS table. Otherwise,the values will be reset to the default values delivered by Oracle in this script.
Properties
DatabaseOrientation
Initial or MTP Products Platforms Languages
Target Both All DB2 z/OS All
Copyright © 2007, Oracle. All rights reserved. 69

Apply PeopleTools Changes Chapter 2
Task 2-2-12: Edit the DDLDBX ScriptEdit PS_HOME\SCRIPTS\DDLDBX.DMS. At the bottom of this script, you will see an insert intoPSDDLDEFPARMS. This insert contains default information used when creating a table, an index, a uniqueindex, or a tablespace. Verify with your database administrator that the last value for each row is appropriatefor your environment by checking the values currently stored in your PSDDLDEFPARMS table. Otherwise,the values will be reset to the default values delivered by Oracle in this script.
Properties
DatabaseOrientation
Initial or MTP Products Platforms Languages
Target Both All DB2 UNIX/NT All
Task 2-2-13: Edit the DDLORA ScriptEdit PS_HOME\SCRIPTS\DDLORA.DMS. At the bottom of this script, you will see an insert intoPSDDLDEFPARMS. This insert contains default information used when creating a table, an index, a uniqueindex, or a tablespace. Verify with your database administrator that the last value for each row is appropriatefor your environment by checking the values currently stored in your PSDDLDEFPARMS table. Otherwise,the values will be reset to the default values delivered by Oracle in this script.
Properties
DatabaseOrientation
Initial or MTP Products Platforms Languages
Target Both All Oracle All
Task 2-2-14: Edit the DDLIFX ScriptEdit PS_HOME\SCRIPTS\DDLIFX.DMS. At the bottom of this script, you will see an insert intoPSDDLDEFPARMS. This insert contains default information used when creating a table, an index, a uniqueindex, or a tablespace. Verify with your database administrator that the last value for each row is appropriatefor your environment by checking the values currently stored in your PSDDLDEFPARMS table. Otherwise,the values will be reset to the default values delivered by Oracle in this script.
Properties
DatabaseOrientation
Initial or MTP Products Platforms Languages
Target Both All Informix All
Task 2-2-15: Edit the MSGTLSUPG ScriptEdit PS_HOME\SCRIPTS\MSGTLSUPG.DMS and make the necessary modifications as documented inthe script.
70 Copyright © 2007, Oracle. All rights reserved.

Chapter 2 Apply PeopleTools Changes
Properties
DatabaseOrientation
Initial or MTP Products Platforms Languages
Target Both All DB2 z/OS All
Task 2-2-16: Edit the Integration Broker ScriptEdit PS_HOME\SCRIPTS\PTIBUPGRADE.DMS and make the necessary modifications as documented inthe script. User level node security and transactional security have been added as of PeopleTools 8.48. Servicenamespace information, a low-level user on the node, and a low-level permission list for service operations,need to be specified. Consult with your Integration Broker specialist for assistance.
Note. If you are upgrading from PeopleTools 8.48 or later, this step and all of the steps in the task “ConvertingIntegration Broker” do not need to be run because the Integration Broker conversion has already beenperformed. You may mark all of these steps as complete in your upgrade job. If you don’t mark these steps ascomplete, the upgrade will try to unnecessarily reconvert your objects.
Properties
DatabaseOrientation
Initial or MTP Products Platforms Languages
Target Initial All All All
Task 2-2-17: Edit Multilingual Step PropertiesIn this step, you will edit the Change Assistant step properties for the multilingual PeopleTools project copystep (or steps). Copy only the translated objects for the languages you license. This prevents the translatedobjects for unlicensed languages from copying over. You will copy any multilingual projects later in theupgrade process.
Depending on which languages you license, you will need to complete the following instructions once ortwice. If you license any of these languages, Arabic, Czech, Danish, Finnish, French, Hebrew, Hungarian,Norwegian, Polish, Russian, or Turkish, perform the following instructions for the step “Export and CopyPPLTLSML Project.” If you license any of these languages, Canadian French, Dutch, German, Greek, Italian,Japanese, Korean, Malay, Portuguese, Simplified Chinese, Spanish, Swedish, Traditional Chinese, or Thai,perform the following instructions for the step “Export and Copy PPLTLS84CURML Project.”
To edit multilingual step properties:
1. In Change Assistant, select the step.2. Open the Step Properties dialog box.3. Click the Upgrade button, and then click the Options button.4. On the Copy Options tab, deselect any languages that you do not license.Common and English should remain deselected.
5. Click OK three times.6. Save the template in Change Assistant.
See Export and Copy PPLTLS84CURML Project.
Copyright © 2007, Oracle. All rights reserved. 71

Apply PeopleTools Changes Chapter 2
See Export and Copy PPLTLSML Project.
Properties
DatabaseOrientation
Initial or MTP Products Platforms Languages
Target Initial All All All Non-English
Task 2-2-18: Edit Data Type StepsFor PeopleTools 8.48 and later, new data types are supported for Microsoft SQL Server 2005 or later andOracle. These data type changes are only available for use in conjunction with PeopleSoft application release9.0 or later. If you have already converted data types or are upgrading to a PeopleSoft application release earlierthan 9.0, you must mark these steps as complete in the template now. Do not run these steps unnecessarily.
To set the Data Conversion steps as complete:
1. In Change Assistant, select all the steps within the task Converting Database Data Types.2. Press the F7 key.3. Save the upgrade job in Change Assistant.
See Converting Database Data Types.
Properties
DatabaseOrientation
Initial or MTP Products Platforms Languages
Target Both All MS SQL Server
Oracle
All
Task 2-3: Updating PeopleTools System TablesThis section discusses:
• Understanding Updating PeopleTools System Tables
• Clean Up Message Data
• Update System Catalog Views
• Update PeopleTools System Tables
• Grant Privileges to the CONNECT ID
• Update the Product License Code
• Update PeopleTools Patch Information
• Create Temporary Performance Indexes
• Export PeopleTools System Tables
72 Copyright © 2007, Oracle. All rights reserved.

Chapter 2 Apply PeopleTools Changes
• Import PeopleTools System Tables
• Reset Database Options Flag
• Rerun Update Statistics for DB2 zOS
• Rerun RUNSTATS Report for DB2 UNIX NT
• Rerun Update Statistics for DB2 UNIX NT
• Rerun Update Statistics for Informix
• Rerun Update Statistics for Oracle
Understanding Updating PeopleTools System TablesIn this task, you update your PeopleTools system tables by running various scripts.
Important! From this point forward, run all steps using the new release of PeopleTools on your Copy ofProduction database, unless otherwise indicated.
Task 2-3-1: Clean Up Message DataIf you are upgrading from PeopleTools 8.48 or later, mark this step as complete in your upgrade job andcontinue with the rest of the upgrade. Do not perform any deletes in this step as you will wipe out current validdata that is needed for your system to function properly.
If you are upgrading from PeopleTools 8.47 or earlier, perform this step to clean out obsolete message data.Message functionality and structure changed as of PeopleTools 8.48 and the old data is obsolete. EditPS_HOME\SCRIPTS\PTUPGIBDEL.SQL to delete data from the tables that only exist in the old PeopleToolsrelease. Open the script and make the following modifications:
1. Search for the string “--- End of PT8.xx ---” in which xx represents the last two digits of the PeopleToolsrelease you are upgrading from.
2. Delete the entire portion of the script below this string.3. Save the script as PS_HOME\SCRIPTS\PTUPGIBDEL8xx.SQL in which xx represents the last two digitsof the PeopleTools release you are upgrading from, as determined in Step 1.
Important! Save the script using the naming convention shown above. This will preserve the original script foruse in updating other databases at different PeopleTools releases, and assist in running the script automatically.
Follow this procedure to edit your template so that the script can run automatically:
1. Select this step and open the Step Properties dialog box.
2. Change the Script/Procedure value from PTUPGIBDEL8xx to the specific name that you used in Step 3without the .SQL extension.
3. Change the type from ManualStop to SQLScript, and click OK.
4. In your upgrade job, mark the step as Run.
Copyright © 2007, Oracle. All rights reserved. 73

Apply PeopleTools Changes Chapter 2
Properties
DatabaseOrientation
Initial or MTP Products Platforms Languages
Target Both All All All
Task 2-3-2: Update System Catalog ViewsThis step runs the UPDOBJ.SQL script, which re-creates system catalog views that both DataMover andPeopleTools use.
Properties
DatabaseOrientation
Initial or MTP Products Platforms Languages
Target Both All Microsoft All
Task 2-3-3: Update PeopleTools System TablesRelease scripts are SQL scripts that modify the underlying table structure of a database so that it is compatiblewith a more recent PeopleTools release. They are located in the PS_HOME\SCRIPTS directory. Releasescripts can be identified by their common naming standard, RELxxx.SQL, in which xxx designates aPeopleTools release number.
These release (REL) scripts alter and update your PeopleTools tables to the current release. Change Assistantdetermines which RELxxx scripts to run based on the PeopleTools release of your Source and Target databases.
If you created RELxxxDBTSFIX (in which xxx is a PeopleTools release) earlier in your upgrade, theprocedure will look at your Output folder and will know to run RELxxxDBTSFIX. If you did not runDBTSFIX, Change Assistant will run RELxxx.
Note. Before running this step, verify that the PS_HOME values are set correctly in the Change Assistantenvironment for your upgrade job. Your new release PS_HOME/SCRIPTS directory should contain all scriptsthat will be run during this step. This step runs at least one script. Do not proceed to the next step untilthese scripts run successfully.
See the Enterprise PeopleTools PeopleBook: PeopleSoft Software Updates for your new release.
Properties
DatabaseOrientation
Initial or MTP Products Platforms Languages
Target Both All All All
Task 2-3-4: Grant Privileges to the CONNECT IDThis step runs the GRANT.SQL script. This script grants select access to the connect ID for tables necessaryfor sign on.
74 Copyright © 2007, Oracle. All rights reserved.

Chapter 2 Apply PeopleTools Changes
Properties
DatabaseOrientation
Initial or MTP Products Platforms Languages
Target Both All All All
Task 2-3-5: Update the Product License CodeThis section discusses:
• Understanding the Product License Code
• Updating the Product License Code
Understanding the Product License CodeThe new PeopleSoft release stores your application product license code on the database. This code is usedto unlock the pages and Application Engine programs that you licensed. It also provides necessary productinformation about your database to be used for identifying software maintenance that may need to be applied.
You need to populate the databases that were upgraded to the new PeopleSoft release so that you have thecorrect access to pages and Application Engine programs that you licensed.
When your new PeopleSoft databases were installed, the appropriate application license code was added to yourdatabase in the PSOPTIONS table. This was done in an update statement that was created when DBSETUPwas run to create the Data Mover script for the new PeopleSoft release. The location of this script is:
PS_HOME\SCRIPTS\DBnameDBplatform.DMS
DBname is the name of the Demo database you installed and DBplatform represents the database platformusing the following chart:
Database Platform Code Used
Microsoft SQL Server MSS
DB2 UDB z/OS DB2
DB2 UDBUNIX/NT DBX
Oracle ORA
Informix INF
Sybase SYB
Updating the Product License CodeFollow the steps below to update your product license code.
To update the product license code:
1. From the Data Mover script that was created for your new PeopleSoft database installation, copy outthe update to PSOPTIONS.The statement should look similar to this:
Copyright © 2007, Oracle. All rights reserved. 75

Apply PeopleTools Changes Chapter 2
update PSOPTIONS set LICENSE_CODE = ’xxxxxxxxxxxxxxxxxxxxxxxxxxxxxxxx’, LICENSE_⇒GROUP = ’xx’;
where ’xxxxxxxxxxxxxxxxxxxxxxxxxxxxxxxx’ equals your license code and ’xx’ equals your license group.2. Run the SQL command identified above using your SQL tool.
Your database is now updated with the appropriate license code. You can now access the pages and ApplicationEngine programs that you licensed.
Properties
DatabaseOrientation
Initial or MTP Products Platforms Languages
Target Initial All All All
Task 2-3-6: Update PeopleTools Patch InformationIn this step, you update your database with the version of the PeopleTools patch being applied.
Note. You only need to run this step if you are applying a PeopleTools patch as part of the upgrade process.
Log on to Data Mover in user mode and run the %PS_HOME\SCRIPTS\PTPATCH.DMS script.
Review the PeopleTools patch instructions and perform any additional database upgrade instructions that maybe listed prior to the copy of the patch project. The patch project will be copied later during the upgrade.
Properties
DatabaseOrientation
Initial or MTP Products Platforms Languages
Target Initial All All All
Task 2-3-7: Create Temporary Performance IndexesPerform this step only if you are running on a DB2 z/OS platform. This step runs the DB2TMPIDXCREATEscript to create multiple indexes for rename performance. You will drop these indexes later in the upgradeprocess.
Properties
DatabaseOrientation
Initial or MTP Products Platforms Languages
Target Initial All DB2 z/OS All
76 Copyright © 2007, Oracle. All rights reserved.

Chapter 2 Apply PeopleTools Changes
Task 2-3-8: Export PeopleTools System TablesThe script for this step exports the content of the PeopleTools tables from the Copy of Production databaseduring your Move to Production passes. During the initial pass, you run programs to convert some objects, likePeopleCode and fields. You perform analysis to decide which objects, such as records and menus, to bring overto your production database and which customized objects to keep. At the end of the initial pass, you reapplycustomizations or make other changes, such as modifying your permission lists. You do not need to repeat thosetasks in the Move to Production pass because this script exports all of your changes to the PeopleTools objects.
The script name for your upgrade path is:
MVPRDEXP.DMS
Properties
DatabaseOrientation
Initial or MTP Products Platforms Languages
Source MTP All All All
Task 2-3-9: Import PeopleTools System TablesThe script for this step imports the content of the PeopleTools tables into your New Copy of Productiondatabase during your Move to Production passes.
These MVPRD* scripts replace tasks and steps performed in the initial pass. These tasks and steps may include:
• Renaming Records and Fields• Running New Release Compare Reports• Running New Release Upgrade Copy
If your relational database management system (RDBMS) uses tablespaces, edit this script for the properDDL information.
The script name for your upgrade path is:
MVPRDIMP.DMS
Properties
DatabaseOrientation
Initial or MTP Products Platforms Languages
Target MTP All All All
Task 2-3-10: Reset Database Options FlagThis step runs UPGDBOPTIONS_DISABLE.SQL, which resets the PSSTATUS.UPGDBOPTIONS flag. Theflag is reset only for upgrades where you are coming from a PeopleSoft application release prior to 9.0 andgoing to a PeopleSoft application release of 9.0 or later with PeopleTools 8.48 or later. The PeopleToolsupgrade must be applied using the old data types as the data type conversion will occur after the PeopleToolschanges have been completed.
Copyright © 2007, Oracle. All rights reserved. 77

Apply PeopleTools Changes Chapter 2
Properties
DatabaseOrientation
Initial or MTP Products Platforms Languages
Target MTP All MS SQL Server
Oracle
All
Task 2-3-11: Rerun Update Statistics for DB2 zOSEarlier in the upgrade process, you updated your statistics for DB2 z/OS. Due to changes in the databasestructure, you must update statistics again to improve the performance of your compare and copy. Contact yourdatabase administrator to have the statistics updated on your database before proceeding with your upgrade.
Properties
DatabaseOrientation
Initial or MTP Products Platforms Languages
Target Both All DB2 z/OS All
Task 2-3-12: Rerun RUNSTATS Report for DB2 UNIX NTThis script creates the RUNSTATS.DAT file for the script to update the statistics for DB2 UDB on UNIX,Linux, or Windows.
Properties
DatabaseOrientation
Initial or MTP Products Platforms Languages
Target Both All DB2 UNIX/NT All
Task 2-3-13: Rerun Update Statistics for DB2 UNIX NTEarlier in the upgrade process, you updated your statistics for DB2 UDB on UNIX, Linux, or Windows. Dueto changes in the database structure, you must update statistics again to improve the performance of yourcompare and copy. This step runs RUNSTATS.SQL to update statistics on your database.
Properties
DatabaseOrientation
Initial or MTP Products Platforms Languages
Target Both All DB2 UNIX/NT All
Task 2-3-14: Rerun Update Statistics for InformixEarlier in the upgrade process, you updated your statistics for Informix. Due to changes in the databasestructure, you must update statistics again to improve the performance of your compare and copy. This stepruns UPDATESTATS to update statistics on your database.
78 Copyright © 2007, Oracle. All rights reserved.

Chapter 2 Apply PeopleTools Changes
Properties
DatabaseOrientation
Initial or MTP Products Platforms Languages
Target Both All Informix All
Task 2-3-15: Rerun Update Statistics for OracleEarlier in the upgrade process, you updated your statistics for Oracle. Due to changes in the database structure,you must update statistics again to improve the performance of your compare and copy. Contact your databaseadministrator to have the statistics updated on your database before proceeding with your upgrade.
Properties
DatabaseOrientation
Initial or MTP Products Platforms Languages
Target Both All Oracle All
Task 2-4: Turning Off Change ControlThis task executes a SQL statement that turns off the Change Control feature to improve performance forthe upgrade copy. One of the tasks for completing database changes will remind you to turn this featureon again, if you want to use it.
Note. Move to Production: The Change Control feature slows down copy functions. The large copy projectsare executed only during the initial pass and the feature is disabled only for the initial pass.
See “Complete Database Changes,” Reviewing Change Control.
Properties
DatabaseOrientation
Initial or MTP Products Platforms Languages
Target Initial All All All
Task 2-5: Loading Model Definition DataThis section discusses:
• Understanding Model Definition Data Load Process
• Load Model Definitions for DB2 zOS
• Load Model Definitions for DB2 UNIX NT
Copyright © 2007, Oracle. All rights reserved. 79

Apply PeopleTools Changes Chapter 2
• Load Model Definitions for Oracle
• Load Model Definitions for Informix
• Load Model Definitions for Microsoft
• Load Model Definitions for Sybase
Understanding Model Definition Data Load ProcessIn this task, you load model definition scripts for your database platform and populate DDL model definitions.This step runs the DDL model definition script applicable to your database platform. If required by yourdatabase platform, you modified this script in the task “Performing Script Modifications,” to use yoursite-specific information.
See Performing Script Modifications.
Task 2-5-1: Load Model Definitions for DB2 zOSThis step runs the DDLDB2.DMS script to populate DDL model definitions for the DB2 z/OS platform.
Properties
DatabaseOrientation
Initial or MTP Products Platforms Languages
Target Both All DB2 z/OS All
Task 2-5-2: Load Model Definitions for DB2 UNIX NTThis step runs the DDLDBX.DMS script to populate DDL model definitions for DB2 UDB on UNIX, Linux,or Windows.
Properties
DatabaseOrientation
Initial or MTP Products Platforms Languages
Target Both All DB2 UNIX/NT All
Task 2-5-3: Load Model Definitions for OracleThis step runs the DDLORA.DMS script to populate DDL model definitions for the Oracle platform.
Properties
DatabaseOrientation
Initial or MTP Products Platforms Languages
Target Both All Oracle All
Task 2-5-4: Load Model Definitions for InformixThis step runs the DDLIFX.DMS script to populate DDL model definitions for the Informix platform.
80 Copyright © 2007, Oracle. All rights reserved.

Chapter 2 Apply PeopleTools Changes
Properties
DatabaseOrientation
Initial or MTP Products Platforms Languages
Target Both All Informix All
Task 2-5-5: Load Model Definitions for MicrosoftThis step runs the DDLMSS.DMS script to populate DDL model definitions for the Microsoft SQL Server.
Properties
DatabaseOrientation
Initial or MTP Products Platforms Languages
Target Both All MS SQL Server All
Task 2-5-6: Load Model Definitions for SybaseThis step runs the DDLSYB.DMS script to populate DDL model definitions for the Sybase platform.
Properties
DatabaseOrientation
Initial or MTP Products Platforms Languages
Target Both All Sybase All
Task 2-6: Loading Message DataThis step loads system messages in the message catalog.
Properties
DatabaseOrientation
Initial or MTP Products Platforms Languages
Target Initial All All All
Task 2-7: Reviewing PeopleTools ObjectsRun this step to identify any PeopleTools objects that you have customized. This step only identifies thecustomized PeopleTools objects. You still must overwrite the customized objects with the new PeopleToolsdefinitions when you copy the project.
Copyright © 2007, Oracle. All rights reserved. 81

Apply PeopleTools Changes Chapter 2
During the upgrade process, you copy PeopleTools objects into your database. PeopleTools functionality, suchas Security, is built using PeopleTools objects and it is possible that you could have modified the PeopleToolsobjects that make up a product like Security.
Warning! Do not change the delivered PeopleTools objects. The delivered objects are integral to the smoothoperation of your system, and the modification of these objects could cause system instability.
When you perform the copy of the PeopleTools projects during the upgrade, you may overwrite modificationsthat you have made. Excluding any PeopleTools-delivered objects from the upgrade may result in instabilitydue to dependencies on specific objects.
To review PeopleTools objects:
1. Open the PPLTLS84CUR project on your Source database.a. Launch Application Designer and sign on to the Demo (Source) database.b. Select File, Open...c. In the Definition field, select Project and click Open to display a list of projects.d. Select the PPLTLS84CUR project and click Open.
2. If the PPLTLS84CUR project does not exist on your Demo (Source) database, then copy the projectdefinition; otherwise continue to the next step.a. Select Tools, Copy Project, From File...b. In the resulting dialog box, change the import directory to PS_HOME\PROJECTS, selectPPLTLS84CUR from the list of projects and click the Open button.
c. The Copy dialog box appears. Click the Deselect All button and then click the Copy button.When the progress dialog disappears, the project definition has been copied.
3. On your Source database, make a copy of the PPLTLS84CUR project and name it PPLTLS84CURCOMP.You will use this project for the compare process.a. If the PPLTLS84CUR project is not open, open it now.b. Select File, Save Project As…c. Name the project PPLTLS84CURCOMP.
4. On your Source database, perform a project compare of the PPLTLS84CURCOMP project against yourTarget database.a. If the PPLTLS84CURCOMP project is not open, open it now.b. Select Tools, Compare and Report…c. Sign on to the Target database.d. Verify that all object types are selected.e. Select Options…f. On the Compare Options tab, select Compare Type of Project.g. Select a value for Target Orientation.h. For Comparison by Release, select the highest release in the list.i. Under Compare Languages, select Common and English.
82 Copyright © 2007, Oracle. All rights reserved.

Chapter 2 Apply PeopleTools Changes
j. If you have non-English languages loaded, select the other languages loaded into your database.k. Select the Report Filter tab and click Default.This will cause only customizations to appear on the compare reports.
l. Click OK.m. Click Compare to start the compare process.
Note. To preserve the PPLTLS84CURCOMP compare reports, you must perform one of the followingactions: 1) rename the reports, 2) move the reports to a different folder, or 3) reset the Compare ReportOutput Directory: Within Application Designer, select Tools, Options. On the General tab, change thepath specified for the Report Output Directory.
5. Evaluate the compare reports to identify whether the delivered objects conflict with any of yourcustomizations.You will overwrite the customized objects with the new PeopleTools definitions when you copy thePeopleTools projects in a later task. You must not make any modifications that will affect PeopleToolsobjects when reimplementing your customizations after the upgrade.
Properties
DatabaseOrientation
Initial or MTP Products Platforms Languages
Target Initial All All All
Task 2-8: Exporting and Copying ProjectsThis section discusses:
• Understanding Exporting and Copying Projects
• Export and Copy PPLTLS84CUR Project
• Export and Copy PPLTLS84CURML Project
• Export and Copy PPLTLSML Project
• Export and Copy PPLTLS84CURDEL Project
• Export and Copy PATCH84X Project
• Export and Copy PATCH84XML Project
Understanding Exporting and Copying ProjectsIn this task, you export and copy projects.
PeopleSoft recommends that you verify the results of all copied projects. After a project has been copied, eachobject is identified with a checkmark in the Done column. You can view these results from the Upgrade tab inApplication Designer. It is also recommended that you copy the PeopleTools projects with the take actionflags set as they originally were set when the database was delivered.
Copyright © 2007, Oracle. All rights reserved. 83

Apply PeopleTools Changes Chapter 2
Note. If you are running Sybase, check the configuration parameter for “open objects.” If this parameter isset too low, you may encounter the following error: ct_connect(): network packet layer:internal net library error during the compare or copy process. If you encounter this error, youwill need to increase your parameter accordingly.
See the Enterprise PeopleTools PeopleBook: PeopleSoft Application Designer for your new release.
Task 2-8-1: Export and Copy PPLTLS84CUR ProjectThis process copies specified objects to the database that are necessary for the proper operation of PeopleTools.The PPLTLS84CUR project contains all PeopleTools objects that have been created or updated sincePeopleTools 8.40 was released.
Before the copy of records and fields, the upgrade process detects if the object definition exists or not.PeopleSoft delivers the PPLTLS84CUR project with an action of CopyProp to prevent the possibleoverwrites of custom field labels and recfields. When the upgrade process detects that a given field or recorddoes not exist, it changes that action so that the entire definition can be copied. You can ignore any errorsthat you may receive at this time similar to the following examples:
Changed Action from CopyProp to Copy, definition does not exist on target.
Definition Name: OBJECTNAME not copied, entire definition already copied.
These warnings occur because the PeopleTools project contains fields along with their field label. This isnecessary so that the software does not overwrite any customized field labels on PeopleSoft field objects.
Properties
DatabaseOrientation
Initial or MTP Products Platforms Languages
Target Initial All All All
Task 2-8-2: Export and Copy PPLTLS84CURML ProjectThis process copies language-specific PeopleTools objects to the database that are necessary for the properoperation of PeopleTools.
Before the copy of records and fields, the upgrade process detects if the object definition exists or not.PeopleSoft delivers the PPLTLS84CURML project with an action of CopyProp to prevent the possibleoverwrites of custom field labels. When the upgrade process detects that a given field does not exist, it changesthat action so that the entire definition can be copied. You can ignore any errors that you may receive at thistime similar to the following example:
Changed Action from CopyProp to Copy, definition does not exist on target.
Definition Name: OBJECTNAME not copied, entire definition already copied.
This warning occurs because the PeopleTools project contains fields along with their field label. This isnecessary so that the software does not overwrite any customized field labels on PeopleSoft field objects.
84 Copyright © 2007, Oracle. All rights reserved.

Chapter 2 Apply PeopleTools Changes
Properties
DatabaseOrientation
Initial or MTP Products Platforms Languages
Target Initial All All Canadian French
Dutch
Greek
German
Italian
Japanese
Korean
Portuguese
Simplified Chinese
Spanish
Swedish
Traditional Chinese
Thai
Malay
Task 2-8-3: Export and Copy PPLTLSML ProjectThis process copies language-specific PeopleTools objects to the database that are necessary for the properoperation of PeopleTools.
Before copying records and fields, the upgrade process detects whether the object definition exists. PeopleSoftdelivers the PPLTLSML project with an action of CopyProp to prevent the possible overwrites of customfield labels and recfields. When the upgrade process detects that a given field or record does not exist, itchanges that action so that the entire definition can be copied. You can ignore any errors that you may receiveat this time similar to the following examples:
Changed Action from CopyProp to Copy, definition does not exist on target.
Definition Name: OBJECTNAME not copied, entire definition already copied.
These warnings occur because the PeopleTools project contains fields along with their field labels. This isnecessary so that the PeopleSoft system does not overwrite any customized field labels on PeopleSoft fieldobjects.
Copyright © 2007, Oracle. All rights reserved. 85

Apply PeopleTools Changes Chapter 2
Properties
DatabaseOrientation
Initial or MTP Products Platforms Languages
Target Initial All All Arabic
Czech
Danish
Finnish
French
Hebrew
Hungarian
Norwegian
Polish
Russian
Turkish
Task 2-8-4: Export and Copy PPLTLS84CURDEL ProjectThis process deletes specified PeopleTools objects from your database.
Properties
DatabaseOrientation
Initial or MTP Products Platforms Languages
Target Initial All All All
Task 2-8-5: Export and Copy PATCH84X ProjectThis process copies specified objects to the database that are necessary for the proper operation of PeopleTools.
Note. Perform this process only if you are applying a PeopleTools patch that includes a database project.Check the patch documentation to verify whether a database project was delivered with the patch.
Use Application Designer to perform the following steps.
To export and copy the project:
1. Log on to your Target database as a valid user.2. Select Tools, Copy Project, From File…3. In the Import Directory field, enter PS_HOME\PROJECTS.4. Select the PATCH84X project from the list, in which 84X corresponds to the PeopleTools release ofthe patch project.This should correspond with the PeopleTools release to which you are upgrading.
86 Copyright © 2007, Oracle. All rights reserved.

Chapter 2 Apply PeopleTools Changes
5. Select Options; select the languages Common and English only.6. Select Copy to begin copying updated PeopleTools objects to your database.
Properties
DatabaseOrientation
Initial or MTP Products Platforms Languages
Target Initial All All All
Task 2-8-6: Export and Copy PATCH84XML ProjectThis process copies language-specific PeopleTools objects to your database that are necessary for the properoperation of PeopleTools.
Note. Perform this process only if you are applying a PeopleTools patch that includes a database project.Check the patch documentation to verify whether a multilingual database project was delivered with the patch.
Use Application Designer to perform the following steps.
To export and copy the project:
1. Log on to your Target database as a valid user.2. Select Tools, Copy Project, From File…3. In the Import Directory field, enter PS_HOME\PROJECTS.4. Select the PATCH84XML project from the list, where 84X represents the PeopleTools release of thepatch project.This should correspond to the PeopleTools release to which you are upgrading.
5. Click Options, and then select the Copy Options tab and verify that only the non-English languagesthat are installed are selected.
Note. The languages English and Common should not be selected.
6. Click OK.7. Click Copy.
Properties
DatabaseOrientation
Initial or MTP Products Platforms Languages
Target Initial All All All Non-English
Task 2-9: Populating Tablespace DataThis section discusses:
Copyright © 2007, Oracle. All rights reserved. 87

Apply PeopleTools Changes Chapter 2
• Create Application Tablespaces
• Populate Tablespace Data
• Update Tablespace Names
Task 2-9-1: Create Application TablespacesDuring each Move to Production pass, you must create any new tablespaces. You can reuse the same scriptcreated during the initial pass when you created new tablespaces, or you can build a new one if you plan to usedifferent tablespaces on your production system.
See “Apply Application Changes,” Updating Database Overrides, Create New Tablespaces.
The script supplied by Oracle to create tablespaces for your upgrade is:
HCDDL.SQL (HCDDLU.SQL for DB2 z/OS Unicode)
Important! For DB2 UNIX/NT sites, the script name is HCDDLDMS.SQL for ANSI, and HCDDLDMSU.SQLfor Unicode.
Once you have determined which script to run during Move to Production, you can change this step to runautomatically.
To run the Create Application Tablespaces step automatically:
1. In Change Assistant, open your upgrade job.
2. In the task Populating Tablespace Data, right-click on the step Create Application Tablespaces, andthen select Step Properties.
3. In the Step Properties dialog box, change the value in the Type field fromManualStop to SQLScript.
4. In the Script/Procedure field, enter the name of the script you want to run and click OK.
5. Select Edit, Run.
Properties
DatabaseOrientation
Initial or MTP Products Platforms Languages
Target MTP All Oracle
Informix
DB2 UNIX/NT
DB2 z/OS
All
Task 2-9-2: Populate Tablespace DataThis step populates all tablespace information in the PSRECTBLSPC table. This step runs the SETSPACE.SQRscript, which ensures that the correct tablespace information is populated for tasks later in the upgrade process.
The values stored in the DDLSPACENAME field are updated with current values found in the system catalogfor tables already defined in your database. If you modified tablespace names from the Oracle-deliverednames, this step makes those same changes in the PeopleSoft record definition.
88 Copyright © 2007, Oracle. All rights reserved.

Chapter 2 Apply PeopleTools Changes
If you receive any errors when you run this script, correct them by creating the needed tablespace or changingthe tablespace definition on the record object. Then run the script again to validate that you have created alltablespaces.
Properties
DatabaseOrientation
Initial or MTP Products Platforms Languages
Target Both All Oracle
Informix
DB2 UNIX/NT
DB2 z/OS
All
Task 2-9-3: Update Tablespace NamesThe SETSPACE SQR script identifies the tables with an invalid database name/tablespace combination.However, the PeopleTools Metadata tables in your Copy of Production (Target) database contain thedatabase/tablespace values from the Demo (Source) database. This also occurs if your Demo and Copy ofProduction databases are in the same DB2 subsystem after the upgrade/copy is completed. SETSPACE.SQRcorrects these values for those tables defined in DB2. For those tables that are defined in the PeopleToolsmetadata tables, but have not been defined in DB2, you need to review the SETSPACE SQR script for thosetables that are reported as not defined in the database, but where the database/tablespace combination is valid.If the report shows an invalid database/tablespace combination, or shows your Demo (Source) database andtablespace names instead of your Copy of Production (Target) database and tablespace names, you can correctthe database and tablespace names using one of the following options:
• Generate the alter/create scripts and globally edit the scripts, changing the database/tablespace valuesto those of your Copy of Production.
• Directly update the PSRECTBLSPC table with your Target database names before generating thealter/create scripts.This will ensure that the database name/tablespace names in the generated alter/create scripts will becorrect. The syntax to update the PSRECTBLSPC table is as follows:
UPDATE PSRECTBLSPC SET DBNAME = dbname, DDLSPACENAME = tablespace name WHERE⇒DDLSPACENAME = tablespace identified in SETSPACE OUTPUT AND DBNAME = database⇒identified in SETSPACE OUTPUT;
If you are using the Oracle-delivered tablespaces, you can omit the references to DDLSPACENAME in theSQL statement above.
Properties
DatabaseOrientation
Initial or MTP Products Platforms Languages
Target Both All DB2 z/OS All
Copyright © 2007, Oracle. All rights reserved. 89

Apply PeopleTools Changes Chapter 2
Task 2-10: Building Updated PeopleTools ProjectThis section discusses:
• Generate Updated PeopleTools Script
• Edit the Updated PeopleTools Script
• Run the Updated PeopleTools Script
Task 2-10-1: Generate Updated PeopleTools ScriptThis step generates the SQL script to create and alter records of the type table that are delivered in thePPLTLS84CUR project. The tables are altered to add new columns, rename existing columns, and changecolumns that have modified properties, such as length, and delete columns. The script will also create newindexes, re-create modified indexes, and create triggers. The script name is:
PPLTLS84CURTABLES.SQL
Note. For DB2 z/OS sites, if this step takes an exceptionally long time, performing a RUNSTATS on thesystem catalog tablespace SYSDBASE may improve performance.
Properties
DatabaseOrientation
Initial or MTP Products Platforms Languages
Target Both All All All
Task 2-10-2: Edit the Updated PeopleTools ScriptIn this step, you edit the PPLTLS84CURTABLES.SQL script that was generated in the previous step fortablespace names and sizing. If you are running on a relational database management system (RDBMS)platform that uses tablespaces, and you are not using the PeopleSoft tablespace names, have your databaseadministrator review this script and modify the tablespace names appropriately. The script can be found inyour Change Assistant output directory for this upgrade path.
Properties
DatabaseOrientation
Initial or MTP Products Platforms Languages
Target Both All DB2 z/OS
DB2 UNIX/NT
Oracle
Informix
All
90 Copyright © 2007, Oracle. All rights reserved.

Chapter 2 Apply PeopleTools Changes
Task 2-10-3: Run the Updated PeopleTools ScriptThis step runs the script you generated in this task to create all records of the type table. This creates new tablestructures, alters existing PeopleSoft table structures, creates new indexes, re-creates modified indexes, andcreates triggers.
Properties
DatabaseOrientation
Initial or MTP Products Platforms Languages
Target Both All All All
Task 2-11: Migrating Records to New TablespacesThis section discusses:
• Understanding Migration of Records to New Tablespaces
• Export and Copy the PT84TBLSPC Project
• Build the Tablespace Alter Script
• Edit the Tablespace Alter Script
• Run the Tablespace Alter Script
Understanding Migration of Records to New TablespacesIn this task you migrate the tables delivered in the PT84TBLSPC project to the correct tablespaces.
Task 2-11-1: Export and Copy the PT84TBLSPC ProjectThis process copies the records that moved to different tablespaces in the new release of PeopleTools. Theupgrade copy options are set to Copy From Source for record DDL to pick up the new tablespace information.
Properties
DatabaseOrientation
Initial or MTP Products Platforms Languages
Target Initial All DB2 z/OS
DB2 UNIX/NT
Oracle
Informix
All
Copyright © 2007, Oracle. All rights reserved. 91

Apply PeopleTools Changes Chapter 2
Task 2-11-2: Build the Tablespace Alter ScriptThis step generates the SQL script to alter records of the type table that are delivered in the PT84TBLSPCproject. The tables are altered to move them to the correct tablespaces for the new release of PeopleTools.The script name is:
TABLESPACEALTERTABLES.SQL
Note. For DB2 z/OS sites, if this step takes an exceptionally long time, performing a RUNSTATS on thesystem catalog tablespace SYSDBASE may improve performance.
Properties
DatabaseOrientation
Initial or MTP Products Platforms Languages
Target Both All DB2 z/OS
DB2 UNIX/NT
Oracle
Informix
All
Task 2-11-3: Edit the Tablespace Alter ScriptIn this step, you edit the TABLESPACEALTERTABLES.SQL script for tablespace names and sizing. If youare running on an RDBMS platform that uses tablespaces, and you are not using the PeopleSoft tablespacenames, you need to review and modify the scripts above. Have your database administrator review thesescripts and modify the tablespace names appropriately. The script can be found in your Change Assistantoutput directory for this upgrade path.
Note. If you are a DB2 z/OS customer, you must edit the scripts for database name regardless of whether youare using the delivered PeopleSoft tablespace names.
Properties
DatabaseOrientation
Initial or MTP Products Platforms Languages
Target Both All DB2 z/OS
DB2 UNIX/NT
Oracle
Informix
All
Task 2-11-4: Run the Tablespace Alter ScriptThis step runs the TABLESPACEALTERTABLES.SQL script to move the tables to the new tablespaces.
92 Copyright © 2007, Oracle. All rights reserved.

Chapter 2 Apply PeopleTools Changes
Properties
DatabaseOrientation
Initial or MTP Products Platforms Languages
Target Both All DB2 z/OS
DB2 UNIX/NT
Oracle
Informix
All
Task 2-12: Loading Base DataThese Data Mover scripts (DMSs) initialize and modify the data in various PeopleTools tables required for thesystem to execute properly. This step runs scripts conforming to the PTxxxTLS.DMS and PTxxxTLSyyy.DMSnaming conventions, where xxx represents a PeopleTools release number and yyy represents a three-letterlanguage code, that are greater than your current PeopleTools release. For some upgrades, no data scripts arerequired. In this case, Change Assistant continues to the next step without producing a log file.
Properties
DatabaseOrientation
Initial or MTP Products Platforms Languages
Target Initial All All All
Task 2-13: Loading Language DataThis section discusses:
• Populate Languages
• Load Language Data
Task 2-13-1: Populate LanguagesThis step runs the PSLANGUAGES.DMS script. This script populates the PSLANGUAGES table withVerity Locale data and other language-specific data.
Properties
DatabaseOrientation
Initial or MTP Products Platforms Languages
Target Initial All All All
Copyright © 2007, Oracle. All rights reserved. 93

Apply PeopleTools Changes Chapter 2
Task 2-13-2: Load Language DataIf your database has languages installed in addition to English, you must populate the PSLANGUAGES table.
To load language data:
1. From the DMS that was created for your PeopleSoft 8.x database installation, find the UPDATE toPSLANGUAGES.The statement should look similar to the following:
UPDATE PSLANGUAGES SET INSTALLED=1 WHERE LANGUAGE_CD = ’xxx’;
2. Run the SQL command identified above using your SQL tool.Your database is now updated with the language data.
Properties
DatabaseOrientation
Initial or MTP Products Platforms Languages
Target Initial All All All Non-English
Task 2-14: Loading PeopleTools DataThis section discusses:
• Load NonComparable Objects
• Load English Messages
• Load English String Data
• Load Stored Statements Data
Task 2-14-1: Load NonComparable ObjectsThis step runs the TLSUPGNONCOMP.DMS script. This script loads the TLSUPGNONCOMP project andall PeopleTools-owned object definitions that cannot be delivered using Copy Project to File.
Properties
DatabaseOrientation
Initial or MTP Products Platforms Languages
Target Initial All All All
Task 2-14-2: Load English MessagesThis step runs the MSGTLENG.DMS script, which loads English messages into your database.
94 Copyright © 2007, Oracle. All rights reserved.

Chapter 2 Apply PeopleTools Changes
Properties
DatabaseOrientation
Initial or MTP Products Platforms Languages
Target Initial All All All
Task 2-14-3: Load English String DataThis step runs the PTSTRENG.DMS script, which loads English string data into the STRINGS_TBL table.
Note. The non-English language data was loaded in the task Loading Base Data.
Properties
DatabaseOrientation
Initial or MTP Products Platforms Languages
Target Initial All All All
Task 2-14-4: Load Stored Statements DataLoading the stored statements ensures that the dynamic SQL statements will work correctly with the deliveredCOBOL programs.
This step runs the STOREPT.DMS script, which loads the dynamic SQL used by the PeopleTools-deliveredCOBOL.
Properties
DatabaseOrientation
Initial or MTP Products Platforms Languages
Target Both All All All
Task 2-15: Loading PeopleTools Definition GroupThis task runs the PTDEFNSEC.DMS script that loads the PeopleTools definition security group. This ensuresthat the definition security group is updated with the PeopleTools objects introduced in this release.
Properties
DatabaseOrientation
Initial or MTP Products Platforms Languages
Target Initial All All All
Copyright © 2007, Oracle. All rights reserved. 95

Apply PeopleTools Changes Chapter 2
Task 2-16: Converting PeopleTools ObjectsThis section discusses:
• Update REN Server Configuration
• Populate MCF Data
• Convert Portal Objects
• Convert Query Prompt Headings
• Encrypt Connector Passwords
• Load Conversion Data
• Report Conversion Details
• Run Data Conversion
Task 2-16-1: Update REN Server ConfigurationThis step runs the Application Engine program UPGMCF843, which converts real-time event notification(REN) server configuration information to the new format. REN servers run in the application serverdomain. They are used for the PeopleTools MultiChannel Framework (MCF) and Reporting Window outputoption. The program converts standard REN server configurations to the new format, including MCF clusterinformation. All REN server configuration information is now stored within the database. You must upgradeold REN server configurations before attempting to boot with the new version of PeopleTools. If you didnot have any REN servers configured prior to starting the upgrade, then the UPGMCF843 program does notmake any changes. If one of your configurations cannot be converted, error messages will be written in theApplication Engine message log.
After running this step, you should also check the PSRENCONFIG.TXT file located in eachapplication server domain that started an old REN server. (The file will not exist in domains thatdid not start a REN server.) Each old file should be replaced with the new template file located atPS_HOME/APPSERV/REN/PSRENCONFIG.TXT. Old template files cannot be used with the new versionof REN server. If you customized your old configuration files, manually edit the new files and update themwith your customizations.
Properties
DatabaseOrientation
Initial or MTP Products Platforms Languages
Target Both All All All
Task 2-16-2: Populate MCF DataThis step runs the Application Engine program MCF_UPGR_SND, which populates thePS_MCFEM_MAIL_DSCR table with data. In PeopleTools 8.44, the REPLY_TO header functionality wasadded. The field PS_MCFEM_MAIL_DSCR.MCF_REPLY_TO is populated with the values stored inPS_MCFEM_MAIL_MAIN.MCF_EMAIL_SENDER.
96 Copyright © 2007, Oracle. All rights reserved.

Chapter 2 Apply PeopleTools Changes
Properties
DatabaseOrientation
Initial or MTP Products Platforms Languages
Target Both All All All
Task 2-16-3: Convert Portal ObjectsThis step runs the Application Engine program UPG844PORTAL, which splits PSPRSMDEFN.PORTAL_URLTEXT into segments and stores them in separate columns: PORTAL_URI_SEG1, PORTAL_URI_SEG2,PORTAL_URI_SEG3, and PORTAL_URI_SEG4. This is performed for PeopleSoft Component URLs toextract values for Menu, Component, and Market. Values for Record, Field, Event, and Function Names areextracted from Iscript URLs.
You may see some errors or messages in your log. Following is a list of some of the errors and what to doabout them:
• Not authorized CRef: Portal Object Name (95,5032).This means that you do not have proper privileges to run this conversion. You need to grant the user IDthat you are using to upgrade Portal Administrator permissions.
• Security synchronization failed for Portal Object: Portal Object Name(96,61).This is not a fatal error. It may be caused by a content reference that contains invalid URL text andindicates that there was an internal error writing to the security table. The invalid URL text may bepointing to a component or script that does not exist in the database. You need to fix the content referenceand then rerun the UPG844PORTAL process.
• Cref Portal Object Name points to Menu: Menu Name, Component ComponentName which doesn’t exist. (96,80).The content reference is pointing to an invalid Menu/Component combination. You need to fix the contentreference so that it points at a valid Menu/Component combination and then rerun the UPG844PORTALprocess.
• Duplicate key. Portal: Portal Name, Obj Name: Portal Object Name,Nodename: Node, URL: URL (133,4).This portal object has the same URL as another portal object. Delete or modify this object to remove theconflict and then rerun the UPG844PORTAL process.
See the Enterprise PeopleTools PeopleBook: Internet Technology for your new release.
Properties
DatabaseOrientation
Initial or MTP Products Platforms Languages
Target Initial All All All
Copyright © 2007, Oracle. All rights reserved. 97

Apply PeopleTools Changes Chapter 2
Task 2-16-4: Convert Query Prompt HeadingsThis step runs the Application Engine program UPGQRYDUPHED, which searches for duplicate promptheadings in the table PSQRYBIND and appends numbers onto the text. For example, Item ID would becomeItem ID 2. When you run Crystal 9 through the process scheduler, it cannot handle queries with two or moreprompts that have the same heading. These duplicates are also not legal in Query. You need to alter any oldqueries that have duplicate prompt headings so that they work with Crystal 9.
If you find a duplicate heading that exceeds the length of the field HEADING, you need to change the headingmanually. In these cases, the following error is written to the log file:
The prompt heading HEADING for Query QUERY is duplicated. Please manually correct.⇒(108, 1108)
See the Enterprise PeopleTools PeopleBook: PeopleSoft Query for your new release.
Properties
DatabaseOrientation
Initial or MTP Products Platforms Languages
Target Initial All All All
Task 2-16-5: Encrypt Connector PasswordsThis step runs the Application Engine program UPGRDPASSWDS, which encrypts the password propertyfield for the POP3Target, FTPTarget, GetMailTarget, and JMSTarget connectors.
Properties
DatabaseOrientation
Initial or MTP Products Platforms Languages
Target Both All All All
Task 2-16-6: Load Conversion DataThis step imports PeopleTools data conversion Application Engine driver data into your database.
Properties
DatabaseOrientation
Initial or MTP Products Platforms Languages
Target Both All All All
Task 2-16-7: Report Conversion DetailsThis step runs the PTUCONV.SQR script. It details which sections will be called by the Upgrade Driverprogram and what they are doing. Each of the upgrade data conversion sections contains comments thatdescribe the processing done by the section. The information contained in the report is used to evaluate theconversions run in the next step and any actions that are required as a result of the conversion.
98 Copyright © 2007, Oracle. All rights reserved.

Chapter 2 Apply PeopleTools Changes
Properties
DatabaseOrientation
Initial or MTP Products Platforms Languages
Target Both All All All
Task 2-16-8: Run Data ConversionThe Upgrade Driver Application Engine program, PTUPGCONVERT, runs additional PeopleTools upgradedata conversions. The program then reads the table PS_PTUPGCONVERT, selecting all rows with the groupnumber of 01 and ordering them by the sequence number on the row. A list of Application Engine librarysections that must be run for data conversion is returned. The program then calls each section in the order ofthe sequence number. After running PTUPGCONVERT, review the output data generated in the previous stepfor more details.
Properties
DatabaseOrientation
Initial or MTP Products Platforms Languages
Target Both All All All
Task 2-17: Creating PeopleTools ViewsThis section discusses:
• Create Updated PeopleTools Views
Task 2-17-1: Create Updated PeopleTools ViewsThis step creates all views defined in the PPLTLS84CUR project. These are PeopleTools views that havechanged and are required for tasks later in the upgrade.
Properties
DatabaseOrientation
Initial or MTP Products Platforms Languages
Target Both All All All
Task 2-18: Converting Integration BrokerThis section discusses:
• Understanding Converting Integration Broker
• Updating Integration Broker Defaults
Copyright © 2007, Oracle. All rights reserved. 99

Apply PeopleTools Changes Chapter 2
• Creating Integration Broker Objects
• Saving Application Messaging Objects
• Exporting Node Transactions
• Preparing Integration Broker Deletes
• Deleting Application Messaging Objects
• Deleting Node Transactions
Understanding Converting Integration BrokerIf you are upgrading from PeopleTools 8.48 or later, this task does not need to be run because the IntegrationBroker conversion has already been performed. You may mark all of the steps in this task as complete in yourupgrade job. If you don’t mark these steps as complete, the upgrade will try to unnecessarily reconvertyour objects.
Task 2-18-1: Updating Integration Broker DefaultsThis step runs the PTIBUPGRADE.DMS script. This script populates the default values specified earlier inthe upgrade.
Properties
DatabaseOrientation
Initial or MTP Products Platforms Languages
Target Initial All All All
Task 2-18-2: Creating Integration Broker ObjectsThe PeopleTools Upgrade Driver Application Engine program, PTUPGCONVERT, runs additionalPeopleTools upgrade data conversions. The program then reads the table PS_PTUPGCONVERT, selectingall rows with a group number of 03 and ordering them by the row sequence number. A list of ApplicationEngine library sections that must be run for data conversion is returned. The program then calls eachsection in the sequence number order. Review the report generated by PTUCONV.SQR for details on theconversions run in this step.
Properties
DatabaseOrientation
Initial or MTP Products Platforms Languages
Target Initial All All All
Task 2-18-3: Saving Application Messaging ObjectsThis step copies the PTUPGIBCLONE project to the PS_HOME\projects directory. This project was created bythe UPGPT848IBUG Application Engine program and contains objects that were successfully converted. Theobjects are copied to file as a precautionary measure because they will be deleted from the upgrade database.
After running this step, save the exported project in a permanent location where it can be accessed post-upgradein case there is a need to review or import the old objects.
100 Copyright © 2007, Oracle. All rights reserved.

Chapter 2 Apply PeopleTools Changes
Properties
DatabaseOrientation
Initial or MTP Products Platforms Languages
Target Initial All All All
Task 2-18-4: Exporting Node TransactionsThis step runs PTUPG_TRX_EXPORT.DMS to save out the old preconversion node transaction data. Thegenerated .dat file is written to the DataMover output directory defined in Configuration Manager, whichshould be your PS_HOME\data directory.
After running this step, save PTUPG_TRX_EXPORT.DAT in a permanent location where it can be accessedpost-upgrade in case there is a need to review or import the old objects.
Properties
DatabaseOrientation
Initial or MTP Products Platforms Languages
Target Initial All All All
Task 2-18-5: Preparing Integration Broker DeletesThis step copies the PTUPGIBDELETE project to your PS_HOME\projects directory in preparation fordeleting the obsolete pre-conversion object definitions from the upgrade database. This project was created bythe UPGPT848IBUG Application Engine program and contains the same objects as PTUPGIBCLONE.
Properties
DatabaseOrientation
Initial or MTP Products Platforms Languages
Target Initial All All All
Task 2-18-6: Deleting Application Messaging ObjectsThis step copies the PTUPGIBDELETE project definition from file. Since the actions in the project are set toDelete, this will delete the obsolete preconversion object definitions from the upgrade database.
Properties
DatabaseOrientation
Initial or MTP Products Platforms Languages
Target Initial All All All
Task 2-18-7: Deleting Node TransactionsThis step runs PTUPG_TRX.DMS, which removes obsolete node transaction data associated with the obsoleteobjects in the PTUPGIBDELETE project. This script was generated by the UPGPT848IBUG ApplicationEngine program.
Copyright © 2007, Oracle. All rights reserved. 101

Apply PeopleTools Changes Chapter 2
Properties
DatabaseOrientation
Initial or MTP Products Platforms Languages
Target Initial All All All
Task 2-19: Setting Object Version NumbersIn this task, you run the VERSION Application Engine program. This ensures that all of your version numbersare correct and, if not, resets them to 1.
Note. You will rerun the VERSION application engine program later in the upgrade. If you want to preservethe log files generated by Change Assistant from this run, you will need to rename the files manually aftercompleting this task.
Properties
DatabaseOrientation
Initial or MTP Products Platforms Languages
Target Both All All All
Task 2-20: Converting Database Data TypesThis section discusses:
• Understanding Converting Database Data Types
• Backing Up Before Platform Changes
• Running Long Data Audit
• Validating Microsoft Database
• Reviewing Microsoft Settings
• Creating Microsoft Conversion Project
• Generating Microsoft Conversion Script
• Running Microsoft Conversion Script
• Granting Permissions to the CONNECT ID
• Running Microsoft Conversion Report
• Validating Oracle Database
• Creating Oracle Audit Tables
• Auditing Duplicate Length Constraints
102 Copyright © 2007, Oracle. All rights reserved.

Chapter 2 Apply PeopleTools Changes
• Auditing Disabled Constraints
• Reviewing Oracle Settings
• Generating Oracle Conversion Scripts
• Running Long to LOB Script 1
• Running Long to LOB Script 2
• Running Long to LOB Script 3
• Running Long to LOB Script 4
• Running Long to LOB Script 5
• Running Long to LOB Script 6
• Running Long to LOB Script 7
• Running Long to LOB Script 8
• Auditing Long to LOB Conversion
• Running Character Length Script 1
• Running Character Length Script 2
• Running Character Length Script 3
• Running Character Length Script 4
• Running Character Length Script 5
• Running Character Length Script 6
• Running Character Length Script 7
• Running Character Length Script 8
• Auditing Character Length Semantics
• Reviewing Conversion Reports
• Updating Database Options
Understanding Converting Database Data TypesAs of PeopleTools 8.48, new database data types are supported for Microsoft SQL Server 2005 or later andOracle 9i or later. These data type changes are mandatory but only available for use in conjunction withapplication releases 9.0 or later.
For Microsoft SQL Server 2005 and later, the data types VARCHAR, NVARCHAR, VARBINARY(MAX),and VARCHAR(MAX) are now supported. Databases on Microsoft SQL Server 2000 and earlier will notuse these new data types. The data types as defined in Application Designer are not changed; only thedatabase-level definition will be different:
• Records with fields defined as PeopleSoft CHAR(N) will now use VARCHAR(N).
• Records with fields defined as PeopleSoft NCHAR(N) will now use NVARCHAR(N).
• Records with fields defined as PeopleSoft Long Character(N) will now use VARCHAR(N) if N is <=4000and VARCHAR(MAX) if N is > 4000 for non-Unicode.
Copyright © 2007, Oracle. All rights reserved. 103

Apply PeopleTools Changes Chapter 2
• Records with fields defined as PeopleSoft Long Character(N) will now use NVARCHAR(N) if N is<=4000 and VARCHAR(MAX) if N is > 4000 for Unicode databases.
• Records with fields defined as PeopleSoft IMAGE will now use VARBINARY(MAX).
For Oracle 9i or later, the data types CLOB and BLOB are now supported. In addition, the Character LengthSemantics feature is also supported for Unicode databases when creating PeopleSoft CHAR fields and LONGCHARACTER fields with specified lengths less than 1334:
• Records with fields defined as PeopleSoft IMAGE or PeopleSoft LONG CHARACTER with Raw Binarywill now use BLOB.
• Records with fields defined as PeopleSoft LONG CHARACTER with no length specified, length greaterthan 1333(UNICODE), or length greater than 4000 (ANSI) will now use CLOB.
Task 2-20-1: Backing Up Before Platform ChangesBack up your upgrade database now. This enables you to restart your upgrade from this point, in case youexperience any database integrity problems during the remaining tasks in the upgrade process.
Important! For Oracle platforms, contact your database administrator to update the statistics on the databasecatalog. This will improve performance for subsequent steps in the upgrade. Typically only the users sysand sysdba have the authority to perform this task.
The following command updates the statistics on the database catalog:
EXEC DBMS_STATS.GATHER_SCHEMA_STATS(’SYS’);
Properties
DatabaseOrientation
Initial or MTP Products Platforms Languages
Target Both All MS SQL Server
Oracle
All
Task 2-20-2: Running Long Data AuditThis step runs LONGS-AUDIT.SQL, which audits for any fields exceeding the actual data length forPeopleSoft long character columns. You will review the output in a later step.
Properties
DatabaseOrientation
Initial or MTP Products Platforms Languages
Target Both All MS SQL Server All
Task 2-20-3: Validating Microsoft DatabaseThis step runs DBSETTINGS.SQL, which checks the Microsoft SQL Server version. The data type conversionis supported only with Microsoft SQL Server 2005 or later. You will review the output in a later step.
104 Copyright © 2007, Oracle. All rights reserved.

Chapter 2 Apply PeopleTools Changes
Properties
DatabaseOrientation
Initial or MTP Products Platforms Languages
Target Both All MS SQL Server All
Task 2-20-4: Reviewing Microsoft SettingsIf you are upgrading to a PeopleSoft 9.0 or later application release, the data type update and a minimumof Microsoft SQL Server 2005 are required. You will run a conversion process that will substitute the olddata types for new ones. The data type conversion is supported for Microsoft SQL Server 2005 or later withPeopleTools 8.48 or later and an application release 9.0 or later. Examine the log file from the step ValidatingMicrosoft Database to ensure that you are running a supported version of Microsoft SQL Server. Do notperform the rest of this task if you do not meet the qualifications.
Examine the log file from the step Running Long Data Audit to determine if there are any fields shorter thanlength 4000 in the database that exceed the actual data length defined for the PeopleSoft long character fields.Prior to PeopleTools 8.48, all PeopleSoft long character fields were created using the TEXT SQL Server datatype, and no matter the length defined by the Application Designer, the data in the field could grow as much asthe TEXT limits on SQL Server. After the data type conversion, the length specified in Application Designerwill be enforced for all fields shorter than length 4000, except for those with length zero. If your data is largerthan the length defined in Application Designer, then you must correct the length using Application Designeror change the data itself using your SQL query tool. You must decide whether you want a change in the fieldlength definition or a change in the data. The log file created by LONGS-AUDIT.SQL will only show all ofthe fields that contain data exceeding a length between 1 and 4000 and will be empty if this condition doesnot occur with no other action to take.
Resolve these problems before continuing to the next step, otherwise the conversion process will fail. Ifnecessary, contact your DBA for assistance in modifying the fields. If no fields are listed in the log file, nofurther action is needed and you may proceed with the upgrade.
Note. During Move to Production passes, copy MSSNEWTYPE_ALTER.SQL from your initial passupgrade’s output directory and place it into the output directory for your Move to Production pass. This scriptis only generated during the initial pass. Edit the script and correct the database name on the first line of thescript to point to the Target database for the pass.
Properties
DatabaseOrientation
Initial or MTP Products Platforms Languages
Target Both All MS SQL Server All
Task 2-20-5: Creating Microsoft Conversion ProjectThis step runs MSSNEWTYPE.SQL, which generates and populates the MSSNEWTYPE project. The projectcontains all of the records that need to be modified to use the newly supported data types.
Copyright © 2007, Oracle. All rights reserved. 105

Apply PeopleTools Changes Chapter 2
Properties
DatabaseOrientation
Initial or MTP Products Platforms Languages
Target Initial All MS SQL Server All
Task 2-20-6: Generating Microsoft Conversion ScriptThis step generates the SQL script MSSNEWTYPE_ALTER.SQL to alter the records in the MSSNEWTYPEproject. The generated script will alter the tables with the new data types.
Properties
DatabaseOrientation
Initial or MTP Products Platforms Languages
Target Initial All MS SQL Server All
Task 2-20-7: Running Microsoft Conversion ScriptThis step runs the generated script from the previous step. This will alter the existing tables to use the new datatypes. All of the tables will be copied into their new representation using the new data types and all of theadditional padding blanks derived from the use of the old data types will be truncated.
Properties
DatabaseOrientation
Initial or MTP Products Platforms Languages
Target Both All MS SQL Server All
Task 2-20-8: Granting Permissions to the CONNECT IDThis step runs the GRANT.SQL script. This script grants select access to the CONNECT ID for tablesnecessary for sign on.
Properties
DatabaseOrientation
Initial or MTP Products Platforms Languages
Target Both All MS SQL Server All
Task 2-20-9: Running Microsoft Conversion ReportThis step runs CONVERSION-AUDIT.SQL, which audits for all unconverted fields. You will review theoutput in a later step.
106 Copyright © 2007, Oracle. All rights reserved.

Chapter 2 Apply PeopleTools Changes
Properties
DatabaseOrientation
Initial or MTP Products Platforms Languages
Target Both All MS SQL Server All
Task 2-20-10: Validating Oracle DatabaseThis step runs the DBSETTINGS.SQL script, which queries the database to determine the value of theNLS_LENGTH_SEMANTICS parameter. You will review the output in a later step.
There are two possible conversions that may occur depending on whether or not the database is Unicode.The Long to LOB conversion will apply to all databases, Unicode or ANSI. CHARACTER LENGTHSEMANTICS (CLS) only applies to Unicode databases. The CLS conversion has a dependency on the init.oraparameter NLS_LENGTH_SEMANTICS. The init.ora parameter NLS_LENGTH_SEMANTICS=CHAR,must be enabled for PeopleSoft Enterprise Unicode databases prior to executing the conversion. If the databasebeing converted is ANSI, then this setting is not necessary.
Properties
DatabaseOrientation
Initial or MTP Products Platforms Languages
Target Both All Oracle All
Task 2-20-11: Creating Oracle Audit TablesThis step runs PRECNVADT1A.SQL, which drops and re-creates some temporary tables required by thepre-conversion audit SQRs.
If the tables being dropped, CHECK_CONSTRAINTS, DUPLICATE_CONSTRAINTS, andDROP_CONSTRAINTS, don’t exist, the execution of this script will generate the following error, whichcan safely be ignored:
ORA-00942: table or view does not exist
Properties
DatabaseOrientation
Initial or MTP Products Platforms Languages
Target Both All Oracle All
Task 2-20-12: Auditing Duplicate Length ConstraintsThis step runs PRECNVADT1.SQR, which checks for duplicate length constraints. This condition cangenerally exist if the database was created using the Oracle Import utility and CONSTRAINTS=Y wasenabled, which is the default setting. You will review the output in a later step.
Note. If this SQR needs to be rerun for any reason, you must run PRECNVADT1A.SQL before rerunningPRECNVADT1.SQR.
Copyright © 2007, Oracle. All rights reserved. 107

Apply PeopleTools Changes Chapter 2
Properties
DatabaseOrientation
Initial or MTP Products Platforms Languages
Target Both All Oracle All
Task 2-20-13: Auditing Disabled ConstraintsThis step runs PRECNVADT2.SQR, which checks for ‘not_validated’ constraints. Although this conditionshould not exist in a production database, it may have occurred if data was imported with external utilities,such as SQL Loader. You will review the output in a later step.
Properties
DatabaseOrientation
Initial or MTP Products Platforms Languages
Target Both All Oracle All
Task 2-20-14: Reviewing Oracle SettingsThe data type conversion is only supported for Oracle 9i or later with PeopleTools 8.48 or later and anapplication release 9.0 or later. Do not perform the rest of this task if you do not meet the qualifications.
For Unicode databases, examine the log file from the step Auditing Duplicate Length Constraints.If there are any duplicate length constraints, those duplicate constraints must be dropped. Run theutility SQL script, PS_HOME\scripts\GENDROPDUPCONSTRAINTS.SQL, to generate the scriptDROPDUPCONSTRAINTS.SQL, containing an ALTER TABLE TABLE_NAME DROP CONSTRAINTfor every duplicate constraint found. Run the DROPDUPCONSTRAINTS.SQL to resolve the duplicatelength constraints.
For Unicode databases, examine the log file from the step Auditing Disabled Constraints. If thereare any disabled or nonvalidated constraints, these constraints should be re-validated. Run theutility SQL script, PS_HOME\scripts\GENREVALIDATECONSTRAINTS.SQL to generate thescript REVALIDATECONSTRAINTS.SQL, containing an ALTER TABLE TABLE_NAME ENABLEVALIDATE CONSTRAINT CONSTRAINT_NAME for every invalid constraint found. Run theREVALIDATECONSTRAINTS.SQL to enable the constraints.
For Unicode databases, examine the log file from the step Validating Oracle Database to determine ifthe values in the init.ora file are set properly. For Unicode databases, the NLS_LENGTH_SEMANTICSparameter needs to have a value of CHAR. This indicates that CHARACTER LENGTH SEMANTICS isenabled and the conversion can continue. If you need to enable Character Length Semantics, work with yourDBA to modify the init.ora for the Target database’s SID and set NLS_LENGTH_SEMANTICS to CHAR.Then stop and restart the database SID for the setting to take effect.
108 Copyright © 2007, Oracle. All rights reserved.

Chapter 2 Apply PeopleTools Changes
Properties
DatabaseOrientation
Initial or MTP Products Platforms Languages
Target Both All Oracle All
Task 2-20-15: Generating Oracle Conversion ScriptsWork with your database administrator to set the following init.ora parameters for the Target database’s systemidentifier (SID). Stop and restart the database SID for the following settings to take effect:
1. Set the following init.ora parameters:
db_block_size=8192
db_cache_size=325165824
db_file_multiblock_read_count=8
job_queue_processes=10
shared_pool_size=425829120
pga_aggregate_target=5871947670
parallel_max_servers=8
workarea_size_policy=AUTO
Note. If you are using Oracle 10g or higher, you may use the parameters SGA_TARGET=300Mand SGA_MAX_SIZE=350M instead of SHARED_POOL_SIZE, DB_CACHE_SIZE, andDB_BLOCK_BUFFERS.
2. Pre-allocate the PSTEMP tablespace to at least 10 GB.3. Pre-allocate the PSDEFAULT tablespace to at least 2 GB with 10-MB local uniform extents.4. Ensure that you have at least six redo logs sized at 500 MB each.
The Oracle data types script generation program is a Java program that connects to an Oracle database.The prerequisites are Java and the Oracle JDBC Drivers. The Oracle JDBC drivers will automatically bepicked up by the .bat file provided that the %ORACLE_HOME% environment variable is set. Check if the%ORACLE_HOME% environment variable is set, by typing the following at the workstation commandprompt:
echo %ORACLE_HOME%;
This should return a path, for example:c:\oracle\product\10.1.0\client_1;
If the %ORACLE_HOME% environment variable is not set, then set it in the command prompt window bytyping the following at the workstation command prompt:
SET ORACLE_HOME=Oracle_Home_location
The Oracle data types script generation program is executed using the PS_HOME\utility\PSORADataTypesConversion.BAT file, which requires five input parameters:
• THREADS: The number of Java threads the conversion script generation spawns to generate the scripts.We recommend 10 threads for running this program on Windows.
• ACCESSID: The access ID for the database to be converted.• ACCESSIDPW: The access password for the database to be converted.
Copyright © 2007, Oracle. All rights reserved. 109

Apply PeopleTools Changes Chapter 2
• DBNAME: The database name.• OUTPUTDIR: A directory path to redirect the generated conversion scripts to a user specified directory.This must be set to the Change Assistant output directory for your upgrade pass. Change Assistantwill run the generated scripts later in the upgrade.Example:
PS_HOME\utility\PSORADataTypesConversion.bat 10 SYSADM SYSADM MYDB c:\upgrade⇒\output\Change_Assistant_job_directory
In the example command line above:THREADS = 10ACCESSID = SYSADMACCESSIDPW = SYSADMDBNAME = MYDBOUTPUTDIR = c:\upgrade\output\Change_Assistant_job_directory
Open a command prompt window on the client workstation and execute the Oracle data types scriptgeneration program PS_HOME\utility\PSORADataTypesConversion.bat. The program will display and writea log (PsOraCnv.log) to the directory specified by the OUTPUTDIR parameter indicating the status of theconversion program. Review PsOraCnv.log and ensure that the conversion scripts were generated cleanly.
For ANSI databases, only LONGTOLOBALTER conversion scripts are generated. For Unicodedatabases, two sets of scripts are generated: LONGTOLOBALTER conversion scripts andCHARACTERLENGTHSEMANTICSALTER scripts.
After successfully running the conversion program, verify that the generated SQL scripts are located in thestaging Change Assistant output directory for your upgrade pass. Later in the upgrade, Change Assistantwill automatically run the SQL scripts later in the upgrade from the Change Assistant output directory foryour upgrade pass.
Properties
DatabaseOrientation
Initial or MTP Products Platforms Languages
Target Both All Oracle All
Task 2-20-16: Running Long to LOB Script 1This step runs LONGTOLOBALTER1.SQL, which was generated using PSORADataTypesConversion.bat.The Oracle long to LOB conversion scripts are designed to run concurrently to improve performance.
Properties
DatabaseOrientation
Initial or MTP Products Platforms Languages
Target Both All Oracle All
110 Copyright © 2007, Oracle. All rights reserved.

Chapter 2 Apply PeopleTools Changes
Task 2-20-17: Running Long to LOB Script 2This step runs LONGTOLOBALTER2.SQL, which was generated using PSORADataTypesConversion.bat.The Oracle long to LOB conversion scripts are designed to run concurrently to improve performance.
Properties
DatabaseOrientation
Initial or MTP Products Platforms Languages
Target Both All Oracle All
Task 2-20-18: Running Long to LOB Script 3This step runs LONGTOLOBALTER3.SQL, which was generated using PSORADataTypesConversion.bat.The Oracle long to LOB conversion scripts are designed to run concurrently to improve performance.
Properties
DatabaseOrientation
Initial or MTP Products Platforms Languages
Target Both All Oracle All
Task 2-20-19: Running Long to LOB Script 4This step runs LONGTOLOBALTER4.SQL, which was generated using PSORADataTypesConversion.bat.The Oracle long to LOB conversion scripts are designed to run concurrently to improve performance.
Properties
DatabaseOrientation
Initial or MTP Products Platforms Languages
Target Both All Oracle All
Task 2-20-20: Running Long to LOB Script 5This step runs LONGTOLOBALTER5.SQL, which was generated using PSORADataTypesConversion.bat.The Oracle long to LOB conversion scripts are designed to run concurrently to improve performance.
Properties
DatabaseOrientation
Initial or MTP Products Platforms Languages
Target Both All Oracle All
Task 2-20-21: Running Long to LOB Script 6This step runs LONGTOLOBALTER6.SQL, which was generated using PSORADataTypesConversion.bat.The Oracle long to LOB conversion scripts are designed to run concurrently to improve performance.
Copyright © 2007, Oracle. All rights reserved. 111

Apply PeopleTools Changes Chapter 2
Properties
DatabaseOrientation
Initial or MTP Products Platforms Languages
Target Both All Oracle All
Task 2-20-22: Running Long to LOB Script 7This step runs LONGTOLOBALTER7.SQL, which was generated using PSORADataTypesConversion.bat.The Oracle long to LOB conversion scripts are designed to run concurrently to improve performance.
Properties
DatabaseOrientation
Initial or MTP Products Platforms Languages
Target Both All Oracle All
Task 2-20-23: Running Long to LOB Script 8This step runs LONGTOLOBALTER8.SQL, which was generated using PSORADataTypesConversion.bat.The Oracle long to LOB conversion scripts are designed to run concurrently to improve performance.
Properties
DatabaseOrientation
Initial or MTP Products Platforms Languages
Target Both All Oracle All
Task 2-20-24: Auditing Long to LOB ConversionThis step runs L2LAUDIT.SQR to report on the output of the long to LOB conversion. You will reviewthe report output in a later step.
Properties
DatabaseOrientation
Initial or MTP Products Platforms Languages
Target Both All Oracle All
Task 2-20-25: Running Character Length Script 1This step runs CHARACTERLENGTHSEMANTICSALTER1.SQL, which was generated usingPSORADataTypesConversion.bat. The Oracle character length semantics conversion scripts are designed torun concurrently to improve performance.
112 Copyright © 2007, Oracle. All rights reserved.

Chapter 2 Apply PeopleTools Changes
Properties
DatabaseOrientation
Initial or MTP Products Platforms Languages
Target Both All Oracle All
Task 2-20-26: Running Character Length Script 2This step runs CHARACTERLENGTHSEMANTICSALTER2.SQL, which was generated usingPSORADataTypesConversion.bat. The Oracle character length semantics conversion scripts are designed torun concurrently to improve performance.
Properties
DatabaseOrientation
Initial or MTP Products Platforms Languages
Target Both All Oracle All
Task 2-20-27: Running Character Length Script 3This step runs CHARACTERLENGTHSEMANTICSALTER3.SQL, which was generated usingPSORADataTypesConversion.bat. The Oracle character length semantics conversion scripts are designed torun concurrently to improve performance.
Properties
DatabaseOrientation
Initial or MTP Products Platforms Languages
Target Both All Oracle All
Task 2-20-28: Running Character Length Script 4This step runs CHARACTERLENGTHSEMANTICSALTER4.SQL, which was generated usingPSORADataTypesConversion.bat. The Oracle character length semantics conversion scripts are designed torun concurrently to improve performance.
Properties
DatabaseOrientation
Initial or MTP Products Platforms Languages
Target Both All Oracle All
Task 2-20-29: Running Character Length Script 5This step runs CHARACTERLENGTHSEMANTICSALTER5.SQL, which was generated usingPSORADataTypesConversion.bat. The Oracle character length semantics conversion scripts are designed torun concurrently to improve performance.
Copyright © 2007, Oracle. All rights reserved. 113

Apply PeopleTools Changes Chapter 2
Properties
DatabaseOrientation
Initial or MTP Products Platforms Languages
Target Both All Oracle All
Task 2-20-30: Running Character Length Script 6This step runs CHARACTERLENGTHSEMANTICSALTER6.SQL, which was generated usingPSORADataTypesConversion.bat. The Oracle character length semantics conversion scripts are designed torun concurrently to improve performance.
Properties
DatabaseOrientation
Initial or MTP Products Platforms Languages
Target Both All Oracle All
Task 2-20-31: Running Character Length Script 7This step runs CHARACTERLENGTHSEMANTICSALTER7.SQL, which was generated usingPSORADataTypesConversion.bat. The Oracle character length semantics conversion scripts are designed torun concurrently to improve performance.
Properties
DatabaseOrientation
Initial or MTP Products Platforms Languages
Target Both All Oracle All
Task 2-20-32: Running Character Length Script 8This step runs CHARACTERLENGTHSEMANTICSALTER8.SQL, which was generated usingPSORADataTypesConversion.bat. The Oracle character length semantics conversion scripts are designed torun concurrently to improve performance.
Properties
DatabaseOrientation
Initial or MTP Products Platforms Languages
Target Both All Oracle All
Task 2-20-33: Auditing Character Length SemanticsThis step runs CLSAUDIT.SQR to report on the output of the character length semantics conversion. You willreview the report output in a later step.
114 Copyright © 2007, Oracle. All rights reserved.

Chapter 2 Apply PeopleTools Changes
Properties
DatabaseOrientation
Initial or MTP Products Platforms Languages
Target Both All Oracle All
Task 2-20-34: Reviewing Conversion ReportsTo review the conversion report for Microsoft, examine the log file from the step Running MicrosoftConversion Report. It contains a list of unconverted columns on tables along with its old data type. Fieldson tables with no Application Designer definition will be included in this log. Any unresolved errors fromthe step Running Microsoft Conversion will also be included. If you are using these tables it is possible toupdate them manually to use the new data types with a SQL query tool or with an ETL tool. Be very cautiouswhen changing a table as this could result in data loss or affected functionality. Once any underlying problemshave been resolved, you may rerun all of the previous steps in this task to reconvert any remaining objectslisted by the audit report.
Note. During Move to Production passes for Microsoft, you must manually convert any remaining objects.During Move to Production passes, the record definition differs from the database table structure, so do notbuild the record with Application Designer.
To review the conversion reports for Oracle, examine the log files from running theLONGTOLOBALTER*.SQL scripts. If the database is Unicode, also examine the log files for theCHARACTERLENGTHSEMANTICS*.SQL scripts. Review the output from the step “Auditing Long to LOBConversion.” L2LAUDIT.SQR reports on any unconverted long raw columns. The tablename, columnname,and column data type are listed. For unicode databases, review the output from the step “Auditing CharacterLength Semantics.” CLSAUDIT.SQR reports on any unconverted character length columns (Unicode only).Correct any errors listed on the log files or conversion reports before proceeding with the upgrade.
Properties
DatabaseOrientation
Initial or MTP Products Platforms Languages
Target Both All MS SQL Server
Oracle
All
Task 2-20-35: Updating Database OptionsThis step runs UPGDBOPTIONS_ENABLE.SQL. This script updates the database to indicate that the newdata types are now enabled.
Copyright © 2007, Oracle. All rights reserved. 115

Apply PeopleTools Changes Chapter 2
Properties
DatabaseOrientation
Initial or MTP Products Platforms Languages
Target Both All MS SQL Server
Oracle
All
Task 2-21: Backing Up After PeopleTools UpgradeBack up your Copy of Production database now. This enables you to restart your upgrade from this point, incase you experience any database integrity problems during the remaining tasks in the upgrade process.
Properties
DatabaseOrientation
Initial or MTP Products Platforms Languages
Target Initial All All All
116 Copyright © 2007, Oracle. All rights reserved.

CHAPTER 3
Run and Review Compare Reports
This chapter discusses:
• Understanding Compare Reports
• Preparing for Application Changes
• Renaming Tables
• Running New Release Compare Reports
• Reviewing New Release Compare Reports
Understanding Compare ReportsNow that your Copy of Production database is at the same PeopleTools release as your new release, youcan compare the two databases to see the differences. In this chapter you run and review compare reportsto make decisions regarding your upgrade. Be sure you have plenty of space to run these reports, as somecan be rather large.
Task 3-1: Preparing for Application ChangesThis section discusses:
• Running Drop Table Script
• Loading HR Ethnicities Table
• Exporting Project Definitions
• Importing Project Definitions
• Dropping View ADP_ACCT_CD_VW
• Dropping the Personal Data View
• Renaming Fields for Microsoft SQL Server
Task 3-1-1: Running Drop Table ScriptIn this step, you run the drop table script to drop tables that contain data that is not required or has anunsupported conversion.
The script name for your upgrade is:
Copyright © 2007, Oracle. All rights reserved. 117

Run and Review Compare Reports Chapter 3
DLHCUPS01.DMS
If you want to make this step automated, follow the steps below.
To make this step automated:
1. Select the step Running Drop Table Script in Change Assistant.2. Open the Step Properties dialog box.3. Change the Type from ManualStop to DataMoverUser.4. Click OK.5. In your upgrade job, mark the step as Run.
If any of these tables do not exist in your database, you will encounter errors. You can ignore the errorsand continue with the upgrade.
Properties
DatabaseOrientation
Initial or MTP Products Platforms Languages
Target Both All All All
Task 3-1-2: Loading HR Ethnicities TableIn this step you populate the UPG_HR_ETHNIC table for upgrading ethnicities. You will use this data duringdata conversion. The DataMover script for your path is:
DLHCHRW01.DMS
Properties
DatabaseOrientation
Initial or MTP Products Platforms Languages
Target Both All All All
Task 3-1-3: Exporting Project DefinitionsIn this step you will export from your Demo database the definition of projects that will be used later in thisupgrade. You will import these definitions in the next step. Your export script is:
DLUPX08E.DMS
Properties
DatabaseOrientation
Initial or MTP Products Platforms Languages
Source Both All All All
118 Copyright © 2007, Oracle. All rights reserved.

Chapter 3 Run and Review Compare Reports
Task 3-1-4: Importing Project DefinitionsIn this step you will import the project definitions into your Copy of Production database. These projects willbe used later in this upgrade. Your import script is:
DLUPX08I.DMS
Properties
DatabaseOrientation
Initial or MTP Products Platforms Languages
Target Both All All All
Task 3-1-5: Dropping View ADP_ACCT_CD_VWRun this task only if you have ADP Connector installed and DB2 z/OS or DB2 UDB database.
This step drops the view ADP_ACCT_CD_VW to avoid possible errors when renaming table ACCT_CD_TBLin the task Renaming Tables. Run the following script to drop the view:
DLHCPIW01.DMS
If you want to automate this step, follow the procedure below.
To make this step automated:
1. Select the step Dropping View ADP_ACCT_CD_VW in Change Assistant.2. Open the Step Properties dialog box.3. Change the Type from ManualStop to DataMoverUser.4. Click OK.5. In your upgrade job, mark the step as Run.
Properties
DatabaseOrientation
Initial or MTP Products Platforms Languages
Target Both Payroll Interface DB2 z/OS
DB2/UNIX NT
All
Task 3-1-6: Dropping the Personal Data ViewThis script drops the PERSONAL_DATA view. PERSONAL_DATA will be created as a table later in yourupgrade.
Run the following script:
DLHCHRI02.DMS
Copyright © 2007, Oracle. All rights reserved. 119

Run and Review Compare Reports Chapter 3
Properties
DatabaseOrientation
Initial or MTP Products Platforms Languages
Target Both All All All
Task 3-1-7: Renaming Fields for Microsoft SQL ServerEarlier in the upgrade, you reversed the rename of fields to be deleted in the new release so that they would notbe altered during the PeopleTools data type conversion. This script will reapply those renames so that yourcompare to the New Release Demo database is consistent with your earlier compare.
Run the following script:
RNHCUPI05.DMS
Properties
DatabaseOrientation
Initial or MTP Products Platforms Languages
Target Initial All MS SQL Server All
Task 3-2: Renaming TablesThis section discusses:
• Understanding Renamed Tables
• Running the RNHCUPI02MSS Script
• Running the RNHCUPI02DB2 Script
• Running the RNHCUPI02DBX Script
• Running the RNHCUPI02IFX Script
• Running the RNHCUPI02ORA Script
• Running the RNHCUPI02SYB Script
Understanding Renamed TablesThese SQL scripts rename tables, at the database level, to temporary table names. They do not change theRecord Definition. These temporary tables will be used in the data conversion programs in a later step.
Near the end of the upgrade tasks, you will run a DDDAUDIT report again. On the report, these temporarytables will be listed in the section listing: “SQL Table defined in the Database and not found in the ApplicationDesigner.” Either at that point or later when you are comfortable with the results of the data conversion, youcan drop these temporary tables.
120 Copyright © 2007, Oracle. All rights reserved.

Chapter 3 Run and Review Compare Reports
In some database platforms, the related indexes and views must be dropped before the table can be renamed.Oracle has included drop statements for these objects that exist on the DMO version of the database. However,the list of related objects may be different in your environment because of customizations or applied productincidents. You may encounter errors in these scripts because of these differences—for example, the script triesto drop an index that you do not have or it cannot rename the table because there are more related objects thatneed to be dropped. Simply modify these scripts to work for your database and you will not encounter theseerrors in your next test pass.
Task 3-2-1: Running the RNHCUPI02MSS ScriptThe RNHCUPI02MSS.SQL script renames tables on the Copy of Production database. This script is for SQLServer databases and runs in the initial and Move to Production passes.
Properties
DatabaseOrientation
Initial or MTP Products Platforms Languages
Target Both All MS SQL Server All
Task 3-2-2: Running the RNHCUPI02DB2 ScriptThe RNHCUPI02DB2.SQL script renames tables on the Copy of Production database. This script is for DB2z/OS databases and runs in the initial and Move to Production passes.
Properties
DatabaseOrientation
Initial or MTP Products Platforms Languages
Target Both All DB2 z/OS All
Task 3-2-3: Running the RNHCUPI02DBX ScriptThe RNHCUPI02DBX.SQL script renames tables on the Copy of Production database. This script is for DB2UDB databases and runs in the initial and Move to Production passes.
Properties
DatabaseOrientation
Initial or MTP Products Platforms Languages
Target Both All DB2 UNIX/NT All
Task 3-2-4: Running the RNHCUPI02IFX ScriptThe RNHCUPI02IFX.SQL script renames tables on the Copy of Production database. This script is forInformix databases and runs in the initial and Move to Production passes.
Copyright © 2007, Oracle. All rights reserved. 121

Run and Review Compare Reports Chapter 3
Properties
DatabaseOrientation
Initial or MTP Products Platforms Languages
Target Both All Informix All
Task 3-2-5: Running the RNHCUPI02ORA ScriptThe RNHCUPI02ORA.SQL script renames tables on the Copy of Production database. This script is forOracle databases and runs in the initial and Move to Production passes.
Properties
DatabaseOrientation
Initial or MTP Products Platforms Languages
Target Both All Oracle All
Task 3-2-6: Running the RNHCUPI02SYB ScriptThe RNHCUPI02SYB.SQL script renames tables on the Copy of Production database. This script is forSybase databases and runs in the initial and Move to Production passes.
Properties
DatabaseOrientation
Initial or MTP Products Platforms Languages
Target Both All Sybase All
Task 3-3: Running New Release Compare ReportsThis section discusses:
• Understanding the New Release Compare
• Preserving Local Message Node
• Modifying New Release Compare Options
• Running New Release UPGCUST Compare
• Running New Release UPGCUSTIB Compare
• Resetting Take Action Flags in UPGCUST
• Running UPGCUSTIB Filter Script
122 Copyright © 2007, Oracle. All rights reserved.

Chapter 3 Run and Review Compare Reports
Understanding the New Release CompareIn this task you will compare your customizations to the new release objects by running a project compareagainst the Demo database.
Task 3-3-1: Preserving Local Message NodeIn this step add your Local Message Node to the UPGCUST project before the project compare between theCopy of Production and Demo database.
To add Local Message Node:
1. Run the following SQL in your Copy of Production database to identify your Local Message Node:
SELECT MSGNODENAME FROM PSMSGNODEDEFN WHERE LOCALDEFAULTFLG = ’Y’
2. Open Application Designer from your Copy of Production database.
3. Open project UPGCUST.
4. Select Insert, Definitions Into Project.
5. Select Definition Type of Message Node.
6. Enter the Message Node name that was returned from the SQL you ran above.
7. Select the displayed Message Node.
8. Click Insert.9. Save project UPGCUST.
Properties
DatabaseOrientation
Initial or MTP Products Platforms Languages
Target Initial All All All
Task 3-3-2: Modifying New Release Compare OptionsFor compare steps, PeopleSoft Change Assistant templates are delivered with the default reports filter turnedon in the compare options. This limits the size of the reports and keeps them manageable. Before you start thecompares, review the Change Assistant template step properties for each compare step in this task and modifythe compare options based on your requirements.
If you decide not to modify the compare options, the objects are still compared. However, the results are onlyavailable online in Application Designer. They are not written to the compare reports. The compare reports aretools to help you review changed objects. However, based on the report filters you select, you may need toreview the action flags for other objects in the compare project in Application Designer.
For example, you can modify the compare options so the report contains customized objects that are present inyour Copy of Production database but absent from the Demo database. Alternatively, you can review theseobjects online, through Application Designer, after the compare.
To modify upgrade compare options:
1. Highlight the compare step you want to review and right-click.2. Select Step Properties.
Copyright © 2007, Oracle. All rights reserved. 123

Run and Review Compare Reports Chapter 3
The Step Properties dialog box appears.3. Click Upgrade.The Compare and Report dialog box appears.
4. Click Options.5. Select the Report Filter tab.The default options include your custom changes on the reports.
6. Change the default options as necessary and click OK.
Upgrade Options page, Report Filter tab
7. In the Compare and Report dialog box, click OK.8. In the Step Definitions dialog box, click OK.9. Repeat steps 1 through 8 for each compare step in the task you want to review and change.10. Select File, Save Job.
124 Copyright © 2007, Oracle. All rights reserved.
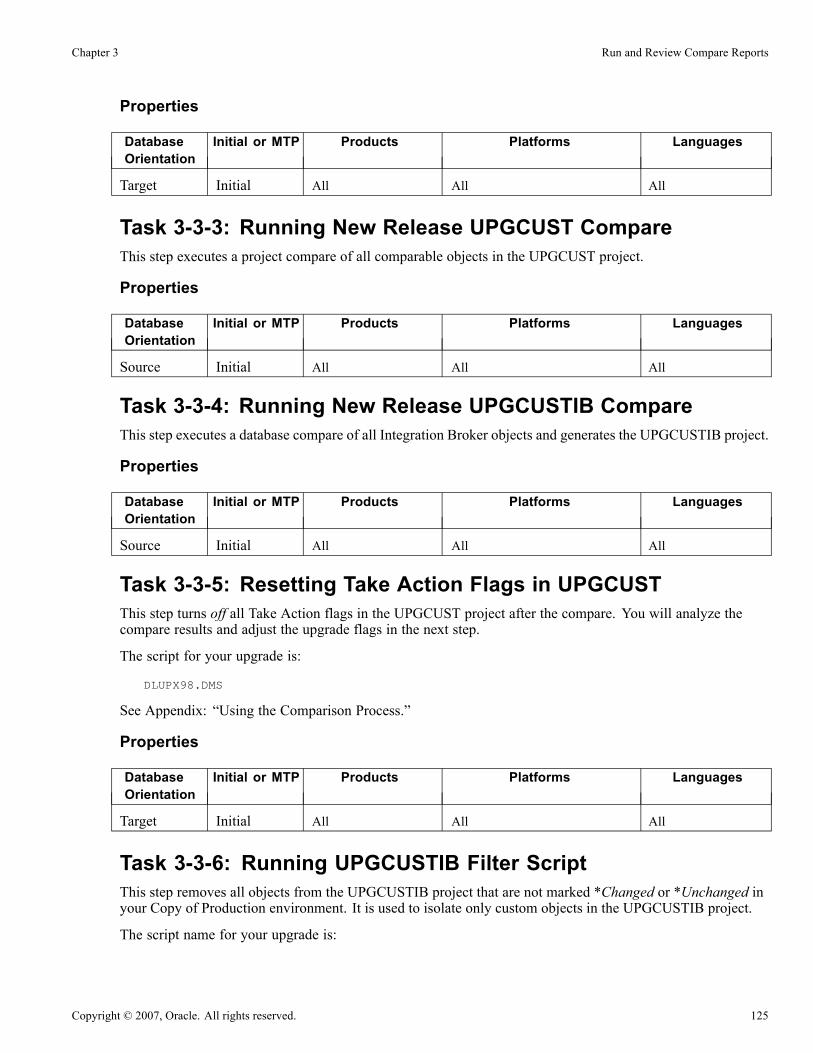
Chapter 3 Run and Review Compare Reports
Properties
DatabaseOrientation
Initial or MTP Products Platforms Languages
Target Initial All All All
Task 3-3-3: Running New Release UPGCUST CompareThis step executes a project compare of all comparable objects in the UPGCUST project.
Properties
DatabaseOrientation
Initial or MTP Products Platforms Languages
Source Initial All All All
Task 3-3-4: Running New Release UPGCUSTIB CompareThis step executes a database compare of all Integration Broker objects and generates the UPGCUSTIB project.
Properties
DatabaseOrientation
Initial or MTP Products Platforms Languages
Source Initial All All All
Task 3-3-5: Resetting Take Action Flags in UPGCUSTThis step turns off all Take Action flags in the UPGCUST project after the compare. You will analyze thecompare results and adjust the upgrade flags in the next step.
The script for your upgrade is:
DLUPX98.DMS
See Appendix: “Using the Comparison Process.”
Properties
DatabaseOrientation
Initial or MTP Products Platforms Languages
Target Initial All All All
Task 3-3-6: Running UPGCUSTIB Filter ScriptThis step removes all objects from the UPGCUSTIB project that are not marked *Changed or *Unchanged inyour Copy of Production environment. It is used to isolate only custom objects in the UPGCUSTIB project.
The script name for your upgrade is:
Copyright © 2007, Oracle. All rights reserved. 125

Run and Review Compare Reports Chapter 3
DLUPX95.DMS
See Appendix: “Using the Comparison Process.”
Properties
DatabaseOrientation
Initial or MTP Products Platforms Languages
Target Initial All All All
Task 3-4: Reviewing New Release Compare ReportsThis section discusses:
• Reviewing New Release Changes
• Reviewing NonComparable Objects
Task 3-4-1: Reviewing New Release ChangesIn this step, review the UPGCUST and UPGCUSTIB projects to evaluate how changes in the new releaseaffect your customizations.
The UPGCUST and UPGCUSTIB projects exist in your Copy of Production database and contain all theobjects you customized in the old release. These projects may include object definitions that are on your Copyof Production database but are not on the Copy of Current Demo database. If these are custom objects that youintend to keep in your upgraded system, you will want to ensure they are set to copy in the UPGCUST orUPGCUSTIB project. Compare reports are viewable when you open the projects in Application Designer. Youcan use these reports to determine your copy action for each object in the projects. Currently all UpgradeFlags are deselected, meaning no action will take place. Analyze the UPGCUST and UPGCUSTIB projectsand select the Upgrade Flags for the customizations you wish to retain.
If the Target column has the value Absent it can indicate one of two possible conditions. If Oracle originallydelivered the object definition, then it can be considered obsolete in the new release. This value can alsoindicate that you originally created the object definition for some custom functionality. To ensure the integrityand functionality of the system, delete obsolete Oracle-delivered objects. If you have made a customization toan obsolete object, refer to the product’s Release Notes to assess the functionality of the customization anddetermine where to reapply it in the new release.
See Appendix: “Using the Comparison Process.”
Warning! Pay close attention to the compare results for URLs, permission lists, and message nodes. It ishighly likely that you will want to keep any customizations that you have made to these objects. You willwant to migrate your customized local message node. Please be sure to select the Upgrade Flags from withinApplication Designer to retain these customizations.
Note. Steps in the database or third-party software installation documentation can result in Oracle-deliveredobjects being identified in the compare reports as *Changed in the Source column. You should investigateall instances where objects are identified as *Changed in the Source column to determine their origin anddetermine a plan of action based on the findings for each object.
126 Copyright © 2007, Oracle. All rights reserved.

Chapter 3 Run and Review Compare Reports
Properties
DatabaseOrientation
Initial or MTP Products Platforms Languages
Target Initial All All All
Task 3-4-2: Reviewing NonComparable ObjectsThe UPGNONCOMP project is delivered in your Demo database. It contains object definitions that cannot becompared using Application Designer. The UPGNONCOMP project for your upgrade may contain some orall objects of the following object types: trees, access groups, roles, dimensions, cube definitions, and cubeinstance definitions. These object definitions are required for your upgraded database to function correctly.You need to review this project to see whether you customized any of the objects. You then need to reapplythose customizations later in the upgrade.
Properties
DatabaseOrientation
Initial or MTP Products Platforms Languages
Source Initial All All All
Copyright © 2007, Oracle. All rights reserved. 127

Run and Review Compare Reports Chapter 3
128 Copyright © 2007, Oracle. All rights reserved.

CHAPTER 4
Apply Application Changes
This chapter discusses:
• Understanding Application Changes
• Customizing the New Release
• Running New Release Upgrade Copy
• Updating Database Overrides
• Backing Up After the Upgrade Copy
• Importing the Front Office Project
• Modifying the Database Structure
• Loading Data for Data Conversion
• Restoring New Release Demo
• Applying Updates Before Data Conversion
• Configuring Scheduler and Server
• Backing Up Before Data Conversion
• Running Data Conversion
• Backing Up After Data Conversion
• Finalizing the Database Structure
• Loading Data to Complete System Setup
• Loading Stored Statements
• Running Final Update Statistics
• Completing Application Processes
• Updating Language Data
• Completing PeopleTools Conversion
• Updating Object Version Numbers
• Running the Final Audit Reports
Copyright © 2007, Oracle. All rights reserved. 129

Apply Application Changes Chapter 4
Understanding Application ChangesEarlier in the upgrade, you made various application changes. Now it is time to apply these applicationchanges to your Copy of Production database.
Task 4-1: Customizing the New ReleaseThis section discusses:
• Understanding New Release Customizations
• Copying the UPGCUST Project
• Reviewing Copy Results
Understanding New Release CustomizationsIn this task, the UPGCUST project is copied from the Copy of Production database to the Demo database.
Note. If you are running Sybase, check the configuration parameter for open objects. If this parameteris set too low, you may encounter the following error: ct_connect(): network packet layer:internal net library error during the compare or copy process. If you encounterthis error, you need to increase the value of this parameter accordingly.
Task 4-1-1: Copying the UPGCUST ProjectThis step copies your customized PeopleTools and application objects from the Copy of Production databaseto your Demo database.
Properties
DatabaseOrientation
Initial or MTP Products Platforms Languages
Source Initial All All All
Task 4-1-2: Reviewing Copy ResultsReview the results of the project copies that were performed in this task. For each of the projects copied,review the copy logs for any errors. Also, verify in Application Designer that each of the projects copied showsthe Done options are checked for those objects you expected to be copied.
There are many different errors you can find in the copy logs, depending on which objects you chose to copyor not copy. For example, if you chose not to copy a record definition, but neglected to clear the PeopleCodeUpgrade check box for that record, you will receive errors when trying to copy the PeopleCode. ApplicationDesigner maintains PeopleTools integrity during the copy and will not copy PeopleCode for records thatdo not exist.
130 Copyright © 2007, Oracle. All rights reserved.

Chapter 4 Apply Application Changes
Review any errors you receive during the copy process and determine whether they are acceptable cases orunacceptable errors that need correction. In the example above, either the PeopleCode error is acceptablebecause you do not intend to copy the record definition, or the error is unacceptable and you should copy therecord and then copy the PeopleCode for that record again.
You may get messages similar to “Warning: FIELDNAME is a key field and has been appended to the end ofthe RECORDNAME record.” This is an acceptable message and you can ignore it.
The following error occurs when copying a Portal Registry Structure that has a different PORTAL_OBJNAMEbut the same PORTAL_URLTEXT as an existing registry object.
Duplicate Key. Portal: portalname, Obj name: objectname, CP: nodename, URL (1st 50⇒char): URL
Properties
DatabaseOrientation
Initial or MTP Products Platforms Languages
Source Initial All All All
Task 4-2: Running New Release Upgrade CopyThis section discusses:
• Exporting Selected PeopleTools Tables
• Importing Selected PeopleTools Tables
• Copying the UPGCUSTIB Project
• Swapping PeopleTools Tables
• Creating the UPGIBCOPY Project
• Copying the UPGIBCOPY Project
• Updating Target Values
• Copying the UPGNONCOMP Project
• Reviewing Project Copy Results
• Exporting New Release Objects
• Importing New Release Objects
• Resetting Object Version Numbers
• Backing Up New Release Demo Again
Task 4-2-1: Exporting Selected PeopleTools TablesDepending on your upgrade path you will need to export one or more PeopleTools tables to preserve values onyour Copy of Production database. This step exports PeopleTools tables in the Copy of Production beforethe upgrade copy has occurred.
Copyright © 2007, Oracle. All rights reserved. 131

Apply Application Changes Chapter 4
The script for your upgrade path is:
DLUPX96E.DMS
Properties
DatabaseOrientation
Initial or MTP Products Platforms Languages
Target Initial All All All
Task 4-2-2: Importing Selected PeopleTools TablesDepending on your upgrade path you will need to import one or more PeopleTools tables to preserve values onyour Copy of Production database. This step imports PeopleTools tables into the Demo database before theupgrade copy occurs.
The script for your upgrade path is:
DLUPX96I.DMS
Properties
DatabaseOrientation
Initial or MTP Products Platforms Languages
Source Initial All All All
Task 4-2-3: Copying the UPGCUSTIB ProjectThis step copies your customized Integration Broker objects from the Copy of Production database to yourDemo database.
See Customizing the New Release, Reviewing Copy Results.
Properties
DatabaseOrientation
Initial or MTP Products Platforms Languages
Source Initial All All All
Task 4-2-4: Swapping PeopleTools TablesThis step swaps the base language for tables that contain PeopleTools Managed Object data and relatedlanguage data on your Demo database. This is in preparation for the step, “Exporting New Release Objects.”This script should only be run if your Copy of Production has a base language other than English. The scriptname for your upgrade path is:
PT_RELEASE_SWAP.DMS
If you would like to automate this step, follow the procedure below.
To make this step automated:
132 Copyright © 2007, Oracle. All rights reserved.

Chapter 4 Apply Application Changes
1. Select the step Swapping PeopleTools Tables in Change Assistant.2. Open the Step Properties dialog box.3. Change the Type from ManualStop to DataMoverUser.4. Click OK.5. In your upgrade job, mark the step as Run.
Properties
DatabaseOrientation
Initial or MTP Products Platforms Languages
Source Initial All All Non-English BaseLanguage
Task 4-2-5: Creating the UPGIBCOPY ProjectIn this step, you create the UPGIBCOPY project and use it to upgrade your Integration Broker objects tothe new release.
To create the UPGIBCOPY project:
1. Launch PeopleTools and sign on to the New Release Demo database.2. From Application Designer, select File, New…3. Select Project, and then click OK.4. Select Insert, Definitions into Project…5. Select Messages from the Object Type drop-down list box.6. Click Insert, and then click Select All.7. Click Insert.8. Repeat steps 5, 6, and 7 for the following object types:• Services• Service Operations• Service Operation Handlers• Service Operating Versions• Service Operation Routings• IB Queues
9. Click Insert, and then click Close.10. Select File, Save All.11. Enter the project name UPGIBCOPY.
Warning! You must name the project UPGIBCOPY or the next step will fail.
12. Click OK.
Copyright © 2007, Oracle. All rights reserved. 133

Apply Application Changes Chapter 4
Properties
DatabaseOrientation
Initial or MTP Products Platforms Languages
Source Initial All All All
Task 4-2-6: Copying the UPGIBCOPY ProjectIn this step, copy all objects in the project, UPGIBCOPY. This project consists of Oracle-delivered IntegrationBroker objects as well as any customizations you may have selected to copy to the New Release Demo ina previous step.
See Copying the UPGCUSTIB Project.
Properties
DatabaseOrientation
Initial or MTP Products Platforms Languages
Target Initial All All All
Task 4-2-7: Updating Target ValuesThis step updates the Message Node table on the Demo database to keep the assignment of the Local Nodedefined in the Copy of Production. The update uses the copy of the Message Node table taken earlier inthe upgrade.
The script for your upgrade path is:
DLUPX97.DMS
Properties
DatabaseOrientation
Initial or MTP Products Platforms Languages
Source Initial All All All
Task 4-2-8: Copying the UPGNONCOMP ProjectIn this step, copy the non-compare project, UPGNONCOMP. This project consists of object types you cannotcompare and object types not included in your compare project. In a previous step, you reviewed thisOracle-delivered project and modified the Upgrade check box for any objects you did not want to copy.
Properties
DatabaseOrientation
Initial or MTP Products Platforms Languages
Target Initial All All All
134 Copyright © 2007, Oracle. All rights reserved.

Chapter 4 Apply Application Changes
Task 4-2-9: Reviewing Project Copy ResultsReview the results of the UPGCUSTIB, UPGIBCOPY, and UPGNONCOMP project copy steps that wereperformed earlier in this task. Review each copy log for any errors and verify in Application Designer that theDone options are checked for the objects in each of the projects. To verify Done options for UPGIBCOPY andUPGNONCOMP, you would log in to the Demo database, whereas to verify Done options for UPGCUSTIB,you would log in to your Copy of Production database.
There are many different errors you can find in the copy logs, depending on which objects you chose to copyor not copy. Review any errors you received during the copy process to determine whether they are acceptablecases or unacceptable errors that need corrective action.
Properties
DatabaseOrientation
Initial or MTP Products Platforms Languages
Source Initial All All All
Task 4-2-10: Exporting New Release ObjectsThis step exports the new release objects and your customizations that you copied to the Demo database inan earlier step, to a file.
The script name for your upgrade path is:
PT_RELEASE_EXPORT.DMS
Properties
DatabaseOrientation
Initial or MTP Products Platforms Languages
Source Initial All All All
Task 4-2-11: Importing New Release ObjectsThis step imports the new release objects and your customizations into your Copy of Production database.
The script name for your upgrade path is:
PT_RELEASE_IMPORT.DMS
Properties
DatabaseOrientation
Initial or MTP Products Platforms Languages
Target Initial All All All
Task 4-2-12: Resetting Object Version NumbersIn this step, you run the VERSION Application Engine program. This ensures that all of your version numbersare correct and, if not, resets them to 1.
Copyright © 2007, Oracle. All rights reserved. 135

Apply Application Changes Chapter 4
Note. You will rerun the VERSION Application Engine program later in the upgrade. If you want topreserve the log files generated by Change Assistant from this run, you will need to manually rename thefiles after completing this step.
Properties
DatabaseOrientation
Initial or MTP Products Platforms Languages
Target Initial All All All
Task 4-2-13: Backing Up New Release Demo AgainBack up your New Release Demo database now. This enables you to restart your upgrade from this point,should you experience any database integrity problems during the remainder of the tasks in the upgrade process.
Properties
DatabaseOrientation
Initial or MTP Products Platforms Languages
Source Initial All All All
Task 4-3: Updating Database OverridesThis section discusses:
• Understanding Database Overrides
• Set Index Parameters After Copy
• Set Tablespace Names After Copy
• Set Record Parameters After Copy
• Create New Tablespaces
Understanding Database OverridesIn this task, you update PeopleTools tables with DDL information from your physical database DDL. You mayhave overwritten information about where tables exist in your database during the copy project steps of thisupgrade. The following steps synchronize your PeopleTools table definitions with your database again.
In the new release, certain tables have moved from 4K to 32K page size tablespaces. Make sure these tablesare created or altered in the 32K tablespaces. See the reference below for a complete list of tables.
See Appendix, “Reviewing Tablespaces.”
136 Copyright © 2007, Oracle. All rights reserved.

Chapter 4 Apply Application Changes
Task 4-3-1: Set Index Parameters After CopyThis step updates index overrides stored in the PSIDXDDLPARM table. The values stored in thePARMVALUE field are updated with current values found in the system catalog. The name of the process is:
SETINDEX.SQR
Properties
DatabaseOrientation
Initial or MTP Products Platforms Languages
Target Initial All Oracle
DB2 z/OS
All
Task 4-3-2: Set Tablespace Names After CopyThis step updates tablespace names stored in the PSRECTBLSPC table. In addition, the values stored in theDDLSPACENAME field are updated with current values found in the system catalog. If you modifiedtablespace names from the Oracle-delivered names, this process makes those same changes in the PeopleSoftsystem record definition. It also corrects any tablespace names that were reset with values from the Demodatabase during the copy project step. The process then lists any tablespaces defined in the PeopleTools tablesthat are not currently on your database. Use this report to create new tablespaces later in this task. Thename of the process is:
SETSPACE.SQR
Note. This step updates both the database and tablespace names in the PSRECTBLSPC table for DB2 z/OSsites. The report produced by this process lists database/tablespace combinations that were not defined in theDB2 system catalog. The report may show your Demo database and tablespace names instead of your Copy ofProduction database and tablespace names. You will correct this situation when you create new tablespaces.
See Create New Tablespaces.
Properties
DatabaseOrientation
Initial or MTP Products Platforms Languages
Target Initial All Oracle
Informix
DB2 UNIX/NT
DB2 z/OS
All
Task 4-3-3: Set Record Parameters After CopyThis step updates table overrides stored in the PSRECDDLPARM table. The values stored in the PARMVALUEfield are updated with the current values found in the system catalog. The name of the process is:
SETTABLE.SQR
Copyright © 2007, Oracle. All rights reserved. 137

Apply Application Changes Chapter 4
Properties
DatabaseOrientation
Initial or MTP Products Platforms Languages
Target Initial All Oracle All
Task 4-3-4: Create New TablespacesThis section discusses:
• Prerequisites
• Creating Oracle Delivered Tablespaces
• Creating Custom Tablespaces
PrerequisitesBefore you perform this step, you must make sure your database administrator has created all new tablespacesthat will be used in new tables.
Note. DB2 z/OS sites need to create databases as well as tablespaces at this time.
Creating Oracle Delivered TablespacesIf you use Oracle-delivered tablespace names, be aware that there may be new ones in this release. Thereport that you produced when you set tablespace names after copying provides a list of tablespaces that aremissing from your database.
See Set Tablespace Names After Copy.
You need to create all the tablespaces on the report listed as missing on the database. Once you create all thetablespaces, you can rerun the SETSPACE.SQR; the report should show that no additional modificationsare needed.
Note. For DBX sites, create all the tablespaces on the report listed as missing on the database in addition to thecorresponding index (IDX) tablespace.
Oracle delivered a shell SQL script containing the DDL commands to create all the Oracle-deliveredtablespaces. Edit the script to create just the new tablespaces and to set up the script for your environment.
Note. Oracle reassigned some tables to larger tablespaces because they now require a 32-KB buffer pool. Youmust manually edit the Create Table statements in the upgrade scripts to replace the tablespace names with anappropriate tablespace name in your implementation that utilizes a 32-KB buffer pool.
The script name is:
HCDDL.SQL (HCDDLU.SQL for DB2 z/OS Unicode)
Important! For DB2 UNIX/NT sites, the script name is HCDDLDMS.SQL for ANSI, and HCDDLDMSU.SQLfor Unicode.
138 Copyright © 2007, Oracle. All rights reserved.

Chapter 4 Apply Application Changes
DB2 z/OS sites must also consider how database names are assigned. After the upgrade/copy is completed,some of the PeopleTools metadata tables in your Copy of Production database will contain the database valuesfrom the Demo database. Review the SETSPACE SQR report for those tables that are reported as not definedin the database. If the report shows your Demo database names instead of your Copy of Production databasenames you can reset them with the following SQL:
UPDATE PSRECTBLSPC SET DBNAME = ‘Copy of Production dbname’
WHERE DBNAME = ‘Demo dbname’
Creating Custom TablespacesIf you will use custom tablespaces, create those tablespaces now. Choose one of the following two methods toget the information into PeopleTools:
• Update PeopleTools for each record you will put into a custom tablespace. You can do this directlythrough Application Designer, or you can update PSRECTBLSPC directly by using the appropriateSQL for your site, as follows:
DB2 z/OS sites:
UPDATE PSRECTBLSPC
SET DBNAME = ‘new dbname’, DDLSPACENAME = ’new tablespacename’
WHERE DBNAME = ‘current dbname’
AND DDLSPACENAME = ’current tablespacename’;
All other sites:UPDATE PSRECTBLSPC
SET DDLSPACENAME = ’new tablespacename’
WHERE DDLSPACENAME = ’current tablespacename’;
To update each table individually, add the following clause to the predicate of the above statement,making sure you use the record name in this clause:AND RECNAME = record name
The SETSPACE report contains the table name. The record name will not have the “PS_” prefix.
You can double-check that you created all tablespaces by rerunning the SETSPACE.SQR report. If youcreated all tablespaces for records defined in PeopleTools, the report will be empty.
• When you edit the Create and Alter scripts, you can change the SQL to create the tables in the correcttablespaces. Later in this task you will set tablespace names, which will update PeopleTools with thecorrect tablespaces or database/tablespace in DB2 z/OS. The report should be empty at that time.
Note. For DB2 z/OS sites, the SETSPACE report may list some database/tablespace combinations as “TableUndefined - DB/TS OK” when in fact the database name is one that was defined for your Demo database. Thisoccurs if your Demo and Copy of Production databases are in the same DB2 subsystem. The SETSPACE.SQRdetected that the database/tablespace combinations do exist in the subsystem and are therefore valid. Makesure that you update these database/tablespace names to match those that exist in your Copy of Production,using the instructions above.
Note. During the Move to Production pass, you will create these tablespaces when you populate tablespacedata. You can reuse this script, or you can create a new script for your production environment. To reuse thescript you have created for this task, save it and copy it into the PS_HOME\SCRIPTS directory that youuse during the Move to Production pass.
Copyright © 2007, Oracle. All rights reserved. 139

Apply Application Changes Chapter 4
See the Enterprise PeopleTools installation guide for DB2 UDB for z/OS for your new release, “Creating aDatabase,” Correcting Invalid Database/Tablespace Combinations.
See Modifying the Database Structure, Editing the Create and Alter Scripts.
See Modifying the Database Structure, Setting Tablespace Names.
See “Apply PeopleTools Changes,” Populating Tablespace Data.
See “Apply Changes to Production Database,” Performing the Move to Production.
Properties
DatabaseOrientation
Initial or MTP Products Platforms Languages
Target Initial All Oracle
Informix
DB2 z/OS
DB2 UNIX/NT
All
Task 4-4: Backing Up After the Upgrade CopyBack up your database now. This enables you to restart your upgrade from this point, should you experienceany database integrity problems during the remaining tasks in the upgrade process.
Properties
DatabaseOrientation
Initial or MTP Products Platforms Languages
Target Initial All All All
Task 4-5: Importing the Front Office ProjectThis task imports the Staffing Front Office project using Application Designer.
Note. Only run this task if you have a Staffing Front Office database installed.
The project for your upgrade is:
UPGFO2HCMTBLS_88
Note. Review all of the DDL information for each of the records imported in this task. You may need toadd a tablespace or modify existing tablespaces.
To run the script automatically:
140 Copyright © 2007, Oracle. All rights reserved.

Chapter 4 Apply Application Changes
1. Select the step.2. Select Edit, Step Properties.The Step Properties dialog box opens.
3. Change the Type from ManualStop to CopyFromFile, and click Upgrade.The Copy From File dialog box appears.
4. Specify an Import/Export Directory of <PS_HOME>\projects.5. Click OK twice.6. In your upgrade job, mark the step as Run.
Properties
DatabaseOrientation
Initial or MTP Products Platforms Languages
Target Both Pay/BillManagement
(Staffing FrontOffice)
All All
Task 4-6: Modifying the Database StructureThis section discusses:
• Understanding Modifying the Database Structure
• Backing Up for DB2
• Building the Upgrade Tables Script
• ReCreating Upgrade Tables
• Building Renamed Tables Script
• Running the Renamed Tables Script
• Creating the ALLTEMPTABS Project
• Building the Create Temp Tables Script
• Creating the ALLTABS Project
• Building the Create and Alter Scripts
• Editing the Create and Alter Scripts
• Creating Temporary Tables
• Creating Tables
• Altering Tables
• Creating Indexes
Copyright © 2007, Oracle. All rights reserved. 141

Apply Application Changes Chapter 4
• ReCreating Triggers
• Reviewing the Create Indexes Log
• Dropping Indexes for Data Conversion
• Dropping Triggers for Data Conversion
• Creating Indexes for Data Conversion
• Setting Index Parameters
• Setting Temp Table Tablespace Names
• Setting Tablespace Names
• Setting Record Parameters
• Generating a DB2 UNIX RUNSTATS Script
• Updating Statistics for DB2 UNIX
• Updating Statistics for DB2 zOS
• Updating Statistics for Informix
• Updating Statistics for Oracle
Understanding Modifying the Database StructureIn this task you create and run various scripts and processes that will modify your database structure, includingcreating new tables and indexes, altering tables that have changed, and re-creating modified indexes.
Note. In the Change Assistant job, some of the steps may complete without error, but display a Warning iconindicating that warning messages exist in the log file.
See the Enterprise PeopleTools PeopleBook: PeopleSoft Software Updates for your new release, “ErrorHandling.”
Task 4-6-1: Backing Up for DB2If you are using the DB2 z/OS platform, back up your database now. This enables you to restart your upgradefrom this point if you should experience any database integrity problems during the remaining tasks in theupgrade process.
Properties
DatabaseOrientation
Initial or MTP Products Platforms Languages
Target MTP All DB2 z/OS All
Task 4-6-2: Building the Upgrade Tables ScriptThis step generates the SQL script to drop and re-create all the tables in the project named UPGCONVERT.These tables will be used during data conversion by Application Engine programs. They can be safely droppedat this time because they do not contain application data required by your PeopleSoft system.
142 Copyright © 2007, Oracle. All rights reserved.

Chapter 4 Apply Application Changes
The script name for your upgrade path is:
UPGCONVERT_CRTTBL.SQL
Properties
DatabaseOrientation
Initial or MTP Products Platforms Languages
Target Both All All All
Task 4-6-3: ReCreating Upgrade TablesThis step runs the SQL script you generated to re-create all the tables in the project named UPGCONVERT.
The script name for your upgrade path is:
UPGCONVERT_CRTTBL.SQL
Properties
DatabaseOrientation
Initial or MTP Products Platforms Languages
Target Both All All All
Task 4-6-4: Building Renamed Tables ScriptIn this step, you will create the SQL script to alter the tables that were renamed with Data Mover renamescripts in an earlier task. Data Mover only renamed the records in Application Designer. This step will buildthe SQL to perform the corresponding rename at the database level.
The generated script name is:
UPGRNHC88.SQL
Properties
DatabaseOrientation
Initial or MTP Products Platforms Languages
Target Both All All All
Task 4-6-5: Running the Renamed Tables ScriptIn this step, you will run the script to alter the tables that were renamed in the Data Mover rename scriptsin an earlier task.
The script name for your upgrade path is:
UPGRNHC88.SQL
Copyright © 2007, Oracle. All rights reserved. 143

Apply Application Changes Chapter 4
When the Change Assistant runs the Create Indexes script to create indexes, it will not stop when it encounterserrors. You may view the log file, and will see some indexes cannot be created due to unique index constraints.The data causing those indexes to fail will be updated during the task, “Running Data Conversion.” Theindexes will then create successfully during the task, “Finalizing the Database Structure.” The log for yourupgrade path is:
UPGRNHC88.LOG
See Running Data Conversion.
See Finalizing the Database Structure.
Properties
DatabaseOrientation
Initial or MTP Products Platforms Languages
Target Both All All All
Task 4-6-6: Creating the ALLTEMPTABS ProjectThis step creates a project named ALLTEMPTABS and inserts all records of the type Temporary Table.
Properties
DatabaseOrientation
Initial or MTP Products Platforms Languages
Target Both All All All
Task 4-6-7: Building the Create Temp Tables ScriptThis step generates the SQL script to drop and re-create all the records of type Temporary Table in the database.Processes use the Temporary Tables dynamically in your system. They can be safely dropped at this timebecause they do not contain transaction data required by your PeopleSoft system.
The script name for your upgrade path is:
ALLTEMPTABS_CRTTBL.SQL
Properties
DatabaseOrientation
Initial or MTP Products Platforms Languages
Target Both All All All
Task 4-6-8: Creating the ALLTABS ProjectThis step creates a project named ALLTABS and inserts all records of the type Table.
144 Copyright © 2007, Oracle. All rights reserved.

Chapter 4 Apply Application Changes
Properties
DatabaseOrientation
Initial or MTP Products Platforms Languages
Target Both All All All
Task 4-6-9: Building the Create and Alter ScriptsThis step generates the SQL script to create all new records of the type Table. The script name is:
ALLTABS_CRTTBL.SQL
This step generates the SQL script to alter all existing records of the type Table. This script is referred to asAlter Without Deletes. The tables are altered to add new columns, rename existing columns and changecolumns that have modified properties, such as length. Columns that will eventually be deleted will still existon the tables after this script is executed. The script name is:
ALLTABS_ALTTBL.SQL
This step also generates the SQL script to create new indexes and to re-create modified indexes as needed forthe tables in the first two scripts. The script name is:
ALLTABS_CRTIDX.SQL
Note. This step also creates the script ALLTABS_CRTTRG.SQL, which re-creates all database triggers. Youdo not need to run this script, because all database triggers will be created in the “Finalizing the DatabaseStructure” task.
Note. For DB2 z/OS sites, if this step takes an exceptionally long time, performing a RUNSTATS on thesystem catalog tablespace SYSDBASE may improve performance.
See Finalizing the Database Structure.
Properties
DatabaseOrientation
Initial or MTP Products Platforms Languages
Target Both All All All
Task 4-6-10: Editing the Create and Alter ScriptsIn this step, you will edit the SQL create and alter scripts for tablespace names and sizing. The script names foryour upgrade path are:
ALLTEMPTABS_CRTTBL.SQL
ALLTABS_CRTTBL.SQL
ALLTABS_ALTTBL.SQL
ALLTABS_CRTIDX.SQL
Copyright © 2007, Oracle. All rights reserved. 145

Apply Application Changes Chapter 4
If you are not using the PeopleSoft tablespace names, you will need to review and modify the scripts above.When the new record was copied to the Copy of Production database, the PeopleSoft default tablespace namewas copied as well. When you performed the step, “Create New Tablespaces,” you were given the option tocorrect the tablespace names online or to wait and edit the scripts. After you have completed running thesescripts you will run the programs that synchronize the PeopleTools definitions with the database catalog again.Therefore, any changes you make to the scripts now will be reflected in the PeopleTools definition. Have yourdatabase administrator review these scripts and modify the tablespace names appropriately.
Many of the new tables and indexes will be populated during the upgrade. If they are not sized appropriatelyfor your database, the conversion programs will stop with errors. After the upgrade is complete, you maywant your database administrator to review and make adjustments to the amount of free space left in some ofthe tables or tablespaces.
PeopleSoft has provided a list of these new tables with information about how to size them relative to the sizeof your existing data. This information is meant to give you a rough estimate on an initial size, so you canexecute the conversion programs without errors.
See Appendix: “Sizing Tables for the Upgrade.”
Properties
DatabaseOrientation
Initial or MTP Products Platforms Languages
Target Both All DB2 z/OS
DB2 UNIX/NT
Oracle
Informix
All
Task 4-6-11: Creating Temporary TablesThis step runs the SQL script you generated to create all the records of the type Temporary Table. The scriptname for your upgrade path is:
ALLTEMPTABS_CRTTBL.SQL
Properties
DatabaseOrientation
Initial or MTP Products Platforms Languages
Target Both All All All
Task 4-6-12: Creating TablesThis step runs the SQL script you generated to create all the records of the type Table. This step creates newtable structures in your database. The script name for your upgrade path is:
ALLTABS_CRTTBL.SQL
146 Copyright © 2007, Oracle. All rights reserved.

Chapter 4 Apply Application Changes
Properties
DatabaseOrientation
Initial or MTP Products Platforms Languages
Target Both All All All
Task 4-6-13: Altering TablesThis step runs the SQL script you generated to alter the existing records of type Table. This step alters existingPeopleSoft table structures to comply with your new PeopleSoft release.
The script name for your upgrade path is:
ALLTABS_ALTTBL.SQL
Properties
DatabaseOrientation
Initial or MTP Products Platforms Languages
Target Both All All All
Task 4-6-14: Creating IndexesThis step runs the SQL script you generated to create indexes on records of the type Table. This step creates ormodifies indexes as required.
The script name for your upgrade path is:
ALLTABS_CRTIDX.SQL
Properties
DatabaseOrientation
Initial or MTP Products Platforms Languages
Target Both All All All
Task 4-6-15: ReCreating TriggersThis step executes the script CREATETRGR.DMS, which will re-create all PeopleSoft triggers in the database.The triggers on PeopleSoft tables were invalidated when the tables were altered and need to be re-created.
Properties
DatabaseOrientation
Initial or MTP Products Platforms Languages
Target Both All Oracle All
Copyright © 2007, Oracle. All rights reserved. 147

Apply Application Changes Chapter 4
Task 4-6-16: Reviewing the Create Indexes LogWhen Change Assistant runs the create indexes script to create indexes, it will not stop when it encounterserrors. When you view the log file, you will see that some indexes cannot be created due to unique indexconstraints. The data causing those indexes to fail will be updated during the task, “Running Data Conversion.”The indexes will then create successfully during the task, “Finalizing the Database Structure.”
Review the errors in the log file. Unique constraint errors are acceptable. If you see any other types of indexcreation errors, such as space problems, you must correct them before you continue with the upgrade. If youdo not correct the errors, it may degrade your performance during data conversion.
The log file name for your upgrade path is:
ALLTABS_CRTIDX.LOG
See Running Data Conversion.
See Finalizing the Database Structure.
Properties
DatabaseOrientation
Initial or MTP Products Platforms Languages
Target Both All All All
Task 4-6-17: Dropping Indexes for Data ConversionDrop the following indexes using the SQL tool of your choice. These tables are changing key structure anddata conversion cannot update the new columns if these old indexes exist. Some of these indexes may not existbecause they did not create in the earlier Create Indexes step. This is acceptable.
Table Name Index Name
PS_SCH_ADHOC_DTL PS_SCH_ADHOC_DTL
PS_HRS_APP_DSTNCT PS_HRS_APP_DSTNCT
Properties
DatabaseOrientation
Initial or MTP Products Platforms Languages
Target Both All All All
Task 4-6-18: Dropping Triggers for Data ConversionDrop all triggers on the following tables using the SQL tool of your choice. These tables add new rows anddata conversion cannot update the SyncID’s. The Triggers and SyncID’s will be updated later in the upgrade.
Drop all triggers on the following:
• PS_SCH_SHIFT_TBL• PS_SCH_SHIFT_DTL
148 Copyright © 2007, Oracle. All rights reserved.

Chapter 4 Apply Application Changes
Properties
DatabaseOrientation
Initial or MTP Products Platforms Languages
Target Both All All All
Task 4-6-19: Creating Indexes for Data ConversionDuring this step, you will create indexes to improve performance during data conversion. These indexes areonly used for the purposes of data conversion. They are not required for regular operation of the products,therefore they were not created in previous steps nor are they delivered with the record definitions on theDemo database. In this step you are asked to manually create those indexes that apply to you (not usingApplication Designer).
It is important to follow the following naming convention so the Alter with Deletes script you run in the task“Finalizing Database Structure” will drop these indexes automatically. Use PS[X]Record Name where X isany letter A-Z. For example, if you have to create an index for table PS_COUNTRY_TBL a proper indexname would be PSUCOUNTRY_TBL. If an additional index is required for that same table, you can thenname it (for example) PSYCOUNTRY_TBL. However, it is important to ensure that the new name of theindex you are creating is not defined in the database already.
Not all listed indexes are required for all customers. Reading the comments with each listed index will helpyou determine if the index is applicable to your specific upgrade. Work with your database administrator tocreate a script that will build the indexes in your Copy of Production. You can then modify the ChangeAssistant Template to automate this step (for the initial pass and all future passes too). To do that, go to theUpgrade Template view, then right-click on the step and edit the step properties. Add your script name, withoutthe file extension, in the Script/Procedure field and change the Type to SQL Script.
After reading the comments to determine whether the index is applicable to your situation, create or modify thefollowing indexes in your Copy of Production database:
Table With Columns Comments
PS_APPLICATN_ROUTE APPLID
APP_DT
JOB_REQ_NBR
ROUTE_DT
This index should be non-unique. It willsignificantly improve performance forsection UPG_ER88.HRATRTE1.
PS_APP_PRIWRK_EXPR APPLID
APP_DT
This index should be non-unique. It willsignificantly improve performance forsection UPG_ER88.HCERW202.
PS_ER_REFERRAL REFERRAL_SOURCE This index should be non-unique.It will significantly improveperformance for sectionUPG_ER88.HROIALSR.STEP34.
PS_HRS_APPLICANT APPLID
HRS_PERSON_ID
This index should be non-unique.It will significantly improveperformance for sectionsUPG_ER88.HROIALSR.STEP34 andUPG_ER88.HCERW51.INSTEMP12.
Copyright © 2007, Oracle. All rights reserved. 149

Apply Application Changes Chapter 4
Table With Columns Comments
PS_HRS_HIRE_TAO HRS_PERSON_ID
HRS_JOB_OPENING_ID
HRS_PROFILE_SEQ
This index should be non-unique. It willsignificantly improve performance forsection UPG_ER88.HCERW51.
PS_HRS_RCMNT_TAO HRS_PERSON_ID
HRS_JOB_OPENING_ID
HRS_PROFILE_SEQ
This index should be non-unique.It will significantly improveperformance for sectionUPG_ER88.HRATRCM1.UPDIDs.
PS_HRS_RCMS_TAO HRS_PERSON_ID
HRS_RCMNT_ID
STATUS_DT
SEQ_NUM
This index should be non-unique. It willsignificantly improve performance forsection UPG_ER88.HRATRCM6.
PS_HRS_RTED_TAO HRS_PERSON_ID
HRS_RCMNT_ID
HRS_RTE_ID
HRS_RTE_SEQ
STATUS_CODE
STATUS_DT
SEQ_NUM
This index should be non-unique. It willsignificantly improve performance forsection UPG_ER88.HRATRTE4.
PS_HRS_RTES_TAO HRS_PERSON_ID
HRS_RCMNT_ID
HRS_RTE_ID
STATUS_CODE
STATUS_DT
SEQ_NUM
This index should be non-unique. It willsignificantly improve performance forsection UPG_ER88.HRATRTE3.
PS_HRS_RTE_TAO HRS_PERSON_ID
HRS_RCMNT_ID
This index should be non-unique. It willsignificantly improve performance forsection UPG_ER88.HRATRTE1.
PS_JOB POSITION_NBR
EFFDT
FLSA_STATUS
This index should be non-unique. It willsignificantly improve performance forsection UPG_HC88.HCPYW10K.
150 Copyright © 2007, Oracle. All rights reserved.

Chapter 4 Apply Application Changes
Table With Columns Comments
PS_JOB ACTION
EMPLID
EMPL_RCD
EFFDT
EFFSEQ
This index should be non-unique. It willsignificantly improve performance forsection UPG_HC88. HCHCW12.
PS_PERS_APPL_INFO APPLID
APP_DT
This index should be non-unique.It will significantly improveperformance for sectionUPG_ER88.HCERW51.INSTEMP12.
PS_TL_MTCHD_2 PROCESS_INSTANCE
EMPLID
EMPL_RCD
PUNCH_BEGIN
TIMEZONE
DUR
This index should be non-unique. It willsignificantly improve performance forstep UPG_TL88.HCTLWO8.Step09(SQL).
PSTZOFFSET TIMEZONE
STARTDATETIME
ENDDATETIME
BASEOFFSET
This index should be non-unique. It willsignificantly improve performance forstep UPG_TL88.HCTLWO8.Step09(SQL).
PS_UPG_GRNOPR_TMP STATE_GARN_LAW
GARN_RULE_ID
EFFDT
GARN_STEP
This index should be non-unique.It will improve the performance ofUPG_PY89.HCPYT05 for NorthAmerican Payroll customers.
PS_UPG_GRNRL_TMP STATE_GARN_LAW
GARN_RULE_ID
EFFDT
This index should be non-unique.It will improve the performance ofUPG_PY89.HCPYT05 for NorthAmerican Payroll customers.
PS_UPG_GRNXMP_TMP STATE_GARN_LAW
GARN_RULE_ID
EFFDT
GARN_EX_CALC
This index should be non-unique.It will improve the performance ofUPG_PY89.HCPYT05 for NorthAmerican Payroll customers.
Copyright © 2007, Oracle. All rights reserved. 151

Apply Application Changes Chapter 4
Properties
DatabaseOrientation
Initial or MTP Products Platforms Languages
Target Both All All All
Task 4-6-20: Setting Index ParametersThis step updates index overrides stored in the PSIDXDDLPARM table. The values stored in thePARMVALUE field are updated with current values found in the system catalog. The name of the process is:
SETINDEX.SQR
Properties
DatabaseOrientation
Initial or MTP Products Platforms Languages
Target Both All Oracle
DB2 z/OS
All
Task 4-6-21: Setting Temp Table Tablespace NamesThis step populates the PeopleTools table PSRECTBLSPC with the table name, database name, and tablespacename information for the temporary table instances created on the database in a previous step. This informationwill be required by processes that perform in-stream RUNSTATS (%UpdateStats) on the temporary tableinstances. The name of the process is:
SETTMPIN.SQR
Properties
DatabaseOrientation
Initial or MTP Products Platforms Languages
Target Both All DB2 z/OS All
Task 4-6-22: Setting Tablespace NamesThis step populates all tablespace information in the PSRECTBLSPC table. The values stored in theDDLSPACENAM field are updated with current values found in the system catalog. If you modifiedtablespace names when you edited the SQL script that created your new tables from the Oracle-deliverednames, this will make those same changes in the PeopleSoft record definition. The name of the process is:
SETSPACE.SQR
152 Copyright © 2007, Oracle. All rights reserved.

Chapter 4 Apply Application Changes
Properties
DatabaseOrientation
Initial or MTP Products Platforms Languages
Target Both All Oracle
Informix
DB2 UNIX/NT
DB2 z/OS
All
Task 4-6-23: Setting Record ParametersThis step updates table overrides stored in the PSRECDDLPARM table. The values stored in the PARMVALUEfield are updated with the current values found in the system catalog. The name of the process is:
SETTABLE.SQR
Properties
DatabaseOrientation
Initial or MTP Products Platforms Languages
Target Both All Oracle All
Task 4-6-24: Generating a DB2 UNIX RUNSTATS ScriptThis step executes the RUNSTATS.SQR that creates the RUNSTATS.SQL to update the statistics on DB2UNIX/NT.
Properties
DatabaseOrientation
Initial or MTP Products Platforms Languages
Target Both All DB2 UNIX/NT All
Task 4-6-25: Updating Statistics for DB2 UNIXEarlier in the upgrade process, you updated your statistics. Now that you have copied your new objects andcreated new indexes, update your statistics again. Run the RUNSTATS.SQL script created in the previous stepto improve performance of your data conversions and generation of the Alter with Delete script.
Properties
DatabaseOrientation
Initial or MTP Products Platforms Languages
Target Both All DB2 UNIX/NT All
Copyright © 2007, Oracle. All rights reserved. 153

Apply Application Changes Chapter 4
Task 4-6-26: Updating Statistics for DB2 zOSEarlier in the upgrade process, you updated your statistics. Now that you have copied your new objects andcreated new indexes, update your statistics again to improve performance of your data conversions andgeneration of the Alter with Delete script. Contact your database administrator to have the statistics updated onyour database before proceeding with your upgrade.
Properties
DatabaseOrientation
Initial or MTP Products Platforms Languages
Target Both All DB2 z/OS All
Task 4-6-27: Updating Statistics for InformixEarlier in the upgrade process, you updated your statistics. Now that you have copied your new objects andcreated new indexes, update your statistics again to improve performance of your data conversions andgeneration of the Alter with Delete script.
Properties
DatabaseOrientation
Initial or MTP Products Platforms Languages
Target Both All Informix All
Task 4-6-28: Updating Statistics for OracleEarlier in the upgrade process, you updated your statistics. Now that you have copied your new objects andcreated new indexes, update your statistics again to improve performance of your data conversions andgeneration of the Alter with Delete script. Contact your database administrator to have the statistics updated onyour database before proceeding with your upgrade.
Properties
DatabaseOrientation
Initial or MTP Products Platforms Languages
Target Both All Oracle All
Task 4-7: Loading Data for Data ConversionThis section discusses:
• Swapping Languages on System Data
• Exporting Application Messages
• Importing Application Messages
• Exporting Record Groups
154 Copyright © 2007, Oracle. All rights reserved.

Chapter 4 Apply Application Changes
• Importing Record Groups
• Exporting the System Setup Data
• Importing the System Setup Data
• Exporting the PW Pagelet Data
• Importing the PW Pagelet Data
• Exporting the Pagelet Wizard Data
• Importing the Pagelet Wizard Data
• Exporting Upgrade Defaults
• Importing Upgrade Defaults
• Exporting Application Conversion Data
• Importing Application Conversion Data
• Exporting Data Conversion Driver Data
• Importing Data Conversion Driver Data
• Populating Control Tables for Data Conversion
Task 4-7-1: Swapping Languages on System DataThis script swaps the base language for tables that contain system data on your Demo database and have relatedlanguage data, in preparation for the system data exports in the next step. This script should be run only if yourCopy of Production has a base language other than English. The script name for your upgrade path is:
DLHCLASWAP.DMS
If you want to make this step automated, follow the steps below.
To make this step automated:
1. Select the step Swapping Languages on System Data in Change Assistant.2. Open the Step Properties dialog box.3. Change the Type from ManualStop to DataMoverUser.4. Click OK.5. In your upgrade job, mark the step as Run.
Properties
DatabaseOrientation
Initial or MTP Products Platforms Languages
Source Initial All All Non-English BaseLanguage
Task 4-7-2: Exporting Application MessagesThis step exports Application Messages data from the Demo database. The script name for your upgradepath is:
Copyright © 2007, Oracle. All rights reserved. 155

Apply Application Changes Chapter 4
DLUPX01E.DMS
Properties
DatabaseOrientation
Initial or MTP Products Platforms Languages
Source Initial All All All
Task 4-7-3: Importing Application MessagesThis step imports Application Message data into your Copy of Production database. Message Sets 0-999 areoverlaid during the PeopleTools Upgrade. Application Message Sets 1000-19,999 are overlaid with thistask. If you have added custom messages in this set range, you must add those messages again at the endof the upgrade. To prevent this from happening again in future maintenance or upgrades, add your custommessages in a set range of 20,000 or greater.
Note. If the script fails, verify that your Configuration Manager Profile output and input directories are set tothe same location. If not, this could be the cause of the problem.
The script name for your upgrade path is:
DLUPX01I.DMS
Properties
DatabaseOrientation
Initial or MTP Products Platforms Languages
Target Initial All All All
Task 4-7-4: Exporting Record GroupsThis step exports Record Group data from the Demo database. The script name for your upgrade path is:
DLUPX02E.DMS
Properties
DatabaseOrientation
Initial or MTP Products Platforms Languages
Source Initial All All All
Task 4-7-5: Importing Record GroupsThis step imports Record Group data and populates Set Control data in your Copy of Production database. Thefollowing records are related to Record Groups and Set Control data:
• REC_GROUP_REC• REC_GROUP_TBL• SET_CNTRL_TBL
156 Copyright © 2007, Oracle. All rights reserved.

Chapter 4 Apply Application Changes
• SET_CNTRL_GROUP• SET_CNTRL_REC• SETID_TBL
The import script deletes from, and then reloads, the Record Group tables, REC_GROUP_REC andREC_GROUP_TBL. These are the tables that are modified when you use PeopleTools, Utilities,Administration, Record Group. The script then rebuilds the related setID tables, PS_SET_CNTRL_GROUPand PS_SET_CNTRL_REC. The PS_SET_CNTRL_TBL and PS_SETID_TBL tables contain the setIDs youuse in your system; this script does not update PS_SET_CNTRL_TBL. However, it does check for orphansetID references in PS_SET_CNTRL_REC and adds the missing setIDs to PS_SETID_TBL.
If you have moved an Oracle-delivered record into a custom added record group, and deleted the record fromthe Oracle-delivered record group, this script will put the record back into the Oracle-delivered record groupand remove it from the custom added record group.
If you have created a new record group, it will be deleted in this step if all of its records are assigned toOracle-delivered record groups in the new release. To continue using your custom record group, you will needto re-create it in the Reapply Customizations task.
This script creates an output file and uses it to create a temporary table. To run successfully, the ConfigurationManager input and output Data Mover directories should be the same.
Note. If the script fails, verify that your Configuration Manager Profile output and input directories are set tothe same location. If not, this could be the cause of the problem.
The script name for your upgrade path is:
DLUPX02I.DMS
Properties
DatabaseOrientation
Initial or MTP Products Platforms Languages
Target Initial All All All
Task 4-7-6: Exporting the System Setup DataThis script exports the contents of the Message, Strings, Stored Statements, Record Group, data conversiondriver, EDI, and Mass Change tables from the Copy of Production database during your Move to Productionpasses. During the initial pass, you ran other scripts to load this data and in some cases had to reapplycustomizations. This script exports the entire contents of these tables, including customizations, so that youwill not need to reapply them after the Move to Production. The script name for your upgrade path is:
MVAPPEXP.DMS
Properties
DatabaseOrientation
Initial or MTP Products Platforms Languages
Source MTP All All All
Copyright © 2007, Oracle. All rights reserved. 157
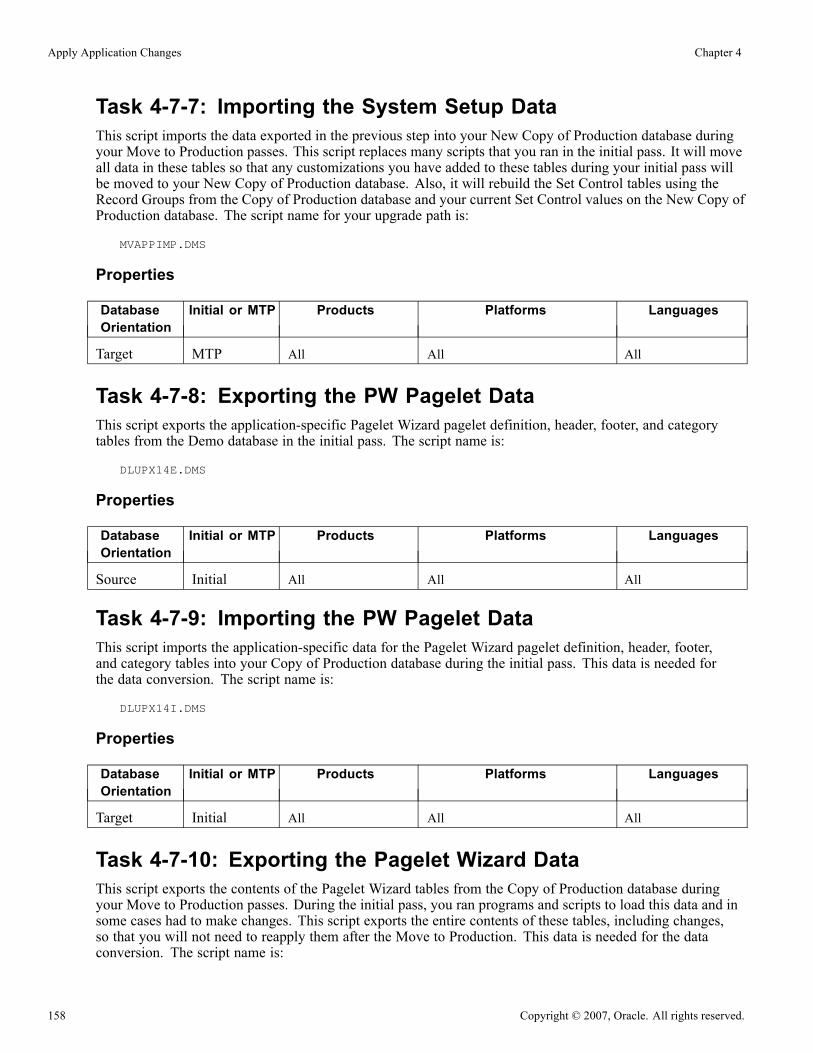
Apply Application Changes Chapter 4
Task 4-7-7: Importing the System Setup DataThis script imports the data exported in the previous step into your New Copy of Production database duringyour Move to Production passes. This script replaces many scripts that you ran in the initial pass. It will moveall data in these tables so that any customizations you have added to these tables during your initial pass willbe moved to your New Copy of Production database. Also, it will rebuild the Set Control tables using theRecord Groups from the Copy of Production database and your current Set Control values on the New Copy ofProduction database. The script name for your upgrade path is:
MVAPPIMP.DMS
Properties
DatabaseOrientation
Initial or MTP Products Platforms Languages
Target MTP All All All
Task 4-7-8: Exporting the PW Pagelet DataThis script exports the application-specific Pagelet Wizard pagelet definition, header, footer, and categorytables from the Demo database in the initial pass. The script name is:
DLUPX14E.DMS
Properties
DatabaseOrientation
Initial or MTP Products Platforms Languages
Source Initial All All All
Task 4-7-9: Importing the PW Pagelet DataThis script imports the application-specific data for the Pagelet Wizard pagelet definition, header, footer,and category tables into your Copy of Production database during the initial pass. This data is needed forthe data conversion. The script name is:
DLUPX14I.DMS
Properties
DatabaseOrientation
Initial or MTP Products Platforms Languages
Target Initial All All All
Task 4-7-10: Exporting the Pagelet Wizard DataThis script exports the contents of the Pagelet Wizard tables from the Copy of Production database duringyour Move to Production passes. During the initial pass, you ran programs and scripts to load this data and insome cases had to make changes. This script exports the entire contents of these tables, including changes,so that you will not need to reapply them after the Move to Production. This data is needed for the dataconversion. The script name is:
158 Copyright © 2007, Oracle. All rights reserved.

Chapter 4 Apply Application Changes
MVUPX16E.DMS
Properties
DatabaseOrientation
Initial or MTP Products Platforms Languages
Source MTP All All All
Task 4-7-11: Importing the Pagelet Wizard DataThis script imports the Pagelet Wizard tables from the Copy of Production database into the New Copy ofProduction during your Move to Production passes. This script replaces processes that you ran in the initialpass. It will move all data in the affected tables so that any changes you have made during your initial passwill be moved to your New Copy of Production database. This data is needed for the data conversion. Thescript name is:
MVUPX16I.DMS
Properties
DatabaseOrientation
Initial or MTP Products Platforms Languages
Target MTP All All All
Task 4-7-12: Exporting Upgrade DefaultsThis script exports the upgrade default data values and mapping during your Move to Production passes. Thisis the data that you set up during the chapter “Prepare Your Database” of your initial upgrade pass. You willload this information into your New Copy of Production later in the Move to Production upgrade pass.The script name for your upgrade path is:
MVHC88EXP.DMS
See “Prepare Your Database.”
Properties
DatabaseOrientation
Initial or MTP Products Platforms Languages
Source MTP All All All
Task 4-7-13: Importing Upgrade DefaultsThis script imports the upgrade default data values and mapping that you set up during the chapter “PrepareYour Database,” of your initial upgrade pass. The script name for your upgrade path is:
MVHC88IMP.DMS
See “Prepare Your Database.”
Copyright © 2007, Oracle. All rights reserved. 159

Apply Application Changes Chapter 4
Properties
DatabaseOrientation
Initial or MTP Products Platforms Languages
Target MTP All All All
Task 4-7-14: Exporting Application Conversion DataIn this step, you will export data, from the Demo database, required for data conversion. The script name foryour upgrade path is as follows:
DLHCUPT01E.DMS
Properties
DatabaseOrientation
Initial or MTP Products Platforms Languages
Source Both All All All
Task 4-7-15: Importing Application Conversion DataIn this step, you will import data into your Copy of Production database for use during data conversion.The script name for your upgrade path is as follows:
DLHCUPT01I.DMS
Properties
DatabaseOrientation
Initial or MTP Products Platforms Languages
Target Both All All All
Task 4-7-16: Exporting Data Conversion Driver DataThis step exports data conversion Application Engine driver data from the Demo database. The script name foryour upgrade path is:
DLUPX03E.DMS
Properties
DatabaseOrientation
Initial or MTP Products Platforms Languages
Source Initial All All All
Task 4-7-17: Importing Data Conversion Driver DataThis step imports data conversion Application Engine driver data into your Copy of Production database.
The script name for your upgrade path is:
160 Copyright © 2007, Oracle. All rights reserved.

Chapter 4 Apply Application Changes
DLUPX03I.DMS
Properties
DatabaseOrientation
Initial or MTP Products Platforms Languages
Target Initial All All All
Task 4-7-18: Populating Control Tables for Data ConversionThis step runs the UPG_DATACONV Application Engine program for Group 99 that will populate controltables required for data conversion by multiple data conversion groups, allowing concurrent processing ofdata conversion groups.
Properties
DatabaseOrientation
Initial or MTP Products Platforms Languages
Target Both All All All
Task 4-8: Restoring New Release DemoRestore your New Release Demo database from the backup you took in Chapter 1 earlier in the upgrade. Thebackup was taken before projects were copied and scripts were run against the Demo database. This is done torestore the environment to the original Demo database.
Properties
DatabaseOrientation
Initial or MTP Products Platforms Languages
Source Initial All All All
Task 4-9: Applying Updates Before Data ConversionYou should have downloaded and applied Required For Upgrade updates just after you installed your Demodatabase. Now is a great time to check PeopleSoft Customer Connection again for any new postings, and applythem now. Before data conversion, you should also verify that you have the most current UPGCONVERT.EXE.
See Oracle/PeopleSoft Customer Connection (Implement, Optimize + Upgrade, Upgrade Guide, UpgradeDocumentation and Software, Upgrade Documentation and Scripts, Release, HRMS, PeopleSoft 9.0, <upgradepath>, Upgrade Scripts and Templates).
This is just one place that you can apply updates. There are other places in the upgrade process whereapplying updates may be applicable as well. How you apply the update varies depending on where youare in the upgrade.
Copyright © 2007, Oracle. All rights reserved. 161

Apply Application Changes Chapter 4
See Appendix: “Applying Fixes Required for Upgrade.”
Important! Apply all fixes listed under the product line/release, even if you have not licensed the product thefix is listed under. There are many interdependencies between products and database objects. If you do notapply the fix, you may be introducing another error in a different area of the conversion code.
To apply PeopleSoft project fixes before data conversion:
1. Download Required for Upgrade Change Packages using the “Download Change Package” functionalityin Change Assistant.
2. Use Change Assistant to install and apply the updates into your Demo database for this upgrade pass.Review the documentation included with each update prior to applying the update.
See the Enterprise PeopleTools PeopleBook: PeopleSoft Software Updates for your current release.3. The project is now loaded on your Demo database. You should run a project compare to make sure theobjects in the fix will not overwrite any of your customizations. If you find customizations, you mustdecide how to deal with them before you copy the fix to your Copy of Production.
4. If you are performing a Move to Production upgrade pass, first migrate the Change Packages into theSource database for this upgrade pass. If needed, first set up Change Assistant with the environmentinformation for your Source database. If you customized any of the objects delivered in the ChangePackage, you should repackage the fix to include your customizations. If you did not customize any objectsdelivered in the fix you may directly apply it to the Source database.
See the Enterprise PeopleTools PeopleBook: PeopleSoft Software Updates for your new release,“Applying Updates.”
5. Migrate the Change Packages into the Target database for this upgrade pass. If needed, first set up ChangeAssistant with the environment information for your Target database.
Properties
DatabaseOrientation
Initial or MTP Products Platforms Languages
Target Both All All All
Task 4-10: Configuring Scheduler and ServerYou can manually run data conversion jobs on the server. Refer to the appendix “Improving Performance”for instructions. If you choose to run data conversion manually, configure and start your process schedulerand application servers now.
Tips for configuring and starting the application server:
• Make sure the application server domain being configured points to the Target database for this passof the upgrade.
• Set a different JSL port for each database instance.
See the Enterprise PeopleTools installation guide for your database platform for the new release.
See Appendix: “Improving Performance.”
162 Copyright © 2007, Oracle. All rights reserved.

Chapter 4 Apply Application Changes
Properties
DatabaseOrientation
Initial or MTP Products Platforms Languages
Target Both All All All
Task 4-11: Backing Up Before Data ConversionBack up your database now. This enables you to restart your upgrade from this point, should you experienceany database integrity problems during the remainder of the tasks in the upgrade process.
Properties
DatabaseOrientation
Initial or MTP Products Platforms Languages
Target Both All All All
Task 4-12: Running Data ConversionThis section discusses:
• Reviewing Data Conversion Tips
• Running Data Conversion for Group 12
• Running Data Conversion for Group 1
• Running Data Conversion for Group 2
• Running Data Conversion for Group 3
• Running Data Conversion for Group 4
• Running Data Conversion for Group 7
• Running Data Conversion for Group 8
Note. In this task you will populate new tables and columns. Earlier, you altered tables and added all new andmodified columns. You did not, however, remove obsolete columns. The following steps will move data fromthe obsolete columns to the new columns and tables. Later in this chapter, in the task “Finalizing the DatabaseStructure,” you will generate and run SQL to delete those obsolete columns. The Upgrade Driver ApplicationEngine program, UPG_DATACONV, will run all upgrade data conversions.
Task 4-12-1: Reviewing Data Conversion TipsThis section discusses:
• Upgrade Driver Program − UPG_DATACONV
Copyright © 2007, Oracle. All rights reserved. 163

Apply Application Changes Chapter 4
• Data Conversion Documentation
• Running Data Conversion Concurrently
• Writing Data Conversion for Your Non-Oracle Records
• Data Conversion Errors Expected During the Initial Upgrade Pass
• Restarting Data Conversion
Upgrade Driver Program − UPG_DATACONVUPG_DATACONV is an Application Engine program designed to run all upgrade data conversions. Eachtime the program is run during an upgrade pass, Change Assistant passes a group number parameter tothe program. The program then reads the table PS_UPG_DATACONV, selecting all rows with that groupnumber and ordering them by the sequence number on the row. A list of Application Engine library sectionsthat must be run for data conversion is returned. The program then calls each section in the order of thesequence number. You can review the sections that are called by the Upgrade Driver program by accessing theDefine Upgrade Drivers page on the Demo database.
Data Conversion DocumentationEach section called by the Upgrade Driver program contains comments describing the underlying conversion.By running the UDATACNV.SQR report you can find which sections are called by the Upgrade Driverprogram and what they are doing.
See Appendix: “Using Data Conversion Utilities.”
Running Data Conversion ConcurrentlyEach data conversion step in this task corresponds to a group number as defined in the Define Upgrade Driverspage. Each group is independent of the others unless otherwise documented, allowing the groups to be runconcurrently. Oracle recommends that you run data conversion in the order it appears in your template duringthe initial upgrade pass to determine processing times. This is why the Change Assistant templates aredelivered with the data conversion steps’ “Run Concurrently” property set to No. To reduce overall processingtime during your Move to Production passes, you may decide to run some or all conversion steps concurrently.To run steps concurrently, reset the “Run Concurrently” property to Yes in your Change Assistant template.
Note. Group 12 data conversion, run later in this task, can not be run concurrently with any of the other groups.It must be completed first before running any other data conversion.
See the Enterprise PeopleTools PeopleBook: PeopleSoft Software Updates for your new release.
Writing Data Conversion for Your Non-Oracle RecordsThe data conversion code delivered for this upgrade was written to handle only Oracle-delivered records. Youmay have added your own records to the system. To convert data in the underlying tables, you may need tocreate your own Application Engine library. The Upgrade Driver program can call an Application Enginelibrary section that you create. To have the Upgrade Driver program call your custom section during this task,you will need to add the section on the Define Upgrade Drivers page.
See Appendix: “Using Data Conversion Utilities.”
164 Copyright © 2007, Oracle. All rights reserved.

Chapter 4 Apply Application Changes
Data Conversion Errors Expected During the Initial Upgrade PassDuring your initial upgrade pass you can expect to have data conversion programs fail. This is because yourPeopleSoft software installation is unique, which makes it difficult to write data conversions that will work foreveryone all of the time. Your database may be larger than most, you may have customized Oracle-definedrecords, or you may not have copied all object deletions onto your Copy of Production. These differences willcause data conversion to fail. You must fix each problem on your initial Copy of Production and restart theApplication Engine program. Your fixes will be automatically copied to your New Copy of Production duringthe Move to Production passes and data conversion will run smoothly.
If you have customized records that are delivered from Oracle, you may need to make changes to theApplication Engine programs to handle these customizations. For example, here are two situations in whichyou may need to customize data conversion code:
• If you added fields to a Oracle-delivered record, you may need to add your additional fields to theconversion code for those records.
• If a Oracle-delivered record you customized will be deleted, you may need to add your own conversions tomove the data to a new location.
Use the Find In feature of Application Designer to determine which Application Engine programs affectyour customized records.
To use the Find In feature:
1. Create a project and add all Application Engine programs and related objects that have a name startingwith UPG and save the project.
2. Select Edit, Find In.3. Enter each customized record name in the Find What field and your project name in the Project field.4. Click Find.The results will appear in the output window.
Document any changes you make to data conversion programs. This way, if a new version of the program isdelivered through Customer Connection, you will know exactly what changes you have made. You can thenreapply the changes to the new version of the program.
If your database is large, you may have data conversion programs that fail due to running out of space as youmove data from one table to another. This problem can happen on all RDBMS platforms, but is more of aproblem on those platforms using tablespaces. If your data conversion terminates abnormally with a spaceerror, examine the Application Engine SQL statements that caused the problem. Determine where the datais coming from and how much will be moved. Have your database administrator adjust the allocated spaceaccordingly. The data conversion can then be restarted.
In the appendix, “Sizing Tables for the Upgrade,” Oracle has provided the approximate number of rows thatwill be loaded into some tables.
If you get a data conversion error because a field does not exist on a table, and the field is not one youhave customized, check your field renames. If a field that appears on a record that is deleted in the newPeopleSoft release but was not deleted in your compare and copy, your table will be out of sync with what isexpected by data conversion. If you had deleted the record, the rename would not happen on the physicaltable and the field would have the old name. This is what the data conversion program expects. If you did notdelete the record, the field was renamed during the altering of tables and the data conversion program willterminate abnormally. Edit the Application Engine SQL to use the name, which is now on your table, andthen restart the data conversion.
See Appendix: “Using the Comparison Process.”
Copyright © 2007, Oracle. All rights reserved. 165

Apply Application Changes Chapter 4
See Appendix: “Sizing Tables for the Upgrade.”
Restarting Data ConversionBefore restarting a data conversion step, rename the log file. Change Assistant uses the same log file nameeach time you start or restart an Application Engine program. This means that the restarted Application Engineprogram will replace the original log file if it is not renamed.
If your data conversion program fails, fix the problem on your Copy of Production and restart the program.When you set the data conversion step to Restart in your Change Assistant job, it will rerun the program usingthe PROCESS_INSTANCE and RUN_CNTL_ID from the initial run and the conversion will restart right afterthe last committed SQL command. Application Engine keeps track of data committed to the database in thetable PS_AERUNCONTROL, keyed by PROCESS_INSTANCE and RUN_CNTL_ID.
See Finalizing the Database Structure.
See Appendix: “Sizing Tables for the Upgrade.”
Properties
DatabaseOrientation
Initial or MTP Products Platforms Languages
Target Initial All All All
Task 4-12-2: Running Data Conversion for Group 12This step runs the UPG_DATACONV Application Engine program for Group 12. If you want to see additionaldocumentation for Group 12, then run the UDATACNV report.
Note. Group 12 must execute successfully before any other groups (if applicable) can run. If there are othergroups and you decide to run groups concurrently, Group 12 must complete before you launch any other groups.
Properties
DatabaseOrientation
Initial or MTP Products Platforms Languages
Target Both All All All
Task 4-12-3: Running Data Conversion for Group 1This step runs the UPG_DATACONV Application Engine program for Group 1. For additional documentationfor Group 1, run the UDATACNV report.
Properties
DatabaseOrientation
Initial or MTP Products Platforms Languages
Target Both All All All
166 Copyright © 2007, Oracle. All rights reserved.

Chapter 4 Apply Application Changes
Task 4-12-4: Running Data Conversion for Group 2This step runs the UPG_DATACONV Application Engine program for Group 2. If you want to see additionaldocumentation for Group 2, then run the UDATACNV report.
Properties
DatabaseOrientation
Initial or MTP Products Platforms Languages
Target Both All All All
Task 4-12-5: Running Data Conversion for Group 3This step runs the UPG_DATACONV Application Engine program for Group 3. If you want to see additionaldocumentation for Group 3, then run the UDATACNV report.
Properties
DatabaseOrientation
Initial or MTP Products Platforms Languages
Target Both All All All
Task 4-12-6: Running Data Conversion for Group 4This step runs the UPG_DATACONV Application Engine program for Group 4. If you want to see additionaldocumentation for Group 4, then run the UDATACNV report.
Properties
DatabaseOrientation
Initial or MTP Products Platforms Languages
Target Both All All All
Task 4-12-7: Running Data Conversion for Group 7This step runs the UPG_DATACONV Application Engine program for Group 7. If you want to see additionaldocumentation for Group 7, then run the UDATACNV report.
Properties
DatabaseOrientation
Initial or MTP Products Platforms Languages
Target Both All All All
Task 4-12-8: Running Data Conversion for Group 8This step runs the UPG_DATACONV Application Engine program for Group 8. If you want to see additionaldocumentation for Group 8, then run the UDATACNV report.
Copyright © 2007, Oracle. All rights reserved. 167

Apply Application Changes Chapter 4
Properties
DatabaseOrientation
Initial or MTP Products Platforms Languages
Target Both All All All
Task 4-13: Backing Up After Data ConversionBack up your database now. This enables you to restart your upgrade from this point, should you experienceany database integrity problems during the remaining tasks in the upgrade process.
Properties
DatabaseOrientation
Initial or MTP Products Platforms Languages
Target Both All All All
Task 4-14: Finalizing the Database StructureThis section discusses:
• Understanding Final Database Structure
• Building the Alter with Deletes Scripts
• Altering Tables with Deletes
• Creating Indexes Again
• Creating Triggers
• Running the AE SYNCIDGEN Process
• Creating All Views
Understanding Final Database StructureNow that Data Conversion is completed, this task will alter the tables to remove obsolete columns, andcreate final indexes and views.
Task 4-14-1: Building the Alter with Deletes ScriptsThis step uses the previously created project ALLTABS and generates three SQL scripts: one that will altertables to drop obsolete columns, one that will also create any remaining indexes that could not be created withthe first alter, and one that will create triggers. The script names are:
ALLTABS_DEL_ALTTBL.SQL
ALLTABS_DEL_CRTIDX.SQL
168 Copyright © 2007, Oracle. All rights reserved.

Chapter 4 Apply Application Changes
ALLTABS_DEL_CRTTRG.SQL
Important! All indexes should create when the ALLTABS_DEL_CRTIDX.SQL script is run. When a uniqueindex fails to create, it is probably due to a data conversion issue. If a unique index fails to create, you mustresolve the issue and not simply remove the index. To prevent this issue, you can back up tables in theALLTABS_DEL_ALTTBL.SQL script that will be dropping recfields that have data. This way, if you havean issue you may have the old fields and data you need to correct it.
Note. For DB2 z/OS sites, if this step takes an exceptionally long time, performing a RUNSTATS on thesystem catalog tablespace SYSDBASE may improve performance.
Properties
DatabaseOrientation
Initial or MTP Products Platforms Languages
Target Both All All All
Task 4-14-2: Altering Tables with DeletesThis step executes the script ALLTABS_DEL_ALTTBL.SQL, which was generated in the previous step.
Properties
DatabaseOrientation
Initial or MTP Products Platforms Languages
Target Both All All All
Task 4-14-3: Creating Indexes AgainThis step executes the script ALLTABS_DEL_CRTIDX.SQL, which was generated in the previous step.All indexes should create at this time.
Important! Review the log to find any unique indexes that might have failed to create. All indexes shouldcreate at this time, so those errors are not acceptable and should be corrected. When a unique index fails tocreate, it is probably due to a data conversion issue.
Properties
DatabaseOrientation
Initial or MTP Products Platforms Languages
Target Both All All All
Task 4-14-4: Creating TriggersThis step executes the script ALLTABS_DEL_CRTTRG.SQL, which was generated in a previous step.
Copyright © 2007, Oracle. All rights reserved. 169

Apply Application Changes Chapter 4
Properties
DatabaseOrientation
Initial or MTP Products Platforms Languages
Target Both All All All
Task 4-14-5: Running the AE SYNCIDGEN ProcessThis step executes the AE_SYNCIDGEN Application Engine program. Mobile applications use Sync IDs togive each row a unique identifier. For any tables with the Sync ID column set to the default value of zero, theAE_SYNCIDGEN program will populate the column with the next valid Sync ID value.
Properties
DatabaseOrientation
Initial or MTP Products Platforms Languages
Target Both All All All
Task 4-14-6: Creating All ViewsThis step runs CREATEVW.DMS to re-create all views in the Copy of Production database. The script willtry to create every view in Application Designer. If there is an error on one view, it will keep going until itgets to the end of the list.
Important! Review the log to find any views that failed to create. All views should create at this time, sothose errors are not acceptable and should be corrected.
Properties
DatabaseOrientation
Initial or MTP Products Platforms Languages
Target Both All All All
Task 4-15: Loading Data to Complete System SetupThis section discusses:
• Exporting Strings
• Importing Strings
• Exporting EDI Statements
• Importing EDI Statements
• Exporting Mass Change Data
• Importing Mass Change Data
170 Copyright © 2007, Oracle. All rights reserved.

Chapter 4 Apply Application Changes
• Exporting XML Service Information
• Importing XML Service Information
• Exporting Related Language System Data
• Importing Related Language System Data
• Editing the System Data Scripts
• Exporting Application System Data
• Importing Application System Data
• Exporting Data for Your Upgrade Path
• Importing Data for Your Upgrade Path
• Exporting Common Portal System Options
• Importing Common Portal System Options
• Exporting Setup Data
• Importing Setup Data
• Importing PayBill Data
• Exporting Approval Framework Definitions
• Importing Approval Framework Definitions
• Exporting Generic Notifications
• Importing Generic Notifications
• Exporting Global Payroll Switzerland Tax Rates
• Importing Global Payroll Switzerland Tax Rates
Task 4-15-1: Exporting StringsThis script exports Strings data from the Demo database. The script name for your upgrade path is:
DLUPX04E.DMS
This data will be exported during Move to Production by the script MVAPPEXP.DMS.
Properties
DatabaseOrientation
Initial or MTP Products Platforms Languages
Source Initial All All All
Task 4-15-2: Importing StringsThis script imports Strings data into the Copy of Production database. The script name for your upgrade path is:
DLUPX04I.DMS
This data will be imported during Move to Production by the script MVAPPIMP.DMS.
Copyright © 2007, Oracle. All rights reserved. 171

Apply Application Changes Chapter 4
Properties
DatabaseOrientation
Initial or MTP Products Platforms Languages
Target Initial All All All
Task 4-15-3: Exporting EDI StatementsThis script exports EDI Statements from the Demo database. The script name for your upgrade path is:
DLUPX05E.DMS
This data will be exported during Move to Production by the script MVPRDEXP.DMS.
Properties
DatabaseOrientation
Initial or MTP Products Platforms Languages
Source Initial All All All
Task 4-15-4: Importing EDI StatementsThis script imports the EDI Statements into the Copy of Production database. The script name for yourupgrade path is:
DLUPX05I.DMS
This data will be imported during Move to Production by the script MVPRDIMP.DMS.
Properties
DatabaseOrientation
Initial or MTP Products Platforms Languages
Target Initial All All All
Task 4-15-5: Exporting Mass Change DataThis script exports Mass Change tables from the Demo database. The script name for your upgrade path is:
DLUPX06E.DMS
This data will be exported during Move to Production by the script MVAPPEXP.DMS.
Properties
DatabaseOrientation
Initial or MTP Products Platforms Languages
Source Initial All All All
172 Copyright © 2007, Oracle. All rights reserved.

Chapter 4 Apply Application Changes
Task 4-15-6: Importing Mass Change DataThis script imports Mass Change tables into the Copy of Production database. The script name for yourupgrade path is:
DLUPX06I.DMS
This data will be imported during Move to Production by the script MVAPPIMP.DMS.
Properties
DatabaseOrientation
Initial or MTP Products Platforms Languages
Target Initial All All All
Task 4-15-7: Exporting XML Service InformationThis script exports XML service data from the Demo database. The script name for your upgrade path is:
DLUPX13E.DMS
This data will be exported during Move to Production by the script MVPRDEXP.DMS.
Properties
DatabaseOrientation
Initial or MTP Products Platforms Languages
Source Initial All All All
Task 4-15-8: Importing XML Service InformationThis script imports XML service data into the Copy of Production database. The script name for yourupgrade path is:
DLUPX13I.DMS
This data will be imported during Move to Production by the script MVPRDIMP.DMS.
Properties
DatabaseOrientation
Initial or MTP Products Platforms Languages
Target Initial All All All
Task 4-15-9: Exporting Related Language System DataThis script exports system data from various application-related language tables in your Demo database intoa Data Mover *.DAT file. In a later step, this data will be loaded into your Copy of Production. The scriptname for your upgrade path is:
DLHCLASYSE.DMS
Copyright © 2007, Oracle. All rights reserved. 173

Apply Application Changes Chapter 4
Note. During Move to Production passes you can reuse the data files that are created by this export script.Preserve this DAT file, and set the Type of Upgrade property in the Change Assistant template to InitialUpgrade for this step.
Properties
DatabaseOrientation
Initial or MTP Products Platforms Languages
Source Both All All All Non-English
Task 4-15-10: Importing Related Language System DataThis script will delete old related language system data from related language tables. The script then importsthe data exported by the scripts above. The script name for your upgrade path is:
DLHCLASYSI.DMS
Properties
DatabaseOrientation
Initial or MTP Products Platforms Languages
Target Both All All All Non-English
Task 4-15-11: Editing the System Data ScriptsOracle sites will need to edit the system data scripts for date formats. Change the date format YYYY-MM-DD toDD-MMM-YYYY. For example, a date 1900-01-01 would need to be changed to 01-JAN-1900. The scripts youwill need to edit are as follows:
DLHCSYSE.DMS
DLHCSYSI.DMS
Properties
DatabaseOrientation
Initial or MTP Products Platforms Languages
Target Initial All Oracle All
Task 4-15-12: Exporting Application System DataThis script exports system data from various application tables from the Demo database into a Data Mover*.DAT file. In a later step, this data will be loaded into the Copy of Production database. The script name foryour upgrade path is:
DLHCSYSE.DMS
Note. During Move to Production passes, you can reuse the data files that are created by this export script. Todo this, change the Type of Upgrade from Both to Initial Upgrade in the step properties and save the job.
174 Copyright © 2007, Oracle. All rights reserved.

Chapter 4 Apply Application Changes
Properties
DatabaseOrientation
Initial or MTP Products Platforms Languages
Source Both All All All
Task 4-15-13: Importing Application System DataThis script imports the application system data, exported in the previous step, into the Copy of Productiondatabase. The script name for your upgrade path is:
DLHCSYSI.DMS
Note. Some of the data will be imported using the ignore dups option. These data loads will give the message“Error: duplicate SQL rows” and then give a “Successful completion” message. These error messages can beignored because duplicate data is expected.
Properties
DatabaseOrientation
Initial or MTP Products Platforms Languages
Target Both All All All
Task 4-15-14: Exporting Data for Your Upgrade PathThis script exports system data from application tables from the Demo database into a Data Mover *.DATfile that is needed for upgrading from your current release. In a later step, this data will be loaded into theCopy of Production database. The script name for your upgrade path is:
DLHCUPI05E.DMS
Properties
DatabaseOrientation
Initial or MTP Products Platforms Languages
Source Both All All All
Task 4-15-15: Importing Data for Your Upgrade PathThis script imports the application system data that is needed for upgrading from your current release, whichwas exported in the above step, into the Copy of Production database. The script name for your upgrade path is:
DLHCUPI05I.DMS
Copyright © 2007, Oracle. All rights reserved. 175

Apply Application Changes Chapter 4
Properties
DatabaseOrientation
Initial or MTP Products Platforms Languages
Target Both All All All
Task 4-15-16: Exporting Common Portal System OptionsThis script exports the contents of the Common Portal System Options table from the Demo database. Thescript name for your upgrade path is:
DLEOX01E.DMS
Properties
DatabaseOrientation
Initial or MTP Products Platforms Languages
Source Both All All All
Task 4-15-17: Importing Common Portal System OptionsThis script imports the Common Portal System Options data into your Copy of Production database. The scriptname for your upgrade path is:
DLEOX01I.DMS
Properties
DatabaseOrientation
Initial or MTP Products Platforms Languages
Target Both All All All
Task 4-15-18: Exporting Setup DataThis script exports setup data from the Demo database. The script name for your upgrade path is:
DLUPX16E.DMS
This data will be exported during Move to Production by the script MVAPPEXP.DMS.
Properties
DatabaseOrientation
Initial or MTP Products Platforms Languages
Source Initial All All All
Task 4-15-19: Importing Setup DataThis script imports setup data into the Copy of Production database. The script name for your upgrade path is:
176 Copyright © 2007, Oracle. All rights reserved.

Chapter 4 Apply Application Changes
DLUPX16I.DMS
This data will be imported during Move to Production by the script MVAPPIMP.DMS.
Properties
DatabaseOrientation
Initial or MTP Products Platforms Languages
Target Initial All All All
Task 4-15-20: Importing PayBill DataIn this task, Pay/Bill Management data from the upgraded FSCM database will be imported into yourHRMS database.
Note. You must have completed the task Exporting PayBill Data in chapter 5 of your FSCM 9.0 Upgradebefore you run this task.
See PeopleSoft Enterprise Financials/Supply Chain Management 9.0 Upgrade guide for your upgrade path,“Complete Database Changes,” Exporting PayBill Data.
The script for your upgrade path is:
UVHCFOR23I.DMS
Properties
DatabaseOrientation
Initial or MTP Products Platforms Languages
Target Both Pay/BillManagement
All All
Task 4-15-21: Exporting Approval Framework DefinitionsThis script exports Approval Framework transaction definitions from the Demo database. The script name foryour upgrade path is:
DLHCUPW10E.DMS
Properties
DatabaseOrientation
Initial or MTP Products Platforms Languages
Source Both All All All
Task 4-15-22: Importing Approval Framework DefinitionsThis script imports Approval Framework transaction definitions from the Demo database. The script name foryour upgrade path is:
DLHCUPW10I.DMS
Copyright © 2007, Oracle. All rights reserved. 177

Apply Application Changes Chapter 4
Properties
DatabaseOrientation
Initial or MTP Products Platforms Languages
Target Both All All All
Task 4-15-23: Exporting Generic NotificationsThis step exports Generic Notification Templates data from the Demo database. The script name for yourupgrade path is:
DLHCUPT04E.DMS
Properties
DatabaseOrientation
Initial or MTP Products Platforms Languages
Source Both All All All
Task 4-15-24: Importing Generic NotificationsThis step imports Generic Notification Templates data into your Copy of Production database.
The script name for your upgrade path is:
DLHCUPT04I.DMS
Properties
DatabaseOrientation
Initial or MTP Products Platforms Languages
Target Both All All All
Task 4-15-25: Exporting Global Payroll Switzerland Tax RatesIn this step, you export the GPCH_TX_RATES table from the Demo database. The script name for yourupgrade path is:
DLHCGCHS10E.DMS
Properties
DatabaseOrientation
Initial or MTP Products Platforms Languages
Source Both Global PayrollSwitzerland
All All
178 Copyright © 2007, Oracle. All rights reserved.

Chapter 4 Apply Application Changes
Task 4-15-26: Importing Global Payroll Switzerland Tax RatesIn this step, you import the GPCH_TX_RATES table into your Copy of Production database. The scriptname for your upgrade path is:
DLHCGCHS10I.DMS
Properties
DatabaseOrientation
Initial or MTP Products Platforms Languages
Target Both Global PayrollSwitzerland
All All
Task 4-16: Loading Stored StatementsThis section discusses:
• Setting PSOPTIONS for COBOL
• Running the STOREBAS Script
• Running the STOREGP Script
• Running the STOREHRM Script
• Running the STOREPAY Script
• Running the STOREPEN Script
• Running the STOREPYI Script
Task 4-16-1: Setting PSOPTIONS for COBOLThis step runs DB2ALLCCSIDUPD.SQL and updates PSOPTIONS.DB2ALLCCSIDOK. The purpose ofthe field PSOPTIONS.DB2ALLCCSIDOK is to control whether COBOL processing should be allowed forCOBOL processes running under Windows NT/2000 or UNIX against a DB2 z/OS database where the DB2subsystem zparm for SCCSID is not 37 (US English EBCDIC). A value of ’N’ in this field will result in theCOBOL process being terminated and value of ’Y’ will allow the process to continue.
Note. Move to Production: PSOPTIONS is copied in the Move to Production pass with the MVPRDEXP/IMPscripts.
Properties
DatabaseOrientation
Initial or MTP Products Platforms Languages
Target Initial All DB2 z/OS All
Copyright © 2007, Oracle. All rights reserved. 179

Apply Application Changes Chapter 4
Task 4-16-2: Running the STOREBAS ScriptIn this step, you run STOREBAS.DMS. This script loads stored statements for COBOL programs ownedby the Benefits Administration product.
Properties
DatabaseOrientation
Initial or MTP Products Platforms Languages
Target Initial BenefitsAdministration
All All
Task 4-16-3: Running the STOREGP ScriptIn this step, you run STOREGP.DMS. This script loads stored statements for COBOL programs ownedby the Global Payroll product.
Properties
DatabaseOrientation
Initial or MTP Products Platforms Languages
Target Initial Global Payroll Core All All
Task 4-16-4: Running the STOREHRM ScriptIn this step you run STOREHRM.DMS. This script loads stored statements for COBOL programs.
Properties
DatabaseOrientation
Initial or MTP Products Platforms Languages
Target Initial All All All
Task 4-16-5: Running the STOREPAY ScriptIn this step, you run STOREPAY.DMS. This script loads stored statements for COBOL programs owned bythe Payroll for North America product.
Properties
DatabaseOrientation
Initial or MTP Products Platforms Languages
Target Initial Payroll for NorthAmerica
All All
Task 4-16-6: Running the STOREPEN ScriptIn this step, you run STOREPEN.DMS. This script loads stored statements for COBOL programs ownedby the Pension Administration product.
180 Copyright © 2007, Oracle. All rights reserved.

Chapter 4 Apply Application Changes
Properties
DatabaseOrientation
Initial or MTP Products Platforms Languages
Target Initial PensionAdministration
All All
Task 4-16-7: Running the STOREPYI ScriptIn this step, you run STOREPYI.DMS. This script loads stored statements for COBOL programs owned bythe Payroll Interface product.
Properties
DatabaseOrientation
Initial or MTP Products Platforms Languages
Target Initial Payroll Interface All All
Task 4-17: Running Final Update StatisticsThis section discusses:
• Generating Final RUNSTATS for DB2 UNIX
• Running Final Statistics for DB2 UNIX
• Running Final Statistics for DB2 zOS
• Running Final Statistics for Informix
• Running Final Statistics for Oracle
Task 4-17-1: Generating Final RUNSTATS for DB2 UNIXThis step executes the RUNSTATS.SQR that creates the RUNSTATS.SQL to update statistics on DB2UNIX/NT.
Properties
DatabaseOrientation
Initial or MTP Products Platforms Languages
Target Both All DB2 UNIX/NT All
Task 4-17-2: Running Final Statistics for DB2 UNIXEarlier in the upgrade process you updated your statistics. Now that you have converted all of your data andmodified all indexes, update your statistics again to improve performance of your post upgrade processes andtesting. Run the RUNSTATS.SQL script created in the previous step.
Copyright © 2007, Oracle. All rights reserved. 181

Apply Application Changes Chapter 4
Properties
DatabaseOrientation
Initial or MTP Products Platforms Languages
Target Both All DB2 UNIX All
Task 4-17-3: Running Final Statistics for DB2 zOSEarlier in the upgrade process you updated your statistics. Now that you have converted all of your data andmodified all indexes, update your statistics again to improve performance of your post upgrade processesand testing. Contact your database administrator to have the statistics updated on your database beforeproceeding with your upgrade.
Properties
DatabaseOrientation
Initial or MTP Products Platforms Languages
Target Both All DB2 z/OS All
Task 4-17-4: Running Final Statistics for InformixEarlier in the upgrade process you updated your statistics. Now that you have converted all of your data andmodified all indexes, update your statistics again to improve performance of your post upgrade processes andtesting. This step runs UPDATESTATS to update the statistics on your database.
Properties
DatabaseOrientation
Initial or MTP Products Platforms Languages
Target Both All Informix All
Task 4-17-5: Running Final Statistics for OracleEarlier in the upgrade process you upgraded your statistics. Now that you have converted all of your data andmodified all indexes, update your statistics again to improve performance of your post upgrade processes.Contact your database administrator to have the statistics updated on your database before proceeding withyour upgrade and testing.
Properties
DatabaseOrientation
Initial or MTP Products Platforms Languages
Target Both All Oracle All
182 Copyright © 2007, Oracle. All rights reserved.

Chapter 4 Apply Application Changes
Task 4-18: Completing Application ProcessesThis section discusses:
• Refreshing Personal Data Table
• Exporting Setup Data for Rules
• Importing Setup Data for Rules
• Exporting Payroll Interface Tables
• Importing Payroll Interface Tables
• Exporting GL Interface Setup Tables
• Importing GL Interface Setup Tables
• Exporting US Custom Garnishment Rules
• Importing US Custom Garnishment Rules
Task 4-18-1: Refreshing Personal Data TableIn this step, you refresh the Personal Data snapshot table used for reporting. Run the Application Engineprogram PERS_REFRESH to refresh the table.
Properties
DatabaseOrientation
Initial or MTP Products Platforms Languages
Target Both All All All
Task 4-18-2: Exporting Setup Data for RulesRun this step only during Move to Production passes. It exports data from tables that were updated forTemplate Built and Custom Rules setup during the initial pass.
Run the following script:
MVTLW01E.DMS
Properties
DatabaseOrientation
Initial or MTP Products Platforms Languages
Source MTP Time and Labor All All
Task 4-18-3: Importing Setup Data for RulesRun this step only during Move to Production passes. It will import data from tables that were updated forTemplate Built and Custom Rules setup during the initial pass.
Run the following script:
Copyright © 2007, Oracle. All rights reserved. 183

Apply Application Changes Chapter 4
MVTLW01I.DMS
Properties
DatabaseOrientation
Initial or MTP Products Platforms Languages
Target MTP Time and Labor All All
Task 4-18-4: Exporting Payroll Interface TablesThis step is only run during the Move to Production passes. It exports all Payroll Interface definitionsincluding data from tables that were updated in the chapter “Complete Database Changes,” Updating PayrollInterface Definitions task during the initial pass.
The script name for your path is:
MVHCPIT01E.DMS
Properties
DatabaseOrientation
Initial or MTP Products Platforms Languages
Source MTP Payroll Interface All All
Task 4-18-5: Importing Payroll Interface TablesThis step is only run during the Move to Production passes. It imports all Payroll Interface definitionsincluding data from tables that were updated in the chapter “Complete Database Changes,” Updating PayrollInterface Definitions task during the initial pass.
The script name for your path is:
MVHCPIT01I.DMS
Properties
DatabaseOrientation
Initial or MTP Products Platforms Languages
Target MTP Payroll Interface All All
Task 4-18-6: Exporting GL Interface Setup TablesIn this step, you export General Ledger Interface setup tables. This step should only be run if you usenon-commitment accounting. If you use commitment accounting, mark this step as complete and continueyour upgrade, since you could lose data that was entered between upgrade passes if you run this step.
To set this step to run:
1. In your job in Change Assistant, highlight this step and select Edit, Step Properties.2. In the Step Properties dialog box, change the Type from Manual to DataMoverUser.
184 Copyright © 2007, Oracle. All rights reserved.

Chapter 4 Apply Application Changes
3. Click OK.
This step is only run during the Move to Production passes. If you are using non-commitment accounting inPayroll for North America, you will set up data in tables used for General Ledger Interface during the initialpass. This script will export the data from these tables.
The script name for your path is:
MVHCPYW01E.DMS
See Appendix: “Understanding Dynamic ChartFields Changes.”
See “Complete Database Changes,” Setting Up General Ledger Interface.
Properties
DatabaseOrientation
Initial or MTP Products Platforms Languages
Source MTP Payroll for NorthAmerica
All All
Task 4-18-7: Importing GL Interface Setup TablesIn this step, you import General Ledger Interface setup tables. This step should only be run if you usenon-commitment accounting. If you use commitment accounting, mark this step as complete and continueyour upgrade, since you could lose data that was entered between upgrade passes if you run this step.
To set this step to run:
1. In your job in Change Assistant, highlight this step and select Edit, Step Properties.2. In the Step Properties dialog box, change the Type from Manual to DataMoverBootstrap.3. Click OK.
This step is only run during the Move to Production passes. If you are using non-commitment accounting inPayroll for North America you will setup the data in tables used for General Ledger Interface during the initialpass. This script will import the data from these tables.
The script name for your path is:
MVHCPYW01I.DMS
See Appendix: “Understanding Dynamic ChartFields Changes.”
See “Complete Database Changes,” Setting Up General Ledger Interface.
Properties
DatabaseOrientation
Initial or MTP Products Platforms Languages
Target MTP Payroll for NorthAmerica
All All
Copyright © 2007, Oracle. All rights reserved. 185

Apply Application Changes Chapter 4
Task 4-18-8: Exporting US Custom Garnishment RulesThis step is only run during the Move to Production passes. If you have created any U.S. garnishment rules,this script will export those rules from garnishment rules tables.
Note. If you have not created any U.S. garnishment rules, you do not have to run this task.
The script name for your path is:
MVHCPYT05E.DMS
See Appendix: “Understanding Garnishments Changes.”
See “Complete Database Changes,” Setting Up US Custom Garnishment Rules.
Properties
DatabaseOrientation
Initial or MTP Products Platforms Languages
Source MTP Payroll for NorthAmerica
All All
Task 4-18-9: Importing US Custom Garnishment RulesThis step is only run during the Move to Production passes. If you have created any U.S. garnishment rulesand run the export script, this script will import those rules into garnishment rules tables.
Note. If you have not created any U.S. garnishment rules, you do not have to run this task.
The script name for your path is:
MVHCPYT05I.DMS
See Appendix: “Understanding Garnishments Changes.”
See “Complete Database Changes,” Setting Up US Custom Garnishment Rules.
Properties
DatabaseOrientation
Initial or MTP Products Platforms Languages
Target MTP Payroll for NorthAmerica
All All
Task 4-19: Updating Language DataThis section discusses:
• Understanding Updating Language Data
• Run the TSRECPOP Script
186 Copyright © 2007, Oracle. All rights reserved.

Chapter 4 Apply Application Changes
Understanding Updating Language DataIn this task, you run scripts to modify data in PeopleTools related language tables.
Note. For DB2 z/OS customers, PeopleSoft recommends that you run RUNSTATS against the system catalogtables at this time.
Task 4-19-1: Run the TSRECPOP ScriptIn this step, the TSRECPOP script initializes and modifies the data in PeopleTools related languagearchitecture tables.
Properties
DatabaseOrientation
Initial or MTP Products Platforms Languages
Target Initial All All All
Task 4-20: Completing PeopleTools ConversionThe PeopleTools Upgrade Driver Application Engine program, PTUPGCONVERT, runs additionalPeopleTools upgrade data conversions. The program then reads the table PS_PTUPGCONVERT, selecting allrows with a group number of 02 and ordering them by the sequence number on the row. A list of ApplicationEngine library sections that must be run for data conversion is returned. The program then calls each sectionin the order of the sequence number. Review the report generated by PTUCONV.SQR for details on theconversions run in this step.
Properties
DatabaseOrientation
Initial or MTP Products Platforms Languages
Target Both All All All
Task 4-21: Updating Object Version NumbersIn this task, you run the VERSION Application Engine program. This ensures that all of your version numbersare correct and, if not, resets them to 1.
Note. Do not update statistics after you complete this task.
Copyright © 2007, Oracle. All rights reserved. 187

Apply Application Changes Chapter 4
Properties
DatabaseOrientation
Initial or MTP Products Platforms Languages
Target Both All All All
Task 4-22: Running the Final Audit ReportsThis section discusses:
• Run the Final DDDAUDIT Report
• Run the Final SYSAUDIT Report
• Create the FNLALTAUD Project
• Run the Final Alter Audit
• Review the Final Audits
• Run a Final SETINDEX Report
• Run a Final SETTABLE Report
Task 4-22-1: Run the Final DDDAUDIT ReportDDDAUDIT is an SQR that compares your production SQL data tables with the PeopleTools recorddefinitions to uncover inconsistencies. You can expect some errors from this report. You will review theoutput from the report in another step.
Properties
DatabaseOrientation
Initial or MTP Products Platforms Languages
Target Both All All All
Task 4-22-2: Run the Final SYSAUDIT ReportSYSAUDIT is an SQR that identifies orphaned PeopleSoft objects. For example, SYSAUDIT will identifya module of PeopleCode that exists but does not relate to any other objects in the system. SYSAUDIT alsoidentifies other inconsistencies within your database.
Properties
DatabaseOrientation
Initial or MTP Products Platforms Languages
Target Both All All All
188 Copyright © 2007, Oracle. All rights reserved.

Chapter 4 Apply Application Changes
Task 4-22-3: Create the FNLALTAUD ProjectIn this step, you create the FNLALTAUD project and use it to run your final Alter Audit. Creating this newproject now ensures that all the records in your system are audited, including SQL tables. This project alsoincludes any custom records that you have created in your system.
Properties
DatabaseOrientation
Initial or MTP Products Platforms Languages
Target Both All All All
Task 4-22-4: Run the Final Alter AuditRun the PeopleTools alter record process on all tables in your system to check whether the PeopleToolsdefinitions are synchronized with the underlying SQL data tables in your database. PeopleSoft calls thisprocess an Alter Audit. Alter Audit compares the data structures of your database tables with the PeopleToolsdefinitions to uncover inconsistencies. Alter Audit then creates an SQL script with the DDL changes needed tosynchronize your database with the PeopleTools definitions.
The Alter Audit script is built using the FNLALTAUD project created in the previous step.
Note. Customers will have some UPG tables that don’t match the meta-sql data with the db structure. Thesedifferences are acceptable since these temporary tables are used only for the upgrade. These differencescan be ignored.
Properties
DatabaseOrientation
Initial or MTP Products Platforms Languages
Target Both All All All
Task 4-22-5: Review the Final AuditsThe Alter Audit process creates SQL scripts that correct any discrepancies between your PeopleTools recorddefinitions and the database system catalog table definitions. Review the Alter Audit output and correctany discrepancies noted by running the generated scripts with your platform-specific SQL tool. The scriptnames are:
FNLALTAUD_ALTTBL.SQL
FNLALTAUD_CRTIDX.SQL
Note. The Alter Audit process also creates the script FNLALTAUD_CRTTRG.SQL, which re-creates alldatabase triggers. You do not need to run this script, since all database triggers were created in a previous task.
See Finalizing the Database Structure.
Note. For Informix sites, if your database has Application Functions, you use SQL to drop and re-create thesefunctions and their associated indexes, even though the underlying tables and indexes have not changed.
Copyright © 2007, Oracle. All rights reserved. 189

Apply Application Changes Chapter 4
Note. For Microsoft SQL Server and DB2 UNIX platforms, if your database has tables containing theMSSCONCATCOL or DBXCONCATCOL column, you will see SQL alter the tables and re-create theirassociated indexes, even though the underlying tables and indexes may not have changed.
Review the output from the SYSAUDIT and DDDAUDIT reports and correct any discrepancies.
Your DDDAUDIT listing shows some expected discrepancies. Tables and views deleted from the ApplicationDesigner are not automatically deleted from the system tables. PeopleSoft takes this precaution in case youhave customized information that you want to preserve. Therefore, the report lists any tables and views thatthe new release does not have. Review these tables to verify that you do not wish to preserve any customdata, and then drop the tables and views.
Your SYSAUDIT report may have some errors due to references to obsolete PeopleSoft-owned objects. Forinstance, if PeopleSoft deletes a Permission List, and you have a Role that still refers to that Permission, then itwill appear on the SYSAUDIT report.
If your database platform is Microsoft SQL Server or DB2 UNIX/NT, your Alter Audit may reportdiscrepancies on some Front Office/PayBill tables that have been exported from your FSCM database andimported into your HRCS database during the upgrade. These occur because the FSCM database containsslightly different field lengths/formats compared with the corresponding fields in the HRCS database. Pleaserun the generated Alter Audit script to ensure database consistency.
See the Enterprise PeopleTools PeopleBook: Data Management for your new release.
Properties
DatabaseOrientation
Initial or MTP Products Platforms Languages
Target Both All All All
Task 4-22-6: Run a Final SETINDEX ReportThe SETINDEX SQR updates index overrides stored in the PSIDXDDLPARM table. The SQR updates thevalues stored in the PARMVALUE field with current values found in the system catalog. Running SETINDEXcleans up fragmentation issues that may have occurred during data conversion.
Properties
DatabaseOrientation
Initial or MTP Products Platforms Languages
Target Both All DB2 z/OS
Oracle
All
Task 4-22-7: Run a Final SETTABLE ReportThe SETTABLE SQR updates table overrides stored in the PSRECDDLPARM table. The SQR updatesthe values stored in the PARMVALUE field with the current values found in the system catalog. RunningSETTABLE will clean up fragmentation issues that may have occurred during data conversion.
190 Copyright © 2007, Oracle. All rights reserved.

Chapter 4 Apply Application Changes
Properties
DatabaseOrientation
Initial or MTP Products Platforms Languages
Target Both All Oracle All
Copyright © 2007, Oracle. All rights reserved. 191

Apply Application Changes Chapter 4
192 Copyright © 2007, Oracle. All rights reserved.

CHAPTER 5
Complete Database Changes
This chapter discusses:
• Understanding Database Changes
• Configuring the Upgrade Environment
• Reapplying Customizations
• Setting Up Security
• Completing Portal Data Conversion
• Updating Department Security
• Backing Up Before Manual Changes
• Converting Retirees with Pay
• Running the Person Organization Audits
• Upgrading Global Payroll Country Extensions
• Validating Alternative Overtime Upgrade
• Updating Payroll Interface Definitions
• Modifying Post Process Formulas
• Verifying Record and RecordField References
• Deleting Obsolete Accumulators
• Updating Jobs and Process for GP Packager
• Upgrading Rules
• Setting Up General Ledger Interface
• Configuring PayBill
• Validating EE Garn Payee Data
• Setting Up US Custom Garnishment Rules
• Validating EE Garn Rule Data
• Reviewing PeopleTools Functionality
• Preparing the Content Provider Registry
• Updating the Portal Options Data
• Stamping the Database
• Reviewing Change Control
Copyright © 2007, Oracle. All rights reserved. 193

Complete Database Changes Chapter 5
• Backing Up Before Testing
• Testing Your Copy of Production
Understanding Database ChangesMany changes were made in the previous chapters of this documentation. In this chapter, you complete thesechanges so that you can begin testing your Copy of Production. By testing your Copy of Production, youensure that you can still operate day-to-day processes on your new PeopleSoft release.
Task 5-1: Configuring the Upgrade EnvironmentThis section discusses:
• Configure Application Server
• Configure Portal
Task 5-1-1: Configure Application ServerRunning Portal requires a fully functional application server domain. In this step, you configure yourapplication server.
Note. If you configured your application server earlier in the upgrade, you can skip this step.
Tips for configuring and starting the application server:
• Make sure that the Application Server domain you configure points to the Target database for this passof the upgrade.
• Set a different JSL port for each database instance.
See the Enterprise PeopleTools installation guide for your database platform.
Properties
DatabaseOrientation
Initial or MTP Products Platforms Languages
Target Both All All All
Task 5-1-2: Configure PortalPeopleSoft applications are accessed through the Portal. You need to grant users access to complete theupgrade process. You must install and configure the Portal to complete the upgrade.
Note. If you configured your Portal earlier in the upgrade, you can skip this step.
194 Copyright © 2007, Oracle. All rights reserved.

Chapter 5 Complete Database Changes
You also must define a password on the Node Definitions page for Single Signon to work properly. If you donot define a password, the signon page appears when trying to access a report directly, instead of the reportitself. To avoid this issue, follow the procedure below to assign a password.
To assign a password:
1. Select PeopleTools, Integration Broker, Integration Setup, Nodes.2. Click Search.3. Select the database’s default local node.The default local node shows a Y in the Default Local Node column.
4. On the Node Definitions page, select Password in the Authentication Option field.5. Enter a password in the Password field.6. Enter the password again in the Confirm Password field.7. Enter the default user in the Default User ID field.8. Save the node definition.9. Reboot the application server and web server.
See the Enterprise PeopleTools installation guide for your database platform.
Properties
DatabaseOrientation
Initial or MTP Products Platforms Languages
Target Both All All All
Task 5-2: Reapplying CustomizationsThis section discusses:
• Understanding the Reapplication
• Performing Customized Object Adjustment
• Registering Portal Navigation Objects
Understanding the ReapplicationIn this task, you work with your customized objects to ensure that they are properly integrated into yourupgraded database.
When reapplying customizations to batch processes, please review the appendix “Reviewing Batch ProgramChanges” for information about changes in batch processes.
Copyright © 2007, Oracle. All rights reserved. 195

Complete Database Changes Chapter 5
Task 5-2-1: Performing Customized Object AdjustmentWhen you reviewed your upgrade compare reports, you decided whether to take the Source or Target versionof the objects. If you took the Oracle-delivered version of an object instead of your own customized version,you may need to customize the new objects to get the blend of new standard features and your customfeatures. In complex cases, this may take several iterations. You need to make manual adjustments to theobjects to apply these customizations.
Once you reapply all of your customizations, you should run the DDDAUDIT and SYSAUDIT reports tomake sure that you did not introduce any problems into your system.
Reapply any Mass Change or EDI customizations.
See “Prepare Your Database,” Identifying Customizations.
Be aware that you must not overwrite Oracle-loaded data. The customizations, extracted during an earlier step,must be manually applied now.
In another step, you applied the Oracle-delivered record group assignments.
See “Apply Application Changes,” Loading Data for Data Conversion, Importing Record Groups.
If you maintain any custom record group assignments, reapply them to your Copy of Production database now.
During Move to Production passes, you will not need to reapply these customizations. The changes you makenow will be copied to any subsequent Copy of Production database using Data Mover scripts.
Properties
DatabaseOrientation
Initial or MTP Products Platforms Languages
Target Initial All All All
Task 5-2-2: Registering Portal Navigation ObjectsYou must register your customized objects, such as menus and components, in order to access them inPortal. You can use the Registration Wizard or the Menu Import process to grant access to the appropriatecomponents. Make sure that you register your components for all of your portals (for example, Customer,Supplier, Employee, and so forth). Also, make sure that you select the node name that matches the database.Do not use the Local node.
See the Enterprise PeopleTools PeopleBook: PeopleSoft Application Designer for your new release, “Usingthe Registration Wizard.”
See the Enterprise PeopleTools PeopleBook: Internet Technology for your new release, “AdministeringPortals.”
Properties
DatabaseOrientation
Initial or MTP Products Platforms Languages
Target Initial All All All
196 Copyright © 2007, Oracle. All rights reserved.

Chapter 5 Complete Database Changes
Task 5-3: Setting Up SecurityThis section discusses:
• Understanding Security
• Set Up Security
• Synchronize CREF Permissions
• Grant Access to Personalize Homepage
Understanding SecurityIn this task you perform steps to set up security, grant access to the user ID, set up permissions lists, andgrant access to navigation and homepages.
Task 5-3-1: Set Up SecurityThis section discusses:
• Understanding Security Setup
Understanding Security SetupSelect the PeopleTools, Security folder now to add the new PeopleTools and application menus, delete oldmenus, and set up appropriate operator security for your system.
Many menu additions and deletions have occurred. Examine the menu compare report and the PeopleSoftDemo database for details of the required security changes, then decide which of your roles and permissionlists should have access to each of the new menus.
Many tasks in this chapter instruct you to select a specific menu within the new PeopleSoft release. To performthese tasks, set up appropriate security for each of the menus referenced in each of the tasks.
At this time, you need to review the two security views that are used for Global Security and Row LevelSecurity. The following naming conventions have been adopted in the new PeopleSoft HRMS release:
List Type Format
Data Permission HCDPXXXXXX (Where XXXXXX can be any specificationyou choose.)
Component Permission Lists HCCPXXYYYY (Where XX is the product code and YYYY isany specification you choose.)
Primary Permission Lists HCPPXXXXXX (where XXXXXX is any specification youchoose.)
If you decide to change your security to use this naming convention, you do not need to take any further action.However, if you do not intend to use the naming convention given above, then you need to modify the WHEREclause in the following two views to reference the naming convention you have decided to follow.
Copyright © 2007, Oracle. All rights reserved. 197

Complete Database Changes Chapter 5
Security View Function
OPRDEFN_SCRTY3 Data Permissions (Row Level Security)
OPRDEFN_SCRTY4 Primary Permissions (Global Security)
See the PeopleSoft Enterprise Portal Solutions PeopleBook: Enterprise Portal Application Technology for yournew release, information on Oracle-delivered security.
Note. Move to Production: If you changed the user profiles in your production system after you froze yourPeopleTools, you must manually apply the changes to your Copy of Production database before the end ofthe final Move to Production.
Properties
DatabaseOrientation
Initial or MTP Products Platforms Languages
Target Initial All All All
Task 5-3-2: Synchronize CREF PermissionsThis section discusses:
• Understanding Content Reference Permissions
• Running the Portal Security Synchronization Process
Understanding Content Reference PermissionsAs part of the PeopleTools 8.4x Portal architecture, Portal Registry Structures reference permission lists. Atthis point, however, the Portal Registry Structures copied from the Demo database do not reference anypermission lists on the Copy of Production database. This synchronization program will match the existingpermission lists to the appropriate Registry Structures and update it.
Note. The user ID that invokes this process must have the security role Portal Administrator. Otherwise,the process may terminate abnormally.
Note. Your Process Scheduler must be running in order to perform this task.
Running the Portal Security Synchronization ProcessFollow the steps below to run the Portal security synchronization process.
To run the security synchronization process:
1. From your browser, sign in to your Target database.2. Select PeopleTools, Portal, Portal Security Sync.3. Click Add a New Value.4. Enter the run control ID UPG_PORTAL_SYNC_BOTH.5. Click Add.
198 Copyright © 2007, Oracle. All rights reserved.

Chapter 5 Complete Database Changes
6. Keep the default value for the default portal registry name in the Portal Name field (for example:EMPLOYEE, CUSTOMER, or SUPPLIER).
7. Click Save.8. Click Run.9. In the Process Scheduler page, check that you set your parameters correctly.10. Click OK.11. Click the Process Monitor link to monitor the program’s process.12. Repeat steps 6 through 11 for each Portal name used in the database for your specific applications.With each repetition, in step 6 change the Portal Name field to one of the following: EMPLOYEE,CUSTOMER, SUPPLIER, MOBILE, and so on.
13. Review any messages received during the running of this process with your Portal Administrator.
See the Enterprise PeopleTools PeopleBook: Internet Technology for your new release.
Note. If the permission lists for your upgrade user do not allow you access to a component, you willencounter this error when running the security synchronization process for that page: Securitysynchronization failed for Portal Object. This error may indicate other problems with thecomponent or folder, but you should check your security first.
Properties
DatabaseOrientation
Initial or MTP Products Platforms Languages
Target Initial All All All
Task 5-3-3: Grant Access to Personalize HomepageThis section discusses:
• Understanding Access to Portal Homepage
• Updating Homepage Personalization Permission List
• Adding the Portal User Role
Understanding Access to Portal HomepageYou must complete this step if you use any of the Portal Pack products or pagelets. In order to add, remove,or change the layout of the homepage, you must grant homepage personalization security access to allnon-guest users.
Updating Homepage Personalization Permission ListTo update the homepage personalization permission list:
1. Using PeopleSoft Data Mover, sign in to the Target database.2. Open the Data Mover script PS_HOME\SCRIPTS\PORTAL_HP_PERS.DMS.3. Run this script against the Target database.4. Close Data Mover.
Copyright © 2007, Oracle. All rights reserved. 199
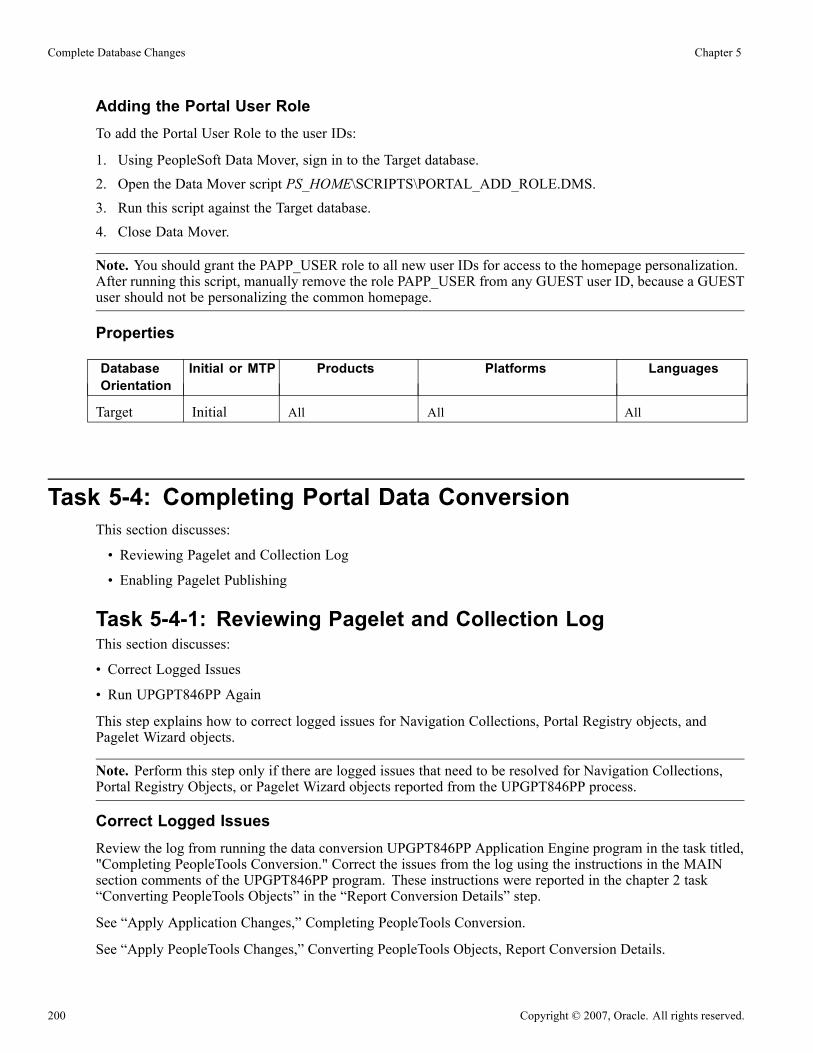
Complete Database Changes Chapter 5
Adding the Portal User RoleTo add the Portal User Role to the user IDs:
1. Using PeopleSoft Data Mover, sign in to the Target database.2. Open the Data Mover script PS_HOME\SCRIPTS\PORTAL_ADD_ROLE.DMS.3. Run this script against the Target database.4. Close Data Mover.
Note. You should grant the PAPP_USER role to all new user IDs for access to the homepage personalization.After running this script, manually remove the role PAPP_USER from any GUEST user ID, because a GUESTuser should not be personalizing the common homepage.
Properties
DatabaseOrientation
Initial or MTP Products Platforms Languages
Target Initial All All All
Task 5-4: Completing Portal Data ConversionThis section discusses:
• Reviewing Pagelet and Collection Log
• Enabling Pagelet Publishing
Task 5-4-1: Reviewing Pagelet and Collection LogThis section discusses:
• Correct Logged Issues
• Run UPGPT846PP Again
This step explains how to correct logged issues for Navigation Collections, Portal Registry objects, andPagelet Wizard objects.
Note. Perform this step only if there are logged issues that need to be resolved for Navigation Collections,Portal Registry Objects, or Pagelet Wizard objects reported from the UPGPT846PP process.
Correct Logged IssuesReview the log from running the data conversion UPGPT846PP Application Engine program in the task titled,"Completing PeopleTools Conversion." Correct the issues from the log using the instructions in the MAINsection comments of the UPGPT846PP program. These instructions were reported in the chapter 2 task“Converting PeopleTools Objects” in the “Report Conversion Details” step.
See “Apply Application Changes,” Completing PeopleTools Conversion.
See “Apply PeopleTools Changes,” Converting PeopleTools Objects, Report Conversion Details.
200 Copyright © 2007, Oracle. All rights reserved.

Chapter 5 Complete Database Changes
Run UPGPT846PP AgainIn this step, you run the UPGPT846PP process again.
Note. The Application Engine process UPGPT846PP can be run repeatedly, if necessary, as you resolvedata issues.
To run UPGPT846PP again:
1. Run the Application Engine conversion process UPGPT846PP with the upgrade user ID.
The program can be run from the command line with the following:
$PS_HOME\bin\client\winx86\psae -CD dbname -CT dbtype -CS dbservername -CO ⇒oprid -CP oprpswd -R 1 -AI UPGPT846PP
2. Review the log file according to the instructions in the previous step.
3. If there are any remaining issues, correct them and rerun UPGPT846PP.
4. Repeat steps 2 and 3, if necessary, until there are no remaining issues for Navigation Collections, PortalRegistry objects, or Pagelet Wizard objects.
Properties
DatabaseOrientation
Initial or MTP Products Platforms Languages
Target Both All All All
Task 5-4-2: Enabling Pagelet PublishingThis step enables the creation of homepage pagelets for Navigation Collections and Pagelet Wizard. The scriptname for your upgrade path is:
PTPP_PORTAL_PACK.DMS
Properties
DatabaseOrientation
Initial or MTP Products Platforms Languages
Target Both All All All
Task 5-5: Updating Department SecurityThis section discusses:
• Understanding Department Security
• Refreshing Operator Security
• Refreshing Transaction Records
Copyright © 2007, Oracle. All rights reserved. 201

Complete Database Changes Chapter 5
Understanding Department SecurityIn this task you update the Operator Security Join table and the transaction side Security Join Tables sothat they are based on the most current information. You need to run this step whether you use departmentlevel security or not.
Task 5-5-1: Refreshing Operator SecurityThis process refreshes the Operator Security Join Table. You must run this process whenever a Security Typeis modified, when a Security Tree is modified or added, or when a ROWSECCLASS is modified or added.
To refresh the Operator Security Join Table:
1. From your browser, sign on to your Copy of Production database, keeping the default browser address.2. Select Set Up HRMS, Security, Core Row Level Security, Refresh SJT_CLASS_ALL.3. Click Add a New Value.4. Enter UPGR_OPRSECURITY on the Run Control selection panel and click Add.5. On the Run Control page, keep all preset defaults for upgrading and click Run.6. On the Process Scheduler Request page, click OK.7. Monitor the process from the Process Monitor.8. Select Set Up HRMS, Security, Core Row Level Security, Refresh SJT_OPR_CLS.9. Enter UPGR_OPRSECURITY on the Run Control selection panel and click Search.10. On the Run Control page, keep all preset defaults for upgrading and click Run.11. On the Process Scheduler Request page, click OK.12. Monitor the process from the Process Monitor
See PeopleSoft Enterprise HRMS 9.0 Application Fundamentals, “Setting Up and Administering HRMSSecurity.”
Properties
DatabaseOrientation
Initial or MTP Products Platforms Languages
Target Both All All All
Task 5-5-2: Refreshing Transaction RecordsThis process updates the transaction side Security Join Tables.
To refresh the transaction side Security Join Tables:
1. From your browser, sign on to your Copy of Production database, keeping the default browser address.
2. Select Set Up HRMS, Security, Core Row Level Security, Refresh Trans SJT Tables.
3. Click Add a New Value.
4. Enter UPGR_OPRSECURITY on the Run Control selection panel and click Add.
5. On the Run Control page, keep all preset defaults for upgrading and click Run.
202 Copyright © 2007, Oracle. All rights reserved.

Chapter 5 Complete Database Changes
6. On the Process Scheduler Request page, click OK.7. Monitor the process from the Process Monitor.
See PeopleSoft Enterprise HRMS 9.0 Application Fundamentals, “Setting Up and Administering HRMSSecurity.”
Properties
DatabaseOrientation
Initial or MTP Products Platforms Languages
Target Both All All All
Task 5-6: Backing Up Before Manual ChangesBack up your Copy of Production database now. This enables you to restart your upgrade from this pointshould you experience any database integrity problems during the remaining tasks in the upgrade process.
Properties
DatabaseOrientation
Initial or MTP Products Platforms Languages
Target Both All All All
Task 5-7: Converting Retirees with PayThis section discusses:
• Understanding the Conversion for Retirees with Pay
• Running Retiree Additional Pay Report UVPYT05
• Running Retiree Additional Pay Report UVPYT06
• Running Retiree Additional Pay Report UVPYT07
• Running Upgrade Conversion for Retirees with Pay
• Rebuilding Job Flags
Understanding the Conversion for Retirees with PayIn this task, you migrate retirees receiving a pension outside of Pension Administration from employees topersons of interest, in order to follow the new Person Model design.
Copyright © 2007, Oracle. All rights reserved. 203

Complete Database Changes Chapter 5
In releases prior to PeopleSoft 8.9, retirees that were paid through the system but outside of PensionAdministration appeared as employees. With the Person Model changes delivered in PeopleSoft 8.9 andbeyond, these retirees become Persons of Interest (POI). Because there is no way to predict every scenarioused to process the pension for the retiree, we must deliver this conversion outside of the standard upgrade dataconversion. If your data fits the scenario outlined in the list below, then you should complete this step.
Note. If your data does not fit the scenario outlined below, please consult the Global Support Center (GSC) toobtain a solution specific to your business requirements.
• This conversion assumes that these retirees belong to a company with a Tax Report Type of R for 1099R.• This conversion assumes that your Payroll System is Payroll for North America• This conversion assumes that you are not using Benefits Billing.• This conversion assumes that you are not using Benefits Administration Credits.• If the EMPL_RCD value for the employment instance is the same value for the retirement instance, theconversion sets the EMPL_RCD value to the next value available for the person on the POI instance.This includes changing the value on the payroll tables.
• If the retiree transfers to the 1099R company, the conversion changes the transfer (XFR) ACTIONto Retired with Pay (RWP).The conversion then copies the data from the row to insert the POI instance.
• If the retiree terminates from the actual company and hires into the 1099R company, the conversionchanges the termination (TER) ACTION to Retired with Pay (RWP).The conversion also changes the hire (HIR) ACTION into the 1099R company to Add Person of Interest(POI).
• This conversion sets the Benefit System for the retiree to the value specified on the Upgrade RetireeRun Control page.
• This conversion will insert or update the following tables:
- Human Resources
PER_ORG_ASGN - Insert for Retirees, Update for Survivor Beneficiaries & Joint⇒Annuitants.
PER_ORG_INST -Insert
JOB - Update and Insert if retiree transfers to 1099R Company
JOB_JR - Update and Insert if retiree transfers to 1099R Company
JOB_EARNS_DIST - Update
COMPENSATION - Update
204 Copyright © 2007, Oracle. All rights reserved.

Chapter 5 Complete Database Changes
- Federal
GVT_JOB - Update & Insert if Retiree transfers to 1099R Company
GVT_EE_KEY - Insert
GVT_PERS_DATA - Update & Insert if Retiree transfers to 1099R Company
GVT_PERS_PHONE - Update
GVT_PERS_NID - Update
GVT_EMPLOYMENT - Update
GVT_CITIZENSHIP - Update
GVT_DISABILITY - Update
GVT_JOBDIST - Update
GVT_AWD_DATA - Update
GVT_EE_DATA_TRK - Update
JOB_USF - Update
GVT_PAYROLL_DATA - Update
GVT_PAY_LIMITS - Update
- Payroll
TAX_DIST_EFFDT - if row exists Update else Insert.
TAX_DISTRIB - if row exists Update else Insert
ADDL_PAY_DATA - See Below
ADDL_PAY_EFFDT - See Below
ADDL_PAY_ERNCD - See Below
BAL_ADJ_CN_ERN - Update
BAL_ADJ_ERN - Update
CAN_ERN_BALANCE - Update
DED_LINE - Update
EARNINGS_BAL - Update
EMPL_WAGELS_CAN - Update
PAY_CHECK - Update
PAY_EARNINGS - Update
PAY_LINE - Update
PSHUP_TXN - Update
PAY_SPCL_EARNS - Update.
• For the scenarios outlined below, the conversion will convert the ADDL_PAY_ERNCD,ADDL_PAY_EFFDT, and ADDL_PAY_DATA tables in the manner described.
- The maximum EFFDT with End Date is before the retirement date.
All rows are applicable to the employee’s history. No action is taken
- The maximum EFFDT with End Date is after the retirement date.
Some rows are applicable to the employee’s history, while some are applicable to the retirementhistory. This data is too cumbersome to convert, therefore we recommend that you convert this datamanually. We provide an SQR Report, UVPYT05.SQR, to identify these rows.
Copyright © 2007, Oracle. All rights reserved. 205

Complete Database Changes Chapter 5
- The maximum EFFDT is before the retirement date.
This history is applicable to both employment and retirement periods. Therefore, the conversionprocess will insert a row for the retirement data. We also provide an SQR Report, UVPYT06.SQR toidentify these rows.
- The maximum EFFDT is after the retirement date.
This history is applicable to both employment and retirement periods. Therefore, the conversionprocess will insert a row for the retirement data. We also provide an SQR Report, UVPYT07.SQR toidentify these rows.
- The minimum EFFDT is after the retirement date.
This data is only applicable to the retiree’s history. Therefore, the conversion process will update theserows, setting the EMPL_RCD value to the value of the POI instance.
• This conversion does not modify the following tables:Payroll
AP_EXTRACT_LINE - if you use AP to create vouchers the data here will not be⇒consistent since we cannot update the data. However, you will be able to view⇒the information by navigating to: Payroll for North America > Pay Distribution⇒> Accounts Payable Information > Review AP Extract Lines
WRK_CHECK - you must complete Payroll processing before upgrading.
WRK_EARNINGS - <same as above>
WRK_LINE - <same as above>
WEK_PSHUP_TXN - <same as above>
WRK_SPCL_EARNS - <same as above>
PYRE_DETAIL - <same as above>
PYRE_INVALID <same as above>
TL_EMPL_DATA - not expecting Retirees to use Time & Labor
PY_LDTLEMP_TBL - <same as above>
CSB_EMPL_SERIES - obsolete Canadian Savings Bond functionality
CSB_REGISTRANT - <same as above>
CSB_REG_DEMON - <same as above>
Task 5-7-1: Running Retiree Additional Pay Report UVPYT05In this step, you run the Retiree Additional Pay SQR Report, UVPYT05.SQR. This report lists retirees withpay that have additional pay with an end date where the maximum EFFDT is after the retirement date.
To run the report:
1. From your web browser, sign in to the Copy of Production database.2. Select Set Up HRMS, Upgrade, Reports, 1099R AddlPay after Ret w/ End.3. Select Add a New Value4. Enter UPG_RET for the Run Control ID.5. Click Add.6. On the Add’l Pay after Ret w/ End page, click Run.7. From the Process Scheduler Request page, click OK.
206 Copyright © 2007, Oracle. All rights reserved.

Chapter 5 Complete Database Changes
8. Analyze the report to decide what rows belong to the retirement history for the each person.Apply manual modifications after running the conversion by setting the retirement rows to the EMPL_RCDvalue assigned by the conversion for the POI instance.
Properties
DatabaseOrientation
Initial or MTP Products Platforms Languages
Target Both All All All
Task 5-7-2: Running Retiree Additional Pay Report UVPYT06In this step, you run the Retiree Additional Pay SQR Report, UVPYT06.SQR. This report lists retirees withpay that have additional pay without an end date where the maximum EFFDT is before the retirement date.
To run the report:
1. From your web browser, sign in to the Copy of Production database.2. Select Set Up HRMS, Upgrade, Reports, 1099R AddlPay b4 Ret w/o End.3. Enter UPG_RET for the Run Control ID.4. Click Search.5. On the Add’l Pay b4 Ret w/o End page, click Run6. From the Process Scheduler Request page, click OK.7. Keep this report as a reference to verify that the conversion converted the data properly.
Properties
DatabaseOrientation
Initial or MTP Products Platforms Languages
Target Both All All All
Task 5-7-3: Running Retiree Additional Pay Report UVPYT07In this step, you run the Retiree Additional Pay SQR Report, UVPYT07.SQR. This report lists retirees withpay that have additional pay without an end date where the maximum EFFDT is after the retirement date
To run the report:
1. From your web browser, sign in to the Copy of Production database.2. Select Set Up HRMS, Upgrade, Reports, 1099R AddlPay after Ret w/o End.3. Enter UPG_RET for the Run Control ID.4. Click Search.5. On the Add’l Pay after Ret w/o End page, click Run.6. From the Process Scheduler Request page, click OK.7. Keep this report as a reference to verify that the conversion converted the data properly.
Copyright © 2007, Oracle. All rights reserved. 207

Complete Database Changes Chapter 5
Properties
DatabaseOrientation
Initial or MTP Products Platforms Languages
Target Both All All All
Task 5-7-4: Running Upgrade Conversion for Retirees with PayIn this step, you run the Application Engine Program to upgrade retirees with pay from employees to personsof interest.
To run the program:
1. From your web browser, sign in to the Copy of Production database.2. Select Set Up HRMS, Upgrade, 1099R Conversion.3. Select Add a New Value.4. Enter UPG for the Run Control ID.5. Click Add.6. In the Benefits System field, select a value for retirees with pay.The JOB table will be populated with this value.
Upg Ret Runcntl page
7. Click the Run button.8. From the Process Scheduler Request page, click OK.9. Click the Process Monitor link to monitor the program’s process.
Properties
DatabaseOrientation
Initial or MTP Products Platforms Languages
Target Both All All All
Task 5-7-5: Rebuilding Job FlagsAfter successfully completing the conversion in the previous step, you must rebuild PRIMARY_JOBS byrunning the SQR utility BEN500.SQR.
208 Copyright © 2007, Oracle. All rights reserved.

Chapter 5 Complete Database Changes
To run the SQR utility:
1. From your web browser, sign in to the Copy of Production database.
2. Select Benefits, Maintain Primary Jobs, Rebuild Primary Job Flags.
3. Select Add a New Value.
4. Enter the run control UPG_PRIMARY_JOBS and click Run.
5. Click the Process Monitor link to monitor the program’s process.
Properties
DatabaseOrientation
Initial or MTP Products Platforms Languages
Target Both All All All
Task 5-8: Running the Person Organization AuditsThis section discusses:
• Understanding the Person Organization Audits
• Running Conversion Audits
Understanding the Person Organization AuditsRun the conversion audits for records PER_ORG_INST and PER_ORG_ASGN - UVHCW01.
At the beginning of the upgrade you ran the Person Relationship Audit Report to list orphaned rows. If youdid not clean up the orphans listed on those reports you will have orphans in the PER_ORG_INST andPER_ORG_ASGN. This report audits the load of record PER_ORG_ASGN against records PERSON andEMPLOYMENT. You will need to work with your Database Administrator to correct these orphans using yourplatform-specific SQL tool. These rows will not be accessible through the new PeopleSoft release.
This report will list the following:
• The audit of the load of PER_ORG_ASGN against PERSON lists EMPLIDs that are not inPER_ORG_ASGN.
Conversion of a commercial database should result in at least one row in PER_ORG_ASGN for everyEMPLID.
• The audit of the load of PER_ORG_ASGN against EMPLOYMENT checks that everyEMPLID/EMPL_RCD was converted to PER_ORG_ASGN.
There should be a one-to-one relationship between the rows in EMPLOYMENT and the rows inPER_ORG_ASGN.
• Check that the number of rows inserted in record PER_ORG_ASGN is correct against PERSON andEMPLOYMENT.
Copyright © 2007, Oracle. All rights reserved. 209

Complete Database Changes Chapter 5
Task 5-8-1: Running Conversion AuditsFollow the steps below to run Conversion Audits for PER_ORG_INST and PER_ORG_ASGN.
To run the report:
1. Launch PeopleTools and sign on to the Copy of Production database.2. Select Set Up HRMS, Upgrade, Reports, PER_ORG Records Audits.3. Click Add.4. Enter the run control UPG_PER_ORG.5. Click Run.6. Click the Process Monitor link to monitor the program’s process.
Properties
DatabaseOrientation
Initial or MTP Products Platforms Languages
Target Initial All All All
Task 5-9: Upgrading Global Payroll Country ExtensionsThis section discusses:
• Understanding Global Payroll Country Extensions Upgrade
• Creating Country Extensions Rule Packages
• Applying the Licensed Rule Package
• Applying the Unlicensed Rule Package
• Creating the Final Rule Package
• Applying the Final Rule Package
• Creating the Consolidated NonRule Package
• Creating Individual NonRule Packages
• Applying the Consolidated NonRule Package
• Applying Individual NonRule Packages
• Creating the Rule Delete Package
• Applying the Rule Delete Package
• Finalizing the Rule Delete Process
• Updating Install Options on the Target Database
• Setting the Store Option for System Elements
• Exporting HR Rate Codes
210 Copyright © 2007, Oracle. All rights reserved.

Chapter 5 Complete Database Changes
• Importing HR Rate Codes
• Configuring Self Service Payslip Options
• Setting Up Global Payroll for Switzerland
• Setting Up Global Payroll for France
Understanding Global Payroll Country Extensions UpgradeIn this task, you upgrade or add Oracle-delivered elements and system data for each Global Payroll CountryExtension using the Rule and Non-Rule Packager functionality delivered as part of Global Payroll. You willalso apply additional steps for each country, when required.
Note. Perform this task only if you are upgrading PeopleSoft Global Payroll Country Extensions alreadyinstalled on your Copy of Production database or newly licensing PeopleSoft Global Payroll CountryExtensions. If you do not use Global Payroll or use only the Global Payroll core product, you can skip this task.
Oracle uses the convention XXX to indicate the three-character country code defined by ISO. To apply theseinstructions, you have to replace XXX with the relevant country code. The country codes of the 17 countriessupported by Global Payroll are shown in the table below:
Country Extension Country Codes (ISO codes)
Australia AUS
Brazil BRA
France FRA
Germany DEU
Hong Kong HKG
India IND
Italy ITA
Japan JPN
Malaysia MYS
Mexico MEX
Netherlands NLD
New Zealand NZL
Singapore SGP
Spain ESP
Switzerland CHE
Copyright © 2007, Oracle. All rights reserved. 211

Complete Database Changes Chapter 5
Country Extension Country Codes (ISO codes)
United Kingdom GBR
United States USA
Task 5-9-1: Creating Country Extensions Rule PackagesThis section discusses:
• Understanding Licensed and Unlicensed Country Extensions Rule Packages
• Updating Installation Options
• Creating Country Extensions Rule Package Definitions
• Creating and Exporting the Country Extensions Rule Packages
Understanding Licensed and Unlicensed Country Extensions Rule PackagesIn this step, you create licensed and unlicensed country extensions rule packages on the New Release Demodatabase. Both of the package definitions will be generated by the Application Engine UPG_GPCECRT, basedon the Install Flags for GP Countries. The licensed country extension rule package UPGRULL will contain allthe Oracle-delivered rule elements for the countries that you have already installed on your Copy of Productiondatabase, and the unlicensed country extension package UPGRULU will contain all Oracle-delivered ruleelements for countries that you have not installed on your Copy of Production database. (UPGRULU alsoincludes countries you may be newly licensing now.)
Updating Installation OptionsOn the New Release Demo database, the installation options for all Global Payroll County Extensions areselected by default. Therefore you will have to clear the install check boxes for the countries you have notlicensed. This will enable the Application Engine UPG_GPCECRT to create two package definitions based onthe country extensions that you use and the ones that you do not use.
Note. At the end of the upgrade, you will have rules elements for all Global Payroll Country Extensions onyour database. However, we want you to clear installation options at this time so that you can save time bynot running the Compare Report for unlicensed country extensions while applying the rules package on yourCopy of Production database.
To update installation options:
1. From your browser, sign in to the New Release Demo database.2. Select Set Up HRMS, Install, Installation Table.3. Click the Installed GP Countries link.4. Clear the check boxes corresponding to all unlicensed country extensions on your old release.If you are licensing a new country extension, you can clear the check box for that country extension herebecause you will not have any customizations on your Production database (which have to be compared).
5. Click OK.6. Click Save.
Note. You can ignore the message that pops up when you click Save.
212 Copyright © 2007, Oracle. All rights reserved.

Chapter 5 Complete Database Changes
Creating Country Extensions Rule Package DefinitionsTo create the rule package definitions:
1. Sign in to the New Release Demo database using Application Designer.2. Open the Application Engine UPG_GPCECRT.3. Run the Application Engine UPG_GPCECRT from Application Designer using the run control of yourchoice.
Note. Running the Application Engine will overwrite any existing Rule Package definitions that havethe name UPGRULL or UPGRULU.
Creating and Exporting the Country Extensions Rule PackagesIn this step, you create and export the licensed and unlicensed country extensions rule packages. You will haveto run through this step twice—once for Package ID UPGRULL and then again for Package ID UPGRULU.
Note. UPGRULL will not be generated if you are only licensing a new country extension and were not usingany Global Payroll County Extension previously. UPGRULU will not be generated if you have licensed all17 country extensions. However, in most cases you will have both of the packages. Run this step for eachgenerated package.
Note. Before proceeding with this step, ensure that the Process Scheduler is up and running.
To create and export the package:
1. From your browser, sign in to the New Release Demo database.2. Select Set Up HRMS, Product Related, Global Payroll & Absence Mgmt, Elements, Manage GlobalPayroll Packages, Create/Export Rule Package.
3. On the Find an Existing Value tab, search for the Package ID (UPGRULL or UPGRULU) and openthe package definition.
4. Select the Package Processing tab.5. Select the Create Package, Create Scripts, and Export Package check boxes.6. For the script location, enter the PS_HOME/SCRIPTS directory of the New Release Demo database.7. Click Process.8. On the Process Monitor page, wait for the process to run successfully.Verify that the program completed without errors by reviewing the message log. If you encounter anyissues or need more information, refer to PeopleBooks.
See PeopleSoft Enterprise 9.0 Global Payroll PeopleBook, “Using the Utilities.”9. Store the generated script and data files. There will be 3 scripts and 1 data file generated in thePS_HOME/SCRIPTS and PS_HOME/DATA directories respectively.They will be named as shown below. (Replace PACKAGE_ID with UPGRULL or UPGRULU, asapplicable.)
PACKAGE_ID_EXP.DMS
PACKAGE_ID_IMP.DMS
GP_CLEANUP.DMS
Copyright © 2007, Oracle. All rights reserved. 213

Complete Database Changes Chapter 5
PACKAGE_ID_DAT.DAT
Note. Store the generated script and data files until the final upgrade pass is complete. They may beneeded in the future.
10. If both rule packages UPGRULL and UPGRULU were generated, repeat the steps above for the secondpackage.
Properties
DatabaseOrientation
Initial or MTP Products Platforms Languages
Source Initial Global Payroll AllCountries
All All
Task 5-9-2: Applying the Licensed Rule PackageThis section discusses:
• Importing and Comparing the Licensed Country Extensions Rule Package
• Upgrading the Licensed Country Extension Rule Package
Note. You can skip this step if you are only licensing new country extensions and do not have any countryextensions installed on your Copy of Production (Target) database, because you will not have a UPGRULLpackage.
Note. Before proceeding with this step, ensure that the Process Scheduler is up and running. Remember toselect the Compare Report option while applying UPGRULL.
Importing and Comparing the Licensed Country Extensions Rule PackageThe licensed country extensions rule package has to be applied on the Copy of Production (Target) databaseduring the Initial pass.
To import and compare the package:
1. Place the script files of the rule package UPGRULL in the PS_HOME/SCRIPTS directory of the Copy ofProduction (Target) database.The script files are:
UPGRULL_IMP.DMS
GP_CLEANUP.DMS
2. Place the data file UPGRULL_DAT.DAT in the PS_HOME/DATA directory of your Copy of Production(Target) database.
3. From your browser, sign in to the Copy of Production (Target) database.4. Select Set Up HRMS, Product Related, Global Payroll & Absence Mgmt, Elements, Manage GlobalPayroll Packages, Apply Rule Package.
5. Add a new Package ID UPGRULL.6. Select the Package Processing tab and complete the following steps:
214 Copyright © 2007, Oracle. All rights reserved.

Chapter 5 Complete Database Changes
a. Select the Import Packages check box.b. For the script location, enter the PS_HOME/SCRIPTS directory.c. Select the Compare Package check box.d. Select the Create Compare Report check box.e. Under Compare Processing, select the Update Statistics check box.f. Under Compare Report Print Options, select the Errors/Warnings, Modified, and New check boxes.g. Under Compare Processing, select the Update Statistics check box.h. Click Process.
7. On the Process Monitor page, verify that the process runs to success.8. Review the Rule Package Compare Report PDF file that was generated for detailed information aboutwhich elements are in an error or warning status, and whether an element is being added or modified.This is a field-by-field compare report.
See PeopleSoft Enterprise 9.0 Global Payroll PeopleBook, “Using the Utilities.”
9. Select Set Up HRMS, Product Related, Global Payroll & Absence Mgmt, Elements, Manage GlobalPayroll Packages, Apply Rule Package.
10. On the Find an Existing Value tab, search for the Package ID UPGRULL and open the package.
11. All elements with a warning or error message will be sorted to the top of the list.
You have to fix all the errors and review all the warnings. You can ignore any elements with Action = InfoOnly and the Upgrade check box cleared and unavailable for selection, as these elements are informationalonly and will not be upgraded.
The compare process clears the Upgrade option for any elements contained in the PeopleSoft RulePackage with Action = Upgrade for which you have taken ownership and you have modified. Thereforeyou should do the following:
a. Document the modifications you made to the original element.
b. Select the Upgrade option to apply the current PeopleSoft-software settings of the element.
Note. You can ignore any PS Delivered/PS Modified warning messages.
You will reapply the modifications later in the upgrade. These updates are included in the Rule Packageyou apply during the Move to Production phase.
Note. There are some changes that you can make to Oracle-delivered elements that do not force you to takeownership of the element (as a result, the Upgrade option might still be selected for these elements). Oraclesuggests that during this step you review all of the modifications you made to Oracle-delivered elements todetermine whether you want to take the updated Oracle-delivered element definitions or retain your elementmodifications. Review the Upgrade Flags on the Rule Package and set them accordingly.
Upgrading the Licensed Country Extension Rule PackageTo upgrade the package:
1. From your browser, sign in to the Copy of Production (Target) database.
2. Select Set Up HRMS, Product Related, Global Payroll & Absence Mgmt, Elements, Manage GlobalPayroll Packages, Apply Rule Package.
Copyright © 2007, Oracle. All rights reserved. 215

Complete Database Changes Chapter 5
3. On the Find an Existing Value tab, search for Package ID UPGRULL and open the package.4. Select the Package Processing tab.a. Select the Upgrade Package check box.b. Under Upgrade Processing, select the Update Statistics check box.c. Under Continue Upgrade Processing, leave the With Errors and With Warnings check boxes cleared.d. Click Process.
5. On the Process Monitor page, verify that the process runs to success.6. Click the “Go back to Apply Rule Package” link.7. On the Find an Existing Value tab, search for the Package ID UPGRULL and open the package.8. Select the Package Elements tab.9. Make sure that the first element displays Success in the Results column.Then scroll down until you see the first element that has the Upgrade check box selected and makesure that the Upgrade Status is Done.
Properties
DatabaseOrientation
Initial or MTP Products Platforms Languages
Target Initial Global Payroll AllCountries
All All
Task 5-9-3: Applying the Unlicensed Rule PackageThe unlicensed country extensions rule package has to be applied on the Copy of Production (Target) databaseduring the Initial Pass.
Note. You can skip this step if you have already licensed all seventeen Global Payroll Country Extensions inthe old release, which means that you do not have any unlicensed country extension to upgrade.
Note. Before proceeding with this step, ensure that the Process Scheduler is up and running. You do not haveto run the Compare Report while applying UPGRULU.
To apply the package:
1. Place all the script files of the rule package in the PS_HOME/SCRIPTS directory of the Copy of Production(Target) database. The script files are:
UPGRULU_IMP.DMS
GP_CLEANUP.DMS
2. Place the data file UPGRULU_DAT.DAT of the rule package in the PS_HOME/DATA directory of theCopy of Production (Target) database.
3. From your browser, sign in to the Copy of Production (Target) database.4. Select Set Up HRMS, Product Related, Global Payroll & Absence Mgmt, Elements, Manage GlobalPayroll Packages, Apply Rule Package.
216 Copyright © 2007, Oracle. All rights reserved.

Chapter 5 Complete Database Changes
5. Add the new Package ID UPGRULU.6. Select the Package Processing tab and complete the following steps:a. Select the Import Packages check box.b. For the script location, enter the PS_HOME/SCRIPTS directory.c. Select the Compare Package check box.d. Leave the Create Compare Report check box cleared.e. Under Compare Processing, select the Update Statistics check box.f. Select the Upgrade Package check box.g. Under Upgrade Processing, select the Update Statistics check box.h. Under Continue Upgrade Processing, leave the With Errors check box cleared and select the WithWarnings check box.
i. Click Process.7. On the Process Monitor page, verify that the job runs to success.8. Click the “Go back to Apply Rule Package” link.9. Search for the Package ID UPGRULU and open the package.10. Select the Package Elements tab.11. Make sure that the first element displays Success in the Results column.Then scroll down until you see the first element that has the Upgrade check box selected and makesure that the Upgrade Status is Done.If you have issues or need more information, refer to PeopleBooks.
See PeopleSoft Enterprise 9.0 Global Payroll PeopleBook, “Using the Utilities.”
Properties
DatabaseOrientation
Initial or MTP Products Platforms Languages
Target Initial Global Payroll AllCountries
All All
Task 5-9-4: Creating the Final Rule PackageThis section discusses:
• Understanding the Final Country Extensions Rule Package
• Applying Element Customizations
• Stamping Modified Rules with a New Version
• Creating and Exporting the Final Country Extensions Rule Package
Understanding the Final Country Extensions Rule PackageIn this step, you create the final country extensions rule packages on the upgraded Copy of Production(Source) database. The package will contain all Oracle-delivered as well as customized rule elements for all17 Global Payroll countries.
Copyright © 2007, Oracle. All rights reserved. 217

Complete Database Changes Chapter 5
Note. If the final country extensions rule package has already been created and exported in a previous Moveto Production pass, and no changes to the package are expected in this pass, you do not have to repeat thistask. You can reuse the package that was exported in the previous Move to Production pass for applicationon the Target database.
Applying Element CustomizationsIn this step, you reapply your element modifications to ensure that they are properly integrated into yourupgraded database.
When you reviewed your upgrade compare reports, you had to decide whether to take the Source or Targetversion of the elements. If you have taken the PeopleSoft-software version of an element over your ownmodified version, you may need to do some modifications to the new elements to get the blend of newstandard features and your custom features. In complex cases, this may take several iterations. You need tomake manual adjustments to the elements to apply these modifications.
When you reapply an element modification, it blanks out the corresponding GP_VERSION value on theelement (GP_PIN), or the corresponding parent Element Definition record (for example, GP_VARIABLEor GP_FORMULA), or both. In the next task, you will update these blank versions so you can identifythe elements where you reapplied modifications.
Stamping Modified Rules with a New VersionIn this step, you stamp the modified rules with a new version. You complete version stamping for all elementsthat you modified during the previous step. This process updates the GP_VERSION field (on GP_PIN, or theparent Element Definition record, or both) with the updated version.
Note. This step must be repeated for each of your licensed country extensions, any new country extensionsthat you may have created, and also for All Countries if you have created any elements of your own whereCountry = ALL so that all your customized elements are stamped appropriately.
To stamp modified rules with the new version:
1. From your browser, sign in to your upgraded Copy of Production (Source) database.2. Select Set Up HRMS, Product Related, Global Payroll & Absence Mgmt, Elements, Manage GlobalPayroll Packages, Version Stamping.
3. If you are stamping elements for a particular country extension, select Specific Country in the Used Byfield and enter the appropriate country in the Country field.
4. If you are stamping elements you have created or modified where Country = ALL, then select AllCountries in the Used By field.
5. For the stamp type, select Blank Version.6. In the New Version field, enter 9.00.00.00.7. Click the Stamp GP Records button.At this time, all elements that do not have a version number will be stamped with version C_9.00.00.00.
Note. PeopleSoft software elements are always delivered with a version number.
8. Repeat this set of steps for each of your licensed country extensions, any new country extensions that youmay have created, and also for All Countries if you have created any elements where Country = ALL.
218 Copyright © 2007, Oracle. All rights reserved.

Chapter 5 Complete Database Changes
Creating and Exporting the Final Country Extensions Rule PackageTo define, create, and export the final country extensions rule package:
1. From your browser, sign in to your upgraded Copy of Production (Source) database.2. Select Set Up HRMS, Product Related, Global Payroll & Absence Mgmt, Elements, Manage GlobalPayroll Packages, Create/Export Rule Package.
3. Under Find an Existing Value, search for Package ID GPCERUL and open the package.4. Select the Package Processing tab.5. Select the Create Package, Create Scripts, and Export Package check boxes.6. For the script location, enter the PS_HOME/SCRIPTS directory for the upgraded Copy of Production(Source) Database.
7. Click Process.8. On the Process Monitor page, wait for the process to run successfully.Verify that the program completed with no errors by reviewing the message log. If you encounter anyissues or need more information, refer to PeopleBooks.
See PeopleSoft Enterprise 9.0 Global Payroll PeopleBook, “Using the Utilities.”9. Store the generated script and data files.There will be three scripts and one data file generated in the PS_HOME/SCRIPTS and thePS_HOME/DATA directories respectively.They are as follows:
GPCERUL_EXP.DMS
GPCERUL_IMP.DMS
GP_CLEANUP.DMS
GPCERUL_DAT.DAT
Note. Store the generated script and data files until the final upgrade pass is complete. They will beneeded in all the upgrade passes.
Properties
DatabaseOrientation
Initial or MTP Products Platforms Languages
Source MTP Global Payroll AllCountries
All All
Task 5-9-5: Applying the Final Rule PackageThe final country extensions rule package GPCERUL has to be applied on the New Copy of Production(Target) database during the Move to Production pass.
Note. You do not have to run the Compare Report while applying GPCERUL.
Note. Before proceeding with this step, ensure that the Process Scheduler is up and running.
Copyright © 2007, Oracle. All rights reserved. 219

Complete Database Changes Chapter 5
To apply the final rule package:
1. Place all the script files of the rule package in the PS_HOME/SCRIPTS directory of the New Copy ofProduction (Target) database. The script files are:
GPCERUL_IMP.DMS
GP_CLEANUP.DMS
2. Place the data file GPCERUL_DAT.DAT of the rule package in the PS_HOME/DATA directory of theNew Copy of Production (Target) database.
3. From your browser, sign in to the New Copy of Production (Target) database.
4. Select Set Up HRMS, Product Related, Global Payroll & Absence Mgmt, Elements, Manage GlobalPayroll Packages, Apply Rule Package.
5. Add the new Package ID GPCERUL.
6. Select the Package Processing tab and complete the following steps:
a. Select the Import Packages check box.
b. For the script location, enter the PS_HOME/SCRIPTS directory.
c. Select the Compare Package check box.
d. Leave the Create Compare Report check box cleared.
e. Under Compare Processing, select the Update Statistics check box.
f. Select the Upgrade Package check box.
g. Under Upgrade Processing, select the Update Statistics check box.
h. Under Continue Upgrade Processing, leave the With Errors check box cleared and select the WithWarnings check box.
i. Click Process.
7. On the Process Monitor page, verify that the job runs successfully.
8. Click the “Go back to Apply Rule Package” link.
9. Search for Package ID GPCERUL and open the package.
10. Select the Package Elements tab.
11. Make sure that the first element displays Success in the Results column.
Then scroll down until you see the first element that has the Upgrade check box selected and make surethat the Upgrade Status is Done. If you have issues or need more information, refer to PeopleBooks.
Note. If there are errors, you will have to fix them and rerun the compare and upgrade process again.
See PeopleSoft Enterprise 9.0 Global Payroll PeopleBook, “Using the Utilities.”
220 Copyright © 2007, Oracle. All rights reserved.

Chapter 5 Complete Database Changes
Properties
DatabaseOrientation
Initial or MTP Products Platforms Languages
Target MTP Global Payroll AllCountries
All All
Task 5-9-6: Creating the Consolidated NonRule PackageThis section discusses:
• Understanding the Consolidated Country Extensions Non-Rule Package
• Creating the Consolidated Country Extensions Non-Rule Package
• Exporting the Consolidated Country Extensions Non-Rule Package
Note. Skip this step if you are only licensing new Global Payroll Country Extensions and not upgradingany country extensions.
Understanding the Consolidated Country Extensions Non-Rule PackageIn this step, you create a consolidated non-rule package containing the upgrade system data for all GlobalPayroll Country Extensions. The package definition UPGGPCE is delivered in the New Release Demodatabase. The package will contain related language records as well.
Creating the Consolidated Country Extensions Non-Rule PackageTo create the consolidated country extensions non-rule package:
1. From your browser, sign in to the New Release Demo (Source) database.2. Select Set Up HRMS, Product Related, Global Payroll & Absence Mgmt, Elements, Manage GlobalPayroll Packages, Create Non-Rule Package.
3. Search for the existing Package ID UPGGPCE and open it.4. Select the Package Criteria tab.5. Click the Create Package button.
Exporting the Consolidated Country Extensions Non-Rule PackageTo export the consolidated country extensions non-rule package:
1. From your browser, sign in to the New Release Demo (Source) database.2. Select Set Up HRMS, Product Related, Global Payroll & Absence Mgmt, Elements, Manage GlobalPayroll Packages, Export Non-Rule Package.
3. Search for existing Package ID UPGGPCE and open it4. Select the Package Records tab.5. For the script location, enter the PS_HOME/SCRIPTS directory.6. Click the Create Scripts button.7. Click the Export button.8. On the Process Monitor page, wait for the data mover process to complete successfully.
Copyright © 2007, Oracle. All rights reserved. 221

Complete Database Changes Chapter 5
9. Store the generated script and data files.There will be four scripts and two data files generated in the PS_HOME/SCRIPTS and PS_HOME/DATAdirectories, respectively. They will be as follows:
UPGGPCE_ELEMENTS_EXP.DMS
UPGGPCE_ELEMENTS_IMP.DMS
UPGGPCE_RECORDS_EXP.DMS
UPGGPCE_RECORDS_IMP.DMS
UPGGPCE_ELEMENTS.DAT
UPGGPCE_RECORDS.DAT
Note. Store the generated script and data files until the final upgrade pass is complete. They will beneeded in all the upgrade passes.
Properties
DatabaseOrientation
Initial or MTP Products Platforms Languages
Source Initial Global Payroll AllCountries
All All
Task 5-9-7: Creating Individual NonRule PackagesThis section discusses:
• Understanding Individual Country Extensions Non-Rule Packages
• Creating the Individual Country Extensions Non-Rule Packages
• Exporting the Individual Country Extensions Non-Rule Packages
Note. Skip this step if you are not licensing any new Global Payroll Country Extensions. This step must berepeated for each new Global Payroll Country Extension you are licensing.
Understanding Individual Country Extensions Non-Rule PackagesEach Global Payroll Country Extension delivers a non-rule package definition named XXXSYS which containsthe install system data for that country extension. The package will contain related language records as well.In this step, you create and export the XXXSYS packages for all the country extensions that you are newlylicensing, on the New Release Demo (Source) database. This list of packages is given below:
Global Payroll Country Extension Individual Non Rule Package ID
Australia AUSSYS
Brazil BRASYS
France FRASYS
Germany DEUSYS
Hong Kong HKGSYS
222 Copyright © 2007, Oracle. All rights reserved.

Chapter 5 Complete Database Changes
Global Payroll Country Extension Individual Non Rule Package ID
India INDSYS
Italy ITASYS
Japan JPNSYS
Malaysia MYSSYS
Mexico MEXSYS
Netherlands NLDSYS
New Zealand NZLSYS
Singapore SGPSYS
Spain ESPSYS
Switzerland CHESYS
United Kingdom GBRSYS
United States USASYS
Creating the Individual Country Extensions Non-Rule PackagesTo create the individual country extensions non-rule package:
1. From your browser, sign in to the New Release Demo (Source) database.2. Select Set Up HRMS, Product Related, Global Payroll & Absence Mgmt, Elements, Manage GlobalPayroll Packages, Create Non-Rule Package.
3. Search for the existing Package ID XXXSYS and open it.4. Select the Package Criteria tab.5. Click the Create Package button.
Exporting the Individual Country Extensions Non-Rule PackagesTo export the individual country extensions non-rule package:
1. From your browser, sign in to the New Release Demo (Source) database.2. Select Set Up HRMS, Product Related, Global Payroll & Absence Mgmt, Elements, Manage GlobalPayroll Packages, Export Non-Rule Package.
3. Search for the existing Package ID XXXSYS and open it.4. Select the Package Records tab.5. For the script location, enter the PS_HOME/SCRIPTS directory.6. Click the Create Scripts button.7. Click the Export button.8. On the Process Monitor page, wait for the data mover process to complete successfully.
Copyright © 2007, Oracle. All rights reserved. 223

Complete Database Changes Chapter 5
9. Store the generated script and data files.There will be four scripts and two data files generated in the PS_HOME/SCRIPTS and PS_HOME/DATAdirectories, respectively. They will be of the form:
XXXSYS_ELEMENTS_EXP.DMS
XXXSYS_ELEMENTS_IMP.DMS
XXXSYS_RECORDS_EXP.DMS
XXXSYS_RECORDS_IMP.DMS
XXXSYS_ELEMENTS.DAT
XXXSYS_RECORDS.DAT
Note. Store the generated script and data files until the final upgrade pass is complete. They will beneeded in all the upgrade passes.
10. Repeat these steps for each new Global Payroll Country Extension that you are licensing.
Properties
DatabaseOrientation
Initial or MTP Products Platforms Languages
Source Initial Global Payroll AllCountries
All All
Task 5-9-8: Applying the Consolidated NonRule PackageThis section discusses:
• Preparing to Apply the Consolidated Country Extensions Non-Rule Package
• Importing the Consolidated Country Extensions Non-Rule Package Elements
• Comparing the Consolidated Country Extensions Non-Rule Package Elements
• Importing the Consolidated Country Extensions Non-Rule Package Records
• Upgrading the Consolidated Country Extensions Non-Rule Package
Note. Skip this step if you are only licensing new Global Payroll Country Extensions and not upgradingany country extensions.
Preparing to Apply the Consolidated Country Extensions Non-Rule PackagePlace the stored script and data files associated with the consolidated package in the PS_HOME/SCRIPTSand PS_HOME/DATA directories of the Target database, respectively. The script and data files requiredfor this step are:
UPGGPCE_ELEMENTS_IMP.DMS
UPGGPCE_RECORDS_IMP.DMS
UPGGPCE_ELEMENTS.DAT
UPGGPCE_RECORDS.DAT
Importing the Consolidated Country Extensions Non-Rule Package ElementsTo import the consolidated country extensions non-rule package elements:
224 Copyright © 2007, Oracle. All rights reserved.
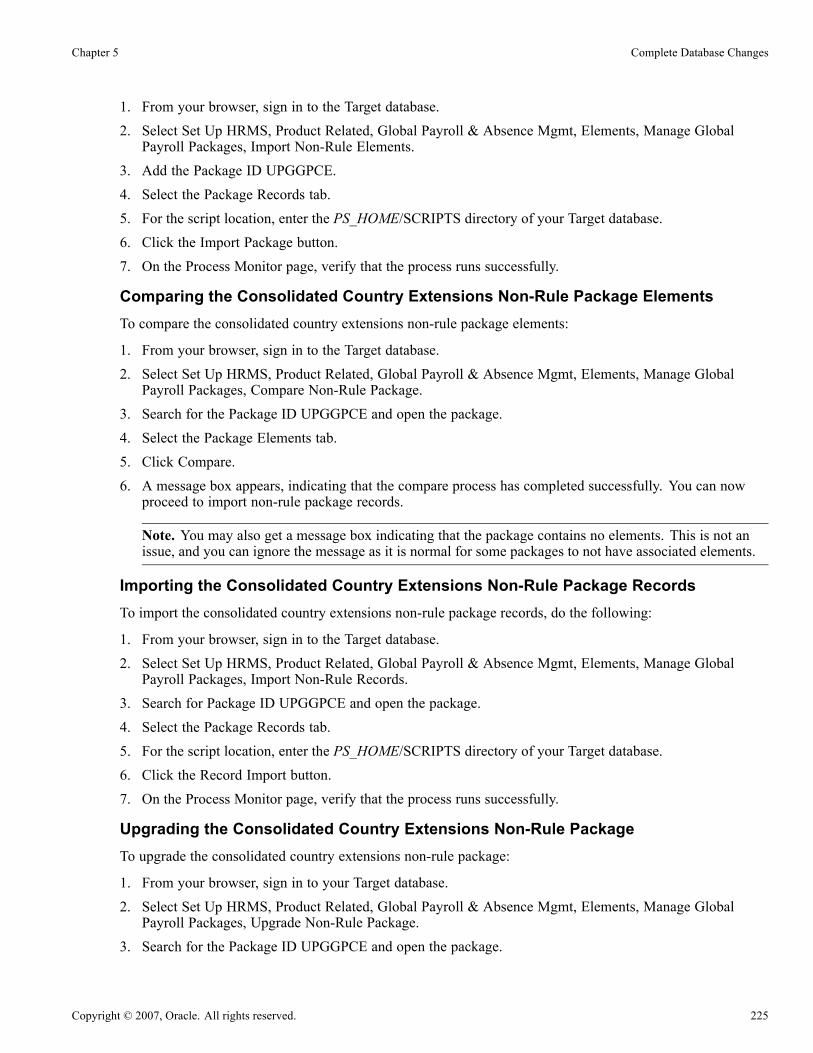
Chapter 5 Complete Database Changes
1. From your browser, sign in to the Target database.2. Select Set Up HRMS, Product Related, Global Payroll & Absence Mgmt, Elements, Manage GlobalPayroll Packages, Import Non-Rule Elements.
3. Add the Package ID UPGGPCE.4. Select the Package Records tab.5. For the script location, enter the PS_HOME/SCRIPTS directory of your Target database.6. Click the Import Package button.7. On the Process Monitor page, verify that the process runs successfully.
Comparing the Consolidated Country Extensions Non-Rule Package ElementsTo compare the consolidated country extensions non-rule package elements:
1. From your browser, sign in to the Target database.2. Select Set Up HRMS, Product Related, Global Payroll & Absence Mgmt, Elements, Manage GlobalPayroll Packages, Compare Non-Rule Package.
3. Search for the Package ID UPGGPCE and open the package.4. Select the Package Elements tab.5. Click Compare.6. A message box appears, indicating that the compare process has completed successfully. You can nowproceed to import non-rule package records.
Note. You may also get a message box indicating that the package contains no elements. This is not anissue, and you can ignore the message as it is normal for some packages to not have associated elements.
Importing the Consolidated Country Extensions Non-Rule Package RecordsTo import the consolidated country extensions non-rule package records, do the following:
1. From your browser, sign in to the Target database.
2. Select Set Up HRMS, Product Related, Global Payroll & Absence Mgmt, Elements, Manage GlobalPayroll Packages, Import Non-Rule Records.
3. Search for Package ID UPGGPCE and open the package.
4. Select the Package Records tab.
5. For the script location, enter the PS_HOME/SCRIPTS directory of your Target database.
6. Click the Record Import button.
7. On the Process Monitor page, verify that the process runs successfully.
Upgrading the Consolidated Country Extensions Non-Rule PackageTo upgrade the consolidated country extensions non-rule package:
1. From your browser, sign in to your Target database.
2. Select Set Up HRMS, Product Related, Global Payroll & Absence Mgmt, Elements, Manage GlobalPayroll Packages, Upgrade Non-Rule Package.
3. Search for the Package ID UPGGPCE and open the package.
Copyright © 2007, Oracle. All rights reserved. 225

Complete Database Changes Chapter 5
4. Select the Package Records tab.5. Click Upgrade.A message box displays “Upgrade Process Completed Successfully.”
Properties
DatabaseOrientation
Initial or MTP Products Platforms Languages
Target Both Global Payroll AllCountries
All All
Task 5-9-9: Applying Individual NonRule PackagesThis section discusses:
• Preparing to Apply Individual Country Extensions Non-Rule Packages
• Importing the Individual Country Extensions Non-Rule Package Elements
• Comparing the Individual Country Extensions Non-Rule Package Elements
• Importing the Individual Country Extensions Non-Rule Package Records
• Upgrading the Individual Country Extensions Non-Rule Package
Note. Skip this step if you are not licensing any new Global Payroll Country Extensions. This step must berepeated once for each new Global Payroll Country Extension you are licensing.
Preparing to Apply Individual Country Extensions Non-Rule PackagesPlace the stored script and data files associated with the individual country extensions non-rule package inthe PS_HOME/SCRIPTS and PS_HOME/DATA directories of the Target database, respectively. The scriptand data files required for this step are:
XXXSYS_ELEMENTS_IMP.DMS
XXXSYS_RECORDS_IMP.DMS
XXXSYS_ELEMENTS.DAT
XXXSYS_RECORDS.DAT
Importing the Individual Country Extensions Non-Rule Package ElementsTo import the individual country extensions non-rule package elements:
1. From your browser, sign in to the Target database.
2. Select Set Up HRMS, Product Related, Global Payroll & Absence Mgmt, Elements, Manage GlobalPayroll Packages, Import Non-Rule Elements.
3. Add a Package ID XXXSYS.
4. Select the Package Records tab.
5. For the script location, enter the PS_HOME/SCRIPTS directory of your Target database.
6. Click the Import Package button.
7. On the Process Monitor page, verify that the process runs successfully.
226 Copyright © 2007, Oracle. All rights reserved.

Chapter 5 Complete Database Changes
Comparing the Individual Country Extensions Non-Rule Package ElementsTo compare the individual country extensions non-rule package elements:
1. From your browser, sign in to the Target database.2. Select Set Up HRMS, Product Related, Global Payroll & Absence Mgmt, Elements, Manage GlobalPayroll Packages, Compare Non-Rule Package.
3. Search for the Package ID XXXSYS and open the package.4. Select the Package Elements tab.5. Click Compare.6. A message box appears indicating that the compare process has completed successfully. You can nowproceed to import non-rule package records.
Note. You may also get a message box indicating that the package contains no elements. This is not anissue, and you can ignore the message as it is normal for some packages to not have associated elements.
Importing the Individual Country Extensions Non-Rule Package RecordsTo import the individual country extensions non-rule package records:
1. From your browser, sign in to the Target database.2. Select Set Up HRMS, Product Related, Global Payroll & Absence Mgmt, Elements, Manage GlobalPayroll Packages, Import Non-Rule Records.
3. Search for the Package ID XXXSYS and open the package.4. Select the Package Records tab.5. For the script location, enter the PS_HOME/SCRIPTS directory of your Target database.6. Click the Record Import button.7. On the Process Monitor page, verify that the process runs successfully.
Upgrading the Individual Country Extensions Non-Rule PackageTo upgrade the individual country extensions non-rule package:
1. From your browser, sign in to your Target database.2. Select Set Up HRMS, Product Related, Global Payroll & Absence Mgmt, Elements, Manage GlobalPayroll Packages, Upgrade Non-Rule Package.
3. Search for the Package ID XXXSYS and open the package.4. Select the Package Records tab.5. Click Upgrade.A message box displays “Upgrade Process Completed Successfully.”
6. Repeat these steps for each new Global Payroll Country Extension you are licensing.
Copyright © 2007, Oracle. All rights reserved. 227

Complete Database Changes Chapter 5
Properties
DatabaseOrientation
Initial or MTP Products Platforms Languages
Target Both Global Payroll AllCountries
All All
Task 5-9-10: Creating the Rule Delete PackageThis section discusses:
• Understanding Country Extensions Rule Delete Package
• Creating the Country Extensions Rule Delete Package Definition
• Creating the Country Extensions Rule Delete Package
• Exporting the Country Extensions Rule Delete Package
Note. Before proceeding with this step, ensure that the Process Scheduler is up and running.
Understanding Country Extensions Rule Delete PackageIn this step, you create and export your upgrade rule delete package. The rule delete package includes allOracle-delivered elements to be deleted from your Target database.
Creating the Country Extensions Rule Delete Package DefinitionTo create the rule delete package definition:
1. Sign in to your Copy of Production (Target) database using Application Designer.2. Open the Application Engine UPG_GPCEDEL.3. Run the Application Engine UPG_GPCEDEL from Application Designer using the run control IDUPGDEL.
Note. Be sure that you are using the correct run control ID UPGDEL.
The Application Engine will create a package definition called UPGRULD.
Creating the Country Extensions Rule Delete PackageIn this step, you create the country extensions rule delete package UPGRULD.
To create the rule delete package:
1. From your browser, sign in to the Copy of Production (Target) Database.2. Select Set Up HRMS, Product Related, Global Payroll & Absence Mgmt, Elements, Manage GlobalPayroll Packages, Create/Export Rule Package.
3. On the Find an Existing Value tab, search for UPGRULD and open the package definition.4. Select the Package Processing tab.5. Select the Create Package check box.6. Click Process.
228 Copyright © 2007, Oracle. All rights reserved.

Chapter 5 Complete Database Changes
7. On the Process Monitor page, wait for the process to run successfully.8. Click the “Go back to Create/Export Rule Package” link.9. On the Find an Existing Value tab, search for the Package ID UPGRULD and open the package.10. Select the View Package tab.You will see a list of elements to be deleted.
11. If there are any Oracle-delivered elements that you do not want to delete, clear the Upgrade check boxcorresponding to that element. If you have issues or need more information, refer to PeopleBooks.
See PeopleSoft Enterprise 9.0 Global Payroll PeopleBook, “Using the Utilities.”
Note. The elements you want to keep will be owned by you in the new release.
12. Click Save.
Exporting the Country Extensions Rule Delete PackageIn this step, you export the country extensions rule delete package UPGRULD.
To create scripts and export the rule delete package:
1. From your browser, sign in to the Copy of Production (Target) Database.
2. Select Set Up HRMS, Product Related, Global Payroll & Absence Mgmt, Elements, Manage GlobalPayroll Packages, Create/Export Rule Package.
3. On the Find an Existing Value tab, search for UPGRULD and open the package definition.
4. Select the Package Processing tab.
5. Select the Create Scripts and Export Package check boxes.
6. For the script location, enter the PS_HOME/SCRIPTS directory for the New Release Demo database.
7. Click Process.8. On the Process Monitor page, wait for the process to run successfully.
Verify that there are no errors by checking the message log. If you have issues or need more information,refer to PeopleBooks.
See PeopleSoft Enterprise 9.0 Global Payroll PeopleBook, “Using the Utilities.”9. Store the generated script and data files.There will be three scripts and one data file generated in the PS_HOME/SCRIPTS and PS_HOME/DATAdirectories, respectively. They will be as follows:
UPGRULD_EXP.DMS
UPGRULD_IMP.DMS
GP_CLEANUP.DMS
UPGRULD_DAT.DAT
Note. Store the generated script and data files until the final upgrade pass is complete. They will beneeded in all the upgrade passes.
Copyright © 2007, Oracle. All rights reserved. 229
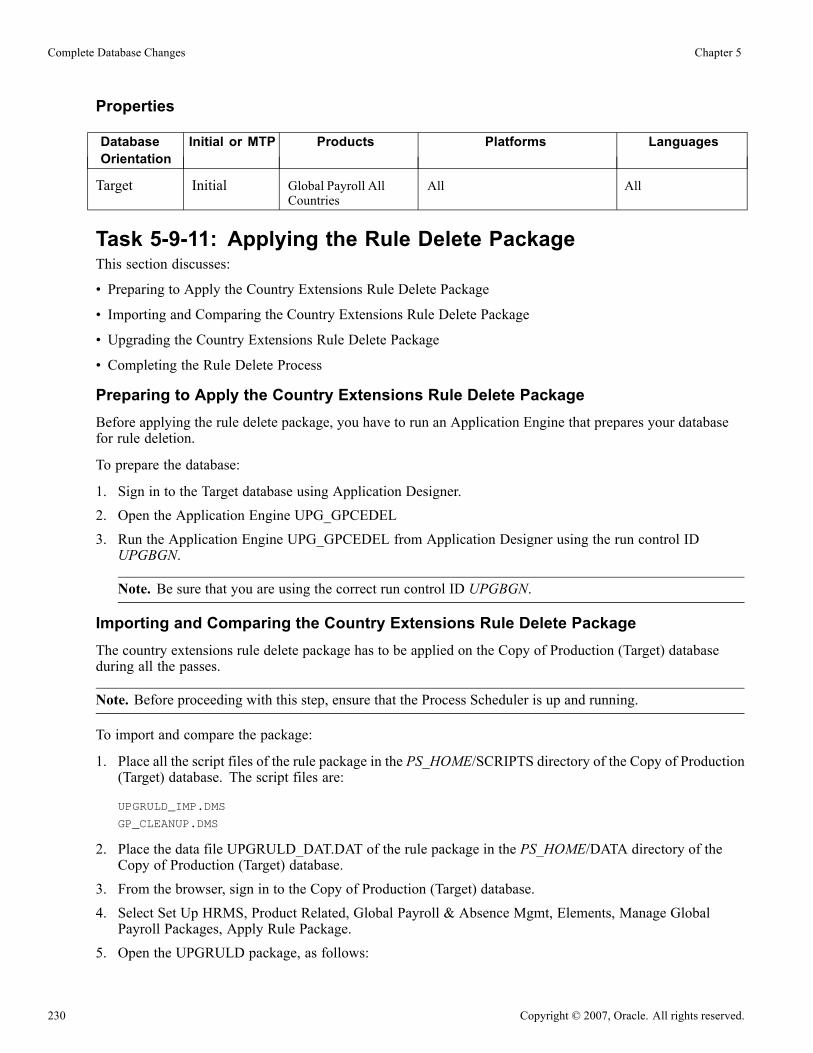
Complete Database Changes Chapter 5
Properties
DatabaseOrientation
Initial or MTP Products Platforms Languages
Target Initial Global Payroll AllCountries
All All
Task 5-9-11: Applying the Rule Delete PackageThis section discusses:
• Preparing to Apply the Country Extensions Rule Delete Package
• Importing and Comparing the Country Extensions Rule Delete Package
• Upgrading the Country Extensions Rule Delete Package
• Completing the Rule Delete Process
Preparing to Apply the Country Extensions Rule Delete PackageBefore applying the rule delete package, you have to run an Application Engine that prepares your databasefor rule deletion.
To prepare the database:
1. Sign in to the Target database using Application Designer.2. Open the Application Engine UPG_GPCEDEL3. Run the Application Engine UPG_GPCEDEL from Application Designer using the run control IDUPGBGN.
Note. Be sure that you are using the correct run control ID UPGBGN.
Importing and Comparing the Country Extensions Rule Delete PackageThe country extensions rule delete package has to be applied on the Copy of Production (Target) databaseduring all the passes.
Note. Before proceeding with this step, ensure that the Process Scheduler is up and running.
To import and compare the package:
1. Place all the script files of the rule package in the PS_HOME/SCRIPTS directory of the Copy of Production(Target) database. The script files are:
UPGRULD_IMP.DMS
GP_CLEANUP.DMS
2. Place the data file UPGRULD_DAT.DAT of the rule package in the PS_HOME/DATA directory of theCopy of Production (Target) database.
3. From the browser, sign in to the Copy of Production (Target) database.4. Select Set Up HRMS, Product Related, Global Payroll & Absence Mgmt, Elements, Manage GlobalPayroll Packages, Apply Rule Package.
5. Open the UPGRULD package, as follows:
230 Copyright © 2007, Oracle. All rights reserved.

Chapter 5 Complete Database Changes
• During the Initial pass, search for the UPGRULD package ID that already exists on the Target databaseand open the package.
• During the Move to Production pass, add a new package ID UPGRULD and open the package.6. Select the Package Processing tab and complete the following steps:a. Select the Import Packages check box.b. For the script location, enter the PS_HOME/SCRIPTS directory.c. Select the Compare Package check box.d. Select the Create Compare Report check box.e. Select the Errors/Warnings and Deleted check boxes, and leave the other options under CompareReport Print Options cleared.
f. Under Compare Processing, select the Update Statistics check box.g. Click Process.
Note. During the Initial pass, a message box will appear with the message “Source and the Target databasesare the same for this import/compare/upgrade. The Source and Target databases are the same for the importor compare or upgrade process. Upgrading a package in the database it was created in can result in lostdata.” Click OK on the message box and continue.
7. On the Process Monitor page, verify that the job runs successfully.8. Click the “Go back to Apply Rule Package” link.9. Search for the Package ID UPGRULD and open the package.10. Select the Package Elements tab.11. View the elements with errors or warnings in the Results column.Many elements will be in error because they are still connected to other elements or referenced elsewhere.Identify the references to these elements and remove them, or if applicable you may clear the Update checkbox corresponding to the element to take ownership of the element.If a failure occurs, review the following information, make any needed changes, and rerun this step ifrequired.• Failure, Element does not exist: This indicates that you do not currently have that element in yourdatabase, so no delete is required. No further action is necessary; the element can be left in failure statusand the Upgrade check box can be left selected.
Copyright © 2007, Oracle. All rights reserved. 231

Complete Database Changes Chapter 5
• Failure, Used in Rule Defn: This indicates that a child element that is to be deleted is referenced by oneor more parent elements in your database. These parent elements may be your own customized elementsor they could be other elements that are included in the delete package. You can use the view elementrelationships functionality to determine how the child element to be deleted is currently referenced. Ifyou want to proceed with the deletion, go to the parent element definitions and remove references to thechild element. This process is known as unhooking. Once elements have been unhooked, compare yourcountry extension delete package again and the compare results should no longer indicate a failure forthe relevant child elements. If you do not want the elements to be deleted, no further action is necessary;the elements can remain in failure status and the Upgrade check boxes can be left selected. The elementswill not be deleted in the upgrade package step.Review the Rule Package Compare Report PDF file that was generated for detailed information aboutwhich elements are in an error or warning status, as well as whether an element is being deleted. This is afield-by-field compare report. For more information on errors and warnings, see PeopleBooks.
See PeopleSoft Enterprise 9.0 Global Payroll PeopleBook, “Using the Utilities.”
Note. Make sure the exact same elements are selected to be deleted for the Initial and Move to Productionpasses.
Note. Repeat the compare process until there are no more errors or you are confident that the errors may beignored. To run the compare process only, repeat the same steps above, but do not select the Import Packagescheck box and enter the script location.
Upgrading the Country Extensions Rule Delete PackageTo upgrade the Country Extensions Rule Delete Package:
1. From your browser, sign in to the Copy of Production (Target) database.2. Select Set Up HRMS, Product Related, Global Payroll & Absence Mgmt, Elements, Manage GlobalPayroll Packages, Apply Rule Package.
3. Search for the UPGRULD package ID that already exists on the Target database and open the package.4. Select the Package Processing tab and complete the following steps:a. Select the Upgrade Package check box.b. Under Upgrade Processing, select the Update Statistics check box.c. If you have errors reported during the compare process that you wish to ignore, select the With Errorscheck box under Compare Upgrade Processing.
d. Under Continue Upgrade Processing, select the With Warnings check box.e. Click Process.
5. On the Process Monitor page, verify that the process runs successfully.6. Click the “Go back to Apply Rule Package” link.7. Search for the Package ID UPGRULD and open the package.8. Select the Package Elements tab.9. Make sure that the first element that has the Upgrade check box selected displays Success in the Resultscolumn and the Upgrade Status is Done.
232 Copyright © 2007, Oracle. All rights reserved.

Chapter 5 Complete Database Changes
Completing the Rule Delete ProcessAfter applying the rule delete package, you have to run an Application Engine that performs some furthermodifications on your database that completes the rule delete process. Not running the Application Enginecould cause problems on your database.
To complete the rule delete process:
1. Sign in to the Target database using Application Designer.2. Open the Application Engine UPG_GPCEDEL.3. Run the Application Engine UPG_GPCEDEL from Application Designer using the run control IDUPGEND.
Note. Be sure that you are using the correct run control ID UPGEND.
Properties
DatabaseOrientation
Initial or MTP Products Platforms Languages
Target Both Global Payroll AllCountries
All All
Task 5-9-12: Finalizing the Rule Delete ProcessDuring the rule delete process, you decided to keep certain elements that were originally delivered by Oracle.In this step, the ownership of those rule elements will be transferred to you. This step should be run inthe final Move to Production pass only.
Note. Perform this step in the final Move to Production pass only.
To finalize the rule delete process:
1. Sign in to the Target database using Application Designer.
2. Open the Application Engine UPG_GPCEDEL
3. Run the Application Engine UPG_GPCEDEL from Application Designer using the run control IDUPGFIN.
Note. Be sure that you are using the correct run control ID UPGFIN.
Properties
DatabaseOrientation
Initial or MTP Products Platforms Languages
Target MTP Global Payroll AllCountries
All All
Task 5-9-13: Updating Install Options on the Target DatabaseIn this step, you update the install options for the newly licensed country extensions on your Target database.
Copyright © 2007, Oracle. All rights reserved. 233

Complete Database Changes Chapter 5
Note. Skip this step if you are not licensing any new Global Payroll Country Extensions.
To update the install options:
1. From your browser, sign in to the Target database.2. Select Set Up HRMS, Install, Installation Table.3. Click the Installed GP Countries link.4. Select the check boxes corresponding to all of the newly licensed Global Payroll Country Extensions.5. Click OK.6. Click Save.
Note. You can ignore the message that appears when you click the Save button.
Properties
DatabaseOrientation
Initial or MTP Products Platforms Languages
Target Both Global Payroll AllCountries
All All
Task 5-9-14: Setting the Store Option for System ElementsIn this step, you run a script that selects the Store option for system elements, depending on which GlobalPayroll Country Extensions are installed on your database. Some Country Extensions require the Store optionto be selected for certain system elements where the Store option is not selected by default.
To run the script:
1. Sign in to the Target database using Data Mover.2. Open and run the script UVHCGPS01.DMS.
Properties
DatabaseOrientation
Initial or MTP Products Platforms Languages
Target Both Global Payroll AllCountries
All All
Task 5-9-15: Exporting HR Rate CodesIn this step, you have the option to bring in any new HR rate code elements that are referenced by a GlobalPayroll rate code element in a country extension that you have licensed, because these HR rate codes arenot automatically upgraded. To do this, you run a script to export the HR rate codes referenced by GlobalPayroll rate code elements for your licensed country extensions from your New Release Demo database. Inthe next step, you load them into your Copy of Production (Target) database. You will use the data exportedhere in any Move to Production passes. If the HR rate code already exists in your database, this process willnot override your data.
234 Copyright © 2007, Oracle. All rights reserved.

Chapter 5 Complete Database Changes
Note. The export and corresponding import have conditional logic that is based on installation indicators sothat only HR rate codes referenced by the Global Payroll country extensions you have licensed will be broughtover. If you only want to copy over HR rate codes for a subset of the country extensions you have licensed,you should modify the GPCERATE_EXP.DMS script before running it and comment out the export logic forthe licensed country extensions that you do not want to copy over, because by default, only those for yourlicensed country extensions will be exported as well, based on your installation indicators.
To export the new HR rate codes, run the following script using Data Mover against your New ReleaseDemo Database.
PS_HOME\SCRIPTS\GPCERATE_EXP.DMS
Note. Store the generated data file GPCERATE.DAT until the final upgrade pass is complete. It will beneeded in all the upgrade passes.
Properties
DatabaseOrientation
Initial or MTP Products Platforms Languages
Source Initial Global Payroll AllCountries
All All
Task 5-9-16: Importing HR Rate CodesIn the previous step, during the Initial upgrade pass you exported new HR rate code elements that arereferenced by a Global Payroll rate code element in a country extension that you have licensed if youwanted to upgrade them, because these HR rate codes are not automatically upgraded. In this step, you loadthem into your Copy of Production (Target) database. If the HR rate code already exists in your database,this process will not override your data.
To import the new HR rate codes, run the following script using Data Mover in bootstrap mode against yourCopy of Production database.
PS_HOME\SCRIPTS\GPCERATE_IMP.DMS
Note. If you are a DB2 z/OS customer, follow the instructions in the script GPCERATE_IMP.DMS to workproperly in your environment.
Properties
DatabaseOrientation
Initial or MTP Products Platforms Languages
Target Both Global Payroll AllCountries
All All
Task 5-9-17: Configuring Self Service Payslip OptionsIn this step, you set up the self-service payslip options for ePay.
Copyright © 2007, Oracle. All rights reserved. 235

Complete Database Changes Chapter 5
Note. This step applies only if you are implementing self-service payslips as part of ePay. Repeat this step foreach of your installed country extensions, as applicable.
To configure the self-service payslip options:
1. From your browser, sign in to the Target database.2. Select Set Up HRMS, Product Related, ePay, Self Service Payslip Options.3. Select the Find an Existing Value tab and search for the applicable country.If your country is not available, add the country
4. If the Default Payslip URL Identifier field is empty, enter GP_SS_PSLP_FTP.5. Click Save
Note. Repeat this step for each of your installed country extensions, as applicable.
Note. For additional information about setting up self-service payslips, see the PeopleSoft Enterprise HRMSand Campus Solutions Application Supplemental Installation guide for your release, Install Instructions forePay Payslips (for Global Payroll) section.
Properties
DatabaseOrientation
Initial or MTP Products Platforms Languages
Target Both Global Payroll AllCountries
All All
Task 5-9-18: Setting Up Global Payroll for SwitzerlandThis section discusses:
• Reviewing Application CH_PRINTCLASS
• Defining Element Groups
• Defining the List Set
• Preparing Migration Script
• Running the Migration Script
• Reviewing Element Group Members
Reviewing Application CH_PRINTCLASSTo review the application CH_PRINTCLASS:
1. From your browser, sign in to the Target database.
2. Select Set Up HRMS, Product Related, Global Payroll & Absence Mgmt, Elements, Define Application.
3. In the Country field, enter CHE.
4. In the Application field, enter CH_PRINTCLASS.
236 Copyright © 2007, Oracle. All rights reserved.

Chapter 5 Complete Database Changes
5. Click Search.6. Verify that the following page appears:
Define Application page
Defining Element GroupsTo define element groups:
1. From your browser, sign in to the Target database.2. Select Set Up HRMS, Product Related, Global Payroll & Absence Mgmt, Elements, Element Groups.3. Click the Add a New Value link.This takes you to the Element Group Name page.
Copyright © 2007, Oracle. All rights reserved. 237
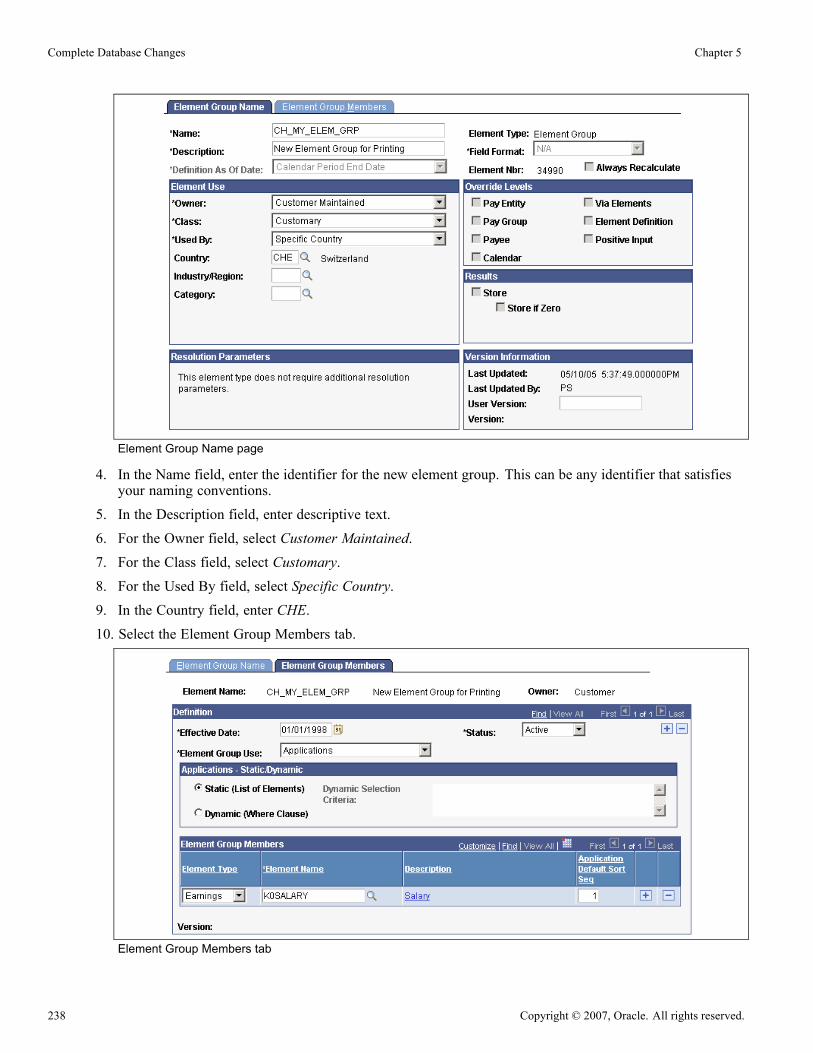
Complete Database Changes Chapter 5
Element Group Name page
4. In the Name field, enter the identifier for the new element group. This can be any identifier that satisfiesyour naming conventions.
5. In the Description field, enter descriptive text.6. For the Owner field, select Customer Maintained.7. For the Class field, select Customary.8. For the Used By field, select Specific Country.9. In the Country field, enter CHE.10. Select the Element Group Members tab.
Element Group Members tab
238 Copyright © 2007, Oracle. All rights reserved.

Chapter 5 Complete Database Changes
11. In the Effective Date field, enter 01/01/1998.12. For the Element Group Use field, select Applications.13. Select the Static (List of Elements) option.14. In the Element Type field, select Earnings.15. In the Element Name field, select a name that is available in the prompt list.It does not matter what value is entered here. This element is entered only because an element groupwithout a member element cannot be saved. When running the Data Mover scripts in the step Run UpgradeScripts, this element will be removed and replaced by the members of the print class that is migrated.
16. In the Application Default Sort Seq field, enter 1.17. Click Save.18. Select the Element Group Name tab.Note the contents of the Element Nbr field. This field contains the element group PIN number that is to beentered into the DMS script in the step Prepare Migration Scripts.
Defining the List SetTo define the list set:
1. From you browser, sign in to the Target database.2. Select Set up HRMS, Product Related, Global Payroll & Absence Mgmt, Elements, Define List Set.3. Click the Add New Value link.
Define List Set page
4. In the Country field, enter CHE.
5. In the List Set field, enter the identifier for the new list set.
This can be any identifier that satisfies your naming conventions.
6. Click Add.7. In the Description field, enter descriptive text.
8. In the Application Country field, enter CHE.
9. In the Application field, enter CH_PRINTCLASS.
Copyright © 2007, Oracle. All rights reserved. 239

Complete Database Changes Chapter 5
10. In the Effective Date field, enter 01/01/1998.11. In the PrintClass field, enter the print class name that you are migrating.12. In the Element Group Name field, enter the name for the element group created in the step DefineElement Groups.
13. Click Save.
Preparing Migration ScriptThe UVHCGCHW50.DMS script migrates the members of your print class to the newly created elementgroup. To execute the script correctly, the element group PIN number, the list identifier, and the print classidentifier must be entered in the appropriate locations. The script currently contains placeholders. Replacethese placeholders as follows:
• Replace the <PIN_NUM> string with the PIN number defined in the step Defining Element Groups.• Replace the <LIST_SET> string with the list set identifier defined in the step Defining the List Set.• Replace the <PRINT_CLASS> string with the print class identifier that you are migrating.
Note. Replace the entire placeholder, including the enclosing brackets (< >). If the placeholders are enclosedby quotes, do not replace the quotes.
The following example shows the script after placeholder replacement:
SET LOG UVHCGCHW50.LOG;
-- Populate Element Group members
DELETE FROM PS_GP_ELEM_GRP_MBR
WHERE PIN_NUM = Your PIN Number
/
INSERT INTO PS_GP_ELEM_GRP_MBR
(
PIN_NUM
, EFFDT
, PIN_ELEM_NUM
, ENTRY_TYPE_ID
, ELEM_ASSIGNMENT
, GP_ORDER
)
SELECT Your PIN Number
, %DateIn(’1998-01-01’)
, CH.PIN_NUM
, CH.ENTRY_TYPE_ELEM
, ’ ’
, CH.GPCH_BL_PR_GROUP
FROM PS_GPCH_BL_PRINT CH
WHERE CH.GPCH_RC_REPORTNAME = ’Your PrintClass Identifier’
/
-- Populate List Setup
240 Copyright © 2007, Oracle. All rights reserved.

Chapter 5 Complete Database Changes
DELETE FROM PS_GP_ELN_PIN_ATTR
WHERE COUNTRY = ’CHE’
AND GP_ELN_SET = ’Your List Set Identifier’
/
INSERT INTO PS_GP_ELN_PIN_ATTR
(
COUNTRY
, GP_ELN_SET
, EFFDT
, PIN_ELEM_GRP_NUM
, PIN_NUM
, GP_ELN_ATTR1
, GP_ELN_ATTR2
, GP_ELN_ATTR3
, GP_ELN_ATTR4
, GP_ELN_ATTR5
, GP_ELN_ATTR6
, GP_ELN_ATTR7
, GP_ELN_ATTR8
, GP_ELN_ATTR9
, GP_ELN_ATTR10
, DATA_TYPE_CD
)
SELECT ’CHE’
, ’Your List Set Identifier’
, %DateIn(’1998-01-01’)
, Your PIN Number
, CH.PIN_NUM
, CH.GPCH_AL_OVERRIDE
, CH.GPCH_BL_PR_GROUP
, CH.GPCH_BL_PR_ORDER
, CH.GPCH_BL_PR_CALC
, CH.GPCH_BL_PR_BASE
, CH.GPCH_BL_PR_RATE
, CH.GPCH_BL_PR_UNITS
, CH.GPCH_BL_PR_PERCENT
, CH.GPCH_BL_PR_SUM
, CH.GPCH_AL_SIGNVALUE
, ’N’
FROM PS_GPCH_BL_PRINT CH
WHERE GPCH_RC_REPORTNAME = ’Your PrintClass Identifier’
/
Running the Migration ScriptTo run the migration script:
1. Open Data Mover.
Copyright © 2007, Oracle. All rights reserved. 241

Complete Database Changes Chapter 5
2. Run the UVHCGCHW50.DMS script.
Reviewing Element Group MembersTo review element group members:
1. From your browser, sign in to the Target database.2. Select Set up HRMS, Product Related, Global Payroll & Absence Mgmt, Elements, Define List Set.3. In the Country field, enter CHE.4. In the List Set field, enter the List Set identifier you created in the step Define List Set.5. Click Search.This will take you to the Define List Set page.
6. Under Elements Group, select the element group that you entered in the step Define List Set.For that element group, click the Element Group Details icon. This takes you to the Element GroupAttributes page.
7. Verify that this page contains all elements that were previously print class members.8. Click OK.This will take you back to the Define List Set page.
9. Modify the contents of the Description field without changing its meaning.For example, insert a space or change a letter from lowercase to uppercase. This change ensures that thesystem validates the newly migrated data.
10. Click Save.
This will update Global Payroll shadow processing tables that are required to use the List Set during a payrollrun but that cannot be populated with the migration script.
Properties
DatabaseOrientation
Initial or MTP Products Platforms Languages
Target Both Global PayrollSwitzerland
All All
Task 5-9-19: Setting Up Global Payroll for FranceThis section discusses:
• Defining the Application
• Defining the List Set for FRA
• Preparing the Migration Script for FRA
• Running the UVHCGFRHW50 Migration Script
In this task you create a new application and list set for France in order to use Absence take mapping codeswhich are defined on the Define List Set page. The list set for this functionality is Absence Reports. TheAbsence Reports list set is based on the element group REP EG ABS LISTE that contains the list of absence
242 Copyright © 2007, Oracle. All rights reserved.
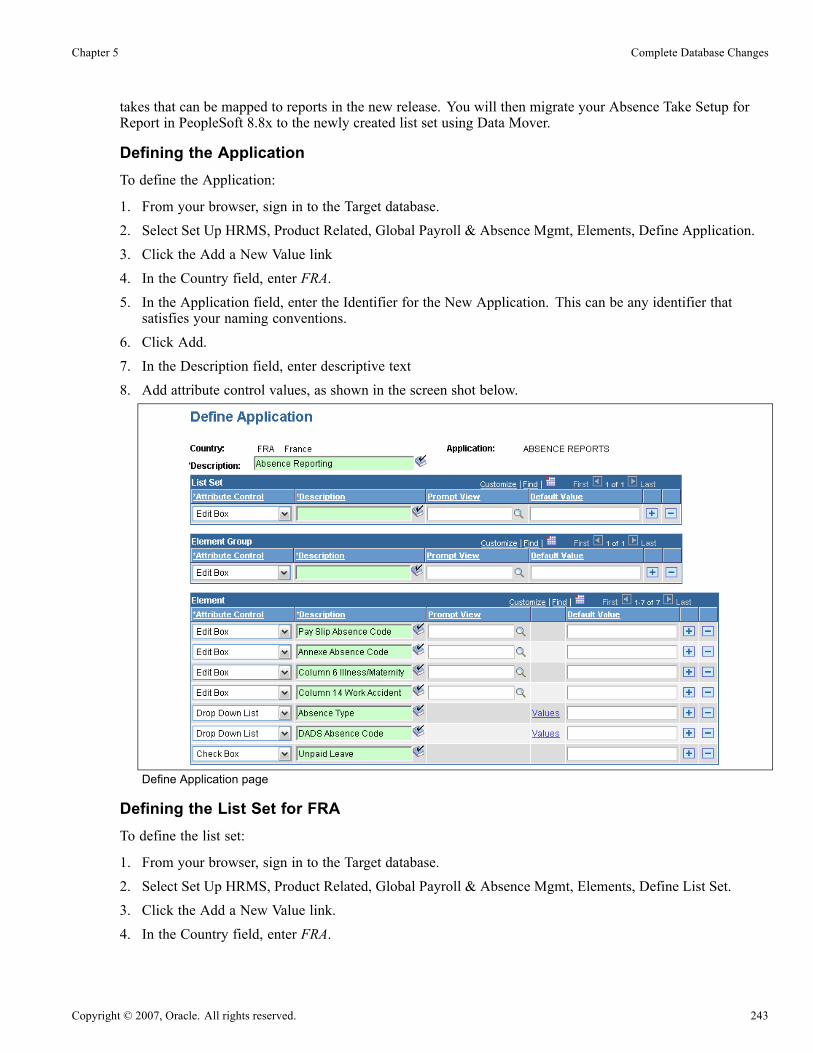
Chapter 5 Complete Database Changes
takes that can be mapped to reports in the new release. You will then migrate your Absence Take Setup forReport in PeopleSoft 8.8x to the newly created list set using Data Mover.
Defining the ApplicationTo define the Application:
1. From your browser, sign in to the Target database.2. Select Set Up HRMS, Product Related, Global Payroll & Absence Mgmt, Elements, Define Application.3. Click the Add a New Value link4. In the Country field, enter FRA.5. In the Application field, enter the Identifier for the New Application. This can be any identifier thatsatisfies your naming conventions.
6. Click Add.7. In the Description field, enter descriptive text8. Add attribute control values, as shown in the screen shot below.
Define Application page
Defining the List Set for FRATo define the list set:
1. From your browser, sign in to the Target database.2. Select Set Up HRMS, Product Related, Global Payroll & Absence Mgmt, Elements, Define List Set.3. Click the Add a New Value link.4. In the Country field, enter FRA.
Copyright © 2007, Oracle. All rights reserved. 243

Complete Database Changes Chapter 5
5. In the List Set Field, enter the Identifier for the New List. This can be any identifier that satisfies yournaming conventions.
6. Click Add
Define List Set page
7. In the Description field, enter descriptive text.8. In the Application Country field, enter FRA.9. In the Application field, enter ABSENCE REPORTS.10. In Effective Date field, enter 01/01/2002.11. In the Element Group Name field, enter the element group REP EG ABS LISTE.12. Click Save.
Preparing the Migration Script for FRAThe UVHCGFRHW50.DMS script will migrate the members of your absence reports to the newly created listset. To execute the script correctly, the element group PIN number and the list identifier must be entered in theappropriate locations. The script currently contains placeholders. Replace these placeholders as follows:
• Replace the <PIN_NUM> string with the PIN number of the element group REP EG ABS LISTE.• Replace the <LIST_SET> string with the list set identifier defined in the step Defining the List Setfor FRA.
Note. Replace the entire placeholder, including the enclosing brackets (< >). If the placeholders are enclosedby quotes, do not replace the quotes.
The following example shows the script after placeholder replacement:
SET LOG UVHCGFRW50.LOG;
-- Populate List Setup
DELETE FROM PS_GP_ELN_PIN_ATTR
WHERE COUNTRY = ’FRA’
244 Copyright © 2007, Oracle. All rights reserved.

Chapter 5 Complete Database Changes
AND GP_ELN_SET = ’Your List Set Identifier’
/
INSERT INTO PS_GP_ELN_PIN_ATTR (
COUNTRY
, GP_ELN_SET
, EFFDT
, PIN_ELEM_GRP_NUM
, PIN_NUM
, GP_ELN_ATTR1
, GP_ELN_ATTR2
, GP_ELN_ATTR3
, GP_ELN_ATTR4
, GP_ELN_ATTR5
, GP_ELN_ATTR6
, GP_ELN_ATTR7
, GP_ELN_ATTR8
, GP_ELN_ATTR9
, GP_ELN_ATTR10
, DATA_TYPE_CD)
SELECT ’FRA’
, ’<LIST_SET>’
, %DateIn (’2002-01-01’)
, <PIN_NUM>
, PIN_NUM
, GPFR_PYSL_ABS_B
, GPFR_PYSL_ABS_A
, GPFR_ILL_C6
, GPFR_ACC_C14
, GPFR_ABS_FAMILY
, GPFR_DA_ABS_CD
, GPFR_DA_UNPAID
, ‘ ‘
, ‘ ‘
, ‘ ‘
, ‘S’
FROM PS_GPFR_ABS_TAKEN
Running the UVHCGFRHW50 Migration ScriptTo run the migration script:
1. Open Data Mover.2. Run the UVHCGFRHW50.DMS script.
Copyright © 2007, Oracle. All rights reserved. 245

Complete Database Changes Chapter 5
Properties
DatabaseOrientation
Initial or MTP Products Platforms Languages
Target Both Global PayrollFrance
All All
Task 5-10: Validating Alternative Overtime UpgradeIf you requested the Alternative Overtime upgrade during the Making Functional Decisions task at thebeginning of the upgrade, the upgrade process has populated the new ALT_OT_STATES table with datarepresenting the U.S. states that require Alternative Overtime processing. This data is keyed by setID andEFFDT. For TableSet Control purposes, the ALT_OT_STATES table is in the new PY_04 Record Group. Theupgrade process created the new record group within every tableset, and assigned to it the default setID that isassociated with that tableset.
Navigate to PeopleTools, Utilities, Administration, TableSet Control and review the default setID values thathave been assigned to the PY_04 Record Group, and ensure that they are appropriate to your requirements. TheAlternative Overtime payroll processes will use COMPANY as the Set Control value for TableSet Controlswhen looking up the Alternative Overtime states. If all your companies will require Alternative Overtimeprocessing for the same states, then you should only have data for one setID on the ALT_OT_STATEStable. This setID should be assigned to the PY_04 record group for all set control values. In this context,Set Control value = Company. Conversely, if the states will be different for some companies, then thereshould be data for separate setIDs on the ALT_OT_STATES table, and you should assign different setIDs tothe PY_04 record group.
Properties
DatabaseOrientation
Initial or MTP Products Platforms Languages
Target Initial Payroll for NorthAmerica
All All
Task 5-11: Updating Payroll Interface DefinitionsThis section discusses:
• Understanding Updates to Payroll Interface Definitions
• Running Validate PI Field References Report
• Updating PS Table Definitions
• Updating Field Definition Table
• Updating Instance Table Definitions
246 Copyright © 2007, Oracle. All rights reserved.

Chapter 5 Complete Database Changes
Understanding Updates to Payroll Interface DefinitionsIn this task you perform steps to update the PeopleSoft Payroll Interface Definitions.
Note. Perform this task only if you have PeopleSoft Payroll Interface and currently have field entries that userecord (table) names impacted by structural changes in the new PeopleSoft release.
A number of enhancements were made in the new PeopleSoft release that involved record structure changesthat may impact Payroll Interface. Some of your existing Payroll Interface definitions may not be valid as aresult of these changes. You must review your Payroll Interface definitions and update PS Table, FieldDefinition Table, and Instance Table, if needed.
Before updating Payroll Interface definitions, you need to do an analysis of structural changes in the newPeopleSoft release, to properly locate all impacted records and fields. For example, for personal data changes,you can review the appendix “Understanding Person Model Changes” and decide how you will updateyour tables.
Task 5-11-1: Running Validate PI Field References ReportIn this step, you run a report that lists all invalid record and field references as a result of new and modifiedrecord structures.
To run the Validate PI Field References report:
1. From your browser, sign on to your Copy of Production database, keeping the default browser address.2. Select Set Up HRMS, Upgrade, Reports, Validate PI Field References.3. Click Add a New Value.4. Enter the run control ID UPG_PI_DEFN.5. Click Add.6. From the Check PI Definitions page, click Run.7. Analyze the data presented in the report to decide whether any changes to Payroll Interface definitionsare needed.
The report has three different sections:
• Invalid references in PS Tables• PI Field Tbl• PI Instance Tbl
If the report lists any data in any section, proceed with updating the corresponding definitions in the followingsteps.
Properties
DatabaseOrientation
Initial or MTP Products Platforms Languages
Target Initial Payroll Interface All All
Copyright © 2007, Oracle. All rights reserved. 247

Complete Database Changes Chapter 5
Task 5-11-2: Updating PS Table DefinitionsIn this step, you update any invalid references in PS Tables.
To update PS Table Definitions:
1. From your browser, sign on to your Copy of Production database, keeping the default browser address.2. Select Set Up HRMS, Product Related, Payroll Interface, Interface Controls, PS Tables, Find an ExistingValue.
3. Enter a Payroll Interface system ID listed in the PS Tables section of the Validate PI Field Referencesreport, if you see any.
4. Click Search.5. Select Record (Table) Name listed in the PS tables section of the Validate PI Field References report.6. On the PS Tables page, review and update the Field Details area.7. Delete the fields from the Field Details of the records where they used to be.Then add the fields to the records where they were moved in this release.
8. Repeat steps 2 through 7 for each record listed in the PS Tables section of the report.
Properties
DatabaseOrientation
Initial or MTP Products Platforms Languages
Target Initial Payroll Interface All All
Task 5-11-3: Updating Field Definition TableIn this step, you update any invalid references in the PI Field Definition Table.
To update the Field Definition Table:
1. Select Set Up HRMS, Product Related, Payroll Interface, Interface Controls, Field Definition Table,Find an Existing Value.
2. Enter a Payroll Interface system ID, Payroll Interface field ID, and process type for fields listed in the PIField Tbl section of the Validate PI Field References report, if you see any.
3. Click Search.4. On the Interface Field2 page, review and update the field definition.5. Repeat steps 1 through 4 for each field listed in the PI Field Tbl section of the report.
Properties
DatabaseOrientation
Initial or MTP Products Platforms Languages
Target Initial Payroll Interface All All
248 Copyright © 2007, Oracle. All rights reserved.

Chapter 5 Complete Database Changes
Task 5-11-4: Updating Instance Table DefinitionsIn this step, you update any invalid references in the PI Instance Table.
To update Instance Table definitions:
1. Select Set Up HRMS, Product Related, Payroll Interface, Interface Controls, Instance Table, Find anExisting Value.
2. Enter a Payroll Interface system ID and instance ID listed in the PI Instance Tbl section of the Validate PIField References report, if you see any.
3. Click Search.4. Review and update the PeopleSoft Record Name and PeopleSoft Field1 Name fields.5. Repeat steps 1 through 4 for each instance ID listed in the PI Instance Tbl section of the report.
Properties
DatabaseOrientation
Initial or MTP Products Platforms Languages
Target Initial Payroll Interface All All
Task 5-12: Modifying Post Process FormulasIn this step, you run a report that lists all the post process formulas that may have been modified. In the newrelease, new Post Process Formula functionality has been provided that allows a rules developer the ability tooverride additional individual components values (Rate, Unit, Base, or Percent) in a post process formula. Toimplement this, nine new system elements have been added:
• Five new system elements called OVRD CURR xxx VAL, where xxx is AMT, RATE, UNIT, BASE, or PCT• Four new system elements called SET CURR xxx VAL, where xxx is RATE, UNIT, BASE, or PCT
The report will list all existing post process formulas that use the system element SET CURR AMT VALbut do not use OVRD CURR AMT VAL. These post process formulas will need to be modified in order touse this new functionality for overriding components. The method used to overwrite the resolved amountalso needs to be modified, as follows:
• For all earnings/deductions where Calc Rule = Flat Amount and where limit processing exists (that is,those post formulas where SET CURR AMT VAL is used), the corresponding post process formulas mustbe modified to update the new OVRD CURR AMT VAL system element to the override value (instead ofsetting the post process formula itself to the override value).
• For all earnings/deductions where Calc Rule <> Flat Amount, the corresponding post process formulasmust be reviewed to determine whether to override one or more of the individual component values as well.
If so, these post process formulas also need to be modified to use the new OVRD CURR xxx VAL andSET CURR xxx VAL system elements.
If you do not modify these formulas in accordance with this enhancement feature, your resolved results will bedifferent than your expected results when you run your payroll process. The system will try to get the overrideamount from the new system element OVRD CURR AMT VAL instead of from the post process formula.
To run the Post Process Formula report:
Copyright © 2007, Oracle. All rights reserved. 249

Complete Database Changes Chapter 5
1. Sign on to the Copy of Production database using your current PeopleTools release.2. Select Set Up HRMS, Upgrade, Reports, Pre-Post Formulas.3. Click Add a New Value.4. Enter UPG_GP_PREPOST_FORMULAS on the Run Control page and click Add.5. Click Run.6. Click OK on the Process Scheduler Request page.7. Review the report and modify the formulas accordingly.
Properties
DatabaseOrientation
Initial or MTP Products Platforms Languages
Target Both Global Payroll Core All All
Task 5-13: Verifying Record and RecordField ReferencesIn this step, you run a report that lists any invalid record and record-field references in arrays, writable arrays,and trigger definitions. After records have been upgraded, some of the arrays, writable arrays, or triggerdefinitions could still be referring to old records or record-fields that no longer exist on the upgraded database.After running the report, you should modify these arrays, writable arrays, and trigger definitions so that theypoint to appropriate records or record-fields, or remove them completely if no longer needed.
To run the invalid record and record-field references report:
1. From your browser, sign on to the Target database.
2. Select Set Up HRMS, Upgrade, Reports, Invalid Rec/Rec-Field Refs.
3. Click Add a New Value.
4. In the Run Control field, enter UPG_GP_INVALID_REC_FLD_REFS and click Add.
5. Click Run.6. On the Process Scheduler Request page, click OK.
7. Review the report and remove any invalid record and record-field references from the arrays, writablearrays, and trigger definitions accordingly.
Properties
DatabaseOrientation
Initial or MTP Products Platforms Languages
Target Both Global Payroll Core All All
250 Copyright © 2007, Oracle. All rights reserved.
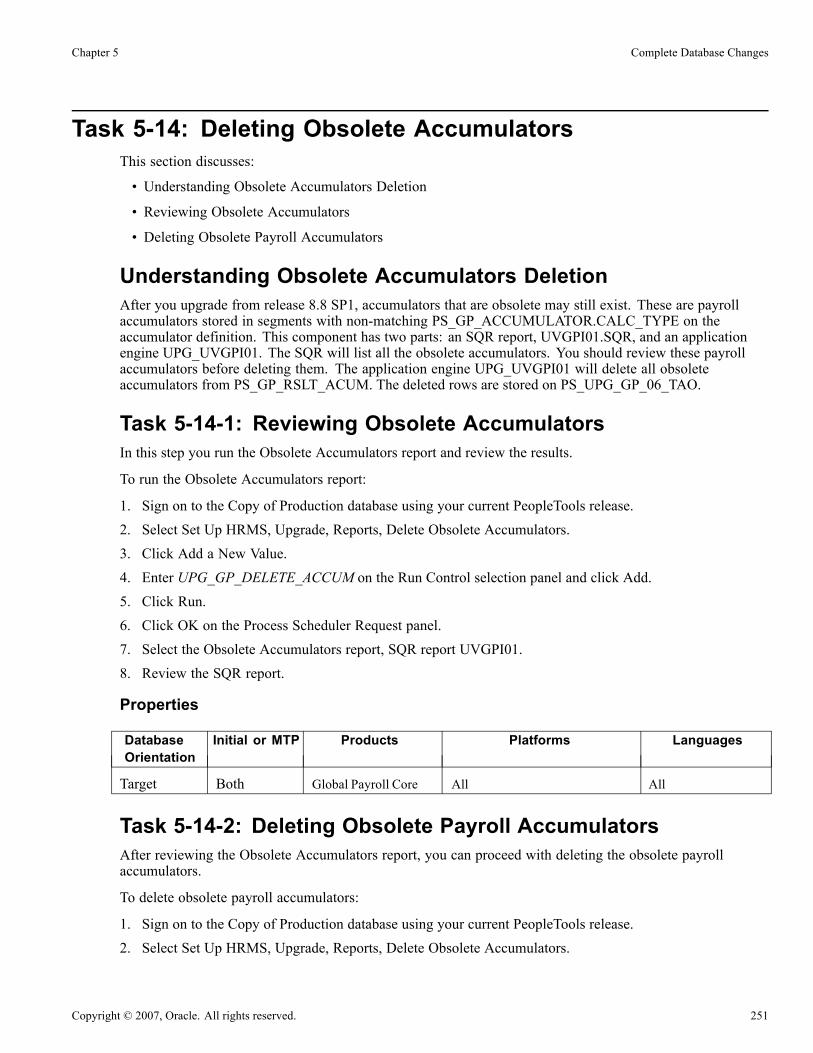
Chapter 5 Complete Database Changes
Task 5-14: Deleting Obsolete AccumulatorsThis section discusses:
• Understanding Obsolete Accumulators Deletion
• Reviewing Obsolete Accumulators
• Deleting Obsolete Payroll Accumulators
Understanding Obsolete Accumulators DeletionAfter you upgrade from release 8.8 SP1, accumulators that are obsolete may still exist. These are payrollaccumulators stored in segments with non-matching PS_GP_ACCUMULATOR.CALC_TYPE on theaccumulator definition. This component has two parts: an SQR report, UVGPI01.SQR, and an applicationengine UPG_UVGPI01. The SQR will list all the obsolete accumulators. You should review these payrollaccumulators before deleting them. The application engine UPG_UVGPI01 will delete all obsoleteaccumulators from PS_GP_RSLT_ACUM. The deleted rows are stored on PS_UPG_GP_06_TAO.
Task 5-14-1: Reviewing Obsolete AccumulatorsIn this step you run the Obsolete Accumulators report and review the results.
To run the Obsolete Accumulators report:
1. Sign on to the Copy of Production database using your current PeopleTools release.2. Select Set Up HRMS, Upgrade, Reports, Delete Obsolete Accumulators.3. Click Add a New Value.4. Enter UPG_GP_DELETE_ACCUM on the Run Control selection panel and click Add.5. Click Run.6. Click OK on the Process Scheduler Request panel.7. Select the Obsolete Accumulators report, SQR report UVGPI01.8. Review the SQR report.
Properties
DatabaseOrientation
Initial or MTP Products Platforms Languages
Target Both Global Payroll Core All All
Task 5-14-2: Deleting Obsolete Payroll AccumulatorsAfter reviewing the Obsolete Accumulators report, you can proceed with deleting the obsolete payrollaccumulators.
To delete obsolete payroll accumulators:
1. Sign on to the Copy of Production database using your current PeopleTools release.2. Select Set Up HRMS, Upgrade, Reports, Delete Obsolete Accumulators.
Copyright © 2007, Oracle. All rights reserved. 251

Complete Database Changes Chapter 5
3. Click Add a New Value.4. Enter UPG_GP_DELETE_ACCUM on the Run Control selection panel.5. Click Run.6. Click OK on the Process Scheduler Request panel.7. Select Delete Obsolete Accumulators, application engine UPG_UVGPI01.8. Review the application engine output messages.This will show the number of rows that were inserted in and deleted from the tables.
Properties
DatabaseOrientation
Initial or MTP Products Platforms Languages
Target Both Global Payroll Core All All
Task 5-15: Updating Jobs and Process for GP PackagerThis section discusses:
• Understanding Updates for Global Payroll Packager
• Updating Job Definitions for GP Packager
• Updating the Process Definition for GP Packager
Understanding Updates for Global Payroll PackagerIn PeopleSoft 9, the SQR Report GP00PK01 has to be run on an NT Process Scheduler. Prior to PeopleSoft 9,the DataMover processes (GP_EXP, GP_IMP) had to be run on an NT Process Scheduler and this continuesto be true. In PeopleSoft 9, the delivered job definitions run multiple Global Payroll Packager processes inorder to streamline the overall process. As a result, the job definitions that contain either the SQR report or theData Mover processes have to be scheduled to be run on an NT Process Scheduler. You need to update thefollowing definitions for Global Payroll Packager:
• Job definitions• Process definition
Task 5-15-1: Updating Job Definitions for GP PackagerThe following job definitions need to run on an NT Process Scheduler.
• GPCMPRPT: Rules Package Compare Report
• GPCMPRU: Compare & Upgrade with Report
• GPCRSCTE: Create Package & Scripts & Export
• GPEXP: Export Rule Packages
• GPICMP: Import Rule Package & Compare
252 Copyright © 2007, Oracle. All rights reserved.

Chapter 5 Complete Database Changes
• GPICMPRU: Import & Compare & Upgrade with Report• GPICMPU: Import & Compare & Upgrade• GPIMP: Import Rule Packages• GPSCTE: Create Scripts & Export Package
To update the job definitions above to run on an NT Process Scheduler:
1. Select PeopleTools, Process Scheduler, Jobs.2. Open the page for one of the job definitions listed above.3. Select the Job Definition Options tab.The Server Name field contains the value PSNT.
4. For the Server Name field, select the value of the NT Process Scheduler that was set up during yourinstallation
5. Repeat steps 2 through 4 for each of the job definitions listed above.
Properties
DatabaseOrientation
Initial or MTP Products Platforms Languages
Target Both Global Payroll Core All All
Task 5-15-2: Updating the Process Definition for GP PackagerThe process for SQR Report GP00PK01 also needs to have the server name of an NT Process Scheduler.
To update the process definition:
1. Select PeopleTools, Process Scheduler, Processes.2. Click the Advanced Search link on the Search page.3. Use the search criteria Process Type = SQR Report and Process Name = GP00PK01, and open the page.4. Select the Process Definition Options tab.5. For the Server Name field, select the value of the NT Process Scheduler that was set up during yourinstallation
The DataMover processes (GP_EXP and GP_IMP) should continue to have the server name of an NT ProcessScheduler.
Properties
DatabaseOrientation
Initial or MTP Products Platforms Languages
Target Both Global Payroll Core All All
Copyright © 2007, Oracle. All rights reserved. 253

Complete Database Changes Chapter 5
Task 5-16: Upgrading RulesThis section discusses:
• Understanding Rules Upgrade
• Running the Dropped Temp Tables Report
• Recompiling Template Built Rules
• Customizing Template Built Rules
• Reviewing and Modifying User Exit Rules
Understanding Rules UpgradeThis task applies only if you are upgrading the PeopleSoft HRMS Time and Labor product. Many SQL objectsmay have been modified for performance and functionality enhancements.
Task 5-16-1: Running the Dropped Temp Tables ReportIn this step, you run a report to list any temporary tables that you use to customize rules that were droppedfor the new release. You will fix these rules as you complete the steps in this task. Refer to this report to seewhich rules have temporary tables to be fixed. After you complete this step, rerun this report to validatethat all rules were upgraded.
The script is:
UVTLW10.SQR
To run the Deleted Temp Table Report:
1. Select Set Up HRMS, Upgrade, Reports, TL Temp Tables List.2. Click Add a New Value.3. Enter the run control ID UPG_RULE.4. Click Add.5. Click Run.6. Click the Process Monitor link to monitor the Program’s process.
The resulting report lists any of the rules that use temp tables that were dropped in the new release. Review therules and change them to work in the new system.
Check to see whether the temp table mentioned in the report exists in the database. If it exists, then add thattable to the properties for the TL_TIMEADMIN application engine. If the temp table does not exist, thencheck the object where that table is used and fix the object.
254 Copyright © 2007, Oracle. All rights reserved.

Chapter 5 Complete Database Changes
Properties
DatabaseOrientation
Initial or MTP Products Platforms Languages
Target Initial Time and Labor All All
Task 5-16-2: Recompiling Template Built RulesAll rules that you have built from rule templates need to be recompiled. To recompile Template-Built Rules,you will need to follow the steps below.
To recompile Template-Built Rules:
1. If you are using Referential Integrity, export any data you have in TL_RI_CNTRL_TBL before you clearthe Production Environment check box option on the Time and Labor Installation page.This table will be deleted once you clear the check box, and you will re-import this data later in theprocedure.
2. Select Set Up HRMS, Install, Product and Country Specific, Time and Labor Installation.3. Clear the Production Environment check box, as shown below, and click Save.
Time and Labor Installation page
4. Select Set Up HRMS, Product Related, Time and Labor, Rules and Workgroups, Template-Built Rules.5. Instead of entering any values in any field, click Search to display all the Template-Built Rules in yoursystem.
Copyright © 2007, Oracle. All rights reserved. 255

Complete Database Changes Chapter 5
Template-Built Rules page
6. Select each rule to review it, making changes if required, then click Save.Saving the component will recompile the rule for you. If no changes are required, you will need tomake some minor change to trigger the save. It is recommended that you change the Short Descriptionfield by either changing the current text or copying the AE Section field and pasting it into the ShortDescription field.If the rule being recompiled is included in rule programs, a warning message similar to this one will bedisplayed:
Template-Built Rules - warning page
256 Copyright © 2007, Oracle. All rights reserved.

Chapter 5 Complete Database Changes
7. After you have finished recompiling all of your Template-Built Rules, select the Production Environmentcheck box option on the Time and Labor Installation page to enable the Referential Integrity process.
Properties
DatabaseOrientation
Initial or MTP Products Platforms Languages
Target Initial Time and Labor All All
Task 5-16-3: Customizing Template Built RulesThis section discusses:
• Understanding Template-Built Rules Customizations
• Customized Template-Built Rules
• Rules Created from Actions and Conditions or SQL Objects
Understanding Template-Built Rules CustomizationsIn this step you customize your Template-Built Rules as well as review and make changes to rules created fromActions and Conditions or SQL objects.
Customized Template-Built RulesCustomized Template-Built Rules are rules that you have created using delivered-rule templates and havemodified to meet your specific needs. To upgrade these rules, you first need to determine the effort requiredto modify the current rules (created in PeopleSoft 8.8) versus the effort required to create new rules fromdelivered-rule templates (in PeopleSoft 9.0) to be modified.
If you think that it will be faster to create a new rule from a rule template than to modify that rule, you willneed to apply the same changes that you applied to PeopleSoft 8.8 Template-Built Rules.
Changes to SQL statements have to be made on the Define Actions, Define Conditions, or SQL Objects pages.To review custom rules, select Set Up HRMS, System Administration, Utilities, Build Time and Labor Rules,Rules, and enter the first few characters of the rule ID that will follow your naming convention for customrules, as shown in the example below:
Copyright © 2007, Oracle. All rights reserved. 257

Complete Database Changes Chapter 5
Rules page
Rules Created from Actions and Conditions or SQL ObjectsFor rules created from Actions and Conditions or SQL objects, you need to review and make necessarychanges as mentioned in the Customized Template-Built Rules section above. If you used delivered rulesobjects (Actions and Condition, SQL Objects, or Temp Tables) in your custom rules without any modifications,you only need to recompile them.
To recompile custom Template-Built rules:
1. Select Set Up HRMS, System Administration, Utilities, Build Time and Labor Rules, Rules.2. On the Define Rule Header tab, click the Compile Rule button.
258 Copyright © 2007, Oracle. All rights reserved.

Chapter 5 Complete Database Changes
Define Rule Header page
If you have cloned delivered rules objects and modified them to be used in your custom rules, you need toreview and modify these custom rules. You will need to either make changes directly in the current rulesobjects (cloned and modified in your previous PeopleSoft release) or clone PeopleSoft 9.0-delivered rulesobjects to modify. Then you will need to recompile these rules.
Properties
DatabaseOrientation
Initial or MTP Products Platforms Languages
Target Initial Time and Labor All All
Task 5-16-4: Reviewing and Modifying User Exit RulesIf you have created any rules as User-Exits, you need to review and modify them directly in the rulesApplication Engine library, TL_TA_RULES.
To review and modify User-Exit rules:
1. Launch Application Designer.2. Open the Application Engine program TL_TA_RULES.3. On the Application Engine Definition page, look for the Application Engine section.4. Modify your SQL steps, as appropriate, to accommodate any changes.5. Click Save to save the Application Engine section.
Copyright © 2007, Oracle. All rights reserved. 259

Complete Database Changes Chapter 5
Properties
DatabaseOrientation
Initial or MTP Products Platforms Languages
Target Initial Time and Labor All All
Task 5-17: Setting Up General Ledger InterfaceThis section discusses:
• Understanding GL Interface Setup
• Setting Up the Liability Accounts
• Setting Up the GL Activity Groupings
• Setting Up the Expenses ChartField Mappings
Understanding GL Interface SetupIn this task you will set up the tables that are used for GL Interface based on the decisions you made afterreviewing audit reports and discussing ChartFields combinations with General Ledger staff.
Note. Run this task only if you are using non-commitment accounting in Payroll for North America.
Important! Once you create your copy of the production database in the initial pass, you should not make anychanges in your production database for Company, Company State Taxes, Company Local Taxes, Wage LossPlan Table, and Deduction Table until you complete the upgrade. If you make any changes to any of the tableslisted above, you will not be able to use import scripts during the Move to Production passes to import datathat you have set up in the initial pass. You will either have to synchronize the data between production and thecopy of the production you created in the initial pass before you set up the data and do the export, or manuallyset up data in your new copy of the production during the Move to Production pass.
See Appendix: “Understanding Dynamic ChartFields Changes.”
See “Prepare Your Database,” Running Application Audits, Running Dynamic ChartFields Audits.
Task 5-17-1: Setting Up the Liability AccountsThis section discusses:
• Understanding Liability Accounts
• Setting Up NetPay, Direct Deposit, and Federal Tax Liability Accounts
• Setting Up State Tax Liability Accounts
• Setting Up Local Tax Liability Accounts
• Setting Up Canadian Tax Liability Accounts
• Setting Up Deduction Liability Accounts
260 Copyright © 2007, Oracle. All rights reserved.

Chapter 5 Complete Database Changes
Understanding Liability AccountsUse the data listed in the Liability ChartField Usage audit report to work with your General Ledger staff andmake decisions about how you want to set up the liability accounts that will offset the credit transactions forpayroll activities. Your setup will vary depending on whether you are using US Payroll or Canadian Payroll.Follow the steps in this section to set up the liability accounts that are applicable to the payroll type youare using.
Note. NetPay, Direct Deposit, and Deduction liability accounts are for both US Payroll and Canadian Payroll.Federal Tax, State Tax, and Local Tax liability accounts are for US Payroll only. Canadian Tax liabilityaccounts are for Canadian Payroll only.
Setting Up NetPay, Direct Deposit, and Federal Tax Liability AccountsTo set up liability accounts for NetPay, Direct Deposit, and Federal Tax:
1. Sign on to the Copy of Production database.2. Select Set Up HRMS, Foundation Tables, Organization, Company.3. Enter the Company.4. Click Search.5. Select the Default Settings tab and the General Ledger Accounts link.6. Enter the liability accounts and click OK.7. Click Save.8. Repeat steps 1 through 7 for each company that needs to be set up.
Setting Up State Tax Liability AccountsTo set up liability accounts for State Tax:
1. Sign on to the Copy of Production database.2. Select Set Up HRMS, Product Related, Payroll for North America, Federal/ State Taxes, Company StateTax Table.
3. Enter the Company/State combination.4. Click Search.5. Select the GL Accounts tab.6. Enter the liability accounts.7. Click Save.8. Repeat steps 1 through 7 for each Company or State combination that needs to be set up.
Setting Up Local Tax Liability AccountsTo set up liability accounts for Local Tax:
1. Sign on to the Copy of Production database.2. Select Set Up HRMS, Product Related, Payroll for North America, Local Taxes, Company Local Tax Table.3. Enter the Company/State/Locality combination.4. Click Search.
Copyright © 2007, Oracle. All rights reserved. 261

Complete Database Changes Chapter 5
5. Enter the liability accounts.6. Click Save.7. Repeat steps 1 through 6 for each Company/State/Locality combination that needs to be set up.
Setting Up Canadian Tax Liability AccountsTo set up liability accounts for Canadian Tax:
1. Sign on to the Copy of Production database.2. Select Set Up HRMS, Product Related, Payroll for North America, Canadian Taxes, Wage Loss Plan Table.3. Enter the Company/Wage Loss Replacement Plan combination.4. Click Search.5. Enter the liability accounts.6. Click Save.7. Repeat steps 1 through 6 for each Company or Wage Loss Replacement Plan combination that needs tobe set up.
Setting Up Deduction Liability AccountsTo set up liability accounts for Deductions:
1. Sign on to the Copy of Production database.2. Select Set Up HRMS, Product Related, Payroll for North America, Deductions, Deduction Table.3. Enter the Plan Type/Deduction Code combination.4. Click Search.5. Select the Process tab.6. Enter the liability accounts.7. Click Save.8. Repeat steps 1 through 7 for each Plan Type or Deduction Code combination that needs to be set up.
Properties
DatabaseOrientation
Initial or MTP Products Platforms Languages
Target Initial Payroll for NorthAmerica
All All
Task 5-17-2: Setting Up the GL Activity GroupingsUse the data listed in the Chartkey Usage by Expense Types audit report to work with general ledger staffand make decisions about how you want to set up the payroll activities. The payroll activities are mappedto ChartFields combinations later in the upgrade.
Follow the steps below to set up the GL Activity Groupings.
To set up the GL activity groupings:
1. Sign on to the Copy of Production database.
262 Copyright © 2007, Oracle. All rights reserved.

Chapter 5 Complete Database Changes
2. Select Set Up HRMS, Product Related, Payroll for North America, GL Interface, GL Activity Grouping.3. Click Add a New Value.4. Enter Company/GL Group Name.5. Click Add.6. Enter data on the Earnings Expenses tab, if applicable.7. Enter data on the Deduction Expenses tab, if applicable.8. Enter data on the Tax Expenses tab, if applicable.9. Click Save.10. Repeat steps 1 through 9 for each Company/GL Group Name you need to set up.
Properties
DatabaseOrientation
Initial or MTP Products Platforms Languages
Target Initial Payroll for NorthAmerica
All All
Task 5-17-3: Setting Up the Expenses ChartField MappingsUse the data listed in the Chartkey Usage by Expense Types and Chartkey Usage by Company and BusinessUnit audit reports to work with General Ledger staff and make decisions about how you want to map payrollactivities to a ChartFields combination.
To set up the Expenses ChartField Mappings:
1. Sign on to the Copy of Production database.2. Select Set Up HRMS, Product Related, Payroll for North America, GL Interface, ChartField ExpenseMapping <country> where <country> is, for example, CAN or USA.
3. Click Add a New Value.4. Enter Company, Business Unit, and Mapping Level.Depending on the mapping level you selected, enter additional information if needed.
5. Click Add.6. Enter data on the Earnings Mapping tab, if applicable.7. Enter data on the Deductions Mapping tab, if applicable.8. Enter data on the U.S. Tax Mapping tab, if applicable.9. Enter data on the Canadian Tax Mapping tab, if applicable.10. Click Save.11. Repeat steps 1 through 10 for each Company, Business Unit, and Mapping Level you need to set up.
Copyright © 2007, Oracle. All rights reserved. 263

Complete Database Changes Chapter 5
Properties
DatabaseOrientation
Initial or MTP Products Platforms Languages
Target Initial Payroll for NorthAmerica
All All
Task 5-18: Configuring PayBillThis section discusses:
• Setting Up Staffing Installation Values
• Setting Up Rapid Time Prompts
Task 5-18-1: Setting Up Staffing Installation ValuesIn this step, you set up values for the Action and Reason Code fields in the Staffing Installation page. Thesefields were added in the PeopleSoft 8.9 release.
To set up values for the Action and Reason Code fields:
1. Select Set Up HRMS, Product Related, Staffing, Installation Options, Staffing Installation.
2. Choose a value for the Action field from the prompt.
3. Choose a value for the Reason Code field from the prompt.
4. Save the component.
Note. The Action and Reason Code fields are both required fields and, therefore, the values must be specifiedfor each of these fields before saving the component.
Properties
DatabaseOrientation
Initial or MTP Products Platforms Languages
Target Initial Pay/BillManagement
All All
Task 5-18-2: Setting Up Rapid Time PromptsIn this step, you set up prompts for the Staffing Rapid Time Entry process. In order to do this, you mustenable the prompts in the Staffing Installation page.
To enable prompts for Staffing Rapid Time Entry:
1. Select Set Up HRMS, Product Related, Staffing, Installation Options, Staffing Installation.
2. If the button Remove Rapid Time Prompts appears, you do not need to do anything at this time. TheRapid Time Prompts have already been enabled.
264 Copyright © 2007, Oracle. All rights reserved.

Chapter 5 Complete Database Changes
Skip the remainder of this step.3. If the button Create Rapid Time Prompts appears, you must continue to enable the prompts.4. Click the Create Rapid Time Prompts button.5. When the prompts have been enabled, the text on the Create Rapid Time Prompts will change to RemoveRapid Time Prompts.This confirms that the prompts have been enabled in the Staffing Rapid Time Entry page.
Properties
DatabaseOrientation
Initial or MTP Products Platforms Languages
Target Initial Pay/BillManagement
All All
Task 5-19: Validating EE Garn Payee DataThis section discusses:
• Understanding EE Garn Payee Data Validation
• Running the EE Garn Payee Data Validation Report
• Updating Garn Payee Data
Understanding EE Garn Payee Data ValidationIn this task you perform steps to update payee data on garnishment orders, if needed.
Note. Run this task only if you are using AP Interface and run the Exporting Non-Tax Deductions program.
See Appendix: “Understanding Garnishments Changes.”
Task 5-19-1: Running the EE Garn Payee Data Validation ReportIn this step, you run a report that lists garnishment orders whose payee has either different invoicing andremitting Vendor ID or multiple locations.
To run the EE Garn Payee Data Validation Report:
1. Sign on to the Copy of Production database.2. Select Set Up HRMS, Upgrade, Reports, EE Garn Payee Data Validation.3. Click Add a New Value.4. Enter the run control ID UPG_GARN_PAYEE.5. Click Add.6. On the EE Garn Payee Data page, click Run.7. Analyze the data presented in the report to decide if any input is needed.
Copyright © 2007, Oracle. All rights reserved. 265

Complete Database Changes Chapter 5
The report has four different sections:
• Active orders with different invoicing and remitting Vendor ID.
• Inactive orders with different invoicing and remitting Vendor ID.
• Active orders with multiple locations.
• Inactive orders with multiple locations.
If there is any active order listed in the report, you are expected to review it and decide if you need to make anychanges or not. The active orders have the status Approved or Received and they will continue to be processedafter the upgrade. If the payee data is not correct, the Extract Non-Tax Deduction program will not create theinvoice correctly or it will not create the invoice at all, depending on your setup.
This report will insert all active orders listed in the report into a new record that will be accessible in the onlinecomponent. The next step provides instructions for accessing the online component and making the updates.
If there is any inactive order listed in the report, it is up to you to decide whether you want to make any updatesto history data or not. Because these orders do not have Approved or Received status, they will not be processedin subsequent pay calculations and leaving them as is will not have any impact on creating the invoices.
The inactive orders will not be automatically inserted and available in the online component. If you decideyou want to make the updates to history data, you can access the online component and manually add theorders you want to update. The next step provides instructions for accessing the online component andadding the history records.
This report will run in each upgrade pass, but it will only list the data that you need to review; for example,the initial pass listed 10 active orders, which you have reviewed and updated. The Move to Productionpasses will list additional orders only if you have created a new order between two passes that matches thereport selection criteria; otherwise, it will be empty.
Note. If the final Move to Production pass lists any data in this report and you decide you need updates, you willdo the updates directly in Create Garnishments or Payee Table in your production database before you go live.
Properties
DatabaseOrientation
Initial or MTP Products Platforms Languages
Target Both Payroll for NorthAmerica
All All
Task 5-19-2: Updating Garn Payee DataThis section discusses:
• Understanding Updating Garn Payee Data
• Updating Active Garnishment Orders
• Updating Garnishment Orders After Final Move to Production Pass
• Adding Inactive Garnishment Orders
Understanding Updating Garn Payee DataIn this step, you update payee data on active garnishment orders, if needed, or add inactive garnishment ordersthat have payee data you want to update.
266 Copyright © 2007, Oracle. All rights reserved.

Chapter 5 Complete Database Changes
Updating Active Garnishment OrdersTo update active orders:
1. Sign on to the Copy of Production database.2. Select Set Up HRMS, Upgrade, Define Defaults, Upgrade EE Garnishment Orders.3. Select the Upgrade Garn Spec tab.4. Review the data and update the Location and Remit Address fields, if needed.5. Click Save.
There are several things to keep in mind when you are reviewing the data on this page:
• The orders are inserted here because they match certain criteria, but that does not mean the data reallyneeds to be updated. For example, payee XYZ has two locations and two remit addresses. Order ABC haspayee XYZ with location 1 and remit address 1, order DEF has payee XYZ with location 2 and remitaddress 2. Both orders will be listed on this page because their payee has multiple locations, but thelocation and remit address might be correct for each order. If that is true, you do not have to do anything;the conversion will use the prepopulated data to do updates in the next upgrade pass, but the data willnot really change. If you think that order DEF should also have location 1 and/or remit address 1, youshould make the update on this page and the conversion programs will use your input to update thedata on the garnishment order in the next pass.
• You can only update the Location and Remit Address fields for the orders that are automatically insertedby the validation report onto this page.
You will get an error message if you try to update any other field in the row.
• You can delete the row on this page, but when you run the report the next time, the validation will find allorders that match the selection criteria and insert the same row again, if it is still applicable.
The same criteria will most likely still be applicable, unless you have changed the payee setup in thePayee Table between upgrade passes.
• The Used field on this page may have multiple values.
This field is display only because it keeps track of why data is inserted, whether data passed throughconversion, and whether data updated the real garnishment order or not. Review the translate values forthis field to see details about each value. The rows created by the first section of the report will have thevalue D in the Used field because they have a payee with different invoicing and remitting vendors.The rows created by the third section of the report will have the value L in the Used field because theyhave a payee with multiple locations.
• If the payee has setup that matches both criteria, it will be listed and inserted into this page only once.
You will have to ensure your input will correctly update data for both scenarios.
• In the following pass, the Used field will have a different value, depending on whether it actually updatedthe real order or not.
The conversion program will update the value of this field to U when the orders are updated, which willhappen if the Location and Remit Address fields have any values. The conversion program will updatethe value of this field to X when the orders are not updated, which will happen if the Location or RemitAddress fields do not have any values.
• The Used field will be very important after running the final upgrade pass.
If there is any row in the data with the value D or L in the Used field, you will have to access thegarnishment order and do manual updates where applicable, because there will be no more upgradeconversion after the last validation. These entries would be created by the last validation report and most
Copyright © 2007, Oracle. All rights reserved. 267

Complete Database Changes Chapter 5
likely would be for the garnishment orders that were newly created in the Copy of Production since thelast time you took the copy.
Updating Garnishment Orders After Final Move to Production PassTo manually update garnishment orders after the final Move to Production pass:
1. Sign on to the Copy of Production database.2. Select Payroll for North America, Employee Pay Data <country>, Deductions, Create Garnishmentswhere country is, for example, CAN, USA, or USF.
3. Enter the employee ID and company that needs manual updates.4. Click Search.5. If there is more than one garnishment order for the same employee, select the row with the garnishmentID that needs to be manually updated.
6. Select the Garnishment Spec Data 2 tab.7. Update any of the following fields, as needed: SetID, Vendor ID, Location, Remit Address.8. Click Save.
Adding Inactive Garnishment OrdersTo add inactive orders:
1. Sign on to the Copy of Production database.2. Select Set Up HRMS, Upgrade, Define Defaults, Upgrade EE Garnishment Orders.3. Select the Upgrade Garn Spec tab.4. Click the “+” button to insert a new row.5. Enter values for the fields EmplID, Company, GarnishmentID, SetID, and VendorID from the inactiveorders sections of the report for each order you want to update.Enter values for the Location and Remit Address fields from the available prompt lists, selecting the correctvalue for each order you are updating.
6. Click Save.
There are several things to keep in mind when you are adding new data on this page:
• All manually inserted rows will initially have the value O in the Used field, marking them as online entry.• The system will not prevent you from entering any combination of data on this page.It does not check whether you are entering only inactive orders. It is your responsibility to decide whatupdates you are making and add corresponding data on this page.
• In the following pass, the Used field will get a different value, depending on whether it actually updatedthe real order or not.The conversion program will update the value of this field to U when the orders are updated, which willhappen if the Location and Remit Address fields have any values. The conversion program will updatethe value of this field to X when the orders are not updated, which will happen if the Location or RemitAddress fields do not have any values.
• The Used field will be very important after running the final upgrade pass.
268 Copyright © 2007, Oracle. All rights reserved.

Chapter 5 Complete Database Changes
If there is any row in the data with the value O in the Used field, you will have to access the garnishmentorder and do manual updates where applicable, because there will be no more upgrade conversion afterthe last validation. Follow the above instructions on how to access the garnishment order and fix thedata manually.
Properties
DatabaseOrientation
Initial or MTP Products Platforms Languages
Target Both Payroll for NorthAmerica
All All
Task 5-20: Setting Up US Custom Garnishment RulesThis section discusses:
• Understanding US Custom Garnishment Rules Setup
• Creating US Custom Garnishment Rules
• Cloning US Custom Garnishment Rules
Understanding US Custom Garnishment Rules SetupIn this task you set up U.S. garnishment rules.
Note. Run this task only if you used to maintain any U.S. garnishment rules in prior releases, and you havedecided that you will still need them after the upgrade.
In PeopleSoft 9, there are two ways to set up garnishment rules:
• Create the U.S. custom rules by entering the data in the online component.
• Clone one of the existing rules and save it as a new custom rule.
In an ideal situation, manual setup of custom rules should be done only during the Initial pass. However, itis possible due to timing of the upgrade passes, that you have added more custom rules since the last pass.You can compare the US Custom Garnishment Rules Audit report from the previous and the current pass tosee whether any custom rules have been added since the previous pass. If there are some new rules, and youdecide you need them in future, you can set them up during the Move To Production Pass, but this appliesonly to any new rules. The rules you have already set up in prior passes will be copied during the upgrade byrunning the export and import scripts for U.S. custom garnishment rules.
See Appendix: “Understanding Garnishments Changes.”
See “Prepare Your Database,” Running Application Audits, Running Upgrade Reports, Running US CustomGarnishment Rules Audit.
See Validating EE Garn Rule Data.
See “Apply Application Changes,” Completing Application Processes, Exporting US Custom GarnishmentRules and Importing US Custom Garnishment Rules.
Copyright © 2007, Oracle. All rights reserved. 269

Complete Database Changes Chapter 5
See PeopleSoft Enterprise Payroll for North America 9.0 PeopleBook.
Task 5-20-1: Creating US Custom Garnishment RulesIn this step you create new garnishment rule by using the online component to enter the required data.
To create a U.S. custom garnishment rule:
1. Sign on to the Copy of Production database.2. Select Set Up HRMS, Product Related, Payroll for North America, Garnishments, Rules Table.3. Click Add a New Value.4. Enter values in the Law Source and Rule ID fields for the rule that you want to create.5. Click Add.6. Enter all required data on each tab of the component.You can use the U.S. Custom Garnishment Rule Audit report to find out what values you need to enter.
7. Click Save.8. Repeat steps 3 through 7 for each U.S. garnishment rule that you need to set up.
Properties
DatabaseOrientation
Initial or MTP Products Platforms Languages
Target Both Payroll for NorthAmerica
All All
Task 5-20-2: Cloning US Custom Garnishment RulesIn this step, you create a new garnishment rule by cloning an existing garnishment rule.
To clone any existing rule as new custom rule:
1. Sign on to the Copy of Production database.
2. Select Set Up HRMS, Product Related, Payroll for North America, Garnishments, Clone Rules.
3. Click Add a New Value.
4. Enter the run control ID UPG_CLONE.
5. Click Add.6. Enter values in the Law Source, RuleID, and Effective Date fields for the rule you want to clone.
7. Enter values in the Law Source, Rule ID, and Effective Date fields for the new rule you want to create.
8. If you want to create more than one rule, insert a new row in the New Garnishment Rule group box.
9. Repeat steps 7 and 8 for each rule you want to create.
10. Click Run.
There are several things to keep in mind when cloning existing rules:
• You can repeat the cloning process many times, using different rules to create as many new rules asyou want.
270 Copyright © 2007, Oracle. All rights reserved.

Chapter 5 Complete Database Changes
• The new rules will be exactly the same as the rule used for cloning, except for the values in the SourceLaw, Rule ID, and Effective Date fields, which you entered on the run control page of the cloning process.
• You should try to find the rule that has the same formula as you need in your new rule.If there is no rule with the identical formula, you can find a rule with the most similar formula anduse it for cloning.
• After the rules are cloned, you can access the Garnishment Rules Tables and modify any of the clonedvalues.For example, you can update the formula steps by deleting old or adding new steps, or update exemptionvariables or any other field that you want to change.
Properties
DatabaseOrientation
Initial or MTP Products Platforms Languages
Target Both Payroll for NorthAmerica
All All
Task 5-21: Validating EE Garn Rule DataThis section discusses:
• Understanding EE Garn Rule Data Validation
• Running the EE Garn Rule Data Validation Report
• Updating Garn Rule Data
Understanding EE Garn Rule Data ValidationIn this task, you perform steps to review and update rule data on garnishments orders, if needed.
The purpose of this task is to find all orders that reference rules that do not exist in garnishment rules tables,because you might have some U.S. custom rules that you do not need. However, this task will not onlycheck orders for U.S. custom rules, it will check orders for any rule that might not be defined in garnishmentrules tables. We recommend that you run this task to check the validity of your data even if you do nothave any U.S. custom rules.
See Appendix: “Understanding Garnishments Changes.”
See Setting Up US Custom Garnishment Rules.
See “Apply Application Changes,” Completing Application Processes, Exporting US Custom GarnishmentRules and Importing US Custom Garnishment Rules.
Task 5-21-1: Running the EE Garn Rule Data Validation ReportIn this step, you run a report that lists garnishment orders whose rules do not exist in Garnishment Rules Tables.
To run the EE Garn Rule Data Validation Report:
Copyright © 2007, Oracle. All rights reserved. 271

Complete Database Changes Chapter 5
1. Sign on to the Copy of Production database.2. Select Set Up HRMS, Upgrade, Reports, EE Garn Rule Data Validation.3. Click Add a New Value.4. Enter the run control ID UPG_GARN_RULE.5. Click Add.6. On the EE Garn Rule Data page, click Run.7. Analyze the data presented in the report to decide how you will correct the data.
The report has two different sections:
• Active orders with rules missing in Garnishments Rules Tables.• Inactive orders with rules missing in Garnishments Rules Tables.
After reviewing the report, you can decide how to fix the data depending on what type of rule is missing.
If the rule is a U.S. custom garnishment rule, you have the following two options:
• You can create the missing rule in Garnishments Rules Tables by following the instructions in SettingUp US Custom Garnishment Rules.
• You can update garnishments orders and replace the missing rule with the existing rule by following theinstructions in the step below.
If the rule is a Canadian custom garnishment rule, you have following two options:
• You can create the missing rule in Garnishments Rules Tables CAN, which must be done in the Copy ofProduction before the tables are renamed.
This way the Canadian custom rules will be copied during the conversion from renamed tables into a newstructure of garnishments rules tables.
• You can update garnishments orders and replace the missing rule with the existing rule by following theinstructions in the step below.
If there is any active order listed in the report, it is expected that you will fix the data using one of the aboveoptions. The active orders have the status Approved or Received. They will continue to be processed after theupgrade. If the rule is not defined in Garnishment Rules Tables, the pay calculation program will issue anerror for the employee.
This report will insert all active orders listed in the report into a new record that will be accessible in the onlinecomponent. The next step provides instructions for accessing the online component and making the updates. Ifyou are planning to create the missing rule, simply ignore the entries created by the report.
If there is any inactive order listed in the report, it is up to you to decide whether you want to make any updatesto history data or not. Because these orders do not have Approved or Received status, they will not be processedin following pay calculations, and leaving them as is will not have any impact on payroll calculations.
The inactive orders will not be automatically inserted and available in the online component. If you decide thatyou want to make updates to history data, you can access the online component and manually add the ordersyou want to update. The next step provides instructions for how to access the online component and add thehistory records. If you decide to create the missing rule, do not add any history rows into the online component.
This report will run in each upgrade pass, but it will only list the data that you need to review; for example,the initial pass listed 10 active orders, which you have reviewed and updated. The Move to Productionpasses will list additional orders only if you have created a new order between two passes that matches thereport selection criteria; otherwise, it will be empty.
272 Copyright © 2007, Oracle. All rights reserved.

Chapter 5 Complete Database Changes
Note. If the final Move to Production pass lists any data in this report and you decide you need updates, youwill do the updates directly in Create Garnishments, Garnishments Rules Tables, or Garnishments Rules TablesCAN in your production database before you go live.
Properties
DatabaseOrientation
Initial or MTP Products Platforms Languages
Target Both Payroll for NorthAmerica
All All
Task 5-21-2: Updating Garn Rule DataThis section discusses:
• Understanding Updating Garn Rule Data
• Updating Active Garnishment Orders
• Updating Garnishment Orders After Final Move to Production Pass
• Adding Inactive Garnishment Orders
Understanding Updating Garn Rule DataIn this step, you update Garn Rule Data on active garnishments orders, if needed, or add inactive garnishmentorders that have Garn Rule data that you want to update.
Updating Active Garnishment OrdersTo update active orders:
1. Sign on to the Copy of Production database.2. Select Set Up HRMS, Upgrade, Define Defaults, Upgrade EE Garnishment Orders.3. Select the Upgrade Garn Rule tab.4. Review the data and select values in the New Law Source and New Rule ID fields from the availableprompt lists, selecting the correct value for each order you are updating.
5. Click Save.
There are several things to keep in mind when you are reviewing the data on this page:
• The orders are inserted here because they match certain criteria, but that does not mean you have toupdate the order and change the rule.You can add the missing rule into Garnishment Rules Tables and ignore the entries listed in this page.If you do not provide new values for the law source and rule ID, the conversion will not make anyupdates in the next pass.
• You can only update the New Law Source and New Rule ID fields for the orders that are automaticallyinserted by the validation report onto this page.You will get an error message if you are trying to update any other field in the row.
• You can delete the row in this page, but when you run the report the next time, the validation will find allorders that match the selection criteria and insert the same row again, if it is still applicable.
Copyright © 2007, Oracle. All rights reserved. 273

Complete Database Changes Chapter 5
The same criteria will most likely still be applicable, unless you have created the rule in GarnishmentsRules Tables between upgrade passes.
• The Used field on this page may have multiple values.This field is display only because it keeps track of why data is inserted, whether data passed throughconversion, and whether data updated the real garnishment order or not. Review translate values for thisfield to see details about each value. The rows created by the first section of the report will have the valueM in the Used field.
• In the following pass, the Used field will have a different value, depending on whether it actually updatedthe real order or not.The conversion program will update the value of this field to U when the orders are updated, which willhappen if the New Law Source and New Rule ID fields have any values. The conversion program willupdate the value of this field to X when the orders are not updated, which will happen if the New LawSource and New Rule ID fields do not have any values.
• The Used field will be very important after running the final upgrade pass.If there is any row in the data with the value M in the Used field, you will have to access the garnishmentorder and do manual updates where applicable, because there will be no more upgrade conversion afterthe last validation. These entries would be created by the last validation report and most likely wouldbe for the garnishment orders that were newly created in the last Copy of Production since the last timeyou took the copy.
Updating Garnishment Orders After Final Move to Production PassTo manually update garnishment orders after the final Move To Production pass:
1. Sign on to the Copy of Production database.2. Select Payroll for North America, Employee Pay Data <country>, Deductions, Create Garnishments where<country> is, for example, CAN, USA, or USF.
3. Enter the employee ID and company that needs manual updates.4. Click Search.5. If there is more than one garnishment order for the same employee, select the row with the garnishmentID that needs to be manually updated.
6. Select the Garnishment Spec Data 6 tab.7. If there is more than one assignment applicable to this garnishment, select the row with the rule thatneeds to be manually updated.
8. Update the following fields, as needed: Law Source, Rule ID.9. Click Save.
Adding Inactive Garnishment OrdersTo add inactive orders:
1. Sign on to the Copy of Production database.2. Select Set Up HRMS, Upgrade, Define Defaults, Upgrade EE Garnishment Orders.3. Select the Upgrade Garn Rule tab.4. Click the “+” button to insert a new row.
274 Copyright © 2007, Oracle. All rights reserved.

Chapter 5 Complete Database Changes
5. Enter EmplID, Company, GarnishmentID, Law Source, and RuleID from the Inactive Orders sectionof the report for each order you want to update.Enter values in the New Law Source and New Rule ID fields from the available prompt lists, selectingthe correct value for each order you are updating.
6. Click Save.
There are several things to keep in mind when you are adding new data on this page:
• All manually inserted rows will initially have the value O in the Used field, marking them as online entry.• The system will not prevent you from entering any combination of data on this page.It does not check whether you are entering only inactive orders. It is your responsibility to decide whatupdates you are making and add corresponding data on this page.
• In the following pass, the Used field will have a different value, depending on whether it actually updatedthe real order or not.The conversion program will update the value of this field to U when the orders are updated, which willhappen if the New Law Source and New Rule ID fields have any values. The conversion program willupdate the value of this field to X when the orders are not updated, which will happen if the New LawSource or New Rule ID fields do not have any values.
• The Used field will be very important after running the final upgrade pass.If there is any row in the data with the value O in the Used field, you will have to access the garnishmentorder and do manual updates where applicable, because there will be no more upgrade conversion afterthe last validation. Follow the above instructions on how to access the garnishment order and fix thedata manually.
Properties
DatabaseOrientation
Initial or MTP Products Platforms Languages
Target Both Payroll for NorthAmerica
All All
Task 5-22: Reviewing PeopleTools FunctionalityThe PeopleSoft Enterprise PeopleBooks detail the current PeopleTools functionality. There are many newfeatures delivered in the new release that you may want to use. You should now review the PeopleSoftEnterprise PeopleBooks and PeopleTools Installation Guide to configure your environment properly. Thismay include, but is not limited to, configuring and starting a process scheduler, report server, and reviewingportal settings.
See the Enterprise PeopleTools installation guide for your database platform on your new release.
See PeopleSoft Customer Connection (Implement Optimize + Upgrade, Upgrade Guide, UpgradeDocumentation and Software, Release Notes).
You should review the following considerations:
• If you applied a PeopleTools patch earlier in the upgrade, review the patch documentation and run anysteps that you have not already performed during the upgrade.
Copyright © 2007, Oracle. All rights reserved. 275

Complete Database Changes Chapter 5
Check your Change Assistant output directory if you do not know whether a script was already runduring the upgrade process.
• You must reimplement any workflow that you want to use in the new release.• PeopleTools has updated the styles that define the look of the user interface.The classic (old) style sheet, as well as two new styles, are delivered with this release of PeopleTools.PeopleTools system databases and PeopleSoft 8.4 applications use the classic style, whereas all otherapplications use the new dark blue style. After the PeopleTools portion of the upgrade, PeopleSoft sets theclassic style as the default, but you can update to one of the new user interface styles.
See Appendix: “Changing the User Interface.”
Note. The new user interface styles are supported by Internet Explorer release 5 and above and NetscapeNavigator release 6 and above. If you are using any other browser or release, the system uses theclassic style as the default.
• PeopleTools uses Verity release 5.0 to implement free text search.Verity 5.0 is not compatible with the version of Verity that was used in previous PeopleTools releases.Check the necessary application patches that may be required in order to use the new version of Verity.
See PeopleSoft Customer Connection (Updates + Fixes, Required for Install or Upgrade).
• As a result, performing PS/nVision drill-down operations on reports that were created prior to upgradewould fail. This is mainly because drill-down hyperlinks are by design hard coded into PS/nVision reports.A simple search and replace utility has been provided that can be used to replace old hyperlinks with newones. This Microsoft Excel macro is located at %PS_HOME%\EXCEL\UpdateNvsDrill.xls.
• Integration Broker was rewritten in PeopleTools 8.48.
If you use Integration Broker, you will need to perform setup configuration and review the explanationof metadata mapping.
See Enterprise PeopleTools 8.48 PeopleBook: PeopleSoft Integration Broker.
Properties
DatabaseOrientation
Initial or MTP Products Platforms Languages
Target Initial All All All
Task 5-23: Preparing the Content Provider RegistryYou should perform this task if you use Enterprise Portal 8.4 or higher running on PeopleTools 8.4xwith full or partial navigation load access method. This means you do not use a single link to access yourcontent provider databases, but instead you load some or all of the portal registry structures from the contentprovider database into your Enterprise Portal database. PeopleSoft refers to Content Provider databases asthe application databases that contain the transaction content. Your Copy of Production database is yourContent Provider database for this task.
276 Copyright © 2007, Oracle. All rights reserved.

Chapter 5 Complete Database Changes
When you upgrade a content provider database, the registry structures are updated, old registry structures areremoved, and new registry structures are added. These changes need to be copied to the Enterprise Portaldatabase by updating the portal registry structures in your Enterprise Portal database to match what is in theContent Provider database. Follow the detailed instructions in the appendix referenced below.
See Appendix: “Upgrading the Content Provider Registry.”
Properties
DatabaseOrientation
Initial or MTP Products Platforms Languages
Target Both All All All
Task 5-24: Updating the Portal Options DataIn this step you update the PeopleTools Portal Options data.
Note. Only perform this step if your upgraded database is on PeopleTools 8.46 or greater.
This step sets the portal options prefix and Owner ID. These values are used when creating Pagelet Wizarddefinitions and Navigation Collection objects.
To set the Portal Options Prefix and Owner ID:
1. From your browser, sign on to your New Copy of Production database.
2. Select PeopleTools, Portal, Portal Utilities, System Options.
3. Update the value for the Registry Object Prefix with a 1- to 4-character prefix that is unique to yourorganization.
Note. Do not use PAPP, PAPX, PAPQ, PAPI, PRTL, EO, or PT. Do not use any product line specific prefix(such as CR, HC, EP, or CI). Do not use a blank value.
4. Enter the Owner ID value with your organization’s specific owner ID.
Note. The Owner ID is a translate value on the PeopleTools field OBJECTOWNERID. Do not useany delivered product Owner ID. If you do not have an Owner ID, then either create one, or leave theOwner ID value as a blank space.
5. Click Save.
Properties
DatabaseOrientation
Initial or MTP Products Platforms Languages
Target MTP All All All
Copyright © 2007, Oracle. All rights reserved. 277

Complete Database Changes Chapter 5
Task 5-25: Stamping the DatabaseIn this step, you set the database to the release level of the Demo database. The values that you enter hereappear whenever you view the Help, About PeopleTools dialog.
To stamp the database:
1. Launch Application Designer on your Copy of Production database using the new PeopleSoft release.2. Select Tools, Upgrade, Stamp Database.3. Fill in all three of the PeopleSoft Release fields with the appropriate value for your product line andrelease number:
HRMS and Campus Solutions, 9.00
4. In the Service Pack field, enter the service pack number to which you are upgrading. For example, ifyou are upgrading to SP2, enter the number 2. If you are upgrading to a release that is not at a servicepack level, enter 0.
5. Click Stamp.6. Close Application Designer.
Properties
DatabaseOrientation
Initial or MTP Products Platforms Languages
Target Both All All All
Task 5-26: Reviewing Change ControlEarlier in the upgrade process, in the beginning of the chapter “Apply PeopleTools Changes,” the ChangeControl feature was disabled. In this step, you re-enable Change Control, if your site uses this functionality.
To turn on Change Control:
1. Sign on to the Target database using Application Designer.
2. Select Tools, Change Control, Administrator.
The following dialog box appears:
278 Copyright © 2007, Oracle. All rights reserved.

Chapter 5 Complete Database Changes
Change Control Administrator dialog box
3. Set Use change control locking and Use change control history according to your site specifications.
Note. Move to Production: The Change Control feature slows down copy functions. The large copy projectsare only executed during the initial pass, and the feature is only disabled during the initial pass. If you enablethe feature at this point, it will remain enabled during future test Move to Production passes.
See “Apply PeopleTools Changes,” Turning Off Change Control.
Properties
DatabaseOrientation
Initial or MTP Products Platforms Languages
Target Initial All All All
Task 5-27: Backing Up Before TestingBack up your Copy of Production database now. This enables you to restart your upgrade from this point,should you experience any database integrity problems during the remaining tasks in the upgrade process.
See Appendix: “Planning for Upgrade Testing.”
Properties
DatabaseOrientation
Initial or MTP Products Platforms Languages
Target Both All All All
Copyright © 2007, Oracle. All rights reserved. 279

Complete Database Changes Chapter 5
Task 5-28: Testing Your Copy of ProductionIn this task, you test your Copy of Production. Testing your Copy of Production will ensure that you canstill operate your day-to-day processes on your new release. After you have reviewed your DDDAUDITand SYSAUDIT, verify that the system is working properly by reviewing the system online. After you arecomfortable that the system is working properly, you can perform the Test Move to Production upgrade pass.
See Appendix: “Planning for Upgrade Testing.”
Properties
DatabaseOrientation
Initial or MTP Products Platforms Languages
Target Both All All All
280 Copyright © 2007, Oracle. All rights reserved.

CHAPTER 6
Apply Changes to Production Database
This chapter discusses:
• Understanding the Move to Production
• Testing the Move to Production
• Testing Once More
• Performing the Move to Production
• Completing the Upgrade Survey
Understanding the Move to ProductionOnce you complete all of the necessary tasks to launch your system into production, you are ready to beginyour Test Move to Production passes or to move your system into production.
Task 6-1: Testing the Move to ProductionThis section discusses:
• Understanding the Move to Production Test
• Understand Move to Production
• Creating a New Change Assistant Job
Understanding the Move to Production TestEverything you have done to this point is the initial pass of the upgrade process. Now you are ready to startthe Test Move to Production pass. The initial pass is very time consuming and requires a lot of analysis atdifferent steps of the process and to troubleshoot issues. The Test Move to Production pass is a different seriesof steps, which includes a subset of the previous tasks, and takes advantage of the tasks performed duringthe first upgrade pass.
You should perform as many test moves to production as necessary to work out any issues and to becomfortable with the process. During each Test Move to Production you will be able to refine the process sothat you can save time and avoid manual processes. These test passes will also let you know how long theprocess takes so you can plan your production downtime for your move to production weekend.
Copyright © 2007, Oracle. All rights reserved. 281

Apply Changes to Production Database Chapter 6
Task 6-1-1: Understand Move to ProductionThe following text is a high level view of what you will be doing in the Move to Production test pass. Theremaining steps in this task will prepare your test environment. For example, you may need to move somescripts generated in the initial pass to a new Change Assistant staging directory. Next you will create a newChange Assistant job, setting the Type of Upgrade to Move to Production. That will give you a job with stepsfiltered with only those steps that apply to the Move to Production (MTP) test pass. From that point forward,you will simply follow the steps as they exist in your new job.
One of those first steps will be to take a Copy of Production. This second Copy of Production is sometimesreferred to as the “New Copy of Production.” The first Copy of Production, or “old” Copy of Production,will now be the Source database (it was the Target database in the initial test pass). The New Copy ofProduction is now the Target database.
The steps executed in the MTP pass vary in several ways. Many of the tasks and steps in the initial test passwill be replaced in the MTP pass with Data Mover export and import scripts. In the initial pass, some stepsrequired you to make functional decisions and take time to manually set up data. That data can be copied fromthe first database to the next, saving you setup time and eliminating the chance for manual error or typos.
Also, the MTP pass does not repeat the database compare/copy steps. You made the decisions once; thereis no need to repeat these steps. Instead, a Data Mover script, MVPRDEXP, will export all the tables thatcontain the PeopleTools objects like records and PeopleCode from the first database. Another Data Moverscript, MVPRDIMP, will import those tables into the second database. Anything you have done to PeopleToolsobjects while executing or testing the first pass—copied objects from DMO, reapplied customizations,applied updates from the PeopleSoft Customer Connection website—will be moved to the second Copy ofProduction with these scripts.
Another important difference with the MTP pass is the handling of SQL scripts that create and alter tables.In the initial pass, you generated the SQL scripts, sometimes edited the SQL script, and then executed theSQL scripts. In the MTP pass, you may be able to skip the generation steps and use the SQL you previouslygenerated. This is another way to save time in your critical go-live window and is the ultimate goal, but it is anincremental process to get to that point.
In the first MTP pass, everyone must regenerate the SQL. There are small differences between the initial andMTP passes that require the SQL to be regenerated in at least one MTP pass. The Change Assistant Templatesare delivered with the steps set this way.
In subsequent MTP passes, you may choose to “turn off” the generation steps if possible. If you have notchanged any records at the end of one MTP pass, then you can reuse the SQL in your next pass. If you havedone anything to change records, you should generate SQL again. This can include things like applyingPeopleTools upgrades (for example, 8.47 to 8.48), or applying updates from the PeopleSoft CustomerConnection website that involve record changes, or making additional customizations to records.
If you choose to skip some of these steps, do one of the following: mark the step complete in your job, orchange the step properties in the template, so the step will never show up in your MTP filtered job again. Tochange the step properties, double-click on the step to open the Step Properties dialog, and change the Type ofUpgrade to Initial Upgrade. In addition, copy the SQL scripts from the previous pass output directory to thenew pass output directory. Change Assistant will look for the SQL scripts in the output directory set on thejob’s Database Configuration, so make sure it will find them when it tries to run them.
The steps that are eligible for this treatment will contain Move To Production documentation notes indicatingsuch.
Note. If you have made any changes to your trees, tree structures, or PS/Query objects since the upgradebegan, you may want information on how to preserve those changes.
282 Copyright © 2007, Oracle. All rights reserved.

Chapter 6 Apply Changes to Production Database
See Appendix: “Preserving Queries and Tree Objects.”
Properties
DatabaseOrientation
Initial or MTP Products Platforms Languages
Target Both All All All
Task 6-1-2: Creating a New Change Assistant JobYou need to create a new Change Assistant Job for each test Move to Production pass.
To create a new Change Assistant job:
1. Oracle recommends that you use new output and stage directories for each new test pass. Create thosedirectories now.
2. From Change Assistant, select Tools, Options and specify the new output and staging directories onthe Change Assistant Options page.
3. Select File, Open Environment and select the environment.4. Review the configuration on the General Settings window.The Database Type, Language and SQL Query Executable will be the same as your previous job. Makechanges to the PS_HOME settings, if necessary, and select Next.
5. Specify the Source Database setup information and click Next.This is the Copy of Production database from your previous pass.
6. Specify the Target Database setup in formation and click Next.This is the new Copy of Production database.
7. Review the environment configuration on the Confirm Selections window and click Next to save thechanges to the environment.
8. Select File, New Job.9. Select the template on the Use Template window and click OK.10. On the Type of Upgrade window, select Move to Production.11. Click OK.A new upgrade job using the naming convention of Template_Environment_Move to Production is created.
12. Highlight the job name and select Edit, Set Documentation Directory, then select the directory where thedocumentation is located and click OK.If you have been using documentation printed from the filtered view on the jobs, print the documentationagain. The steps for Move to Production are different than in the initial pass.
13. Select View, Documentation.14. Select View, Expand All to display all the steps in the job that apply to your upgrade.The job will contain steps that were not in the initial upgrade pass and will exclude some steps that were inthe initial upgrade pass based on the step properties.
Now you are ready to run the job.
Copyright © 2007, Oracle. All rights reserved. 283

Apply Changes to Production Database Chapter 6
Properties
DatabaseOrientation
Initial or MTP Products Platforms Languages
Target Both All All All
Task 6-2: Testing Once MoreAs in any implementation project, you must consider planning, resources, development, and training. Testingalso needs to be an integral part of your implementation project. Testing your database once more, afteryou have completed the upgrade, ensures that you can still operate your day-to-day processes on your newPeopleSoft release.
The level of testing in this task will focus primarily on the strategies to employ before moving into production.
See Appendix: “Planning for Upgrade Testing.”
Properties
DatabaseOrientation
Initial or MTP Products Platforms Languages
Target Both All All All
Task 6-3: Performing the Move to ProductionWhen you are ready, you can move the system into production. Take your system out of production andperform all of the steps involved in testing the Move to Production against your production database.
See Testing the Move to Production.
Properties
DatabaseOrientation
Initial or MTP Products Platforms Languages
Target MTP All All All
Task 6-4: Completing the Upgrade SurveyWe are interested in feedback on your upgrade experience and any thoughts and/or suggestions you have onhow we can improve the process in the future. Note that this survey should only be accessed once you havecompleted your upgrade and are in production on the new release.
284 Copyright © 2007, Oracle. All rights reserved.

Chapter 6 Apply Changes to Production Database
See Alsohttp://www.peoplesoft.com/go/upgradesurvey
Properties
DatabaseOrientation
Initial or MTP Products Platforms Languages
Target MTP All All All
Copyright © 2007, Oracle. All rights reserved. 285

Apply Changes to Production Database Chapter 6
286 Copyright © 2007, Oracle. All rights reserved.
CHAPTER 7
Appendices
Understanding AppendicesThe appendices portion of this documentation contains information you may need for your upgrade. Theappendices have been referenced throughout the upgrade documentation for further understanding of theupgrade you are performing. Oracle recommends that you read each appendix as it is referenced in thedocumentation.
Copyright © 2007, Oracle. All rights reserved. 287

Appendices Chapter 7
288 Copyright © 2007, Oracle. All rights reserved.

APPENDIX A
Applying Fixes Required for Upgrade
This appendix discusses:
• Preparing to Apply Fixes
• Applying Fixes During Installation
• Applying Fixes After Copying Project
• Applying Fixes After Data Conversion
• Applying Fixes Between Upgrade Passes
• Applying Fixes in Move to Production
Task A-1: Preparing to Apply FixesThis appendix gives general instructions for applying a Required for Upgrade fix for your upgrade. If thedirections given in a particular fix are different from those given here, then follow the instructions in the fix.
It is important that you run your upgrade using the latest versions of all upgrade software. In CustomerConnection, check the upgrade page and the Updates and Fixes page to ensure that you have all of the latestcode.
Note. Because of interdependencies between products and product lines, you will need to download all fixesfor all HRMS products and product lines, even if you are not licensed for them. If you do not need theprogram, the upgrade will detect it but you can introduce an error by not applying it. This includes HRMSCommercial, HRMS Education and Government, and HRMS Federal Government product lines, as wellas all products within the product lines.
Ideally, you should follow the steps below to apply the various files and fixes.
To apply files and fixes:
1. Install the new release from the CD.2. Apply any additional scripts and projects from the Customer Connection upgrade page to your new releasecodeline (and to the New Release Demo database, if applicable).
3. Apply any other Required for Upgrade fixes from Customer Connection’s Updates and Fixes to your newrelease codeline (and to the New Release Demo database, if applicable).
4. Run your initial pass of the upgrade.5. Before you begin each subsequent upgrade pass, check the upgrade page for new versions of any filesyou previously applied.Then check Updates and Fixes for any new Required for Upgrade fixes.
Copyright © 2007, Oracle. All rights reserved. 289

Applying Fixes Required for Upgrade Appendix A
Your initial upgrade pass will differ from your subsequent Test Move to Production passes. Some of theupgrade tasks and steps are common to both the initial upgrade pass and the Move to Production pass. For thisreason, you may find Required for Upgrade fixes that do not apply to the upgrade pass that you are currentlyperforming. The details provided with each fix will help you determine whether to apply the fix and when toapply it. The fix will also tell you what to do if you have already passed the step for which the fix is needed.
How you apply a fix depends on where you are in the upgrade process. This appendix explains how to apply atypical fix, and is organized by the various points within the upgrade where you will apply fixes.
Task A-2: Applying Fixes During InstallationIn the chapter, “Install the Software,” of Getting Started on Your PeopleSoft Upgrade, you should firstdownload and apply all files and objects from the upgrade page on PeopleSoft Customer Connection. Then youmust download all Required for Upgrade fixes from Updates and Fixes on PeopleSoft Customer Connection.You can use the instructions in this section to apply any additional fixes that are posted, until you reach thetask, “Running New Release Compare Reports.”
If a fix contains a project that needs to be copied from a file, apply it to your New Release Demo databaseduring installation. If the project contains changes for records or fields, those objects will be updated duringthe normal compare and copy steps in the upgrade. You will not have to build objects in the project separatelyor consider whether it will have an impact on customizations. You will do that with the rest of the objectsduring the upgrade. Apply as many of the fixes as you can at this time.
To apply script fixes during installation:
1. Download Required for Upgrade change packages using the “Download Change Package” functionalityin Change Assistant.
2. Use Change Assistant to apply the updates into your New Release Demo database.
Review the documentation included with each update prior to applying each update. There may be manualsteps that need to be performed in order to successfully apply the update.
See the Enterprise PeopleTools PeopleBook: PeopleSoft Software Updates for your current release, “ApplyingUpdates.”
Task A-3: Applying Fixes After Copying ProjectIt is best not to apply fixes during the compare and copy tasks in the “Run and Review Compare Reports”and “Apply Application Changes” chapters of the initial upgrade pass. It can also be cumbersome to applyrecord and field changes during the creating and altering of tables in the “Complete Database Changes”chapter. It is, therefore, best to wait until just before the “Running Data Conversions” task in the “ApplyApplication Changes” chapter to apply additional fixes. Most of the fixed objects will be data conversioncode, delivered in projects.
To apply PeopleSoft project fixes before data conversion:
1. Download Required for Upgrade change packages using the “Download Change Package” functionalityin Change Assistant.
2. Use Change Assistant to apply the updates into your New Release Demo database for this upgrade pass.
290 Copyright © 2007, Oracle. All rights reserved.

Appendix A Applying Fixes Required for Upgrade
Review the documentation included with each update prior to applying each update.
See the Enterprise PeopleTools PeopleBook: PeopleSoft Software Updates for your current release,“Applying Updates.”
3. The project is now loaded on your New Release Demo database. You should run a project compare tomake sure that the objects in the fix will not overwrite any of your customizations.
If you find customizations, you must decide how to deal with them before you copy the fix to yourCopy of Production.
4. If you are performing a Move to Production upgrade pass, first migrate the change packages into theSource database for this upgrade pass.
If needed, first set up Change Assistant with the environment information for your Source database. Ifyou customized any of the objects delivered in the change package, you should repackage the fix toinclude your customizations. If you did not customize any objects delivered in the fix you may directlyapply them to your Source database.
See the Enterprise PeopleTools PeopleBook: PeopleSoft Software Updates for your current release,“Applying Updates.”
5. Migrate the change packages into the Target database for this upgrade pass.If needed, first set up Change Assistant with the environment information for your Target database.
Task A-4: Applying Fixes After Data ConversionAt this point, you have already converted all of your data for the upgrade pass, and you cannot applyApplication Engine program fixes and use them in this upgrade pass. You should refer to the fix instructions todetermine what to do in each case. Often, the instructions say that you need to restore your database from apre-conversion backup and rerun data conversion to get the benefits of the fix. Because this is the only wayyou can get the fix onto your current Copy of Production, you may decide to allow the error and not apply thefix until you do a Test Move to Production. Then after you have completed that test pass, you can test theaffected function. However, you should not do this if your next pass is your final Move to Production, andyou are going into production with the resulting database. You should always test your upgraded databasebetween test passes if changes have been made to procedures, scripts, or programs. You do not want anysurprises during the final Move to Production.
Task A-5: Applying Fixes Between Upgrade PassesYou can apply fixes just before you start a Test Move to Production pass in the same way you would in thestep above, Apply Fixes After Copying Project. In those instructions, you apply the fix to your New ReleaseDemo database and compare it to the Copy of Production. Make sure that you do the database comparison inorder to verify that the fix does not wipe out any customizations you made to Application Engine programsduring your initial upgrade pass. If you have made customizations, merge your customizations into the newApplication Engine code on the New Release Demo database. Then apply the fix to your Copy of Production,which you will use as the Source database in the Test Move to Production. The fix will then get moved toyour New Copy of Production when you run the MVPRDEXP.DMS and MVPRDIMP.DMS scripts in the“Apply PeopleTools Changes” chapter.
Copyright © 2007, Oracle. All rights reserved. 291

Applying Fixes Required for Upgrade Appendix A
Task A-6: Applying Fixes in Move to ProductionOnce you have started a Test Move to Production, do not apply any fixes until just before data conversion.Apply any fixes using the previous step, “Applying Fixes After Copying Project.” In those instructions youapply the fix to your New Release Demo database and compare it to your Copy of Production. Instead of usingthe original Copy of Production as the Target, you must now use your New Copy of Production, the one definedas the Target in your Move to Production Change Assistant job. Be sure to do the database comparison to verifythat the fix does not wipe out any customizations that you made to Application Engine programs during yourinitial upgrade pass. If you have made customizations, merge your customizations into the new ApplicationEngine code on the New Release Demo database, then copy the project to your New Copy of Production.
292 Copyright © 2007, Oracle. All rights reserved.

APPENDIX B
Changing the User Interface
This appendix discusses:
• Change the User Interface
• Change the User Interface for Mobile
Task B-1: Change the User InterfaceThree user interface options were delivered with your current release of PeopleSoft 8.x. The classic style, thestyle seen in previous releases of your PeopleSoft application, is set as your default style. The following areexamples of the three delivered styles: classic, light blue, and dark blue.
The classic style, shown below, is set as your default style delivered with your PeopleSoft release.
The classic style user interface option
The following example represents the light blue style.
Copyright © 2007, Oracle. All rights reserved. 293

Changing the User Interface Appendix B
The light blue style user interface option
This example represents the dark blue style.
The dark blue style user interface option
294 Copyright © 2007, Oracle. All rights reserved.
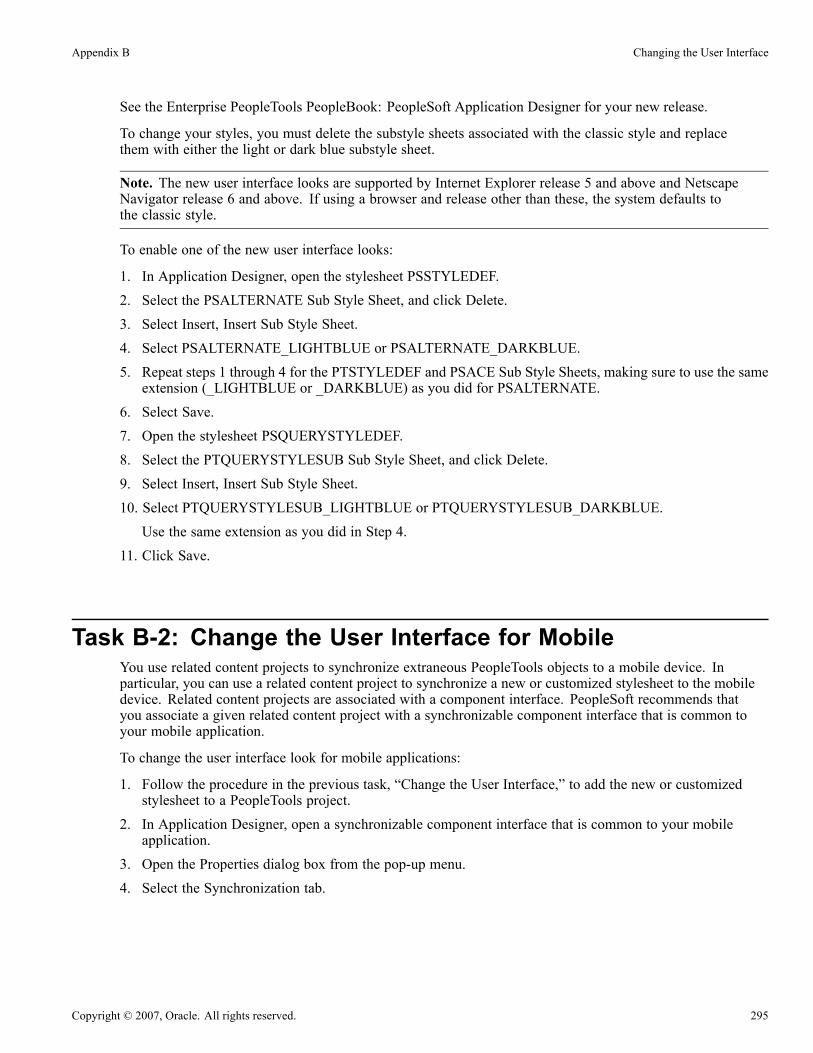
Appendix B Changing the User Interface
See the Enterprise PeopleTools PeopleBook: PeopleSoft Application Designer for your new release.
To change your styles, you must delete the substyle sheets associated with the classic style and replacethem with either the light or dark blue substyle sheet.
Note. The new user interface looks are supported by Internet Explorer release 5 and above and NetscapeNavigator release 6 and above. If using a browser and release other than these, the system defaults tothe classic style.
To enable one of the new user interface looks:
1. In Application Designer, open the stylesheet PSSTYLEDEF.
2. Select the PSALTERNATE Sub Style Sheet, and click Delete.
3. Select Insert, Insert Sub Style Sheet.
4. Select PSALTERNATE_LIGHTBLUE or PSALTERNATE_DARKBLUE.
5. Repeat steps 1 through 4 for the PTSTYLEDEF and PSACE Sub Style Sheets, making sure to use the sameextension (_LIGHTBLUE or _DARKBLUE) as you did for PSALTERNATE.
6. Select Save.7. Open the stylesheet PSQUERYSTYLEDEF.
8. Select the PTQUERYSTYLESUB Sub Style Sheet, and click Delete.
9. Select Insert, Insert Sub Style Sheet.
10. Select PTQUERYSTYLESUB_LIGHTBLUE or PTQUERYSTYLESUB_DARKBLUE.
Use the same extension as you did in Step 4.
11. Click Save.
Task B-2: Change the User Interface for MobileYou use related content projects to synchronize extraneous PeopleTools objects to a mobile device. Inparticular, you can use a related content project to synchronize a new or customized stylesheet to the mobiledevice. Related content projects are associated with a component interface. PeopleSoft recommends thatyou associate a given related content project with a synchronizable component interface that is common toyour mobile application.
To change the user interface look for mobile applications:
1. Follow the procedure in the previous task, “Change the User Interface,” to add the new or customizedstylesheet to a PeopleTools project.
2. In Application Designer, open a synchronizable component interface that is common to your mobileapplication.
3. Open the Properties dialog box from the pop-up menu.4. Select the Synchronization tab.
Copyright © 2007, Oracle. All rights reserved. 295

Changing the User Interface Appendix B
The Synchronization tab
5. Click Select at the Related Content Project field.
6. Find and highlight the desired project and click Select.
7. Click OK.
The stylesheet will be synchronized to the mobile device during the next bootstrap or update applicationssynchronization.
See the Enterprise PeopleTools PeopleBook: PeopleSoft Component Interfaces for your new release.
See the Enterprise PeopleTools PeopleBook: PeopleSoft Mobile Agent for your new release.
296 Copyright © 2007, Oracle. All rights reserved.

APPENDIX C
Improving Performance
This appendix discusses:
• Understanding Performance Improvement
• Planning Your Upgrade for Performance
• Performing the Upgrade
• Improving Performance for Your Platform
• Consulting the Global Support Center
Understanding Performance ImprovementPerformance is always a challenge when you are upgrading. Much of the data currently in your database willbe affected. No other batch processing works quite like it. Upgrade performance is sensitive to your uniqueenvironment and data. These performance recommendations are designed to help you improve performanceduring your upgrade.
Task C-1: Planning Your Upgrade for PerformanceReview the following guidelines to help plan for better upgrade performance:
• Provide as much hardware, memory, and disk space as you can.• Run long processes on a dedicated server, not the client. Configure that server similarly to your productionenvironment.
• Size the Copy of Production database (Target) like your production database — allow for growth.• Use the appendix titled “Sizing Tables for the Upgrade” to determine how much space you will need.These recommendations are minimum levels; you should plan to use more.
• Use a dedicated workstation, configured like the production environment.• Provide an application server and process scheduler for the Target database on the new PeopleSoft release.• Look for fragmented tables. Resize or reorganize the initial and next extends accordingly.• Know which tables are your largest. This information will be valuable during the upgrade.
Copyright © 2007, Oracle. All rights reserved. 297

Improving Performance Appendix C
Task C-2: Performing the UpgradeThis section discusses:
• Verifying the Database Structure Task
• Creating and Altering SQL Scripts
• Performing Data Conversion
Task C-2-1: Verifying the Database Structure TaskWhen performing the “Modifying the Database Structure” task, perform all recommended update statistics, sothe optimizer can make a good decision.
Task C-2-2: Creating and Altering SQL ScriptsThe following list provides tips to use when performing the “Modifying the Database Structure” task.
• Perform all recommended update statistics, so the optimizer can make a good decision.• Look for large tables that are being altered. Create separate scripts for each of these tables and run thescript concurrently with your other alter scripts. You can run these concurrently even if you are usingthe Alter by Rename build option because each table creation uses an independent temporary tablename in the new PeopleSoft release (PSYrecname).
• Run your create table script concurrently with the alter tables without deletes script.• Some indexes will not create during alter without deletes because of a unique key violation. You canexpect this because index structures have changed. The data in these indexes will be corrected during dataconversion. You can create the index as a non-unique key for data conversion. Create this non-uniqueindex, without the field that caused the error, so that data conversion does not have to update the index aswell as the data pages as it corrects the data in this field.
Task C-2-3: Performing Data ConversionOracle delivers the Change Assistant templates to run the steps on the client by default. The server can runApplication Engine programs. You may want to run these programs on the server to increase performance.Change Assistant uses the PSEMHUB and PSEMAgent to execute jobs to the server. You will need toconfigure and start your Environment Management Hub and Agent, enter the Environment Managementinformation into the Change Assistant options, set your Change Assistant mode, select the Perform ServerProcessing check box, and modify the run location of the steps you wish to run on the server. Consider runningdata conversion application engine programs concurrently as they were designed with no dependenciesbetween programs. Any exceptions to this are noted in the documentation. If you would like to take advantageof concurrent processing, modify the step properties and set the Run Concurrently option to Yes.
See the Enterprise PeopleTools PeopleBook: PeopleSoft Software Updates for your new release.
Task C-3: Improving Performance for Your PlatformThis section discusses:
298 Copyright © 2007, Oracle. All rights reserved.

Appendix C Improving Performance
• Using Oracle
• Using DB2
Task C-3-1: Using OracleYou should use the cost-based optimizer during the upgrade. The application engine scripts use MetaSQL torun the update statistics command at various times during data conversion. If you are running the rule-basedoptimizer, you will not take advantage of these statements.
When running the alter scripts, remember the Oracle hint /*APPEND*/. This command will improve theperformance of your alter script if you are doing an “Alter by Rename.” This hint performs like an OracleDirect Load Insert and does not capture redo or recovery information. The syntax is as follows:
INSERT /*+ APPEND */ INTO TABLENAME (FIELD1, FIELD2, ...
Make sure your database administrator has turned autoextend on. Autoextend allows tablespaces to growlarger than their set maximum size and will be useful during the upgrade process since tablespaces growseveral times larger than they would in production.
Alter the tablespace for PSIMAGE and increase it to 200 MB; autoextend on the next 10 MB; set themaxsize to unlimited.
Task C-3-2: Using DB2Perform all recommended update statistics on the system catalog as well as the application tablespaces.
Interspersed throughout the Application Engine data conversion programs are steps that make a dynamic callfor RUNSTATS to be performed against selected tables. An example of how this is used follows:
• Step01 - Start with an empty Temp_Table_TAO.
• Step02 - INSERT 60,000 rows into the Temp_Table_TAO.
• Step03 - Application Engine Step calls %UpdateStats(Temp_Table_TAO).
• Step04 - You can now perform SQL against Temp_Table_TAO using new statistics.
This will allow you to use indexes when processing against Temp_Table_TAO. If DB2 z/OS is not configuredcorrectly, Application Engine programs skip these steps and the performance of the SQL steps that followwill suffer.
In order to take advantage of the %UpdateStats feature, at least one of these conditions must be met:
• You implemented the DSNUTILS stored procedure.
• You followed the enhanced installation path.
See the Enterprise PeopleTools Installation for DB2 UDB for z/OS for your new release.
Note. If you disable the %UpdateStats feature of Application Engine, it will adversely affect the performanceof your data conversion programs, because statistics will not update when the tables are loaded with largevolumes of data.
Copyright © 2007, Oracle. All rights reserved. 299

Improving Performance Appendix C
Task C-4: Consulting the Global Support CenterIf you do have a problem with your upgrade, contact the Global Support Center (GSC). Oracle will be able togive you a solution to the problem faster if you supply the following information:
• Include details about the table row counts and indexes available on the tables involved in the processing:
- Include indexes in your physical database, not those defined in Application Designer.
- Mention any additional indexes that you custom-added; they could be getting in the way.• Include RDBMS (Oracle, SQL Server, or DB2, and so on) and RDBMS release (for example, Oracle7.3 or 8.16).
• If you are running on Oracle, specify whether you are you running in cost-based or rule-based mode.• Include the PeopleSoft upgrade path for both PeopleTools and the application.• Provide trace files: PeopleTools trace and RDBMS-specific trace files, SQL explains, and so on.
300 Copyright © 2007, Oracle. All rights reserved.

APPENDIX D
Planning for Upgrade Testing
This appendix discusses:
• Understanding Testing Techniques
• Deciding When to Test
• Evaluating Your Testing Requirements
• Defining Your Testing Strategy
• Determining the Testing Conditions
• Developing Your Test Plan
• Developing Test Scripts
• Reviewing Tips and Techniques
Understanding Testing TechniquesAs with any project, testing is a critical part of your upgrade project. With proper testing, you can ensure thatyou upgrade successfully and you are ready for your Move to Production.
Upgrades vary in complexity and scale from release to release and customer to customer, so the testing periodsand the activities required to perform testing vary from upgrade to upgrade. Because PeopleSoft cannotanticipate how every organization uses the system to fit their own business practices, including customizationsand data setup, PeopleSoft does not deliver upgrade test scripts. However, there are some general testingguidelines that you can follow to assist with your upgrade testing. In this section, you will find informationthat will help you plan your testing efforts.
Task D-1: Deciding When to TestAn effective testing strategy involves an understanding of the stages of a PeopleSoft upgrade and where,within these stages, testing should be performed. You can take more than one approach and use more than onemethod to test your upgrade.
Copyright © 2007, Oracle. All rights reserved. 301

Planning for Upgrade Testing Appendix D
Task D-2: Evaluating Your Testing RequirementsTo evaluate your testing requirements, you need the following information:
• The number of products and modules you currently have in your production database.
• The number of customizations you have in your production database.
• The functional design and business requirements addressed by each customization.
• Your online, batch, and reporting business processes that you want to include in testing.
Task D-3: Defining Your Testing StrategyThis section discusses:
• Understanding Your Testing Strategy
• Evaluating Unit Testing
• Evaluating System Testing
• Evaluating Integration Testing
• Evaluating Parallel Testing
• Evaluating Performance Testing
• Evaluating User Acceptance Testing
• Evaluating Regression Testing
Understanding Your Testing StrategyOnce you evaluate your testing requirements, you can determine what types of testing you need. You shoulddefine the tests to be performed for the project and the goals of each test—including roles and responsibilities,test-case management, control points, and success criteria. In addition, you should define and document thescope of each type of testing. Use the definitions below to determine the levels of testing required in yourorganization.
To ensure upgrade success, be sure to train upgrade members before the upgrade. It is critical to have educatedtesters to ensure adequate test coverage of new functionality.
The testing types below do not necessarily run systematically, one after another. Different test conditionscan sometimes run in parallel.
Important! It is important to test not only your customizations and changes in your new release but also yourstandard business practices. By doing this you ensure that your normal business practices have not beenaltered by the new release and/or your customizations.
302 Copyright © 2007, Oracle. All rights reserved.

Appendix D Planning for Upgrade Testing
Task D-3-1: Evaluating Unit TestingIn this stage of testing, you have completed your upgrade tasks and your database is now at the new releaselevel. However, you should unit test before you use the new system. Unit testing validates data, business rules,and business process requirements. In addition, it ensures that business processes work as designed and yourdatabase is ready for full functionality testing. The processes for performing unit testing are described below:
• Test individual online transactions and batch processes on the upgraded database.• Validate data converted during the upgrade.• Verify that you can access existing data and enter new data successfully.• Test customizations reapplied to the upgraded database.• Each customization is tested individually along with all related processes.• Business processes are not tested.• Test scripts are not required.• Test − Document − Resolve issues − Retest.
Task D-3-2: Evaluating System TestingSystem testing ensures that all business functions and processes execute appropriately from the customer’sview. Business processes are tested from beginning to end during system testing; this is sometimes referred toas end-to-end testing. The processes for performing system testing are described below:
• Create system test environment via a test Move to Production.
• Test inbound and outbound interfaces and related business processes.
• Test online business processes using relevant security (that is, user IDs, roles, and permission lists).
• Test batch business processes.
• Test reporting processes (SQR, PS/Query, nVision, and Crystal).
• Test customizations to business processes.
• Perform using test scripts.
• Compare expected results to actual results.
• Test − Document − Resolve issues − Retest − Document − Sign off.
Task D-3-3: Evaluating Integration TestingAfter system testing, you perform integration testing. In this stage, you test business processes and groups ofrelated business processes within the application to determine that they function as designed. In addition,you ensure that any design flaws are resolved before user testing. The following list of activities describesintegration testing:
• Create integration test environment via a test Move to Production.• Test specific business processes.• Test integration between modules and business processes.• Perform using test scripts.• Compare expected results to actual results.
Copyright © 2007, Oracle. All rights reserved. 303

Planning for Upgrade Testing Appendix D
• Test − Document − Resolve issues − Retest − Document − Sign off.
Task D-3-4: Evaluating Parallel TestingParallel testing validates that the current production system and the upgraded database generate the expectedresults for specific business events. Parallel testing is optional, but frequently used to ensure that the newrelease will generate the same results given the same testing scenarios. The processes for performing paralleltesting are described below:
• Create a parallel test environment via a test Move to Production.
The Copy of Production should be taken before the major business processes/events are executed so thatthe same processes can be run during the parallel test.
• Retain any output from production processes for later comparison.
• Run the same business processes/events in the upgraded database.
• Compare results generated in the production system with the results generated using the upgraded database.
• Perform using test scripts.
• Test − Document − Resolve issues − Retest − Document − Sign off.
Task D-3-5: Evaluating Performance TestingYou conduct performance testing to determine if the system can accomplish stated objectives within a specifiedtime period. Performance of the current production system is often used as a baseline. The processes forperforming performance testing are described below:
• Define performance objectives for each business process included in the scope of the test.• Perform business process.• Monitor performance.• Compare actual performance and acceptance criteria.• Perform using test scripts.• Test − Document − Resolve issues − Retest − Document − Sign off.
Task D-3-6: Evaluating User Acceptance TestingUser acceptance testing determines if day-to-day users can complete daily work activities within the systemwith an acceptable level of effort. For example, run through business processes such as hiring, terminating,and paying an employee in Human Resources or creating, editing, and posting journals in Financials. Theprocesses for performing user acceptance testing are described below:
• Functional resources should execute test scenarios (with their appropriate production security access toensure they have access to all the components, pages, and processes used in their daily functions).
• Perform using test scripts.• User testing should not be performed with developer or Super User access.• Test − Document − Resolve issues − Retest − Test − Document − Sign off.
304 Copyright © 2007, Oracle. All rights reserved.

Appendix D Planning for Upgrade Testing
Task D-3-7: Evaluating Regression TestingYou perform regression, or re-testing, if problems were found and resolved or changes were made during anyof the previous tests. This stage of testing validates the test Move to Production and Move to Production partsof the upgrade. When all the tests have received sign-off, you will use the initial Copy of Production toupgrade the production database/environment. You then perform a test move into the production environmentand customers confirm that the test move executed successfully. At this point you conduct regression testing.The following tips will assist you with regression testing:
• Ensure that no new defects have been introduced during the move.• Execute a predefined set of scripts to confirm the test move.• Performed by Functional Resources before Go Live.• Rerun scripts from previous testing.
Task D-4: Determining the Testing ConditionsAfter you identify the types of testing to include in your upgrade, determine conditions for each stage of testing.Be sure to test the actual test Move to Production to resolve any technical issues in the upgrade process itself inaddition to performing functional application testing. Perform the following actions for each testing type:
• Determine criteria for successful completion.
• Determine which tests you can run concurrently and which you must run serially.
• Set up test plans and test scripts you will need.
• Define the testing environment.
• Define issue resolution procedures.
• Define change control and migration procedures.
• Define which third-party tools you must install and configure.
• Identify database maintenance procedures, for example, backup and refresh.
• Evaluate the need for a testing tool to aid in the testing process.
Task D-5: Developing Your Test PlanIf you have test plans from your implementation or previous upgrades, consider modifying them for thisupgrade project, ensuring that you incorporate features and functions delivered with the new release. Useexisting test plans and scripts wherever possible. Identify modifications during the fit/gap analysis andcomplete script generation during the initial upgrade. Based on the objectives and scope defined in your testingstrategy, identify the following items for each type of testing:
• Test procedures• Assumptions• Timing• Deliverables
Copyright © 2007, Oracle. All rights reserved. 305

Planning for Upgrade Testing Appendix D
• Acceptance criteria• Roles and responsibilities• Resource requirements• Training requirements• Test environment• Data requirements• Issue and change control tracking procedures• Testing Tools
Task D-6: Developing Test ScriptsThe process of developing test scripts can assist with detecting problems in the requirements or design of anapplication. It requires thinking through the entire operation of the application. For this reason, you may findit useful to start preparing test scripts early in the upgrade cycle and, if possible, base them on existing testscripts from your implementation project or previous upgrade.
If you have test scripts from your original implementation, recycle them and modify them to accommodate newfunctionality. That way, you can be sure to cover your critical end-to-end business processes. You will alsowant to focus additional testing time on your customizations to verify that they have upgraded successfully.
If you do not have test scripts from your implementation, you can create them by documenting what youcurrently do within the system.
Create a test script for each business process to define the Action or Event, Input, and the expected resultto determine if a feature of an application is working correctly. Functional people who are aware of currentprocesses should write your test scripts. However, when writing test scripts, assume the person testing does notknow how to use the system. Use the following procedure for developing test scripts:
• Test scripts should contain specifics, such as test identifier, test name, objective, test conditions and setup,input data requirements, steps, and expected results.
• Write as a step-by-step guide, stating what data should be entered, when, and where.
• Organize by module, business process, and process cycles.
• Create with full production security in mind.
• Create early in the upgrade process.
Make sure that your tests are consistent with the following tips:
• Action
- Include the script name, description, and purpose.
- Include the navigation steps within the PeopleSoft system.
- Include navigation steps outside the PeopleSoft system.• Input
- Include security requirements: what User ID, Role, and Permission List should be used to perform thetest.
306 Copyright © 2007, Oracle. All rights reserved.

Appendix D Planning for Upgrade Testing
- Specify key data elements: entering new or accessing existing data.• Results
- Include the exact results.
- Print screens to support the results and print the report output.
Task D-7: Reviewing Tips and TechniquesThis section discusses:
• Reducing the Time of Upgrade Process
• Performing Security Testing
• Performing Testing on Up to Date Data
• Performing Test Move to Production
• Tracking Issues
• Reviewing Testing Tools
• Discussing Change Control
• Discussing Back Up Procedures
• Evaluating Unexpected Results
• Evaluating Reasons for Failure
Task D-7-1: Reducing the Time of Upgrade ProcessAll testing can be performed at the end, including running the tests on the current system to obtain resultsfor comparison. One way to reduce the overall timeframe of an upgrade is to execute the tests on the currentsystem while the upgrade is in progress. This way you will have the results ready when the upgraded databaseis to be tested. This can be achieved by taking two copies of the production database at the start of the upgrade.Only one copy is upgraded, while the other remains at current release. The testing time is now reduced to onlyperforming the tests on one database.
After each test Move to Production, you may want to turn over the upgraded database to the testing team whilethe technical team begins a new iteration of the test Move to Production. Conducting the two efforts in parallelmay decrease the overall time required to upgrade. Any issues that are found by the testing team can beincorporated into the newly upgraded database as soon as it is available.
One approach that may be used for the Move to Production is to run the production database and upgradeddatabase in parallel to ensure that key business processes operate as expected. Although this may requiredual maintenance of data during the parallel testing period, it may minimize the impact of the actualMove to Production. If you are interested in using this method, once you have performed a test Move toProduction to your satisfaction, schedule the production cutover weekend. Then, perform the next test Move toProduction during that weekend. Bring the existing production system back up and run the upgraded databaseconcurrently. If, after comparing the outcome of your critical business processes, you are satisfied with theresults, simply set the upgraded database to your production system. If you are not satisfied with the results,make the necessary adjustments and perform another test Move to Production.
Copyright © 2007, Oracle. All rights reserved. 307

Planning for Upgrade Testing Appendix D
Task D-7-2: Performing Security TestingIt is very important that you test security on each test pass you complete. Security is a vital part of the upgradeprocess and if it is not tested properly before you go live with your new release, there is a great potentialfor failure.
Task D-7-3: Performing Testing on Up to Date DataThe previous technique will mean that testing is performed on old data. The copies of production may havebeen taken some weeks or months in the past. It will confirm that the data you started with has upgradedsuccessfully. However, it may be required to perform the tests on the most recent data set as follows:
• Take a copy of production and upgrade• Perform all phases of testing on the upgrade version up to unit testing• Determine that the database is ready for full functionality testing
Task D-7-4: Performing Test Move to ProductionPerforming a test Move to Production is a good technique for assuring database readiness as follows:
• Take two up to date copies of the production database.• Perform the test Move to Production steps to upgrade one of the databases.• Execute test scripts on the remaining database.• Perform tests on the upgraded database and compare results.
Task D-7-5: Tracking IssuesYou should implement a method for tracking the tests and issues discovered during testing. Tracking issuesand resolutions on a central document serves as a communication tool and minimizes duplication effort. Thefollowing tips should be considered while tracking issues:
• Categorize issues:
Critical, Major, Minor, Cosmetic
• Use a central document repository or tracking tool
Task D-7-6: Reviewing Testing ToolsSQA Robot :
• Records key strokes (like a macro recorder) into Visual Basic scripts.• Useful for regression testing.• SQA Manager—can be used to simulate multiple users.
Test Director by Mercury/Interactive:
• Tool that manages test scripts—tracks execution and defects.
• Useful for regression testing.
308 Copyright © 2007, Oracle. All rights reserved.

Appendix D Planning for Upgrade Testing
Task D-7-7: Discussing Change ControlMake sure that you have a procedure for implementing changes during the testing stage. You may have severaldatabases, if server space permits. All changes should be made in a master database. If an issue is foundduring testing, the resolution should be applied to the master database and promoted via pre-defined migrationprocedures. Remember that a master database will also be required to perform the Move to Production.
Task D-7-8: Discussing Back Up ProceduresThe following tips should be considered when backing up your data:
• Back up at baseline before testing (use a backup technique that will allow you to restore individual tables).• Back up at key points for point in time testing.• Implement refresh procedures to avoid duplicate data.
Task D-7-9: Evaluating Unexpected ResultsIn the event you receive unexpected results and you cannot determine their cause, attempt to replicate anyissues you encounter in your Copy of Production database on a delivered Demo database. If the issue doesoccur on Demo, it should be reported to the Global Support Center. Check PeopleSoft Customer Connectionto see if a fix has been posted to resolve the issue.
See PeopleSoft Customer Connection (Updates + Fixes).
Task D-7-10: Evaluating Reasons for FailureThe list below identifies reasons why your test plan might have failed:
• Testing strategy was poorly defined
• Test plans were poorly defined
• Test scripts were poorly defined
• Lack of resources and resource commitment
• Lack of understanding of the upgrade process
Copyright © 2007, Oracle. All rights reserved. 309

Planning for Upgrade Testing Appendix D
310 Copyright © 2007, Oracle. All rights reserved.

APPENDIX E
Preserving Queries and Tree Objects
This appendix discusses:
• Understanding Preserve Queries and Trees
• Preparing the Database
• Creating a New Project
• Comparing the New Project
• Copying the Project
• Testing the Project
• ReExporting the PeopleTools Tables
Understanding Preserve Queries and TreesThis appendix contains information for preserving queries, trees, and tree structures. At the beginning of yourupgrade, you should have informed your end-users and development team that your PeopleSoft system wasfrozen, meaning that no changes should have been made to any PeopleTools tables or objects includingqueries, trees, and tree structures. The freeze on PeopleTools changes is important because you will lose anychanges to these objects made during an upgrade to PeopleTools tables. Occasionally, however, end-users mayhave to make critical changes to trees, tree structures, and PS/Query objects. If this has happened in yoursystem, you can perform a process to preserve those additions and changes to trees, tree structures, andqueries. You will have to work with your end-users and developers to obtain a list of queries, trees, andtree structures that you need to preserve.
You will run through the test Move to Production (MTP) steps several times for practice and testing purposes.Please note that you have the option to perform the preserving queries and trees procedure during each of yourtest Move to Production runs, but you must perform it during the last run of the test Move to Production. If youdo not perform this procedure during your last run to preserve the trees, tree structures, and queries that havebeen changed since the beginning of your upgrade, they will be lost.
Note. The process outlined in this appendix to preserve trees and queries should be performed prior to dataconversion so that any additional conversion would be taken care of by the appropriate data conversionprograms.
This appendix includes instructions to prepare your database and create a project on which to preserve yourqueries, trees, and tree structure changes.
Copyright © 2007, Oracle. All rights reserved. 311

Preserving Queries and Tree Objects Appendix E
Task E-1: Preparing the DatabaseIn this step, you create a new copy of your current production database, perform steps on the new copy, and runscripts against the new copy to update the release level.
To prepare the database:
1. At the beginning of the test Move to Production, you should make a new copy of your current productiondatabase. To preserve queries and trees, you need to make not only that Copy of Production but also anadditional copy of your current production database. For clarity, PeopleSoft refers to this additional copyof your production database as the Tree/Query Copy of Production database. So now you should have aCopy of Production database and a Tree/Query Copy of Production database.
2. Perform the test Move to Production on your Copy of Production database.3. To obtain the queries and trees that you want to preserve, the Tree/Query Copy of Production databaseneeds to be at the same release level as the Copy of Production database on which you just completedthe test Move to Production. To update your Tree/Query Copy of Production to the same release, yourun release scripts against this database. PeopleSoft refers to this as “reling up” the database. Use theCustom Compare template to “rel up” your database. Select the Product Line PEOPLETOOLS whenconfiguring your Change Assistant job.
Task E-2: Creating a New ProjectNow that your Tree/Query Copy of Production is at the same release as your Copy of Production database,you create a project in the Tree/Query Copy of Production that contains all of the queries and trees thatyou wish to preserve.
To create a new project:
1. Using PeopleTools 8.4x, sign on to the Tree/Query Copy of Production using a valid PeopleSoft UserID and launch Application Designer.
2. Select File, New...
3. Select Project for Object Type.
4. Select File, Save Project and enter a project name; for example, PRESERVED.
5. Select the Upgrade tab in Application Designer.
Note. Queries and trees do not appear in projects under the Development tab in Application Designer. Tosee the queries and trees that you will insert into the PRESERVED project in the next step, you must makesure that you are using the Upgrade view of Application Designer.
6. Select Insert, Definitions into Project...7. Select Queries from the Definition Type drop-down list box and click Insert.8. Using your list of identified queries that need to be preserved, highlight each one of those queries fromthe Application Designer list.You can highlight more than one by holding down the Control (CTRL) key while you click the name ofthe query.
312 Copyright © 2007, Oracle. All rights reserved.

Appendix E Preserving Queries and Tree Objects
9. After you have highlighted all of the queries that you want to preserve, click Insert, then click Close.Under the PRESERVED project name in the Upgrade view of Application Designer, you will see Queriesas an object type in the project.
10. Double-click on queries under the PRESERVED project to see a listing of all of the queries to preserve inthe right-hand window of Application Designer.
11. Select File, Save Project.12. Repeat steps 6 through 11 for trees and tree structures.Now your PRESERVED project should contain all of the queries, trees, and tree structures that youwant to preserve.
Task E-3: Comparing the New ProjectIn this step, you compare the queries, trees, and tree structures that are in your PRESERVED project againstyour Copy of Production database. Because the tree objects in your PRESERVED project are not comparableobjects in Application Designer, you must manually compare the tree objects that you want to preserve. Duringthe query and tree structure compare process, the Application Upgrade utility sets the project flags. These flagsdetermine whether the following actions will occur:
• Changes will be performed on the Copy of Production (Target) database when you perform the exportand copy.
• Changes will be tagged as Copy or Delete operations.
• The project flags will be set to automatically take these actions or not.
These settings are determined based on whether or not the objects in the project currently exist on the Copy ofProduction (Target) database.
To compare the new project:
1. Using PeopleTools 8.4x, sign on to the Tree/Query Copy of Production using a valid PeopleSoft UserID and launch Application Designer.
2. Select File, Open...
3. For Definition, select Project and click Open to display the list of projects.
4. Select the PRESERVED project and click Open.
5. Select Tools, Compare and Report.
6. Sign on to your Copy of Production.
7. From the Object Type box, select Queries and Tree Structures.
8. Click Options…
9. Select PeopleSoft Vanilla for the Target Orientation.
10. Select Project for the Compare Type.
11. Verify that the Compare Report output directory is set to the correct location.
12. Select the Report Filter tab and set the report filter check boxes appropriately for your compare.
13. Click OK.
Copyright © 2007, Oracle. All rights reserved. 313

Preserving Queries and Tree Objects Appendix E
14. Select Compare.15. Review the compare reports for queries and tree structures. In addition, perform a manual compare of thetrees that you want to preserve. Based on the results of this review, set the Action and Upgrade checkbox appropriately in the PRESERVED project.
Task E-4: Copying the ProjectIn the following steps, you copy the PRESERVED project to the Target database. This is the Copy ofProduction database on which you ran the test Move to Production.
To copy the project:
1. Using PeopleTools 8.4x, sign on to the Tree/Query Copy of Production using a valid PeopleSoft UserID and launch Application Designer.
2. Select File, Open...3. For Definition, select Project and click Open to display the list of projects.4. Select the PRESERVED project and click Open.5. Select Tools, Upgrade, Copy.6. Sign on to your Copy of Production database.7. Make sure that the Reset Done Flags and Copy Project check boxes are selected.8. Click Select All.9. Click Copy.10. Using the Upgrade view of the PRESERVED project in Application Designer, review the Done flags in theproject to make sure that all of the objects that you wanted to preserve were copied to the Target database.
Task E-5: Testing the ProjectNow that the queries, trees, and tree structures that you wanted to preserve are in the Copy of Productiondatabase, you must test and re-test and make any necessary changes if the test results are not what you expected.
Task E-6: ReExporting the PeopleTools TablesOnce you are satisfied with the test results, you must re-export the PeopleTools tables to actually preservethe queries, trees, and tree structures. During your test Move to Production, you ran MVPRDEXP.DMS toexport the PeopleTools tables. You will use the output files created from running this job as input filesduring your Move to Production. Because these files were created before copying the queries, trees, andtree structures that you wanted to preserve, the files do not contain the preserved objects, so you must runthe MVPRDEXP.DMS script again. Running the MVPRDEXP.DMS script again ensures that you have themost current PeopleTools tables.
To re-export the PeopleTools tables:
314 Copyright © 2007, Oracle. All rights reserved.
Appendix E Preserving Queries and Tree Objects
1. As a PeopleSoft user, launch Data Mover against your Copy of Production database and run the followingscript:
\PS_HOME\SCRIPTS\MVPRDEXP.DMS
2. Use the output files created during your final Move to Production.
Copyright © 2007, Oracle. All rights reserved. 315

Preserving Queries and Tree Objects Appendix E
316 Copyright © 2007, Oracle. All rights reserved.
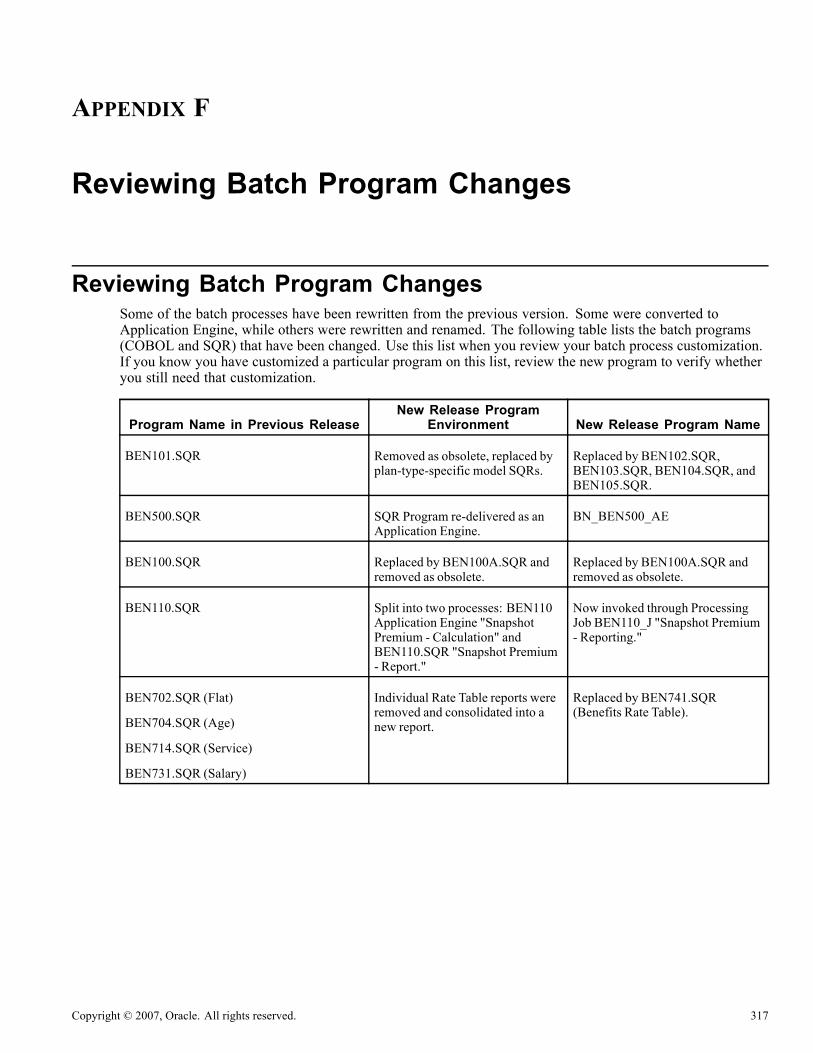
APPENDIX F
Reviewing Batch Program Changes
Reviewing Batch Program ChangesSome of the batch processes have been rewritten from the previous version. Some were converted toApplication Engine, while others were rewritten and renamed. The following table lists the batch programs(COBOL and SQR) that have been changed. Use this list when you review your batch process customization.If you know you have customized a particular program on this list, review the new program to verify whetheryou still need that customization.
Program Name in Previous ReleaseNew Release Program
Environment New Release Program Name
BEN101.SQR Removed as obsolete, replaced byplan-type-specific model SQRs.
Replaced by BEN102.SQR,BEN103.SQR, BEN104.SQR, andBEN105.SQR.
BEN500.SQR SQR Program re-delivered as anApplication Engine.
BN_BEN500_AE
BEN100.SQR Replaced by BEN100A.SQR andremoved as obsolete.
Replaced by BEN100A.SQR andremoved as obsolete.
BEN110.SQR Split into two processes: BEN110Application Engine "SnapshotPremium - Calculation" andBEN110.SQR "Snapshot Premium- Report."
Now invoked through ProcessingJob BEN110_J "Snapshot Premium- Reporting."
BEN702.SQR (Flat)
BEN704.SQR (Age)
BEN714.SQR (Service)
BEN731.SQR (Salary)
Individual Rate Table reports wereremoved and consolidated into anew report.
Replaced by BEN741.SQR(Benefits Rate Table).
Copyright © 2007, Oracle. All rights reserved. 317

Reviewing Batch Program Changes Appendix F
318 Copyright © 2007, Oracle. All rights reserved.

APPENDIX G
Reviewing Benefits Changes
This appendix discusses:
• Reviewing Benefit System Indicator on Job
• Reviewing Benefit Record Number Display
• Reviewing Effective Dating of Dependents
• Reviewing Effective Dating of Company Cars
• Reviewing Savings Management Enhancements
• Understanding Benefit Program Enhancement
• Reviewing Changes to Relationship Usage
• Reviewing Spending Account Changes
• Reviewing Consolidation of Benefit Rates
• Reviewing Consolidation of Coverage Calculations
Task G-1: Reviewing Benefit System Indicator on JobIn the new PeopleSoft release a new value was added to the translate list for Benefit System “OT” (Other orNot managed by PeopleSoft Benefits). This complements the existing values of the “BN” (Base Benefits)and “BA” (Automated Benefits Administration). This new value, in conjunction with changes to the PersonModel, allow for better management of contingent workers and non-employee persons-of-interest. Thesepersons can be assigned to Benefits System OT and will be screened out of most Benefits-related search viewsand processes. Persons assigned to Benefit System OT will not have default Benefit Program assignedto them in the Job Data pages.
During the upgrade, we attempt to identify persons who are assigned to Benefit System “BN” because noother choice was available. Most notably, these are persons for whom prior hiring logic did not requirea Benefits Program Participation record. All persons lacking a Benefits Program Participation record(PS_BEN_PROG_PARTIC) are moved to the Benefit System OT. This can leave many persons assigned toBenefit System BN for whom you don’t actually manage benefits. Unfortunately, the upgrade process cannotreliably identify such persons because of the wide range of business practices in use. (For example, somecompanies want certain persons assigned to a Benefit Program for administrative or third-party purposes, eventhough these persons never have active benefit elections recorded for them). Leaving such persons in BenefitSystem BN will not be a problem, as the system will continue to process (or ignore) them as before.
Copyright © 2007, Oracle. All rights reserved. 319

Reviewing Benefits Changes Appendix G
Task G-2: Reviewing Benefit Record Number DisplayIn some prior PeopleSoft releases, a configuration parameter on the Installation Table was used to indicatewhether multiple simultaneous jobs for employees were managed. However, this system capability is nowpermanently turned on. (This tracks persons-of-interest and contingent workers, and allows these personsto transition to employees while retaining their original high-level Person ID.) Because of this system-widechange, the concept of the Benefit Record Number is now more prominent than it was in previous releases. Infact, all Base Benefits election pages now display Benefit Record Number (BENEFIT_RCD_NBR) ratherthan Employment Record Number (EMPL_RCD).
In the past, if you managed only single jobs for your employees, you were “shielded” from the BenefitRecord Number. This was possible because the employee’s single Benefit Record Number was generated toequal the employee’s single Employment Record Number, so the concept of Benefit Record Number waskept “hidden” for clarity. If you manage multiple jobs for your employees, you know that Benefit RecordNumber is the key to grouping together several jobs that share the same set benefits. For these customers, theEmployment Record Number displayed in the Base Benefits corresponded to the “primary” job within theBenefit Record Number group.
Going forward, the Base Benefits search dialogs and pages use and display Benefit Record Number.
Note. This does not change how benefits are managed, and is not a functional change in how the PeopleSoftsystem behaves.
This is simply an attempt to make the system visually and functionally consistent. If you manage only singlejobs for your employees, you can ignore the Benefit Record Number, which is automatically assigned toemployees, contingent workers, and persons-of-interest in a manner consistent with previous releases. If youmanage multiple jobs with multiple benefit tracks, the new search view criteria and page displays resultin improved usability.
Task G-3: Reviewing Effective Dating of DependentsDependent/Beneficiary information is now effective-dated. The existing dependent information has beenrestructured in a manner similar to the core Person information: a core set of identifying information that doesnot change with time (PS_DEP_BEN); biographical information that is time sensitive (PS_DEP_BEN_EFF);and separate records for Name (PS_DEP_BEN_NAME), Addresses (PS_DEP_BEN_ADDR), and NationalID (PS_DEP_BENEF_NID). Most processes that use dependent (or beneficiary) information will be fullyeffective-date enabled. They will retrieve or process dependent information based on the state of that data onthe historical or functional event date or “as-of” date applicable to the benefits process being run.
Task G-4: Reviewing Effective Dating of Company CarsCompany car data is now effective dated with effective status. In previous PeopleSoft releases, you may havedirectly deleted the cars (CAR_DATA) from the table when they were no longer required to avoid incorrectallocation. In the new PeopleSoft release, you can make the cars active or inactive and maintain history.
320 Copyright © 2007, Oracle. All rights reserved.

Appendix G Reviewing Benefits Changes
Task G-5: Reviewing Savings Management EnhancementsSavings Extensions and Overrides has been renamed and redesigned to reflect its true Savings Managementpurpose. Limit types/Exception Reasons have been expanded to include Limit 401(a)/Adjust Eligible EarningsYTD which allows the user to adjust eligible earnings used in 401(a) limit processing. The second Limittype/Exception reason is the Hardship Withdrawal 402(g) limit reduction which was taken off of the 402(g)Catch up row. The corresponding Hardship Withdrawal Date, which regulates the Savings Plan suspensionperiod after a hardship withdrawal, has been moved to a new Enrollment Suspension grid. Note that ExceptionReason is more descriptive of how it affects the calculation; for example, Extend Limit, Reduce Limit, orAdjust Eligible Earnings YTD.
The upgrade is performed for all rows in Savings Management, PS_SAVINGS_MGT_EE, with LimitType/Exception Reason 402(g) Catch-up and an existing Hardship Withdrawal Date. Review the new LimitException 402(g) Hardship, SAVINGS_MGT_EE, and Enrollment Suspension, ENROLL_EXCEPTN, rowsgenerated from the Limit Exception 402(g) Catch-Up record, as described for upgrade.
Task G-6: Understanding Benefit Program EnhancementCustomers have asked for an “empty” Benefit Program, one with no Plans associated with it, for use invarious administrative situations. For example, PeopleSoft Payroll for North America expects a payee tobe assigned to a Benefit Program even if that individual is not being administered through Base Benefits.Assigning this person to an “empty” Program emphasizes the administrative nature of the assignment andprevents unintentional enrollments from being entered. To facilitate this, a new manual Benefit Program calledPSX with an effective date of 1900-01-01 is being delivered as system data. (This is because the businessvalidations performed by the Benefit Program Definition component prevent the user from directly creatingsuch an “empty” program themselves.)
Task G-7: Reviewing Changes to Relationship UsageThis section discusses:
• Understanding Changes to Relationship Usage
• Reviewing Cobra Event Rules
• Reviewing Dependent Relationship Rules
• Reviewing HIPAA Changes
Task G-7-1: Understanding Changes to Relationship UsageFor consistency in the use of Relationship codes, we are consolidating any relationships codes in the TranslateTable that currently reflect gender into a single genderless code. For example, Son and Daughter are beingconsolidated into Child, since in general gender is available as a separately tracked personal attribute. All tablesthat contain the field Relationship will undergo data conversion to reflect the non-gender translate values.
Copyright © 2007, Oracle. All rights reserved. 321

Reviewing Benefits Changes Appendix G
Task G-7-2: Reviewing Cobra Event RulesCobra Event Rules (CBR_EVENT_BENEF) is being modified to use Covered Person Type instead ofRelationships, in order to streamline and standardize the functionality with the existing functionality in theBenefits Administration product. You should validate the content of this record after upgrading, since theconversion of duplicate genderless Relationship rows might have impacted your production data.
Task G-7-3: Reviewing Dependent Relationship RulesThe Dependents Relationship Table (DEPBEN_TYPE_TBL) is specifically upgraded to convert to genderlessrelationship codes. To eliminate duplicates, only the most current rows for any grouping of old gender-specifictranslate values was converted. Customized rows that do not conflict with the new PeopleSoft-maintainednon-gender values are converted, but overlapping rows are deleted. You should validate the content of thisrecord after upgrading.
Task G-7-4: Reviewing HIPAA ChangesThe EDI mapping table (BN_834_MAP_TBL) is specifically upgraded to convert to genderless relationshipcodes. Customized rows that do not conflict with the new PeopleSoft-maintained non-gender values areconverted, but overlapping rows are deleted. You should validate the content after upgrading.
Task G-8: Reviewing Spending Account ChangesThis section discusses:
• Understanding Spending Account Setup
• Reviewing Changes to Spending Account Pledge Limits
• Reviewing FSA Claims Processing Setup
Task G-8-1: Understanding Spending Account SetupA new field, Spending Account Type (BN_SPEND_ACCT_TYPE), has been added to the FSA Benefit Table.It is used to distinguish whether the Spending Account being created is a traditional Flexible SpendingAccount (which assumes claims management) or a newly supported Health Savings Account. The defaultvalue for this new field is Flexible Spending Account. During the Record-Alter step of applying the upgrade,all existing rows will receive this default value, since that is the only type of Spending Account that waspreviously supported. Further, for plan types 60, 61, 65, and 66, this attribute cannot be changed. This isbecause certain assumed functional and regional behaviors for these standard FSA plans are built into the code.For all other plan types, the Spending Account Type is open for assignment, although all benefit plans under agiven plan type must have the same Spending Account Type. Note also that the system still has limitationsabout its ability to manage client-defined plan types within the 6X series.
A new field, Plan Contribution (PLAN_CONTRIBUTION), has also been added to the table. This concept isborrowed from Savings Plans and controls the requirements for employee contributions (Annual Pledge) whenenrolled in a Spending Account. That is, once enrolled, this flag controls whether an employee contributionis required, is optional (perhaps because the employer is also contributing), or not allowed (as might bethe case for a fully employer-paid HSA plan). To retain existing system behavior, the default for this fieldduring the Record-Alter step is Contribution Required.
322 Copyright © 2007, Oracle. All rights reserved.

Appendix G Reviewing Benefits Changes
Task G-8-2: Reviewing Changes to Spending AccountPledge LimitsFor Spending Accounts (6X plans) the Minimum and Maximum Employee Annual Contribution limits havebeen moved from the Benefit Program definition (from the Plan-level on PS_BEN_DEFN_PLAN) onto theSpending Account plan table (PS_FSA_BENEF_TBL). This provides better control over plan-specific limits.The data conversion performed on existing limit data is consequently a “best guess.” This is because the same6X plan may appear in more than one Benefit Program, but with different plan-type-level limits. Thus, theexisting limit definitions cannot be accurately mapped from their current plan-type level to the new individualbenefit-plan level. The data conversion process will copy the lowest non-zero Minimum limit and the highestnon-zero Maximum limit found for each Benefit Plan to the Spending Account Plan Table. As part of yourimplementation of this upgrade release, you need to review all of your existing 6X Spending Accountsand verify the limit information for them. Note that the default numeric value of 0 for either limit will beinterpreted as unlimited (or limit not used). Note that in order to reduce the impact of this feature, the existinglimit fields are not physically removed from the PS_BEN_DEFN_PLAN table, but rather simply hidden on allapplication pages, set to zero in the table, and ignored by all processing.
Task G-8-3: Reviewing FSA Claims Processing SetupAn FSA Admin Configuration tab has been added to the FSA Benefits Table setup to capture the informationneeded to properly implement the optional grace period, where overlapping periods exist for different calendaryears and claims may be paid from either available remaining pledge. This information is only needed if FSAclaims will be processed using the FSA Administration product.
Two new date fields, Service Date From and Through, are used to determine the service dates that are valid forclaims submitted. The following online restrictions apply:
• Claims must have a service date within the service date range to be paid under the plan.
• The beginning service date will default to the effective date of the plan; for example, 1/1/2006.
• The end service date will default to 12 months after the effective date of the plan; for example, 12/31/2006.
• The end service date must be greater than or equal to the beginning date.
• The service date range may be longer than 12 months and may overlap with service dates of other benefitplans that the employer offers in which the employee is enrolled.
A new Plan Year field has been added, in order to properly close only the relevant plans. All plans will need tobe identified with a Plan Year value. This field has a prompt from which valid years, such as 2005 or 2006, canbe selected. This value is used to group plans for use in the FSA Closure process. A new field is added tothe FSA Closure run control, from which the plan year is selected. Only those plans with a matching PlanYear Name value will be displayed and then can be selected for closure.
The minimum check amount for FSA plans, which was previously determined at the benefit program level, hasbeen moved to the benefit plan level. This allows FSA plans within one benefit program to have differentminimum check amounts. It is used to determine the minimum check amount when generating payments forthe plan in the same manner as before.
The upgrade process will populate the new fields as follows:
• Service dates from and through will default to the beginning and the end of the current year when theupgrade is run for all combinations of FSA plan types and benefit plans where the effective date isbefore the current date. In cases where future effective dates exist, a 12-month period will be assignedusing the effective date as the starting service date.
• The plan year will be the current year, or the year of the future effective date, depending on the case.
Copyright © 2007, Oracle. All rights reserved. 323

Reviewing Benefits Changes Appendix G
Be aware that the stated assumptions might not coincide with your implemented functionality, and valueswill need to be reviewed after conversion be selecting Set Up HRMS, Product Related , Base Benefits ,Plan Attributes, FSA Benefits Table. Also, since each effective dated row covers only a specific serviceperiod, you will need to introduce a new effective dated row for each plan type and benefit plan each yeargoing forward in the FSA Benefits table. This is only required if FSA claims will be processed using theFSA Administration product.
Task G-9: Reviewing Consolidation of Benefit RatesIn this release, we are consolidating all benefit rate data into a single common structure. The individualAge-Graded, Flat, Salary-Percent and Service tables will be dropped, and all rate data migrated to the newBenefit Rate Table. This table has a flexible architecture that can support all rate types, and will allow for thedefinition of user-defined rate types as well. The data conversion process has several points that require review:
• Rate Table IDs: Because the current benefit rates exist in several individual tables, the possibility existsthat the Rate Table IDs defined on those tables could conflict (be duplicates) when consolidated. Tomanage this, each Rate Table ID will be checked as it is converted, and if a conflict is detected, the RateTable ID will be modified to make it unique. Appending a Rate Type code to the end of the Rate Table IDdoes this. In prior releases, the Rate Type field was controlled by a set of Translate Table values. Theexisting values are Age-Graded (rate type=1), Flat (rate type=2), Salary-Percentage (rate type=3), andService (rate type=4). So as an example, if a Service-rate Rate Table ID “ABC” was found to conflictwith an ID that had already been converted, it would be renamed as “ABC-4”. All references to the oldRate Table ID in Benefit Program definitions will be updated. You can review the set of Rate Table IDsthat experienced conflicts by using the search criteria “%-%” in the new Benefit Rate Table component(Navigation: Set Up HRMS, Product Related, Base Benefits, Rates and Rules, Benefit Rates.)
• Zero-base on Numeric Ranges: The Age-Graded table and the Service table both contain ranges used todetermine the correct rate. In prior releases, the system allowed two situations that make interpretationdifficult. First, some Rate Tables do not have a lowest range defined. For example, the first entry may be 5to 15. Thus the range 0 to 4 is not managed. (Fortunately, the system would default to a zero rate forvalues in these undefined ranges.) During data conversion, the system will insert an “anchor” value ofzero for all ranges and set the associated rates to $0.00. Without a specific lower functional limit, the newbenefit rate architecture will return an error if a value falls outside the defined table ranges. Secondly(and more commonly), the first range in the rate table may start with 1 rather than 0. For example, thefirst age range might be 1-20, which technically omits newborns. (Again, the system previously woulddefault to a zero rate for ages below 1). During data conversion, the system will detect that a range starts at1 and automatically set it to start at zero instead. Since most values (age and service) can functionallybe zero in some situations, the new benefit rate architecture will return an error if a value falls outsidethe defined table ranges. You may want to review your converted Age-Graded and Service rates toconfirm that these actions have been made appropriately. (Navigation: Set Up HRMS, Product Related,Base Benefits, Rates and Rules, Benefit Rates.)
• Currency Code: Benefit Program definitions currently display a Currency Code as an informational item.However, neither PeopleSoft Benefits nor PeopleSoft Payroll for North America perform any type ofcurrency conversion. In previous releases, benefit rates did not include a currency code. Thus, the burdenwas on the user when setting up a Benefit Program to only use rates that matched the Program’s currency;the system was unaware of any currency mixing. For HCM 9, the Benefit Rate Table now includesa Currency Code as an informational item (except for Percent-of-Salary rates, which have no impliedcurrency). When setting up a Benefit Program, the system will validate that a Rate’s currency matches theProgram’s currency to reduce setup errors. During data conversion (benefit rate consolidation), the systemwill attempt to assign an appropriate currency code to each Rate Table ID, based on its usage in BenefitPrograms. There are two considerations here that should be reviewed: Rates may be defined that have
324 Copyright © 2007, Oracle. All rights reserved.

Appendix G Reviewing Benefits Changes
never been used in a Benefit Program, or Rates may exist that have been used in several different BenefitPrograms whose currency codes are not consistent. In the first instance, the converted Benefit Rate willhave a blank Currency Code. This will not affect its use (the system will treat that as a “wildcard” andallow it to be used with any Program currency) but it should be corrected as soon as possible for the sakeof simple data integrity. In the second instance, during data conversion the system will simply assignthe currency code found on the alphabetically lowest Benefit Program using that Rate Table ID. Thisshould be reviewed for correctness. (Select Set Up HRMS, Product Related, Base Benefits, Rates andRules, Benefit Rates.)
TaskG-10: Reviewing Consolidation of Coverage CalculationsIn prior releases, elements of coverage existed not only on the Benefit Plan attribute tables, the Life ADDTable and the Disability Plan Table, but also on the Calculation Rule Table. The Life ADD Table containedthe coverage formula components (Factor X Salary + Flat Amount), the Disability Plan Table containedthe Maximum Monthly Benefit and an implicit formula of Salary / 12, and the Calculation Rules Tablecontained the Coverage and Premium As-Of date rules, the Benefit Base to use, Multiple-job combinationrules, Rounding rules, and Coverage Minimum/Maximum. For this release, we consolidated these componentsinto a “Coverage Formula.”
During data conversion, the system analyzes the usage of Life and Disability benefit plans and CalculationRule IDs in Benefit Programs. Based on the combinations found, the system creates new Coverage Formulasto duplicate the coverage calculations performed in previous releases. The number of combinations could bequite large, and many of them could be unintentional (or even duplicates) since the Benefit Program allowscomplete flexibility in associating calculation rules with benefit plans, and since multiple benefit plans mayexist with the same attributes but from different vendors or with different descriptions. To reduce the numberof formulas created, and to avoid perpetuating unintentional variations, we restrict the data conversion;for each distinct set of Life or Disability attributes, we combine the set with only the single alphabeticallylowest Calculation Rule ID with which it is associated. We then create a model Coverage Formula based onthat combination, and update all relevant Life and Disability plans to reference the new Coverage FormulaID. In doing this, we assume that the same Life or Disability plan is not being used with a wide variety ofcalculation rules (different rounding rules, different Minimum/maximum, etc.), in order to avoid creating alarge number of Coverage Formulas. The concept of the reusable Coverage Formula is significant enoughto warrant performing only this model conversion, and requires a small re-implementation of your Life andDisability plans. This should be as simple as reviewing the data conversion results and confirming the actualcoverage calculations in test deduction calculation runs. (Navigation: Set Up HRMS, Product Related,Base Benefits, Rates and Rules, Coverage Formula.)
To facilitate the use of the automatically converted Coverage Formulas, we have implemented a namingconvention for Coverage Formula IDs that is representative of the formula’s content, 99|X|X|999X|X|X|,which is described in the following table.
BytePosition Format Content
1-2 99 Salary factor rounded to an integer for Life, DS for Disability
3 X The Benefit Base used, coded as Job Compensation Rate (C) or Annual BenefitsBase Rate (A).
4 X Indication of whether the Base combines across multiple jobs, coded as Multiple(M) or Single (S).
Copyright © 2007, Oracle. All rights reserved. 325

Reviewing Benefits Changes Appendix G
BytePosition Format Content
5–8 999X The Flat Amount for Life, if any, added to the coverage calculation, or MaximumMonthly Benefit for Disability, in a form of 500, 250K, or 1.5M, as appropriate.
9 X The Coverage Base As-Of date rule, coded as Check Date (C), Pay End Date (P),Last Year OnMM/DD (L), This Year OnMM/DD (T)
10 X A letter used to identify, in sequence, otherwise identical formulas (A, B, C, D, ...)
For example, Coverage Formula ID “02CS050KCA” would represent a Life coverage formula of “2 x Salary +50,000,” where the Salary is the Compensation Rate from the primary Job (not combined for multiple jobs) asdetermined on the Check Date. The final A indicates that this is the first such formula created. Note that theRounding rules, if any, are not represented in the Coverage Formula ID string, for lack of space.
326 Copyright © 2007, Oracle. All rights reserved.

APPENDIX H
Reviewing HRMS Changes
This appendix discusses:
• Reviewing Record and Field Conversions
• Reviewing Records with Duplicate Key Structures
• Reviewing the National ID Expiration Record
• Reviewing Schedule Defaults
Task H-1: Reviewing Record and Field ConversionsThis section discusses:
• Understanding Record and Field Conversions
• Status Conversions
• Reviewing Profile Management Table Deletions
Understanding Record and Field ConversionsThis section discusses a number of columns in your database that will be converted during the upgrade but willneed some functional analysis performed prior to running the data conversion scripts. Review the items belowto determine if you want to modify the delivered scripts prior to running them.
Task H-1-1: Status ConversionsIn the new release, the status indicators for six Recruit Workforce Records are changed from Translate Valuesto system-defined status codes. The following record.fields are converted:
• JOB_REQUISITION.JOB_REQ_STATUS• APPLICATN_DATA.APP_STATUS• POSN_APPLIEDFOR.APP_STATUS• OFFER.RESPONSE_OFFER• APPLICATN_ROUTE.RESPONSE_CD• INTERVIEW.RECOMMENDATION
Copyright © 2007, Oracle. All rights reserved. 327

Reviewing HRMS Changes Appendix H
Task H-1-2: Reviewing Profile Management Table DeletionsDuring the upgrade to Profile Management, there is data that will not be upgraded and thus will be not be inthe new release. There is no action for you to take, as this data cannot fit into the new Profile Managementmodel. Some of these tables contain related language data. The following tables are affected:
• CM_EVALUAT_LNG• CM_ELEM_DTL_LNG• ACCOMPLISH_LANG• SCHL_EDUC_LANG
Task H-2: Reviewing Records with Duplicate Key StructuresIn PeopleSoft 7.5, the records listed below had keys that were defined as duplicate keys. In PeopleSoft 8.3, theduplicate key structure was removed from these records. Where a PeopleSoft 7.5 record has duplicate keys, thedata conversion will eliminate all but the first row that it retrieves. If you want to preserve this data, you mayrun the following SQL, which will return all rows where the duplicate key condition is met. These SQLs needto be run on your current (old) database before the PeopleTools conversion takes place.
• INTERVIEW
SELECT *
FROM PS_INTERVIEW B
WHERE EXISTS (SELECT ’X’ FROM PS_INTERVIEW B2
WHERE B.EMPLID = B2.EMPLID
AND B.JOB_REQUISITION# = B2.JOB_REQUISITION#
AND B.POSITION_NBR = B2.POSITION_NBR
AND B.SETID = B2.SETID
AND B.JOBCODE = B2.JOBCODE
AND B. INTERVW_DT = B2.INTERVW_DT
AND B2.FINAL_RECOMMENDATN = ’Y’
GROUP BY B2.EMPLID, B2.JOB_REQUISITION#, B2.POSITION_NBR, B2.SETID, B2.JOBCODE
HAVING COUNT (*)>1)
• APPLICATN_ROUTE
SELECT*
FROM PS_APPLICATN_ROUTE B
WHERE EXISTS (SELECT ’X’ FROM PS_APPLICATN_ROUTE B2
WHERE B.EMPLID = B2.EMPLID
AND B.JOB_REQUISITION# = B2.JOB_REQUISITION#
AND B.POSITION_NBR = B2.POSITION_NBR
AND B.SETID = B2.SETID
AND B.JOBCODE = B2.JOBCODE
AND B.ROUTE_DT = B2.ROUTE_DT
AND B.ROUTE_TO_ID = B2.ROUTE_TO_ID
GROUP BY B2.EMPLID, B2.JOB_REQUISITION#, B2.POSITION_NBR, B2.SETID, B2.JOBCODE,
B2.ROUTE_DT, B2.ROUTE_TO_ID
328 Copyright © 2007, Oracle. All rights reserved.

Appendix H Reviewing HRMS Changes
• OFFER
SELECT *
FROM PS_OFFER B
WHERE EXISTS (SELECT ’X’ FROM PS_OFFER B2
WHERE B.EMPLID = B2.EMPLID
AND B.JOB_REQUISITION# = B2.JOB_REQUISITION#
AND B.POSITION_NBR = B2.POSITION_NBR
AND B.SETID = B2.SETID
AND B.JOBCODE = B2.JOBCODE
Task H-3: Reviewing the National ID Expiration RecordIn the new PeopleSoft release, the National ID expiration record, PERS_NID_EXP used to store Canadianexpiration dates, now only contains data for National ID rows that have an expiration date. If an expiration datedoes not exist, a row will not be stored in this record as it was in previous releases. If you have customizedviews or reports that rely on a one-to-one relationship between a Canadian National ID row in PERS_NIDand PERS_NID_EXP this change will affect you.
Task H-4: Reviewing Schedule DefaultsThis section discusses:
• Reviewing Shift and Workdays Upgrade
• Determining the Effective Date of Schedule Definitions
• Reviewing Schedule Override Tables
Task H-4-1: Reviewing Shift and Workdays UpgradeReview the list below to see how the upgrade modified shifts and workdays.
• The effective dates of the shift IDs and workday IDs are set to the earliest effective date from the scheduledefinition in which they are used, only if the schedule definition has an earlier effective date than that ofthe shift or workday.
• The setIDs are set to the setID of the schedule definition in which they are used.
• If the shifts and workdays are used in multiple schedule definitions with different setIDs, a copy of theshift and workday is created for each of the setIDs.
Copyright © 2007, Oracle. All rights reserved. 329

Reviewing HRMS Changes Appendix H
Task H-4-2: Determining the Effective Date ofSchedule DefinitionsThe upgrade process determines the effective date of the schedule definitions. It begins by determining theminimum effective date in the locations where the schedule ID is used. This is called the “First Date Used.”You can check for the use of the schedule ID in the following locations:
• Assign Work Schedule (SCH_ASSIGN) as the schedule ID or the alternate schedule ID• Global Payroll Paygroup (GP_PYGRP_DTL) as the schedule ID or the alternate schedule ID• Workgroup (TL_WRKGRP_TBL) as the schedule ID
Follow the steps below to determine the effective date of the schedule definition.
To determine the effective date:
1. Check the last date that was built for the schedule ID from the Schedule Calendar (SCH_CLND_TBL) bychecking the View Schedule Calendar page in the source database.
2. Determine the number of days for that schedule definition.This process is done after converting the rest of the schedule definition so the number of days in theschedule is already determined.
3. Add one day, then start subtracting the number of days for that schedule definition to get the start day ofthe last schedule pattern of the Schedule Calendar.
4. Continue subtracting by the number of days for that schedule until the system derives the date on or beforethe First Date Used determined earlier.
For example, Schedule ID KUSCHDFP1 has a First Date Used=Schedule ID KUSCHDFP1.
• 1/1/1980 is the earliest effective date used in a Workgroup KUWRKGRP1.• 9/25/1982 is the earliest effective date used for EmplID KU0020 in SCH_ASSIGN as Schedule ID.The last date of the schedule calendar for KUSCHDFP1 Schedule Definition = 12/30/2006 from thePS_SCH_CLND_TBL. Add one day, then subtract the number of days in the schedule (Duration ofschedule = seven days) from 12/31/2006 = 12/24/2006. Continue subtracting the number of days in theschedule until you get a date to begin the schedule pattern, which is on or before the First Date Used =12/30/1979 = Sunday.
Task H-4-3: Reviewing Schedule Override TablesThe following list explains how the schedule override tables are upgraded in the new PeopleSoft release:
• Shift ID has been added to SCH_MNG_SCH_TBL, which was the storage table for the override scheduleworkday. The shift ID will be populated using details from the old workday.
• If workday had consisted of more than one shift, than a new row would be inserted intoSCH_MNG_SCH_TBL for each of the shifts, whether a primary or alternate workday override.
• The Sched Hrs, Sch Config Totals, and Start and End Time values are all populated using details fromthe shift tables.
• The setID is set to the setID of the workday.• If there is an alternate workday override from PeopleSoft 8 SP1, there will be another row in theSCH_MNG_SCH_TBL for the alternate override.
330 Copyright © 2007, Oracle. All rights reserved.
Appendix H Reviewing HRMS Changes
• The SCH_MNG_SCH_TBL is now populated for any third party overrides that exist inSCH_ADHOC_DTL. (In previous PeopleSoft releases any scheduling third-party interface populatedonly SCH_ADHOC_DTL.)
• The SCH_ADHOC_DTL table is now also populated for the alternate as well as the primary scheduleoverrides, using details from the shift table. (In previous PeopleSoft releases, this was only populated forprimary workday overrides.)
Copyright © 2007, Oracle. All rights reserved. 331

Reviewing HRMS Changes Appendix H
332 Copyright © 2007, Oracle. All rights reserved.

APPENDIX I
Reviewing Tablespaces
This appendix discusses:
• Understanding Tablespace Review
• Reviewing PeopleSoft 8.8x Table Names
Understanding Tablespace ReviewThis appendix lists the tables that previously existed in 4K page size tablespaces that now reside in 32Kpage size tablespaces in the new release.
Task I-1: Reviewing PeopleSoft 8.8x Table NamesReview the following PeopleSoft 8.8x tables:
• HR_SSTEXT_TEXT• EP_APPR_ITEM• EP_AP_ITM_TMP• EP_CHK_SUG_LANG• EP_CHK_SUG_TBL
Copyright © 2007, Oracle. All rights reserved. 333

Reviewing Tablespaces Appendix I
334 Copyright © 2007, Oracle. All rights reserved.

APPENDIX J
Sizing Tables for the Upgrade
This appendix discusses:
• Sizing Tables
Task J-1: Sizing TablesMany of the new tables and indexes will be populated during the upgrade. If they are not sized appropriatelyfor your database, the conversion programs will stop with errors. The following lists these new tables withinformation about how to size them relative to the size of your existing data. This information is meant to giveyou a rough estimate on an initial size so you can execute the conversion programs without errors.
Product Code Table Populated During UpgradeEstimate of Number ofRows of Data Inserted
PY PS_ALTOT_COMP_TMP This table will be populated if youmake functional decisions to doAlternative Overtime conversion.
Approximately one row peremployee/employee record forthose employees whose Jobrecords currently have FLSAstatus equal to Nonexempt, HRstatus not equal to Terminated, andwho work in a state specified onthe Alt Overtime upgrade defaultpage.
PY PS_ALTOT_JOBAUSTMP This table will be populated if youmake functional decisions to doAlternative Overtime conversion.
Approximately one row peremployee/employee record forthose employees whose Jobrecords currently have FLSAstatus equal to Nonexempt, HRstatus not equal to Terminated, andwho work in a state specified onthe Alt Overtime upgrade defaultpage.
Copyright © 2007, Oracle. All rights reserved. 335

Sizing Tables for the Upgrade Appendix J
Product Code Table Populated During UpgradeEstimate of Number ofRows of Data Inserted
PY PS_ALTOT_JOBINDTMP This table will be populated if youmake functional decisions to doAlternative Overtime conversion.
Approximately one row peremployee/employee record forthose employees whose Jobrecords currently have FLSAstatus equal to Nonexempt, HRstatus not equal to Terminated, andwho work in a state specified onthe Alt Overtime upgrade defaultpage.
PY PS_ALTOT_JOBJR_TMP This table will be populated if youmake functional decisions to doAlternative Overtime conversion.
Approximately one row peremployee/employee record forthose employees whose Jobrecords currently have FLSAstatus equal to Nonexempt, HRstatus not equal to Terminated, andwho work in a state specified onthe Alt Overtime upgrade defaultpage.
PY PS_ALTOT_JOBKEYS This table will be populated if youmake functional decisions to doAlternative Overtime conversion.
Approximately one row peremployee/employee record forthose employees whose Jobrecords currently have FLSAstatus equal to Nonexempt, HRstatus not equal to Terminated, andwho work in a state specified onthe Alt Overtime upgrade defaultpage.
336 Copyright © 2007, Oracle. All rights reserved.

Appendix J Sizing Tables for the Upgrade
Product Code Table Populated During UpgradeEstimate of Number ofRows of Data Inserted
PY PS_ALTOT_JOBUSFTMP This table will be populated if youmake functional decisions to doAlternative Overtime conversionand you have the Federal HRMSproduct.
Approximately one row peremployee/employee record forthose employees whose Jobrecords currently have FLSAstatus equal to Nonexempt, HRstatus not equal to Terminated, andwho work in a state specified onthe Alt Overtime upgrade defaultpage.
PY PS_ALT_OT_STATES This table will be populated if youmake functional decisions to doAlternative Overtime conversion.This is a setup table and wouldbe expected to be relatively lowvolume.
One row for each state allowingalternative overtime per setID, asspecified on the Upgrade Defaultspage.
TL PS_AUDIT_SCH_TBL Audit Scheduling table.
TL PS_AUDIT_TL_PAY_TM Audit payable time.
TL PS_AUDIT_TLRPTTIME All the audit data will be moved tothis new table.
BN PS_BEN_CONTACT_HDR
PS_BEN_CONTACT_TBL
This is a setup table and wouldbe expected to be relatively lowvolume.
Approximately the samenumber of records as inPS_COBRA_ADMINISTR.
BN PS_BN_FORM_DEF Approximately 1-10 rows for eachparent PS_BN_FORMULA row.
BN PS_BN_FORMULA Approximately the same numberof rows as PS_LIFE_ADD_TBLand PS_DISBLTY_PLN_TBLcombined.
Copyright © 2007, Oracle. All rights reserved. 337

Sizing Tables for the Upgrade Appendix J
Product Code Table Populated During UpgradeEstimate of Number ofRows of Data Inserted
BN PS_BN_RATE_DATA Approximately thesame number of rows asPS_FLAT_RATE_TBL,PS_SALARY_RATE_TBL,PS_SVC_COVG_TBL, and2 x PS_AGE_COVG_TBL(for Smoker vs Non-smoker)combined.
BN PS_BN_RATE_TBL Will have the same number ofrows as PS_AGE_RATE_TBL,PS_FLAT_RATE_TBL,PS_SALARY_RATE_TBL, andPS_SVC_RATE_TBL combined.
BN PS_BN_RATE_TBL_LNG For each row in parentPS_BN_RATE_TBL, willhave one row for each non-baselanguage supported by the client.
BN PS_COVRG_RULE_TBL This is a small, fairly static setuptable and will have approximatelyone to three times the number ofrows as in PS_COVRG_CD_TBL.
BN PS_DEP_BEN
PS_DEP_BEN_ADDR
PS_DEP_BEN_EFF
PS_DEP_BEN_NAME
All four new tables will eachhave the same number of rows asexist in PS_DEPENDENT_BENEF. After upgrade,PS_DEPENDENT_BENEFwill become a view on thesetables, rather than be a physicaltable.
BN PS_ENROLL_EXCEPTN Rows with withdrawal dates fromPS_SAVINGS_MGT_EE.
EP PS_EP_APPR_B_ITEM One row for each item within eachappraisal if using the baselinedocumentation.
EP PS_EP_APPR_B_ROLE One row for each role within eachappraisal if using the baselinedocumentation.
EP PS_EP_APPR_B_SEC One row for each section withineach appraisal if using the baselinedocumentation.
EP PS_EP_APPR_B_SUB One row for each sub-item withineach appraisal if using the baselinedocumentation.
338 Copyright © 2007, Oracle. All rights reserved.

Appendix J Sizing Tables for the Upgrade
Product Code Table Populated During UpgradeEstimate of Number ofRows of Data Inserted
EP PS_EP_APPR_NOMINEE One row for each reviewernominated to participate in areview, per appraisal.
EP PS_EP_APPR_NOM_LIST One row for each person selectedto participate in a review, perappraisal.
EP PS_EP_APPR_PARTIC One row for each role typeparticipating in a review, perappraisal.
EP PS_EP_ROLE_LANG Related Language for role setuptable. Size should be small.
EP PS_EP_ROLE_TBL Setup table. Use to set up roletypes. Size should be small.
EP PS_EP_TMPL_PARTIC Used to create/update documenttemplate participation roles. Onerow per review type, template IDand role.
PY PS_GARN_EXEMPT_TBL This is not a new table. However,upgrade processes will insertmany additional rows duringdata conversion. It will containa summary of rows for U.S. andCanadian garnishment rulesmaintained by PeopleSoft (definedas system data in PeopleSoft 9),plus all custom rows for U.S.and/or Canadian garnishmentrules that have been added in theprior release.
PY PS_GARN_OPERANDS This is not a new table. However,upgrade processes will insertmany additional rows duringdata conversion. It will containa summary of rows for U.S. andCanadian garnishment rulesmaintained by PeopleSoft (definedas system data in PeopleSoft 9),plus all custom rows for Canadiangarnishment rules defined in theCopy of Production, plus 6 rowson average for each custom U.S.garnishment rule from the Copy ofProduction database.
Copyright © 2007, Oracle. All rights reserved. 339

Sizing Tables for the Upgrade Appendix J
Product Code Table Populated During UpgradeEstimate of Number ofRows of Data Inserted
GP ES PS_GPES_CNTRB_RSLT The same number of rows as thefollowing:
PS_GP_RSLT_ACUMWHEREPIN_NUM = (SELECTPIN_NUM FROM PS_GP_PINWHERE PIN_CODE = ’SSAC BSE CCNRM S ESP’)AND (A.EMPL_RCD =A.EMPL_RCD_ACUMORACM_TYPE = ’N’)
GP ES PS_GPES_TAX2_RSLT Same number of rows as in the GPaccumulator results table for theelement TAXACDIN S
GP PS_GPGB_EE_IN Will have the same numberof rows as the existingPS_GPGB_EE_STDTLS table.
GP PS_GPGB_EE_TAX Will have the same numberof rows as the existingPS_GPGB_EE_STDTLS record.
GPMX PS_GPMX_INT_PARM One row per company per year.
GPMX PS_GPMX_INT_PAYEE One row per payee.
GPMX PS_GPMX_INT_P_DTL Twenty–five rows per companyper year.
PM PS_JPM_CAT_GMEMB The same number of rows asPS_COMPETENCY_TYPS.
PM PS_JPM_CAT_GROUPS The same number of rows asPS_CM_TYPE_TBL.
PM PS_JPM_CAT_GRP_LNG The same number of rows asPS_CM_TYPE_LANG.
PM PS_JPM_CAT_IRD_LNG The sum of the number of rows inthe following:
PS_CM_RATDESCR_LNG,PS_EP_SUBPROF_LANG
PM PS_JPM_CAT_I_RLAT Two times the sum of the numberof rows in the following:
PS_CM_ELM_CRITERIA,PS_COMPETENCY_ELEM,PS_EP_SUB_COMP_TBL,PS_NVQ_UNITS_REQ
340 Copyright © 2007, Oracle. All rights reserved.

Appendix J Sizing Tables for the Upgrade
Product Code Table Populated During UpgradeEstimate of Number ofRows of Data Inserted
PM PS_JPM_CAT_ITEM_RD The sum of the number of rows inthe following:
PS_CM_RATING_DESCR,PS_EP_SUB_PROF_TBL
PM PS_JPM_CAT_ITM_LNG The sum of the number of rows inthe following:
PS_ACCOMP_TBL_LANG,PS_CM_CRITERIA_LNG,PS_CM_ELEMENT_LNG,PS_COMPETENCY_LANG,PS_EDLVL_ACHV_LNG,PS_EP_GOAL_LANG,PS_EP_INIT_LANG,PS_EP_MISSION_LANG,PS_EP_RESP_LANG,PS_EP_SUBCOMP_LANG
PM PS_JPM_JP_SYND_SRC The number of rows will be thesame as the number of clusterprofiles syndicated to role profiles.
PM PS_JPM_JP_X_RLAT The sum of the number of rows inthe following:
1) PS_JOB_PROF_REVW
2) PS_CM_ROLE
3) PS_POSITION_DATA whereJOB_PROFILE_ID <> ’ ’
4) PS_JOB_FAMILY_TBL whereJOB_PROFILE_ID <> ’ ’
5) PS_JOBCODE_TBL whereJOB_PROFILE_ID <> ’ ’
6) PS_SAL_GRADE_TBL whereJOB_PROFILE_ID <> ’ ’
7) DISTINCT EMPLIDACROSS: PS_SCHL_EDUC_LANG, PS_EDUC_AREA_STUDY, PS_EG_SPECIAL_PRJ,PS_ACCOMPLISHMENTS,PS_SCHOOL_EDUCAT,PS_CM_EVALUATIONS,PS_SPECL_PROJECT
Copyright © 2007, Oracle. All rights reserved. 341

Sizing Tables for the Upgrade Appendix J
Product Code Table Populated During UpgradeEstimate of Number ofRows of Data Inserted
PM PS_JPM_PROFILE The sum of:
1) DISTINCT JOB_PROFILE_IDFROM PS_JOB_PROFILE_TBL
2) PS_CM_CLUSTER_TBL
3) PS_CM_ROLE
4) DISTINCT EMPLIDACROSS: PS_SCHL_EDUC_LANG, PS_EDUC_AREA_STUDY, PS_EG_SPECIAL_PRJ,PS_ACCOMPLISHMENTS,PS_SCHOOL_EDUCAT,PS_CM_EVALUATIONS,PS_SPECL_PROJECT
PM PS_JPM_PROFILE_LNG The sum of:
1) DISTINCT JOB_PROFILE_ID, LANGUAGE_CD FROMPS_JOB_PROF_LANG
2)PS_CM_CLUSTER_LANG
3) PS_CM_TYPE_LANG
HC PS_MU_CHANGE_TBL The latest results fromPS_MU_MASSUPD_RSLTusing max (LASTUPDDTTM).
HC PS_MU_SETUP_CHG Maximum number of rows willbe PS_MU_LEVEL01_DATA +(PS_MU_COMP_DATA x 11).
HC PS_MU_SETUP_DTL The same number of rows in rowfrom PS_MU_MASS_UPD_TBL.
HC PS_MU_SETUP_LNG The same number of rows inPS_MU_MASS_UPD_LNG.
HC PS_MU_SETUP_POP The same number of rows inPS_MU_MASS_UPD_TBL.
HC PS_MU_SETUP_TBL The same number of rows inPS_MU_MASS_UPD_TBL.
HC PS_MU_TP_TRANS_LNG The number of latest rowsbased on LASTUPDDTTMfrom the join of PS_MU_MASSUPD_RLNG,PS_RUNCTL_MASSUPD1,and PS_MU_MASSUPD_RSLT.
342 Copyright © 2007, Oracle. All rights reserved.

Appendix J Sizing Tables for the Upgrade
Product Code Table Populated During UpgradeEstimate of Number ofRows of Data Inserted
HC PS_MU_TP_TRANS_LOG The number of latest rowsbased on LASTUPDDTTMfrom the join of PS_MU_MASSUPD_RSLT,PS_RUNCTL_MASSUPD1,and PS_MU_MASSUPD_RSLT.
HC PS_MU_TP_TRANS_TBL The latest results fromPS_MU_MASSUPD_RSLTusing max (LASTUPDDTTM).
PY PS_PYGL_ACTIVDEDDT Approximately the same numberof rows as the Deductions ActivityGroup.
PY PS_PYGL_ACTIVDEDMP Approximately one row perCompany and Deductions ActivityGroup for each Deductions Codewithin that group that uses thesame Expense Account.
PY PS_PYGL_ACTIVERNDT Approximately the same numberof rows as the Earnings andActivity groups.
PY PS_PYGL_ACTIVERNMP Approximately one row perCompany and Earnings ActivityGroup, for each Earnings Codewithin that group that uses thesame Expense Account.
Copyright © 2007, Oracle. All rights reserved. 343

Sizing Tables for the Upgrade Appendix J
Product Code Table Populated During UpgradeEstimate of Number ofRows of Data Inserted
PY PS_PYGL_ACTIVITYGP Summary of Earnings,Deductions, and Taxes ActivityGroups.
Earnings Activity Groups:Approximately onerow per Company foreach Activity defined inPS_CHART_KEYS_HRthat is used as a distinctExpense Account inPS_EARNINGS_TBL.
Deductions ActivityGroups: Approximatelyone row per Company foreach Activity defined inPS_CHART_KEYS_HRthat is used as a distinctExpense Account inPS_DEDUCTION_CLASS
Taxes Activity Groups:Approximately one rowper USA Company foreach Activity defined inPS_CHART_KEYS_HRthat is used as a distinctExpense Account inPS_COMPANY_TBL_GLand/or one row per CanadianCompany, Wage Loss Plan,and each Activity defined inPS_CHART_KEYS_HR that isused as an Expense Account inPS_WGLS_EXP_GL_ACC.
PY PS_PYGL_ACTIVTAXDT Approximately the same numberof rows as the Taxes Activitygroups.
PY PS_PYGL_ACTIVTAXMP Approximately one row perCompany and Taxes ActivityGroup for each Tax Class withinthat group that uses the sameExpense Account.
PY PS_PYGL_CF_CPNYCTX Approximately one row perCompany for each HR BusinessUnit that is mapped to a GLBusiness Unit and has chartkeysdefined for the CAN Payroll TaxesActivity Group.
344 Copyright © 2007, Oracle. All rights reserved.

Appendix J Sizing Tables for the Upgrade
Product Code Table Populated During UpgradeEstimate of Number ofRows of Data Inserted
PY PS_PYGL_CF_CPNYDED Approximately one row perCompany for each HR BusinessUnit that is mapped to a GLBusiness Unit and has chartkeysdefined for the DeductionsActivity Group.
PY PS_PYGL_CF_CPNYERN Approximately one row perCompany for each HR BusinessUnit that is mapped to a GLBusiness Unit and has chartkeysdefined for Earnings Activitygroups.
PY PS_PYGL_CF_CPNYLEV Approximately one row perCompany for each HR BusinessUnit that is mapped to a GLBusiness Unit.
PY PS_PYGL_CF_CPNYTAX Approximately one row perCompany for each HR BusinessUnit that is mapped to a GLBusiness Unit and has chartkeysdefined for the US Payroll TaxesActivity Group.
PY PS_PYGL_CF_MAPPING Approximately one row perCompany for each HR BusinessUnit that is mapped to a GLBusiness Unit.
PY PS_PY_TAX_GL_CLASS This is a setup table and wouldbe expected to be relatively lowvolume.
One row for each Payroll Activityand Account Type for U.S.A. andCanada.
HR PS_SP_MER_INCR_EE For each employee, one row foreach “current” Employee Reviewentry for each Review Type thatis associated with a salary/meritincrease.
HR PS_SP_MER_INCR_RNG This is a setup table and would beexpected to be low volume.
One row for each Merit GroupTable entry associated with a meritscale represented in the new tablePS_SP_MER_INCR_TBL.
Copyright © 2007, Oracle. All rights reserved. 345

Sizing Tables for the Upgrade Appendix J
Product Code Table Populated During UpgradeEstimate of Number ofRows of Data Inserted
HR PS_SP_MER_INCR_TBL This is a setup table and would beexpected to be low volume.
One row for each Review ScaleTable entry of the type Summation.
TL PS_TL_RPTD_TIME All the data from PS_TL_RPTD_ELPTIME andPS_TL_RPTD_PCHTIMEwill be moved to this new table.
TL PS_TL_SCH_EXT_DTL Scheduling external detail table.
TL PS_TL_TR_COMMENTS If you used comments in timereporting, then this table will havecomments rows for both Punchand Elapsed data tables.
HP PS_UPG_ACCT_CD_TAO Approximately the number ofdistinct ACCT_CD values inPS_UPG_ACCT_CD_TBL(renamed PS_ACCT_CD_TBL).
PY PS_UPG_ACTBU_TAO Approximately the number ofdistinct ACCT_CD values inPS_UPG_ACCT_CD_TBL(renamed PS_ACCT_CD_TBL)multiplied by the number of GLBusiness Units you use.
PY PS_UPG_ACTCD_L_TAO Approximately the number ofdistinct ACCT_CD values inPS_UPG_ACCT_CD_TBL(renamed PS_ACCT_CD_TBL).
PY PS_UPG_ALTOTJOBTMP This table will be populated if youmake functional decisions to doAlternative Overtime conversion.
Approximately one row peremployee/employee record forthose employees whose Jobrecords currently have FLSAstatus equal to Nonexempt, HRstatus not equal to Terminated, andwho work in a state specified onthe Alt Overtime upgrade defaultpage.
346 Copyright © 2007, Oracle. All rights reserved.

Appendix J Sizing Tables for the Upgrade
Product Code Table Populated During UpgradeEstimate of Number ofRows of Data Inserted
PY PS_UPG_HRSNRDTSTMP This table will be populated if youmake functional decisions to doAlternative Overtime conversion.
Approximately one row peremployee/employee record forthose employees whose Jobrecords currently have FLSAstatus equal to Nonexempt, HRstatus not equal to Terminated, andwho work in a state specified onthe Alt Overtime upgrade defaultpage.
GP ES PS_UPG_TXRSLT_GPES The same as number of rows as inPS_GPES_TAX_RSLT.
HP PS_UPG_VALCMBO_TAO Approximately the samenumber of records as inPS_UPG_ACCT_CD_TBL(renamed PS_ACCT_CD_TBL).
HP PS_VALID_COMBO_LNG Approximately the same numberof records as in PS_UPG_ACCT_CD_LNG (renamedPS_ACCT_CD_TBL_LNG).
HP PS_VALID_COMBO_TBL Approximately the samenumber of records as inPS_UPG_ACCT_CD_TBL(renamed PS_ACCT_CD_TBL).
Copyright © 2007, Oracle. All rights reserved. 347

Sizing Tables for the Upgrade Appendix J
348 Copyright © 2007, Oracle. All rights reserved.

APPENDIX K
Understanding Dynamic ChartFields Changes
This appendix discusses:
• Understanding Dynamic ChartFields Upgrade
• Understanding Changes in the Account Code Table
• Understanding Changes in GL Interface Setup
• Upgrading Time and Labor ChartFields
Understanding Dynamic ChartFields UpgradeIn PeopleSoft 9.0 there have been changes in the way Payroll for North America uses Standard ChartFieldconfiguration. This new functionality will vary according to the financials system being used, but no matterwhat financials system you use, the upgrade will impact your existing data.
Note. Changes in General Ledger Interface Setup impact you only if you use non-commitment accounting,while changes in Account Code Table impact you no matter what type of accounting you use.
Task K-1: Understanding Changes in the Account Code TableThis section discusses:
• Understanding Combination Codes
• Understanding FDM_HASH
Task K-1-1: Understanding Combination CodesCombination Code represents a particular set of ChartField values. The ChartField values used to be stored inACCT_CD_TBL.
In PeopleSoft 9.0 the structure of ACCT_CD_TBL is changing as well as the content. The newACCT_CD_TBL will store only combination codes used in Payroll for North America for either commitmentaccounting or noncommitment accounting.
In PeopleSoft 9.0 there is a new table VALID_COMBO_TBL that will store combination codes as theyare defined in the Financials database.
Both tables will be populated during the upgrade process with the data from your ACCT_CD_TBL as follows:
• Current ACCT_CD_TBL will be physically renamed into UPG_ACCT_CD_TBL.
Copyright © 2007, Oracle. All rights reserved. 349

Understanding Dynamic ChartFields Changes Appendix K
• Current ACCT_CD_TBL_LNG will be physically renamed into UPG_ACCT_CD_LNG.• To avoid confusion between DEPTID used in the Financials database and DEPTID used in the HCMdatabase, the DEPTID in CHARTFLD_KY_SBR will be renamed into DEPTID_CF.
New tables will have key structure as follows:
• ACCT_CD_TBL:FDM_HASH – a new value built for efficient access of the data. It is not going to be visible on any ofthe pages.
• VALID_COMBO_TBL:
- SETID – value converted from UPG_ACCT_CD_TBL.SETID.
- PROCESS_GROUP – blank value.
- FDM_HASH – a new value built for efficient access of the data. It is not going to be visible onany of the pages.
- EFFDT – value converted from UPG_ACCT_CD_TBL.EFFDT.
ACCT_CD, the old key in ACCT_CD_TBL, will still be saved in both tables; however, since it does notrepresent the same values in both tables, it will be saved as follows:
• ACCT_CD in ACCT_CD_TBL• FDM_COMBO_CD in VALID_COMBO_TBL
You will be able to use these fields to reconcile your conversion and verify that all data are convertedas expected.
Both tables will be populated during the upgrade, but that does not mean you have to use them both in yournew release. Using ACCT_CD_TBL is mandatory, but using VALID_COMBO_TBL is optional and youcan clear the table if you are not planning to use it. However, the timing of deleting these entries is crucialand might impact your setup of Expenses ChartField Mapping if you are planning to use that functionality.Please keep in mind that ACCT_CD_TBL in a new release might have less entries than you had in the oldrelease because it will only have entries you actually used. All entries from VALID_COMBO_TBL thatyou are planning to use in a new release will be saved in ACCT_CD_TBL during the Expenses ChartFieldMapping, if they have not been used already. If you clear VALID_COMBO_TBL before you complete thesetup, you might not have all expected entries available for a setup.
Note. Recommendation: Ensure all combination codes you need for setting up Expenses ChartField Mappingin a new release are entered in your old release before you make a copy of production database.
See AlsoPeopleSoft Application Fundamentals for HRMS PeopleBook, for your new release.
PeopleSoft Payroll for North America PeopleBook, for your new release.
PeopleSoft Human Resources PeopleBook: Manage Commitment Accounting, for your new release.
Task K-1-2: Understanding FDM_HASHFDM_HASH is a unique value representing acombination of all 16 ChartFields. It consists of two parts:characters 1-28 are hash value built based on ChartField combination, characters 29-31 are sequence numberadded to hash value to ensure uniqueness of the key.
350 Copyright © 2007, Oracle. All rights reserved.

Appendix K Understanding Dynamic ChartFields Changes
FDM_HASH is dependent on the format of each ChartField; therefore, the format of each ChartField inUPG_ACCT_CD_TBL is updated to uppercase to ensure that hash value will be built correctly.
Note. Each record in UPG_ACCT_CD_TBL that has SETID and at least one ChartField populated will beinserted into VALID_COMBO_TBL.
It is possible that the same ChartField combination is represented with two different account codes in theUPG_ACCT_CD_TBL:
• If the second (and any following) identical ChartField combination is within the same SETID, the sequencenumber of the FDM_HASH will be incremented by 1. If any of these identical ChartField combinationshas ‘Active’ Effective Status, all of them will have Effective Status updated to ‘Active’.
• If the second (and any following) identical ChartField combinations is within two different SETIDs, thesequence number of the FDM_HASH will not be incremented. This will result in two or more recordswith identical FDM_HASH, but it is valid because FDM_HASH is just one of the keys and the insertedrecords will not be duplicates.
It is possible that the algorithm used to create FDM_HASH returns the same value for two different ChartFieldcombinations:
• If the second ChartField combination is within the same SETID, the sequence number of the FDM_HASHwill be incremented by 1.
• If the second ChartField combination is within two different SETIDs, the sequence number of theFDM_HASH will not be incremented.
Note. Each record in UPG_ACCT_CD_TBL that has been used for distribution anywhere in PeopleSoft HCMand has at least one ChartField populated will be inserted into a new ACCT_CD_TBL.
FDM_HASH on ACCT_CD_TBL should be in sync with FDM_HASH on VALID_COMBO_TBL in themajority of the cases, but there are some exceptions to this:
• It is possible that the ChartField combination doesn’t exist on VALID_COMBO_TBL, but becauseit was used for distribution it has to be converted into a new structure of ACCT_CD_TBL. ChartFieldcombinations that have blank SETID are skipped during VALID_COMBO_TBL conversion.
• It is possible that FDM_HASH is duplicated on the new ACCT_CD_TBL even though it is not duplicatedon VALID_COMBO_TBL. VALID_COMBO_TBL has unique FDM_HASH within SETID. If there aretwo or more records with different account codes, but the same ChartField combination within differentSETIDs, they will not be duplicates in VALID_COMBO_TBL, but will be duplicates in ACCT_CD_TBL.To avoid this problem with duplicates and keep the distribution history as is, the sequence number of theFDM_HASH will be increased by 1.
Task K-2: Understanding Changes in GL Interface SetupThis section discusses:
• Understanding GL Interface Setup
• Understanding Liability Accounts
• Understanding GL Activity Grouping
Copyright © 2007, Oracle. All rights reserved. 351

Understanding Dynamic ChartFields Changes Appendix K
• Understanding Expenses ChartField Mapping
Understanding GL Interface SetupIn PeopleSoft 9.0, there have been changes to the General Ledger Interface setup procedure for organizationsthat use non-commitment accounting. There are some new interface tables introduced that provide moreflexible integration between Payroll for North America and General Ledger.
Chart Dist HR and Chart Keys HR will not be used in PeopleSoft 9.0. Instead, new tables are defined to grouppayroll activities and map defined groupings to specific ChartFields. Liability offset accounts are defined onthe payroll source table directly.
Chart Dist HR and Chart Keys HR can be deleted at the end of the conversion.
The fields that represent Expenses Account Type in the COMPANY_TBL_GL, WGLS_EXP_GL_ACC,EARNINGS_TBL, and DEDUCTION_CLASS tables will not be physically deleted, but they are notaccessible from any of the pages.
Important! Once you create your Copy of Production database during the initial pass you should not makeany changes in your production database for Company, Company State Taxes, Company Local Taxes, WageLoss Plan Table, and Deduction Table until you complete the upgrade. If you make changes to any of theabove tables you will not be able to use the import script during the Move to Production pass to import the datathat you have set up in the initial pass. You will either have to synchronize the data between production and thecopy of the production in the initial pass before you set up data and complete the export, or manually set updata in your Copy of Production during the Move to Production pass.
Task K-2-1: Understanding Liability AccountsThe General Ledger Interface process enforces balancing of GL transactions by creating offset credittransactions using Liability accounts. In PeopleSoft 9.0, these liability accounts are defined directly onpayroll source tables.
If you are using non-commitment accounting, you must do following:
• Run and review Liability ChartField Usage audit report on your copy of the production during initial pass.Work in conjunction with general ledger staff to make sure the reviewed liability accounts are correctlyassigned.
See “Prepare Your Database,” Running Application Audits, Running Dynamic ChartFields Audits.• Manually update tables with liability accounts, if any updates are needed.
See “Complete Database Changes,” Setting Up General Ledger Interface, Setting Up the LiabilityAccounts.
• Export tables updated in your copy of the production during the initial pass of the upgrade.
See “Apply Application Changes,” Completing Application Processes, Exporting GL Interface SetupTables.
• Import tables into your new copy of the production during the Move to Production (MTP) phase.
See “Apply Application Changes,” Completing Application Processes, Importing GL Interface SetupTables.
Sections of audit reports listed under table name will help to decide how you want to set up data in each table:
• Company — COMPANY_TBL_GL
352 Copyright © 2007, Oracle. All rights reserved.

Appendix K Understanding Dynamic ChartFields Changes
Review the liability accounts listed in the Company Federal Tax and Net Pay Liability ChartFieldssection of the Liability ChartField Usage report and set up the data by entering liability accounts foreach Company if the update is needed.The fields you might need to set up are as follows:
Field Name Description
GL_NET_PAY Net Pay
GL_DIR_DEPOSITS Direct Deposit
GL_FWT Federal Withholding
GL_EIC Earned Income Credit
GL_FICA_EE_OASDI OASDI – Employee
GL_FICA_EE_MED FICAMedicare – Employee
GL_FICA_ER_OASDI OASDI – Employer
GL_FICA_ER_MED FICAMedicare – Employer
GL_FUT Federal Unemployment
Note. NetPay and Direct Deposit liability accounts are for both US Payroll and Canadian Payroll. FederalTax liability accounts are for US Payroll only.
• Company State Tax Table — CO_STATETAX_TBLReview the liability accounts listed in the State Tax Liability ChartFields section of the Liability ChartFieldUsage report and set up the data in Company State Tax Table by entering liability accounts for eachCompany/State combination if the updates are needed.The fields you might need to set up are as follows:
Field Name Description
GL_SWT State Withholding
GL_SUT State Unemployment – Employee
GL_SUT_ER State Unemployment – Employer
GL_SDI State Disability – Employee
GL_SDI_ER State Disability – Employer
GL_VDI_EE Voluntary Deduction – Employee
GL_VDI_ER Voluntary Deduction – Employer
GL_ST_EIC State Earned Income Credit
Copyright © 2007, Oracle. All rights reserved. 353

Understanding Dynamic ChartFields Changes Appendix K
Note. State Tax liability accounts are for US Payroll only.
• Company Local Tax Table — CO_LOCALTAX_TBLReview the liability accounts listed in the Local Tax Liability ChartFields section of the LiabilityChartField Usage report and set up the data in Company Local Tax Table by entering liability accounts foreach Company/State/Locality combination if the updates are needed.The fields you might need to set up are as follows:
Field Name Description
GL_LWT Local Withholding – Employee
GL_LWT_ER Local Withholding – Employer
Note. Local Tax liability accounts are for US Payroll only.
• Wage Loss Plan Table — WGLS_LIA_GL_ACCReview the liability accounts listed in the Canadian Tax Liability ChartFields section of the LiabilityChartField Usage report and set up the data in Wage Loss Table by entering liability accounts for eachWage Loss Plan/Tax Class combination if the updates are needed.The fields you might need to set up are as follows:
Field Name Tax Class Description
GL_NBR CIT Canadian Income Tax
GL_NBR CPP Canadian Pension Plan –Employee
GL_NBR CPR Canadian Pension Plan –Employer
GL_NBR EIE Employment Insurance -Employee
GL_NBR EIR Employment Insurance - Employer
GL_NBR HTX Health Tax
GL_NBR PYT Payroll Tax
GL_NBR QBT Quebec Bonus Tax
GL_NBR QIT Quebec Income Tax
GL_NBR QPP Quebec Pension Plan – Employee
GL_NBR QPR Quebec Pension Plan – Employer
354 Copyright © 2007, Oracle. All rights reserved.

Appendix K Understanding Dynamic ChartFields Changes
Field Name Tax Class Description
GL_NBR RV2 Quebec Income Tax – RL2
GL_NBR T4A Canadian Income Tax – T4A
Note. Canadian Tax liability accounts are for Canadian Payroll only.
• Deduction Table — DEDUCTION_CLASS
Review the liability accounts listed in the Deduction Liability ChartFields section of the LiabilityChartField Usage report and set up the data in Deduction Table for each Wage Deduction Code/DeductionClass combination, if updates are needed.
The fields you might need to set up are:
Field Name Description
GL_LIABILITY Deduction Liability
Note. Deduction liability accounts are for both US Payroll and Canadian Payroll.
Task K-2-2: Understanding GL Activity GroupingIn PeopleSoft 9.0, organizations that use non-commitment accounting can track expenses by using payrollactivities groups. In prior releases, GL accounts were assigned to individual earning, deduction, and taxactivities. In PeopleSoft 9.0, organizations can group payroll activities that share similar characteristics andthat are assigned to one ChartField combination.
If you are using non-commitment accounting you must do the following:
• Run and review Chartkey Usage by Expense Types audit report on your copy of the production duringinitial pass. The report lists all earnings code, deduction code, U.S. taxes, and Canadian taxes expensesaccounts defined on Chart Dist HR and Chart Keys HR tables in prior releases.
See “Prepare Your Database,” Running Application Audits, Running Dynamic ChartFields Audits.• Manually set up the GL activity groupings. Work in conjunction with general ledger staff to make sure youwill group payroll activities and be able to map them correctly to corresponding ChartFields in a later step.
See “Complete Database Changes,” Setting Up General Ledger Interface, Setting Up the GL ActivityGroupings.
• Export tables updated in your copy of the production during initial pass of the upgrade.
See “Apply Application Changes,” Completing Application Processes, Exporting GL Interface SetupTables.
• Import tables into your new copy of the production during Move to Production pass.
See “Apply Application Changes,” Completing Application Processes, Importing GL Interface SetupTables.
Tables created for Payroll Activities grouping are:
Copyright © 2007, Oracle. All rights reserved. 355

Understanding Dynamic ChartFields Changes Appendix K
PYGL_ACTIVITYGP
PYGL_ACTIVERNDT PYGL_ACTIVDEDDT PYGL_ACTIVTAXDT
PYGL_ACTIVERNMP PYGL_ACTIVDEDMP PYGL_ACTIVTAXMP
Tables created for Payroll Activities Grouping
PYGL_ACTIVITYGP table stores activity groups by Company. Earnings, Deductions, and Taxes Indicatorscan be checked ON in any combinations.
Field Name Description
COMPANY Company Code
PYGL_GROUPNAME 30 characters group identifier
DESCR Activity Group description
PYGL_EARN_GRP Yes / No indicator for Earnings
PYGL_DEDUCT_GRP Yes / No indicator for Deductions
PYGL_TAX_GRP Yes / No indicator for Taxes
PYGL_ACTIVERNDT stores the effective date of each Earnings activity group.
Field Name Description
COMPANY Company Code
PYGL_GROUPNAME 30 characters group identifier
EFFDT Effective date of the Earnings Group
PYGL_ALLCODES Yes / No indictor to identify if this activity group includesAll earnings codes. Note: For each Company, there shouldbe only one Earnings Activity Group that has this indicatorchecked ON
356 Copyright © 2007, Oracle. All rights reserved.

Appendix K Understanding Dynamic ChartFields Changes
PYGL_ACTIVERNMP stores all earnings codes that are included in the Earnings activity group.
Field Name Description
COMPANY Company Code
PYGL_GROUPNAME 30 characters group identifier
EFFDT Effective date of the Earnings Group
ERNCD Earnings Code
Following is an example of the Earnings Activity Group setup for Sick Leave:
Earnings Expenses page
PYGL_ACTIVDEDDT stores the effective date of each Deduction activity group
FieldName Description
COMPANY Company Code
PYGL_GROUPNAME 30 characters group identifier
EFFDT Effective date of the Deduction Group
PYGL_ALLCODES Yes / No indictor to identify if this activity group includesAll deduction codes. Note: For each Company, thereshould be only one Deduction Activity Group that has thisindicator checked ON
PYGL_ACTIVDEDMP stores all deduction codes that are included in the Deduction activity group.
Copyright © 2007, Oracle. All rights reserved. 357

Understanding Dynamic ChartFields Changes Appendix K
FieldName Description
COMPANY Company Code
PYGL_GROUPNAME 30 characters group identifier
EFFDT Effective date of the Deduction Group
PLAN_TYPE Deductions plan type
DED_CLASS Deduction Classification
DEDCD Deduction Code
DED_SLSTX_CLASS Sales Tax Type
Following is an example of the Deduction Activity Group setup for Health Benefits:
Deduction Expenses page
PYGL_ACTIVTAXDT stores the effective date of each Tax activity group.
FieldName Description
COMPANY Company Code
PYGL_GROUPNAME 30 characters group identifier
358 Copyright © 2007, Oracle. All rights reserved.

Appendix K Understanding Dynamic ChartFields Changes
FieldName Description
EFFDT Effective date of the Tax Group
PYGL_ALLCODES Yes / No indictor to identify if this activity group includesAll taxes. Note: For each Company, there should be onlyone Tax Activity Group that has this indicator checked ON
PYGL_ACTIVTAXMP stores all taxes that are included in the Tax activity group.
FieldName Description
COMPANY Company Code
PYGL_GROUPNAME 30 characters group identifier
EFFDT Effective date of the Deduction Group
PYGL_TAX_COUNTRY Either USA or Canada
STATE State (for US only)
LOCALITY Locality (for US only)
WAGE_LOSS_PLAN Wage Loss Replacement Plan (for Canada only)
PYGL_TAX_CLASS Tax Class activities
Following is an example of the Tax Activity Group setup for Federal FICA Tax:
Tax Expenses page example for FEDERAL FICA Tax
Following is an example of the Tax Activity Group setup for Canada CPP Tax:
Copyright © 2007, Oracle. All rights reserved. 359

Understanding Dynamic ChartFields Changes Appendix K
Tax Expenses page example for Canada CPP Tax
See AlsoPeopleSoft Enterprise Payroll for North America PeopleBook, for your new release.
Task K-2-3: Understanding Expenses ChartField MappingIn the new PeopleSoft release, organizations that use non-commitment accounting, can assign ChartFieldsto payroll activity in various report levels. There are five report levels – Company, Department, Position,JobCode, and employment record. Organizations can track expenses down to individual employment recordlevel if desired
Earnings, Deductions, and Taxes are defined as separate mapping entries. Therefore, they could be mapped todifferent levels. For example, organizations can track earnings expenses in employment record level and trackfringe benefits (deductions and taxes) at Department level. The General Ledger Interface process retrievesthese mappings starting from the lowest level (employment record) and reaches up to JobCode, Position,Department, and Company until a mapping definition is found.
If you are using non-commitment accounting you must do following:
1. Run and review Chartkey Usage by Company and Business Unit and Chartkey Usage by Expense Typesaudit reports on your copy of the production during initial pass.The reports list all earnings code, deduction code, U.S. taxes, and Canadian taxes expenses accountsdefined on Chart Dist HR and Chart Keys HR tables in prior releases.
See “Prepare Your Database,” Running Application Audits, Running Dynamic ChartFields Audits.2. Manually set up the expenses ChartField mappings.Work in conjunction with general ledger staff to make sure you will map payroll activities groupingscorrectly to each company/business unit combination.
See “Complete Database Changes,” Setting Up General Ledger Interface, Setting Up the ExpensesChartField Mappings.
3. Export tables updated in your copy of the production during initial pass of the upgrade.
See “Apply Application Changes,” Completing Application Processes, Exporting GL Interface SetupTables.
4. Import tables into your new copy of the production during Move to Production pass.
360 Copyright © 2007, Oracle. All rights reserved.
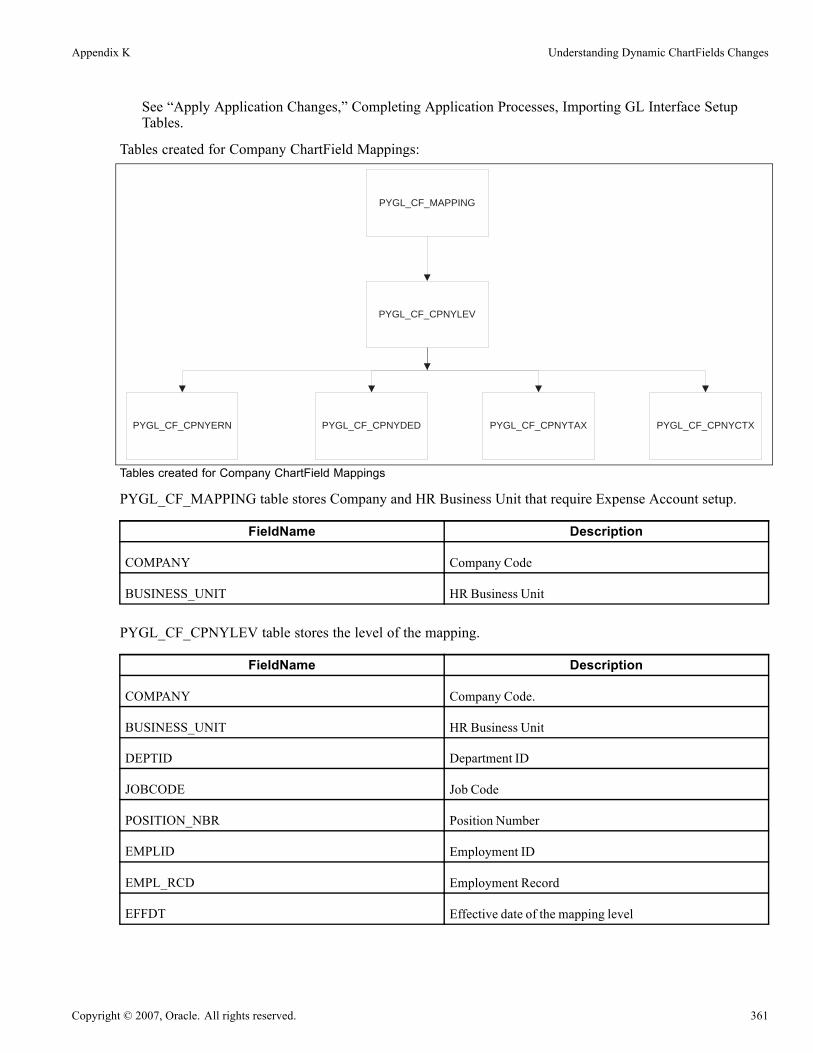
Appendix K Understanding Dynamic ChartFields Changes
See “Apply Application Changes,” Completing Application Processes, Importing GL Interface SetupTables.
Tables created for Company ChartField Mappings:
PYGL_CF_MAPPING
PYGL_CF_CPNYLEV
PYGL_CF_CPNYERN PYGL_CF_CPNYDED PYGL_CF_CPNYTAX PYGL_CF_CPNYCTX
Tables created for Company ChartField Mappings
PYGL_CF_MAPPING table stores Company and HR Business Unit that require Expense Account setup.
FieldName Description
COMPANY Company Code
BUSINESS_UNIT HR Business Unit
PYGL_CF_CPNYLEV table stores the level of the mapping.
FieldName Description
COMPANY Company Code.
BUSINESS_UNIT HR Business Unit
DEPTID Department ID
JOBCODE Job Code
POSITION_NBR Position Number
EMPLID Employment ID
EMPL_RCD Employment Record
EFFDT Effective date of the mapping level
Copyright © 2007, Oracle. All rights reserved. 361

Understanding Dynamic ChartFields Changes Appendix K
FieldName Description
EFF_STATUS Effective status of the mapping level
COMPANY_LEVEL_INDC Mapping Level – either Company, Department, Position,JobCode or Employment record.
PYGL_CF_CPNYERN table stores ChartField assignment to each earnings activity group.
PYGL_CF_CPNYDED table stores ChartField assignment to each deduction activity group.
PYGL_CF_CPNYTAX table stores ChartField assignment to each US Tax activity group.
PYGL_CF_CPNYCTX table stores ChartField assignment to each Canada Tax activity group.
All these tables share the same record layout:
FieldName Description
COMPANY Company Code
BUSINESS_UNIT HR Business Unit
DEPTID Department ID
JOBCODE Job Code
POSITION_NBR Position Number
EMPLID Employment ID
EMPL_RCD Employment Record
EFFDT Effective date of the mapping level
PYGL_GROUPNAME Payroll Activity Group name
ACCT_CD ChartField Combination code
Sections of audit reports listed under table name will help you in deciding how you want to set up data ineach table:
• PYGL_CF_CPNYERN tableReview the expense accounts listed in:
- ChartKey Usage by Company and Business Unit audit report, Company Earnings Accounts section
- ChartKey Usage by Expense Type audit report, Earnings Expense Accounts section• PYGL_CF_CPNYDED tableReview the expense accounts listed in:
- ChartKey Usage by Company and Business Unit audit report, Company Deduction Accounts section
- ChartKey Usage by Expense Type audit report, Deduction Expense Accounts section• PYGL_CF_CPNYTAX table
362 Copyright © 2007, Oracle. All rights reserved.

Appendix K Understanding Dynamic ChartFields Changes
Review the expense accounts listed in:
- ChartKey Usage by Company and Business Unit audit report, US Company Tax Accounts section
- ChartKey Usage by Expense Type audit report, US Tax Expense Accounts section
• PYGL_CF_CPNYCTX table
Review the expense accounts listed in:
- ChartKey Usage by Company and Business Unit audit report, Canadian Company Tax Accountssection
- ChartKey Usage by Expense Type audit report, Canadian Tax Expense Accounts section
Following is an example of the Earnings Mapping setup for Sick Leave at Employee Level:
Earnings Mapping page; Setup for Sick Leave at Employee Level
Following is an example of the Earnings Mapping setup for Sick Leave at Department Level:
Earnings Mapping Tab; Setup for Sick Leave at Department Level
Following is an example of the Deduction Mapping setup for Health Benefits at Department Level:
Copyright © 2007, Oracle. All rights reserved. 363

Understanding Dynamic ChartFields Changes Appendix K
Deductions Mapping tab; Setup for Health Benefits at Department Level
Following is an example of the US Tax Mapping setup for Federal FICA Tax at Department Level:
US Tax Mapping tab; Setup for Federal FICA Tax at Department Level
Following is an example of the Canada Tax Mapping setup for CPP Tax at Department Level:
Canadian Tax Mapping tab; Setup for CPP Tax at Department Level
364 Copyright © 2007, Oracle. All rights reserved.

Appendix K Understanding Dynamic ChartFields Changes
See AlsoPeopleSoft Enterprise Payroll for North America PeopleBook, for your new release.
Task K-3: Upgrading Time and Labor ChartFieldsChartField enhancements are provided with the new PeopleSoft release. The individual ChartFields wereexpanded from 14 fields to 16 fields and the Account Code field was relabeled as Combo Code. The biggestchange is that now commitment accounting and non-commitment accounting customers have access to allChartFields and the associated functionality. A distinction between the two no longer exists in Time and Labor.
Prior to the new release, a user was able to report an Account Code and a Project ID for a single transaction.The reported Account Code might have an associated Project ID. The associated Project ID could be the sameor different from the Project ID entered on the transaction row. This functionality is still available in the newrelease, however; if Project ID is an active ChartField then the Combo Code that is reflected on the transactionneeds to represent the combination of associated individual ChartField values correctly.
To upgrade the data from prior releases correctly, a process was created to identify all transactions that have anAccount Code and Project ID reported together. Data from TL_PAYABLE_TIME, TL_RPTD_TIME andTL_TSKPRF_DETL tables is pulled into an upgrade table, and then the comparison is performed to identify ifthe Project ID associated with the Account Code is the same as the Project ID reported directly. If the AccountCode does not reflect the reported Project ID, then a new Combo Code is generated or an existing ComboCode is identified, from the ACCT_CD_TBL, and all transaction rows associated are updated with the newvalue. This process will only impact transaction rows where the application is integrated with PeopleSoftProject Costing and not transaction rows that have a Time and Labor Project reported.
During the process outlined above, Combo Codes that were inactive at the start of the upgrade may bereactivated. The new release captured these Combo Codes for informational purposes. The following query:‘UPG_TL_ACCT_CD_ACTIVATED – Upgrade TL activated Account Codes’ displays a list of impactedCombo Codes. If you are using the Account Code Load Process from PeopleSoft Financials, run this at the endof the upgrade to inactivate any Combo Codes that are no longer valid.
In the new release, the Project ID associated with a Combo Code is stored in the project field throughout theapplication. Prior to the new release, only the Account Code was stored, the associated Project ID was not. Inthe new release, this will cause exceptions to be generated when Interface with PeopleSoft/Projects flag ischecked on the Time and Labor Installation page. To assist with preventing these exceptions, the upgradeprocess will query all transaction rows to determine if a reported Account Code has an associated ProjectID and a Business Unit PC also exists. For these transactions the Project ID associated with the ComboCode will be stored in the project field.
The new release provides some queries that can be generated to compare the upgraded data to what existed inthe system prior to the upgrade process. These queries all begin with UPG_TL and are:
• UPG_TL_CFOLDNEW – Upgrade TL Account Code
Provides a list of account codes that have been impacted during the upgrade. They are either old onesthat need to be reactivated or new ones that have been generated.
• UPG_TL_PAY_NEWACC – TL Upgrade Payable Time New Account Code
Provides a list of payable time rows that have been changed. The existing account code has beenreplaced with a newly generated account code that represents the combination of data originally storedin payable time.
• UPG_TL_PAY_REUSED – TL Upgrade Payable Time Reused Account Code
Copyright © 2007, Oracle. All rights reserved. 365

Understanding Dynamic ChartFields Changes Appendix K
Provides a list of payable time rows that have been changed. The existing account code has beenreplaced with a previously existing account code that represents the combination of data originally storedin payable time.
• UPG_TL_PAY_UPDATED – TL Upgrade Payable Time UpdatedProvides a list of payable time rows that have been changed because the Project ID associated with theaccount code is now stored in the project id field.
• UPG_TL_PRJ_NEWACC – TL Upgrade Task Profile New Account CodeProvides a list of task profiles that have been changed. The existing account code has been replaced with anewly generated account code that represents the combination of data originally stored on the task profile.
• UPG_TL_PRJ_REUSED – TL Upgrade Task Profile Reused Account CodeProvides a list of task profiles rows that have been changed. The existing account code has been replacedwith a previously existing account code that represents the combination of data originally stored onthe task profile.
• UPG_TL_PRJ_UPDATED – TL Upgrade Task Profile UpdatedProvides a list of task profiles that have been changed because the Project ID associated with the accountcode has been stored in the project id field.
• UPG_TL_RPTD_NEWACC – TL Upgrade Reported Time New Account CodeProvides a list of reported time rows that have been changed. The existing account code has beenreplaced with a newly generated account code that represents the combination of data originally storedin reported time.
• UPG_TL_RPTD_REUSED – TL Upgrade Reported Time Reused Account CodeProvides a list of reported time rows that have been changed. The existing account code has beenreplaced with a previously existing account code that represents the combination of data originally storedin reported time.
• UPG_TL_RPTD_UPDATED – TL Upgrade Reported Time UpdatedProvides a list of reported time rows that have been changed because the Project ID associated with theaccount code is now stored in the project id field.
Additionally, the new release provides a query for users to identify if the Combo Code associated to a TaskProfile is invalid, ‘UPG_TL_INVALID_TSKPRF – Task Profile-Invalid Combo Code’. This query will onlyvalidate using the table method and not the sync message with PeopleSoft Financials. Run this anytimeindividual ChartField values or Combo Codes are inactivated.
366 Copyright © 2007, Oracle. All rights reserved.

APPENDIX L
Understanding Garnishments Changes
This appendix discusses:
• Understanding Garnishments Upgrade
• Understanding Payee Changes
• Understanding Rules Changes
Understanding Garnishments UpgradeIn PeopleSoft 9, we enhanced Garnishments functionality, which impacted the following areas:
• Garnishment Payee Data• Garnishment Rule Data
We added the Location field to the payee data we store on the garnishment order to enhance processes thatcreate invoices for paid orders. You will notice this change when you are creating new garnishment orders,whether you are using U.S. Payroll or Canadian Payroll. However, the upgrade related to this change ismandatory only if you are using our AP Interface functionality to create invoices.
We made several changes in the way we store U.S. garnishments rules, which you will notice if you are usingU.S. Payroll or Federal Payroll to set up or review garnishments rules. There is no change in the way that westore Canadian garnishments rules. However, due to the fact that garnishments rules tables store data for U.S.and Canadian rules, and may store rules maintained by you in addition to the rules we deliver, even if you onlyuse Canadian Payroll, your garnishments data will be processed by some upgrade tasks. This was the only wayfor us to deliver a generic upgrade that will work for any combination of data a user might have.
Task L-1: Understanding Payee ChangesThis section discusses:
• Understanding Changes to Payee Data
• Updating Payee Data During the Initial Pass
• Updating Payee Data During Move to Production
Copyright © 2007, Oracle. All rights reserved. 367

Understanding Garnishments Changes Appendix L
Understanding Changes to Payee DataIf you are using AP Interface to create an invoice for the payee, you have to store payee data in the garnishmentorder. The payee data must exist in the Payee Table in order to be entered into the garnishment order. Whenyou enter the payee data, the payee’s address details will be added to the garnishment order, but it will notbe used in any further processing. When the invoice and the voucher are created, the data sent to AccountsPayable does not contain the details about the payee’s address; instead, it only has key information from thePayee Table that will allow AP processes to find the details on their side. This processing is based on theassumption that the Payee Table is synchronized on both sides, and it was designed in such way to avoidsending unnecessary information.
In PeopleSoft 9, we have added the Location field to the garnishment order (GARN_SPEC record) to ensurethat we will send the correct keys to the AP side, which will in return find the correct address details whensending vouchers to the payees.
During the conversion, we will update the location on the garnishment order with the default location fromthe Payee Table. However, in some cases that might not be enough to complete the upgrade correctly. Thefollowing scenarios are possible:
• Some of your payees might be set up with different invoicing and remitting VendorIDs.
• Some of your payees might have multiple locations.
If you have any payees with either of the above setup scenarios, we will need your input to complete theupgrade.
Following are simplified tasks related to garnishment payee data, which you can perform during the upgrade.
Task L-1-1: Updating Payee Data During the Initial PassTo update garnishment payee data during the Initial pass:
1. Run the Garnishment Payee Audit Report.
2. Review the report listing and fix any garnishment order or payee setup for the payees that are referenced onthe garnishment order, but do not exist in the Payee Table.
See “Prepare Your Database,” Running Application Audits, Correcting Garnishment Payee Data, Runningthe Garnishment Payee Audit Report.
3. Run conversion for the Garn Spec record.The conversion will perform the following updates:• Update the Location field on the Garn Spec record with the default location from the Payee Table.• Update the Location and Remit Address on the Garn Spec field with your input, which in this pass willnot be available; therefore, there will be no updates.See the comments on the Upgrade Data Conversion page. Select HRMS, Upgrade, Data Conversion, andthen select the Comments link for Update GARN_SPEC.
4. Run the EE Garn Payee Data Validation Report.5. Review the report listing and decide what data needs your input to complete the conversion.
See “Complete Database Changes,” Validating EE Garn Payee Data.6. Add your input for updating Garn Payee Data where needed.
Note. These entries will be used in the subsequent pass during the conversion to update Garn Spec records.
368 Copyright © 2007, Oracle. All rights reserved.

Appendix L Understanding Garnishments Changes
See “Complete Database Changes,” Validating EE Garn Payee Data.
Task L-1-2: Updating Payee Data During Move to ProductionTo update garnishment payee data during the Move to Production pass:
1. Run the Garnishment Payee Audit Report.
2. Review the report listing and fix any garnishment order or payee setup for the payees that are referenced onthe garnishment order, but do not exist in the Payee Table.
See “Prepare Your Database,” Running Application Audits, Correcting Garnishment Payee Data, Runningthe Garnishment Payee Audit Report.
3. Run conversion for the Garn Spec record.The conversion will perform the following updates:• Update the Location field on Garn Spec record with the default location from the Payee Table.• Update Location and Remit Address on the Garn Spec field with your input, which in this pass will beavailable.See the comments on the Upgrade Data Conversion page. Select HRMS, Upgrade, Data Conversion, andthen select the Comments link for Update GARN_SPEC.
4. Run the EE Garn Payee Data Validation Report.5. Review the report listing and decide what data needs your input to complete the conversion. This reportmay contain data if you have created a new garnishment order between upgrade passes with a payeethat does not exist on the Payee Table.
See “Complete Database Changes,” Validating EE Garn Payee Data.6. Add your input for updating Garn Payee Data where needed.
Note. These entries will be used in subsequent Move to Production passes during the conversion toupdate Garn Spec records. If this is the final Move to Production pass, you need to do manual updatesdirectly in the Create Garnishment or Payee Table component because there will be no more conversionsto take care of these entries.
See “Complete Database Changes,” Validating EE Garn Payee Data.
Task L-2: Understanding Rules ChangesThis section discusses:
• Understanding Changes to Garnishment Rules
• Updating Rules During the Initial Pass
• Updating Rules During Move to Production
Copyright © 2007, Oracle. All rights reserved. 369
Understanding Garnishments Changes Appendix L
Understanding Changes to Garnishment RulesIn PeopleSoft 9, we have changed the way that we store U.S. garnishment rules data. Even though there is nochange to the way that we store Canadian garnishment rules data, due to the fact that all data is stored in thesame set of setup tables, there will be some upgrade processing on your garnishments rules tables.
The garnishment rules tables may have the following rules:
• U. S. rules maintained and delivered by Oracle• Canadian rules maintained and delivered by Oracle• U.S. rules created and maintained by the user• Canadian rules created and maintained by the user
You may not have all of the above data. You probably have the rules delivered by Oracle, and in addition, youmight have some custom rules for either payroll. In order to ensure that the upgrade processing will work forany combination of data you may have, we decided to do the following conversion on garnishments rules tables:
• Rename garnishments rules tables in your Copy of Production.• Export U.S. and Canadian rules maintained by Oracle from the New Release Demo database.There is no change to Canadian rules maintained by us, but redelivering them was a better option thanconverting them from the renamed tables.
• Import U.S. and Canadian rules maintained by Oracle into your Copy of Production before the conversion.• Copy Canadian custom garnishment rules, if you currently have any, from renamed tables intogarnishments rules tables in your Copy of Production.
We are not going to do any conversion for the U.S. custom garnishment rules, if you currently have any.The changes that we made in garnishment rules tables would require a very complex upgrade with a highprobability of creating invalid data in your tables. On the other hand, the flexibility in setting up the rulesmight allow you to replace your existing custom rule with a rule delivered by Oracle. Depending on whetheryou decide that you still need the U.S. custom rules or not, you may need to recreate the U.S. custom rules, oryou may need to update garnishment orders to replace a U.S. custom rule with some other existing rule.
Following are simplified tasks related to rules changes, which you can perform during the upgrade:
Task L-2-1: Updating Rules During the Initial PassTo update garnishment rules during the Initial pass:
1. Run the US Custom Garnishment Rule Audit Report.2. Review the report listing and decide whether you need any of these rules in PeopleSoft 9.
See “Prepare Your Database,” Running Application Audits, Running Upgrade Reports, Running USCustom Garnishment Rule Audit Report.
3. Run conversion for Garn Rule record (GARN_RULE).The conversion will update the State Law and Rule ID fields with your input, which in this pass will notbe available; therefore, there will be no updates.See the comments on the Upgrade Data Conversion page. Select HRMS, Upgrade, Data Conversion, andthen select the Comments link for Update GARN_RULE.
4. Set up US Custom Garnishment Rules.
370 Copyright © 2007, Oracle. All rights reserved.

Appendix L Understanding Garnishments Changes
If you have any U.S. custom garnishments rules that you will need in new release, you will have tore-create them. You can set up the rule using the online component or you can clone any existing rule if theformula is similar to the rule you need to create. You can use the audit report to ensure that all data isset up the way you need it.
See “Complete Database Changes,” Setting Up US Custom Garnishment Rules.
5. Run the EE Garn Rule Data Validation Report.
6. Review the report listing and decide what data needs your input to complete the conversion, in case youwant to replace an obsolete rule with an existing rule.
See “Complete Database Changes,” Validating EE Garn Rule Data.7. Add your input for updating rule data in garnishment orders, where needed.
Note. These entries will be used in the following pass during the conversion to update Garn Rule records.
See “Complete Database Changes,” Validating EE Garn Rule Data.
Task L-2-2: Updating Rules During Move to ProductionTo update rules during the Move to Production pass:
1. Run the US Custom Garnishment Rule Audit Report.2. Review the report listing and decide whether you need any of these rules in PeopleSoft 9. Compare thereport from the current and previous passes to see whether any new rules were added between upgradepasses.
See “Prepare Your Database,” Running Application Audits, Running Upgrade Reports, Running USCustom Garnishment Rule Audit Report.
3. Run conversion for the Garn Rule record (GARN_RULE).The conversion will update the State Law and Rule ID fields with your input, which will be availablein this pass if you added any.See the comments on the Upgrade Data Conversion page. Select HRMS, Upgrade, Data Conversion, andthen select the Comments link for Update GARN_RULE.
4. Set up US Custom Garnishment Rules.If you have any new U.S. custom garnishments rules that you have set up between upgrade passes, and youhave decided that you will need them in the new release, you must recreate them. You will have to do setup only for the U.S. rules newly added between the upgrade passes. All other U.S. rules set up in previouspasses, will be taken care of by running the export/import scripts. You can set up the rule using the onlinecomponent or you can clone any existing rule if the formula is similar to the rule you need to create. Youcan use the audit report to ensure that all data is set the way you need it.
See “Complete Database Changes,” Setting Up US Custom Garnishment Rules.
5. Run the Export US Custom Garnishments Rules script.
Run this script to export from your Copy of Production all U.S. custom garnishments rules that you haveset up manually in the previous pass.
See “Apply Application Changes,” Completing Application Processes, Exporting US Custom GarnishmentRules.
6. Run the Import US Custom Garnishments Rules script.
Copyright © 2007, Oracle. All rights reserved. 371
Understanding Garnishments Changes Appendix L
Run above script to import into your new Copy of Production all U.S. custom garnishments rules thatyou have set up manually in the previous pass.
See “Apply Application Changes,” Completing Application Processes, Importing US Custom GarnishmentRules.
7. Run the EE Garn Rule Data Validation Report.
8. Review the report listing and decide what data needs your input to complete the conversion.
This report may contain data if you have created a new garnishment order in between upgrade passes thatreferences a rule that no longer exists in garnishment rules tables.
See “Complete Database Changes,” Validating EE Garn Rule Data.9. Add your input for updating rule data in garnishment orders, where needed.
Note. These entries will be used in subsequent Move to Production passes during the conversion toupdate Garn Rule records. If this is the final Move to Production pass, you need to do manual updatesdirectly in the Create Garnishment or Garnishment Rules Tables component, because there will be nomore conversions to take care of these entries.
See “Complete Database Changes,” Validating EE Garn Rule Data.
See PeopleSoft Payroll for North America PeopleBook, for your new release.
372 Copyright © 2007, Oracle. All rights reserved.

APPENDIX M
Understanding Person Model Changes
This appendix discusses:
• Understanding Changes
• Understanding Entity Relationships
• Understanding Record and Table Changes
Understanding ChangesThis appendix discusses the changes to the core record structures for a Person, the Person’s basic biographicaldata, and the relationships that the Person has with the organization. These record structures evolved ineach of the releases from PeopleSoft 8.0 to PeopleSoft 9.0. Because the biggest changes occurred betweenPeopleSoft 8.0 and PeopleSoft 8.3 and between PeopleSoft 8.3 and PeopleSoft 8.9, these changes will be thefocus of this appendix.
The main goals of the changes were to:
1. Normalize the Person data structures as follows:• Remove the storing of a single address in 7 different tables.• Remove all redundant fields from PERSONAL_DATA.• Simplify the maintenance of names and addresses.
2. Separate the Person data structures into components by moving non-core data into distinct records.• This was done to minimize the amount of blank fields that had to be captured in a record. If a customerdoesn’t use a particular country, then no data has to be stored in those fields.
• While this does increase the number of records in PERSONAL_DATA component, it allows us toseparate the business logic and the processing. Eventually it will allow us to compartmentalize the actualcomponent and only bring into the buffer the data that you need.
• It also makes adding additional non-core fields easier to manage, as their addition will not break anyusage of the core records.
3. Keep one ID for a person.This feature adds the ability to have a single ID for a Person regardless of how many different relationshipsto the organization that person has. This means that you no longer have to create a separate ID if someonewas an employee and is now a contingent worker.
4. Allow a Person to be created without having to create JOB records.This change means that instead of having to create new EMPLIDs whenever a Person is both an Employeeand a Non-employee, this model will allow a Person to have multiple organizational relationships. In
Copyright © 2007, Oracle. All rights reserved. 373

Understanding Person Model Changes Appendix M
addition, we are splitting the Non-employees into two categories: Contingent Workers and Persons ofInterest. This allows us to be able to treat Employees and Contingent Workers as part of the workforce —and the other Persons of Interest as not part of the workforce.The three organizational relationships that a Person can have are:• Employee (EMP)• Contingent Worker (CWR)• Person of Interest (POI)Employees and Contingent Workers comprise the workforce and are required to have a JOB history.Persons of Interest might have a JOB record if certain products process them. POIs include CobraParticipants, Pension Payees, and Stock non-emps, Learning Solution Students needing a refund viaNA Payroll, External Trainers, and External Students. Because processes are already built for thesegroupings that need information on the JOB record, those groups will need to have a JOB record.Currently, the only POI types that don’t need a JOB record are the External Trainers and ExternalStudents (including the Applicants needing training prior to hire).The new model will allow a Person to be an Employee, a Contingent Worker, and/or a Person ofInterest simultaneously or in succession using the same EMPLID. Each organizational relationshipwill be separated by EMPL_RCD — meaning any one EMPL_RCD for a Person can only be for oneorganizational relationship history. But there is no intelligence in the actual EMPL_RCD number.
The PeopleSoft 8.81 to 8.9 upgrade deals with creating the new structure that allows a single EMPLID to havemore than one Relationship to the organization. In addition, the separation of the non-core data is finished.
The main changes:
• The upgrade process will not attempt to merge EMPLIDs.• The current EMPL_RCDs assigned to an EMPLID will not change.• No EMPL_RCDs will be deleted.• Customers do not have to remove references to PERSONAL_DATA or EMPLOYMENT in theircustomized code.
Task M-1: Understanding Entity RelationshipsThis section discusses:
• Understanding PeopleSoft 8.0 Entity Relationships
• Understanding PeopleSoft 8.8 Entity Relationships
• Understanding PeopleSoft New Release Entity Relationships
The following Entity Relationship Diagrams (ERDs) are designed to provide you with a visual representationof some of the key relationships Person records had in earlier PeopleSoft releases.
Task M-1-1: Understanding PeopleSoft 8.0 Entity RelationshipsThe following ERD describes the interrelationships of the PERSONAL_DATA, PERS_DATA_EFFDT andother records where Addresses and Names are stored redundantly.
374 Copyright © 2007, Oracle. All rights reserved.

Appendix M Understanding Person Model Changes
Partial Entity Relationship Diagram for Person Data, Names, and Addresses.
Task M-1-2: Understanding PeopleSoft 8.8 Entity RelationshipsThe following Entity Relationship Diagram shows the relationship of Core Records in Release 8.8.
Copyright © 2007, Oracle. All rights reserved. 375

Understanding Person Model Changes Appendix M
Entity Relationship Diagram of the Core Records in PeopleSoft 8.8
Task M-1-3: Understanding PeopleSoft New ReleaseEntity RelationshipsThis section discusses:
• Understanding PeopleSoft New Release Diagrams
• Person Object Model
• Person and Organization Entities
• Worker Entity
• What Happens to PERSONAL_DATA
• What Happens to EMPLOYMENT
Understanding PeopleSoft New Release DiagramsThe following Entity Relationship Diagrams (ERDs) provide a visual representation of some of the keyrelationships the Person Object has with other records in the new PeopleSoft release.
Person Object ModelThe following Entity Relationship Diagram illustrates the Person Object Model, showing core requirementsand optional core records as well as the type and number of extensions.
376 Copyright © 2007, Oracle. All rights reserved.

Appendix M Understanding Person Model Changes
Person Object Model ERD
Person and Organization EntitiesThe following Entity Relationship Diagram shows the relationship between Person and OrganizationalRelationship entities.
Copyright © 2007, Oracle. All rights reserved. 377

Understanding Person Model Changes Appendix M
Person and Organizational Relationship ERD
While referencing the diagram above, keep in mind:
• While EMPLOYMENT is replaced by a new record (PER_ORG_ASGN), this record maintains the samekey structure that EMPLOYMENT had.
• EMPLOYMENT remains as a View returning most of the same information.• The key structure of JOB, COMPENSATION, and so on, will not change.• A specific organizational relationship (Employee, Contingent Worker, POI) can be identified for eachdistinct EMPLID/EMPL_RCD. This relationship will never change for that ENPL_RCD. This is whatallows us to keep the key structure of EMPLID, EMPL_RCD throughout the rest of the system withouthaving to add an additional key for the PER_ORG.
• The PER_ORG_INST record is new, but it does represent a logical parent relationship that was alreadyin the system. In order to keep the key structure of EMPLID and EMPL_RCD intact for the rest of thesystem, we have created PER_ORG_INST as a logical parent not a physical parent. The relationship iscaptured using the common ORG_INSTANCE_ERN field on PER_ORG_INST and PER_ORG_ASGN.
378 Copyright © 2007, Oracle. All rights reserved.

Appendix M Understanding Person Model Changes
Worker EntityThe following illustrates the Worker entity relationships.
Worker ERD
Copyright © 2007, Oracle. All rights reserved. 379

Understanding Person Model Changes Appendix M
What Happens to PERSONAL_DATAWhile we are no longer using the PERSONAL_DATA record as a core transaction table, we are keeping it forreporting and batch. PeopleSoft added processes to keep the data up to date in real-time with changes made toPERSON, PERS_DATA_EFFDT, NAMES, ADDRESSES, and the Person Extension records.
There is a component post change PeopleCode that will capture changes made in real-time. There is anApplication Engine that can be run nightly to capture the data that has just become effective and also capturesany changes that happened during the previous day. Please refer to the Application Fundamentals for HRMSPeopleBook for more information.
See PeopleSoft Enterprise HRMS 9.0 Application Fundamentals PeopleBook.
What Happens to EMPLOYMENTEMPLOYMENT is now a view that joins together the PER_ORG_ASGN, PER_ORG_INST, and currentJOB row. It contains most of the same fields as the old EMPLOYMENT record and can still be usedfor reporting and online usage.
Task M-2: Understanding Record and Table ChangesThis section discusses:
• Understanding Record Changes
• Understanding Table Changes
Task M-2-1: Understanding Record ChangesThis section discusses:
• Record Changes from PeopleSoft 8.01
• Record Changes from PeopleSoft 8.8x
• Record Changes from PeopleSoft 8.01 and 8.8x
Record Changes from PeopleSoft 8.01The following tables detail record changes from PeopleSoft 8.01:
PERSONAL_DATA Fields deleted, added, moved Conversion Rules
EMPLID Moved to PERSON
NAMEGBL_NPC_SBR Delete NAMES record created fromPERS_DATA_EFFDT
ADDRESS_SBR Delete ADDRESSES record created fromPERS_DATA_EFFDT
ADDR_OTR_SBR Delete ADDRESSES record created fromPERS_DATA_EFFDT
380 Copyright © 2007, Oracle. All rights reserved.

Appendix M Understanding Person Model Changes
PERSONAL_DATA Fields deleted, added, moved Conversion Rules
PHONE_SBR Delete PERSONAL_PHONE created fromPERS_DATA_EFFDT
PER_STATUS Delete Replaced by PER_ORG_ASGN.PER_ORG
ORIG_HIRE_DT Move to PER_ORG_INST
SEX Move to PERS_DATA_EFFDT
AGE_STATUS Move to PERS_DATA_DEU
MAR_STATUS Move to PERS_DATA_EFFDT
BIRTHDATE Move to PERSON
BIRTHPLACE Move to PERSON
BIRTHCOUNTRY Move to PERSON
BIRTHSTATE Move to PERSON
DT_OF_DEATH Move to PERSON
HIGHEST_EDUC_LVL Move to PERS_DATA_EFFDT
FT_STUDENT Move to PERS_DATA_EFFDT
REFERRAL_SOURCE Move to PERS_APPL_REF
EMPL_REFERRAL_ID Move to PERS_APPL_REF
SPECIFIC_REFER_SRC Move to PERS_APPL_REF
HIGHLY_COMP_EMPL_P Move to BN_PERSON
HIGHLY_COMP_EMPL_C Move to BN_PERSON
RESUME_TEXT_FILE Move to PERS_DATA_APPL
QDRO_IND_YN Deleted
PER_TYPE Move to PER_ORG_ASGN asPOI_TYPE
PERS_DTUSA_SBR Move to PERS_DATA_USA
PERS_DTCAN_SBR Move to PERS_DATA_CAN
PERS_DTCHE_SBR Move to PERS_DATA_CHE
PERS_DTGER_SBR Move to PERS_DATA_DEU
Copyright © 2007, Oracle. All rights reserved. 381

Understanding Person Model Changes Appendix M
PERSONAL_DATA Fields deleted, added, moved Conversion Rules
PERS_DTFRA_SBR Move to PERS_DATA_FRA
PERS_DTJPN_SBR Move to PERS_DATA_JPN
PERS_DTUK_SBR Move to PERS_DATA_UK
PERS_DTITA_SBR Move to PERS_DATA_ITA
PERS_DTESP_SBR Move to PERS_DATA_ESP
LANG_CD Move to PERS_DATA_EFFDT
YEARS_OF_EXP Move to PRIORWORK_SUM
APPLID Move to PERS_APPL_INFO
APP_DT Move to PERS_APPL_INFO
ON_DM_EM_DOSAVENOW Delete
PERS_DTFED2_SBR Move to PERS_DATA_USF
ALTER_EMPLID Move to PERS_DATA_EFFDT
ADDRESS1_AC Delete See PERS_DATA_EFFDT
ADDRESS2_AC Delete See PERS_DATA_EFFDT
ADDRESS3_AC Delete See PERS_DATA_EFFDT
CITY_AC Delete See PERS_DATA_EFFDT
PERS_DATA_EFFDT Fields deleted, added, moved Conversion Rules
EMPLID
EFFDT
UPDATE_PERS_DATA Delete
ADDRESS_SBR Move to ADDRESSES As ADDRESS_TYPE =INSTALLATION.ADDRESS_TYPE
ADDR_OTR_SBR Move to ADDRESSES As ADDRESS_TYPE =INSTALLATION_ADDR_TYPE1
MAR_STATUS
SMOKER Move to PERS_SMOKER
NAMEGBL_SBR Move to NAMES As NAME_TYPE = PRI
382 Copyright © 2007, Oracle. All rights reserved.

Appendix M Understanding Person Model Changes
PERS_DATA_EFFDT Fields deleted, added, moved Conversion Rules
ADDRESS1_AC Move to ADDRESSES As ADDRESS_TYPE =INSTALLATION.ADDRESS_TYPE
ADDRESS2_AC Move to ADDRESSES As ADDRESS_TYPE =INSTALLATION.ADDRESS_TYPE
ADDRESS3_AC Move to ADDRESSES As ADDRESS_TYPE =INSTALLATION.ADDRESS_TYPE
CITY_AC Move to ADDRESSES As ADDRESS_TYPE =INSTALLATION.ADDRESS_TYPE
Record Changes from PeopleSoft 8.8xThe PeopleSoft 8.8x upgrade deals with creating the new structure that allows a single EMPLID to have morethan one relationship to the organization. In addition, splitting the non-core data into components has beencompleted. Therefore, the following will not be done during your upgrade:
• The upgrade process will not attempt to merge EMPLIDs.
• The upgrade process will not assign the current EMPL_RCDs to an EMPLID change.
• No EMPL_RCDs will be deleted.
See PeopleSoft Enterprise HRMS 9.0 Application Fundamentals PeopleBook.
The following will occur during the upgrade:
• EMPL_RCDs that were created with the HIR action will be created as separate Organizational Instances.
• EMPL_RCDs that were created with the ADL action will be created as additional assignments and willbe related to an appropriate Instance.
• EMPL_RCDs that have Host assignments will be created as Instances.
• EMPL_RCDs that are Host assignments will be created as Assignments related to the HOME assignment.
• Japanese main appointments will be created as Instances.
• Japanese additional assignments will be created as assignments connect to the Main appointment.
If you want EMPL_RCDs that you created with the ADL action to be created as separate Instances, you shouldchange that action to HIR in your source data prior to data conversion.
PERSON
PERSON Fields Deleted, Moved, Added Conversion Rules
EMPLID
PER_STATUS Replaced by PER_ORG_ASGN.PER_ORG
E = EMP
N= See Chart 2—UpgradeConversion Chart below.
BIRTHDATE
BIRTHPLACE
Copyright © 2007, Oracle. All rights reserved. 383

Understanding Person Model Changes Appendix M
PERSON Fields Deleted, Moved, Added Conversion Rules
BIRTHCOUNTRY
BIRTHSTATE
DT_OF_DEATH
ORIG_HIRE_DT Moved to PER_ORG_INST Copied on each PER_ORG_INST rowfor a Person
HIGHLY_COMP_EMPL_C Moved to BN_PERSON Only create a row where thereis data in either field. SinceHIGHLY_COMP_EMPL_P hada defaulted specified of N this shouldbe treated as a blank value.
HIGLY_COMP_EMPL_P Moved to BN_PERSON Same as above
LAST_CHILD_UPDTTM New field Null
PERS_DATA_EFFDT
PERS_DATA_EFFDT Fields Deleted, Added, Moved Conversion Rules
EMPLID
EFFDT
PER_TYPE Replaced by POI_TYPE See Chart 2—Upgrade ConversionChart below
MAR_STATUS
MAR_STATUS_DT
SEX
AGE_STATUS Moved to PERS_DATA_DEU
HIGHEST_EDUC_LVL
FT_STUDENT
LANG_CD
LASTUPDDTTM New field %datetime
LASTUPDOPRID New field PPLSOFT
YEARS_OF_EXP Moved to PRIORWORK_SUM
APPLID Deleted— In PERS_APPL_INFO If the APPLID/APP_DT is notPERS_APPL_INFO already, insert ofrow
384 Copyright © 2007, Oracle. All rights reserved.

Appendix M Understanding Person Model Changes
PERS_DATA_EFFDT Fields Deleted, Added, Moved Conversion Rules
APP_DT Delete— In PERS_APPL_INFO See above
ALTER_EMPLID
BILINGUALISM_CODE PERS_DATA_CAN
HEALTH_CARE_NBR PERS_DATA_CAN
HEALTH_CARE_STATE PERS_DATA_CAN
GUARDIAN_CHE PERS_DATA_CHE
MILIT_SITUATN_ESP PERS_DATA_ESP
SOC_SEC_AFF_DT PERS_DATA_ESP
PERS_DTFED2_SBR PERS_DATA_USF
ENTRY_DT_FRA PERS_DATA_FRA
MILIT_SITUATN_FRA PERS_DATA_FRA
CPAMID PERS_DATA_FRA
MILITARY_STAT_GER PERS_DATA_DEU
EXPCTD_MILITARY_DT PERS_DATA_DEU
HR_RESPONSIBLE_ID PERS_DATA_DEU
MILITARY_STAT_ITA PERS_DATA_ITA
MILATRY_TYPE_ITA PERS_DATA_ITA
MILIATARY_RANK_ITA PERS_DATA_ITA
MILITARY_END_ITA PERS_DATA_ITA
HONSEKI_JPN PERS_DATA_JPN
US_WORK_ELIGIBILITY PERS_DATA_USA
MILITARY_STATUS PERS_DATA_USA
CITIZEN_PROOF1 PERS_DATA_USA
CITIZEN_PROOF2 PERS_DATA_USA
SMOKER PERS_SMOKER
MEDICARE_ENTLD_DT PERS_DATA_USA
SMOKER_DT PERS_SMOKER
Copyright © 2007, Oracle. All rights reserved. 385

Understanding Person Model Changes Appendix M
PERS_DATA_EFFDT Fields Deleted, Added, Moved Conversion Rules
FP_ACTION_2 PERS_DATA_FPS
ACTION_REASON PERS_DATA_FPS
FP_ACTION_REQ PERS_DATA_FPS
FP_SUPDOC_REQ PERS_DATA_FPS
LAST_UPDATE_DATE PERS_DATA_FPS
Chart 2 - Upgrade Conversion Chart for PER_STATUS and PER_TYPE
If the PER_STATUS is N and there is no POI_TYPE, the employee will be loaded as a Contingent Worker.
Since a Person can have different PERS_DATA_EFFDT.PER_TYPEs over time, it is possible for a person tohave more than one row inserted into PER_ORG_ASGN.
Record Changes from PeopleSoft 8.01 and 8.8xThe tables listed in this section are in both PeopleSoft 8.01 and 8.8x.
The upgrade converts EMPL_RCDs that are in EMPLOYMENT to PER_ORG_ASGN and PER_ORG_INST.All rows in EMPLOYMENT will be moved to PER_ORG_ASGN. PER_ORG_INST will contain therelationship between EMPL_RCDs in PER_ORG ASGN. Some EMPL_RCDs are considered Instances whichactually creates a new employment instance. Others are additional assignments that the person may have overtime but that should not be considered a “hire action.” See the reference below for more information on thedifferences between Instances and Assignments.
See PeopleSoft Enterprise HRMS 9.0 Application Fundamentals PeopleBook.
EMPL_RCDs that are Instances will also be in PER_ORG_INST. EMPL_RCDs that aretrue additional assignments will not be in PER_ORG_INST, but will have a value in theirPER_ORG_ASGN.ORG_INSTANCE_ERN that will connect them with an Instance.
The following will occur during the upgrade:
• EMPL_RCDs that were created with the HIR action will be created as separate Organizational Instances.• EMPL_RCDs that were created with the ADL action will be created as additional assignments and willbe related to an appropriate Instance.
• EMPL_RCDs that have Host assignments will be created as Instances.• EMPL_RCDs that are Host assignments will be created as Assignments related to the HOME assignment.
386 Copyright © 2007, Oracle. All rights reserved.

Appendix M Understanding Person Model Changes
• Japanese main appointments will be created as Instances.• Japanese additional assignments will be created as assignments connect to the Main appointment.
If you want EMPL_RCDs that you created with the ADL action to be created as separate Instances, you shouldchange that action to HIR in your source data prior to data conversion.
NAMES
NAMES Field Added Conversion Rules
EMPLID
NAME_TYPE
EFFDT
COUNTRY_NM_FORMAT Prompt Table is now NAME_FORMAT_TBL. Some values willneed to be set to a default format value.
NAME_DISPLAY New field Casual formatted name whichcan be used on pages and reports.Formatting rules are based on theCOUNTRY_NM_FORMAT.
NAME_FORMAL New field Formally formatted namewhich can be used for letters.Formatting rules are based on theCOUNTRY_NM_FORMAT
LASTUPDDTTM New field %datetime
LASTUPDOPRID New field ’PPLSOFT’
PERSONAL_PHONE
PERSONAL_PHONE Field Added Conversion Rules
EMPLID
PHONE_TYPE
COUNTRY_CODE
Copyright © 2007, Oracle. All rights reserved. 387

Understanding Person Model Changes Appendix M
PERSONAL_PHONE Field Added Conversion Rules
PHONE
PREF_PHONE_FLAG New field If you have SA, the type will be setbased on the type selected in “PrepareYour Database,” Making FunctionalDecisions, Assigning UpgradeDefault Values, Assigning CampusCommunity Upgrade Default Valuesfirst.
If that type is not found or if you do nothave SA, the order used in the upgradeis HOME, BUSN, MAIN or else thefirst found.
EMAIL_ADDR
EMAIL_ADDRESS Field Added Conversion Rules
EMPLID
E_ADDR_TYPE
EMAIL_ADDR
PREF_EMAIL_FLAG New field Order is BUSN
EMPLOYMENT
EMPLOYMENTReplaced with a View based on
new records Conversion Rules
EMPLID Moved to PER_ORG_ASGN
EMPL_RCD Moved to PER_ORG_ASGN
BENEFIT_RCD_NBR Moved to PER_ORG_ASGN
HOME_HOST_CLASS Moved to PER_ORG_ASGN
HIRE_DT Moved to JOB
REHIRE_DT Moved to JOB as LST_HIRE_DT
CMPNY_SENORITY_DT Data copied to PER_ORG_ASGN.SEN_PAY_DT_OVR andPER_ORG_ASGN.CMPNY_SENIORITY_DT
SERVICE_DT Moved to PER_ORG_ASGN
PROF_EXERIENCE_DT Moved to PER_ORG_ASGN
388 Copyright © 2007, Oracle. All rights reserved.

Appendix M Understanding Person Model Changes
EMPLOYMENTReplaced with a View based on
new records Conversion Rules
LAST_VERIFICATN_DT Moved to PER_ORG_ASGN
EXPECTED_RETURN_DT Moved to JOB
TERMINATION_DT Moved to JOB
LAST_DATE_WORKED Moved to JOB
LAST_INCREASE_DT Moved to PER_ORG_ASGN
OWN_5PERCENT_CO Moved to PER_ORG_ASGN
BUSINESS_TITLE Moved to PER_ORG_ASGN
REPORTS_TO Delete (was moved to JOB inPeopleSoft 8.0)
SUPERVISOR_ID Delete (was moved to JOB inPeopleSoft 8.0)
PROBATION_DT Moved to PER_ORG_ASGN
COUNTRY_CODE Moved to PER_ORG_ASGN
PHONE Moved to PER_ORG_ASGN asPOSITION_PHONE
TIME_RPT_LOC Deleted— not used
JOB_REPORTING Deleted— not used
DED_TAKEN Moved to DED_NA
DED_SUBSET_ID Moved to DED_NA
GVT_SCD_RETIRE Moved to JOB_USF
GVT_SCD_TSP Moved to JOB_USF
GVT_SCD_LEO Moved to JOB_USF
GVT_SCD_SEVPAY Moved to JOB_USF
GVT_SECPAY_PRV_WRKS Moved to JOB_USF
GVT_MAND_RET_DAT Moved to JOB_USF
GVT_WGI_STATUS Moved to JOB_USF
GVT_INTRM_DAYS_WGI Moved to JOB_USF
GVT_NONPAY_NOA Moved to JOB_USF
Copyright © 2007, Oracle. All rights reserved. 389

Understanding Person Model Changes Appendix M
EMPLOYMENTReplaced with a View based on
new records Conversion Rules
GVT_NONPAY_HRS_WGI Moved to JOB_USF
GVT_NONPAY_HRS_SCD Moved to JOB_USF
GVT_NONPAY_HRS_TNR Moved to JOB_USF
GVT_NONPAY_HRS_PRB Moved to JOB_USF
GVT_TEMP_PRO_EXPIR Moved to JOB_USF
GVT_TEMP_PSN_EXPIR Moved to JOB_USF
GVT_DETAIL_EXPIRES Moved to JOB_USF
GVT_SABBATIC_EXPIR Moved to JOB_USF
GVT_RTND_GRADE_BEG Moved to JOB_USF
GVT_RTND_GRADE_EXP Moved to JOB_USF
GVT_NOA_CODE Moved to JOB_USF
GVT_CURR_APT_AUTH1 Moved to JOB_USF
GVT_CURR_APT_AUTH2 Moved to JOB_USF
GVT_APPT_EXPIR_DT Moved to JOB_USF
GVT_CNV_BEGIN_DATE Moved to JOB_USF
GVT_CAREER_CNV_DUE Moved to JOB_USF
GVT_CAREER_COND_DT Moved to JOB_USF
GVT_APPT_LIMIT_HRS Moved to JOB_USF
GVT_APPT_LIMIT_DYS Moved to JOB_USF
GVT_APPT_LIMIT_AMT Moved to JOB_USF
GVT_SUPV_PROB_DT Moved to JOB_USF
GVT_SES_PROB_DT Moved to JOB_USF
GVT_SEC_CLR_STATUS Moved to JOB_USF
GVT_CLRNCE_STAT_DT Moved to JOB_USF
GVT_ERN_PGM_PERM Moved to JOB_USF
GVT_OCC_SERS_PERM Moved to JOB_USF
390 Copyright © 2007, Oracle. All rights reserved.

Appendix M Understanding Person Model Changes
EMPLOYMENTReplaced with a View based on
new records Conversion Rules
GVT_GRADE_PERM Moved to JOB_USF
GVT_COMP_AREA_PERM Moved to JOB_USF
GVT_COMPA_LVL_PERM Moved to JOB_USF
GVT_CHANGE_FLAG Moved to JOB_USF
GVT_SPEP Moved to JOB_USF
GVT_WGI_DUE_DATE Moved to JOB_USF
GVT_DT_LEI Moved to JOB_USF
GVT_FIN_DISCLOSURE Moved to JOB_USF
GVT_FIN_DISCL_DATE Moved to JOB_USF
GVT_TENURE Moved to JOB_USF
GVT_DETL_BARG_UNIT Moved to JOB_USF
GVT_DETL_UNION_CD Moved to JOB_USF
NEXT_REVIEW_DATE Moved to JOB_USF
GVT_WELFARE_WK_CD Moved to JOB_USF
TENURE_ACCR_FLG Moved to PER_ORG_ASG_HP
FTE_TENURE Moved to PER_ORG_ASG_HP
EG_GROUP Moved to PER_ORG_ASG_HP
FTE_FLX_SRVC Moved to PER_ORG_ASG_HP
CONTRACT_LENGTH Moved to PER_ORG_ASG_HP
APPOINT_END_DT Moved to PER_ORG_ASG_HP
NEE_PROVIDER_ID Moved to PER_ORG_INST
FA_PAY_PROGRAM Moved to PER_ORG_ASG_FA
FA_TYPE Moved to PER_ORG_ASG_FA
FA_ELIG_DT Moved to PER_ORG_ASG_FA
EDUC_LVVL_AD_BTD Moved to PER_ORG_ASG_JPN
OFFICIAL_LANG Moved to PER_ORG_ASG_BEL
Copyright © 2007, Oracle. All rights reserved. 391

Understanding Person Model Changes Appendix M
EMPLOYMENTReplaced with a View based on
new records Conversion Rules
RELAT_TO_OWNER_NLD Moved to PER_ORG_ASG_NLD
INS_DAYS_BRA Moved to PER_ORG_ASG_BRA
INS_MOTHS_BRA Moved to PER_ORG_ASG_BRA
INS_YEARS_BRA Moved to PER_ORG_ASG_BRA
JOB
JOB Fields Added or Deleted Conversion Rules
EMPLID
EMPL_RCD
EFFDT
EFFSEQ
PER_ORG New
HR_STATUS New
GVT_EFFDT Moved to JOB_USF
GVT_EFFDT_PROPOSED Moved to JOB_USF
GVT_TRANS_NBR Moved to JOB_USF
GVT_TRANS_NBR_SEQ Moved to JOB_USF
GVT_WIP_STATUS Moved to JOB_USF
GVT_STATUS_TYPE Moved to JOB_USF
GVT_NOA_CODE Moved to JOB_USF
GVT_LEG_AUTH_1 Moved to JOB_USF
GVT_PAR_AUTH_D1 Moved to JOB_USF
GVT_PAR_AUTH_D1_2 Moved to JOB_USF
GVT_LEG_AUTH_2 Moved to JOB_USF
GVT_PAR_AUTH_D2 Moved to JOB_USF
GVT_PAR_AUTH_D2_2 Moved to JOB_USF
GVT_PAR_NTE_DATE Moved to JOB_USF
392 Copyright © 2007, Oracle. All rights reserved.

Appendix M Understanding Person Model Changes
JOB Fields Added or Deleted Conversion Rules
GVT_WORK_SCHED Moved to JOB_USF
GVT_SUB_AGENCY Moved to JOB_USF
GVT_ELIG_FEHB Moved to JOB_USF
GVT_FEHB_DT Moved to JOB_USF
GVT_PAY_RATE_DETER Moved to JOB_USF
GVT_STEP Moved to JOB_USF
GVT_RTND_PAY_PLAN Moved to JOB_USF
GVT_RTND_SAL_PLAN Moved to JOB_USF
GVT_RTND_GRADE Moved to JOB_USF
GVT_RTND_STEP Moved to JOB_USF
GVT_RTND_GVT_STEP Moved to JOB_USF
GVT_PAY_BASIS Moved to JOB_USF
GVT_COMPRATE Moved to JOB_USF
GVT_LOCALITY_ADJ Moved to JOB_USF
GVT_BIWEEKLY_RT Moved to JOB_USF
GVT_DAILY_RT Moved to JOB_USF
GVT_HRLY_RT_NO_LOC Moved to JOB_USF
GVT_DLY_RT_NO_LOC Moved to JOB_USF
GVT_BW_RT_NO_LOC Moved to JOB_USF
GVT_MNLY_RT_NO_LOC Moved to JOB_USF
GVT_ANNL_RT_NO_LOC Moved to JOB_USF
GVT_XFER_FROM_AGCY Moved to JOB_USF
GVT_XFER_TO_AGCY Moved to JOB_USF
GVT_RETIRE_PLAN Moved to JOB_USF
GVT_ANN_IND Moved to JOB_USF
GVT_FEGLI Moved to JOB_USF
Copyright © 2007, Oracle. All rights reserved. 393

Understanding Person Model Changes Appendix M
JOB Fields Added or Deleted Conversion Rules
GVT_FEGLI_LIVING Moved to JOB_USF
GVT_LIVING_AMT Moved to JOB_USF
GVT_ANNUITY_OFFESET Moved to JOB_USF
GVT_CSRS_FROZN_SVC Moved to JOB_USF
GVT_GREV_RET_COVRG Moved to JOB_USF
GVT_FERS_COVERAGE Moved to JOB_USF
GVT_TYPE_OF_APPT Moved to JOB_USF
GVT_POI Moved to JOB_USF
GVT_POSN_OCCUPIED Moved to JOB_USF
GVT_CONT_EMPLID Moved to JOB_USF
GVT_ROUTE_NEXT Moved to JOB_USF
GVT_CHANGE_FLAG Moved to JOB_USF
GVT_TSP_UPD_IND Moved to JOB_USF
GVT_PI_UPD_IND Moved to JOB_USF
GVT_SF52_NBR Moved to JOB_USF
GVT_S113G_CEILING Moved to JOB_USF
GVT_LEO_POSITION Moved to JOB_USF
GVT_ANNUIT_COM_DT Moved to JOB_USF
GVT_BASIC_LIFE_RED Moved to JOB_USF
GVT_DED_PROPT_DT Moved to JOB_USF
GVT_FEGLI_BASC_PCT Moved to JOB_USF
GVT_FEGLI_OPT_PCT Moved to JOB_USF
GVT_FEHB_PCT Moved to JOB_USF
GVT_RETRO_FLAG Moved to JOB_USF
GVT_RETRO_DED_FLAG Moved to JOB_USF
GVT_RETRO_JOB_FLAG Moved to JOB_USF
GVT_RETRO_BSE_FLAG Moved to JOB_USF
394 Copyright © 2007, Oracle. All rights reserved.

Appendix M Understanding Person Model Changes
JOB Fields Added or Deleted Conversion Rules
GVT_OTH_PAY_CHG Moved to JOB_USF
GVT_DETL_POSN_NBR Moved to JOB_USF
ANNL_BEN_BASE_OVRD Moved to JOB_USF
BENEFIT_PROGRAM Moved to JOB_USF
UPDATE_PAYROLL Moved to JOB_USF
GVT_PAY_PLAN Moved to JOB_USF
GVT_PAY_FLAG Moved to JOB_USF
GVT_NID_CHANGE Moved to JOB_USF
WPP_STOP_FLAG New
SUPV_LVL_ID Moved from JOB_JR
SETID_SUPV_LVL Moved from JOB_JR
ABSENCE_SYSTEM_FLG New
POI_TYPE New
AUTO_END_FLG Moved from JOB_JR
HIRE_DT Moved from EMPLOYMENT
LAST_HIRE_DT Moved from EMPLOYMENT
TERMINATION_DT Moved from EMPLOYMENT
ASGN_START_DT New
LST_ASSGN_START_DT New
ASGN_END_DT New
LDW_OVR New
LAST_DATE_WORKED Moved from EMPLOYMENT
EXPECTED_RETURN_DT Moved from EMPLOYMENT
EXPECTED_END_DATE Moved from JOB_JR
LASTUPDDTTM New
LASTUPDOPRID New
Copyright © 2007, Oracle. All rights reserved. 395
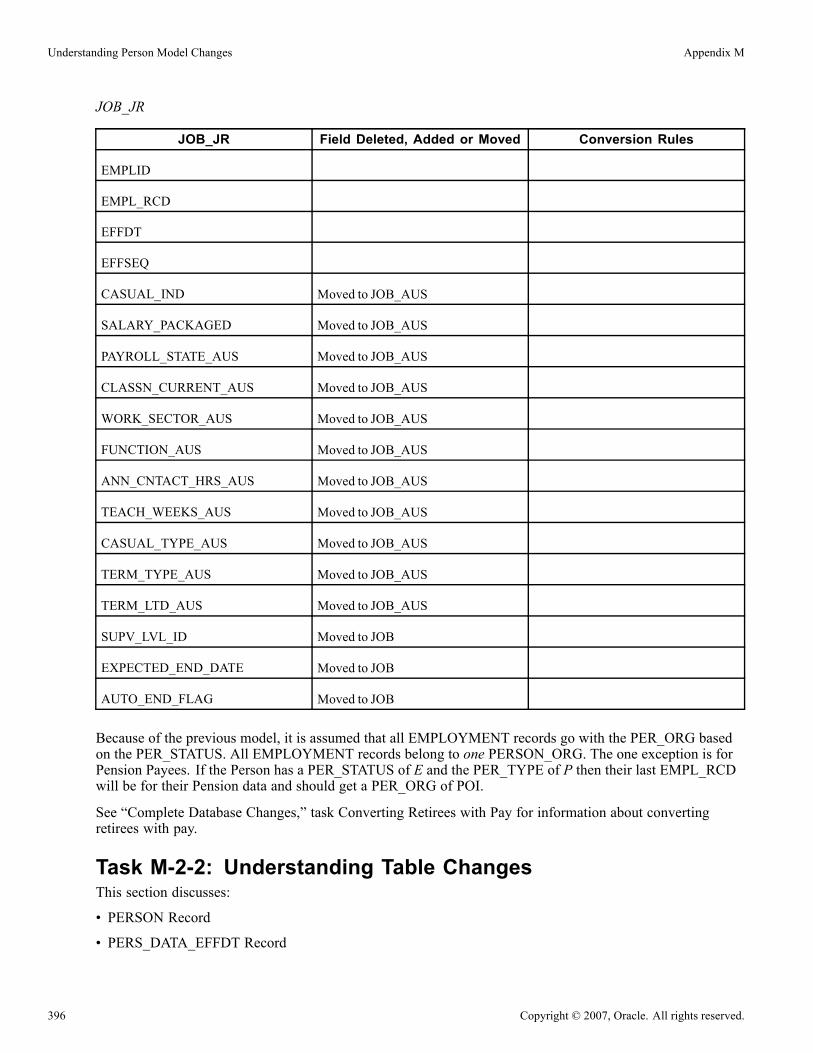
Understanding Person Model Changes Appendix M
JOB_JR
JOB_JR Field Deleted, Added or Moved Conversion Rules
EMPLID
EMPL_RCD
EFFDT
EFFSEQ
CASUAL_IND Moved to JOB_AUS
SALARY_PACKAGED Moved to JOB_AUS
PAYROLL_STATE_AUS Moved to JOB_AUS
CLASSN_CURRENT_AUS Moved to JOB_AUS
WORK_SECTOR_AUS Moved to JOB_AUS
FUNCTION_AUS Moved to JOB_AUS
ANN_CNTACT_HRS_AUS Moved to JOB_AUS
TEACH_WEEKS_AUS Moved to JOB_AUS
CASUAL_TYPE_AUS Moved to JOB_AUS
TERM_TYPE_AUS Moved to JOB_AUS
TERM_LTD_AUS Moved to JOB_AUS
SUPV_LVL_ID Moved to JOB
EXPECTED_END_DATE Moved to JOB
AUTO_END_FLAG Moved to JOB
Because of the previous model, it is assumed that all EMPLOYMENT records go with the PER_ORG basedon the PER_STATUS. All EMPLOYMENT records belong to one PERSON_ORG. The one exception is forPension Payees. If the Person has a PER_STATUS of E and the PER_TYPE of P then their last EMPL_RCDwill be for their Pension data and should get a PER_ORG of POI.
See “Complete Database Changes,” task Converting Retirees with Pay for information about convertingretirees with pay.
Task M-2-2: Understanding Table ChangesThis section discusses:
• PERSON Record
• PERS_DATA_EFFDT Record
396 Copyright © 2007, Oracle. All rights reserved.

Appendix M Understanding Person Model Changes
• NAMES
• ADDRESSES
• DEPENDENT_BENEF
• EMERGENCY_CNTCT
• PAYROLL_DATA
• ABS_HIST_DET
• New Views
• PERSON_NAME
• PERSON_ADDRESS
• PERSONAL_DT_FST
PERSON RecordPERSON is a new Record that serves as the parent to PERS_DATA_EFFDT, EMPLOYMENT, and all otherrecords that previously used PERSONAL_DATA as the parent.
The upgrade scripts will load this record with the information from PERSONAL_DATA.
PERS_DATA_EFFDT RecordThe upgrade scripts will ensure that all PERS_DATA_EFFDT rows are updated with the data from PERSONfor the fields moved from PERSONAL_DATA to PERS_DATA_EFFDT.
NAMESThis is the only source of Name data for a person in the record, PERSON.
The upgrade scripts will ensure that a row is created in NAMES for any PERS_DATA_EFFDT row that had aname change for NAME_TYPE = ‘PRI’.
The fields NAME_DISPLAY and NAME_FORMAL are new in this PeopleSoft release. To populate them,you must run the Application Engine process NAME_DISPLAY. This process is called during data conversion.If the fields are not populated after data conversion you can run the Refresh Name Display Values processat any time.
To run the Refresh Name Display Values process:
Select Set Up HRMS, System Administration, Database Processes, Refresh Name Display Values.
To update all name formats check Update All Name Formats. Otherwise, select a Name format Type. Besure that the following check boxes are selected:
• Update NAMES record
• Update Dependants
• Update HS Non-Employees
• Update French Public Sector
• Update US Federal Names
Copyright © 2007, Oracle. All rights reserved. 397

Understanding Person Model Changes Appendix M
ADDRESSESThis is the only source of Address data for a person in the record PERSON.
The upgrade scripts will ensure that a row is created in ADDRESSES for any PERS_DATA_EFFDT rowthat had an address change for the ADDRESS_TYPE = INSTALLATION.ADDRESS_TYPE if you areupgrading from 8.01.
The upgrade scripts will ensure that a row is created in ADDRESSES for any PERS_DATA_EFFDT rowthat had another address change for the ADDRESS_TYPE = INSTALLATION.ADDR_TYPE1 if you areupgrading from 8.01.
DEPENDENT_BENEFIf the Address is the same as the employee’s then the address data is not physically stored on the record,only the Address_type is. If the Address is not the same as the employee’s, then the dependent’s address isdirectly stored on the record.
If the Phone is the same as the employees, then the phone data is not physically stored on the record, onlythe PHONE_TYPE is. If the Phone is not the same as the employee’s, then the dependent’s phone is directlystored on the record. There is now the ability to have the address be the same as the employee’s while thePhone is different.
The Upgrade scripts will enter an Address_type of HOME and a Phone_Type of MAIN if the Same Addressas Employee is Yes. The address and phone fields will then be cleared. No change will happen if the SameAddress as Employee is No.
EMERGENCY_CNTCTIf the address is the same as the employee’s, then the address data is not physically stored on the record, onlythe Address_type is stored. If the address is not the same as the employee’s, then the contact’s address isdirectly stored on the record.
If the phone is the same as the employee’s, then the phone data is not physically stored on the record, onlythe PHONE_TYPE is stored. If the phone is not the same as the employee’s, then the contact’s phone isdirectly stored on the record. It is now possible for the address to be the same as the employee’s whilethe phone is different.
If you are upgrading from Peoplesoft 8.01, when Same Address as Employee option is set to Yes:
• The Upgrade scripts will enter the Address_type from PS_INSTALLATION table.• The Phone_Type is set to the same as the preferred phone from the PS_PERSONAL_PHONE.• The address and phone fields will be cleared.
No change will happen if the Same Address as Employee option is set to No.
PAYROLL_DATAThe Address fields were removed from PAYROLL_DATA. Any address used to send the paycheck or adviceto must exist in ADDRESSES. However, the PAYROLL_DATA component allows the user to select theHOME or MAILING address or to enter a different CHECK address.
The Upgrade scripts will create an ADDRESSES record with the data from PAYROLL_DATA with theappropriate ADDRESS_TYPE if this data does not exist in ADDRESSES.
398 Copyright © 2007, Oracle. All rights reserved.

Appendix M Understanding Person Model Changes
ABS_HIST_DETIf the Address is the same as the employee’s then the address data is not physically stored on the record, onlythe ADDRESS_TYPE is. If the Address is not the same as the employee’s, then the address is directlystored on the record.
The Upgrade scripts will enter an Address_type of HOME and a Phone_Type of MAIN if the Same Addressas Employee is Yes. The address and phone fields will then be cleared. No change will happen if the SameAddress as Employee is No.
New ViewsThe following lists the new views that have been created.
PERSON_NAMEThis view returns a Person’s current Primary Name. One row per PERSON will always exist in this view.
PERSON_ADDRESSThis view returns a Person’s current Address of each ADDRESS_TYPE. One row per Person per Address_typewill exist in this view. Since Addresses are not required, this view will not return all people in PERSON.
PERSONAL_DT_FSTThis view is a combination of PERSON, current primary name from NAMES, and the current row fromPERS_DATA_EFFDT. One row will exist for each person in PERSON.
Copyright © 2007, Oracle. All rights reserved. 399

Understanding Person Model Changes Appendix M
400 Copyright © 2007, Oracle. All rights reserved.

APPENDIX N
Upgrading Front Office and PayBill
This appendix discusses:
• Understanding Front Office and PayBill
• Reviewing the FSCM and HRMS Upgrade
• Reviewing the Front Office FSCM PayBill Upgrade
Understanding Front Office and PayBillThis upgrade requires you to fully understand the structure of the upgrade process before you begin. Thisappendix explains each different scenario that you may have in connection with Staffing Front Office, FSCM,and HRMS Pay/Bill Management. It is extremely important that you read the information that pertains to yoursituation in this appendix so you have a full understanding of what is about to occur.
Note. In this appendix we may refer to Staffing Front Office as SFO, Pay/Bill Management as PBM,Financials/Supply Chain Management as FSCM, and Human Resource Management Systems as HRMS.
There are several different flavors that this upgrade will encompass, while still dealing with Staffing FrontOffice, FSCM, and HRMS Pay/Bill Management. One of the following situations will pertain to you.
• You currently have a FSCM 8.8x database and an HRMS 8.8x database with Pay/Bill Management.• You currently have integrated a Staffing Front Office 8.8 database, a FSCM 8.8x database, and a HRMS8.8x database.
The reason for a special upgrade for these situations is that in FSCM 9.0 the Staffing Front Office database as astandalone database no longer exists and has been incorporated into the FSCM 9.0 database. This requires aspecial upgrade to move data from the Staffing Front Office database into the FSCM 9.0 database. Due to thedependency of Pay/Bill Management on Staffing Front Office, in addition to HRMS and FSCM, the Pay/BillManagement portion of the upgrade must be handled separately as well.
Because of Pay/Bill Management’s dependency on HRMS, FSCM, and Staffing Front Office databases,PeopleSoft has moved some tables and data from the HRMS database into the FSCM database and out ofthe FSCM database into the HRMS database. This creates a situation where you must run your HRMS9.0 and FSCM 9.0 upgrades concurrently. There will be points within the upgrade where you will need tostop and wait until your other upgrade has caught up or where you will need to import data from a certainpoint in your other upgrade.
In the remainder of this appendix, we explain how the upgrade will work for your particular situation, asdescribed earlier. Please identify your situation and read the sections that apply to you and your upgrade. Youdo not need to read about the other situations unless you feel they will be relevant.
Copyright © 2007, Oracle. All rights reserved. 401

Upgrading Front Office and PayBill Appendix N
Task N-1: Reviewing the FSCM and HRMS UpgradeThis upgrade is sometimes referred to as the Pay/Bill Management standalone upgrade. The upgrade followsthe same tasks and steps as the traditional FSCM 8.8x upgrade, along with tasks and steps to ensure yourHRMS data is upgraded as well. During this upgrade, you will import data out of your HRMS 9.0 upgrade intoyour FSCM database.
You must run the FSCM 9.0 and HRMS 9.0 upgrades concurrently. During the upgrades you will move someof your data that currently resides in your HRMS database into your FSCM database and vice versa. Youwill export data out of your FSCM database at the beginning to be imported into your HRMS databasebefore your compare and copies. By chapter 5, both upgrades must be at the same place in order to exchangePay/Bill Management data.
Important! As you work through the upgrade make sure you do not run any steps that are flagged for theStaffing Front Office upgrade. These tasks and steps require you to have a Staffing Front Office database andyou could damage your data by running such steps.
Task N-2: Reviewing the Front Office FSCM PayBill UpgradeIf you are upgrading your Staffing Front Office 8.8 database, your FSCM 8.8x database, and your HRMS8.8x database, then you will be running the upgrade described here. This upgrade will take your StaffingFront Office data and roll it either into your FSCM 9.0 database or into your HRMS 9.0 database. There arenumerous dependencies between the Staffing Front Office/FSCM upgrade and the HRMS upgrade. Pay specialattention during the upgrade to make sure you are running the upgrades at the correct pace.
402 Copyright © 2007, Oracle. All rights reserved.

APPENDIX O
Upgrading System Element Deletions
This appendix discusses:
• Retaining System Element Functionality
• Changing References to System Elements
Task O-1: Retaining System Element FunctionalityThis section discusses:
• Understanding System Element Functionality Retention
• Defining a Variable
• Defining an Array
Understanding System Element Functionality RetentionThe steps below will provide the instructions on how to define a variable and an array. The array will beused to retrieve data to support retaining existing system element functionality. The variable will be usedin the array definition to store the retrieved data.
Task O-1-1: Defining a VariableDefine a variable using the same attributes as the system element.
To obtain the system element attributes:
1. Select Set Up HRMS, Product Related, Global Payroll, Elements, Supporting Elements, System Elements.2. Enter the name of the system element to be deleted.3. Click the Search button.4. Take screen shots of the System Element Name page including the subpages for Customer Fields,Comments, and Source and Use. See the examples of screen shots below.
Copyright © 2007, Oracle. All rights reserved. 403

Upgrading System Element Deletions Appendix O
System Element Name page
Customer Fields page
Comments page
404 Copyright © 2007, Oracle. All rights reserved.

Appendix O Upgrading System Element Deletions
Source and Use page
The previous screen shots contain all the attributes you will need in defining your variable. Remember touse the appropriate effective date for the variable definition.
Task O-1-2: Defining an ArrayThis section discusses:
• Understanding Array Definition
• Array Logic for System Element QDRO IND YN ALL
• Array Logic for System Elements RATING SCALE ALL, REVIEW DT ALL, REVIEW RATING ALL
• For Retrieval From Record EP_APPR
• For Retrieval From Record EMPLOYEE_REVIEW
• Array Logic for System Element SALARY MATRIX CD ALL
• Array Logic for System Element WRKS CNCL MEM DEU ALL
Understanding Array DefinitionDefine an array to retrieve information that was previously contained in the record field that the system elementcame from. Use the variable in the array to contain the value previously contained by the system element.
Array logic will be different for each system element as shown below.
Array Logic for System Element QDRO IND YN ALLFor the system element QDRO IND YN ALL, the array logic is the following:
• If no court order has been defined (PA_QDRODAT record does not exist for the employee), thenQDRO_IND_YN value for the employee is ‘N’.
Copyright © 2007, Oracle. All rights reserved. 405

Upgrading System Element Deletions Appendix O
• If a court order does exist for the employee, then the employee’s QDRO_IND_YN= ‘Q’. The alternatepayee (QDRO_ID) will have a value of ‘A’ for the QDRO_IND_YN.
Array Logic for System Elements RATING SCALE ALL, REVIEW DT ALL, REVIEWRATING ALLThe following table shows where these system elements were sourced in previous releases and where you willbe able to find this data after you upgrade to your new PeopleSoft release. The information following this tablewill help you define your array. The “Source Prior to PeopleSoft 8.9” refers to the record field used by GlobalPayroll to retrieve the system element value. The “True Source prior to PeopleSoft 8.9,” therefore, refers tothe original home of the system element. An HR process would move the value to the JOB record. The lastcolumn, “Source for Your New Release” is where the system element will reside after the upgrade.
PIN CODE of GPSystem Element
Source prior toPeopleSoft 8.9
True Source prior toPeopleSoft 8.9
Source for Your NewRelease
RATING SCALE ALL JOB.RATING_SCALE EMPLOYEE_REVIEW.RATING_SCALE
EP_APPR.RATING_MODEL
REVIEWDT ALL JOB.REVIEW_DT EMPLOYEE_REVIEW.EFFDT
EP_APPR.PERIOD_END_DT
REVIEW RATING ALL JOB.REVIEW_RATING EMPLOYEE_REVIEW.REVIEW_RATING
EP_APPR.REVIEW_RATING
SALARYMATRIX CDALL
JOB.SALARY_MATRIX_CD
SAL_GRADE_TBL SAL_GRADE_TBL
For Retrieval From Record EP_APPRThe following instructions and SQL statements will help you define your array.
For any specified employee and target date:
Select the maximum EP_APPR record whose PERIOD_END_DT is less than the target date
Whose EP_REVIEW_STATUS is “Complete”
Whose EP_APPROVAL_STATUS is either “Approved” or “Not Required”
If the above returns more than one row, take the row with the latest PERIOD_BEGIN_DT.
The possible SQL for this approach would be:
Select RATING_MODEL, REVIEW_RATING, PERIOD_END_DT
From PS_EP_APPR
Where EMPLID = ????
And EMPL_RCD = ????
And EP_REVIEW_STATUS = ’CO’
And EP_APPROVAL_STATUS In (’NRQD’, ’APPR’))
And PERIOD_END_DT <=
(Select Max(PERIOD_END_DT)
From PS_EP_APPR
Where EMPLID = PS_EP_APPR.EMPLID
And EMPL_RCD = PS_EP_APPR.EMPL_RCD
406 Copyright © 2007, Oracle. All rights reserved.

Appendix O Upgrading System Element Deletions
And PERIOD_END_DT <= ????
And EP_REVIEW_STATUS = ’CO’
And EP_APPROVAL_STATUS In (’NRQD’, ’APPR’))
And PERIOD_BEGIN_DT <=
(Select Max(PERIOD_BEGIN_DT)
From PS_EP_APPR
Where EMPLID = PS_EP_APPR.EMPLID
And EMPL_RCD = PS_EP_APPR.EMPL_RCD
And PERIOD_END_DT = PS_EP_APPR.PERIOD_END_DT
And EP_REVIEW_STATUS = ’CO’
And EP_APPROVAL_STATUS In (’NRQD’, ’APPR’))
A new functionality was introduced for PeopleSoft 8.8, where you can mark certain types of reviews as official.This could be used to indicate those reviews that affect salary, but the indicator will only be informational. Ifyou use this feature, use the above SQL with the following criteria within each sub-Select:
And EP_OFFICIAL_SW= ‘Y’
The existing PS_EMPLOYEE_REVIEW data will not be converted during the upgrade but it will remain ashistorical data. Key structures are vastly different from each PeopleSoft release, making it so the data couldnot accurately be converted into the new business process.
As a result, another array will need to be defined to retrieve the above data from PS_EMPLOYEE_REVIEW.This is to support retroactive processing that could go to a period where data in EP_APPR is not available anddata from EMPLOYEE_REVIEW has to be read instead.
For Retrieval From Record EMPLOYEE_REVIEWTo retrieve the values from EMPLOYEE_REVIEW, you want to fetch the employee’s latest Employee Reviewrow of rating scale type ‘Average’ (determined by REVW_SCALE_TBL.REVW.SCALE_TYPE = ‘A’).
Note. The EMPLOYEE_REVIEW.EFFDT is used as the REVIEW_DT.
Note. The review status (field EMPLOYEE_REVIEW.EMPL_REVW_STATUS) has no impact because thisfield is not used for employee reviews of rating scale type ‘Average.’
For example, you want to fetch the values for EmplID KC0001, Empl Rcd 0, As-Of-Date 01-01-2002. TheSQL would look like the following:
SELECT
ER.EFFDT, -- replacement for JOB.REVIEW_DT
ER.REVIEW_RATING, -- replacement for JOB.REVIEW_RATING
ER.RATING_SCALE -- replacement for JOB.RATING_SCALE
FROM PS_EMPLOYEE_REVIEW ER
,PS_REVW_SCALE_TBL RS
WHERE ER.EMPLID = ’KC0001’
AND ER.EMPL_RCD = 0
AND ER.EFFDT = (SELECT MAX(ER1.EFFDT)
FROM PS_EMPLOYEE_REVIEW ER1
WHERE ER1.EMPLID = ER.EMPLID
AND ER1.EMPL_RCD = ER.EMPL_RCD
AND ER1.RATING_SCALE = ER.RATING_SCALE
Copyright © 2007, Oracle. All rights reserved. 407

Upgrading System Element Deletions Appendix O
AND ER1.EFFDT <= ’01-01-2002’)
AND RS.RATING_SCALE = ER.RATING_SCALE
AND RS.EFFDT = (SELECT MAX(RS1.EFFDT)
FROM PS_REVW_SCALE_TBL RS1
WHERE RS1.RATING_SCALE = ER.RATING_SCALE
AND RS1.EFFDT <= ER.EFFDT)
AND RS.EFF_STATUS = ’A’
AND RS.REVW_SCALE_TYPE = ’A’
You will need to include logic to read information from the correct array based on when data is available inEMPLOYEE_REVIEW versus in EP_APPR. You can define effective dated sections to use the right arraybased on when processing is being done. You can also define the transition date in a variable and then based onwhen processing is being done, use the variable in a formula to read from the right array.
Array Logic for System Element SALARY MATRIX CD ALLSalary matrix code will come directly from the Salary Grade Table (SAL_GRADE_TBL.SALARY_MATRIX_CD).
Here is the SQL statement that joins JOB and SAL_GRADE_TBL to select the Salary Matrix Code for aspecific Job row:
SELECT J.EMPLID, J.EMPL_RCD, J.EFFDT, J.EFFSEQ, S.SALARY_MATRIX_CD
FROM PS_JOB J,
PS_SAL_GRADE_TBL S
WHERE S.SETID = J.SETID_SALARY
AND S.SAL_ADMIN_PLAN = J.SAL_ADMIN_PLAN
AND S.GRADE = J.GRADE
AND S.EFFDT = (SELECT MAX(S1.EFFDT)
FROM PS_SAL_GRADE_TBL S1
WHERE S1.SETID = S.SETID
AND S1.SAL_ADMIN_PLAN = S.SAL_ADMIN_PLAN
AND S1.GRADE = S.GRADE
AND S1.EFFDT <= J.EFFDT)
AND S.EFF_STATUS = ’A’
Array Logic for System Element WRKS CNCL MEM DEU ALLIf you need to know if your employee is a spokesperson, check the record WC_CNCLSPK_TBL.
SELECT COUNT (*) FROM PS_WC_CNCLSPK_TBL A WHERE A.SETID = :1 ANDA.WC_COUNCIL_ID= <WC_COUNCIL_ID value> AND A.SPOKESPERSON_ID = <Your EMPLID>AND A.EFFDT. = <Use appropriate EFFDT here>
If you want to retrieve the works council ID of an employee, works council ID is in the recordCOMP_LOC_TBL.
SELECT C.SETID,C.WC_COUNCIL_ID
FROM PS_JOB A , PS_COMP_LOC_TBL C
WHERE A.EMPLID = <EMPLID value>
AND A.EMPL_RCD=< EMPL_RCD value>
AND A.EFFDT=
408 Copyright © 2007, Oracle. All rights reserved.

Appendix O Upgrading System Element Deletions
( SELECT MAX(A2.EFFDT) FROM PS_JOB A2 WHERE A2.EMPLID=A.EMPLID AND A2.EMPL_RCD=⇒A.EMPL_RCD)
AND A.EFFSEQ= (SELECT MAX(A3.EFFSEQ )
FROM PS_JOB A3
WHERE A3.EMPLID=A.EMPLID
AND A3.EMPL_RCD=A.EMPL_RCD
AND A3.EFFDT=A.EFFDT)
AND A.COMPANY = C.COMPANY
AND C.SETID = A.SETID_LOCATION
AND C.LOCATION = A.LOCATION
AND C.EFFDT= (
SELECT MAX(C1.EFFDT)
FROM PS_COMP_LOC_TBL C1
WHERE C1.SETID=C.SETID
AND C1.COMPANY=C.COMPANY
AND C1.LOCATION=C.LOCATION)
Task O-2: Changing References to System ElementsThis section discusses:
• Changing Rule Definitions
• Verifying Non-Rule Definitions
• Reviewing Record Field Usage
• Changing Array Definitions
• Changing Trigger Definitions
You will now use the SQR output and notes from the task, “Preparing for System Element Deletions,” tochange the areas where the system element has been used.
Task O-2-1: Changing Rule DefinitionsYou will use the output captured from the step, “View Element Relationships” in the task, “Preparing forSystem Element Deletions” to identify any rules that need to be changed.
If a variable was defined earlier in the step, “Retaining System Element Functionality,” follow the instructionsbelow.
• Go to each definition that referenced the system element and replace the reference with the new variablecreated in its place.
• In order for the variable to resolve correctly, put the array defined earlier in the step, “Retaining SystemElement Functionality,” in the appropriate place on the appropriate process list.
• If the system element was used in any element that was sliced, put the array on the corresponding event list.
• If the system element was also used in an element that was not sliced, call the array from a formula that isnot sliced so that it is also resolved for the segment.
Copyright © 2007, Oracle. All rights reserved. 409
Upgrading System Element Deletions Appendix O
If you did not define a variable earlier, you need to change each definition that was referencing the systemelement to not refer to that system element any more, meaning you have decided to not retain the systemelement functionality.
Task O-2-2: Verifying Non-Rule DefinitionsThis section discusses:
• Understanding Non-Rule Definition Verification
• Output Result Tables − Checking PS_GP_RSLT_PIN
• Positive Input Supporting Element Overrides
• Packages
• Non-Rule Package and Records − Checking PS_GP_NR_PKG_ELMTS
• Other Records
Understanding Non-Rule Definition VerificationThe following steps correspond to the output you got from running PUHCY100.SQR. Each step herecorresponds to the output of the SQR. Complete these steps ONLY if the SQR output indicates that thesystem element has been used in that area.
Note. The steps below need to be followed for EVERY system element.
For the following steps, the <Variable PIN NUM> refers to the PIN_NUM of the variable, if one was createdearlier. If a variable was not defined earlier, you decided not to retain system element functionality. The<System Element PIN NUM> refers to the PIN_NUM of the system element found in the SQR output.These steps provide SQL to update places where the system element was used to use the variable definedearlier instead of the deleted element. If a variable was not created, these steps provide SQL to delete thedata accordingly.
Output Result Tables − Checking PS_GP_RSLT_PINIf a variable was defined earlier, use the following SQL to update the data.
UPDATE PS_GP_RSLT_PIN
SET PIN_NUM=<Variable PIN NUM>
WHERE PIN_NUM=<System Element PIN NUM>
If a variable was not defined earlier, use the following SQL to delete the row from the PS_GP_RSLT_PIN.DELETE FROM PS_GP_RSLT_PIN
WHERE PIN_NUM=<System Element PIN NUM>
Positive Input Supporting Element OverridesPositive Input Supporting Element Override 1 − Checking PS_GP_PI_MNL_SOVR
If a variable was defined earlier, use the following SQL to update the data:
UPDATE PS_GP_PI_MNL_SOVR
SET PIN_SOVR_NUM=<Variable PIN NUM>
WHERE PIN_SOVR_NUM=<System Element PIN NUM>
If a variable was not defined earlier, use the following SQL to delete the row:
410 Copyright © 2007, Oracle. All rights reserved.

Appendix O Upgrading System Element Deletions
DELETE FROM PS_GP_PI_MNL_SOVR
WHERE PIN_NUM=<System Element PIN NUM>
• Positive Input Supporting Element Override 2 − Checking PS_GP_PI_GEN_SOVRIf a variable was defined earlier, use the following SQL to update that data.
UPDATE PS_GP_PI_GEN_SOVR
SET PIN_SOVR_NUM=<Variable PIN NUM>
WHERE PIN_SOVR_NUM=<System Element PIN NUM>
If a variable was not defined earlier, use the following SQL to delete the row.DELETE FROM PS_GP_PI_GEN_SOVR
WHERE PIN_NUM=<System Element PIN NUM>
• Positive Input Supporting Element Override 3 − Checking PS_GP_RSLT_PI_SOVRIf a variable was defined earlier, use this SQL to update the data.
UPDATE PS_GP_RSLT_PI_SOVR
SET PIN_SOVR_NUM=<Variable PIN NUM>
WHERE PIN_SOVR_NUM=<System Element PIN NUM>
If a variable was not defined earlier, issue the following SQL to delete the row fromPS_GP_RSLT_PI_SOVR.DELETE FROM PS_GP_RSLT_PI_SOVR
WHERE PIN_NUM=<System Element PIN NUM>
PackagesThis section needs to be done with the help of a functional user who understands the Global Payroll Packagerfunctionality.
• Rule Package Criteria − Checking PS_GP_PKG_CRIT1If a variable was defined earlier, issue the following SQL to update the data:
UPDATE PS_GP_PKG_CRIT1
SET PIN_NUM=<Variable PIN NUM>,
PIN_TYPE=’VR’
WHERE PIN_NUM=<System Element PIN NUM>
If a variable was not defined earlier, issue the following SQL to delete the row from PG_PKG_CRIT1.DELETE FROM PS_GP_PKG_CRIT1
WHERE PIN_NUM=<System Element PIN NUM>
At the end of the upgrade process, you will need to recreate the packages impacted by the changes abovebefore they can be used again. The impacted packages can be found in the <PUHCY100>SQR output.
• Rule Package Output − Checking PS_GP_PKG_ELEMENTS
If the system element is listed in the Rule Package Output, you will need to recreate the packages listed inthe <PUHCY100>SQR output before they can be used again. This needs to be done at the end of theupgrade process. (Do not include the ones that were already covered by the Rule Package Criteria output.)
• Version Package − Checking PS_GP_PKG_VER_DTL
If the system element is listed in the Version Package, you will need to recreate the packages listed inthe <PUHCY100>SQR output before they can be used again. Complete this step at the end of the entireupgrade process. If the existing system element had a value of Version starting with ‘C_’ it means that
Copyright © 2007, Oracle. All rights reserved. 411
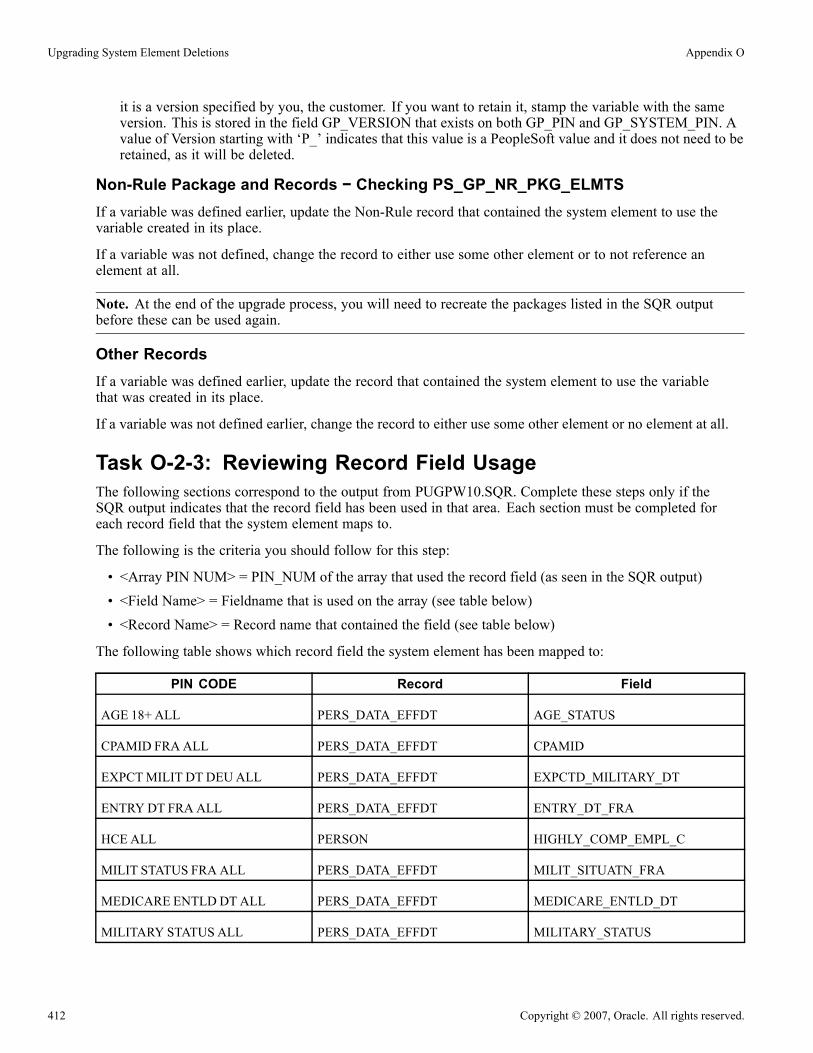
Upgrading System Element Deletions Appendix O
it is a version specified by you, the customer. If you want to retain it, stamp the variable with the sameversion. This is stored in the field GP_VERSION that exists on both GP_PIN and GP_SYSTEM_PIN. Avalue of Version starting with ‘P_’ indicates that this value is a PeopleSoft value and it does not need to beretained, as it will be deleted.
Non-Rule Package and Records − Checking PS_GP_NR_PKG_ELMTSIf a variable was defined earlier, update the Non-Rule record that contained the system element to use thevariable created in its place.
If a variable was not defined, change the record to either use some other element or to not reference anelement at all.
Note. At the end of the upgrade process, you will need to recreate the packages listed in the SQR outputbefore these can be used again.
Other RecordsIf a variable was defined earlier, update the record that contained the system element to use the variablethat was created in its place.
If a variable was not defined earlier, change the record to either use some other element or no element at all.
Task O-2-3: Reviewing Record Field UsageThe following sections correspond to the output from PUGPW10.SQR. Complete these steps only if theSQR output indicates that the record field has been used in that area. Each section must be completed foreach record field that the system element maps to.
The following is the criteria you should follow for this step:
• <Array PIN NUM> = PIN_NUM of the array that used the record field (as seen in the SQR output)• <Field Name> = Fieldname that is used on the array (see table below)• <Record Name> = Record name that contained the field (see table below)
The following table shows which record field the system element has been mapped to:
PIN CODE Record Field
AGE 18+ ALL PERS_DATA_EFFDT AGE_STATUS
CPAMID FRA ALL PERS_DATA_EFFDT CPAMID
EXPCTMILIT DT DEUALL PERS_DATA_EFFDT EXPCTD_MILITARY_DT
ENTRYDT FRA ALL PERS_DATA_EFFDT ENTRY_DT_FRA
HCE ALL PERSON HIGHLY_COMP_EMPL_C
MILIT STATUS FRA ALL PERS_DATA_EFFDT MILIT_SITUATN_FRA
MEDICARE ENTLD DT ALL PERS_DATA_EFFDT MEDICARE_ENTLD_DT
MILITARY STATUS ALL PERS_DATA_EFFDT MILITARY_STATUS
412 Copyright © 2007, Oracle. All rights reserved.

Appendix O Upgrading System Element Deletions
PIN CODE Record Field
PERSON TYPE ALL PERS_DATA_EFFDT PER_TYPE
PREVHCE ALL PERSON HIGHLY_COMP_EMPL_P
SMOKER ALL PERS_DATA_EFFDT SMOKER
USWORK ELIGIBILITY ALL PERS_DATA_EFFDT US_WORK_ELIGIBILITY
YRS OFWORK EXPER ALL PERS_DATA_EFFDT YEARS_OF_EXP
Task O-2-4: Changing Array DefinitionsThis section discusses:
• Understanding Arrays
• Array Field − PS_GP_ARRAY_FLD
• Array Keys PS_GP_ARRAY_KEY
Understanding ArraysAny array definitions that used the record field need to be changed to not use the record field since it no longerexists. If you need to use the functionality that was provided by the field, you could define another array asexplained earlier in the step titled, “Define an Array.”
Array Field − PS_GP_ARRAY_FLDExamine the following Array definition:
DELETE FROM PS_GP_ARRAY_FLD
WHERE PIN_NUM=<Array PIN NUM>
AND FIELDNAME=<Field Name>
You also need to blank out the Version field on GP_ARRAY to indicate that the array has been changed. Thisis done to mimic the functionality provided when an array definition is changed with the online application.Whenever an array definition is changed with the online application, the GP_VERSION field is blanked out.
UPDATE PS_GP_ARRAY
SET GP_VERSION=’ ‘
WHERE PIN_NUM=<Array PIN NUM>
Array Keys PS_GP_ARRAY_KEYExamine the following Array definition:
DELETE FROM PS_GP_ARRAY_KEY
WHERE PIN_NUM=<Array PIN NUM>
AND FIELDNAME=<Field Name>
You also need to blank out the Version field on GP_ARRAY to indicate that the array has been changed.UPDATE PS_GP_ARRAY
SET GP_VERSION=’ ‘
WHERE PIN_NUM=<Array PIN NUM>
Copyright © 2007, Oracle. All rights reserved. 413

Upgrading System Element Deletions Appendix O
Task O-2-5: Changing Trigger DefinitionsThis section discusses:
• Understanding Trigger Definition
• Trigger Field − Checking PS_GP_TRGR_RECFLD
• Trigger Value − Checking PS_GP_TRGR_VALUE
Understanding Trigger DefinitionA functional user who understands the Global Payroll Trigger functionality needs to work on this section aswell.
Any trigger definitions that used the record field need to be changed to not use the record field since it will notexist. You also need to evaluate where you need to define a NEW trigger definition based on location of wheredata is now stored. Remember to add trigger PC to that record if needed as well.
Trigger Field − Checking PS_GP_TRGR_RECFLDExamine the following Array definition:
DELETE FROM PS_GP_TRGR_RECFLD
WHERE RECNAME=<Record Name>
AND FIELDNAME=<Field Name>
Trigger Value − Checking PS_GP_TRGR_VALUEExamine the following Array definition:
DELETE FROM PS_GP_TRGR_VALUE
WHERE RECNAME=<Record Name>
AND FIELDNAME=<Field Name>
414 Copyright © 2007, Oracle. All rights reserved.

APPENDIX P
Upgrading the Content Provider Registry
This appendix discusses:
• Understanding the Content Provider Registry Upgrade
• Copying Your Enterprise Portal Database
• Upgrading Enterprise Portal PeopleTools
• Updating Registry Permission Lists
• Creating the Portal Project
• Comparing the Portal Project
• Reviewing the Portal Project
• Copying the Portal Project
• Copying Portal Project to Production
• Deleting Obsolete Folders
• Updating Registry Folder Permissions
Understanding the Content Provider Registry UpgradeYou should perform this task if you use the Enterprise Portal 8.4 or higher running on PeopleTools 8.4x withthe full navigation load access method. This means you do not use a single link to access your contentprovider database, but instead load some or all of the portal registry structures from the content providerdatabase into your Enterprise Portal database. PeopleSoft refers to its application databases that containthe transaction content as Content Provider databases. Your Copy of Production database is your ContentProvider database for this task.
When you upgrade a content provider database, the registry structures are updated, removed and added.These changes need to be copied to the Enterprise Portal database. This task will update the portal registrystructures in your Enterprise Portal database to match what is in the Content Provider database. This isaccomplished by the following:
• Upgrade the PeopleTools on a copy of the Enterprise Portal database.This allows a project compare to run between the Enterprise Portal and the Content Provider database.
• Create a portal project in the Enterprise Portal database containing all of the existing Content Providerregistry structures.Copy the portal project (definition only) to the Content Provider database.
Copyright © 2007, Oracle. All rights reserved. 415

Upgrading the Content Provider Registry Appendix P
• Create a portal project in the Content Provider database containing all of the current Content Providerregistry structures, then merge the project definition copied from the Enterprise Portal database intothis project.You will have a complete list of all registry structures for the Content Provider, including what is currentand what should be deleted.
• Compare the complete list of registry structures in the Content Provider database to what exists in theEnterprise Portal, using project compare.This marks the missing registry structures as delete and the updated or added registry structures as copy inthe portal project definition.
• Copy the portal project from the Content Provider database to the Enterprise Portal database.This deletes, updates, and adds registry structures to the Enterprise Portal database which syncs it up withwhat is current in the Content Provider database.
If you use Enterprise Portal 8 SP2, PeopleSoft recommends that you upgrade your Enterprise Portal to thelatest available release.
If you do upgrade your Enterprise Portal database, you must be on PeopleTools 8.46 or higher.
Note. If you use Enterprise Portal 8.4 you do not need to upgrade to Enterprise Portal 8.8. You can stillupgrade to PeopleTools 8.46.
See Enterprise Portal 8.1x – Managing Information Architecture on PeopleSoft Customer Connection(Support, Documentation, Documentation Updates, Enterprise, Portal Products, Enterprise Portal) foradditional information on this topic.
In this appendix, you load your new Portal Registry definitions from your Copy of Production database to acopy of your Enterprise Portal database.
Note. You must complete the tasks in the appendix for each of your separately installed Enterprise Portaldatabases that correspond to one of the four Portal Registry definitions: EMPLOYEE, CUSTOMER,SUPPLIER, and PARTNER. If your installed Enterprise Portal uses all the registries, then complete this taskfor each of the portal registries using the same copy of the single Enterprise Portal database.
In the first task of this appendix, you create a copy of your Enterprise Portal database. You use this copy for allsubsequent steps for the initial and test Move to Production upgrade passes. For the final Move to Production,do not make a copy. Instead perform the steps on the production Enterprise Portal database.
This document uses the term “target Enterprise Portal database” to refer to the Enterprise Portal database usedin the upgrade steps. Use the table below to determine the correct copy of your Enterprise Portal database foreach pass:
Upgrade Pass Target Enterprise Portal Database
Initial pass Copy of the Enterprise Portal database
Test Move to Production Copy of the Enterprise Portal database
Final Move to Production Enterprise Portal production database
416 Copyright © 2007, Oracle. All rights reserved.

Appendix P Upgrading the Content Provider Registry
Task P-1: Copying Your Enterprise Portal DatabaseYou initially upgrade the Content Provider registry on a copy of your Enterprise Portal database, then testthe results of the upgrade. During your test Move to Production, you perform this task against another Copyof the Enterprise Portal.
Create a copy of your current Enterprise Portal production database now. Use this database as your targetEnterprise Portal database.
Note. During your final Move to Production, you copy the registry definitions directly to your Enterprise Portalproduction database. Therefore, you do not need to execute this step during your final Move to Production.
Task P-2: Upgrading Enterprise Portal PeopleToolsDuring the initial upgrade pass, your Enterprise Portal database must run on the same PeopleTools release levelas your Copy of Production database so that you can do the compare step. Because you do not need to run thecompare step during your Move to Production passes, you can skip this task during Move to Production passes.
If the release level of PeopleTools on your target Enterprise Portal database is not the same as your Copy ofProduction database release level, upgrade your PeopleTools now.
See PeopleSoft Customer Connection (Implement Optimize + Upgrade, Upgrade Guide, UpgradeDocumentation and Software, Upgrade Documentation and Scripts, Release, Enterprise, PeopleTools).
Task P-3: Updating Registry Permission ListsThis section discusses:
• Understanding Registry Permission Lists Updates
• Updating Portal Registry
• Deleting the Database Cache
Understanding Registry Permission Lists UpdatesThis task applies only to the initial upgrade pass.
Earlier in this upgrade you copied portal registry data from the Demo database to your Copy of Productiondatabase. You must update this registry data to include your permission list changes. After updating the portalregistry permission lists, delete the database cache.
This process takes between a few minutes and a few hours, depending on the volume of the portal data.
Note. The user ID that invokes this process must have the security role Portal Administrator, or the processmay terminate with an abend.
Note. You must have a process scheduler started for your Copy of Production database.
Copyright © 2007, Oracle. All rights reserved. 417

Upgrading the Content Provider Registry Appendix P
Task P-3-1: Updating Portal RegistryFollow the steps below to update your portal registry permission lists.
To update the portal registry permission lists:
1. On your Copy of Production database, select PeopleTools, Portal, Portal Security Sync.
2. Select the Add a New Value tab.
3. Add a run control as follows:
a. Enter a value for the run control ID. The run control ID is SECURITY_SYNC_XXXX, where XXXXrepresents the portal registry name (EMPLOYEE, CUSTOMER, SUPPLIER, or PARTNER).
b. Click Add.4. Enter a value for the portal name.
This value must match the portal registry name you used to replace the XXXX in the run control ID.
5. Click Save.6. Click Run.7. Set up the process scheduler information and click OK.
8. Click the Process Monitor link to view the progress of the process.
Task P-3-2: Deleting the Database CacheFollow the steps below to delete the database cache.
To delete the database cache:
1. Delete the Copy of Production database application server cache.2. Stop and restart the Copy of Production database web server service.
Task P-4: Creating the Portal ProjectThis section discusses:
• Understanding Portal Project Creation
• Creating the Target Enterprise Portal Project
• Cleaning the Target Enterprise Portal Project
• Deleting the Target Enterprise Portal Database Cache
• Copying the Target Enterprise Portal Project Definition
• Creating the Copy of Production Portal Project
• Cleaning the Copy of Production Portal Project
• Deleting the Copy of Production Database Cache
418 Copyright © 2007, Oracle. All rights reserved.

Appendix P Upgrading the Content Provider Registry
Understanding Portal Project CreationThis task applies only to the initial upgrade pass. In this task, you create and modify a project on your targetEnterprise Portal database. Then you copy the project definition to the Copy of Production database, whereyou further modify the project.
Task P-4-1: Creating the Target Enterprise Portal ProjectFollow the steps below to create the target Enterprise Portal project.
To create the target Enterprise Portal project:
1. Launch Application Designer and sign on to your target Enterprise Portal database.2. Select Insert, Definitions into Project…3. Select the following values:a. In the Definition Type field, select Portal Registry Structures.b. Leave the Portal Name field blank.c. In the Owner ID field, select All Owners.d. Do not select any values in the Related Definitions field.
Insert into Project dialog box
4. Click Insert.5. Click Select All, and the click Insert again6. Click Close.7. From Application Designer, select File, Save Project As….
Copyright © 2007, Oracle. All rights reserved. 419

Upgrading the Content Provider Registry Appendix P
8. Enter the project name PORTAL_PA84X_REGISTRY.9. Close Application Designer.
Task P-4-2: Cleaning the Target Enterprise Portal ProjectIn this step, you clean the target Enterprise Portal Project so that it contains only the existing Content Providerregistry structure content references.
To clean the target Enterprise Portal project:
1. In your Enterprise Portal database, select PeopleTools, Portal, Portal Utilities, Clean Portal Project.
Warning! Do not follow the instructions on the Clean Portal Project page. Instead, follow the instructionsbelow.
2. Add the run control ID CLEAN_PORTAL_XXXXXXXX where XXXXXXXX represents the portaldefinition name: EMPLOYEE, CUSTOMER, SUPPLIER or PARTNER for example.
3. In the Project Name field, enter the project name PORTAL_PA84X_REGISTRY.
4. Enter a value in the Portal Name field; EMPLOYEE for example.
5. Enter a value in the Content Provider Name field; CRM for example.
Note. Before running the Clean Portal Project you must enter the node URI text for the message nodethat you selected.
6. Select Full Navigation.7. Click Save.8. Click Run.9. Set up the Process Scheduler information and click OK.10. Select the Process Monitor link to view the progress of the process.
Task P-4-3: Deleting the Target Enterprise Portal Database CacheIn this step, you delete the target Enterprise Portal database cache.
To delete the target Enterprise Portal database cache:
1. On your target Enterprise Portal database, launch Configuration Manager.2. On the Startup tab, click Purge Cache Directories.3. Select the target Enterprise Portal database name.4. Click Delete.5. Click OK.6. Click Close.7. Click OK to close Configuration Manager.
420 Copyright © 2007, Oracle. All rights reserved.

Appendix P Upgrading the Content Provider Registry
Task P-4-4: Copying the Target Enterprise PortalProject DefinitionIn this step, you copy the target Enterprise Portal project definition to your Copy of Production database.
To copy the target Enterprise Portal project definition:
1. Using PeopleSoft Data Mover, sign on to your target Enterprise Portal database.
2. Run the following Data Mover script:
PS_HOME\SCRIPTS\UVUPX10E.dms
3. Close Data Mover.4. Using PeopleSoft Data Mover, sign on to the Copy of Production database.5. Run the following Data Mover script:
PS_HOME\SCRIPTS\UVUPX10I.dms
6. Close Data Mover.
Task P-4-5: Creating the Copy of Production Portal ProjectCreate a project containing all Portal Registry data on your Copy of Production database.
To create the Copy of Production Portal project:
1. Launch Application Designer and sign on to your Copy of Production database.2. Select Insert, Definitions into Project….3. In the Definition Type field, select Permission Lists.
Copyright © 2007, Oracle. All rights reserved. 421

Upgrading the Content Provider Registry Appendix P
Insert into Project dialog box: Definition Type Permission Lists
4. Click Insert.5. Click Select All, and then click Insert again.6. Select the following values:a. In the Definition Type field, select Portal Registry Definitions.b. In the Name field, enter the Enterprise Portal database’s default portal name (EMPLOYEE,CUSTOMER, SUPPLIER or PARTNER).
c. In the Owner ID field, select All Owners.d. In the Related Definitions field, select Portal Registry Structures.
422 Copyright © 2007, Oracle. All rights reserved.

Appendix P Upgrading the Content Provider Registry
Insert into Project dialog box with Portal Registry Structures selected
7. Click Insert.8. Click Select All, then click Insert again.9. Click Close.10. From Application Designer, select File, Save Project As….11. Enter the appropriate new project name from the table below. This project is referred to as the PortalProject:
Portal Name Project Name
EMPLOYEE PORTAL_APP84X_EMPLOYEE
CUSTOMER PORTAL_APP84X_CUSTOMER
PARTNER PORTAL_APP84X_PARTNER
SUPPLIER PORTAL_APP84X_SUPPLIER
12. Click OK.13. From Application Designer, select File, Merge Projects...14. Enter the project name PORTAL_PA84X_REGISTRY.This merges the objects from the PORTAL_PA84XREGISTERY project into your newly created PortalProject.
15. Select File, Save Project to save the updated Portal Project.16. Close Application Designer.
Copyright © 2007, Oracle. All rights reserved. 423

Upgrading the Content Provider Registry Appendix P
Task P-4-6: Cleaning the Copy of Production Portal ProjectIn this step, you clean the Copy of Production Portal project so that it contains only the Content Providerregistry data.
Important! Before using the Copy of Production Portal project, you must run the Clean Portal Project on theCopy of Production database. Follow the directions on the Clean Portal Project Page.
To clean the Copy of Production Portal project:
1. In your Copy of Production database, select PeopleTools, Portal, Portal Utilities, Clean Portal Project.2. Add the run control ID, CLEAN_PORTAL_XXXXXXXX, where XXXXXXXX represents the portal definitionname; EMPLOYEE, CUSTOMER, SUPPLIER, or PARTNER, for example.
3. In the Project Name field, enter the Portal Project name that you created in the Creating the Copy ofProduction Portal Project step (PORTAL_APP84X_[your portal name here]).
4. Enter a value in the Portal Name field; EMPLOYEE, for example.5. Enter a value in the Content Provider Name field; CRM, for example.
Important! Before running the Clean Portal Project, you must enter the Node URI text for the MessageNode you selected.
6. Select Full Navigation.7. Click Save.8. Click Run.9. Set up the Process Scheduler information and click OK.10. Select the Process Monitor link to view the progress of the process.
Task P-4-7: Deleting the Copy of Production Database CacheIn this step, you delete the Copy of Production database cache.
To delete the Copy of Production database cache:
1. On your Copy of Production database, start Configuration Manager.2. On the Startup tab, click Purge Cache Directories.3. Select the Copy of Production database name.4. Click Delete.5. Click OK.6. Click Close.7. Click OK to close Configuration Manager.
Task P-5: Comparing the Portal ProjectThis task applies only to the initial upgrade pass.
424 Copyright © 2007, Oracle. All rights reserved.

Appendix P Upgrading the Content Provider Registry
In this step, you compare the Portal project that you created in the previous step and then review the compareresults. This will enable you to adjust the portal project as necessary before copying it into the EnterprisePortal database.
To compare the Portal Project:
1. Launch Application Designer and sign on to your Copy of Production database.2. Select Tools, Compare and Report....3. Enter the Portal Project name that you specified in the Creating the Copy of Production Portal Project step(PORTAL_APP84X_[your portal name here]).
4. Enter the database name of your target Enterprise Portal database, and the user ID and password.5. Click the Options button.6. In the Compare Type field, select Project, and click OK.7. Select all object types and click OK.8. Close Application Designer.
Task P-6: Reviewing the Portal ProjectThis task applies only to the initial upgrade pass.
Review the Portal project (PORTAL_APP84X_[your portal name here]) on the Copy of Production database,looking for customizations that you have applied to your database. Object definitions that you changed have*Changed or *Unchanged in the Target column of the compare report. The * indicates that the change was notmade by PeopleSoft. Review each of these objects carefully. If PeopleSoft delivered the object, the Sourcecolumn of the report will read Changed. Note the changes that you made to the object. After you completethe upgrade, when you test the system, you can decide whether you still need the customization. You canreapply the customization at that time.
See Appendix: “Using the Comparison Process.”
Task P-7: Copying the Portal ProjectThis section discusses:
• Understanding Portal Project Copying
• Copying the Portal Project
• Deleting the Enterprise Portal Database Cache
Understanding Portal Project CopyingThis task applies only to the initial upgrade pass.
In this step, you copy the project from your Copy of Production database to your target Enterprise Portaldatabase.
Copyright © 2007, Oracle. All rights reserved. 425

Upgrading the Content Provider Registry Appendix P
Task P-7-1: Copying the Portal ProjectFollow the steps below to copy the Portal Project to the Enterprise Portal database.
Important! Before exporting the Portal Project from the Content Provider database, you must successfullyclean the Copy of Production Portal Project. If you proceed with this step without cleaning the project,you will overwrite critical Enterprise Portal data.
See Creating the Portal Project, Cleaning the Copy of Production Portal Project.
To copy the Portal Project:
1. Launch Application Designer and sign on to your Copy of Production database.2. Select File, Open...3. In the Definition field, select Project and click Open.4. Highlight the newly created Portal Project name (PORTAL_APP84X_[your portal name]) and clickOpen again.
5. Select Tools, Copy Project, To Database...6. Enter the name of your target Enterprise Portal database, and the user ID and password.7. Click Select All.8. Click Copy.This may take a few minutes.
9. Close Application Designer.
Note. You do not need to create or alter any records or views.
Task P-7-2: Deleting the Enterprise Portal Database CacheIn this step, you delete the Enterprise Portal database cache.
To delete the Enterprise Portal database cache:
1. Delete the target Enterprise Portal database application server cache.2. Stop and restart the target Enterprise Portal database web server service.
Task P-8: Copying Portal Project to ProductionThis section discusses:
• Understanding Portal Project to Production Copying
• Copying the Portal Project to File
• Copying the Portal Project from File
• Deleting the Enterprise Portal Database Cache Again
426 Copyright © 2007, Oracle. All rights reserved.

Appendix P Upgrading the Content Provider Registry
Understanding Portal Project to Production CopyingYou must perform this step during both your test and final Move to Production upgrade passes.
Task P-8-1: Copying the Portal Project to FileFollow the steps below to copy the Portal Project to file.
Note. If your Copy of Production and target Enterprise Portal databases run on the same PeopleTools releaseand database platform, you can copy the project directly to the target Enterprise Portal database from withinthe Copy of Production Application Designer and skip the rest of this step.
To copy the Portal Project to file:
1. Launch Application Designer and sign on to your Copy Production database.
2. Select File, Open....
3. In the Definition field, select Project and the click Open.
4. Highlight the newly created Portal Project name (PORTAL_APP84X_[your portal name]) and clickOpen again.
5. Select Tools, Copy Project, To File....
6. Click the Browse button for the Export Directory.
7. Select a temporary directory and then click OK.
8. Click Select All.
9. Click Copy.This may take a few minutes.
10. Close Application Designer.
Task P-8-2: Copying the Portal Project from FileIn this step, you copy the Portal Project from file.
To copy the Portal Project from file:
1. Launch Application Designer and sign on to your target Enterprise Portal database.2. Select Tools, Copy Project, From File....3. Browse to the Copy of Production database server’s temporary directory.If you cannot access the Copy of Production database server’s temporary directory, then copy the PortalProject folder and files from the temporary directory to the target Enterprise Portal database server’sPS_HOME\PROJECTS directory, and browse to that directory.
4. Select the Portal Project name that you just copied to file in the previous step.5. Click Open.6. Click Select All.7. Set the project language options as follows:a. Click Options.b. In the Copy Options tab, select English, and COMMON.
Copyright © 2007, Oracle. All rights reserved. 427

Upgrading the Content Provider Registry Appendix P
c. If your Enterprise Portal database is a multi-language database, then also select the languages that youhave installed on your Enterprise Portal database.
d. Click OK.8. Click Copy.9. Select the Upgrade tab and view the Output window.All objects should have copied successfully.
10. Close Application Designer.
Note. After the copy, you do not need to create or alter any records or views on the target Enterprise Portaldatabase.
Task P-8-3: Deleting the Enterprise Portal Database Cache AgainIn this step, you delete the Enterprise Portal database cache.
To delete the Enterprise Portal database cache:
1. Delete the target Enterprise Portal database’s application server cache.2. Stop and restart the target Enterprise Portal database web server service.
Task P-9: Deleting Obsolete FoldersThis section discusses:
• Understanding Obsolete Folder Deletion
• Deleting Obsolete Folders on Enterprise Portal 8.4
• Deleting Obsolete Folders on Enterprise Portal 8.8
Understanding Obsolete Folder DeletionThis task applies to all upgrade passes: Initial, Test Move to Production, and Final Move to Production.
In this step, you delete folders on your target Enterprise Portal database that the Portal Registry Structures nolonger reference. The process that you run depends on your version of Enterprise Portal.
Task P-9-1: Deleting Obsolete Folders on Enterprise Portal 8.4Follow this procedure to delete obsolete folders on Enterprise Portal 8.4.
To delete obsolete folders on Enterprise Portal 8.4:
1. Using PeopleSoft Data Mover, sign on to your target Enterprise Portal database.
2. Run the following Data Mover script, located in the Enterprise Portal PS_HOME\SCRIPTS directory:
PORTAL_REG_FOLDER_DEL.DMS
3. Close Data Mover.
428 Copyright © 2007, Oracle. All rights reserved.

Appendix P Upgrading the Content Provider Registry
Task P-9-2: Deleting Obsolete Folders on Enterprise Portal 8.8Follow this procedure to delete obsolete folders on Enterprise Portal 8.8 or higher.
To delete obsolete folders on Enterprise Portal 8.8 or higher:
1. On your target Enterprise Portal database, navigate accordingly:a. For Enterprise Portal 8.8: Portal Administration, Navigation, Run Folder Cleanup.b. For Enterprise Portal 8.9 or higher: Portal Administration, Navigation, Delete Empty Folders.
2. Add a run control as follows:a. Enter a value for the run control ID. The run control ID is FOLDER_CLEAN_XXXX, where XXXXrepresents the portal registry name (EMPLOYEE, CUSTOMER, PARTNER, or SUPPLIER).
b. Click Add.3. Enter a value in the Portal Name field.This value must match the portal registry name that you used to replace XXXX in the run control ID(EMPLOYEE, CUSTOMER, PARTNER, or SUPPLIER).
4. Click Save.5. Click Run.6. Set up the process scheduler information and click OK.7. Click the Process Monitor link to view the progress of the process.
Task P-10: Updating Registry Folder PermissionsThis section discusses:
• Understanding Registry Folder Permissions Updates
• Updating the Enterprise Portal Registry Folder Permissions
• Deleting the Enterprise Portal Cache
Understanding Registry Folder Permissions UpdatesThis task applies to all upgrade passes: Initial, Test Move to Production, and Final Move to Production.
Portal data from different Content Provider databases may share a common portal folder. After copying theregistry projects, you must update the folder permissions to reflect the changes. After you update the folderpermissions, you must delete the target Enterprise Portal database cache files to propagate the changes.
Task P-10-1: Updating the Enterprise Portal RegistryFolder PermissionsFollow this procedure to update your Enterprise Portal registry folder permissions.
Copyright © 2007, Oracle. All rights reserved. 429

Upgrading the Content Provider Registry Appendix P
Note. This process will take between a few minutes to a few hours, depending on the volume of portaldata. The user ID that invokes this process must have the security role Portal Administrator, or the processmay terminate with an abend.
To update the Enterprise Portal folder permissions:
1. On your target Enterprise Portal database, select PeopleTools, Portal, Portal Security Sync.2. Add a run control as follows:a. Enter a value for the run control ID.The run control ID is SECURITY_SYNC_XXXX, where XXXX represents the portal registry name(EMPLOYEE, CUSTOMER, PARTNER, or SUPPLIER).
b. Click Add.3. Enter a value in the Portal Name field.This value must match the portal registry name that you used to replace XXXX in the run control ID(EMPLOYEE, CUSTOMER, PARTNER, or SUPPLIER).
4. Click Save.5. Click Run.6. Set up the process scheduler information and click OK.7. Click the Process Monitor link to view the progress of the process.
Task P-10-2: Deleting the Enterprise Portal CacheIn this step delete the Enterprise Portal cache.
To delete the Enterprise Portal cache:
1. Delete the target Enterprise Portal database application server cache.2. Stop and restart the target Enterprise Portal database web server service.
430 Copyright © 2007, Oracle. All rights reserved.

APPENDIX Q
Upgrading with Tax Updates
Upgrading with Tax UpdatesYour HRMS Demo database was delivered with a predetermined level of Tax Updates applied. This TaxUpdate level is listed in the task, “Understanding Your Upgrade.” Oracle recommends you run your upgradeusing your Copy of Production at the same Tax Update level as the HRMS Demo database. Your Copy ofProduction database may be in one of three states relative to the Demo database.
• You will need to update the delivered HRMS Demo database with all tax updates through the latest taxupdate on your Copy of Production before you start your initial upgrade pass. This is required so you willnot lose any of the more current Tax Updates. Do not apply any more updates to your production systemuntil your upgrade is complete and you go live on the new PeopleSoft release. If you apply additionalupdates to your production system while running the upgrade passes, you will loose those updates duringyour Move to Production pass. You will then need to reapply the tax updates that were applied to yourproduction since your Initial upgrade pass.
• The Copy of Production database may be current with the Tax Update from the Demo database applied(but not beyond). You do not need to apply any tax updates.
• The Copy of Production database may not be current with the Tax Update from the Demo database. Oraclestrongly recommends that you apply all of the Tax Updates to bring your Copy of Production database tothe same Tax Update level as your HRMS Demo database. This will assure that your tax informationwill be correct when you have completed your upgrade. If this is not possible, be aware of the followingpotential issues and act accordingly:
Copyright © 2007, Oracle. All rights reserved. 431

Upgrading with Tax Updates Appendix Q
- To get your Tax Tables up to date, you will need to compare data in the Tax Tables from your Copy ofProduction to the HRMS Demo database. Any needed updates from the Demo Database should beapplied to the Copy of Production database manually. The tables involved are as follows:
PS_CAN_TAX_TBL
PS_CAN_TAX_CITLUMP
PS_CAN_TAX_QITLUMP
PS_CAN_TAX_CITRATE
PS_CAN_TAX_QITRATE
PS_CAN_TAX_PROV
PS_CAN_TAX_PROVNCT
PS_CAN_TAX_PROVTHR
PS_GARN_RULE_TBL
PS_GARN_EXEMPT_TBL
PS_GARN_OPERANDS
PS_GARN_DE_DEFN
PS_GARN_DE_DED
PS_GARN_PRORATE_RL
PS_STATE_TAX_TBL
PS_STATE_TAXRT_TBL
PS_ST_OTH_TAX_TBL
PS_STTAX_RECIP_TBL
PS_LOCTX_RECIP_TBL
PS_TAXGR_DEFN_TBL
PS_TAXGR_BASE_TBL
PS_TAXGR_CMPNT_TBL
PS_LOCAL_TAX_TBL
PS_LOCAL_TAX_TBL2
PS_SWT_MARSTAT_TBL
PS_LCLWK_TXRCP_TBL
Note. Garnishments Rules tables GARN_RULE_TBL, GARN_EXEMPT_TBL, andGARN_OPERANDS have a different structure in this release and will be part of data conversion.We will deliver all garnishments rules maintained by us during the upgrade, so there is no need tomanually update these tables to bring them to the Tax Update level of the Demo database.
See Appendix: “Understanding Garnishments Changes.”
- You should also review the Tax Update documentation to guide you on specific Tax Updates. Thisdocumentation is available on PeopleSoft Customer Connection.
432 Copyright © 2007, Oracle. All rights reserved.

APPENDIX R
Using Data Conversion Utilities
This appendix discusses:
• Understanding Data Conversion Utilities
• Using the Upgrade Driver Program
• Using the Upgrade Drivers Page
• Reviewing the Data Conversion Report
Understanding Data Conversion UtilitiesThis appendix contains information regarding the Application Engine program UPG_DATACONV and thePS_UPG_DATACONV table.
Task R-1: Using the Upgrade Driver ProgramIn order to run all data conversions in the correct sequence, Oracle has provided the Application Engineprogram UPG_DATACONV and the PS_UPG_DATACONV table. This program runs the Application Enginesections defined in the table PS_UPG_DATACONV. The PS_UPG_DATACONV table contains a list of all ofthe Application Engine sections that you need to run and in what sequence they should be run.
Task R-2: Using the Upgrade Drivers PageThis section discusses:
• Understanding Upgrade Drivers Page
• Accessing the Upgrade Drivers Page
• Adding New Upgrade Drivers Section Page
• Inactivating Upgrade Drivers Section
Understanding Upgrade Drivers PageBefore you run data conversion, you may need to change what the Upgrade Driver program runs. You can add,remove, or deactivate Application Engine sections through the Upgrade Drivers page.
Copyright © 2007, Oracle. All rights reserved. 433

Using Data Conversion Utilities Appendix R
You do not have an active portal on your Copy of Production during data conversion, so you need to viewand update the Data Conversion Definitions on your Demo database and then copy the updated data to yourCopy of Production database.
Task R-2-1: Accessing the Upgrade Drivers PageTo access the Upgrade Drivers page:
1. From your browser, sign on to the Demo database.
2. Select Set Up HRMS, Upgrade, Data Conversion.
3. Enter your upgrade path:
HC88 for groups 1 to 8
PB88 for group 12
4. Click Search.You are now on the Upgrade Drivers page. The following are descriptions for each section of theUpgrade Drivers page.
Upgrade Drivers page
• Upgrade Path. This field contains the upgrade path on which the section will be run.• Program Name. This is the Application Engine program that contains the section.• Group #. This is the group number. All sections with the same group number will be run during the samerun of the UPG_DATACONV Application Engine program.
• Section. This is the section that will be called from the UPG_DATACONV Application Engine program.• Sequence. This is the order in which the sections will be called during the run of UPG_DATACONVfor the group number.
• Active Flag. This field determines whether the section will be run. If the value of this field is Active, thesection will be run. If the value is Inactive, it will not be run. If you need to remove a section, change thevalue in this field to Inactive.
• Description.• Comments.
Task R-2-2: Adding New Upgrade Drivers Section PageFollow the instructions below to add a new section to the Upgrade Drivers page.
Note. To add a new section, the Application Engine program and section must exist on the Demo database.
To add a new section to the Upgrade Drivers page:
434 Copyright © 2007, Oracle. All rights reserved.

Appendix R Using Data Conversion Utilities
1. From your browser, sign on to the Demo database.2. Select Set Up HRMS, Upgrade, Data Conversion.3. Select Add a New Value.4. Click Add.5. Enter values for Upgrade Path and Program Name.6. Enter a value for Group #.
Note. Each group number corresponds to a data conversion step in the Change Assistant template. Ifyou select a group number that already exists in the PS_UPG_DATACONV table, your section will beexecuted when Change Assistant runs the data conversion step that corresponds to the group number youselected. Alternatively, if you assign a group number to your new section that does not already exist inPS_UPG_DATACONV, you must add a new step to your Change Assistant template. The new templatestep will have the same properties as the other data conversion steps, except for the group number specifiedin the step properties Parameters box.
7. Enter values for Section and Sequence.The Description and Comments fields are optional.
8. Click Save.9. When you have completed all changes, sign on to your Demo database using Data Mover and run thefollowing script to export the updated data conversion data:
DLUPX03E.DMS
10. Sign on to your Copy of Production database using Data Mover and run the following script to load theupdated data conversion data:
DLUPX03I.DMS
See the Enterprise PeopleTools PeopleBook: PeopleSoft Software Updates for your new release,Appendix: “Using a Change Assistant Template.”
Task R-2-3: Inactivating Upgrade Drivers SectionFollow the instructions below to deactivate a section on the Upgrade Drivers page. Once deactivated, thesection will not run as part of data conversion.
To inactivate a section on the Upgrade Drivers page:
1. From your browser, sign on to the Demo database.2. Select Set Up HRMS, Upgrade, Data Conversion.3. Enter your upgrade path:
HC88 for groups 1 to 8
PB88 for group 12
4. Click Search.5. Find the row with the Program Name and Section you want to remove and change the value of the ActiveFlag field to Inactive.
6. Click Save.
Copyright © 2007, Oracle. All rights reserved. 435

Using Data Conversion Utilities Appendix R
7. When you have completed all changes, sign on to your Demo database using Data Mover and run thefollowing script to export the updated data conversion data:
DLUPX03E.DMS
8. Sign on to your Copy of Production database using Data Mover and run the following script to load theupdated data conversion data:
DLUPX03I.DMS
Task R-3: Reviewing the Data Conversion ReportEach of the upgrade data conversion sections contains comments that describe the processing performed by thesection. PeopleSoft has delivered an SQR to list all of these comments by the group and sequence numbersthat determine how they run. The name of this report is UDATACNV.
To run UDATACNV:
1. Using SQRW, run SQR UDATACNV on your Copy of Production database.2. When prompted for Upgrade Path, enter:
HC88 for groups 1 to 8
PB88 for groups 12
3. When prompted for Group Number, enter the two-digit group number to report on, or enter 0 to seethe comments for all groups.
436 Copyright © 2007, Oracle. All rights reserved.

APPENDIX S
Using the Comparison Process
This appendix discusses:
• Understanding the Comparison Process
• Understanding Upgrade Compare Reports
Task S-1: Understanding the Comparison ProcessThis section discusses:
• Reviewing Source and Target Columns
• Reviewing the Action Column
• Reviewing the Upgrade Column
• Putting it All Together
During the upgrade you run a compare process and then review the resulting reports. The compare process firstcompares every property of an object definition on the source database to the properties of object definitionson the target database. The PeopleSoft system tracks object changes using the contents of the PSRELEASEtable, and the value of two fields, LASTUPDDTTM, and LASTUPDOPRID, used in the PeopleTools tables.
• The PSRELEASE table maintains the Comparison Release Level. This table contains rows of data forevery release level at which the database has ever existed. The first column in this table, RELEASEDTTM,contains a date/time stamp identifying when each release level was “stamped.” The second column,RELEASELABEL, identifies the release level. The format of a release label is M XX.XX.XX.YYY, whereM is the market code, XX is an integer from 0 to 99, and YYY is an integer from 0 to 999. A release labelhas two parts: the PeopleSoft release number (M XX.XX.XX) and the customer release number (YYY).Each time you customize your production database, you can stamp it with a new customer release levelto help you track your changes over time. You should not change any portion of the PeopleSoft releasenumber unless specifically instructed to do so.
• The LASTUPDDTTM field in our PSobjectDEFN tables—such as PSRECDEFN, PSPNLDEFN, and soon—stores a date/time stamp of when each object was last modified.
• The LASTUPDOPRID field stores the operator ID of the user who made the modification. If PeopleSoftmade the modification, the proprietary ID PPLSOFT is used.
Note. Maintain Security prevents you from creating an operator named PPLSOFT.
If an object definition is defined differently in the source database than in the target, the compare processwill check to see whether either object definition has changed since the comparison release. If the object’sLASTUPDDTTM value is greater than the RELEASEDTTM value for the comparison release level(stored in PSRELEASE), the object has changed. If the object’s LASTUPDDTTM value is equal to or less
Copyright © 2007, Oracle. All rights reserved. 437

Using the Comparison Process Appendix S
than RELEASEDTTM, the object has not changed (since the comparison release). Whether the comparedobject has changed or not, if it has ever been changed prior to the comparison release by someone otherthan PeopleSoft (LASTUPDOPRID <> ‘PPLSOFT’), the object is identified as a customization.After you run a compare report, you see the following information when you open an object type in theupgrade project from the Upgrade Tab of Application Designer. This is called the Application DesignerUpgrade Definition window.
Task S-1-1: Reviewing Source and Target ColumnsThe status of each object is reported as it appears on the Source database and the Target database. Thefollowing table explains the various status types:
Status Type Definition
Unknown The object has not been compared. This is the default statusfor all objects inserted manually into a project and thepermanent status of all non-comparison objects.
Absent The object was found in the other database, but not in thisone. When upgrading to a new PeopleSoft release, all ofour new objects should have Absent status in the Targetdatabase and all of your new objects should have Absentstatus in the Source database.
Changed The object has been compared, its LASTUPDOPRID valueis PPLSOFT, and its LASTUPDTIME value is greater thanthe date/time stamp of the comparison release database.In other words, PeopleSoft modified the object since thecomparison release.
Unchanged The object has been compared, its LASTUPDOPRID valueis PPLSOFT, and its LASTUPDTIME value is less thanor equal to the date/time stamp of the comparison releasedatabase. In other words, PeopleSoft last modified theobject prior to the comparison release.
*Changed The object has been compared, its LASTUPDOPRIDvalue is not PPLSOFT, and its LASTUPDTIME value isgreater than the date/time stamp of the comparison releasedatabase. In this case, the customer has modified the objectsince the comparison release.
438 Copyright © 2007, Oracle. All rights reserved.

Appendix S Using the Comparison Process
Status Type Definition
*Unchanged The object has been compared, its LASTUPDOPRID valueis not PPLSOFT, and its LASTUPDTIME value is less thanor equal to the date/time stamp of the comparison releasedatabase. In this case, the customer last modified the objectprior to the comparison release.
Same The object has been compared and is defined as the samein both databases. When an object in one database has thisstatus, so will its counterpart in the other database. Thisstatus would never be seen when performing a databasecomparison because in that case, the project is onlypopulated with objects defined differently. However, itcan occur when performing a project comparison becausein a project comparison, the project contents are static; theproject is not repopulated based on the comparison results.
Task S-1-2: Reviewing the Action ColumnThe default actions for each object that you compared are reported in the Action column. The compare sets theaction column based on what you need to do to make the Target database consistent with the Source. Youshould not change these actions. You can decide whether or not to accept each action by setting the Upgradevalue. Action types include:
Action Type Definition
Copy Object will be added to the Target database
Copy Prop (Records and Fields only) Object will be added to the Target database
Delete Object will be deleted from the Target database.
None No action will be taken on this object.
The PeopleSoft system assigns one of these action types to every object in a comparison project and in thecompare reports. However, these actions are not necessarily carried out during the copy process. The value ofthe Upgrade column for each object makes that determination.
Task S-1-3: Reviewing the Upgrade ColumnThe Upgrade values for each object – YES or NO – determine whether the object action will be carriedout during the copy process. The upgrade orientation you assign during the compare process determinesthese settings. You can orient the Upgrade to keep PeopleSoft changes or to retain your changes in thetarget database. Whichever orientation you choose, you will still have the option to set each Upgrade valueindividually before launching the copy process.
You may find that after the compare process, your project contains objects that show up as Unchanged onthe Demo database and Changed on the Copy of Production and the Upgrade column is not checked. Whatthis status combination means is that the PeopleSoft object on your Copy of Production was changed morerecently than on the Demo database. In these instances, PeopleSoft recommends that you accept the Demodatabase version of the object.
Copyright © 2007, Oracle. All rights reserved. 439

Using the Comparison Process Appendix S
Task S-1-4: Putting it All TogetherThe following chart summarizes every possible Status, Action, and Upgrade value that could be set by thecompare process to a single object:
Source Status Target Status Action PeopleSoft Vanilla KeepCustomizations
(Any) Absent COPY YES YES
Changed orUnchanged
DELETE YES YESAbsent
Changed* orUnchanged*
DELETE NO NO
Changed orUnchanged
COPY YES YESChanged
Changed* orUnchanged*
COPY YES NO
Changed COPY NO NO
Unchanged COPY YES YES
Unchanged
Changed* orUnchanged*
COPY YES NO
Changed orUnchanged
COPY NO YESChanged*
Changed* orUnchanged*
COPY YES YES
Changed orUnchanged
COPY NO YES
Changed* COPY NO NO
Unchanged*
Unchanged* COPY YES YES
Task S-2: Understanding Upgrade Compare ReportsThis section discusses:
• Reviewing Report Columns
• Using Reports
When you run the compare process, it creates reports to help you understand what objects differ between theSource and Target databases, and how they differ. If you have documentation of your database modifications,you should retrieve it before reviewing these reports. This will help you understand how the Target objects
440 Copyright © 2007, Oracle. All rights reserved.

Appendix S Using the Comparison Process
have changed and enable you to better compare the Target version of the object with the Source version. If youare upgrading to a new PeopleSoft release, you should also review the Release Notes for your product. Thesenotes will identify and explain object changes in the New Release Demo database.
Upgrade reports can be a little intimidating at first glance, until you understand what data you are looking forand how best to use it. This section includes information to help you use the reports.
Task S-2-1: Reviewing Report ColumnsFor the most part, the columns in upgrade reports correspond with the columns you see in ApplicationDesigner’s upgrade definition window. Moving from left to right, you see the Name of the object, then otherkey columns that vary by object type, then the Source and Target status, the Action value and Upgradeflag (Yes or No).
After these columns are three more that are not included in Application Designer. The first is Attribute. Thistells you the type of difference that was found between the two objects. For example, record field Attributevalues include Use/Edit, which identifies key or audit differences, and Default Field Name (Def. Fldnm),which identifies differences in a default value. Lastly, there is a Source column and a Target column. Thesewide columns display the actual differences between the object definitions. For example, on a Use/Editattribute recfield difference, the Source column might contain Xlat Table Edit while the Target column isempty. This means the Source record field has a translate table edit while the Target record field does not.
If you are unsure of the meaning of any value in the last three report columns, open the PeopleTool that editsthe particular object. The values in these columns correspond directly to dialog options in the tool.
Task S-2-2: Using ReportsOracle delivers several cross-reference reports that you can run to provide information about theinter-relationships between various objects. Oracle delivers these reports in the form of SQRs (found inPS_HOME\SQR), Crystal Reports (found in PS_HOME\CRW\ENG), and Queries.
The cross-reference reports include:
Object Type(s) Report Name Report Description
Applications and Fields XRFAPFL Lists all application windows, suchas General Tables, in alphabeticalorder, as well as the fields within eachwindow. For each field, the reportdetails the Field Name, Field Type,Length, and Format, as well as allthe record and page definitions thatcontain the field (within the window).
Fields Referenced by PeopleCodePrograms
XRFFLPC Lists all PeopleCode programs inalphabetical order by associatedrecord definition/field. The reportincludes type of field and lists allfields referenced in the PeopleCodeprogram.
Fields and Panels XRFFLPN Lists all fields in alphabetical order.The report includes the names of allrecord and page definitions in whicheach field is used, as well as the LongName of each field.
Copyright © 2007, Oracle. All rights reserved. 441

Using the Comparison Process Appendix S
Object Type(s) Report Name Report Description
Records and Fields XRFFLRC Lists all fields in alphabetical order.The report details the Long Name,Field Type, Field Length, andFormatting specified for the field,and includes the names of all recorddefinitions that contain the field.
Field Listing XRFIELDS Lists all fields in alphabetical order.The report includes Field Type,Length, Format, Long Name and ShortName.
Menu Listing XRFMENU Lists application windows inalphabetical order. The report detailsall menus within each window, and allpage definitions within each menu.It also includes the associated searchrecord definition name and detail pagedefinition name.
Panel Listing XRFPANEL Lists all page definitions inalphabetical order.
PeopleCode Programs and FieldReferences
XRFPCFL Lists record definitions that containfields with PeopleCode programattributes. The report includesthe Field Name, as well as theassociated record definitions andfields referenced in the PeopleCodeprogram.
Panels with PeopleCode XRFPNPC Lists all pages that contain fields withPeopleCode attributes. For each page,the report includes the name of therecord definition(s) that contain thefield as well as the Field Name andType.
Fields and Records XRFRCFL Lists all fields in alphabetical order byassociated record definition name. Thereport details the Long Name, FieldType, Field Length, and Formattingspecified for the field.
Records and Panels XRFRCPN Lists all record definitions inalphabetical order. The reportincludes the menu and page definitionsassociated with each record definition.
Window Listing XRFWIN Lists all application windows inalphabetical order.
442 Copyright © 2007, Oracle. All rights reserved.

Appendix S Using the Comparison Process
In addition to using our standard cross-reference reports, you can also generate ad hoc reports to extract theexact combination of information you need. Or, you can create permanent custom reports for informationyou extract on a regular basis.
Oracle recommends that you mark your upgrade reports using a color-coding system to help you quicklyidentify what you need to do to certain objects.
If you have several people reviewing sections of the reports, a good documentation policy is to have everyoneon your review cycle initial and date the action defaults and overrides they select.
You may also find it easier to change some objects manually after the upgrade, rather than copying thenew versions from the source.
Copyright © 2007, Oracle. All rights reserved. 443

Using the Comparison Process Appendix S
444 Copyright © 2007, Oracle. All rights reserved.

Index
AAbsence Management approvals,completing 29accumulators, obsoletedeleting 251reviewing 251
ADP_ACCT_CD_VW view,dropping 119AE SYNCIDGEN, running 170ALLTABS project, creating 144ALLTEMPTABS project, creating 144Alter Auditfinal, reviewing 189final, running 189running initial 13
alter tables script, running 147alter with deletes scriptbuilding 168running 169
alternative overtime upgrade,validating 246Alternative Overtime, setting values 37application audits, running 19application changes, preparing 117application conversion data,exporting 160application conversion data,importing 160Application Engine driver program,using 433application messagesexporting 155importing 156
application messagingobjects, deleting 101objects, saving 100
application processes, completing 183application serversconfiguring 162, 194granting administrator permissions 62updating REN servers 96
application system dataexporting 174importing 175
application tablespaces, creating 88
application upgrade, preparing 56applyingfixes after copying project 290fixes after data conversion 291fixes between upgrade passes 291fixes during installation 290fixes during Move to Production 292updates before data conversion 161UPGOPT project 6UPGOPTPB project 7upgrade planning files 6
appraisal approvals, upgrading 27Approval Framework definitionsexporting 177importing 177
approvals, preparing for upgrade 27assigning upgrade default values 36auditingcharacter length semantics 114disabled constraints 108duplicate length constraints 107long to LOB conversion 112
auditsAlter Audit 13ChartFields, running 25DDDAUDIT, final 188DDDAUDIT, initial 12final 188initial 11SYSAUDIT, final 188SYSAUDIT, initial 12
Bbacking upafter data conversion 168after PeopleTools upgrade 116after preparing your database 59after upgrade copy 140before conversion 163before manual changes 203before platform changes 104before testing 279Copy of Current Demo database 48demo databases 47new release demo again 136
Copyright © 2007, Oracle. All rights reserved. 445

Index
New Release Demo database 48base data, loading 93benefit program, understanding 321benefit rates, reviewing consolidation 324benefit record number display,reviewing 320benefitspreparing benefits administration forupgrade 29preparing COBRA administration forupgrade 30preparing for upgrade 29
buildingalter with deletes script 168tablespace alter script 92UPGOPT project 7UPGOPTPB project 8
CChange Assistantcreating new job 283editing multilingual step properties 71
change controlreviewing 278turning off 79
character length script 1, running 112character length script 2, running 113character length script 3, running 113character length script 4, running 113character length script 5, running 113character length script 6, running 114character length script 7, running 114character length script 8, running 114character length semantics, auditing 114ChartFields audit reports, running 25cloning US garnishment rules 270COBOLsetting PSOPTIONS for 179
COBRA administration, preparing forupgrade 30common portal system optionsexporting 176importing 176
company cars 320company cars, effective dating 320compare options, modifying 123compare reportscolumns 441modifying options 51reviewing 126
understanding 440using 441
comparingcustomizations 51new release 122running UPGCUST 52
comparison processdefault actions for objects 439settings for objects 440status of objects 438Upgrade column 439using 437
completingdata conversion 200
completing system setupexporting data 171, 173exporting EDI statements 172exporting mass change data 172importing data 171, 173importing EDI statements 172importing mass change data 173loading data 170
Configuration Manager profile,updating 63configuringapplication servers 162, 194Pay/Bill Management 264Portal 194Process Scheduler 162self-service payslip options 235upgrade environment 194
CONNECT ID, granting permissions 106connect ID, granting privileges to 74connector passwords, encrypting 98contacting global support 300Content Provider registryupgrading 276
content reference permissions,synchronizing 198control tables, populating 161conversionloading data 98reporting details 98running data conversion 99
conversion reports, reviewing 115conversion scriptsOracle, generating 109
convertingdatabase data types 102Integration Broker 99
446 Copyright © 2007, Oracle. All rights reserved.

Index
PeopleTools objects 96Portal objects 97query prompt headings 98
Copy of Current Demo databasebacking up 48restoring 54
Copy of Productioncreating 5testing 280
Copy of Production databasebacking up 116
Copy of Production database cache,deleting 418copy results, reviewing 130copyingEnterprise Portal database 417existing non-stable tables to file 16new non-stable tables to file 17PATCH84X project 86PATCH84XML project 87PPLTLS84CUR project 84PPLTLS84CURDEL project 86PPLTLS84CURML project 84PPLTLSML project 85production database 5projects 83PT84TBLSPC project 91Time and Labor temp table list 57translate values 56UPGCUST 130UPGCUSTIB 132UPGIBCOPY 134UPGNONCOMP 134
country extensionapplying individual non-rulepackages 226
country extensionsapplying consolidated non-rulepackage 224applying licensed rule package 214applying rule delete package 230applying the final rule package 219applying unlicensed rule package 216creating consolidated non-rulepackage 221creating final rule package 217creating individual non-rulepackages 222creating rule delete package 228creating rule packages 212
exporting HR rate codes 234finalizing rule delete process 233importing HR rate codes 235setting Store option for systemelements 234understanding upgrade 211updating install options 233
coverage calculations, reviewingconsolidation 325create and alter scriptsbuilding 145editing 145
create indexes script, running 169create tables scriptrunning 146
create temp tables scriptbuilding 144running 146
create triggers script, running 169create upgrade tables scriptbuilding 142
CREATEVW, running 170creatingall views 170ALLTABS project 144ALLTEMPTABS project 144application tablespaces 88copy of RecField definitions 57country extensions rule packages 212custom tablespaces 139FNLALTAUD project 189indexes 147INITALTAUD project 13Integration Broker objects 100Microsoft conversion project 105new Change Assistant job 283new tablespaces 138Oracle audit tables 107Oracle-delivered tablespaces 138PPLTOOLS views 99RUNSTATS.DAT 78target Enterprise Portal project 419temporary performance indexes 76updated PeopleTools views 99UPGIBCOPY 133US custom garnishment rules 270
customizationscomparing 51identifying 54reapplying 195
Copyright © 2007, Oracle. All rights reserved. 447

Index
customized objectsadjusting 196
customizingnew release 130template built rules 257
Ddatabase data, loading 93conversion data, loading 98data conversion, running 99English messages, loading 94English string data, loading 95language data, loading 94MCF data, populating 96PeopleTools data, loading 94stored statements data, loading 95
data conversionapplying updates before 161backing up after 168creating indexes 149dropping indexes 148dropping triggers 148loading data 154loading data for PeopleTools 98reporting details 98running for application changes 163running for group 1 166running for group 12 166running for group 2 167running for group 3 167running for group 4 167running for group 7 167running for group 8 167running for PeopleTools changes 99understanding 163
data conversion driver dataexporting 160importing 160
data conversion report 436data conversion, completing 200data model definitions, loadingDB2 UNIX/NT 80DB2 z/OS 80Informix 80Oracle 80SQL Server 81Sybase 81understanding 80
data type steps, editing 72
databaseincreasing space 5
database cachedeleting from Copy of Production 418
database data types, converting 102database options flag, resetting 77database options, updating 115database servers, backing up 116database structurefinalizing 168modifying 141
databasespreparing for the upgrade 44stamping 278updating overrides 136verifying integrity 44
DB2editing upgrade planning scripts 9
DB2 UNIXgenerating final RUNSTATS 181running final statistics 181
DB2 UNIX RUNSTATS script,generating 153DB2 UNIX/NTloading data model definitions 80rerunning RUNSTATS 78updating statistics 78
DB2 z/OSbacking up database 142editing create table scripts 67editing MTP import scripts 68loading data model definitions 80running final statistics 182updating statistics 78
DB2TMPIDXCREATE script 76DBTSFIX output scriptsediting 65running 74
DBTSFIX script, running 64DDDAUDIT scriptfinal, running 188running initial 12
DDLDB2 scriptediting 69running 80
DDLDBX scriptediting 70running 80
DDLIFX scriptediting 70
448 Copyright © 2007, Oracle. All rights reserved.

Index
running 80DDLMSS script, running 81DDLORA scriptediting 70running 80
DDLSYB script, running 81default values, assigning 36defining, testing strategy 302deletingapplication messaging objects 101Copy of Production database cache 418node transactions 101obsolete accumulators 251Pagelet Wizard Common Componentsdata 58
department security, updating 201dependent information, effectivedating 320developingtest plan 305test scripts 306
disabled constraints, auditing 108drop table script, running 117droppingADP_ACCT_CD_VW view 119personal data view 119triggers for data conversion 148
dropping PeopleTools tables 45duplicate length constraints, auditing 107
EEDI tables, identifying 54editingdata type steps 72DB2 z/OS create table scripts 67DB2 z/OS MTP import scripts 68DBTSFIX output scripts 65DDLDB2 script 69DDLDBX script 70DDLIFX script 70DDLORA script 70GRANT script 66Integration Broker script 71Move to Production import scripts 68MSGTLSUPG script 70multilingual step properties 71MVPRDIMP script 69PPLTLS84CURTABLES script 90PSLANGUAGES script 66PTxxxTLS scripts 66
system data scripts 174tablespace alter script 92TLSUPGNONCOMP script 66upgrade planning DB2 scripts 9
EE Garn Payee Data Validation Report,running 265effective dating 320dependent information 320
encrypting connector passwords 98Enterprise Portalcopying database 417upgrading PeopleTools 417
Enterprise Portal project, targetcreating 419
ePerformance approvals, completing 28eProfile approvals, completing 28Expenses ChartField mappings, settingup 263exportingapplication conversion data 160application messages 155application system data 174Approval Framework definitions 177common portal system options 176data conversion driver data 160generic notifications 178GL interface setup tables 184Global Payroll Switzerland taxrates 178new release objects 135node transactions 101Pagelet Wizard application data 158Pagelet Wizard data 158PATCH84X project 86PATCH84XML project 87Pay/Bill Management non-stabletables 18Pay/Bill Management stable tables 17payroll interface tables 184PeopleTools system tables 77PPLTLS84CUR project 84PPLTLS84CURDEL project 86PPLTLS84CURML project 84PPLTLSML project 85project definitions 118projects 83PT84TBLSPC project 91record groups 156related language system data 173rules setup data 183
Copyright © 2007, Oracle. All rights reserved. 449

Index
selected PeopleTools tables 131setup data 176system data for upgrade path 175system setup data 157upgrade default options 43upgrade defaults 159US custom garnishment rules 186
Ffieldsrenaming 48
fields for Microsoft SQL Server 120file serversediting PTxxxTLS scripts 66
final audit reports, running 188fixesapplying after copying project 290applying after data conversion 291applying between upgrade passes 291applying during installation 290applying during Move toProduction 292
FNLALTAUD project, creating 189functional decisions, making 36
Ggarnishment payee dataupdating 266validating 265
garnishment payee data, correcting 21garnishment rule datarunning report 271updating 273validating 271
garnishment rulesexporting 186importing 186US custom, creating 270US custom, setting up 269US, cloning 270
garnishment rules changes,understanding 369garnishments upgrade, understanding 367General Ledger activity groupings, settingup 262General Ledger interface, setting up 260generatingDB2 UNIX RUNSTATS script 153final RUNSTATS 181
Microsoft conversion scripts 106Oracle conversion scripts 109PPLTLS84CURTABLES script 90
generic notificationsexporting 178importing 178
getting started 2GL interface setup tablesexporting 184importing 185
Global Payrollsetting up for France 242setting up for Switzerland 236upgrading country extensions 210verifying 19verifying record and record-fieldreferences 250
Global Payroll Packager 252Global Payroll settings, auditing 35Global Payroll Switzerland tax ratesexporting 178importing 179
global support, contacting 300GRANT scriptediting 66running 74
grantinghome page personalization access 199privileges to connect ID 74
granting permissionsCONNECT ID 106
Hhome page personalization access,granting 199HR default values, assigning 42HR ethnicities, loading 118
Iidentifyingcustomizations 54EDI tables 54mass change 54
images, shrinking 46importingapplication conversion data 160application messages 156application system data 175Approval Framework definitions 177
450 Copyright © 2007, Oracle. All rights reserved.

Index
common portal system options 176data conversion driver data 160DB2 z/OS-specific information 68generic notifications 178GL interface setup tables 185Global Payroll Switzerland taxrates 179new release non-stable projectdefinition 16new release objects 135Pagelet Wizard application data 158Pagelet Wizard data 159payroll interface tables 184PeopleTools system tables 77previous release non-stable projectdefinition 16project definitions 119record groups 156related language system data 174rules setup data 183selected PeopleTools tables 132setup data 176Staffing Front Office project 140system data for upgrade path 175system setup data 158upgrade default options 11upgrade defaults 159US custom garnishment rules 186
increasing space, log file and database 5index parameterssetting 152
indexescreating 147dropping for data conversion 148parameters, setting after copy 137reviewing the create indexes log 148temporary performance, creating 76
Informixloading data model definitions 80running final statistics 182updating statistics 78
INITALTAUD project, creating 13initial auditsreviewing 14running 11
installation, applying fixes during 290Integration Brokerconverting 99defaults, updating 100deletes, preparing 101
objects, creating 100Integration Broker script, editing 71integration testing 303
Jjobs, updating for GP Packager 252
Llanguage data, updating 186language system dataexporting related 173importing related 174
languagesloading data 94populating 93swapping on system data 155
liability accounts, setting up 260license code, updating 75loadingbase data 93conversion data 98data for data conversion 154data model definitions 79data to complete system setup 170English messages 94English string data 95HR ethnicities 118language data 94message data 81noncomparable objects 94PeopleTools data 94PeopleTools definition securitygroup 95planning messages and strings 10Staffing Front Office data 15stored statements 179stored statements data 95system messages 81
local message node, preserving 123logreviewing for pagelet and collectionissues 200
log file, increasing space 5long data audit, running 104long to LOB conversion, auditing 112long to LOB script 1, running 110long to LOB script 2, running 111long to LOB script 3, running 111long to LOB script 4, running 111
Copyright © 2007, Oracle. All rights reserved. 451
Index
long to LOB script 5, running 111long to LOB script 6, running 111long to LOB script 7, running 112long to LOB script 8, running 112
Mmass change, identifying 54message dataloading 81loading English messages 94
message data, cleaning up 73message queues, purging 47Microsoft conversion project,creating 105Microsoft conversion report, running 106Microsoft conversion scripts,generating 106Microsoft conversion scripts, running 106Microsoft database, validating 104Microsoft settings, reviewing 105Microsoft SQL Server, renaming fieldsfor 120Microsoft SQL Server, reversing renamesfor 57migrating records 91model definitions, See data modeldefinitionsmodifyingcompare options 123compare report options 51database structure 141post process formulas 249user exit rules 259
Move to Productionediting import scripts 68editing password 69performing 284testing 281understanding 282
MSGTLSUPG script, editing 70MultiChannel Framework (MCF) data 96multilingual step properties, editing 71multiple distributions, finding 34MVPRDIMP script, editing 69
NNew Copy of Production databaseimporting data 68
new release
exporting objects 135importing objects 135
new release databasebacking up again 136
new release demorestoring 161
New Release Demo databasebacking up 48
node transactionsdeleting 101exporting 101
non-comparable objects, reviewing 127non-stable project definitionimporting previous release 16
non-stable project definition, importingnew release 16notes and tips, for your upgrade 3
Oobject version numberssetting 102updating 187
object version numbers, resetting 135Operator Security Join Table,refreshing 202Oracleloading data model definitions 80running final statistics 182updating statistics 79
Oracle audit tables, creating 107Oracle conversion scripts, generating 109Oracle database, validating 107Oracle settings, reviewing 108
Ppagelet and collection log 200pagelet publishing, enabling 201Pagelet Wizardexporting application data 158exporting data 158importing application data 158importing data 159
Pagelet Wizard Common Components data,deleting 58parallel testing 304password, Move to Production 69passwords, encrypting connectorpasswords 98patch information, updating 76
452 Copyright © 2007, Oracle. All rights reserved.

Index
PATCH84X project 86PATCH84XML project 87Pay/Bill Managementconfiguring 264setting up rapid time prompts 264setting up staffing installationvalues 264
Pay/Bill Management non-stable tables,exporting 18Pay/Bill Management stable tables,exporting 17payee changes, understanding 367payroll accumulators, deletingobsolete 251Payroll Interface Definitions,updating 246payroll interface tablesexporting 184importing 184
PeopleSoft upgrade survey 284PeopleToolsdata, loading 94definition security group, loading 95exporting system tables 77functionality 275importing system tables 77objects, converting 96objects, reviewing 81re-exporting tables 314script 90swap script, editing 59tables, dropping 45updating patch information 76updating system tables 72upgrade, backing up after 116upgrading Enterprise Portal 417
PeopleTools conversioncompleting 187
PeopleTools tablesexporting 131importing 132swapping languages 132
performanceimproving for your platform 298testing 304tips for creating and altering SQL 298tips for data conversion 298tips for DB2 299tips for modify database structures 298tips for Oracle RDBMS 299
permission listsupdating Portal registry 418
permissions listsunderstanding registry updates 417
person model conversion method,defining 42person organization audits, running 209person relationship audit report,running 23personal data table, refreshing 183PI Field Definition Table, updating 248PI Instance Table definitions,updating 249PIN element numbers, verifying 35planning scripts, running 10platform changes, backing up before 104Portalconfiguring 194converting objects 97running security synchronization 198
Portal navigation objects, registering 196portal options data, updating 277Portal registryupdating permission lists 418
post process formulas, modifying 249PPLTLS84CUR project 84PPLTLS84CURDEL project 86PPLTLS84CURML project 84PPLTLS84CURTABLES scriptediting 90generating 90running 91
PPLTLSML project 85preparingapplication upgrade 56for the upgrade 44Integration Broker deletes 101record field for deletion 30system element for deletion 30
preservingqueries and trees 311
preserving, local message node 123Process Schedulerconfiguring 162
process, updating for GP Packager 253product license code, updating 75production databaseidentifying empty tables 44
production database, copying 5ProfileManagement, assigning options 40
Copyright © 2007, Oracle. All rights reserved. 453

Index
project definitionsexporting 118importing 119
projectsexporting and copying 83INITALTAUD 13PATCH84X 86PATCH84XML 87PPLTLS84CUR 84PPLTLS84CURDEL 86PPLTLS84CURML 84PPLTLSML 85PT84TBLSPC 91
PS Table definitions, updating 248PSLANGUAGES scriptediting 66running 93
PSOBJCHNG table, cleaning 45PSOPTIONSsetting for COBOL 179
PT84TBLSPC project 91PTUPGCONVERT 187PTUPGCONVERT program 99PTxxxTLS scriptsediting 66running 93
Qqueries, preserving 311query prompt headings, converting 98
Rrapid time prompts, setting up 264re-creatingtriggers 147
reapplying customizations 195RecField definitions, creating a copy 57recompiling, template built rules 255record and record-field references 250verifying in Global Payroll 250
record field, preparing for deletion 30record groupsexporting 156importing 156
record parameterssetting 153
recordsmigrating 91renaming 48
setting parameters after copy 137Recruiting Solutionsassigning defaults 39
registering Portal navigation objects 196registry permission lists, understandingupdates 417registry, upgrading Content Provider 276regression testing 305relationship usage, reviewingchanges 321REN servers, updating configuration 96renamed tables scriptbuilding 143running 143
renames, reversing for Microsoft SQLServer 57renaming 120fields 48records 48tables 120
reporting conversion details 98reportsrunning person relationship 23upgrade, running 19upgrade, understanding 20
reports and interface setup, reviewing 34resettingaction flags in UPGCUST 125database options flag 77object version numbers 135
restoringCopy of Current Demo database 54new release demo 161
retaining target rename log files 50Retiree Additional Pay Reportrunning UVPYT05.SQR 206running UVPYT06.SQR 207running UVPYT07.SQR 207
retirees with payconverting 203rebuilding job flags 208running Retiree Additional Pay ReportUVPYT05.SQR 206running Retiree Additional Pay ReportUVPYT06.SQR 207running Retiree Additional Pay ReportUVPYT07.SQR 207running upgrade conversion 208understanding conversion 203
reviewing
454 Copyright © 2007, Oracle. All rights reserved.

Index
Alter Audit, final 189change control 278conversion reports 115copy results 130create indexes log 148initial audits 14Microsoft settings 105new release changes 126new release compare reports 126non-comparable objects 127obsolete accumulators 251Oracle settings 108PeopleTools functionality 275PeopleTools objects 81reports and interface setup 34UPGCUST compare log 54UPGCUSTIB copy results 135UPGIBCOPY copy results 135UPGNONCOMP copy results 135user exit rules 259
RNHCGPI02 scriptrunning 49running on Copy of Current Demo 50
RNHCUPI01 scriptrunning 50running on Copy of Current Demo 50
rules setup dataexporting 183importing 183
rules, upgrading 254runningAlter Audit, final 189Alter Audit, initial 13alter tables script 147alter with deletes script 169application audits 19audits 188character length script 1 112character length script 2 113character length script 3 113character length script 4 113character length script 5 113character length script 6 114character length script 7 114character length script 8 114create indexes script 147create tables script 146create temp tables script 146create triggers script 169
data conversion, for applicationchanges 163data conversion, for PeopleToolschanges 99DB2TMPIDXCREATE script 76DBTSFIX output scripts 74DBTSFIX script 64DDDAUDIT script, final 188DDDAUDIT script, initial 12DDLDB2 script 80DDLDBX script 80DDLIFX script 80DDLMSS script 81DDLORA script 80DDLSYB script 81dropped temp tables report 254EE Garn Payee Data ValidationReport 265final statistics for DB2 UNIX 181final statistics for DB2 z/OS 182final statistics for Informix 182final statistics for Oracle 182final update statistics 181garnishment rule data report 271GRANT script 74initial audits 11long data audit 104long to LOB script 1 110long to LOB script 2 111long to LOB script 3 111long to LOB script 4 111long to LOB script 5 111long to LOB script 6 111long to LOB script 7 112long to LOB script 8 112Microsoft conversion report 106Microsoft conversion scripts 106new release UPGCUST 125new release UPGCUSTIB 125new release upgrade copy 131person organization audits 209Portal security synchronization 198PPLTLS84CURTABLES script 91PSLANGUAGES script 93PTUPGCONVERT program 99PTxxxTLS scripts 93row count report 44SETINDEX script 137, 190SETSPACE script 137SETTABLE script 137, 190
Copyright © 2007, Oracle. All rights reserved. 455

Index
STOREBAS script 180STOREGP script 180STOREHRM script 180STOREPAY script 180STOREPEN script 180STOREPYI script 181SYSAUDIT script, final 188SYSAUDIT script, initial 12tablespace alter script 92TLSUPGNONCOMP script 94TSRECPOP script 187UPGCOUNT script 44UPGCUST 52UPGCUST filter script 53upgrade planning scripts 10upgrade reports 19
RUNSTATS.DAT, creating 78
Ssavingapplication messaging objects 100
savings management enhancements,reviewing 321schedules, assigning defaults 38scriptsDB2 z/OS create table scripts 67DB2 z/OS MTP import scripts 68DB2TMPIDXCREATE 76DBTSFIX, editing 65DBTSFIX, running 64DDDAUDIT 12DDLDB2, editing 69DDLDB2, running 80DDLDBX, editing 70DDLDBX, running 80DDLIFX, editing 70DDLIFX, running 80DDLMSS, running 81DDLORA, editing 70DDLORA, running 80DDLSYB, running 81DHC8X01DMS 156editing DB2 upgrade planning 9GRANT 74GRANT, editing 66Integration Broker 71MSGTLSUPG 70MVPRDIMP 69PeopleTools 90PPLTLS84CURTABLES 90
PSLANGUAGES 93PSLANGUAGES, editing 66PTxxxTLS scripts 93PTxxxTLS scripts, editing 66running ALLTABS_ALTTBL 147running ALLTABS_CRTTBL 146running RNHCUPH02DB2 121running RNHCUPH02DBX 121running RNHCUPH02IFX 121running RNHCUPH02MSS 121running RNHCUPH02ORA 122running RNHCUPH02SYB 122SETINDEX 137SETSPACE 137SETTABLE 137SYSAUDIT 12TLSUPGNONCOMP 94TLSUPGNONCOMP, editing 66UPGCOUNT 44
securitygranting home page personalizationaccess 199loading PeopleTools definition securitygroup 95running Portal securitysynchronization 198setting up 197setting up, upgrade planning 9synchronizing content referencepermissions 198understanding setup 197
Security Join Tables, refreshing 202self-service payslip options,configuring 235serversapplication servers 162, 194database servers 116file servers 66REN servers 96
SETINDEX script 137, 190SETSPACE script 137SETTABLE script 137, 190setting 102index parameters 137object version numbers 102PSOPTIONS for COBOL 179record parameters after copy 137tablespace names 137
setting upGlobal Payroll for France 242
456 Copyright © 2007, Oracle. All rights reserved.

Index
Global Payroll for Switzerland 236rapid time prompts 264security 197security for upgrade planning 9staffing installation values 264US custom garnishment rules 269
settingsMicrosoft, reviewing 105Oracle, reviewing 108
setup dataexporting 176importing 176
shrinking images 46single signon, setting up 194software installationverifying 2
spending account changes, reviewing 322SQL Serverloading data model definitions 81
Staffing Front Office data, loading 15Staffing Front Office project,importing 140staffing installation values, setting up 264stamping the database 278startingapplication servers 194
statisticsDB2 UNIX/NT, updating 78DB2 z/OS, updating 78Informix, updating 78Oracle, updating 79running final 181updating 11
STOREBAS script, running 180stored statements data, loading 95stored statements, loading 179STOREGP script, running 180STOREHRM script, running 180STOREPAY script, running 180STOREPEN script, running 180STOREPYI script, running 181string data, loading 95support, contacting 300Sybaseloading data model definitions 81
synchronizing content referencepermissions 198SYSAUDIT scriptrunning final 188running initial 12
systemmessages, loading 81tables, exporting 77tables, importing 77
system catalog views, updating 74system dataexporting for upgrade path 175importing for upgrade path 175
system data scripts, editing 174system data swap script, editing 59system elementfinding to delete 33preparing for deletion 30view relationships 32
system setup dataexporting 157importing 158
system testing 303
Ttablesmoving to new tablespaces 92PeopleTools system tables, updating 72PeopleTools, dropping 45PSOBJCHNG 45renaming 120running drop script 117running row count report 44system tables, exporting 77system tables, importing 77
tablespacesalter script 92alter script, building 92alter script, editing 92creating custom 139creating new 138creating Oracle-delivered 138migrating records to 91populating data 87setting names 137, 152setting names for temporary tables 152updating names 89
target rename log files, retaining 50target values, updating 134template built rulescustomizing 257recompiling 255
temporary tables, setting tablespacenames 152test plan, developing 305
Copyright © 2007, Oracle. All rights reserved. 457

Index
test scripts, developing 306testingafter the upgrade 284backing up before 279Copy of Production 280determining conditions 305evaluating requirements 302integration 303Move to Production 281parallel environments 304performance 304regression 305system 303tips and techniques 307unit 303user acceptance 304
testing strategydefining 302determining conditions 305when to test 301
TLSUPGNONCOMP scriptediting 66running 94
training employee record defaults,assigning 43transaction records, refreshing 202translate values, creating copy 56Tree/Query Copy of Productioncomparing project 313copying project 314creating project in 312preparing database 312
trees, preserving 311triggersdropping for data conversion 148
triggers, re-creating 147TSRECPOP script, running 187turning off change control 79
Uunit testing 303updatesapplying before data conversion 161
updates for 252updatingConfiguration Manager profile 63database options 115database overrides 136garnishment payee data 266garnishment rule data 273
Integration Broker defaults 100job definitions for GP Packager 252language data 186object version numbers 187Payroll Interface Definitions 246PeopleTools patch information 76PeopleTools system tables 72portal options data 277process definition for GP Packager 253product license code 75REN server configuration 96statistics for DB2 UNIX duringapplication changes 153statistics for DB2 UNIX/NT 78statistics for DB2 z/OS 78statistics for DB2 z/OS during applicationchanges 154statistics for Informix 78statistics for Informix during applicationchanges 154statistics for Oracle 79statistics for Oracle during applicationchanges 154statistics, initial 11system catalog views 74tablespace names 89target values 134
updating statisticsDB2 UNIX/NT 78DB2 z/OS 78Informix 78Oracle 79
UPGCOUNT script, running 44UPGCUSTcopying 130resetting action flags 125reviewing compare log 54running a compare 52running filter script 53running new release 125
UPGCUSTIBcopying 132reviewing copy results 135running filter script 125running new release 125
UPGCUSTIB filter script 125UPGIBCOPYcopying 134creating 133reviewing copy results 135
458 Copyright © 2007, Oracle. All rights reserved.

Index
UPGNONCOMPcopying 134reviewing copy results 135
UPGOPT projectapplying 6applying Pay/Bill Management 7building 7
UPGOPTPB project, building 8upgradecompare reports, understanding 440configuring environment 194database preparation 2databases, defined 3default values, assigning 36getting started 2notes and tips 3PeopleTools, backing up after 116planning for performance 297preparing for 44reports, running 19setting up upgrade planning security 9user, verifying 62
upgrade copy, running 131upgrade default optionsexporting 43importing 11
upgrade defaultsexporting 159importing 159
Upgrade Defaults dialog, opening 37Upgrade Drivers pageaccessing 433adding new section 434inactivating section 435
upgrade planning files, applying 6upgrade tables scriptrecreating 143
upgradingContent Provider registry 276Enterprise Portal PeopleTools 417Global Payroll country extensions 210rules 254
US garnishment rulescloning 270creating 270setting up 269
user acceptance testing 304user exit rulesmodifying 259
user interface
changing for desktop computers 293changing for mobile devices 295
usingApplication Engine Driverprogram 433
VValidate PI Field References Report,running 247validatinggarnishment payee data 265garnishment rule data 271Microsoft database 104Oracle database 107
verifying 250database integrity 44Global Payroll 19PIN element numbers 35software installation 2upgrade user 62
version numberssetting 102updating 187
viewscreating all 170creating PPLTOOLS 99
Copyright © 2007, Oracle. All rights reserved. 459

Index
460 Copyright © 2007, Oracle. All rights reserved.