Embed Size (px)
Citation preview

DIY STEMTHE SCIENCE OF EVERY DAY
Important Guidelines for Photocopying
Limited permission is granted free of charge to photocopy all pages of this program manual. Under no circumstances is it permissible to sell or distribute on a commercial basis multiple copies of material reproduced from this publication.
Copyright © 2016 Boys & Girls Clubs of America
All rights reserved. Printed in the United States of America.
Boys & Girls Clubs of America National Headquarters 1275 Peachtree St. NE Atlanta, GA 404-487-5700 BGCA.org

3
DIY STEM THE SCIENCE OF EVERYDAY FACILITATOR’S GUIDE
TABLE OF CONTENTS
Introduction........................................................................... 4
Guided Activities
Unit 1 – Energy and Electricity........................................ 8
Unit 2 – Engineering Design ............................................ 19
Unit 3 – Food Chemistry ................................................... 39
Unit 4 – Intro to Aeronautics ............................................ 50
Unit 5 – The Science of Sports ........................................ 61
Appendix ............................................................................... 86
Appendix A: Sample Implementation Schedules ............. 87
Appendix B: Materials List with Estimated Costs ............. 89
4
DIY STEM THE SCIENCE OF EVERYDAY FACILITATOR’S GUIDE
INTRODUCTION
WHAT IS DIY STEM?
Welcome to DIY STEM, an activity-based program for 9-12 year olds that helps them make connections between scientific principles and real-world applications. This low-cost program can be run using common items that Clubs may have on hand, or can procure easily to demonstrate STEM concepts in each thematic unit. Since piloting in 2014, Do it Yourself (DIY) STEM has quickly become the go-to STEM resource for Clubs. Using everyday materials, the current four units allow youth of all ages to explore science concepts like engineering design, chemistry, energy/electricity and aeronautics. The DIY STEM program is ideal for Clubs interested in introducing STEM in the Club environment. You can implement the whole program or take it apart and create your own set of experiments. Each unit comes with Next Generation Science Standards (NGSS)-aligned background, guides, instructional videos and extension questions to further the fun and learning!
• Energy and Electricity – Hands-on experiences with common applications of energy including how to use electricity in electromagnets, motors, speakers, power robots and light bulbs.
• Engineering Design – Practical exposure to the application of engineering in the world using the engineering design process to design water filters, build stable bridges to hold specified amounts or weights, and design rockets powered by pressure.
• Food Chemistry – Experiments with chemical reactions from a combination of different ingredients to create products to eat and develop experiments that can be explosive including rock candy and rockets powered by Mentos and soda.
• Intro to Aeronautics – Common applications of the four forces of aeronautics from designing pop, straw and effervescing rockets with ordinary products and ingredients to constructing rockets designed to carry specified payloads.
• The Science of Sports – Use football to introduce youth to scientific concepts including the impact of nutrition on an athlete’s body system, how weather can influence performance and the way sound waves travel in a loud stadium.
The goal of the DIY STEM program is to promote interest and awareness of STEM among traditionally underserved groups, including girls and young people of color. Exposure to science, technology, engineering and math is critical during the tween years when Club members’ natural curiosity drives interest and builds capacity for success in these disciplines. This is an ideal time to engage Club members who might otherwise not have access to STEM experiences in these simple, FUN, hands-on activities.
5
DIY STEM THE SCIENCE OF EVERYDAY FACILITATOR’S GUIDE
DIY STEM: ALIGNMENT TO NEXT GENERATION SCIENCE STANDARDS (NGSS)
What are NGSS and why do they matter to Club professionals?
The NGSS are part of academic initiatives by multiple states that work to align educational content to academic expectations in terms of rigor and overall student interest in the sciences. The organizations and leaders in the scientific community who were involved in the development of the standards sought to focus on college and career readiness in science so that more young people would be interested in science and technology in college. With the implementation of NGSS, young people will see practical hands-on science concepts implemented in their learning environments so they can delve deeper into critical concepts. Content aligned to these standards will get Club members more involved in inquiry-based learning, critical thinking and practical knowledge of key science and technology concepts. Youth are encouraged to create and test hypotheses about science and technology concepts and develop their mental skill set so they are more engaged in the evaluation of scientific evidence. In addition to focusing on engineering design and scientific inquiry-based learning, the NGSS also describe performance expectations for youth at each grade level so they know what is required of them to show they have mastered scientific concepts.
As more schools and after-school programs implement STEM programs to encourage the natural implementation of science, technology, engineering and mathematics, the NGSS incorporate a laser-like focus on the practices of scientists and engineers. This focus on STEM in the NGSS encourages schools and after-school programs to give students opportunities to engage with science and technology in a manner that makes sense to them and gives them practical opportunities to apply the knowledge they are learning. Moreover, the NGSS seek to clarify for young people why the concepts they are learning in STEM activities have relevance in their daily lives. Furthermore, the increased emphasis on the practicality of science and technology for young people through hands-on STEM activities will ultimately ensure that more of them are college- and career-ready and have the ability to become critical thinkers about scientific principles.
What are the NGSS in each unit and where will you find them?
The NGSS are listed at the beginning of each activity. These standards guide Club facilitators in terms of what is expected of members at the end of each activity.
6
DIY STEM THE SCIENCE OF EVERYDAY FACILITATOR’S GUIDE
IMPLEMENTING DIY STEM IN YOUR CLUB
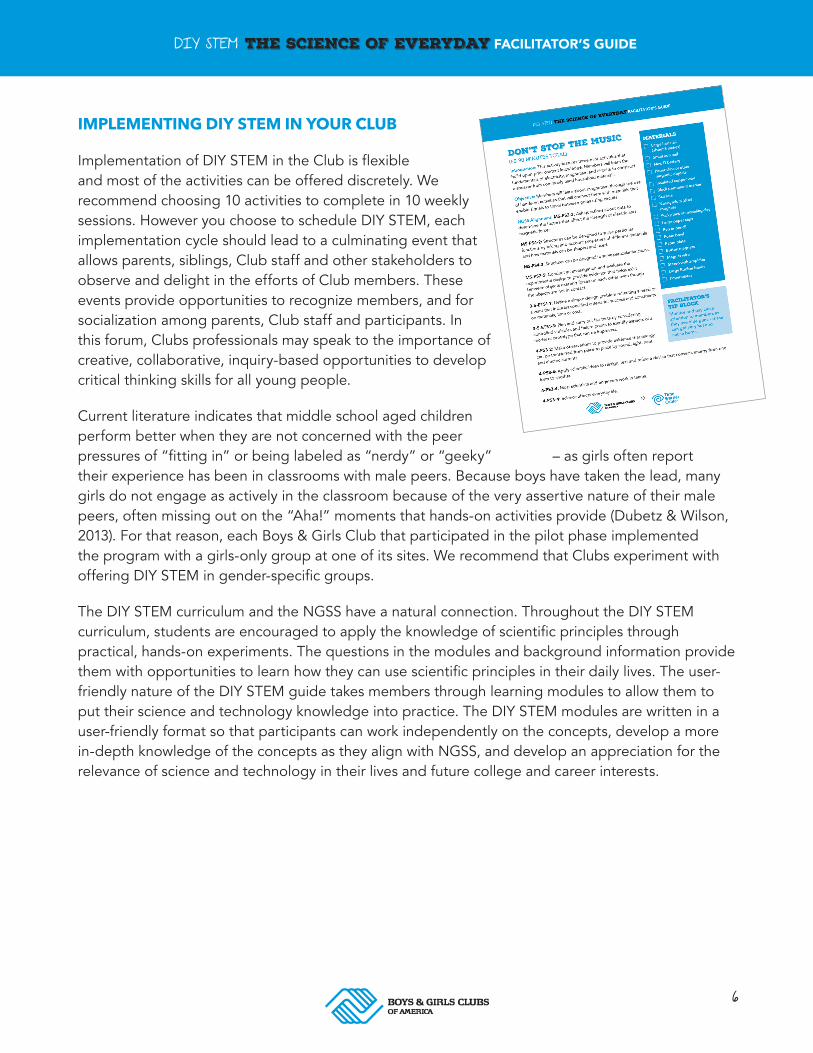
Implementation of DIY STEM in the Club is flexible and most of the activities can be offered discretely. We recommend choosing 10 activities to complete in 10 weekly sessions. However you choose to schedule DIY STEM, each implementation cycle should lead to a culminating event that allows parents, siblings, Club staff and other stakeholders to observe and delight in the efforts of Club members. These events provide opportunities to recognize members, and for socialization among parents, Club staff and participants. In this forum, Clubs professionals may speak to the importance of creative, collaborative, inquiry-based opportunities to develop critical thinking skills for all young people.
Current literature indicates that middle school aged children perform better when they are not concerned with the peer pressures of “fitting in” or being labeled as “nerdy” or “geeky” – as girls often report their experience has been in classrooms with male peers. Because boys have taken the lead, many girls do not engage as actively in the classroom because of the very assertive nature of their male peers, often missing out on the “Aha!” moments that hands-on activities provide (Dubetz & Wilson, 2013). For that reason, each Boys & Girls Club that participated in the pilot phase implemented the program with a girls-only group at one of its sites. We recommend that Clubs experiment with offering DIY STEM in gender-specific groups.
The DIY STEM curriculum and the NGSS have a natural connection. Throughout the DIY STEM curriculum, students are encouraged to apply the knowledge of scientific principles through practical, hands-on experiments. The questions in the modules and background information provide them with opportunities to learn how they can use scientific principles in their daily lives. The user-friendly nature of the DIY STEM guide takes members through learning modules to allow them to put their science and technology knowledge into practice. The DIY STEM modules are written in a user-friendly format so that participants can work independently on the concepts, develop a more in-depth knowledge of the concepts as they align with NGSS, and develop an appreciation for the relevance of science and technology in their lives and future college and career interests.
7
DIY STEM THE SCIENCE OF EVERYDAY FACILITATOR’S GUIDE
DIY STEM – GUIDE, INSTRUCTIONAL VIDEOS AND KITS
The NGSS are found at the beginning of each activity. These standards guide the Club facilitators in terms of what is expected of members at the end of each activity.
The DIY STEM program includes the following components:
• Four STEM units connected to NGSS, with two to four hands-on activities with extension questions
• Ready-to-go material kits for the units to help save your Club time and money
• Short, engaging instructional videos for each of the units and selected activities to bring staff up to speed quickly
• Featured STEM professional development guides to help staff better engage youth in STEM activities
NOTE ABOUT THE DIY STEM KITS AND MATERIALS:
The instructional videos will be available online in June 2016.
Our DIY STEM kits will be available in test markets in Summer 2016 and will be available Movement-wide at the end of 2016. The DIY STEM kits will contain a majority of the items listed in each individual unit and priced in the Appendix at a significant discount for Clubs who would traditionally have to purchase all of these items individually.
Materials for DIY STEM come in two main categories: Common Consumables and Activity-Specific. Common Consumables are those materials that can be used across many activities. You may have to replenish these materials depending on how often you use them in the activities. Activity-Specific materials are those that may be used specifically for an activity within a unit.
There’s a detailed list of the individual rough purchase costs of Common Consumables and the Activity-Specific materials in Appendix B. Most materials can be found at local craft, hardware or general stores. Quantities required per activity will depend on the number of members you engage, the number of trials you include in each activity session, and your plans for demonstrating these activities during your culminating event. Unless otherwise noted, recommended group sizes are three or four members with the goal to engage in groups with an average size of 15.
Although not listed as materials for each individual activity, science notebooks, college ruled composition book, draw charts and tables should be used to capture data from experiments.
REFERENCES
Dubetz, T., & Wilson, J. A. (2013). Girls in engineering, mathematics and science, gems: A science outreach program for middle-school female students. Journal of STEM Education: Innovations & Research,14(3), 5, 41-47. Retrieved from http://ehis.ebscohost.com
8
8
UNIT 1ENERGY AND ELECTRICITY
9
DIY STEM THE SCIENCE OF EVERYDAY FACILITATOR’S GUIDE
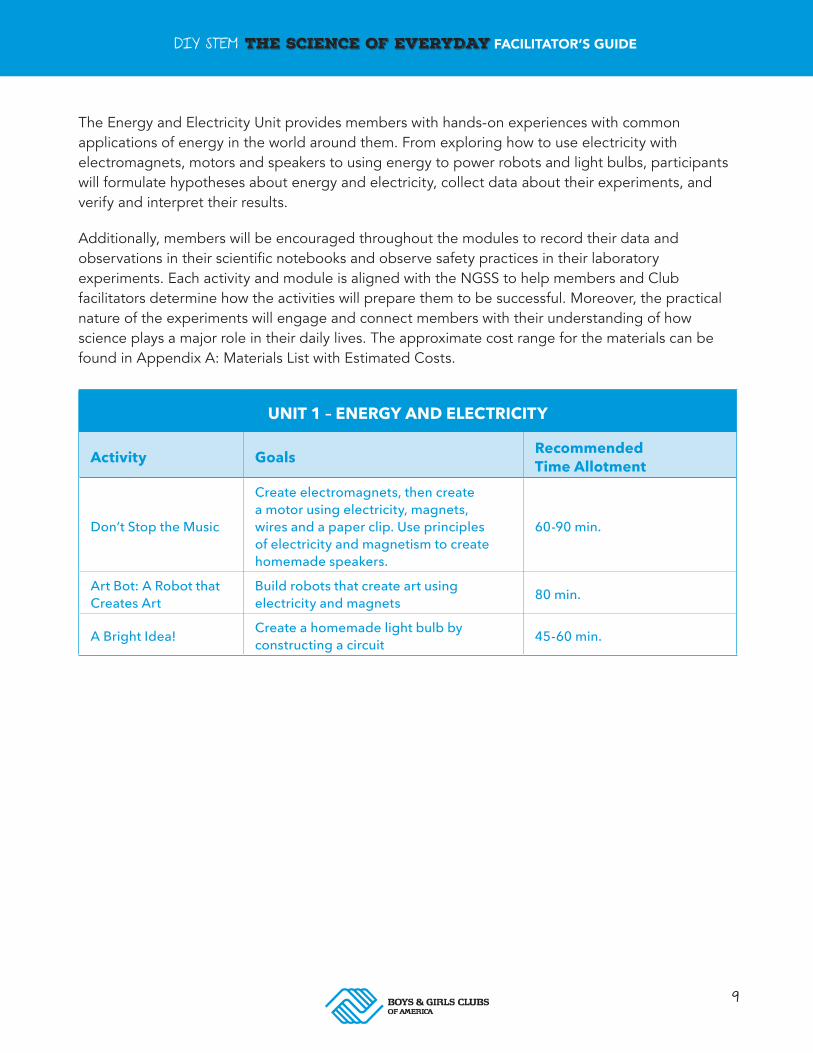
The Energy and Electricity Unit provides members with hands-on experiences with common applications of energy in the world around them. From exploring how to use electricity with electromagnets, motors and speakers to using energy to power robots and light bulbs, participants will formulate hypotheses about energy and electricity, collect data about their experiments, and verify and interpret their results.
Additionally, members will be encouraged throughout the modules to record their data and observations in their scientific notebooks and observe safety practices in their laboratory experiments. Each activity and module is aligned with the NGSS to help members and Club facilitators determine how the activities will prepare them to be successful. Moreover, the practical nature of the experiments will engage and connect members with their understanding of how science plays a major role in their daily lives. The approximate cost range for the materials can be found in Appendix A: Materials List with Estimated Costs.
UNIT 1 – ENERGY AND ELECTRICITY
Activity Goals Recommended Time Allotment
Don’t Stop the Music
Create electromagnets, then create a motor using electricity, magnets, wires and a paper clip. Use principles of electricity and magnetism to create homemade speakers.
60-90 min.
Art Bot: A Robot that Creates Art
Build robots that create art using electricity and magnets 80 min.
A Bright Idea! Create a homemade light bulb by constructing a circuit 45-60 min.
10
DIY STEM THE SCIENCE OF EVERYDAY FACILITATOR’S GUIDE
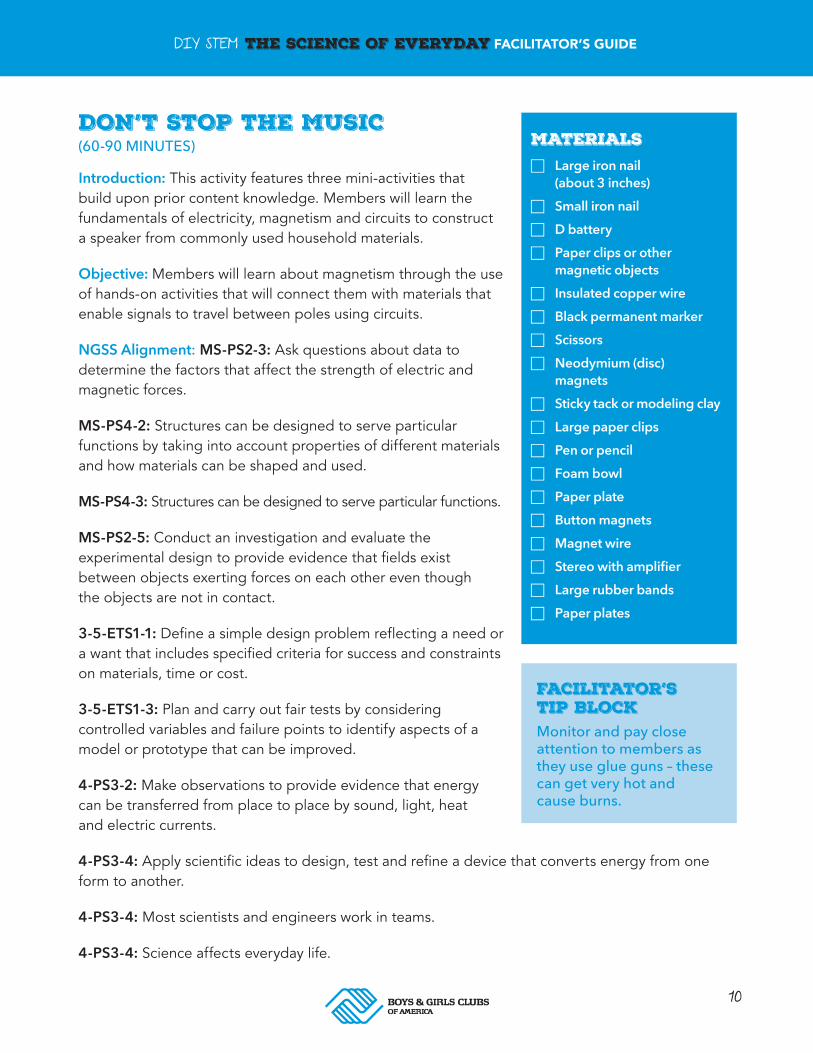
DON’T STOP THE MUSIC (60-90 MINUTES)
Introduction: This activity features three mini-activities that build upon prior content knowledge. Members will learn the fundamentals of electricity, magnetism and circuits to construct a speaker from commonly used household materials.
Objective: Members will learn about magnetism through the use of hands-on activities that will connect them with materials that enable signals to travel between poles using circuits.
NGSS Alignment: MS-PS2-3: Ask questions about data to determine the factors that affect the strength of electric and magnetic forces.
MS-PS4-2: Structures can be designed to serve particular functions by taking into account properties of different materials and how materials can be shaped and used.
MS-PS4-3: Structures can be designed to serve particular functions.
MS-PS2-5: Conduct an investigation and evaluate the experimental design to provide evidence that fields exist between objects exerting forces on each other even though the objects are not in contact.
3-5-ETS1-1: Define a simple design problem reflecting a need or a want that includes specified criteria for success and constraints on materials, time or cost.
3-5-ETS1-3: Plan and carry out fair tests by considering controlled variables and failure points to identify aspects of a model or prototype that can be improved.
4-PS3-2: Make observations to provide evidence that energy can be transferred from place to place by sound, light, heat and electric currents.
4-PS3-4: Apply scientific ideas to design, test and refine a device that converts energy from one form to another.
4-PS3-4: Most scientists and engineers work in teams.
4-PS3-4: Science affects everyday life.
MATERIALS F Large iron nail
(about 3 inches) F Small iron nail F D battery F Paper clips or other
magnetic objects F Insulated copper wire F Black permanent marker F Scissors F Neodymium (disc)
magnets F Sticky tack or modeling clay F Large paper clips F Pen or pencil F Foam bowl F Paper plate F Button magnets F Magnet wire F Stereo with amplifier F Large rubber bands F Paper plates
Facilitator’s Tip BlockMonitor and pay close attention to members as they use glue guns – these can get very hot and cause burns.
11
DIY STEM THE SCIENCE OF EVERYDAY FACILITATOR’S GUIDE
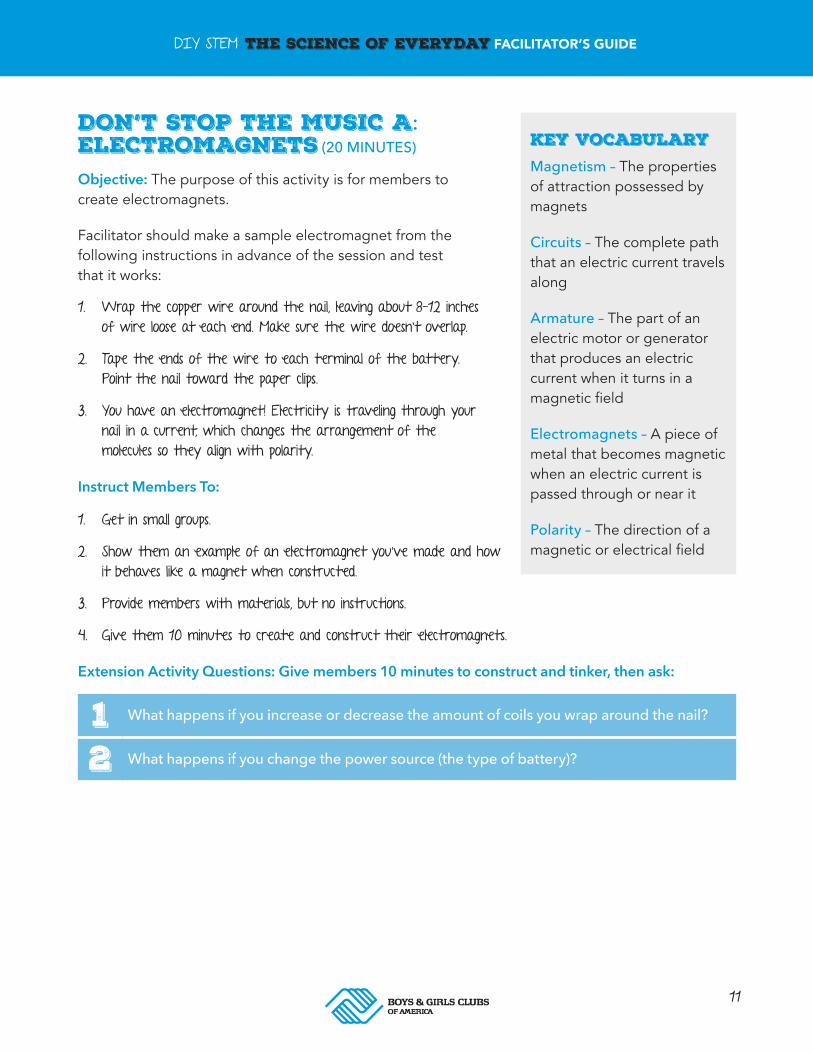
Key VocabularyMagnetism – The properties of attraction possessed by magnets
Circuits – The complete path that an electric current travels along
Armature – The part of an electric motor or generator that produces an electric current when it turns in a magnetic field
Electromagnets – A piece of metal that becomes magnetic when an electric current is passed through or near it
Polarity – The direction of a magnetic or electrical field
DON’T STOP THE MUSIC A ELECTROMAGNETS (20 MINUTES)
Objective: The purpose of this activity is for members to create electromagnets.
Facilitator should make a sample electromagnet from the following instructions in advance of the session and test that it works:
1. Wrap the copper wire around the nail, leaving about 8-12 inches of wire loose at each end. Make sure the wire doesn’t overlap.
2. Tape the ends of the wire to each terminal of the battery. Point the nail toward the paper clips.
3. You have an electromagnet! Electricity is traveling through your nail in a current, which changes the arrangement of the molecules so they align with polarity.
Instruct Members To:
1 What happens if you increase or decrease the amount of coils you wrap around the nail?
2 What happens if you change the power source (the type of battery)?
1. Get in small groups.
2. Show them an example of an electromagnet you’ve made and how it behaves like a magnet when constructed.
3. Provide members with materials, but no instructions.
4. Give them 10 minutes to create and construct their electromagnets.
Extension Activity Questions: Give members 10 minutes to construct and tinker, then ask:
12
DIY STEM THE SCIENCE OF EVERYDAY FACILITATOR’S GUIDE
DON’T STOP THE MUSIC B MOTORS (30 MINUTES)
Objective: The purpose of this activity is to have members create a motor.
Instruct Members To:
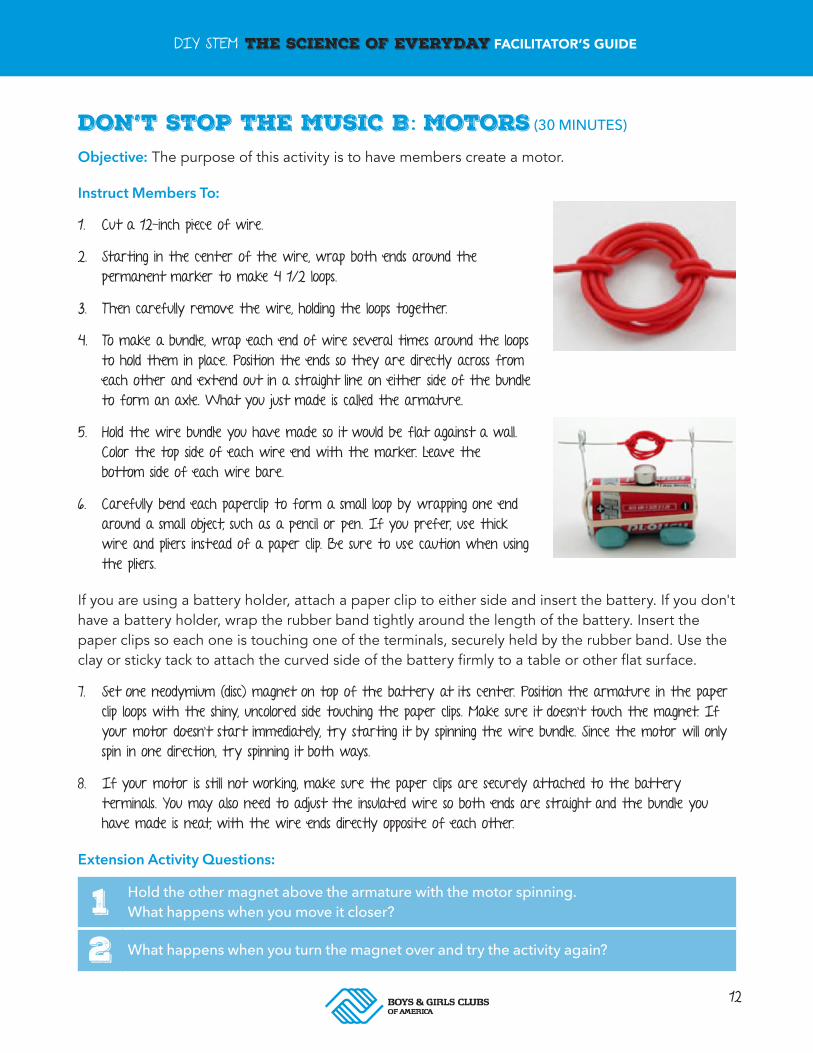
1. Cut a 12-inch piece of wire.
2. Starting in the center of the wire, wrap both ends around the permanent marker to make 4 1/2 loops.
3. Then carefully remove the wire, holding the loops together.
4. To make a bundle, wrap each end of wire several times around the loops to hold them in place. Position the ends so they are directly across from each other and extend out in a straight line on either side of the bundle to form an axle. What you just made is called the armature.
5. Hold the wire bundle you have made so it would be flat against a wall. Color the top side of each wire end with the marker. Leave the bottom side of each wire bare.
6. Carefully bend each paperclip to form a small loop by wrapping one end around a small object, such as a pencil or pen. If you prefer, use thick wire and pliers instead of a paper clip. Be sure to use caution when using the pliers.
If you are using a battery holder, attach a paper clip to either side and insert the battery. If you don't have a battery holder, wrap the rubber band tightly around the length of the battery. Insert the paper clips so each one is touching one of the terminals, securely held by the rubber band. Use the clay or sticky tack to attach the curved side of the battery firmly to a table or other flat surface.
7. Set one neodymium (disc) magnet on top of the battery at its center. Position the armature in the paper clip loops with the shiny, uncolored side touching the paper clips. Make sure it doesn't touch the magnet. If your motor doesn't start immediately, try starting it by spinning the wire bundle. Since the motor will only spin in one direction, try spinning it both ways.
8. If your motor is still not working, make sure the paper clips are securely attached to the battery terminals. You may also need to adjust the insulated wire so both ends are straight and the bundle you have made is neat, with the wire ends directly opposite of each other.
Extension Activity Questions:
1 Hold the other magnet above the armature with the motor spinning. What happens when you move it closer?
2 What happens when you turn the magnet over and try the activity again?
13
DIY STEM THE SCIENCE OF EVERYDAY FACILITATOR’S GUIDE
1 Can you create the same effect when you complete this task with batteries of different strengths?
2 Do the number of batteries used affect the light produced by your light bulb?
DON’T STOP THE MUSIC C SPEAKERS (25 MINUTES)
Introduction: The purpose of this activity is to allow members to continue to explore the relationship of electricity and magnetism as they create homemade speakers.
Objective: To create homemade speakers using magnets.
Instruct Members To:
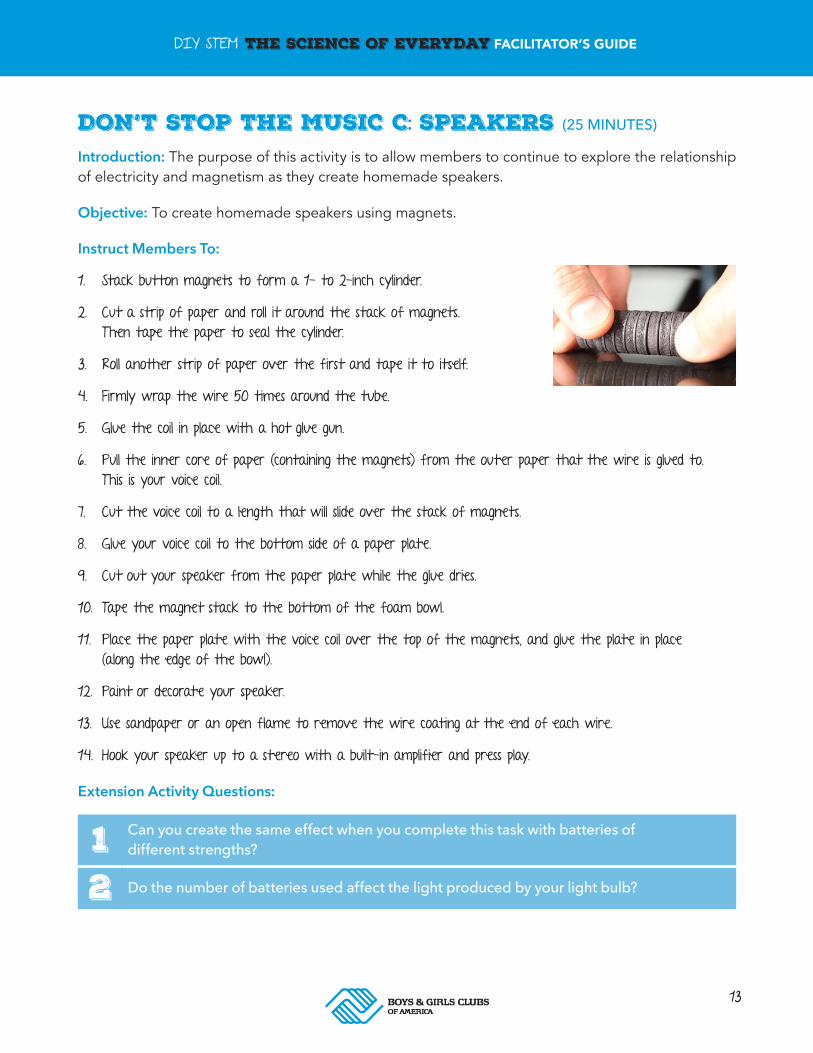
1. Stack button magnets to form a 1- to 2-inch cylinder.
2. Cut a strip of paper and roll it around the stack of magnets. Then tape the paper to seal the cylinder.
3. Roll another strip of paper over the first and tape it to itself.
4. Firmly wrap the wire 50 times around the tube.
5. Glue the coil in place with a hot glue gun.
6. Pull the inner core of paper (containing the magnets) from the outer paper that the wire is glued to. This is your voice coil.
7. Cut the voice coil to a length that will slide over the stack of magnets.
8. Glue your voice coil to the bottom side of a paper plate.
9. Cut out your speaker from the paper plate while the glue dries.
10. Tape the magnet stack to the bottom of the foam bowl.
11. Place the paper plate with the voice coil over the top of the magnets, and glue the plate in place (along the edge of the bowl).
12. Paint or decorate your speaker.
13. Use sandpaper or an open flame to remove the wire coating at the end of each wire.
14. Hook your speaker up to a stereo with a built-in amplifier and press play.
Extension Activity Questions:
14
DIY STEM THE SCIENCE OF EVERYDAY FACILITATOR’S GUIDE
MATERIALS F Toy DC motor that will
operate at three volts (V). Important: Make sure you buy a motor with leads attached – this will enable you to connect it to your battery pack
F Battery holders – AA with a built-in power switch (which makes it easy to turn your robot on and off)
F AA batteries
F 16-ounce plastic cup
F Popsicle sticks
F Cork or Styrofoam® ball (cork will work better, but can be harder to find at craft stores)
F Thin-size washable markers
F 22 x 28-inch white poster board (at least three pieces)
F Electrical tape
F Scotch tape
F Glue gun (make sure an adult supervises if you use a normal hot glue gun, otherwise use a low-temperature child-safe glue gun)
F Craft materials: googly eyes, pipe cleaners for decoration
ART BOT A ROBOT THAT CREATES ART (60 MINUTES)
Introduction: Members will use robots to create art. Members will need some prior knowledge about robots and their role in society. You can spend approximately 10-15 minutes discussing their role in society before the activity. Have members brainstorm how to use the materials to make a robot before the activity. You could also discuss some of the basic tasks they would like their robot to complete related to art.
Objective: To build a robot that creates art and determine how changes in the design of the robot affect the art produced.
NGSS Alignment: 3-5-ETS1-1: Define a simple design problem reflecting a need or a want that includes specified criteria for success and constraints on materials, time and cost.
3-5-ETS1-2: Generate and compare multiple possible solutions to a problem based on how well each is likely to meet the criteria and constraints of the problem.
Key VocabularyDC – Stands for direct current and is a one directional flow of electric charge produced by sources such as batteries and power supplies
Battery pack – A set of any number of identical batteries or individual battery cells
Facilitator’s Tip BlockAdult supervision is required. Glue guns get very hot and cause burns. The robot’s motor and attachments can spin very fast. Facilitators should be available to assist while the motor is spinning to remind participants to keep hands and fingers away from the attachments.
15
DIY STEM THE SCIENCE OF EVERYDAY FACILITATOR’S GUIDE
Instruct Members To:
1. Use the plastic cup for the robot’s body.
2. Apply a small amount of glue to the tip of the motor’s shaft. Before the glue dries, press the cork or Styrofoam ball onto the motor’s shaft.
3. Use the hot glue gun to attach one end of a single Popsicle stick to the top of the cork or Styrofoam ball.
4. Use double-sided tape, electrical tape and/or glue as needed to firmly attach the motor to the top of the robot (you must flip the cup upside down, so the base of the cup acts as the top of the robot). How well the motor attaches will depend on its exact shape and if it has a flat bottom.
5. Put the two AA batteries in the battery pack. Make sure the switch on the battery pack is in the off position.
6. Use electrical tape to strap the battery pack to the side of the cup.
Note: If you did not purchase a battery pack with a built-in on/off switch, then wait until the end of the project to complete the instructions in the next bullet. Do not twist both pairs of wires together yet.
7. Twist the exposed metal ends of the motor wires and battery pack wires together (red to red, and black to black). This lets electrical current flow from the batteries to the motor when the switch is on.
8. Using electrical tape, attach the three markers — with their lids left on — to the sides of the cup with their points facing downward. Make sure the markers are spaced equally around the cup to create a stable tripod — the cup should not fall over when it is standing.
9. If you have arts and crafts supplies, be creative and use these to decorate your robot.
10. Place one sheet of poster board flat on the floor and put your robot in the middle. (You can do this on a table or counter, but be careful so your robot does not fall off the edge.)
11. Remove the lids from the markers, and turn the battery pack switch on.
12. After you create your first Art Bot, turn it off — either with the on/off switch or by untwisting one pair of wires.
13. Be inventive to change the position of the objects attached to the motor.
14. Use glue (assist younger members with the hot glue gun) to attach objects securely – you don’t want objects flying off robots as they are spinning!
15. Take a new piece of poster board (or use the back of your first piece, if you want to save paper) and turn off your robot either by untwisting one pair of wires or with the on/off switch and design again! Do this as many times as you wish.
16
DIY STEM THE SCIENCE OF EVERYDAY FACILITATOR’S GUIDE
Extension Activity Questions:
1 Do you notice any patterns emerging?
2 What happens if you use a different number of Popsicle sticks (or other objects of your choice) but keep them all centered?
3 What happens if you use a different number of off-center Popsicle sticks?
4 Does the robot tend to move around faster in some cases more than in others?
Facilitator’s Tip BlockBe sure to keep your hands and fingers clear of the spinning Popsicle sticks, which can give a painful whack.
17
DIY STEM THE SCIENCE OF EVERYDAY FACILITATOR’S GUIDE
A BRIGHT IDEA (45-60 MINUTES)
Introduction: Many household items contain circuits and switches that allow a free flow of electricity. For example, light bulbs contain a simple circuit of electricity that burns so bright that they make light. In devices like cellular phones, tablets and computers, circuits are more complex and help to flow charge from a battery to areas within the devices where data can be stored, sent and even analyzed! All of these complicated things happen in such small devices!
Objective: The purpose of this activity is to use household items to construct a simple circuit that results in a homemade light bulb.
NGSS Alignment: 3-5-ETS1-2: Generate and compare multiple possible solutions to a problem based on how well each is likely to meet the criteria and constraints of the problem.
3-5-ETS1-1: Defining and Delimiting Engineering Problems. Possible solutions to a problem are limited by available materials and resources (constraints). The success of a designed solution is determined by considering the desired features of a solution (criteria). Different proposals for solutions can be compared on the basis of how well each one meets the specified criteria for success or how well each takes the constraints into account.
4-PS3-4: Apply scientific ideas to design, test and refine a device that converts energy from one form to another.
Instruct Members To:
1. Ask members to get in to groups of two to four and give each group one set of materials from the materials list.
2. Give them 10-15 minutes to tinker, explore and create the homemade light bulbs.
3. After 15 minutes, lead a demonstration with members. Instruct members to follow your lead as you construct the light bulb.
MATERIALS F D-size batteries (8-10)
F Mason jar or other clear glass container
F Electrical tape
F Pie pan
F Scissors F Toilet paper tube F Mechanical pencil refills F Alligator clips
Key VocabularyCircuits – The complete path that an electric current travels along
Pole – Either of the two terminals of an electric cell, battery, generator or motor
Facilitator’s Tip BlockGive groups 5-10 minutes to brainstorm and share solutions before going through the instructions of creating a light bulb. This will engage participants in the activity.
18
DIY STEM THE SCIENCE OF EVERYDAY FACILITATOR’S GUIDE
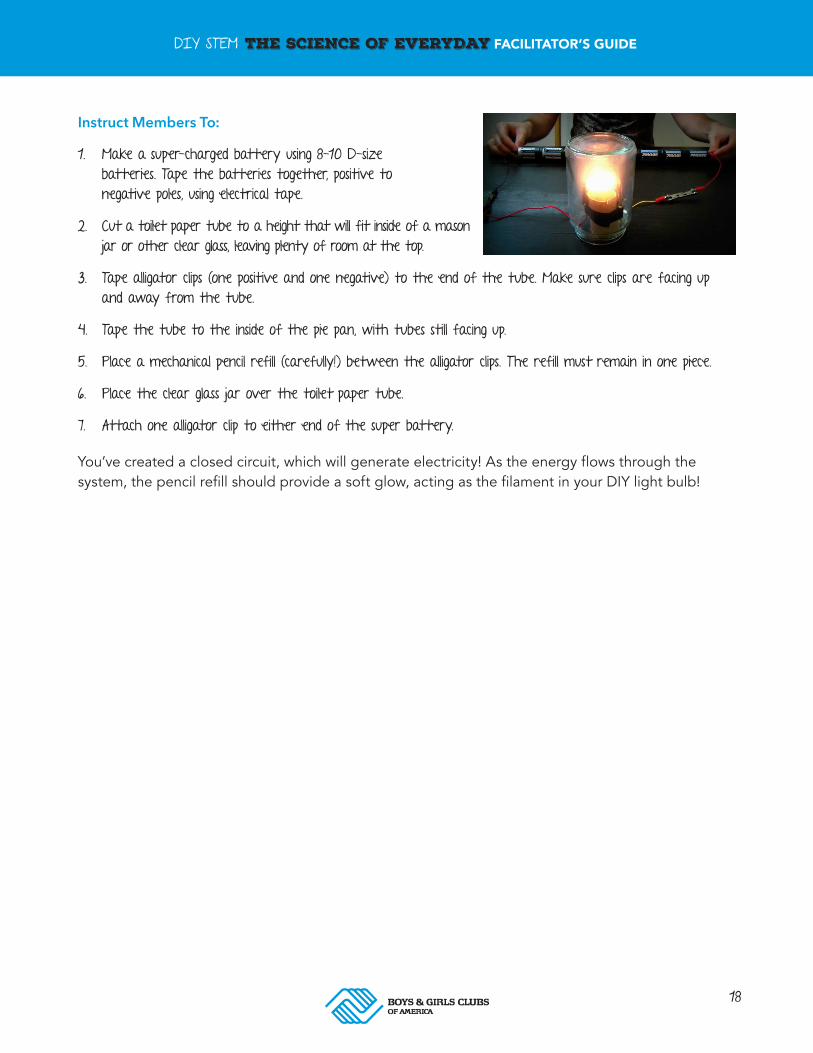
Instruct Members To:
1. Make a super-charged battery using 8-10 D-size batteries. Tape the batteries together, positive to negative poles, using electrical tape.
2. Cut a toilet paper tube to a height that will fit inside of a mason jar or other clear glass, leaving plenty of room at the top.
3. Tape alligator clips (one positive and one negative) to the end of the tube. Make sure clips are facing up and away from the tube.
4. Tape the tube to the inside of the pie pan, with tubes still facing up.
5. Place a mechanical pencil refill (carefully!) between the alligator clips. The refill must remain in one piece.
6. Place the clear glass jar over the toilet paper tube.
7. Attach one alligator clip to either end of the super battery.
You’ve created a closed circuit, which will generate electricity! As the energy flows through the system, the pencil refill should provide a soft glow, acting as the filament in your DIY light bulb!
19
19
UNIT 2ENGINEERING
DESIGN
20
DIY STEM THE SCIENCE OF EVERYDAY FACILITATOR’S GUIDE
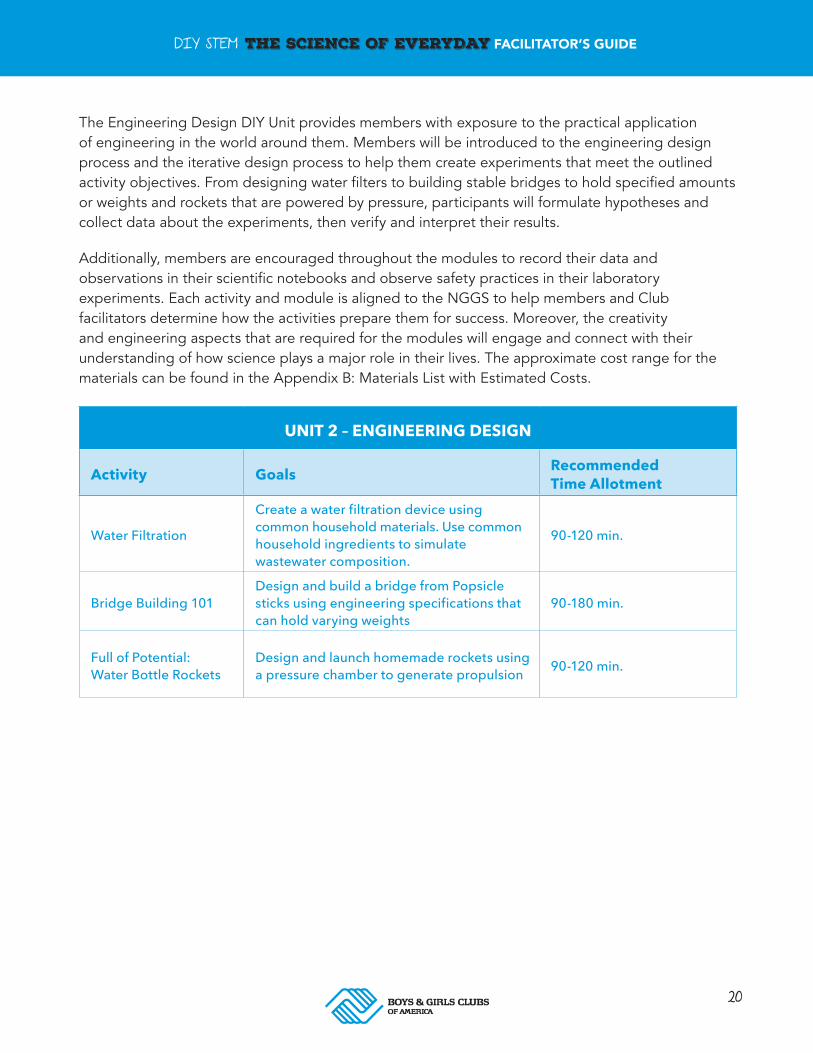
The Engineering Design DIY Unit provides members with exposure to the practical application of engineering in the world around them. Members will be introduced to the engineering design process and the iterative design process to help them create experiments that meet the outlined activity objectives. From designing water filters to building stable bridges to hold specified amounts or weights and rockets that are powered by pressure, participants will formulate hypotheses and collect data about the experiments, then verify and interpret their results.
Additionally, members are encouraged throughout the modules to record their data and observations in their scientific notebooks and observe safety practices in their laboratory experiments. Each activity and module is aligned to the NGGS to help members and Club facilitators determine how the activities prepare them for success. Moreover, the creativity and engineering aspects that are required for the modules will engage and connect with their understanding of how science plays a major role in their lives. The approximate cost range for the materials can be found in the Appendix B: Materials List with Estimated Costs.
UNIT 2 – ENGINEERING DESIGN
Activity Goals Recommended Time Allotment
Water Filtration
Create a water filtration device using common household materials. Use common household ingredients to simulate wastewater composition.
90-120 min.
Bridge Building 101Design and build a bridge from Popsicle sticks using engineering specifications that can hold varying weights
90-180 min.
Full of Potential: Water Bottle Rockets
Design and launch homemade rockets using a pressure chamber to generate propulsion 90-120 min.
21
DIY STEM THE SCIENCE OF EVERYDAY FACILITATOR’S GUIDE
Teaching Strategies for an Engineering Design Challenge
The following guidelines are intended to help you make these activities as productive as possible.
• Discuss the designs before and after testing. If possible, make observations or ask questions during the test. Discussing the designs before testing forces members to think about and communicate why they have designed as they have. Discussing the designs after testing while test results are fresh in their minds helps them reflect on and communicate what worked and what didn’t so they can improve their design next time.
• Watch what members do carefully, and listen closely to what they say. Observation will help you understand if members are designing, prototyping and modifying their design with an understanding of the engineering concepts.
• Remind them of what they have already done. Compare their designs to previous ones to help them learn from the design-test-redesign approach.
• Steer members toward a more scientific approach. If they have changed multiple aspects of a design and observed changes in results, ask them which change caused the difference in performance. If they are not sure what caused the change, suggest they change only one thing at a time. This will teach them the value of controlling variables.
• Model brainstorming, careful observation and detailed description using appropriate vocabulary.
• Ask “guiding” or “focusing” questions.
• Require members to be precise about what they are describing by using specific language.
• Compare designs to those of other groups. Endorse borrowing. After all, engineers borrow a good idea whenever they can. However, be sure to give credit in documentation to the team that came up with the good idea.
• Emphasize improvement over competition. The goal of the challenge is for each team to improve its design. However, there should be some recognition of designs that perform extremely well. There should also be recognition for teams whose designs improve the most, for teams that originate design innovations that are used by others, for elegance of design and for quality of construction.
• Encourage questions. Get members to articulate what they are doing in the form of “I want to see what will happen if…”
• Connect what members are doing to what engineers do. They will understand the significance of the design challenge if they see that their process is the same process of adult engineers.
• Help members understand that designs that fail are part of the normal design process. Much can be learned from a failed design. Discuss how engineers and scientists learn from their failures.
22
DIY STEM THE SCIENCE OF EVERYDAY FACILITATOR’S GUIDE
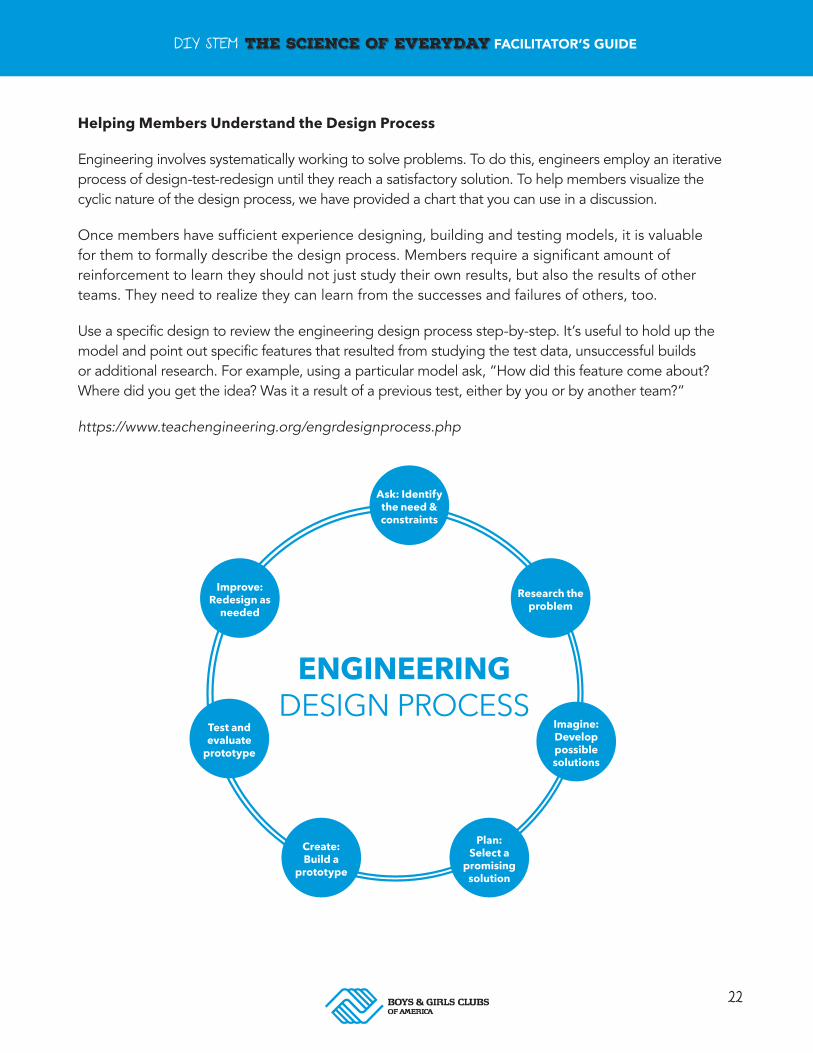
Helping Members Understand the Design Process
Engineering involves systematically working to solve problems. To do this, engineers employ an iterative process of design-test-redesign until they reach a satisfactory solution. To help members visualize the cyclic nature of the design process, we have provided a chart that you can use in a discussion.
Once members have sufficient experience designing, building and testing models, it is valuable for them to formally describe the design process. Members require a significant amount of reinforcement to learn they should not just study their own results, but also the results of other teams. They need to realize they can learn from the successes and failures of others, too.
Use a specific design to review the engineering design process step-by-step. It’s useful to hold up the model and point out specific features that resulted from studying the test data, unsuccessful builds or additional research. For example, using a particular model ask, “How did this feature come about? Where did you get the idea? Was it a result of a previous test, either by you or by another team?”
https://www.teachengineering.org/engrdesignprocess.php
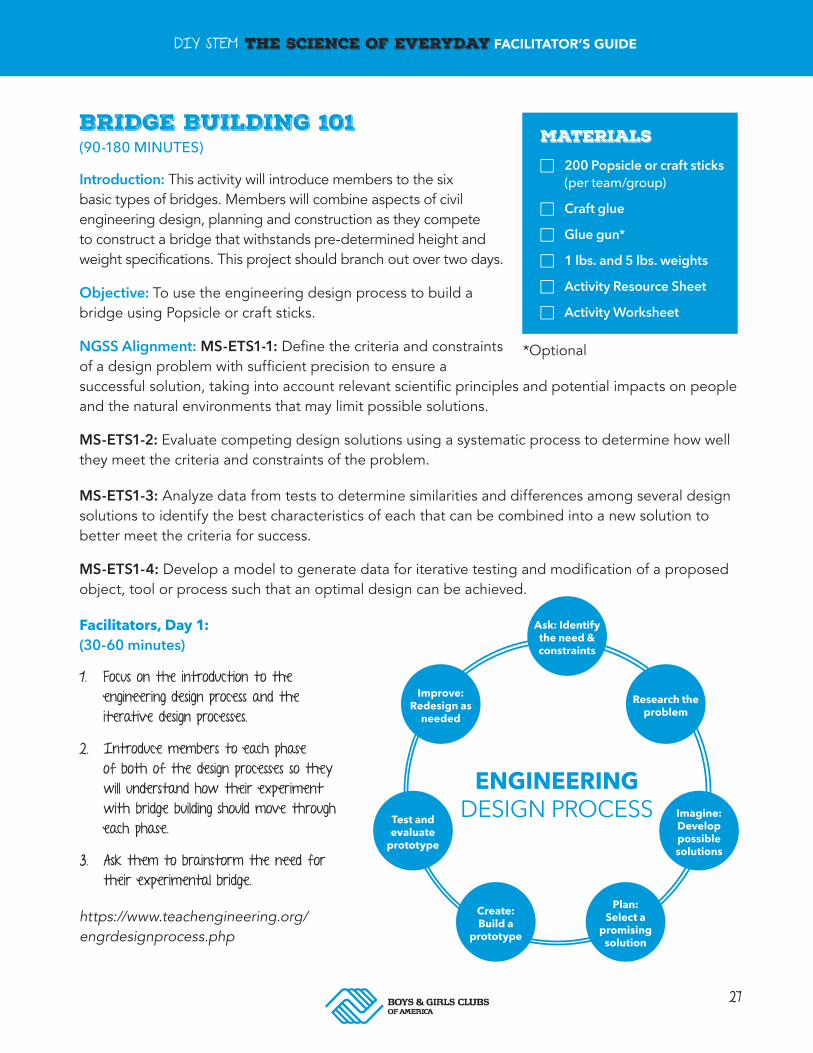
ENGINEERING DESIGN PROCESS
Improve: Redesign as
needed
Ask: Identify the need & constraints
Research the problem
Imagine: Develop possible solutions
Test and evaluate
prototype
Create: Build a
prototype
Plan: Select a
promising solution
23
DIY STEM THE SCIENCE OF EVERYDAY FACILITATOR’S GUIDE
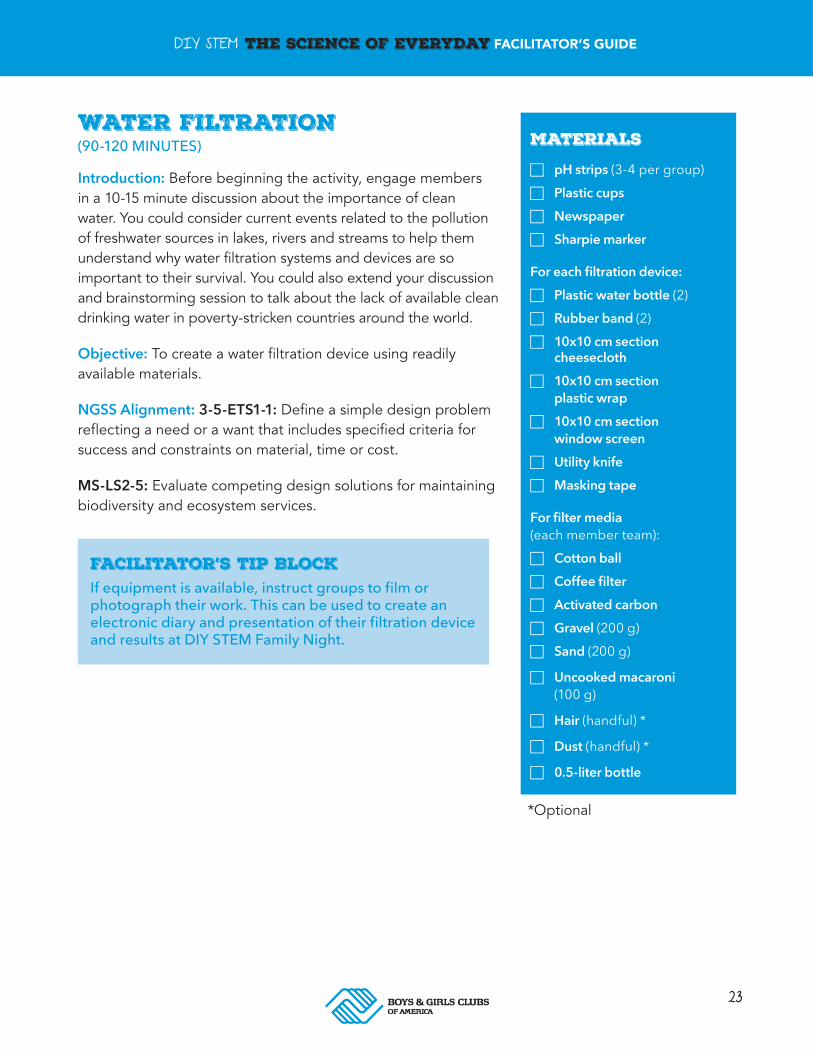
WATER FILTRATION (90-120 MINUTES)
Introduction: Before beginning the activity, engage members in a 10-15 minute discussion about the importance of clean water. You could consider current events related to the pollution of freshwater sources in lakes, rivers and streams to help them understand why water filtration systems and devices are so important to their survival. You could also extend your discussion and brainstorming session to talk about the lack of available clean drinking water in poverty-stricken countries around the world.
Objective: To create a water filtration device using readily available materials.
NGSS Alignment: 3-5-ETS1-1: Define a simple design problem reflecting a need or a want that includes specified criteria for success and constraints on material, time or cost.
MS-LS2-5: Evaluate competing design solutions for maintaining biodiversity and ecosystem services.
MATERIALS
F pH strips (3-4 per group) F Plastic cups F Newspaper F Sharpie marker
For each filtration device: F Plastic water bottle (2) F Rubber band (2) F 10x10 cm section
cheesecloth F 10x10 cm section
plastic wrap F 10x10 cm section
window screen F Utility knife F Masking tape
For filter media (each member team):
F Cotton ball F Coffee filter F Activated carbon F Gravel (200 g) F Sand (200 g)
F Uncooked macaroni (100 g)
F Hair (handful) *
F Dust (handful) *
F 0.5-liter bottle
Facilitator’s Tip BlockIf equipment is available, instruct groups to film or photograph their work. This can be used to create an electronic diary and presentation of their filtration device and results at DIY STEM Family Night.
*Optional
24
DIY STEM THE SCIENCE OF EVERYDAY FACILITATOR’S GUIDE
WATER FILTRATION A MAKING THE FILTRATION DEVICE (30-45 MINUTES)
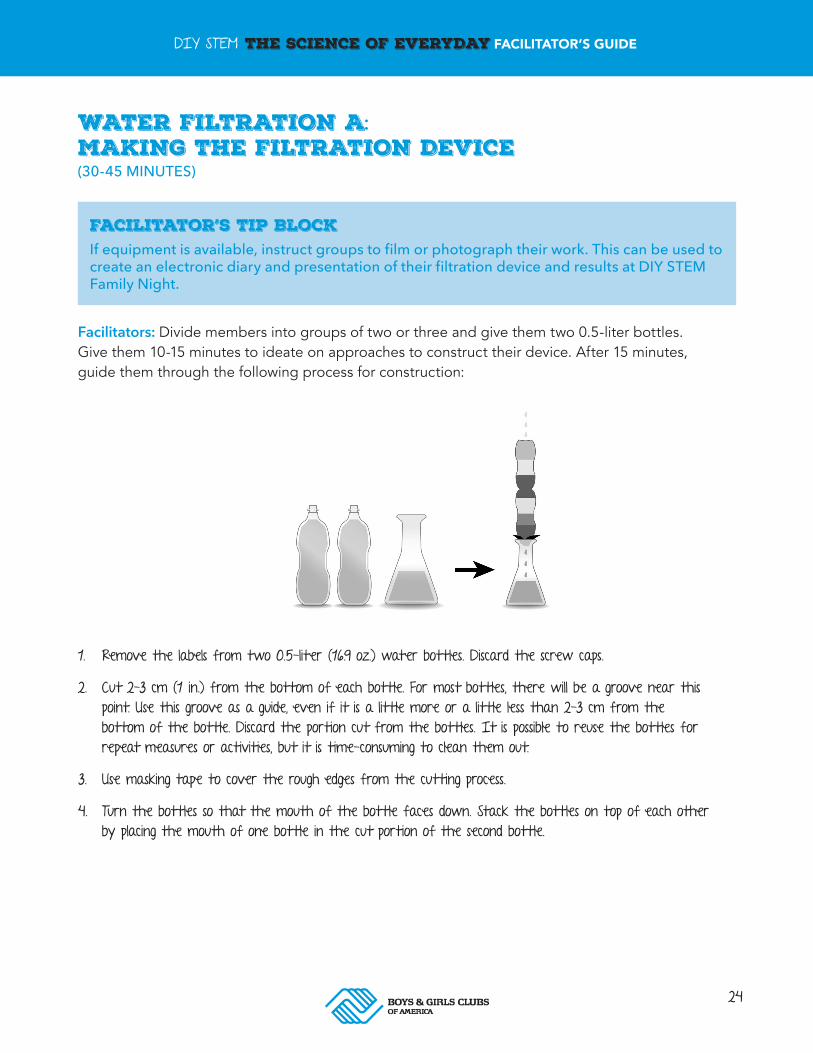
Facilitators: Divide members into groups of two or three and give them two 0.5-liter bottles. Give them 10-15 minutes to ideate on approaches to construct their device. After 15 minutes, guide them through the following process for construction:
1. Remove the labels from two 0.5-liter (16.9 oz.) water bottles. Discard the screw caps.
2. Cut 2-3 cm (1 in.) from the bottom of each bottle. For most bottles, there will be a groove near this point. Use this groove as a guide, even if it is a little more or a little less than 2-3 cm from the bottom of the bottle. Discard the portion cut from the bottles. It is possible to reuse the bottles for repeat measures or activities, but it is time-consuming to clean them out.
3. Use masking tape to cover the rough edges from the cutting process.
4. Turn the bottles so that the mouth of the bottle faces down. Stack the bottles on top of each other by placing the mouth of one bottle in the cut portion of the second bottle.
Facilitator’s Tip BlockIf equipment is available, instruct groups to film or photograph their work. This can be used to create an electronic diary and presentation of their filtration device and results at DIY STEM Family Night.

25
DIY STEM THE SCIENCE OF EVERYDAY FACILITATOR’S GUIDE
WATER FILTRATION B MAKING THE SIMULATED WASTEWATER (15 MINUTES)
Introduction: It will take approximately 15 minutes to make the simulated wastewater. This should be done the morning of the filtration experiment. Each team will need 200 mL of the wastewater. Thus, a 2-liter supply will allow 10 teams to conduct the filtration experiment once each.
Objective: To simulate wastewater using readily available materials.
NGSS Alignment: 3-5-ETS1-1: Define a simple design problem reflecting a need or a want that includes specified criteria for success and constraints on materials, time or cost.
3-5-ETS1-2: Generate and compare multiple possible solutions to a problem based on how well each is likely to meet the criteria and constraints of the problem.
3-5-ETS1-3: Plan and carry out fair tests in which variables are controlled and failure points are considered to identify aspects of a model or prototype that can be improved.
Facilitator Steps:
1. Measure the dry materials and place them one at a time into a large container that can hold at least 2 liters of water.
2. Measure the vinegar and add it to the dry materials.
3. Put two liters of water in the container.
4. Add 1–2 drops of food coloring.
5. Stir to mix.
Instruct Members To:
1. Members should create measured layers of filter media in each bottle. Since some materials are optional, allow groups to use different media. At the end of the activity, have the groups compare their selected media and the differences in color and pH of their simulated wastewater after filtration.
2. Members will pour simulated wastewater through their constructed filters and observe the filtration process and note changes in color as it travels through the filter.
Key VocabularyFiltration – The act or process of removing something unwanted from a liquid, gas, etc., by using a filter
Conductivity – The ability to move heat or electricity from one place to another
Dissolve – To cause to pass into a solution
Submerge – To make something go under the surface of water or some other liquid
An acid – Any of a class of substances that yields hydrogen ions (H+) when dissolved in water. The greater the concentration of hydrogen ions produced, the more acidic the substance is. Acids are characterized by a sour taste and the ability to react with bases and certain metals to form salts.
A base – Any of a class of substances that yields hydroxide ions (OH-) when dissolved in water. The greater the concentration of hydroxide ions produced, the more basic the substance is. Bases are characterized by a bitter taste, a slippery feel, and the ability to react with acids to form salts.
26
DIY STEM THE SCIENCE OF EVERYDAY FACILITATOR’S GUIDE
Facilitators: Measuring pH
The pH scale lets you determine the relative acidity of a substance. The pH scale ranges from 1 to 14 where 7 is neutral, greater than 7 is basic, and less than 7 is acidic.
The water recovered and purified by the WRS on the ISS has a pH of 4.5 to 7. This lower pH is a result of the addition of iodine to the filtered water.
Members will be measuring the pH of the unfiltered wastewater and the filtered wastewater. Have members pour a few drops of the sample onto the pH paper rather than contaminating the sample by dipping the pH strip into it. The students will use the color guide provided with the strips to determine the pH of their samples.
Extension Activity Questions:
1. What happened to the water as it passed through the different layers of the filter?
2. What changes occurred to the properties of the gray water as it was filtered (pH, appearance, odor)?
3. Compare your filtered water to the clean water. Did your gray water become “clean”? What properties told you it was or was not clean? Does this data support your hypothesis? Why or why not?
4. If you could build a water filteration system by using any of the materials available in this activity, which three materials would you use and in what order would you layer them? Why?
Extension and Enrichment Activities:
1. Collect and filter other samples of water, (e.g., rain water, hand wash water, stream, pond water, etc.).
2. Try using other filter media such as Styrofoam™ pieces, potting soil, marbles and popcorn. Ask the students to research how the water in your town is filtered/treated. Maybe take a field trip to the water treatment plant, or see if someone from the water treatment plant can speak to your class.
3. Investigate other water treatment methods, such as desalination. Conduct experiments using these methods.
4. Have members compete in a run-off to determine the best design from the data collected.
5. Have members create a poster about their design and test results for DIY STEM Family Night. Select two to three members to make a poster for the class-designed filtration device.
27
DIY STEM THE SCIENCE OF EVERYDAY FACILITATOR’S GUIDE
BRIDGE BUILDING 101 (90-180 MINUTES)
Introduction: This activity will introduce members to the six basic types of bridges. Members will combine aspects of civil engineering design, planning and construction as they compete to construct a bridge that withstands pre-determined height and weight specifications. This project should branch out over two days.
Objective: To use the engineering design process to build a bridge using Popsicle or craft sticks.
NGSS Alignment: MS-ETS1-1: Define the criteria and constraints of a design problem with sufficient precision to ensure a successful solution, taking into account relevant scientific principles and potential impacts on people and the natural environments that may limit possible solutions.
MS-ETS1-2: Evaluate competing design solutions using a systematic process to determine how well they meet the criteria and constraints of the problem.
MS-ETS1-3: Analyze data from tests to determine similarities and differences among several design solutions to identify the best characteristics of each that can be combined into a new solution to better meet the criteria for success.
MS-ETS1-4: Develop a model to generate data for iterative testing and modification of a proposed object, tool or process such that an optimal design can be achieved.
Facilitators, Day 1: (30-60 minutes)
1. Focus on the introduction to the engineering design process and the iterative design processes.
2. Introduce members to each phase of both of the design processes so they will understand how their experiment with bridge building should move through each phase.
3. Ask them to brainstorm the need for their experimental bridge.
https://www.teachengineering.org/engrdesignprocess.php
MATERIALS F 200 Popsicle or craft sticks
(per team/group)
F Craft glue
F Glue gun*
F 1 lbs. and 5 lbs. weights
F Activity Resource Sheet
F Activity Worksheet
ENGINEERING DESIGN PROCESS
Improve: Redesign as
needed
Ask: Identify the need & constraints
Research the problem
Imagine: Develop possible solutions
Test and evaluate
prototype
Create: Build a
prototype
Plan: Select a
promising solution
*Optional
28
DIY STEM THE SCIENCE OF EVERYDAY FACILITATOR’S GUIDE
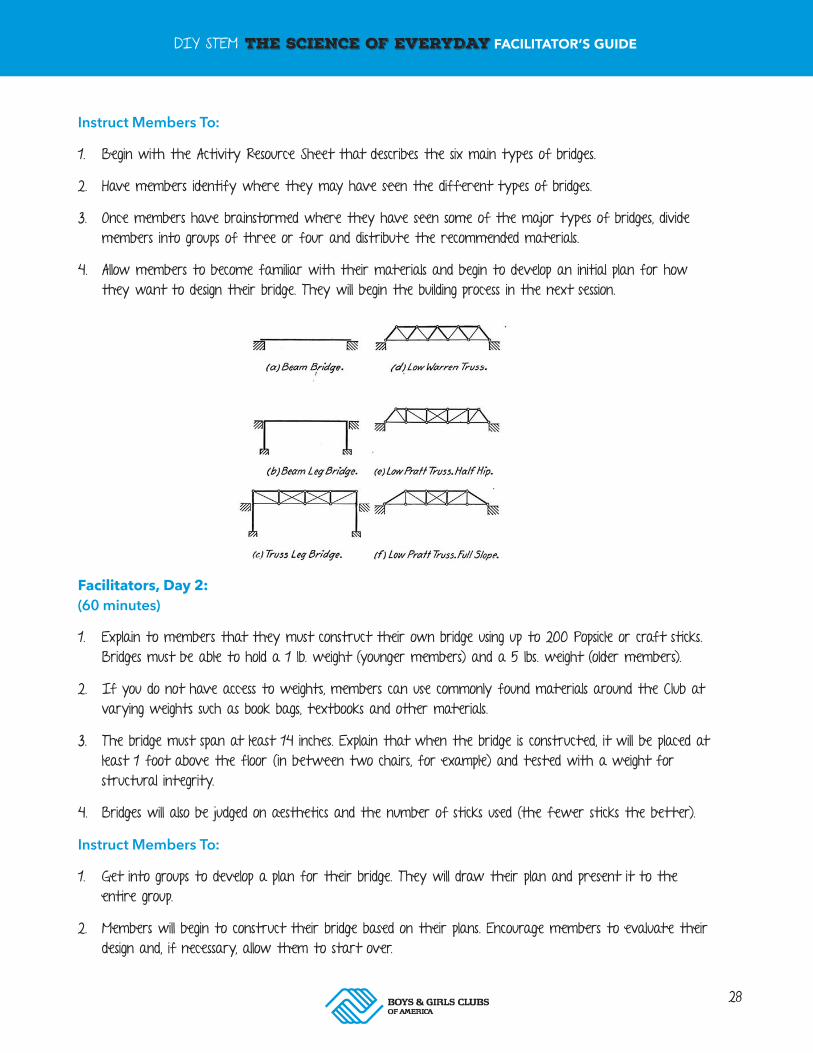
Instruct Members To:
1. Begin with the Activity Resource Sheet that describes the six main types of bridges.
2. Have members identify where they may have seen the different types of bridges.
3. Once members have brainstormed where they have seen some of the major types of bridges, divide members into groups of three or four and distribute the recommended materials.
4. Allow members to become familiar with their materials and begin to develop an initial plan for how they want to design their bridge. They will begin the building process in the next session.
Facilitators, Day 2: (60 minutes)
1. Explain to members that they must construct their own bridge using up to 200 Popsicle or craft sticks. Bridges must be able to hold a 1 lb. weight (younger members) and a 5 lbs. weight (older members).
2. If you do not have access to weights, members can use commonly found materials around the Club at varying weights such as book bags, textbooks and other materials.
3. The bridge must span at least 14 inches. Explain that when the bridge is constructed, it will be placed at least 1 foot above the floor (in between two chairs, for example) and tested with a weight for structural integrity.
4. Bridges will also be judged on aesthetics and the number of sticks used (the fewer sticks the better).
Instruct Members To:
1. Get into groups to develop a plan for their bridge. They will draw their plan and present it to the entire group.
2. Members will begin to construct their bridge based on their plans. Encourage members to evaluate their design and, if necessary, allow them to start over.
29
DIY STEM THE SCIENCE OF EVERYDAY FACILITATOR’S GUIDE
Facilitator’s Tip BlockContinue to emphasize the scientific method with an emphasis on the experiment and analysis steps used to test their experiments and hypothesis. Require members to use their scientific notebook to record their information.
Facilitator’s Tip BlockMembers could test the stability and strength of their bridges as a part of DIY STEM Family Night.Participants would benefit from a tangible example of a bridge that you have created using the same requirements so that they have an idea about what they are expected to build. You may even decide to build alongside them as they create their bridges to make the process more enjoyable and collaborative.
Facilitators, Day 3: (30-60 minutes)
Instructions For Competition:
1. Each team will test their bridge’s weight capacity by placing it at least 1 foot above the floor using blocks or chairs. Each bridge must bear the assigned weight.
2. Have members from other teams rank the team’s bridge in three areas:
a. Aesthetics: How does the bridge look? Rated on a scale of 1 to 5 (1: not appealing, to 5: very appealing).
b. Efficiency of Materials: How many sticks did the team use? Rated on a scale of 1 to 5 (1: used quite a few sticks, to 5: limited number of sticks used).
c. Weight Capacity: Did the bridge withstand lots of weight? Rated on a scale of 1 to 5 (1: did not last long, broke under pressure, to 5: took quite a bit weight).
d. Groups will complete an evaluation.
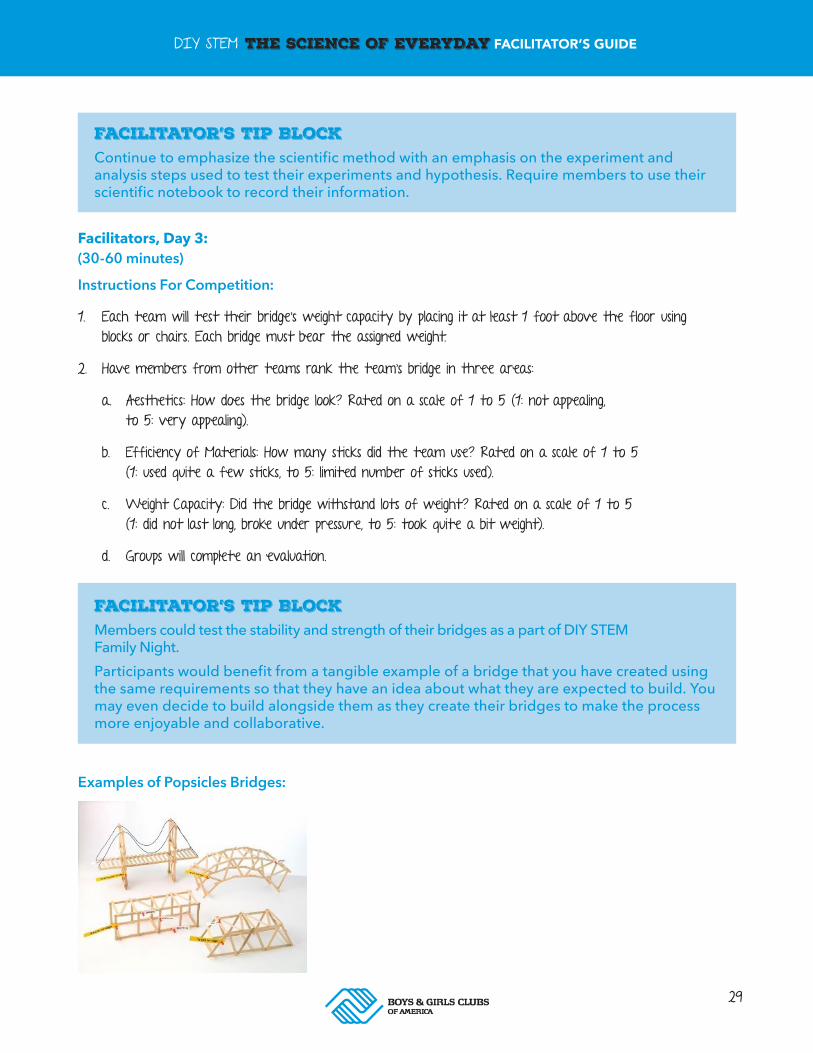
Examples of Popsicles Bridges:
30
DIY STEM THE SCIENCE OF EVERYDAY FACILITATOR’S GUIDE
1 If your bridge did not hold the 1 lbs. or 5 lbs. weight, what flaws did you notice in your design?
2 What are some of the changes that you made to your original bridge design to strengthen it?
Extension Activity Questions:
FULL OF POTENTIAL :WATER BOTTLE ROCKETS (90-120 MINUTES)
Introduction: The purpose of this activity is to allow members to explore how design plays an integral part in the successful launch of their rocket.
Objective: Design and launch a rocket reflecting the members’ innovative design and use of a pressure chamber to generate propulsion.
NGSS Alignment: MS-ETS1-1: Define the criteria and constraints of a design problem with sufficient precision to ensure a successful solution by taking into account relevant scientific principles and potential impacts on people and the natural environments that may limit possible solutions.
MS-ETS1-2: Evaluate competing design solutions using a systematic process to determine how well they meet the criteria and constraints of the problem.
MS-ETS1-3: Analyze data from tests to determine similarities and differences among several design solutions to identify the best characteristics of each that can be combined into a new solution to better meet the criteria for success.
Key VocabularyPressure chamber – A chamber designed to hold material under pressure
Scale – An instrument or machine for weighing
Nose cone – The pointed front end of an aircraft, rocket, missile, etc.
MATERIALS F Eye Protection
(During launch)
Body: F 1-liter or 2-liter soda bottle
Fins: F Index cards F Duct tape or clear
packing tape F Cardstock board F Poster board or tag board
Nose cone: F Poster board or tag board F Clay
F Parachutes* F Kite string or yarn F Baby powder F Grocery bags or tall
kitchen bag F Scotch tape
Launcher: F See instructions for
constructing your own or purchase online
*Optional
31
DIY STEM THE SCIENCE OF EVERYDAY FACILITATOR’S GUIDE
Facilitators: Use the following questions to engage participants in the activity and build background knowledge before beginning the experiment.
1. Why do bottle rockets fly?
2. Why do we have to use water, or do we?
3. Will it fly without water?
4. If a little water works well, will a lot of water work better?
5. Will it fly best when it is totally full?
6. What volume of water works best?
Use a plain water bottle with different levels of water to demonstrate the answers to these questions. Reintroduce the scientific method before beginning the experiment. After answering the engagement questions, members should develop their own hypothesis about what they think will happen in the experiment.
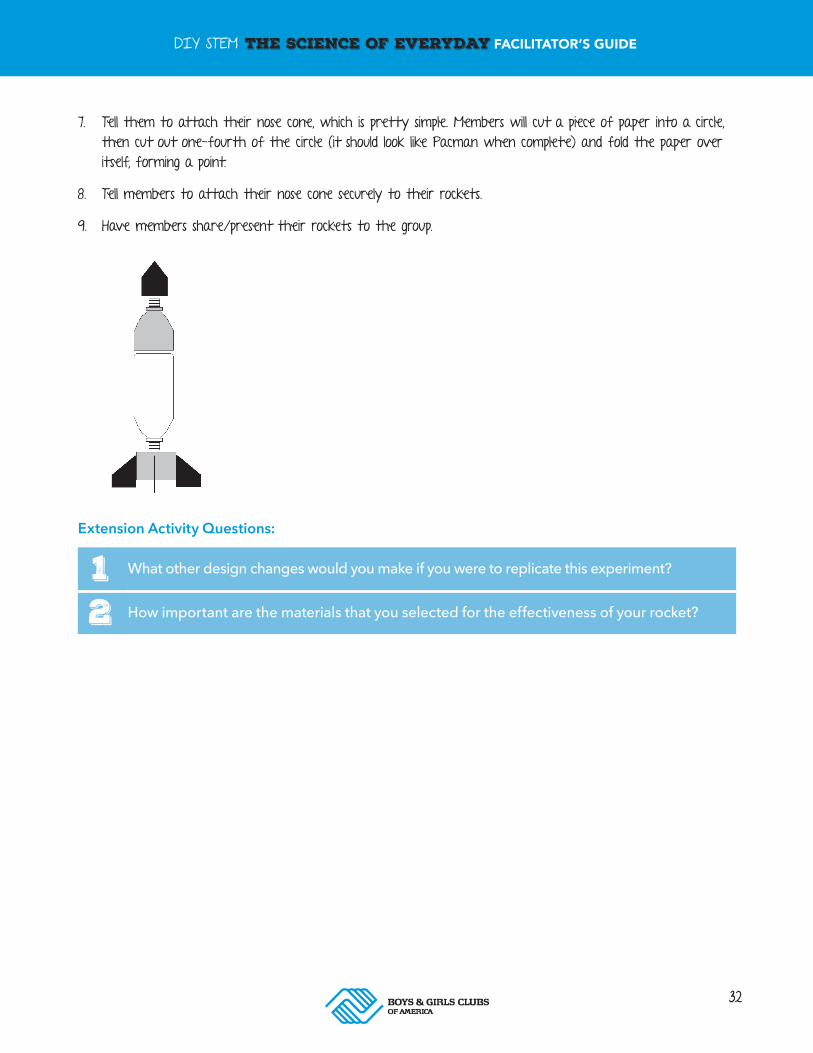
Review the main parts of a rocket – the body, nose cone and fins with members. Have a rocket available so that you can point these parts out as you introduce them.
Instruct Members To:
1. The main part of your rocket is the body or pressure chamber. Provide members with all the materials listed in the materials list. Instruct members to sketch a rocket using only the materials provided in their scientific notebook. Allow them to tinker, explore and create for 20 minutes.
2. Ask members what items are most useful for the main body.
3. After reviewing all options possible for the main body of the rocket, ask each group to select the material they will use for the body. After your review and approval, instruct members to draw their rocket to scale using the provided graphing paper.
4. After you have reviewed the scale drawings, tell members to add fins to their rockets.
5. Tell members to be creative and cut out any shape for their fins except “forward swept” fins. After they decide on their shape, ask them to cut three or four identical fins and place their fins at the base of the rocket.
6. Remind them the importance of making the fins the same size and placing them evenly around their rocket to ensure rocket stability.
Facilitator’s Tip BlockThis is a great place to require members to use their lab notebook to record their responses to the discussion questions and write their hypothesis.
32
DIY STEM THE SCIENCE OF EVERYDAY FACILITATOR’S GUIDE
7. Tell them to attach their nose cone, which is pretty simple. Members will cut a piece of paper into a circle, then cut out one-fourth of the circle (it should look like Pacman when complete) and fold the paper over itself, forming a point.
8. Tell members to attach their nose cone securely to their rockets.
9. Have members share/present their rockets to the group.
1 What other design changes would you make if you were to replicate this experiment?
2 How important are the materials that you selected for the effectiveness of your rocket?
Extension Activity Questions:

33
33
UNIT 3FOOD
CHEMISTRY
34
DIY STEM THE SCIENCE OF EVERYDAY FACILITATOR’S GUIDE
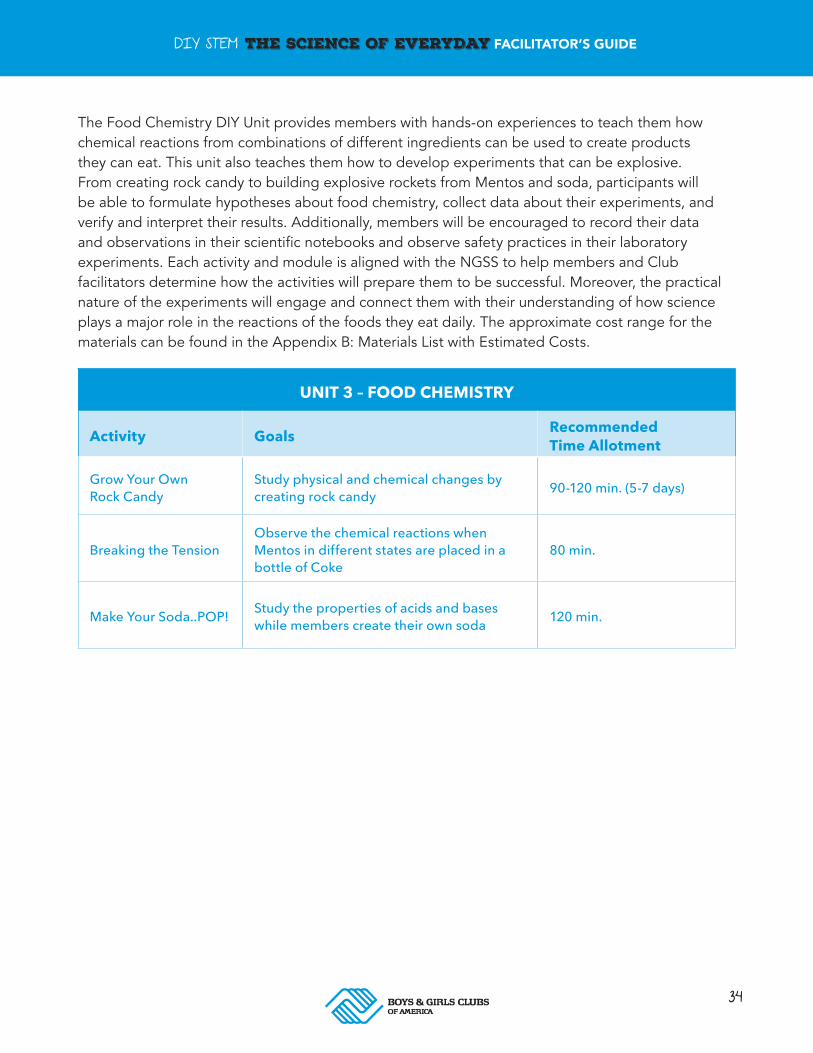
The Food Chemistry DIY Unit provides members with hands-on experiences to teach them how chemical reactions from combinations of different ingredients can be used to create products they can eat. This unit also teaches them how to develop experiments that can be explosive. From creating rock candy to building explosive rockets from Mentos and soda, participants will be able to formulate hypotheses about food chemistry, collect data about their experiments, and verify and interpret their results. Additionally, members will be encouraged to record their data and observations in their scientific notebooks and observe safety practices in their laboratory experiments. Each activity and module is aligned with the NGSS to help members and Club facilitators determine how the activities will prepare them to be successful. Moreover, the practical nature of the experiments will engage and connect them with their understanding of how science plays a major role in the reactions of the foods they eat daily. The approximate cost range for the materials can be found in the Appendix B: Materials List with Estimated Costs.
UNIT 3 – FOOD CHEMISTRY
Activity Goals Recommended Time Allotment
Grow Your Own Rock Candy
Study physical and chemical changes by creating rock candy 90-120 min. (5-7 days)
Breaking the TensionObserve the chemical reactions when Mentos in different states are placed in a bottle of Coke
80 min.
Make Your Soda..POP! Study the properties of acids and bases while members create their own soda 120 min.

35
DIY STEM THE SCIENCE OF EVERYDAY FACILITATOR’S GUIDE
GROW YOUR OWN ROCK CANDY (90-120 MINUTES)
Introduction: This activity will introduce participants to a concept known as a physical change. A substance may sometimes change color, shape or appearance, but otherwise remain the same. This is known as a physical change. Sometimes an object loses energy or changes its state of matter, (e.g. liquid to a gas). This is known as a chemical change.
Objective: To introduce participants to the concepts of physical and chemical changes.
NGSS Alignment: 5-PS1-1: Develop a model to describe that matter is made of particles too small to be seen.
5-PS1-2: Measure and graph quantities to provide evidence that regardless of the type of change that occurs when heating, cooling or mixing substances, the total weight of the matter is conserved.
Facilitator: Participants will use a hot, boiling solution for part of this activity! Make sure participants are safe while handling hot containers and transferring the boiling solution, which can cause a bad burn if spilled.
GROW YOUR OWN ROCK CANDY A : SET-UP (20 MINUTES)
Facilitators:
1. Remind participants to use precaution when handling the sugar-water solution.
2. Divide participants into groups of three or four.
3. Have materials organized on a table or project the materials for the group to see.
4. Ask one member of the group to gather all project materials.
5. Review steps for each section before beginning.
MATERIALS F Mason jars – pint or
quart size F Yarn or cotton string F Water F Measuring cup F Measuring spoon F Small plate F Granulated sugar F Wax paper F Screws for weights F Wooden beads F Popsicle sticks F Metric ruler (with
centimeter markings) F Scotch tape F Pot F Stove F Wooden mixing spoon F Potholders F Paper towels F Markers
Key VocabularySolution – A blended mixture of liquids
Substance – What an object is made of
Particle – A tiny or very small amount of something
36
DIY STEM THE SCIENCE OF EVERYDAY FACILITATOR’S GUIDE
Facilitator’s Tip BlockAllow members 15-25 minutes during each session to write their answers to the discussion questions in their scientific notebooks. Members can also document the work they completed for the day and record the growth of their rock candy over time.
Instruct Members To:
1. Take two minutes to pick one person to gather all the materials for this project.
2. Cut two pieces of yarn 1-2 inches longer than the height of the Mason jar.
3. Set one string to the side until later in the activity – this is your control string.
4. Seeding the rock candy:
a. Soak the second string of yarn in water for 7-10 minutes. This is the yarn that will seed your rock candy.
b. Squeeze the water from the string so that it still remains moist, but it not dripping wet.
c. Roll the moistened string of yarn in 1 tablespoon of sugar on a plate.
d. Play with varying quantities of sugar and use this later as a class comparison.
5. Place your seeded (sugar-coated) string and your non-seeded string on a piece of wax paper, make sure they are not touching. We will continue with part two of this activity tomorrow.
Discussion Question:
GROW YOUR OWN ROCK CANDY B PREPARING THE STRINGS (45 MINUTES)
Facilitators:
1. Review materials to be used as weights and find substitutes when needed.
2. Divide members into their teams and ask them to retrieve the strings that were prepared in the previous session.
Instruct Members To:
1. Take each of your strings and tie one end to a small object that serves as a weight. Some sugar may fall off of the string during this step (this is okay!).
1 Will the amount of sugar on a plate affect how much rock candy will grow?
37
DIY STEM THE SCIENCE OF EVERYDAY FACILITATOR’S GUIDE
2. Tie the other end of each piece of string to a pencil or other object that serves as an anchor.
3. Use a marker, colored tape or another method to mark the pencil that holds the seeded string.
4. Write down what you marked on your seeded string in your lab notebook in case you forget later.
5. Lower the weighted end of the string into each of the jars, rest the pencil across the top (mouth) of the jar.
6. Each string should be about 1 centimeter from the bottom the jar. You may have to roll your string around the pencil to adjust the height.
These next steps are very important. Please take your time and be careful as you’ll be working with hot water!
Instruct Members To:
1. Fill each jar with boiling water using a funnel or other device to reduce the risk of splashing water and spills.
2. Keep the boiled water in each Mason jar until you are ready to replace this water with your sugar-water solution.
GROW YOUR OWN ROCK CANDY C MAKING THE SUGAR-WATER SOLUTION (30 MINUTES)
Facilitators: Complete the following steps for the group and give out appropriate amounts of the solution for each group to complete the activity.
1. Use a measuring cup to add 1 cup of water to a pot, bring the water to a rolling boil on the stove.
2. Reduce heat to low.
3. Use a measuring cup to add 2 cups of sugar to the hot water, then mix with a wooden mixing spoon until all the sugar has dissolved.
Facilitator’s Tip BlockGive members 15-25 minutes during each session to write the answers to their discussion questions in their scientific notebooks. Members can also document the work they completed for the day and record the growth of their rock candy over time.
Facilitator’s Tip BlockContinue to emphasize the scientific method with an emphasis on the experiment and analysis steps used to test their experiments and hypothesis. Require members to use their scientific notebook to record their information.
38
DIY STEM THE SCIENCE OF EVERYDAY FACILITATOR’S GUIDE
4. Turn the heat back up and wait until the sugar-water solution returns to a rolling boil, keep stirring to keep the solution consistent.
5. Remove the boiling sugar-water solution from the stove.
6. Continue to add 1 tablespoon of sugar at a time to the solution. Stir thoroughly after each spoonful, making sure the sugar is completely dissolved before adding more.
7. Continue adding sugar until no more dissolves in the solution. After all the sugar has dissolved, let the solution cool for five minutes.
Making the Candy:
8. Pour the hot water out of the preheated glass jars.
9. After the sugar-water solution has cooled for five minutes, pour the solution into the two preheated glass jars, dividing the liquid equally between the two containers.
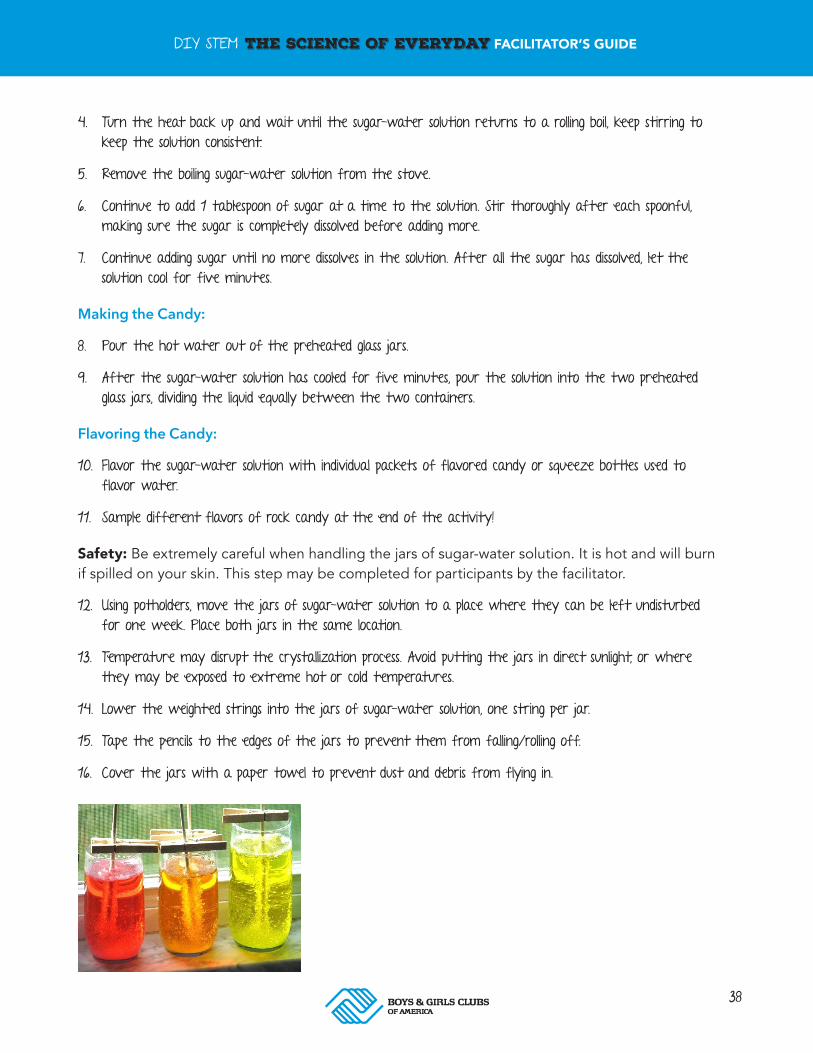
Flavoring the Candy:
10. Flavor the sugar-water solution with individual packets of flavored candy or squeeze bottles used to flavor water.
11. Sample different flavors of rock candy at the end of the activity!
Safety: Be extremely careful when handling the jars of sugar-water solution. It is hot and will burn if spilled on your skin. This step may be completed for participants by the facilitator.
12. Using potholders, move the jars of sugar-water solution to a place where they can be left undisturbed for one week. Place both jars in the same location.
13. Temperature may disrupt the crystallization process. Avoid putting the jars in direct sunlight, or where they may be exposed to extreme hot or cold temperatures.
14. Lower the weighted strings into the jars of sugar-water solution, one string per jar.
15. Tape the pencils to the edges of the jars to prevent them from falling/rolling off.
16. Cover the jars with a paper towel to prevent dust and debris from flying in.

39
DIY STEM THE SCIENCE OF EVERYDAY FACILITATOR’S GUIDE
Facilitators: Let participants look at their jars once a day. Encourage participants to record their observations in their science notebook. On the seventh day, have participants remove the strings from the jars and take measurements of their rock candy crystals.
Observation Questions:
1. What do you see?
2. Are any crystals growing?
3. Where are the crystals?
4. Which string has more crystals – the one that was or wasn’t seeded?
Troubleshooting:
1. If there is a hardened layer of sugar-water solution at the top of your jar, use a spoon to break that layer before pulling out your sugar crystals.
2. Rinse the rock candy crystals in cold water and allow them to dry on a paper towel for one hour.
Instruct Members To:
1. Using a ruler, measure the length of the rock candy, and the width at its widest point.
2. Record your measurements in a data table in your lab notebook.
3. Once you’ve recorded all your measurements and observations, you can enjoy your hard work by eating the rock candy you grew and sample the different flavors made by others in the class!
Extension Activity Questions:
Facilitator’s Tip BlockGive members 15-25 minutes during each session to write the answers to their discussion questions in their scientific notebooks. Members can also document the work they completed for the day and record the growth of their rock candy over time. They should be focused on the results section of the scientific method in their notebooks to record the results of their food experiments.
1 Did the amount of sugar on your seeded string make a difference in the size of your rock candy?
2 What other steps could you have included to increase the growth of your rock candy?
GROW YOUR OWN ROCK CANDY D OBSERVING AND MEASURING (30-45 MINUTES, ONCE A DAY FOR 3-5 DAYS)

40
DIY STEM THE SCIENCE OF EVERYDAY FACILITATOR’S GUIDE
BREAKING THE TENSION (80 MINUTES)
Safety: Make sure all participants wear safety goggles when testing the explosions so no one gets sprayed in the eyes!
Introduction: Participants will test crushed Mentos in three separate trials to test how chemicals react when they are combined, then measure the reactions. In the first trial, participants will use crushed Mentos and Coke. In the second trial, participants will use whole Mentos and Coke. For the third trial, participants will use either whole or crushed Mentos with a new variable soda.
Objective: To develop and test their hypothesis about what will happen when various states of Mentos and Coke combine.
NGSS Alignment: MS-PS1-2: Structure and Properties of Matter. Each pure substance has characteristic physical and chemical properties that can be used to identify it.
MS-PS1-5: Substances react chemically in characteristic ways.
MS-PS1-5: The total number of each type of atom is conserved, and thus the matter does not change.
MS-PS1-6: Some chemical reactions release energy, others store energy.
MS-PS1-6: A solution needs to be tested, and then modified on the basis of the test results in order to improve it.
MS-PS1-6: Undertake a design project to construct, test and modify a device that either releases or absorbs thermal energy by chemical processes.
MS-PS1-2: Analyze and interpret data to determine similarities and differences in findings.
MS-PS1-2: Analyze and interpret data on the properties of substances before and after the substances interact to determine if a chemical reaction has occurred.
MATERIALS
F Eye protection, such as goggles or glasses
F Mentos® mint flavored candies (24 candies)
F Wax paper F Cutting board* F Knife F Funnel F Measuring cup F Index cards (at least 2) F 2-liter bottle of Diet Coke® F Blue painter’s tape F Metric tape measure or
meter stick F Ladder* F Outdoor space next to an
exterior wall where tape can be applied with permission
F Video camera* F Tripod*
Key VocabularyVariable – Something that changes or that can be changed
Diameter – The distance through the center of something from one side to the other
*Optional
41
DIY STEM THE SCIENCE OF EVERYDAY FACILITATOR’S GUIDE
RST.6-8.3: Follow a multi-step procedure precisely when carrying out experiments, taking measurements, or performing technical tasks.
RST.6-8.7: Integrate quantitative or technical information expressed in words in a text with a version of that information expressed visually, (e.g. in a flowchart, diagram, model, graph, table, etc.). This is met through the creation and analysis of multiple graphs at the end of this activity.
BREAKING THE TENSION A PREPARING THE CANDY (10 MINUTES)
Facilitators: Have participants form groups of three or four, and distribute all project materials. Be sure to have different flavors of soda available for the third trial, (e.g., root-beer, sprite, orange, etc.).
Instruct Members To:
1. Place a piece of wax paper on their desk.
2. Divide the Mentos into three equal groups on the wax paper (8 pieces).
3. Carefully use their chosen tool (hammer, book) to crush the Mentos candies into many small pieces.
BREAKING THE TENSION B MAKING THE CANDY TUBE (10 MINUTES)
Instruct Members To:
1. Take one of the index cards and roll it into a tube that is slightly larger than the diameter of a Mentos candy. The easiest way to do this is to wrap it around an unopened tube of Mentos.
2. Tape the tube together on the side.
3. Place the other index card beneath the tube of Mentos to keep the Mentos from dropping into the soda bottle until they are ready.
Facilitator’s Tip BlockContinue to emphasize the scientific method with an emphasis on the experiment and analysis steps used to test their experiments and hypothesis. Require members to use their scientific notebook to record their information.
42
DIY STEM THE SCIENCE OF EVERYDAY FACILITATOR’S GUIDE
BREAKING THE TENSION C LAUNCHING PREPARATION AND GEYSER TRIALS (30 MINUTES) Facilitators: 1. Prepare your test site to measure the height of the geysers.
2. Use a ladder if needed to mark off the taller measurements.
3. Members may add 4-8 whole Mentos (or the crushed equivalent) to their tube for each trial. Use funnels to help load the crushed Mentos candy pieces into the candy tube.
4. Go outside the Club and set one bottle of Coke (or other soda) against an exterior wall.
5. Mark the top of the soda bottle with blue painter’s tape. This will be your baseline measurement.
6. Mark the rest of the wall in 18-inch increments to measure your geysers as you conduct individual trials.
7. If available, a member of the group could use a video camera on a cell phone or a tablet to capture each trial and verify the height of each geyser.
8. Place an unopened soda bottle outside of the area you have marked off, at least 6 feet away from the building. It's important to make sure that the bottle is also placed in a safe area where it is away from buildings or a covered area that could be damaged after the bottle top launches. A clear open field with no coverings or roof would be ideal.
9. Remove the cap from the soda bottle and place the flat index card on top, covering up the mouth of the bottle.
10. Put on safety goggles.
11. For each trial, measure the following:
a. The reaction time (from the last candy dropped in, to the time a geyser erupted).
b. The height of each geyser.
c. The volume remaining in the bottle after the geyser erupted.
12. Place your full candy tube on top of the flat index card by lining the mouth of the bottle with the opening of your tube.
13. Remove the flat index card by pulling it to release the Mentos into the bottle.
Safety: The geyser will erupt quickly, so remove the empty candy tube and step away from the bottle as soon as the last candy has dropped into the bottle.
14. When the bottle stops spouting, stop recording.
15. Remove the used soda bottle and set it aside. Do not pour out the remaining soda yet! You will measure the remaining volume of each soda bottle at the end of the activity.
16. Label the bottle with the trial number, and record whether it was used with whole or crushed Mentos.
17. Repeat the steps two more times, for a total of three trials using 4-8 whole or crushed Mentos each time.
43
DIY STEM THE SCIENCE OF EVERYDAY FACILITATOR’S GUIDE
Soda and Mentos Surface Tension DataInstruct Members To:
1. Make the following four bar graphs of whole Mentos versus crushed Mentos:
a. One of the average reaction time.
b. One of the average geyser height.
c. One of the remaining soda volume.
d. One of the soda geyser height and “other” soda geyser height. Make sure the type of Mentos used for this comparison is the same (crushed or whole for both trials).
2. For each graph, put whole Mentos and crushed Mentos on the x-axis (the horizontal axis). Record average reaction time, average geyser height and remaining soda volume on the y-axis (the vertical axis).
3. Calculate the average reaction time, geyser height and remaining soda volume for the trials using whole Mentos and the trials using crushed Mentos.
Facilitator’s Tip BlockGive members 15-25 minutes during each session to write their answers to the discussion questions in their scientific notebooks. Members can also document the work they completed for the day and record the different reactions of the liquid when it interacts with Mentos in different physical states.
1 What makes the Coke/soda suddenly form a geyser?
2 Does the speed of the candy entering the bottle affect how large the geyser is?
3 Do you think that using crushed Mentos makes a difference in the reaction?
4 Were the results what you expected or were they different? Why or why not?
5 How do you think the reaction time, geyser height and remaining soda volume might correlate with each other?
6 Was there a significant difference in geyser height, reaction time or remaining soda volume in your trial with the “other” soda?
Extension Activity Questions:
44
DIY STEM THE SCIENCE OF EVERYDAY FACILITATOR’S GUIDE
MAKE YOUR SODA...POP! (120 MINUTES)
Introduction: Members will be creating their own soda using the scientific property of chemical reactions among acids and bases.
Objective: To give members opportunities to explore mixtures and solutions as well as practice recording data in their science notebooks.
NGSS Alignment: MS-PS1-1: Develop models to describe the atomic composition of simple molecules and extended structures.
MS-PS1-2: Analyze and interpret data on the properties of substances before and after the substances interact to determine if a chemical reaction has occurred.
MS-PS1-3: Gather and make sense of information to describe that synthetic materials come from natural resources and impact society.
MAKE YOUR SODA...POP! A SIMPLE REACTIONS: ACIDS AND BASES (20 MINUTES)
Facilitators:
1. Show or print an example of the data table for participants as a guide for them to make their own data table to record their soda experiments.
2. Let participants know they are free to spit out the liquid after they have tasted it. It won’t harm them to swallow it, but it might not taste very much like soda yet. Swallowing will over-acidify their stomach (which could give them a slight stomach ache).
3. Reintroduce the scientific method before beginning the experiment. After answering the engagement questions, members should develop their own hypothesis about what they think will happen in the experiment.
4. At the end of the experiment, members will evaluate their hypothesis to determine if their analysis was correct.
MATERIALS F Baking soda (8 oz. box)
F Citric acid (50 g) – you can find food-grade citric acid at your local health foods store or online
F Measuring teaspoons (1/4 tsp and 1/8 tsp)
F Plastic cups, clear
F Liquid measuring cup, 1 cup
F Wooden coffee stirrers
F Paper towels (1 roll)
F Sugar (50g)
Key VocabularyGrittiness – Containing very small pieces of sand or stone
45
DIY STEM THE SCIENCE OF EVERYDAY FACILITATOR’S GUIDE
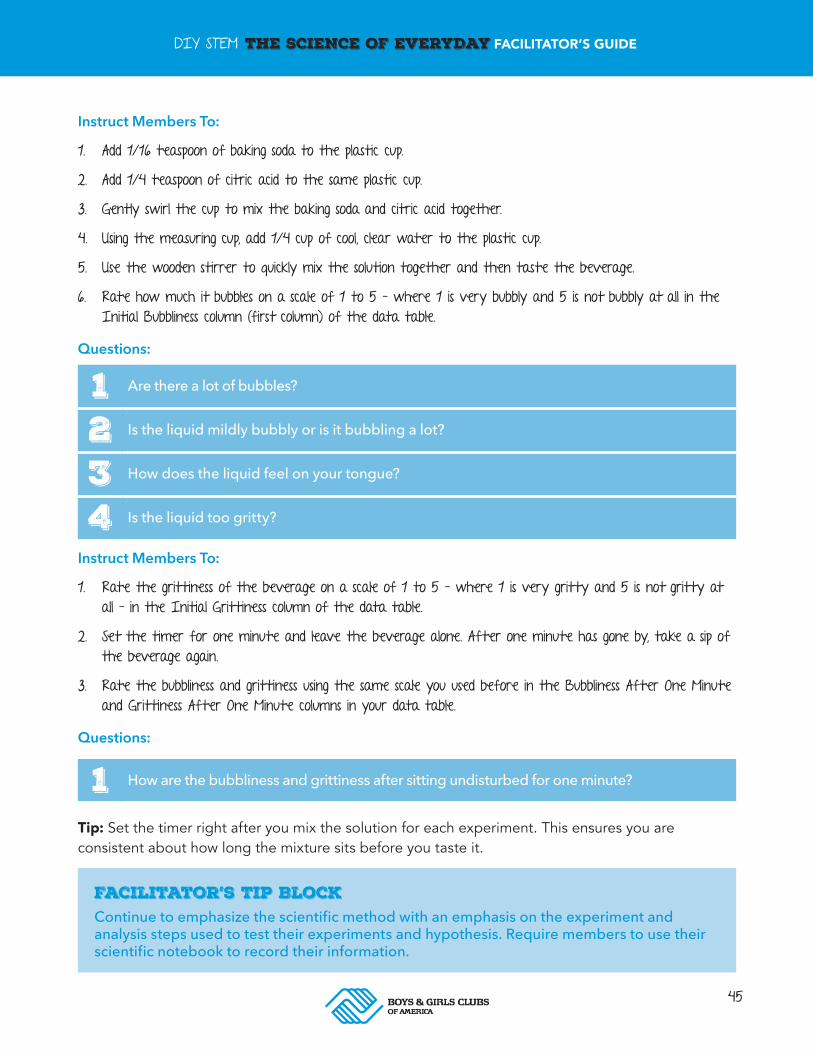
Instruct Members To:
1. Add 1/16 teaspoon of baking soda to the plastic cup.
2. Add 1/4 teaspoon of citric acid to the same plastic cup.
3. Gently swirl the cup to mix the baking soda and citric acid together.
4. Using the measuring cup, add 1/4 cup of cool, clear water to the plastic cup.
5. Use the wooden stirrer to quickly mix the solution together and then taste the beverage.
6. Rate how much it bubbles on a scale of 1 to 5 – where 1 is very bubbly and 5 is not bubbly at all in the Initial Bubbliness column (first column) of the data table.
Questions:
Facilitator’s Tip BlockContinue to emphasize the scientific method with an emphasis on the experiment and analysis steps used to test their experiments and hypothesis. Require members to use their scientific notebook to record their information.
1 Are there a lot of bubbles?
2 Is the liquid mildly bubbly or is it bubbling a lot?
3 How does the liquid feel on your tongue?
4 Is the liquid too gritty?
1 How are the bubbliness and grittiness after sitting undisturbed for one minute?
Instruct Members To:
1. Rate the grittiness of the beverage on a scale of 1 to 5 – where 1 is very gritty and 5 is not gritty at all – in the Initial Grittiness column of the data table.
2. Set the timer for one minute and leave the beverage alone. After one minute has gone by, take a sip of the beverage again.
3. Rate the bubbliness and grittiness using the same scale you used before in the Bubbliness After One Minute and Grittiness After One Minute columns in your data table.
Questions:
Tip: Set the timer right after you mix the solution for each experiment. This ensures you are consistent about how long the mixture sits before you taste it.
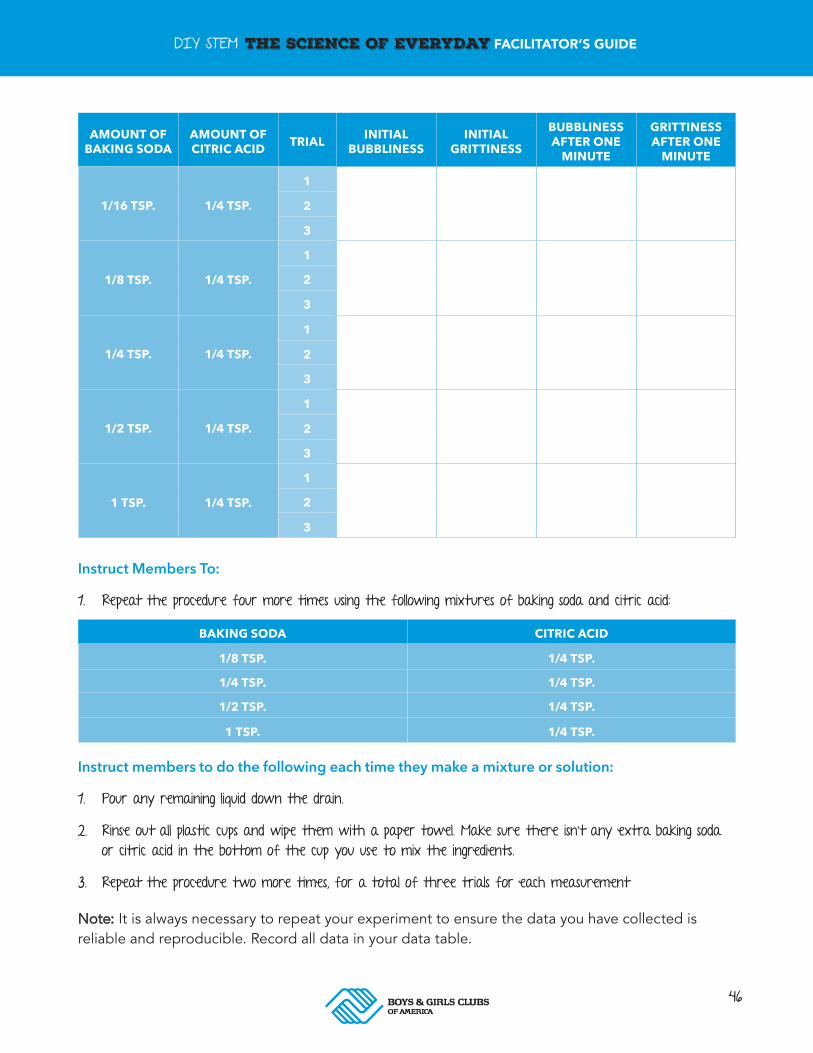
46
DIY STEM THE SCIENCE OF EVERYDAY FACILITATOR’S GUIDE
AMOUNT OF BAKING SODA
AMOUNT OF CITRIC ACID TRIAL INITIAL
BUBBLINESSINITIAL
GRITTINESS
BUBBLINESS AFTER ONE
MINUTE
GRITTINESS AFTER ONE
MINUTE
1/16 TSP. 1/4 TSP.
1
2
3
1/8 TSP. 1/4 TSP.
1
2
3
1/4 TSP. 1/4 TSP.
1
2
3
1/2 TSP. 1/4 TSP.
1
2
3
1 TSP. 1/4 TSP.
1
2
3
BAKING SODA CITRIC ACID
1/8 TSP. 1/4 TSP.
1/4 TSP. 1/4 TSP.
1/2 TSP. 1/4 TSP.
1 TSP. 1/4 TSP.
Instruct Members To:
1. Repeat the procedure four more times using the following mixtures of baking soda and citric acid:
Instruct members to do the following each time they make a mixture or solution:
1. Pour any remaining liquid down the drain.
2. Rinse out all plastic cups and wipe them with a paper towel. Make sure there isn’t any extra baking soda or citric acid in the bottom of the cup you use to mix the ingredients.
3. Repeat the procedure two more times, for a total of three trials for each measurement
Note: It is always necessary to repeat your experiment to ensure the data you have collected is reliable and reproducible. Record all data in your data table.
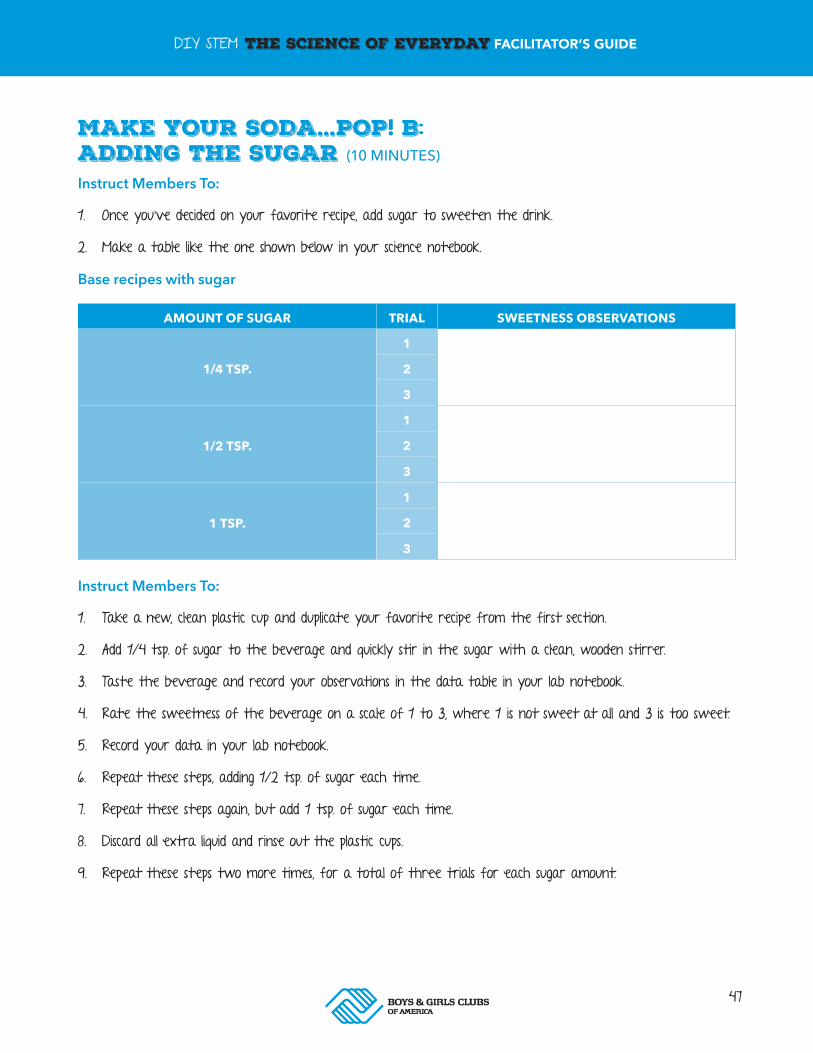
47
DIY STEM THE SCIENCE OF EVERYDAY FACILITATOR’S GUIDE
MAKE YOUR SODA...POP! B ADDING THE SUGAR (10 MINUTES)
Instruct Members To:
1. Once you’ve decided on your favorite recipe, add sugar to sweeten the drink.
2. Make a table like the one shown below in your science notebook.
Base recipes with sugar
Instruct Members To:
1. Take a new, clean plastic cup and duplicate your favorite recipe from the first section.
2. Add 1/4 tsp. of sugar to the beverage and quickly stir in the sugar with a clean, wooden stirrer.
3. Taste the beverage and record your observations in the data table in your lab notebook.
4. Rate the sweetness of the beverage on a scale of 1 to 3, where 1 is not sweet at all and 3 is too sweet.
5. Record your data in your lab notebook.
6. Repeat these steps, adding 1/2 tsp. of sugar each time.
7. Repeat these steps again, but add 1 tsp. of sugar each time.
8. Discard all extra liquid and rinse out the plastic cups.
9. Repeat these steps two more times, for a total of three trials for each sugar amount.
AMOUNT OF SUGAR TRIAL SWEETNESS OBSERVATIONS
1/4 TSP.
1
2
3
1/2 TSP.
1
2
3
1 TSP.
1
2
3
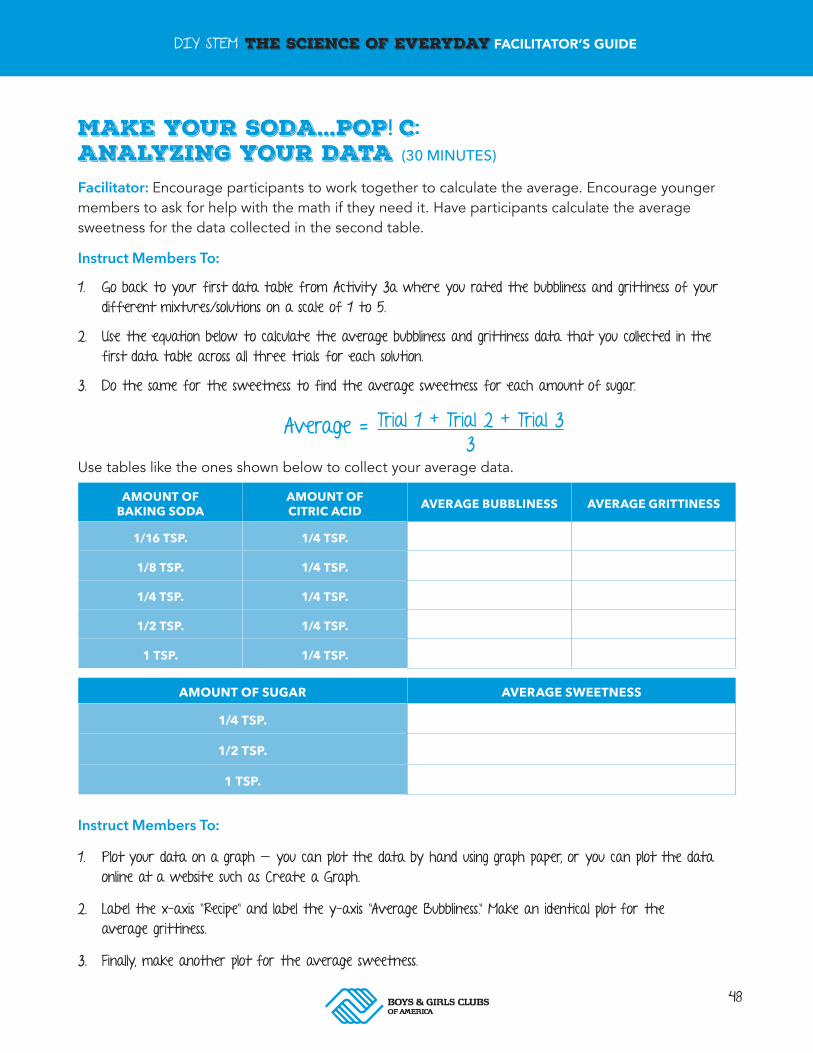
48
DIY STEM THE SCIENCE OF EVERYDAY FACILITATOR’S GUIDE
MAKE YOUR SODA...POP! C ANALYZING YOUR DATA (30 MINUTES)
Facilitator: Encourage participants to work together to calculate the average. Encourage younger members to ask for help with the math if they need it. Have participants calculate the average sweetness for the data collected in the second table.
Instruct Members To:
1. Go back to your first data table from Activity 3a where you rated the bubbliness and grittiness of your different mixtures/solutions on a scale of 1 to 5.
2. Use the equation below to calculate the average bubbliness and grittiness data that you collected in the first data table across all three trials for each solution.
3. Do the same for the sweetness to find the average sweetness for each amount of sugar.
Instruct Members To:
1. Plot your data on a graph — you can plot the data by hand using graph paper, or you can plot the data online at a website such as Create a Graph.
2. Label the x-axis "Recipe" and label the y-axis "Average Bubbliness." Make an identical plot for the average grittiness.
3. Finally, make another plot for the average sweetness.
Average = Trial 1 + Trial 2 + Trial 33
AMOUNT OF BAKING SODA
AMOUNT OF CITRIC ACID AVERAGE BUBBLINESS AVERAGE GRITTINESS
1/16 TSP. 1/4 TSP.
1/8 TSP. 1/4 TSP.
1/4 TSP. 1/4 TSP.
1/2 TSP. 1/4 TSP.
1 TSP. 1/4 TSP.
AMOUNT OF SUGAR AVERAGE SWEETNESS
1/4 TSP.
1/2 TSP.
1 TSP.
Use tables like the ones shown below to collect your average data.
49
DIY STEM THE SCIENCE OF EVERYDAY FACILITATOR’S GUIDE
1 According to your data, which combination of baking soda, citric acid and sugar yields the most enjoyable soda?
2 Was your hypothesis about the experiment verified? If not, what was incorrect about your hypothesis?
Extension Activity Questions:
50
50
UNIT 4INTRO TO
AERONAUTICS
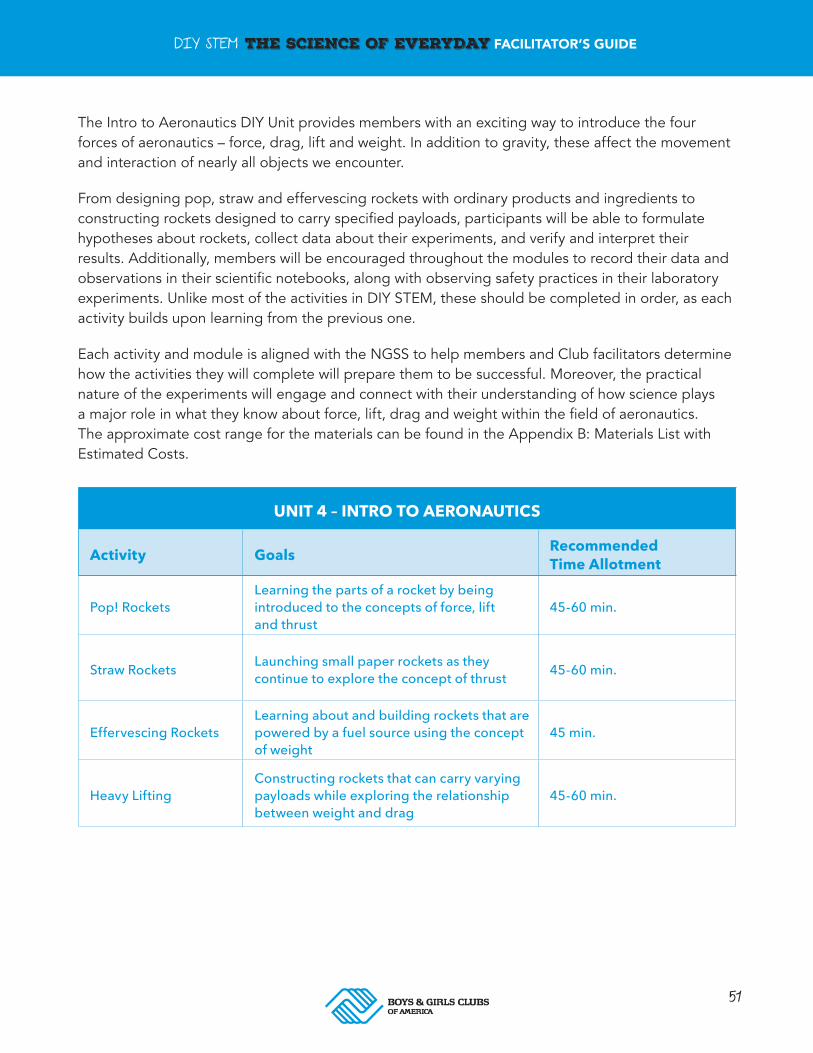
51
DIY STEM THE SCIENCE OF EVERYDAY FACILITATOR’S GUIDE
The Intro to Aeronautics DIY Unit provides members with an exciting way to introduce the four forces of aeronautics – force, drag, lift and weight. In addition to gravity, these affect the movement and interaction of nearly all objects we encounter.
From designing pop, straw and effervescing rockets with ordinary products and ingredients to constructing rockets designed to carry specified payloads, participants will be able to formulate hypotheses about rockets, collect data about their experiments, and verify and interpret their results. Additionally, members will be encouraged throughout the modules to record their data and observations in their scientific notebooks, along with observing safety practices in their laboratory experiments. Unlike most of the activities in DIY STEM, these should be completed in order, as each activity builds upon learning from the previous one.
Each activity and module is aligned with the NGSS to help members and Club facilitators determine how the activities they will complete will prepare them to be successful. Moreover, the practical nature of the experiments will engage and connect with their understanding of how science plays a major role in what they know about force, lift, drag and weight within the field of aeronautics. The approximate cost range for the materials can be found in the Appendix B: Materials List with Estimated Costs.
UNIT 4 – INTRO TO AERONAUTICS
Activity Goals Recommended Time Allotment
Pop! RocketsLearning the parts of a rocket by being introduced to the concepts of force, lift and thrust
45-60 min.
Straw Rockets Launching small paper rockets as they continue to explore the concept of thrust 45-60 min.
Effervescing RocketsLearning about and building rockets that are powered by a fuel source using the concept of weight
45 min.
Heavy Lifting Constructing rockets that can carry varying payloads while exploring the relationship between weight and drag
45-60 min.
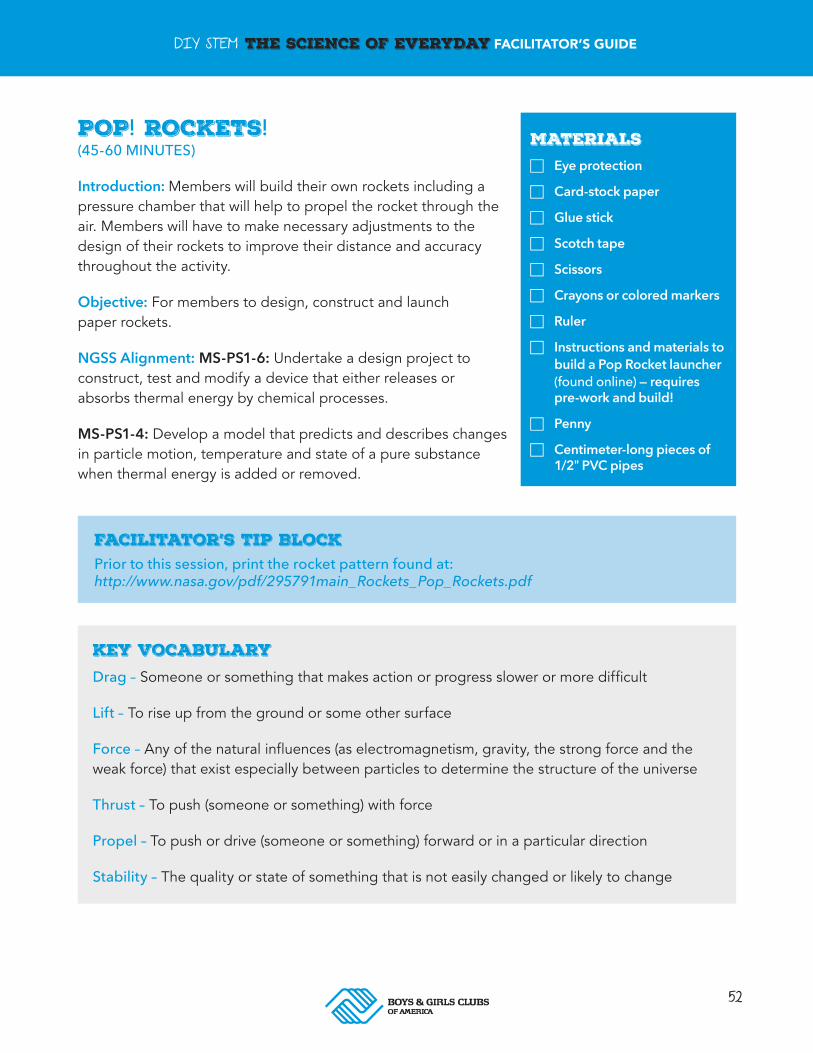
52
DIY STEM THE SCIENCE OF EVERYDAY FACILITATOR’S GUIDE
POP! ROCKETS!! (45-60 MINUTES)
Introduction: Members will build their own rockets including a pressure chamber that will help to propel the rocket through the air. Members will have to make necessary adjustments to the design of their rockets to improve their distance and accuracy throughout the activity.
Objective: For members to design, construct and launch paper rockets.
NGSS Alignment: MS-PS1-6: Undertake a design project to construct, test and modify a device that either releases or absorbs thermal energy by chemical processes.
MS-PS1-4: Develop a model that predicts and describes changes in particle motion, temperature and state of a pure substance when thermal energy is added or removed.
Facilitator’s Tip BlockPrior to this session, print the rocket pattern found at: http://www.nasa.gov/pdf/295791main_Rockets_Pop_Rockets.pdf
Key VocabularyDrag – Someone or something that makes action or progress slower or more difficult
Lift – To rise up from the ground or some other surface
Force – Any of the natural influences (as electromagnetism, gravity, the strong force and the weak force) that exist especially between particles to determine the structure of the universe
Thrust – To push (someone or something) with force
Propel – To push or drive (someone or something) forward or in a particular direction
Stability – The quality or state of something that is not easily changed or likely to change
MATERIALS F Eye protection
F Card-stock paper
F Glue stick
F Scotch tape
F Scissors
F Crayons or colored markers
F Ruler
F Instructions and materials to build a Pop Rocket launcher (found online) — requires pre-work and build!
F Penny
F Centimeter-long pieces of 1/2" PVC pipes
53
DIY STEM THE SCIENCE OF EVERYDAY FACILITATOR’S GUIDE
Ask Members:
1. Who can name the parts of a rocket?
2. Who can explain the three parts listed below:
a. The body or pressure chamber, which stores passengers, machinery and fuel.
b. Fins, which are necessary for stability.
c. The nose cone, which assists with direction and reduces the effect of drag on a rocket.
3. Let participants know they are going to explore the following two forces that make it possible for rockets to take flight : lift and thrust.
4. Can anyone give an example of objects that takes advantage of lift and thrust? Examples may include: airplanes, helicopters, drones, space shuttle, slingshots, etc.
5. Let participants know they’ve been given two rocket patterns and ask them to decide whether they are going to build a one-piece or a three-piece rocket.
6. After participants are finished with their rockets, allow them to decorate their rockets with crayons, colored pencils or markers. Other decorations, such as stickers, may be too heavy and affect the rockets’ stability.
POP! ROCKETS! A:!ONE-PIECE ROCKET
Instruct Members To:
1. Use a ruler and the edge of a penny to score (dent) the fold lines on their template.
2. Place the ruler along a dashed line and hold their penny at an angle.
3. Run the edge of the penny across the paper to make a small groove. This groove ensures the fold line is both accurate and straight.
4. Cut out the pattern on the solid lines.
5. Tape a penny to the inside of one of the nose cone triangles.
6. Fold the three rectangles into a triangular prism with the large tab inside. Tape the seam.
7. Fold the triangles inward to form the nose cone. The tabs should be inside. They will provide support for taping.
8. Bend the fins outward. The rocket is ready for flight.
54
DIY STEM THE SCIENCE OF EVERYDAY FACILITATOR’S GUIDE
POP! ROCKETS! B:!THREE-PIECE ROCKET
Instruct Members To:
1. Cut out the three pieces of the template.
2. Press the edge of a ruler to the fold lines for the fins and nose cone to get a straight fold.
3. Fold the fins outward.
4. Tape a penny securely to the inside of one of the nose cone triangles.
5. Slide the pieces together and match-up the sides of the rocket body.
6. Place a strip of tape along the seams. (Do not tape the fins or nose cone pieces yet.)
7. Pick up the rocket, bring the two side pieces together, and tape the seam. It may be helpful to insert the PVC pipe into the rocket before taping.
8. Use a glue stick or tape to join adjacent fins pieces to make three fins. Or, don’t tape the fins to make six.
9. Push the PVC pipe inside the rocket body to the position of the nose cone. Use the pipe for support while taping.
10. Fold the three triangles inward and tape the seams.
11. The rocket is ready for launch.
To launch the rockets, follow instructions for the Pop! Rocket Launcher at: www.nasa.gov/pdf/295790main_Rockets_Pop_Rocket_Launcher.pdf.
*Activity adapted from: www.nasa.gov/pdf/295791main_Rockets_Pop_Rockets.pdf and http://www.nasa.gov/pdf/295790main_Rockets_Pop_Rocket_Launcher.pdf.
Extension Activity Questions:
1 What design changes could you make to your rocket to cause it to fly a greater distance?
2 Which rocket traveled the greatest distance?
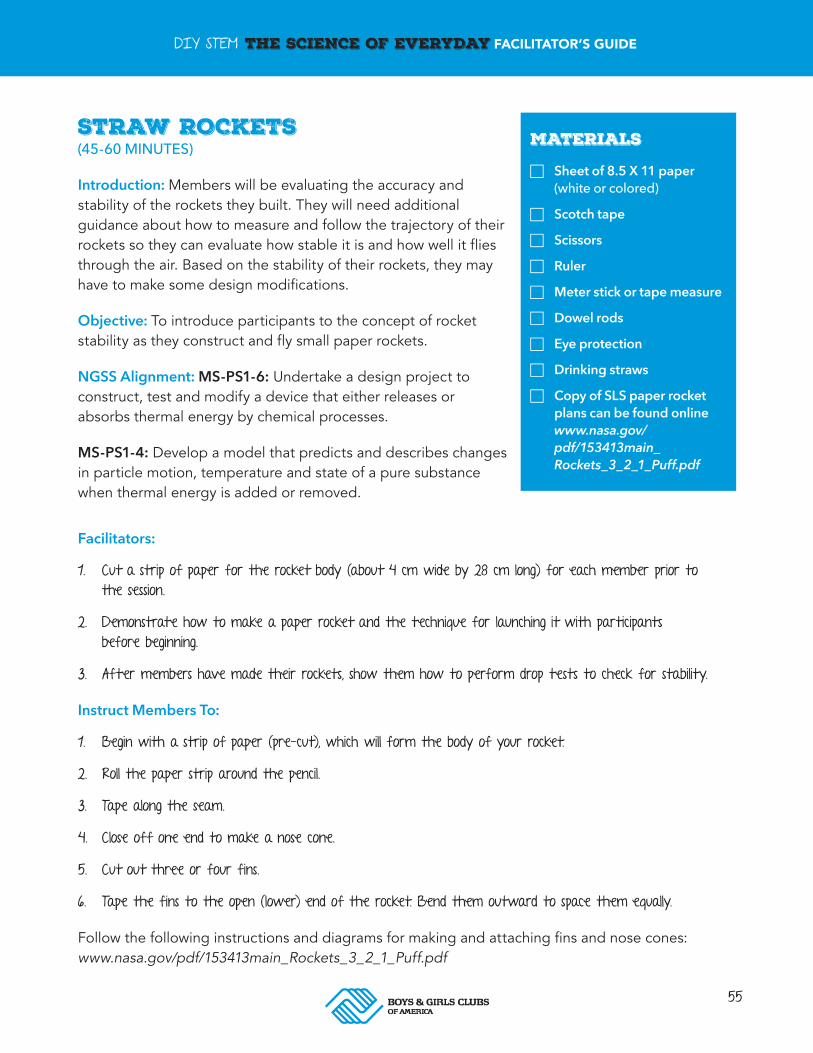
55
DIY STEM THE SCIENCE OF EVERYDAY FACILITATOR’S GUIDE
STRAW ROCKETS! (45-60 MINUTES)
Introduction: Members will be evaluating the accuracy and stability of the rockets they built. They will need additional guidance about how to measure and follow the trajectory of their rockets so they can evaluate how stable it is and how well it flies through the air. Based on the stability of their rockets, they may have to make some design modifications.
Objective: To introduce participants to the concept of rocket stability as they construct and fly small paper rockets.
NGSS Alignment: MS-PS1-6: Undertake a design project to construct, test and modify a device that either releases or absorbs thermal energy by chemical processes.
MS-PS1-4: Develop a model that predicts and describes changes in particle motion, temperature and state of a pure substance when thermal energy is added or removed.
MATERIALS
F Sheet of 8.5 X 11 paper (white or colored)
F Scotch tape
F Scissors
F Ruler
F Meter stick or tape measure
F Dowel rods
F Eye protection
F Drinking straws
F Copy of SLS paper rocket plans can be found online www.nasa.gov/pdf/153413main_Rockets_3_2_1_Puff.pdf
Facilitators:
1. Cut a strip of paper for the rocket body (about 4 cm wide by 28 cm long) for each member prior to the session.
2. Demonstrate how to make a paper rocket and the technique for launching it with participants before beginning.
3. After members have made their rockets, show them how to perform drop tests to check for stability.
Instruct Members To:
1. Begin with a strip of paper (pre-cut), which will form the body of your rocket.
2. Roll the paper strip around the pencil.
3. Tape along the seam.
4. Close off one end to make a nose cone.
5. Cut out three or four fins.
6. Tape the fins to the open (lower) end of the rocket. Bend them outward to space them equally.
Follow the following instructions and diagrams for making and attaching fins and nose cones: www.nasa.gov/pdf/153413main_Rockets_3_2_1_Puff.pdf
56
DIY STEM THE SCIENCE OF EVERYDAY FACILITATOR’S GUIDE
7. Hold their rocket horizontally at eye level and drop it to the floor.
8. If the nose of the rocket hits the floor first, the rocket is stable and ready for flight.
9. If the rocket falls horizontally or the fins hit first, the rocket is unstable and you will need larger fins to stabilize it.
Facilitators: The focus on launching a rocket will be stability and accuracy. The members should be guided to make sure the rockets are built to be stable enough to hit the target you designate accurately. Have them make any design adjustments that are necessary.
Instruct Members To:
1. Insert a straw into the rocket body.
2. Aim the rocket at a target directly in front of them, approximately 10 feet away.
3. Puff strongly into the straw to launch their rocket.
Extension Activity Questions:
*Adapted from: http://er.jsc.nasa.gov/seh/3-2-1_Pop!.pdf.
1 How can a rocket be stable even if it doesn’t have fins?
2 How do paper rockets work?
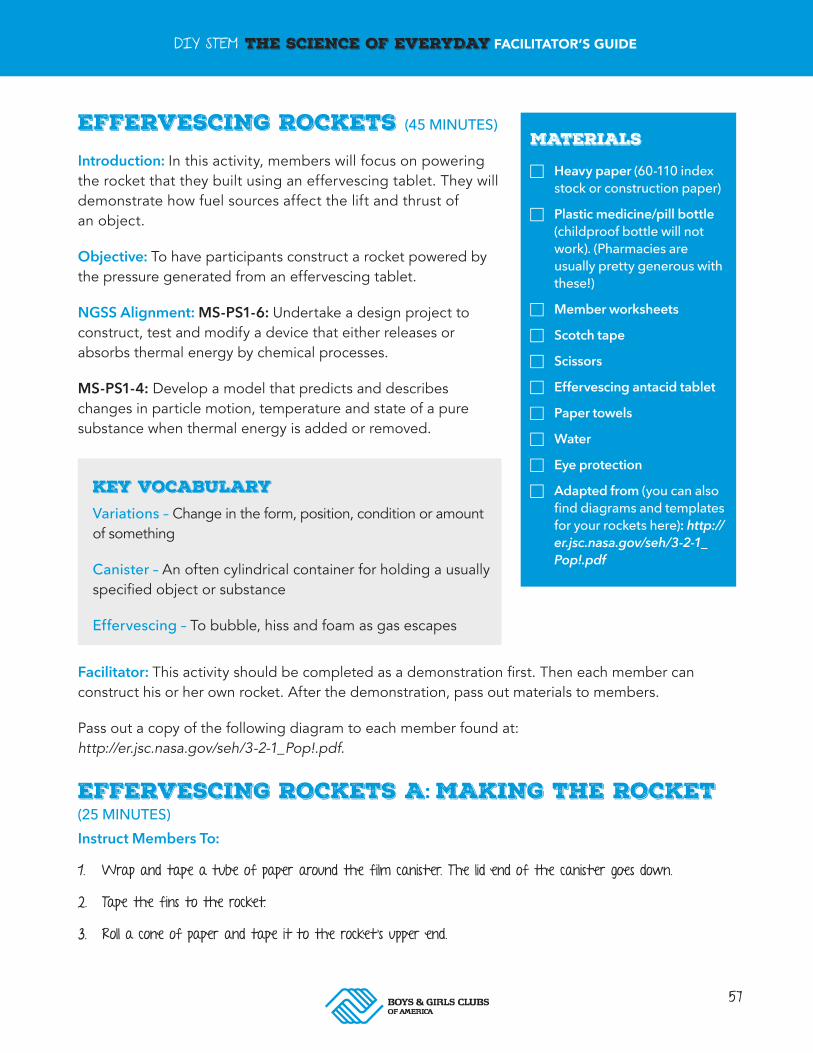
57
DIY STEM THE SCIENCE OF EVERYDAY FACILITATOR’S GUIDE
EFFERVESCING ROCKETS (45 MINUTES)
Introduction: In this activity, members will focus on powering the rocket that they built using an effervescing tablet. They will demonstrate how fuel sources affect the lift and thrust of an object.
Objective: To have participants construct a rocket powered by the pressure generated from an effervescing tablet.
NGSS Alignment: MS-PS1-6: Undertake a design project to construct, test and modify a device that either releases or absorbs thermal energy by chemical processes.
MS-PS1-4: Develop a model that predicts and describes changes in particle motion, temperature and state of a pure substance when thermal energy is added or removed.
Facilitator: This activity should be completed as a demonstration first. Then each member can construct his or her own rocket. After the demonstration, pass out materials to members.
Pass out a copy of the following diagram to each member found at: http://er.jsc.nasa.gov/seh/3-2-1_Pop!.pdf.
EFFERVESCING ROCKETS A: MAKING THE ROCKET (25 MINUTES) Instruct Members To:
1. Wrap and tape a tube of paper around the film canister. The lid end of the canister goes down.
2. Tape the fins to the rocket.
3. Roll a cone of paper and tape it to the rocket’s upper end.
MATERIALS
F Heavy paper (60-110 index stock or construction paper)
F Plastic medicine/pill bottle (childproof bottle will not work). (Pharmacies are usually pretty generous with these!)
F Member worksheets
F Scotch tape
F Scissors
F Effervescing antacid tablet
F Paper towels
F Water
F Eye protection
F Adapted from (you can also find diagrams and templates for your rockets here): http://er.jsc.nasa.gov/seh/3-2-1_Pop!.pdf
Key VocabularyVariations – Change in the form, position, condition or amount of something
Canister – An often cylindrical container for holding a usually specified object or substance
Effervescing – To bubble, hiss and foam as gas escapes
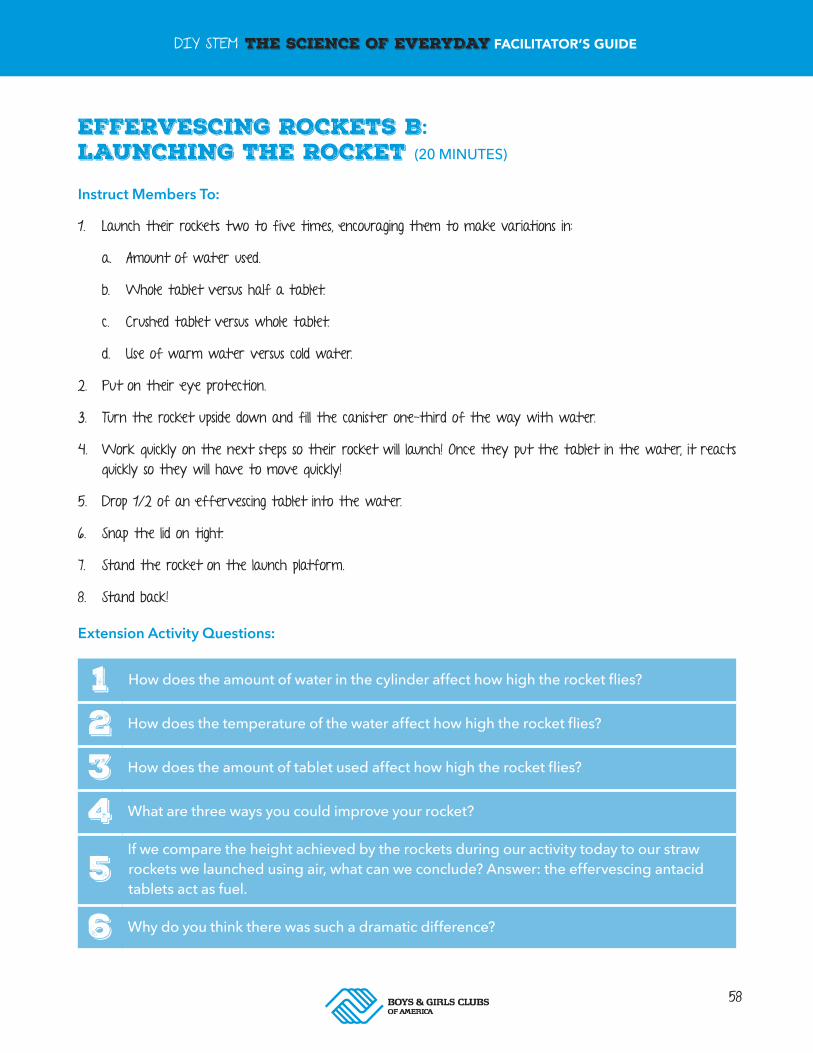
58
DIY STEM THE SCIENCE OF EVERYDAY FACILITATOR’S GUIDE
EFFERVESCING ROCKETS B: LAUNCHING THE ROCKET (20 MINUTES)
Instruct Members To:
1. Launch their rockets two to five times, encouraging them to make variations in:
a. Amount of water used.
b. Whole tablet versus half a tablet.
c. Crushed tablet versus whole tablet.
d. Use of warm water versus cold water.
2. Put on their eye protection.
3. Turn the rocket upside down and fill the canister one-third of the way with water.
4. Work quickly on the next steps so their rocket will launch! Once they put the tablet in the water, it reacts quickly so they will have to move quickly!
5. Drop 1/2 of an effervescing tablet into the water.
6. Snap the lid on tight.
7. Stand the rocket on the launch platform.
8. Stand back!
Extension Activity Questions:
1 How does the amount of water in the cylinder affect how high the rocket flies?
2 How does the temperature of the water affect how high the rocket flies?
3 How does the amount of tablet used affect how high the rocket flies?
4 What are three ways you could improve your rocket?
5If we compare the height achieved by the rockets during our activity today to our straw rockets we launched using air, what can we conclude? Answer: the effervescing antacid tablets act as fuel.
6 Why do you think there was such a dramatic difference?
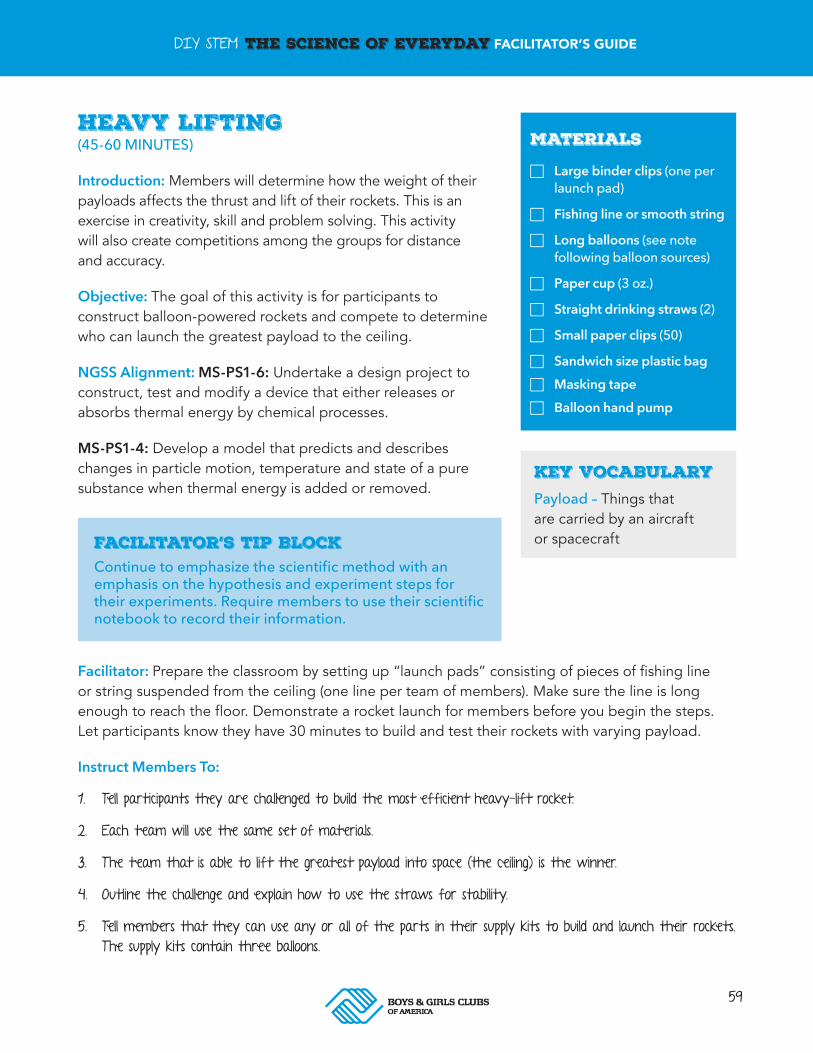
59
DIY STEM THE SCIENCE OF EVERYDAY FACILITATOR’S GUIDE
HEAVY LIFTING (45-60 MINUTES)
Introduction: Members will determine how the weight of their payloads affects the thrust and lift of their rockets. This is an exercise in creativity, skill and problem solving. This activity will also create competitions among the groups for distance and accuracy.
Objective: The goal of this activity is for participants to construct balloon-powered rockets and compete to determine who can launch the greatest payload to the ceiling.
NGSS Alignment: MS-PS1-6: Undertake a design project to construct, test and modify a device that either releases or absorbs thermal energy by chemical processes.
MS-PS1-4: Develop a model that predicts and describes changes in particle motion, temperature and state of a pure substance when thermal energy is added or removed.
Facilitator: Prepare the classroom by setting up “launch pads” consisting of pieces of fishing line or string suspended from the ceiling (one line per team of members). Make sure the line is long enough to reach the floor. Demonstrate a rocket launch for members before you begin the steps. Let participants know they have 30 minutes to build and test their rockets with varying payload.
Instruct Members To:
1. Tell participants they are challenged to build the most efficient heavy-lift rocket.
2. Each team will use the same set of materials.
3. The team that is able to lift the greatest payload into space (the ceiling) is the winner.
4. Outline the challenge and explain how to use the straws for stability.
5. Tell members that they can use any or all of the parts in their supply kits to build and launch their rockets. The supply kits contain three balloons.
MATERIALS
F Large binder clips (one per launch pad)
F Fishing line or smooth string
F Long balloons (see note following balloon sources)
F Paper cup (3 oz.)
F Straight drinking straws (2)
F Small paper clips (50)
F Sandwich size plastic bag F Masking tape F Balloon hand pump
Key VocabularyPayload – Things that are carried by an aircraft or spacecraftFacilitator’s Tip Block
Continue to emphasize the scientific method with an emphasis on the hypothesis and experiment steps for their experiments. Require members to use their scientific notebook to record their information.
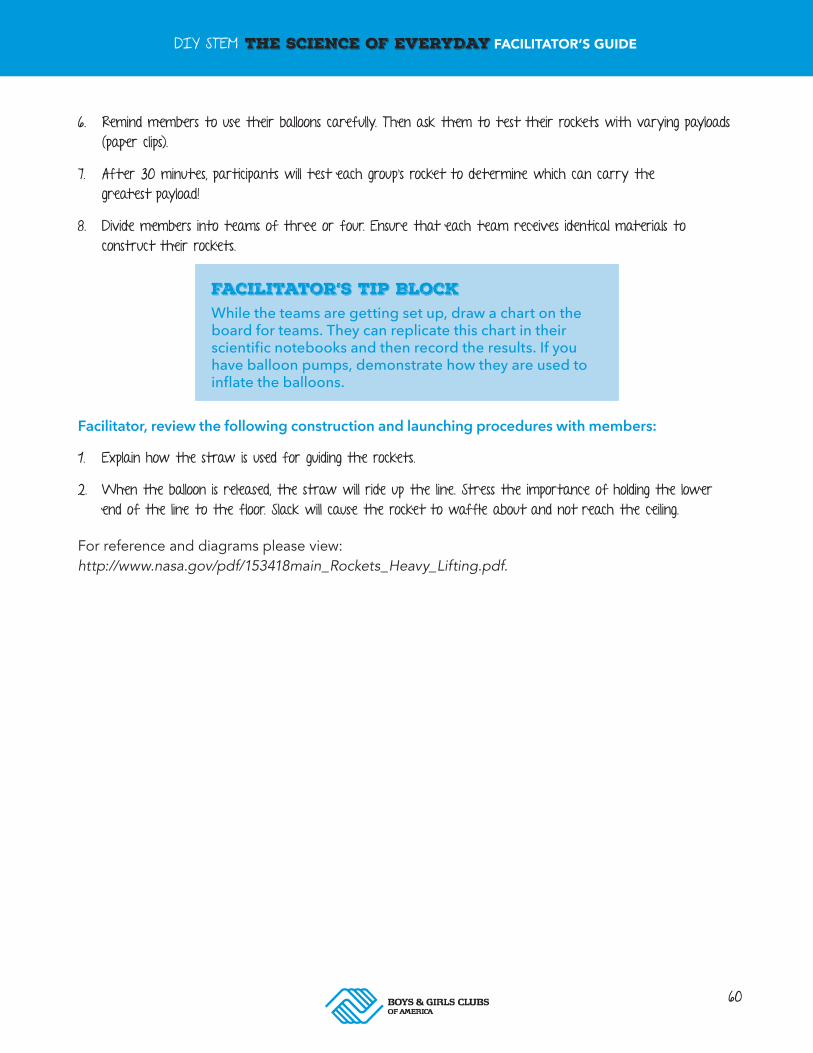
60
DIY STEM THE SCIENCE OF EVERYDAY FACILITATOR’S GUIDE
6. Remind members to use their balloons carefully. Then ask them to test their rockets with varying payloads (paper clips).
7. After 30 minutes, participants will test each group’s rocket to determine which can carry the greatest payload!
8. Divide members into teams of three or four. Ensure that each team receives identical materials to construct their rockets.
Facilitator, review the following construction and launching procedures with members:
1. Explain how the straw is used for guiding the rockets.
2. When the balloon is released, the straw will ride up the line. Stress the importance of holding the lower end of the line to the floor. Slack will cause the rocket to waffle about and not reach the ceiling.
For reference and diagrams please view: http://www.nasa.gov/pdf/153418main_Rockets_Heavy_Lifting.pdf.
Facilitator’s Tip BlockWhile the teams are getting set up, draw a chart on the board for teams. They can replicate this chart in their scientific notebooks and then record the results. If you have balloon pumps, demonstrate how they are used to inflate the balloons.

61
UNIT 5THE SCIENCE OF SPORTS
62
DIY STEM THE SCIENCE OF EVERYDAY FACILITATOR’S GUIDE
BODY SYSTEMS (45-60 MINUTES)
Introduction: Proper nutrition is one of the key components of success for NFL players. NFL athletes are routinely concerned about the foods they put in their body. They work with nutritionists and coaches to develop healthy eating plans to stay in the best possible shape during the regular and off-season. As players consume healthy food, their bodies convert the chemical energy in food into mechanical energy which the body uses to fuel its muscles. NFL players have to constantly monitor what they eat to ensure their bodies have the chemical energy necessary to keep them healthy and effective on the football field.
Objective: Members will use science and mathematics principles to create a breakfast meal plan, nutritional values and ingredients for an NFL player, and then cook and create the meal option they designed.
NGSS Alignment: Grades 3-5: Engineering Design
1. 3-5-ETS1-1. Define a simple design problem reflecting a need or a want that includes specified criteria for success and constraints on materials, time or cost.
2. 3-5-ETS1-2. Generate and compare multiple possible solutions to a problem based on how well each is likely to meet the criteria and constraints of the problem.
MATERIALS F Cooking skillets (2)
F Blender (1)
F Pack of paper or Styrofoam plates (1)
F Pack of plastic utensils (1)
F Stove with at least two eyes or two hot plates (1)
F Spatulas (2)
F Can of cooking spray (1)
F Pack of plastic cups (1)
F Measuring cups (2)
F Measuring spoons (2)
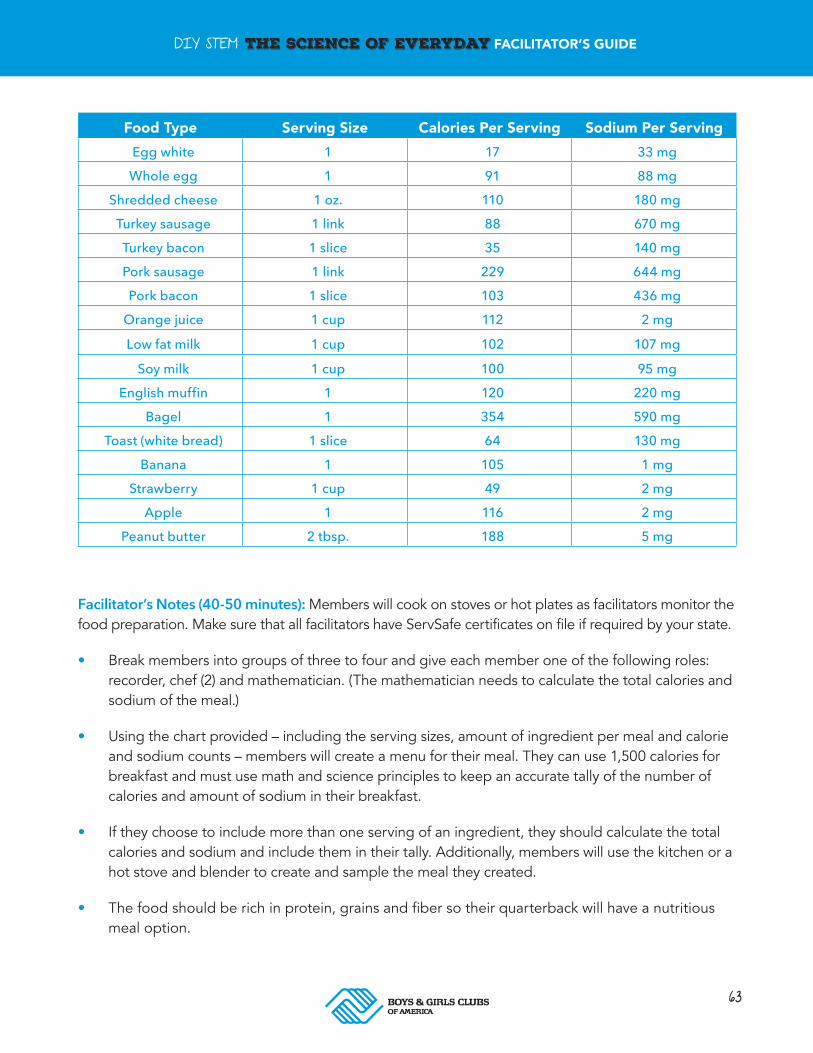
63
DIY STEM THE SCIENCE OF EVERYDAY FACILITATOR’S GUIDE
Food Type Serving Size Calories Per Serving Sodium Per ServingEgg white 1 17 33 mg
Whole egg 1 91 88 mg
Shredded cheese 1 oz. 110 180 mg
Turkey sausage 1 link 88 670 mg
Turkey bacon 1 slice 35 140 mg
Pork sausage 1 link 229 644 mg
Pork bacon 1 slice 103 436 mg
Orange juice 1 cup 112 2 mg
Low fat milk 1 cup 102 107 mg
Soy milk 1 cup 100 95 mg
English muffin 1 120 220 mg
Bagel 1 354 590 mg
Toast (white bread) 1 slice 64 130 mg
Banana 1 105 1 mg
Strawberry 1 cup 49 2 mg
Apple 1 116 2 mg
Peanut butter 2 tbsp. 188 5 mg
Facilitator’s Notes (40-50 minutes): Members will cook on stoves or hot plates as facilitators monitor the food preparation. Make sure that all facilitators have ServSafe certificates on file if required by your state.
• Break members into groups of three to four and give each member one of the following roles: recorder, chef (2) and mathematician. (The mathematician needs to calculate the total calories and sodium of the meal.)
• Using the chart provided – including the serving sizes, amount of ingredient per meal and calorie and sodium counts – members will create a menu for their meal. They can use 1,500 calories for breakfast and must use math and science principles to keep an accurate tally of the number of calories and amount of sodium in their breakfast.
• If they choose to include more than one serving of an ingredient, they should calculate the total calories and sodium and include them in their tally. Additionally, members will use the kitchen or a hot stove and blender to create and sample the meal they created.
• The food should be rich in protein, grains and fiber so their quarterback will have a nutritious meal option.

64
DIY STEM THE SCIENCE OF EVERYDAY FACILITATOR’S GUIDE
NFL QUARTERBACK BREAKFAST FOOD ITEMSSelected Food Selected Food Selected Food Selected Food
Total Calories - /1500 Calories for Breakfast
Extending Your Learning (10 minutes):
1. Based on the calculations on your chart, what did you learn about the lack of nutritional value of some of the foods you may eat on a daily basis?
2. What are some changes you may need to make to ensure you are not consuming too many calories for breakfast?
3. Why would NFL players need to consume 1,500-2,000 calories for breakfast during the regular season?
4. What would happen to the energy transformation process if the body did not receive the proper amount to fuel its muscles?
65
DIY STEM THE SCIENCE OF EVERYDAY FACILITATOR’S GUIDE
WEATHER (50 MINUTES)
Introduction: Extreme weather can have a dramatic impact on the outcome of a professional sporting event. Currently, 24 out of 32 NFL teams have open stadiums where players are exposed to extreme weather conditions including heat, rain, cold and snow. There are four teams with retractable roofs that can be closed when inclement weather arises, and four teams that play in a dome stadium. Extreme cold or heat impacts the pressure maintained within the football. Scientific studies have shown that extreme cold temperatures can cause a football to shrink and become less bouncy, and extreme heat can cause the football to expand and become bouncier than normal. These size changes can have negative impacts on how well the quarterback throws the football, how the football sails off the kicker’s foot and how the football bounces after it is kicked or fumbled.
Objective: Members will use math and science principles to conduct an experiment to test how heat, wind, rain and cold impact the accuracy of a football thrown by a quarterback.
NGSS Alignment:
Middle School, Human Impacts 1. MS-ESS3-3. Apply scientific principles to design a method for monitoring and minimizing a human impact on the environment.
Middle School, Properties of Matter 2. MS-PS1-4. Develop a model that predicts and describes changes in particle motion, temperature and state of a pure substance when thermal energy is added or removed.
MATERIALS F Bucket or large tub (1)
F Large bag of ice cubes (2)
F Box fan or industrial fan (1)
F Industrial strength heater or small heater (1)
F Gallon of water (2)
F NFL or NCAA footballs (2)
F Cardboard boxes or white poster boards (3)
F Black permanent markers or black markers with chisel tips (2)
F Roll of masking tape (2)
F Air pump with needle (1)
F Air pressure gauge (1)
F Measuring tape (1)
F Lab notebook for each participant (1)
All of the materials for the experiments can be purchased at a supermarket, office supply or sporting goods store.
Key VocabularyRetractable – roof on a stadium that can be rolled back on tracks to expose the inside of a stadium to the outdoors
Inclement – unpleasant cold or wet weather
Dehydration – a lack of water and fluids in the body necessary to carry out normal functions
Frostbite – injury to body tissues caused by being exposed to extreme cold
Cramps – painful, involuntary contraction of the muscles caused by being tired or lacking necessary fluids in the body
Simulated – replicating an exercise
Velocity – the speed an object is traveling in a given direction
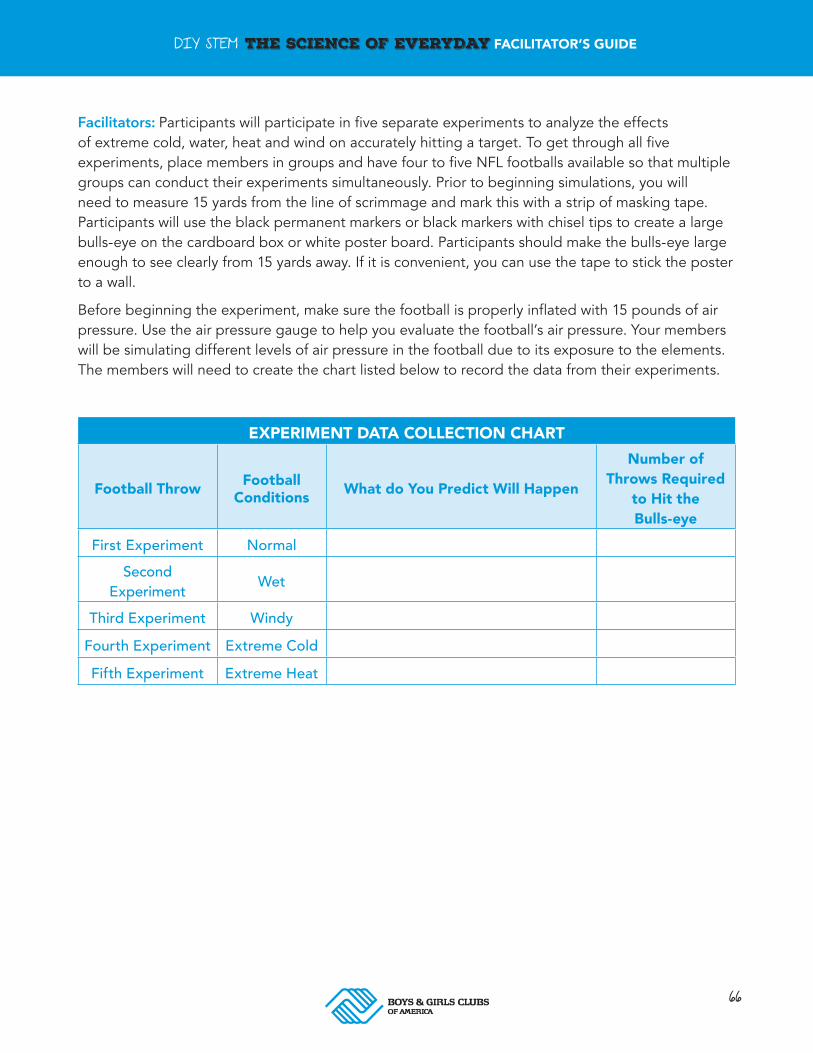
66
DIY STEM THE SCIENCE OF EVERYDAY FACILITATOR’S GUIDE
Facilitators: Participants will participate in five separate experiments to analyze the effects of extreme cold, water, heat and wind on accurately hitting a target. To get through all five experiments, place members in groups and have four to five NFL footballs available so that multiple groups can conduct their experiments simultaneously. Prior to beginning simulations, you will need to measure 15 yards from the line of scrimmage and mark this with a strip of masking tape. Participants will use the black permanent markers or black markers with chisel tips to create a large bulls-eye on the cardboard box or white poster board. Participants should make the bulls-eye large enough to see clearly from 15 yards away. If it is convenient, you can use the tape to stick the poster to a wall.
Before beginning the experiment, make sure the football is properly inflated with 15 pounds of air pressure. Use the air pressure gauge to help you evaluate the football’s air pressure. Your members will be simulating different levels of air pressure in the football due to its exposure to the elements. The members will need to create the chart listed below to record the data from their experiments.
EXPERIMENT DATA COLLECTION CHART
Football Throw Football Conditions What do You Predict Will Happen
Number of Throws Required
to Hit the Bulls-eye
First Experiment NormalSecond
Experiment Wet
Third Experiment WindyFourth Experiment Extreme ColdFifth Experiment Extreme Heat
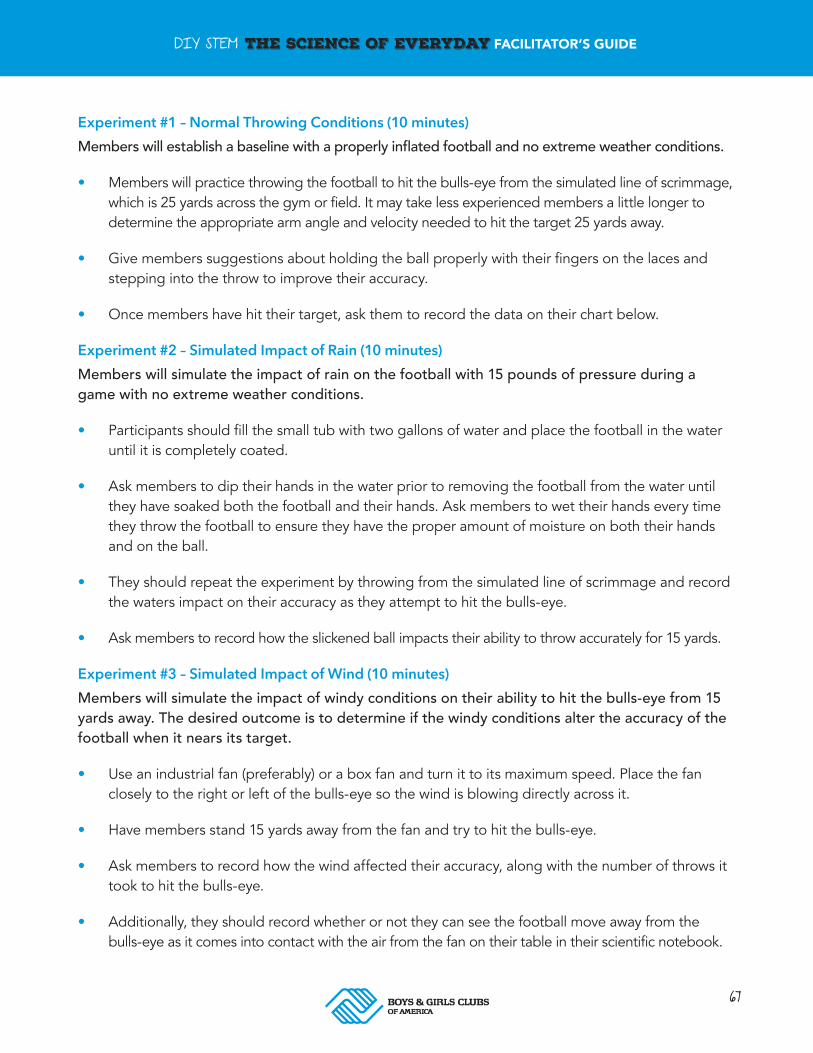
67
DIY STEM THE SCIENCE OF EVERYDAY FACILITATOR’S GUIDE
Experiment #1 – Normal Throwing Conditions (10 minutes)Members will establish a baseline with a properly inflated football and no extreme weather conditions.
• Members will practice throwing the football to hit the bulls-eye from the simulated line of scrimmage, which is 25 yards across the gym or field. It may take less experienced members a little longer to determine the appropriate arm angle and velocity needed to hit the target 25 yards away.
• Give members suggestions about holding the ball properly with their fingers on the laces and stepping into the throw to improve their accuracy.
• Once members have hit their target, ask them to record the data on their chart below.
Experiment #2 – Simulated Impact of Rain (10 minutes)Members will simulate the impact of rain on the football with 15 pounds of pressure during a game with no extreme weather conditions.
• Participants should fill the small tub with two gallons of water and place the football in the water until it is completely coated.
• Ask members to dip their hands in the water prior to removing the football from the water until they have soaked both the football and their hands. Ask members to wet their hands every time they throw the football to ensure they have the proper amount of moisture on both their hands and on the ball.
• They should repeat the experiment by throwing from the simulated line of scrimmage and record the waters impact on their accuracy as they attempt to hit the bulls-eye.
• Ask members to record how the slickened ball impacts their ability to throw accurately for 15 yards.
Experiment #3 – Simulated Impact of Wind (10 minutes)Members will simulate the impact of windy conditions on their ability to hit the bulls-eye from 15 yards away. The desired outcome is to determine if the windy conditions alter the accuracy of the football when it nears its target.
• Use an industrial fan (preferably) or a box fan and turn it to its maximum speed. Place the fan closely to the right or left of the bulls-eye so the wind is blowing directly across it.
• Have members stand 15 yards away from the fan and try to hit the bulls-eye.
• Ask members to record how the wind affected their accuracy, along with the number of throws it took to hit the bulls-eye.
• Additionally, they should record whether or not they can see the football move away from the bulls-eye as it comes into contact with the air from the fan on their table in their scientific notebook.
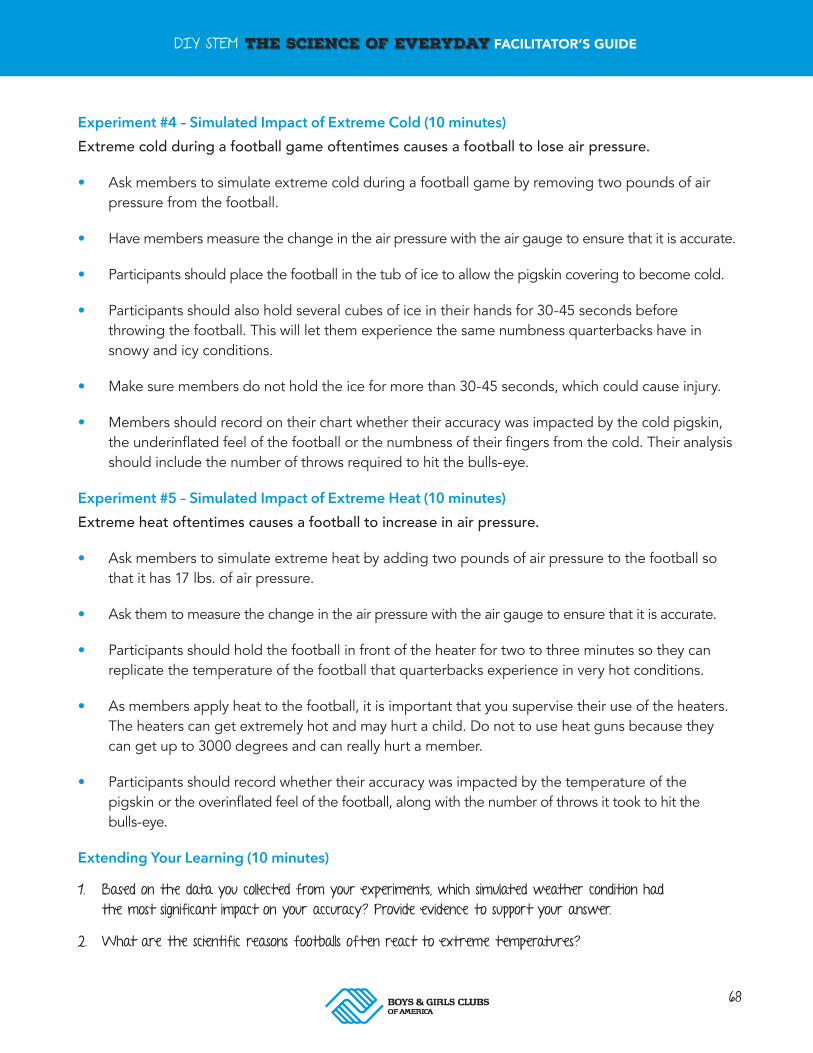
68
DIY STEM THE SCIENCE OF EVERYDAY FACILITATOR’S GUIDE
Experiment #4 – Simulated Impact of Extreme Cold (10 minutes)Extreme cold during a football game oftentimes causes a football to lose air pressure.
• Ask members to simulate extreme cold during a football game by removing two pounds of air pressure from the football.
• Have members measure the change in the air pressure with the air gauge to ensure that it is accurate.
• Participants should place the football in the tub of ice to allow the pigskin covering to become cold.
• Participants should also hold several cubes of ice in their hands for 30-45 seconds before throwing the football. This will let them experience the same numbness quarterbacks have in snowy and icy conditions.
• Make sure members do not hold the ice for more than 30-45 seconds, which could cause injury.
• Members should record on their chart whether their accuracy was impacted by the cold pigskin, the underinflated feel of the football or the numbness of their fingers from the cold. Their analysis should include the number of throws required to hit the bulls-eye.
Experiment #5 – Simulated Impact of Extreme Heat (10 minutes)Extreme heat oftentimes causes a football to increase in air pressure.
• Ask members to simulate extreme heat by adding two pounds of air pressure to the football so that it has 17 lbs. of air pressure.
• Ask them to measure the change in the air pressure with the air gauge to ensure that it is accurate.
• Participants should hold the football in front of the heater for two to three minutes so they can replicate the temperature of the football that quarterbacks experience in very hot conditions.
• As members apply heat to the football, it is important that you supervise their use of the heaters. The heaters can get extremely hot and may hurt a child. Do not to use heat guns because they can get up to 3000 degrees and can really hurt a member.
• Participants should record whether their accuracy was impacted by the temperature of the pigskin or the overinflated feel of the football, along with the number of throws it took to hit the bulls-eye.
Extending Your Learning (10 minutes)
1. Based on the data you collected from your experiments, which simulated weather condition had the most significant impact on your accuracy? Provide evidence to support your answer.
2. What are the scientific reasons footballs often react to extreme temperatures?
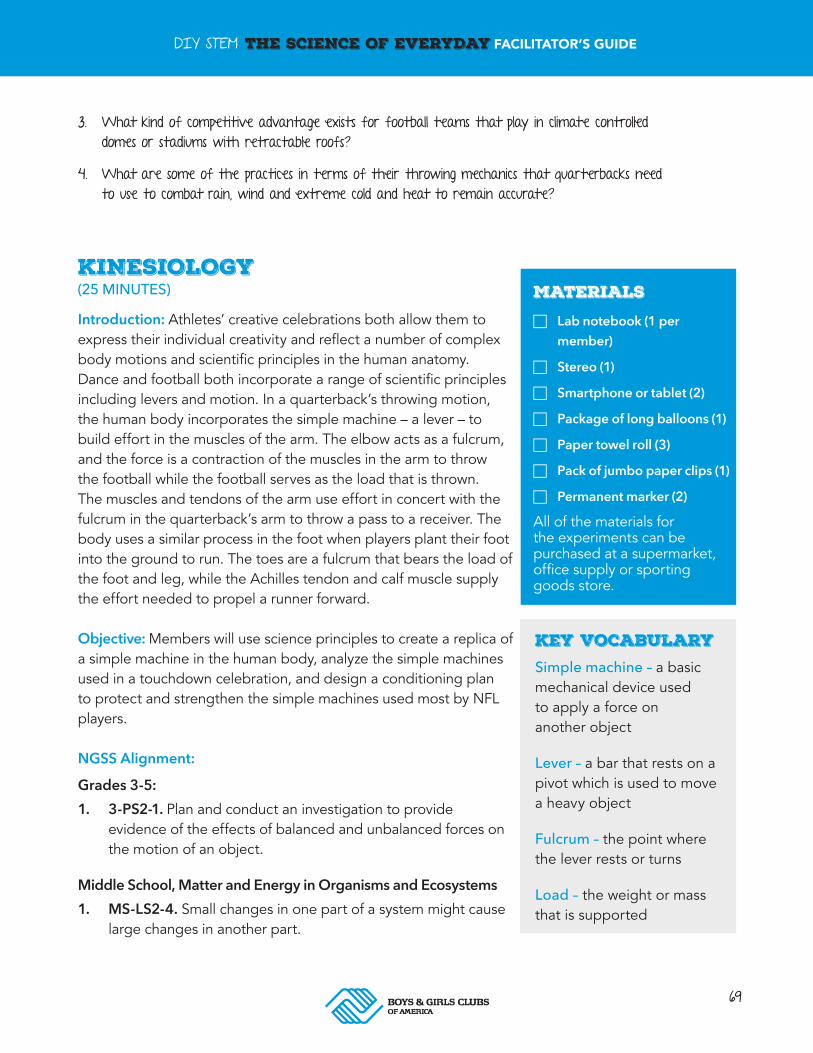
69
DIY STEM THE SCIENCE OF EVERYDAY FACILITATOR’S GUIDE
3. What kind of competitive advantage exists for football teams that play in climate controlled domes or stadiums with retractable roofs?
4. What are some of the practices in terms of their throwing mechanics that quarterbacks need to use to combat rain, wind and extreme cold and heat to remain accurate?
KINESIOLOGY (25 MINUTES)
Introduction: Athletes’ creative celebrations both allow them to express their individual creativity and reflect a number of complex body motions and scientific principles in the human anatomy. Dance and football both incorporate a range of scientific principles including levers and motion. In a quarterback’s throwing motion, the human body incorporates the simple machine – a lever – to build effort in the muscles of the arm. The elbow acts as a fulcrum, and the force is a contraction of the muscles in the arm to throw the football while the football serves as the load that is thrown. The muscles and tendons of the arm use effort in concert with the fulcrum in the quarterback’s arm to throw a pass to a receiver. The body uses a similar process in the foot when players plant their foot into the ground to run. The toes are a fulcrum that bears the load of the foot and leg, while the Achilles tendon and calf muscle supply the effort needed to propel a runner forward.
Objective: Members will use science principles to create a replica of a simple machine in the human body, analyze the simple machines used in a touchdown celebration, and design a conditioning plan to protect and strengthen the simple machines used most by NFL players.
NGSS Alignment:
Grades 3-5: 1. 3-PS2-1. Plan and conduct an investigation to provide evidence of the effects of balanced and unbalanced forces on the motion of an object.
Middle School, Matter and Energy in Organisms and Ecosystems 1. MS-LS2-4. Small changes in one part of a system might cause large changes in another part.
MATERIALS F Lab notebook (1 per
member)
F Stereo (1)
F Smartphone or tablet (2)
F Package of long balloons (1)
F Paper towel roll (3)
F Pack of jumbo paper clips (1)
F Permanent marker (2)
All of the materials for the experiments can be purchased at a supermarket, office supply or sporting goods store.
Key VocabularySimple machine – a basic mechanical device used to apply a force on another object
Lever – a bar that rests on a pivot which is used to move a heavy object
Fulcrum – the point where the lever rests or turns
Load – the weight or mass that is supported
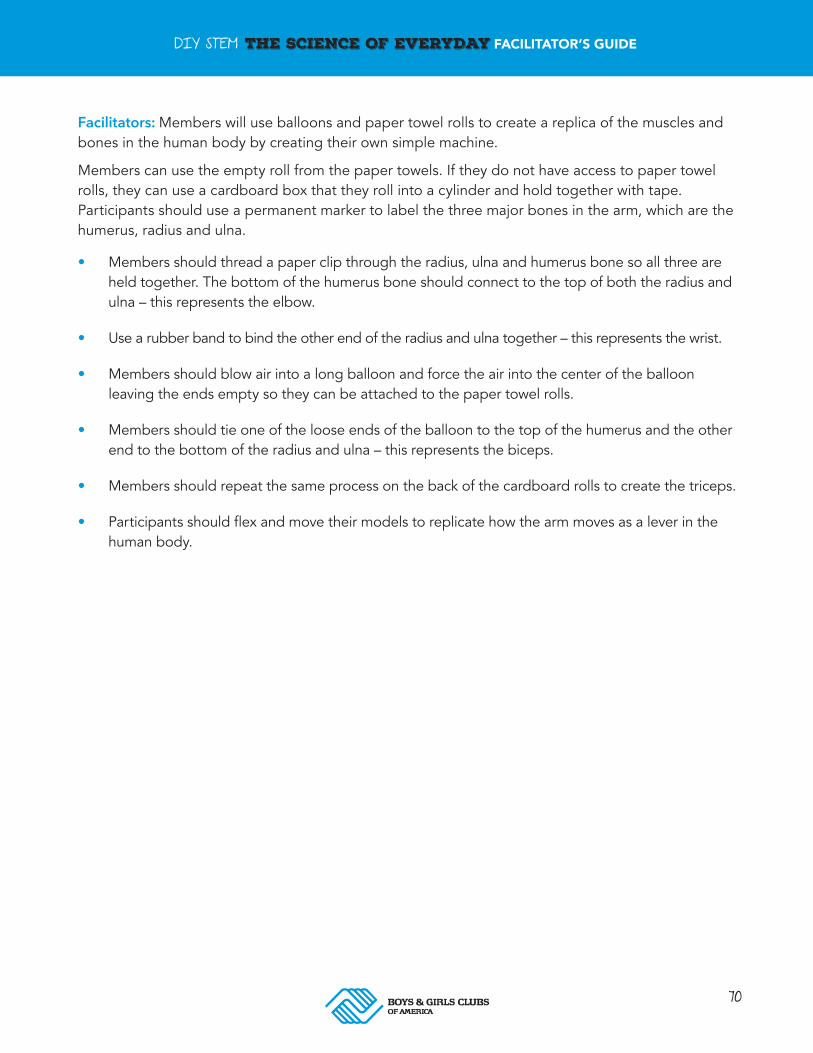
70
DIY STEM THE SCIENCE OF EVERYDAY FACILITATOR’S GUIDE
Facilitators: Members will use balloons and paper towel rolls to create a replica of the muscles and bones in the human body by creating their own simple machine.
Members can use the empty roll from the paper towels. If they do not have access to paper towel rolls, they can use a cardboard box that they roll into a cylinder and hold together with tape. Participants should use a permanent marker to label the three major bones in the arm, which are the humerus, radius and ulna.
• Members should thread a paper clip through the radius, ulna and humerus bone so all three are held together. The bottom of the humerus bone should connect to the top of both the radius and ulna – this represents the elbow.
• Use a rubber band to bind the other end of the radius and ulna together – this represents the wrist.
• Members should blow air into a long balloon and force the air into the center of the balloon leaving the ends empty so they can be attached to the paper towel rolls.
• Members should tie one of the loose ends of the balloon to the top of the humerus and the other end to the bottom of the radius and ulna – this represents the biceps.
• Members should repeat the same process on the back of the cardboard rolls to create the triceps.
• Participants should flex and move their models to replicate how the arm moves as a lever in the human body.

71
DIY STEM THE SCIENCE OF EVERYDAY FACILITATOR’S GUIDE
Extension Activity #1 (20 minutes)Members will explore physical science in their exploration of simple machines in the human body. In this activity participants will understand how muscles, joints and tendons serve as levers and fulcrums. They will also explore how scientific principles of force and motion can be applied through motion and dance by analyzing how Victor Cruz’s celebratory touchdown dance uses properties of motion and simple machines.
• Using the chart below, participants will provide a description of the muscles that are necessary in Victor Cruz’s salsa dance.
• Let members use a computer, their cell phones or tablet to search online for Victor Cruz’s touchdown salsa. They should reenact his body movements and use the chart below to analyze the body movements involved in the dance.
• Members must provide a written analysis in their laboratory notebook of the body movements included in his touchdown celebration.
Describe the touchdown dance
or motions
Which simple machines are used in the celebration?
What muscle groups are involved in the operation of the simple machine in
the human body?
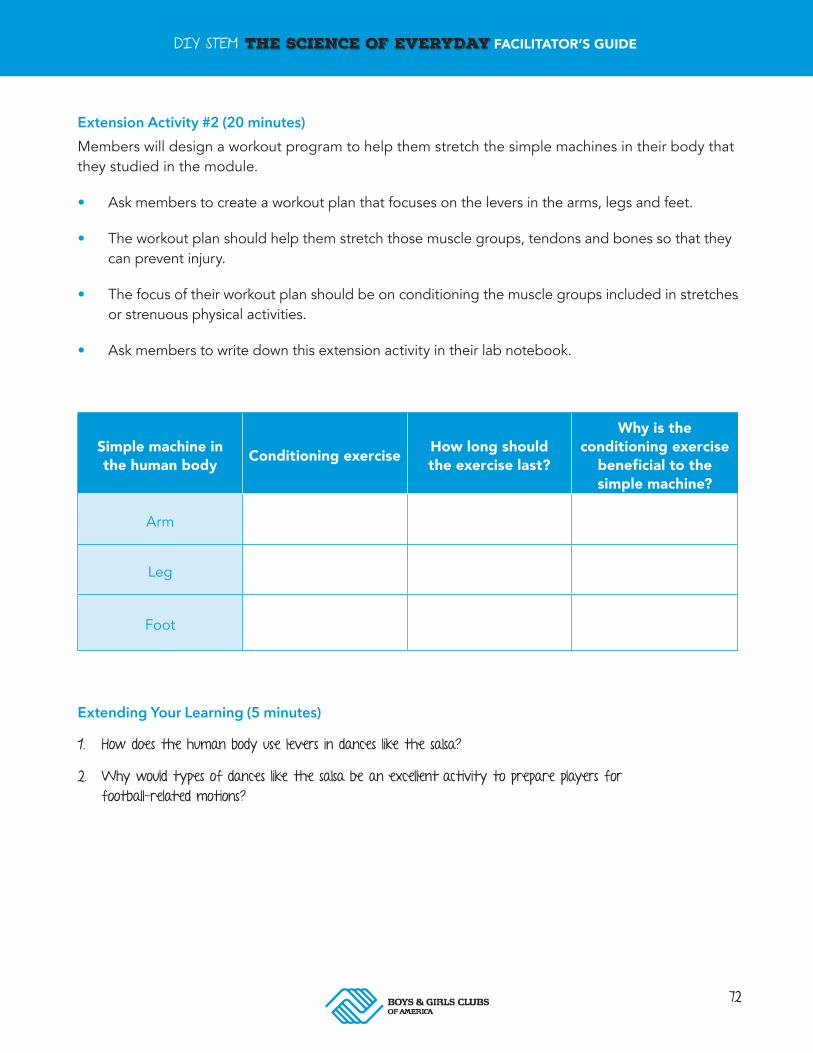
72
DIY STEM THE SCIENCE OF EVERYDAY FACILITATOR’S GUIDE
Extension Activity #2 (20 minutes)Members will design a workout program to help them stretch the simple machines in their body that they studied in the module.
• Ask members to create a workout plan that focuses on the levers in the arms, legs and feet.
• The workout plan should help them stretch those muscle groups, tendons and bones so that they can prevent injury.
• The focus of their workout plan should be on conditioning the muscle groups included in stretches or strenuous physical activities.
• Ask members to write down this extension activity in their lab notebook.
Simple machine in the human body Conditioning exercise How long should
the exercise last?
Why is the conditioning exercise
beneficial to the simple machine?
Arm
Leg
Foot
Extending Your Learning (5 minutes)
1. How does the human body use levers in dances like the salsa?
2. Why would types of dances like the salsa be an excellent activity to prepare players for football-related motions?
73
DIY STEM THE SCIENCE OF EVERYDAY FACILITATOR’S GUIDE
SOUND WAVES (30 MINUTES)
Introduction: Sound waves are patterns of disturbances caused by energy moving away from sound through air, water, liquid or a solid. In sports, sound waves oftentimes travel from the voices of screaming fans or stadium speakers. Sound waves can be heard by humans as loud, sometimes deafening noises, or felt as strong vibrations. If you have ever participated in the “wave” at a football game, you have modeled what a real sound wave does. As you wait for the wave to flow across the stadium, you probably noticed that no one actually moved with the wave as it traveled longitudinally from left to right or right to left. Real sound waves operate in the same manner. The height of each part of the wave – when people are standing and raising their hands together – is called the crest. The lowest part – when people sit back down as the energy moves to the next section – is called the trough.
Objective: Participants will increase both their math and science skills by analyzing how sound waves produced by different items can be perceived at different distances; transmitted through solids, liquids and gases; and measured using digital tools.
NGSS Alignment:
Middle School, Energy1. 4-MS2-2. Make observations to provide evidence that energy can be transferred from place to place by sound, light, heat and electric currents.
Middle School, Waves and their Applications in Technologies for Information Transfer 1. MS-PS4-2. Develop and use a model to describe that waves are reflected, absorbed or transmitted through various materials.
Facilitator’s Notes: The focus of this experiment is to help members understand how sound waves move through solids, air and liquids. The results of the experiments will help them understand how well sound waves travel through different materials and how sound travels in an NFL stadium. Members will learn how to use technology to measure decibels of sounds produced from the human voice and other objects. This section is a continuation of what the members learned earlier about noise at NFL games. They
MATERIALS F Large bowl (3)
F Roll of plastic wrap (1)
F Box of salt (1)
F Gallon of water (1)
F Whistle (3)
F Large metal pan (3)
F Measuring spoon (3)
F Plastic or glass measuring cup (3)
F Stereo (1)
F Large cardboard box (3)
F Apple or Android smartphone/tablet (3)
F Measuring tape or meter stick (3)
All of the materials for the module, except the smartphone or tablet, can be purchased at a supermarket, office supply or sporting goods store. Members can use their own smartphones, or they can use the Club’s tablets for the experiments.
Key VocabularyPitch – the highness or lowness of a tone
Frequency – the rate at which a sound vibration occurs that represents a sound wave
Decibel – a unit used to measure the sound of volume
Resonance – the length of sound reflecting off a surface
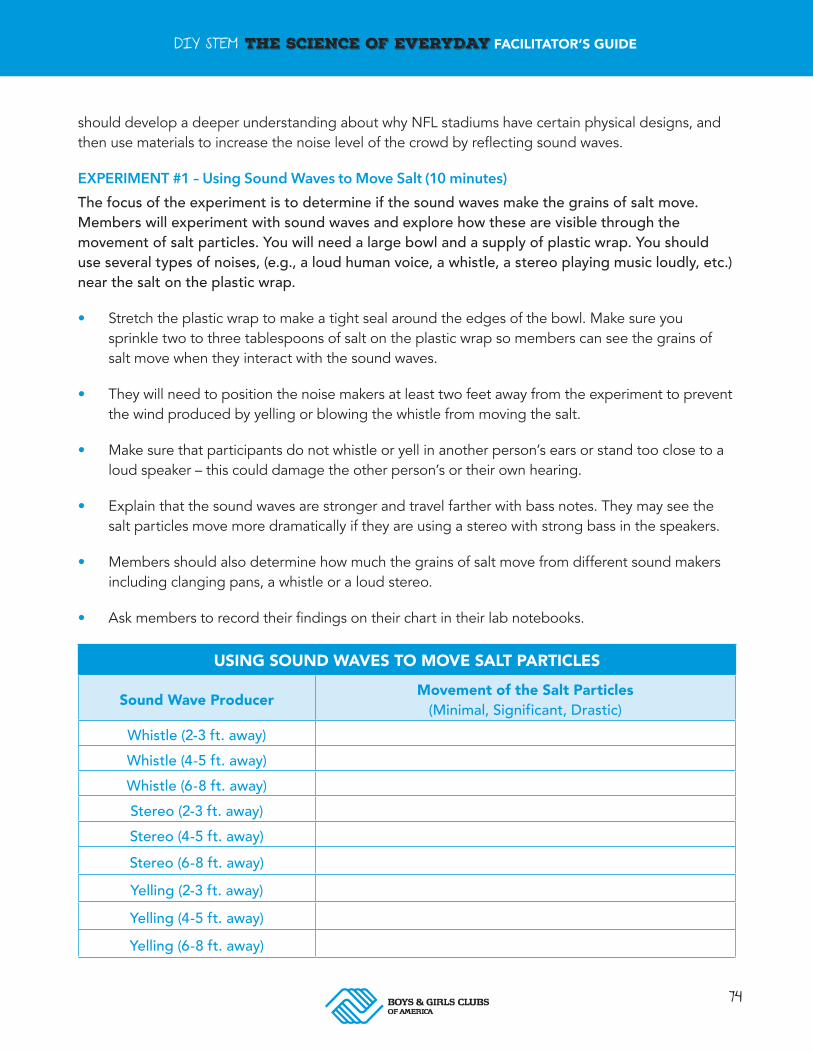
74
DIY STEM THE SCIENCE OF EVERYDAY FACILITATOR’S GUIDE
should develop a deeper understanding about why NFL stadiums have certain physical designs, and then use materials to increase the noise level of the crowd by reflecting sound waves.
EXPERIMENT #1 – Using Sound Waves to Move Salt (10 minutes)The focus of the experiment is to determine if the sound waves make the grains of salt move. Members will experiment with sound waves and explore how these are visible through the movement of salt particles. You will need a large bowl and a supply of plastic wrap. You should use several types of noises, (e.g., a loud human voice, a whistle, a stereo playing music loudly, etc.) near the salt on the plastic wrap.
• Stretch the plastic wrap to make a tight seal around the edges of the bowl. Make sure you sprinkle two to three tablespoons of salt on the plastic wrap so members can see the grains of salt move when they interact with the sound waves.
• They will need to position the noise makers at least two feet away from the experiment to prevent the wind produced by yelling or blowing the whistle from moving the salt.
• Make sure that participants do not whistle or yell in another person’s ears or stand too close to a loud speaker – this could damage the other person’s or their own hearing.
• Explain that the sound waves are stronger and travel farther with bass notes. They may see the salt particles move more dramatically if they are using a stereo with strong bass in the speakers.
• Members should also determine how much the grains of salt move from different sound makers including clanging pans, a whistle or a loud stereo.
• Ask members to record their findings on their chart in their lab notebooks.
USING SOUND WAVES TO MOVE SALT PARTICLES
Sound Wave Producer Movement of the Salt Particles (Minimal, Significant, Drastic)
Whistle (2-3 ft. away)Whistle (4-5 ft. away)Whistle (6-8 ft. away)Stereo (2-3 ft. away)Stereo (4-5 ft. away)Stereo (6-8 ft. away)Yelling (2-3 ft. away)Yelling (4-5 ft. away)Yelling (6-8 ft. away)
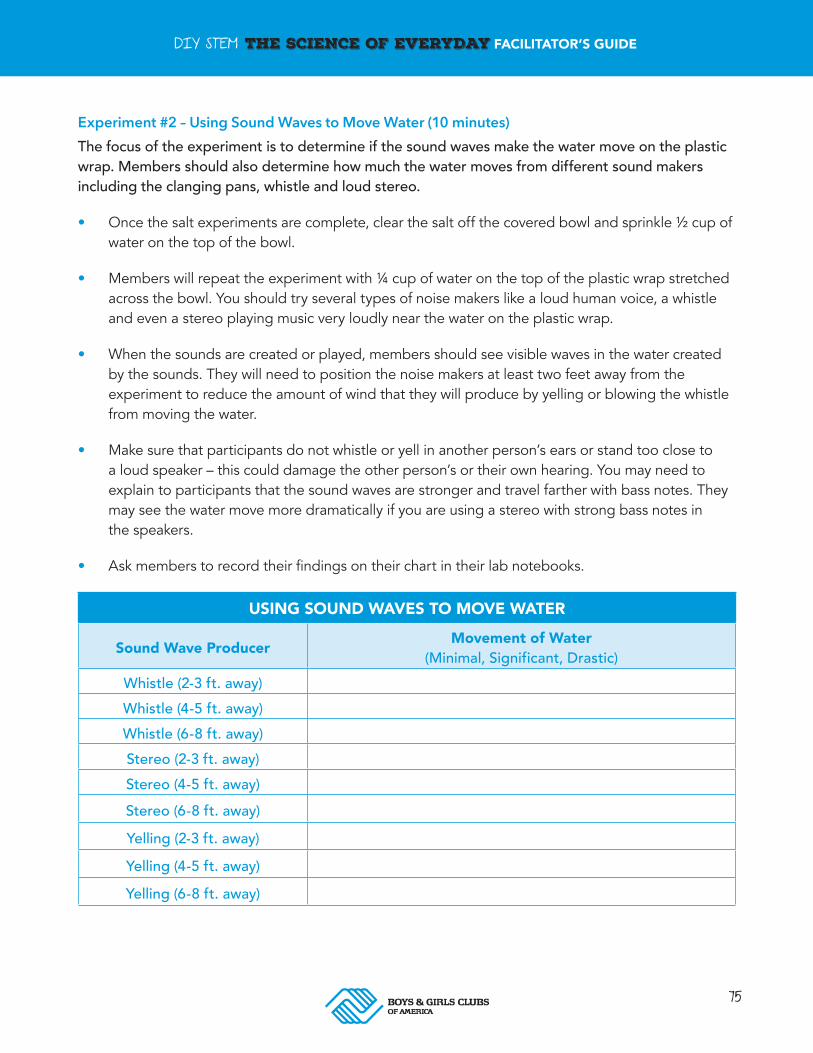
75
DIY STEM THE SCIENCE OF EVERYDAY FACILITATOR’S GUIDE
Experiment #2 – Using Sound Waves to Move Water (10 minutes)The focus of the experiment is to determine if the sound waves make the water move on the plastic wrap. Members should also determine how much the water moves from different sound makers including the clanging pans, whistle and loud stereo.
• Once the salt experiments are complete, clear the salt off the covered bowl and sprinkle ½ cup of water on the top of the bowl.
• Members will repeat the experiment with ¼ cup of water on the top of the plastic wrap stretched across the bowl. You should try several types of noise makers like a loud human voice, a whistle and even a stereo playing music very loudly near the water on the plastic wrap.
• When the sounds are created or played, members should see visible waves in the water created by the sounds. They will need to position the noise makers at least two feet away from the experiment to reduce the amount of wind that they will produce by yelling or blowing the whistle from moving the water.
• Make sure that participants do not whistle or yell in another person’s ears or stand too close to a loud speaker – this could damage the other person’s or their own hearing. You may need to explain to participants that the sound waves are stronger and travel farther with bass notes. They may see the water move more dramatically if you are using a stereo with strong bass notes in the speakers.
• Ask members to record their findings on their chart in their lab notebooks.
USING SOUND WAVES TO MOVE WATER
Sound Wave Producer Movement of Water (Minimal, Significant, Drastic)
Whistle (2-3 ft. away)Whistle (4-5 ft. away)Whistle (6-8 ft. away)Stereo (2-3 ft. away)Stereo (4-5 ft. away)Stereo (6-8 ft. away)Yelling (2-3 ft. away)Yelling (4-5 ft. away)Yelling (6-8 ft. away)

76
DIY STEM THE SCIENCE OF EVERYDAY FACILITATOR’S GUIDE
Experiment #3 – Reflecting Sound Waves Off a Solid (10 minutes)Members will use a large cardboard box and metal pan to study how sound waves from a human voice resonate off solid objects. The principle that they will study is similar to the way that sound echoes in large rooms when it bounces off walls or ceilings.
• Ask members to put the box and pan one foot from their mouths and yell or scream as loud as they can and blow a whistle.
• Ask members to record how they interpret the sound’s reflection from the box and pan at that distance.
• Members should move the box and pan two to three feet from their mouths and repeat the same processes. Make sure that participants do not whistle or yell in another person’s ears or stand too close to a loud speaker – this could damage the other person’s or their own hearing.
• Finally, participants should move the box and pan four to five feet from their mouths and repeat the processes. Ask members to record their findings from the experiments in their lab notebooks.
• Participants will determine whether the sound waves resonated strongest off the cardboard box or pan. They should also discuss whether the hollow nature of the box with its four sides contributed to the sound it reflected and why metal is a good material to reflect sound waves.
SOUND WAVE RESONANCE
Sound Wave Producer
Resonance Strength on Box (Minimal, Significant, Drastic)
Resonance Strength on Metal Pan
(Minimal, Significant, Drastic)Whistle (1 ft. away)
Whistle (2-3 ft. away)Whistle (4-5 ft. away)
Yelling (1 ft. away)Yelling (2-3 ft. away)Yelling (4-5 ft. away)

77
DIY STEM THE SCIENCE OF EVERYDAY FACILITATOR’S GUIDE
Extension Activity Using Technology (20 minutes)As an extension activity, participants can download a free app such as digital sound meter from the Android or Apple app market that will measure the decibels (dB) for sounds of their voice including whispering, talking or yelling using the microphone on their tablet or smartphone. • Designate one member to operate the smartphone or tablet to ensure that they are receiving accurate measurements.
• Members should try recording the sounds from various sound makers at different distances from the tablet or phones.
• Members should attempt to generate sounds of 142 dB from a variety of distances from the smartphone or tablet using their voices and other objects to replicate the record-breaking noise level that the Kansas City Chiefs reached in the 2014 season.
• Make sure that participants do not whistle or yell in another person’s ears or stand too close to a loud speaker – this could damage the other person’s or their own hearing.
• Ask members to measure and record the different levels of sound made from various objects in their lab notebooks.
MEASURED SOUNDS IN DECIBELS (DB)
Sound Maker 2-3 Feet 5-6 Feet 8-10 Feet
Whistle Measure Sound (____dB)
Measure Sound (____dB)
Measure Sound (____dB)
Clanging Pans Measure Sound (____dB)
Measure Sound (____dB)
Measure Sound (____dB)
Stereo Measure Sound (____dB)
Measure Sound (____dB)
Measure Sound (____dB)
Screaming Measure Sound (____dB)
Measure Sound (____dB)
Measure Sound (____dB)
Normal Talking Measure Sound (____dB)
Measure Sound (____dB)
Measure Sound (____dB)
Extending Your Learning (5 minutes)After the data has been recorded in their lab notebooks, members should evaluate the results of their experiment by answering the following questions:
1. What did you notice about how sound waves affected the salt or water on the plastic wrap?
2. Based on your experiments, which sound maker produced the highest decibel readings?
3. In your opinion, how much higher would the decibel readings be if the NFL allowed all of its fans to blow whistles during the game?
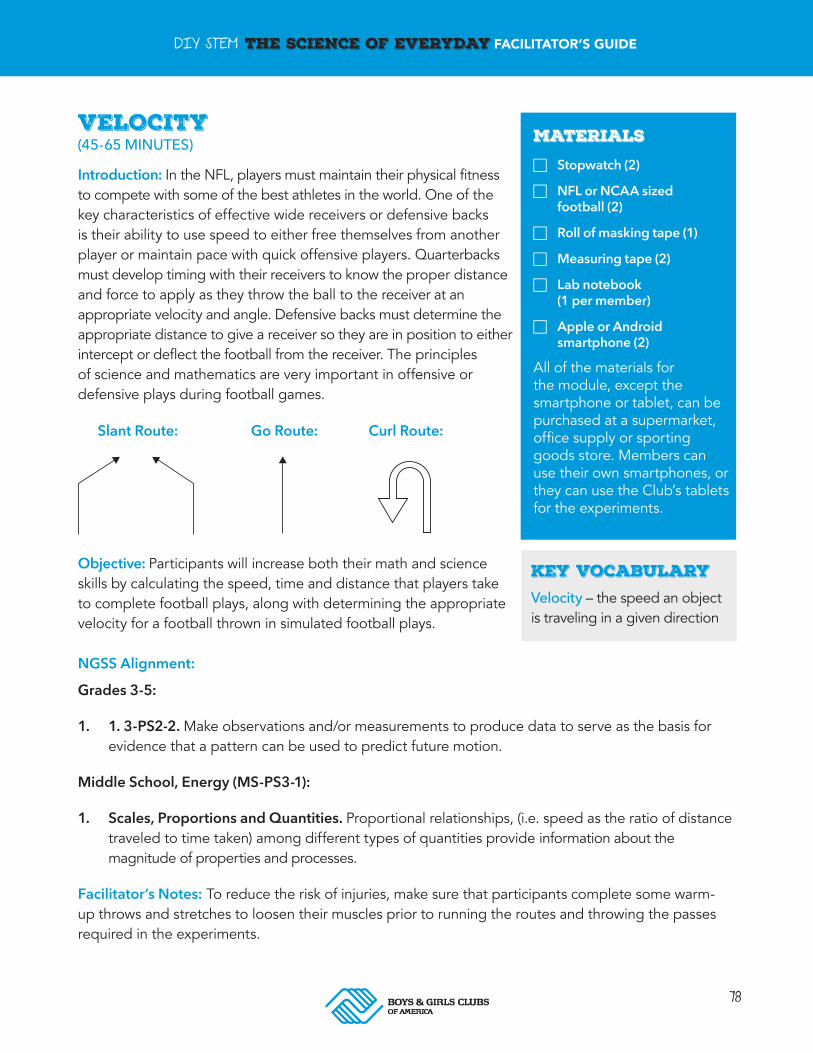
78
DIY STEM THE SCIENCE OF EVERYDAY FACILITATOR’S GUIDE
MATERIALS F Stopwatch (2)
F NFL or NCAA sized football (2)
F Roll of masking tape (1)
F Measuring tape (2)
F Lab notebook (1 per member)
F Apple or Android smartphone (2)
All of the materials for the module, except the smartphone or tablet, can be purchased at a supermarket, office supply or sporting goods store. Members can use their own smartphones, or they can use the Club’s tablets for the experiments.
Key VocabularyVelocity – the speed an object is traveling in a given direction
Slant Route:
VELOCITY (45-65 MINUTES)
Introduction: In the NFL, players must maintain their physical fitness to compete with some of the best athletes in the world. One of the key characteristics of effective wide receivers or defensive backs is their ability to use speed to either free themselves from another player or maintain pace with quick offensive players. Quarterbacks must develop timing with their receivers to know the proper distance and force to apply as they throw the ball to the receiver at an appropriate velocity and angle. Defensive backs must determine the appropriate distance to give a receiver so they are in position to either intercept or deflect the football from the receiver. The principles of science and mathematics are very important in offensive or defensive plays during football games.
Objective: Participants will increase both their math and science skills by calculating the speed, time and distance that players take to complete football plays, along with determining the appropriate velocity for a football thrown in simulated football plays.
Go Route: Curl Route:
NGSS Alignment:
Grades 3-5:
1. 1. 3-PS2-2. Make observations and/or measurements to produce data to serve as the basis for evidence that a pattern can be used to predict future motion.
Middle School, Energy (MS-PS3-1):
1. Scales, Proportions and Quantities. Proportional relationships, (i.e. speed as the ratio of distance traveled to time taken) among different types of quantities provide information about the magnitude of properties and processes.
Facilitator’s Notes: To reduce the risk of injuries, make sure that participants complete some warm-up throws and stretches to loosen their muscles prior to running the routes and throwing the passes required in the experiments.
79
DIY STEM THE SCIENCE OF EVERYDAY FACILITATOR’S GUIDE
Experiment #1a (10-15 minutes) This activity will require participants to use a stopwatch and their lab notebooks to record the speed their peers run both designated football routes and the 40-yard dash. This activity works best in an area where you can clearly mark distances such as football fields or parking lots. You should use tape or another marker to mark 10-yard increments for a total of 50 yards. Members will use technology – a speedometer and a radar gun app – to calculate speed and distance.
• Put members into groups and ask them to use the stopwatch to record how fast each member can run the 40-yard dash.
• Ask members to record their data on the chart listed below.
Experiment #1b (10-15 minutes) • Ask two of the group members to line up beside one another. One member will act as a wide receiver, and the other member will act as a defensive back.
• Ask another group member to record how far the wide receiver can run in five seconds on a go route, with the defensive back following the receiver straight up the field.
• Have members record their data on the chart listed below.
Experiment #2 (10-15 minutes) Participants will use technology to calculate the velocity they need to throw a football and then complete a pass for one of the assigned routes. Participants can download a radar gun from the Apple or Android app market for their smartphone or tablet.
• Ask one member of the group to use the radar gun app to calculate and record the appropriate velocity of a football thrown in the assigned football routes.
• Ask members to record whether or not the football has low, medium or high velocity on the chart below.
• Have a second group member use a stopwatch to calculate the time it took for the receiver to run a 10-yard curl route and catch the football from the quarterback. The route will require the receiver and quarterback to have appropriate timing, and the quarterback must use the correct velocity on his throw to the receiver.
• Ask members to record their data on the chart listed below.
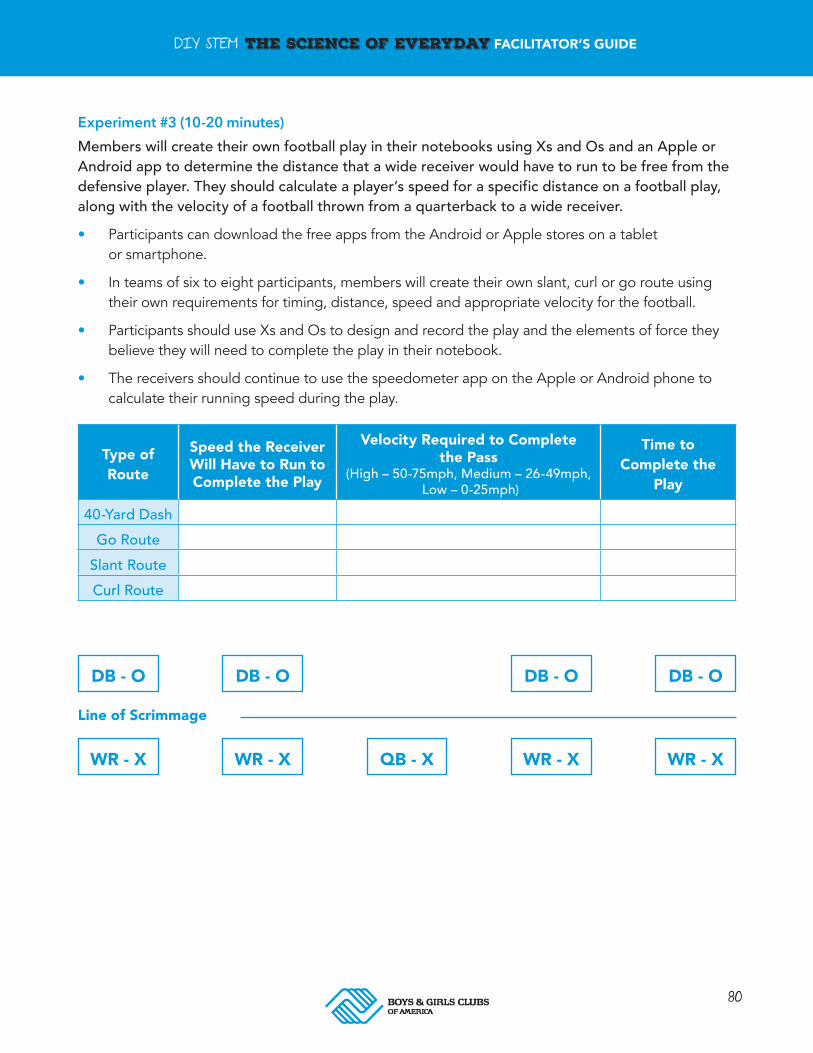
80
DIY STEM THE SCIENCE OF EVERYDAY FACILITATOR’S GUIDE
Experiment #3 (10-20 minutes) Members will create their own football play in their notebooks using Xs and Os and an Apple or Android app to determine the distance that a wide receiver would have to run to be free from the defensive player. They should calculate a player’s speed for a specific distance on a football play, along with the velocity of a football thrown from a quarterback to a wide receiver.• Participants can download the free apps from the Android or Apple stores on a tablet or smartphone.
• In teams of six to eight participants, members will create their own slant, curl or go route using their own requirements for timing, distance, speed and appropriate velocity for the football.
• Participants should use Xs and Os to design and record the play and the elements of force they believe they will need to complete the play in their notebook.
• The receivers should continue to use the speedometer app on the Apple or Android phone to calculate their running speed during the play.
Type of Route
Speed the Receiver Will Have to Run to Complete the Play
Velocity Required to Complete the Pass
(High – 50-75mph, Medium – 26-49mph, Low – 0-25mph)
Time to Complete the
Play
40-Yard DashGo Route
Slant RouteCurl Route
DB - O DB - O
WR - X WR - XQB - X
DB - O DB - O
WR - X WR - X
Line of Scrimmage
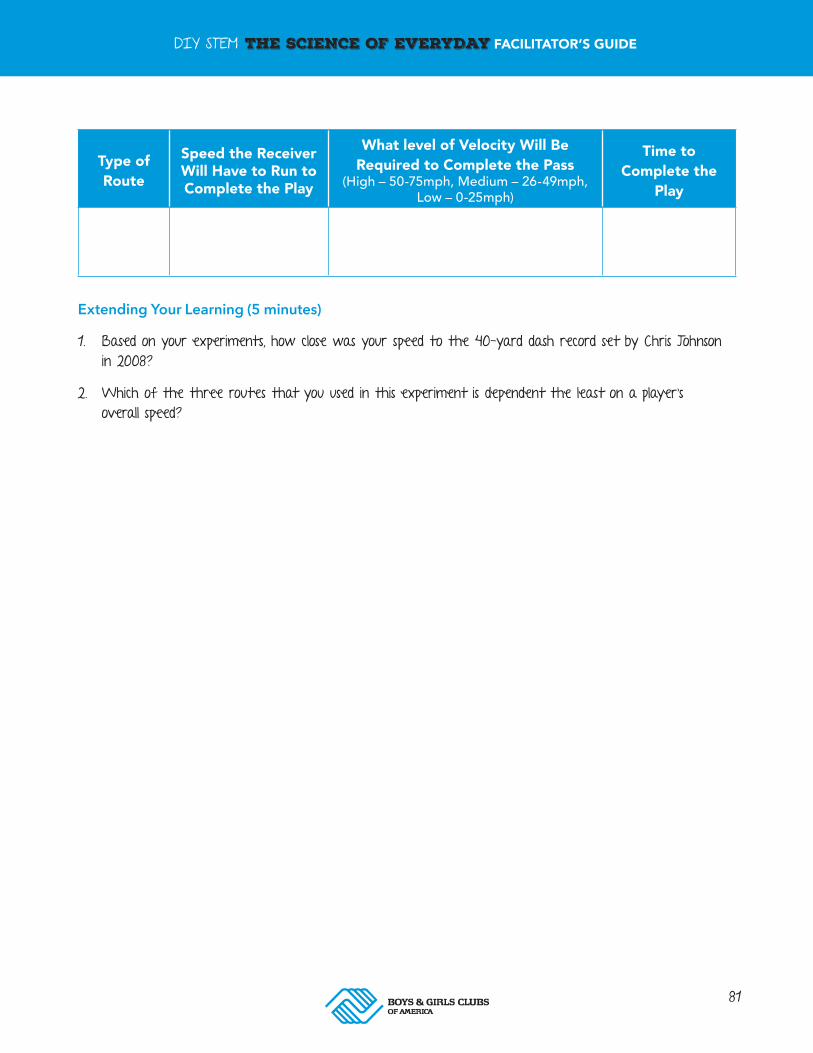
81
DIY STEM THE SCIENCE OF EVERYDAY FACILITATOR’S GUIDE
Type of Route
Speed the Receiver Will Have to Run to Complete the Play
What level of Velocity Will Be Required to Complete the Pass
(High – 50-75mph, Medium – 26-49mph, Low – 0-25mph)
Time to Complete the
Play
Extending Your Learning (5 minutes)
1. Based on your experiments, how close was your speed to the 40-yard dash record set by Chris Johnson in 2008?
2. Which of the three routes that you used in this experiment is dependent the least on a player’s overall speed?
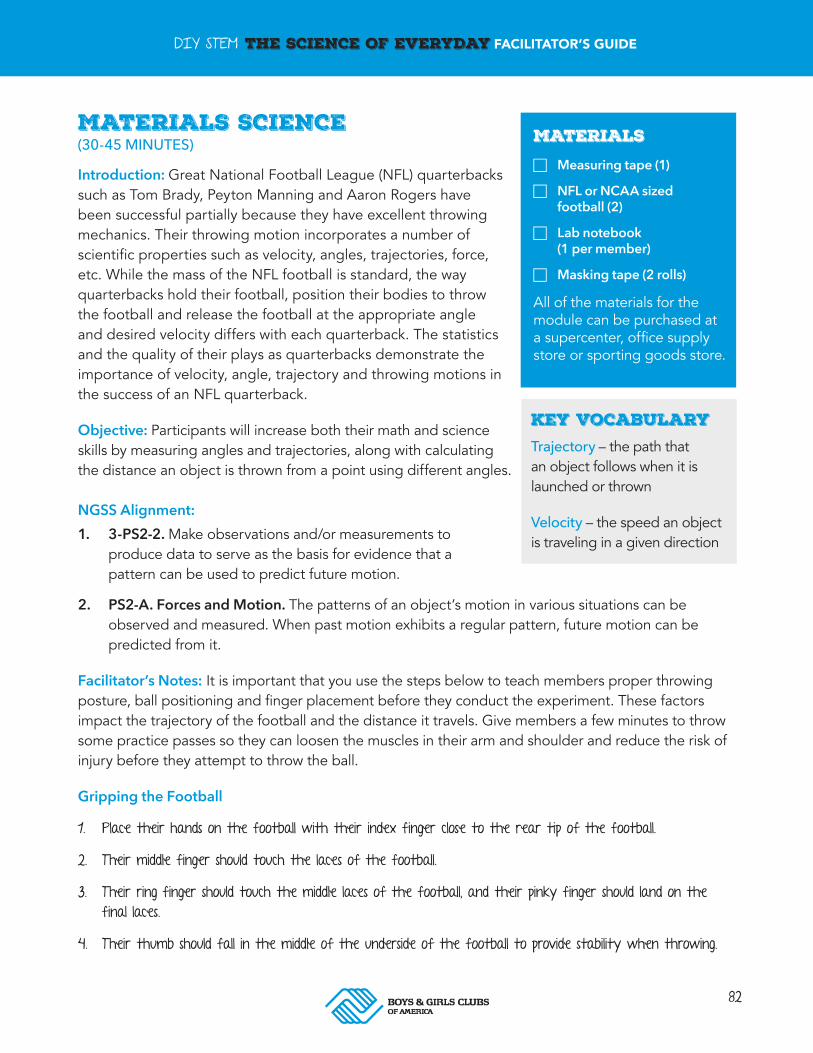
82
DIY STEM THE SCIENCE OF EVERYDAY FACILITATOR’S GUIDE
MATERIALS F Measuring tape (1)
F NFL or NCAA sized football (2)
F Lab notebook (1 per member)
F Masking tape (2 rolls)
All of the materials for the module can be purchased at a supercenter, office supply store or sporting goods store.
Key VocabularyTrajectory – the path that an object follows when it is launched or thrown
Velocity – the speed an object is traveling in a given direction
MATERIALS SCIENCE (30-45 MINUTES)
Introduction: Great National Football League (NFL) quarterbacks such as Tom Brady, Peyton Manning and Aaron Rogers have been successful partially because they have excellent throwing mechanics. Their throwing motion incorporates a number of scientific properties such as velocity, angles, trajectories, force, etc. While the mass of the NFL football is standard, the way quarterbacks hold their football, position their bodies to throw the football and release the football at the appropriate angle and desired velocity differs with each quarterback. The statistics and the quality of their plays as quarterbacks demonstrate the importance of velocity, angle, trajectory and throwing motions in the success of an NFL quarterback.
Objective: Participants will increase both their math and science skills by measuring angles and trajectories, along with calculating the distance an object is thrown from a point using different angles.
NGSS Alignment: 1. 3-PS2-2. Make observations and/or measurements to produce data to serve as the basis for evidence that a pattern can be used to predict future motion.
2. PS2-A. Forces and Motion. The patterns of an object’s motion in various situations can be observed and measured. When past motion exhibits a regular pattern, future motion can be predicted from it.
Facilitator’s Notes: It is important that you use the steps below to teach members proper throwing posture, ball positioning and finger placement before they conduct the experiment. These factors impact the trajectory of the football and the distance it travels. Give members a few minutes to throw some practice passes so they can loosen the muscles in their arm and shoulder and reduce the risk of injury before they attempt to throw the ball.
Gripping the Football
1. Place their hands on the football with their index finger close to the rear tip of the football.
2. Their middle finger should touch the laces of the football.
3. Their ring finger should touch the middle laces of the football, and their pinky finger should land on the final laces.
4. Their thumb should fall in the middle of the underside of the football to provide stability when throwing.
83
DIY STEM THE SCIENCE OF EVERYDAY FACILITATOR’S GUIDE
Body Position for the Throw
1. Both feet should be spread apart with the left foot slightly in front of the body.
2. The body should be turned slightly sideways with the throwing shoulder behind and the other shoulder pointed toward the target.
Releasing the Football
1. Release the non-throwing hand from the football and step forward into a throwing position.
2. Raise the ball above the head with the throwing hand and bring the arm forward.
3. Select the best angle for the throw. (A higher angle on the throw will produce a higher trajectory, but less distance. A medium angle will produce a slightly lower trajectory, but greater distance.)
4. Release the football at the height of the selected throwing angle with the appropriate amount of force.
5. Bring the throwing arm completely through the throwing motion and release the football with a slight twist of the hands to form a spiral on the football.
Note: If a member’s grip is not properly placed on the laces, the ball will not travel in a spiral, which will impact its trajectory.
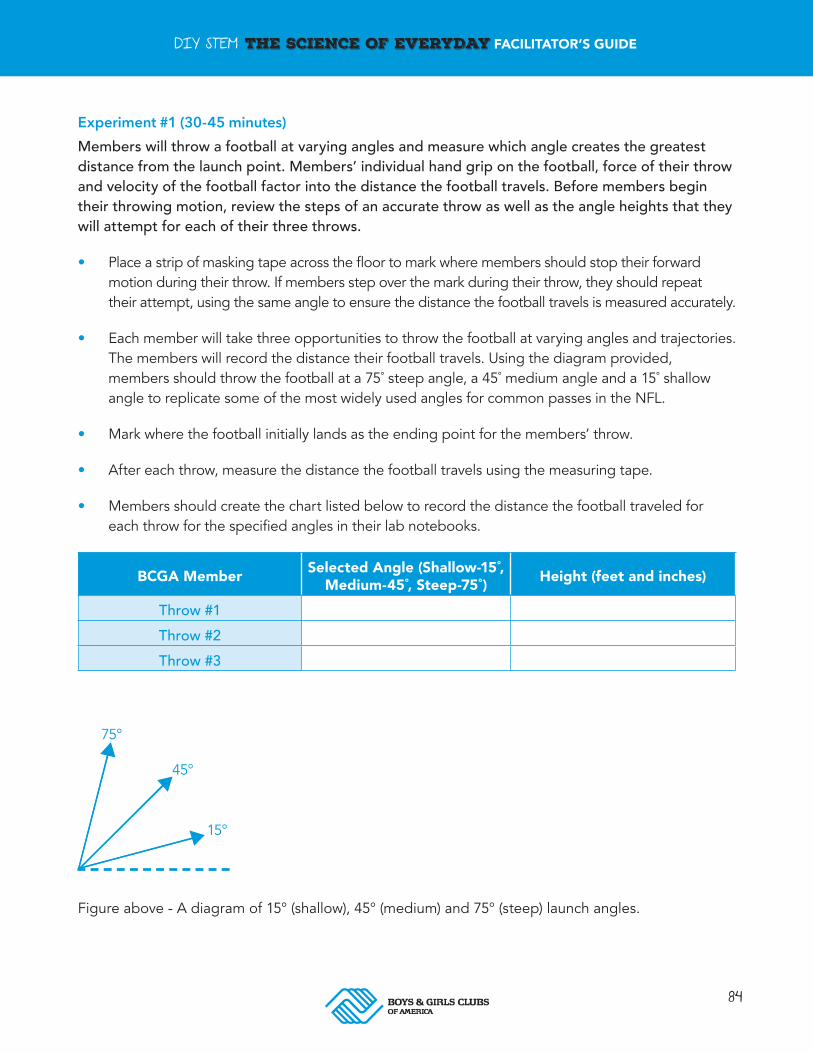
84
DIY STEM THE SCIENCE OF EVERYDAY FACILITATOR’S GUIDE
Experiment #1 (30-45 minutes)Members will throw a football at varying angles and measure which angle creates the greatest distance from the launch point. Members’ individual hand grip on the football, force of their throw and velocity of the football factor into the distance the football travels. Before members begin their throwing motion, review the steps of an accurate throw as well as the angle heights that they will attempt for each of their three throws.
• Place a strip of masking tape across the floor to mark where members should stop their forward motion during their throw. If members step over the mark during their throw, they should repeat their attempt, using the same angle to ensure the distance the football travels is measured accurately.
• Each member will take three opportunities to throw the football at varying angles and trajectories. The members will record the distance their football travels. Using the diagram provided, membersshouldthrowthefootballata75˚steepangle,a45˚mediumangleanda15˚shallow angle to replicate some of the most widely used angles for common passes in the NFL.
• Mark where the football initially lands as the ending point for the members’ throw.
• After each throw, measure the distance the football travels using the measuring tape.
• Members should create the chart listed below to record the distance the football traveled for each throw for the specified angles in their lab notebooks.
BCGA Member Selected Angle (Shallow-15 ,̊ Medium-45 ,̊ Steep-75˚) Height (feet and inches)
Throw #1Throw #2Throw #3
Figure above - A diagram of 15° (shallow), 45° (medium) and 75° (steep) launch angles.
75°
45°
15°
85
DIY STEM THE SCIENCE OF EVERYDAY FACILITATOR’S GUIDE
Extending Your Learning (10 minutes)After the data has been recorded in their lab notebooks, members should evaluate their experiment by answering the following questions:
1. Which angle produced the greatest trajectory?
2. What variables could have impacted the distance the football traveled including your stance, grip and throwing motion?
3. Which angle would produce the most appropriate trajectory for a “Hail Mary” pass to the number one or number two receiver at the end of half a football field? Why would it be the most effective?
4. Which throwing angle would be most appropriate for a quick 15-20 yard slant across the middle of the field to the tight end or slot receiver? Based on your experiments, why would it be the best throwing trajectory?
5. Which throwing angle would be most appropriate for a 30-40 yard pass across the field, (e.g., seam route, go route, etc.) so the football would sail over the heads of the linebackers? Based on your experiments, why would it be the best throwing trajectory?
1Science Buddies Staff. "How Far Can You Throw (or Kick) a Ball?" Science Buddies. Science Buddies, 17 Dec. 2014. Web. 2 July 2015
86
86
APPENDIX
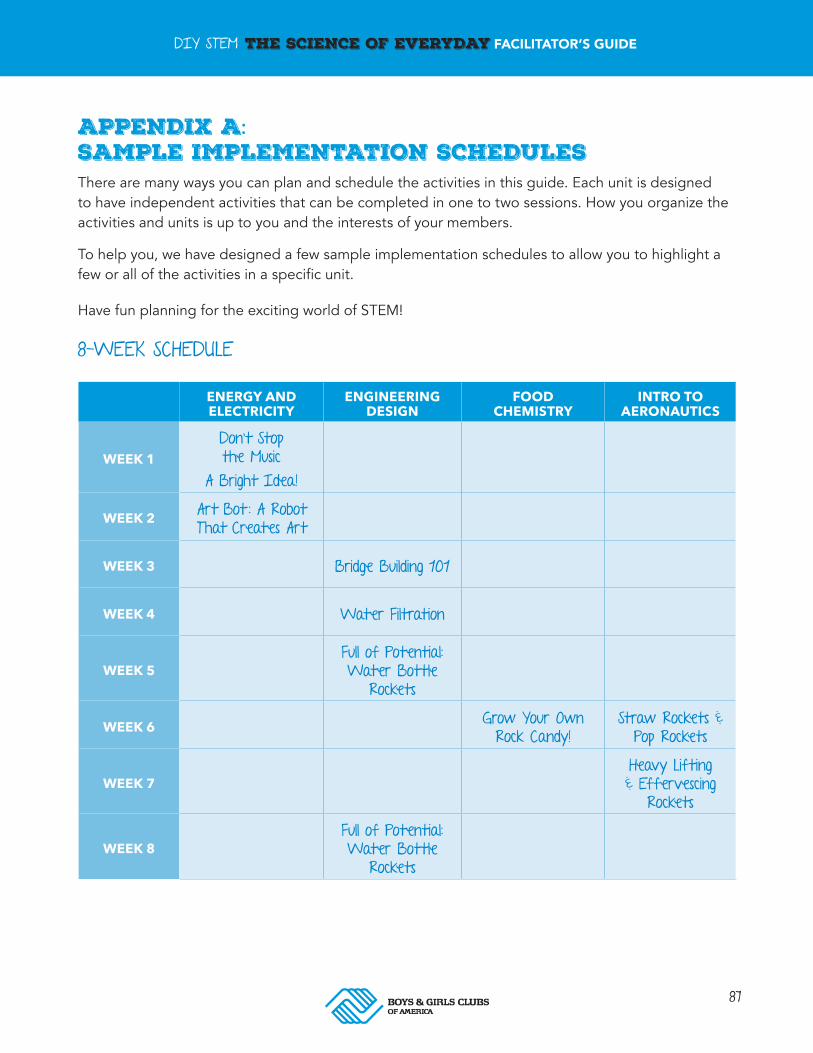
87
DIY STEM THE SCIENCE OF EVERYDAY FACILITATOR’S GUIDE
ENERGY AND ELECTRICITY
ENGINEERING DESIGN
FOOD CHEMISTRY
INTRO TO AERONAUTICS
WEEK 1Don’t Stop the Music
A Bright Idea!
WEEK 2 Art Bot : A Robot That Creates Art
WEEK 3 Bridge Building 101
WEEK 4 Water Filtration
WEEK 5Full of Potential: Water Bottle
Rockets
WEEK 6 Grow Your Own Rock Candy!
Straw Rockets & Pop Rockets
WEEK 7Heavy Lifting & Effervescing
Rockets
WEEK 8Full of Potential: Water Bottle
Rockets
APPENDIX A: SAMPLE IMPLEMENTATION SCHEDULESThere are many ways you can plan and schedule the activities in this guide. Each unit is designed to have independent activities that can be completed in one to two sessions. How you organize the activities and units is up to you and the interests of your members.
To help you, we have designed a few sample implementation schedules to allow you to highlight a few or all of the activities in a specific unit.
Have fun planning for the exciting world of STEM!
8-WEEK SCHEDULE
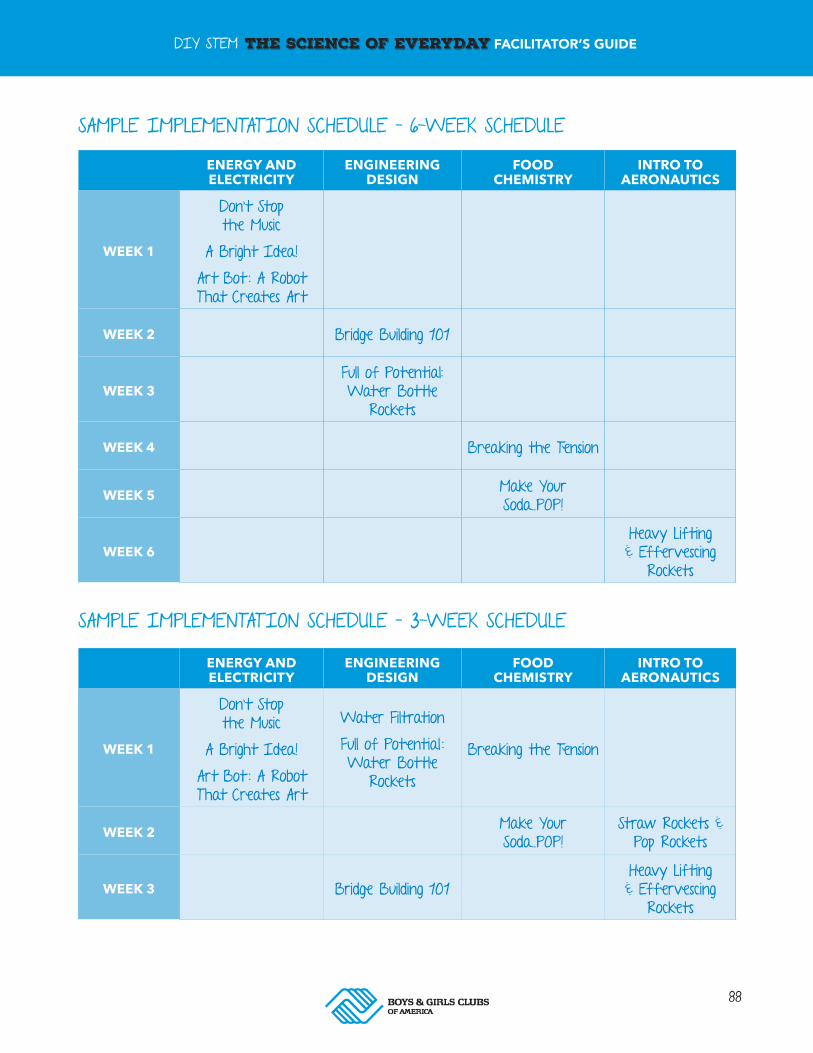
88
DIY STEM THE SCIENCE OF EVERYDAY FACILITATOR’S GUIDE
ENERGY AND ELECTRICITY
ENGINEERING DESIGN
FOOD CHEMISTRY
INTRO TO AERONAUTICS
WEEK 1
Don’t Stop the Music
A Bright Idea!
Art Bot : A Robot That Creates Art
WEEK 2 Bridge Building 101
WEEK 3Full of Potential: Water Bottle
Rockets
WEEK 4 Breaking the Tension
WEEK 5 Make Your Soda..POP!
WEEK 6Heavy Lifting & Effervescing
Rockets
ENERGY AND ELECTRICITY
ENGINEERING DESIGN
FOOD CHEMISTRY
INTRO TO AERONAUTICS
WEEK 1
Don’t Stop the Music
A Bright Idea!
Art Bot : A Robot That Creates Art
Water Filtration
Full of Potential : Water Bottle
Rockets
Breaking the Tension
WEEK 2 Make Your Soda..POP!
Straw Rockets & Pop Rockets
WEEK 3 Bridge Building 101Heavy Lifting & Effervescing
Rockets
SAMPLE IMPLEMENTATION SCHEDULE – 6-WEEK SCHEDULE
SAMPLE IMPLEMENTATION SCHEDULE – 3-WEEK SCHEDULE

89
DIY STEM THE SCIENCE OF EVERYDAY FACILITATOR’S GUIDE
APPENDIX B: MATERIALS LIST WITH ESTIMATED COSTBelow is a comprehensive list of the items required to successfully complete each activity. Most materials can be found at local craft, hardware or general stores. Quantities listed below are based on enough supplies to engage a group of 12-16 youth. We would recommend that you split members into smaller groups of three or four for the majority of the activities.
Although not listed as a material for each individual activity, provide each member with a science notebook, a college ruled composition book to capture data from experiments, draw charts and tables, as well as their designs for engineering design activities.
Finally, there is purposeful overlap of materials between activities. When planning ahead for activities, this should be taken into account, as supplies can often be reused between units and activities. In our DIY STEM Kits, we take this into account through the creation of the Common Consumables Kit, which packages all of the multi-use items together.
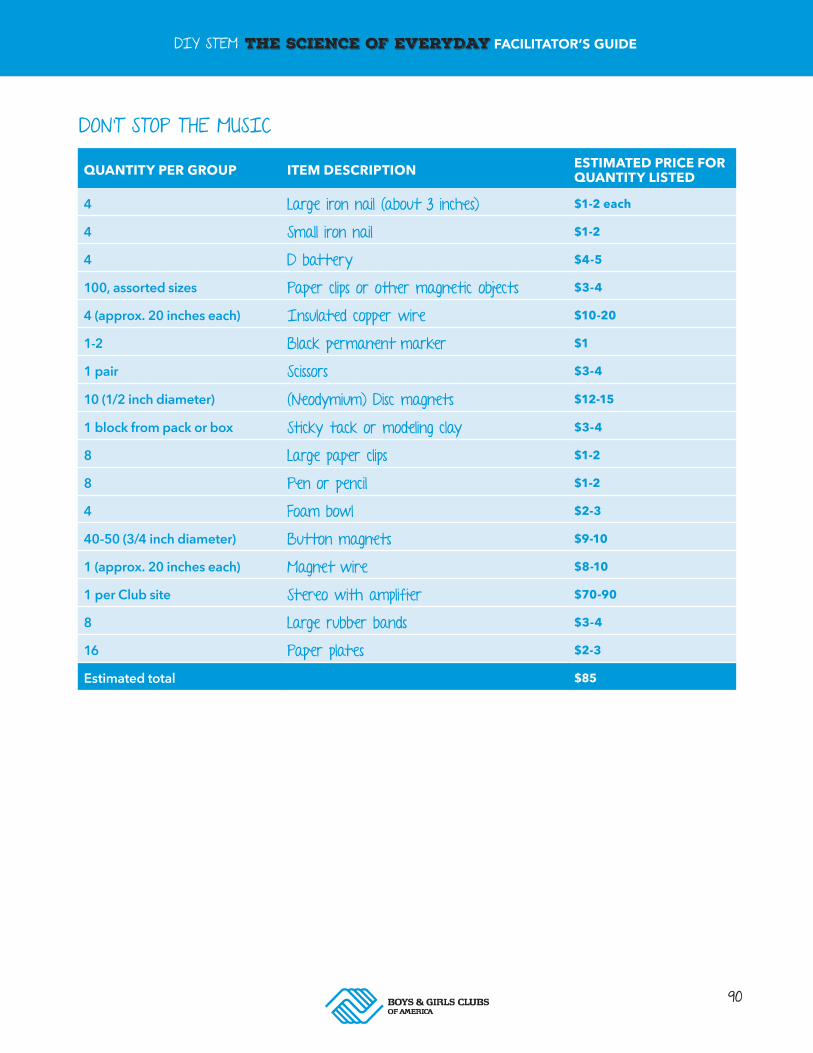
90
DIY STEM THE SCIENCE OF EVERYDAY FACILITATOR’S GUIDE
QUANTITY PER GROUP ITEM DESCRIPTION ESTIMATED PRICE FOR QUANTITY LISTED
4 Large iron nail (about 3 inches) $1-2 each
4 Small iron nail $1-2
4 D battery $4-5
100, assorted sizes Paper clips or other magnetic objects $3-4
4 (approx. 20 inches each) Insulated copper wire $10-20
1-2 Black permanent marker $1
1 pair Scissors $3-4
10 (1/2 inch diameter) (Neodymium) Disc magnets $12-15
1 block from pack or box Sticky tack or modeling clay $3-4
8 Large paper clips $1-2
8 Pen or pencil $1-2
4 Foam bowl $2-3
40-50 (3/4 inch diameter) Button magnets $9-10
1 (approx. 20 inches each) Magnet wire $8-10
1 per Club site Stereo with amplifier $70-90
8 Large rubber bands $3-4
16 Paper plates $2-3
Estimated total $85
DON’T STOP THE MUSIC
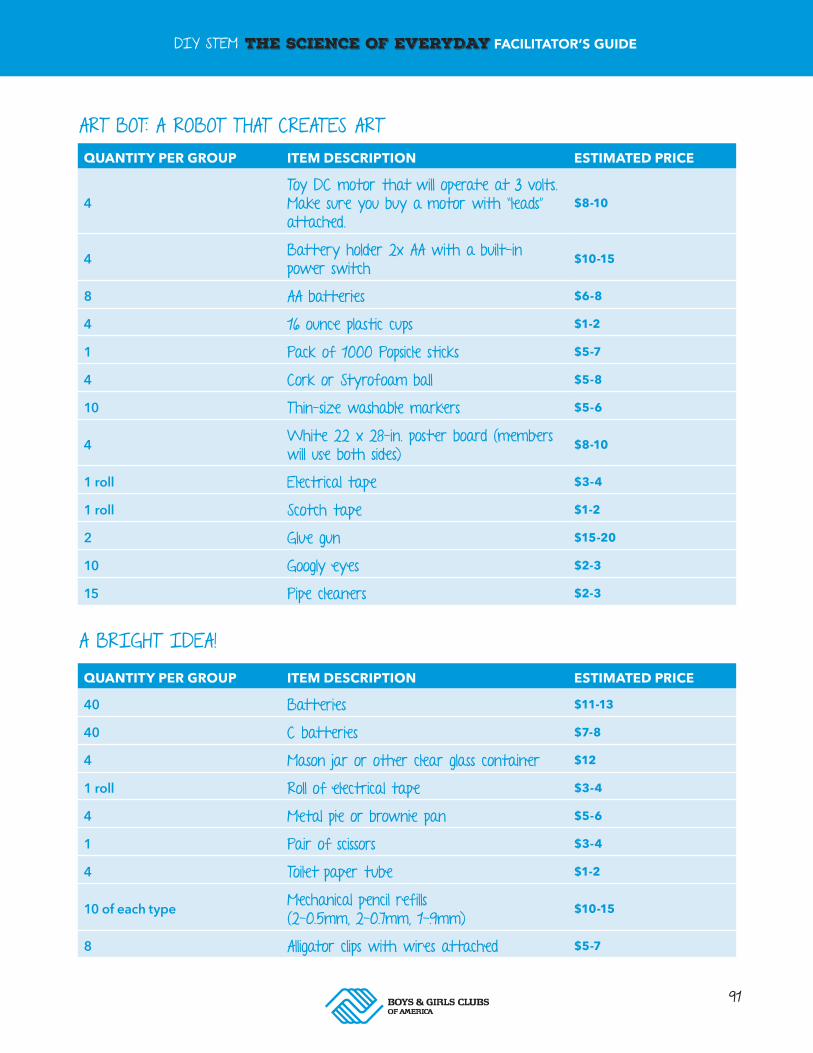
91
DIY STEM THE SCIENCE OF EVERYDAY FACILITATOR’S GUIDE
QUANTITY PER GROUP ITEM DESCRIPTION ESTIMATED PRICE
4Toy DC motor that will operate at 3 volts. Make sure you buy a motor with "leads” attached.
$8-10
4 Battery holder 2x AA with a built-in power switch
$10-15
8 AA batteries $6-8
4 16 ounce plastic cups $1-2
1 Pack of 1000 Popsicle sticks $5-7
4 Cork or Styrofoam ball $5-8
10 Thin-size washable markers $5-6
4 White 22 x 28-in. poster board (members will use both sides)
$8-10
1 roll Electrical tape $3-4
1 roll Scotch tape $1-2
2 Glue gun $15-20
10 Googly eyes $2-3
15 Pipe cleaners $2-3
QUANTITY PER GROUP ITEM DESCRIPTION ESTIMATED PRICE
40 Batteries $11-13
40 C batteries $7-8
4 Mason jar or other clear glass container $12
1 roll Roll of electrical tape $3-4
4 Metal pie or brownie pan $5-6
1 Pair of scissors $3-4
4 Toilet paper tube $1-2
10 of each type Mechanical pencil refills (2-0.5mm, 2-0.7mm, 1-.9mm)
$10-15
8 Alligator clips with wires attached $5-7
ART BOT: A ROBOT THAT CREATES ART
A BRIGHT IDEA!
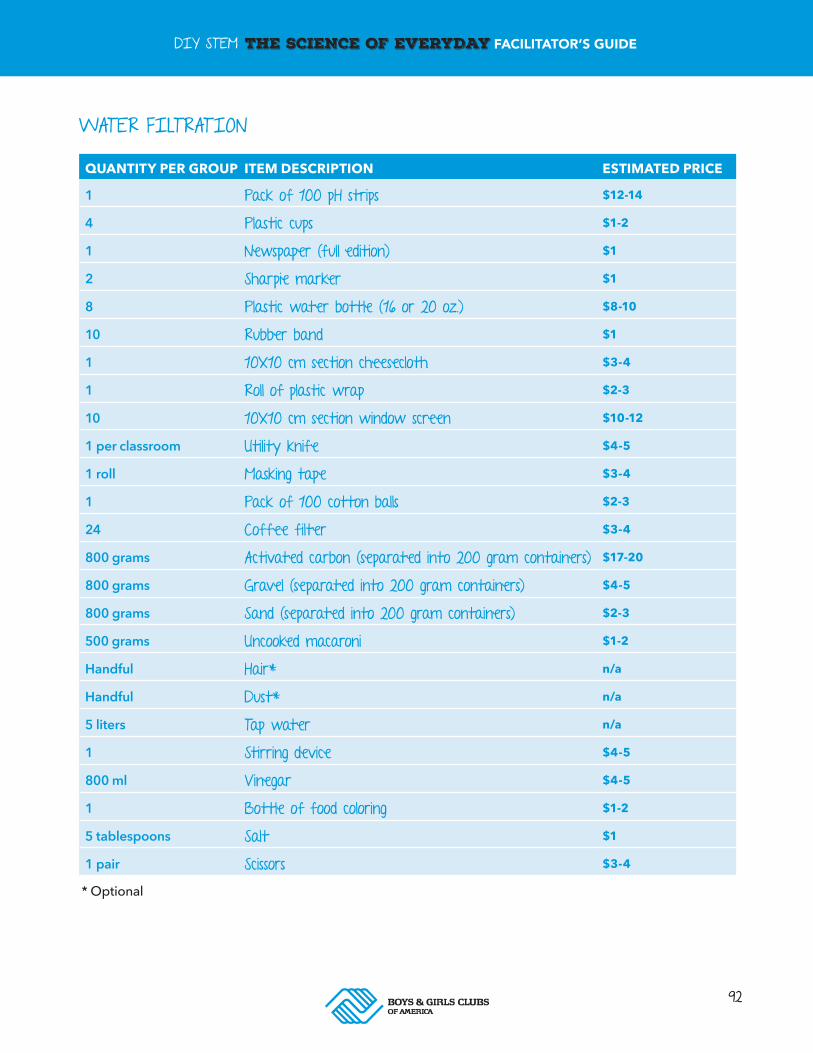
92
DIY STEM THE SCIENCE OF EVERYDAY FACILITATOR’S GUIDE
QUANTITY PER GROUP ITEM DESCRIPTION ESTIMATED PRICE
1 Pack of 100 pH strips $12-14
4 Plastic cups $1-2
1 Newspaper (full edition) $1
2 Sharpie marker $1
8 Plastic water bottle (16 or 20 oz.) $8-10
10 Rubber band $1
1 10X10 cm section cheesecloth $3-4
1 Roll of plastic wrap $2-3
10 10X10 cm section window screen $10-12
1 per classroom Utility knife $4-5
1 roll Masking tape $3-4
1 Pack of 100 cotton balls $2-3
24 Coffee filter $3-4
800 grams Activated carbon (separated into 200 gram containers) $17-20
800 grams Gravel (separated into 200 gram containers) $4-5
800 grams Sand (separated into 200 gram containers) $2-3
500 grams Uncooked macaroni $1-2
Handful Hair* n/a
Handful Dust* n/a
5 liters Tap water n/a
1 Stirring device $4-5
800 ml Vinegar $4-5
1 Bottle of food coloring $1-2
5 tablespoons Salt $1
1 pair Scissors $3-4
WATER FILTRATION
* Optional
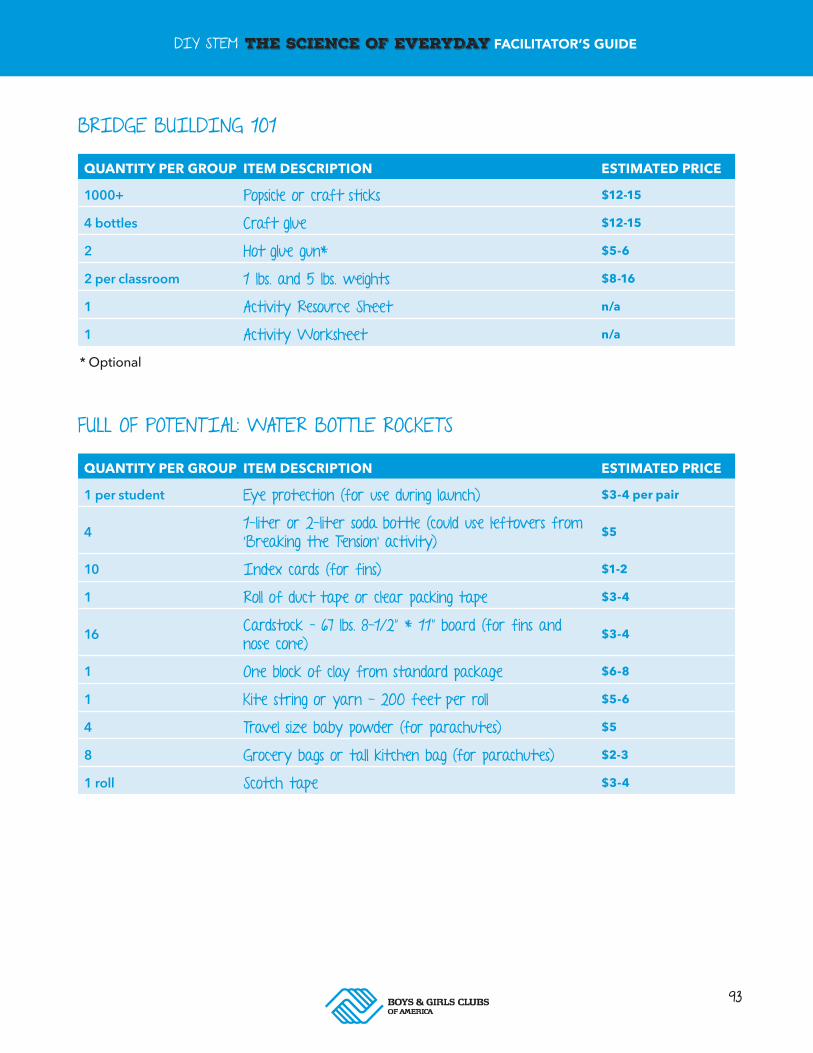
93
DIY STEM THE SCIENCE OF EVERYDAY FACILITATOR’S GUIDE
BRIDGE BUILDING 101
FULL OF POTENTIAL: WATER BOTTLE ROCKETS
QUANTITY PER GROUP ITEM DESCRIPTION ESTIMATED PRICE
1000+ Popsicle or craft sticks $12-15
4 bottles Craft glue $12-15
2 Hot glue gun* $5-6
2 per classroom 1 lbs. and 5 lbs. weights $8-16
1 Activity Resource Sheet n/a
1 Activity Worksheet n/a
QUANTITY PER GROUP ITEM DESCRIPTION ESTIMATED PRICE
1 per student Eye protection (for use during launch) $3-4 per pair
4 1-liter or 2-liter soda bottle (could use leftovers from ‘Breaking the Tension’ activity)
$5
10 Index cards (for fins) $1-2
1 Roll of duct tape or clear packing tape $3-4
16 Cardstock – 67 lbs. 8-1/2” * 11” board (for fins and nose cone)
$3-4
1 One block of clay from standard package $6-8
1 Kite string or yarn - 200 feet per roll $5-6
4 Travel size baby powder (for parachutes) $5
8 Grocery bags or tall kitchen bag (for parachutes) $2-3
1 roll Scotch tape $3-4
* Optional
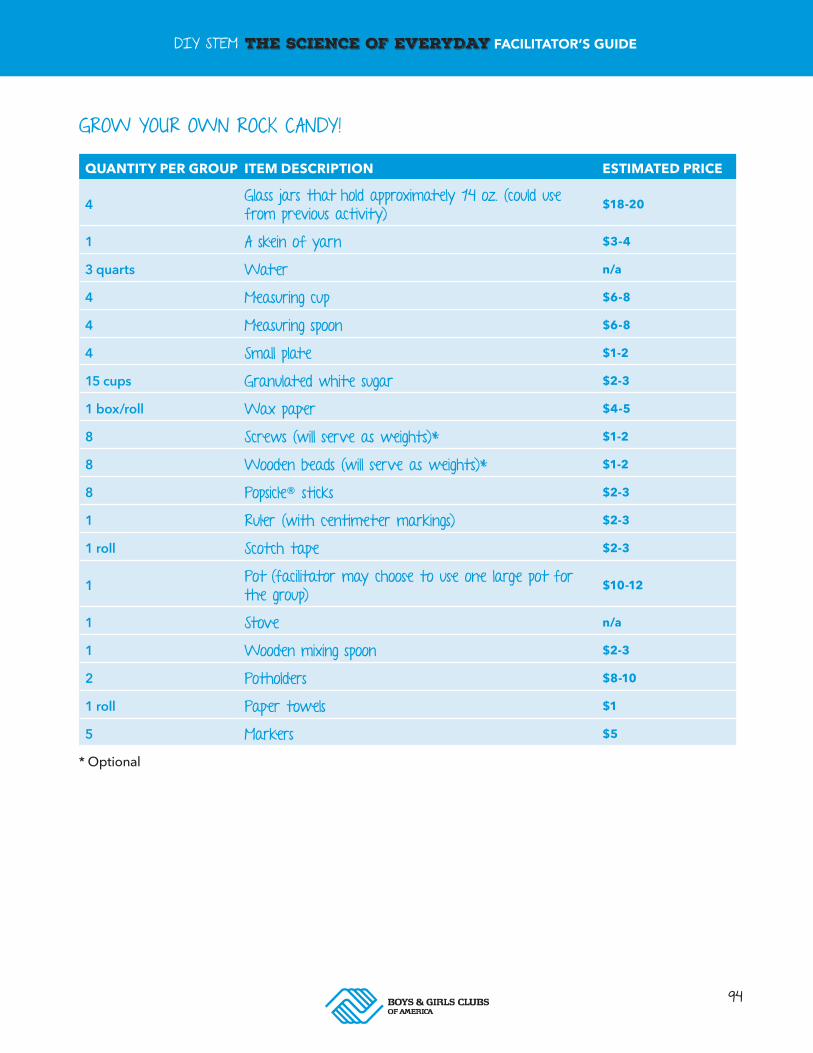
94
DIY STEM THE SCIENCE OF EVERYDAY FACILITATOR’S GUIDE
QUANTITY PER GROUP ITEM DESCRIPTION ESTIMATED PRICE
4 Glass jars that hold approximately 14 oz. (could use from previous activity)
$18-20
1 A skein of yarn $3-4
3 quarts Water n/a
4 Measuring cup $6-8
4 Measuring spoon $6-8
4 Small plate $1-2
15 cups Granulated white sugar $2-3
1 box/roll Wax paper $4-5
8 Screws (will serve as weights)* $1-2
8 Wooden beads (will serve as weights)* $1-2
8 Popsicle® sticks $2-3
1 Ruler (with centimeter markings) $2-3
1 roll Scotch tape $2-3
1 Pot (facilitator may choose to use one large pot for the group)
$10-12
1 Stove n/a
1 Wooden mixing spoon $2-3
2 Potholders $8-10
1 roll Paper towels $1
5 Markers $5
GROW YOUR OWN ROCK CANDY!
* Optional
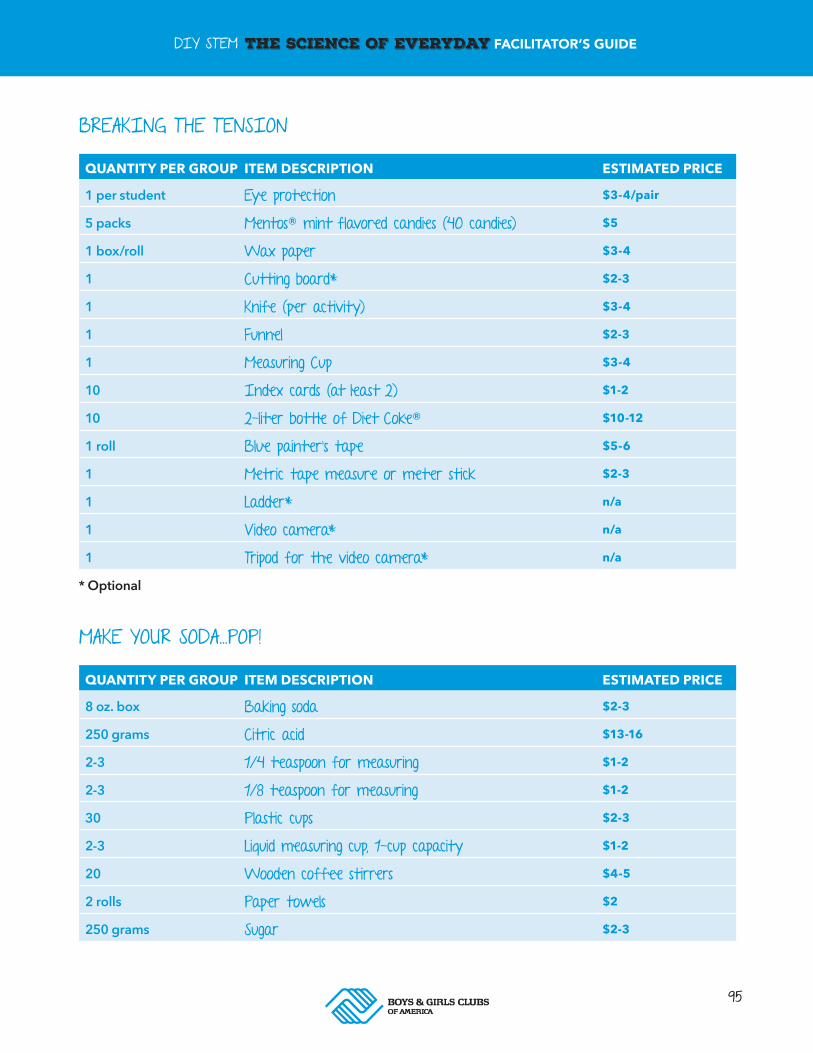
95
DIY STEM THE SCIENCE OF EVERYDAY FACILITATOR’S GUIDE
QUANTITY PER GROUP ITEM DESCRIPTION ESTIMATED PRICE
1 per student Eye protection $3-4/pair
5 packs Mentos® mint flavored candies (40 candies) $5
1 box/roll Wax paper $3-4
1 Cutting board* $2-3
1 Knife (per activity) $3-4
1 Funnel $2-3
1 Measuring Cup $3-4
10 Index cards (at least 2) $1-2
10 2-liter bottle of Diet Coke® $10-12
1 roll Blue painter's tape $5-6
1 Metric tape measure or meter stick $2-3
1 Ladder* n/a
1 Video camera* n/a
1 Tripod for the video camera* n/a
QUANTITY PER GROUP ITEM DESCRIPTION ESTIMATED PRICE
8 oz. box Baking soda $2-3
250 grams Citric acid $13-16
2-3 1/4 teaspoon for measuring $1-2
2-3 1/8 teaspoon for measuring $1-2
30 Plastic cups $2-3
2-3 Liquid measuring cup, 1-cup capacity $1-2
20 Wooden coffee stirrers $4-5
2 rolls Paper towels $2
250 grams Sugar $2-3
BREAKING THE TENSION
MAKE YOUR SODA…POP!
* Optional

96
DIY STEM THE SCIENCE OF EVERYDAY FACILITATOR’S GUIDE
QUANTITY PER GROUP ITEM DESCRIPTION ESTIMATED PRICE
1 per member Eye protection $3-4 per pair
10 Sheets of card-stock paper $5-6
4 Glue sticks $8-10
1 roll Scotch tape $1-2
1 pair Scissors $3-4
2-3 boxes Crayons and colored markers $3-4
4 Ruler $4
1 Pop! Rocket launcher (one launcher per activity is also sufficient)
$8-18
5 Penny n/a
15 Centimeter-long pieces of 1/2” PVC pipe $15-18
QUANTITY PER GROUP ITEM DESCRIPTION ESTIMATED PRICE
1 per member 8.5 X 11 paper (white or colored) $3-4
1 roll Scotch tape $6-7
1 pair Scissors $3-4
4 Ruler $5
2 Meter stick or tape measure $8-10
8 1/8” Dowel rod (12”) $10-12
1 per member Eye protection $3-4 per pair
1 per member Drinking straws $3-5
POP! ROCKETS
STRAW ROCKETS
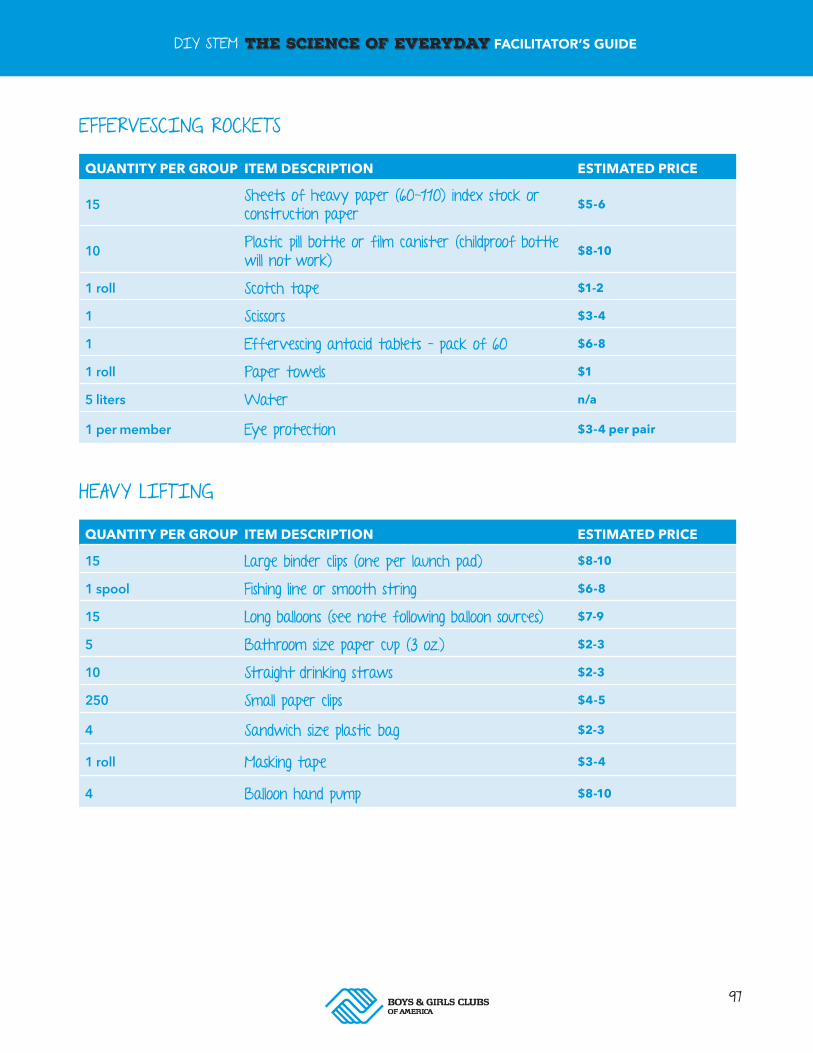
97
DIY STEM THE SCIENCE OF EVERYDAY FACILITATOR’S GUIDE
QUANTITY PER GROUP ITEM DESCRIPTION ESTIMATED PRICE
15 Sheets of heavy paper (60-110) index stock or construction paper
$5-6
10 Plastic pill bottle or film canister (childproof bottle will not work)
$8-10
1 roll Scotch tape $1-2
1 Scissors $3-4
1 Effervescing antacid tablets – pack of 60 $6-8
1 roll Paper towels $1
5 liters Water n/a
1 per member Eye protection $3-4 per pair
QUANTITY PER GROUP ITEM DESCRIPTION ESTIMATED PRICE
15 Large binder clips (one per launch pad) $8-10
1 spool Fishing line or smooth string $6-8
15 Long balloons (see note following balloon sources) $7-9
5 Bathroom size paper cup (3 oz.) $2-3
10 Straight drinking straws $2-3
250 Small paper clips $4-5
4 Sandwich size plastic bag $2-3
1 roll Masking tape $3-4
4 Balloon hand pump $8-10
EFFERVESCING ROCKETS
HEAVY LIFTING
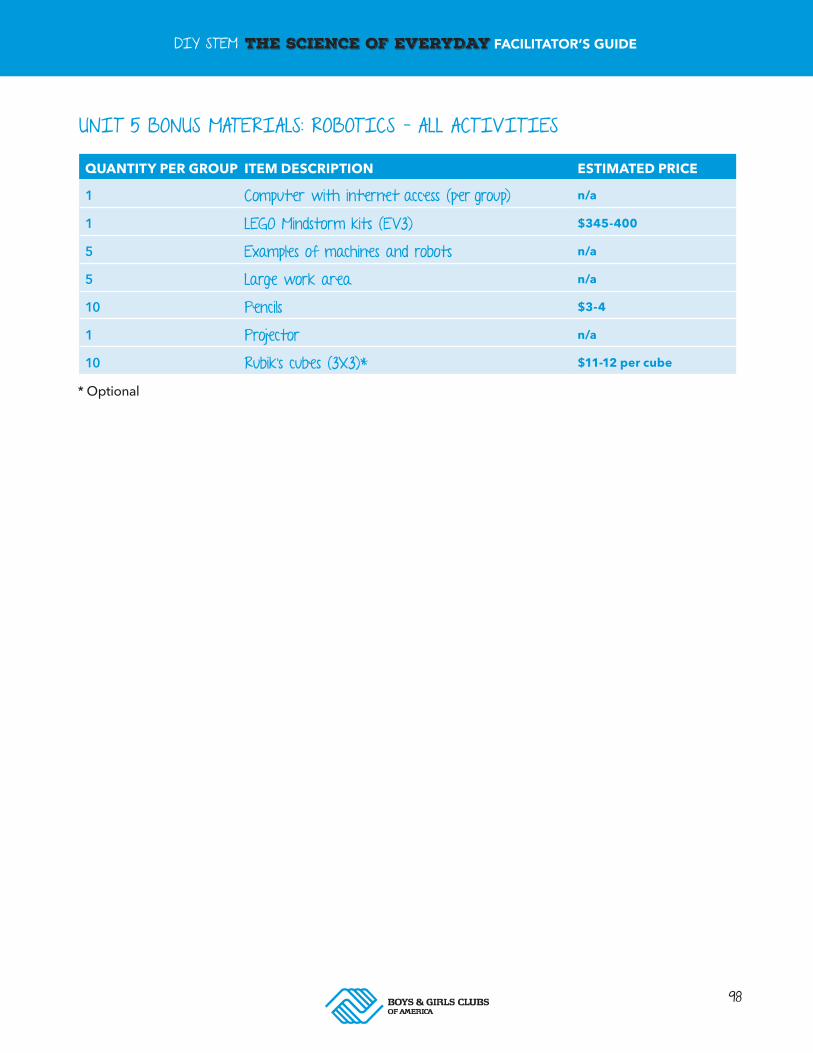
98
DIY STEM THE SCIENCE OF EVERYDAY FACILITATOR’S GUIDE
QUANTITY PER GROUP ITEM DESCRIPTION ESTIMATED PRICE
1 Computer with internet access (per group) n/a
1 LEGO Mindstorm kits (EV3) $345-400
5 Examples of machines and robots n/a
5 Large work area n/a
10 Pencils $3-4
1 Projector n/a
10 Rubik’s cubes (3X3)* $11-12 per cube
UNIT 5 BONUS MATERIALS: ROBOTICS – ALL ACTIVITIES
* Optional

2956-16