Embed Size (px)
Citation preview
Distribuido por:Distributed by - Distribué par:
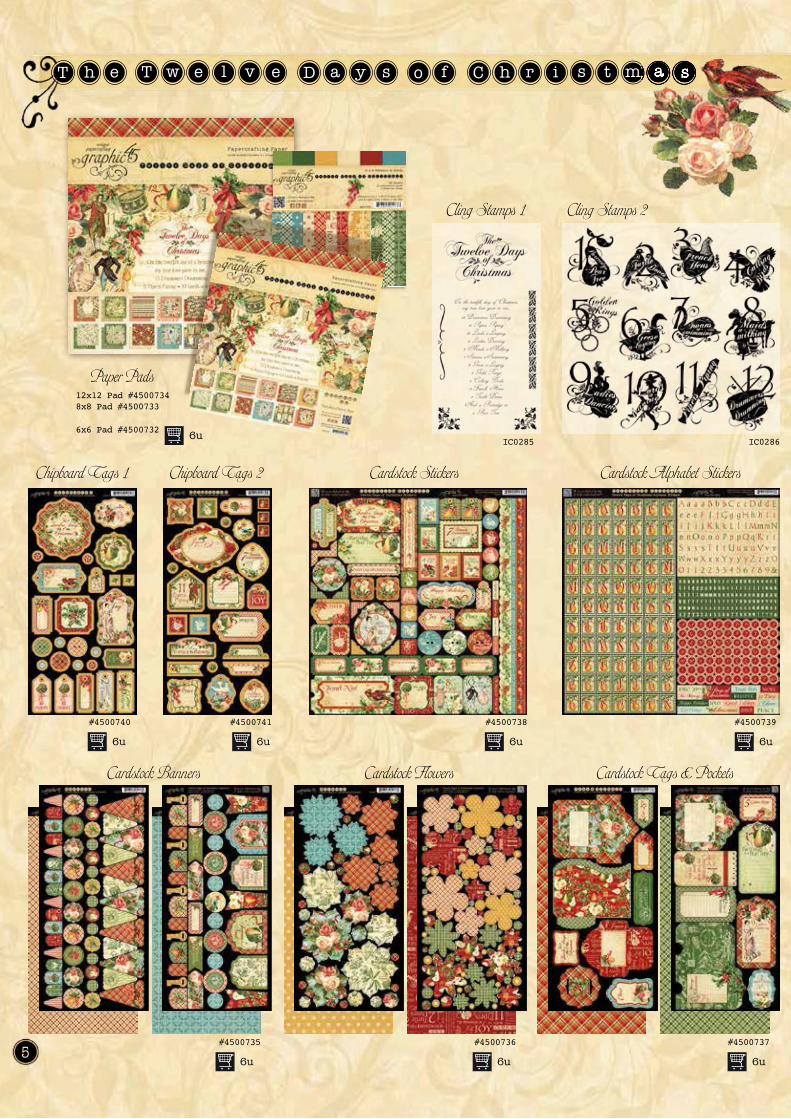
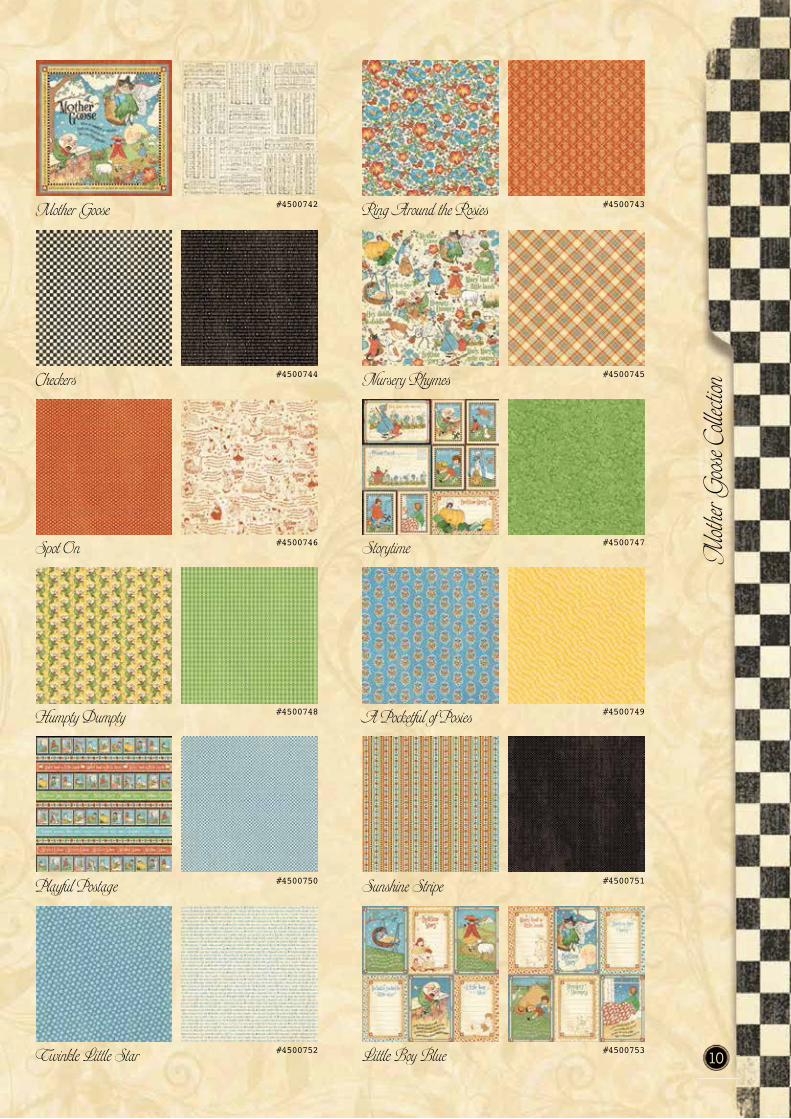
Each collection features twenty-four designs printed on twelve double-sided 12x12 cover-weight sheets that are acid and lignin free (also available in 8x8 size). A 6x6 Paper Pad includes three each of 12 coordinating pattern/solid papers.
Collections feature two separate chipboard die-cut tags, three sets of coordinating cling stamps, cardstock alphabet stickers, and cardstock stickers. Also available are two pages of cardstock banners, and tags & pockets.
The 12x12 and 8x8 Pads include two each of the 12 double-sided papers.
The 6x6 Pad includes three each of 12 coordinating patter/solid papers.
Cada colección consta de 24 diseños impresos en 12 hojas de doble cara medida 12’x12’ (30x30cm.).Su grosor es de #65 (176gr.m2) .
Los papeles se presentan en paquetes de 25 hojas.
Los “Paper Pad” 12x12, así como en 8x8 ‘ incluye 2 hojas de cada de los 12 modelos de la colección.
Los “Paper Pad” 6x6, incluye 3 hojas de cada de los 12 modelos de la colección.
**Los “Paper pad” de la colección “Typographi” en las medidas 12x12 y 8x8 contienen 3 hojas de cada de los 8 modelos de la colección.Los artículos “Chipboard ” y “Cardstcok ” su grosor es de #80 (216gr.m2).
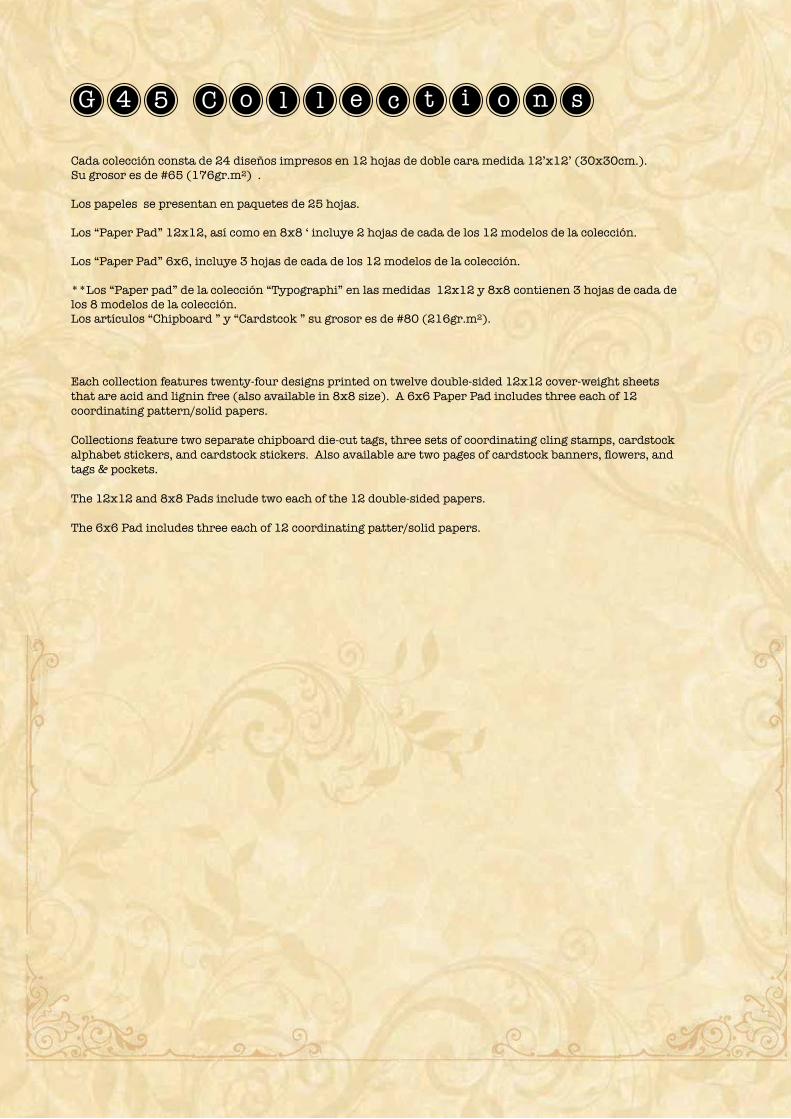
New
Coll
ection
s
3
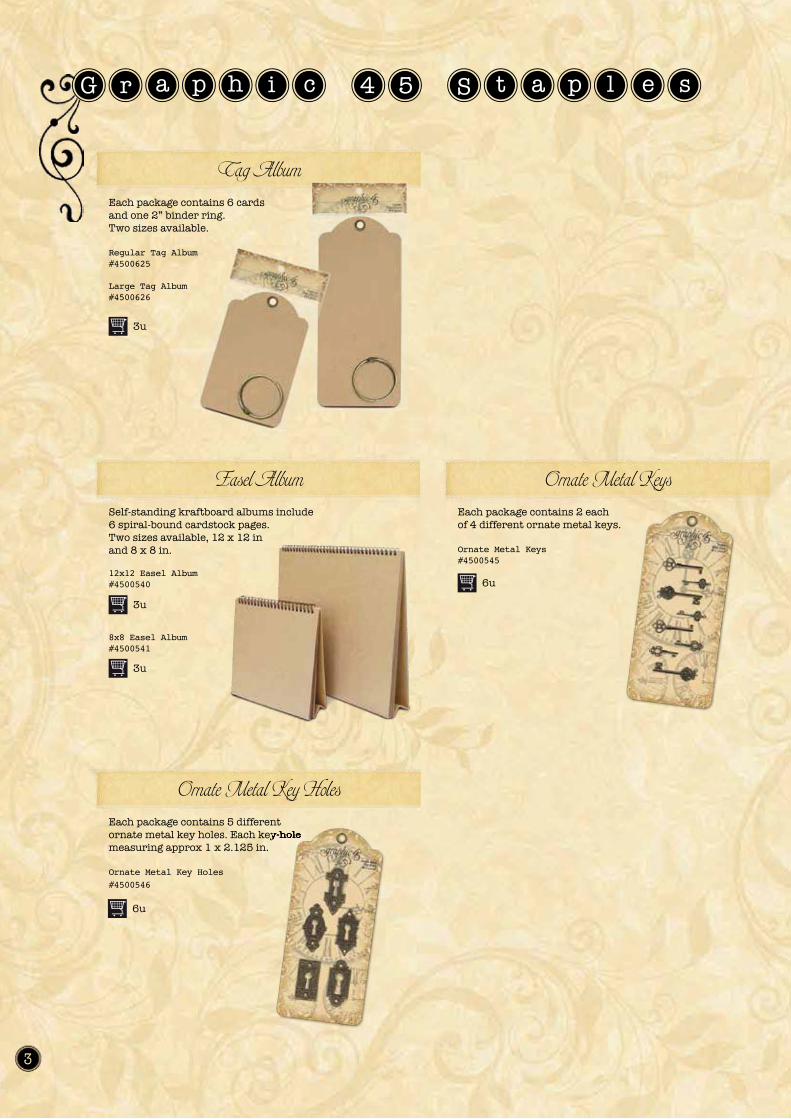
Each package contains 6 cards and one 2” binder ring. Two sizes available.
Regular Tag Album #4500625
Large Tag Album#4500626
Self-standing kraftboard albums include 6 spiral-bound cardstock pages. Two sizes available, 12 x 12 in and 8 x 8 in.
12x12 Easel Album #4500540
8x8 Easel Album#4500541
Each package contains 5 different ornate metal key holes. Each key-hole measuring approx 1 x 2.125 in.
Ornate Metal Key Holes
#4500546
Each package contains 2 each of 4 different ornate metal keys.
Ornate Metal Keys #4500545
Tag Album
Easel Album
Ornate Metal Key Holes
Ornate Metal Keys
3u
3u
3u
6u
6u
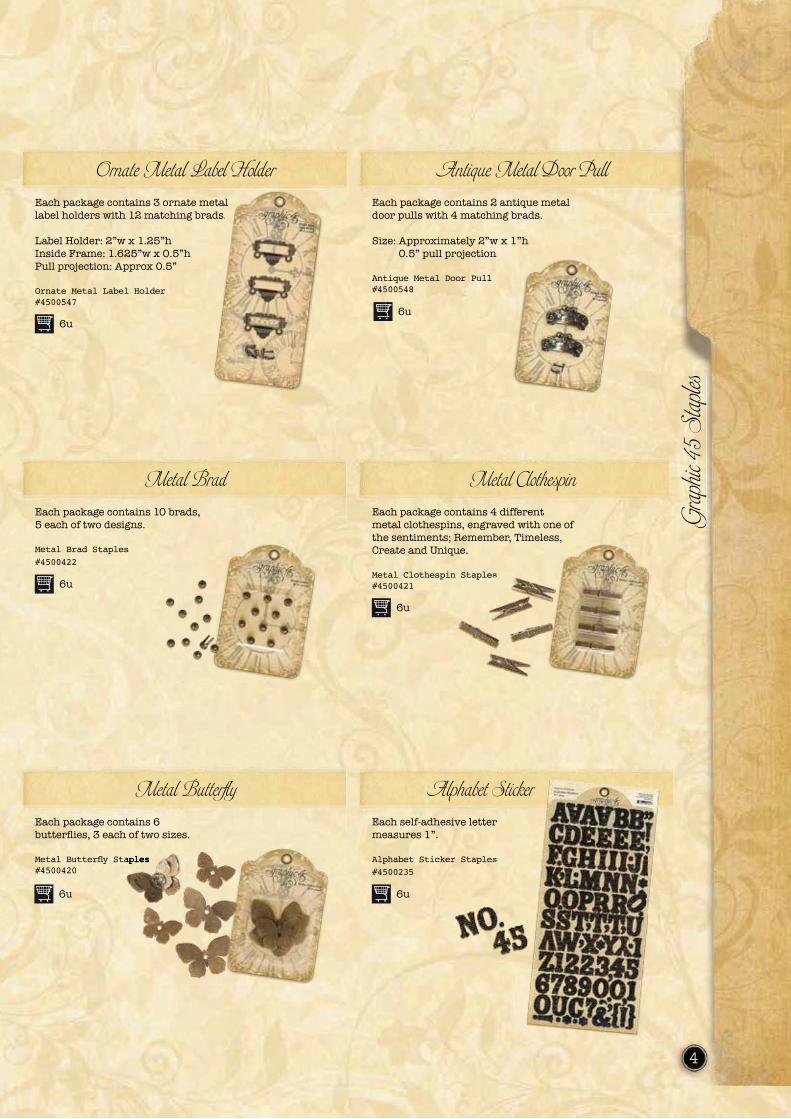
Each package contains 3 ornate metal label holders with 12 matching brads.
Label Holder: 2”w x 1.25”hInside Frame: 1.625”w x 0.5”hPull projection: Approx 0.5”
Ornate Metal Label Holder #4500547
Each package contains 10 brads, 5 each of two designs.
Metal Brad Staples
#4500422
Each package contains 6 3 each of two sizes.
#4500420
Each package contains 2 antique metal door pulls with 4 matching brads.
Size: Approximately 2”w x 1”h 0.5” pull projection
Antique Metal Door Pull #4500548
Each package contains 4 different metal clothespins, engraved with one of the sentiments; Remember, Timeless, Create and Unique.
Metal Clothespin Staples #4500421
Each self-adhesive letter measures 1”.
Alphabet Sticker Staples
#4500235
Ornate Metal Label Holder
Metal Brad
Metal Butterfly
Antique Metal Door Pull
Metal Clothespin
Alphabet Sticker
etalads.ads
, ,ue.
Staples
sive letter
er Staples
Alphabet Sticker
Gra
phic
45 S
taples
Gra
phic
45 S
taples
4
6u6u
6u
6u
6u 6u
#4500737#4500736#4500735
Cardstock Tags & Pockets
Cling Stamps 2Cling Stamps 1
Cardstock Flowers Cardstock Banners
Paper Pads
IC0286IC0285
12x12 Pad #45007348x8 Pad #4500733
6x6 Pad #4500732
5
#4500738 #4500739
Chipboard Tags 1 Cardstock Stickers Cardstock Alphabet StickersChipboard Tags 2
#4500740 #4500741
6u
6u 6u 6u 6u
6u 6u 6u
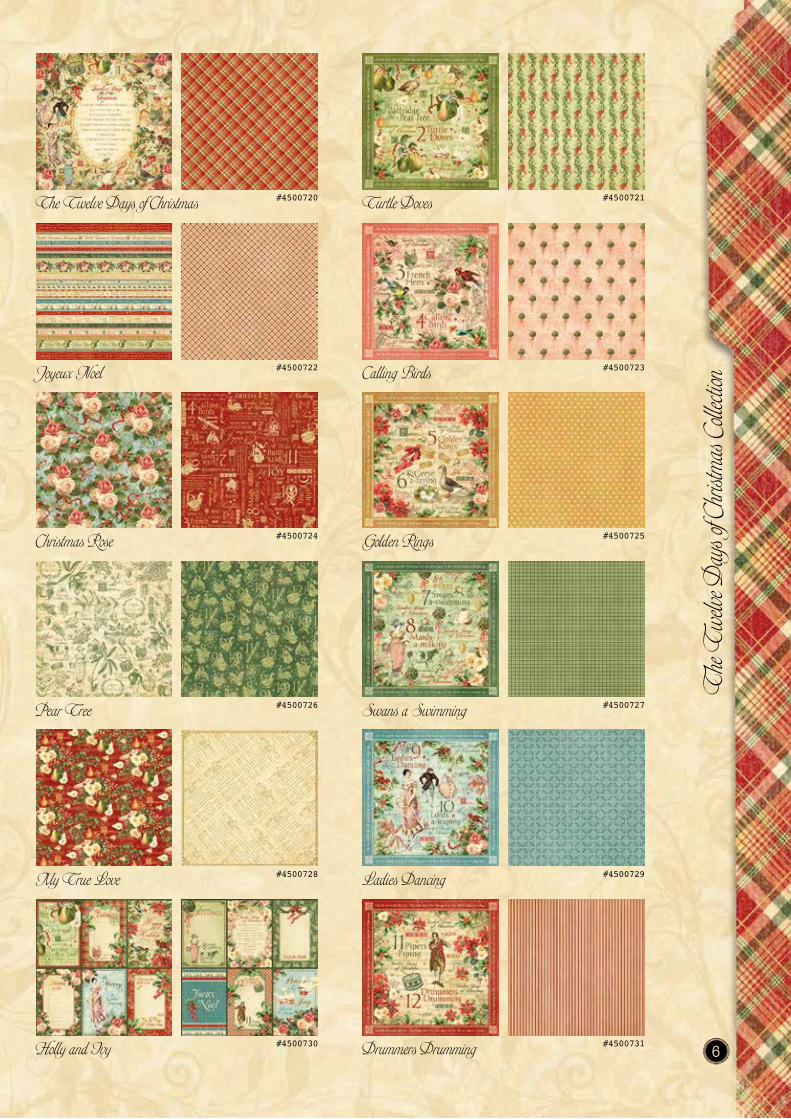
The Twelve Days of Christmas
Joyeux Noel
Christmas Rose
Pear Tree
My True Love
Holly and Ivy
Turtle Doves
Calling Birds
Golden Rings
Swans a Swimming
Ladies Dancing
Drummers Drumming
#4500720
#4500722
#4500724
#4500726
#4500728
#4500730
#4500721
#4500723
#4500725
#4500727
#4500729
#4500731
The
Twe
lve D
ays o
f Chri
stmas
Coll
ection
6
Project Sheet
7
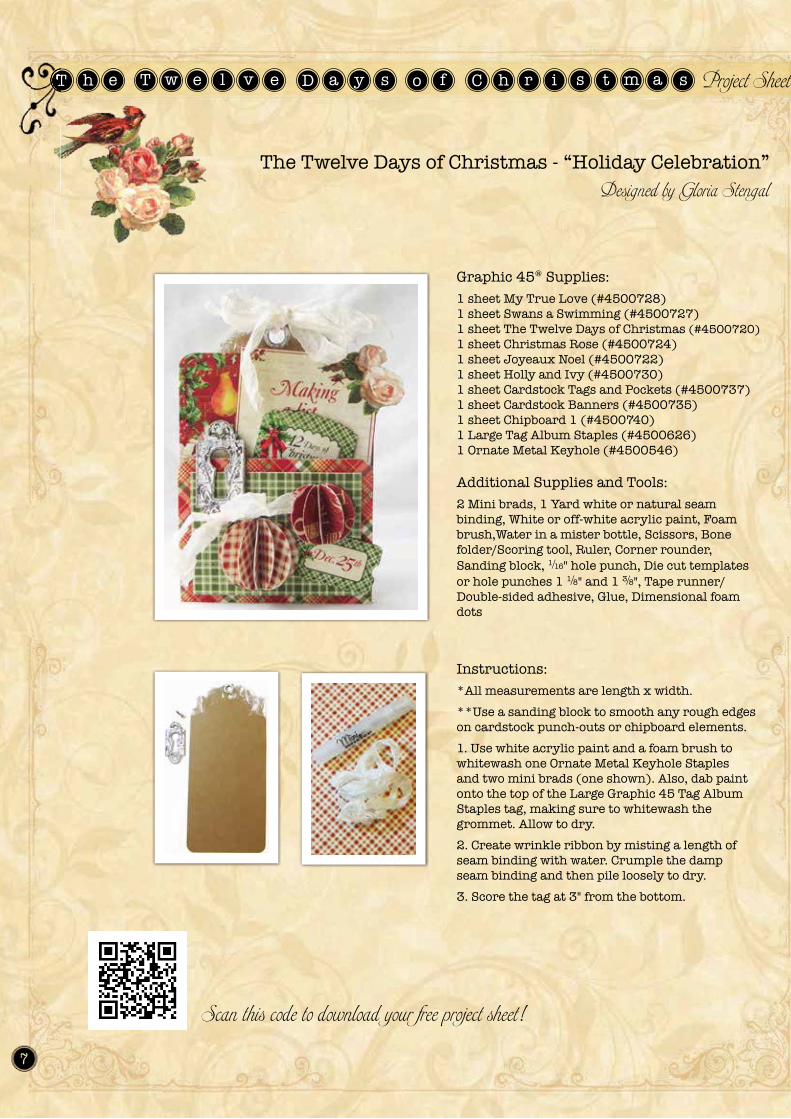
The Twelve Days of Christmas - “Holiday Celebration”Designed by Gloria Stengal
Scan this code to download your free project sheet!
Graphic 45® Supplies:1 sheet My True Love (#4500728)1 sheet Swans a Swimming (#4500727)1 sheet The Twelve Days of Christmas (#4500720)1 sheet Christmas Rose (#4500724)1 sheet Joyeaux Noel (#4500722)1 sheet Holly and Ivy (#4500730)1 sheet Cardstock Tags and Pockets (#4500737)1 sheet Cardstock Banners (#4500735)1 sheet Chipboard 1 (#4500740)1 Large Tag Album Staples (#4500626)1 Ornate Metal Keyhole (#4500546)
Additional Supplies and Tools:2 Mini brads, 1 Yard white or natural seam binding, White or off-white acrylic paint, Foam brush,Water in a mister bottle, Scissors, Bone folder/Scoring tool, Ruler, Corner rounder, Sanding block, 1 16" hole punch, Die cut templates or hole punches 1 1 8" and 1 3 8", Tape runner/ Double-sided adhesive, Glue, Dimensional foam dots
Instructions:*All measurements are length x width.**Use a sanding block to smooth any rough edges on cardstock punch-outs or chipboard elements. 1. Use white acrylic paint and a foam brush to whitewash one Ornate Metal Keyhole Staples and two mini brads (one shown). Also, dab paint onto the top of the Large Graphic 45 Tag Album Staples tag, making sure to whitewash the grommet. Allow to dry.2. Create wrinkle ribbon by misting a length of seam binding with water. Crumple the damp seam binding and then pile loosely to dry. 3. Score the tag at 3" from the bottom.
The
Twe
lve D
ays o
f Chri
stmas
Coll
ection
8
Follow us for daily creative inspiration
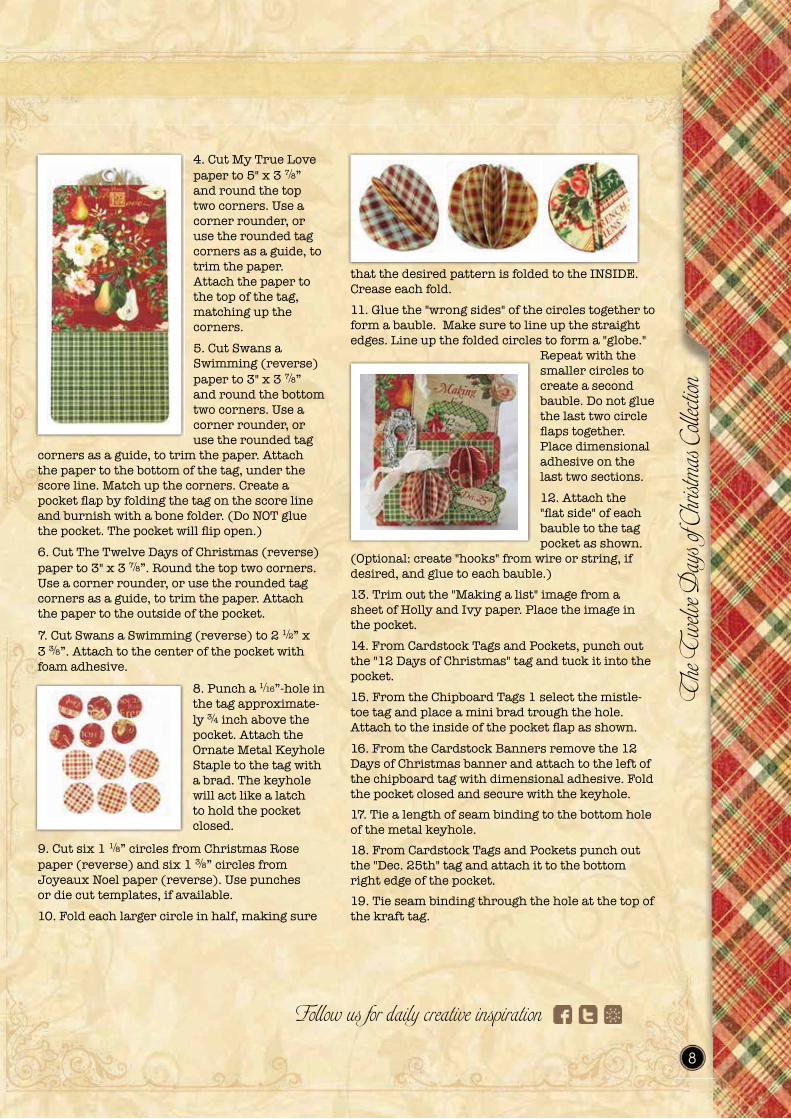
4. Cut My True Love paper to 5" x 3 7 8” and round the top two corners. Use a corner rounder, or use the rounded tag corners as a guide, to trim the paper. Attach the paper to the top of the tag, matching up the corners. 5. Cut Swans a Swimming (reverse) paper to 3" x 3 7 8” and round the bottom two corners. Use a corner rounder, or use the rounded tag
corners as a guide, to trim the paper. Attach the paper to the bottom of the tag, under the score line. Match up the corners. Create a pocket by folding the tag on the score line and burnish with a bone folder. (Do NOT glue the pocket. The pocket will open.) 6. Cut The Twelve Days of Christmas (reverse) paper to 3" x 3 7 8”. Round the top two corners. Use a corner rounder, or use the rounded tag corners as a guide, to trim the paper. Attach the paper to the outside of the pocket.7. Cut Swans a Swimming (reverse) to 2 1 2” x 3 3 8”. Attach to the center of the pocket with foam adhesive.
8. Punch a 1 16”-hole in the tag approximate-ly 3 4 inch above the pocket. Attach the Ornate Metal Keyhole Staple to the tag with a brad. The keyhole will act like a latch to hold the pocket closed.
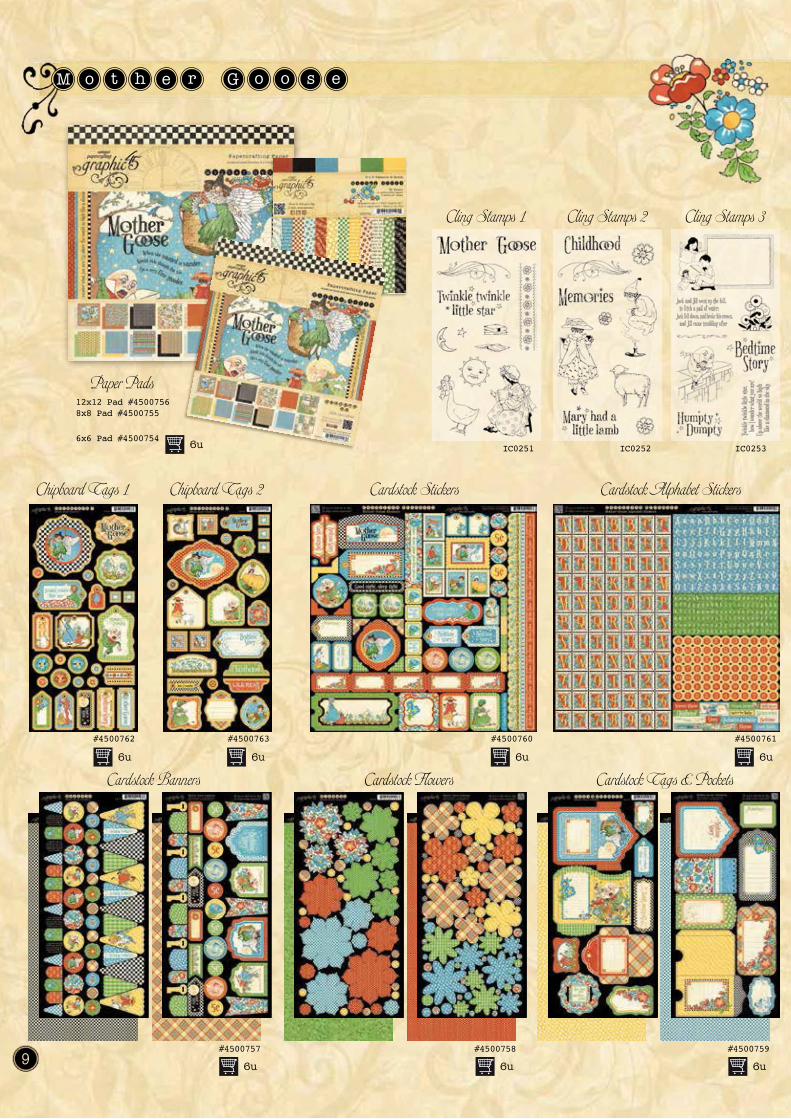
9. Cut six 1 1 8” circles from Christmas Rose paper (reverse) and six 1 3 8” circles from Joyeaux Noel paper (reverse). Use punches or die cut templates, if available.10. Fold each larger circle in half, making sure
that the desired pattern is folded to the INSIDE. Crease each fold.11. Glue the "wrong sides" of the circles together to form a bauble. Make sure to line up the straight edges. Line up the folded circles to form a "globe."
Repeat with the smaller circles to create a second bauble. Do not glue the last two circle
together. Place dimensional adhesive on the last two sections.12. Attach the
side" of each bauble to the tag pocket as shown.
(Optional: create "hooks" from wire or string, if desired, and glue to each bauble.)13. Trim out the "Making a list" image from a sheet of Holly and Ivy paper. Place the image in the pocket.14. From Cardstock Tags and Pockets, punch out the "12 Days of Christmas" tag and tuck it into the pocket.15. From the Chipboard Tags 1 select the mistle-toe tag and place a mini brad trough the hole. Attach to the inside of the pocket as shown. 16. From the Cardstock Banners remove the 12 Days of Christmas banner and attach to the left of the chipboard tag with dimensional adhesive. Fold the pocket closed and secure with the keyhole.17. Tie a length of seam binding to the bottom hole of the metal keyhole. 18. From Cardstock Tags and Pockets punch out the "Dec. 25th" tag and attach it to the bottom right edge of the pocket.19. Tie seam binding through the hole at the top of the kraft tag.
#4500759#4500758#4500757
Cardstock Tags & Pockets
Cling Stamps 3Cling Stamps 2Cling Stamps 1
Cardstock Flowers Cardstock Banners
Paper Pads
IC0253IC0252IC0251
12x12 Pad #45007568x8 Pad #4500755
6x6 Pad #4500754
9
o o s eM Go t h e r
#4500760 #4500761
Chipboard Tags 1 Cardstock Stickers Cardstock Alphabet StickersChipboard Tags 2
#4500762 #4500763
6u
6u 6u 6u 6u
6u 6u 6u
Mother Goose
Checkers
Spot On
Humpty Dumpty
Playful Postage
Twinkle Little Star
Ring Around the Rosies
Nursery Rhymes
Storytime
A Pocketful of Posies
Sunshine Stripe
Little Boy Blue
#4500742
#4500744
#4500746
#4500748
#4500750
#4500752
#4500743
#4500745
#4500747
#4500749
#4500751
#4500753
Moth
er G
oose C
ollect
ion
10
11
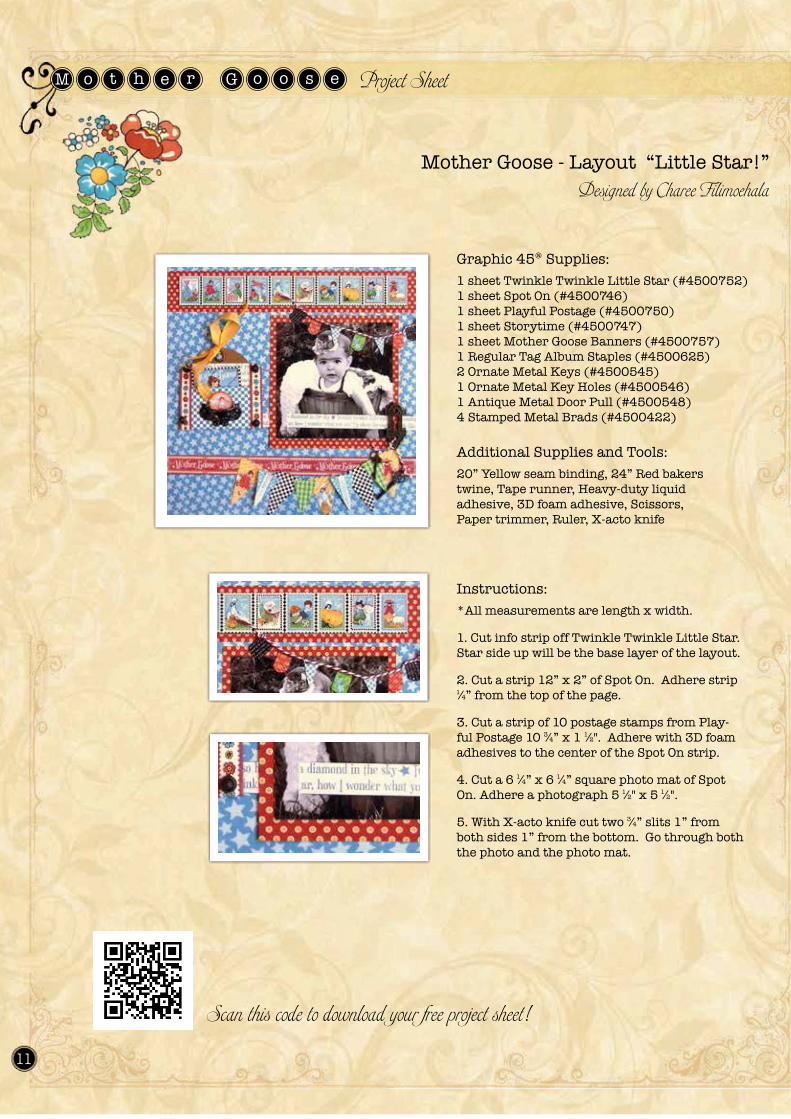
Mother Goose - Layout “Little Star!”Designed by Charee Filimoehala
Project Sheeto o s eM Go t h e r
Graphic 45® Supplies:1 sheet Twinkle Twinkle Little Star (#4500752)1 sheet Spot On (#4500746)1 sheet Playful Postage (#4500750)1 sheet Storytime (#4500747)1 sheet Mother Goose Banners (#4500757)1 Regular Tag Album Staples (#4500625)2 Ornate Metal Keys (#4500545)1 Ornate Metal Key Holes (#4500546)1 Antique Metal Door Pull (#4500548)4 Stamped Metal Brads (#4500422)
Additional Supplies and Tools:20” Yellow seam binding, 24” Red bakers twine, Tape runner, Heavy-duty liquid adhesive, 3D foam adhesive, Scissors, Paper trimmer, Ruler, X-acto knife
Instructions:*All measurements are length x width.
1. Cut info strip off Twinkle Twinkle Little Star. Star side up will be the base layer of the layout.
2. Cut a strip 12” x 2” of Spot On. Adhere strip ¼” from the top of the page.
3. Cut a strip of 10 postage stamps from Play-ful Postage 10 ¾” x 1 ½". Adhere with 3D foam adhesives to the center of the Spot On strip.
4. Cut a 6 ¼” x 6 ¼” square photo mat of Spot On. Adhere a photograph 5 ½" x 5 ½".
5. With X-acto knife cut two ¾” slits 1” from both sides 1” from the bottom. Go through both the photo and the photo mat.
Scan this code to download your free project sheet!

Moth
er G
oose C
ollect
ion
12
Follow us for daily creative inspiration
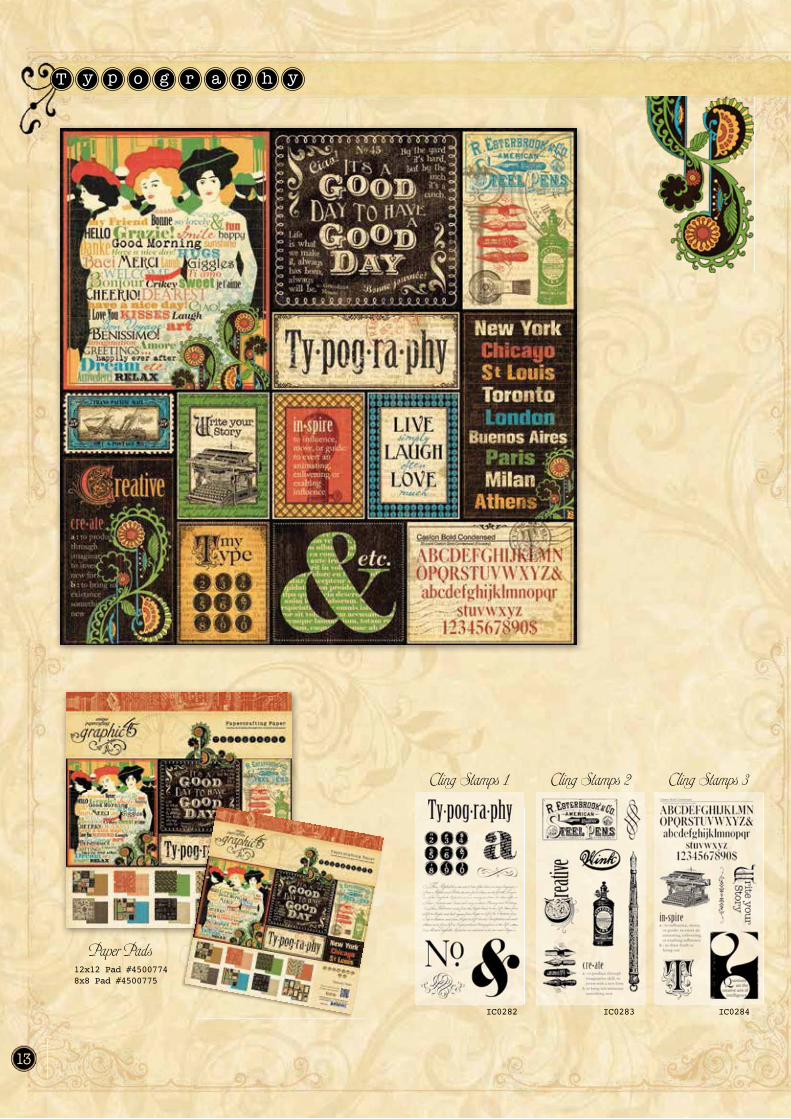
6. Cut a ½” x 9 ½” strip from Twinkle Twinkle Little Star of the lyric side of the paper, keeping two lines of wording intact. Thread this strip trough the backside photo and photo mat slits.
7. Adhere photo mat ¼” below Spot On strip and 1 ¼” from the right hand side. Using 3D foam adhesive adhere Twinkle Twinkle Little Star strip
with the right side of the layout. Pull left side straight and adhere with dry adhesive.
8. Cut Mother Goose boarder from Playful Postage. Adhere 2” from the bottom of the layout, spanning from left to right.
9. From Mother Goose cardstock banner set select 5 large, 4 medium, 7 small pennant banners. Adhere banners 3 ½” from the left hand side starting at the top of the Mother Goose boarder. Adhering large and medium banners interchanging every other banner. Pop up medium banners with 3D foam adhesives.
10. With 12” of red bakers twine knot ends 1” from both ends. Adhere diagonally from the bottom of the Postage Stamps starting in the center, swag down to the right hand side. Adhere small banners approximately ½” apart just under twine.
11. Using 1 Regular Tag from the Graphic 45® Staples. Score 2” from the bottom.
12. Cut Twinkle Twinkle Little Star 3 ¾” x 3” and adhere just under the metal eyelet to one
side of the tag, trim corners to match tag.
13. Cut Playful Postage 2 ¾” x 3 ¾”. Using check side up adhere to the bottom of the blank side of the tag. On score line fold up to expose the check side of the tag
over the Twinkle Twinkle side. Adhere left and right side to create a pocket.
14. Trim red boarder from Playful Postage, cut two strips 3 ½”. Adhere boarder of both sides of the tag, just reaching to the backside. Trim top edges.
15. Using 4 Stamped Metal Brads and 1 Antique Metal Door Pull from the Graphic 45® Staples, adhere to the pocket using heavy-duty liquid adhesive.
16. Adhere red Mother Goose circle banner peeking out of the top of the Antique Metal Door Pull.
17. Tie 20” of yellow seam binding in a bow through the Eyelet on the tag. Adhere the tag 1” from the left and 4” from the bottom.
18. Cut one large stamp from Storytime. Insert in pocket.
19. Tie 2 Metal Keys with 12” of red twine to Keyhole, adhere using heavy-duty liquid adhesive to bottom right of the photo mat, make sure Spot On is peeking out of the keyhole. Leave Keys to dangle.
Cling Stamps 3Cling Stamps 2Cling Stamps 1
Paper Pads
IC0284IC0283IC0282
12x12 Pad #45007748x8 Pad #4500775
13

Typography
Celebrate
Inscribe
Journey
Inspire
Create
Dream
Imagine
#4500766
#4500768
#4500770
#4500772
#4500777 #4500776
#4500767
#4500769
#4500771
#4500773T
ypog
raph
y Coll
ection
14
Cardstock Tags & PocketsChipboard Tags 1 Cardstock Stickers
#4500778
6u 6u 6u
Project Sheet
15
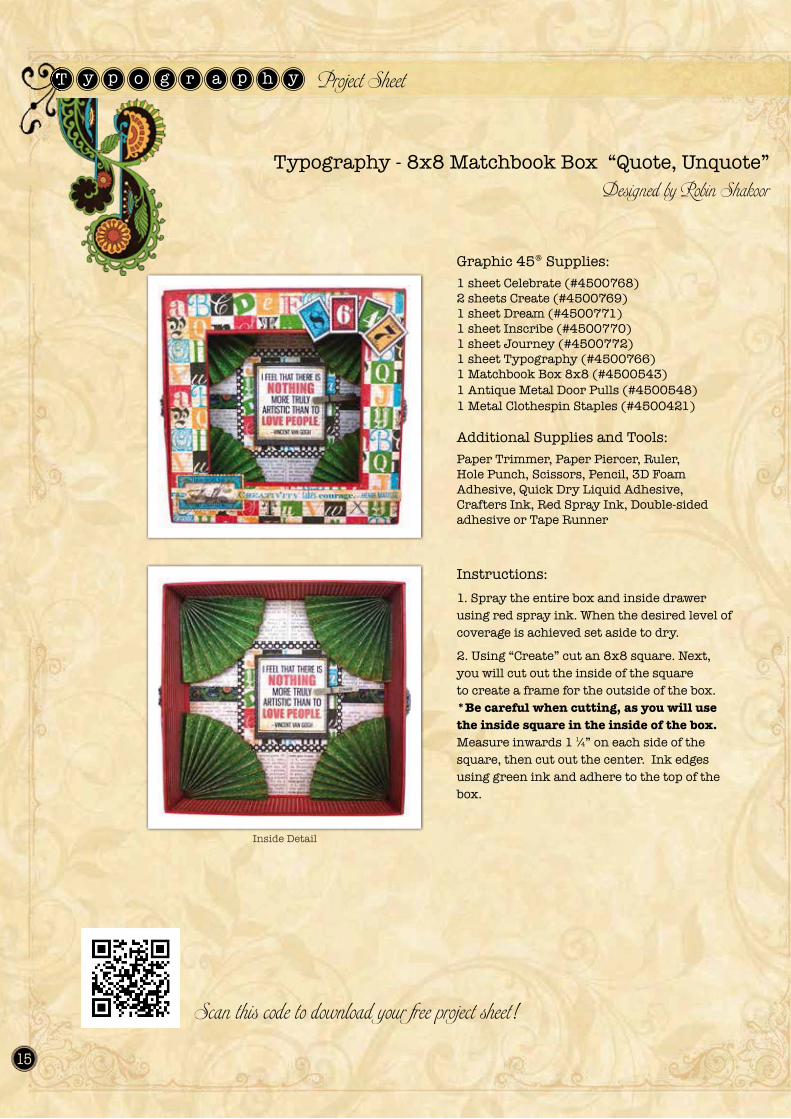
Typography - 8x8 Matchbook Box “Quote, Unquote”Designed by Robin Shakoor
Scan this code to download your free project sheet!
Inside Detail
Graphic 45® Supplies:1 sheet Celebrate (#4500768)2 sheets Create (#4500769)1 sheet Dream (#4500771)1 sheet Inscribe (#4500770)1 sheet Journey (#4500772) 1 sheet Typography (#4500766)1 Matchbook Box 8x8 (#4500543)1 Antique Metal Door Pulls (#4500548)1 Metal Clothespin Staples (#4500421)
Additional Supplies and Tools:Paper Trimmer, Paper Piercer, Ruler, Hole Punch, Scissors, Pencil, 3D Foam Adhesive, Quick Dry Liquid Adhesive, Crafters Ink, Red Spray Ink, Double-sided adhesive or Tape Runner
Instructions:1. Spray the entire box and inside drawer using red spray ink. When the desired level of coverage is achieved set aside to dry.
2. Using “Create” cut an 8x8 square. Next, you will cut out the inside of the square to create a frame for the outside of the box. *Be careful when cutting, as you will use the inside square in the inside of the box. Measure inwards 1 ¼” on each side of the square, then cut out the center. Ink edges using green ink and adhere to the top of the box.
Typ
ogra
phy C
ollect
ion
16
Follow us for daily creative inspiration
3. Cut two 1 5 8” x 8 1 8” strips from “Inscribe”, ink edges and adhere to the outer sides of the box.
4. Cut the Henri Matisse quote strip from “Dream”, spot trim across the front of the box, ink edges. From “Typography” cut out the postage stamp and make a 5 8” cut on both sides just inside the blue frame creating a buckle, thread the strip through and adhere to the
lower left part of the window as shown. 5. Select a four stamps from the right side of “Dream” and place them on the top right hand corner of the box using 3D adhesive.
6. To create the layout that will go inside on the bottom of tray, cut an 8”x 8” square using “Journey” and ink the edges and place in tray.7. From “Celebrate” add a 1 2” border strip across the center of the page, trim.8. Cut a 4 1 4” x 4 1 2” square from “Inscribe”, ink and adhere to the center of the drawer.9. Cut a 3 1 2” x 4” square from “Create”, ink and adhere to the center of the previous square mat.
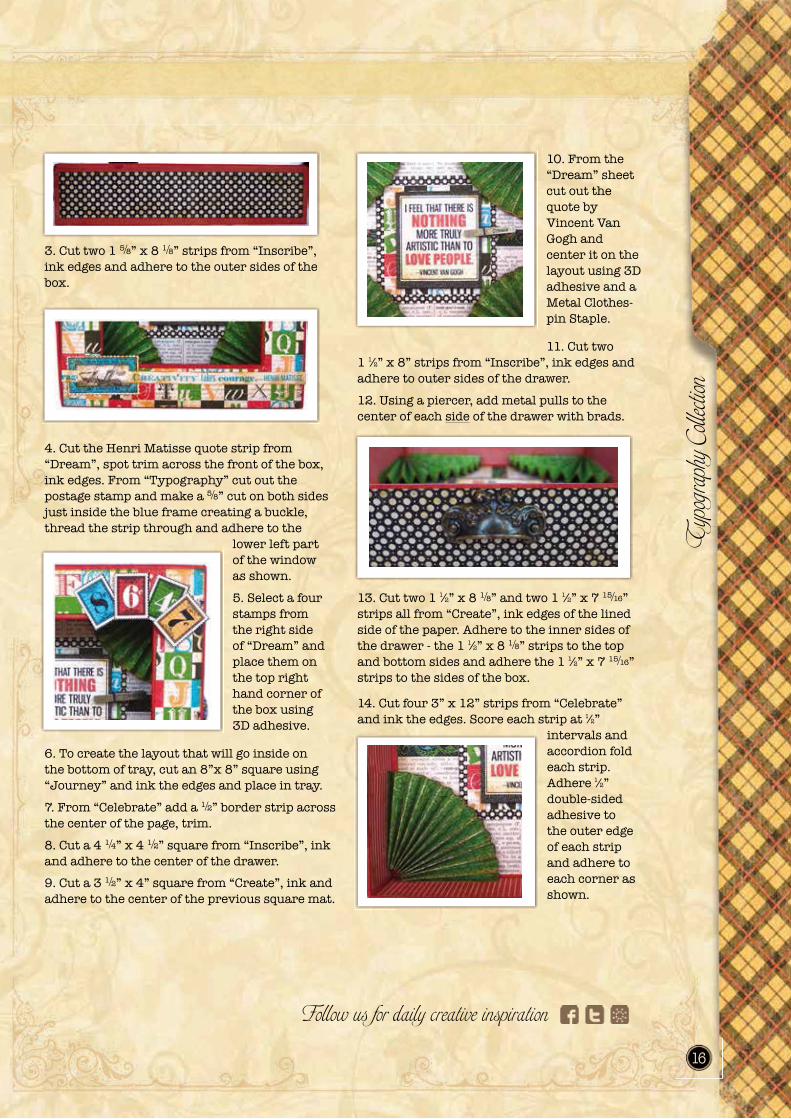
10. From the “Dream” sheet cut out the quote by Vincent Van Gogh and center it on the layout using 3D adhesive and a Metal Clothes-pin Staple.
11. Cut two 1 ½” x 8” strips from “Inscribe”, ink edges and adhere to outer sides of the drawer. 12. Using a piercer, add metal pulls to the center of each side of the drawer with brads.
13. Cut two 1 ½” x 8 1 8” and two 1 ½” x 7 15 16” strips all from “Create”, ink edges of the lined side of the paper. Adhere to the inner sides of the drawer - the 1 ½” x 8 1 8” strips to the top and bottom sides and adhere the 1 ½” x 7 15 16” strips to the sides of the box.
14. Cut four 3” x 12” strips from “Celebrate” and ink the edges. Score each strip at ½”
intervals and accordion fold each strip. Adhere ½” double-sided adhesive to the outer edge of each strip and adhere to each corner as shown.
FONTORPIN, S.L.
C. Taga, 16. Ctra C17, km 73,5
08509 Les Masies de Voltregà
Barcelona
T. +34 93 859 08 30
F. +34 93 850 52 89
www.innspiro.com
Distribuido por:Distributed by - Distribué par:


![[AzureCamp 24 Juin 2014] Cache Distribué par Thomas Conté](https://img.pdfslide.us/doc/110x75/54661fd3af795974338b5130/azurecamp-24-juin-2014-cache-distribue-par-thomas-conte.jpg)