Embed Size (px)
Citation preview
© 2011 PSU Center for Dirt and Gravel Roads www.dirtandgravelroads.org
1: Introduction – page 1
Penn State UniversityCenter for Dirt and Gravel Road Studies
Dirt and Gravel Road Maintenance and Shale Gas Development
© Center for Dirt and Gravel Road Studies 2011
A SHORTHISTORY
Dirt and Gravel Road
Maintenance Program
Why are we heretoday?
Section 9106 of Pa. Motor Vehicle Code,In a nutshell…
“To reduce sediment and dust pollution to the waters of the Commonwealth through effective and common sense
maintenance practices on unpaved public roads”.
Dirt and Gravel Road Maintenance Programwww.dirtandgravelroads.org D&G Program History
- Began in 1997- Over 8,000 people ESM trained- Completed over 2,000 Worksites- Run by County Conservation Districts- Local road owning entities (majority are
municipalities) work with District to plan and complete projects
- Cooperative effort to reduce long term maintenance costs and stream pollution from unpaved roads
Dirt and Gravel Road Maintenance Programwww.dirtandgravelroads.org D&G Program History
• Your Goal - Better roads through proper practices and procedures
• Program‟s Goal – Better environment through proper practices and procedures
13 Years has Proven!“improved maintenance techniques will benefit both roads and the environment”
DIRT AND GRAVEL PROGRAM is a Win-Win
Dirt and Gravel Road Maintenance Programwww.dirtandgravelroads.org D&G Program History Dirt and Gravel Road Maintenance Program
www.dirtandgravelroads.org Center @ Penn State
• Conduct Environmentally Sensitive Maintenance Trainings (PA and beyond)
• Technical Assistance for PA DGRP, State and Local DOTs, Private Sector and Non-profits
• Maintain PA DGRP GIS Database• Develop Technical Bulletins on Specific Road
Maintenance Practices• Website and Seasonal Newsletter.• Research Road Maintenance Practices
www.dirtandgravelroads.org
Dirt and Gravel Road Maintenance Programwww.dirtandgravelroads.org Center @ Penn State Dirt and Gravel Road Maintenance Program
www.dirtandgravelroads.org Center @ Penn State Common Ground
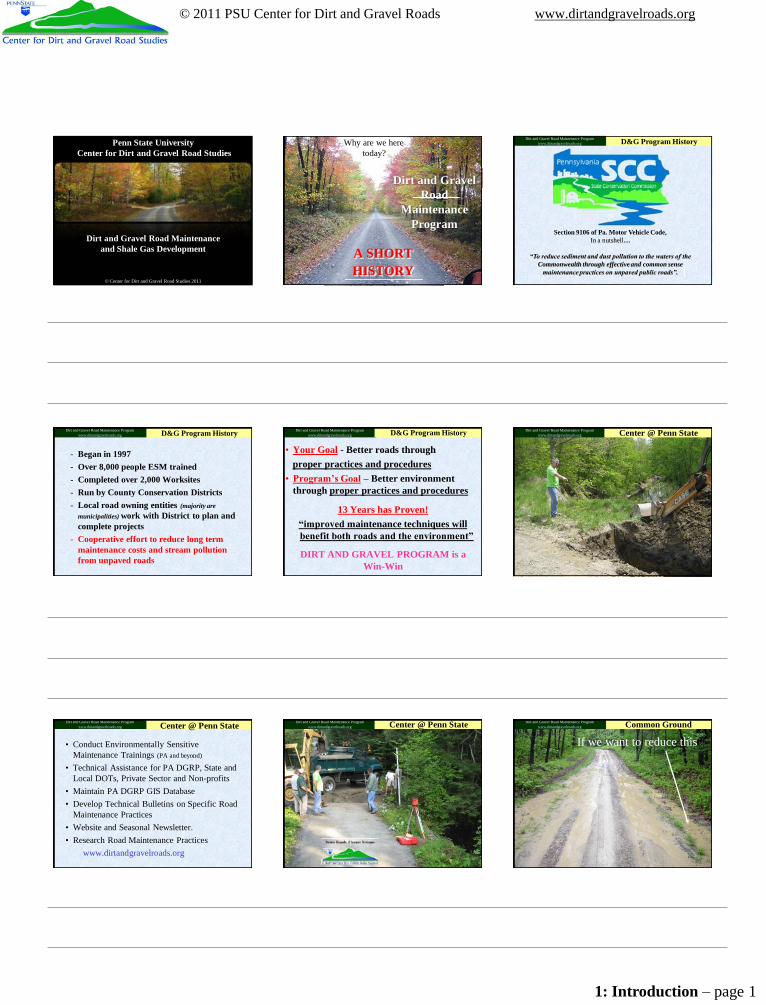
If we want to reduce this
Dirt and Gravel Road Maintenance Programwww.dirtandgravelroads.org
© 2011 PSU Center for Dirt and Gravel Roads www.dirtandgravelroads.org
1: Introduction – page 2
As well as this
Common GroundDirt and Gravel Road Maintenance Programwww.dirtandgravelroads.org
While trying to keep this here
Dirt and Gravel Road Maintenance Programwww.dirtandgravelroads.org Common Ground
With the ultimate goal of reducing this
Dirt and Gravel Road Maintenance Programwww.dirtandgravelroads.org Common Ground
And this
Common GroundDirt and Gravel Road Maintenance Programwww.dirtandgravelroads.org Common GroundDirt and Gravel Road Maintenance Program
www.dirtandgravelroads.org
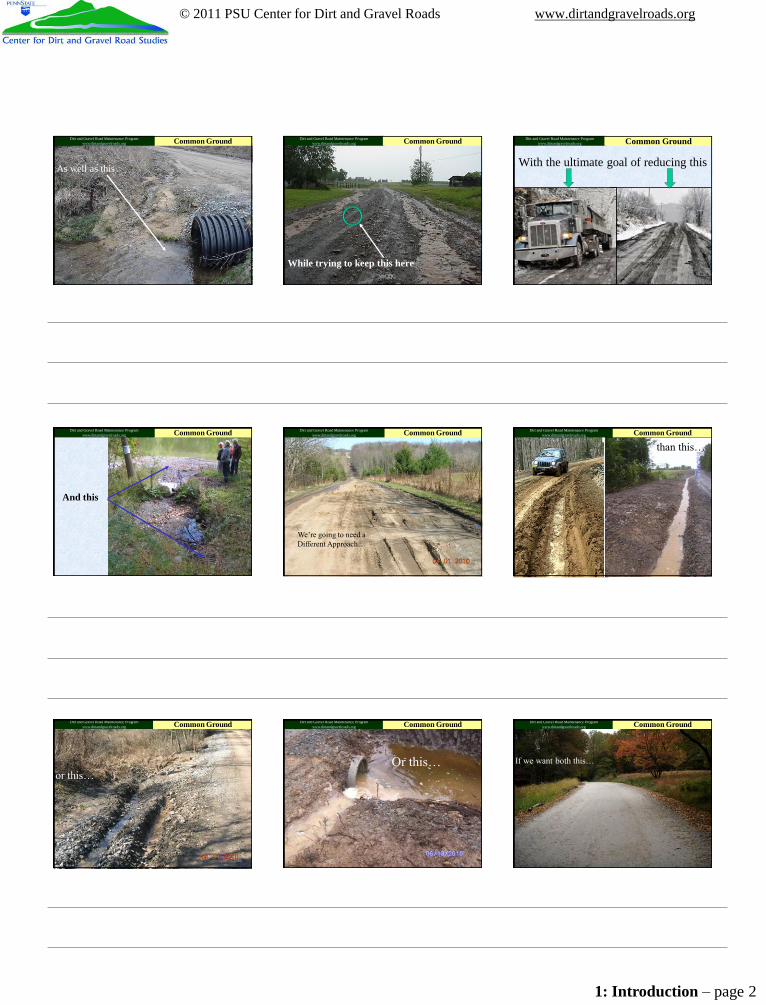
We’re going to need a Different Approach…
Dirt and Gravel Road Maintenance Programwww.dirtandgravelroads.org Common Ground
than this…
Dirt and Gravel Road Maintenance Programwww.dirtandgravelroads.org Common Ground
or this…
Dirt and Gravel Road Maintenance Programwww.dirtandgravelroads.org Common Ground
Or this…
Dirt and Gravel Road Maintenance Programwww.dirtandgravelroads.org Common Ground
If we want both this…
© 2011 PSU Center for Dirt and Gravel Roads www.dirtandgravelroads.org
1: Introduction – page 3
Dirt and Gravel Road Maintenance Programwww.dirtandgravelroads.org Common Ground
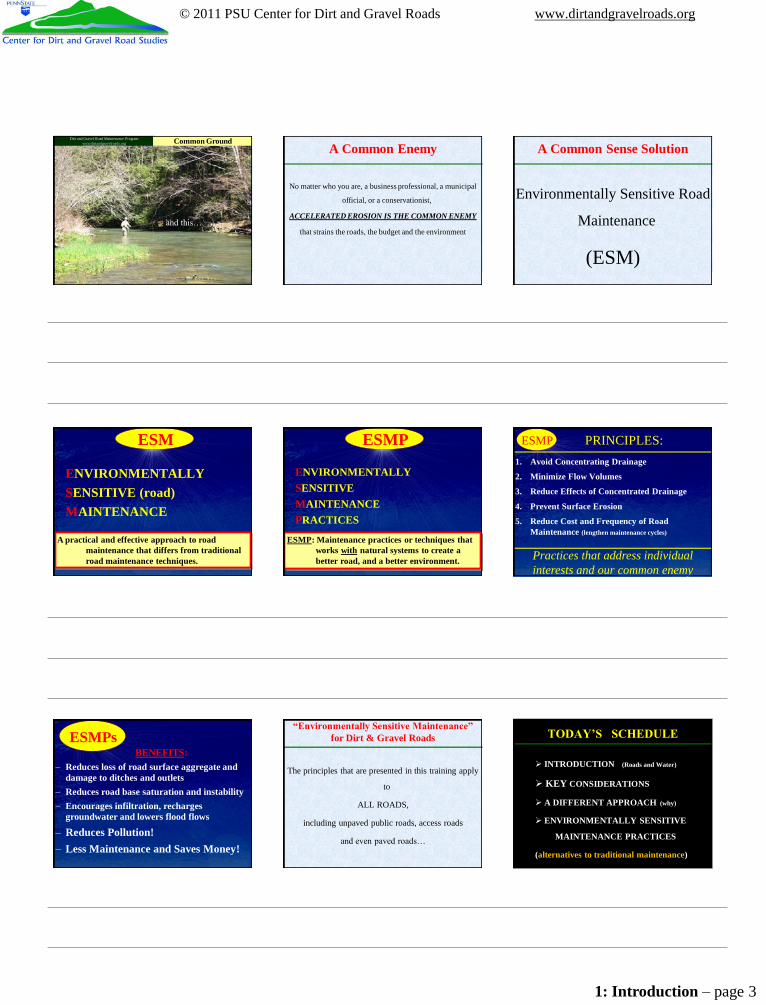
and this…
A Common Enemy
No matter who you are, a business professional, a municipal
official, or a conservationist,
ACCELERATED EROSION IS THE COMMON ENEMY
that strains the roads, the budget and the environment
A Common Sense Solution
Environmentally Sensitive Road
Maintenance
(ESM)
ENVIRONMENTALLYSENSITIVE (road)MAINTENANCE
ESM
A practical and effective approach to road maintenance that differs from traditional road maintenance techniques.
ENVIRONMENTALLYSENSITIVEMAINTENANCEPRACTICES
ESMP
ESMP: Maintenance practices or techniques that works with natural systems to create a better road, and a better environment.
ESMPs
1. Avoid Concentrating Drainage
2. Minimize Flow Volumes
3. Reduce Effects of Concentrated Drainage
4. Prevent Surface Erosion
5. Reduce Cost and Frequency of Road Maintenance (lengthen maintenance cycles)
ESMP PRINCIPLES:
Practices that address individual interests and our common enemy
BENEFITS:– Reduces loss of road surface aggregate and
damage to ditches and outlets– Reduces road base saturation and instability– Encourages infiltration, recharges
groundwater and lowers flood flows
– Reduces Pollution!– Less Maintenance and Saves Money!
ESMPs“Environmentally Sensitive Maintenance”
for Dirt & Gravel Roads
The principles that are presented in this training apply
to
ALL ROADS,
including unpaved public roads, access roads
and even paved roads…
TODAY‟S SCHEDULE
INTRODUCTION (Roads and Water)
KEY CONSIDERATIONS
A DIFFERENT APPROACH (why)
ENVIRONMENTALLY SENSITIVE
MAINTENANCE PRACTICES
(alternatives to traditional maintenance)
© 2011 PSU Center for Dirt and Gravel Roads www.dirtandgravelroads.org
1: Introduction – page 4
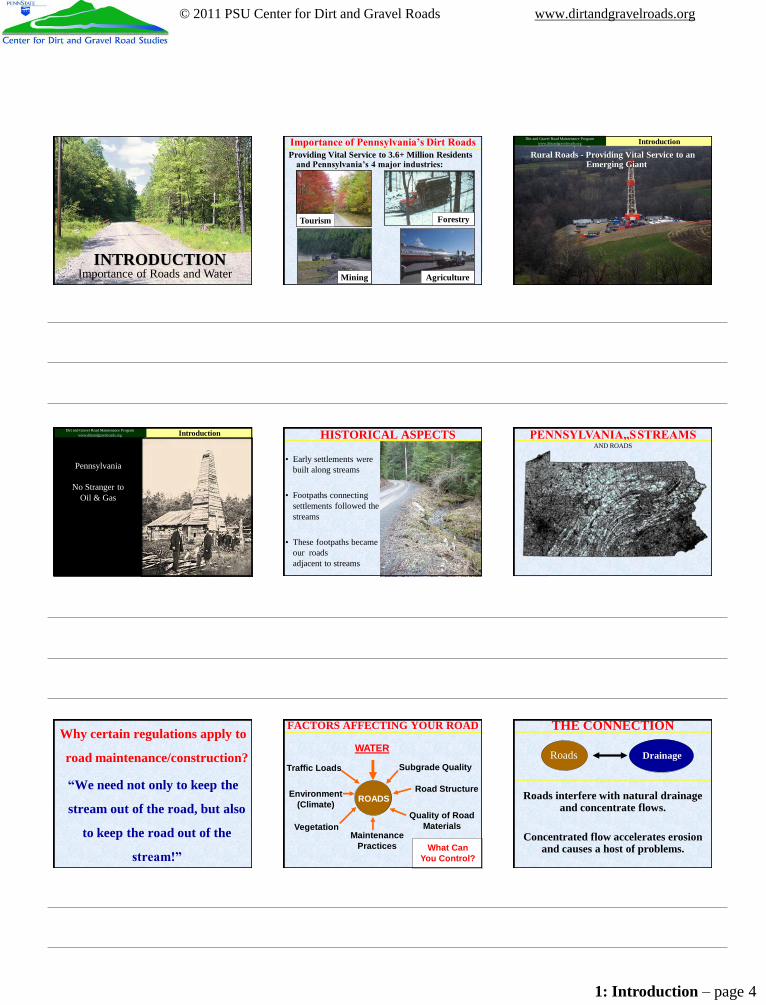
INTRODUCTIONImportance of Roads and Water
Importance of Pennsylvania‟s Dirt RoadsProviding Vital Service to 3.6+ Million Residents
and Pennsylvania‟s 4 major industries:
Mining
Forestry
Agriculture
Tourism
Rural Roads - Providing Vital Service to an Emerging Giant
Dirt and Gravel Road Maintenance Programwww.dirtandgravelroads.org Introduction
Pennsylvania
No Stranger to Oil & Gas
Dirt and Gravel Road Maintenance Programwww.dirtandgravelroads.org Introduction HISTORICAL ASPECTS
• Early settlements were built along streams
• Footpaths connecting settlements followed the streams
• These footpaths became our roads adjacent to streams
AND ROADSPENNSYLVANIA„S STREAMS
Why certain regulations apply to
road maintenance/construction?
“We need not only to keep the
stream out of the road, but also
to keep the road out of the
stream!”
FACTORS AFFECTING YOUR ROAD
What Can You Control?
ROADS
Traffic Loads
WATER
Subgrade Quality
Road StructureEnvironment (Climate)
Quality of Road Materials
Maintenance Practices
Vegetation
THE CONNECTION
Roads Drainage
Roads interfere with natural drainage and concentrate flows.
Concentrated flow accelerates erosion and causes a host of problems.
© 2011 PSU Center for Dirt and Gravel Roads www.dirtandgravelroads.org
1: Introduction – page 5
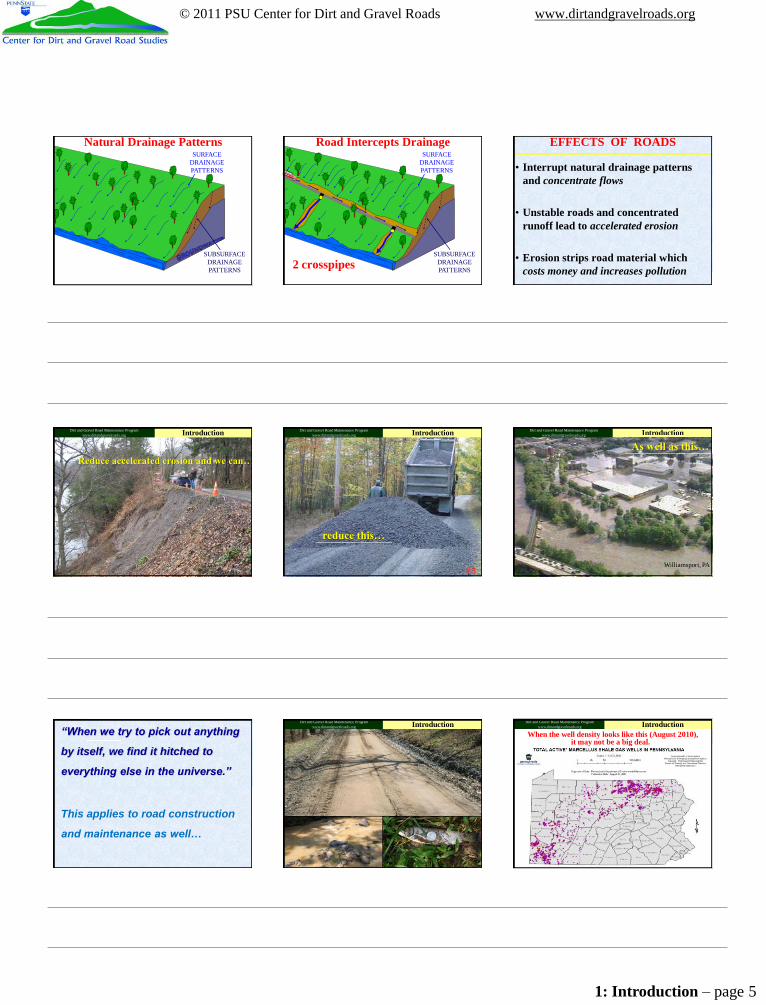
Natural Drainage PatternsSURFACE
DRAINAGE PATTERNS
SUBSURFACE DRAINAGE PATTERNS
Road Intercepts Drainage
SUBSURFACE DRAINAGE PATTERNS
SURFACE DRAINAGE PATTERNS
2 crosspipes
EFFECTS OF ROADS
• Interrupt natural drainage patterns and concentrate flows
• Unstable roads and concentrated runoff lead to accelerated erosion
• Erosion strips road material which costs money and increases pollution
EFFECTS OF ROADS
pipe outlet
IntroductionDirt and Gravel Road Maintenance Programwww.dirtandgravelroads.org
Reduce accelerated erosion and we can…
Dirt and Gravel Road Maintenance Programwww.dirtandgravelroads.org Introduction
reduce this…
Dirt and Gravel Road Maintenance Programwww.dirtandgravelroads.org Introduction
As well as this…
Williamsport, PA
“When we try to pick out anything
by itself, we find it hitched to
everything else in the universe.”
This applies to road construction
and maintenance as well…
Dirt and Gravel Road Maintenance Programwww.dirtandgravelroads.org Introduction Dirt and Gravel Road Maintenance Program
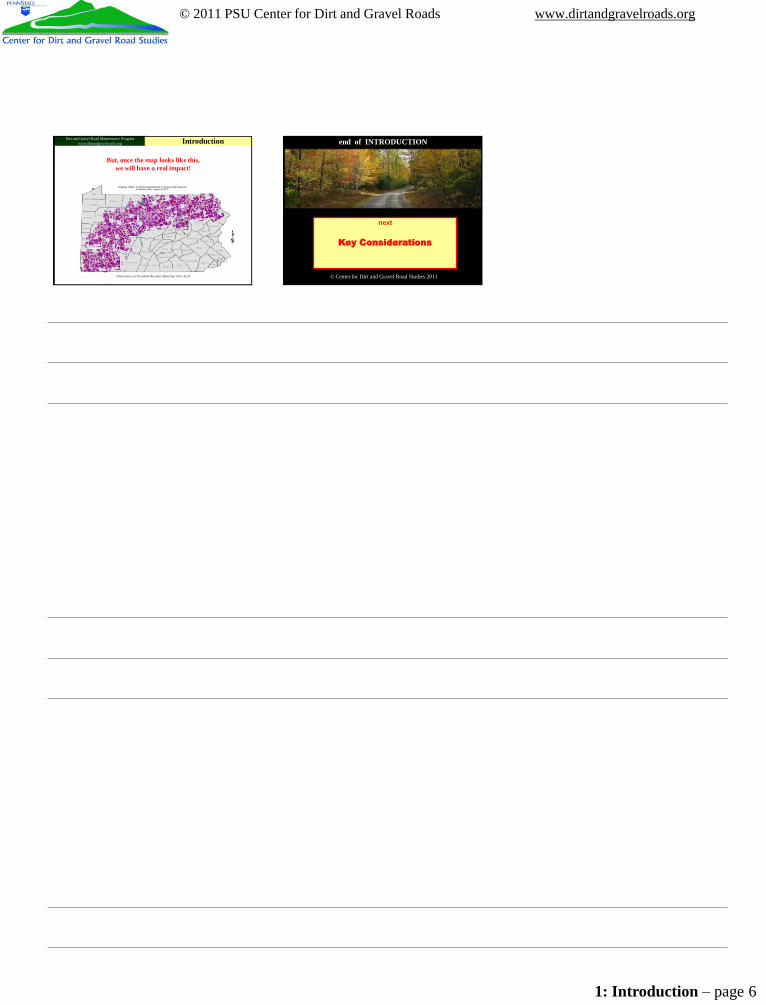
www.dirtandgravelroads.org Shale Gas DevelopmentWhen the well density looks like this (August 2010),
Introduction
it may not be a big deal.
© 2011 PSU Center for Dirt and Gravel Roads www.dirtandgravelroads.org
1: Introduction – page 6
Dirt and Gravel Road Maintenance Programwww.dirtandgravelroads.org Shale Gas Development
But, once the map looks like this, we will have a real impact!
Introduction end of INTRODUCTION
© Center for Dirt and Gravel Road Studies 2011
next
Key Considerations

2: Key Considerations – page 1
© 2011 PSU Center for Dirt and Gravel Roads www.dirtandgravelroads.org
Goal
Provide a snapshot of issues particular to shale gas development and heavy hauling
1. Construction vs maintenance2. Preemptive road improvements3. Road structure4. New challenges of wider roads 5. Winter maintenance6. Timing of hauling activities7. Site planning for access roads
KEY CONSIDERATIONSCenter for Dirt and Gravel Road Studieswww.dirtandgravelroads.org
1. Construction vs maintenance2. Preemptive road improvements3. Road structure4. New challenges of wider roads 5. Winter maintenance6. Timing of hauling activities7. Site planning for access roads
KEY CONSIDERATIONSCenter for Dirt and Gravel Road Studieswww.dirtandgravelroads.org
Filling the road profile = maintenancevs
Expanding the road cross-section = construction
Construction –vs- MaintenanceKey Considerations
See handout in bookDetails of maintenance –vs- construction with examples
Construction –vs- MaintenanceKey Considerations
Construction –vs- MaintenanceKey Considerations Construction –vs- MaintenanceKey Considerations Construction –vs- MaintenanceKey Considerations
2: Key Considerations – page 2
© 2011 PSU Center for Dirt and Gravel Roads www.dirtandgravelroads.org
1. Construction vs maintenance2. Preemptive road improvements3. Road structure4. New challenges of wider roads 5. Winter maintenance6. Timing of hauling activities7. Site planning for access roads
KEY CONSIDERATIONSCenter for Dirt and Gravel Road Studieswww.dirtandgravelroads.org
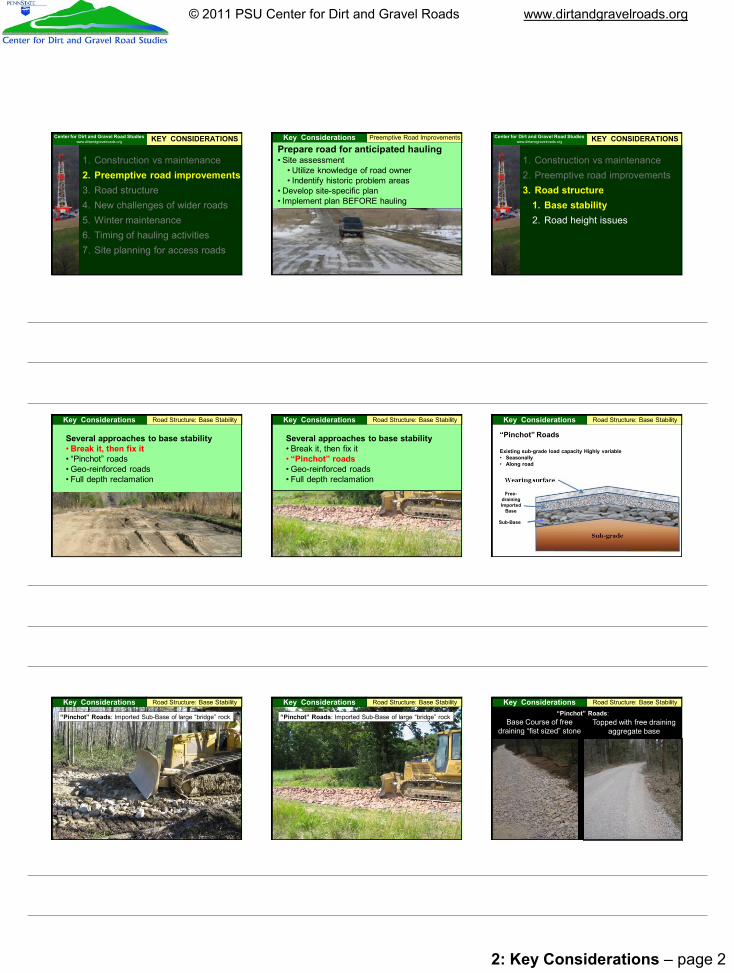
Preemptive Road ImprovementsKey ConsiderationsPrepare road for anticipated hauling• Site assessment
• Utilize knowledge of road owner• Indentify historic problem areas
• Develop site-specific plan• Implement plan BEFORE hauling
1. Construction vs maintenance2. Preemptive road improvements3. Road structure
1. Base stability2. Road height issues
KEY CONSIDERATIONSCenter for Dirt and Gravel Road Studieswww.dirtandgravelroads.org
Road Structure: Base StabilityKey Considerations
Several approaches to base stability• Break it, then fix it• “Pinchot” roads• Geo-reinforced roads• Full depth reclamation
Road Structure: Base StabilityKey Considerations
Several approaches to base stability• Break it, then fix it• “Pinchot” roads• Geo-reinforced roads• Full depth reclamation
Road Structure: Base StabilityKey Considerations
Free-draining Imported
Base Course
Sub-Base
“Pinchot” Roads
Existing sub-grade load capacity Highly variable• Seasonally• Along road
Road Structure: Base StabilityKey Considerations
“Pinchot” Roads: Imported Sub-Base of large “bridge” rock
Road Structure: Base StabilityKey Considerations
“Pinchot” Roads: Imported Sub-Base of large “bridge” rock
Road Structure: Base StabilityKey Considerations
Base Course of free draining “fist sized” stone
Topped with free draining aggregate base
“Pinchot” Roads:
2: Key Considerations – page 3
© 2011 PSU Center for Dirt and Gravel Roads www.dirtandgravelroads.org
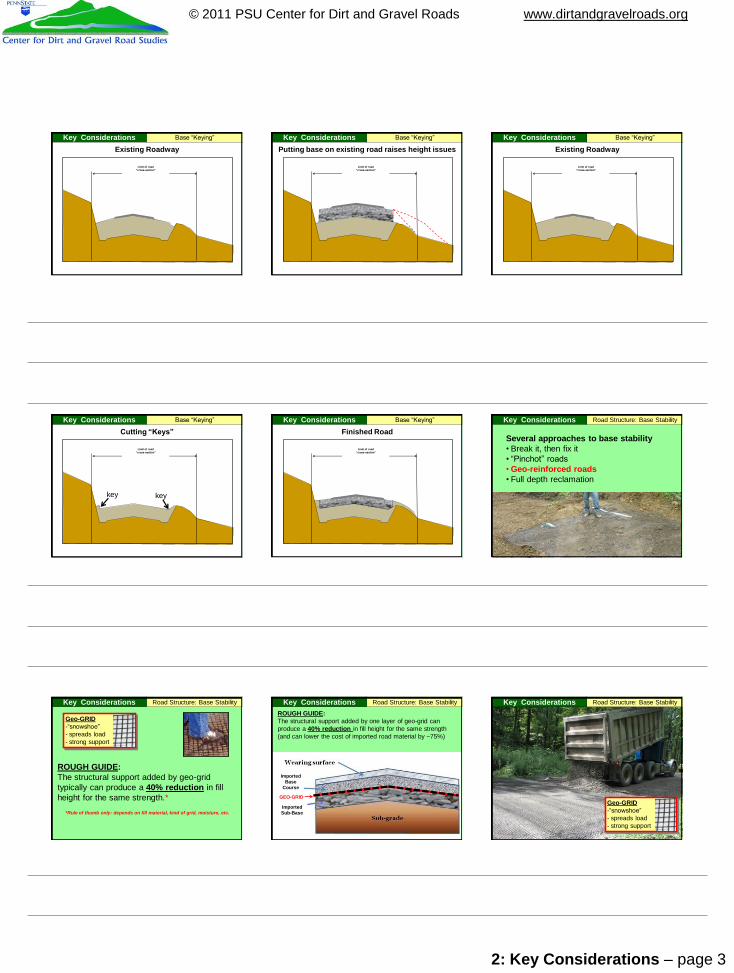
Base “Keying”Key Considerations
Limit of road “cross-section”
Existing RoadwayBase “Keying”Key Considerations
Limit of road “cross-section”
cartway
Putting base on existing road raises height issuesBase “Keying”Key Considerations
Limit of road “cross-section”
Existing Roadway
Base “Keying”Key Considerations
Limit of road “cross-section”
Cutting “Keys”
key key
Base “Keying”Key Considerations
Limit of road “cross-section”
Road Fill
Finished RoadRoad Structure: Base StabilityKey Considerations
Several approaches to base stability• Break it, then fix it• “Pinchot” roads• Geo-reinforced roads• Full depth reclamation
Road Structure: Base StabilityKey Considerations
Geo-GRID-“snowshoe”- spreads load- strong support
ROUGH GUIDE:The structural support added by geo-grid typically can produce a 40% reduction in fill height for the same strength.*
*Rule of thumb only: depends on fill material, kind of grid, moisture, etc.
Road Structure: Base StabilityKey ConsiderationsROUGH GUIDE:The structural support added by one layer of geo-grid can produce a 40% reduction in fill height for the same strength(and can lower the cost of imported road material by ~75%)
Imported Base
Course
Imported Sub-Base
GEO-GRID
Road Structure: Base StabilityKey Considerations
Geo-GRID-“snowshoe”- spreads load- strong support

2: Key Considerations – page 4
© 2011 PSU Center for Dirt and Gravel Roads www.dirtandgravelroads.org
Without Fabric With
Fabric
Fabric
Separation Fabric- separates- spreads load- some support
Key Considerations Road Structure: Base Stability
Keeps support stone on top and soils from “pumping” to surface
Road Structure: Base StabilityKey Considerations
Separation:Fabric keeps sub-base and sub-grade separate(keeps mud below and stone on top)
Imported Base
Course
Imported Sub-Base
FABRIC
Road Structure: Base StabilityKey Considerations
Several approaches to base stability• Break it, then fix it• “Pinchot” roads• Geo-reinforced roads• Full depth reclamation
Road Structure: Base StabilityKey Considerations
“Stabilized Road”
Correct drainage first!
1. Construction vs maintenance2. Preemptive road improvements3. Road structure
1. Base stability2. Road height issues
KEY CONSIDERATIONSCenter for Dirt and Gravel Road Studieswww.dirtandgravelroads.org
Road Structure: Height IssuesKey Considerations
Road Height Issues
Road Structure: Height IssuesKey Considerations
Road Height Issues:• Liability costs (risk management)
• Traffic safety• Backwater potential
• Regulatory costs• Permit fees• Permit time delays• Professional fees for permits
and compliance• Violations and down time
• Additional material costs• Drainage structures
Road Structure: Height IssuesKey Considerations
Road Height Issues1. Construction vs maintenance2. Preemptive road improvements3. Road structure4. New challenges of wider roads 5. Winter maintenance6. Timing of hauling activities7. Site planning for access roads
KEY CONSIDERATIONSCenter for Dirt and Gravel Road Studieswww.dirtandgravelroads.org
2: Key Considerations – page 5
© 2011 PSU Center for Dirt and Gravel Roads www.dirtandgravelroads.org
Challenges of Wider RoadsKey Considerations Challenges of Wider RoadsKey Considerations
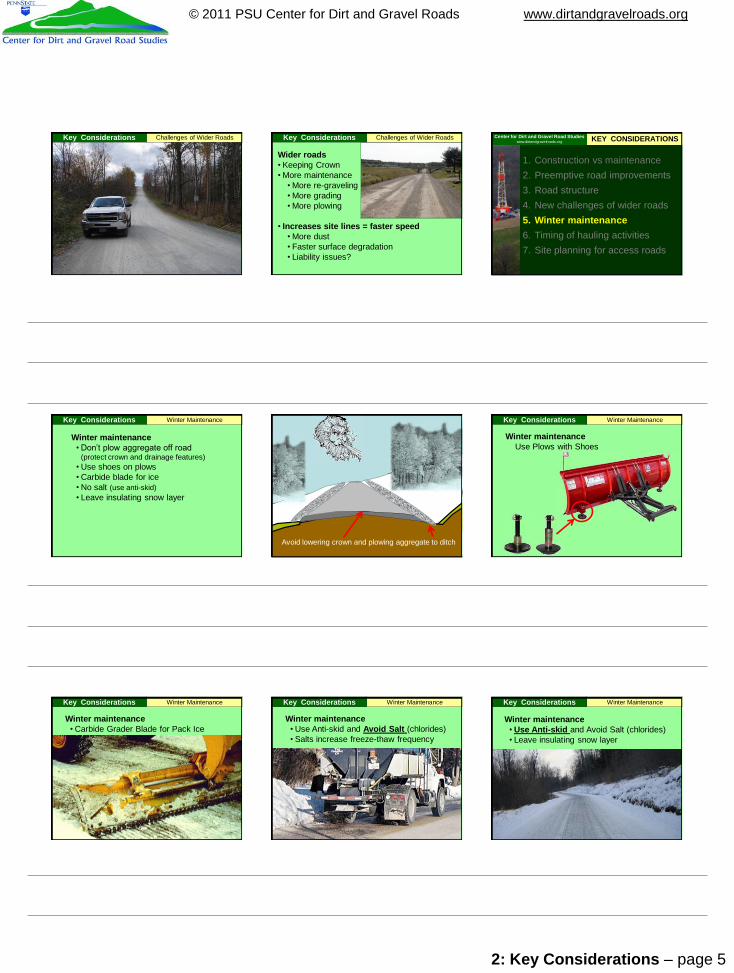
Wider roads• Keeping Crown• More maintenance
• More re-graveling• More grading• More plowing
• Increases site lines = faster speed• More dust • Faster surface degradation• Liability issues?
1. Construction vs maintenance2. Preemptive road improvements3. Road structure4. New challenges of wider roads 5. Winter maintenance6. Timing of hauling activities7. Site planning for access roads
KEY CONSIDERATIONSCenter for Dirt and Gravel Road Studieswww.dirtandgravelroads.org
Winter MaintenanceKey Considerations
Winter maintenance• Don’t plow aggregate off road
(protect crown and drainage features)• Use shoes on plows• Carbide blade for ice• No salt (use anti-skid)• Leave insulating snow layer
Avoid lowering crown and plowing aggregate to ditch
Winter MaintenanceKey Considerations
Winter maintenanceUse Plows with Shoes
Winter MaintenanceKey Considerations
Winter maintenance• Carbide Grader Blade for Pack Ice
Winter MaintenanceKey Considerations
Winter maintenance• Use Anti-skid and Avoid Salt (chlorides)• Salts increase freeze-thaw frequency
Winter MaintenanceKey Considerations
Winter maintenance• Use Anti-skid and Avoid Salt (chlorides)• Leave insulating snow layer

2: Key Considerations – page 6
© 2011 PSU Center for Dirt and Gravel Roads www.dirtandgravelroads.org
1. Construction vs maintenance2. Preemptive road improvements3. Road structure4. New challenges of wider roads 5. Winter maintenance6. Timing of hauling activities7. Site planning for access roads
KEY CONSIDERATIONSCenter for Dirt and Gravel Road Studieswww.dirtandgravelroads.org
Timing of Hauling ActivitiesKey Considerations Timing of Hauling ActivitiesKey Considerations
• Avoid heavy hauling during thaw(1 day can be worse than the other 364)
• Implement upgrades prior to breakup
• Utilize pipelines, flow back recycling and central impoundments to minimize hauling.
1. Construction vs maintenance2. Preemptive road improvements3. Road structure4. New challenges of wider roads 5. Winter maintenance6. Timing of hauling activities7. Site planning for access roads
KEY CONSIDERATIONSCenter for Dirt and Gravel Road Studieswww.dirtandgravelroads.org
Access Road Site PlanningKey Considerations Access Road Site PlanningKey Considerations
Site planning for access roads
• Grades and Contours• Soil types (ref soil website)• Distance to stream channels, wetlands, springs, dry channels• Land use concerns• Use local resources• Use latest site planning tools / technology available• Follow regulatory requirements• Field Investigation
A chance to use knowledge gained and avoid many of the mistakes made on public roads
Site Planning - GradesKey ConsiderationsSite planning for access roads• Grades and Contours
• “straight line” roads often not best choice• Follow contours where possible• Limit lengths of sections > 10%
Site Planning - GradesKey Considerations Site Planning - SoilsKey Considerations
Soil types (ref soil survey)
• Know your soil characteristics• Avoid problem areas where possible
2: Key Considerations – page 7
© 2011 PSU Center for Dirt and Gravel Roads www.dirtandgravelroads.org
Site Planning - SoilsKey Considerations Site Planning – Water SourcesKey Considerations
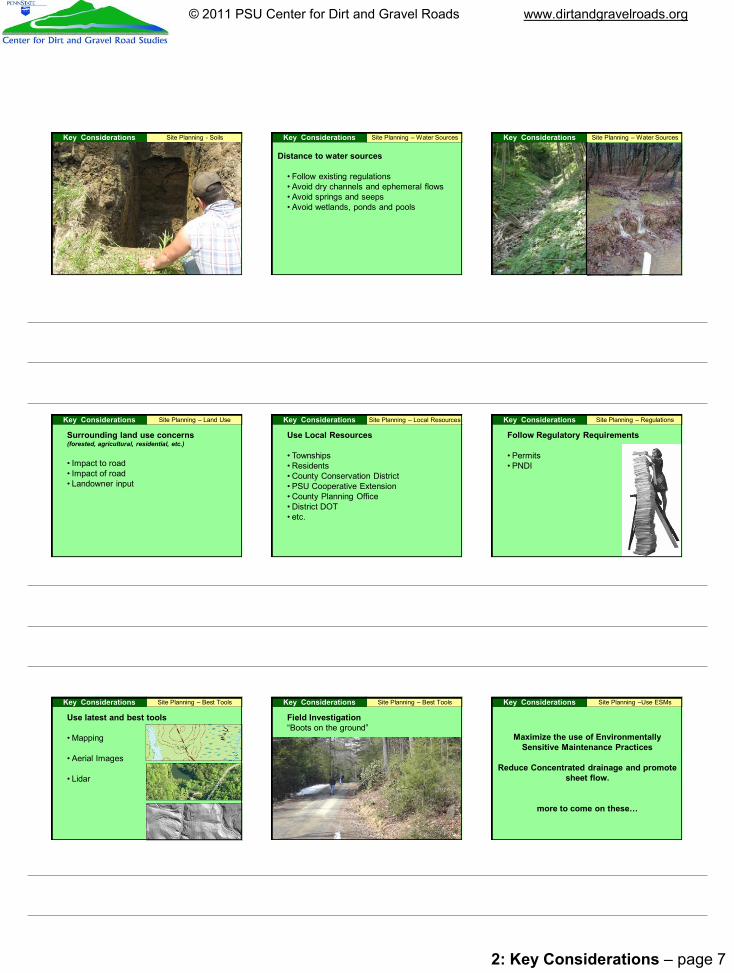
Distance to water sources
• Follow existing regulations• Avoid dry channels and ephemeral flows• Avoid springs and seeps• Avoid wetlands, ponds and pools
Site Planning – Water SourcesKey Considerations
Site Planning – Land UseKey Considerations
Surrounding land use concerns(forested, agricultural, residential, etc.)
• Impact to road• Impact of road• Landowner input
Site Planning – Local ResourcesKey Considerations
Use Local Resources
• Townships • Residents• County Conservation District• PSU Cooperative Extension• County Planning Office• District DOT• etc.
Site Planning – RegulationsKey Considerations
Follow Regulatory Requirements
• Permits• PNDI
Site Planning – Best ToolsKey Considerations
Use latest and best tools
• Mapping
• Aerial Images
• Lidar
Site Planning – Best ToolsKey Considerations
Field Investigation“Boots on the ground”
Site Planning –Use ESMsKey Considerations
Maximize the use of Environmentally Sensitive Maintenance Practices
Reduce Concentrated drainage and promote sheet flow.
more to come on these…
2: Key Considerations – page 8
© 2011 PSU Center for Dirt and Gravel Roads www.dirtandgravelroads.org
end of KEY CONSIDERATIONS
© Center for Dirt and Gravel Road Studies 2011
next
A Different Approach
3: A Different Approach – page 1
© 2011 PSU Center for Dirt and Gravel Roads www.dirtandgravelroads.org
• NEW MODULE BEGINS
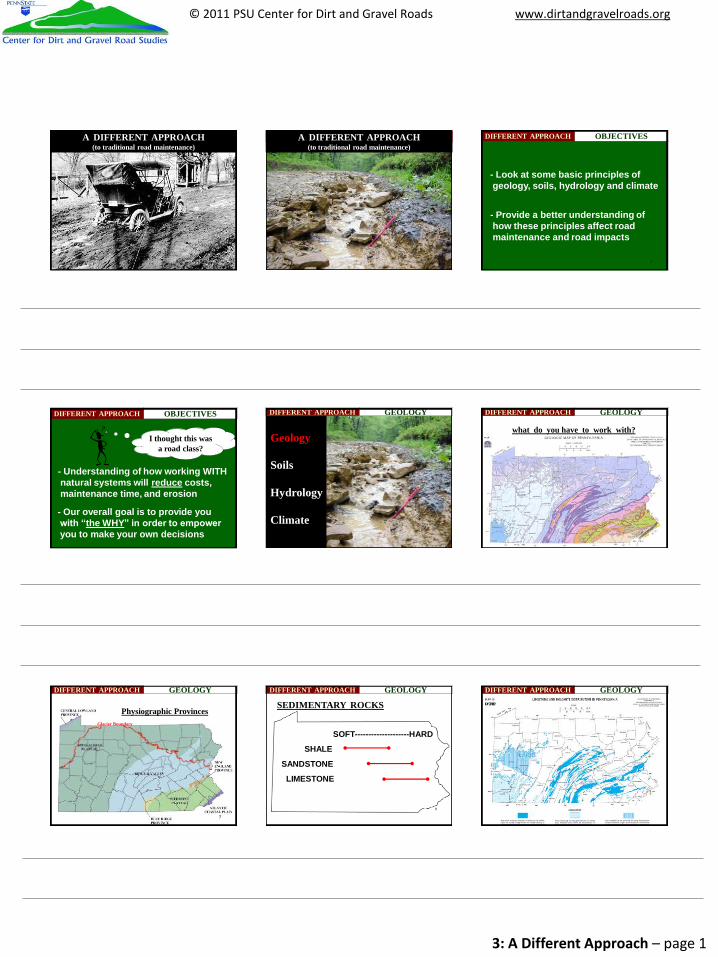
A DIFFERENT APPROACH (to traditional road maintenance)
A DIFFERENT APPROACH (to traditional road maintenance)A DIFFERENT APPROACH (to traditional road maintenance)
OBJECTIVES
3
DIFFERENT APPROACH
- Look at some basic principles of geology, soils, hydrology and climate
- Provide a better understanding of how these principles affect road maintenance and road impacts
- Understanding of how working WITH natural systems will reduce costs, maintenance time, and erosion
- Our overall goal is to provide you with “the WHY” in order to empower you to make your own decisions
I thought this was a road class?
OBJECTIVESDIFFERENT APPROACH
Geology
Soils
Hydrology
Climate
GEOLOGYDIFFERENT APPROACH
6
what do you have to work with?
GEOLOGYDIFFERENT APPROACH
77
Glacier Boundary
Physiographic Provinces
GEOLOGYDIFFERENT APPROACH
8
SEDIMENTARY ROCKS
SOFT--------------------HARD
SHALE
SANDSTONE
LIMESTONE
GEOLOGYDIFFERENT APPROACH GEOLOGYDIFFERENT APPROACH
3: A Different Approach – page 2
© 2011 PSU Center for Dirt and Gravel Roads www.dirtandgravelroads.org
1010
Glacier Boundary
Area with poor sub-grades and highly variable material quality
Better sub-grades with variable material quality
Good road material with no shale gas
GEOLOGYDIFFERENT APPROACH
1111
Glacier Boundary
Tioga Bradford Susquehanna Wayne
Glacier BoundaryGlacier BoundaryGlacier Boundary
GEOLOGYDIFFERENT APPROACH
1212
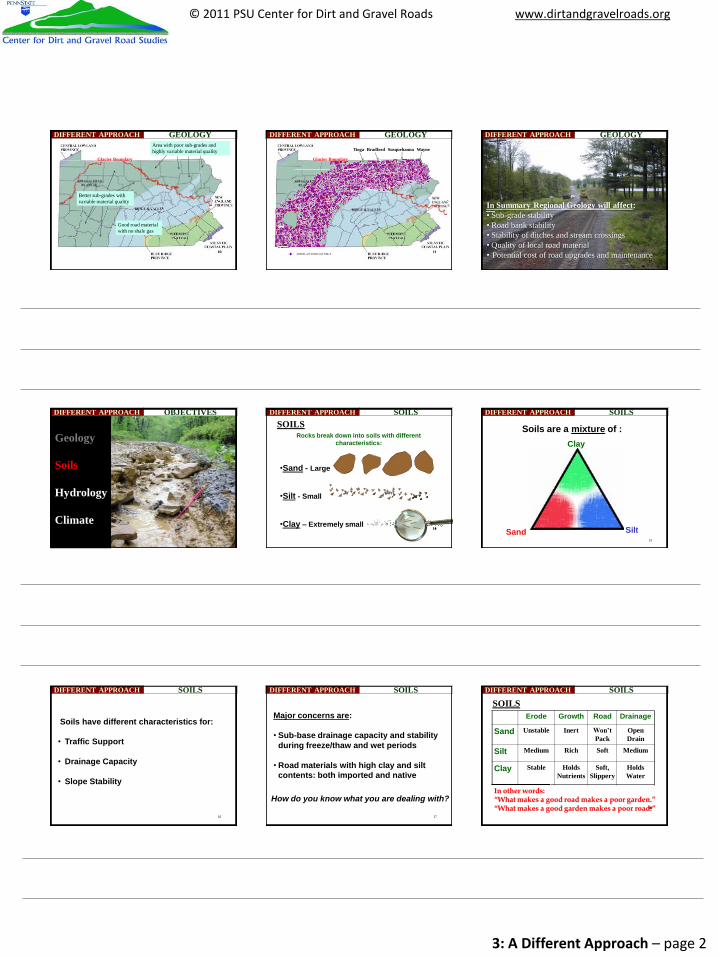
In Summary Regional Geology will affect:• Sub-grade stability • Road bank stability • Stability of ditches and stream crossings • Quality of local road material• Potential cost of road upgrades and maintenance
GEOLOGYDIFFERENT APPROACH
Geology
Soils
Hydrology
Climate
OBJECTIVESDIFFERENT APPROACH
14
SOILSRocks break down into soils with different
characteristics:
•Sand - Large
•Silt - Small
•Clay – Extremely small14
SOILSDIFFERENT APPROACH
15
Soils are a mixture of :
Sand Silt
Clay
SOILSDIFFERENT APPROACH
16
Soils have different characteristics for:
• Traffic Support
• Drainage Capacity
• Slope Stability
SOILSDIFFERENT APPROACH
17
Major concerns are:
• Sub-base drainage capacity and stability during freeze/thaw and wet periods
• Road materials with high clay and silt contents: both imported and native
How do you know what you are dealing with?
SOILSDIFFERENT APPROACH
18
SOILSErode Growth Road Drainage
Sand Unstable Inert Won’t Pack
Open Drain
Silt Medium Rich Soft Medium
Clay Stable Holds Nutrients
Soft, Slippery
Holds Water
18
In other words:“What makes a good road makes a poor garden.”“What makes a good garden makes a poor road.”
SOILSDIFFERENT APPROACH
3: A Different Approach – page 3
© 2011 PSU Center for Dirt and Gravel Roads www.dirtandgravelroads.org
• Road materials containing a lot of soil may act more like a garden than a road
• Truck traffic or turnips?
SOILSDIFFERENT APPROACH SOILSDIFFERENT APPROACH
http://websurvey.nrcs.usda.gov
SOILSDIFFERENT APPROACH
Geology
Soils
Hydrology
Climate
OBJECTIVESDIFFERENT APPROACH
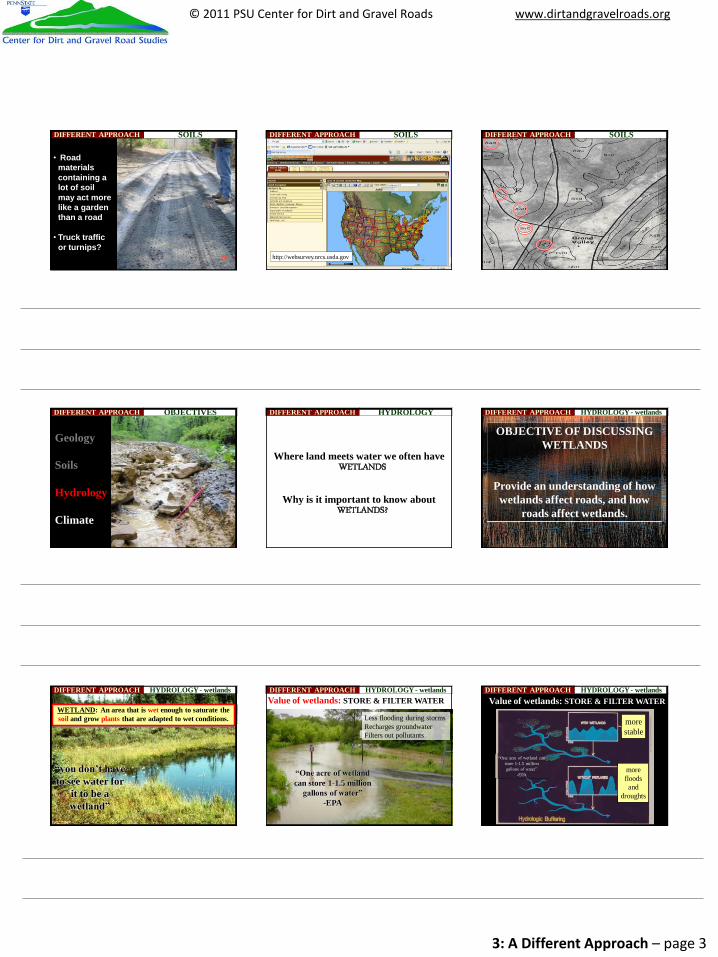
Where land meets water we often have WETLANDS
Why is it important to know about WETLANDS?
HYDROLOGYDIFFERENT APPROACH
24
OBJECTIVE OF DISCUSSINGWETLANDS
Provide an understanding of how wetlands affect roads, and how
roads affect wetlands.
HYDROLOGY - wetlandsDIFFERENT APPROACH
25
WETLAND: An area that is wet enough to saturate the soil and grow plants that are adapted to wet conditions.
HYDROLOGY - wetlandsDIFFERENT APPROACH
“you don’t have to see water for
it to be a wetland”
26
Value of wetlands: STORE & FILTER WATER
“One acre of wetland can store 1-1.5 million
gallons of water” -EPA
Less flooding during stormsRecharges groundwaterFilters out pollutants
HYDROLOGY - wetlandsDIFFERENT APPROACH
27
Value of wetlands: STORE & FILTER WATER
“One acre of wetland can store 1-1.5 million gallons of water”
-EPA
more stable
more floods
and droughts
HYDROLOGY - wetlandsDIFFERENT APPROACH
3: A Different Approach – page 4
© 2011 PSU Center for Dirt and Gravel Roads www.dirtandgravelroads.org
28
Value of wetlands: STORE & FILTER WATER
“One acre of wetland can store
1-1.5 million gallons of water”
-EPA
Lock Haven, PA –vs- Charles River, MA
HYDROLOGY - wetlandsDIFFERENT APPROACHA Wetland doesn’t have to be at the low point and
look like this…
HYDROLOGY - wetlandsDIFFERENT APPROACH
30
It could be on a wooded hillside and look like this…HYDROLOGY - wetlandsDIFFERENT APPROACH
Shallow Roots
31
Aside from Cattails, Wetland Indicators
Surface RootsButtress Roots are just a few of many
indicators
HYDROLOGY - wetlandsDIFFERENT APPROACH
• Roads built in or around wetlands often experience perpetual base saturation and increased cyclical maintenance requirements
• Sediment impacts wetlands similar to streams and slowly destroys wetland habitat
• Regulations
KEEP WETLANDS OUT OF THE ROAD AND ROADS OUT OF WETLANDS!
32
HYDROLOGY - wetlandsDIFFERENT APPROACH HYDROLOGYDIFFERENT APPROACH
34
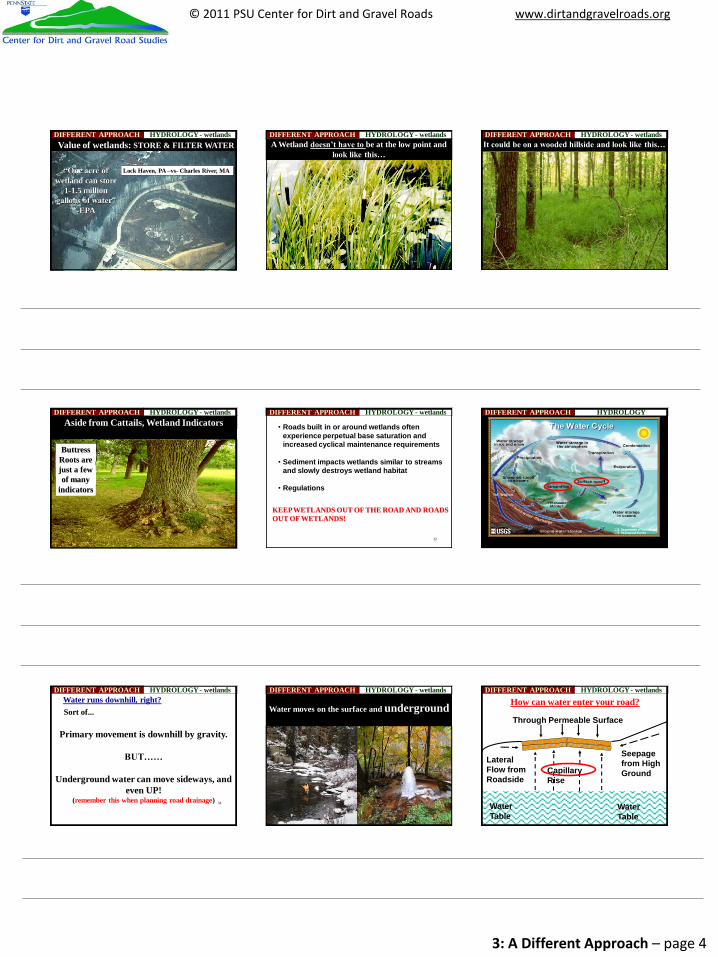
Water runs downhill, right?Sort of...
Primary movement is downhill by gravity.
BUT……
Underground water can move sideways, and even UP!
(remember this when planning road drainage)
HYDROLOGY - wetlandsDIFFERENT APPROACH
Water moves on the surface and underground
HYDROLOGY - wetlandsDIFFERENT APPROACH
36
How can water enter your road?
Water Table
Through Permeable Surface
Capillary Rise
Seepage from High Ground
Lateral Flow from Roadside
Water Table
HYDROLOGY - wetlandsDIFFERENT APPROACH
3: A Different Approach – page 5
© 2011 PSU Center for Dirt and Gravel Roads www.dirtandgravelroads.org
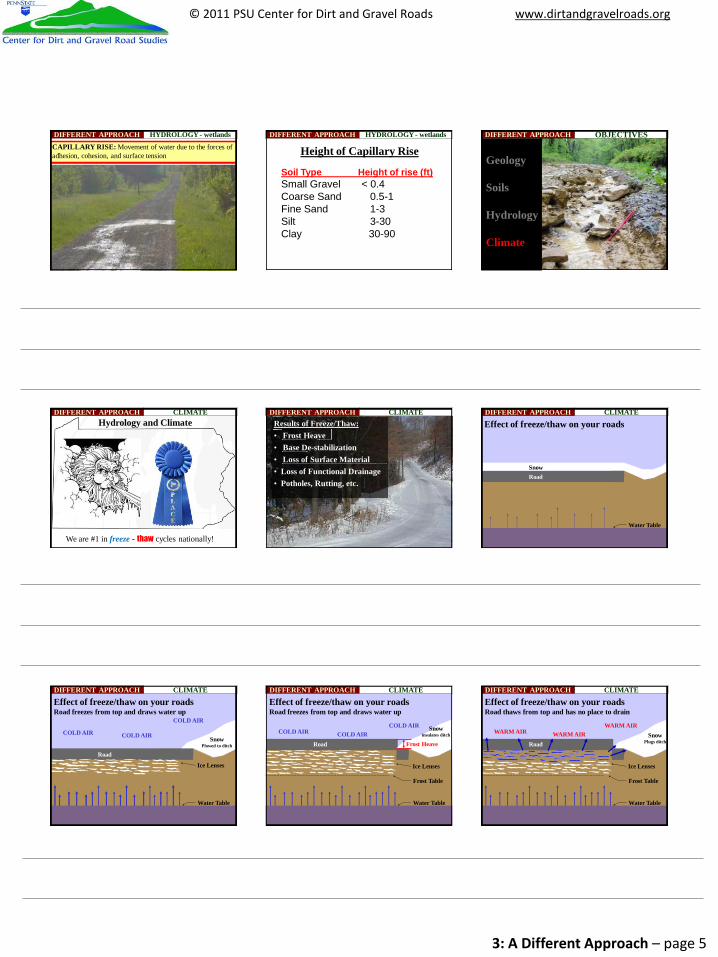
CAPILLARY RISE: Movement of water due to the forces of adhesion, cohesion, and surface tension
HYDROLOGY - wetlandsDIFFERENT APPROACH
Soil Type Height of rise (ft)Small Gravel < 0.4Coarse Sand 0.5-1Fine Sand 1-3Silt 3-30Clay 30-90
Height of Capillary RiseHYDROLOGY - wetlandsDIFFERENT APPROACH
Geology
Soils
Hydrology
Climate
OBJECTIVESDIFFERENT APPROACH
Hydrology and Climate
We are #1 in freeze - thaw cycles nationally!
CLIMATEDIFFERENT APPROACHResults of Freeze/Thaw:• Frost Heave• Base De-stabilization• Loss of Surface Material• Loss of Functional Drainage• Potholes, Rutting, etc.
CLIMATEDIFFERENT APPROACH
Effect of freeze/thaw on your roads
Water Table
RoadSnow
CLIMATEDIFFERENT APPROACH
Water Table
Road
SnowPlowed to ditch
COLD AIR COLD AIR
COLD AIR
Ice Lenses
CLIMATEDIFFERENT APPROACH
Effect of freeze/thaw on your roadsRoad freezes from top and draws water up
Frost Table
Water Table
Road
Snowinsulates ditchCOLD AIR COLD AIR
COLD AIR
Frost Heave
Ice Lenses
CLIMATEDIFFERENT APPROACH
Effect of freeze/thaw on your roadsRoad freezes from top and draws water up
Frost Table
Water Table
RoadSnow
Plugs ditch
WARM AIR WARM AIRWARM AIR
Ice Lenses
CLIMATEDIFFERENT APPROACH
Effect of freeze/thaw on your roadsRoad thaws from top and has no place to drain
3: A Different Approach – page 6
© 2011 PSU Center for Dirt and Gravel Roads www.dirtandgravelroads.org
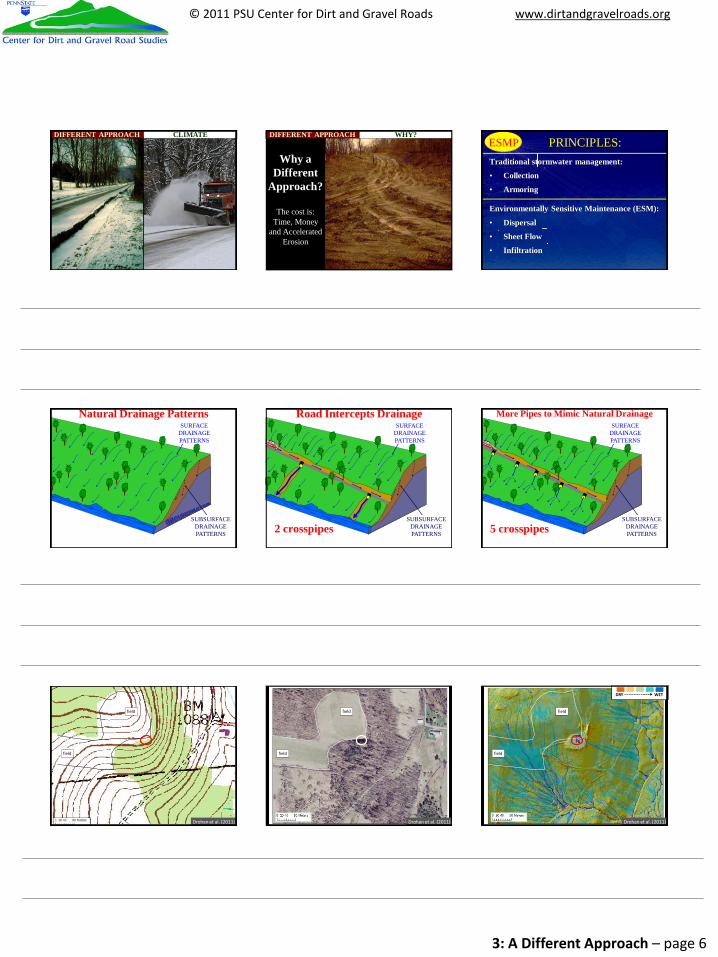
CLIMATEDIFFERENT APPROACH
Why a Different
Approach?
The cost is: Time, Money
and Accelerated Erosion
WHY?DIFFERENT APPROACH
ESMPsESMPs
Traditional stormwater management:
• Collection
• Armoring
Environmentally Sensitive Maintenance (ESM):
• Dispersal
• Sheet Flow
• Infiltration
ESMP PRINCIPLES:
Natural Drainage PatternsSURFACE
DRAINAGE PATTERNS
SUBSURFACE DRAINAGE PATTERNS
Road Intercepts Drainage
SUBSURFACE DRAINAGE PATTERNS
SURFACE DRAINAGE PATTERNS
2 crosspipes
More Pipes to Mimic Natural Drainage
SUBSURFACE DRAINAGE PATTERNS
SURFACE DRAINAGE PATTERNS
5 crosspipes
field
field
Drohan et al. (2011)
field
field
Drohan et al. (2011)
DRY WET
field
field
Drohan et al. (2011)
3: A Different Approach – page 7
© 2011 PSU Center for Dirt and Gravel Roads www.dirtandgravelroads.org
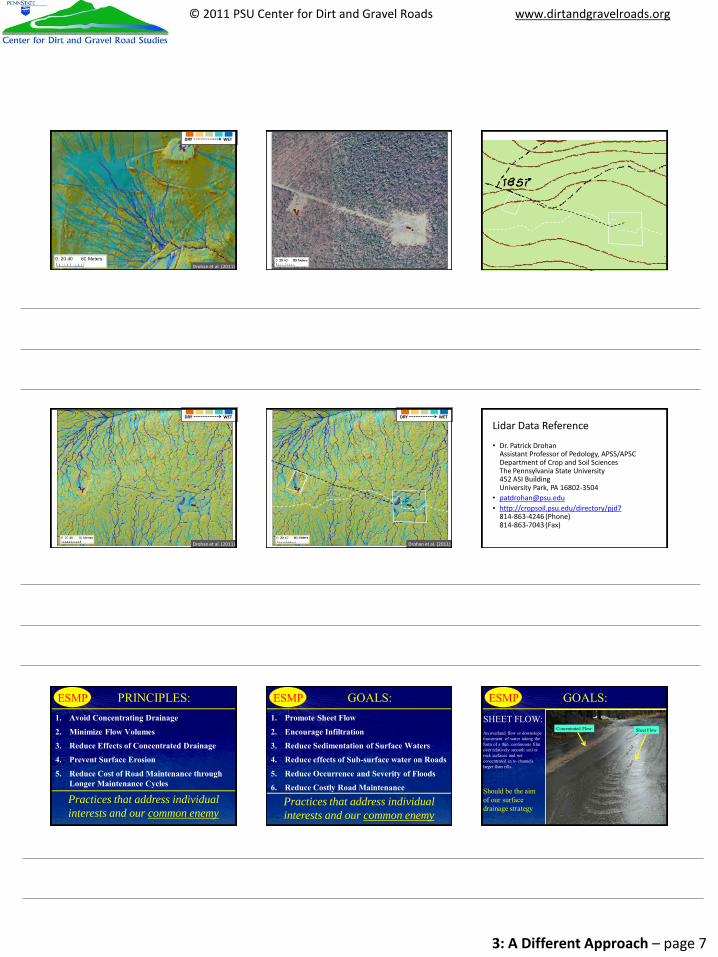
Drohan et al. (2011)
DRY WET
Drohan et al. (2011)
Drohan et al. (2011)
DRY WET
Drohan et al. (2011)
DRY WET
Lidar Data Reference
• Dr. Patrick DrohanAssistant Professor of Pedology, APSS/APSCDepartment of Crop and Soil SciencesThe Pennsylvania State University452 ASI Building University Park, PA 16802-3504
• [email protected]• http://cropsoil.psu.edu/directory/pjd7
814-863-4246 (Phone)814-863-7043 (Fax)
ESMPs
1. Avoid Concentrating Drainage
2. Minimize Flow Volumes
3. Reduce Effects of Concentrated Drainage
4. Prevent Surface Erosion
5. Reduce Cost of Road Maintenance through Longer Maintenance Cycles
ESMP PRINCIPLES:
Practices that address individual
interests and our common enemy
ESMPs
1. Promote Sheet Flow
2. Encourage Infiltration
3. Reduce Sedimentation of Surface Waters
4. Reduce effects of Sub-surface water on Roads
5. Reduce Occurrence and Severity of Floods
6. Reduce Costly Road Maintenance
ESMP GOALS:
Practices that address individual
interests and our common enemy
ESMPs
ESMP GOALS:SHEET FLOW:An overland flow or downslopemovement of water taking the form of a thin, continuous film over relatively smooth soil or rock surfaces and not concentrated in to channels larger than rills.
Should be the aim of our surface drainage strategy
Sheet FlowConcentrated Flow
3: A Different Approach – page 8
© 2011 PSU Center for Dirt and Gravel Roads www.dirtandgravelroads.org
end of A DIFFERENT APPROACH
© Center for Dirt and Gravel Road Studies 2011
next
Roadside Influences
4: Roadside Influences – page 1
© 2011 PSU Center for Dirt and Gravel Roads www.dirtandgravelroads.org
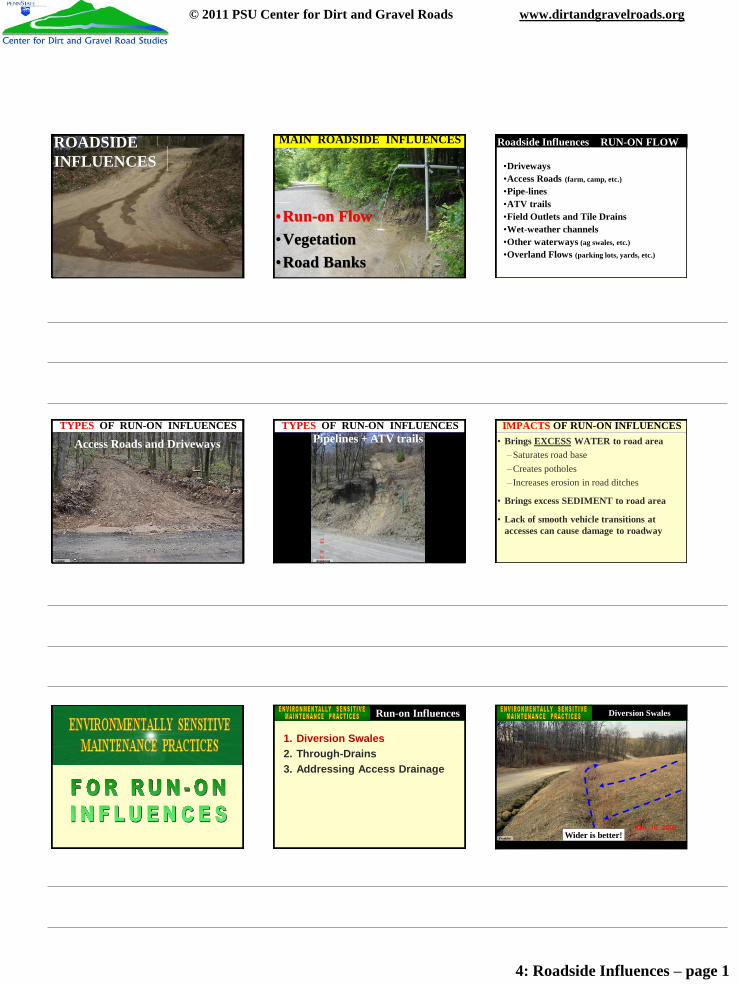
ROADSIDE INFLUENCES
•Run-on Flow•Vegetation•Road Banks
MAIN ROADSIDE INFLUENCES
Examples…
Roadside Influences RUN-ON FLOW
•Driveways•Access Roads (farm, camp, etc.)
•Pipe-lines•ATV trails•Field Outlets and Tile Drains•Wet-weather channels•Other waterways (ag swales, etc.)
•Overland Flows (parking lots, yards, etc.)
TYPES OF RUN-ON INFLUENCES
Centre
Access Roads and DrivewaysTYPES OF RUN-ON INFLUENCES
Armstrong
Pipelines + ATV trailsIMPACTS OF RUN-ON INFLUENCES
• Brings EXCESS WATER to road area–Saturates road base–Creates potholes– Increases erosion in road ditches
• Brings excess SEDIMENT to road area
• Lack of smooth vehicle transitions at accesses can cause damage to roadway
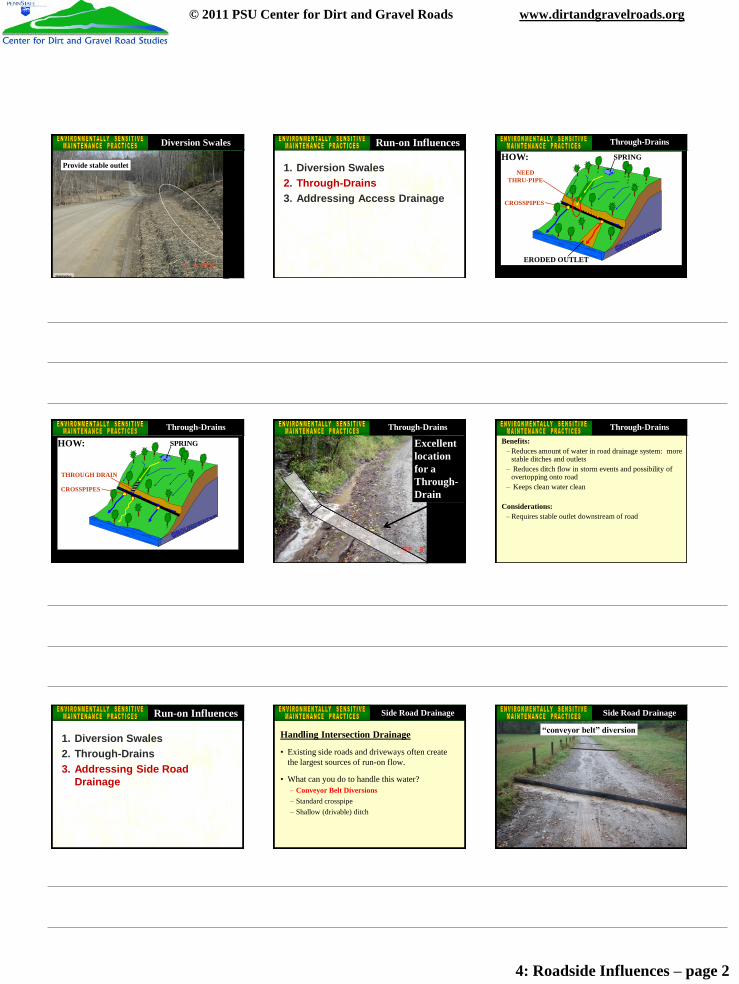
1. Diversion Swales2. Through-Drains3. Addressing Access Drainage
ESMPs Run-on Influences
Wider is better!Franklin
ESMPs Diversion Swales
4: Roadside Influences – page 2
© 2011 PSU Center for Dirt and Gravel Roads www.dirtandgravelroads.org
Pi ct ur es : r ed r ose
Huntingdon
ESMPs Diversion Swales
Provide stable outlet 1. Diversion Swales2. Through-Drains3. Addressing Access Drainage
ESMPs Run-on Influences
HOW
CROSSPIPES
SPRING
ERODED OUTLET
NEEDTHRU-PIPE
HOW:
ESMPs Through-Drains
CROSSPIPES
SPRINGHOW:
THROUGH DRAIN
ESMPs Through-Drains Through-Drains
Excellent location for a Through-Drain
Benefits:– Reduces amount of water in road drainage system: more
stable ditches and outlets– Reduces ditch flow in storm events and possibility of
overtopping onto road– Keeps clean water clean
Considerations:– Requires stable outlet downstream of road
ESMPs Through-Drains
1. Diversion Swales2. Through-Drains3. Addressing Side Road
Drainage
ESMPs Run-on Influences
Handling Intersection Drainage
• Existing side roads and driveways often create the largest sources of run-on flow.
• What can you do to handle this water?– Conveyor Belt Diversions– Standard crosspipe– Shallow (drivable) ditch
Side Road Drainage
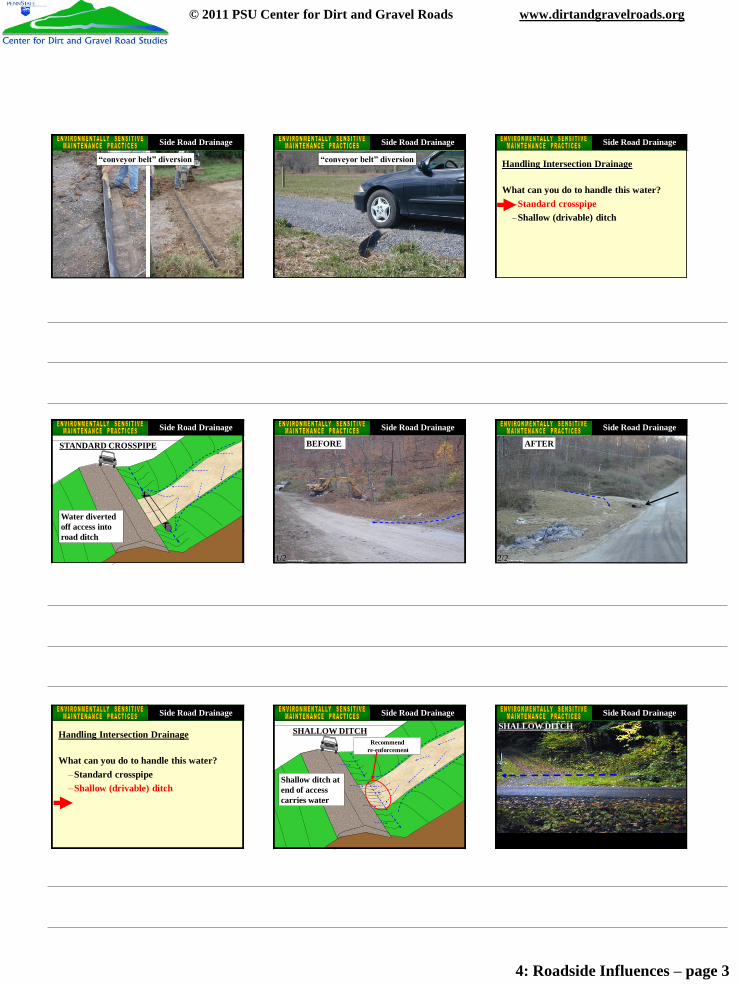
“conveyor belt” diversion
Side Road Drainage
4: Roadside Influences – page 3
© 2011 PSU Center for Dirt and Gravel Roads www.dirtandgravelroads.org
“conveyor belt” diversion
Side Road Drainage
“conveyor belt” diversion
Side Road Drainage
Handling Intersection Drainage
What can you do to handle this water?–Standard crosspipe–Shallow (drivable) ditch
Side Road Drainage
Water diverted off access into road ditch
STANDARD CROSSPIPE
Side Road Drainage
1/2
BEFORE
1/2Huntingdon
Side Road Drainage
AFTER
2/22/2Huntingdon
Side Road Drainage
Handling Intersection Drainage
What can you do to handle this water?–Standard crosspipe–Shallow (drivable) ditch
Side Road Drainage
SHALLOW DITCH
Shallow ditch at end of access carries water
Recommendre-enforcement
Side Road DrainageSHALLOW DITCH
Side Road Drainage
4: Roadside Influences – page 4
© 2011 PSU Center for Dirt and Gravel Roads www.dirtandgravelroads.org
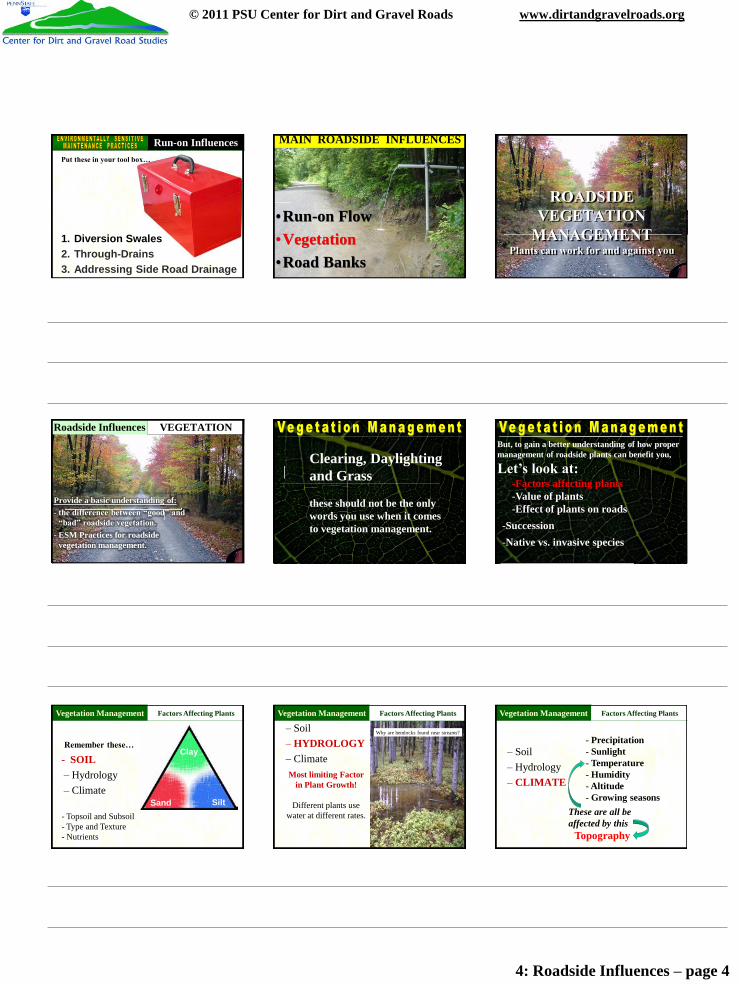
1. Diversion Swales2. Through-Drains3. Addressing Side Road Drainage
ESMPs Run-on InfluencesPut these in your tool box…
•Run-on Flow•Vegetation•Road Banks
MAIN ROADSIDE INFLUENCES
Roadside Influences VEGETATION
Provide a basic understanding of:- the difference between “good” and
“bad” roadside vegetation.- ESM Practices for roadside
vegetation management.
Clearing, Daylighting and Grass
these should not be the only words you use when it comes to vegetation management.
-Factors affecting plants-Value of plants-Effect of plants on roads
-Succession-Native vs. invasive species
But, to gain a better understanding of how proper management of roadside plants can benefit you,
Let’s look at:
Remember these…
- SOIL– Hydrology– Climate
- Topsoil and Subsoil- Type and Texture- Nutrients
Vegetation Management UPLANDSFactors Affecting Plants
Sand Silt
Clay
– Soil– HYDROLOGY– ClimateMost limiting Factor
in Plant Growth!
Different plants use water at different rates.
Why are hemlocks found near streams?
Vegetation Management UPLANDSFactors Affecting Plants
– Soil– Hydrology– CLIMATE
- Precipitation- Sunlight- Temperature- Humidity- Altitude- Growing seasons
Vegetation Management UPLANDSFactors Affecting Plants
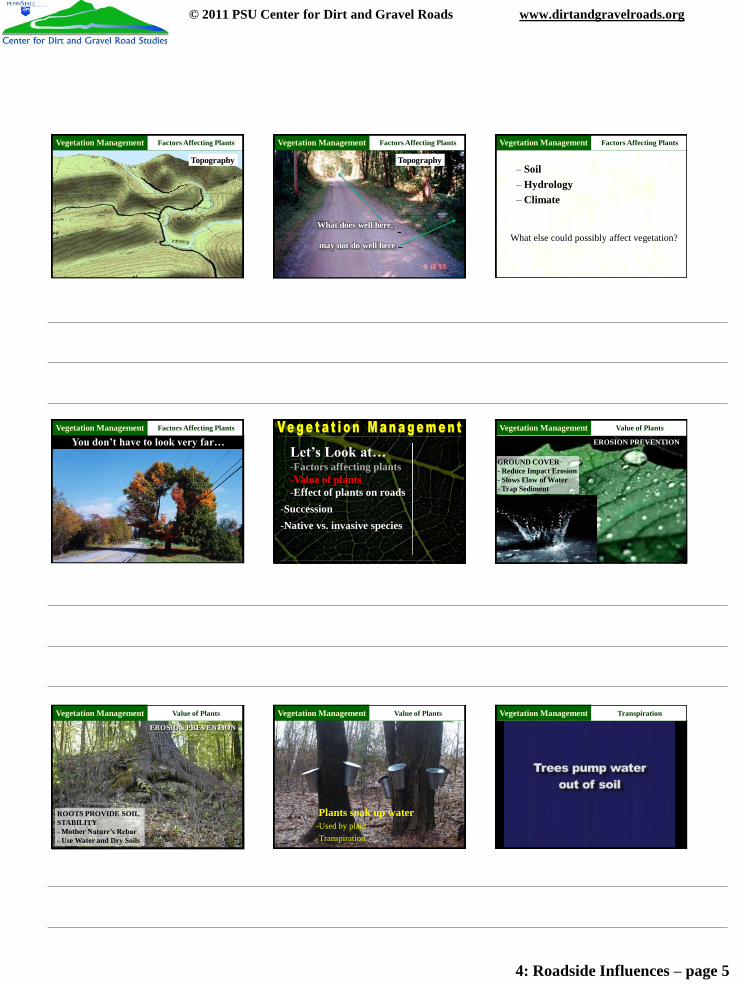
These are all be affected by this
Topography
4: Roadside Influences – page 5
© 2011 PSU Center for Dirt and Gravel Roads www.dirtandgravelroads.org
Topography
Vegetation Management UPLANDSFactors Affecting Plants
Topography
Vegetation Management UPLANDSFactors Affecting Plants
What does well here,
may not do well here
– Soil– Hydrology– Climate
What else could possibly affect vegetation?
Vegetation Management UPLANDSFactors Affecting Plants
You don’t have to look very far…
The same acorn could grow into any of these trees!
Vegetation Management UPLANDSFactors Affecting Plants
Let’s Look at…-Factors affecting plants-Value of plants-Effect of plants on roads
-Succession-Native vs. invasive species
EROSION PREVENTION
GROUND COVER- Reduce Impact Erosion- Slows Flow of Water- Trap Sediment
Vegetation Management UPLANDSValue of Plants
57
ROOTS PROVIDE SOIL STABILITY- Mother Nature’s Rebar- Use Water and Dry Soils
EROSION PREVENTION
Vegetation Management UPLANDSValue of Plants
Plants soak up water-Used by plant-Transpiration
Vegetation Management UPLANDSValue of Plants Vegetation Management UPLANDSTranspiration
4: Roadside Influences – page 6
© 2011 PSU Center for Dirt and Gravel Roads www.dirtandgravelroads.org
Transpiration rates of treesare highly variable:
50-500 gallons per day!50-100 Cherry100-120 Oak
150-200 Maple
“Redwood trees can give off 500+ gal/day and
actually generate their own fog” - USGS
Depending on:Tree species & sizeAvailable waterSeason (foliage)SunlightTemp & Humidity
Vegetation Management UPLANDSValue of Plants
61
Produce ShadeTranspiration cooling
Vegetation Management UPLANDSValue of Plants
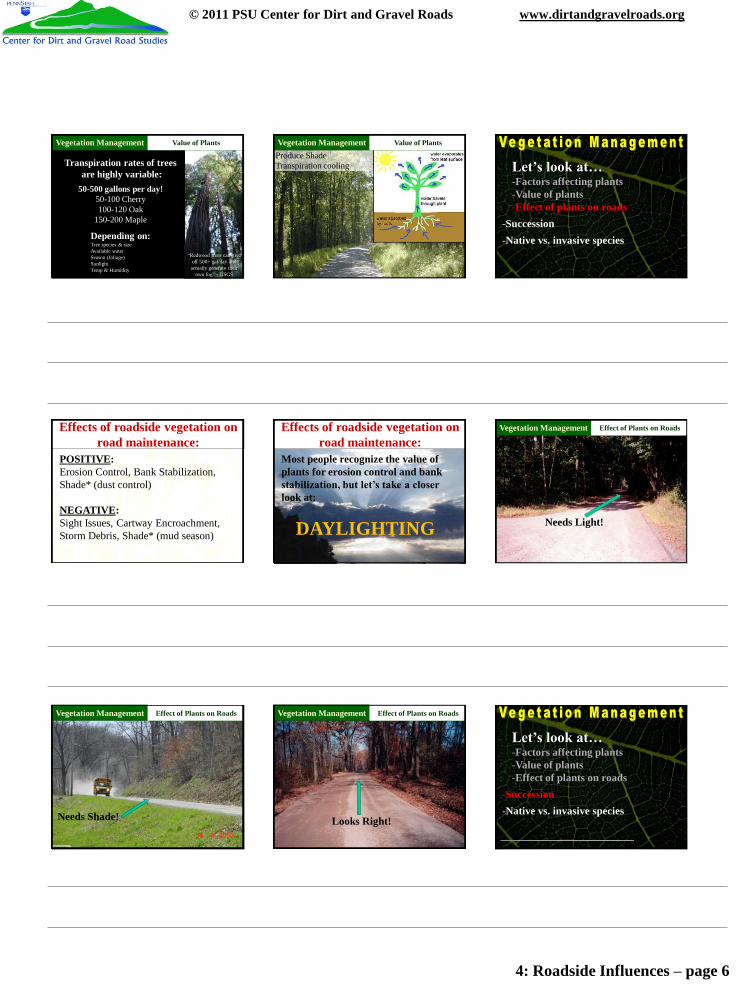
Let’s look at…-Factors affecting plants-Value of plants-Effect of plants on roads
-Succession-Native vs. invasive species
POSITIVE:Erosion Control, Bank Stabilization,Shade* (dust control)
NEGATIVE:Sight Issues, Cartway Encroachment, Storm Debris, Shade* (mud season)
Effects of roadside vegetation on road maintenance:
Most people recognize the value of plants for erosion control and bank stabilization, but let’s take a closer look at:
DAYLIGHTING
Effects of roadside vegetation on road maintenance:
Pictures of bad banks/ practices
Vegetation Management UPLANDSEffect of Plants on Roads
Needs Light!
Armstrong
Vegetation Management UPLANDSEffect of Plants on Roads
Needs Shade!
Vegetation Management UPLANDSEffect of Plants on Roads
Looks Right!
Let’s look at… -Factors affecting plants-Value of plants-Effect of plants on roads
-Succession-Native vs. invasive species
4: Roadside Influences – page 7
© 2011 PSU Center for Dirt and Gravel Roads www.dirtandgravelroads.org
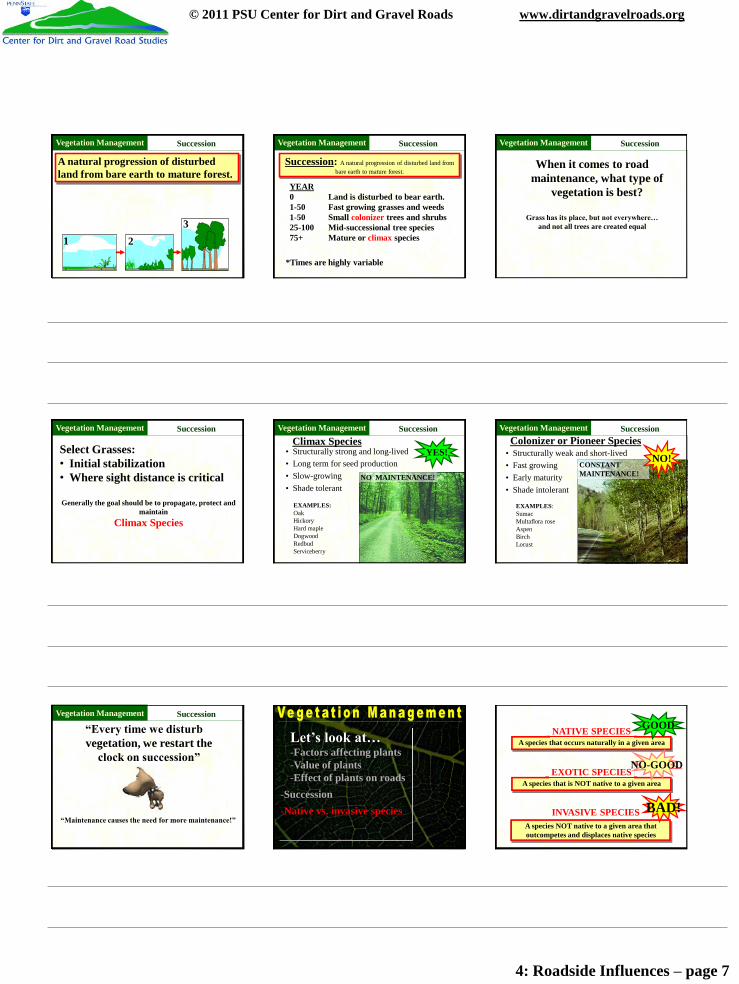
A natural progression of disturbed land from bare earth to mature forest.
1 23
Vegetation Management UPLANDSSuccession
EXAMPLEYEAR0 Land is disturbed to bear earth.1-50 Fast growing grasses and weeds1-50 Small colonizer trees and shrubs25-100 Mid-successional tree species75+ Mature or climax species
*Times are highly variable
Succession: A natural progression of disturbed land from bare earth to mature forest.
Vegetation Management UPLANDSSuccession
When it comes to road maintenance, what type of
vegetation is best?
Grass has its place, but not everywhere…and not all trees are created equal
Vegetation Management UPLANDSSuccession
Select Grasses: • Initial stabilization • Where sight distance is critical
Generally the goal should be to propagate, protect and maintain
Climax Species
Vegetation Management UPLANDSSuccession
1
NO MAINTENANCE!
Climax Species• Structurally strong and long-lived• Long term for seed production • Slow-growing• Shade tolerant
EXAMPLES:OakHickoryHard mapleDogwoodRedbudServiceberry
YES!
Vegetation Management UPLANDSSuccessionColonizer or Pioneer Species
• Structurally weak and short-lived• Fast growing• Early maturity• Shade intolerant
1
EXAMPLES:SumacMultaflora roseAspenBirchLocust
CONSTANT MAINTENANCE!
NO!
Vegetation Management UPLANDSSuccession
“Every time we disturb vegetation, we restart the
clock on succession”
“Maintenance causes the need for more maintenance!”
Vegetation Management UPLANDSSuccession
Let’s look at…-Factors affecting plants-Value of plants-Effect of plants on roads
-Succession-Native vs. invasive species
What are native, exotic, and invasive species?
77
A species that occurs naturally in a given areaNATIVE SPECIES GOOD
A species that is NOT native to a given areaEXOTIC SPECIES
NO-GOOD
77
A species NOT native to a given area that outcompetes and displaces native species
INVASIVE SPECIES BAD!
4: Roadside Influences – page 8
© 2011 PSU Center for Dirt and Gravel Roads www.dirtandgravelroads.org
78
LARGE TREESRed Maple
Sugar MapleBlack BirchWhite AshSycamore
many OaksWhite PineHemlocks
TREES / SHRUBSServiceberry
RedbudMany Dogwoods
Witch-hazelMountain Laurel
ElderberryVirginia Creeper
Vegetation Management UPLANDSNative –vs- Invasive
A species that is adapted to and occurs naturally in a given area
NATIVE SPECIES GOOD
For road maintenance desirable species include:
What are native, exotic, and invasive species?
79
WORST OFFENDERSJapanese KnotweedPurple LoosestrifeJapanese StiltgrassMultaflora RoseTree-of-heaven
KudzuHogweed
TAKE ACTION TO AVOID!
Vegetation Management UPLANDSNative –vs- Invasive
A species NOT native to a given area that outcompetes and displaces native species
Vegetation ManagementINVASIVE SPECIES VERY
BAD!What are native, exotic, and invasive species?
80
Vegetation Management UPLANDSNative –vs- Invasive
A species NOT native to a given area that outcompetes and displaces native species
Vegetation ManagementINVASIVE SPECIES VERY
BAD!
An important reason for quickly re-vegetating a site with native species.
81
Informational resources:
Vegetation Management UPLANDSNative –vs- Invasive
http://www.dcnr.state.pa.us/Forestry/invasivetutorial/list.htm
http://www.invasivespeciesinfo.gov/unitedstates/pa.shtml
http://vm.cas.psu.edu/index.html
Available free
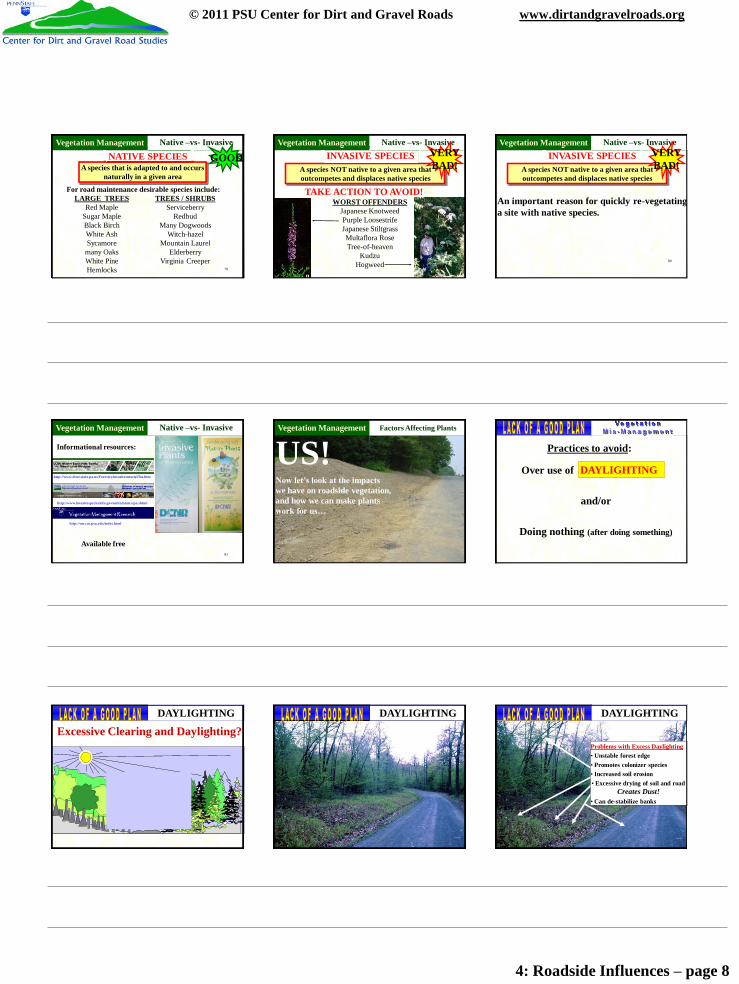
US!Now let’s look at the impacts we have on roadside vegetation, and how we can make plants work for us…
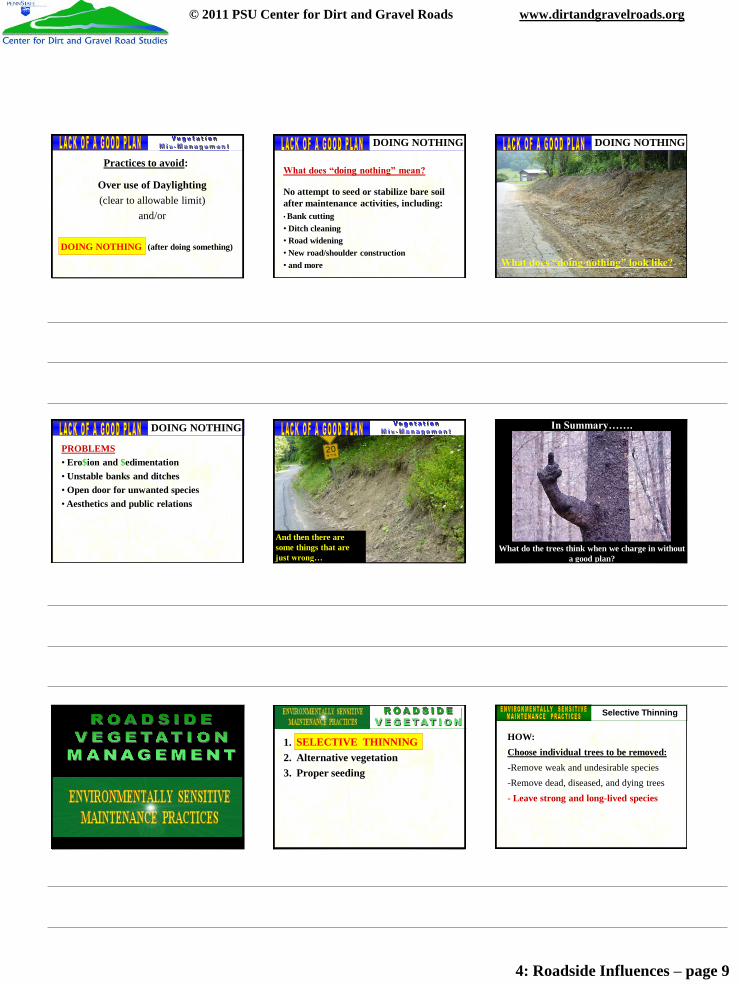
Vegetation Management UPLANDSFactors Affecting Plants
Over use of
and/or
Doing nothing (after doing something)
DAYLIGHTING
Practices to avoid:
DAYLIGHTING
Excessive Clearing and Daylighting?DAYLIGHTING DAYLIGHTING
Problems with Excess Daylighting • Unstable forest edge• Promotes colonizer species• Increased soil erosion• Excessive drying of soil and road
Creates Dust!• Can de-stabilize banks
4: Roadside Influences – page 9
© 2011 PSU Center for Dirt and Gravel Roads www.dirtandgravelroads.org
Over use of Daylighting(clear to allowable limit)
and/or
Doing nothing (after doing something)
Practices to avoid:
DOING NOTHING
What does “doing nothing” mean?
No attempt to seed or stabilize bare soil after maintenance activities, including:• Bank cutting• Ditch cleaning• Road widening• New road/shoulder construction• and more
DOING NOTHING DOING NOTHING
What does “doing nothing” look like?
PROBLEMS• Ero$ion and $edimentation• Unstable banks and ditches• Open door for unwanted species• Aesthetics and public relations
DOING NOTHING
And then there are some things that are just wrong…
What do the trees think when we charge in without a good plan?
In Summary…….
1. Selective thinning2. Alternative vegetation3. Proper seeding
SELECTIVE THINNING HOW:Choose individual trees to be removed:-Remove weak and undesirable species-Remove dead, diseased, and dying trees- Leave strong and long-lived species
Selective Thinning
4: Roadside Influences – page 10
© 2011 PSU Center for Dirt and Gravel Roads www.dirtandgravelroads.org
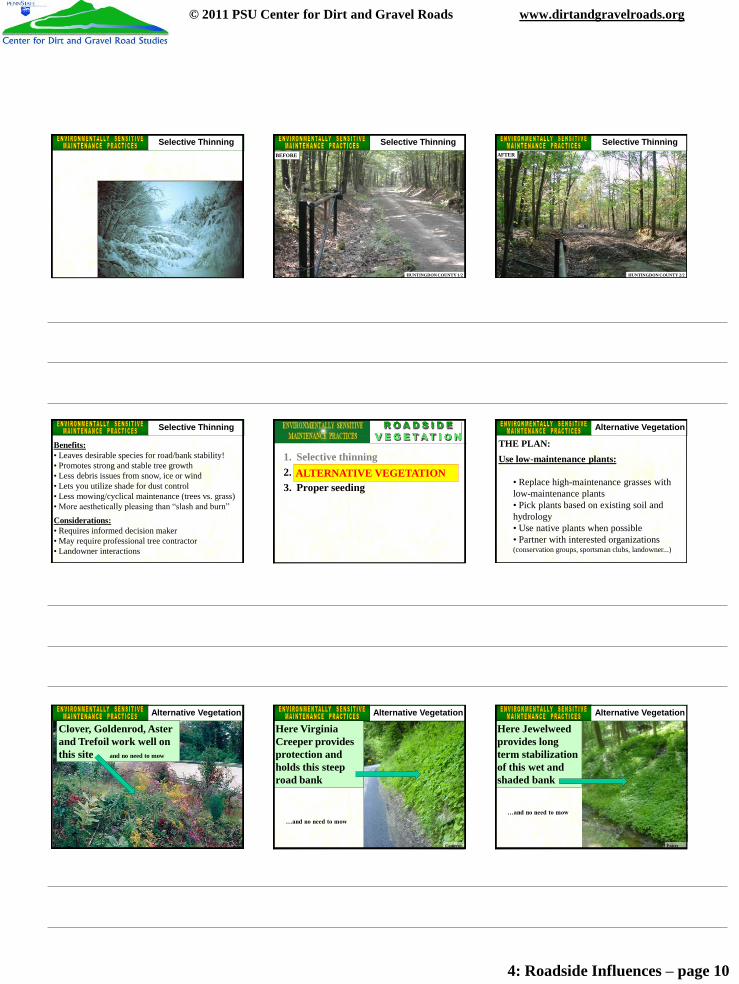
REMOVE COLONIZER SPECIES• Multiflora Rose• Sumac• Aspen• Birch• Locust• StripedMaple
Selective Thinning
HUNTINGDON COUNTY 1/2
BEFORE
Selective ThinningAFTER
Selective Thinning
HUNTINGDON COUNTY 2/2
Benefits:• Leaves desirable species for road/bank stability!• Promotes strong and stable tree growth• Less debris issues from snow, ice or wind• Lets you utilize shade for dust control• Less mowing/cyclical maintenance (trees vs. grass)• More aesthetically pleasing than “slash and burn”Considerations:• Requires informed decision maker • May require professional tree contractor• Landowner interactions
Selective Thinning
1. Selective thinning2. Alternative vegetation3. Proper seeding
ALTERNATIVE VEGETATION
THE PLAN:Use low-maintenance plants:
• Replace high-maintenance grasses with low-maintenance plants• Pick plants based on existing soil and hydrology• Use native plants when possible• Partner with interested organizations (conservation groups, sportsman clubs, landowner...)
Alternative Vegetation
Alternative Vegetation
Clover, Goldenrod, Asterand Trefoil work well on this site and no need to mow
Low-maintenanceplants:
Vining plants:• Virginia creeper• American
Bittersweet
- low to ground- easy to manage- used by property owners - don’t mow
Alternative Vegetation
Cameron
Here Virginia Creeper provides protection and holds this steep road bank
…and no need to mow
Low-maintenanceplants:
Wet rooted plants• Jewel weed• Lilies• Rhododendron
- grow in wet, poor soils- easy to manage- mowing not required
Alternative Vegetation
Potter
Here Jewelweed provides long term stabilization of this wet and shaded bank
…and no need to mow
4: Roadside Influences – page 11
© 2011 PSU Center for Dirt and Gravel Roads www.dirtandgravelroads.org
Low-maintenanceplants:
Vining plants:• Virginia creeper• American
Bittersweet
- low to ground- easy to manage- used by property owners - don’t mow
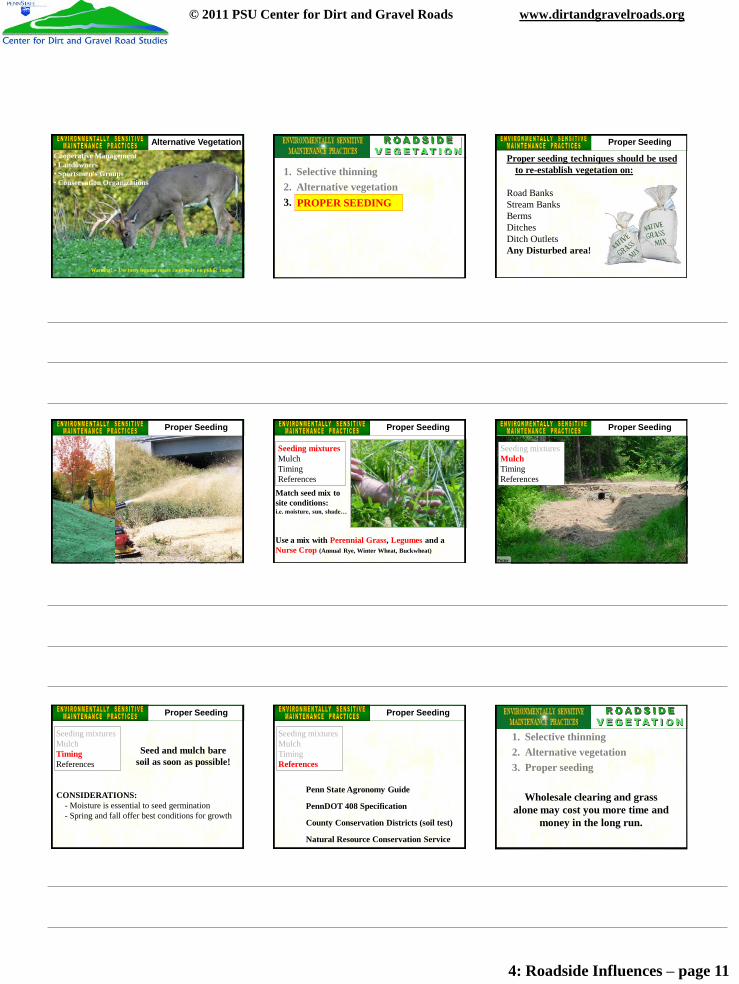
Alternative VegetationCooperative Management• Landowners• Sportsmen's Groups• Conservation Organizations
Warning! – Use tasty legume mixes cautiously on public roads
1. Selective thinning2. Alternative vegetation3. Proper seedingPROPER SEEDING
Proper seeding techniques should be used to re-establish vegetation on:
Road BanksStream BanksBermsDitchesDitch OutletsAny Disturbed area!
Proper Seeding
Proper Seeding
Seeding mixtures MulchTimingReferences
Match seed mix to site conditions:i.e. moisture, sun, shade…
Use a mix with Perennial Grass, Legumes and aNurse Crop (Annual Rye, Winter Wheat, Buckwheat)
Proper Seeding
Seeding mixtures MulchTimingReferences
Proper Seeding
Potter
Seeding mixtures MulchTimingReferences
Seed and mulch bare soil as soon as possible!
CONSIDERATIONS: - Moisture is essential to seed germination- Spring and fall offer best conditions for growth
Proper Seeding
Seeding mixtures MulchTimingReferences
Penn State Agronomy Guide
PennDOT 408 Specification
County Conservation Districts (soil test)
Natural Resource Conservation Service
Proper Seeding
Wholesale clearing and grass alone may cost you more time and
money in the long run.
1. Selective thinning2. Alternative vegetation3. Proper seeding
4: Roadside Influences – page 12
© 2011 PSU Center for Dirt and Gravel Roads www.dirtandgravelroads.org
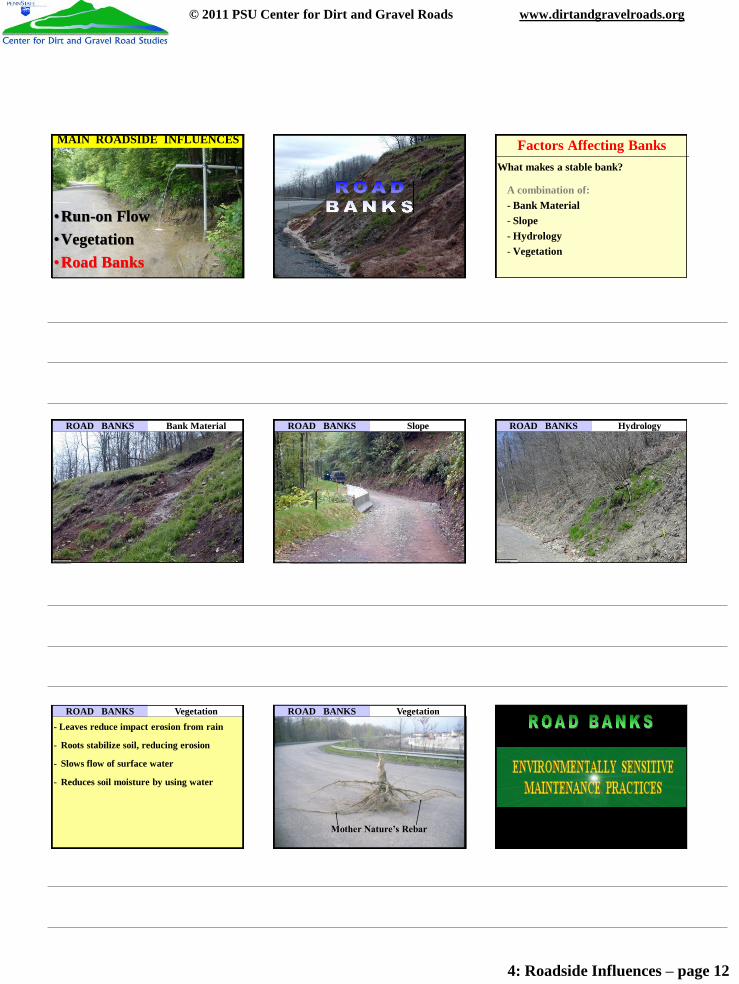
•Run-on Flow•Vegetation•Road Banks
MAIN ROADSIDE INFLUENCES Factors Affecting BanksWhat makes a stable bank?
A combination of:- Bank Material- Slope- Hydrology- Vegetation
PIC
• pi cs
West Virginia
ROAD BANKS Bank Material SLOPE
Cameron
ROAD BANKS Slope
Armstrong
ROAD BANKS Hydrology
- Leaves reduce impact erosion from rain
- Roots stabilize soil, reducing erosion
- Slows flow of surface water
- Reduces soil moisture by using water
ROAD BANKS Vegetation
• Tie into vegetation
Mother Nature’s Rebar
ROAD BANKS Vegetation
4: Roadside Influences – page 13
© 2011 PSU Center for Dirt and Gravel Roads www.dirtandgravelroads.org
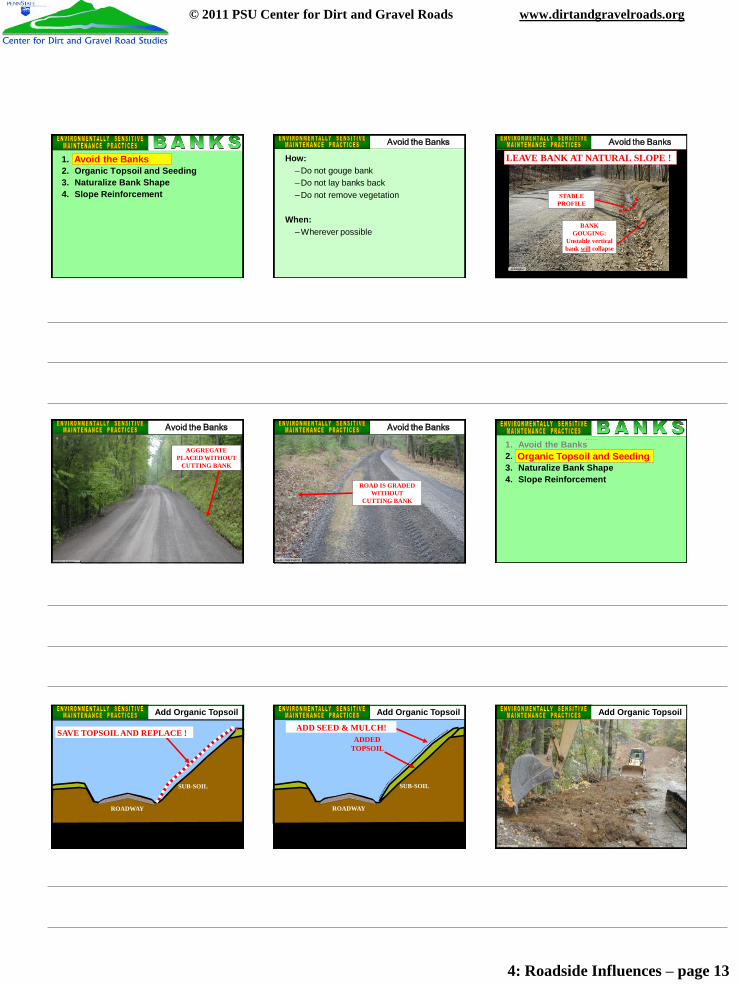
BANK S: ALTERNATIVE ENVIRO NMENTALLY SENSITIVE MAINTENANCE PRACTICES
1. Avoid the Banks 2. Organic Topsoil and Seeding3. Naturalize Bank Shape4. Slope Reinforcement
Avoid the Banks How:–Do not gouge bank–Do not lay banks back–Do not remove vegetation
When:–Wherever possible
Avoid the Banks
BANK GOUGING:
Unstable vertical bank will collapse
STABLE PROFILE
LEAVE BANK AT NATURAL SLOPE !
Huntingdon
Avoid the Banks
AGGREGATE PLACED WITHOUT
CUTTING BANK
Luzerne - Lehman
Avoid the Banks
• How TOO:– Picture
ROAD IS GRADED WITHOUT
CUTTING BANK
Centre – Bale Eagle SF
Avoid the BanksBANK S: ALTERNATIVE ENVIRO NMENTALLY SENSITIVE MAINTENANCE PRACTICES
1. Avoid the Banks2. Organic Topsoil and Seeding3. Naturalize Bank Shape4. Slope Reinforcement
Organic Topsoil and Seeding
SUB-SOIL
ROADWAY
Add Organic Topsoil
SAVE TOPSOIL AND REPLACE !
SUB-SOIL
ROADWAY
ADDED TOPSOIL
ADD SEED & MULCH!
Add Organic Topsoil
Huntingdon
Add Organic Topsoil
4: Roadside Influences – page 14
© 2011 PSU Center for Dirt and Gravel Roads www.dirtandgravelroads.org
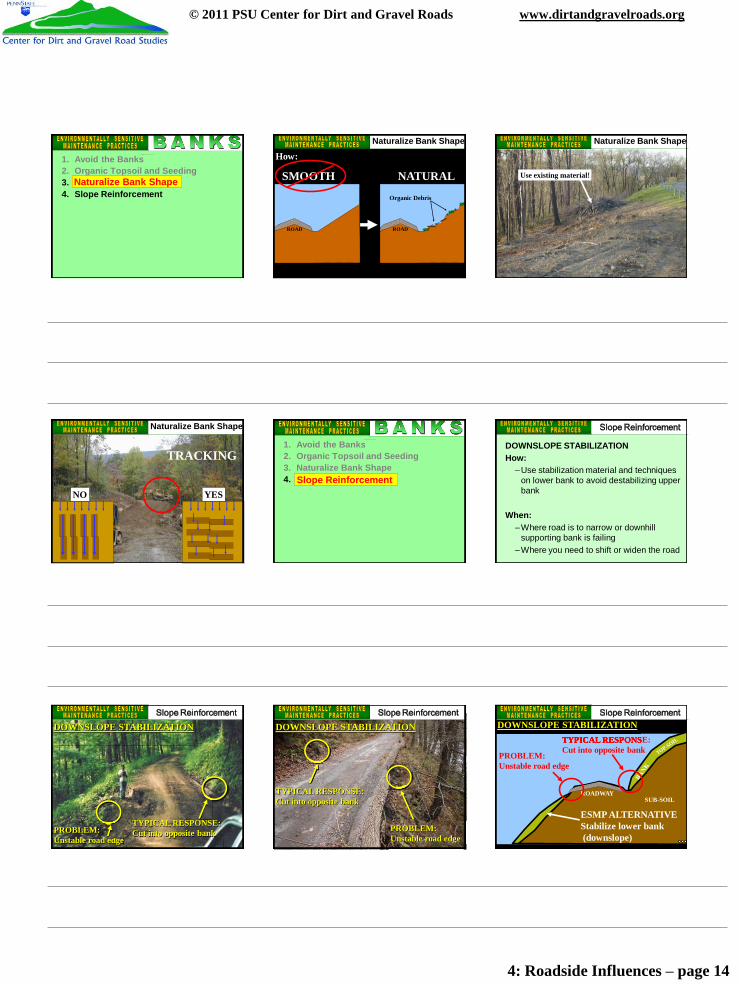
BANK S: ALTERNATIVE ENVIRO NMENTALLY SENSITIVE MAINTENANCE PRACTICES
1. Avoid the Banks2. Organic Topsoil and Seeding3. Naturalize Bank Shape4. Slope Reinforcement
Naturalize Bank Shape
How:
ROAD ROAD
SMOOTH NATURAL
Organic Debris
Naturalize Bank Shape
Use existing material!
Naturalize Bank Shape
TRACKING
Naturalize Bank Shape
NO YES
BANK S: ALTERNATIVE ENVIRO NMENTALLY SENSITIVE MAINTENANCE PRACTICES
1. Avoid the Banks2. Organic Topsoil and Seeding3. Naturalize Bank Shape4. Slope Reinforcement Slope Reinforcement
DOWNSLOPE STABILIZATIONHow:
–Use stabilization material and techniques on lower bank to avoid destabilizing upper bank
When:–Where road is to narrow or downhill
supporting bank is failing–Where you need to shift or widen the road
llo Slope Reinforcement
DOWNSLOPE STABILIZATION
PROBLEM:Unstable road edge
TYPICAL RESPONSE:Cut into opposite bank
Slope ReinforcementDOWNSLOPE STABILIZATION
PROBLEM:Unstable road edge
TYPICAL RESPONSE:Cut into opposite bank
Slope Reinforcement
ROADWAYSUB-SOIL
PROBLEM:Unstable road edge
TYPICAL RESPONSE:Cut into opposite bank
ESMP ALTERNATIVEStabilize lower bank(downslope)
TYPICAL RESPONSE:
DOWNSLOPE STABILIZATIONSlope Reinforcement
4: Roadside Influences – page 15
© 2011 PSU Center for Dirt and Gravel Roads www.dirtandgravelroads.org
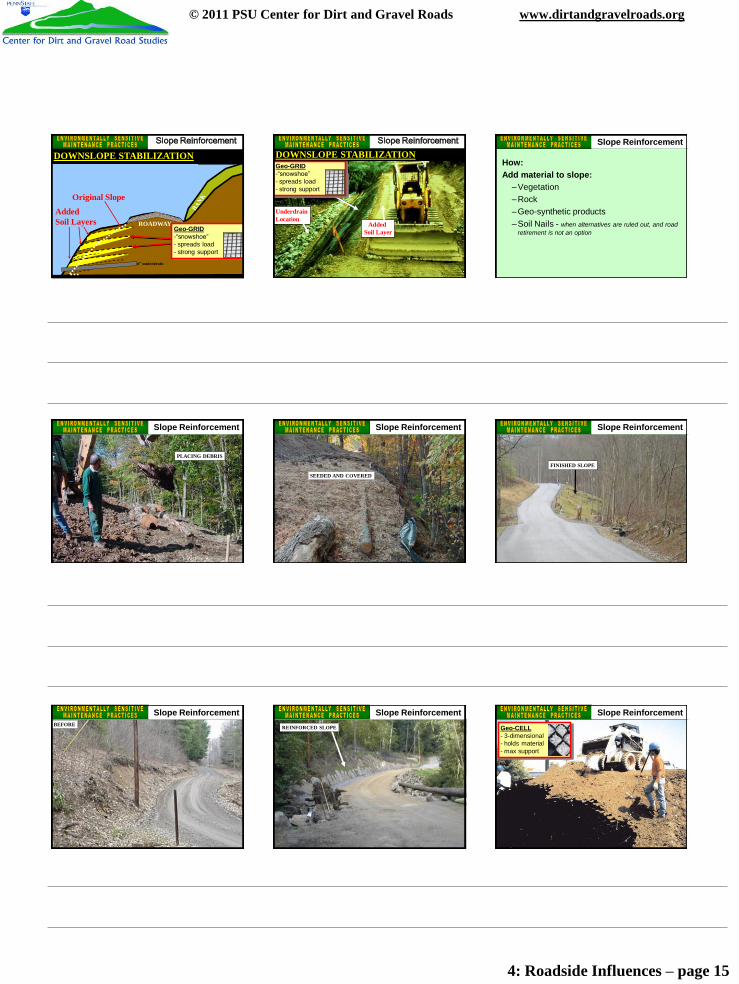
Slope Reinforcement
ROADWAY
DOWNSLOPE STABILIZATION
6” underdrain
Original Slope
Added Soil Layers
Avoid the Banks
SUB-SOILROADWAY
Geo-GRID-“snowshoe”- spreads load- strong support
Slope Reinforcement
PICTURES
Added Soil Layer
Reinforcing Geo-grid
UnderdrainLocation
DOWNSLOPE STABILIZATIONAvoid the Banks
Geo-GRID-“snowshoe”- spreads load- strong support
Slope Reinforcement
How:Add material to slope:
–Vegetation–Rock –Geo-synthetic products–Soil Nails - when alternatives are ruled out, and road
retirement is not an option
Slope Reinforcement
• Example: red rose PLACING DEBRIS
Slope Reinforcement
• Example: red rose
SEEDED AND COVERED
Slope Reinforcement
• Example: red roseFINISHED SLOPE
Slope Reinforcement
• Example: elk county
BEFORE
Slope Reinforcement
• Example: elk county
Slope ReinforcementREINFORCED SLOPE
• picture
Slope ReinforcementGeo-CELL- 3-dimensional- holds material - max support
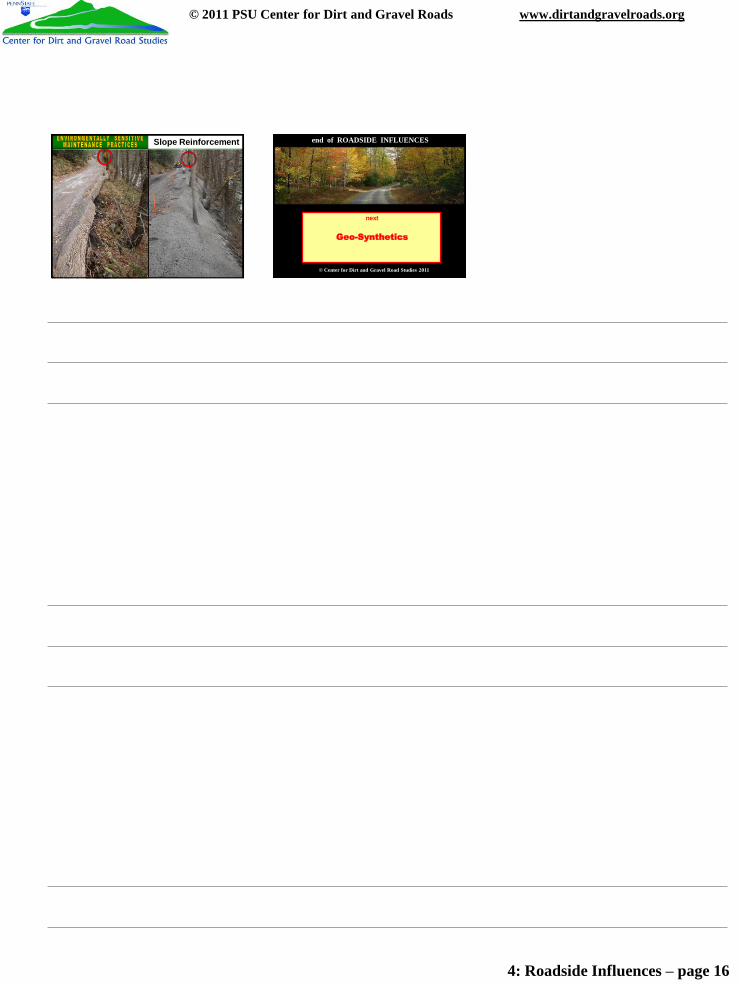
4: Roadside Influences – page 16
© 2011 PSU Center for Dirt and Gravel Roads www.dirtandgravelroads.org
Slope Reinforcement end of ROADSIDE INFLUENCES
© Center for Dirt and Gravel Road Studies 2011
next
Geo-Synthetics
5: Geo-synthetics – page 1
© 2011 PSU Center for Dirt and Gravel Roads www.dirtandgravelroads.org
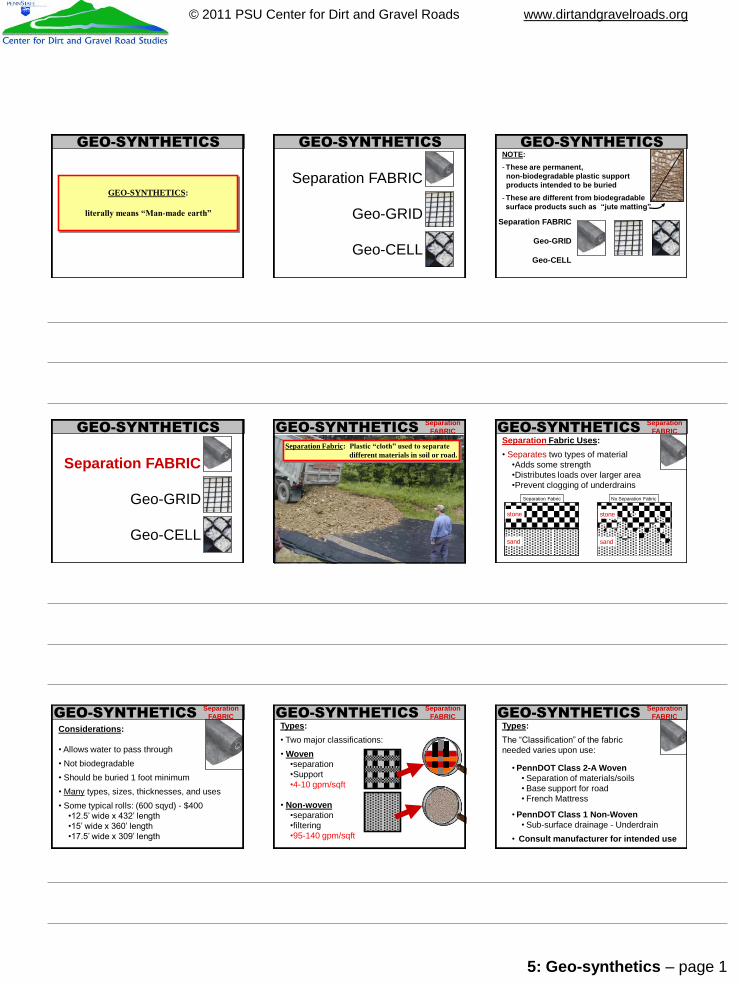
GEO-SYNTHETICS:
literally means “Man-made earth”
GEO-SYNTHETICS GEO-SYNTHETICS
Separation FABRIC
Geo-GRID
Geo-CELL
GEO-SYNTHETICS
Separation FABRIC
Geo-GRID
Geo-CELL
NOTE: - These are permanent, non-biodegradable plastic support products intended to be buried
- These are different from biodegradable surface products such as “jute matting”
GEO-SYNTHETICS
Separation FABRIC
Geo-GRID
Geo-CELL
GEO-SYNTHETICS Separation FABRIC
Separation Fabric: Plastic “cloth” used to separate different materials in soil or road.
GEO-SYNTHETICS Separation FABRIC
Separation Fabric Uses:• Separates two types of material
•Adds some strength•Distributes loads over larger area•Prevent clogging of underdrains
No Separation FabricSeparation Fabric
stone
sand
stone
sand
GEO-SYNTHETICS Separation FABRIC
Considerations:
• Allows water to pass through• Not biodegradable• Should be buried 1 foot minimum• Many types, sizes, thicknesses, and uses• Some typical rolls: (600 sqyd) - $400
•12.5’ wide x 432’ length•15’ wide x 360’ length•17.5’ wide x 309’ length
GEO-SYNTHETICS Separation FABRIC
Types:• Two major classifications:• Woven
•separation•Support•4-10 gpm/sqft
• Non-woven•separation•filtering•95-140 gpm/sqft
GEO-SYNTHETICS Separation FABRIC
Types:The “Classification” of the fabric needed varies upon use:
• PennDOT Class 2-A Woven• Separation of materials/soils• Base support for road• French Mattress
• PennDOT Class 1 Non-Woven• Sub-surface drainage - Underdrain
• Consult manufacturer for intended use
5: Geo-synthetics – page 2
© 2011 PSU Center for Dirt and Gravel Roads www.dirtandgravelroads.org
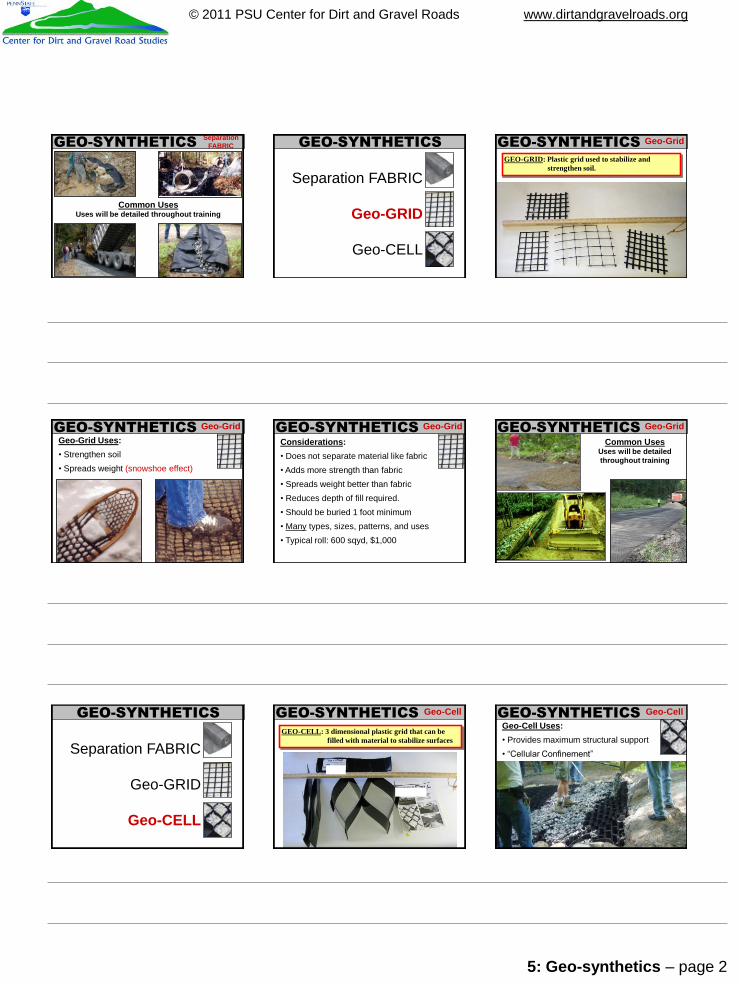
Common UsesUses will be detailed throughout training
GEO-SYNTHETICS Separation FABRIC GEO-SYNTHETICS
Separation FABRIC
Geo-GRID
Geo-CELL
GEO-SYNTHETICS Geo-Grid
GEO-GRID: Plastic grid used to stabilize and strengthen soil.
GEO-SYNTHETICSGeo-Grid Uses:• Strengthen soil• Spreads weight (snowshoe effect)
Geo-Grid GEO-SYNTHETICSConsiderations:• Does not separate material like fabric• Adds more strength than fabric• Spreads weight better than fabric• Reduces depth of fill required.• Should be buried 1 foot minimum• Many types, sizes, patterns, and uses• Typical roll: 600 sqyd, $1,000
Geo-GridCommon Uses
Uses will be detailed throughout training
GEO-SYNTHETICS Geo-Grid
GEO-SYNTHETICS
Separation FABRIC
Geo-GRID
Geo-CELL
GEO-CELL: 3 dimensional plastic grid that can be filled with material to stabilize surfaces
GEO-SYNTHETICS Geo-Cell GEO-SYNTHETICSGeo-Cell Uses:• Provides maximum structural support• “Cellular Confinement”
Geo-Cell
5: Geo-synthetics – page 3
© 2011 PSU Center for Dirt and Gravel Roads www.dirtandgravelroads.org
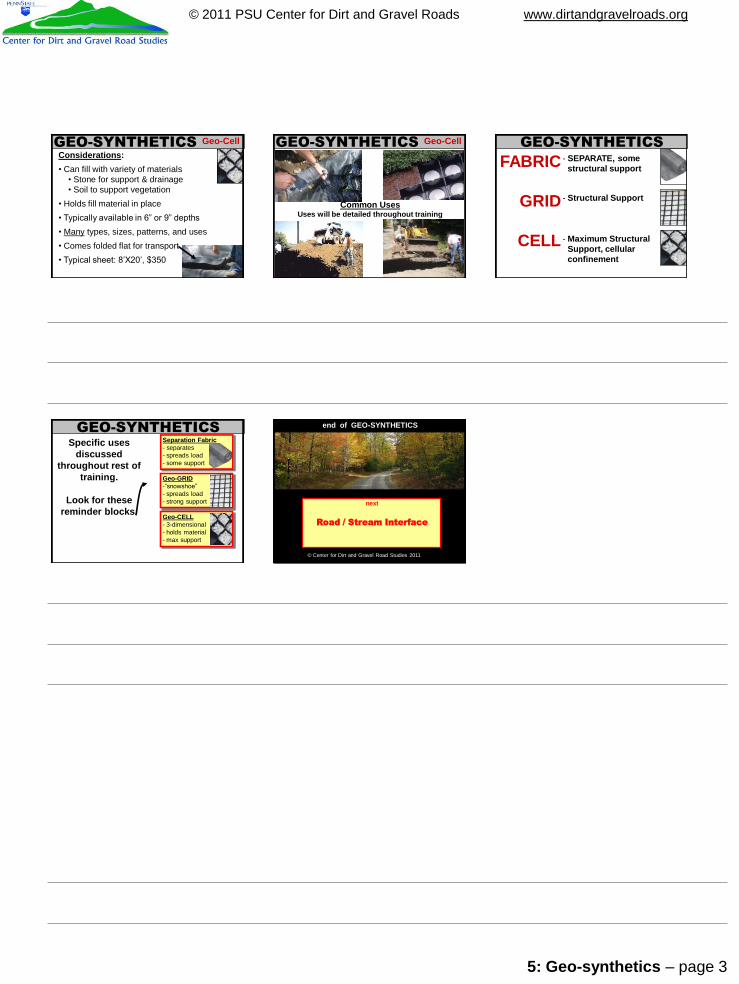
GEO-SYNTHETICS Geo-CellConsiderations:• Can fill with variety of materials
• Stone for support & drainage• Soil to support vegetation
• Holds fill material in place• Typically available in 6” or 9” depths• Many types, sizes, patterns, and uses• Comes folded flat for transport• Typical sheet: 8’X20’, $350
Common UsesUses will be detailed throughout training
GEO-SYNTHETICS Geo-Cell GEO-SYNTHETICSFABRIC
GRID
CELL
- SEPARATE, some structural support
- Structural Support
- Maximum Structural Support, cellular confinement
Separation Fabric- separates- spreads load- some support
GEO-SYNTHETICS
Geo-GRID-“snowshoe”- spreads load- strong support
Geo-CELL- 3-dimensional- holds material - max support
Specific uses discussed
throughout rest of training.
Look for these reminder blocks.
end of GEO-SYNTHETICS
© Center for Dirt and Gravel Road Studies 2011
next
Road / Stream Interface
6: Road Stream Interface – page 1
© 2011 PSU Center for Dirt and Gravel Roads www.dirtandgravelroads.org
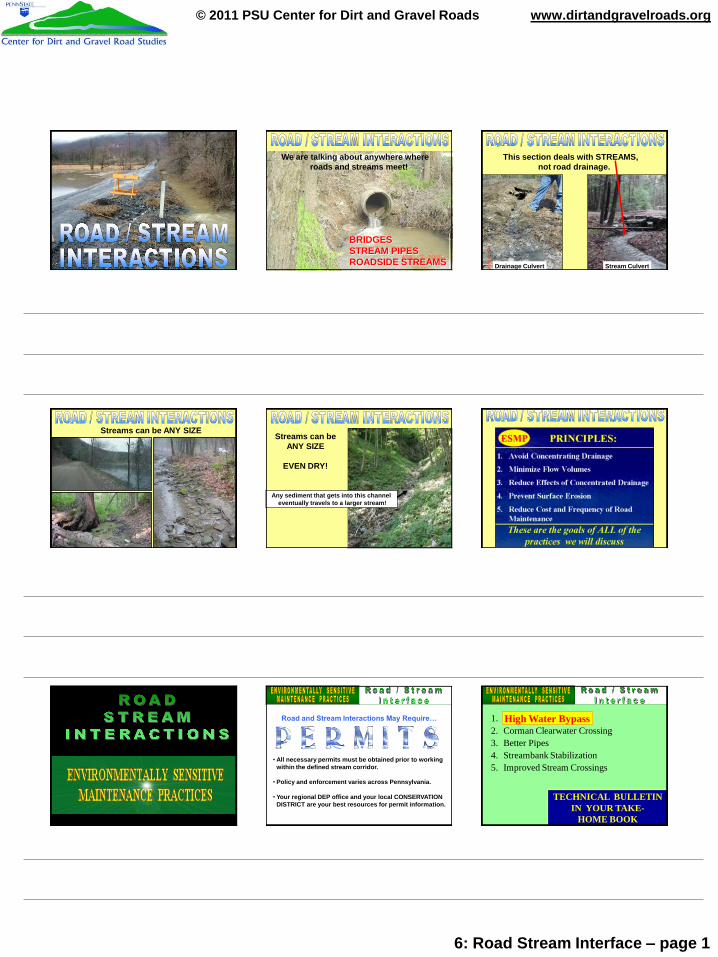
We are talking about anywhere where roads and streams meet!
BRIDGESSTREAM PIPESROADSIDE STREAMS
This section deals with STREAMS, not road drainage.
Drainage Culvert Stream Culvert
Streams can be ANY SIZEStreams can be
ANY SIZE
EVEN DRY!
Any sediment that gets into this channeleventually travels to a larger stream!
Road and Stream Interactions May Require…
• All necessary permits must be obtained prior to working within the defined stream corridor.
• Policy and enforcement varies across Pennsylvania.
• Your regional DEP office and your local CONSERVATION DISTRICT are your best resources for permit information.
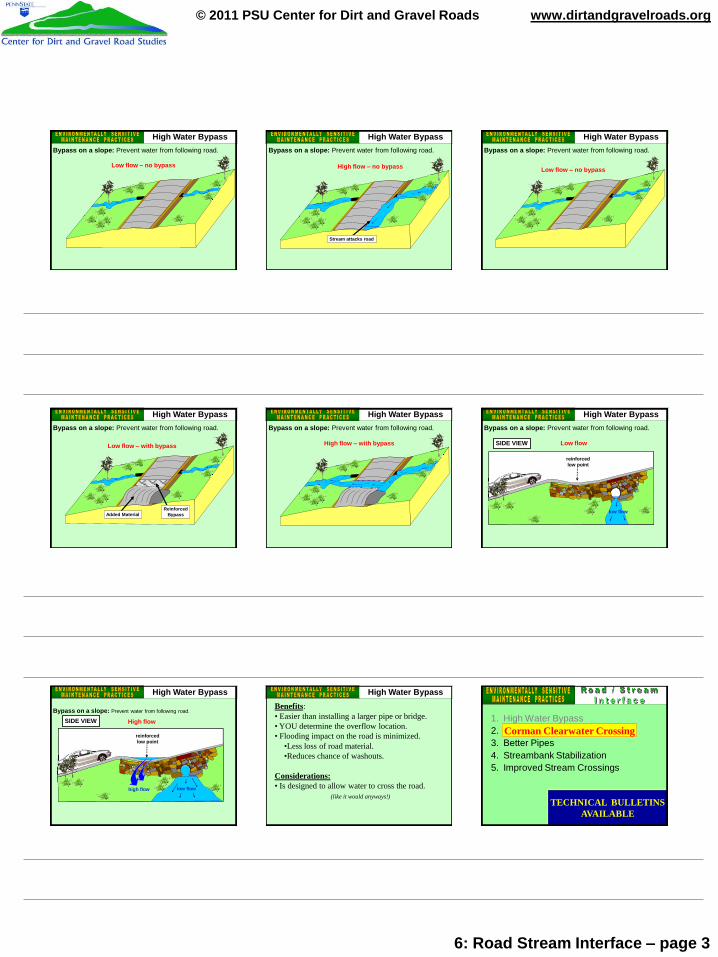
1. High-water Bypass2. Corman Clearwater Crossing3. Better Pipes4. Streambank Stabilization5. Improved Stream Crossings
High Water Bypass
TECHNICAL BULLETININ YOUR TAKE-
HOME BOOK

6: Road Stream Interface – page 2
© 2011 PSU Center for Dirt and Gravel Roads www.dirtandgravelroads.org
High-Water Bypass
low flow
path of high
flow
stream crossingHighHigh Water
Close-up of bank armor
High Water Bypass: A flat, low-lyingsection of road that serves as anoverflow to allow water to cross theroad with minimal damage duringextreme flow events.
TECHNICAL BULLETIN IN YOUR TAKE-HOME BOOK
High Water Bypass
Considerations:•Make bypass wide and flat.•Reinforce the overflow area.•Can be constructed over stream crossing.•Only designed to handle large events.
Where to use a high-water bypass•Stream historically overtops the road.•Road pipes or bridges are too small.
TECHNICAL BULLETIN IN YOUR TAKE-HOME BOOK
High Water Bypass
Demo 1/7
Excavate bypass area
High Water Bypass
Demo 2/7
Place fabric
High Water Bypass
Separation Fabric- separates- spreads load- some support
Demo 3/7
Stretch out geo-cell
High Water Bypass
Geo-CELL- 3-dimensional- holds material - max support
Demo 4/7
Pin geo-cell in place
High Water Bypass
Geo-CELL- 3-dimensional- holds material - max support
Demo 5/7
Fill with clean stone
High Water Bypass
Demo 6/7
Cover bypass
High Water Bypass
Demo 7/7
1 year later TECHNICAL BULLETIN IN YOUR TAKE-HOME BOOK
High Water Bypass
6: Road Stream Interface – page 3
© 2011 PSU Center for Dirt and Gravel Roads www.dirtandgravelroads.org
Bypass on a slope: Prevent water from following road.
Low flow – no bypass
High Water Bypass
High flow – no bypass
Stream attacks road
High Water BypassBypass on a slope: Prevent water from following road.
Low flow – no bypass
High Water BypassBypass on a slope: Prevent water from following road.
Low flow – with bypass
ReinforcedBypassAdded Material
High Water BypassBypass on a slope: Prevent water from following road.
High flow – with bypass
High Water BypassBypass on a slope: Prevent water from following road.
low flow
reinforcedlow point
SIDE VIEW Low flow
Bypass on a slope: Prevent water from following road.
High Water Bypass
low flow
reinforcedlow point
Bypass on a slope: Prevent water from following road.
SIDE VIEW
high flow
High flow
High Water BypassBenefits:• Easier than installing a larger pipe or bridge.• YOU determine the overflow location.• Flooding impact on the road is minimized.
•Less loss of road material.•Reduces chance of washouts.
Considerations:• Is designed to allow water to cross the road.
(like it would anyways!)
High Water Bypass
1. High Water Bypass2. Corman Clearwater Crossing3. Better Pipes4. Streambank Stabilization5. Improved Stream Crossings
Corman Clearwater Crossing
TECHNICAL BULLETINSAVAILABLE
6: Road Stream Interface – page 4
© 2011 PSU Center for Dirt and Gravel Roads www.dirtandgravelroads.org
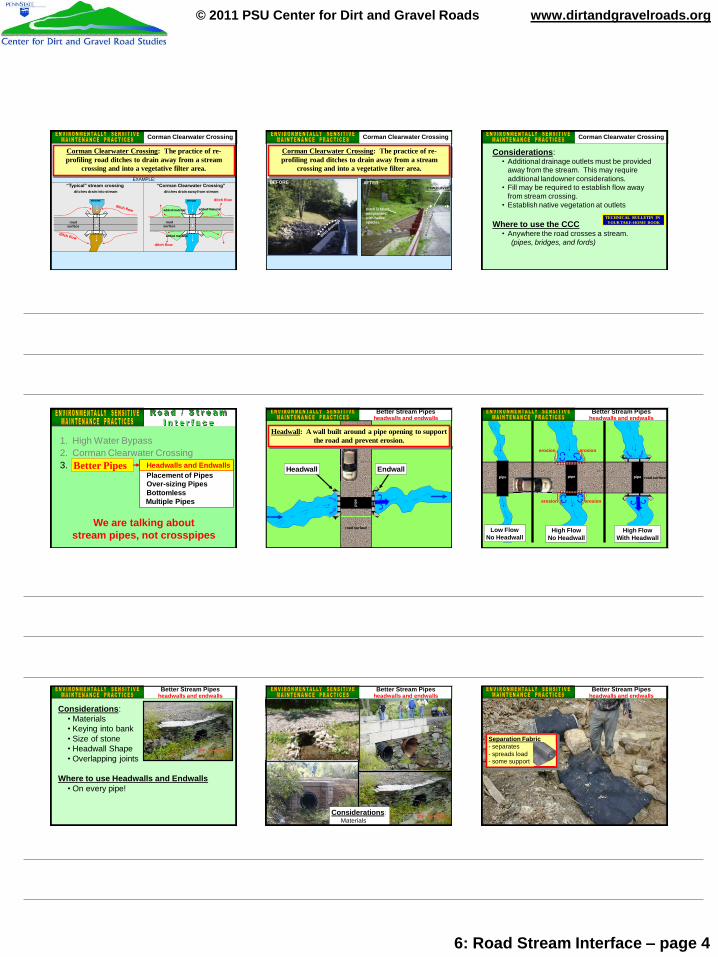
Corman Clearwater Crossing: The practice of re-profiling road ditches to drain away from a stream
crossing and into a vegetative filter area.
lowflow
stream
“Typical” stream crossing
road surface
ditches drain into stream
road surface
ditch flow
stream ditch flow
added material
added material
“Corman Clearwater Crossing”ditches drain away from stream
added material
EXAMPLE:
Corman Clearwater Crossing
BEFORE AFTER
Ditch is filled and planted with native species
new culvert
Corman Clearwater Crossing: The practice of re-profiling road ditches to drain away from a stream
crossing and into a vegetative filter area.
Corman Clearwater Crossing
Considerations:• Additional drainage outlets must be provided
away from the stream. This may require additional landowner considerations.
• Fill may be required to establish flow away from stream crossing.
• Establish native vegetation at outlets
Where to use the CCC• Anywhere the road crosses a stream.
(pipes, bridges, and fords)
TECHNICAL BULLETIN IN YOUR TAKE-HOME BOOK
Corman Clearwater Crossing
1. High Water Bypass2. Corman Clearwater Crossing3. Better Pipes Headwalls and Endwalls
Placement of Pipes Over-sizing Pipes BottomlessMultiple Pipes
Headwalls and EndwallsBetter Pipes
We are talking about stream pipes, not crosspipes
Better Stream Pipesheadwalls and endwalls
pipe
Headwall Endwall
road surface
Headwall: A wall built around a pipe opening to support the road and prevent erosion.
road surfacepipe
Low FlowNo Headwall
pipe
High FlowWith Headwall
pipe
erosion
erosionerosion
erosion
High FlowNo Headwall
Better Stream Pipesheadwalls and endwalls
Considerations:• Materials• Keying into bank• Size of stone• Headwall Shape• Overlapping joints
Where to use Headwalls and Endwalls• On every pipe!
Better Stream Pipesheadwalls and endwalls
Considerations:Materials
Better Stream Pipesheadwalls and endwalls
Better Stream Pipesheadwalls and endwalls
Separation Fabric- separates- spreads load- some support
6: Road Stream Interface – page 5
© 2011 PSU Center for Dirt and Gravel Roads www.dirtandgravelroads.org
Better Stream Pipesheadwalls and endwalls
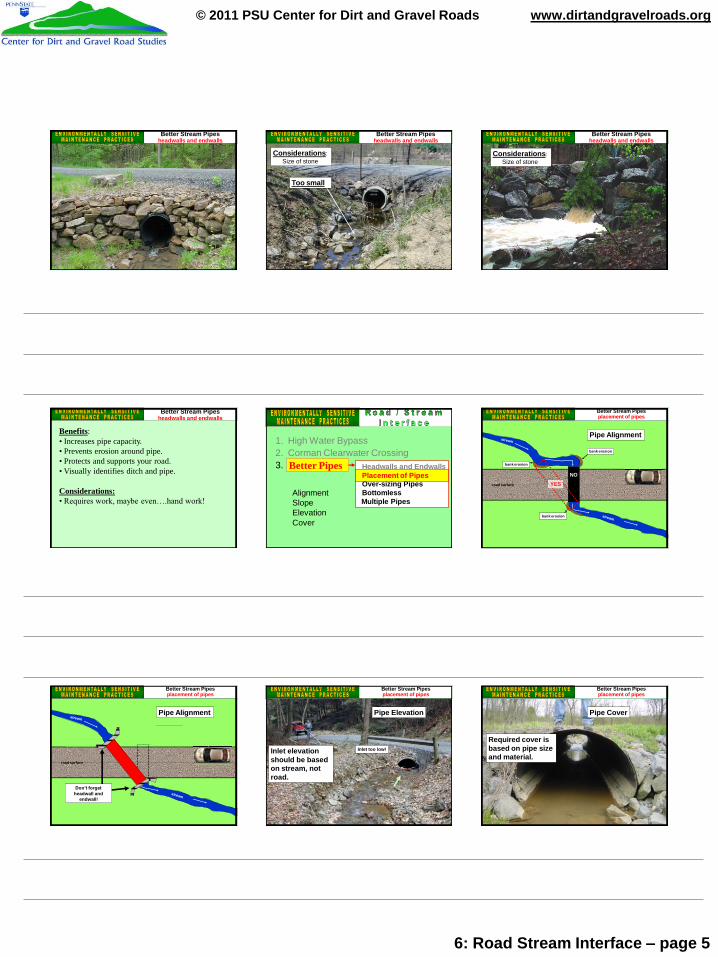
Considerations:Size of stone
Better Stream Pipesheadwalls and endwalls
Too small
Considerations:Size of stone
Better Stream Pipesheadwalls and endwalls
Benefits:• Increases pipe capacity.• Prevents erosion around pipe.• Protects and supports your road.• Visually identifies ditch and pipe.
Considerations:• Requires work, maybe even….hand work!
Better Stream Pipesheadwalls and endwalls
1. High Water Bypass2. Corman Clearwater Crossing3. Better PipesBetter Pipes Headwalls and Endwalls
Placement of Pipes Over-sizing Pipes BottomlessMultiple Pipes
Placement of Pipes
AlignmentSlopeElevationCover
road surface
NO
Pipe Alignment
YES
bank erosion
bank erosion
bank erosion
Better Stream Pipesplacement of pipes
road surface
bank erosion
bank erosion
Pipe Alignment
Don’t forget headwall and
endwall!
Better Stream Pipesplacement of pipes
Pipe Elevation
Inlet elevation should be based on stream, not road.
Inlet too low!
Better Stream Pipesplacement of pipes
Pipe Cover
Required cover is based on pipe size and material.
Better Stream Pipesplacement of pipes

6: Road Stream Interface – page 6
© 2011 PSU Center for Dirt and Gravel Roads www.dirtandgravelroads.org
1. High Water Bypass2. Corman Clearwater Crossing3. Better PipesBetter Pipes Headwalls and Endwalls
Placement of Pipes Over-sizing Pipes BottomlessMultiple Pipes
Over-sizing Pipes
WHY?• Required by DEP.• Better for stream life.• Extra weight helps to hold pipe in place.
Instead of a small pipe that flushes clean, consider a larger pipe that is embedded in stream channel.
Stream material onbottom of pipe
Better Stream Pipesover-sizing pipes
1. High Water Bypass2. Corman Clearwater Crossing3. Better PipesBetter Pipes Headwalls and Endwalls
Placement of Pipes Over-sizing Pipes BottomlessMultiple PipesBottomless Pipes
Not this kind of bottomless pipe!
A pipe that is INTENTIONALLY bottomless.
Better Stream Pipesbottomless pipes
Why consider a bottomless pipe?
• Higher capacity for same depth.• Less stream impact.• Less maintenance. (gravel bars etc)• Less cover required.• Natural stream bottom.
Better Stream Pipesbottomless pipes
1. High Water Bypass2. Corman Clearwater Crossing3. Better PipesBetter Pipes Headwalls and Endwalls
Placement of Pipes Over-sizing Pipes BottomlessMultiple PipesMultiple Pipes
Better Stream Pipesmultiple pipes
Better Stream Pipesmultiple pipes
Considerations:
Staggered inlets prevent blockages.
Different elevations handle low and high flow.
pipepipe pipe
Better Stream Pipesmultiple pipes
6: Road Stream Interface – page 7
© 2011 PSU Center for Dirt and Gravel Roads www.dirtandgravelroads.org
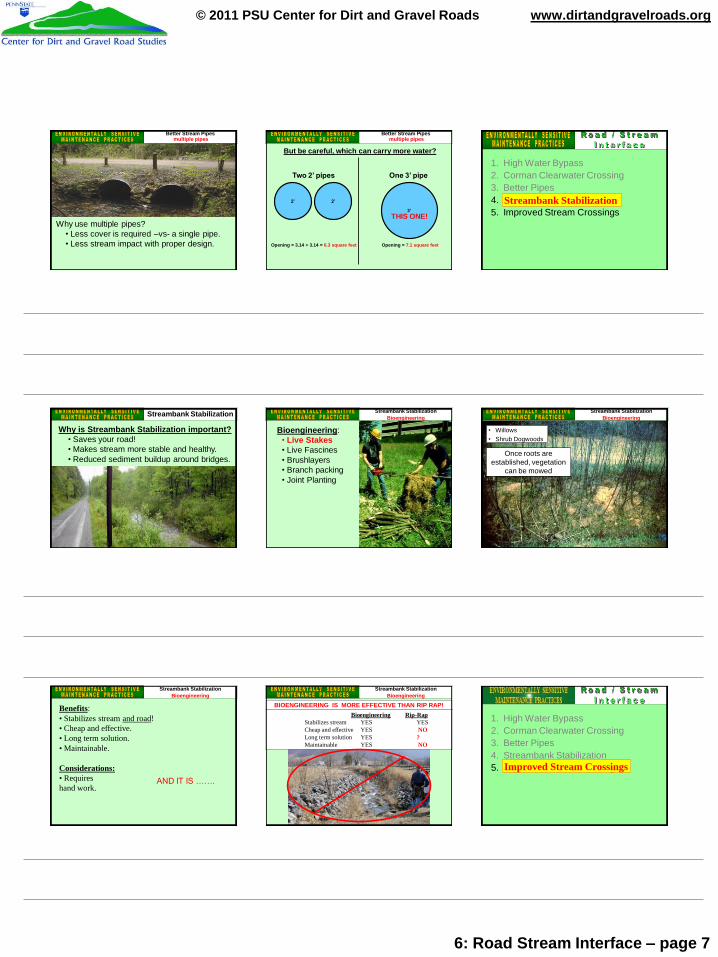
Why use multiple pipes?• Less cover is required –vs- a single pipe.• Less stream impact with proper design.
Better Stream Pipesmultiple pipes
2’
3’
But be careful, which can carry more water?
2’
Two 2’ pipes One 3’ pipe
Opening = 3.14 + 3.14 = 6.3 square feet Opening = 7.1 square feet
THIS ONE!
Better Stream Pipesmultiple pipes
1. High Water Bypass2. Corman Clearwater Crossing3. Better Pipes4. Streambanks5. Improved Stream Crossings
Streambank Stabilization
Why is Streambank Stabilization important?• Saves your road!• Makes stream more stable and healthy.• Reduced sediment buildup around bridges.
Streambank Stabilization
Bioengineering:• Live Stakes• Live Fascines• Brushlayers• Branch packing• Joint Planting
Streambank StabilizationBioengineering
• Willows• Shrub Dogwoods
Once roots are established, vegetation
can be mowed
Streambank StabilizationBioengineering
AND IT IS …….
Benefits:• Stabilizes stream and road!• Cheap and effective.• Long term solution.• Maintainable.
Considerations:• Requires hand work.
Streambank StabilizationBioengineering
Bioengineering Rip-RapStabilizes stream YES YESCheap and effective YES NOLong term solution YES ?Maintainable YES NO
BIOENGINEERING IS MORE EFFECTIVE THAN RIP RAP!
Streambank StabilizationBioengineering
1. High Water Bypass2. Corman Clearwater Crossing3. Better Pipes4. Streambank Stabilization5. Improved Stream CrossingsImproved Stream Crossings
6: Road Stream Interface – page 8
© 2011 PSU Center for Dirt and Gravel Roads www.dirtandgravelroads.org
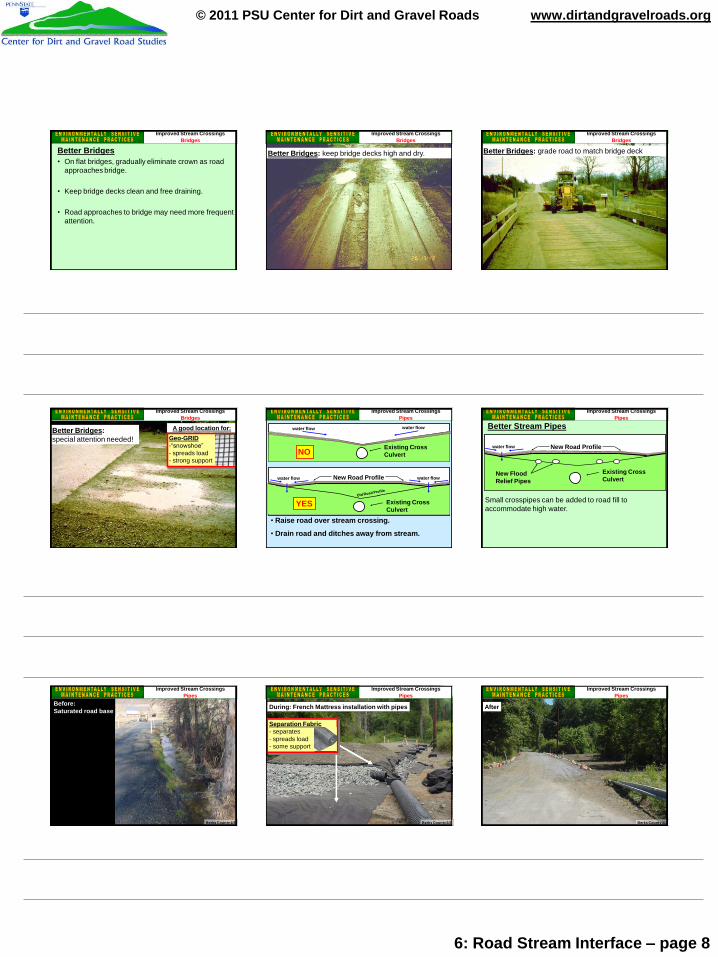
Better Bridges• On flat bridges, gradually eliminate crown as road
approaches bridge.
• Keep bridge decks clean and free draining.
• Road approaches to bridge may need more frequent attention.
Improved Stream CrossingsBridges
Better Bridges: keep bridge decks high and dry.
Improved Stream CrossingsBridges
Better Bridges: grade road to match bridge deck
Improved Stream CrossingsBridges
Better Bridges: special attention needed!
Improved Stream CrossingsBridges
Geo-GRID-“snowshoe”- spreads load- strong support
A good location for:
• Raise road over stream crossing.
• Drain road and ditches away from stream.
New Road Profile
Existing Cross Culvert
Existing Cross Culvert
water flowwater flow
water flow water flow
NO
YES
Improved Stream CrossingsPipes
Better Stream Pipes
Small crosspipes can be added to road fill to accommodate high water.
Existing Cross Culvert
New Flood Relief Pipes
New Road Profilewater flow
Improved Stream CrossingsPipes
Berks County 1/3
Before: Saturated road base
Improved Stream CrossingsPipes
Berks County 2/3
During: French Mattress installation with pipes
Improved Stream CrossingsPipes
Separation Fabric- separates- spreads load- some support
Berks County 3/3
After
Improved Stream CrossingsPipes
6: Road Stream Interface – page 9
© 2011 PSU Center for Dirt and Gravel Roads www.dirtandgravelroads.org
end of ROAD STREM INTERFACE
© Center for Dirt and Gravel Road Studies 2011
next
Roadside Ditches
7: Ditches – page 1
© 2011 PSU Center for Dirt and Gravel Roads www.dirtandgravelroads.org
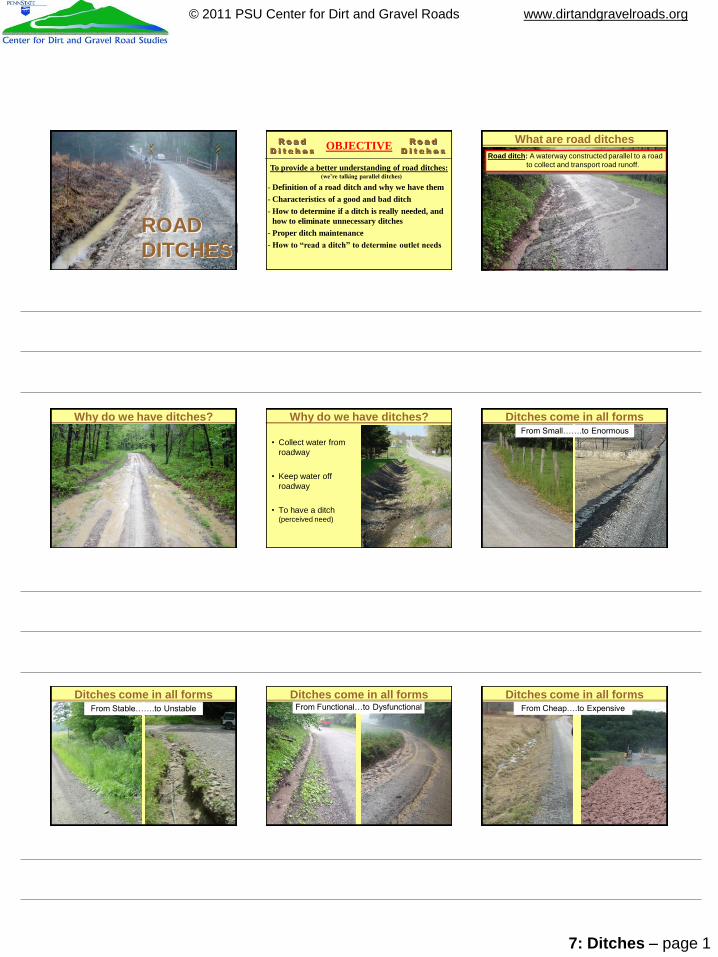
ROAD DITCHES
OBJECTIVE
To provide a better understanding of road ditches:(we’re talking parallel ditches)
- Definition of a road ditch and why we have them- Characteristics of a good and bad ditch - How to determine if a ditch is really needed, and
how to eliminate unnecessary ditches- Proper ditch maintenance- How to “read a ditch” to determine outlet needs
What are road ditchesRoad ditch: A waterway constructed parallel to a road
to collect and transport road runoff.
Why do we have ditches?
• Collect water from roadway
• Keep water off roadway
• To have a ditch (perceived need)
Why do we have ditches? Ditches come in all formsFrom Small…….to Enormous
Ditches come in all formsFrom Stable…….to Unstable
Ditches come in all formsFrom Functional…to Dysfunctional
Ditches come in all formsFrom Cheap….to Expensive
7: Ditches – page 2
© 2011 PSU Center for Dirt and Gravel Roads www.dirtandgravelroads.org
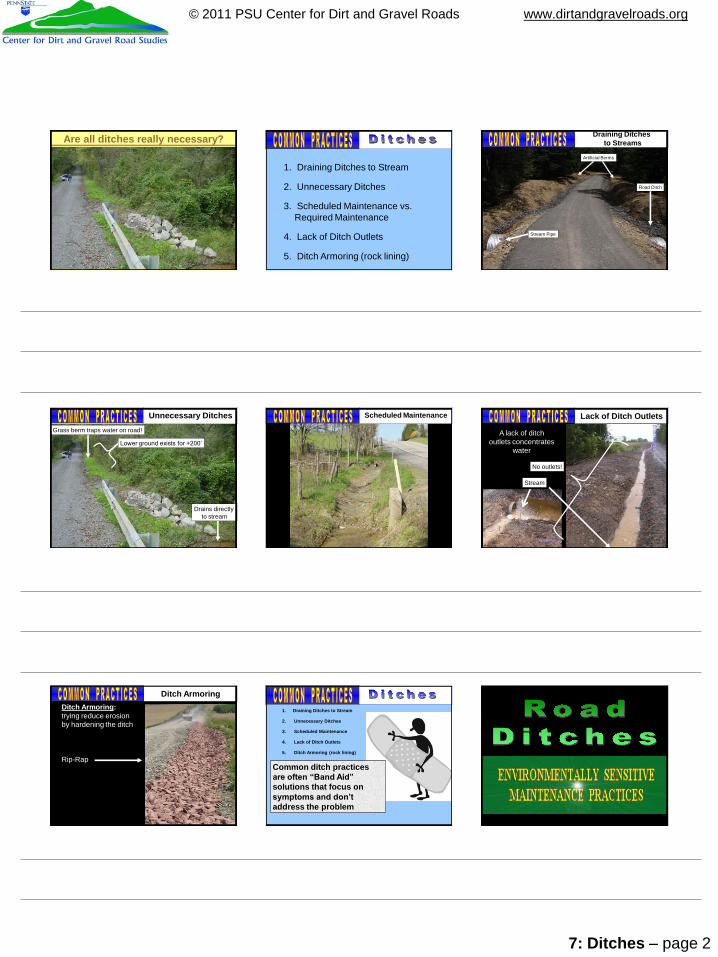
Are all ditches really necessary?
1. Draining Ditches to Stream
2. Unnecessary Ditches
3. Scheduled Maintenance vs. Required Maintenance
4. Lack of Ditch Outlets
5. Ditch Armoring (rock lining)
Draining Ditchesto Streams
Stream Pipe
Road Ditch
Artificial Berms
Unnecessary Ditches
Lower ground exists for +200’
Grass berm traps water on road!
Drains directly to stream
Scheduled Maintenance
A lack of ditch outlets concentrates
water
Lack of Ditch Outlets
No outlets!
Stream
Ditch ArmoringDitch Armoring:trying reduce erosion by hardening the ditch
Rip-Rap
1/3
1. Draining Ditches to Stream
2. Unnecessary Ditches
3. Scheduled Maintenance
4. Lack of Ditch Outlets
5. Ditch Armoring (rock lining)
Common ditch practices are often “Band Aid” solutions that focus on symptoms and don’t address the problem

7: Ditches – page 3
© 2011 PSU Center for Dirt and Gravel Roads www.dirtandgravelroads.org
ESM Ps
1. Avoid Concentrating Drainage2. Minimize Flow Volumes3. Reduce Effects of Concentrated
Drainage4. Prevent Surface Erosion5. Reduce Cost and Frequency of
Road Maintenance
ESMP PRINCIPLES:REMEMBER THESE?
Especially important for DITCHES:
– Eliminate ditches when possible– Reduce ditch flow with frequent outlets– Water Volume X Velocity = Erosion!
Unlike urban storm sewers that “connect” drainage to streams, we want to “disconnect”
the rural drainage system.
ESM Ps
ESM Practices
1. Ditch Elimination2. Fill Road Cross-section 3. Low Maintenance Ditches4. Alternative Cleaning Methods5. Re-vegetation6. Underdrains7. Through-drains 8. Ditch Outlet Frequency
ESM Ps
Ditch Elimination
2 TECHNICAL BULLETINSAVAILABLE
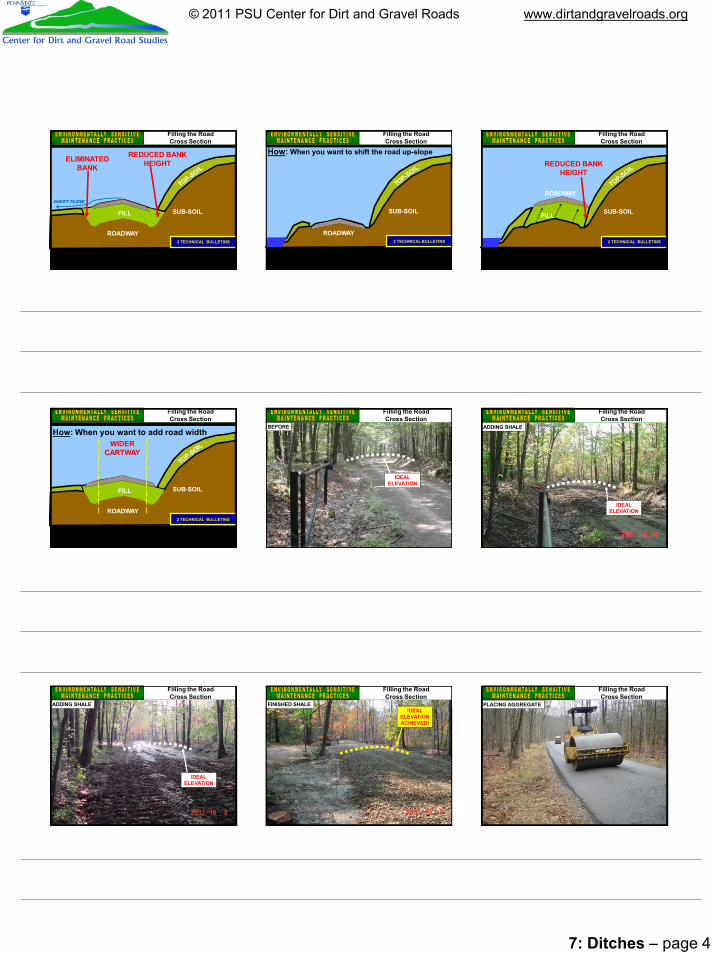
Ditch EliminationBerm RemovalOutslope the RoadFill Road Cross-section
Ditch EliminationBerm RemovalOutslope the RoadFill Road Cross-section
Berm RemovalOutslope the RoadFill Road Cross-section
No Ditch!
No Ditch!
Ditch Elimination
Berm RemovalOutslope the RoadFill Road Cross-section
No Ditch!
Ditch
TECHNICAL BULLETINAVAILABLE
Ditch Elimination
When:
–Where banks are higher on both sides of the road
–When you want to shift the road up-slope
–When you want to add road width
–When pipes and turn-outs pose a problem (fewer landowner issues with less outlets)
2 TECHNICAL BULLETINSAVAILABLE
Filling the Road Cross Section
SUB-SOIL
ROADWAY
IDEAL CROSS-SECTION
How: Where banks are higher on both sides of the road
2 TECHNICAL BULLETINS
Filling the Road Cross Section
7: Ditches – page 4
© 2011 PSU Center for Dirt and Gravel Roads www.dirtandgravelroads.org
SUB-SOIL
ROADWAY
ELIMINATED BANK
REDUCED BANK HEIGHT
FILL
2 TECHNICAL BULLETINS
Filling the Road Cross Section
SHEET FLOW
SUB-SOIL
ROADWAY
How: When you want to shift the road up-slope
2 TECHNICAL BULLETINS
Filling the Road Cross Section
SUB-SOIL
ROADWAY
FILL
REDUCED BANK HEIGHT
2 TECHNICAL BULLETINS
Filling the Road Cross Section
SUB-SOIL
ROADWAY
WIDER CARTWAY
FILL
2 TECHNICAL BULLETINS
Filling the Road Cross Section
How: When you want to add road widthBEFORE
IDEALELEVATION
Filling the Road Cross Section
ADDING SHALE
IDEALELEVATION
Filling the Road Cross Section
ADDING SHALE
IDEALELEVATION
Filling the Road Cross Section
FINISHED SHALEIDEAL
ELEVATIONACHIEVED!
Filling the Road Cross Section
PLACING AGGREGATE
Filling the Road Cross Section
7: Ditches – page 5
© 2011 PSU Center for Dirt and Gravel Roads www.dirtandgravelroads.org
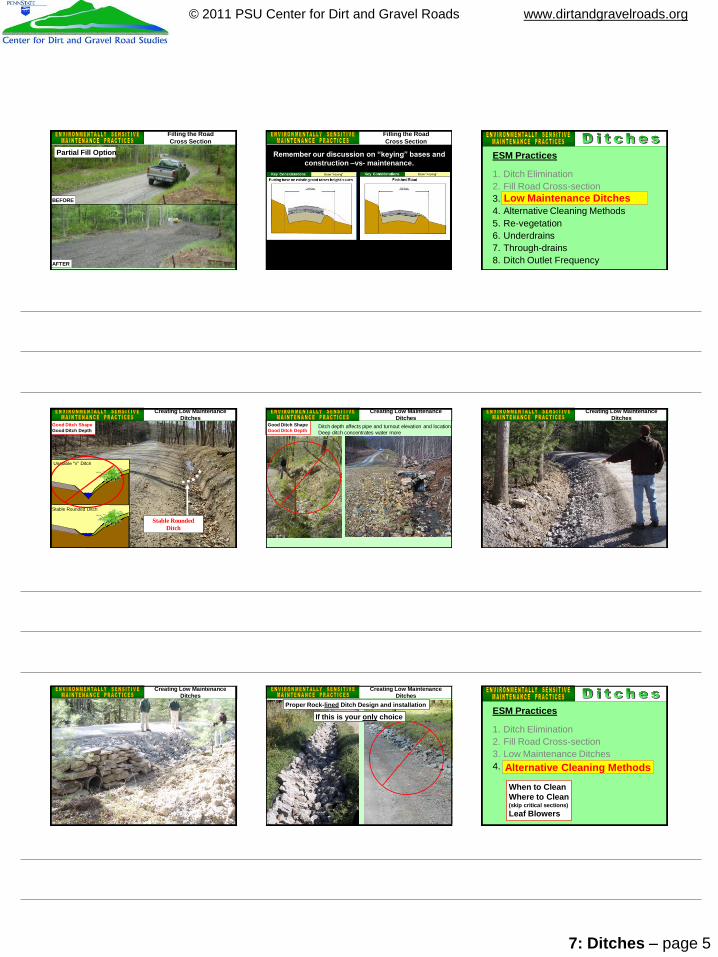
BEFORE
AFTER
Filling the Road Cross Section
Partial Fill Option
Filling the Road Cross Section
Remember our discussion on “keying” bases and construction –vs- maintenance.
ESM Practices
1. Ditch Elimination2. Fill Road Cross-section 3. Low Maintenance Ditches4. Alternative Cleaning Methods5. Re-vegetation6. Underdrains7. Through-drains 8. Ditch Outlet Frequency
ESM Ps
Low Maintenance Ditches
Creating Low Maintenance Ditches
Good Ditch ShapeGood Ditch Depth
Unstable “V” Shaped Ditch
Unstable “V” Ditch
Compared to…Compared to….
Stable Rounded Ditch
Stable Rounded Ditch
Ditch depth affects pipe and turnout elevation and locationDeep ditch concentrates water more
Good Ditch ShapeGood Ditch Depth
Creating Low Maintenance Ditches
Creating Low Maintenance Ditches
Creating Low Maintenance Ditches
Creating Low Maintenance Ditches
Proper Rock-lined Ditch Design and installation
If this is your only choiceESM Practices
1. Ditch Elimination2. Fill Road Cross-section 3. Low Maintenance Ditches4. Alternative Cleaning Methods
ESM Ps
Alternative Cleaning Methods
When to CleanWhere to Clean(skip critical sections)Leaf Blowers
7: Ditches – page 6
© 2011 PSU Center for Dirt and Gravel Roads www.dirtandgravelroads.org
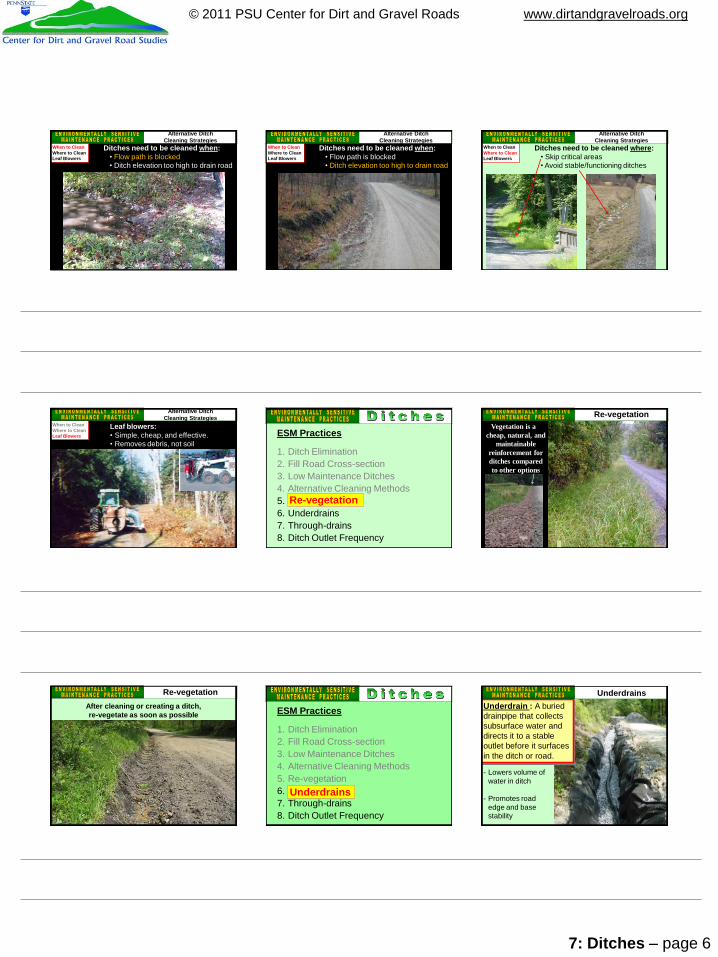
Ditches need to be cleaned when:• Flow path is blocked• Ditch elevation too high to drain road
When to CleanWhere to CleanLeaf Blowers
Alternative DitchCleaning Strategies
Ditches need to be cleaned when:• Flow path is blocked• Ditch elevation too high to drain road
When to CleanWhere to CleanLeaf Blowers
Alternative DitchCleaning Strategies
Ditches need to be cleaned where:• Skip critical areas• Avoid stable/functioning ditches
When to CleanWhere to CleanLeaf Blowers
Alternative DitchCleaning Strategies
Leaf blowers:• Simple, cheap, and effective.• Removes debris, not soil
When to CleanWhere to CleanLeaf Blowers
Alternative DitchCleaning Strategies
ESM Practices
1. Ditch Elimination2. Fill Road Cross-section 3. Low Maintenance Ditches4. Alternative Cleaning Methods5. Re-vegetation6. Underdrains7. Through-drains 8. Ditch Outlet Frequency
ESM Ps
Re-vegetation
Vegetation is a cheap, natural, and
maintainable reinforcement for ditches compared to other options
Re-vegetation
Re-vegetationAfter cleaning or creating a ditch, re-vegetate as soon as possible ESM Practices
1. Ditch Elimination 2. Fill Road Cross-section 3. Low Maintenance Ditches4. Alternative Cleaning Methods5. Re-vegetation6. Underdrains7. Through-drains 8. Ditch Outlet Frequency
ESM Ps
Underdrains
UnderdrainsUnderdrain : A buried drainpipe that collects subsurface water and directs it to a stable outlet before it surfaces in the ditch or road.
- Lowers volume of water in ditch
- Promotes road edge and base stability

7: Ditches – page 7
© 2011 PSU Center for Dirt and Gravel Roads www.dirtandgravelroads.org
Where TO USE:
• Perpetually wet ditches and banks
• Saturated road bases
ANY CONSISTENTLYWET AREAS!
Saturated road bases
ditches and banks
Saturated road basesSaturated road bases
Underdrains
PRE-FAB CONSTRUCTED
Underdrains
PRO• Cheaper• Quicker and easier
to install
CON• Clogs easier• Not for clay soils• Less surface area
to collect water
PRO• Customized size• Can carry more water• Less likely to clog• Can be used in clay soil
CON• More construction
cost and time
PRE-FAB CONSTRUCTED(preferred)
Underdrains
Pre-fab Underdrain:
- Perforated pipe pre-wrapped in fabric
- Road fill placed directly on top
UnderdrainsConstructed Stone Underdrain:
1 2 3
4 5 6
Excavate Place Fabric Bedding & Pipe
Filter Material Wrap Fabric Compact Fill
Underdrains Underdrains
Early Spring – good time to ID sub-surface water problems
To fix later on
UnderdrainsConstructed Stone
Underdrain
UnderdrainsConstructed Stone
Underdrain
Underdrains
Separation Fabric-Separates andfilters
- spreads load- some support
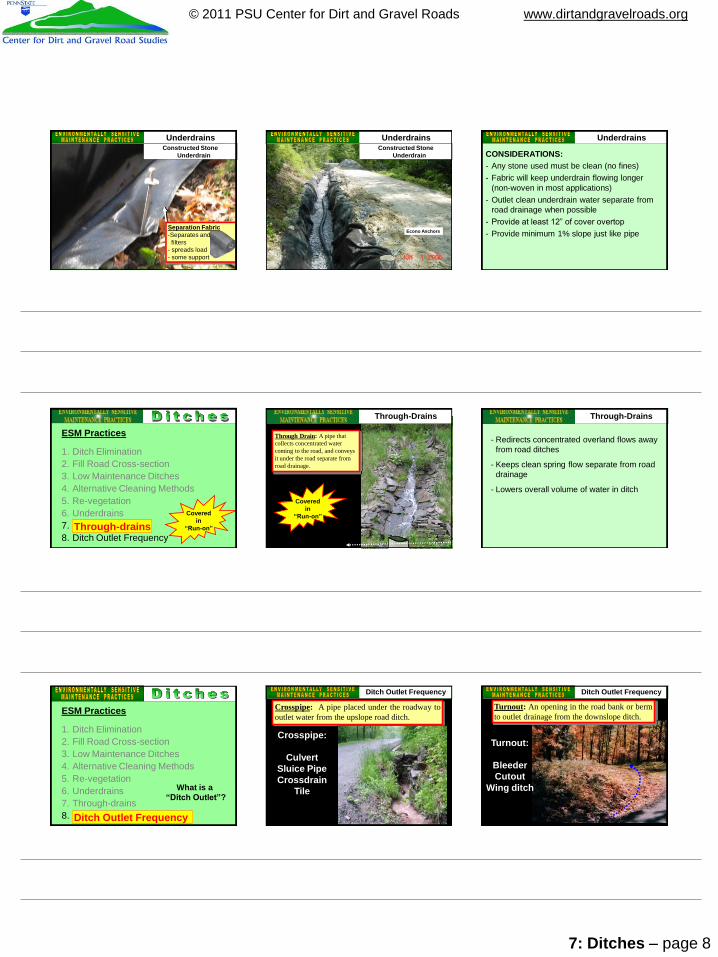
7: Ditches – page 8
© 2011 PSU Center for Dirt and Gravel Roads www.dirtandgravelroads.org
Constructed Stone Underdrain
Underdrains
Separation Fabric-Separates andfilters
- spreads load- some support
Constructed Stone Underdrain
Underdrains
Econo Anchors
CONSIDERATIONS:- Any stone used must be clean (no fines)- Fabric will keep underdrain flowing longer
(non-woven in most applications) - Outlet clean underdrain water separate from
road drainage when possible- Provide at least 12” of cover overtop- Provide minimum 1% slope just like pipe
Underdrains
ESM Practices
1. Ditch Elimination2. Fill Road Cross-section 3. Low Maintenance Ditches4. Alternative Cleaning Methods5. Re-vegetation6. Underdrains7. Through-drains 8. Ditch Outlet Frequency
ESM Ps
Through-drainsCovered
in“Run-on”
Through Drain: A pipe that collects concentrated water coming to the road, and conveys it under the road separate from road drainage.
Through-Drains
Coveredin
“Run-on”
- Redirects concentrated overland flows away from road ditches
- Keeps clean spring flow separate from road drainage
- Lowers overall volume of water in ditch
Through-Drains
ESM Practices
1. Ditch Elimination2. Fill Road Cross-section 3. Low Maintenance Ditches4. Alternative Cleaning Methods5. Re-vegetation6. Underdrains7. Through-drains 8. Ditch Outlet Frequency
ESM Ps
Ditch Outlet Frequency
What is a “Ditch Outlet”?
Crosspipe:
CulvertSluice PipeCrossdrain
Tile
Crosspipe: A pipe placed under the roadway tooutlet water from the upslope road ditch.
Ditch Outlet Frequency
Turnout:
BleederCutout
Wing ditch
Turnout: An opening in the road bank or bermto outlet drainage from the downslope ditch.
Ditch Outlet Frequency
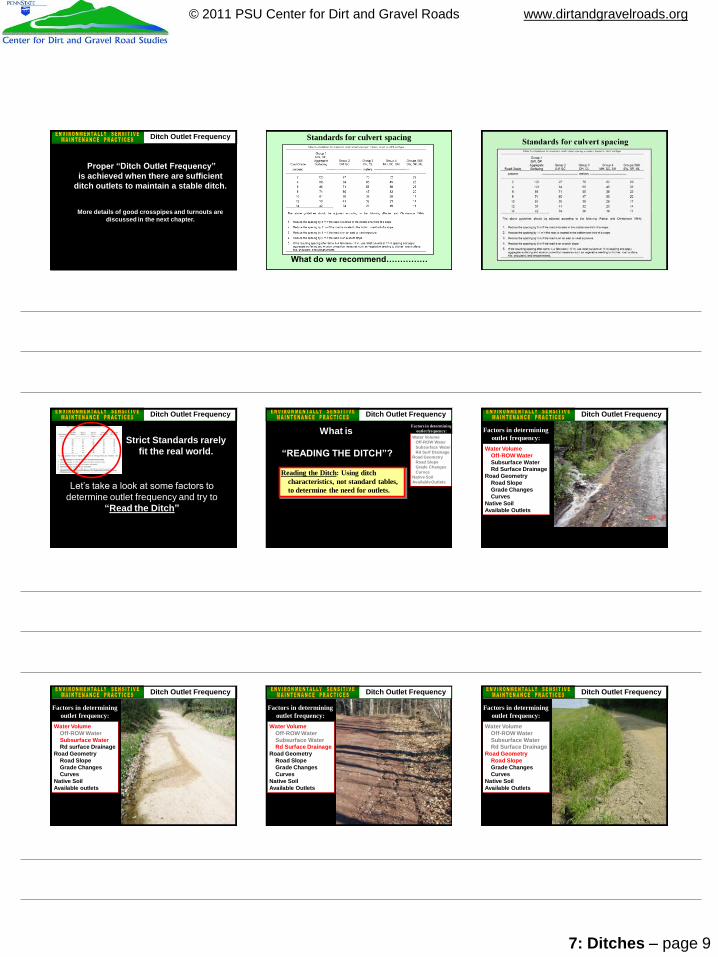
7: Ditches – page 9
© 2011 PSU Center for Dirt and Gravel Roads www.dirtandgravelroads.org
Proper “Ditch Outlet Frequency”is achieved when there are sufficient
ditch outlets to maintain a stable ditch.
More details of good crosspipes and turnouts are discussed in the next chapter.
Ditch Outlet Frequency Standards for culvert spacing
What do we recommend……………
Strict Standards rarely fit the real world.
Let’s take a look at some factors to determine outlet frequency and try to
“Read the Ditch”
Ditch Outlet FrequencyFactors in determining
outlet frequency:What is
“READING THE DITCH”?
Reading the Ditch: Using ditch characteristics, not standard tables, to determine the need for outlets.
Water VolumeOff-ROW WaterSubsurface WaterRd Surf Drainage
Road GeometryRoad SlopeGrade ChangesCurves
Native SoilAvailable Outlets
Ditch Outlet Frequency
Water VolumeOff-ROW WaterSubsurface WaterRd Surface Drainage
Road GeometryRoad SlopeGrade ChangesCurves
Native SoilAvailable Outlets
Factors in determiningoutlet frequency:
Ditch Outlet Frequency
Water VolumeOff-ROW WaterSubsurface WaterRd surface Drainage
Road GeometryRoad SlopeGrade ChangesCurves
Native SoilAvailable outlets
Factors in determiningoutlet frequency:
Ditch Outlet Frequency
Water VolumeOff-ROW WaterSubsurface WaterRd Surface Drainage
Road GeometryRoad SlopeGrade ChangesCurves
Native SoilAvailable Outlets
Factors in determiningoutlet frequency:
Ditch Outlet Frequency
Water VolumeOff-ROW WaterSubsurface WaterRd Surface Drainage
Road GeometryRoad SlopeGrade ChangesCurves
Native SoilAvailable Outlets
Factors in determiningoutlet frequency:
Ditch Outlet Frequency
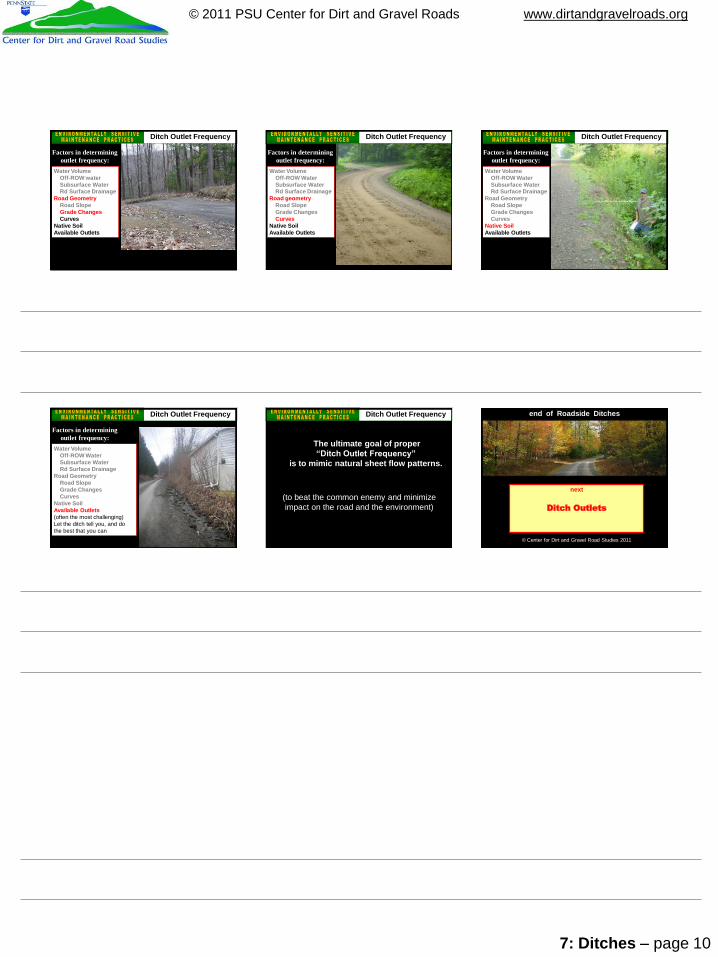
7: Ditches – page 10
© 2011 PSU Center for Dirt and Gravel Roads www.dirtandgravelroads.org
Water VolumeOff-ROW waterSubsurface WaterRd Surface Drainage
Road GeometryRoad SlopeGrade ChangesCurves
Native SoilAvailable Outlets
Factors in determiningoutlet frequency:
Ditch Outlet Frequency
Water VolumeOff-ROW WaterSubsurface WaterRd Surface Drainage
Road geometryRoad SlopeGrade ChangesCurves
Native SoilAvailable Outlets
Factors in determiningoutlet frequency:
Ditch Outlet Frequency
Water VolumeOff-ROW WaterSubsurface WaterRd Surface Drainage
Road GeometryRoad SlopeGrade ChangesCurves
Native SoilAvailable Outlets
Factors in determiningoutlet frequency:
Ditch Outlet Frequency
Water VolumeOff-ROW WaterSubsurface WaterRd Surface Drainage
Road GeometryRoad SlopeGrade ChangesCurves
Native SoilAvailable Outlets(often the most challenging)Let the ditch tell you, and do the best that you can
Factors in determiningoutlet frequency:
Ditch Outlet Frequency
The ultimate goal of proper “Ditch Outlet Frequency”
is to mimic natural sheet flow patterns.
Ditch Outlet Frequency
(to beat the common enemy and minimize impact on the road and the environment)
end of Roadside Ditches
© Center for Dirt and Gravel Road Studies 2011
next
Ditch Outlets
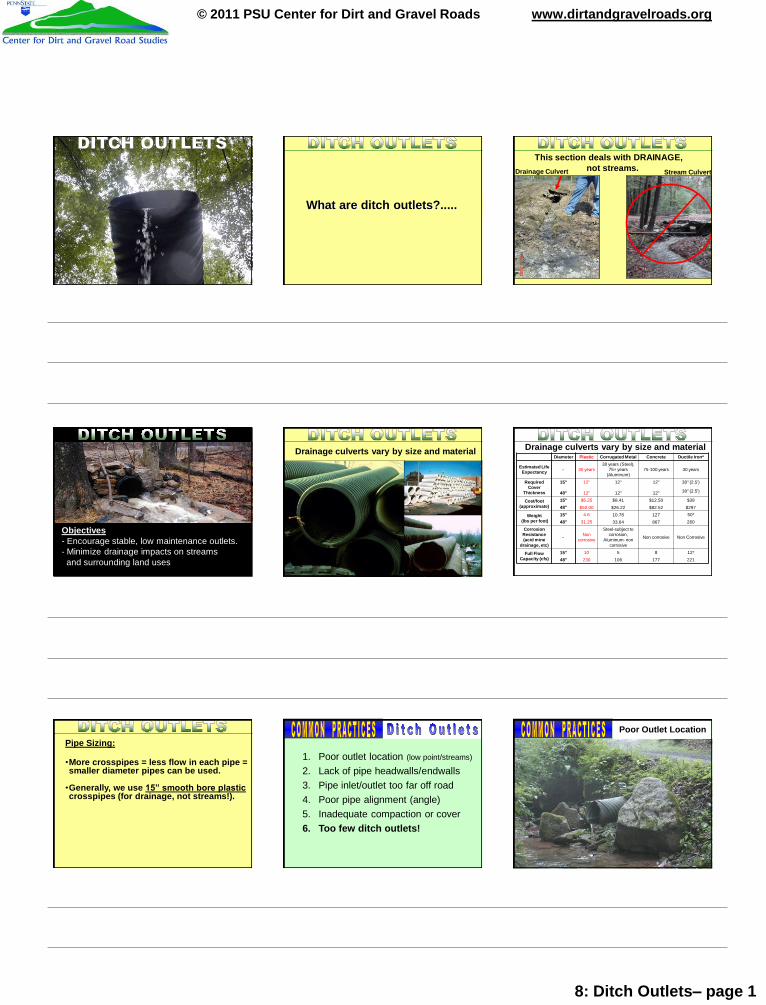
8: Ditch Outlets– page 1
© 2011 PSU Center for Dirt and Gravel Roads www.dirtandgravelroads.org
What are ditch outlets?.....
This section deals with DRAINAGE, not streams.Drainage Culvert Stream Culvert
Objectives- Encourage stable, low maintenance outlets.- Minimize drainage impacts on streams and surrounding land uses
Drainage culverts vary by size and material Drainage culverts vary by size and materialDiameter Plastic Corrugated Metal Concrete Ductile Iron*
Estimated Life Expectancy - 30 years
30 years (Steel), 75+ years
(Aluminum)75-100 years 30 years
Required Cover
Thickness
15" 12" 12" 12" 30" (2.5')
48" 12" 12" 12" 30" (2.5')
Cost/foot (approximate)
15" $6.25 $8.41 $12.50 $39 48" $50.00 $26.22 $82.52 $297
Weight(lbs per foot)
15" 4.6 10.78 127 50*48" 31.25 33.64 867 260
Corrosion Resistance(acid mine
drainage, etc)
- Non corrosive
Steel-subject to corrosion,
Aluminum- non corrosive
Non corrosive Non Corrosive
Full Flow Capacity (cfs)
15" 10 5 8 12*48" 230 106 177 221
Pipe Sizing:
•More crosspipes = less flow in each pipe = smaller diameter pipes can be used.
•Generally, we use 15” smooth bore plasticcrosspipes (for drainage, not streams!).
1. Poor outlet location (low point/streams)
2. Lack of pipe headwalls/endwalls3. Pipe inlet/outlet too far off road4. Poor pipe alignment (angle)5. Inadequate compaction or cover6. Too few ditch outlets!
Poor Outlet Location

8: Ditch Outlets– page 2
© 2011 PSU Center for Dirt and Gravel Roads www.dirtandgravelroads.org
Lack of Headwalls Pipe Inlet/Outlet too far off road Poor Pipe Alignment
Inadequate Compactionor Cover Too Few Ditch Outlets!
ESMPs
1. Selecting a Good Outlet Location2. Creating Low Maintenance Turnouts 3. Proper Pipe Alignment4. Proper Pipe Installation5. Shallow Pipe Installation6. “Through-the-Bank” Pipes7. French Mattresses
Selecting a Good Outlet Location
ROAD SURFACE
Avoid discharging pipes directly to streamDischarge into vegetated buffer when possible
DITCH
Selecting a GoodOutlet Location
DITCH
YES
YES
NO
NO
Benefits:• Keeps road out of stream• Vegetative filters provide outlet protection• In many cases, it is ILLEGAL to discharge water
directly into the stream
Considerations:• May require more and/or longer crosspipes• Landowner issues concerning outlets
Selecting a GoodOutlet Location
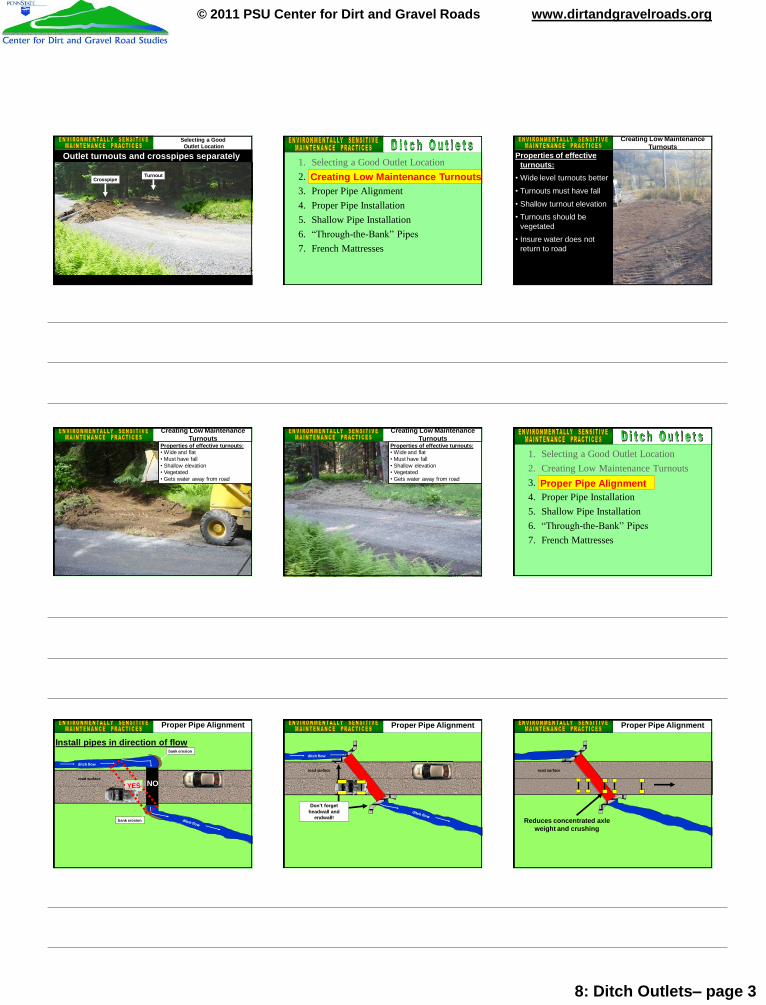
8: Ditch Outlets– page 3
© 2011 PSU Center for Dirt and Gravel Roads www.dirtandgravelroads.org
Outlet turnouts and crosspipes separately
CrosspipeTurnout
Selecting a GoodOutlet Location
ESMPs
1. Selecting a Good Outlet Location2. Creating Low Maintenance Turnouts 3. Proper Pipe Alignment4. Proper Pipe Installation5. Shallow Pipe Installation6. “Through-the-Bank” Pipes7. French Mattresses
Creating Low Maintenance Turnouts
Properties of effective turnouts:
• Wide level turnouts better
• Turnouts must have fall
• Shallow turnout elevation• Turnouts should be
vegetated• Insure water does not
return to road
Creating Low Maintenance Turnouts
Properties of effective turnouts:• Wide and flat• Must have fall • Shallow elevation• Vegetated• Gets water away from road
Creating Low Maintenance Turnouts
Properties of effective turnouts:• Wide and flat• Must have fall • Shallow elevation• Vegetated• Gets water away from road
Creating Low Maintenance Turnouts
ESMPs
1. Selecting a Good Outlet Location2. Creating Low Maintenance Turnouts 3. Proper Pipe Alignment4. Proper Pipe Installation5. Shallow Pipe Installation6. “Through-the-Bank” Pipes7. French Mattresses
Proper Pipe Alignment
Undersized Pipes
road surfaceNO
bank erosion
bank erosion
ditch flow
Proper Pipe Alignment
YES
Install pipes in direction of flow
road surface
ditch flow
Don’t forget headwall and
endwall!
Proper Pipe Alignment
road surface
Proper Pipe Alignment
Reduces concentrated axle weight and crushing
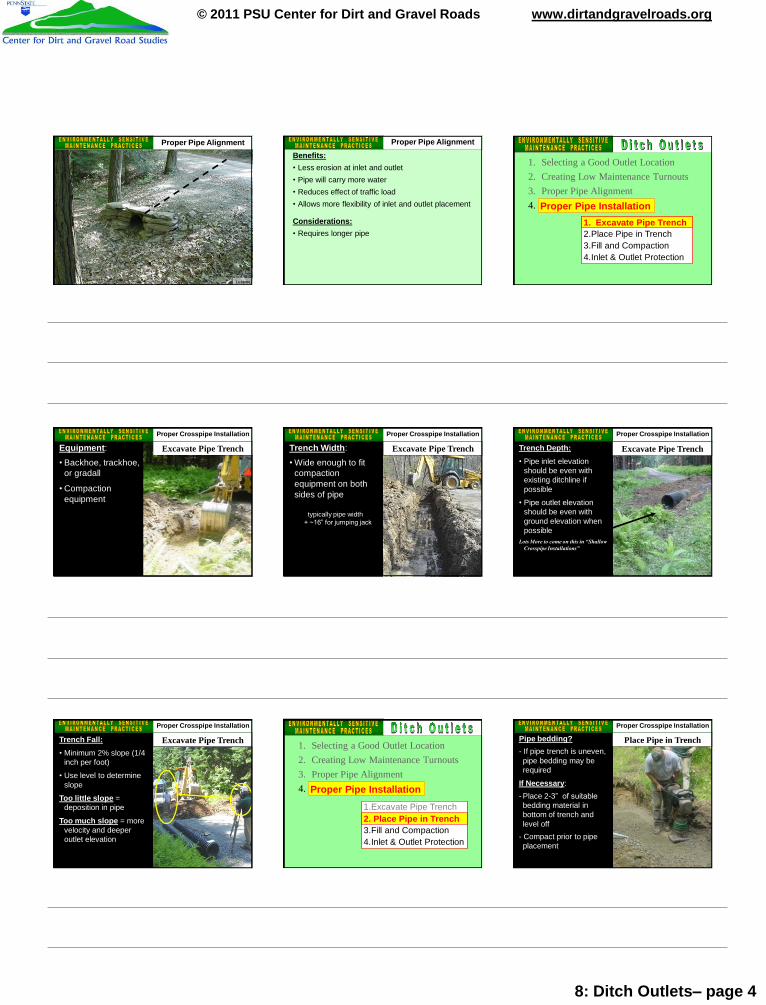
8: Ditch Outlets– page 4
© 2011 PSU Center for Dirt and Gravel Roads www.dirtandgravelroads.org
Proper Pipe Alignment
Luzerne
Benefits:• Less erosion at inlet and outlet• Pipe will carry more water• Reduces effect of traffic load• Allows more flexibility of inlet and outlet placement
Considerations:• Requires longer pipe
Proper Pipe Alignment ESMPs
1. Selecting a Good Outlet Location2. Creating Low Maintenance Turnouts 3. Proper Pipe Alignment4. Proper Pipe InstallationProper Pipe Installation
1.Excavate Pipe Trench2.Place Pipe in Trench3.Fill and Compaction4.Inlet & Outlet Protection
1. Excavate Pipe Trench
Excavate Pipe TrenchEquipment:• Backhoe, trackhoe,
or gradall
• Compaction equipment
Proper Crosspipe Installation
Trench Width:
• Wide enough to fit compaction equipment on both sides of pipe
typically pipe width + ~16” for jumping jack
Excavate Pipe Trench
Proper Crosspipe Installation
Excavate Pipe TrenchTrench Depth:• Pipe inlet elevation
should be even with existing ditchline if possible
• Pipe outlet elevation should be even with ground elevation when possible
Lots More to come on this in “Shallow Crosspipe Installations”
Proper Crosspipe Installation
Excavate Pipe TrenchTrench Fall:• Minimum 2% slope (1/4
inch per foot)
• Use level to determine slope
Too little slope = deposition in pipe
Too much slope = more velocity and deeper outlet elevation
Proper Crosspipe Installation ESMPs
1. Selecting a Good Outlet Location2. Creating Low Maintenance Turnouts 3. Proper Pipe Alignment4. Proper Pipe InstallationProper Pipe Installation
1.Excavate Pipe Trench2.Place Pipe in Trench3.Fill and Compaction4.Inlet & Outlet Protection
2. Place Pipe in Trench
Place Pipe in TrenchPipe bedding?- If pipe trench is uneven, pipe bedding may be required
If Necessary:- Place 2-3” of suitable bedding material in bottom of trench and level off
- Compact prior to pipe placement
Proper Crosspipe Installation

8: Ditch Outlets– page 5
© 2011 PSU Center for Dirt and Gravel Roads www.dirtandgravelroads.org
Place Pipe in TrenchPlacement:Inlet should be located in existing ditch line:
- Too close to road makes a traffic hazard
- Too far off road makes it difficult for water to enter and causes bank erosion
Proper Crosspipe Installation
Place Pipe in TrenchPlacement:• Place pipe sections in trench
• Join together with glue or collars
• Check for proper fall
• Check for uniform pipe support.
• Fill any gaps under pipe with additional bedding
Proper Crosspipe Installation ESMPs
1. Selecting a Good Outlet Location2. Creating Low Maintenance Turnouts 3. Proper Pipe Alignment4. Proper Pipe InstallationProper Pipe Installation
1.Excavate Pipe Trench2.Place Pipe in Trench3.Fill and Compaction4.Inlet & Outlet Protection3. Fill and Compaction
Fill and Compaction
Pipe Fill: Material used to fill and compact trench around a pipe.
Proper Crosspipe Installation
Ideal Material:- Use excavated material
when possible- If excavated material is
too course, fill material should be imported
- Typical fill materials include bankrun gravel, shale, and 2RC
Fill and CompactionProper Crosspipe Installation
Fill and CompactionFill:
• While holding pipe in place, add 8-12” of pipe fill on each side of pipe
• Place by machine, spread by hand
Proper Crosspipe Installation
Fill and CompactionCompaction:
Typically done using a “Jumping Jack”
Jumping Jack: (tamper, whacker) device that uses a rapidly vibrating foot to compact soil.
Proper Crosspipe Installation
Compaction:
Sometimes done using a “Vibratory Plate”
Vibratory Plate: LARGEdevice that uses a rapidly vibrating foot to compact soil.
Fill and CompactionProper Crosspipe Installation
Fill and CompactionCompact:Compaction of first lift is crucial to support bottom of pipe!
uncompacted compacted
pipe
Proper Crosspipe Installation
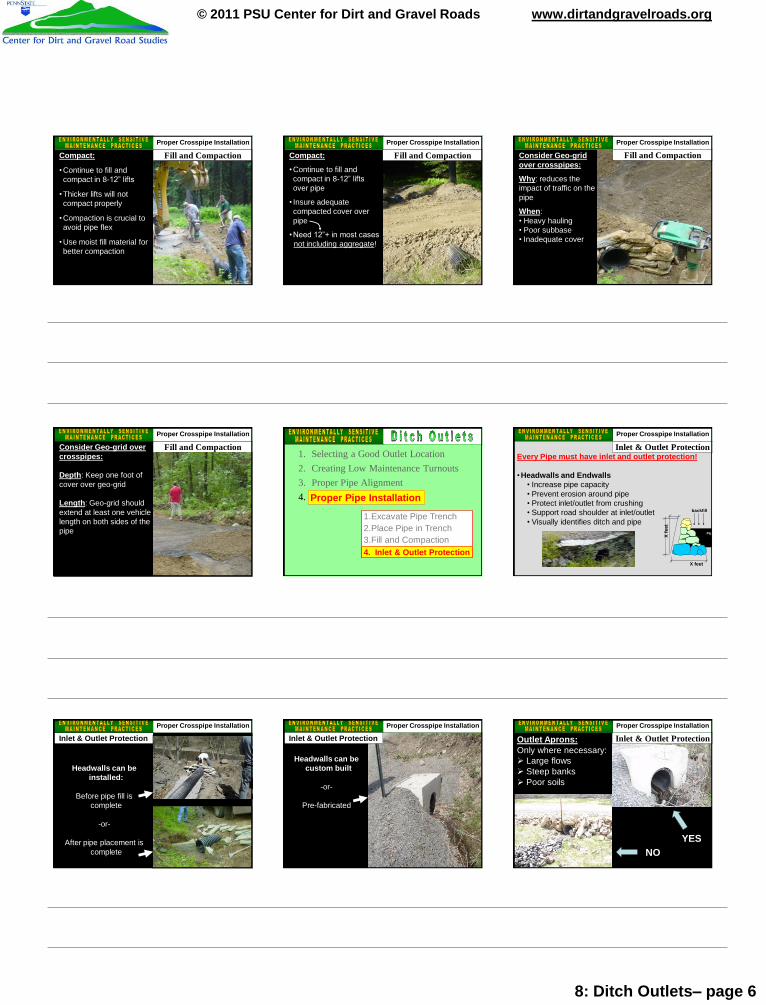
8: Ditch Outlets– page 6
© 2011 PSU Center for Dirt and Gravel Roads www.dirtandgravelroads.org
Fill and CompactionCompact:
• Continue to fill and compact in 8-12” lifts
• Thicker lifts will not compact properly
• Compaction is crucial to avoid pipe flex
• Use moist fill material for better compaction
Proper Crosspipe Installation
Fill and CompactionCompact:
• Continue to fill and compact in 8-12” lifts over pipe
• Insure adequate compacted cover over pipe
• Need 12”+ in most casesnot including aggregate!
Proper Crosspipe Installation
Fill and CompactionConsider Geo-grid over crosspipes:
Why: reduces the impact of traffic on the pipe
When: • Heavy hauling• Poor subbase• Inadequate cover
Proper Crosspipe Installation
Fill and CompactionConsider Geo-grid over crosspipes:
Depth: Keep one foot of cover over geo-grid
Length: Geo-grid should extend at least one vehicle length on both sides of the pipe
Proper Crosspipe Installation ESMPs
1. Selecting a Good Outlet Location2. Creating Low Maintenance Turnouts 3. Proper Pipe Alignment4. Proper Pipe InstallationProper Pipe Installation
1.Excavate Pipe Trench2.Place Pipe in Trench3.Fill and Compaction4.Inlet & Outlet Protection4. Inlet & Outlet Protection
Inlet & Outlet ProtectionEvery Pipe must have inlet and outlet protection!
• Headwalls and Endwalls• Increase pipe capacity• Prevent erosion around pipe• Protect inlet/outlet from crushing • Support road shoulder at inlet/outlet• Visually identifies ditch and pipe
Pipe
backfill
X fe
et
X feet
Proper Crosspipe Installation
Inlet & Outlet Protection
Headwalls can be installed:
Before pipe fill is complete
-or-
After pipe placement is complete
Proper Crosspipe Installation
Headwalls can be custom built
-or-
Pre-fabricated
Proper Crosspipe Installation
Inlet & Outlet Protection Inlet & Outlet ProtectionOutlet Aprons:Only where necessary: Large flows Steep banks Poor soils
Proper Crosspipe Installation
YESNO
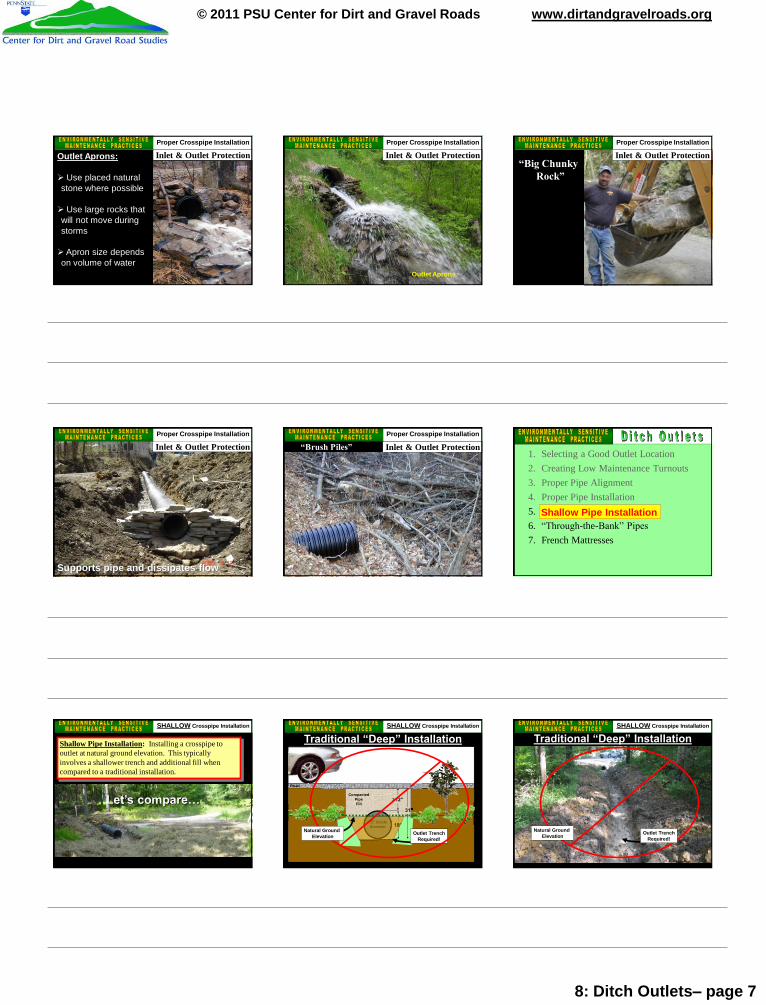
8: Ditch Outlets– page 7
© 2011 PSU Center for Dirt and Gravel Roads www.dirtandgravelroads.org
Inlet & Outlet ProtectionOutlet Aprons:
Use placed natural stone where possible
Use large rocks that will not move during storms
Apron size depends on volume of water
Proper Crosspipe Installation
Inlet & Outlet ProtectionProper Crosspipe Installation
Outlet Aprons
“Big Chunky Rock”
Inlet & Outlet ProtectionProper Crosspipe Installation
Inlet & Outlet ProtectionProper Crosspipe Installation
Supports pipe and dissipates flow
“Brush Piles” Inlet & Outlet ProtectionProper Crosspipe Installation ESMPs
1. Selecting a Good Outlet Location2. Creating Low Maintenance Turnouts 3. Proper Pipe Alignment4. Proper Pipe Installation5. Shallow Pipe Installation6. “Through-the-Bank” Pipes7. French Mattresses
Shallow Pipe Installation
Shallow Pipe Installation: Installing a crosspipe to outlet at natural ground elevation. This typically involves a shallower trench and additional fill when compared to a traditional installation.
Let’s compare…
SHALLOW Crosspipe Installation
Traditional “Deep” Installation
Road
31”
>12”
31”
CompactedPipeFill
31”31”31”31”31”
19”15” inside diameter 19”
15” inside diameter
Outlet TrenchRequired!
Natural Ground Elevation
SHALLOW Crosspipe Installation
Traditional “Deep” Installation
Natural Ground Elevation Outlet Trench
Required!
SHALLOW Crosspipe Installation
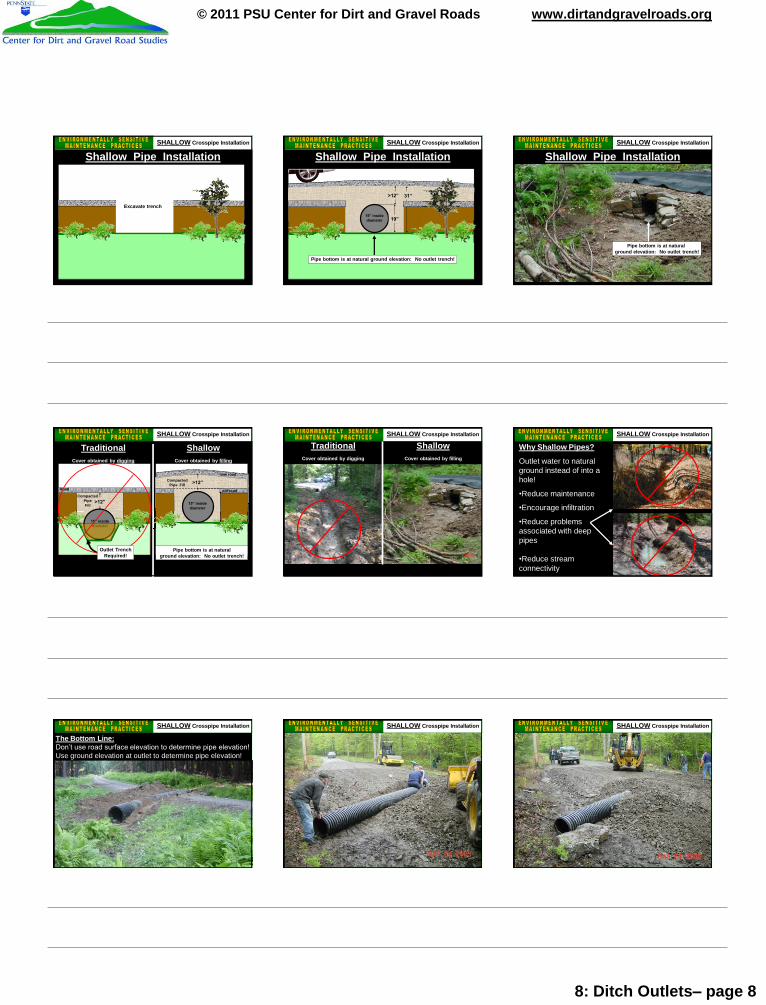
8: Ditch Outlets– page 8
© 2011 PSU Center for Dirt and Gravel Roads www.dirtandgravelroads.org
Shallow Pipe InstallationSHALLOW Crosspipe Installation
Excavate trench
Shallow Pipe InstallationSHALLOW Crosspipe Installation
CompactedPipeFill 31”>12”
Pipe bottom is at natural ground elevation: No outlet trench!
19”15” inside diameter
Pipe bottom is at natural ground elevation: No outlet trench!
Shallow Pipe InstallationSHALLOW Crosspipe Installation
>12”Compacted
PipeFill
31”
>12”CompactedPipe Fill
Road
Roadbed
old road
Roadbed
TraditionalCover obtained by digging Cover obtained by filling
Shallow
15” inside diameter
15” inside diameterdiameter
new road
Pipe bottom is at natural ground elevation: No outlet trench!
Outlet TrenchRequired!
SHALLOW Crosspipe Installation
TraditionalCover obtained by digging Cover obtained by filling
ShallowSHALLOW Crosspipe Installation
Why Shallow Pipes?
Outlet water to natural ground instead of into a hole!
•Reduce maintenance
•Encourage infiltration
•Reduce problems associated with deep pipes
•Reduce stream connectivity
SHALLOW Crosspipe Installation
The Bottom Line:Don’t use road surface elevation to determine pipe elevation!Use ground elevation at outlet to determine pipe elevation!
SHALLOW Crosspipe Installation SHALLOW Crosspipe Installation SHALLOW Crosspipe Installation
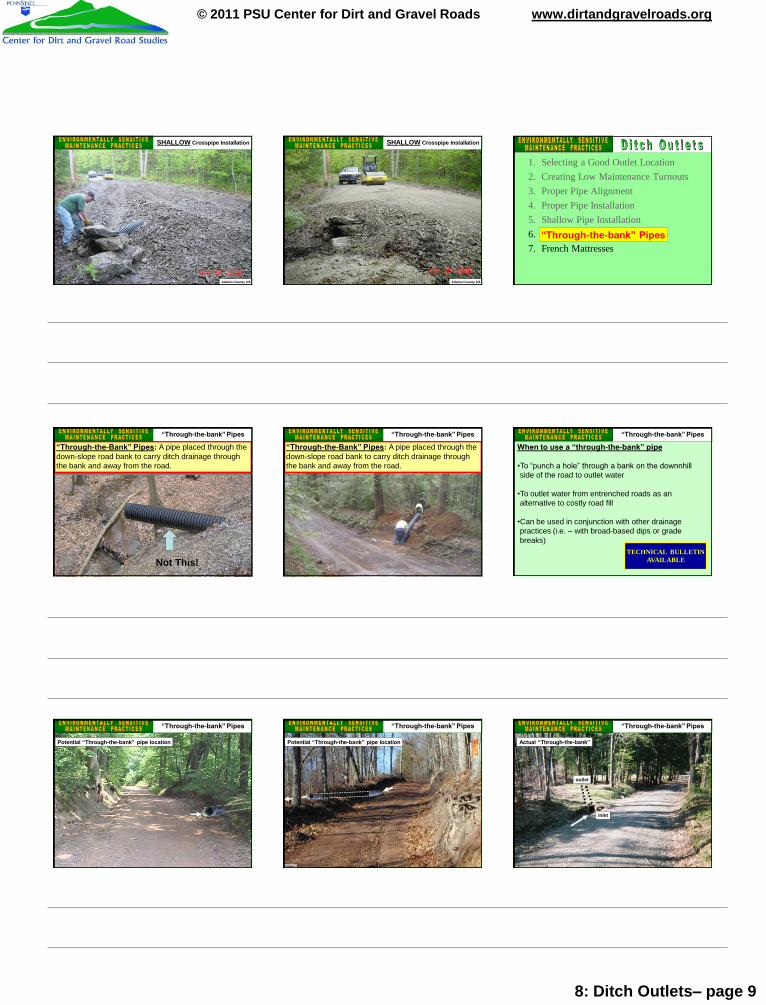
8: Ditch Outlets– page 9
© 2011 PSU Center for Dirt and Gravel Roads www.dirtandgravelroads.org
Adams County 3/4
SHALLOW Crosspipe Installation
Adams County 4/4
SHALLOW Crosspipe Installation ESMPs
1. Selecting a Good Outlet Location2. Creating Low Maintenance Turnouts 3. Proper Pipe Alignment4. Proper Pipe Installation5. Shallow Pipe Installation6. “Through-the-Bank” Pipes7. French Mattresses
“Through-the-bank” Pipes
Actual “Through-the-bank”VenangoVenangoVenangoVenango
“Through-the-Bank” Pipes: A pipe placed through the down-slope road bank to carry ditch drainage through the bank and away from the road.
“Through-the-bank” Pipes
Not This!
Actual “Through-the-bank”VenangoVenangoVenangoVenango
“Through-the-Bank” Pipes: A pipe placed through the down-slope road bank to carry ditch drainage through the bank and away from the road.
“Through-the-bank” Pipes
When to use a “through-the-bank” pipe
•To “punch a hole” through a bank on the downnhill side of the road to outlet water
•To outlet water from entrenched roads as an alternative to costly road fill
•Can be used in conjunction with other drainage practices (i.e. – with broad-based dips or grade breaks)
TECHNICAL BULLETINAVAILABLE
“Through-the-bank” Pipes
Potential “Through-the-bank” pipe location
“Through-the-bank” Pipes
Centre
Potential “Through-the-bank” pipe location
“Through-the-bank” Pipes
Actual “Through-the-bank”
inlet
outlet
“Through-the-bank” Pipes
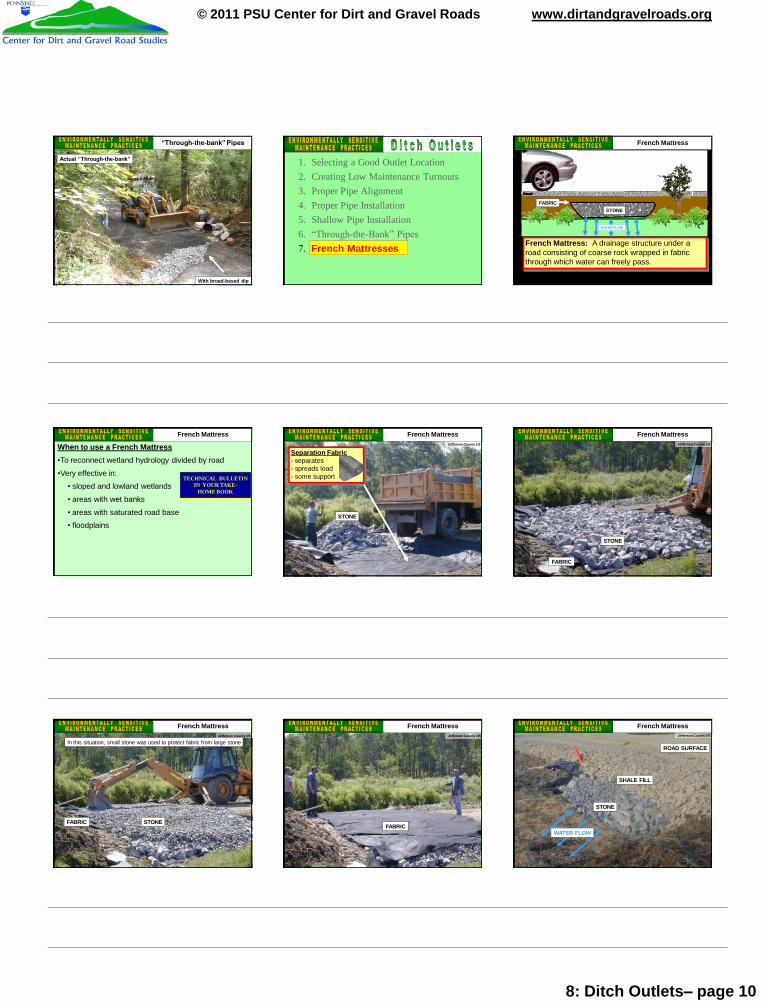
8: Ditch Outlets– page 10
© 2011 PSU Center for Dirt and Gravel Roads www.dirtandgravelroads.org
Actual “Through-the-bank”
“Through-the-bank” Pipes
With broad-based dip
ESMPs
1. Selecting a Good Outlet Location2. Creating Low Maintenance Turnouts 3. Proper Pipe Alignment4. Proper Pipe Installation5. Shallow Pipe Installation6. “Through-the-Bank” Pipes7. French MattressesFrench Mattresses French Mattress: A drainage structure under a
road consisting of coarse rock wrapped in fabric through which water can freely pass.
RoadRoad
STONEFABRIC
WATER FLOW
French Mattress
When to use a French Mattress•To reconnect wetland hydrology divided by road
•Very effective in:• sloped and lowland wetlands
• areas with wet banks
• areas with saturated road base• floodplains
TECHNICAL BULLETININ YOUR TAKE-
HOME BOOK
French MattressJefferson County 1/5
STONE
French Mattress
Separation Fabric- separates- spreads load- some support
Separation Fabric
FABRIC
Jefferson County 2/5
STONE
French Mattress
Jefferson County 3/5
STONE
In this situation, small stone was used to protect fabric from large stone
FABRIC
French MattressJefferson County 4/5
FABRIC
French Mattress
ROAD SURFACE
Jefferson County 5/5
STONE
SHALE FILL
WATER FLOW
French Mattress
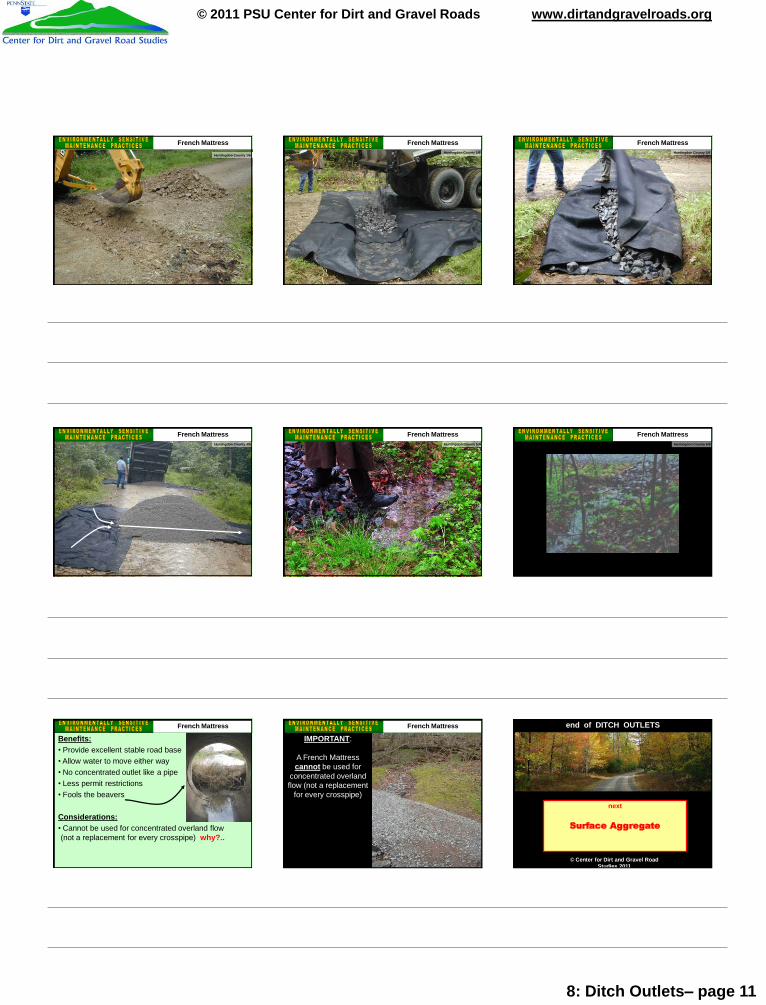
8: Ditch Outlets– page 11
© 2011 PSU Center for Dirt and Gravel Roads www.dirtandgravelroads.org
Huntingdon County 1/6
French MattressHuntingdon County 2/6
French MattressHuntingdon County 3/6
French Mattress
Huntingdon County 4/6
French MattressHuntingdon County 5/6
French MattressHuntingdon County 6/6
French Mattress
Benefits:• Provide excellent stable road base• Allow water to move either way• No concentrated outlet like a pipe• Less permit restrictions• Fools the beavers
Considerations:• Cannot be used for concentrated overland flow (not a replacement for every crosspipe) why?..
French Mattress
IMPORTANT:
A French Mattresscannot be used for
concentrated overland flow (not a replacement
for every crosspipe)
French Mattress end of DITCH OUTLETS
© Center for Dirt and Gravel Road Studies 2011
next
Surface Aggregate
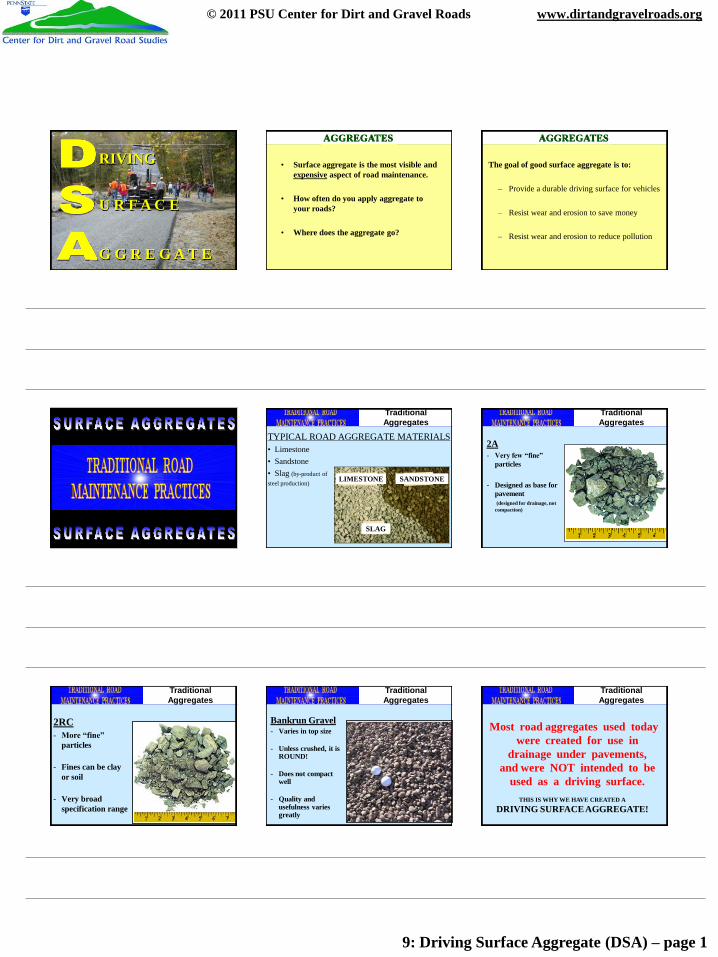
9: Driving Surface Aggregate (DSA) – page 1
© 2011 PSU Center for Dirt and Gravel Roads www.dirtandgravelroads.org
RIVING
U R F A C E
G G R E G A T E
• Surface aggregate is the most visible and expensive aspect of road maintenance.
• How often do you apply aggregate to your roads?
• Where does the aggregate go?
AGGREGATES
The goal of good surface aggregate is to:
– Provide a durable driving surface for vehicles
– Resist wear and erosion to save money
– Resist wear and erosion to reduce pollution
AGGREGATES
TYPICAL ROAD AGGREGATE MATERIALS• Limestone• Sandstone• Slag (by-product of steel production)
TraditionalAggregates
LIMESTONE
SLAG
SANDSTONE
2A- Very few “fine”
particles
- Designed as base for pavement(designed for drainage, not
compaction)
TraditionalAggregates
2RC- More “fine”
particles
- Fines can be clay or soil
- Very broad specification range
TraditionalAggregates
Bankrun Gravel- Varies in top size
- Unless crushed, it is ROUND!
- Does not compact well
- Quality and usefulness varies greatly
TraditionalAggregates
Most road aggregates used today were created for use in
drainage under pavements, and were NOT intended to be
used as a driving surface.THIS IS WHY WE HAVE CREATED A
DRIVING SURFACE AGGREGATE!
TraditionalAggregates
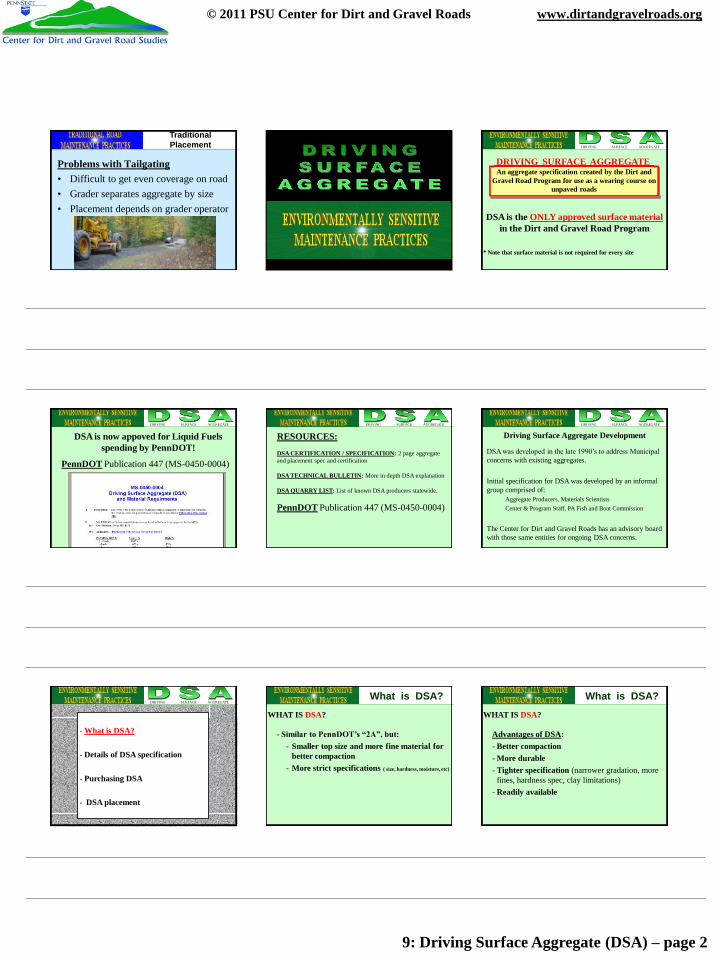
9: Driving Surface Aggregate (DSA) – page 2
© 2011 PSU Center for Dirt and Gravel Roads www.dirtandgravelroads.org
Problems with Tailgating• Difficult to get even coverage on road• Grader separates aggregate by size• Placement depends on grader operator
TraditionalPlacement DRIVING SURFACE AGGREGATE
DSA is the ONLY approved surface materialin the Dirt and Gravel Road Program
* Note that surface material is not required for every site
An aggregate specification created by the Dirt and Gravel Road Program for use as a wearing course on
unpaved roads
DRIVING SURFACE AGGREGATE
DRIVING SURFACE AGGREGATE
DSA is now appoved for Liquid Fuels spending by PennDOT!
PennDOT Publication 447 (MS-0450-0004)
DRIVING SURFACE AGGREGATE
RESOURCES:
DSA CERTIFICATION / SPECIFICATION: 2 page aggregate and placement spec and certification
DSA TECHNICAL BULLETIN: More in depth DSA explanation
DSA QUARRY LIST: List of known DSA producers statewide.
PennDOT Publication 447 (MS-0450-0004)
DRIVING SURFACE AGGREGATE
Driving Surface Aggregate Development
DSA was developed in the late 1990’s to address Municipal concerns with existing aggregates.
Initial specification for DSA was developed by an informal group comprised of:
Aggregate Producers, Materials ScientistsCenter & Program Staff, PA Fish and Boat Commission
The Center for Dirt and Gravel Roads has an advisory board with those same entities for ongoing DSA concerns.
DRIVING SURFACE AGGREGATE
- What is DSA?
- Details of DSA specification
- Purchasing DSA
- DSA placement
What is DSA?WHAT IS DSA?
- Similar to PennDOT’s “2A”, but:- Smaller top size and more fine material for
better compaction- More strict specifications ( size, hardness, moisture, etc)
WHAT IS DSA?
Advantages of DSA:- Better compaction- More durable- Tighter specification (narrower gradation, more
fines, hardness spec, clay limitations)- Readily available
What is DSA?
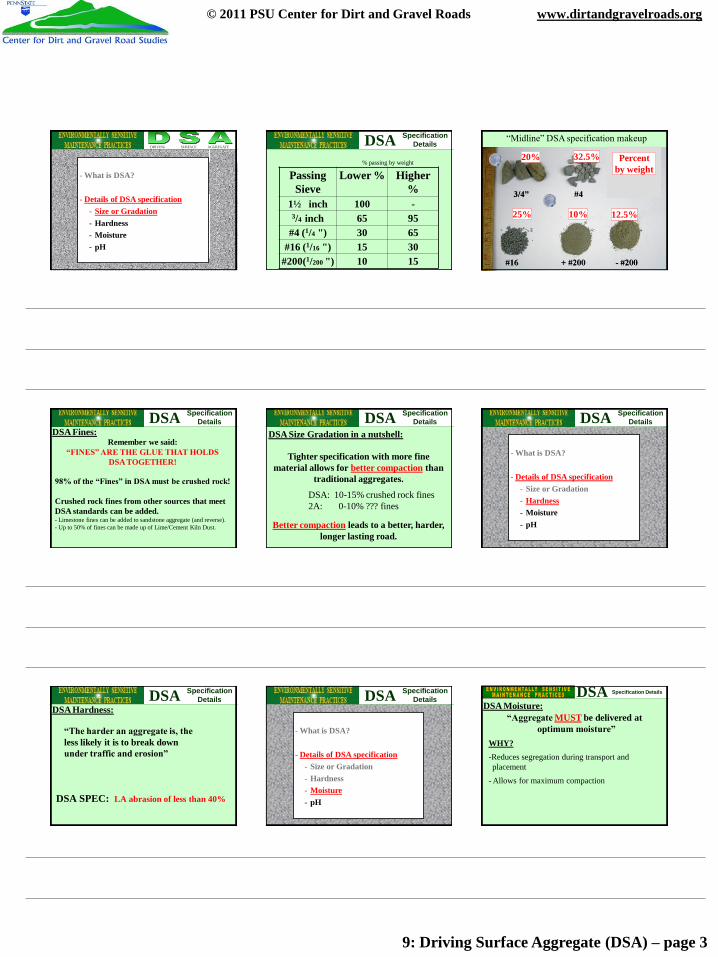
9: Driving Surface Aggregate (DSA) – page 3
© 2011 PSU Center for Dirt and Gravel Roads www.dirtandgravelroads.org
DRIVING SURFACE AGGREGATE
- What is DSA?
- Details of DSA specification- Size or Gradation- Hardness- Moisture- pH
Passing Sieve
Lower % Higher %
1½ inch 100 -3/4 inch 65 95
#4 (1/4 ") 30 65#16 (1/16 ") 15 30
#200(1/200 ") 10 15
% passing by weight
SpecificationDetailsDSA
20%
12.5%25% 10%
32.5%
“Midline” DSA specification makeup
Percent by weight
DSA Fines:Remember we said:
“FINES” ARE THE GLUE THAT HOLDS DSA TOGETHER!
98% of the “Fines” in DSA must be crushed rock!
Crushed rock fines from other sources that meet DSA standards can be added.- Limestone fines can be added to sandstone aggregate (and reverse).- Up to 50% of fines can be made up of Lime/Cement Kiln Dust.
SpecificationDetailsDSA
Tighter specification with more fine material allows for better compaction than
traditional aggregates.
DSA: 10-15% crushed rock fines2A: 0-10% ??? fines
Better compaction leads to a better, harder, longer lasting road.
DSA Size Gradation in a nutshell:
SpecificationDetailsDSA
- What is DSA?
- Details of DSA specification- Size or Gradation- Hardness- Moisture- pH
SpecificationDetailsDSA
DSA SPEC: LA abrasion of less than 40%
“The harder an aggregate is, the less likely it is to break down under traffic and erosion”
DSA Hardness:
SpecificationDetailsDSA
- What is DSA?
- Details of DSA specification- Size or Gradation- Hardness- Moisture- pH
SpecificationDetailsDSA
“Aggregate MUST be delivered at optimum moisture”
WHY?-Reduces segregation during transport and placement
- Allows for maximum compaction
DSA Moisture:Specification DetailsDSA
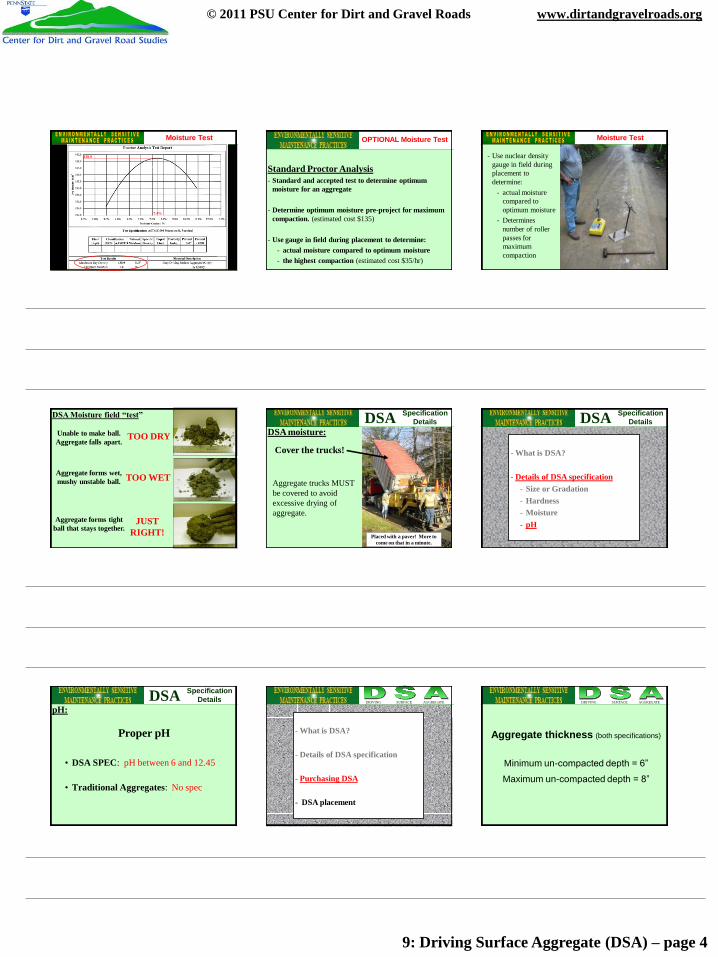
9: Driving Surface Aggregate (DSA) – page 4
© 2011 PSU Center for Dirt and Gravel Roads www.dirtandgravelroads.org
Moisture Test
7.4%
138.9
Standard Proctor Analysis- Standard and accepted test to determine optimum
moisture for an aggregate
- Determine optimum moisture pre-project for maximum compaction. (estimated cost $135)
- Use gauge in field during placement to determine:- actual moisture compared to optimum moisture- the highest compaction (estimated cost $35/hr)
OPTIONAL Moisture Test
- Use nuclear density gauge in field during placement to determine:
- actual moisture compared to optimum moisture
- Determines number of roller passes for maximum compaction
Moisture Test
DSA Moisture field “test”
TOO DRYUnable to make ball. Aggregate falls apart.
JUST RIGHT!
Aggregate forms tight ball that stays together.
TOO WETAggregate forms wet, mushy unstable ball.
Cover the trucks!
DSA moisture:
Aggregate trucks MUST be covered to avoid excessive drying of aggregate.
Placed with a paver! More to come on that in a minute.
SpecificationDetailsDSA
- What is DSA?
- Details of DSA specification- Size or Gradation- Hardness- Moisture- pH
SpecificationDetailsDSA
Proper pH
pH:
• DSA SPEC: pH between 6 and 12.45
• Traditional Aggregates: No spec
SpecificationDetailsDSA
DRIVING SURFACE AGGREGATE
- What is DSA?
- Details of DSA specification
- Purchasing DSA
- DSA placement
DRIVING SURFACE AGGREGATE
Aggregate thickness (both specifications)
Minimum un-compacted depth = 6”
Maximum un-compacted depth = 8”
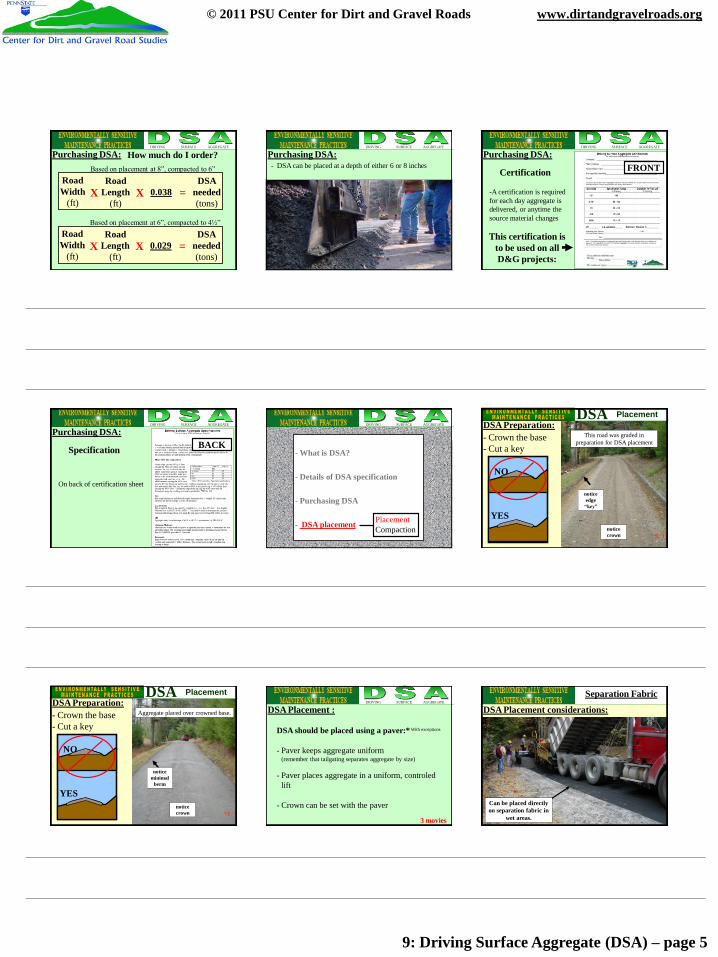
9: Driving Surface Aggregate (DSA) – page 5
© 2011 PSU Center for Dirt and Gravel Roads www.dirtandgravelroads.org
How much do I order?DRIVING SURFACE AGGREGATE
Purchasing DSA:
Road Width
(ft)
Road Length
(ft)0.038
DSA needed(tons)
X X =
Based on placement at 8”, compacted to 6”
Road Width
(ft)
Road Length
(ft)0.029
DSA needed(tons)
X X =
Based on placement at 6”, compacted to 4½”
DRIVING SURFACE AGGREGATE
Purchasing DSA:- DSA can be placed at a depth of either 6 or 8 inches
Certification
DRIVING SURFACE AGGREGATE
Purchasing DSA:
-A certification is required for each day aggregate is delivered, or anytime the source material changes
FRONT
This certification is to be used on all D&G projects:
Specification
DRIVING SURFACE AGGREGATE
Purchasing DSA:
On back of certification sheet
BACK
DRIVING SURFACE AGGREGATE
- What is DSA?
- Details of DSA specification
- Purchasing DSA
- DSA placement PlacementCompaction
- Crown the base- Cut a key
DSA Preparation:This road was graded in
preparation for DSA placement
noticecrown
notice edge “key”
SUB-SOILROADWAY
ROADWAY
NO
YES
PlacementDSA
Aggregate placed over crowned base.
noticecrown
notice minimal
berm
PlacementDSA- Crown the base- Cut a key
DSA Preparation:
SUB-SOILROADWAY
ROADWAY
NO
YES
DRIVING SURFACE AGGREGATE
DSA Placement :
DSA should be placed using a paver:*
- Paver keeps aggregate uniform (remember that tailgating separates aggregate by size)
- Paver places aggregate in a uniform, controled lift
- Crown can be set with the paver
With exceptions
3 movies
DSA Placement considerations:
Can be placed directly on separation fabric in
wet areas.
Separation Fabric
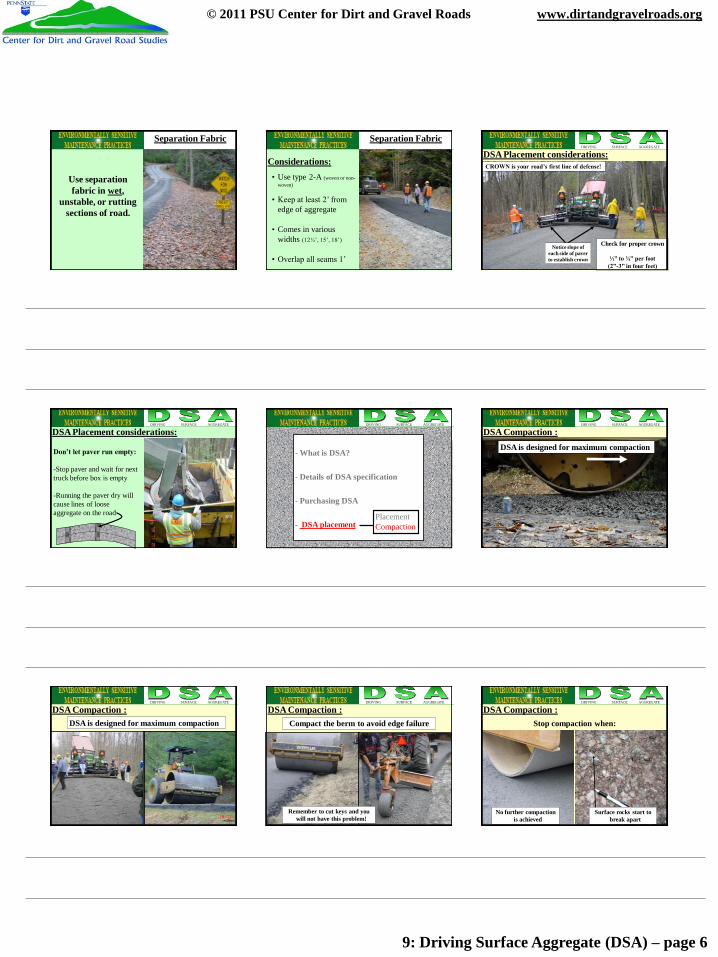
9: Driving Surface Aggregate (DSA) – page 6
© 2011 PSU Center for Dirt and Gravel Roads www.dirtandgravelroads.org
Separation Fabric
Use separation fabric in wet,
unstable, or rutting sections of road.
Considerations:• Use type 2-A (woven or non-
woven)
• Keep at least 2’ from edge of aggregate
• Comes in various widths (12½’, 15’, 18’)
• Overlap all seams 1’
Separation FabricDRIVING SURFACE AGGREGATE
DSA Placement considerations:
Check for proper crown
½” to ¾” per foot (2”-3” in four feet)
Notice slope of each side of paver to establish crown
CROWN is your road’s first line of defense!
DRIVING SURFACE AGGREGATE
DSA Placement considerations:
Don’t let paver run empty:
-Stop paver and wait for next truck before box is empty
-Running the paver dry will cause lines of loose aggregate on the road
DRIVING SURFACE AGGREGATE
- What is DSA?
- Details of DSA specification
- Purchasing DSA
- DSA placement PlacementCompaction
DRIVING SURFACE AGGREGATE
DSA Compaction :DSA is designed for maximum compaction
DRIVING SURFACE AGGREGATE
DSA Compaction :DSA is designed for maximum compaction
DRIVING SURFACE AGGREGATE
DSA Compaction :Compact the berm to avoid edge failure
Remember to cut keys and you will not have this problem!
DRIVING SURFACE AGGREGATE
DSA Compaction :Stop compaction when:
No further compaction is achieved
Surface rocks start to break apart
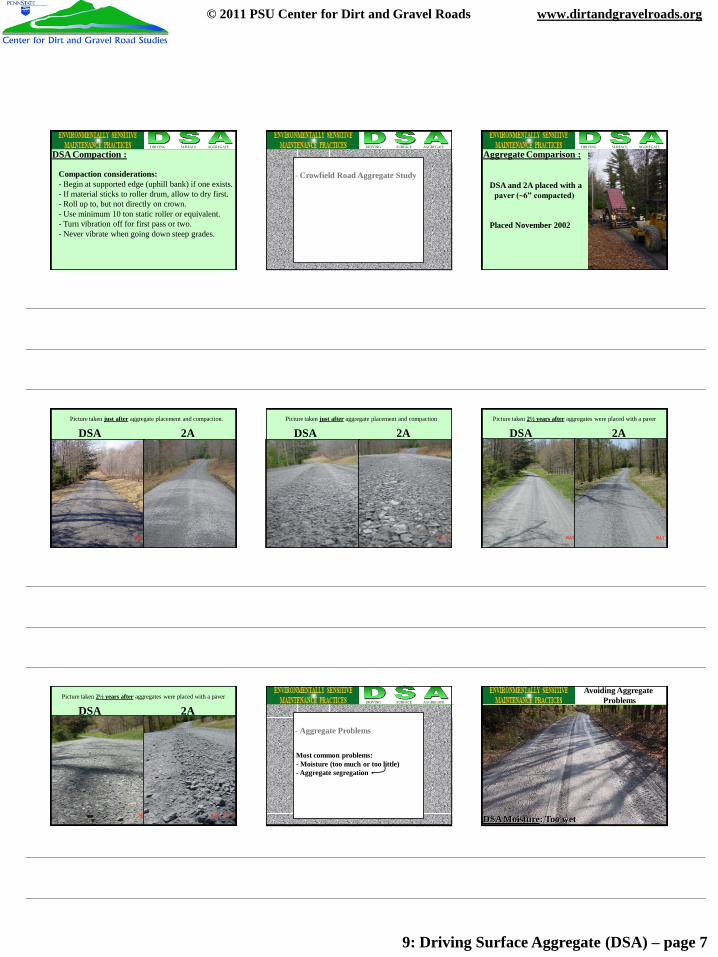
9: Driving Surface Aggregate (DSA) – page 7
© 2011 PSU Center for Dirt and Gravel Roads www.dirtandgravelroads.org
DRIVING SURFACE AGGREGATE
DSA Compaction :
Compaction considerations:- Begin at supported edge (uphill bank) if one exists.- If material sticks to roller drum, allow to dry first.- Roll up to, but not directly on crown.- Use minimum 10 ton static roller or equivalent.- Turn vibration off for first pass or two.- Never vibrate when going down steep grades.
DRIVING SURFACE AGGREGATE
- Crowfield Road Aggregate Study
DRIVING SURFACE AGGREGATE
Aggregate Comparison :
DSA and 2A placed with a paver (~6” compacted)
Placed November 2002
DSA 2APicture taken just after aggregate placement and compaction.
DSA 2APicture taken just after aggregate placement and compaction
DSA 2APicture taken 2½ years after aggregates were placed with a paver
DSA 2APicture taken 2½ years after aggregates were placed with a paver
DRIVING SURFACE AGGREGATE
- Aggregate Problems
Most common problems:- Moisture (too much or too little)- Aggregate segregation
DSA Moisture: Too wet
Avoiding Aggregate Problems
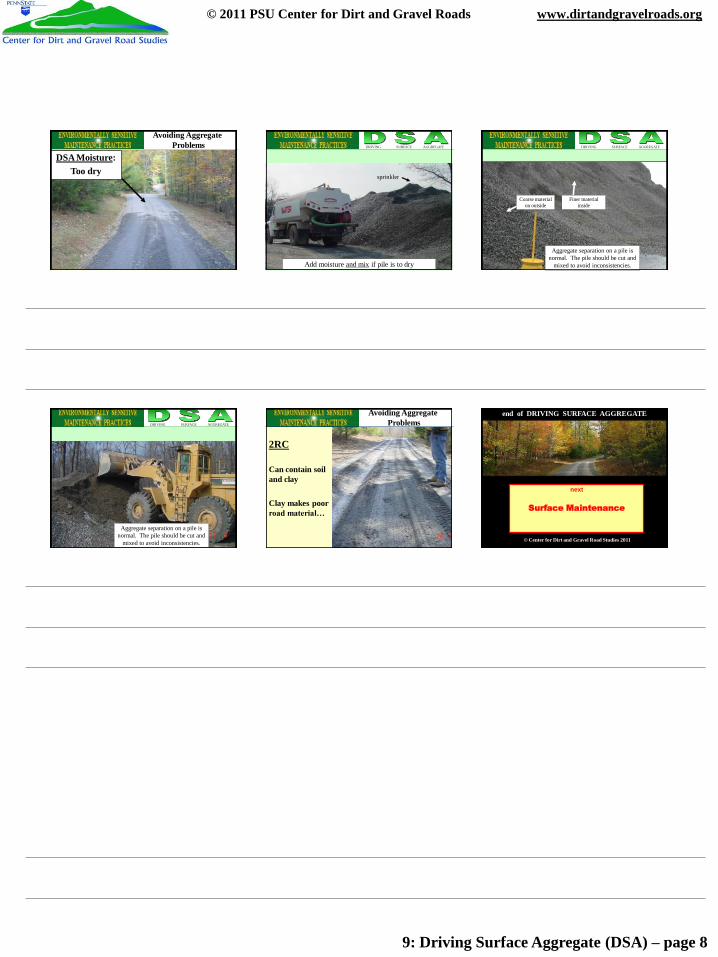
9: Driving Surface Aggregate (DSA) – page 8
© 2011 PSU Center for Dirt and Gravel Roads www.dirtandgravelroads.org
Avoiding Aggregate Problems
DSA Moisture:Too dry
DRIVING SURFACE AGGREGATE
Add moisture and mix if pile is to dry
sprinkler
DRIVING SURFACE AGGREGATE
Aggregate separation on a pile is normal. The pile should be cut and
mixed to avoid inconsistencies.
Coarse material on outside
Finer material inside
DRIVING SURFACE AGGREGATE
Aggregate separation on a pile is normal. The pile should be cut and
mixed to avoid inconsistencies.
Avoiding Aggregate Problems
2RC
Can contain soil and clay
Clay makes poor road material…
end of DRIVING SURFACE AGGREGATE
© Center for Dirt and Gravel Road Studies 2011
next
Surface Maintenance
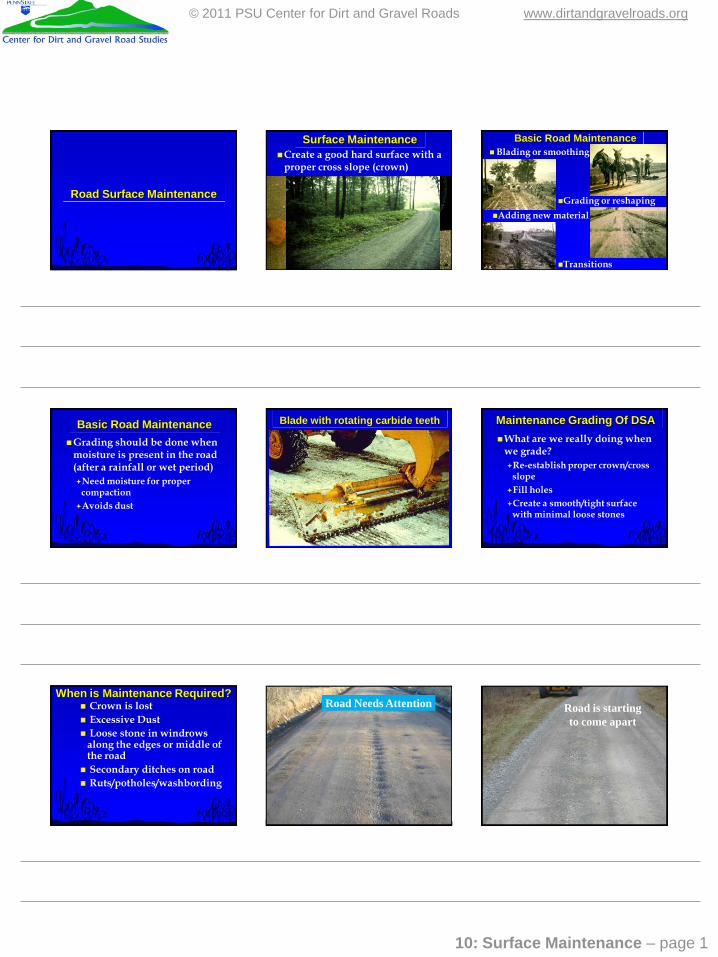
10: Surface Maintenance – page 1
© 2011 PSU Center for Dirt and Gravel Roads www.dirtandgravelroads.org
1
Road Surface Maintenance
Surface MaintenanceCreate a good hard surface with a
proper cross slope (crown)
Basic Road MaintenanceBlading or smoothing
Grading or reshapingAdding new material
Transitions
4
Basic Road MaintenanceGrading should be done when
moisture is present in the road (after a rainfall or wet period)Need moisture for proper
compactionAvoids dust
Blade with rotating carbide teeth66
Maintenance Grading Of DSAWhat are we really doing when
we grade?Re-establish proper crown/cross
slopeFill holesCreate a smooth/tight surface
with minimal loose stones
77When is Maintenance Required? Crown is lost Excessive Dust Loose stone in windrows
along the edges or middle of the road
Secondary ditches on road Ruts/potholes/washbording
8
Road Needs Attention9
Road is starting to come apart
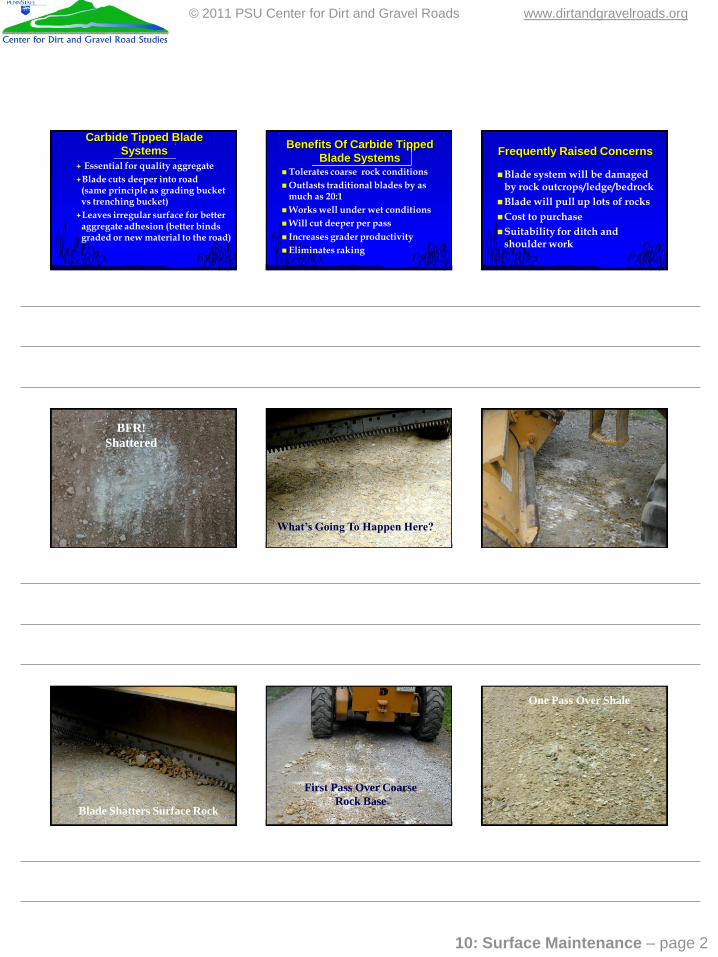
10: Surface Maintenance – page 2
© 2011 PSU Center for Dirt and Gravel Roads www.dirtandgravelroads.org
10Carbide Tipped Blade Systems
Essential for quality aggregateBlade cuts deeper into road
(same principle as grading bucket vs trenching bucket)Leaves irregular surface for better
aggregate adhesion (better binds graded or new material to the road)
1111
Benefits Of Carbide Tipped Blade Systems
Tolerates coarse rock conditionsOutlasts traditional blades by as
much as 20:1Works well under wet conditionsWill cut deeper per pass Increases grader productivity Eliminates raking
12
Frequently Raised Concerns
Blade system will be damaged by rock outcrops/ledge/bedrock
Blade will pull up lots of rocksCost to purchaseSuitability for ditch and
shoulder work
13
BFR! Shattered
14
What’s Going To Happen Here?
15
16
Blade Shatters Surface Rock
17
First Pass Over Coarse Rock Base
18
One Pass Over Shale
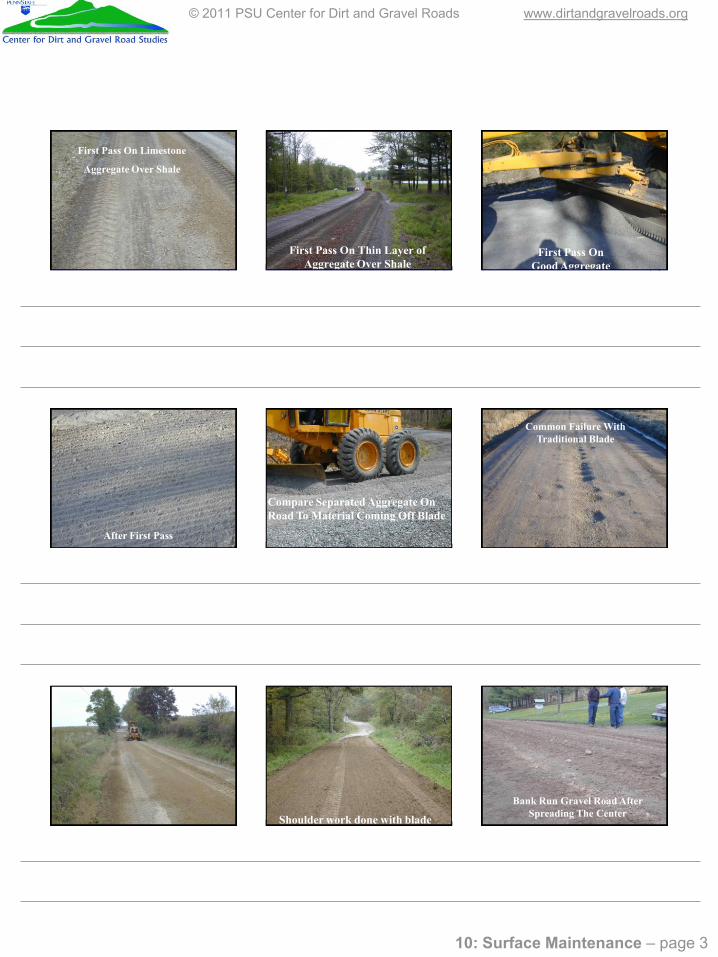
10: Surface Maintenance – page 3
© 2011 PSU Center for Dirt and Gravel Roads www.dirtandgravelroads.org
19
First Pass On Limestone
Aggregate Over Shale
20
First Pass On Thin Layer of Aggregate Over Shale
21
First Pass On Good Aggregate
22
After First Pass
23
Compare Separated Aggregate On Road To Material Coming Off Blade
24
Common Failure With Traditional Blade
25 26
Shoulder work done with blade
27
Bank Run Gravel Road After Spreading The Center
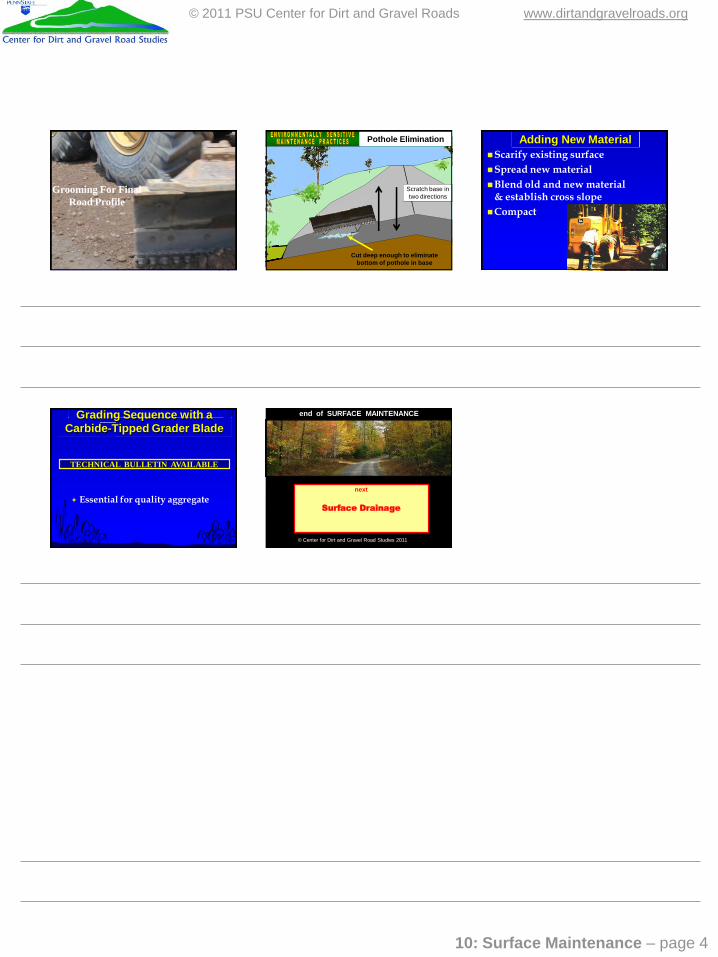
10: Surface Maintenance – page 4
© 2011 PSU Center for Dirt and Gravel Roads www.dirtandgravelroads.org
28
Grooming For Final Road Profile
Pothole Elimination
Scratch base in two directions
Cut deep enough to eliminate bottom of pothole in base
Adding New MaterialScarify existing surfaceSpread new materialBlend old and new material
& establish cross slopeCompact
31Grading Sequence with a Carbide-Tipped Grader Blade
Essential for quality aggregate
TECHNICAL BULLETIN AVAILABLE
end of SURFACE MAINTENANCE
© Center for Dirt and Gravel Road Studies 2011
next
Surface Drainage
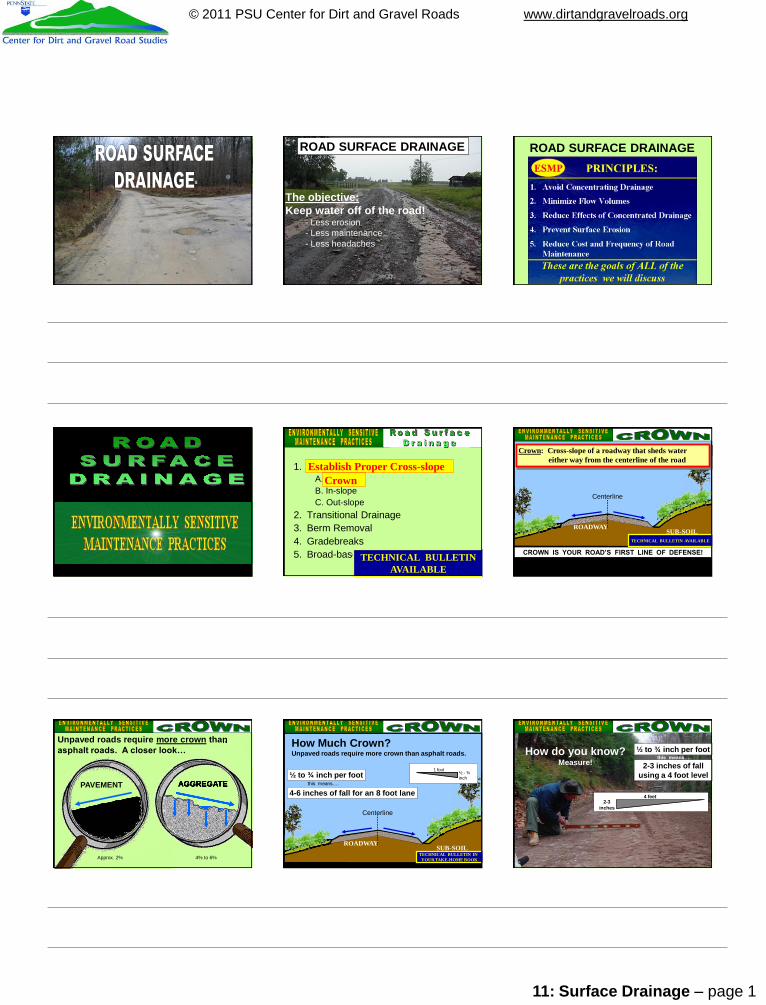
11: Surface Drainage – page 1
© 2011 PSU Center for Dirt and Gravel Roads www.dirtandgravelroads.org
ROAD SURFACE DRAINAGEROAD SURFACE DRAINAGE
The objective:Keep water off of the road!
- Less erosion- Less maintenance - Less headaches
ROAD SURFACE DRAINAGE
1. Establish Proper Cross-slopeA. CrownB. In-slopeC. Out-slope
2. Transitional Drainage3. Berm Removal4. Gradebreaks5. Broad-based Dips
Establish Proper Cross-slopeCrown
TECHNICAL BULLETINAVAILABLE
SUB-SOILROADWAY
Crown: Cross-slope of a roadway that sheds water either way from the centerline of the road
Centerline
CROWN IS YOUR ROAD’S FIRST LINE OF DEFENSE!
TECHNICAL BULLETIN AVAILABLE
Unpaved roads require more crown than asphalt roads. A closer look…
PAVEMENT AGGREGATE
than
AGGREGATE
Approx. 2% 4% to 6%
SUB-SOILROADWAY
How Much Crown?Unpaved roads require more crown than asphalt roads.
½ to ¾ inch per foot
4-6 inches of fall for an 8 foot lane
1 foot ½ - ¾ inch
this means….
Centerline
TECHNICAL BULLETIN IN YOUR TAKE-HOME BOOK
How do you know?Measure!
½ to ¾ inch per foot
2-3 inches of fallusing a 4 foot level
this means….
4 feet2-3
inches
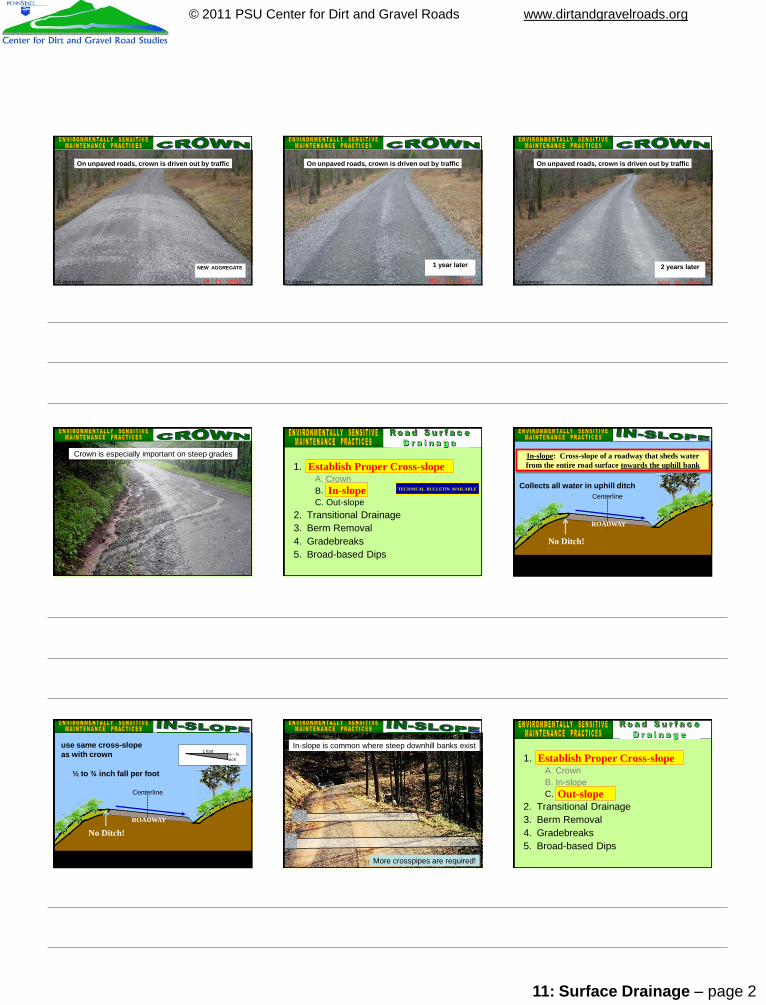
11: Surface Drainage – page 2
© 2011 PSU Center for Dirt and Gravel Roads www.dirtandgravelroads.org
On unpaved roads, crown is driven out by traffic
2A aggregate
NEW AGGREGATE
2A aggregate
On unpaved roads, crown is driven out by traffic
1 year later
2A aggregate
2 years later
On unpaved roads, crown is driven out by traffic
Crown is especially important on steep grades
1. Establish Proper Cross-slopeA. CrownB. In-slopingC. Out-slope
2. Transitional Drainage3. Berm Removal4. Gradebreaks5. Broad-based Dips
Establish Proper Cross-slope
In-slope TECHNICAL BULLETIN AVAILABLE
No Ditch!
Centerline
In-slope: Cross-slope of a roadway that sheds water from the entire road surface towards the uphill bank
ROADWAY
Collects all water in uphill ditch
use same cross-slope as with crown 1 foot ½ - ¾
inch
½ to ¾ inch fall per foot
Centerline
ROADWAY
No Ditch!
In-slope is common where steep downhill banks exist
More crosspipes are required!
1. Establish Proper Cross-slopeA. CrownB. In-slopeC. Out-sloping
2. Transitional Drainage3. Berm Removal4. Gradebreaks5. Broad-based Dips
Establish Proper Cross-slope
Out-slope
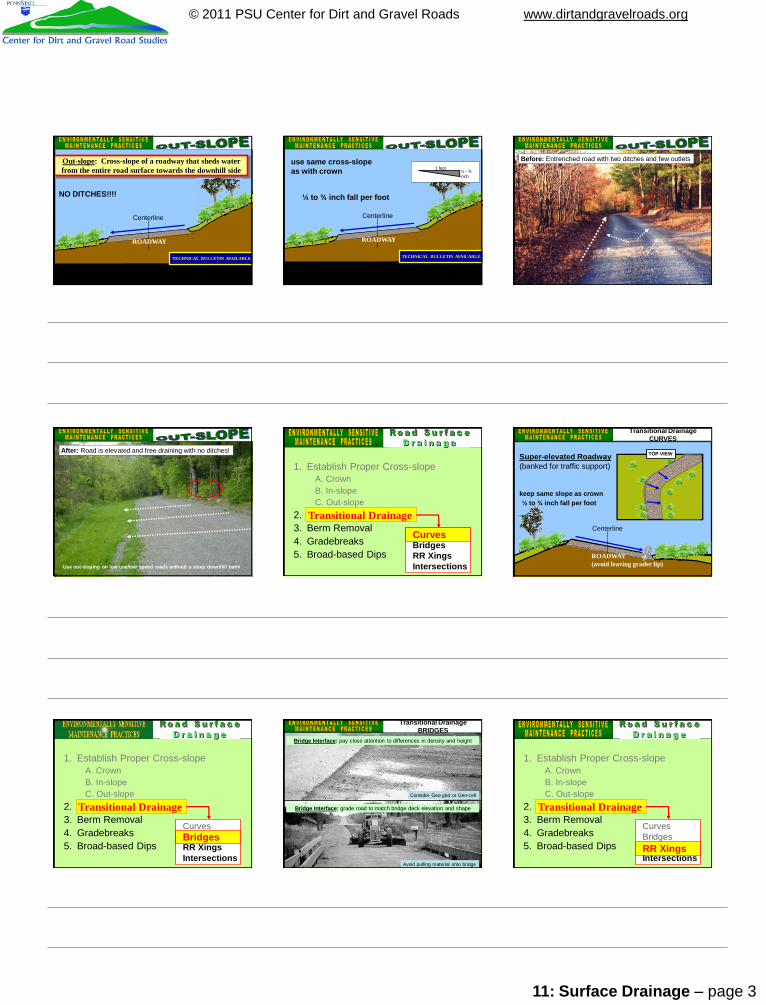
11: Surface Drainage – page 3
© 2011 PSU Center for Dirt and Gravel Roads www.dirtandgravelroads.org
NO DITCHES!!!!
Centerline
ROADWAY
TECHNICAL BULLETIN AVAILABLE
Out-slope: Cross-slope of a roadway that sheds water from the entire road surface towards the downhill side 1 foot
½ - ¾ inch
½ to ¾ inch fall per foot
Centerline
ROADWAY
TECHNICAL BULLETIN AVAILABLE
use same cross-slope as with crown
Before: Entrenched road with two ditches and few outlets
After: Road is elevated and free draining with no ditches!
Use out-sloping on low use/low speed roads without a steep downhill bank
1. Establish Proper Cross-slopeA. CrownB. In-slopeC. Out-slope
2. Transitional Drainage3. Berm Removal4. Gradebreaks5. Broad-based Dips
Transitional Drainage
CurvesBridgesRR XingsIntersections
CurvesCenterline
ROADWAY (avoid leaving grader lip)
Super-elevated Roadway(banked for traffic support)
TOP VIEW
keep same slope as crown½ to ¾ inch fall per foot
Transitional DrainageCURVES
1. Establish Proper Cross-slopeA. CrownB. In-slopeC. Out-slope
2. Transitional Drainage3. Berm Removal4. Gradebreaks5. Broad-based Dips
Transitional Drainage
CurvesBridgesRR XingsIntersections
Bridges
Bridges• b
Bridge Interface: grade road to match bridge deck elevation and shape
Bridge Interface: pay close attention to differences in density and height
Transitional DrainageBRIDGES
Consider Geo-grid or Geo-cell
Avoid pulling material onto bridge
1. Establish Proper Cross-slopeA. CrownB. In-slopeC. Out-slope
2. Transitional Drainage3. Berm Removal4. Gradebreaks5. Broad-based Dips
Transitional Drainage
CurvesBridgesRR XingsIntersectionsRR Xings
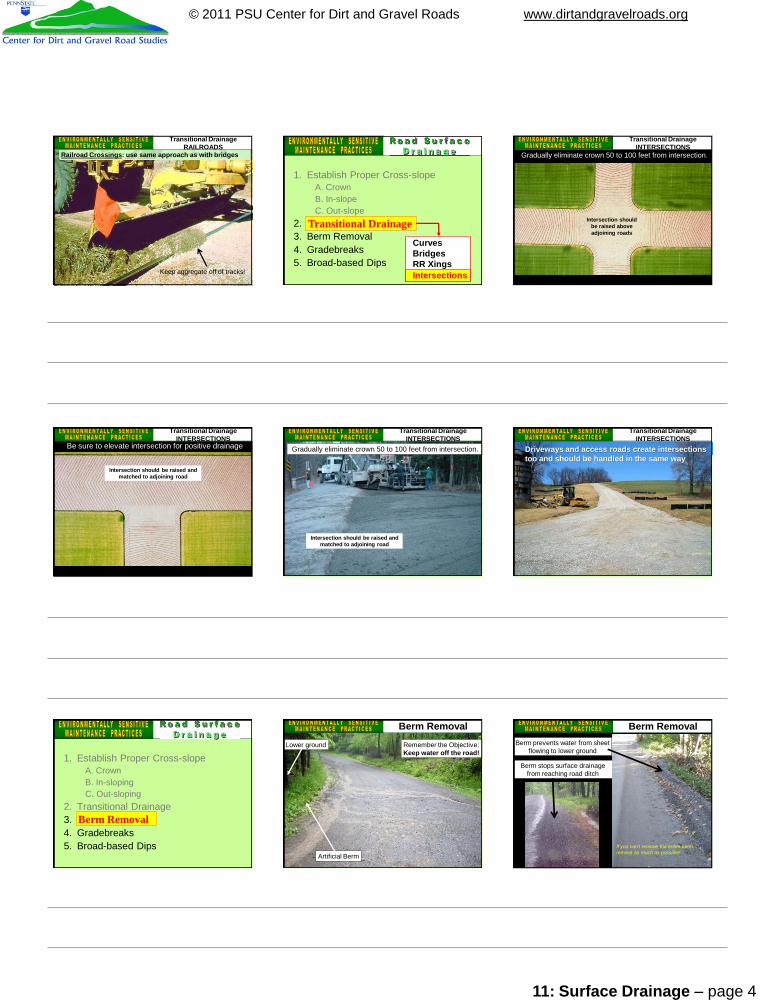
11: Surface Drainage – page 4
© 2011 PSU Center for Dirt and Gravel Roads www.dirtandgravelroads.org
Railroad Crossings: use same approach as with bridges
Transitional DrainageRAILROADS
Keep aggregate off of tracks!
1. Establish Proper Cross-slopeA. CrownB. In-slopeC. Out-slope
2. Transitional Drainage3. Berm Removal4. Gradebreaks5. Broad-based Dips
Transitional Drainage
CurvesBridgesRR XingsIntersectionsIntersections
Gradually eliminate crown 50 to 100 feet from intersection.
Intersection shouldbe raised above adjoining roads
Transitional DrainageINTERSECTIONS
Be sure to elevate intersection for positive drainage
Intersection should be raised and matched to adjoining road
Transitional DrainageINTERSECTIONS
Gradually eliminate crown 50 to 100 feet from intersection.
Transitional DrainageINTERSECTIONS
Intersection should be raised and matched to adjoining road
Transitional DrainageINTERSECTIONS
Driveways and access roads create intersections too and should be handled in the same way
1. Establish Proper Cross-slopeA. CrownB. In-slopingC. Out-sloping
2. Transitional Drainage3. Berm Removal4. Gradebreaks5. Broad-based Dips
Berm Removal
Artificial Berm
Lower ground Remember the Objective:Keep water off the road!
Berm Removal
Berm stops surface drainage from reaching road ditch
Berm prevents water from sheet flowing to lower ground
Berm Removal
If you can’t remove the entire berm, remove as much as possible!
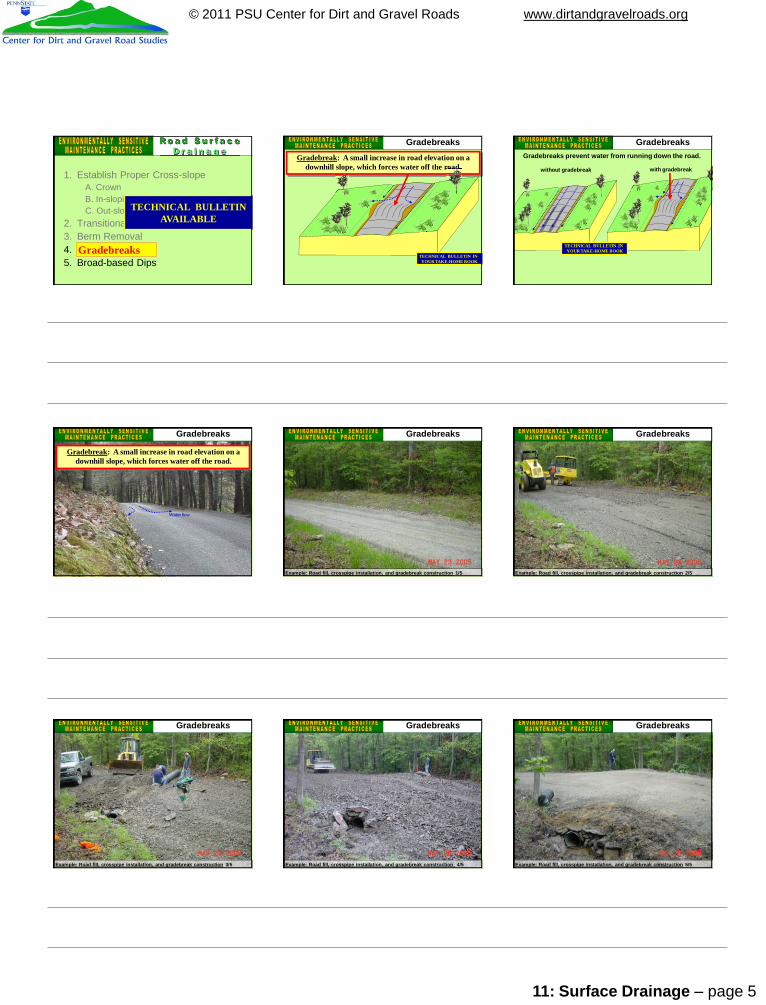
11: Surface Drainage – page 5
© 2011 PSU Center for Dirt and Gravel Roads www.dirtandgravelroads.org
1. Establish Proper Cross-slopeA. CrownB. In-slopingC. Out-sloping
2. Transitional Drainage3. Berm Removal4. Gradebreaks5. Broad-based Dips
Gradebreaks
TECHNICAL BULLETINAVAILABLE
Gradebreak: A small increase in road elevation on a downhill slope, which forces water off the road.downhill slope, which forces water off the road.
TECHNICAL BULLETIN IN YOUR TAKE-HOME BOOK
Gradebreaks
without gradebreak with gradebreak
Gradebreaks prevent water from running down the road.
TECHNICAL BULLETIN IN YOUR TAKE-HOME BOOK
Gradebreaks
Water flow
Gradebreak: A small increase in road elevation on a downhill slope, which forces water off the road.
Gradebreaks
Example: Road fill, crosspipe installation, and gradebreak construction 1/5
Gradebreaks
Example: Road fill, crosspipe installation, and gradebreak construction 2/5
Gradebreaks
Example: Road fill, crosspipe installation, and gradebreak construction 3/5
Gradebreaks
Example: Road fill, crosspipe installation, and gradebreak construction 4/5
Gradebreaks
Example: Road fill, crosspipe installation, and gradebreak construction 5/5
Gradebreaks
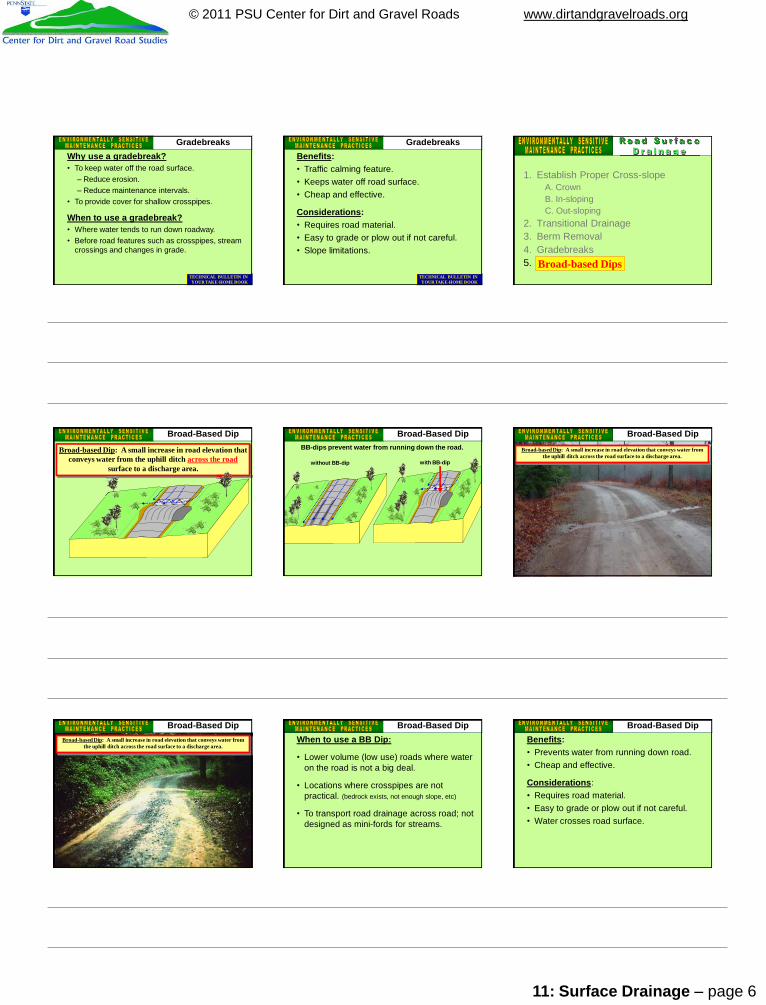
11: Surface Drainage – page 6
© 2011 PSU Center for Dirt and Gravel Roads www.dirtandgravelroads.org
Why use a gradebreak?• To keep water off the road surface.
– Reduce erosion.– Reduce maintenance intervals.
• To provide cover for shallow crosspipes.
When to use a gradebreak?• Where water tends to run down roadway.• Before road features such as crosspipes, stream
crossings and changes in grade.
TECHNICAL BULLETIN IN YOUR TAKE-HOME BOOK
GradebreaksBenefits:• Traffic calming feature.• Keeps water off road surface.• Cheap and effective.
Considerations:• Requires road material.• Easy to grade or plow out if not careful.• Slope limitations.
TECHNICAL BULLETIN IN YOUR TAKE-HOME BOOK
Gradebreaks
1. Establish Proper Cross-slopeA. CrownB. In-slopingC. Out-sloping
2. Transitional Drainage3. Berm Removal4. Gradebreaks5. Broad-based DipsBroad-based Dips
Broad-based Dip: A small increase in road elevation that conveys water from the uphill ditch across the road
surface to a discharge area.
Broad-Based Dip
without BB-dip with BB-dip
BB-dips prevent water from running down the road.
Broad-Based DipBroad-based Dip: A small increase in road elevation that conveys water from
the uphill ditch across the road surface to a discharge area.
Broad-Based Dip
Broad-based Dip: A small increase in road elevation that conveys water from the uphill ditch across the road surface to a discharge area.
Broad-Based DipWhen to use a BB Dip:
• Lower volume (low use) roads where water on the road is not a big deal.
• Locations where crosspipes are not practical. (bedrock exists, not enough slope, etc)
• To transport road drainage across road; not designed as mini-fords for streams.
Broad-Based DipBenefits:• Prevents water from running down road.• Cheap and effective.
Considerations:• Requires road material.• Easy to grade or plow out if not careful.• Water crosses road surface.
Broad-Based Dip
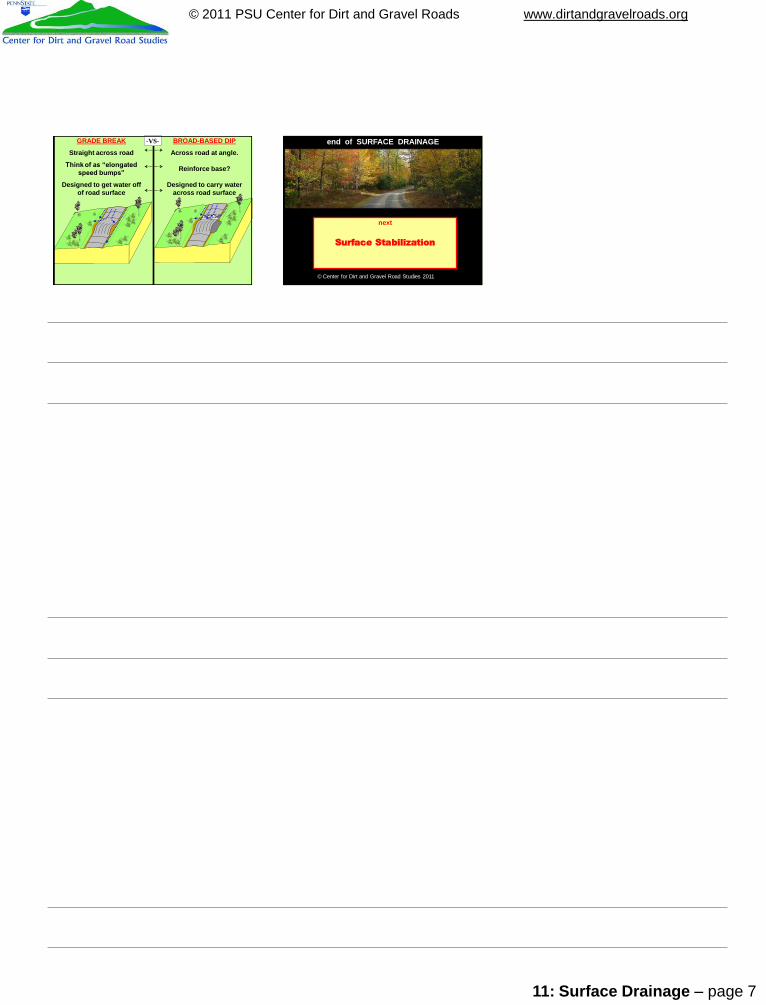
11: Surface Drainage – page 7
© 2011 PSU Center for Dirt and Gravel Roads www.dirtandgravelroads.org
-VS-GRADE BREAK
Straight across road
Think of as “elongatedspeed bumps”
Designed to get water off of road surface
BROAD-BASED DIP
Across road at angle.
Reinforce base?
Designed to carry water across road surface
end of SURFACE DRAINAGE
© Center for Dirt and Gravel Road Studies 2011
next
Surface Stabilization
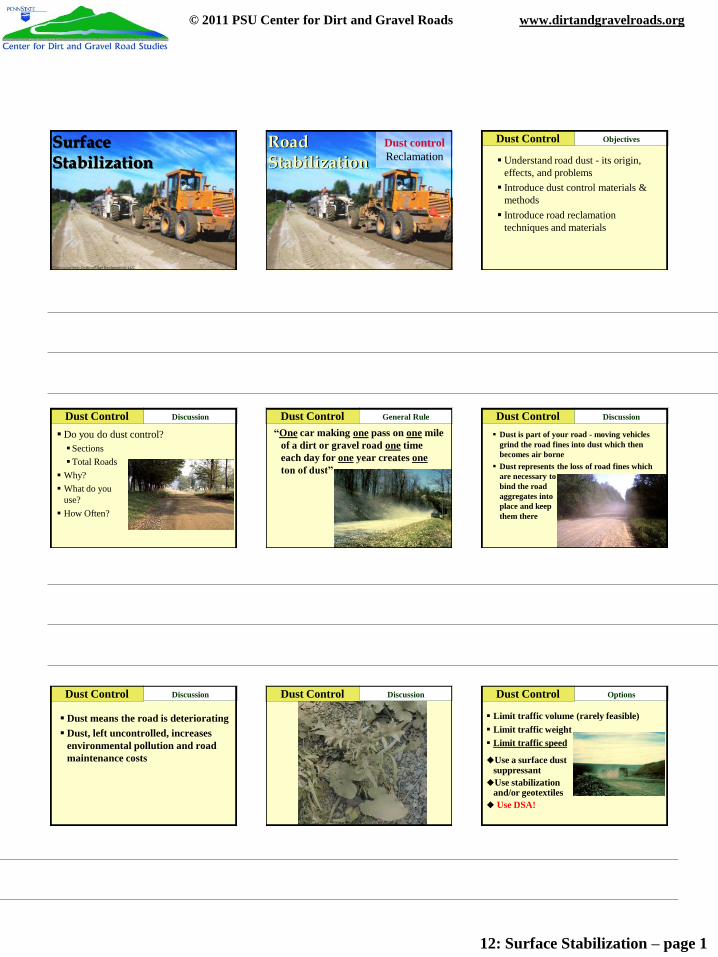
12: Surface Stabilization – page 1
© 2011 PSU Center for Dirt and Gravel Roads www.dirtandgravelroads.org
1SurfaceStabilization
Photo courtesy: Cutting Edge Reclamation, LLC
2RoadStabilization
Dust controlReclamation
3
Understand road dust - its origin, effects, and problems Introduce dust control materials &
methods Introduce road reclamation
techniques and materials
Dust Control Objectives
4
Do you do dust control?SectionsTotal Roads
Why? What do you
use? How Often? Times
Dust Control Discussion 5
“One car making one pass on one mile of a dirt or gravel road one time each day for one year creates oneton of dust”
1
Dust Control General Rule 6
Dust is part of your road - moving vehicles grind the road fines into dust which then becomes air borne
Dust represents the loss of road fines which are necessary to bind the road aggregates into place and keep them there
Dust Control Discussion
7
Dust means the road is deteriorating Dust, left uncontrolled, increases
environmental pollution and road maintenance costs
Dust Control Discussion 8Dust Control Discussion 9
Limit traffic volume (rarely feasible) Limit traffic weight Limit traffic speed
Use a surface dust suppressant
Use stabilization and/or geotextiles
Use DSA!
Dust Control Options
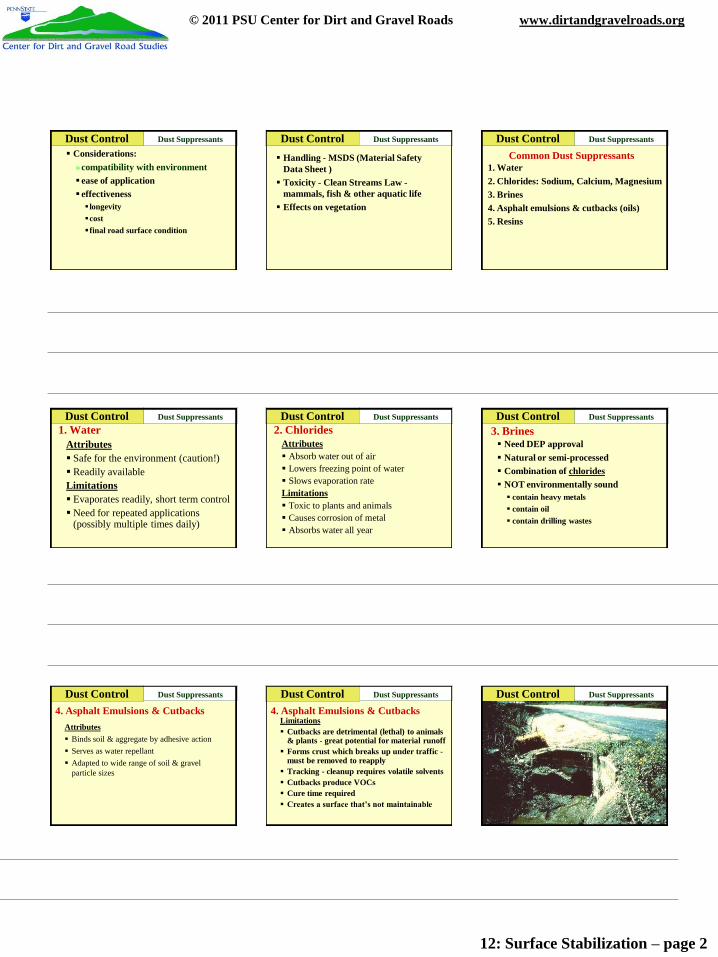
12: Surface Stabilization – page 2
© 2011 PSU Center for Dirt and Gravel Roads www.dirtandgravelroads.org
10
Considerations:»compatibility with environment ease of application effectiveness longevitycost final road surface condition
Dust Control Dust Suppressants 11
Handling - MSDS (Material Safety Data Sheet ) Toxicity - Clean Streams Law -
mammals, fish & other aquatic life Effects on vegetation
Dust Control Dust Suppressants 12
Common Dust Suppressants1. Water2. Chlorides: Sodium, Calcium, Magnesium3. Brines 4. Asphalt emulsions & cutbacks (oils)5. Resins
Dust Control Dust Suppressants
13
1. WaterAttributes Safe for the environment (caution!) Readily availableLimitations Evaporates readily, short term control Need for repeated applications
(possibly multiple times daily)
Dust Control Dust Suppressants 14
2. ChloridesAttributes Absorb water out of air Lowers freezing point of water Slows evaporation rateLimitations Toxic to plants and animals Causes corrosion of metal Absorbs water all year
Dust Control Dust Suppressants 15Dust Control Dust Suppressants
3. Brines Need DEP approval Natural or semi-processed Combination of chlorides NOT environmentally sound contain heavy metals contain oil contain drilling wastes
Dust Control Dust Suppressants
4. Asphalt Emulsions & CutbacksAttributes Binds soil & aggregate by adhesive action Serves as water repellant Adapted to wide range of soil & gravel
particle sizes
17Dust Control Dust Suppressants
4. Asphalt Emulsions & CutbacksLimitations Cutbacks are detrimental (lethal) to animals
& plants - great potential for material runoff Forms crust which breaks up under traffic -
must be removed to reapply Tracking - cleanup requires volatile solvents Cutbacks produce VOCs Cure time required Creates a surface that’s not maintainable
18Dust Control Dust Suppressants
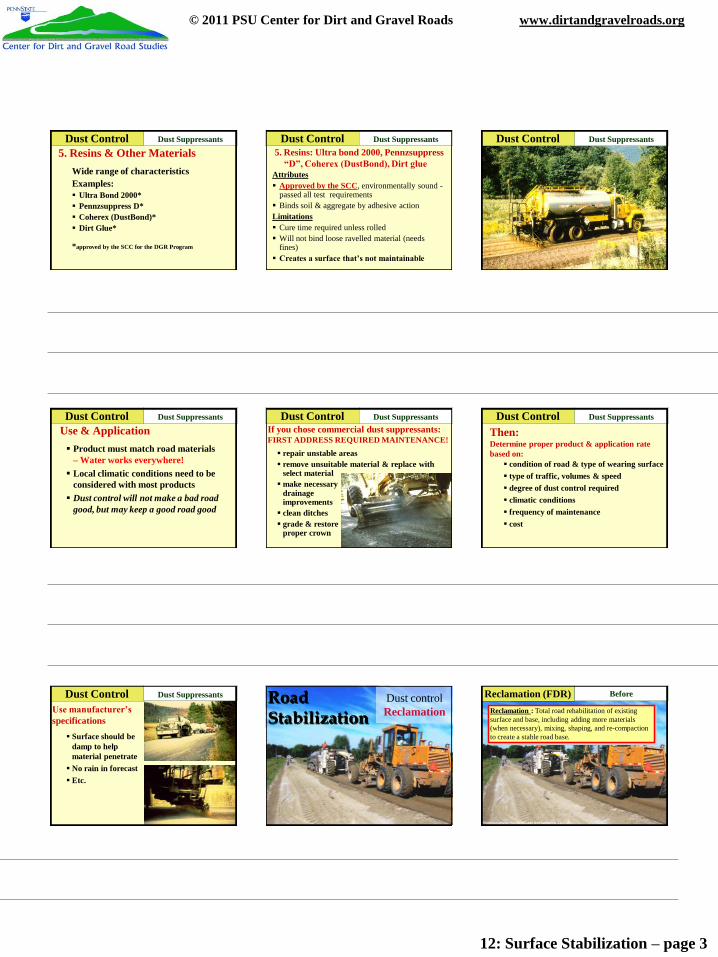
12: Surface Stabilization – page 3
© 2011 PSU Center for Dirt and Gravel Roads www.dirtandgravelroads.org
19Dust Control Dust Suppressants
5. Resins & Other MaterialsWide range of characteristicsExamples: Ultra Bond 2000* Pennzsuppress D* Coherex (DustBond)* Dirt Glue*
*approved by the SCC for the DGR Program
20Dust Control Dust Suppressants5. Resins: Ultra bond 2000, Pennzsuppress
“D”, Coherex (DustBond), Dirt glueAttributes Approved by the SCC, environmentally sound -
passed all test requirements Binds soil & aggregate by adhesive actionLimitations Cure time required unless rolled Will not bind loose ravelled material (needs
fines) Creates a surface that’s not maintainable
21Dust Control Dust Suppressants
22
Use & Application Product must match road materials
– Water works everywhere! Local climatic conditions need to be
considered with most products Dust control will not make a bad road
good, but may keep a good road good
Dust Control Dust Suppressants
repair unstable areas remove unsuitable material & replace with
select materialmake necessary
drainage improvements clean ditches grade & restore
proper crown
Dust Control Dust SuppressantsIf you chose commercial dust suppressants:FIRST ADDRESS REQUIRED MAINTENANCE!
24
condition of road & type of wearing surface type of traffic, volumes & speed degree of dust control required climatic conditions frequency of maintenance cost
Dust Control Dust Suppressants
Then:Determine proper product & application rate based on:
Surface should be damp to help material penetrate No rain in forecast Etc.
Dust Control Dust Suppressants
Use manufacturer’s specifications
26RoadStabilization
Dust controlReclamation
27Reclamation (FDR) Before
Reclamation : Total road rehabilitation of existing surface and base, including adding more materials (when necessary), mixing, shaping, and re-compaction to create a stable road base.
Photo courtesy: Cutting Edge Reclamation, LLC
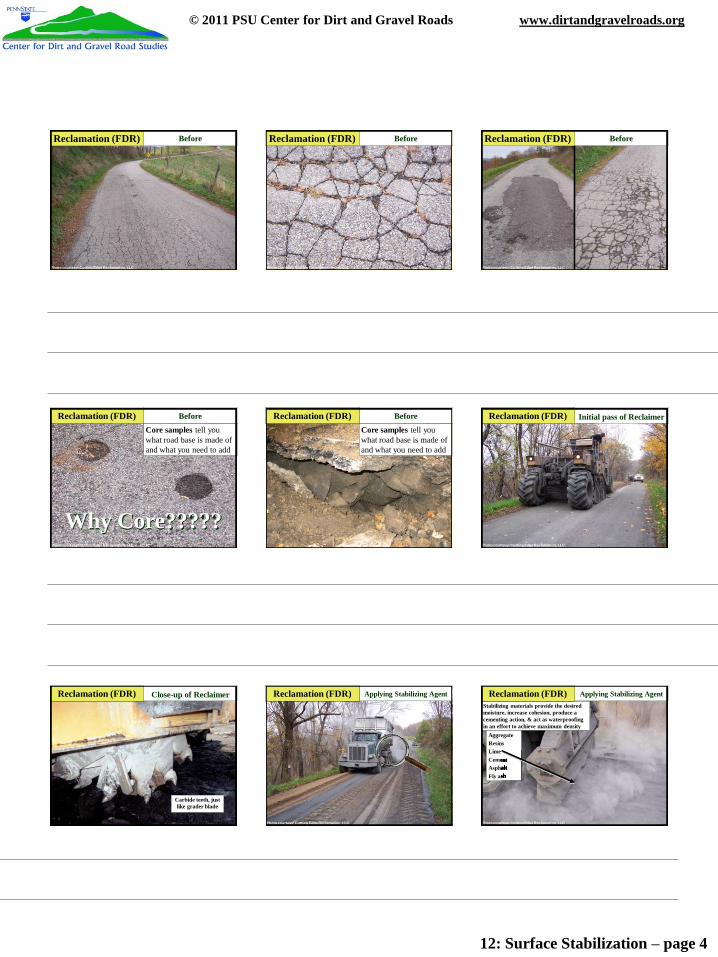
12: Surface Stabilization – page 4
© 2011 PSU Center for Dirt and Gravel Roads www.dirtandgravelroads.org
28Reclamation (FDR) Before
Photo courtesy: Cutting Edge Reclamation, LLC
29
Photo courtesy: Cutting Edge Reclamation, LLC
Reclamation (FDR) Before 30
Photo courtesy: Cutting Edge Reclamation, LLC
Reclamation (FDR) Before
31
Photo courtesy: Cutting Edge Reclamation, LLC
Core samples tell you what road base is made of and what you need to add
Reclamation (FDR) Before
Why Core?????
32
Core samples tell you what road base is made of and what you need to add
Reclamation BeforeReclamation (FDR) 33Initial pass of Reclaimer
Photo courtesy: Cutting Edge Reclamation, LLC
ReclamationReclamation (FDR)
34Close-up of ReclaimerReclamation
Carbide teeth, just like grader blade
Reclamation (FDR) 35
Photo courtesy: Cutting Edge Reclamation, LLC
Reclamation Applying Stabilizing AgentReclamation (FDR) 36
Photo courtesy: Cutting Edge Reclamation, LLC
Reclamation Applying Stabilizing AgentStabilizing materials provide the desired moisture, increase cohesion, produce a cementing action, & act as waterproofing in an effort to achieve maximum density
AggregateResinsLimeCementAsphaltFly ash
CementAsphaltFly ash
Reclamation (FDR)
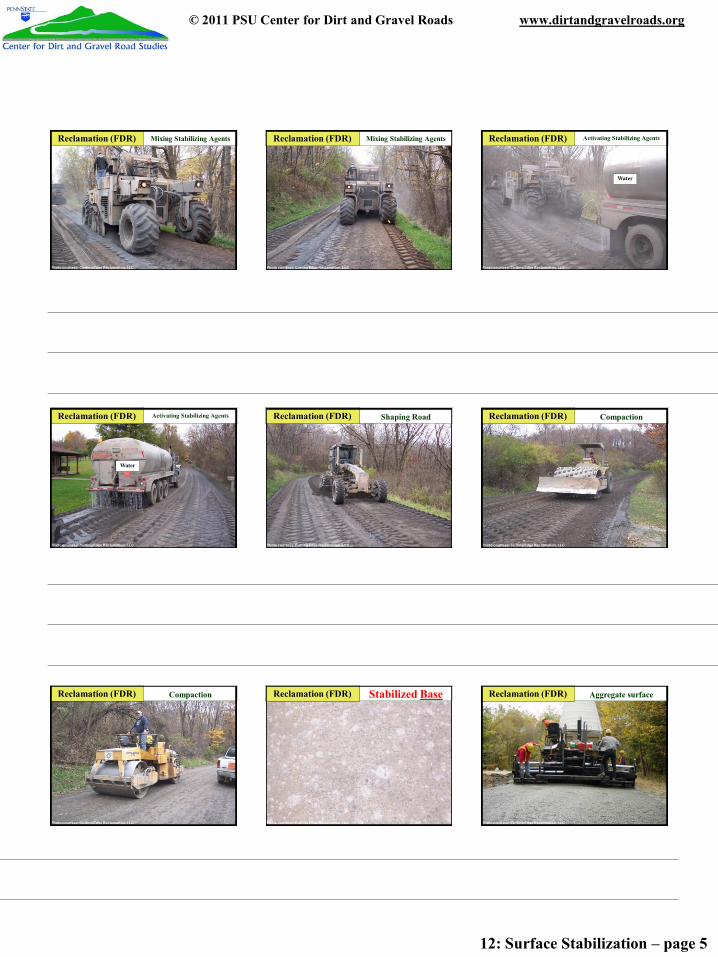
12: Surface Stabilization – page 5
© 2011 PSU Center for Dirt and Gravel Roads www.dirtandgravelroads.org
37Mixing Stabilizing Agents Reclamation
Photo courtesy: Cutting Edge Reclamation, LLC
Reclamation (FDR) 38
Photo courtesy: Cutting Edge Reclamation, LLC
Reclamation Mixing Stabilizing Agents Reclamation (FDR) 39
Photo courtesy: Cutting Edge Reclamation, LLC
Reclamation Activating Stabilizing Agents
Water
Reclamation (FDR)
40
Photo courtesy: Cutting Edge Reclamation, LLC
Reclamation Activating Stabilizing Agents
Water
Reclamation (FDR) 41Shaping Road
Photo courtesy: Cutting Edge Reclamation, LLC
ReclamationReclamation (FDR) 42Compaction
Photo courtesy: Cutting Edge Reclamation, LLC
ReclamationReclamation (FDR)
43Compaction
Photo courtesy: Cutting Edge Reclamation, LLC
ReclamationReclamation (FDR) 44
Photo courtesy: Cutting Edge Reclamation, LLC
Reclamation Stabilized BaseReclamation (FDR) 45
Photo courtesy: Cutting Edge Reclamation, LLC
Reclamation Aggregate surfaceReclamation (FDR)
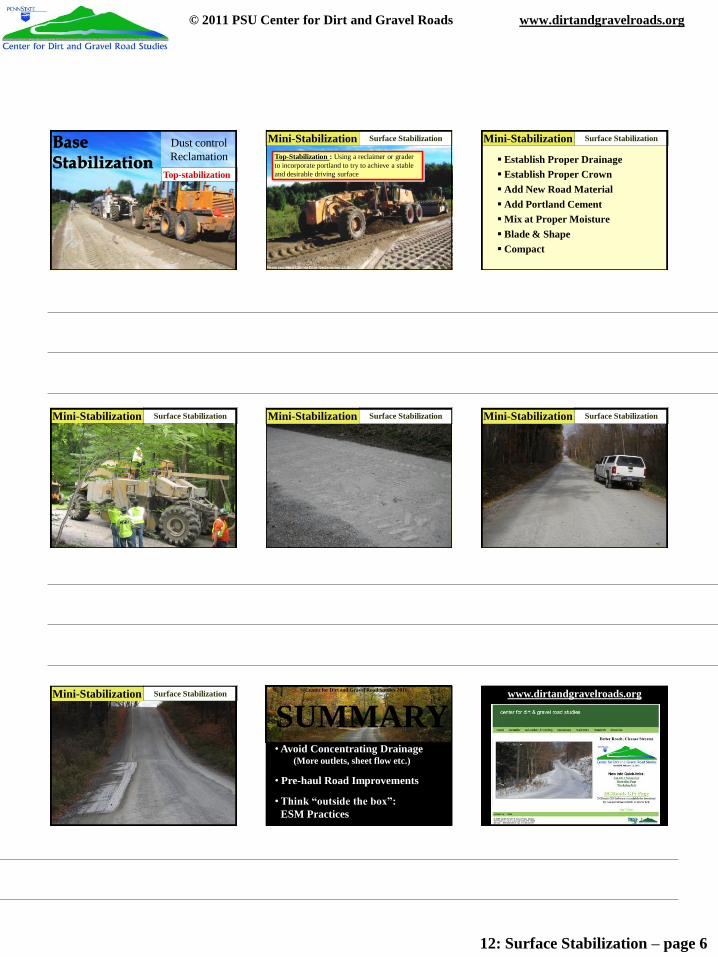
12: Surface Stabilization – page 6
© 2011 PSU Center for Dirt and Gravel Roads www.dirtandgravelroads.org
46BaseStabilization
Dust controlReclamation
Top-stabilization
47
Photo courtesy: Cutting Edge Reclamation, LLC
Mini-StabilizationTop-Stabilization : Using a reclaimer or grader to incorporate portland to try to achieve a stable and desirable driving surface
Surface Stabilization 48
Establish Proper Drainage Establish Proper Crown Add New Road Material Add Portland CementMix at Proper Moisture Blade & Shape Compact
Mini-Stabilization Surface Stabilization
49Mini-Stabilization Surface Stabilization 50Mini-Stabilization Surface Stabilization 51Mini-Stabilization Surface Stabilization
52Mini-Stabilization Surface Stabilization © Center for Dirt and Gravel Road Studies 2011
SUMMARY• Avoid Concentrating Drainage
(More outlets, sheet flow etc.)
• Pre-haul Road Improvements
• Think “outside the box”: ESM Practices
www.dirtandgravelroads.org
12: Surface Stabilization – page 7
© 2011 PSU Center for Dirt and Gravel Roads www.dirtandgravelroads.org
© Center for Dirt and Gravel Road Studies 2011
THANK YOUwww.dirtandgravelroads.org
Tim ZieglerDave Shearer