Embed Size (px)
Citation preview
Digital Projector X95iProduct Warranty and Safety Guide
X95i Projecteur numérique - Garantie du produit et guide de sécuritéX95i Digitalprojektor - Produktgarantie und SicherheitshinweiseX95i Proyector digital - Garantia de producto e Instrucciones de seguridadX95i Proiettore digitale - Garanzia del Prodotto e Manuale di SicurezzaX95i Digitale Projector - Garantie op het product en veiligheidsvoorschriftenX95i Projector Digital - Garantia do Produto e Guia de SegurançaX95i Digital projektor - Produktgaranti och säkerhetsguideX95iX95i디지털 프로젝터 - 제품보증 및 안전지침X95i Digitaalinen projektori - Tuotetakuu ja turvallisuusopas
2 3M™ Digital Projector X95i Product Warranty and Safety Guide © 3M 2009. All rights reserved.
Table of ContentsENGLISH3M™ Digital Projector Limited Warranty ....................................................................................................5Safety Information ........................................................................................................................................7Product Safety Labels .................................................................................................................................11Lamp ...........................................................................................................................................................12Remote control.............................................................................................................................................15Replacing Internal Clock battery .................................................................................................................16Inserting an SD Card and USB Memory .....................................................................................................17
FRANÇAIS3M™ Projecteur Numérique Garantie Limitée ...........................................................................................19Mesures de sécurité......................................................................................................................................21Autocollants de sécurité sur le produit.........................................................................................................25Lampe ..........................................................................................................................................................26Télécommande.............................................................................................................................................29Remplacement de la pile d’horloge interne .................................................................................................30Insérer une Carte SD et une Mémoire USB.................................................................................................31
DEUTSCHBeschränkte Gewährleistung für 3M™ Digitalprojektor.............................................................................33Sicherheitsanweisungen...............................................................................................................................35Sicherheitsaufkleber.....................................................................................................................................39Lampe ..........................................................................................................................................................40Fernbedienung..............................................................................................................................................43Austausch der internen Uhrbatterie .............................................................................................................44Einsetzen einer SD-Karte und eines USB-Speichers...................................................................................45
ESPAÑOLGarantía limitada del Proyector Digital 3M™.............................................................................................47Infomación de seguridad..............................................................................................................................49Etiquetas de seguridad del producto ...........................................................................................................53Lámpara .......................................................................................................................................................54Control remote .............................................................................................................................................57Reemplazo de la pila del reloj interno .........................................................................................................58Inserción de una tarjeta SD y USB Memory ...............................................................................................59
ITALIANOProiettore digitale 3M™ garanzia limitata...................................................................................................61Informazioni sulla sicurezza ........................................................................................................................63Etichette di sicurezza del prodotto...............................................................................................................67Lampada.......................................................................................................................................................68Telecomando ................................................................................................................................................71Sostituzione della batteria dell'orologio interno ..........................................................................................72Inserimento di una scheda SD e memoria USB...........................................................................................73
NEDERLANDS3M™ Digitale Projector Beperkte Garantie ................................................................................................75Veiligheidsinformatie...................................................................................................................................77Veiligheidslabels ..........................................................................................................................................81Lamp ............................................................................................................................................................82Afstandsbediening........................................................................................................................................85Vervanging Interne Klok batterij .................................................................................................................86Plaatsen van een SD Kaart en USB Geheugen ............................................................................................87

33M™ Digital Projector X95i Product Warranty and Safety Guide© 3M 2009. All rights reserved.
Table of ContentsPORTUGUÊSGarantia Limitada do Projector Digital 3M™ ............................................................................................89Informações sobre Segurança ......................................................................................................................91Etiquetas de Segurança do Produto..............................................................................................................95Lâmpada.......................................................................................................................................................96Controlo remoto ...........................................................................................................................................99Substituição da pilha do Relógio Interno...................................................................................................100Inserir um Cartão de Memória SD e Memória USB..................................................................................101
SVENSKA3M™ Digital projektor Begränsad garanti ................................................................................................103Säkerhetsinformation .................................................................................................................................105Produktsäkerhetsetiketter...........................................................................................................................109Lampan ......................................................................................................................................................110Fjärrkontroll ...............................................................................................................................................113Byte av batteri för den interna klockan......................................................................................................114Sätt i ett SD-kort eller ett USB-minne .......................................................................................................115
.......................................................................................................................117....................................................................................................................................................119
............................................................................................................................................123............................................................................................................................................................124
........................................................................................................................................................127................................................................................................................................128
..........................................................................................................................129
한국어3M™ 디지털 프로젝터 유한 보증 .......................................................................................................131안전 정보 ..................................................................................................................................................133상품 안전 라벨 .........................................................................................................................................137램프............................................................................................................................................................138리모컨........................................................................................................................................................141내부 시계 배터리 교체하기....................................................................................................................142SD 카드와 USB 메모리 삽입하기 ........................................................................................................143
SUOMI3M™ Digitaalisen projektorin rajoitettu takuu..........................................................................................145Tietoja turvallisuutta varten .......................................................................................................................147Laitteen turvakyltit.....................................................................................................................................151Lamppu ......................................................................................................................................................152Kaukosäädin...............................................................................................................................................155Sisäisen kellon pariston vaihto...................................................................................................................156SD-kortin ja USB-muistin asettaminen .....................................................................................................157
ENG
LISH
FRAN
ÇAIS
DEU
TSC
HES
PAÑ
OL
ITA
LIA
NO
NEDE
RLAN
DSPO
RTUG
UÊS
SVEN
SKA
SUO
MI
3M™ Digital Projector X95i Product Warranty and Safety Guide4
ENG
LISH
© 3M 2009. All rights reserved.
3M™ Digital Projector X95i Product Warranty and Safety Guide 5
ENG
LISH
© 3M 2009. All rights reserved.
3M™ Digital Projector Limited Warranty
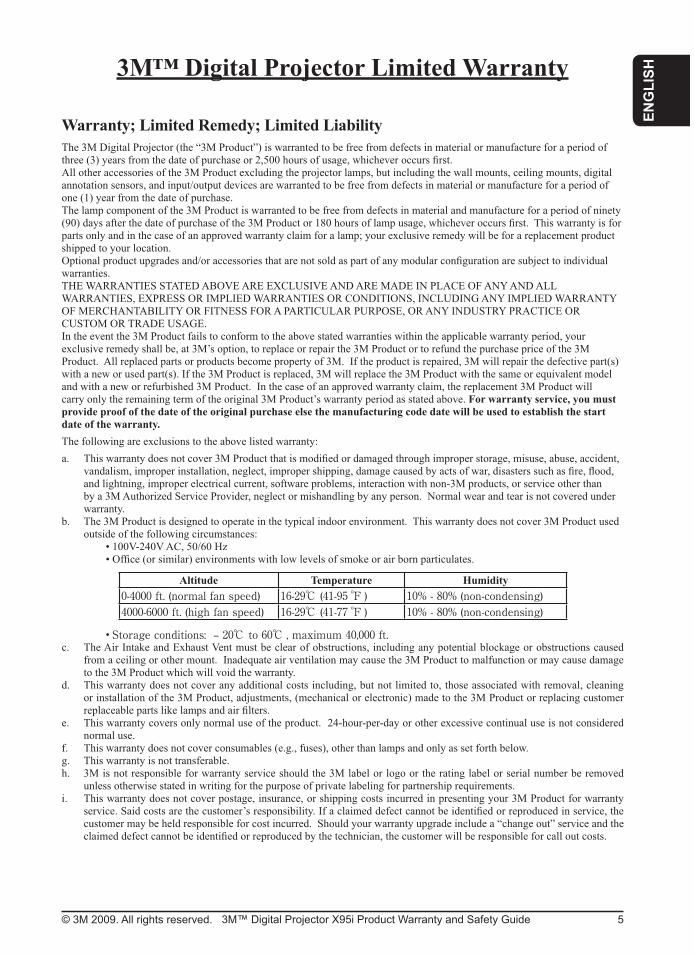
Warranty; Limited Remedy; Limited LiabilityThe 3M Digital Projector (the “3M Product”) is warranted to be free from defects in material or manufacture for a period of
All other accessories of the 3M Product excluding the projector lamps, but including the wall mounts, ceiling mounts, digital annotation sensors, and input/output devices are warranted to be free from defects in material or manufacture for a period of one (1) year from the date of purchase.The lamp component of the 3M Product is warranted to be free from defects in material and manufacture for a period of ninety
parts only and in the case of an approved warranty claim for a lamp; your exclusive remedy will be for a replacement product shipped to your location.
warranties.THE WARRANTIES STATED ABOVE ARE EXCLUSIVE AND ARE MADE IN PLACE OF ANY AND ALL WARRANTIES, EXPRESS OR IMPLIED WARRANTIES OR CONDITIONS, INCLUDING ANY IMPLIED WARRANTY OF MERCHANTABILITY OR FITNESS FOR A PARTICULAR PURPOSE, OR ANY INDUSTRY PRACTICE OR CUSTOM OR TRADE USAGE. In the event the 3M Product fails to conform to the above stated warranties within the applicable warranty period, your exclusive remedy shall be, at 3M’s option, to replace or repair the 3M Product or to refund the purchase price of the 3M Product. All replaced parts or products become property of 3M. If the product is repaired, 3M will repair the defective part(s) with a new or used part(s). If the 3M Product is replaced, 3M will replace the 3M Product with the same or equivalent model and with a new or refurbished 3M Product. In the case of an approved warranty claim, the replacement 3M Product will carry only the remaining term of the original 3M Product’s warranty period as stated above. For warranty service, you must provide proof of the date of the original purchase else the manufacturing code date will be used to establish the start date of the warranty. The following are exclusions to the above listed warranty:
and lightning, improper electrical current, software problems, interaction with non-3M products, or service other than by a 3M Authorized Service Provider, neglect or mishandling by any person. Normal wear and tear is not covered under warranty.
b. The 3M Product is designed to operate in the typical indoor environment. This warranty does not cover 3M Product used outside of the following circumstances:
Storage conditions: ‒ 20℃ to 60℃ , maximum 40,000 ft.c. The Air Intake and Exhaust Vent must be clear of obstructions, including any potential blockage or obstructions caused
from a ceiling or other mount. Inadequate air ventilation may cause the 3M Product to malfunction or may cause damage to the 3M Product which will void the warranty.
d. This warranty does not cover any additional costs including, but not limited to, those associated with removal, cleaning or installation of the 3M Product, adjustments, (mechanical or electronic) made to the 3M Product or replacing customer
e. This warranty covers only normal use of the product. 24-hour-per-day or other excessive continual use is not considered normal use.
f. This warranty does not cover consumables (e.g., fuses), other than lamps and only as set forth below. g. This warranty is not transferable.h. 3M is not responsible for warranty service should the 3M label or logo or the rating label or serial number be removed
unless otherwise stated in writing for the purpose of private labeling for partnership requirements.i. This warranty does not cover postage, insurance, or shipping costs incurred in presenting your 3M Product for warranty
customer may be held responsible for cost incurred. Should your warranty upgrade include a “change out” service and the
Altitude Temperature Humidity0-4000 ft. (normal fan speed) 16-29℃ (41-95 ℉ ) 10% - 80% (non-condensing)4000-6000 ft. (high fan speed) 16-29℃ (41-77 ℉ ) 10% - 80% (non-condensing)
3M™ Digital Projector X95i Product Warranty and Safety Guide6
ENG
LISH
© 3M 2009. All rights reserved.
FAILURE TO FOLLOW THE INSTRUCTIONS CONTAINED IN THE APPROPRIATE 3M PRODUCT MANUAL OR TO USE THE 3M PRODUCT IN ACCORDANCE WITH 3M’S INTENDED USE STATEMENT, WILL VOID ALL WARRANTIES AND LIMITED REMEDIES. EXCEPT AS SPECIFICALLY STATED IN THE APPLICABLE 3M PRODUCT MANUAL, 3M SHALL NOT BE LIABLE FOR ANY INDIRECT, INCIDENTAL, SPECIAL OR CONSEQUENTIAL DAMAGES (INCLUDING, BUT NOT LIMITED TO, LOSS OF PROFITS, REVENUE OR BUSINESS) RESULTING FROM, OR IN ANY WAY RELATED TO PERFORMANCE, USE OR INABILITY TO USE ANY OF THE 3M PRODUCT. This limitation applies regardless of the legal theory upon which damages are sought.
Material Authorization Number) before returning the product. If you are inside the Continental United States of America, please contact 3M Customer Service at 800-328-1371 or email [email protected].
What 3M Will Do To Correct Problems:
container or equivalent, along with proof of the date of original purchase, to your 3M Service Dealer or 3M Service Center.
at 3M’s expense.
the replacement may be another model of like kind and quality.
Product. Exchange or replacement products or parts assume the remaining warranty period of the product covered by this limited warranty. However, each replacement lamp carries the limited 90-day warranty stated above.
3M™ Digital Projector X95i Product Warranty and Safety Guide 7
ENG
LISH
© 3M 2009. All rights reserved.
Safety Information
Read, understand, and follow all safety information contained in the “Product Warranty and Safety Guide” and in the “Operator’s Guide” prior to using the X95i Digital Projector. Service personnel must also read and understand the safety information contained in the “Service Manual”. Retain these instructions for future reference.
Intended UseThe 3M™ Digital Projectors are designed, built, and tested for use indoors, using 3M lamps,3M ceiling mount hardware, and common line voltages (100V to 240V AC, 50/60 Hz).The use of other replacement lamps, outdoor operation, or different voltages has not been tested and could damage the projector, peripheral equipment and/or create a potentially unsafe operating condition.
100V - 240V AC, 50/60 Hz 16° to 29° C (60° to 85° F) 10-80% RH (without condensation) 0-1828m (0-6000 feet) above sea level The ambient operating environment should be free of airborne smoke, grease, oil and other contaminates that can effect the operation or performance of the projector.
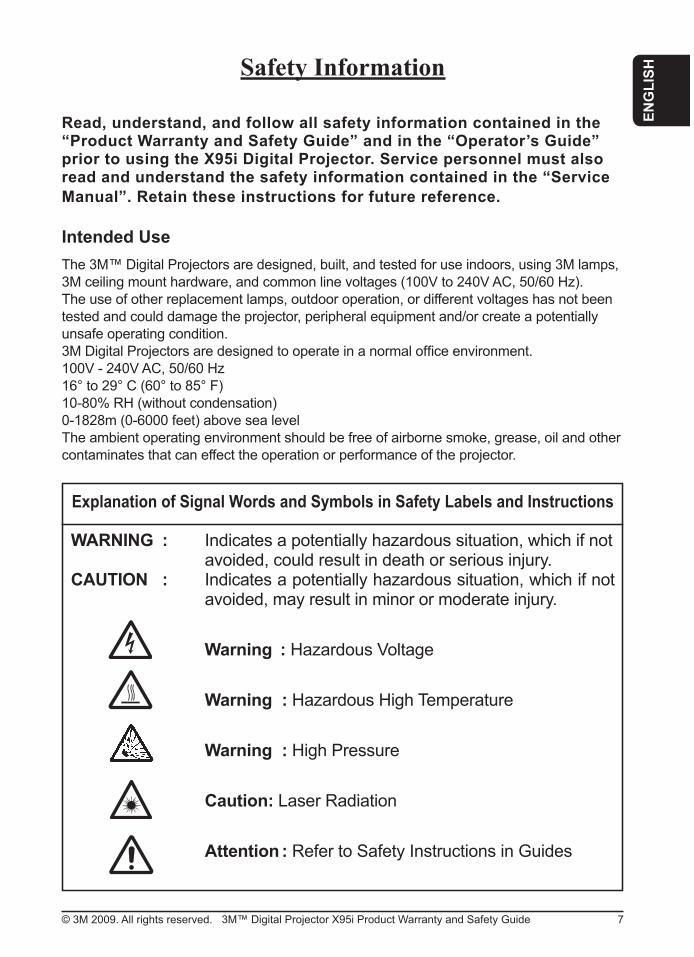
Explanation of Signal Words and Symbols in Safety Labels and Instructions
WARNING : Indicates a potentially hazardous situation, which if not avoided, could result in death or serious injury.
CAUTION : Indicates a potentially hazardous situation, which if not avoided, may result in minor or moderate injury.
Warning : Hazardous Voltage
Warning : Hazardous High Temperature
Warning : High Pressure
Caution: Laser Radiation
Attention : Refer to Safety Instructions in Guides

3M™ Digital Projector X95i Product Warranty and Safety Guide8
ENG
LISH
© 3M 2009. All rights reserved.
- Keep the battery away from children and pets.
- Disconnect power cord when the projector is not in use, during lamp replacement, and while cleaning.
instructions. - Do not store or operate this projector in wet environments. - Do not modify this projector. - Do not attempt to service the projector - there are no user serviceable parts,
other than the lamp cartridge, inside the projector. Contact a 3M authorized service provider for service.
- Do not allow water or other liquids to enter the projector.
mercury in the projection lamp:- Dispose of lamp cartridge in accordance with applicable federal, state and local regulations.- The lamp in this product contains mercury. Dispose of projection lamp in a manner
that is consistent with your local hazardous waste regulations for mercury.- For recycling and disposal information, contact your respective governmental
agencies.In U.S., contact 1-800-328-1371 (3M US) or the Electronic Industries Alliance at www.lamprecycle.orgIn Canada, contact 1-800-364-3577 (3M Canada)
- Replace power cord if damaged. - Contact a 3M authorized service provider if the projector becomes damaged. - Use a grounded extension cord with a rating at least equal to that of the projector. - Connect this projector to a grounded outlet.
intense visible light: - Do not use this projector around unsupervised children.
- Unplug the projector from the electrical outlet and allow the lamp to cool for 45 minutes before replacing the lamp.
- Always handle the fragile lamp module with care. - Remove the projector from the ceiling or wall mount before replacing the lamp. - Use care when replacing the lamp module in the event of a lamp rupture - small
glass particles and small amounts of mercury may be present. - Ventilate the area where the lamp rupture occurred. - Wear safety goggles and gloves when cleaning up ruptured lamp debris. - Carefully collect the ruptured lamp debris in a closed container and dispose of
the container and the expired lamp module in accordance with federal, state, and local regulations.
- Wash your hands thoroughly after handling ruptured lamp debris. - Replace the lamp module when the lamp replacement message appears. - Never replace the lamp module with a previously used lamp module.
WARNING

3M™ Digital Projector X95i Product Warranty and Safety Guide 9
ENG
LISH
© 3M 2009. All rights reserved.
CAUTION- Dispose of exhausted batteries in accordance with applicable federal, state, and
local regulations.
result in minor or moderate injury:- Never look directly at the laser output of the remote control or point it at other people.- Never attempt to make any adjustments to the internal controls of the remote
control other than those described in the Operator’s Guide.
batteries:- Use only with battery type AA (HITACHI MAXELL Part No.LR6 or R6P).- Orient the battery's plus (+) and minus (-) terminals of the batteries according to
the markings found on the remote control or internal clock battery case.- Do not leave the battery in the remote for an extended period of time.
- Do not carry batteries loose in your pocket or purse.- Avoid eye and skin contact in the event that battery would leak.- Do not mix used and new batteries.- Obey the local laws on disposing the battery.
- Use only the 3M™ brand wall/ceiling mounting hardware kit if wall or ceiling mounting is desired.
- Adhere strictly to the proper installation procedure as outlined in the installation instructions when installing the 3M™ wall/ceiling kit.
- Avoid looking directly into the projector lens while the lamp is on.
- Position the power cord and data cable so that they cannot be tripped over.
excessive voltage.

3M™ Digital Projector X95i Product Warranty and Safety Guide10
ENG
LISH
© 3M 2009. All rights reserved.
Important Note 1. Always open the lens shutter or remove lens cap when the projection lamp is on. 2. To avoid premature lamp failure, do not change the mounting position of the
projector (desktop ceiling mount or ceiling desktop mount) and continue to use the same lamp.
4. To avoid reduced image quality, do not touch projection lens or other internal optical components.
5. Do not use detergents, chemicals, or any spray liquids for cleaning this unit, other than those referred to in the “Operator's Guide”.
6. For maximum lamp life, do not strike or drop, improperly handle, or scratch the lamp glass. Also, do not install an old or used lamp.
Guide”. 8. Keep all ventilation openings free of any obstructions. 9. In some countries, the line voltage is NOT stable. This projector is designed to
operate safely within a bandwidth of 100 to 120 volts / 220 to 240 volts (50 to 60 Hz) ±10%, but could fail if power drops or surges of ±10 volts occur. In these high-risk areas, it is recommended to install a power stabilizer unit.
10. Do not block intake or exhaust air vents. This will cause the projector to over heat and shut down.
11. Do not place the projector in direct sunlight or near a hot object such as a heater.12. To prevent damaging the projector, always hold the projector whenever using the
elevator buttons to adjust the elevator feet.13. Use the accessory cable or a designated-type cable for the connection. Some
cables have to be used with core set. A too long cable may cause certain picture degradation. Please consult with your dealer for details. For cables that have a core only at one end, connect the core to the projector.
14. Make sure that you connect devices to the correct port. Incorrect connection may result in malfunction and/or damage to the device and/or projector.
15. Do not place the projector in the side/front/rear-up position, except care of the air
16. The mark is in compliance with the Waste Electrical and Electronic Equipment Directive 2002/96/EC (WEEE). The mark indicates the requirement NOT to dispose the equipment including any spent or discarded batteries or accumulators as unsorted municipal waste, but use the return and collection systems available. If the batteries or accumulators included with this equipment, display the chemical symbol Hg, Cd, or Pb, then it means that the battery has a heavy metal content of more than 0.0005% Mercury or more than, 0.002% Cadmium, or more than 0.004% Lead.

3M™ Digital Projector X95i Product Warranty and Safety Guide 11
ENG
LISH
© 3M 2009. All rights reserved.
Product Safety Labels
BLANK
LASER
ASPECT
PUSH ENTER
PAGE UP
LASER
INDICATOR
MY SOURCE/
DOC.CAMERA
SEARCHSTANDBY/ONVIDEO
RGB
PAGE DOWN
ESC
MENURESET
POSITIONAUTO
MAGNIFY
ON
OFF
MY BUTTON
1
2
VOLUME
+
-
FREEZEKEYSTONE
MUTE
LASER INDICATOR
LASER button
The laser beam outlet
3M™ Digital Projector X95i Product Warranty and Safety Guide12
ENG
LISH
© 3M 2009. All rights reserved.
LampLamp Operation:
The following symptoms may indicate a lamp in need of replacement:
mercury in the projection lamp:- Dispose of lamp cartridge in accordance with applicable federal, state and local regulations.- The lamp in this product contains mercury. Dispose of projection lamp in a manner
that is consistent with your local hazardous waste regulations for mercury.- For recycling and disposal information, contact your respective governmental
agencies.In U.S., contact 1-800-328-1371 (3M US) or the Electronic Industries Alliance at www.lamprecycle.orgIn Canada, contact 1-800-364-3577 (3M Canada)
WARNING
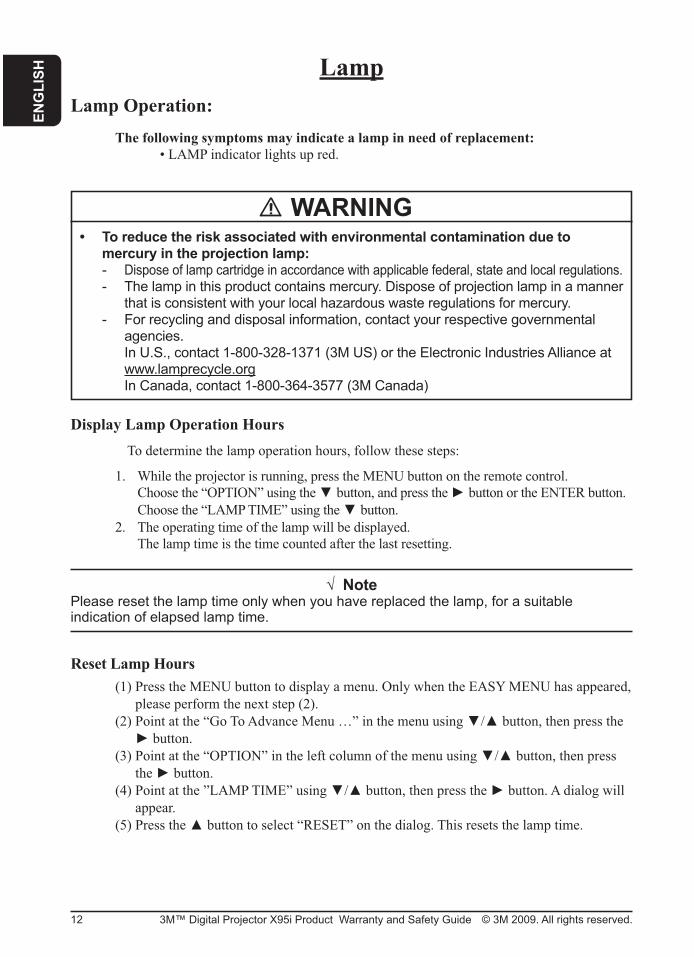
Display Lamp Operation HoursTo determine the lamp operation hours, follow these steps:
1. While the projector is running, press the MENU button on the remote control. Choose the “OPTION” using the button, and press the button or the ENTER button. Choose the “LAMP TIME” using the button.
2. The operating time of the lamp will be displayed. The lamp time is the time counted after the last resetting.
NotePlease reset the lamp time only when you have replaced the lamp, for a suitable indication of elapsed lamp time.
Reset Lamp Hours (1) Press the MENU button to display a menu. Only when the EASY MENU has appeared,
please perform the next step (2).
appear.

3M™ Digital Projector X95i Product Warranty and Safety Guide 13
ENG
LISH
© 3M 2009. All rights reserved.
- Disconnect power cord when the projector is not in use, during lamp replacement,and while cleaning.
-- Do not attempt to service the projector - there are no user serviceable parts, other
than the lamp cartridge, inside the projector. Contact a 3M authorized service provider for service.
- Unplug the projector from the electrical outlet and allow the lamp to cool for 45 minutes before replacing the lamp.
- Always handle the fragile lamp module with care.- Remove the projector from the ceiling or wall mount before replacing the lamp. In
the case of a lamp rupture, small glass particles could fall out when the lamp door is opened or the projector is tilted.
- Use care when replacing the lamp module in the event of a lamp rupture - small glass particles and small amounts of mercury may be present.
- Ventilate the area where the lamp rupture occurred.- Wear safety goggles and gloves when cleaning up ruptured lamp debris.- Carefully collect the ruptured lamp debris in a closed container and dispose of
the container and the expired lamp module in accordance with federal, state, and local regulations.
- Wash your hands thoroughly after handling ruptured lamp debris.- Replace the lamp module when the lamp replacement message appears.- Never replace the lamp module with a previously used lamp module.
mercury in the projection lamp:- Dispose of lamp cartridge in accordance with applicable federal, state and local regulations.- The lamp in this product contains mercury. Dispose of projection lamp in a manner
that is consistent with your local hazardous waste regulations for mercury.- For recycling and disposal information, contact your respective governmental
agencies.In U.S., contact 1-800-328-1371 (3M US) or the Electronic Industries Alliance at www.lamprecycle.orgIn Canada, contact 1-800-364-3577 (3M Canada)
WARNING
The glass lamp used in this projector contains small amounts of mercury and operates athigh pressure and at high temperature and may unexpectedly shatter. Each lamp has adifferent lifetime and can fail in different ways, including a rupture with a loud bang orsimply burn out. In the event of a lamp rupture, be sure to follow the instructions.
Replacing Lamp
Important Note:
elsewhere besides the lamp. If this happens, contact your local dealer or a service representative.
3M™ Digital Projector X95i Product Warranty and Safety Guide14
ENG
LISH
© 3M 2009. All rights reserved.
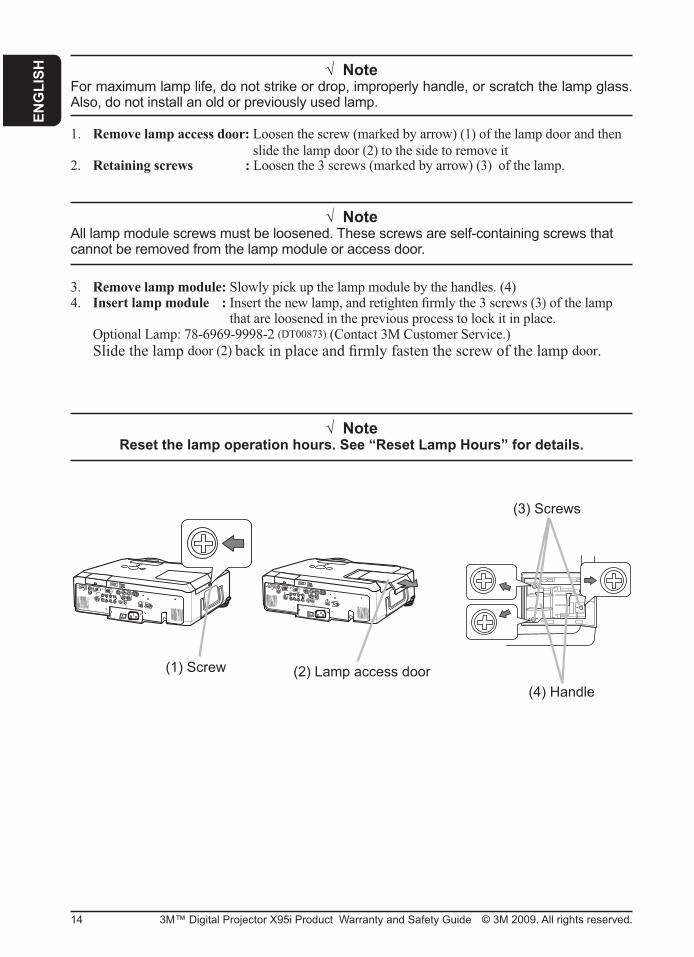
NoteReset the lamp operation hours. See “Reset Lamp Hours” for details.
3. Remove lamp module: Slowly pick up the lamp module by the handles. (4)4. Insert lamp module : (3) of the lamp
that are loosened in the previous process to lock it in place.Optional Lamp: 78-6969-9998-2 (DT00873) (Contact 3M Customer Service.)Slide the lamp door (2) door.
NoteFor maximum lamp life, do not strike or drop, improperly handle, or scratch the lamp glass. Also, do not install an old or previously used lamp.
1. Remove lamp access door: Loosen the screw (marked by arrow) (1) of the lamp door and then slide the lamp door (2) to the side to remove it
2. Retaining screws : Loosen the 3 screws (marked by arrow) (3) of the lamp.
NoteAll lamp module screws must be loosened. These screws are self-containing screws that cannot be removed from the lamp module or access door.
(2) Lamp access door(1) Screw
(4) Handle
(3) Screws

3M™ Digital Projector X95i Product Warranty and Safety Guide 15
ENG
LISH
© 3M 2009. All rights reserved.
Remote control
BLANK
LASER
ASPECT
PUSH ENTER
PAGE UP
LASER
INDICATOR
MY SOURCE/
DOC.CAMERA
SEARCHSTANDBY/ONVIDEO
RGB
PAGE DOWN
ESC
MENURESET
POSITIONAUTO
MAGNIFY
ON
OFF
MY BUTTON
1
2
VOLUME
+
-
FREEZEKEYSTONE
MUTE
LASER INDICATOR
LASER button
Always handle the batteries with care and use them only as directed. Improper use
:-
at the same time. Do not mix a new battery with used one.- Make sure the plus and minus terminals are correctly aligned when loading a battery.- Keep a battery away from children and pets.- Do not recharge, short circuit, solder or disassemble a battery.-- If you observe battery leakage, wipe out the battery residue and replace the battery.
If the residue adheres to your body or clothes, rinse well with water immediately.- Obey the local laws on disposing the battery.
Laser pointer
INDICATOR lights while the LASER button is pressed.
Installing the batteriesPlease load the batteries before using the remote control. If the remote control starts to malfunction, replace the batteries. If you will not use the remote control for an extended period, remove the batteries from the remote control and store them in a safe place.1. Slide back and remove the battery cover in the direction of
the arrow.2. Align and insert the two AA batteries(HITACHI MAXELL,
Part No.LR6 or R6P) according to their plus and minus terminals as indicated in the remote control.
3. Replace the battery cover in the direction of the arrow and snap it back into place.
WARNINGdirectly into the laser beam outlet or point the laser beam at other people. The laser beam can cause vision problems.
CAUTIONUse of controls or adjustments or performance of procedures other than those
WARNING

3M™ Digital Projector X95i Product Warranty and Safety Guide16
ENG
LISH
© 3M 2009. All rights reserved.
Consumption of the battery makes the clock not to work correctly. When the clock is wrong or it has stopped, please replace the battery according to the following procedures.1. Turn the projector off, and unplug the power cord. Allow the
2. After making sure that the projector has cooled adequately, slowly turn over the projector, so that the bottom is facing.
3. Turn the battery cover fully in the direction indicated “OPEN”using a coin or the like, and pick the cover up to remove it.
4. One of two kinds of clock battery holder, A or B shown to the right, is inside the battery cover.
For A holder:
out of the holder.
For B holder:
on the battery since it may pop out of the holder. Then the battery will come up. Remove the battery.
5. Replace the battery with a newHITACHI MAXELLL, Part No. CR2032 or CR2032H.Slide the battery in under the plastic claw, and push it into the holder until it clicks.
6. Replace the battery cover in place, then turn it in the direction indicated “CLOSE
Replacing the internal clock battery
WARNINGAlways handle the batteries with care and use them only as directed. Battery may
or pollution of the surrounding environment.:-- Make sure the plus and minus terminals are correctly aligned when loading a battery.- Keep a battery away from children and pets. If swallowed consult a physician
immediately for emergency treatment.- Do not short circuit or solder a battery.-- If you observe battery leakage, wipe out the leakage and then replace a battery. If the
leakage adheres to your body or clothes, rinse well with water immediately.- Obey the local laws on disposing the battery.
Note
1. Remove the battery cover and turn the projector’s upside up.2. While lifting the side of the projector closer to the lens, press the metal claw of the battery holder.
The battery will fall out of the holder, so be careful not to lose it.
Battery Cover
OPEN
CLOS
E
OPEN
CLOS
E
OPEN
CLOS
E
OPEN
CLOS
E
OPENCLOSE
90°
OPEN
CLOS
E
90°

3M™ Digital Projector X95i Product Warranty and Safety Guide 17
ENG
LISH
© 3M 2009. All rights reserved.
Using a USB storageIn order to view images stored in a USB storage, such as a USB memory, insert the device into the AUX I/O port. Before removing the USB storage, be sure to perform the REMOVE MEDIA procedure using the PC-LESS PRESENTATION menu under the MIU menu.
Using an SD cardIn order to view images stored in an SD storage, such as an SD memory card, insert the device into the SD card slot. Or, in order to use the wireless network function, load the internal clock battery and insert the designated wireless network card that is sold as an option into the slot.Inserting the SD card1. Make sure that the power code is not plugged into the projector for the wireless
network card only.2. Remove the SD card slot cover. After slowly insert the SD card completely into
the SD card slot, replace the SD card slot cover.Using the slot cover lock for securityUsing the enclosed slot cover lock can prevent the SD card slot cover from being opened.1. Open the two plates of the slot cover lock to put the tips of two plates together,
and then insert the tips to the lock hole of the SD card slot cover.2. Put the body of the two plates together. Then, hook a padlock or combination
lock to the hole of the slot cover lock.Removing the SD card1. Perform the REMOVE MEDIA procedure using the PC-LESS PRESENTATION menu under
the MIU menu for SD storage card only.2. Turn the projector off and unplug the power code from the projector for the wireless network
card only.3. Remove the SD card slot cover. After taking the SD card away, replace the SD card slot cover.
Inserting an SD Card and USB Memory
CAUTIONDo not touch the SD card while being accessed.
sold as an option is required.- The wireless network card is not permitted to be sold or used in some countries
and regions. Use the card only in the country or region where you buy it. For more information, ask your local dealer.
- When using the wireless network card, to comply with FCC RF exposure compliance requirements, the antenna used for this transmitter must be installed to provide a separation distance of at least 20 cm from all persons and must not be co-located or operating in conjunction with any other antenna or transmitter.
- Before using the projector with a wired LAN, remove the wireless network card.
SD CARD
SD CARD
SD CARD
Angled corner
SD card slot cover (SD card slot inside) AUX I/O port

3M™ Digital Projector X95i Product Warranty and Safety Guide18
ENG
LISH
© 3M 2009. All rights reserved.
FCC STATEMENT - CLASS B: This equipment generates, uses and can radiate radio frequency energy, and if not installed and used in accordance with the instruction manual may cause interference to radio communications. It has been tested and found to comply with the limits for a Class “B” computing device pursuant to Subpart B of Part 15 of the FCC Rules, which are designed to provide reasonable protection against such interference when operated in a residential installation.However, there is no guarantee that interference will not occur in a particular installation. If this equipment does cause harmful interference to radio or television reception, which can be determined by turning the equipment off and on, the user is encouraged to try to correct the interference by one or more of the following measures:* Reorient or relocate the receiving antenna.* Increase the separation between the equipment and receiver.* Connect the equipment into an outlet on a circuit different from that to which the receiver is connected.* Consult the dealer or an experienced radio/TV technician for help.
WARNING: In the US This device complies with part 15 of the FCC Rules. Operation is subject to the following two conditions: (1) This device may not cause harmful interference, and (2) This device must accept any interference received, including interference that may cause undesired operation.
INSTRUCTIONS TO USERS: This equipment complies with the requirements of FCC equipment provided that the following conditions are met. The cables may have to be used with the core set to the projector side. Use the cables which are included with
Note:operate the equipment.
EEC STATEMENT: This machine was tested against the 2004/108/EC (European Economic Community) for EMC (Electro
This product is compliant with EU Directive 2002/95/EC (Restriction of Hazardous Substances in Electrical and Electronic Equipment), as amended by Commission Decision 2005/618/EC on maximum concentration values.This product is compliant with EU Directive 2002/96/EC on Waste Electrical and Electronic Equipment (WEEE).
Video Signal Cables: Double shielded coaxial cables (FCC shield cable) must be used and the outer shield must be connected to the ground. If normal coaxial cables are used, the cable must be enclosed in metal pipes or in a similar way to reduce the interference noise radiation.Video Inputs: The input signal amplitude must not exceed th
PATENTS, TRADEMARKS & COPY RIGHTSIBM is a registered trademark of International Business Machines Corporation. Apple Macintosh and Apple Powerbookare registered trademarks of Apple Inc. Microsoft and Windows 95 & Windows 98 are registered trademarks, and Windowsand Windows for Workgroups are trademarks of the Microsoft Corporation. Toshiba is a registered trademark of Toshiba Corporation. Kensington is a trademark of Kensington Corporation. All other products are trademarks or registered trademarks of their respective companies. 3M is a trademark of 3M Company.


3M Austin CenterBuilding A145-5N-016801 River Place Blvd.Austin, TX 78726-9000
3M CanadaP.O. Box 5757London, OntarioN6A 4T1
3M Mexico, S.A. de C.V.Apartado Postal 14-139Mexico, D.F. 07000Mexico
3M EuropeBoulevard de l’Oise95006 Cerge Pontoise CedexFrance
Please recycle.Printed in Japan.© 3M 2009. All Rights Reserved.78-6971-1481-3 Rev. A
QR78391