Embed Size (px)
Citation preview
M A K E I T
YOU R S
How-2 instruction books for cool projects you can make your own.
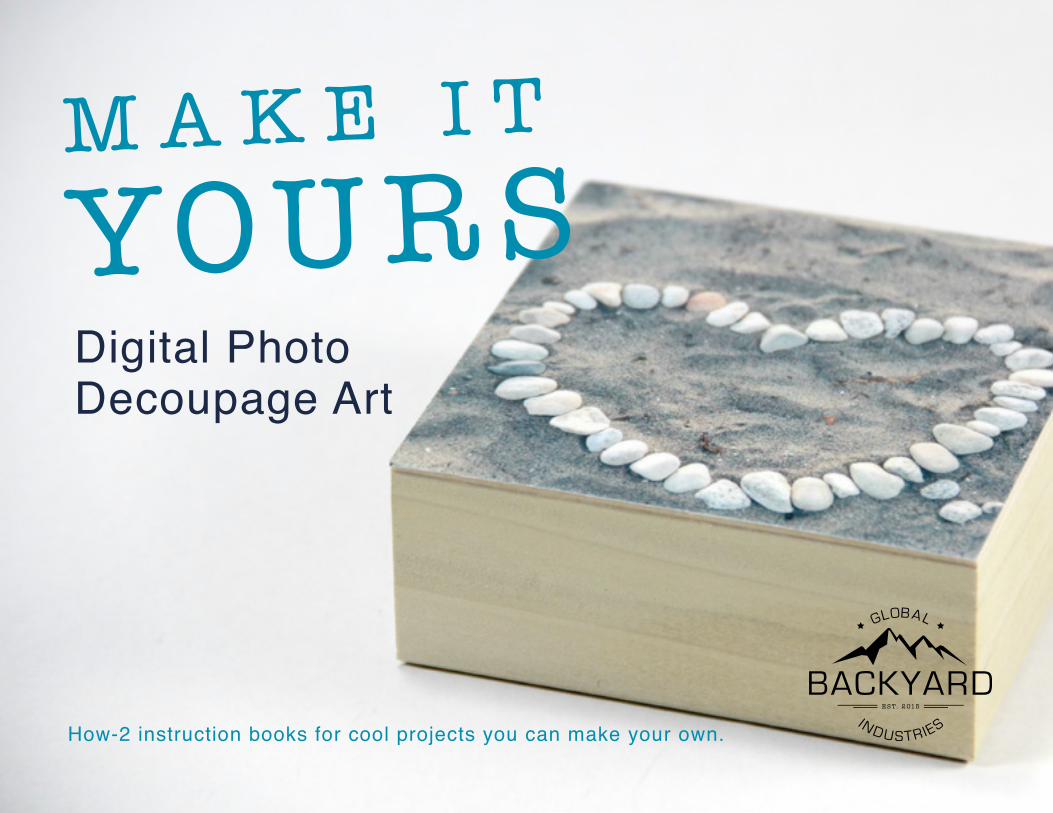
Digital Photo Decoupage Art
WHAT YOU WILL NEED
This project is a fun, easy way to take those digital photos and make them into your own works of art — and they look great hanging on the wall in groups.
• Computer / Internet Connection
• Digital photos you would like to use
• A program you can use to re-size and
print your photos (most word processing
programs will work)
• Decoupage medium (Matte or Gloss)
• Foam Brush
• Surface of your choice for mounting photos
(we’re using a 4”x 4” Birch Painting Panel)
• Ruler and craft knife, or scissors
• Small disposable cup, bowl, or dish
DIGITAL PHOTO DECOUPAGE ART
M A K E I T Y O U R S | 2 C o p y r i g h t © 2 0 1 5 G l o b a l B a c k y a r d I n d u s t r i e s . A l l R i g h t s R e s e r v e d

M A K E I T Y O U R S | 3 C o p y r i g h t © 2 0 1 5 G l o b a l B a c k y a r d I n d u s t r i e s . A l l R i g h t s R e s e r v e d
1 GET THOSE PHOTOS!
You know how to take a great photo – now we just need to get those gems off the internet or your computer and onto your custom art pieces...

M A K E I T Y O U R S | 4 C o p y r i g h t © 2 0 1 5 G l o b a l B a c k y a r d I n d u s t r i e s . A l l R i g h t s R e s e r v e d
2 SIZE TO FIT
You want the printed photos to match the size of the boards that they will be mounted on. (example: 4”x 4”)
If you have an image editing program you can use to resize your photos, great!
If you don’t, no problem – most word processing programs will work just fine for this, too.
Insert your photos into a new document and make sure the image size is set to the size of your surface.
M A K E I T Y O U R S | 5 C o p y r i g h t © 2 0 1 5 G l o b a l B a c k y a r d I n d u s t r i e s . A l l R i g h t s R e s e r v e d
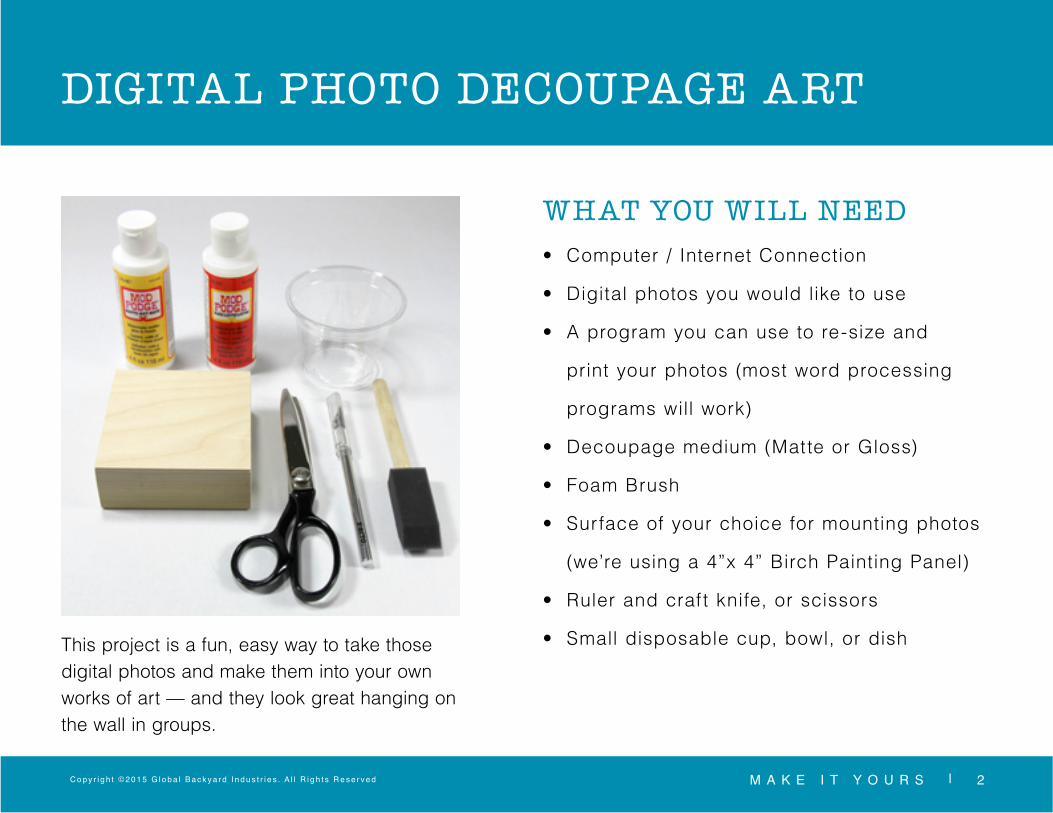
3 PRINT OUT & CUT OUT
Using a straight-edge ruler and a utility knife, carefully cut out your photo so that it matches the size of your art board.
D e c o u p a g e c a n s mu d g e i n k j e t p r i nt s!
Yo u c a n a v o i d t h i s b y p r i n t i n g p h o t o s o n a l a s e r p r i n t e r.
N o lase r p r i n te r ? Take yo u r i n k j e t p r i n ts to a copy ce n te r and make ph o to cop ies .
A l t e r n a t i v e l y y o u c a n u s e a s e a l a n t p r i o r t o d e c o u p a g i n g – t h i s w i l l p r o t e c t y o u r p h o t o f r o m t h e d r e a d e d s m u d g e .
S ea lan ts i nc lude sp ray f i xa t i ves , b rus h - o n p o lyu re thane — eve n ha i rsp ray can wo rk to sea l i n k j e t p r i n ts i n a p i nch .
(You may want to use a cutting mat to protect your table.)If you don’t have these things, use a pair of scissors. Try to make your edges as precise as possible.
First, print out your photo.
Now gather your cutting tools and find a table or other flat, stable work surface.
M A K E I T Y O U R S | 6 C o p y r i g h t © 2 0 1 5 G l o b a l B a c k y a r d I n d u s t r i e s . A l l R i g h t s R e s e r v e d
4 PREP THE SURFACE
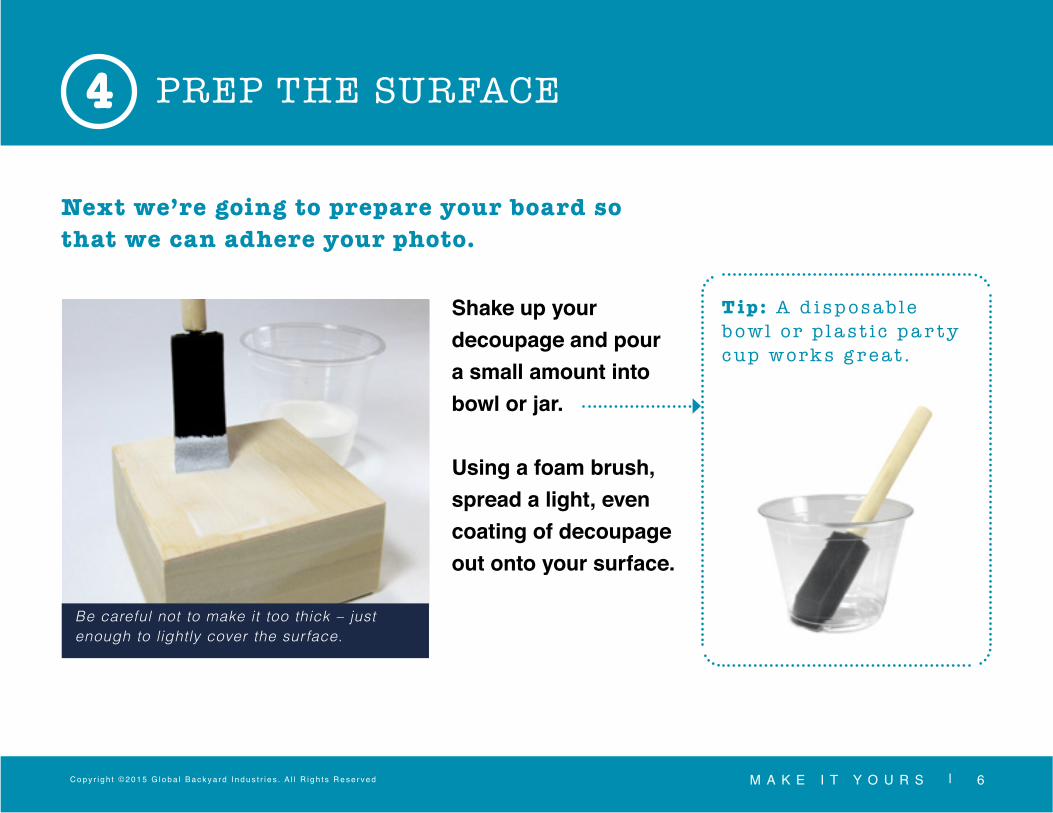
Next we’re going to prepare your board so that we can adhere your photo.
Shake up your decoupage and pour a small amount into bowl or jar.
Using a foam brush, spread a light, even coating of decoupage out onto your surface.
Be careful not to make it too thick – just enough to lightly cover the surface.
T i p: A d i s p o s a bl e b o wl or p l a s t i c p a r t y c up w ork s g r e a t .
M A K E I T Y O U R S | 7 C o p y r i g h t © 2 0 1 5 G l o b a l B a c k y a r d I n d u s t r i e s . A l l R i g h t s R e s e r v e d
5
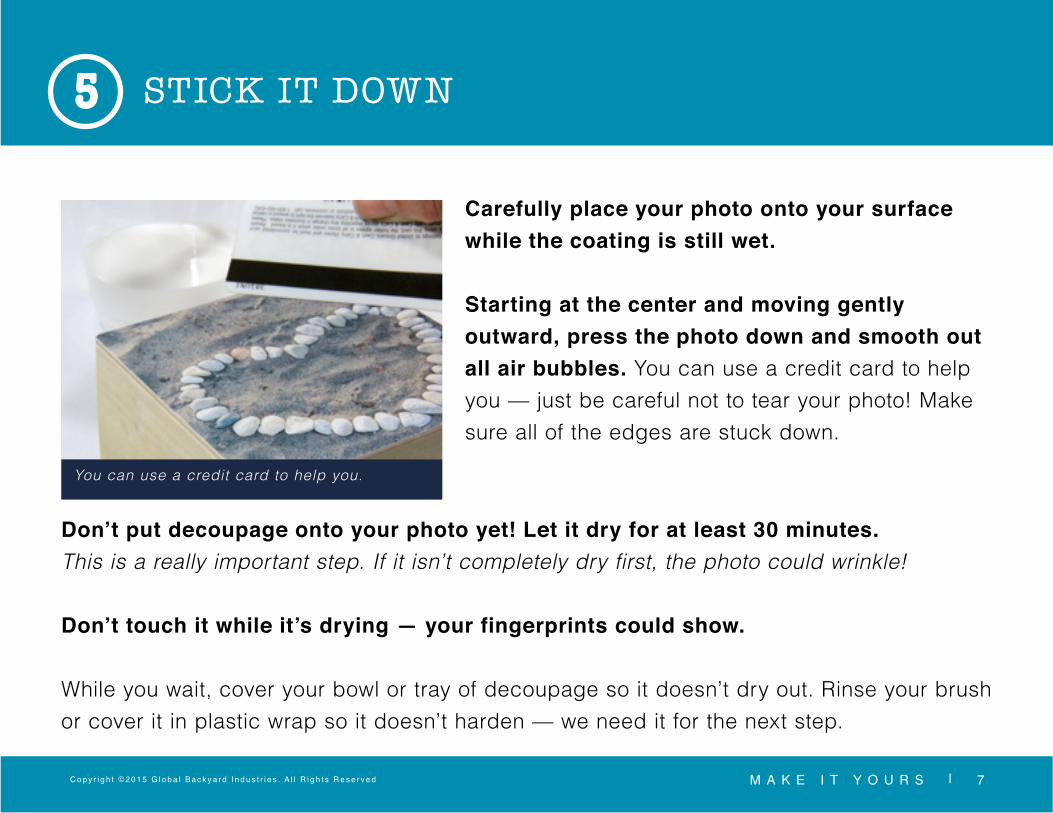
You can use a credit card to help you.
STICK IT DOWN
Carefully place your photo onto your surface while the coating is still wet.
Starting at the center and moving gently outward, press the photo down and smooth out all air bubbles. You can use a credit card to help you — just be careful not to tear your photo! Make sure all of the edges are stuck down.
Don’t put decoupage onto your photo yet ! Let it dry for at least 30 minutes.This is a really important step. If it isn’t completely dry first, the photo could wrinkle!
Don’t touch it while it’s drying — your fingerprints could show.
While you wait, cover your bowl or tray of decoupage so it doesn’t dry out. Rinse your brush or cover it in plastic wrap so it doesn’t harden — we need it for the next step.
M A K E I T Y O U R S | 8 C o p y r i g h t © 2 0 1 5 G l o b a l B a c k y a r d I n d u s t r i e s . A l l R i g h t s R e s e r v e d
6 DECOUPAGE TIME
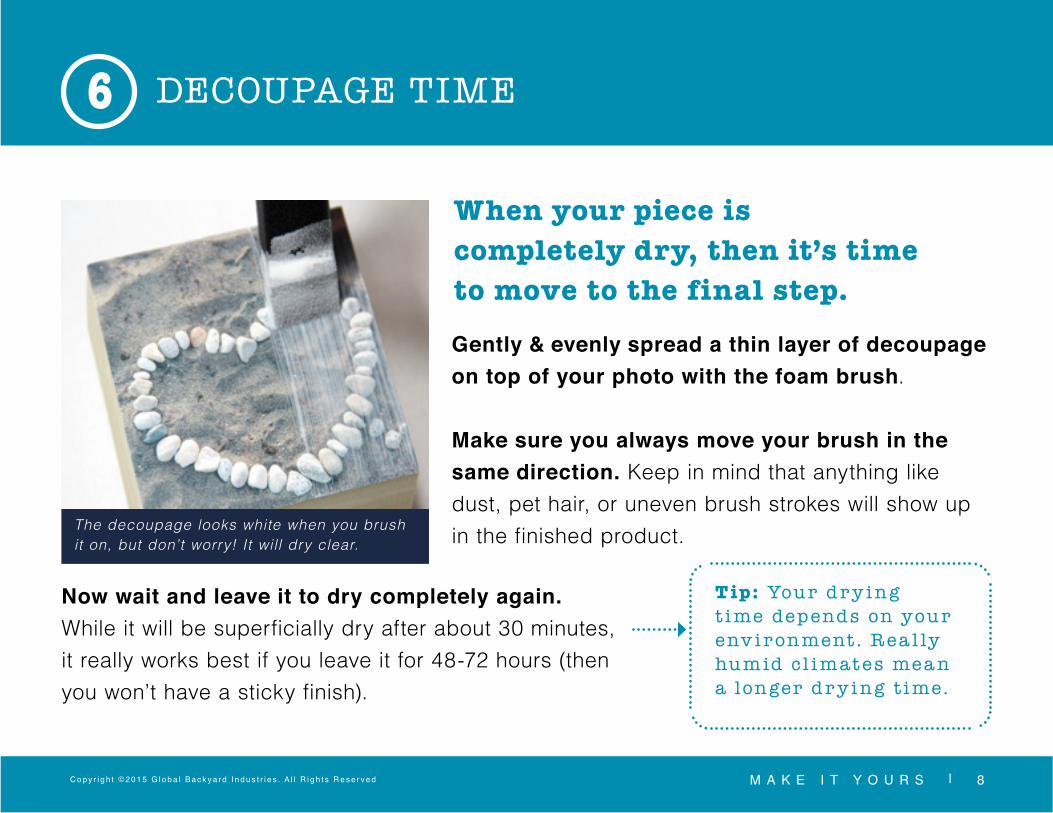
Gently & evenly spread a thin layer of decoupage on top of your photo with the foam brush.
Make sure you always move your brush in the same direction. Keep in mind that anything like dust, pet hair, or uneven brush strokes will show up in the finished product.
T ip: You r d r y i n g t i me depend s on you r env i r on ment . R ea l ly hu m id cl i m at es mea n a lon ger d r y i n g t i me.
Now wait and leave it to dry completely again.While it will be superficially dry after about 30 minutes, it really works best if you leave it for 48-72 hours (then you won’t have a sticky finish).
The decoupage looks white when you brush it on, but don’t worry! It will dry clear.
When your piece iscompletely dry, then it’s time to move to the final step.

M A K E I T Y O U R S | 9 C o p y r i g h t © 2 0 1 5 G l o b a l B a c k y a r d I n d u s t r i e s . A l l R i g h t s R e s e r v e d
!
Copyr ight ©2015 Global Backyard Industr ies. A l l R ights Reserved
YOU ARE A ROCK STAR!
We hope you enjoyed this project! We’re planning more cool Make It Yours projects for the future.
Thank you!
Congratulations!Project complete — now you can show off that digital photo gold!