Embed Size (px)
Citation preview
4-10-2014
DHCP Server
TABLE OF CONTENTS
Introduction ................................................................................................................................................................... 3
Operation ....................................................................................................................................................................... 3
Dynamic Address Allocation ...................................................................................................................................... 4
IP Address Conflict Prevention .................................................................................................................................. 5
DHCPD Leases ............................................................................................................................................................ 5
Setup .............................................................................................................................................................................. 6
Using the DHCP Distribution ...................................................................................................................................... 6
Firewall Rules ......................................................................................................................................................... 7
Partial Servers ........................................................................................................................................................ 7
LINUX ..................................................................................................................................................................... 7
SCO ........................................................................................................................................................................ 9
HP-UX ..................................................................................................................................................................... 9
ULTRIX .................................................................................................................................................................. 10
FreeBSD ............................................................................................................................................................... 10
NeXTSTEP ............................................................................................................................................................. 10
Solaris .................................................................................................................................................................. 10
AIX ........................................................................................................................................................................ 12
MacOS X ............................................................................................................................................................... 12
Configuring dhcpd ....................................................................................................................................................... 12
Example Configuration ................................................................................................................................................ 14
Subnets .................................................................................................................................................................... 17
Lease Lengths .......................................................................................................................................................... 17
Lease Format ....................................................................................................................................................... 18
The Lease Declaration.......................................................................................................................................... 18
Address Pools .......................................................................................................................................................... 21
Client Classing .......................................................................................................................................................... 22
Subclasses ............................................................................................................................................................ 23
Per-Class Limits on Dynamic Address Allocation ................................................................................................. 24
Spawning Classes ................................................................................................................................................. 24
Combining MATCH, MATCH IF, and SPAWN WITH .............................................................................................. 25
DHCP Failover .......................................................................................................................................................... 25
Failover Startup ................................................................................................................................................... 26
Configuring Failover ............................................................................................................................................. 27

Dynamic DNS Updates ............................................................................................................................................. 32
The DNS Update Scheme ..................................................................................................................................... 33
Dynamic DNS Update Security ............................................................................................................................. 34
INTRODUCTION
The documentation for dhcpd, the ISC DHCP server, has been assembled from the various man pages included in
the ISC DHCP distribution and should not be considered comprehensive. Instead, it is intended to serve as an
introduction and overview of ISC DHCP – specifically, the process of setting up a basic DHCP server. This
documentation assumes a basic familiarity with networking and DNS.
ISC DHCP was originally written by Ted Lemon under a contract with Vixie Labs with the goal of being a complete
reference implementation of the DHCP protocol. Funding for this project was provided by Internet Systems
Consortium. The first release of the ISC DHCP distribution in December 1997 included just the DHCP server.
Release 2 in June 1999 added a DHCP client and a BOOTP/DHCP relay agent. DHCP 3 was released in October 2001
and included DHCP failover support, OMAPI, Dynamic DNS, conditional behaviour, client classing, and more.
Version 3 of the DHCP server was funded by Nominum, Inc. The 4.0 release in December 2007 introduced DHCPv6
protocol support for the server and client.
This is ISC DHCP 4.3.0. The major theme for this release is "ipv6 uplift", in which we enhance the v6 code to
support many of the features found in the v4 code. These include: support for v6, support for on_commit,
on_expiry and on_release in v6, support for accessing v6 relay options and better log messages for v6 addresses.
Non v6 features include: support for the standard DDNS, better OMAPI class and sub-class support allowing for
dynamic addition and removal of sub-classes, and support for DDNS without zone statements.
In this release, the DHCPv6 server should be fully functional on Linux, Solaris, or any BSD. The DHCPv6 client should
be similarly functional except on Solaris.
The DHCPv4 server, relay, and client, should be fully functional on Linux, Solaris, any BSD, HPUX, SCO, NextSTEP,
and Irix.
If you are running the DHCP distribution on a machine which is a firewall, or if there is a firewall between your
DHCP server(s) and DHCP clients, please read the section on firewalls which appears later in this document.
If you wish to run the DHCP Distribution on Linux, please see the Linux-specific notes later in this document. If you
wish to run on an SCO release, please see the SCO-specific notes later in this document. You particularly need to
read these notes if you intend to support Windows 95 clients. If you are running HP-UX or Ultrix, please read the
notes for those operating systems below. If you are running NeXTSTEP, please see the notes on NeXTSTEP below.
If you start dhcpd and get a message, "no free bpf", that means you need to configure the Berkeley Packet Filter
into your operating system kernel. On NetBSD, FreeBSD and BSD/os, type ``man bpf'' for information. On Digital
Unix, type ``man pfilt''.
OPERATION
The DHCP protocol allows a host to contact a central server which maintains a list of IP addresses which may be
assigned on one or more subnets. A DHCP client may request an address from this pool, and then use it on a
temporary basis for communication on network. The DHCP protocol also provides a mechanism whereby a client
can learn important details about the network to which it is attached, such as the location of a default router, the
location of a name server, and so on.

There are two versions of the DHCP protocol: DHCPv4 and DHCPv6. At startup the client may be started for one or
the other via the -4 or -6 options.
On startup, dhclient reads the dhclient.conf for configuration instructions. It then gets a list of all the network
interfaces that are configured in the current system. For each interface, it attempts to configure the interface using
the DHCP protocol.
In order to keep track of leases across system reboots and server restarts, dhclient keeps a list of leases it has been
assigned in the dhclient.leases file. On startup, after reading the dhclient.conf file, dhclient reads the
dhclient.leases file to refresh its memory about what leases it has been assigned.
When a new lease is acquired, it is appended to the end of the dhclient.leases file. In order to prevent the file from
becoming arbitrarily large, from time to time dhclient creates a new dhclient.leases file from its in-core lease
database. The old version of the dhclient.leases file is retained under the name dhclient.leases~ until the next time
dhclient rewrites the database.
Old leases are kept around in case the DHCP server is unavailable when dhclient is first invoked (generally during
the initial system boot process). In that event, old leases from the dhclient.leases file which have not yet expired
are tested, and if they are determined to be valid, they are used until either they expire or the DHCP server
becomes available.
A mobile host which may sometimes need to access a network on which no DHCP server exists may be preloaded
with a lease for a fixed address on that network. When all attempts to contact a DHCP server have failed, dhclient
will try to validate the static lease, and if it succeeds, will use that lease until it is restarted.
A mobile host may also travel to some networks on which DHCP is not available but BOOTP is. In that case, it may
be advantageous to arrange with the network administrator for an entry on the BOOTP database, so that the host
can boot quickly on that network rather than cycling through the list of old leases. DYNAMIC ADDRESS ALLOCATION
Address allocation is actually only done when a client is in the INIT state and has sent a DHCPDISCOVER message. If
the client thinks it has a valid lease and sends a DHCPREQUEST to initiate or renew that lease, the server has only
three choices - it can ignore the DHCPREQUEST, send a DHCPNAK to tell the client it should stop using the address,
or send a DHCPACK, telling the client to go ahead and use the address for a while.
If the server finds the address the client is requesting, and that address is available to the client, the server will
send a DHCPACK. If the address is no longer available, or the client isn't permitted to have it, the server will send a
DHCPNAK. If the server knows nothing about the address, it will remain silent, unless the address is incorrect for
the network segment to which the client has been attached and the server is authoritative for that network
segment, in which case the server will send a DHCPNAK even though it doesn't know about the address.
There may be a host declaration matching the client's identification. If that host declaration contains a fixed-
address declaration that lists an IP address that is valid for the network segment to which the client is connected.
In this case, the DHCP server will never do dynamic address allocation. In this case, the client is required to take
the address specified in the host declaration. If the client sends a DHCPREQUEST for some other address, the
server will respond with a DHCPNAK.
When the DHCP server allocates a new address for a client (remember, this only happens if the client has sent a
DHCPDISCOVER), it first looks to see if the client already has a valid lease on an IP address, or if there is an old IP
address the client had before that hasn't yet been reassigned. In that case, the server will take that address and
check it to see if the client is still permitted to use it. If the client is no longer permitted to use it, the lease is freed
if the server thought it was still in use - the fact that the client has sent a DHCPDISCOVER proves to the server that
the client is no longer using the lease.
If no existing lease is found, or if the client is forbidden to receive the existing lease, then the server will look in the
list of address pools for the network segment to which the client is attached for a lease that is not in use and that
the client is permitted to have. It looks through each pool declaration in sequence (all range declarations that
appear outside of pool declarations are grouped into a single pool with no permit list). If the permit list for the pool
allows the client to be allocated an address from that pool, the pool is examined to see if there is an address
available. If so, then the client is tentatively assigned that address. Otherwise, the next pool is tested. If no
addresses are found that can be assigned to the client, no response is sent to the client.
If an address is found that the client is permitted to have, and that has never been assigned to any client before,
the address is immediately allocated to the client. If the address is available for allocation but has been previously
assigned to a different client, the server will keep looking in hopes of finding an address that has never before
been assigned to a client.
The DHCP server generates the list of available IP addresses from a hash table. This means that the addresses are
not sorted in any particular order, and so it is not possible to predict the order in which the DHCP server will
allocate IP addresses. Users of previous versions of the ISC DHCP server may have become accustomed to the
DHCP server allocating IP addresses in ascending order, but this is no longer possible, and there is no way to
configure this behavior with version 3 of the ISC DHCP server.
IP ADDRESS CONFLICT PREVENTION
The DHCP server checks IP addresses to see if they are in use before allocating them to clients. It does this by
sending an ICMP Echo request message to the IP address being allocated. If no ICMP Echo reply is received within a
second, the address is assumed to be free. This is only done for leases that have been specified in range
statements, and only when the lease is thought by the DHCP server to be free - i.e., the DHCP server or its failover
peer has not listed the lease as in use.
If a response is received to an ICMP Echo request, the DHCP server assumes that there is a configuration error - the
IP address is in use by some host on the network that is not a DHCP client. It marks the address as abandoned, and
will not assign it to clients.
If a DHCP client tries to get an IP address, but none are available, but there are abandoned IP addresses, then the
DHCP server will attempt to reclaim an abandoned IP address. It marks one IP address as free, and then does the
same ICMP Echo request check described previously. If there is no answer to the ICMP Echo request, the address is
assigned to the client.
The DHCP server does not cycle through abandoned IP addresses if the first IP address it tries to reclaim is free.
Rather, when the next DHCPDISCOVER comes in from the client, it will attempt a new allocation using the same
method described here, and will typically try a new IP address.
DHCPD LEASES
The Internet Systems Consortium DHCP Server keeps a persistent database of leases that it has assigned. This
database is a free-form ASCII file containing a series of lease declarations. Every time a lease is acquired, renewed
or released, its new value is recorded at the end of the lease file. So if more than one declaration appears for a
given lease, the last one in the file is the current one.
When dhcpd is first installed, there is no lease database. However, dhcpd requires that a lease database be present
before it will start. To make the initial lease database, just create an empty file called DBDIR/dhcpd.leases. You can
do this with:
touch DBDIR/dhcpd.leases
In order to prevent the lease database from growing without bound, the file is rewritten from time to time. First, a
temporary lease database is created and all known leases are dumped to it. Then, the old lease database is
renamed DBDIR/dhcpd.leases~. Finally, the newly written lease database is moved into place.
SETUP
To download ISC DHCP, please visit http://www.isc.org/downloads/
To build the DHCP Distribution, you must first unpack the compressed tar file. You can use the tar utility and the
gzip command – type something like:
gunzip dhcp-4.3.0.tar.gz tar xvf dhcp-4.3.0.tar
Now, cd to the dhcp-4.3.0 subdirectory that you've just created and configure the source tree by typing:
./configure
If the configure utility can figure out what sort of system you're running on, it will create a custom Makefile for you
for that system; otherwise, it will complain. If it can't figure out what system you are using, that system is not
supported - you are on your own.
Several options may be enabled or disabled via the configure command. You can get a list of these by typing:
./configure –-help
Once you've run configure, just type “make”, and after a while you should have a dhcp server. If you get warnings,
it's not likely to be a problem - the DHCP server compiles completely warning-free on as many architectures as we
can manage, but there are a few for which this is difficult. If you get errors on a system not mentioned above, you
will need to do some programming or debugging on your own to get the DHCP Distribution working.
Once you have successfully gotten the DHCP Distribution to build, you can install it by typing “make install”. If you
already have an old version of the DHCP Distribution installed, you may want to save it before typing “make
install”.
USING THE DHCP DISTRIBUTION
FIREWALL RULES
If you are running the DHCP server or client on a computer that's also acting as a firewall, you must be sure to
allow DHCP packets through the firewall. In particular, your firewall rules _must_ allow packets from IP address
0.0.0.0 to IP address 255.255.255.255 from UDP port 68 to UDP port 67 through. They must also allow packets
from your local firewall's IP address and UDP port 67 through to any address your DHCP server might serve on UDP
port 68. Finally, packets from relay agents on port 67 to the DHCP server on port 67, and vice versa, must be
permitted.
We have noticed that on some systems where we are using a packet filter, if you set up a firewall that blocks UDP
port 67 and 68 entirely, packets sent through the packet filter will not be blocked. However, unicast packets will be
blocked. This can result in strange behaviour, particularly on DHCP clients, where the initial packet exchange is
broadcast, but renewals are unicast - the client will appear to be unable to renew until it starts broadcasting its
renewals, and then suddenly it'll work. The fix is to fix the firewall rules as described above.
PARTIAL SERVERS
If you have a server that is connected to two networks, and you only want to provide DHCP service on one of those
networks (e.g., you are using a cable modem and have set up a NAT router), if you don't write any subnet
declaration for the network you aren't supporting, the DHCP server will ignore input on that network interface if it
can. If it can't, it will refuse to run - some operating systems do not have the capability of supporting DHCP on
machines with more than one interface, and ironically this is the case even if you don't want to provide DHCP
service on one of those interfaces.
LINUX
There are three big LINUX issues: the all-ones broadcast address, Linux 2.1 ip_bootp_agent enabling, and
operations with more than one network interface. There are also two potential compilation/runtime problems for
Linux 2.1/2.2: the "SO_ATTACH_FILTER undeclared" problem and the "protocol not configured" problem.
LINUX: PROTOCOL NOT CONFIGURED
If you get the following message, it's because your kernel doesn't have the linux packetfilter or raw packet socket
configured:
Make sure CONFIG_PACKET (Packet socket) and CONFIG_FILTER (Socket Filtering)
are enabled in your kernel configuration
If this happens, you need to configure your Linux kernel to support Socket Filtering and the Packet socket, or to
select a kernel provided by your Linux distribution that has these enabled (virtually all modern ones do by default).
LINUX: BROADCAST
If you are running a recent version of Linux, this won't be a problem, but on older versions of Linux (kernel versions
prior to 2.2), there is a potential problem with the broadcast address being sent incorrectly.
In order for dhcpd to work correctly with picky DHCP clients (e.g., Windows 95), it must be able to send packets
with an IP destination address of 255.255.255.255. Unfortunately, Linux changes an IP destination of
255.255.255.255 into the local subnet broadcast address (here, that's 192.5.5.223).
This isn't generally a problem on Linux 2.2 and later kernels, since we completely bypass the Linux IP stack, but on
old versions of Linux 2.1 and all versions of Linux prior to 2.1, it is a problem - pickier DHCP clients connected to the
same network as the ISC DHCP server or ISC relay agent will not see messages from the DHCP server. It *is*
possible to run into trouble with this on Linux 2.2 and later if you are running a version of the DHCP server that was
compiled on a Linux 2.0 system, though.
It is possible to work around this problem on some versions of Linux by creating a host route from your network
interface address to 255.255.255.255. The command you need to use to do this on Linux varies from version to
version. The easiest version is:
route add -host 255.255.255.255 dev eth0
On some older Linux systems, you will get an error if you try to do this. On those systems, try adding the following
entry to your /etc/hosts file:
255.255.255.255 all-ones
Then, try:
route add -host all-ones dev eth0
Another route that has worked for some users is:
route add -net 255.255.255.0 dev eth0
If you are not using eth0 as your network interface, you should specify the network interface you *are* using in
your route command.
LINUX: IP BOOTP AGENT
Some versions of the Linux 2.1 kernel apparently prevent dhcpd from working unless you enable it by doing the
following:
echo 1 >/proc/sys/net/ipv4/ip_bootp_agent
LINUX: MULTIPLE INTERFACES
Very old versions of the Linux kernel do not provide a networking API that allows dhcpd to operate correctly if the
system has more than one broadcast network interface. However, Linux 2.0 kernels with version numbers greater
than or equal to 2.0.31 add an API feature: the SO_BINDTODEVICE socket option. If SO_BINDTODEVICE is present,
it is possible for dhcpd to operate on Linux with more than one network interface. In order to take advantage of
this, you must be running a 2.0.31 or greater kernel, and you must have 2.0.31 or later system headers installed
*before* you build the DHCP Distribution.
We have heard reports that you must still add routes to 255.255.255.255 in order for the all-ones broadcast to
work, even on 2.0.31 kernels. In fact, you now need to add a route for each interface. Hopefully the Linux kernel
gurus will get this straight eventually.
Linux 2.1 and later kernels do not use SO_BINDTODEVICE or require the broadcast address hack, but do support
multiple interfaces, using the Linux Packet Filter.
LINUX: OPENWRT
DHCP 4.1 has been tested on OpenWrt 7.09 and 8.09. In keeping with standard practice, client/scripts now
includes a dhclient-script file for OpenWrt. However, this is not sufficient by itself to run dhcp on OpenWrt; a full
OpenWrt package for DHCP is available at ftp://ftp.isc.org/isc/dhcp/dhcp-4.1.0-openwrt.tar.gz
LINUX: 802.1Q VLAN INTERFACES
If you're using 802.1q vlan interfaces on Linux, it is necessary to vconfig the subinterface(s) to rewrite the 802.1q
information out of packets received by the dhcpd daemon via LPF:
vconfig set_flag eth1.523 1 1
Note that this may affect the performance of your system, since the Linux kernel must rewrite packets received via
this interface. For more information, consult the vconfig man pages.
SCO
ISC DHCP will now work correctly on newer versions of SCO out of the box (tested on OpenServer 5.05b, assumed
to work on UnixWare 7).
Older versions of SCO have the same problem as Linux (described earlier). The thing is, SCO *really* doesn't want
to let you add a host route to the all-ones broadcast address.
You can try the following:
ifconfig net0 xxx.xxx.xxx.xxx netmask 0xNNNNNNNN broadcast 255.255.255.255
If this doesn't work, you can also try the following strange hack:
ifconfig net0 alias 10.1.1.1 netmask 8.0.0.0
Apparently this works because of an interaction between SCO's support for network classes and the weird
netmask. The 10.* network is just a dummy that can generally be assumed to be safe. Don't ask why this works.
Just try it. If it works for you, great.
HP-UX
HP-UX has the same problem with the all-ones broadcast address that SCO and Linux have. One user reported that
adding the following to /etc/rc.config.d/netconf helped (you may have to modify this to suit your local
configuration):
INTERFACE_NAME[0]=lan0 IP_ADDRESS[0]=1.1.1.1 SUBNET_MASK[0]=255.255.255.0
BROADCAST_ADDRESS[0]="255.255.255.255" LANCONFIG_ARGS[0]="ether"
DHCP_ENABLE[0]=0
ULTRIX
Now that we have Ultrix packet filter support, the DHCP Distribution on Ultrix should be pretty trouble-free.
However, one thing you do need to be aware of is that it now requires that the pfilt device be configured into your
kernel and present in /dev. If you type ``man packetfilter'', you will get some information on how to configure your
kernel for the packet filter (if it isn't already) and how to make an entry for it in /dev.
FREEBSD
Versions of FreeBSD prior to 2.2 have a bug in BPF support in that the ethernet driver swaps the ethertype field in
the ethernet header downstream from BPF, which corrupts the output packet. If you are running a version of
FreeBSD prior to 2.2, and you find that dhcpd can't communicate with its clients, you should #define
BROKEN_FREEBSD_BPF in site.h and recompile.
Modern versions of FreeBSD include the ISC DHCP 3.0 client as part of the base system, and the full distribution
(for the DHCP server and relay agent) is available from the Ports Collection in /usr/ports/net/isc-dhcp3, or as a
package on FreeBSD installation CDROMs.
NEXTSTEP
The NeXTSTEP support uses the NeXTSTEP Berkeley Packet Filter extension, which is not included in the base
NextStep system. You must install this extension in order to get dhcpd or dhclient to work.
SOLARIS
There are two known issues seen when compiling using the Sun compiler.
The first is that older Sun compilers generate an error on some of our uses of the flexible array option. Newer
versions only generate a warning, which can be safely ignored. If you run into this error ("type of struct member
"buf" can not be derived from structure with flexible array member"), upgrade your tools to Oracle Solaris Studio
(previously Sun Studio) 12 or something newer.
The second is the interaction between the configure script and the makefiles for the Bind libraries. Currently we
don't pass all environment variables between the DHCP configure and the Bind configure.
If you attempt to specify the compiler you wish to use like this:
CC=/opt/SUNWspro/bin/cc ./configure
"make" may not build the Bind libraries with that compiler.
In order to use the same compiler for Bind and DHCP we suggest the following commands:
CC=/opt/SUNWspro/bin/cc ./configure CC=/opt/SUNWspro/bin/cc make
SOLARIS 11
We have integrated a patch from Oracle to use sockets instead of DLPI on Solaris 11. This functionality was written
for use with Solaris Studio 12.2 and requires the system/header package.
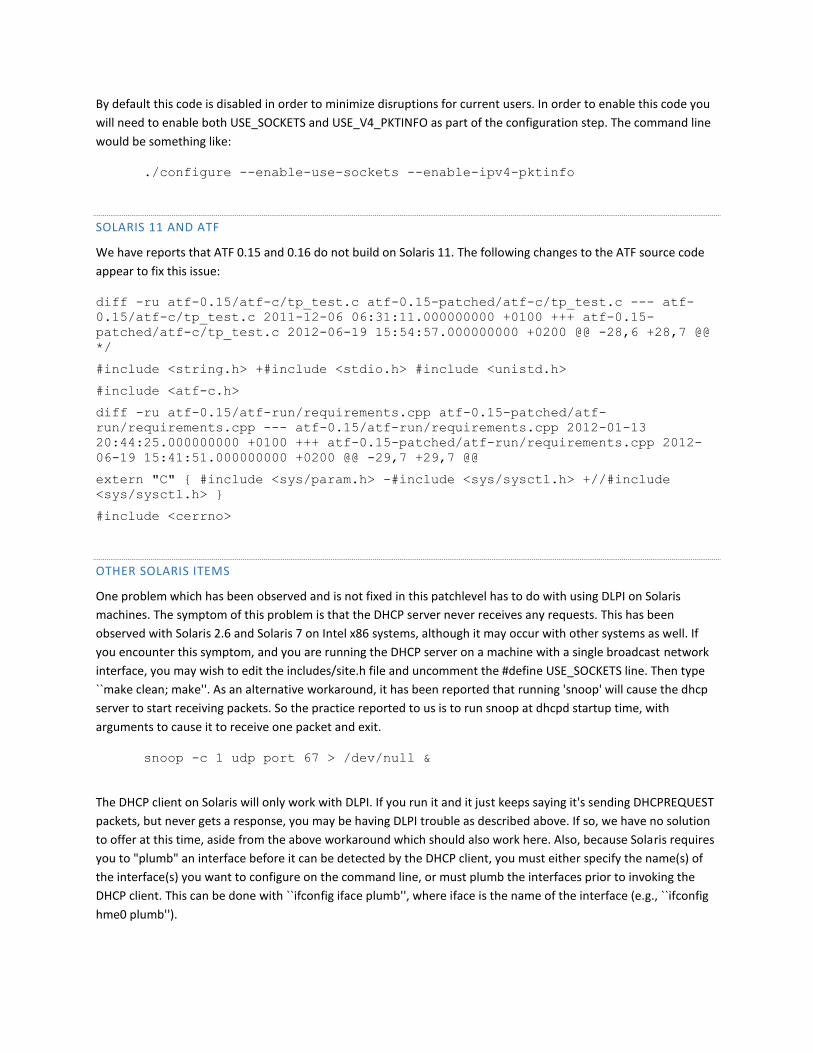
By default this code is disabled in order to minimize disruptions for current users. In order to enable this code you
will need to enable both USE_SOCKETS and USE_V4_PKTINFO as part of the configuration step. The command line
would be something like:
./configure --enable-use-sockets --enable-ipv4-pktinfo
SOLARIS 11 AND ATF
We have reports that ATF 0.15 and 0.16 do not build on Solaris 11. The following changes to the ATF source code
appear to fix this issue:
diff -ru atf-0.15/atf-c/tp_test.c atf-0.15-patched/atf-c/tp_test.c --- atf-
0.15/atf-c/tp_test.c 2011-12-06 06:31:11.000000000 +0100 +++ atf-0.15-
patched/atf-c/tp_test.c 2012-06-19 15:54:57.000000000 +0200 @@ -28,6 +28,7 @@
*/
#include <string.h> +#include <stdio.h> #include <unistd.h>
#include <atf-c.h>
diff -ru atf-0.15/atf-run/requirements.cpp atf-0.15-patched/atf-
run/requirements.cpp --- atf-0.15/atf-run/requirements.cpp 2012-01-13
20:44:25.000000000 +0100 +++ atf-0.15-patched/atf-run/requirements.cpp 2012-
06-19 15:41:51.000000000 +0200 @@ -29,7 +29,7 @@
extern "C" { #include <sys/param.h> -#include <sys/sysctl.h> +//#include
<sys/sysctl.h> }
#include <cerrno>
OTHER SOLARIS ITEMS
One problem which has been observed and is not fixed in this patchlevel has to do with using DLPI on Solaris
machines. The symptom of this problem is that the DHCP server never receives any requests. This has been
observed with Solaris 2.6 and Solaris 7 on Intel x86 systems, although it may occur with other systems as well. If
you encounter this symptom, and you are running the DHCP server on a machine with a single broadcast network
interface, you may wish to edit the includes/site.h file and uncomment the #define USE_SOCKETS line. Then type
``make clean; make''. As an alternative workaround, it has been reported that running 'snoop' will cause the dhcp
server to start receiving packets. So the practice reported to us is to run snoop at dhcpd startup time, with
arguments to cause it to receive one packet and exit.
snoop -c 1 udp port 67 > /dev/null &
The DHCP client on Solaris will only work with DLPI. If you run it and it just keeps saying it's sending DHCPREQUEST
packets, but never gets a response, you may be having DLPI trouble as described above. If so, we have no solution
to offer at this time, aside from the above workaround which should also work here. Also, because Solaris requires
you to "plumb" an interface before it can be detected by the DHCP client, you must either specify the name(s) of
the interface(s) you want to configure on the command line, or must plumb the interfaces prior to invoking the
DHCP client. This can be done with ``ifconfig iface plumb'', where iface is the name of the interface (e.g., ``ifconfig
hme0 plumb'').
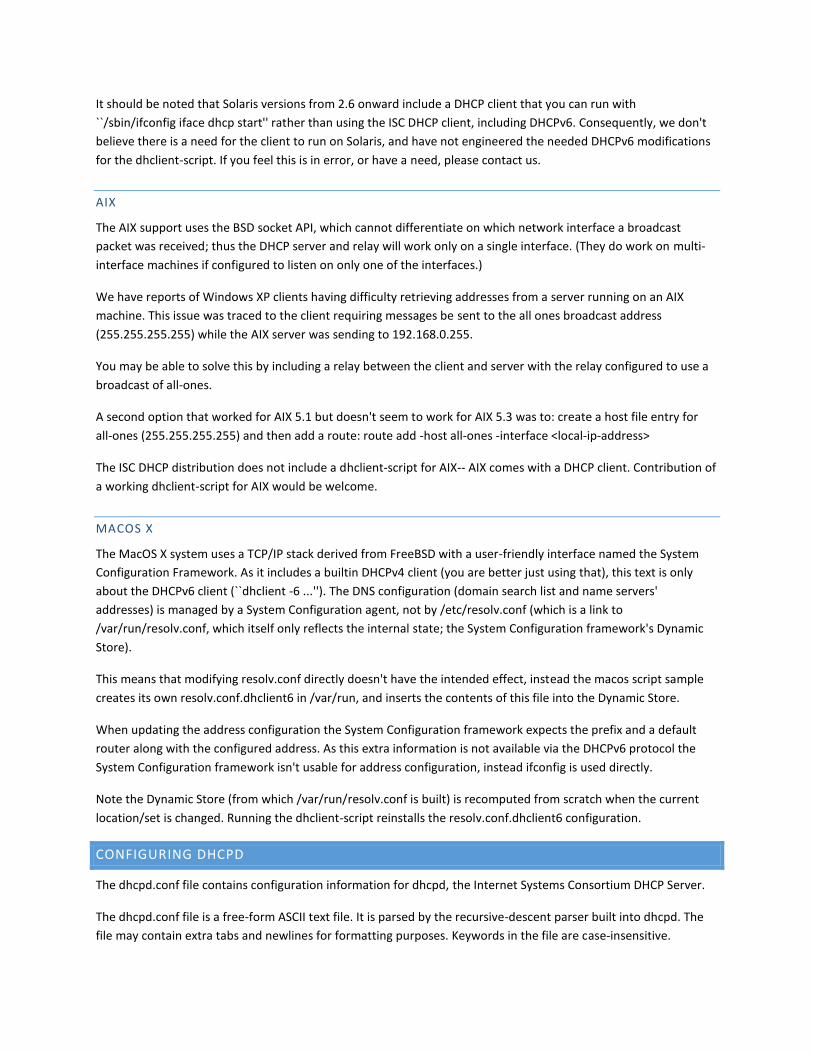
It should be noted that Solaris versions from 2.6 onward include a DHCP client that you can run with
``/sbin/ifconfig iface dhcp start'' rather than using the ISC DHCP client, including DHCPv6. Consequently, we don't
believe there is a need for the client to run on Solaris, and have not engineered the needed DHCPv6 modifications
for the dhclient-script. If you feel this is in error, or have a need, please contact us.
AIX
The AIX support uses the BSD socket API, which cannot differentiate on which network interface a broadcast
packet was received; thus the DHCP server and relay will work only on a single interface. (They do work on multi-
interface machines if configured to listen on only one of the interfaces.)
We have reports of Windows XP clients having difficulty retrieving addresses from a server running on an AIX
machine. This issue was traced to the client requiring messages be sent to the all ones broadcast address
(255.255.255.255) while the AIX server was sending to 192.168.0.255.
You may be able to solve this by including a relay between the client and server with the relay configured to use a
broadcast of all-ones.
A second option that worked for AIX 5.1 but doesn't seem to work for AIX 5.3 was to: create a host file entry for
all-ones (255.255.255.255) and then add a route: route add -host all-ones -interface <local-ip-address>
The ISC DHCP distribution does not include a dhclient-script for AIX-- AIX comes with a DHCP client. Contribution of
a working dhclient-script for AIX would be welcome.
MACOS X
The MacOS X system uses a TCP/IP stack derived from FreeBSD with a user-friendly interface named the System
Configuration Framework. As it includes a builtin DHCPv4 client (you are better just using that), this text is only
about the DHCPv6 client (``dhclient -6 ...''). The DNS configuration (domain search list and name servers'
addresses) is managed by a System Configuration agent, not by /etc/resolv.conf (which is a link to
/var/run/resolv.conf, which itself only reflects the internal state; the System Configuration framework's Dynamic
Store).
This means that modifying resolv.conf directly doesn't have the intended effect, instead the macos script sample
creates its own resolv.conf.dhclient6 in /var/run, and inserts the contents of this file into the Dynamic Store.
When updating the address configuration the System Configuration framework expects the prefix and a default
router along with the configured address. As this extra information is not available via the DHCPv6 protocol the
System Configuration framework isn't usable for address configuration, instead ifconfig is used directly.
Note the Dynamic Store (from which /var/run/resolv.conf is built) is recomputed from scratch when the current
location/set is changed. Running the dhclient-script reinstalls the resolv.conf.dhclient6 configuration.
CONFIGURING DHCPD
The dhcpd.conf file contains configuration information for dhcpd, the Internet Systems Consortium DHCP Server.
The dhcpd.conf file is a free-form ASCII text file. It is parsed by the recursive-descent parser built into dhcpd. The
file may contain extra tabs and newlines for formatting purposes. Keywords in the file are case-insensitive.

Comments may be placed anywhere within the file (except within quotes). Comments begin with the # character
and end at the end of the line.
The file essentially consists of a list of statements. Statements fall into two broad categories - parameters and
declarations.
Parameter statements either say how to do something (e.g., how long a lease to offer), whether to do something
(e.g., should dhcpd provide addresses to unknown clients), or what parameters to provide to the client (e.g., use
gateway 220.177.244.7).
Declarations are used to describe the topology of the network, to describe clients on the network, to provide
addresses that can be assigned to clients, or to apply a group of parameters to a group of declarations. In any
group of parameters and declarations, all parameters must be specified before any declarations which depend on
those parameters may be specified.
Declarations about network topology include the shared-network and the subnet declarations. If clients on a
subnet are to be assigned addresses dynamically, a range declaration must appear within the subnet declaration.
For clients with statically assigned addresses, or for installations where only known clients will be served, each
such client must have a host declaration. If parameters are to be applied to a group of declarations which are not
related strictly on a per-subnet basis, the group declaration can be used.
For every subnet which will be served, and for every subnet to which the dhcp server is connected, there must be
one subnet declaration, which tells dhcpd how to recognize that an address is on that subnet. A subnet declaration
is required for each subnet even if no addresses will be dynamically allocated on that subnet.
Some installations have physical networks on which more than one IP subnet operates. For example, if there is a
site-wide requirement that 8-bit subnet masks be used, but a department with a single physical ethernet network
expands to the point where it has more than 254 nodes, it may be necessary to run two 8-bit subnets on the same
ethernet until such time as a new physical network can be added. In this case, the subnet declarations for these
two networks must be enclosed in a shared-network declaration.
Note that even when the shared-network declaration is absent, an empty one is created by the server to contain
the subnet (and any scoped parameters included in the subnet). For practical purposes, this means that "stateless"
DHCP clients, which are not tied to addresses (and therefore subnets) will receive the same configuration as
stateful ones.
Some sites may have departments which have clients on more than one subnet, but it may be desirable to offer
those clients a uniform set of parameters which are different than what would be offered to clients from other
departments on the same subnet. For clients which will be declared explicitly with host declarations, these
declarations can be enclosed in a group declaration along with the parameters which are common to that
department. For clients whose addresses will be dynamically assigned, class declarations and conditional
declarations may be used to group parameter assignments based on information the client sends.
When a client is to be booted, its boot parameters are determined by consulting that client's host declaration (if
any), and then consulting any class declarations matching the client, followed by the pool, subnet and shared-
network declarations for the IP address assigned to the client. Each of these declarations itself appears within a
lexical scope, and all declarations at less specific lexical scopes are also consulted for client option declarations.
Scopes are never considered twice, and if parameters are declared in more than one scope, the parameter
declared in the most specific scope is the one that is used.
When dhcpd tries to find a host declaration for a client, it first looks for a host declaration which has a fixed-
address declaration that lists an IP address that is valid for the subnet or shared network on which the client is
booting. If it doesn't find any such entry, it tries to find an entry which has no fixed-address declaration.
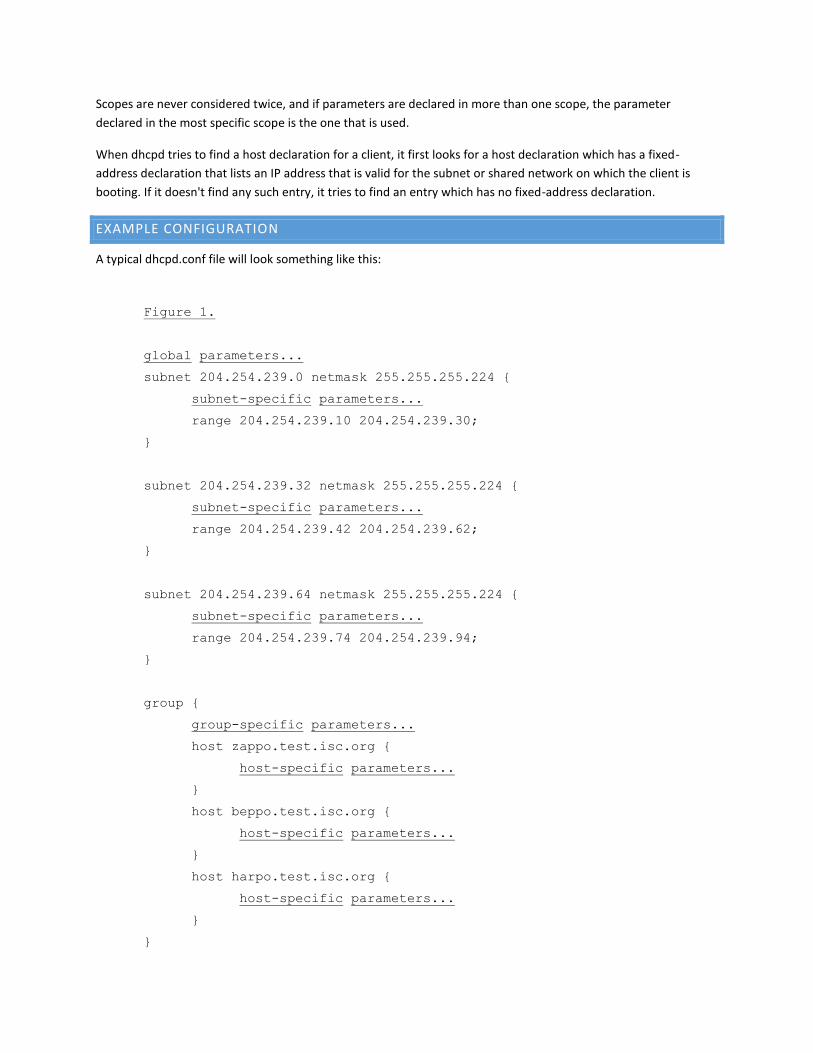
EXAMPLE CONFIGURATION
A typical dhcpd.conf file will look something like this:
Figure 1.
global parameters...
subnet 204.254.239.0 netmask 255.255.255.224 {
subnet-specific parameters...
range 204.254.239.10 204.254.239.30;
}
subnet 204.254.239.32 netmask 255.255.255.224 {
subnet-specific parameters...
range 204.254.239.42 204.254.239.62;
}
subnet 204.254.239.64 netmask 255.255.255.224 {
subnet-specific parameters...
range 204.254.239.74 204.254.239.94;
}
group {
group-specific parameters...
host zappo.test.isc.org {
host-specific parameters...
}
host beppo.test.isc.org {
host-specific parameters...
}
host harpo.test.isc.org {
host-specific parameters...
}
}
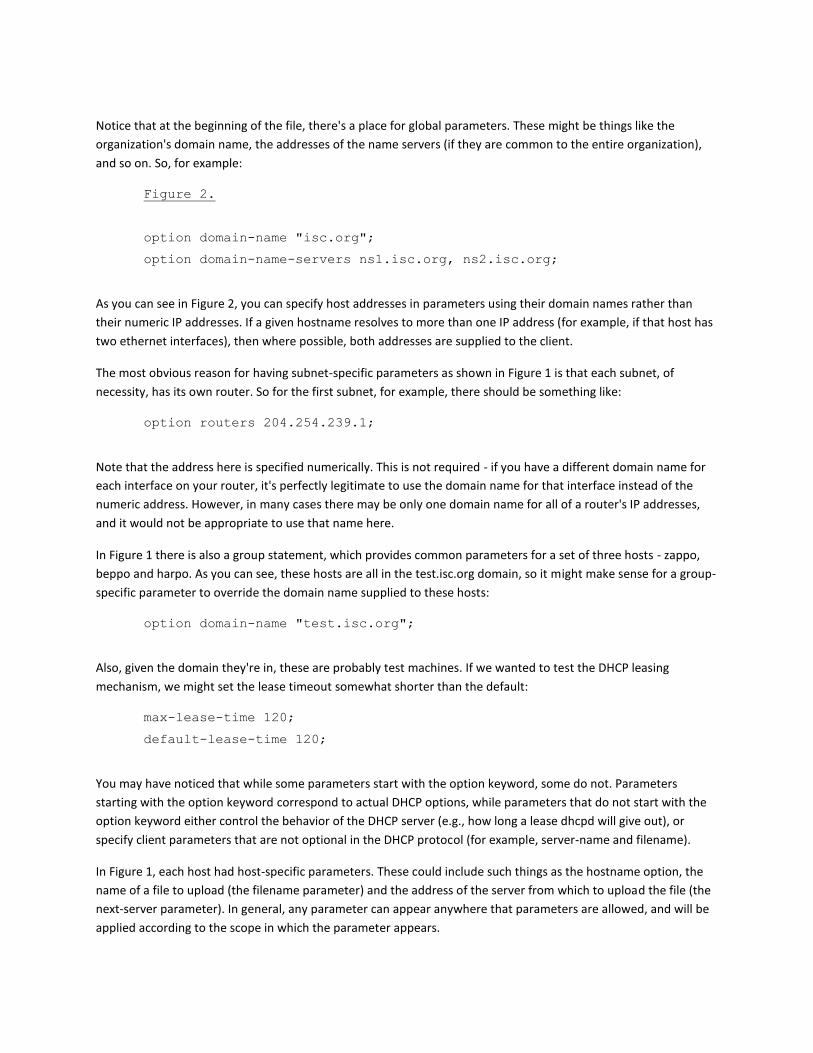
Notice that at the beginning of the file, there's a place for global parameters. These might be things like the
organization's domain name, the addresses of the name servers (if they are common to the entire organization),
and so on. So, for example:
Figure 2.
option domain-name "isc.org";
option domain-name-servers ns1.isc.org, ns2.isc.org;
As you can see in Figure 2, you can specify host addresses in parameters using their domain names rather than
their numeric IP addresses. If a given hostname resolves to more than one IP address (for example, if that host has
two ethernet interfaces), then where possible, both addresses are supplied to the client.
The most obvious reason for having subnet-specific parameters as shown in Figure 1 is that each subnet, of
necessity, has its own router. So for the first subnet, for example, there should be something like:
option routers 204.254.239.1;
Note that the address here is specified numerically. This is not required - if you have a different domain name for
each interface on your router, it's perfectly legitimate to use the domain name for that interface instead of the
numeric address. However, in many cases there may be only one domain name for all of a router's IP addresses,
and it would not be appropriate to use that name here.
In Figure 1 there is also a group statement, which provides common parameters for a set of three hosts - zappo,
beppo and harpo. As you can see, these hosts are all in the test.isc.org domain, so it might make sense for a group-
specific parameter to override the domain name supplied to these hosts:
option domain-name "test.isc.org";
Also, given the domain they're in, these are probably test machines. If we wanted to test the DHCP leasing
mechanism, we might set the lease timeout somewhat shorter than the default:
max-lease-time 120;
default-lease-time 120;
You may have noticed that while some parameters start with the option keyword, some do not. Parameters
starting with the option keyword correspond to actual DHCP options, while parameters that do not start with the
option keyword either control the behavior of the DHCP server (e.g., how long a lease dhcpd will give out), or
specify client parameters that are not optional in the DHCP protocol (for example, server-name and filename).
In Figure 1, each host had host-specific parameters. These could include such things as the hostname option, the
name of a file to upload (the filename parameter) and the address of the server from which to upload the file (the
next-server parameter). In general, any parameter can appear anywhere that parameters are allowed, and will be
applied according to the scope in which the parameter appears.
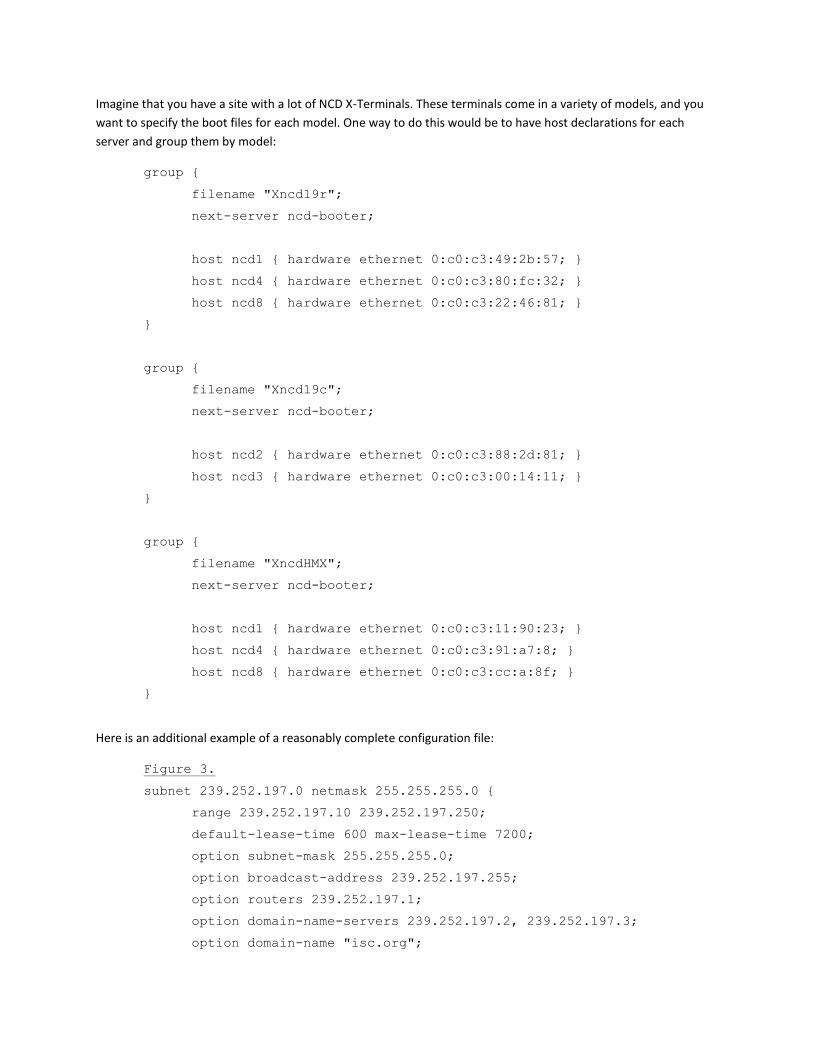
Imagine that you have a site with a lot of NCD X-Terminals. These terminals come in a variety of models, and you
want to specify the boot files for each model. One way to do this would be to have host declarations for each
server and group them by model:
group {
filename "Xncd19r";
next-server ncd-booter;
host ncd1 { hardware ethernet 0:c0:c3:49:2b:57; }
host ncd4 { hardware ethernet 0:c0:c3:80:fc:32; }
host ncd8 { hardware ethernet 0:c0:c3:22:46:81; }
}
group {
filename "Xncd19c";
next-server ncd-booter;
host ncd2 { hardware ethernet 0:c0:c3:88:2d:81; }
host ncd3 { hardware ethernet 0:c0:c3:00:14:11; }
}
group {
filename "XncdHMX";
next-server ncd-booter;
host ncd1 { hardware ethernet 0:c0:c3:11:90:23; }
host ncd4 { hardware ethernet 0:c0:c3:91:a7:8; }
host ncd8 { hardware ethernet 0:c0:c3:cc:a:8f; }
}
Here is an additional example of a reasonably complete configuration file:
Figure 3.
subnet 239.252.197.0 netmask 255.255.255.0 {
range 239.252.197.10 239.252.197.250;
default-lease-time 600 max-lease-time 7200;
option subnet-mask 255.255.255.0;
option broadcast-address 239.252.197.255;
option routers 239.252.197.1;
option domain-name-servers 239.252.197.2, 239.252.197.3;
option domain-name "isc.org";
}
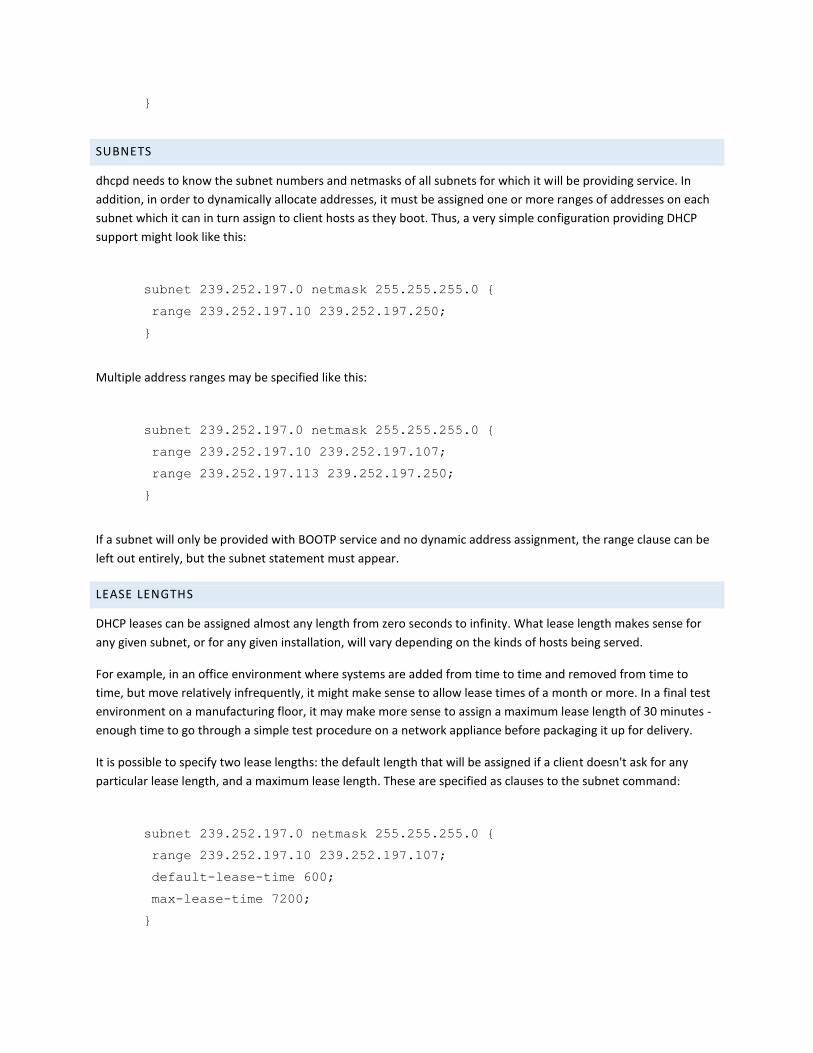
SUBNETS
dhcpd needs to know the subnet numbers and netmasks of all subnets for which it will be providing service. In
addition, in order to dynamically allocate addresses, it must be assigned one or more ranges of addresses on each
subnet which it can in turn assign to client hosts as they boot. Thus, a very simple configuration providing DHCP
support might look like this:
subnet 239.252.197.0 netmask 255.255.255.0 {
range 239.252.197.10 239.252.197.250;
}
Multiple address ranges may be specified like this:
subnet 239.252.197.0 netmask 255.255.255.0 {
range 239.252.197.10 239.252.197.107;
range 239.252.197.113 239.252.197.250;
}
If a subnet will only be provided with BOOTP service and no dynamic address assignment, the range clause can be
left out entirely, but the subnet statement must appear.
LEASE LENGTHS
DHCP leases can be assigned almost any length from zero seconds to infinity. What lease length makes sense for
any given subnet, or for any given installation, will vary depending on the kinds of hosts being served.
For example, in an office environment where systems are added from time to time and removed from time to
time, but move relatively infrequently, it might make sense to allow lease times of a month or more. In a final test
environment on a manufacturing floor, it may make more sense to assign a maximum lease length of 30 minutes -
enough time to go through a simple test procedure on a network appliance before packaging it up for delivery.
It is possible to specify two lease lengths: the default length that will be assigned if a client doesn't ask for any
particular lease length, and a maximum lease length. These are specified as clauses to the subnet command:
subnet 239.252.197.0 netmask 255.255.255.0 {
range 239.252.197.10 239.252.197.107;
default-lease-time 600;
max-lease-time 7200;
}
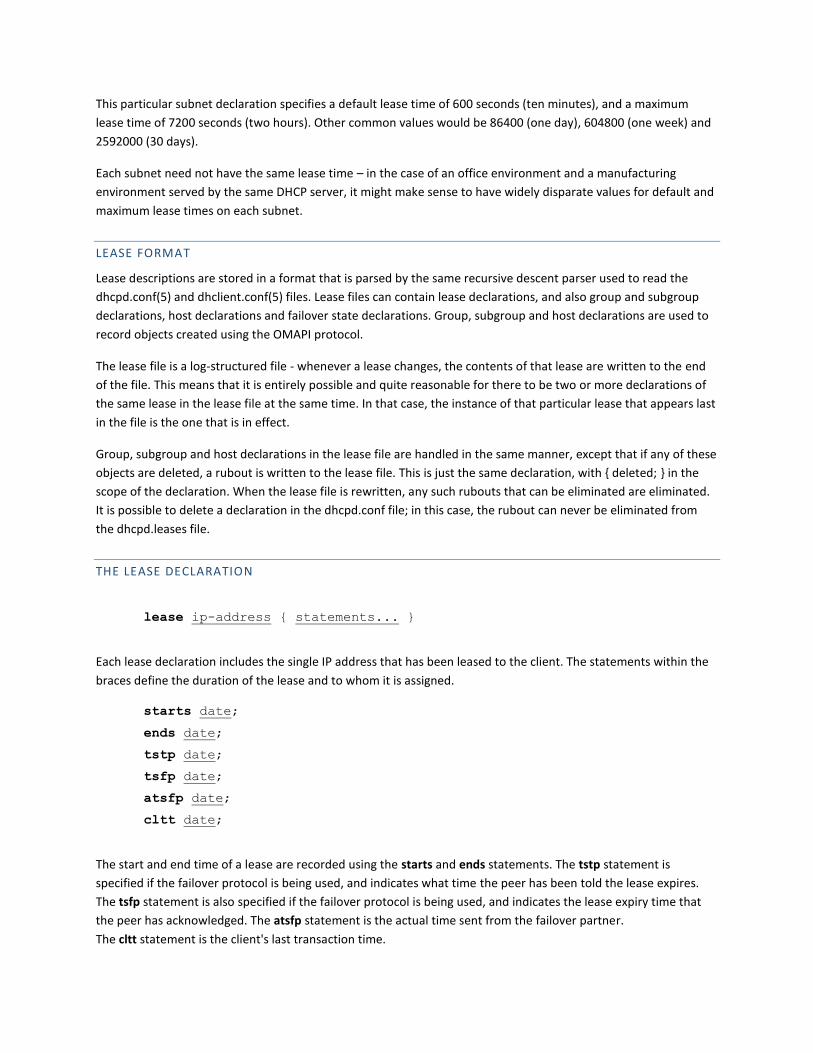
This particular subnet declaration specifies a default lease time of 600 seconds (ten minutes), and a maximum
lease time of 7200 seconds (two hours). Other common values would be 86400 (one day), 604800 (one week) and
2592000 (30 days).
Each subnet need not have the same lease time – in the case of an office environment and a manufacturing
environment served by the same DHCP server, it might make sense to have widely disparate values for default and
maximum lease times on each subnet.
LEASE FORMAT
Lease descriptions are stored in a format that is parsed by the same recursive descent parser used to read the
dhcpd.conf(5) and dhclient.conf(5) files. Lease files can contain lease declarations, and also group and subgroup
declarations, host declarations and failover state declarations. Group, subgroup and host declarations are used to
record objects created using the OMAPI protocol.
The lease file is a log-structured file - whenever a lease changes, the contents of that lease are written to the end
of the file. This means that it is entirely possible and quite reasonable for there to be two or more declarations of
the same lease in the lease file at the same time. In that case, the instance of that particular lease that appears last
in the file is the one that is in effect.
Group, subgroup and host declarations in the lease file are handled in the same manner, except that if any of these
objects are deleted, a rubout is written to the lease file. This is just the same declaration, with { deleted; } in the
scope of the declaration. When the lease file is rewritten, any such rubouts that can be eliminated are eliminated.
It is possible to delete a declaration in the dhcpd.conf file; in this case, the rubout can never be eliminated from
the dhcpd.leases file.
THE LEASE DECLARATION
lease ip-address { statements... }
Each lease declaration includes the single IP address that has been leased to the client. The statements within the
braces define the duration of the lease and to whom it is assigned.
starts date;
ends date;
tstp date;
tsfp date;
atsfp date;
cltt date;
The start and end time of a lease are recorded using the starts and ends statements. The tstp statement is
specified if the failover protocol is being used, and indicates what time the peer has been told the lease expires.
The tsfp statement is also specified if the failover protocol is being used, and indicates the lease expiry time that
the peer has acknowledged. The atsfp statement is the actual time sent from the failover partner.
The cltt statement is the client's last transaction time.
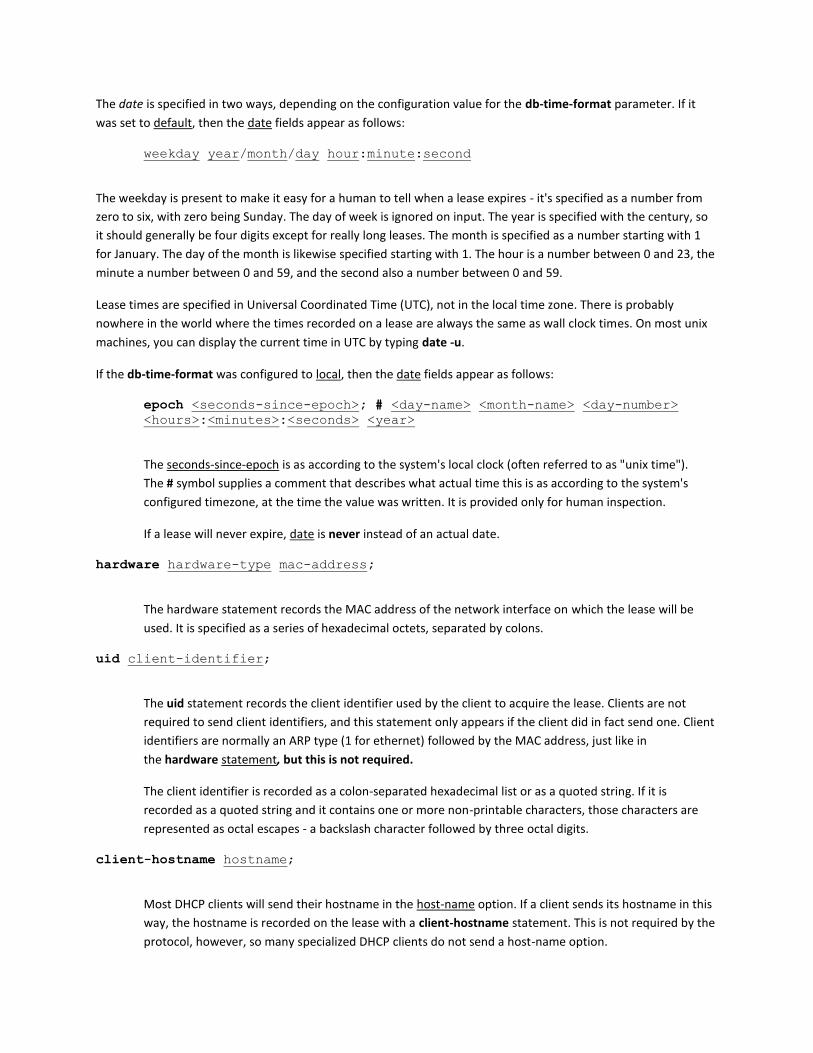
The date is specified in two ways, depending on the configuration value for the db-time-format parameter. If it
was set to default, then the date fields appear as follows:
weekday year/month/day hour:minute:second
The weekday is present to make it easy for a human to tell when a lease expires - it's specified as a number from
zero to six, with zero being Sunday. The day of week is ignored on input. The year is specified with the century, so
it should generally be four digits except for really long leases. The month is specified as a number starting with 1
for January. The day of the month is likewise specified starting with 1. The hour is a number between 0 and 23, the
minute a number between 0 and 59, and the second also a number between 0 and 59.
Lease times are specified in Universal Coordinated Time (UTC), not in the local time zone. There is probably
nowhere in the world where the times recorded on a lease are always the same as wall clock times. On most unix
machines, you can display the current time in UTC by typing date -u.
If the db-time-format was configured to local, then the date fields appear as follows:
epoch <seconds-since-epoch>; # <day-name> <month-name> <day-number>
<hours>:<minutes>:<seconds> <year>
The seconds-since-epoch is as according to the system's local clock (often referred to as "unix time").
The # symbol supplies a comment that describes what actual time this is as according to the system's
configured timezone, at the time the value was written. It is provided only for human inspection.
If a lease will never expire, date is never instead of an actual date.
hardware hardware-type mac-address;
The hardware statement records the MAC address of the network interface on which the lease will be
used. It is specified as a series of hexadecimal octets, separated by colons.
uid client-identifier;
The uid statement records the client identifier used by the client to acquire the lease. Clients are not
required to send client identifiers, and this statement only appears if the client did in fact send one. Client
identifiers are normally an ARP type (1 for ethernet) followed by the MAC address, just like in
the hardware statement, but this is not required.
The client identifier is recorded as a colon-separated hexadecimal list or as a quoted string. If it is
recorded as a quoted string and it contains one or more non-printable characters, those characters are
represented as octal escapes - a backslash character followed by three octal digits.
client-hostname hostname;
Most DHCP clients will send their hostname in the host-name option. If a client sends its hostname in this
way, the hostname is recorded on the lease with a client-hostname statement. This is not required by the
protocol, however, so many specialized DHCP clients do not send a host-name option.
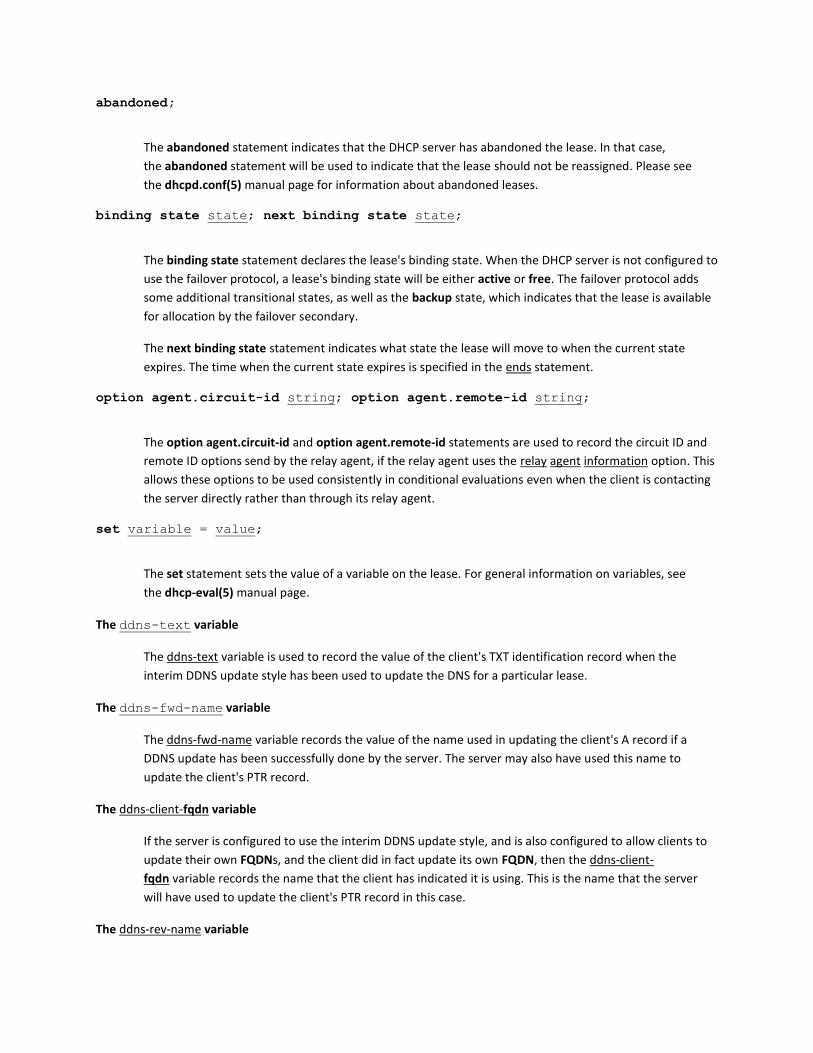
abandoned;
The abandoned statement indicates that the DHCP server has abandoned the lease. In that case,
the abandoned statement will be used to indicate that the lease should not be reassigned. Please see
the dhcpd.conf(5) manual page for information about abandoned leases.
binding state state; next binding state state;
The binding state statement declares the lease's binding state. When the DHCP server is not configured to
use the failover protocol, a lease's binding state will be either active or free. The failover protocol adds
some additional transitional states, as well as the backup state, which indicates that the lease is available
for allocation by the failover secondary.
The next binding state statement indicates what state the lease will move to when the current state
expires. The time when the current state expires is specified in the ends statement.
option agent.circuit-id string; option agent.remote-id string;
The option agent.circuit-id and option agent.remote-id statements are used to record the circuit ID and
remote ID options send by the relay agent, if the relay agent uses the relay agent information option. This
allows these options to be used consistently in conditional evaluations even when the client is contacting
the server directly rather than through its relay agent.
set variable = value;
The set statement sets the value of a variable on the lease. For general information on variables, see
the dhcp-eval(5) manual page.
The ddns-text variable
The ddns-text variable is used to record the value of the client's TXT identification record when the
interim DDNS update style has been used to update the DNS for a particular lease.
The ddns-fwd-name variable
The ddns-fwd-name variable records the value of the name used in updating the client's A record if a
DDNS update has been successfully done by the server. The server may also have used this name to
update the client's PTR record.
The ddns-client-fqdn variable
If the server is configured to use the interim DDNS update style, and is also configured to allow clients to
update their own FQDNs, and the client did in fact update its own FQDN, then the ddns-client-
fqdn variable records the name that the client has indicated it is using. This is the name that the server
will have used to update the client's PTR record in this case.
The ddns-rev-name variable

If the server successfully updates the client's PTR record, this variable will record the name that the DHCP
server used for the PTR record. The name to which the PTR record points will be either the ddns-fwd-
name or the ddns-client-fqdn.
The vendor-class-identifier variable
The server retains the client-supplied Vendor Class Identifier option for informational purposes, and to
render them in DHCPLEASEQUERY responses.
on events { statements... }
The on statement records a list of statements to execute if a certain event occurs. The possible events
that can occur for an active lease are release and expiry. More than one event can be specified - if so, the
events are separated by '|' characters.
bootp; reserved;
These two statements are effectively flags. If present, they indicate that the BOOTP and RESERVED
failover flags, respectively, should be set. BOOTP and RESERVED dynamic leases are treated differently
than normal dynamic leases, as they may only be used by the client to which they are currently allocated.
ADDRESS POOLS
The pool and pool6 declarations can be used to specify a pool of addresses that will be treated differently than
another pool of addresses, even on the same network segment or subnet. For example, you may want to provide a
large set of addresses that can be assigned to DHCP clients that are registered to your DHCP server, while providing
a smaller set of addresses, possibly with short lease times, that are available for unknown clients. If you have a
firewall, you may be able to arrange for addresses from one pool to be allowed access to the Internet, while
addresses in another pool are not, thus encouraging users to register their DHCP clients. To do this, you would set
up a pair of pool declarations:
subnet 10.0.0.0 netmask 255.255.255.0 {
option routers 10.0.0.254;
# Unknown clients get this pool.
pool {
option domain-name-servers bogus.example.com;
max-lease-time 300;
range 10.0.0.200 10.0.0.253;
allow unknown-clients;
}
# Known clients get this pool.
pool {
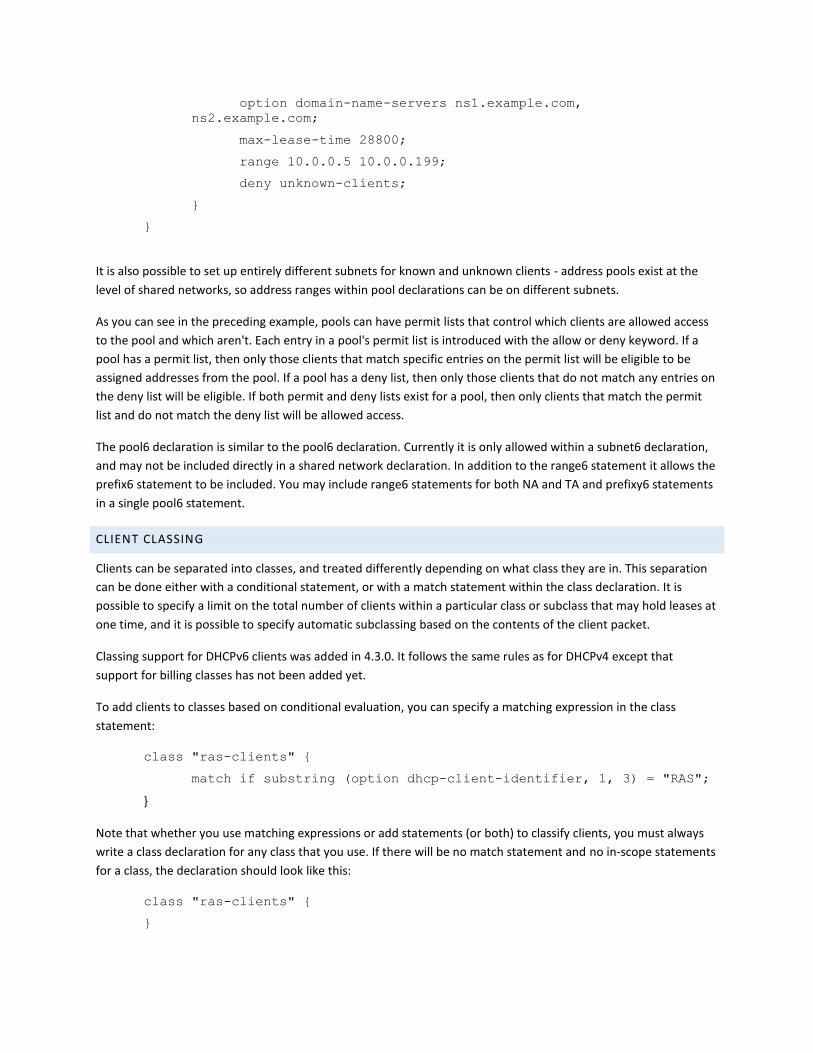
option domain-name-servers ns1.example.com,
ns2.example.com;
max-lease-time 28800;
range 10.0.0.5 10.0.0.199;
deny unknown-clients;
}
}
It is also possible to set up entirely different subnets for known and unknown clients - address pools exist at the
level of shared networks, so address ranges within pool declarations can be on different subnets.
As you can see in the preceding example, pools can have permit lists that control which clients are allowed access
to the pool and which aren't. Each entry in a pool's permit list is introduced with the allow or deny keyword. If a
pool has a permit list, then only those clients that match specific entries on the permit list will be eligible to be
assigned addresses from the pool. If a pool has a deny list, then only those clients that do not match any entries on
the deny list will be eligible. If both permit and deny lists exist for a pool, then only clients that match the permit
list and do not match the deny list will be allowed access.
The pool6 declaration is similar to the pool6 declaration. Currently it is only allowed within a subnet6 declaration,
and may not be included directly in a shared network declaration. In addition to the range6 statement it allows the
prefix6 statement to be included. You may include range6 statements for both NA and TA and prefixy6 statements
in a single pool6 statement.
CLIENT CLASSING
Clients can be separated into classes, and treated differently depending on what class they are in. This separation
can be done either with a conditional statement, or with a match statement within the class declaration. It is
possible to specify a limit on the total number of clients within a particular class or subclass that may hold leases at
one time, and it is possible to specify automatic subclassing based on the contents of the client packet.
Classing support for DHCPv6 clients was added in 4.3.0. It follows the same rules as for DHCPv4 except that
support for billing classes has not been added yet.
To add clients to classes based on conditional evaluation, you can specify a matching expression in the class
statement:
class "ras-clients" {
match if substring (option dhcp-client-identifier, 1, 3) = "RAS";
}
Note that whether you use matching expressions or add statements (or both) to classify clients, you must always
write a class declaration for any class that you use. If there will be no match statement and no in-scope statements
for a class, the declaration should look like this:
class "ras-clients" {
}
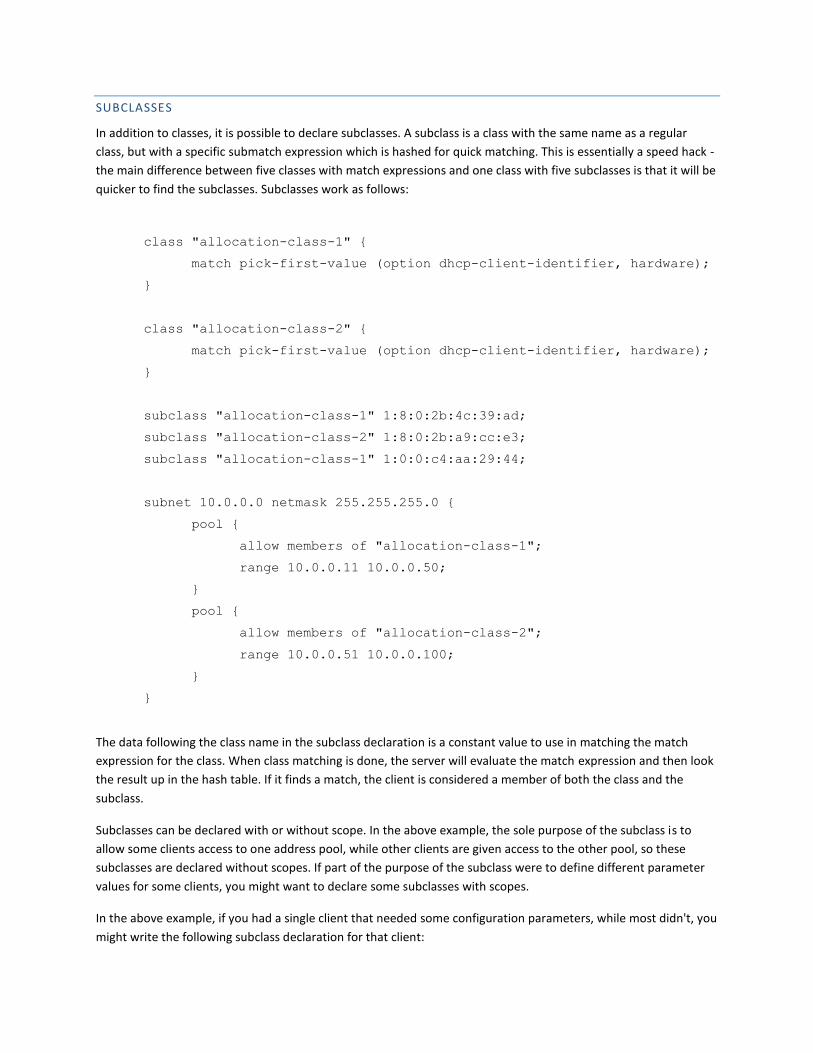
SUBCLASSES
In addition to classes, it is possible to declare subclasses. A subclass is a class with the same name as a regular
class, but with a specific submatch expression which is hashed for quick matching. This is essentially a speed hack -
the main difference between five classes with match expressions and one class with five subclasses is that it will be
quicker to find the subclasses. Subclasses work as follows:
class "allocation-class-1" {
match pick-first-value (option dhcp-client-identifier, hardware);
}
class "allocation-class-2" {
match pick-first-value (option dhcp-client-identifier, hardware);
}
subclass "allocation-class-1" 1:8:0:2b:4c:39:ad;
subclass "allocation-class-2" 1:8:0:2b:a9:cc:e3;
subclass "allocation-class-1" 1:0:0:c4:aa:29:44;
subnet 10.0.0.0 netmask 255.255.255.0 {
pool {
allow members of "allocation-class-1";
range 10.0.0.11 10.0.0.50;
}
pool {
allow members of "allocation-class-2";
range 10.0.0.51 10.0.0.100;
}
}
The data following the class name in the subclass declaration is a constant value to use in matching the match
expression for the class. When class matching is done, the server will evaluate the match expression and then look
the result up in the hash table. If it finds a match, the client is considered a member of both the class and the
subclass.
Subclasses can be declared with or without scope. In the above example, the sole purpose of the subclass is to
allow some clients access to one address pool, while other clients are given access to the other pool, so these
subclasses are declared without scopes. If part of the purpose of the subclass were to define different parameter
values for some clients, you might want to declare some subclasses with scopes.
In the above example, if you had a single client that needed some configuration parameters, while most didn't, you
might write the following subclass declaration for that client:
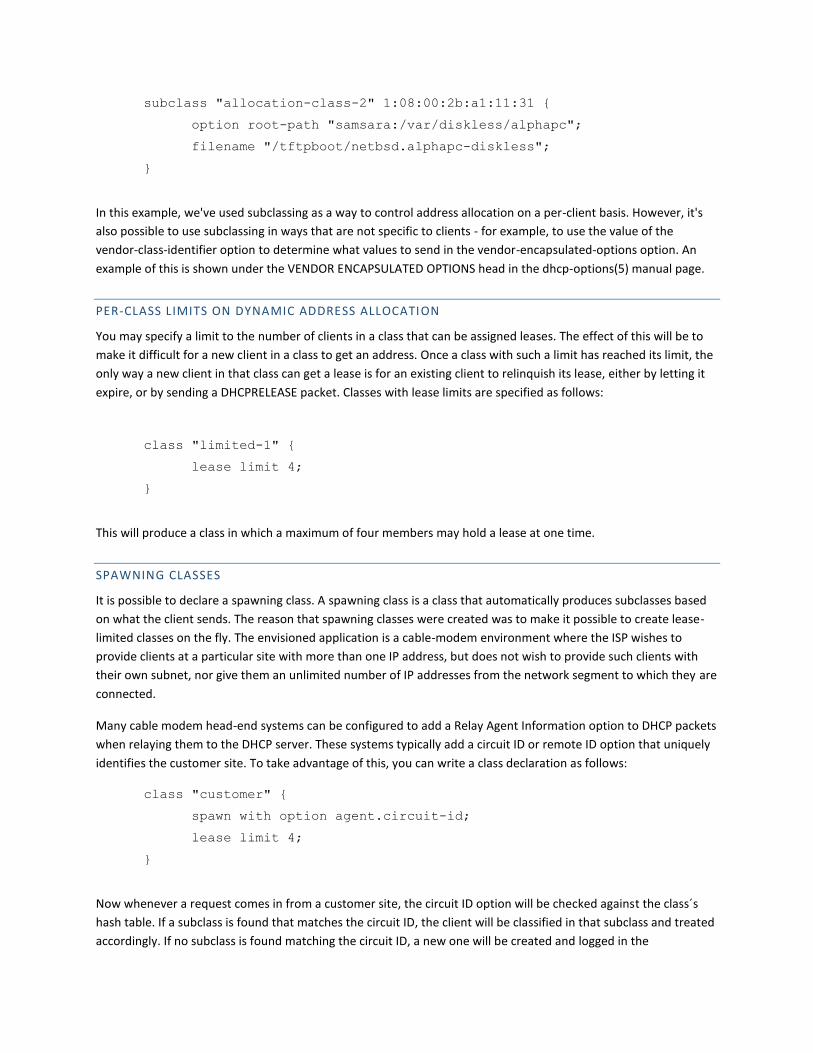
subclass "allocation-class-2" 1:08:00:2b:a1:11:31 {
option root-path "samsara:/var/diskless/alphapc";
filename "/tftpboot/netbsd.alphapc-diskless";
}
In this example, we've used subclassing as a way to control address allocation on a per-client basis. However, it's
also possible to use subclassing in ways that are not specific to clients - for example, to use the value of the
vendor-class-identifier option to determine what values to send in the vendor-encapsulated-options option. An
example of this is shown under the VENDOR ENCAPSULATED OPTIONS head in the dhcp-options(5) manual page.
PER-CLASS LIMITS ON DYNAMIC ADDRESS ALLOCATION
You may specify a limit to the number of clients in a class that can be assigned leases. The effect of this will be to
make it difficult for a new client in a class to get an address. Once a class with such a limit has reached its limit, the
only way a new client in that class can get a lease is for an existing client to relinquish its lease, either by letting it
expire, or by sending a DHCPRELEASE packet. Classes with lease limits are specified as follows:
class "limited-1" {
lease limit 4;
}
This will produce a class in which a maximum of four members may hold a lease at one time.
SPAWNING CLASSES
It is possible to declare a spawning class. A spawning class is a class that automatically produces subclasses based
on what the client sends. The reason that spawning classes were created was to make it possible to create lease-
limited classes on the fly. The envisioned application is a cable-modem environment where the ISP wishes to
provide clients at a particular site with more than one IP address, but does not wish to provide such clients with
their own subnet, nor give them an unlimited number of IP addresses from the network segment to which they are
connected.
Many cable modem head-end systems can be configured to add a Relay Agent Information option to DHCP packets
when relaying them to the DHCP server. These systems typically add a circuit ID or remote ID option that uniquely
identifies the customer site. To take advantage of this, you can write a class declaration as follows:
class "customer" {
spawn with option agent.circuit-id;
lease limit 4;
}
Now whenever a request comes in from a customer site, the circuit ID option will be checked against the class´s
hash table. If a subclass is found that matches the circuit ID, the client will be classified in that subclass and treated
accordingly. If no subclass is found matching the circuit ID, a new one will be created and logged in the
dhcpd.leases file, and the client will be classified in this new class. Once the client has been classified, it will be
treated according to the rules of the class, including, in this case, being subject to the per-site limit of four leases.
The use of the subclass spawning mechanism is not restricted to relay agent options - this particular example is
given only because it is a fairly straightforward one.
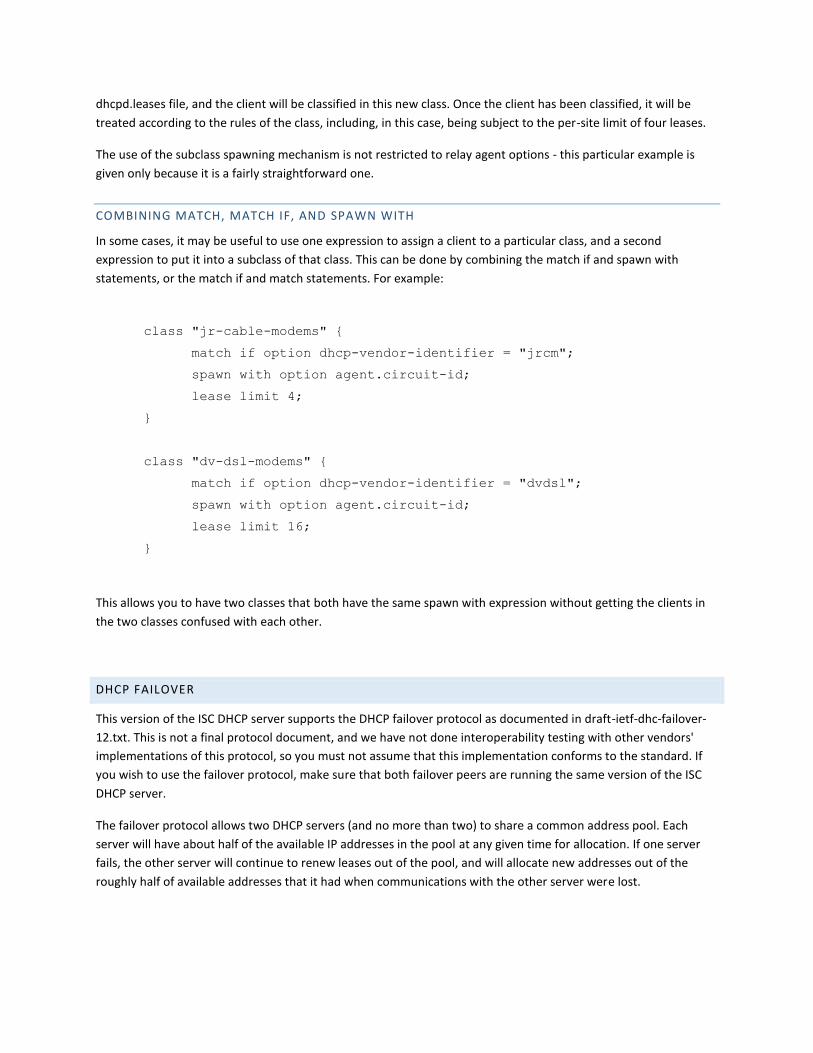
COMBINING MATCH, MATCH IF, AND SPAWN WITH
In some cases, it may be useful to use one expression to assign a client to a particular class, and a second
expression to put it into a subclass of that class. This can be done by combining the match if and spawn with
statements, or the match if and match statements. For example:
class "jr-cable-modems" {
match if option dhcp-vendor-identifier = "jrcm";
spawn with option agent.circuit-id;
lease limit 4;
}
class "dv-dsl-modems" {
match if option dhcp-vendor-identifier = "dvdsl";
spawn with option agent.circuit-id;
lease limit 16;
}
This allows you to have two classes that both have the same spawn with expression without getting the clients in
the two classes confused with each other.
DHCP FAILOVER
This version of the ISC DHCP server supports the DHCP failover protocol as documented in draft-ietf-dhc-failover-
12.txt. This is not a final protocol document, and we have not done interoperability testing with other vendors'
implementations of this protocol, so you must not assume that this implementation conforms to the standard. If
you wish to use the failover protocol, make sure that both failover peers are running the same version of the ISC
DHCP server.
The failover protocol allows two DHCP servers (and no more than two) to share a common address pool. Each
server will have about half of the available IP addresses in the pool at any given time for allocation. If one server
fails, the other server will continue to renew leases out of the pool, and will allocate new addresses out of the
roughly half of available addresses that it had when communications with the other server were lost.
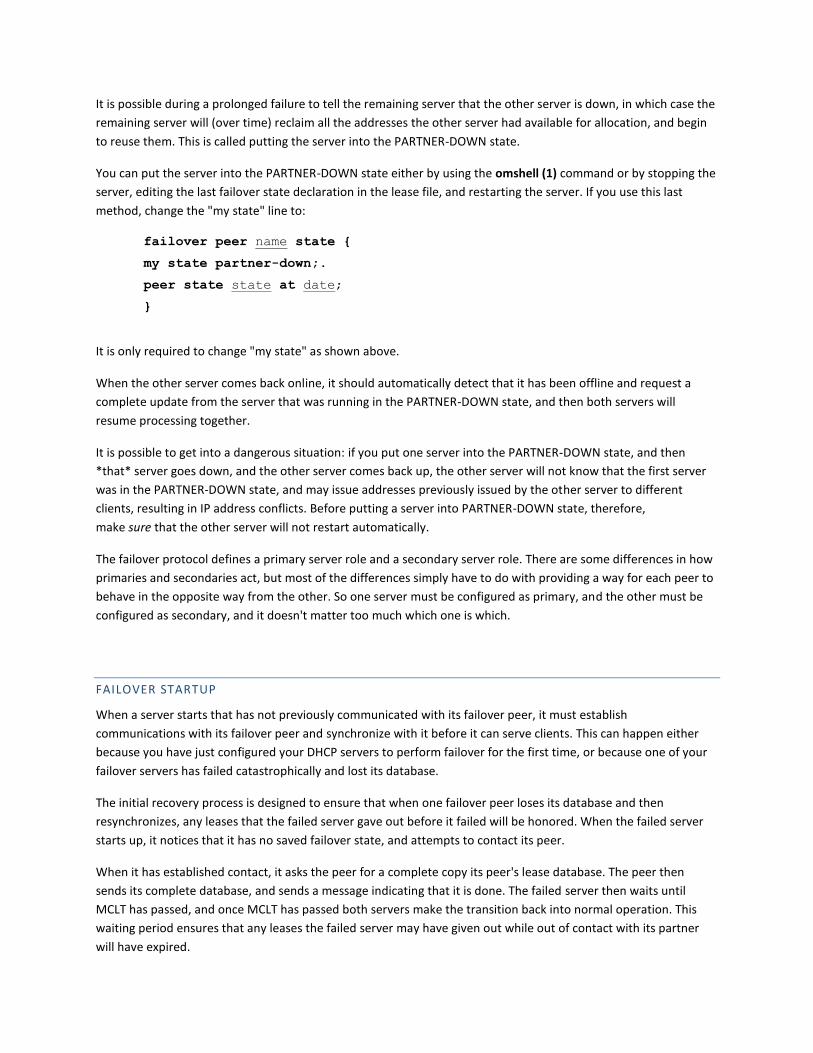
It is possible during a prolonged failure to tell the remaining server that the other server is down, in which case the
remaining server will (over time) reclaim all the addresses the other server had available for allocation, and begin
to reuse them. This is called putting the server into the PARTNER-DOWN state.
You can put the server into the PARTNER-DOWN state either by using the omshell (1) command or by stopping the
server, editing the last failover state declaration in the lease file, and restarting the server. If you use this last
method, change the "my state" line to:
failover peer name state {
my state partner-down;.
peer state state at date;
}
It is only required to change "my state" as shown above.
When the other server comes back online, it should automatically detect that it has been offline and request a
complete update from the server that was running in the PARTNER-DOWN state, and then both servers will
resume processing together.
It is possible to get into a dangerous situation: if you put one server into the PARTNER-DOWN state, and then
*that* server goes down, and the other server comes back up, the other server will not know that the first server
was in the PARTNER-DOWN state, and may issue addresses previously issued by the other server to different
clients, resulting in IP address conflicts. Before putting a server into PARTNER-DOWN state, therefore,
make sure that the other server will not restart automatically.
The failover protocol defines a primary server role and a secondary server role. There are some differences in how
primaries and secondaries act, but most of the differences simply have to do with providing a way for each peer to
behave in the opposite way from the other. So one server must be configured as primary, and the other must be
configured as secondary, and it doesn't matter too much which one is which.
FAILOVER STARTUP
When a server starts that has not previously communicated with its failover peer, it must establish
communications with its failover peer and synchronize with it before it can serve clients. This can happen either
because you have just configured your DHCP servers to perform failover for the first time, or because one of your
failover servers has failed catastrophically and lost its database.
The initial recovery process is designed to ensure that when one failover peer loses its database and then
resynchronizes, any leases that the failed server gave out before it failed will be honored. When the failed server
starts up, it notices that it has no saved failover state, and attempts to contact its peer.
When it has established contact, it asks the peer for a complete copy its peer's lease database. The peer then
sends its complete database, and sends a message indicating that it is done. The failed server then waits until
MCLT has passed, and once MCLT has passed both servers make the transition back into normal operation. This
waiting period ensures that any leases the failed server may have given out while out of contact with its partner
will have expired.
While the failed server is recovering, its partner remains in the partner-down state, which means that it is serving
all clients. The failed server provides no service at all to DHCP clients until it has made the transition into normal
operation.
In the case where both servers detect that they have never before communicated with their partner, they both
come up in this recovery state and follow the procedure we have just described. In this case, no service will be
provided to DHCP clients until MCLT has expired.
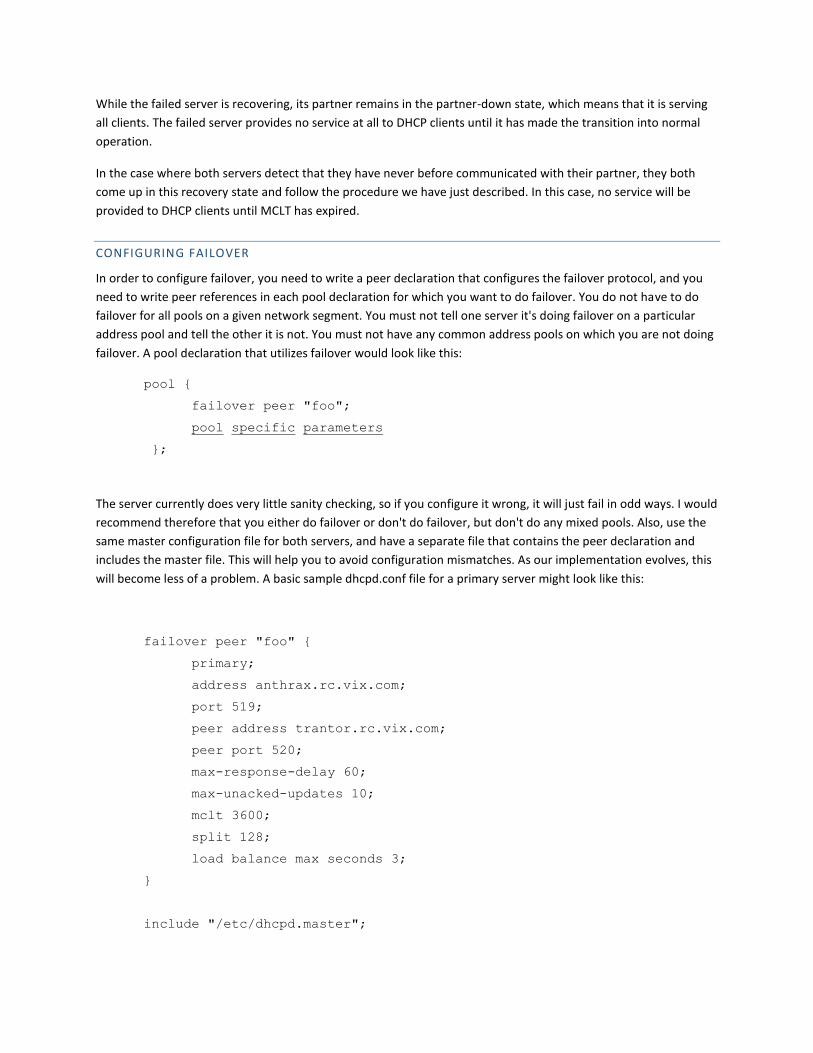
CONFIGURING FAILOVER
In order to configure failover, you need to write a peer declaration that configures the failover protocol, and you
need to write peer references in each pool declaration for which you want to do failover. You do not have to do
failover for all pools on a given network segment. You must not tell one server it's doing failover on a particular
address pool and tell the other it is not. You must not have any common address pools on which you are not doing
failover. A pool declaration that utilizes failover would look like this:
pool {
failover peer "foo";
pool specific parameters
};
The server currently does very little sanity checking, so if you configure it wrong, it will just fail in odd ways. I would
recommend therefore that you either do failover or don't do failover, but don't do any mixed pools. Also, use the
same master configuration file for both servers, and have a separate file that contains the peer declaration and
includes the master file. This will help you to avoid configuration mismatches. As our implementation evolves, this
will become less of a problem. A basic sample dhcpd.conf file for a primary server might look like this:
failover peer "foo" {
primary;
address anthrax.rc.vix.com;
port 519;
peer address trantor.rc.vix.com;
peer port 520;
max-response-delay 60;
max-unacked-updates 10;
mclt 3600;
split 128;
load balance max seconds 3;
}
include "/etc/dhcpd.master";
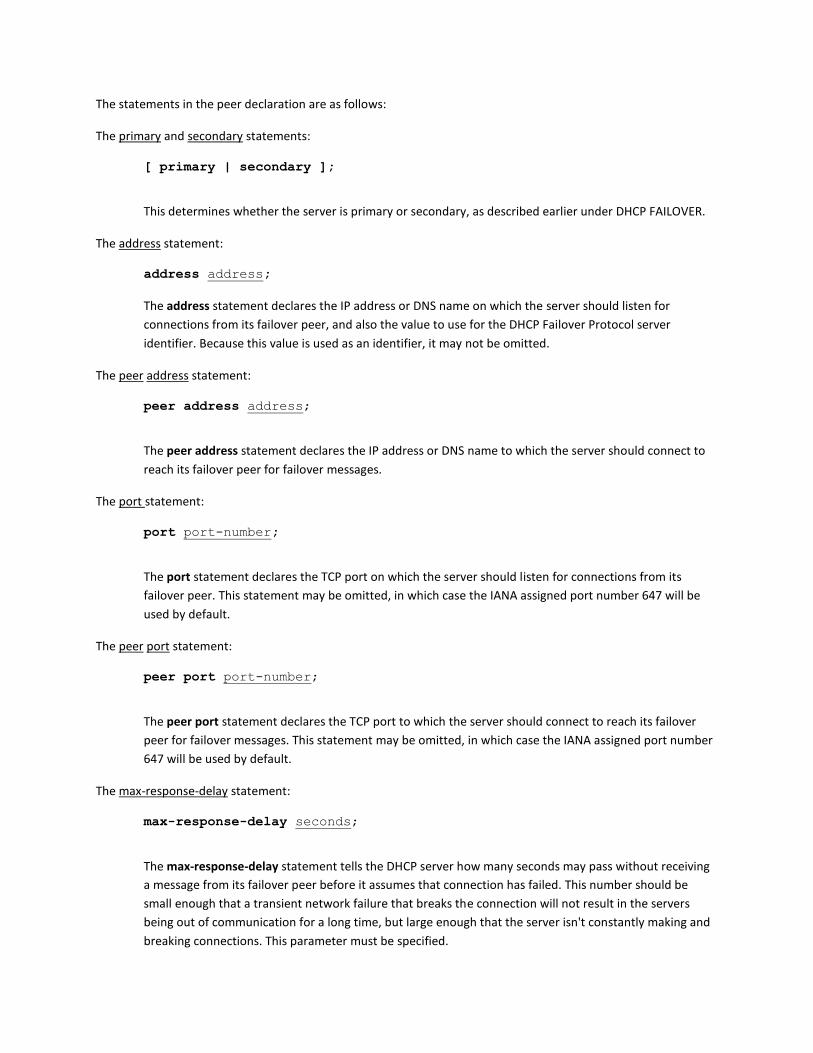
The statements in the peer declaration are as follows:
The primary and secondary statements:
[ primary | secondary ];
This determines whether the server is primary or secondary, as described earlier under DHCP FAILOVER.
The address statement:
address address;
The address statement declares the IP address or DNS name on which the server should listen for
connections from its failover peer, and also the value to use for the DHCP Failover Protocol server
identifier. Because this value is used as an identifier, it may not be omitted.
The peer address statement:
peer address address;
The peer address statement declares the IP address or DNS name to which the server should connect to
reach its failover peer for failover messages.
The port statement:
port port-number;
The port statement declares the TCP port on which the server should listen for connections from its
failover peer. This statement may be omitted, in which case the IANA assigned port number 647 will be
used by default.
The peer port statement:
peer port port-number;
The peer port statement declares the TCP port to which the server should connect to reach its failover
peer for failover messages. This statement may be omitted, in which case the IANA assigned port number
647 will be used by default.
The max-response-delay statement:
max-response-delay seconds;
The max-response-delay statement tells the DHCP server how many seconds may pass without receiving
a message from its failover peer before it assumes that connection has failed. This number should be
small enough that a transient network failure that breaks the connection will not result in the servers
being out of communication for a long time, but large enough that the server isn't constantly making and
breaking connections. This parameter must be specified.
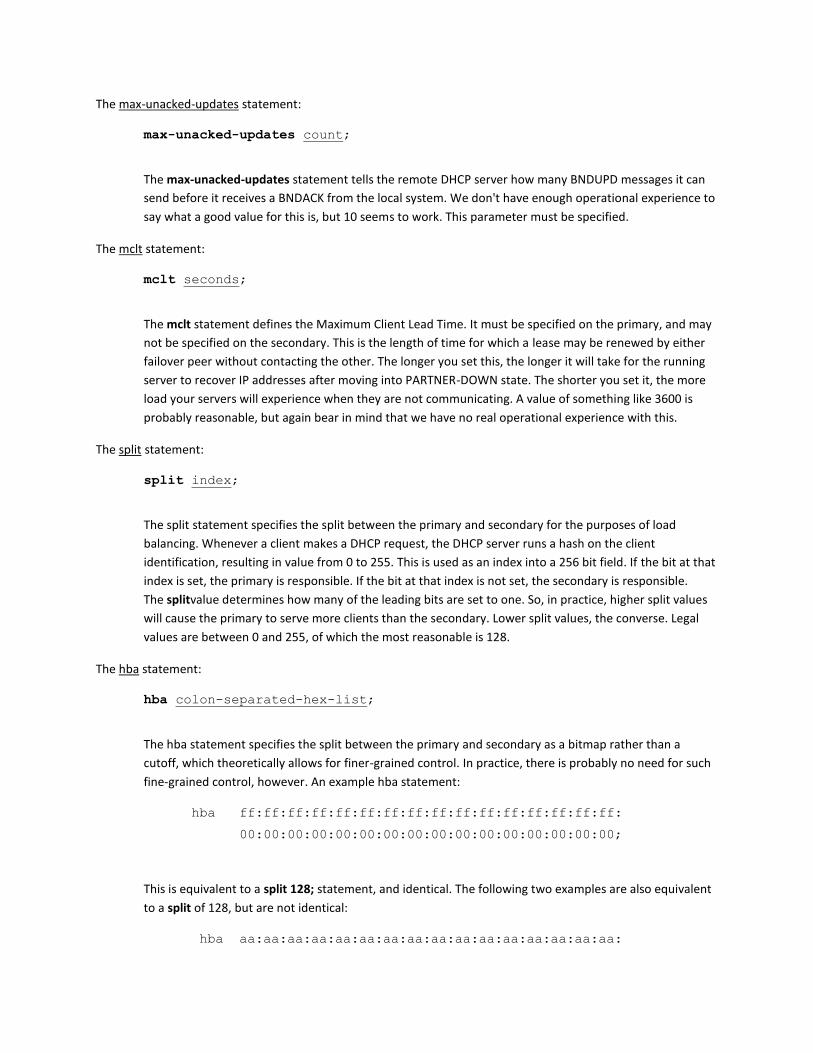
The max-unacked-updates statement:
max-unacked-updates count;
The max-unacked-updates statement tells the remote DHCP server how many BNDUPD messages it can
send before it receives a BNDACK from the local system. We don't have enough operational experience to
say what a good value for this is, but 10 seems to work. This parameter must be specified.
The mclt statement:
mclt seconds;
The mclt statement defines the Maximum Client Lead Time. It must be specified on the primary, and may
not be specified on the secondary. This is the length of time for which a lease may be renewed by either
failover peer without contacting the other. The longer you set this, the longer it will take for the running
server to recover IP addresses after moving into PARTNER-DOWN state. The shorter you set it, the more
load your servers will experience when they are not communicating. A value of something like 3600 is
probably reasonable, but again bear in mind that we have no real operational experience with this.
The split statement:
split index;
The split statement specifies the split between the primary and secondary for the purposes of load
balancing. Whenever a client makes a DHCP request, the DHCP server runs a hash on the client
identification, resulting in value from 0 to 255. This is used as an index into a 256 bit field. If the bit at that
index is set, the primary is responsible. If the bit at that index is not set, the secondary is responsible.
The splitvalue determines how many of the leading bits are set to one. So, in practice, higher split values
will cause the primary to serve more clients than the secondary. Lower split values, the converse. Legal
values are between 0 and 255, of which the most reasonable is 128.
The hba statement:
hba colon-separated-hex-list;
The hba statement specifies the split between the primary and secondary as a bitmap rather than a
cutoff, which theoretically allows for finer-grained control. In practice, there is probably no need for such
fine-grained control, however. An example hba statement:
hba ff:ff:ff:ff:ff:ff:ff:ff:ff:ff:ff:ff:ff:ff:ff:ff:
00:00:00:00:00:00:00:00:00:00:00:00:00:00:00:00;
This is equivalent to a split 128; statement, and identical. The following two examples are also equivalent
to a split of 128, but are not identical:
hba aa:aa:aa:aa:aa:aa:aa:aa:aa:aa:aa:aa:aa:aa:aa:aa:
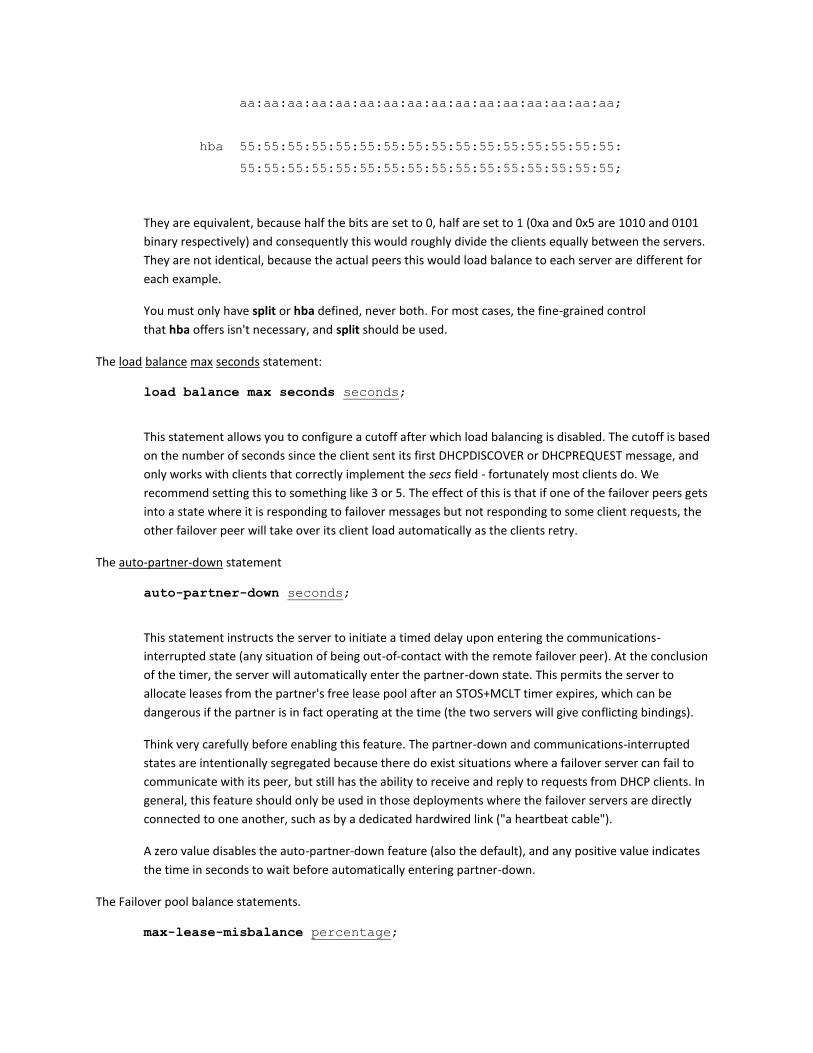
aa:aa:aa:aa:aa:aa:aa:aa:aa:aa:aa:aa:aa:aa:aa:aa;
hba 55:55:55:55:55:55:55:55:55:55:55:55:55:55:55:55:
55:55:55:55:55:55:55:55:55:55:55:55:55:55:55:55;
They are equivalent, because half the bits are set to 0, half are set to 1 (0xa and 0x5 are 1010 and 0101
binary respectively) and consequently this would roughly divide the clients equally between the servers.
They are not identical, because the actual peers this would load balance to each server are different for
each example.
You must only have split or hba defined, never both. For most cases, the fine-grained control
that hba offers isn't necessary, and split should be used.
The load balance max seconds statement:
load balance max seconds seconds;
This statement allows you to configure a cutoff after which load balancing is disabled. The cutoff is based
on the number of seconds since the client sent its first DHCPDISCOVER or DHCPREQUEST message, and
only works with clients that correctly implement the secs field - fortunately most clients do. We
recommend setting this to something like 3 or 5. The effect of this is that if one of the failover peers gets
into a state where it is responding to failover messages but not responding to some client requests, the
other failover peer will take over its client load automatically as the clients retry.
The auto-partner-down statement
auto-partner-down seconds;
This statement instructs the server to initiate a timed delay upon entering the communications-
interrupted state (any situation of being out-of-contact with the remote failover peer). At the conclusion
of the timer, the server will automatically enter the partner-down state. This permits the server to
allocate leases from the partner's free lease pool after an STOS+MCLT timer expires, which can be
dangerous if the partner is in fact operating at the time (the two servers will give conflicting bindings).
Think very carefully before enabling this feature. The partner-down and communications-interrupted
states are intentionally segregated because there do exist situations where a failover server can fail to
communicate with its peer, but still has the ability to receive and reply to requests from DHCP clients. In
general, this feature should only be used in those deployments where the failover servers are directly
connected to one another, such as by a dedicated hardwired link ("a heartbeat cable").
A zero value disables the auto-partner-down feature (also the default), and any positive value indicates
the time in seconds to wait before automatically entering partner-down.
The Failover pool balance statements.
max-lease-misbalance percentage;
max-lease-ownership percentage;
min-balance seconds;
max-balance seconds;
This version of the DHCP Server evaluates pool balance on a schedule, rather than on demand as leases
are allocated. The latter approach proved to be slightly klunky when pool misbalanced reach total
saturation (em when any server ran out of leases to assign, it also lost its ability to notice it had run dry.
In order to understand pool balance, some elements of its operation first need to be defined. First, there
are ´free´ and ´backup´ leases. Both of these are referred to as ´free state leases´. ´free´ and ´backup´ are
´the free states´ for the purpose of this document. The difference is that only the primary may allocate
from ´free´ leases unless under special circumstances, and only the secondary may allocate ´backup´
leases.
When pool balance is performed, the only plausible expectation is to provide a 50/50 split of the free
state leases between the two servers. This is because no one can predict which server will fail, regardless
of the relative load placed upon the two servers, so giving each server half the leases gives both servers
the same amount of ´failure endurance´. Therefore, there is no way to configure any different behaviour,
outside of some very small windows we will describe shortly.
The first thing calculated on any pool balance run is a value referred to as ´lts´, or "Leases To Send". This,
simply, is the difference in the count of free and backup leases, divided by two. For the secondary, it is the
difference in the backup and free leases, divided by two. The resulting value is signed: if it is positive, the
local server is expected to hand out leases to retain a 50/50 balance. If it is negative, the remote server
would need to send leases to balance the pool. Once the lts value reaches zero, the pool is perfectly
balanced (give or take one lease in the case of an odd number of total free state leases).
The current approach is still something of a hybrid of the old approach, marked by the presence of
the max-lease-misbalance statement. This parameter configures what used to be a 10% fixed value in
previous versions: if lts is less than free+backup * max-lease-misbalance percent, then the server will skip
balancing a given pool (it won't bother moving any leases, even if some leases "should" be moved). The
meaning of this value is also somewhat overloaded, however, in that it also governs the estimation of
when to attempt to balance the pool (which may then also be skipped over). The oldest leases in the free
and backup states are examined. The time they have resided in their respective queues is used as an
estimate to indicate how much time it is probable it would take before the leases at the top of the list
would be consumed (and thus, how long it would take to use all leases in that state). This percentage is
directly multiplied by this time, and fit into the schedule if it falls within the min-balance and max-
balance configured values. The scheduled pool check time is only moved in a downwards direction, it is
never increased. Lastly, if the lts is more than double this number in the negative direction, the local
server will ´panic´ and transmit a Failover protocol POOLREQ message, in the hopes that the remote
system will be woken up into action.
Once the lts value exceeds the max-lease-misbalance percentage of total free state leases as described
above, leases are moved to the remote server. This is done in two passes.
In the first pass, only leases whose most recent bound client would have been served by the remote
server - according to the Load Balance Algorithm (see above split and hba configuration statements) - are

given away to the peer. This first pass will happily continue to give away leases, decrementing the lts
value by one for each, until the lts value has reached the negative of the total number of leases multiplied
by the max-lease-ownership percentage. So it is through this value that you can permit a small
misbalance of the lease pools - for the purpose of giving the peer more than a 50/50 share of leases in the
hopes that their clients might some day return and be allocated by the peer (operating normally). This
process is referred to as ´MAC Address Affinity´, but this is somewhat misnamed: it applies equally to
DHCP Client Identifier options. Note also that affinity is applied to leases when they enter the state ´free´
from ´expired´ or ´released´. In this case also, leases will not be moved from free to backup if the
secondary already has more than its share.
The second pass is only entered into if the first pass fails to reduce the lts underneath the total number of
free state leases multiplied by the max-lease-ownership percentage. In this pass, the oldest leases are
given over to the peer without second thought about the Load Balance Algorithm, and this continues until
the lts falls under this value. In this way, the local server will also happily keep a small percentage of the
leases that would normally load balance to itself.
So, the max-lease-misbalance value acts as a behavioural gate. Smaller values will cause more leases to
transition states to balance the pools over time, higher values will decrease the amount of change (but
may lead to pool starvation if there's a run on leases).
The max-lease-ownership value permits a small (percentage) skew in the lease balance of a percentage of
the total number of free state leases.
Finally, the min-balance and max-balance make certain that a scheduled rebalance event happens within
a reasonable timeframe (not to be thrown off by, for example, a 7 year old free lease).
Plausible values for the percentages lie between 0 and 100, inclusive, but values over 50 are
indistinguishable from one another (once lts exceeds 50% of the free state leases, one server must
therefore have 100% of the leases in its respective free state). It is recommended to select a max-lease-
ownership value that is lower than the value selected for the max-lease-misbalance value. max-lease-
ownershipdefaults to 10, and max-lease-misbalance defaults to 15.
Plausible values for the min-balance and max-balance times also range from 0 to (2^32)-1 (or the limit of
your local time_t value), but default to values 60 and 3600 respectively (to place balance events between
1 minute and 1 hour).
DYNAMIC DNS UPDATES
The DHCP server has the ability to dynamically update the Domain Name System. Within the configuration files,
you can define how you want the Domain Name System to be updated. These updates are RFC 2136 compliant so
any DNS server supporting RFC 2136 should be able to accept updates from the DHCP server.
There are two DNS schemes implemented. The interim option is based on draft revisions of the DDNS documents
while the standard option is based on the RFCs for DHCP-DNS interaction and DHCIDs. A third option, ad-hoc, was
deprecated and has now been removed from the code base. The DHCP server must be configured to use one of
the two currently-supported methods, or not to do DNS updates.
New installations should use the standard option. Older installations may want to continue using the interim
option for backwards compatibility with the DNS database until the database can be updated. This can be done
with the ddns-update-style configuration parameter.
THE DNS UPDATE SCHEME
The interim and standard DNS update schemes operate mostly according to work from the IETF. The interim
version was based on the drafts in progress at the time while the standard is based on the completed RFCs. The
standard RFCs are:
RFC 4701 (updated by RF5494)
RFC 4702
RFC 4703
And the corresponding drafts were:
draft-ietf-dnsext-dhcid-rr-??.txt
draft-ietf-dhc-fqdn-option-??.txt
draft-ietf-dhc-ddns-resolution-??.txt
The basic framework for the two schemes is similar with the main material difference being that a DHCID RR is
used in the standard version while the interim versions uses a TXT RR. The format of the TXT record bears a
resemblance to the DHCID RR but it is not equivalent (MD5 vs SHA2, field length differences etc).
In these two schemes the DHCP server does not necessarily always update both the A and the PTR records. The
FQDN option includes a flag which, when sent by the client, indicates that the client wishes to update its own A
record. In that case, the server can be configured either to honor the client´s intentions or ignore them. This is
done with the statement allow client-updates; or the statement ignore client-updates;. By default, client updates
are allowed.
If the server is configured to allow client updates, then if the client sends a fully-qualified domain name in the
FQDN option, the server will use that name the client sent in the FQDN option to update the PTR record. For
example, let us say that the client is a visitor from the "radish.org" domain, whose hostname is "jschmoe". The
server is for the "example.org" domain. The DHCP client indicates in the FQDN option that its FQDN is
"jschmoe.radish.org.". It also indicates that it wants to update its own A record. The DHCP server therefore does
not attempt to set up an A record for the client, but does set up a PTR record for the IP address that it assigns the
client, pointing at jschmoe.radish.org. Once the DHCP client has an IP address, it can update its own A record,
assuming that the "radish.org" DNS server will allow it to do so.
If the server is configured not to allow client updates, or if the client doesn´t want to do its own update, the server
will simply choose a name for the client from either the fqdn option (if present) or the hostname option (if
present). It will use its own domain name for the client. It will then update both the A and PTR record, using the
name that it chose for the client. If the client sends a fully-qualified domain name in the fqdn option, the server
uses only the leftmost part of the domain name - in the example above, "jschmoe" instead of
"jschmoe.radish.org".
Further, if the ignore client-updates; directive is used, then the server will in addition send a response in the DHCP
packet, using the FQDN Option, that implies to the client that it should perform its own updates if it chooses to do
so. With deny client-updates;, a response is sent which indicates the client may not perform updates.
Also, if the use-host-decl-names configuration option is enabled, then the host declaration’s hostname will be used
in place of the hostname option, and the same rules will apply as described above.
Both the standard and interim options also include a method to allow more than one DHCP server to update the
DNS database without accidentally deleting A records that shouldn´t be deleted nor failing to add A records that
should be added. For the standard option the method works as follows:
When the DHCP server issues a client a new lease, it creates a text string that is an SHA hash over the DHCP client´s
identification (see RFCs 4701 & 4702 for details). The update attempts to add an A record with the name the server
chose and a DHCID record containing the hashed identifier string (hashid). If this update succeeds, the server is
done.
If the update fails because the A record already exists, then the DHCP server attempts to add the A record with the
prerequisite that there must be a DHCID record in the same name as the new A record, and that DHCID record´s
contents must be equal to hashid. If this update succeeds, then the client has its A record and PTR record. If it fails,
then the name the client has been assigned (or requested) is in use, and can´t be used by the client. At this point
the DHCP server gives up trying to do a DNS update for the client until the client chooses a new name.
The server also does not update very aggressively. Because each DNS update involves a round trip to the DNS
server, there is a cost associated with doing updates even if they do not actually modify the DNS database. So the
DHCP server tracks whether or not it has updated the record in the past (this information is stored on the lease)
and does not attempt to update records that it thinks it has already updated.
This can lead to cases where the DHCP server adds a record, and then the record is deleted through some other
mechanism, but the server never again updates the DNS because it thinks the data is already there. In this case the
data can be removed from the lease through operator intervention, and once this has been done, the DNS will be
updated the next time the client renews.
The interim DNS update scheme was written before the RFCs were finalized and does not quite follow them. The
RFCs call for a new DHCID RRtype while he interim DNS update scheme uses a TXT record. In addition the ddns-
resolution draft called for the DHCP server to put a DHCID RR on the PTR record, but the interim update method
does not do this. In the final RFC this requirement was relaxed such that a server may add a DHCID RR to the PTR
record.
DYNAMIC DNS UPDATE SECURITY
When you set your DNS server up to allow updates from the DHCP server, you may be exposing it to unauthorized
updates. To avoid this, you should use TSIG signatures - a method of cryptographically signing updates using a
shared secret key. As long as you protect the secrecy of this key, your updates should also be secure. Note,
however, that the DHCP protocol itself provides no security, and that clients can therefore provide information to
the DHCP server which the DHCP server will then use in its updates, with the constraints described previously.
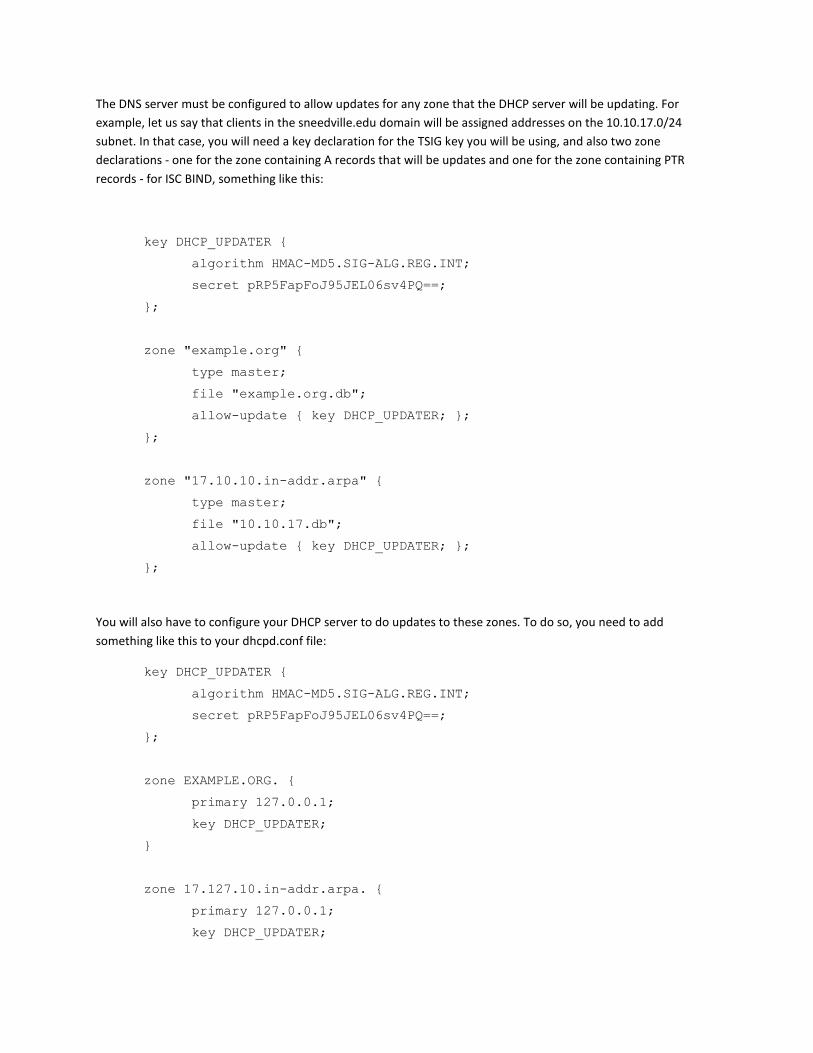
The DNS server must be configured to allow updates for any zone that the DHCP server will be updating. For
example, let us say that clients in the sneedville.edu domain will be assigned addresses on the 10.10.17.0/24
subnet. In that case, you will need a key declaration for the TSIG key you will be using, and also two zone
declarations - one for the zone containing A records that will be updates and one for the zone containing PTR
records - for ISC BIND, something like this:
key DHCP_UPDATER {
algorithm HMAC-MD5.SIG-ALG.REG.INT;
secret pRP5FapFoJ95JEL06sv4PQ==;
};
zone "example.org" {
type master;
file "example.org.db";
allow-update { key DHCP_UPDATER; };
};
zone "17.10.10.in-addr.arpa" {
type master;
file "10.10.17.db";
allow-update { key DHCP_UPDATER; };
};
You will also have to configure your DHCP server to do updates to these zones. To do so, you need to add
something like this to your dhcpd.conf file:
key DHCP_UPDATER {
algorithm HMAC-MD5.SIG-ALG.REG.INT;
secret pRP5FapFoJ95JEL06sv4PQ==;
};
zone EXAMPLE.ORG. {
primary 127.0.0.1;
key DHCP_UPDATER;
}
zone 17.127.10.in-addr.arpa. {
primary 127.0.0.1;
key DHCP_UPDATER;
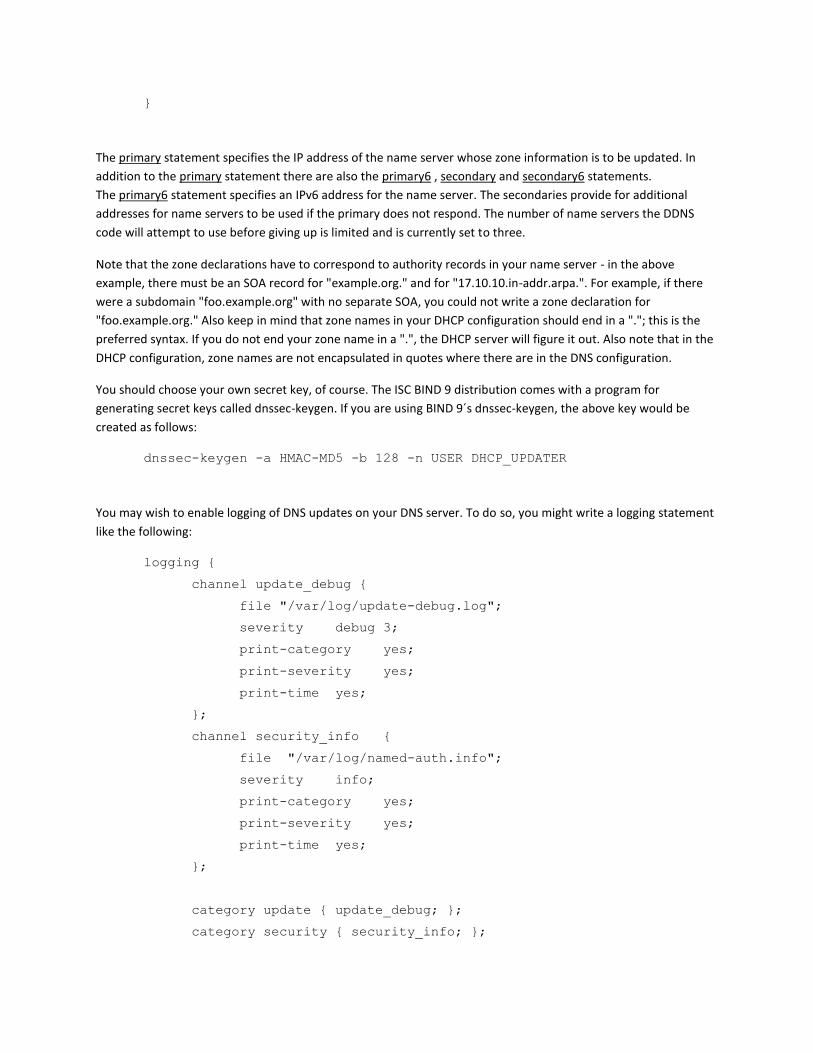
}
The primary statement specifies the IP address of the name server whose zone information is to be updated. In
addition to the primary statement there are also the primary6 , secondary and secondary6 statements.
The primary6 statement specifies an IPv6 address for the name server. The secondaries provide for additional
addresses for name servers to be used if the primary does not respond. The number of name servers the DDNS
code will attempt to use before giving up is limited and is currently set to three.
Note that the zone declarations have to correspond to authority records in your name server - in the above
example, there must be an SOA record for "example.org." and for "17.10.10.in-addr.arpa.". For example, if there
were a subdomain "foo.example.org" with no separate SOA, you could not write a zone declaration for
"foo.example.org." Also keep in mind that zone names in your DHCP configuration should end in a "."; this is the
preferred syntax. If you do not end your zone name in a ".", the DHCP server will figure it out. Also note that in the
DHCP configuration, zone names are not encapsulated in quotes where there are in the DNS configuration.
You should choose your own secret key, of course. The ISC BIND 9 distribution comes with a program for
generating secret keys called dnssec-keygen. If you are using BIND 9´s dnssec-keygen, the above key would be
created as follows:
dnssec-keygen -a HMAC-MD5 -b 128 -n USER DHCP_UPDATER
You may wish to enable logging of DNS updates on your DNS server. To do so, you might write a logging statement
like the following:
logging {
channel update_debug {
file "/var/log/update-debug.log";
severity debug 3;
print-category yes;
print-severity yes;
print-time yes;
};
channel security_info {
file "/var/log/named-auth.info";
severity info;
print-category yes;
print-severity yes;
print-time yes;
};
category update { update_debug; };
category security { security_info; };

};
You must create the /var/log/named-auth.info and /var/log/update-debug.log files before starting the name
server. For more information on configuring ISC BIND, consult the documentation that accompanies it.