Embed Size (px)
Citation preview
WA02030XX200503
Device Server Users Manual
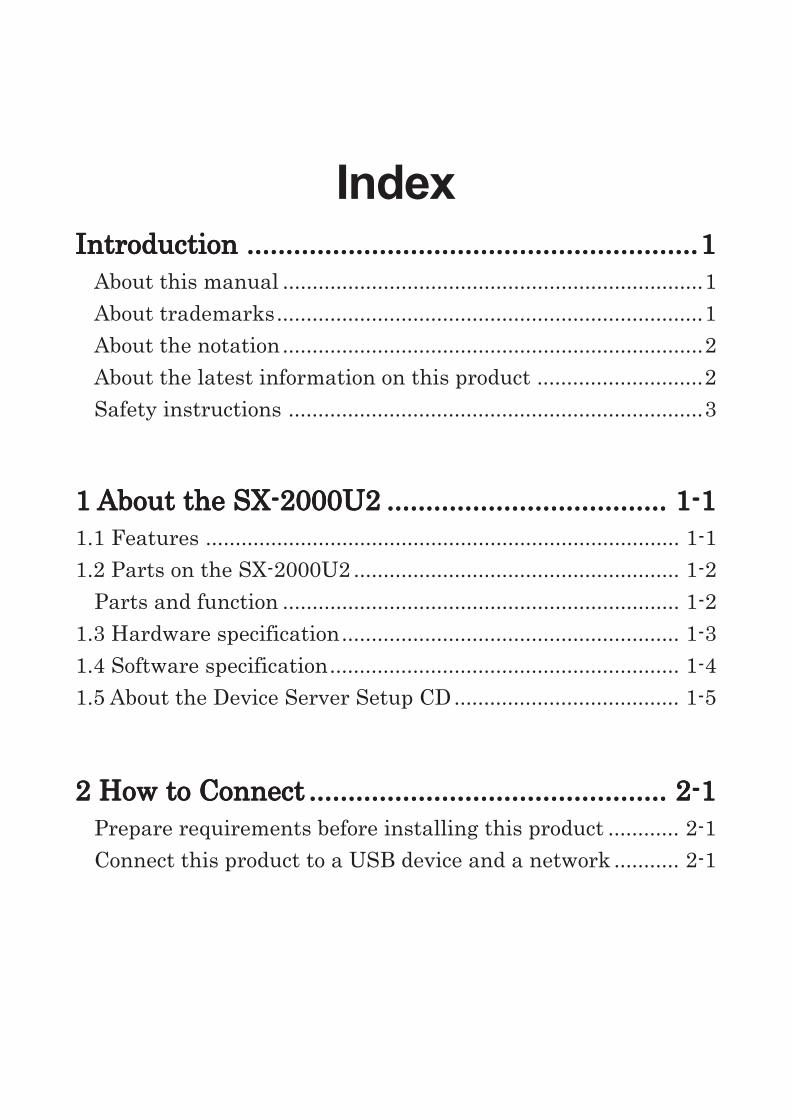
IndexIntroductionIntroductionIntroductionIntroductionIntroduction ..................................................................................................................................................................................................................................................................................................11111
About this manual .......................................................................1About trademarks........................................................................1About the notation.......................................................................2About the latest information on this product ............................2Safety instructions ......................................................................3
1 1 1 1 1 About the SX-2000U2About the SX-2000U2About the SX-2000U2About the SX-2000U2About the SX-2000U2 .................................................................................................................................................................................... 1-11-11-11-11-11.1 Features ................................................................................ 1-11.2 Parts on the SX-2000U2 ....................................................... 1-2
Parts and function ................................................................... 1-21.3 Hardware specification......................................................... 1-31.4 Software specification........................................................... 1-41.5 About the Device Server Setup CD...................................... 1-5
2 How to Connect2 How to Connect2 How to Connect2 How to Connect2 How to Connect ...................................................................................................................................................................................................................................... 2-12-12-12-12-1Prepare requirements before installing this product ............ 2-1Connect this product to a USB device and a network ........... 2-1
3 Installation of This Product3 Installation of This Product3 Installation of This Product3 Installation of This Product3 Installation of This Product .................................................................................................................................. 3-13-13-13-13-13.1 Initial configuration of the SX-2000U2 ............................... 3-1
Initial configuration using Quick Setup................................. 3-1Configure additional PCs ........................................................ 3-6
5 Q&A5 Q&A5 Q&A5 Q&A5 Q&A ................................................................................................................................................................................................................................................................................................................................ 5-15-15-15-15-15.1 Problems while initial installation ...................................... 5-1
This product is not found even after searchingby the configuration utility...................................................... 5-1Communication error occurs when configuring an IP address. ......................................................................... 5-3
5.2 Problems of the SX Virtual Link.......................................... 5-4Connection error occurs when connecting to a USB device. . 5-4
5.3 Other ..................................................................................... 5-4I cannot change the configuration of this productvia my Web browser. ................................................................ 5-4
4 How to Use the SX V4 How to Use the SX V4 How to Use the SX V4 How to Use the SX V4 How to Use the SX Virtual Linkirtual Linkirtual Linkirtual Linkirtual Link ............................................................................................... 4-14-14-14-14-14.1 Use the SX Virtual Link ....................................................... 4-1
Connect to a USB device ......................................................... 4-1Add to Favorites ...................................................................... 4-3Display in the compact mode .................................................. 4-4Use the printer auto connection ............................................. 4-5
4.2 SX Virtual Link definitions .................................................. 4-7SX Virtual Link screens .......................................................... 4-7Optional settings dialog .......................................................... 4-8Device properties dialog ........................................................ 4-10
User RegistrationUser RegistrationUser RegistrationUser RegistrationUser Registration..........................................................................................................................................................................................................................................................11111
AppendixAppendixAppendixAppendixAppendix ...........................................................................................................................................................................................................................................................................................................................11111Using a Web browser ......................................................................1
Configure this product using a Web browser. ............................1Configuration settings.................................................................2
Enhanced Function.........................................................................3Network Plug and Play ...............................................................4IP filtering function .....................................................................5
Reset this product to the factory default settings.........................7Reset to the factory default settings by the push switch ..........7Reset to the factory default settings by a Web browser ............7
1Introduction
Users Manual
IntroductionThank you for purchasing our product. This manual provides information on how to configureand use SX-2000U2 (this product). To correctly and safely use this product, please readcarefully.
- Copying all or a part of this manual without our permission is prohibited.
- The contents of this manual may be changed without advance notice.
- If you have any question regarding this manual or our products, please contact our customersupport.
- Please note that the actual screens may vary from the examples in this manual. This can becaused by different versions of operating systems on the PC, upgrades, etc.
- This manual has been edited very carefully. However, silex technology, Inc. is not responsiblefor any mistakes included in this manual or any damages, direct or indirect, arising from theuse of this manual.
About this manual
About trademarks
- Microsoft and Windows are either registered trademarks or trademarks of MicrosoftCorporation in the United States and/or other countries.
- Other brand or product names are registered trademarks or trademarks of their respectiveowners.
2Introduction
Users Manual
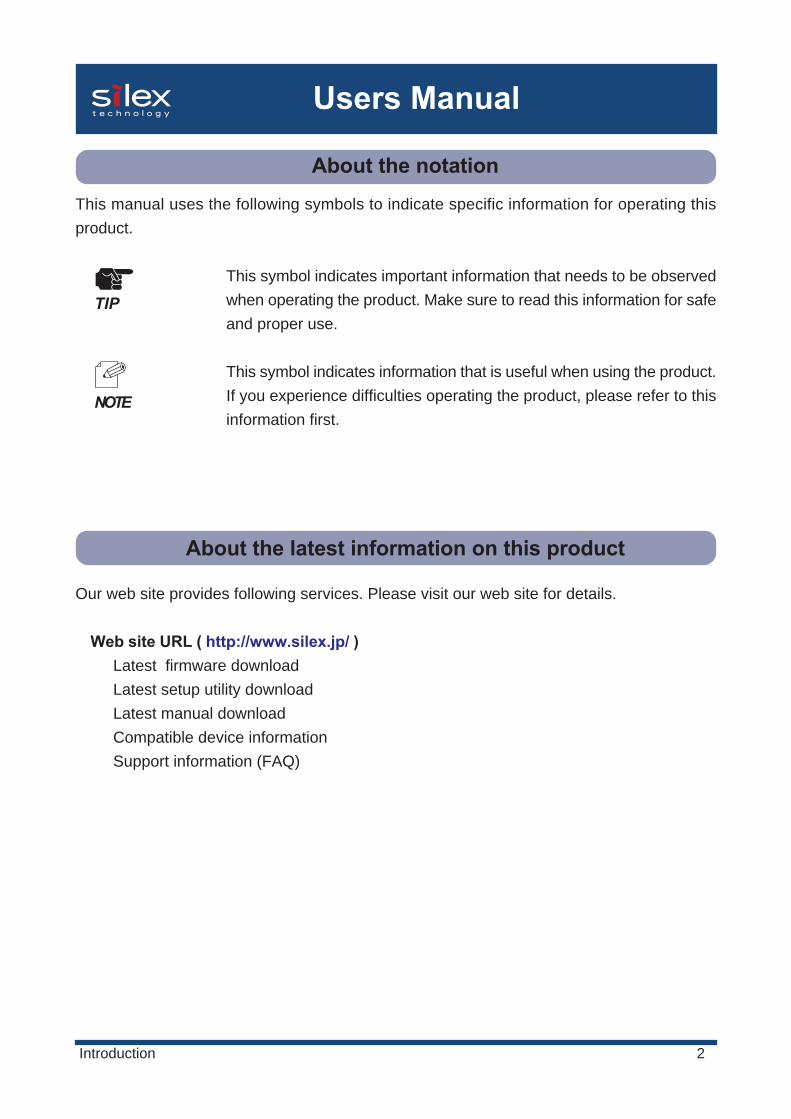
This manual uses the following symbols to indicate specific information for operating thisproduct.
This symbol indicates important information that needs to be observedwhen operating the product. Make sure to read this information for safeand proper use.
This symbol indicates information that is useful when using the product.If you experience difficulties operating the product, please refer to thisinformation first.
TIP
NOTE
About the notation
About the latest information on this product
Our web site provides following services. Please visit our web site for details.
Web site URL ( http://www.silex.jp/ )Latest firmware downloadLatest setup utility downloadLatest manual downloadCompatible device informationSupport information (FAQ)

3Introduction
Users Manual
Safety instructions
- To ensure safe and proper use, please read the following information carefully before usingthis product. The safety instructions include important information on safe handling of theproduct and on general safety issues. Cautions regarding the USB device connected to thisproduct are also included.
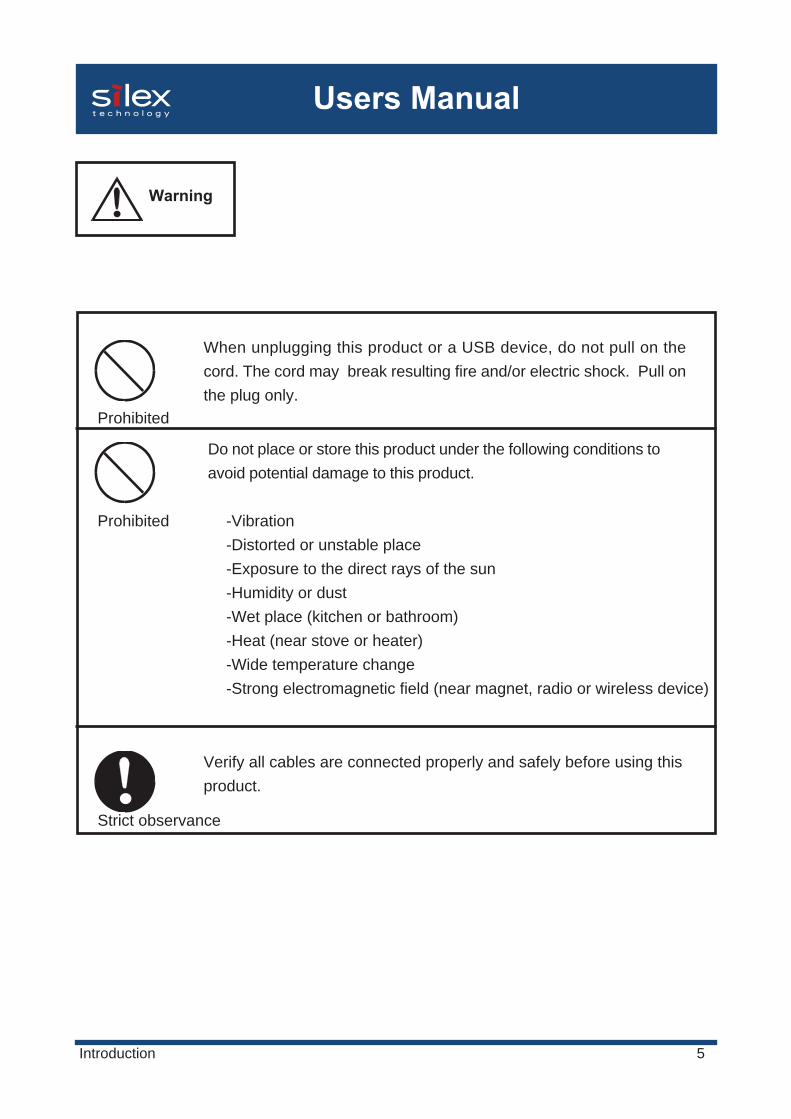
“Warning” indicates the existence of a hazard that could result in materialdamage if the safety instruction is not observed.
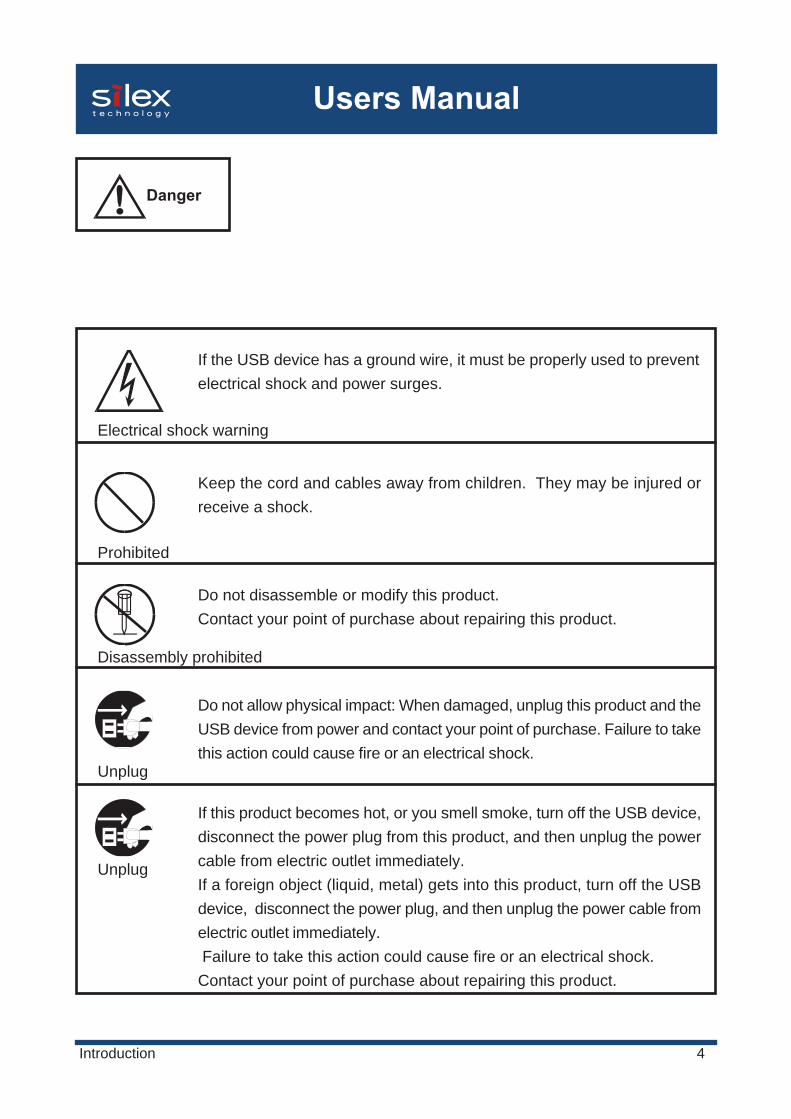
Danger “Danger” indicates the existence of a hazard that could result in bodily injuryif the safety instruction is not observed.
Warning
This symbol warns of possible danger.The danger symbol will contain another symbol or have a picture
near it to indicate possible danger.
This is the prohibit symbol.This symbol will include another symbol or have a picture near itto indicate what is prohibited.
This indicates a regulation by its contents.The regulation will appear inside or near this symbol.
Indication of the expression
Indication of the symbol
4Introduction
Users Manual
Danger
If the USB device has a ground wire, it must be properly used to preventelectrical shock and power surges.
Keep the cord and cables away from children. They may be injured orreceive a shock.
Do not allow physical impact: When damaged, unplug this product and theUSB device from power and contact your point of purchase. Failure to takethis action could cause fire or an electrical shock.
Do not disassemble or modify this product.Contact your point of purchase about repairing this product.
If this product becomes hot, or you smell smoke, turn off the USB device,disconnect the power plug from this product, and then unplug the powercable from electric outlet immediately.If a foreign object (liquid, metal) gets into this product, turn off the USBdevice, disconnect the power plug, and then unplug the power cable fromelectric outlet immediately. Failure to take this action could cause fire or an electrical shock.Contact your point of purchase about repairing this product.
Electrical shock warning
Prohibited
Disassembly prohibited
Unplug
Unplug
5Introduction
Users Manual
Warning
When unplugging this product or a USB device, do not pull on thecord. The cord may break resulting fire and/or electric shock. Pull onthe plug only.
Verify all cables are connected properly and safely before using thisproduct.
Do not place or store this product under the following conditions to avoid potential damage to this product.
Prohibited -Vibration-Distorted or unstable place-Exposure to the direct rays of the sun-Humidity or dust-Wet place (kitchen or bathroom)-Heat (near stove or heater)-Wide temperature change-Strong electromagnetic field (near magnet, radio or wireless device)
Prohibited
Strict observance
1-1About the SX-2000U2
Users Manual
- silex technology shall not be liable for any loss or damage of data in data storage devicesresulting from the use of this product. silex technology shall not also be liable for any leak,manipulation, loss, or corruption of data in data storage devices connected to this product as aresult of improper use.
- USB devices using isochronous transmission, such as web cameras or speaker devices, are notsupported.
- Some USB devices may not be supported depending on the USB device driver specification.Please refer to our web site( http://www.silex.jp/ ) for the latest compatibility information.
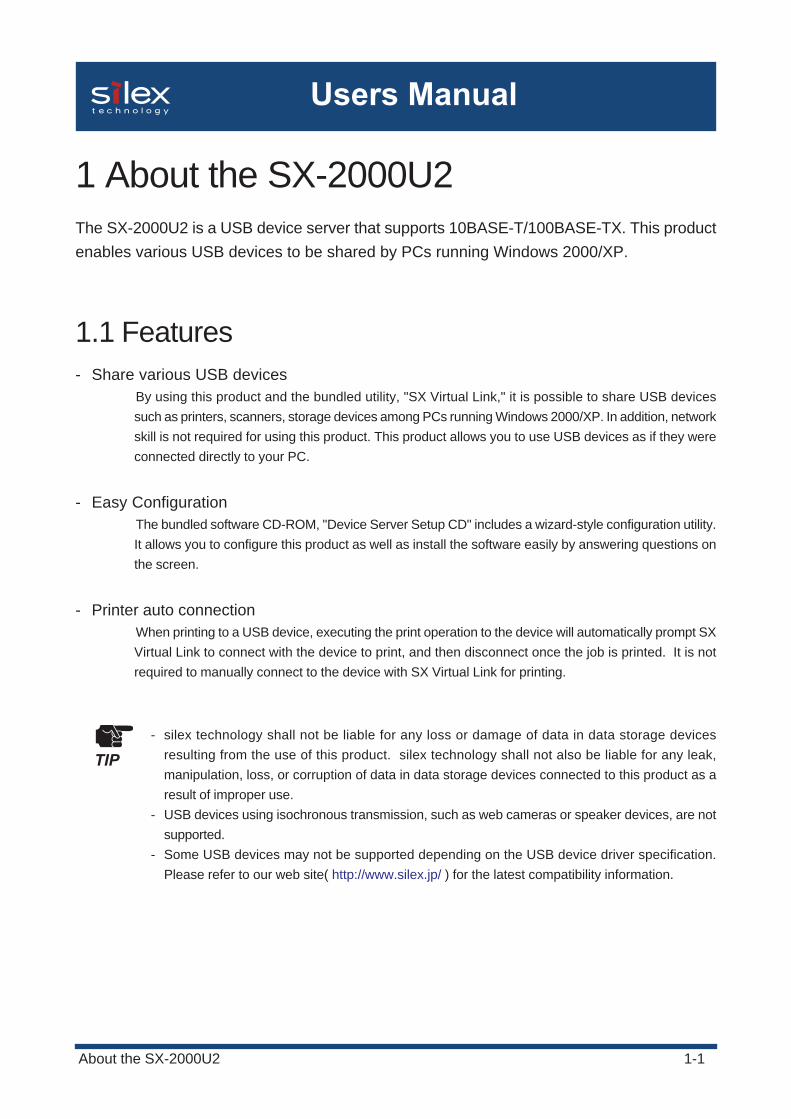
1 About the SX-2000U2The SX-2000U2 is a USB device server that supports 10BASE-T/100BASE-TX. This productenables various USB devices to be shared by PCs running Windows 2000/XP.
1.1 Features- Share various USB devices
By using this product and the bundled utility, "SX Virtual Link," it is possible to share USB devicessuch as printers, scanners, storage devices among PCs running Windows 2000/XP. In addition, networkskill is not required for using this product. This product allows you to use USB devices as if they wereconnected directly to your PC.
- Easy ConfigurationThe bundled software CD-ROM, "Device Server Setup CD" includes a wizard-style configuration utility.It allows you to configure this product as well as install the software easily by answering questions onthe screen.
- Printer auto connectionWhen printing to a USB device, executing the print operation to the device will automatically prompt SXVirtual Link to connect with the device to print, and then disconnect once the job is printed. It is notrequired to manually connect to the device with SX Virtual Link for printing.
TIP
1-2About the SX-2000U2
Users Manual
1.2 Parts on the SX-2000U2
Parts and function
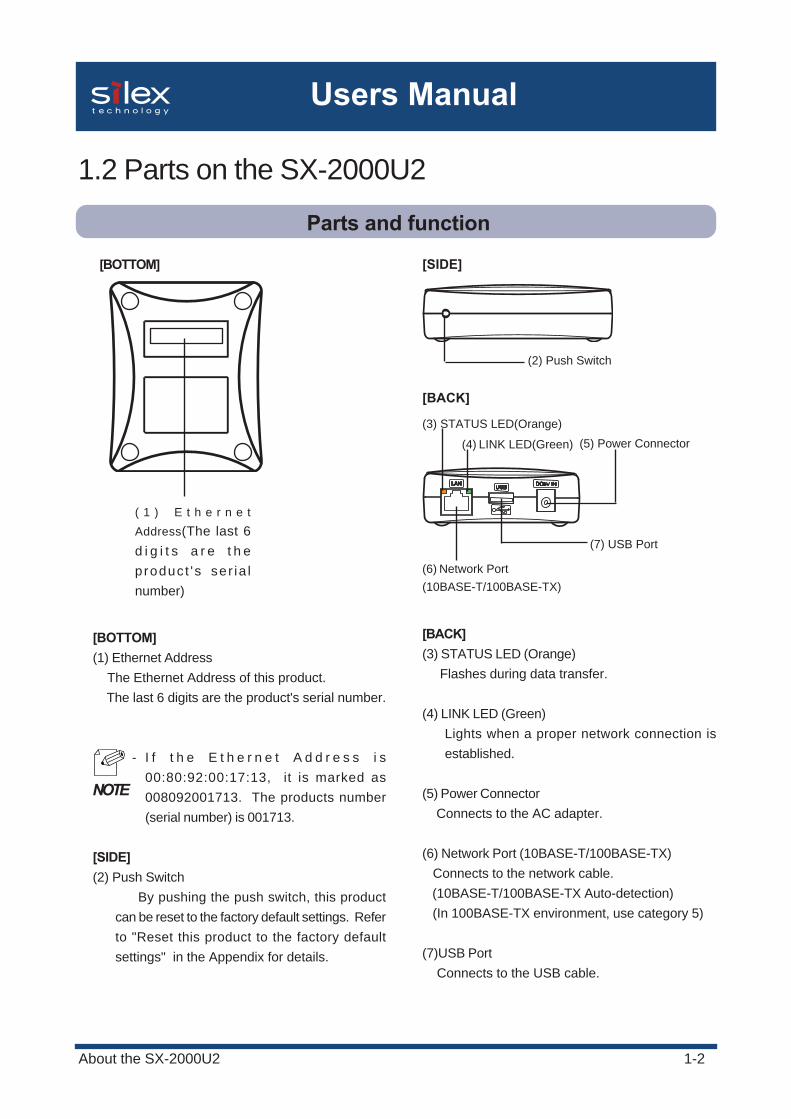
[BOTTOM](1) Ethernet Address The Ethernet Address of this product. The last 6 digits are the product's serial number.
- I f t h e E t h e r n e t A d d r e s s i s00:80:92:00:17:13, it is marked as008092001713. The products number(serial number) is 001713.
[SIDE](2) Push Switch
By pushing the push switch, this productcan be reset to the factory default settings. Referto "Reset this product to the factory defaultsettings" in the Appendix for details.
[BOTTOM]
[BACK]
[BACK](3) STATUS LED (Orange) Flashes during data transfer.
(4) LINK LED (Green) Lights when a proper network connection is
established.
(5) Power Connector Connects to the AC adapter.
(6) Network Port (10BASE-T/100BASE-TX) Connects to the network cable. (10BASE-T/100BASE-TX Auto-detection) (In 100BASE-TX environment, use category 5)
(7)USB Port Connects to the USB cable.
[SIDE]
( 1 ) E t h e r n e t
Address(The last 6d i g i t s a r e t h eproduct 's ser ia lnumber)
(4) LINK LED(Green)
(3) STATUS LED(Orange)
(6) Network Port(10BASE-T/100BASE-TX)
(2) Push Switch
(5) Power Connector
(7) USB Port
NOTE
1-3About the SX-2000U2
Users Manual
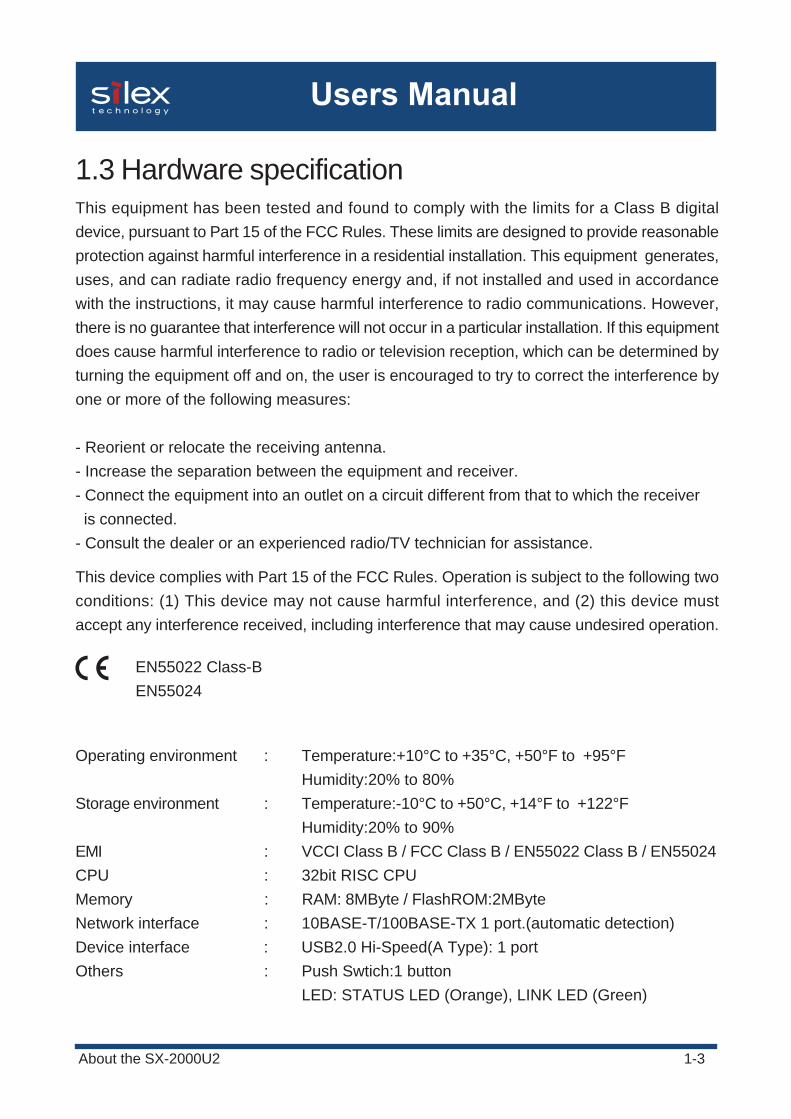
1.3 Hardware specificationThis equipment has been tested and found to comply with the limits for a Class B digitaldevice, pursuant to Part 15 of the FCC Rules. These limits are designed to provide reasonableprotection against harmful interference in a residential installation. This equipment generates,uses, and can radiate radio frequency energy and, if not installed and used in accordancewith the instructions, it may cause harmful interference to radio communications. However,there is no guarantee that interference will not occur in a particular installation. If this equipmentdoes cause harmful interference to radio or television reception, which can be determined byturning the equipment off and on, the user is encouraged to try to correct the interference byone or more of the following measures:
- Reorient or relocate the receiving antenna.- Increase the separation between the equipment and receiver.- Connect the equipment into an outlet on a circuit different from that to which the receiver is connected.- Consult the dealer or an experienced radio/TV technician for assistance.
This device complies with Part 15 of the FCC Rules. Operation is subject to the following twoconditions: (1) This device may not cause harmful interference, and (2) this device mustaccept any interference received, including interference that may cause undesired operation.
EN55022 Class-B EN55024
Operating environment : Temperature:+10°C to +35°C, +50°F to +95°FHumidity:20% to 80%
Storage environment : Temperature:-10°C to +50°C, +14°F to +122°FHumidity:20% to 90%
EMI : VCCI Class B / FCC Class B / EN55022 Class B / EN55024CPU : 32bit RISC CPUMemory : RAM: 8MByte / FlashROM:2MByteNetwork interface : 10BASE-T/100BASE-TX 1 port.(automatic detection)Device interface : USB2.0 Hi-Speed(A Type): 1 portOthers : Push Swtich:1 button
LED: STATUS LED (Orange), LINK LED (Green)
1-4About the SX-2000U2
Users Manual
1.4 Software specification
NOTE
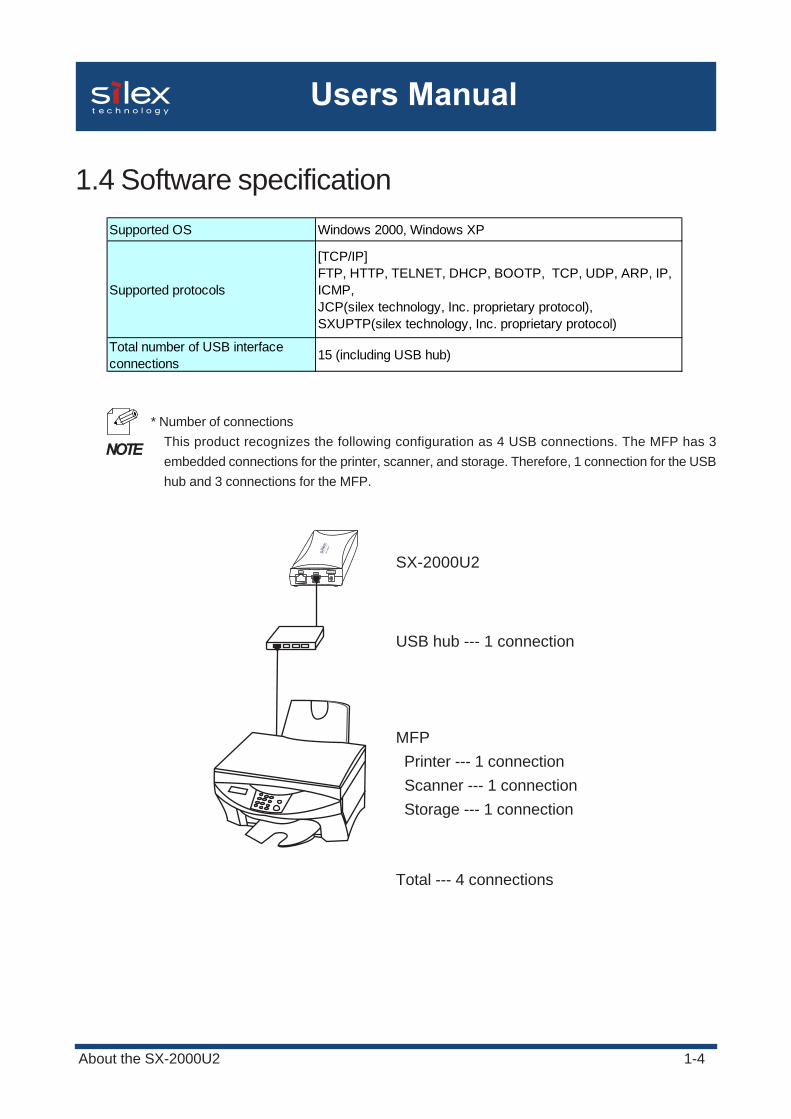
SX-2000U2
USB hub --- 1 connection
MFP Printer --- 1 connection Scanner --- 1 connection Storage --- 1 connection
Total --- 4 connections
* Number of connectionsThis product recognizes the following configuration as 4 USB connections. The MFP has 3embedded connections for the printer, scanner, and storage. Therefore, 1 connection for the USBhub and 3 connections for the MFP.
Supported OS Windows 2000, Windows XP
Supported protocols
[TCP/IP]FTP, HTTP, TELNET, DHCP, BOOTP, TCP, UDP, ARP, IP,ICMP,JCP(silex technology, Inc. proprietary protocol),SXUPTP(silex technology, Inc. proprietary protocol)
Total number of USB interfaceconnections
15 (including USB hub)
1-5About the SX-2000U2
Users Manual
1.5 About the Device Server Setup CD
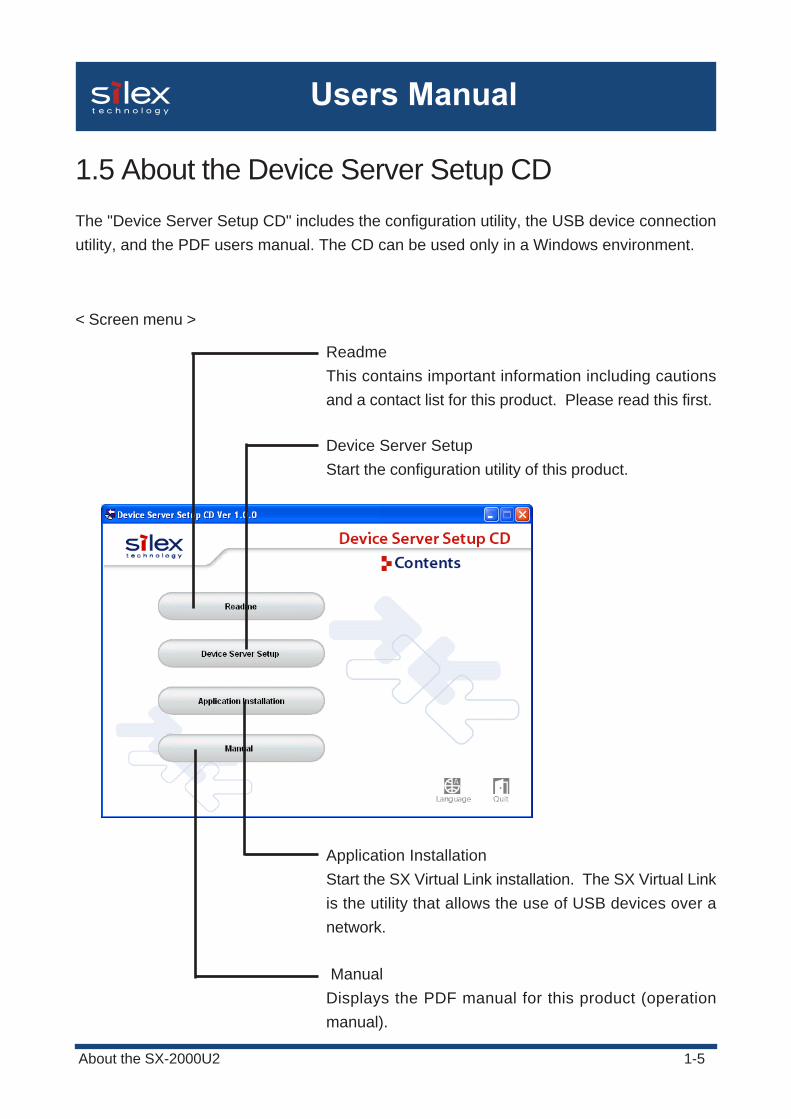
The "Device Server Setup CD" includes the configuration utility, the USB device connectionutility, and the PDF users manual. The CD can be used only in a Windows environment.
< Screen menu >
ReadmeThis contains important information including cautionsand a contact list for this product. Please read this first.
Device Server SetupStart the configuration utility of this product.
Application InstallationStart the SX Virtual Link installation. The SX Virtual Linkis the utility that allows the use of USB devices over anetwork.
ManualDisplays the PDF manual for this product (operationmanual).
2-1How to Connect
Users Manual
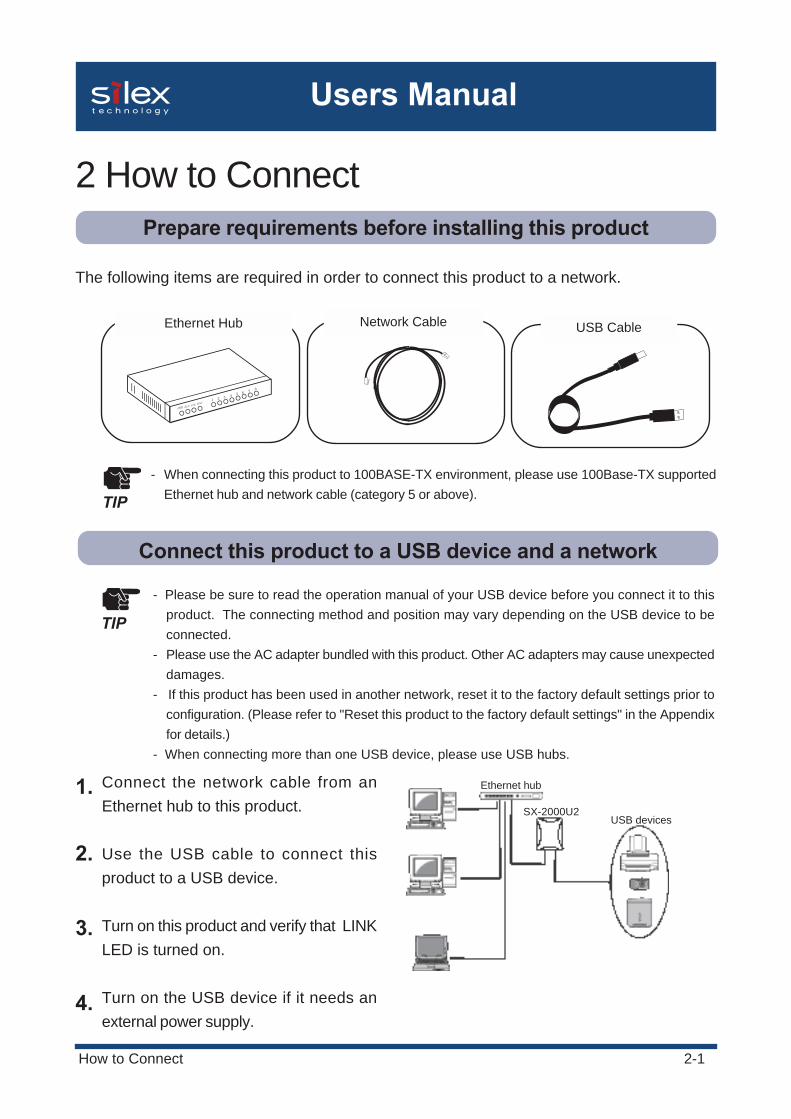
Connect the network cable from anEthernet hub to this product.
Use the USB cable to connect thisproduct to a USB device.
Turn on this product and verify that LINKLED is turned on.
Turn on the USB device if it needs anexternal power supply.
2 How to Connect
Ethernet Hub Network Cable
- When connecting this product to 100BASE-TX environment, please use 100Base-TX supportedEthernet hub and network cable (category 5 or above).
Prepare requirements before installing this product
The following items are required in order to connect this product to a network.
USB Cable
Connect this product to a USB device and a network
- Please be sure to read the operation manual of your USB device before you connect it to thisproduct. The connecting method and position may vary depending on the USB device to beconnected.
- Please use the AC adapter bundled with this product. Other AC adapters may cause unexpecteddamages.
- If this product has been used in another network, reset it to the factory default settings prior toconfiguration. (Please refer to "Reset this product to the factory default settings" in the Appendixfor details.)
- When connecting more than one USB device, please use USB hubs.
2.
1.
3.
4.
Ethernet hub
SX-2000U2USB devices
TIP
TIP

3-1Installation of This Product
Users Manual
3 Installation of This ProductThis chapter explains how to configure this product and install the user software "SX VirtualLink."
In order to use this product as a device server, TCP/IP needs to be configured. Each setupmethod is explained below.
3.1 Initial configuration of the SX-2000U2
Click Device Server Setup.
Insert the Device Server Setup CD into your Windows PC.
Initial configuration using Quick Setup
1.
2.
- If the screen does not appear automatically, open My Computer, select the CD-ROM drive anddouble-click Autorun.exe.TIP
TIP- When in a Windows XP environment (SP2 or higher), the following message will be displayed.
Select Yes.
Click Yes.
3-2Installation of This Product
Users Manual
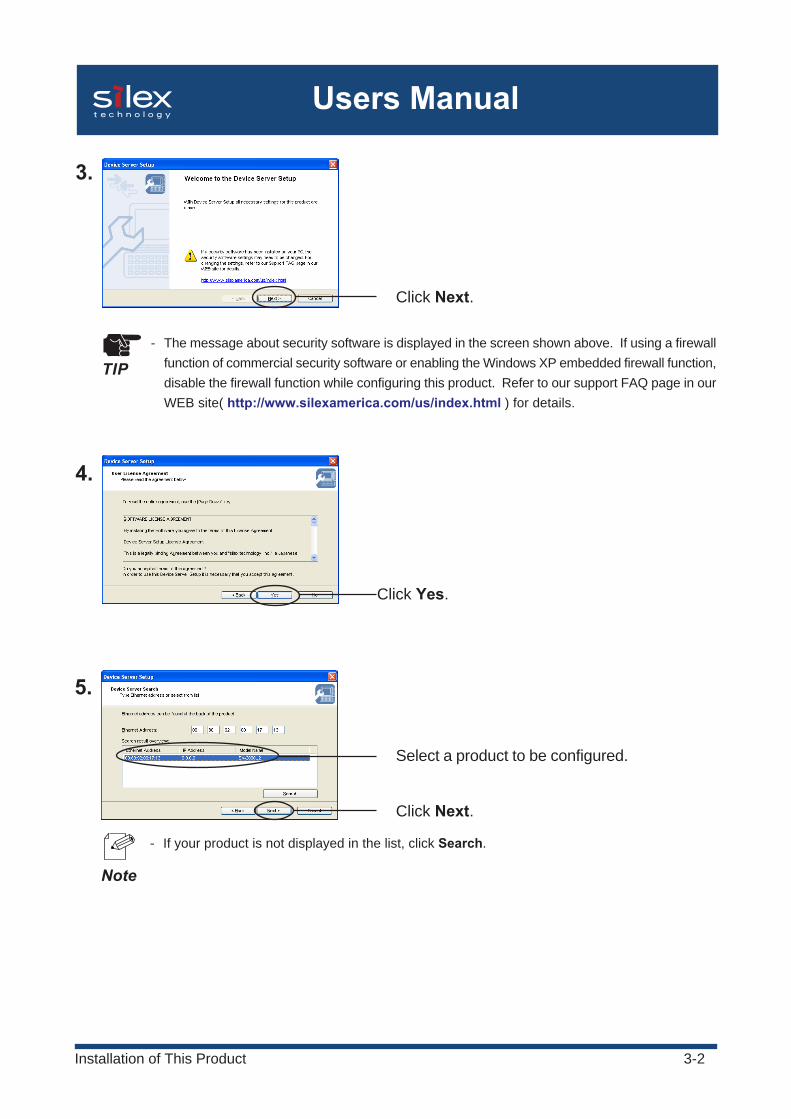
Click Yes.
4.
- If your product is not displayed in the list, click Search.
Select a product to be configured.
Click Next.
5.
Note
Click Next.
3.
TIP- The message about security software is displayed in the screen shown above. If using a firewall
function of commercial security software or enabling the Windows XP embedded firewall function,disable the firewall function while configuring this product. Refer to our support FAQ page in ourWEB site( http://www.silexamerica.com/us/index.html ) for details.
3-3Installation of This Product
Users Manual
���Ö
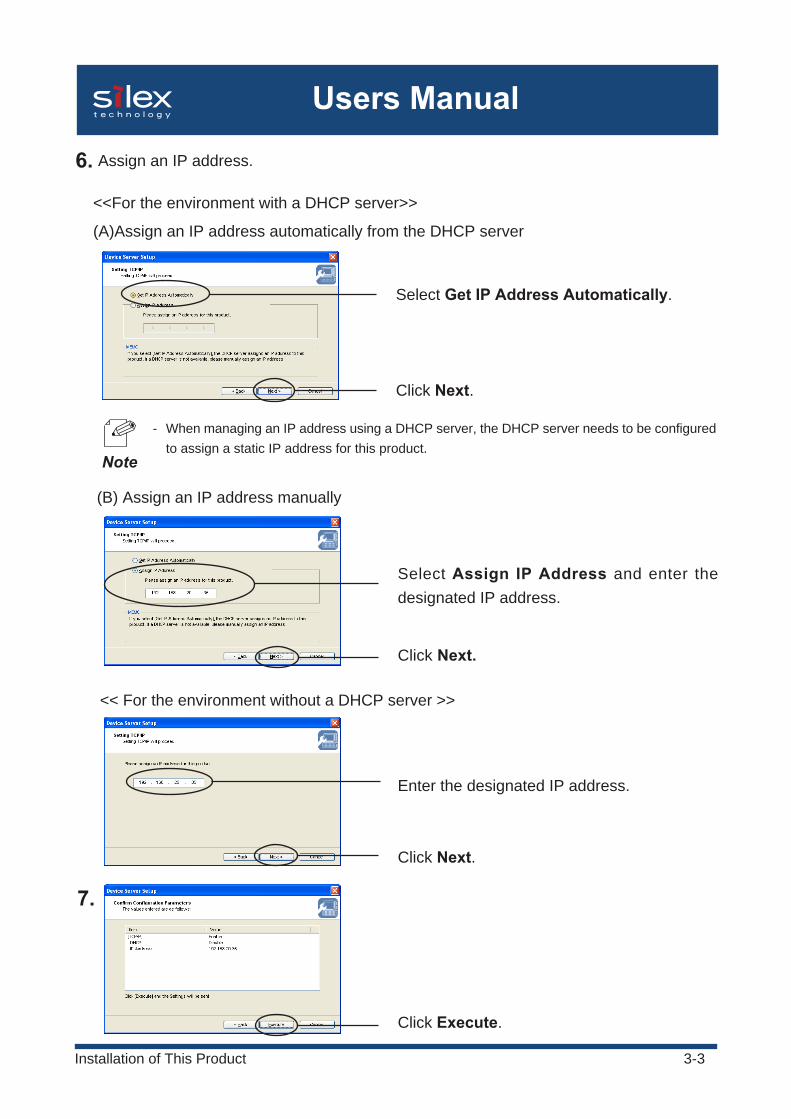
(B) Assign an IP address manually
Select Assign IP Address and enter thedesignated IP address.
Click Next.
<< For the environment without a DHCP server >>
Enter the designated IP address.
Click Next.
7.
Click Execute.
Click Next.
Select Get IP Address Automatically.
6. Assign an IP address.
<<For the environment with a DHCP server>>
(A)Assign an IP address automatically from the DHCP server
- When managing an IP address using a DHCP server, the DHCP server needs to be configuredto assign a static IP address for this product.
Note
3-4Installation of This Product
Users Manual
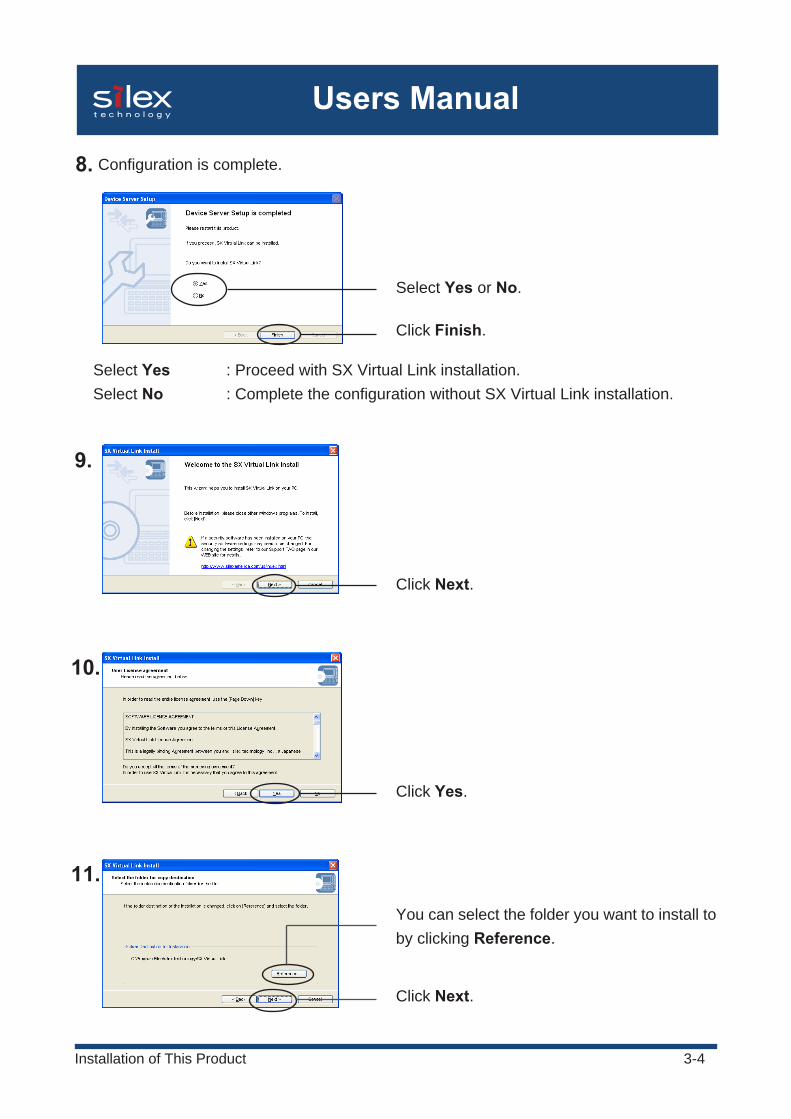
Click Next.
Click Yes.
Click Next.
You can select the folder you want to install toby clicking Reference.
9.
10.
11.
Select Yes or No.
Click Finish.
Configuration is complete.8.
Select Yes : Proceed with SX Virtual Link installation. Select No : Complete the configuration without SX Virtual Link installation.
3-5Installation of This Product
Users Manual
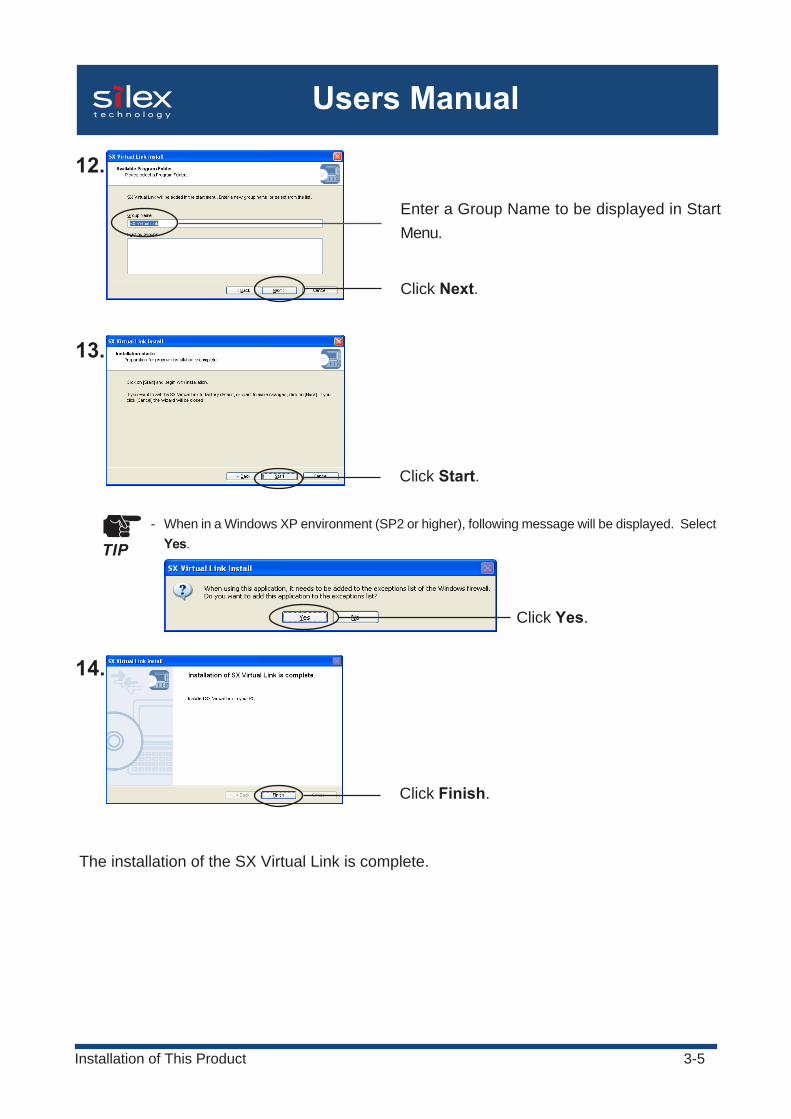
The installation of the SX Virtual Link is complete.
Click Start.
Click Finish.
13.
14.
Enter a Group Name to be displayed in StartMenu.
Click Next.
12.
TIP- When in a Windows XP environment (SP2 or higher), following message will be displayed. Select
Yes.
Click Yes.
3-6Installation of This Product
Users Manual
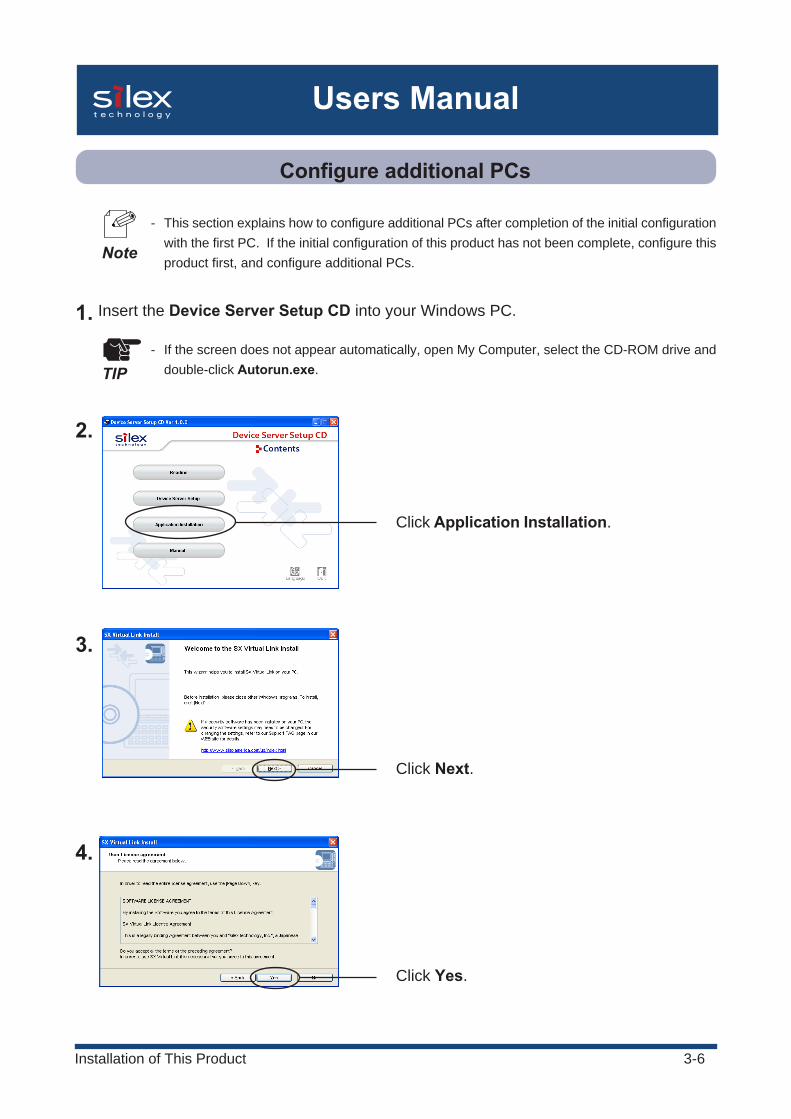
Configure additional PCs
Click Application Installation.
Insert the Device Server Setup CD into your Windows PC.1.
2.
- If the screen does not appear automatically, open My Computer, select the CD-ROM drive anddouble-click Autorun.exe.
Click Next.
Click Yes.
4.
3.
- This section explains how to configure additional PCs after completion of the initial configurationwith the first PC. If the initial configuration of this product has not been complete, configure thisproduct first, and configure additional PCs.
TIP
Note
3-7Installation of This Product
Users Manual
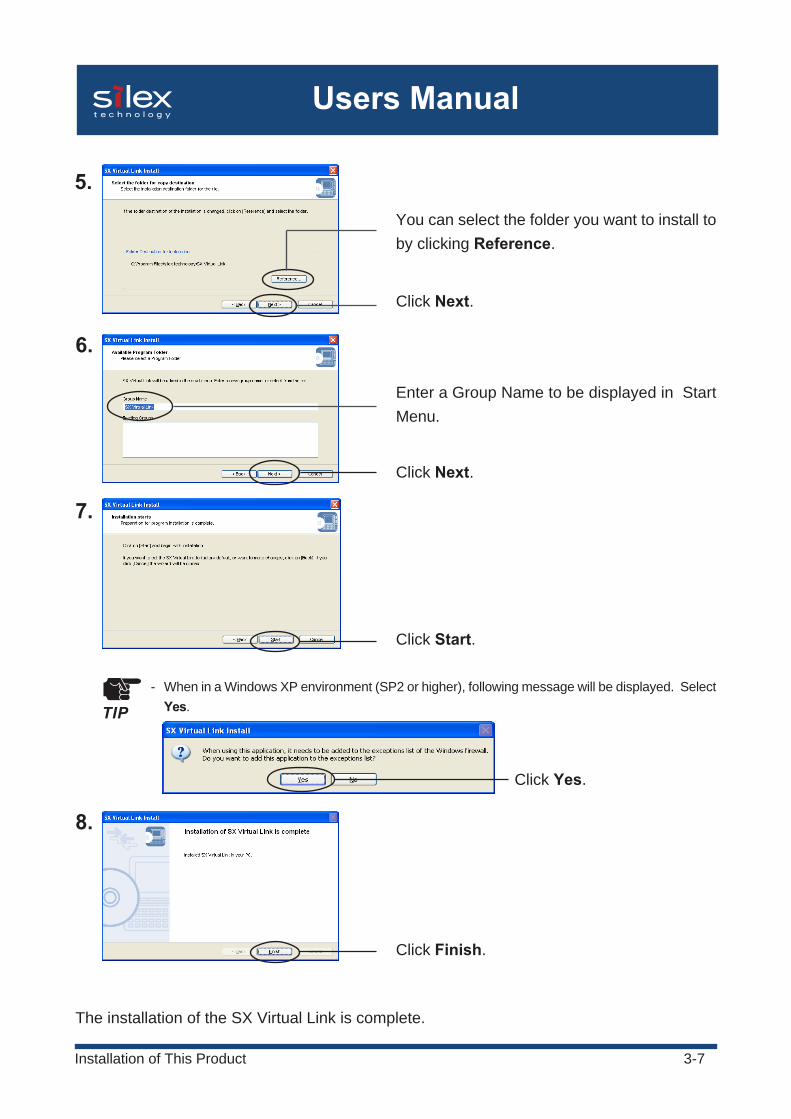
Click Next.
You can select the folder you want to install toby clicking Reference.
6.
Enter a Group Name to be displayed in StartMenu.
Click Next.
7.
The installation of the SX Virtual Link is complete.
Click Start.
Click Finish.
8.
5.
TIP- When in a Windows XP environment (SP2 or higher), following message will be displayed. Select
Yes.
Click Yes.
4-1
Users Manual
How to Use the SX Virtual Link
This chapter explains how to use the SX Virtual Link utility to operate this product from a PC.Using the SX Virtual Link enables you to share USB devices connected to this product over anetwork.
4 How to Use the SX Virtual Link
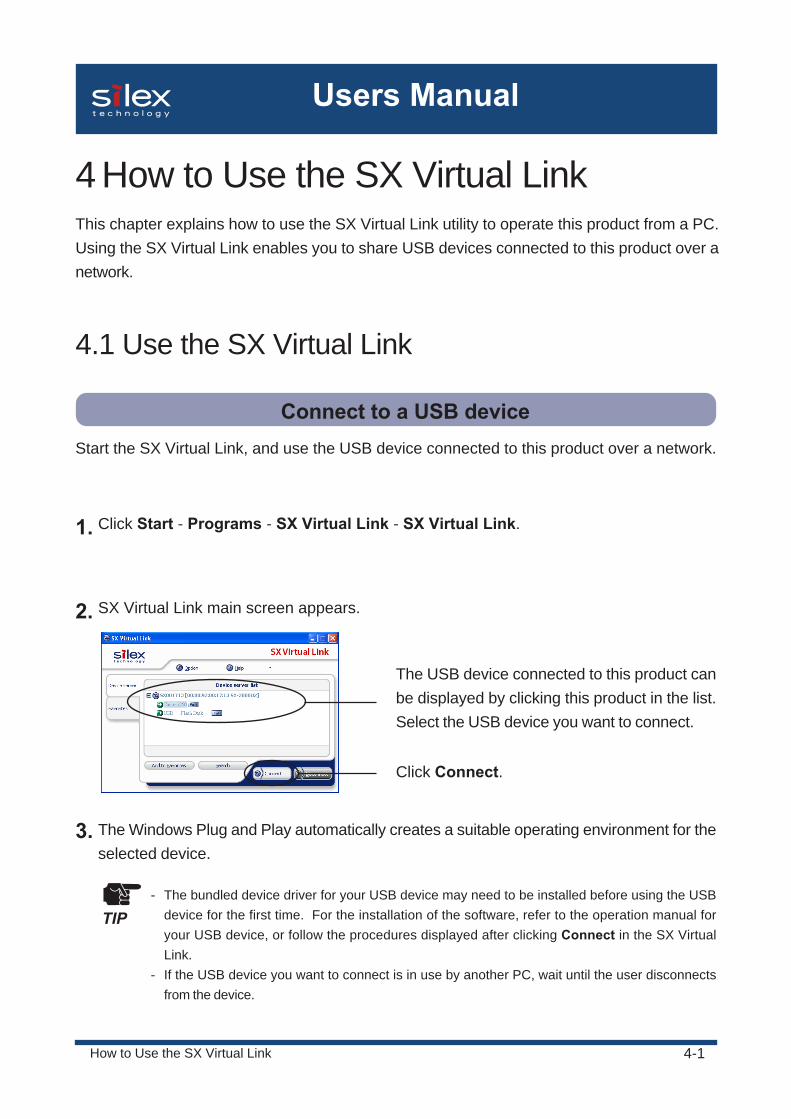
Click Start - Programs - SX Virtual Link - SX Virtual Link.
Connect to a USB deviceStart the SX Virtual Link, and use the USB device connected to this product over a network.
1.
2.
The USB device connected to this product canbe displayed by clicking this product in the list.Select the USB device you want to connect.
3.
SX Virtual Link main screen appears.
Click Connect.
The Windows Plug and Play automatically creates a suitable operating environment for theselected device.
- The bundled device driver for your USB device may need to be installed before using the USBdevice for the first time. For the installation of the software, refer to the operation manual foryour USB device, or follow the procedures displayed after clicking Connect in the SX VirtualLink.
- If the USB device you want to connect is in use by another PC, wait until the user disconnectsfrom the device.
4.1 Use the SX Virtual Link
TIP
4-2
Users Manual
How to Use the SX Virtual Link
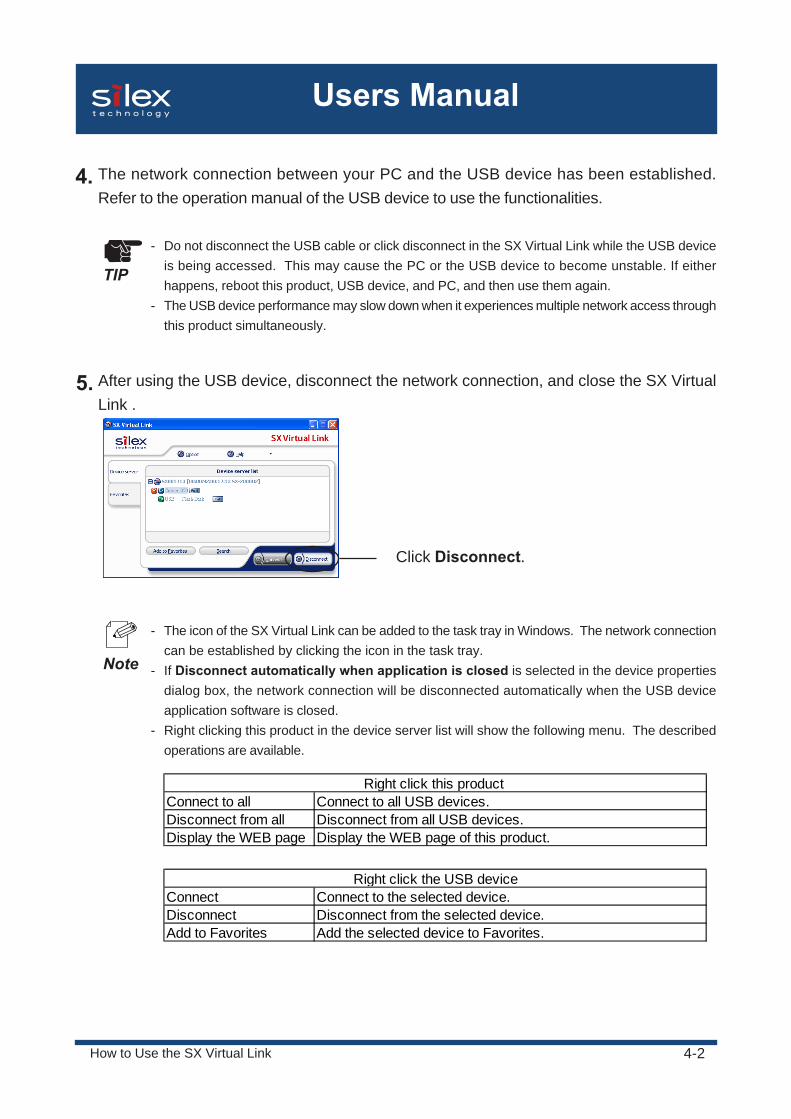
- The icon of the SX Virtual Link can be added to the task tray in Windows. The network connectioncan be established by clicking the icon in the task tray.
- If Disconnect automatically when application is closed is selected in the device propertiesdialog box, the network connection will be disconnected automatically when the USB deviceapplication software is closed.
- Right clicking this product in the device server list will show the following menu. The describedoperations are available.
After using the USB device, disconnect the network connection, and close the SX VirtualLink .
Click Disconnect.
5.
4. The network connection between your PC and the USB device has been established.Refer to the operation manual of the USB device to use the functionalities.
- Do not disconnect the USB cable or click disconnect in the SX Virtual Link while the USB deviceis being accessed. This may cause the PC or the USB device to become unstable. If eitherhappens, reboot this product, USB device, and PC, and then use them again.
- The USB device performance may slow down when it experiences multiple network access throughthis product simultaneously.
TIP
Note
Connect to all Connect to all USB devices. Disconnect from all Disconnect from all USB devices.Display the WEB page Display the WEB page of this product.
Right click this product
Connect Connect to the selected device.Disconnect Disconnect from the selected device.Add to Favorites Add the selected device to Favorites.
Right click the USB device
4-3
Users Manual
How to Use the SX Virtual Link
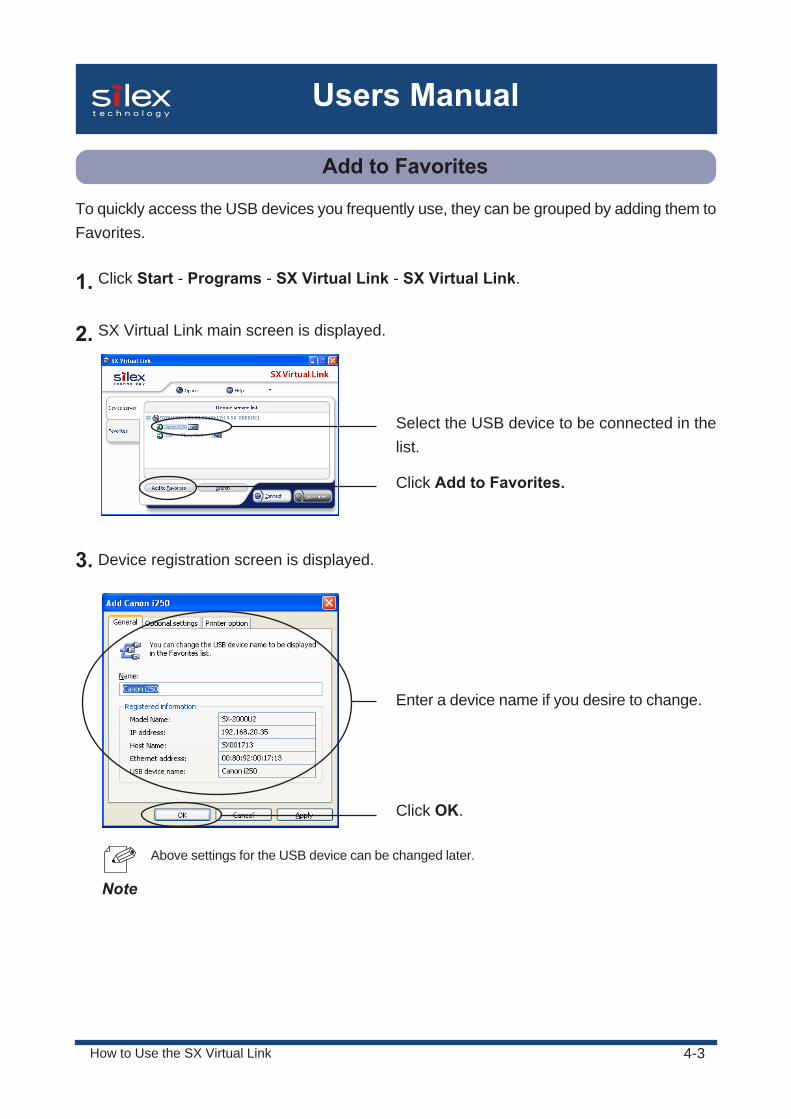
Add to Favorites
To quickly access the USB devices you frequently use, they can be grouped by adding them toFavorites.
Click Start - Programs - SX Virtual Link - SX Virtual Link.1.
2.
Select the USB device to be connected in thelist.
SX Virtual Link main screen is displayed.
Click Add to Favorites.
3. Device registration screen is displayed.
Enter a device name if you desire to change.
Click OK.
Above settings for the USB device can be changed later.
Note
4-4
Users Manual
How to Use the SX Virtual Link
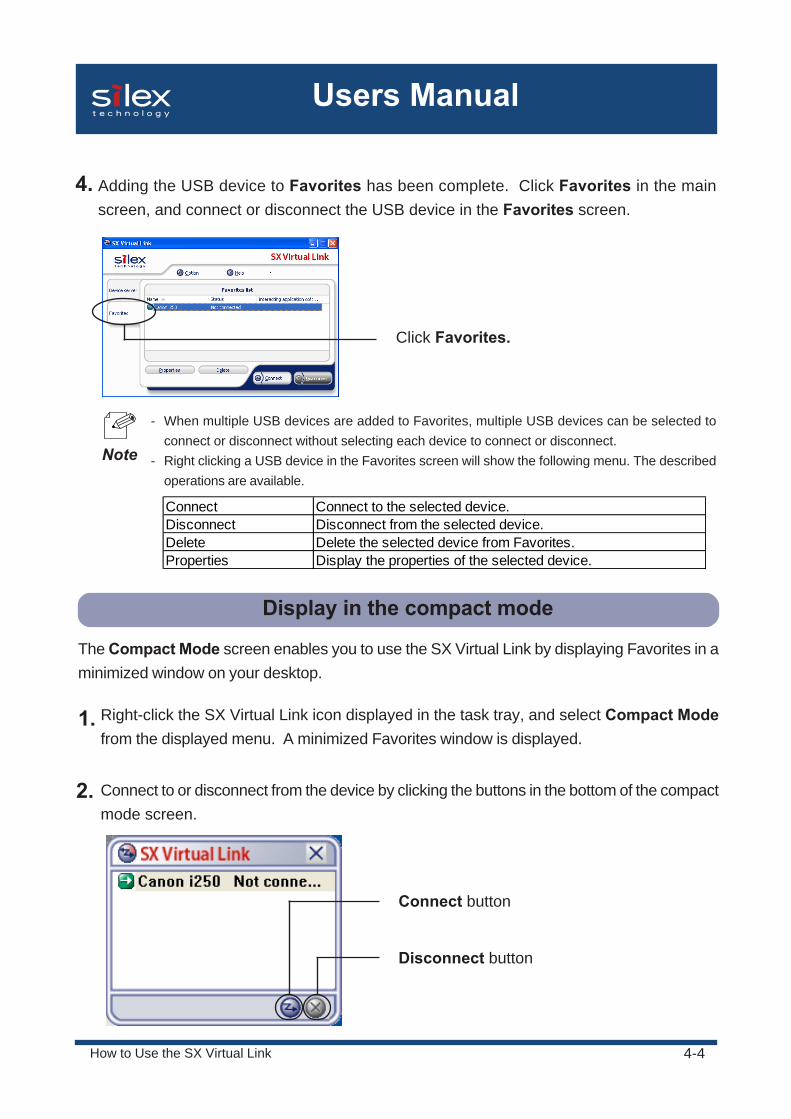
4. Adding the USB device to Favorites has been complete. Click Favorites in the mainscreen, and connect or disconnect the USB device in the Favorites screen.
Click Favorites.
- When multiple USB devices are added to Favorites, multiple USB devices can be selected toconnect or disconnect without selecting each device to connect or disconnect.
- Right clicking a USB device in the Favorites screen will show the following menu. The describedoperations are available.
1. Right-click the SX Virtual Link icon displayed in the task tray, and select Compact Modefrom the displayed menu. A minimized Favorites window is displayed.
2. Connect to or disconnect from the device by clicking the buttons in the bottom of the compactmode screen.
Connect button
Disconnect button
Note
The Compact Mode screen enables you to use the SX Virtual Link by displaying Favorites in aminimized window on your desktop.
Display in the compact mode
Connect Connect to the selected device.Disconnect Disconnect from the selected device.Delete Delete the selected device from Favorites.Properties Display the properties of the selected device.
4-5
Users Manual
How to Use the SX Virtual Link
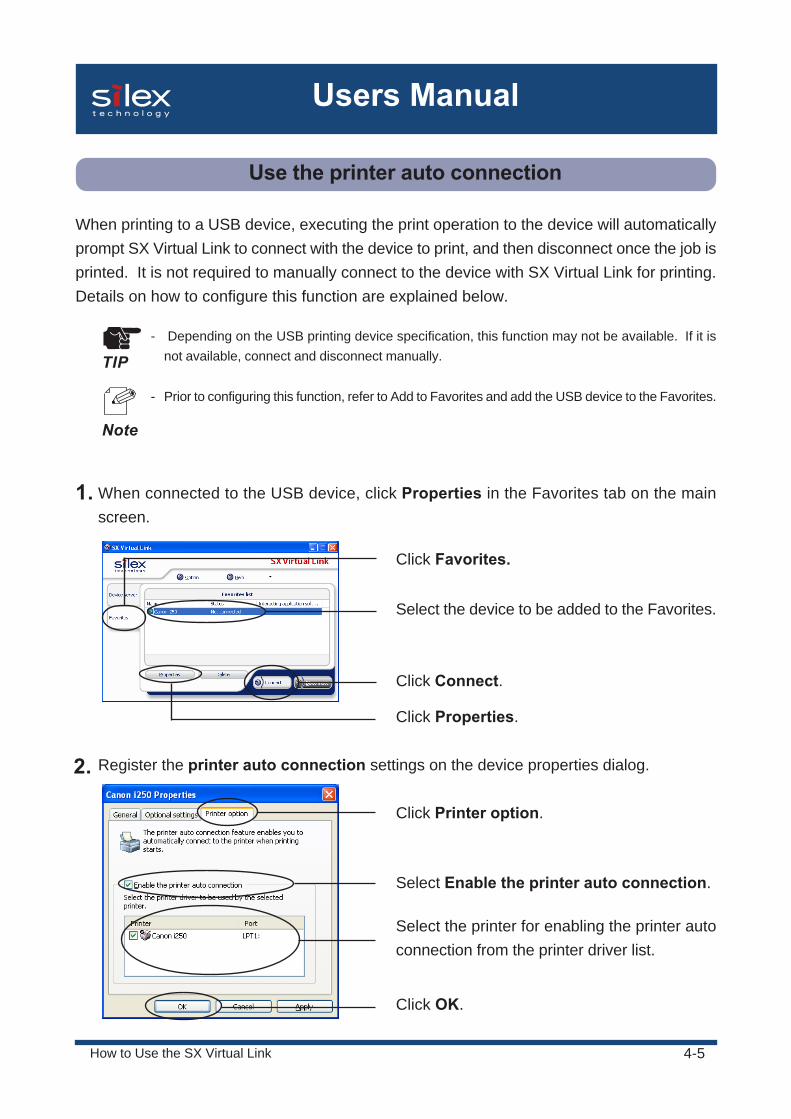
Use the printer auto connection
When printing to a USB device, executing the print operation to the device will automaticallyprompt SX Virtual Link to connect with the device to print, and then disconnect once the job isprinted. It is not required to manually connect to the device with SX Virtual Link for printing.Details on how to configure this function are explained below.
- Depending on the USB printing device specification, this function may not be available. If it isnot available, connect and disconnect manually.TIP
- Prior to configuring this function, refer to Add to Favorites and add the USB device to the Favorites.
Note
When connected to the USB device, click Properties in the Favorites tab on the mainscreen.
1.
Click Favorites.
Select the device to be added to the Favorites.
Click Connect.
Click Properties.
Register the printer auto connection settings on the device properties dialog.2.
Select Enable the printer auto connection.
Select the printer for enabling the printer autoconnection from the printer driver list.
Click OK.
Click Printer option.

4-6
Users Manual
How to Use the SX Virtual Link
Click Disconnect.
3.
The printer auto connection has been enabled. From your application, select the printer thatis designated in step 2, and then print. The printing will start automatically.
TIP
- Depending on the printer, when printing is complete, an error may be displayed in the printerstatus monitoring utility that came with the printer. This does not affect printing. Close the printerstatus monitoring utility manually.

4-7
Users Manual
How to Use the SX Virtual Link
This section explains various buttons and configuration parameters for the SX Virtual Link.
< Favorites screen >< Main screen >
When starting the SX Virtual Link, the main screen will appear.
4.2 SX Virtual Link definitions
Connect Connect your PC to the USB device via this product.
Disconnect Disconnect your PC from the USB device via this product.Option Display Option screen of the SX Virtual Link for configuration.
Help Display SX Virtual Link Help, About SX Virtual Link, and silex website.
Device server Display main screen (Device server list).
Favorites Display Favorites screen.
Add to Favorites Add the selected USB device to Favorites.
Search Search for this product on a network.
Delete Delete the selected USB device from the Favorites screen.
Properties Display properties configuration screen for each USB device.
Common buttons
Main menu buttons
Favorites buttons
SX Virtual Link screens
4-8
Users Manual
How to Use the SX Virtual Link
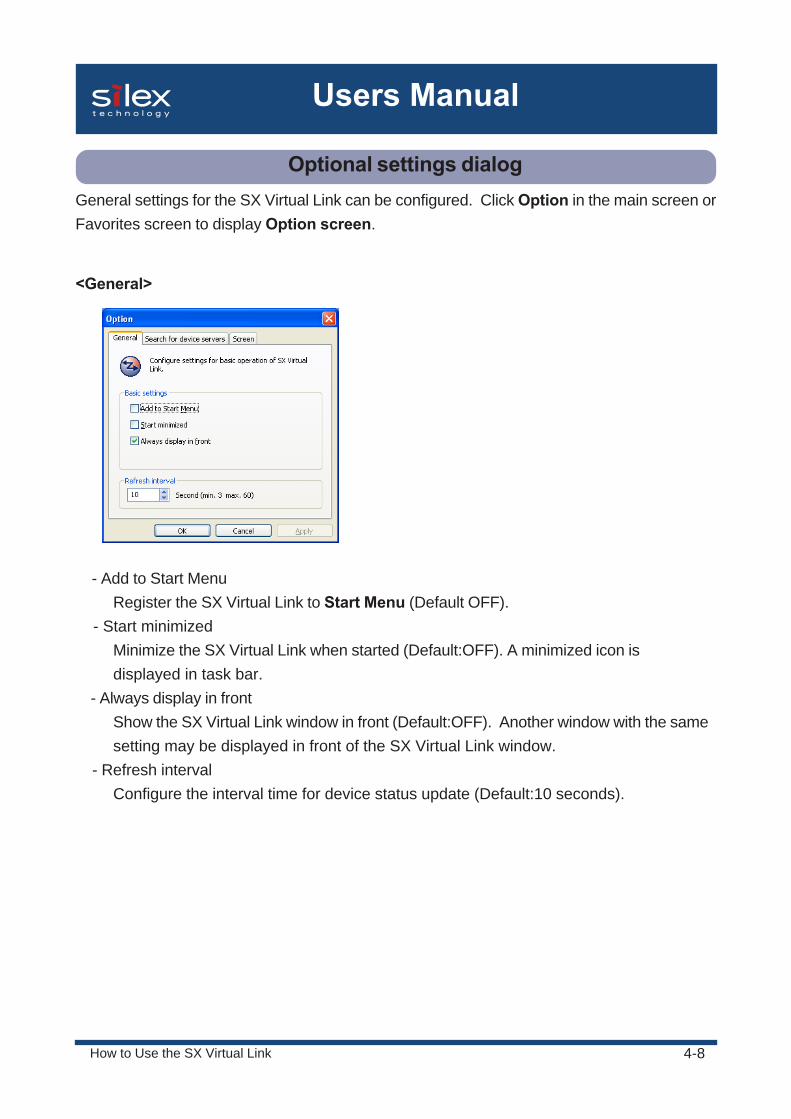
- Add to Start MenuRegister the SX Virtual Link to Start Menu (Default OFF).
- Start minimizedMinimize the SX Virtual Link when started (Default:OFF). A minimized icon isdisplayed in task bar.
- Always display in frontShow the SX Virtual Link window in front (Default:OFF). Another window with the samesetting may be displayed in front of the SX Virtual Link window.
- Refresh intervalConfigure the interval time for device status update (Default:10 seconds).
<General>
Optional settings dialogGeneral settings for the SX Virtual Link can be configured. Click Option in the main screen orFavorites screen to display Option screen.

4-9
Users Manual
How to Use the SX Virtual Link
<Search for device servers>
- Broadcast addressA specific IP address segment can be designated for searching this product.When no IP segment is specified, devices in a local segment are searched.
<Screen >
- Show IP addressWhen displaying this product on the main screen, display the IP address assignedfor this product.(Default:Off) If this setting is not selected, the host name is displayed.
- Show all the device server informationWhen displaying this product on the main screen, display all the device server information.(Default:ON)
- Display USB data transfer rateDisplay the detected USB device data transfer speed in Hi, Full, or Low on the main screen. (Default:ON)
4-10
Users Manual
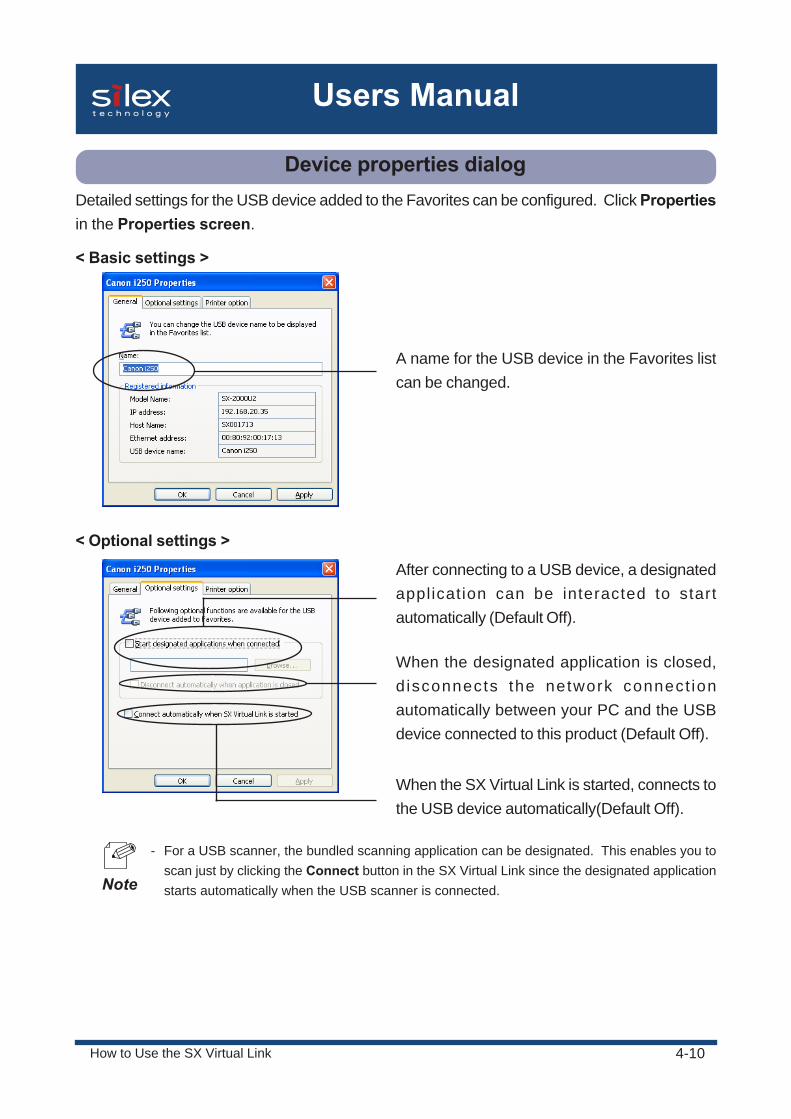
How to Use the SX Virtual Link
< Basic settings >
A name for the USB device in the Favorites listcan be changed.
< Optional settings >
- For a USB scanner, the bundled scanning application can be designated. This enables you toscan just by clicking the Connect button in the SX Virtual Link since the designated applicationstarts automatically when the USB scanner is connected.
After connecting to a USB device, a designatedapplication can be interacted to startautomatically (Default Off).
When the designated application is closed,d isconnects the network connect ionautomatically between your PC and the USBdevice connected to this product (Default Off).
When the SX Virtual Link is started, connects tothe USB device automatically(Default Off).
Note
Device properties dialogDetailed settings for the USB device added to the Favorites can be configured. Click Propertiesin the Properties screen.
4-11
Users Manual
How to Use the SX Virtual Link
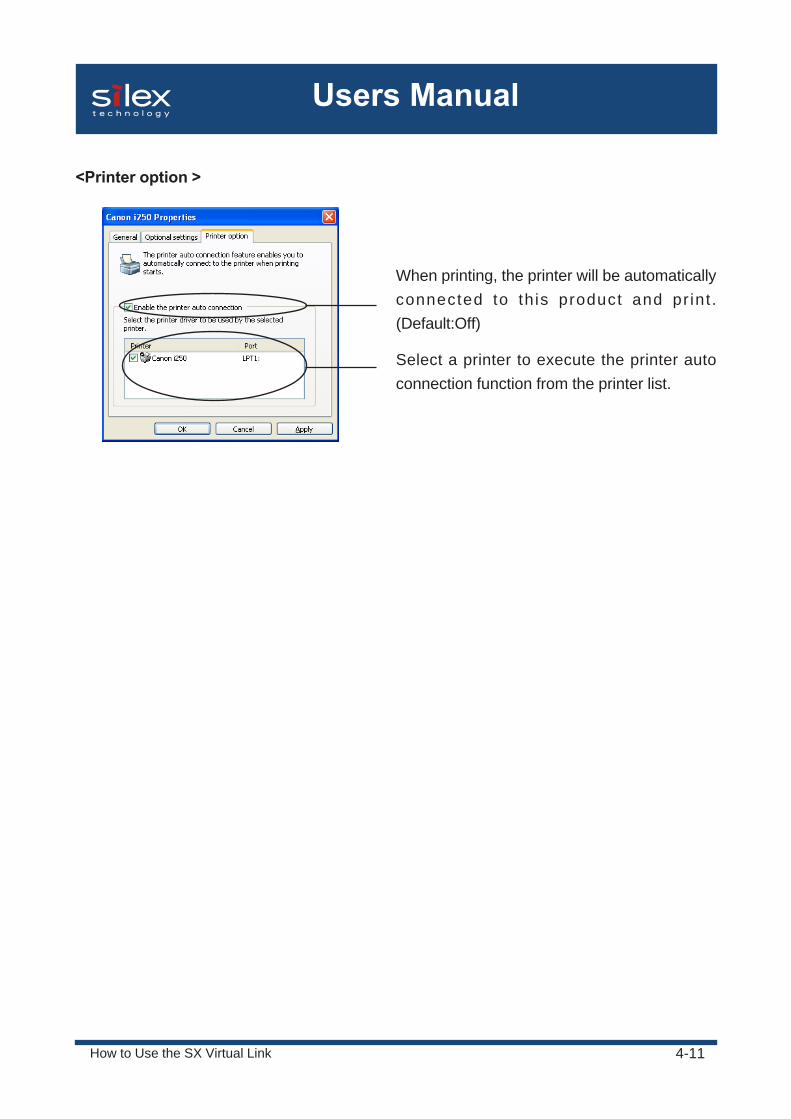
<Printer option >
When printing, the printer will be automaticallyconnected to th is product and pr int .(Default:Off)
Select a printer to execute the printer autoconnection function from the printer list.
5-1Q&A
Users Manual
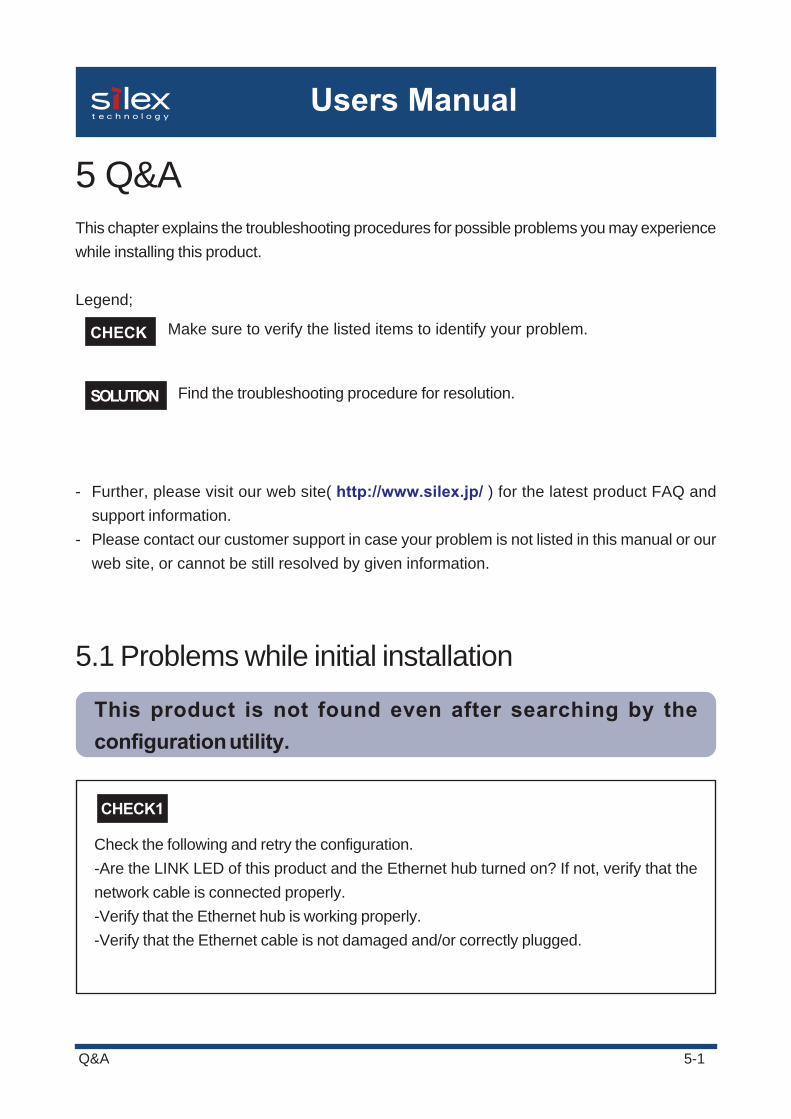
5.1 Problems while initial installation
This product is not found even after searching by theconfiguration utility.
5 Q&AThis chapter explains the troubleshooting procedures for possible problems you may experiencewhile installing this product.
Legend;
- Further, please visit our web site( http://www.silex.jp/ ) for the latest product FAQ andsupport information.
- Please contact our customer support in case your problem is not listed in this manual or ourweb site, or cannot be still resolved by given information.
Find the troubleshooting procedure for resolution.
Make sure to verify the listed items to identify your problem.
Check the following and retry the configuration.-Are the LINK LED of this product and the Ethernet hub turned on? If not, verify that thenetwork cable is connected properly.-Verify that the Ethernet hub is working properly.-Verify that the Ethernet cable is not damaged and/or correctly plugged.
SOLUTION
CHECK
CHECK1
5-2Q&A
Users Manual
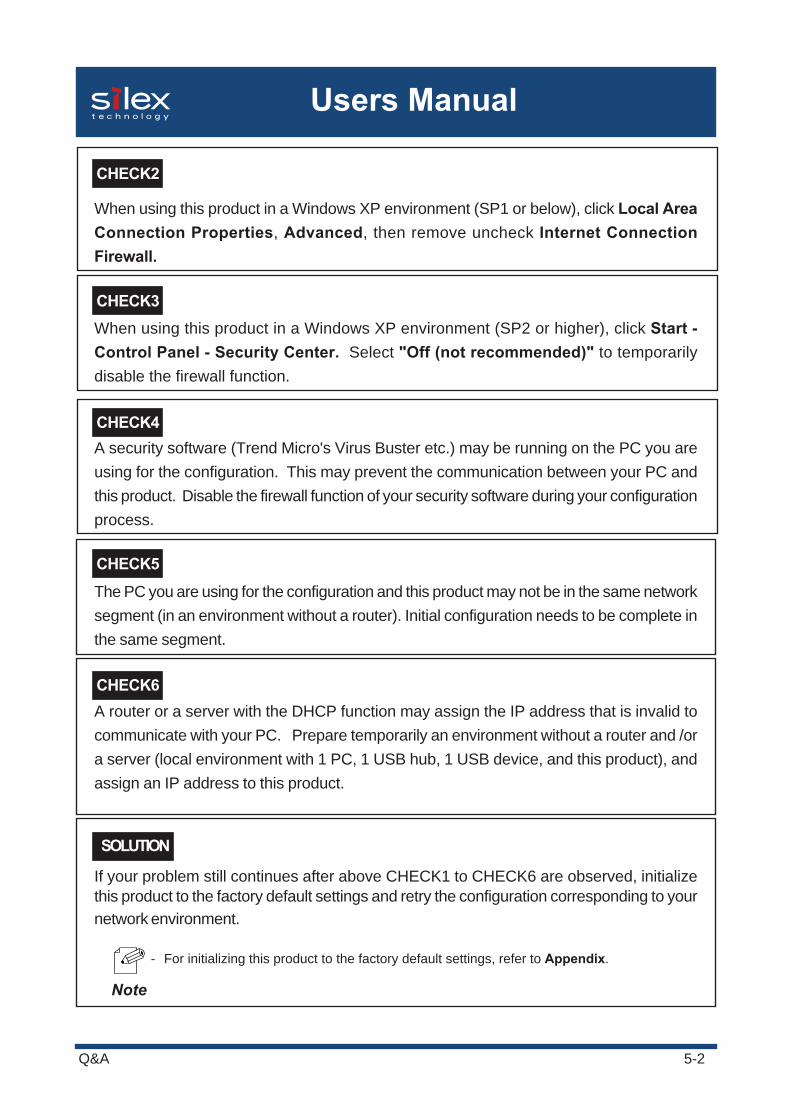
When using this product in a Windows XP environment (SP1 or below), click Local AreaConnection Properties, Advanced, then remove uncheck Internet ConnectionFirewall.
When using this product in a Windows XP environment (SP2 or higher), click Start -Control Panel - Security Center. Select "Off (not recommended)" to temporarilydisable the firewall function.
A security software (Trend Micro's Virus Buster etc.) may be running on the PC you areusing for the configuration. This may prevent the communication between your PC andthis product. Disable the firewall function of your security software during your configurationprocess.
The PC you are using for the configuration and this product may not be in the same networksegment (in an environment without a router). Initial configuration needs to be complete inthe same segment.
A router or a server with the DHCP function may assign the IP address that is invalid tocommunicate with your PC. Prepare temporarily an environment without a router and /ora server (local environment with 1 PC, 1 USB hub, 1 USB device, and this product), andassign an IP address to this product.
If your problem still continues after above CHECK1 to CHECK6 are observed, initializethis product to the factory default settings and retry the configuration corresponding to yournetwork environment.
- For initializing this product to the factory default settings, refer to Appendix.
CHECK2
CHECK6
CHECK5
CHECK4
CHECK3
Note
SOLUTION
5-3Q&A
Users Manual
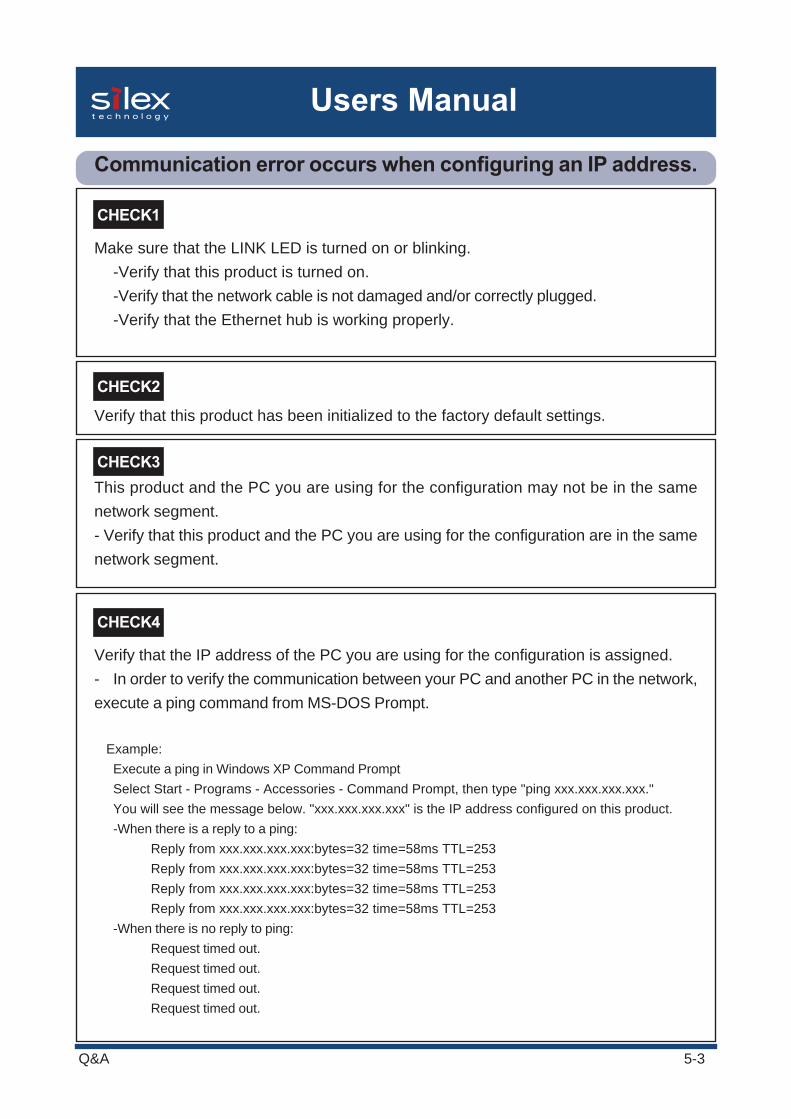
Communication error occurs when configuring an IP address.
Make sure that the LINK LED is turned on or blinking.-Verify that this product is turned on.-Verify that the network cable is not damaged and/or correctly plugged.-Verify that the Ethernet hub is working properly.
Verify that this product has been initialized to the factory default settings.
This product and the PC you are using for the configuration may not be in the samenetwork segment.- Verify that this product and the PC you are using for the configuration are in the samenetwork segment.
Verify that the IP address of the PC you are using for the configuration is assigned.- In order to verify the communication between your PC and another PC in the network,execute a ping command from MS-DOS Prompt.
Example:Execute a ping in Windows XP Command PromptSelect Start - Programs - Accessories - Command Prompt, then type "ping xxx.xxx.xxx.xxx."You will see the message below. "xxx.xxx.xxx.xxx" is the IP address configured on this product.-When there is a reply to a ping:
Reply from xxx.xxx.xxx.xxx:bytes=32 time=58ms TTL=253Reply from xxx.xxx.xxx.xxx:bytes=32 time=58ms TTL=253Reply from xxx.xxx.xxx.xxx:bytes=32 time=58ms TTL=253Reply from xxx.xxx.xxx.xxx:bytes=32 time=58ms TTL=253
-When there is no reply to ping:Request timed out.Request timed out.Request timed out.Request timed out.
CHECK3
CHECK2
CHECK1
CHECK4
5-4Q&A
Users Manual
5.3 Other
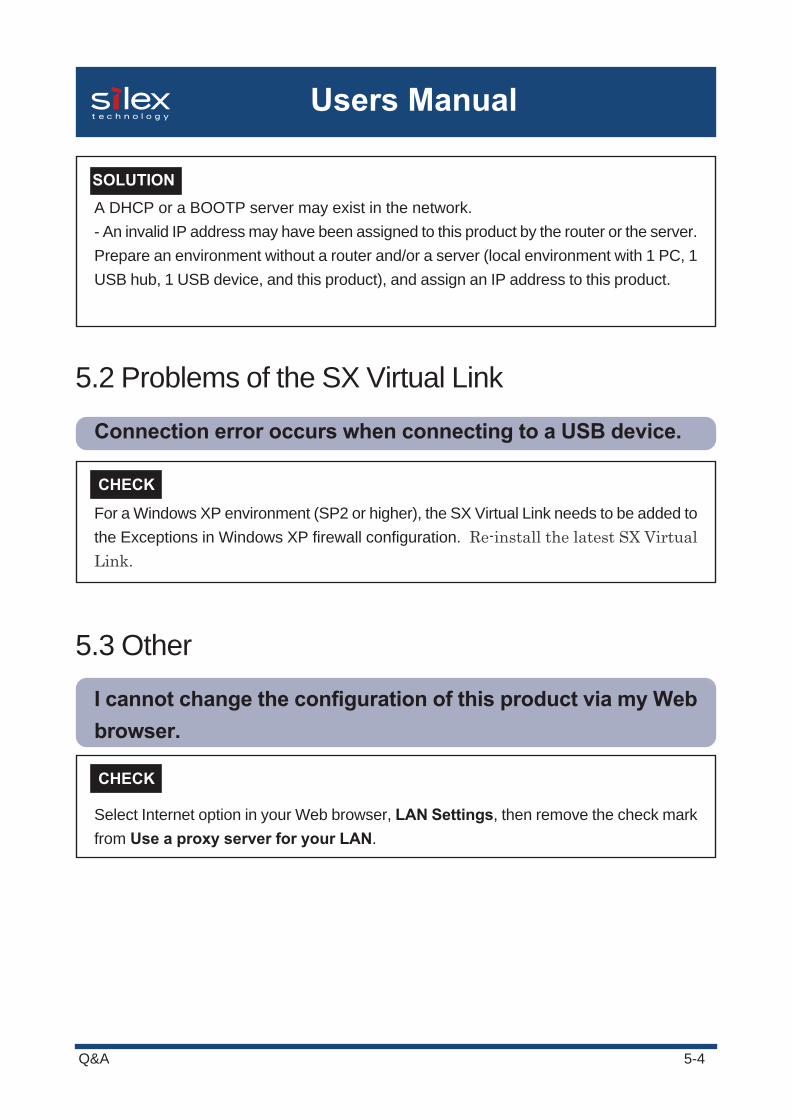
I cannot change the configuration of this product via my Webbrowser.
Select Internet option in your Web browser, LAN Settings, then remove the check markfrom Use a proxy server for your LAN.
5.2 Problems of the SX Virtual Link
Connection error occurs when connecting to a USB device.
A DHCP or a BOOTP server may exist in the network.- An invalid IP address may have been assigned to this product by the router or the server.Prepare an environment without a router and/or a server (local environment with 1 PC, 1USB hub, 1 USB device, and this product), and assign an IP address to this product.
For a Windows XP environment (SP2 or higher), the SX Virtual Link needs to be added tothe Exceptions in Windows XP firewall configuration. Re-install the latest SX VirtualLink.
SOLUTION
CHECK
CHECK
1Appendix
Users Manual
Appendix
- When using the Web browser to change the configuration, an IP address needs to be assigned tothis product.
- For Web browser, we recommend Netscape 6.2(or higher) or Internet Explorer 5.5 (or higher)version. Display designs may vary depending on the Web browser.
Using a Web browser
This product has an embedded HTTP function which enables you to check or change theconfiguration.
TIP
Configure this product using a Web browser.
Follow the procedures below to configure this product.
Start your Web browser, and enter the IP address of this product in the address bar.
This product's web page is displayed. Click Network Settings in the menu located on theleft side of the screen.
A login screen requiring a user name and password is displayed. Enter "root" for User name,and a password (Default: no password is configured), and click OK.
Network Settings screen is displayed. Enter the parameters for each item, and clickSubmit.
The changed configuration will be reflected after rebooting this product.
1.
2.
3.
4.
5.
2Appendix
Users Manual
Configuration settings
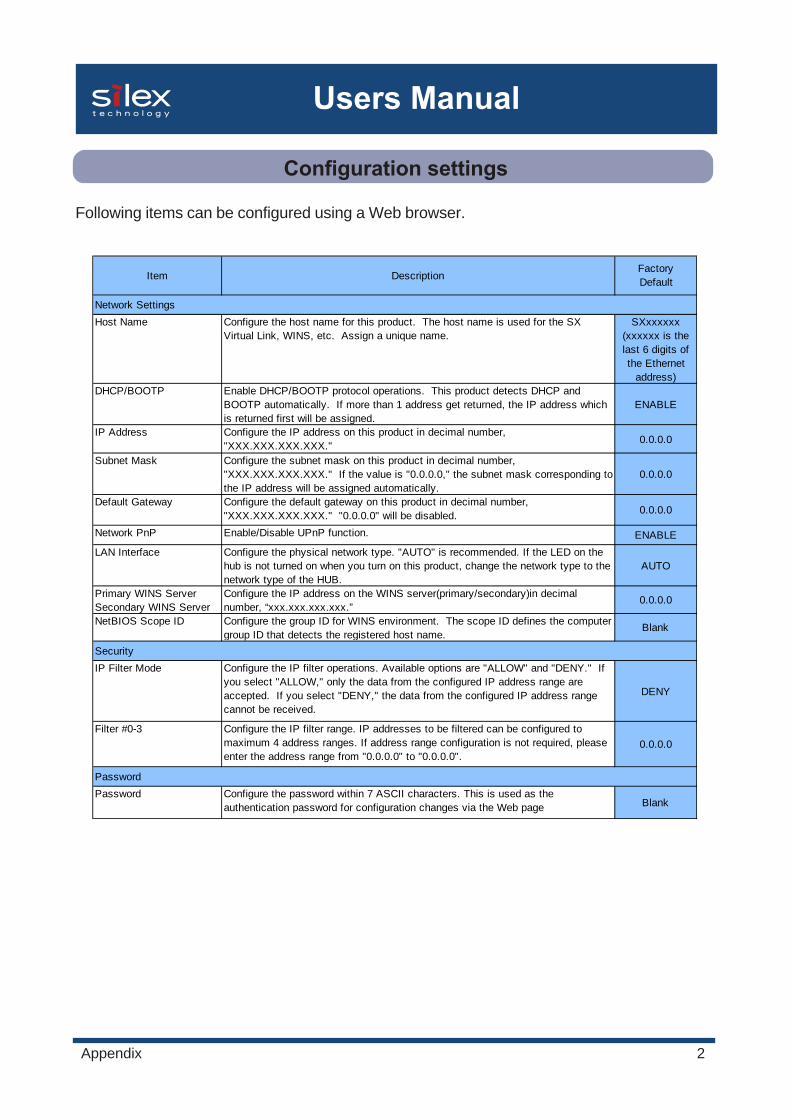
Following items can be configured using a Web browser.
Host Name Configure the host name for this product. The host name is used for the SXVirtual Link, WINS, etc. Assign a unique name.
SXxxxxxx(xxxxxx is thelast 6 digits ofthe Ethernet
address)DHCP/BOOTP Enable DHCP/BOOTP protocol operations. This product detects DHCP and
BOOTP automatically. If more than 1 address get returned, the IP address whichis returned first will be assigned.
ENABLE
IP Address Configure the IP address on this product in decimal number,"XXX.XXX.XXX.XXX." 0.0.0.0
Subnet Mask Configure the subnet mask on this product in decimal number,"XXX.XXX.XXX.XXX." If the value is "0.0.0.0," the subnet mask corresponding tothe IP address will be assigned automatically.
0.0.0.0
Default Gateway Configure the default gateway on this product in decimal number,"XXX.XXX.XXX.XXX." "0.0.0.0" will be disabled. 0.0.0.0
Network PnP Enable/Disable UPnP function. ENABLE
LAN Interface Configure the physical network type. "AUTO" is recommended. If the LED on thehub is not turned on when you turn on this product, change the network type to thenetwork type of the HUB.
AUTO
Primary WINS ServerSecondary WINS Server
Configure the IP address on the WINS server(primary/secondary)in decimalnumber, “xxx.xxx.xxx.xxx.”
0.0.0.0
NetBIOS Scope ID Configure the group ID for WINS environment. The scope ID defines the computergroup ID that detects the registered host name.
Blank
IP Filter Mode Configure the IP filter operations. Available options are "ALLOW" and "DENY." Ifyou select "ALLOW," only the data from the configured IP address range areaccepted. If you select "DENY," the data from the configured IP address rangecannot be received.
DENY
Filter #0-3 Configure the IP filter range. IP addresses to be filtered can be configured tomaximum 4 address ranges. If address range configuration is not required, pleaseenter the address range from "0.0.0.0" to "0.0.0.0".
0.0.0.0
Password Configure the password within 7 ASCII characters. This is used as theauthentication password for configuration changes via the Web page Blank
Password
Security
DescriptionFactoryDefaultItem
Network Settings
3Appendix
Users Manual
This section explains the enhanced functions of this product.
- When you change the configuration to use the following function, refer to the section ofConfiguration settings in this chapter regarding each parameter in detail.
Enhanced Function
TIP
4Appendix
Users Manual
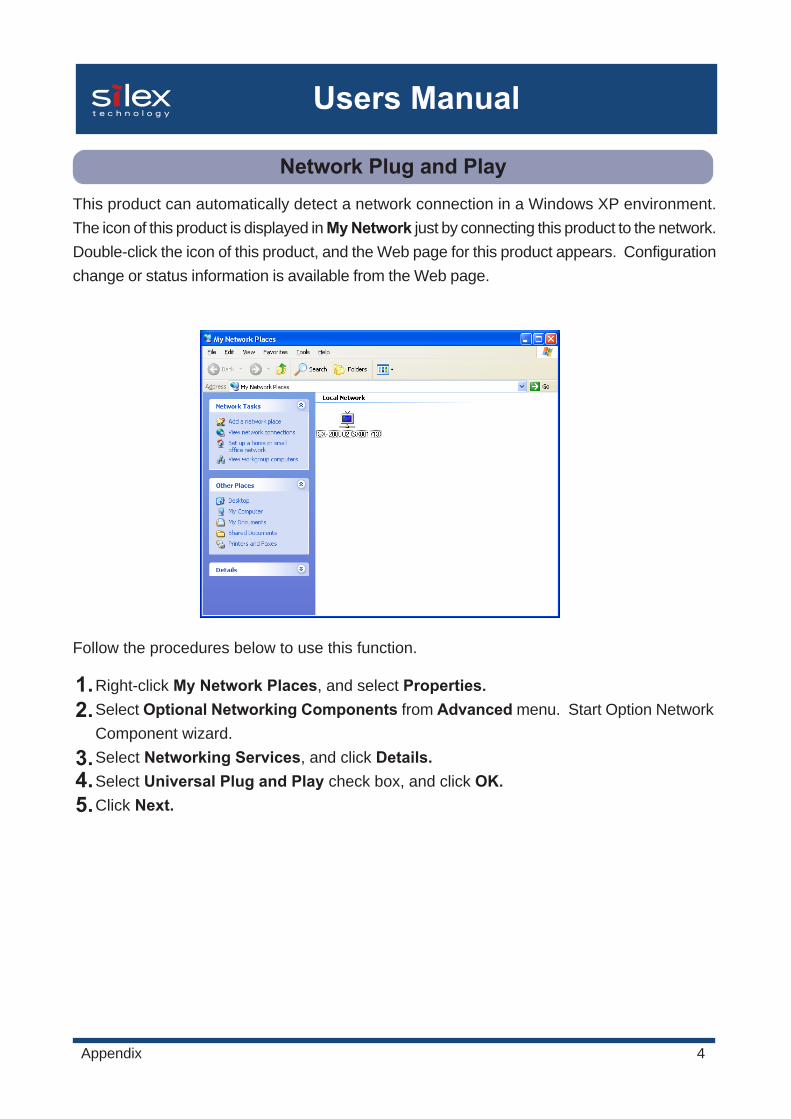
Network Plug and PlayThis product can automatically detect a network connection in a Windows XP environment.The icon of this product is displayed in My Network just by connecting this product to the network.Double-click the icon of this product, and the Web page for this product appears. Configurationchange or status information is available from the Web page.
Follow the procedures below to use this function.
Right-click My Network Places, and select Properties.Select Optional Networking Components from Advanced menu. Start Option NetworkComponent wizard.Select Networking Services, and click Details.Select Universal Plug and Play check box, and click OK.Click Next.
1.2.
3.4.5.
5Appendix
Users Manual
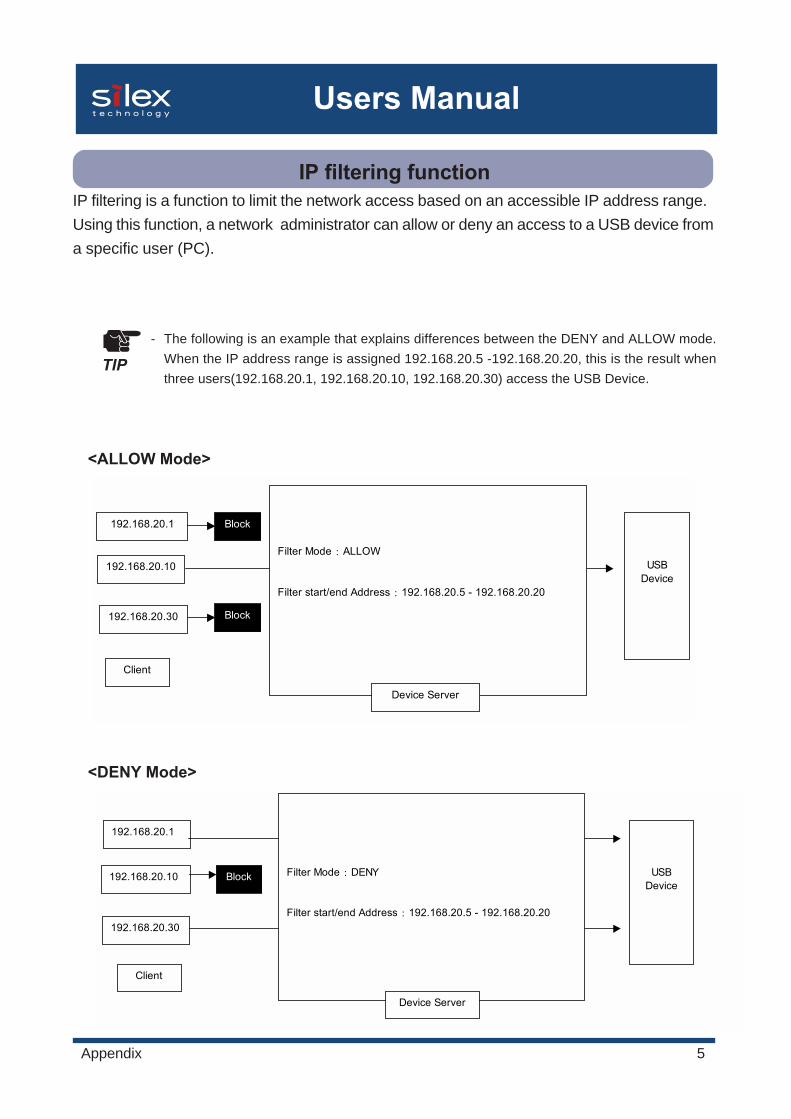
IP filtering is a function to limit the network access based on an accessible IP address range.Using this function, a network administrator can allow or deny an access to a USB device froma specific user (PC).
- The following is an example that explains differences between the DENY and ALLOW mode.When the IP address range is assigned 192.168.20.5 -192.168.20.20, this is the result whenthree users(192.168.20.1, 192.168.20.10, 192.168.20.30) access the USB Device.
<ALLOW Mode>
<DENY Mode>
192.168.20.1
192.168.20.10
192.168.20.30
Client
Filter Mode : ALLOW
Filter start/end Address : 192.168.20.5 - 192.168.20.20
USBDevice
Block
Device Server
Block
192.168.20.1
192.168.20.10
192.168.20.30
Client
USBDevice
Block Filter Mode : DENY
Filter start/end Address : 192.168.20.5 - 192.168.20.20
Device Server
TIP
IP filtering function
6Appendix
Users Manual
The IP filtering function can be configured using a Web browser. Follow the procedures below toconfigure this function.
Start your Web browser, and enter the IP address of this product in the address bar.
This product's web page is displayed. Click Network Settings in the menu located on theleft side of the screen.
A login screen requiring a user name and password is displayed. Enter "root" for User name,and a password (Default: no password is configured), and click OK.
Network Settings screen is displayed. Click Security in the menu located on the right sideof the screen. Enter the parameters for each item, and click Submit.
The changed configuration will be reflected after rebooting this product.
1.
2.
3.
4.
5.
7Appendix
Users Manual
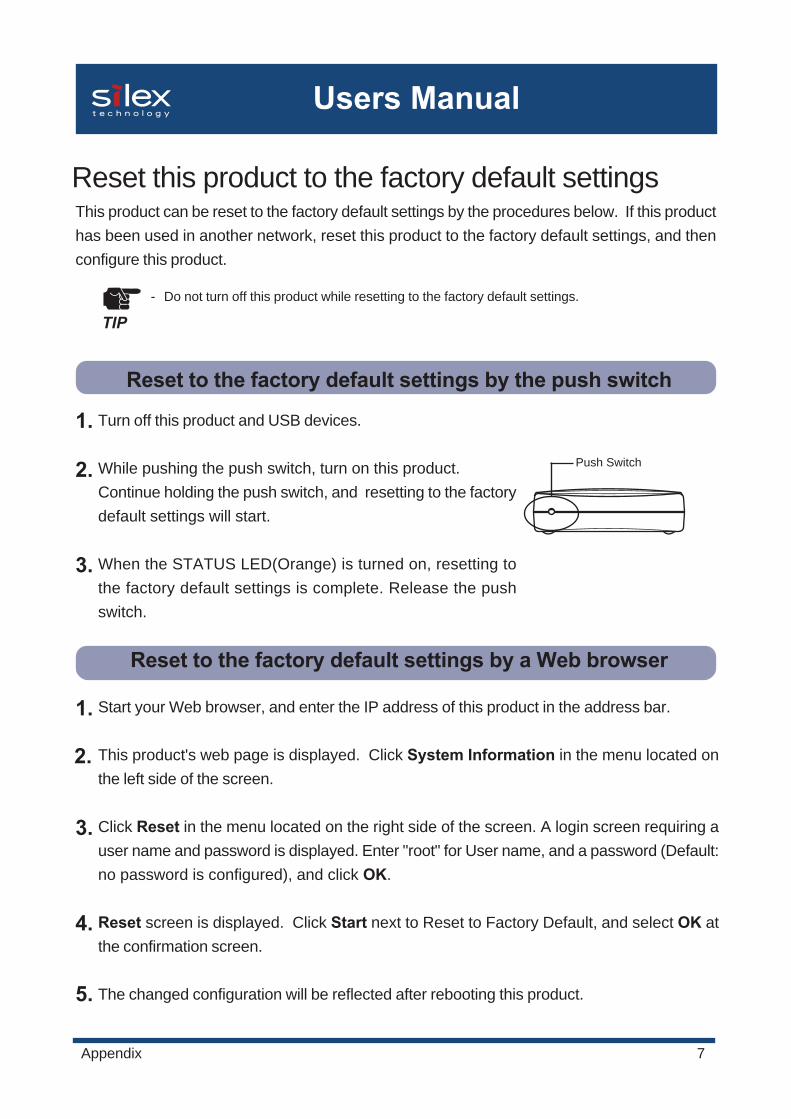
Turn off this product and USB devices.
While pushing the push switch, turn on this product.Continue holding the push switch, and resetting to the factorydefault settings will start.
When the STATUS LED(Orange) is turned on, resetting tothe factory default settings is complete. Release the pushswitch.
Reset this product to the factory default settingsThis product can be reset to the factory default settings by the procedures below. If this producthas been used in another network, reset this product to the factory default settings, and thenconfigure this product.
- Do not turn off this product while resetting to the factory default settings.
Push Switch
1.
2.
3.
Start your Web browser, and enter the IP address of this product in the address bar.
This product's web page is displayed. Click System Information in the menu located onthe left side of the screen.
Click Reset in the menu located on the right side of the screen. A login screen requiring auser name and password is displayed. Enter "root" for User name, and a password (Default:no password is configured), and click OK.
Reset screen is displayed. Click Start next to Reset to Factory Default, and select OK atthe confirmation screen.
The changed configuration will be reflected after rebooting this product.
1.
2.
3.
4.
5.
TIP
Reset to the factory default settings by a Web browser
Reset to the factory default settings by the push switch
1
Users Manual
User Registration
User RegistrationTo provide a better technical support, we recommend you to register with us as a useron-line at:
Global Site; http://www.silex.jp/register/USA Site; http://www.silexamerica.com/us/regist/index.htmlEU Site; http://www.silexeurope.de/euro/regist/index.htmlChina Site; http://www.silex.com.cn/china/support/regist/index.html